Embed Size (px)
Citation preview
If you need terminal emulation, and you like Extra!...
...you’re going to love Reflection! Upgrading from Extra!® to Reflection® couldn’t be easier. When you start Reflection the first time, all your existing macros, keyboard maps, and session files work as expected. Moreover, if you were using previous versions of Reflection, PComm, or Rumba emulation software, you’ll find those sessions and macros work as well. Reflection has the features you depend on for advanced productivity, secure multi-host connectivity, and more.
Instead of an application designed for the operating systems you were using a decade ago, Reflection gives you an emulator that has earned the Windows logos pertinent to the enterprise and is uniquely integrated with the desktop and Microsoft Office applications.
Windows integration provides a range of built-in security capabilities, designed to help you meet evolving internal and external security requirements. Integration with Windows’ User Account Control (UAC) maximizes your control over user access to administrative features and functions, and minimizes desktop vulnerabilities. And Reflection’s Trusted Locations feature can prevent security breaches by allowing users to open documents only from trusted file locations that you specify.
Reflection protects the security of your data before, during, and after transmission by providing time-tested cryptographic modules that meet the rigorous federal government FIPS 140-2 standards. Besides providing secure access to hosts and gateways, additional tools help you verify the authenticity of hosts, gateways, and clients, and facilitate compliance with regulations such as Payment Card Industry (PCI) audits, Sarbanes-Oxley (SOX), HIPAA/HITECH, FISMA, Basel II, and evolving regulatory mandates regarding data protection.
Other terminal emulators may provide security through third-party partnerships, and even then, they typically support a lower level of certification. With Reflection, you get a single-vendor solution that’s integrated with the emulator and supported by
dedicated security development, test, support, and services teams at Micro Focus.
Reflection seamlessly integrates with Microsoft Office applications to provide a consistent user experience. And the productivity features that you used in Extra! are more powerful than ever. If you’ve been using PComm, or HostExplorer software or any other emulator, you will be amazed at how much these tools save time.
Using Reflection, you can:
• Open an e-mail message or Word document, and automatically include the current host screen content in the message or document.
• Send a single screen or a series of screens to a PowerPoint presentation to create training decks or manuals for host applications.
• Configure information privacy filters to prevent online display of sensitive data, such as account and personal identification numbers.
• Use the auto-complete and auto-expand functions to save time and keystrokes, and the built-in spell check function to reduce errors.
Instead of just emulating a dumb terminal, Reflection makes your emulation sessions powerful, productive, secure, and easy to use.
Open any number of sessions in the Reflection workspace, and connect to any combination of mainframe, AS/400 (IBM System i), UNIX/Linux, or OpenVMS hosts. Each session appears within its own tabbed window, making it fast and easy to move between sessions. Session documents include pointers to mouse maps, keyboard maps, theme files, hotspot files, and Ribbons that you can customize for greater efficiency.
You can even open Web applications in the workspace. You can, for example, copy an address out of your customer database, paste it into your favorite online mapping application, and get directions to the customer location. Or, create a custom application using the Reflection .NET API to automate this process. Once your sessions are configured to your liking, you can save them as a layout file, which opens them together with a single click.
You can quickly take advantage of the advanced capabilities of Reflection because Reflection supports your existing IT infrastructure, including Windows 7, Windows Remote Desktop Services, and Citrix
PAGE 1
EVALUATING REFLECTION
XenApp platform, as well as other virtualization platforms.
If you don’t yet have Reflection software, go to www.microfocus.com/products/reflection/desktop and fill out an evaluation request form. You’ll be sent an e-mail message with instructions on how to download and install Reflection.
Once you’ve installed the software, you’ll want to take a brief tour of the new user interface.
Start Reflection To open Reflection from the Start menu, select Micro Focus Reflection, then select Reflection Workspace.
When the workspace is open, you’ll see the Create New Document dialog box. Close this for now, so that you can get acquainted with the Reflection user interface.
Use the Quick Access toolbar The Quick Access toolbar provides one-click access to common tasks.
The Quick Access toolbar is at the top of the workspace
Move your mouse pointer over each button to reveal a tooltip describing what it does.
You can add commands to this toolbar to provide quick access to your most frequently performed tasks. Simply, click or and select an action in the Action list.
Connect to a Session To create a terminal session, complete the following steps:
1. From the Quick Access toolbar, click the New Document button .
2. Select the type of session you want to set up, and click Create.
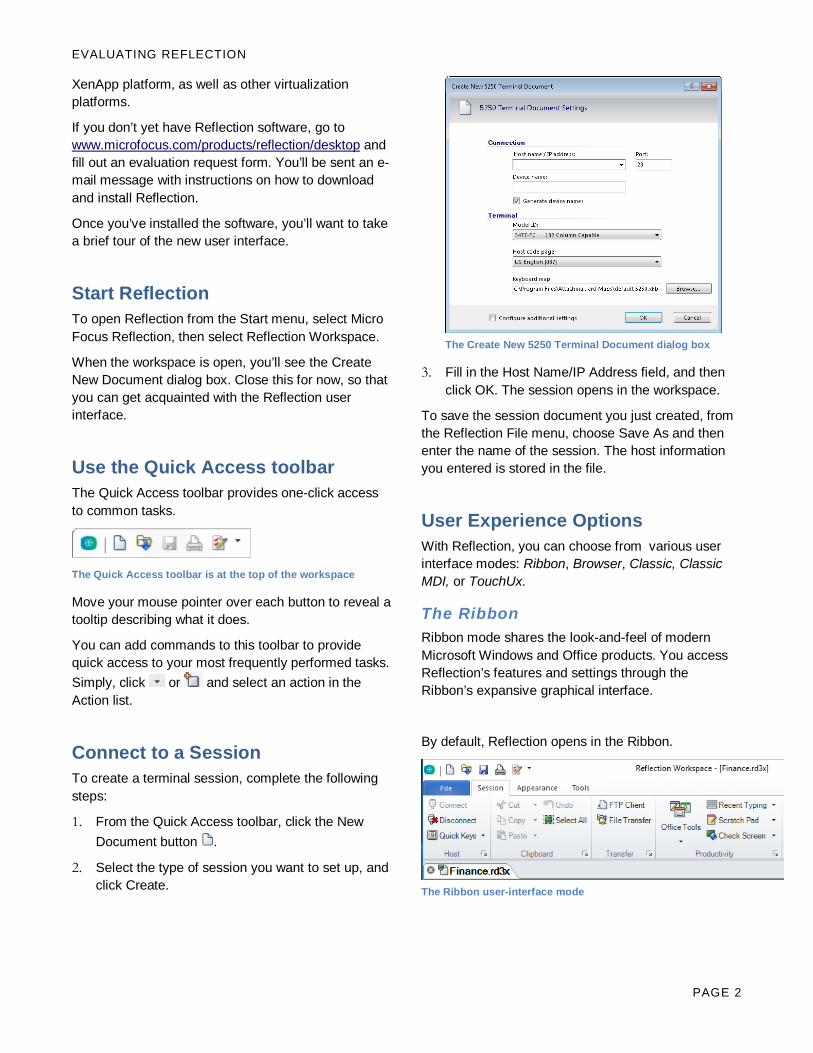
The Create New 5250 Terminal Document dialog box
3. Fill in the Host Name/IP Address field, and then click OK. The session opens in the workspace.
To save the session document you just created, from the Reflection File menu, choose Save As and then enter the name of the session. The host information you entered is stored in the file.
User Experience Options With Reflection, you can choose from various user interface modes: Ribbon, Browser, Classic, Classic MDI, or TouchUx.
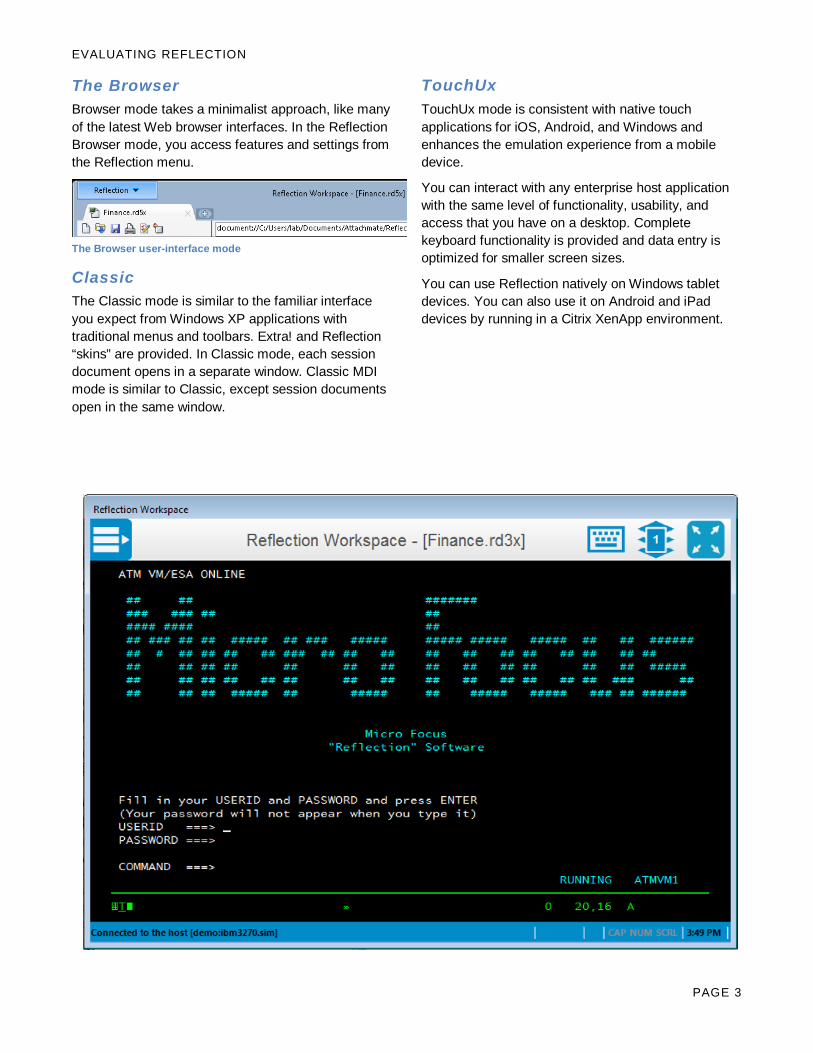
The Ribbon Ribbon mode shares the look-and-feel of modern Microsoft Windows and Office products. You access Reflection’s features and settings through the Ribbon’s expansive graphical interface.
By default, Reflection opens in the Ribbon.
The Ribbon user-interface mode
PAGE 2
EVALUATING REFLECTION
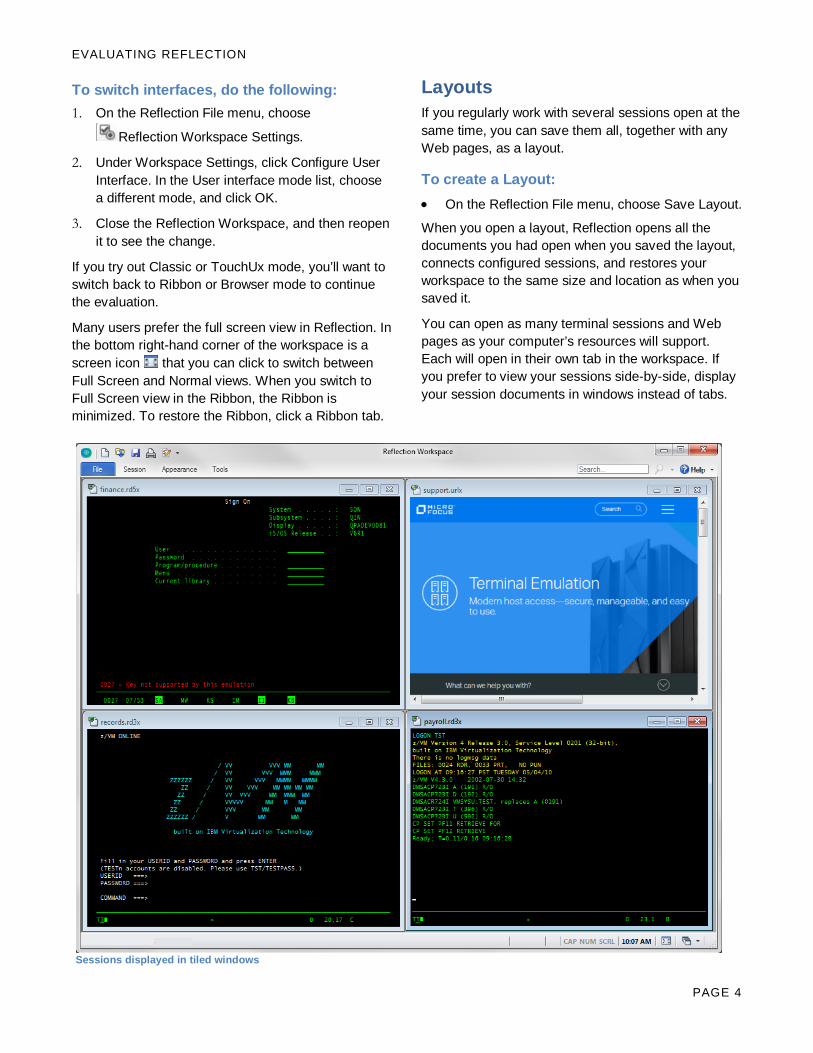
The Browser Browser mode takes a minimalist approach, like many of the latest Web browser interfaces. In the Reflection Browser mode, you access features and settings from the Reflection menu.
The Browser user-interface mode
Classic The Classic mode is similar to the familiar interface you expect from Windows XP applications with traditional menus and toolbars. Extra! and Reflection “skins” are provided. In Classic mode, each session document opens in a separate window. Classic MDI mode is similar to Classic, except session documents open in the same window.
TouchUx TouchUx mode is consistent with native touch applications for iOS, Android, and Windows and enhances the emulation experience from a mobile device.
You can interact with any enterprise host application with the same level of functionality, usability, and access that you have on a desktop. Complete keyboard functionality is provided and data entry is optimized for smaller screen sizes.
You can use Reflection natively on Windows tablet devices. You can also use it on Android and iPad devices by running in a Citrix XenApp environment.
PAGE 3
EVALUATING REFLECTION
To switch interfaces, do the following: 1. On the Reflection File menu, choose
Reflection Workspace Settings.
2. Under Workspace Settings, click Configure User Interface. In the User interface mode list, choose a different mode, and click OK.
3. Close the Reflection Workspace, and then reopen it to see the change.
If you try out Classic or TouchUx mode, you’ll want to switch back to Ribbon or Browser mode to continue the evaluation.
Many users prefer the full screen view in Reflection. In the bottom right-hand corner of the workspace is a screen icon that you can click to switch between Full Screen and Normal views. When you switch to Full Screen view in the Ribbon, the Ribbon is minimized. To restore the Ribbon, click a Ribbon tab.
Layouts If you regularly work with several sessions open at the same time, you can save them all, together with any Web pages, as a layout.
To create a Layout: • On the Reflection File menu, choose Save Layout.
When you open a layout, Reflection opens all the documents you had open when you saved the layout, connects configured sessions, and restores your workspace to the same size and location as when you saved it.
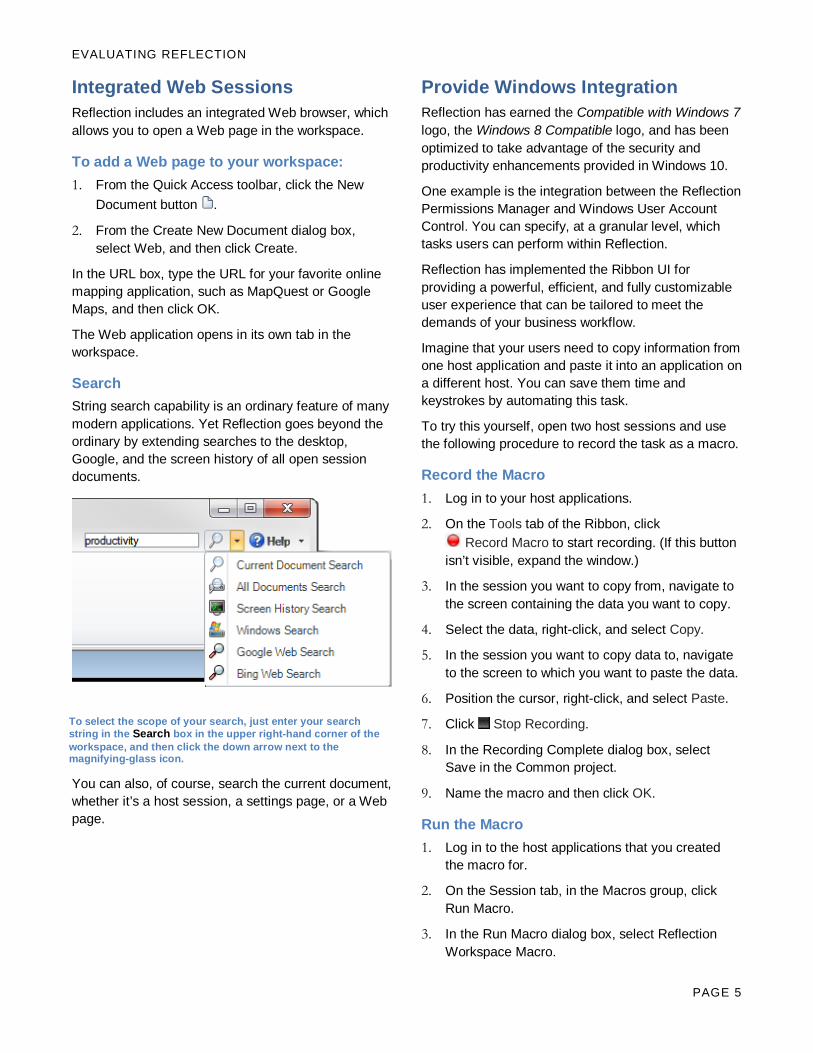
You can open as many terminal sessions and Web pages as your computer’s resources will support. Each will open in their own tab in the workspace. If you prefer to view your sessions side-by-side, display your session documents in windows instead of tabs.
Sessions displayed in tiled windows
PAGE 4
EVALUATING REFLECTION
Integrated Web Sessions Reflection includes an integrated Web browser, which allows you to open a Web page in the workspace.
To add a Web page to your workspace: 1. From the Quick Access toolbar, click the New
Document button .
2. From the Create New Document dialog box, select Web, and then click Create.
In the URL box, type the URL for your favorite online mapping application, such as MapQuest or Google Maps, and then click OK.
The Web application opens in its own tab in the workspace.
Search String search capability is an ordinary feature of many modern applications. Yet Reflection goes beyond the ordinary by extending searches to the desktop, Google, and the screen history of all open session documents.
You can also, of course, search the current document, whether it’s a host session, a settings page, or a Web page.
Provide Windows Integration Reflection has earned the Compatible with Windows 7 logo, the Windows 8 Compatible logo, and has been optimized to take advantage of the security and productivity enhancements provided in Windows 10.
One example is the integration between the Reflection Permissions Manager and Windows User Account Control. You can specify, at a granular level, which tasks users can perform within Reflection.
Reflection has implemented the Ribbon UI for providing a powerful, efficient, and fully customizable user experience that can be tailored to meet the demands of your business workflow.
Imagine that your users need to copy information from one host application and paste it into an application on a different host. You can save them time and keystrokes by automating this task.
To try this yourself, open two host sessions and use the following procedure to record the task as a macro.
Record the Macro 1. Log in to your host applications.
2. On the Tools tab of the Ribbon, click Record Macro to start recording. (If this button
isn’t visible, expand the window.)
3. In the session you want to copy from, navigate to the screen containing the data you want to copy.
4. Select the data, right-click, and select Copy.
5. In the session you want to copy data to, navigate to the screen to which you want to paste the data.
6. Position the cursor, right-click, and select Paste.
7. Click Stop Recording.
8. In the Recording Complete dialog box, select Save in the Common project.
9. Name the macro and then click OK.
Run the Macro 1. Log in to the host applications that you created
the macro for.
2. On the Session tab, in the Macros group, click Run Macro.
3. In the Run Macro dialog box, select Reflection Workspace Macro.
To select the scope of your search, just enter your search string in the Search box in the upper right-hand corner of the workspace, and then click the down arrow next to the magnifying-glass icon.
PAGE 5

EVALUATING REFLECTION
4. From the Macros dialog box, in the Macros in list, select Common. Then select the macro and then click Run.
Since you expect your users to perform this task frequently, you’ll want to use the built-in UI Designer utility to add a button to the Ribbon for your new macro.
Add a Button to the Ribbon 1. In the workspace, click the tab for the session
from which you will run the macro.
2. On the Appearance tab of the Ribbon, click UI Designer.
3. Select the Macros group in the image of the Ribbon.
4. Below, from the Insert Controls pane, click Button.
A new button is added to the Macro group.
5. From the Settings pane, click Select Action.
6. In the Action list, select Run Reflection Workspace Macro.
7. Under Action Parameters, click Select macro and the select the Common VBA project.
8. Select the macro to associate with this button and then click OK.
9. In the UI Designer Settings pane, select Change Settings for “Run Reflection Workspace Macro.”
10. Change the label and add a ToolTip.
11. When you’re done, click OK.
The new button appears on the Session tab of the Ribbon.
Strengthen Host Security Dealing with sensitive customer data requires security support on multiple levels.
The U.S. federal government is a large Micro Focus customer and demands the highest level of security from their products — for example, FIPS 140-2 for strong data encryption; Department of Defense PKI for strong certificate-based, 2-factor authentication; and FDCC/USGCB to prove that Reflection can support a locked-down desktop configuration.
The high level of Reflection security can help you comply with nongovernmental/industry mandates driven by PCI audits, Sarbanes-Oxley (SOX), HIPAA/HITECH, and Basel II.
Protect Mission-Critical Host Data Reflection includes information privacy features designed to protect customer data and secure the desktop.
Set Up Privacy Filters Privacy filters allow you to mask sensitive host data, such as personal identification numbers, and prevent that data from being printed, saved, or copied.
Let’s say that you want to protect your customers’ telephone numbers. With Reflection, it’s easy:
1. On the Ribbon File menu, choose Reflection Workspace settings. (In Browser mode, choose Settings > Reflection Workspace Settings from the Reflection menu.)
2. In Reflection Workspace Settings, click Set up Information Privacy.
3. Under Privacy Filters, click Add.
4. In Add Privacy Filter, enter a description, select Simple expression, and then type # symbols in the box to represent the digits of the data you want to protect. For example:
###-###-####
Be sure to use the formats that your host systems use to display these numbers. If telephone numbers are entered both with and without dashes, you’ll need to set up another filter without dashes. For example:
##########
PAGE 6
EVALUATING REFLECTION
5. Under Privacy Filters Redaction Rules, specify how to redact the data:
• To redact sensitive data so that it is not displayed by the Scratch Pad, Recent Typing, and other productivity features, select Enable redaction (exported data only).
• To redact data on screens, select Redact display data (Terminals Supported: IBM).
6. Click OK to save your changes.
7. Connect to a host application that displays telephone number data to verify that the data is redacted.
Protect Credit Card Data To help your organization meet Payment Card Industry Data Security Standard (PCI DSS) requirements, Reflection can automatically protect credit/debit card data that is entered or stored on IBM host screens. Let’s say that you want to protect credit card data.
1. On the Ribbon File menu, choose Reflection Workspace settings. (In Browser mode, choose Settings > Reflection Workspace Settings from the Reflection menu.)
2. In Reflection Workspace Settings, click Set Up Information Privacy.
3. Under Primary Account Number (PAN) Detection Rules, choose Simple PAN detection.
4. Under Primary Account Number (PAN) Redaction Rules, choose Enable Redaction (exported data only), Redact display data (Terminals Supported: IBM), and Redact data while typing (Terminals Supported: IBM).
5. Click OK to save your changes.
6. Connect to a host application that contains an input field long enough to enter a credit card number.
7. Remove a credit card from your wallet and type the number into the input field. Notice that when you enter the last digit, all but the last 4 digits of the credit card number are redacted.
Secure File Transfers Traditional protocols, such as Telnet and FTP, are not inherently secure. They put your confidential host data at risk.
Reflection helps you manage that risk as your needs evolve — with comprehensive support for existing security infrastructures, user-level security features, and encryption technology that meets today’s stringent security mandates. This level of security combined with support for a broad range of hosts is unmatched by competitive products.
Improve User Productivity The productivity of your end users is critical to meeting your business goals. Features such as Auto Complete, Auto Expand, Spell Check, Scratch Pad, Recent Typing, and Screen History can make your cryptic legacy host applications work like modern office apps, saving users thousands of keystrokes throughout the day and shortening call times while improving customer satisfaction.
Just as importantly, these features improve the quality of data that is entered into the system. No other emulator contains all of these tools.
Because Reflection is integrated with current and older versions of Office applications, users can copy data from the host screen into a Word document, e-mail message, or PowerPoint slide with the click of a button.
E-mail a Host Screen Suppose a sales representative needs complete information on a customer account. Sending the data is as easy as 1-2-3.
1. Navigate to the appropriate screen, and then click the Office Tools button on the Session Ribbon (or in Browser mode, choose View > Office Tools from the Reflection menu.)
The Office Tools pane opens.
PAGE 7
EVALUATING REFLECTION
2. From the Office Tools pane, under Create New, click E-mail Message.
Reflection opens a new e-mail message in Outlook, with the current screen content pasted into it. If an account or telephone number was included in the screen, look closely at the image in the e-mail. Because you set up privacy filters, this sensitive information is obscured in the screen image within the e-mail message.
3. Fill in the To and Subject lines of the e-mail, and then click Send.
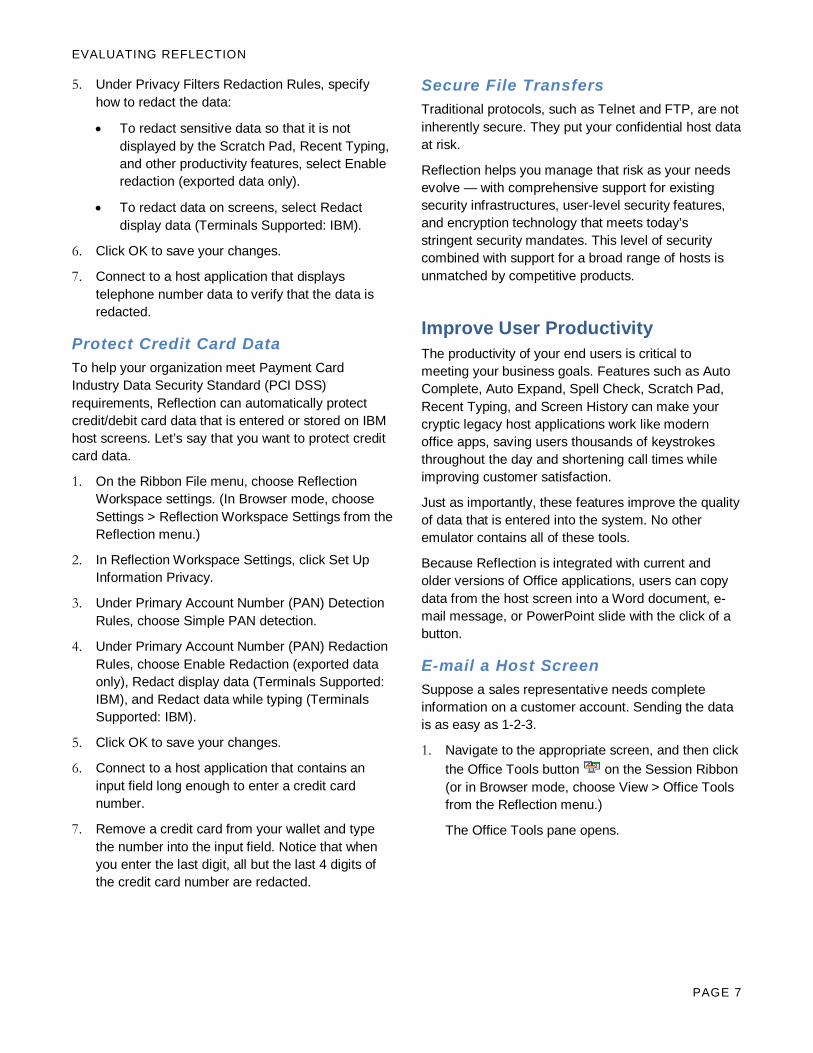
Find Host Screens Fast With the Reflection Screen History function, you can review host screens and use them in Office applications without having to navigate back to them.
Display the screen history for the session by clicking the Screen History button on the Session tab of the Ribbon. (In Browser mode, choose View > Screen History from the Reflection menu.)
Navigate through four or five host screens, and notice the way they appear in the Screen History pane.
Now imagine that you have just received a call from a courier who needs to verify directions to a customer location. You need to enter the customer address into an online map application that you have open in a Web session in your workspace.
You’ve already been to the customer data screen. Rather than navigate back to give the courier the information he needs, you can get to the screen by using Screen History in one of two ways:
1. If you only have a few screens to review, scroll through the Screen History pane and click the customer data screen to display it in the main session window.
-or-
If you have multiple screens to review or the data you need is too small to read:
a. Enter the customer’s name in the Search box above the Ribbon.
b. On the Search button , click the down arrow to select Screen History Search.
The Search Results appear below the terminal window, so that you can move quickly to the screen that has the required data.
2. To get directions to the customer’s address, copy the address, click the tab for the online map application, and paste the address into the destination address field.
You can respond to the call that easily!
Reflection productivity features accelerate data entry and host navigation, improving user efficiency while reducing data-entry errors.
Modernize your Host Screens The Micro Focus Plus Screen Designer enables you to modernize your legacy host applications with current-day application functionality.
With the Screen Designer, you can quickly add modern UI elements to your legacy IBM host applications, such as drop-down lists, buttons, and date-pickers, to make data entry easier.
The Screen History pane
PAGE 8
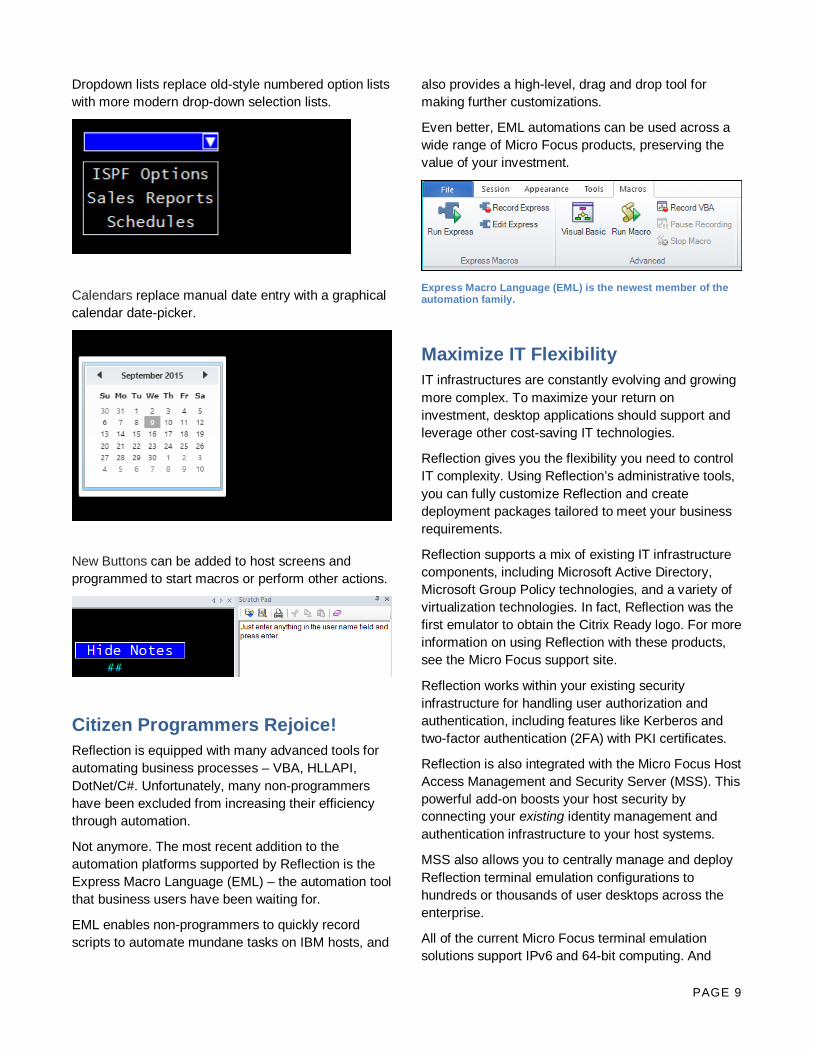
Dropdown lists replace old-style numbered option lists with more modern drop-down selection lists.
Calendars replace manual date entry with a graphical calendar date-picker.
New Buttons can be added to host screens and programmed to start macros or perform other actions.
Citizen Programmers Rejoice! Reflection is equipped with many advanced tools for automating business processes – VBA, HLLAPI, DotNet/C#. Unfortunately, many non-programmers have been excluded from increasing their efficiency through automation.
Not anymore. The most recent addition to the automation platforms supported by Reflection is the Express Macro Language (EML) – the automation tool that business users have been waiting for.
EML enables non-programmers to quickly record scripts to automate mundane tasks on IBM hosts, and
also provides a high-level, drag and drop tool for making further customizations.
Even better, EML automations can be used across a wide range of Micro Focus products, preserving the value of your investment.
Express Macro Language (EML) is the newest member of the automation family.
Maximize IT Flexibility IT infrastructures are constantly evolving and growing more complex. To maximize your return on investment, desktop applications should support and leverage other cost-saving IT technologies.
Reflection gives you the flexibility you need to control IT complexity. Using Reflection’s administrative tools, you can fully customize Reflection and create deployment packages tailored to meet your business requirements.
Reflection supports a mix of existing IT infrastructure components, including Microsoft Active Directory, Microsoft Group Policy technologies, and a variety of virtualization technologies. In fact, Reflection was the first emulator to obtain the Citrix Ready logo. For more information on using Reflection with these products, see the Micro Focus support site.
Reflection works within your existing security infrastructure for handling user authorization and authentication, including features like Kerberos and two-factor authentication (2FA) with PKI certificates.
Reflection is also integrated with the Micro Focus Host Access Management and Security Server (MSS). This powerful add-on boosts your host security by connecting your existing identity management and authentication infrastructure to your host systems.
MSS also allows you to centrally manage and deploy Reflection terminal emulation configurations to hundreds or thousands of user desktops across the enterprise.
All of the current Micro Focus terminal emulation solutions support IPv6 and 64-bit computing. And
PAGE 9
EVALUATING REFLECTION
Micro Focus is currently focused on providing broad support for enterprise virtualization technologies.
Micro Focus has been developing IT solutions that support emerging technologies for nearly 30 years. As your business continues to evolve, Micro Focus is committed to building solutions that maximize your IT investments and allow your IT organization to be as flexible as possible. Micro Focus bridges the old and the new, enabling you to exploit the latest industry innovation and leverage prior investments.
Simplify Migration and Support Migrating from one desktop application to another is never easy. Migrations can be time consuming and resource intensive.
However, supporting multiple emulation products also puts an ongoing and unnecessary drain on valuable IT resources. The problem is determining how to standardize on a single solution, without losing the custom macros, keyboard maps, and settings files you’ve created over the years, and without disrupting your users’ workflow. The solution is Reflection. You
can successfully standardize on a Reflection single-emulation solution using the proven tools and services of Micro Focus.
Compatibility tools built into Reflection run competitive macros, keyboard maps, and settings files; thereby minimizing the risk of business disruption.
Reflection has deeper support for Windows 7, Windows 8, and Windows 10 than any competitive terminal emulation product. It also has broader security options, unique user productivity tools, and wide-ranging support for existing and emerging technologies.
By providing Reflection to your emulation users, you’ll allow them to take advantage of the powerful features, robust security, and Windows integration that they can’t get anywhere else. Bottom line: Reflection is ready for Windows 7, Windows 8, and Windows 10 when you are.
705 Fifth Avenue South
Seattle, WA 98104
USA
Tel: +1.206.217.7100
+1.800.872.2829
For additional office locations, partners, and resellers, visit our web site at www.microfocus.com.
Provided for informational use only; may be modified at any time without notice. No part of this document may be reproduced, transmitted, transcribed, or translated into any language, in any form, or by any means, without the written permission of Micro Focus.
Copyright © 2017 Attachmate Corporation, a Micro Focus company. All Rights Reserved. Micro Focus, the Micro Focus symbol, Extra!, and Reflection are registered trademarks of Micro Focus in the USA. All other trademarks, trade names, or company names referenced herein are used for identification only and are the property of their respective owners.
For More Information on Reflection For more information about Reflection, review the product Help. For further assistance regarding evaluation software and product updates, visit our Support & Services site at www.microfocus.com/support-and-services/.
PAGE 10