Embed Size (px)
Citation preview
Indian Institute of Technology Kanpur
National Programme on Technology Enhanced Learning (NPTEL)
Course Title
Engineering Graphics
Lecture – 01
Course objective, Lettering and Numbering
by
Prof. Nihar Ranjan Patre
Department of civil engineering, IIT Kanpur
So TA 101.
(Refer Slide Time: 00:16)
Engineering Graphics, so.
(Refer Slide Time: 00:20)
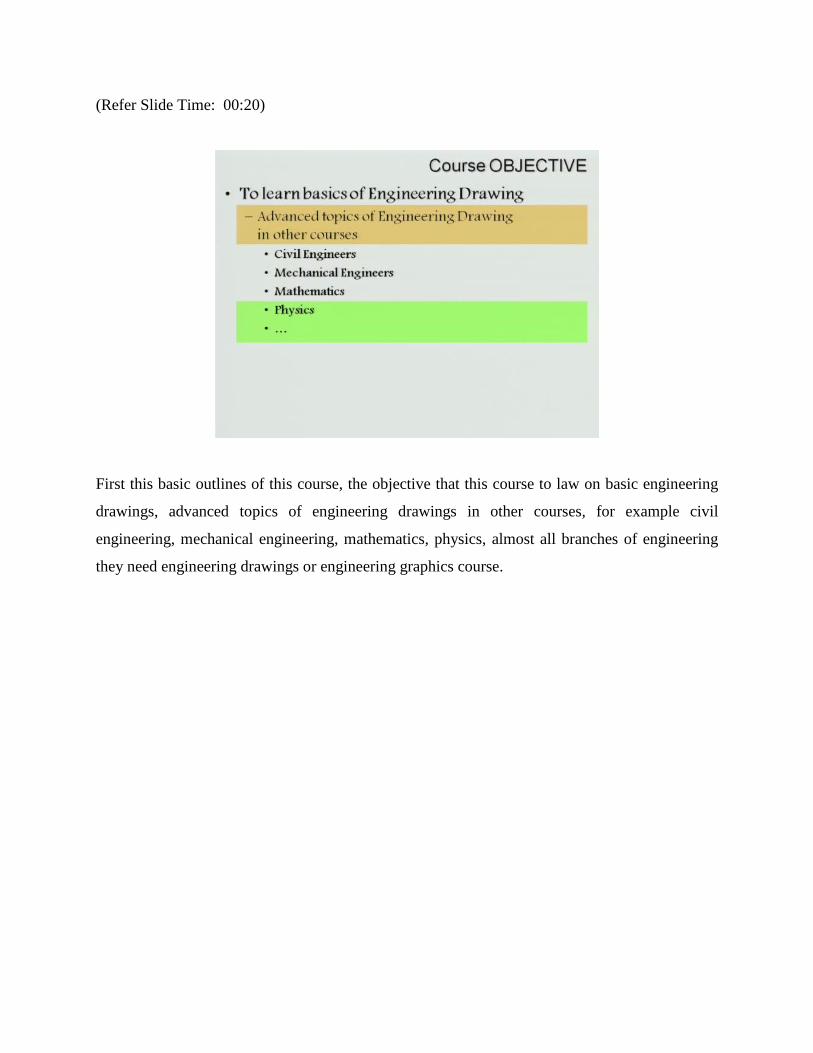
First this basic outlines of this course, the objective that this course to law on basic engineering
drawings, advanced topics of engineering drawings in other courses, for example civil
engineering, mechanical engineering, mathematics, physics, almost all branches of engineering
they need engineering drawings or engineering graphics course.
(Refer Slide Time: 00:44)
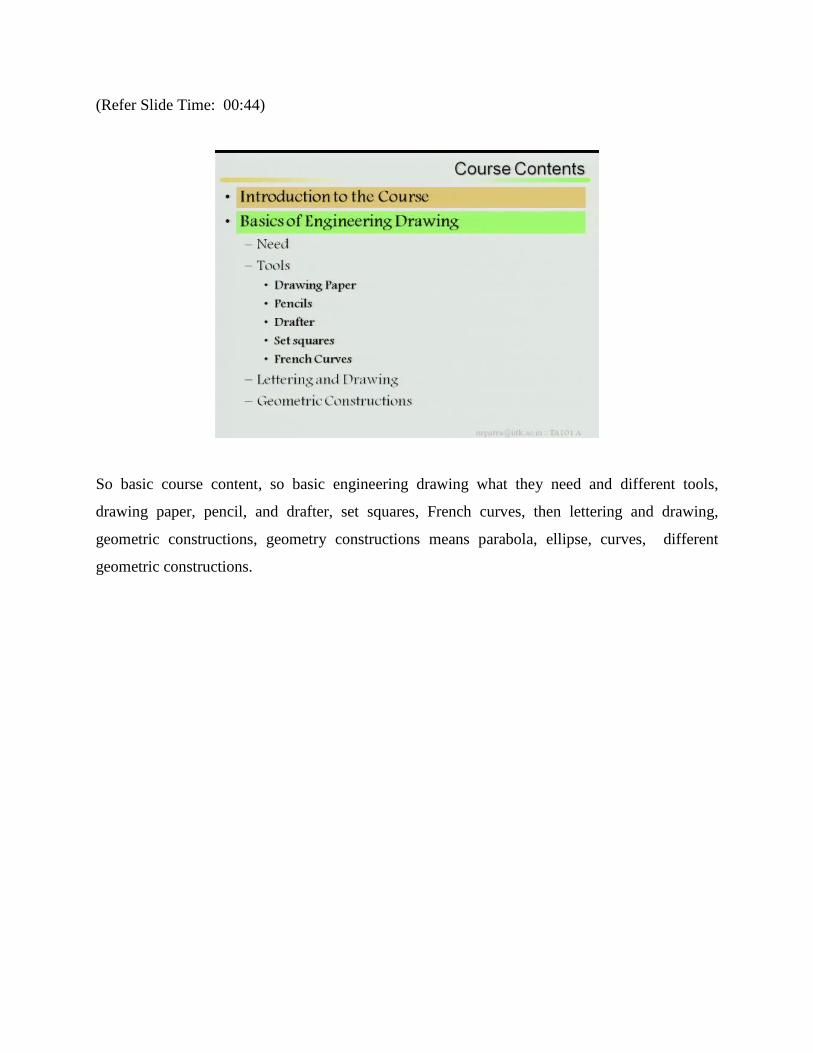
So basic course content, so basic engineering drawing what they need and different tools,
drawing paper, pencil, and drafter, set squares, French curves, then lettering and drawing,
geometric constructions, geometry constructions means parabola, ellipse, curves, different
geometric constructions.
(Refer Slide Time: 01:09)
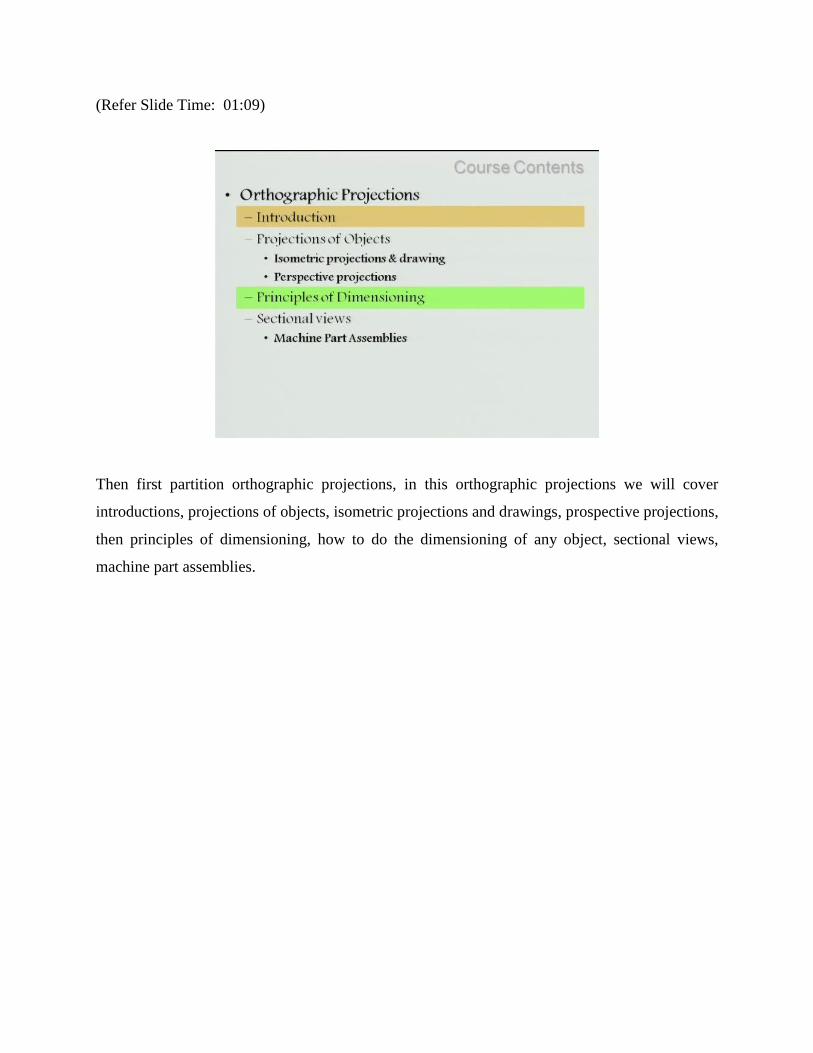
Then first partition orthographic projections, in this orthographic projections we will cover
introductions, projections of objects, isometric projections and drawings, prospective projections,
then principles of dimensioning, how to do the dimensioning of any object, sectional views,
machine part assemblies.
(Refer Slide Time: 1:33)
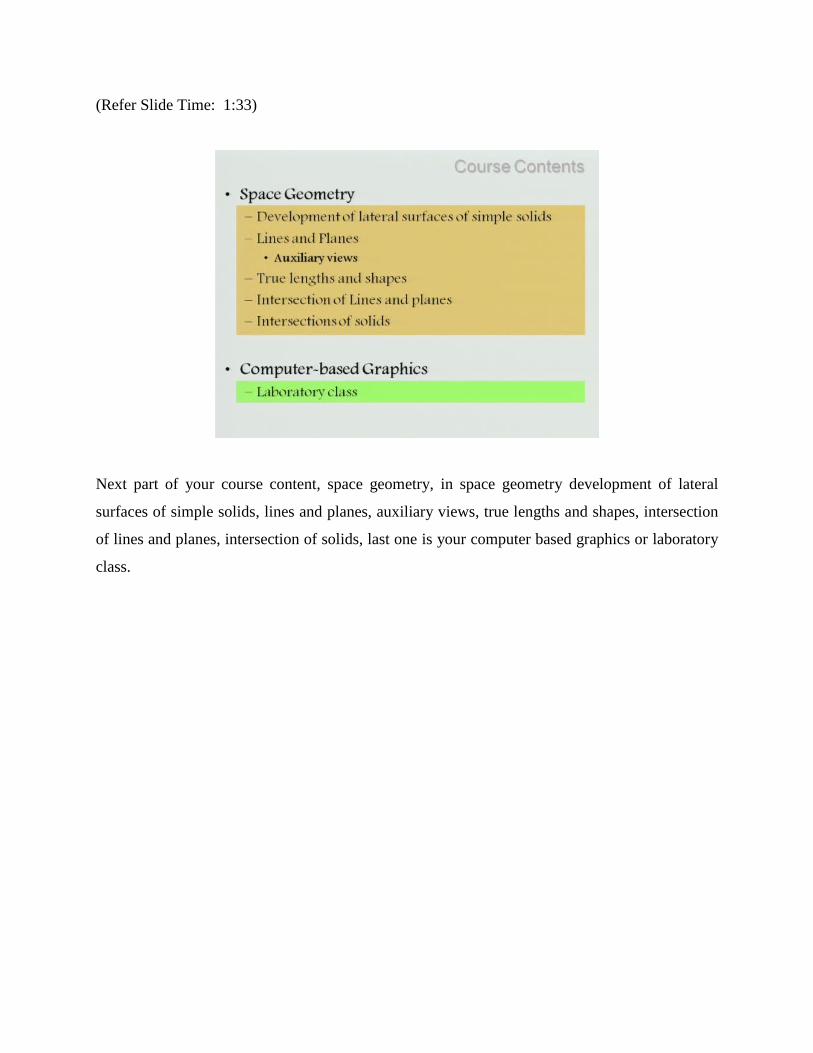
Next part of your course content, space geometry, in space geometry development of lateral
surfaces of simple solids, lines and planes, auxiliary views, true lengths and shapes, intersection
of lines and planes, intersection of solids, last one is your computer based graphics or laboratory
class.
(Refer Slide Time: 02:22)
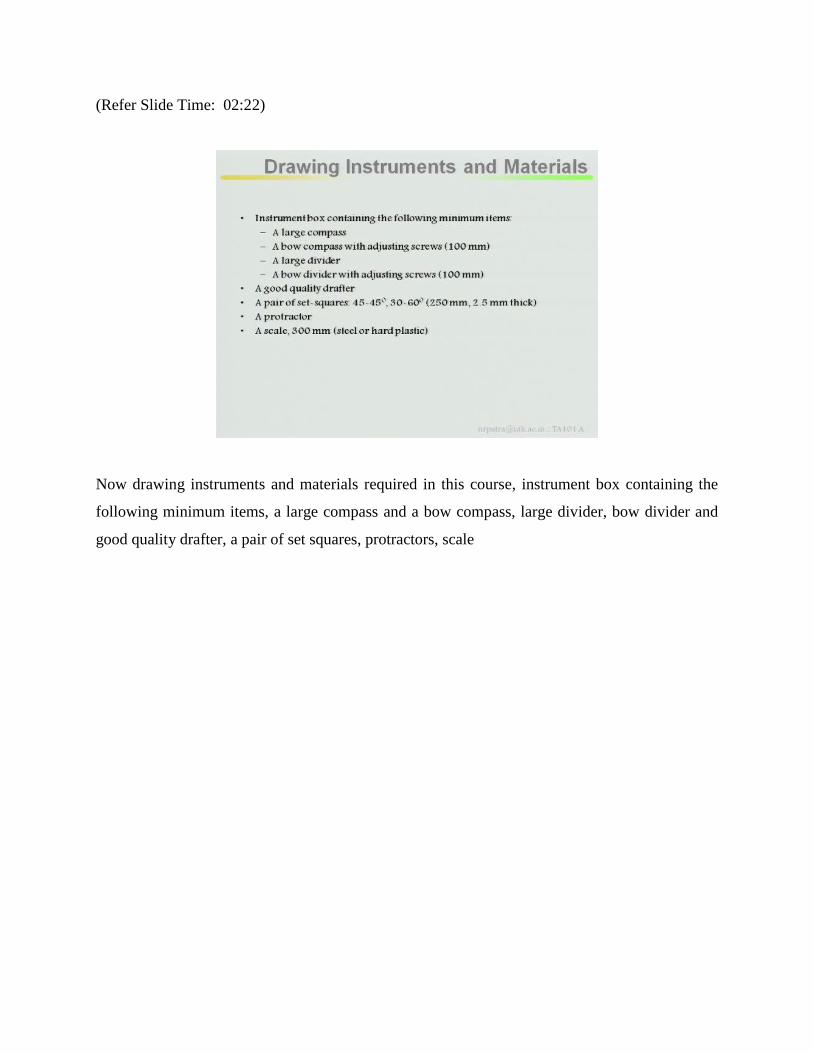
Now drawing instruments and materials required in this course, instrument box containing the
following minimum items, a large compass and a bow compass, large divider, bow divider and
good quality drafter, a pair of set squares, protractors, scale
(Refer Slide Time: 02:23)
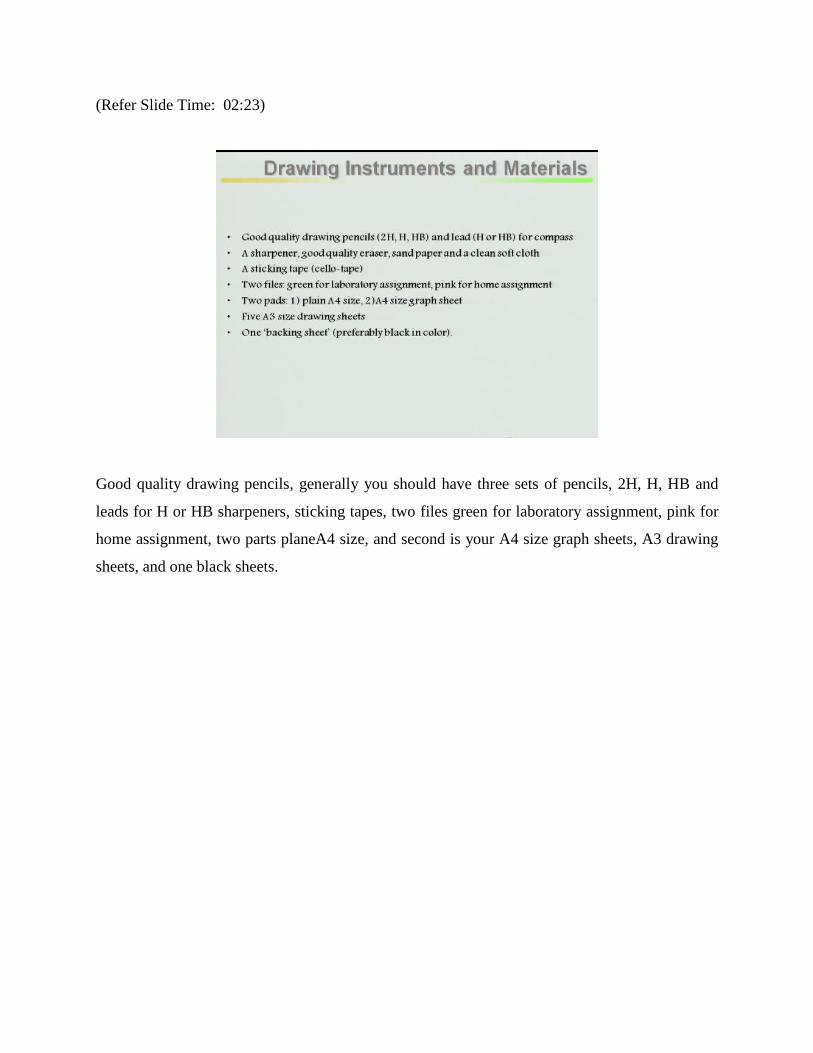
Good quality drawing pencils, generally you should have three sets of pencils, 2H, H, HB and
leads for H or HB sharpeners, sticking tapes, two files green for laboratory assignment, pink for
home assignment, two parts planeA4 size, and second is your A4 size graph sheets, A3 drawing
sheets, and one black sheets.
(Refer Slide Time: 02: 55)

(Refer Slide Time: 02:54)
Preferably in a black in color.
(Refer Slide Time: 02:58)
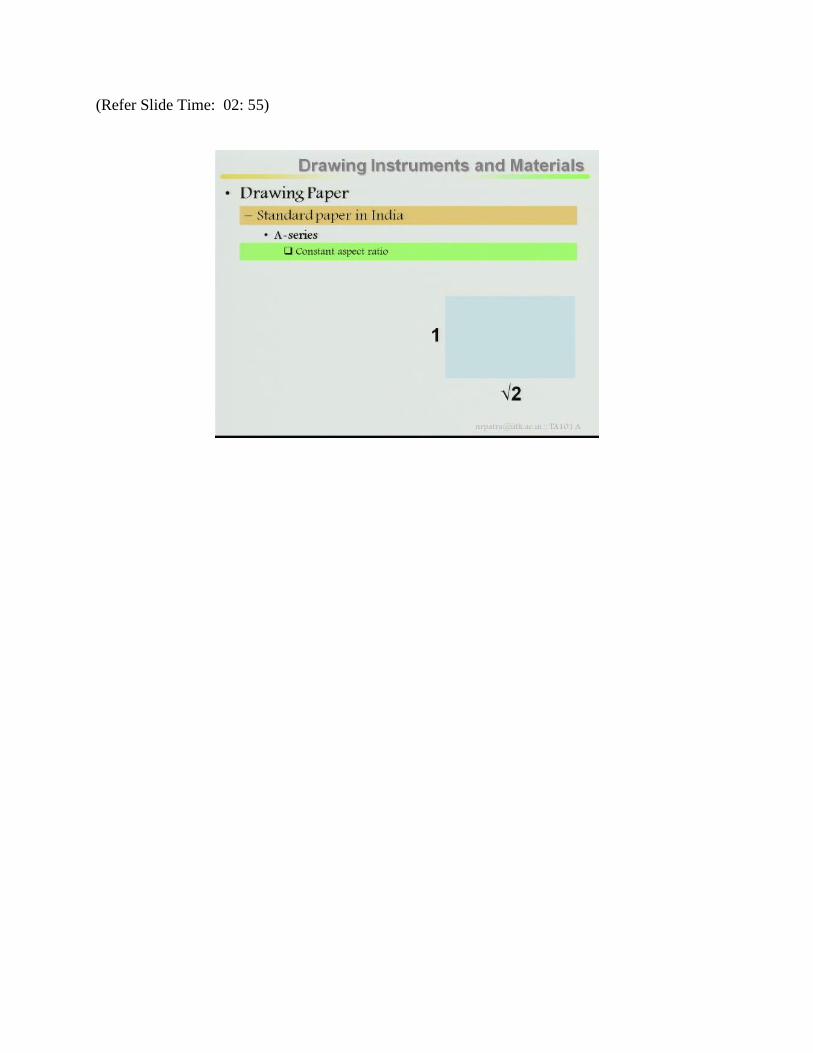
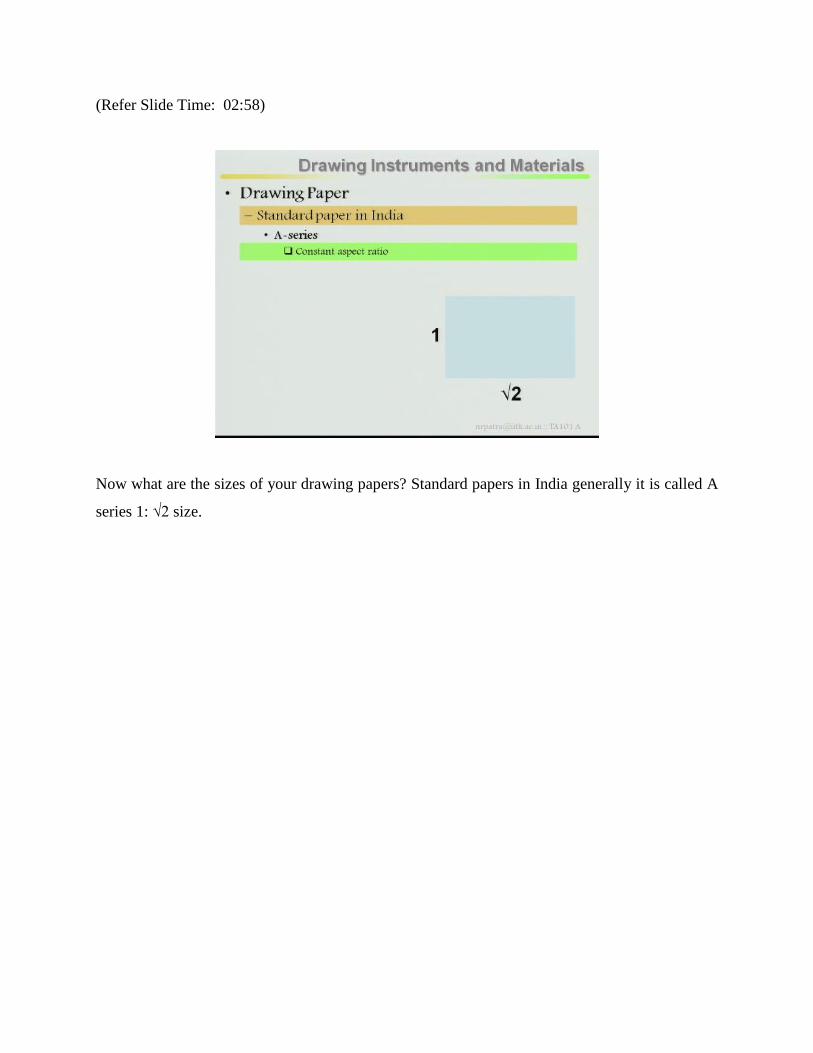
Now what are the sizes of your drawing papers? Standard papers in India generally it is called A
series 1: √2 size.
(Refer Slide Time: 03:09)
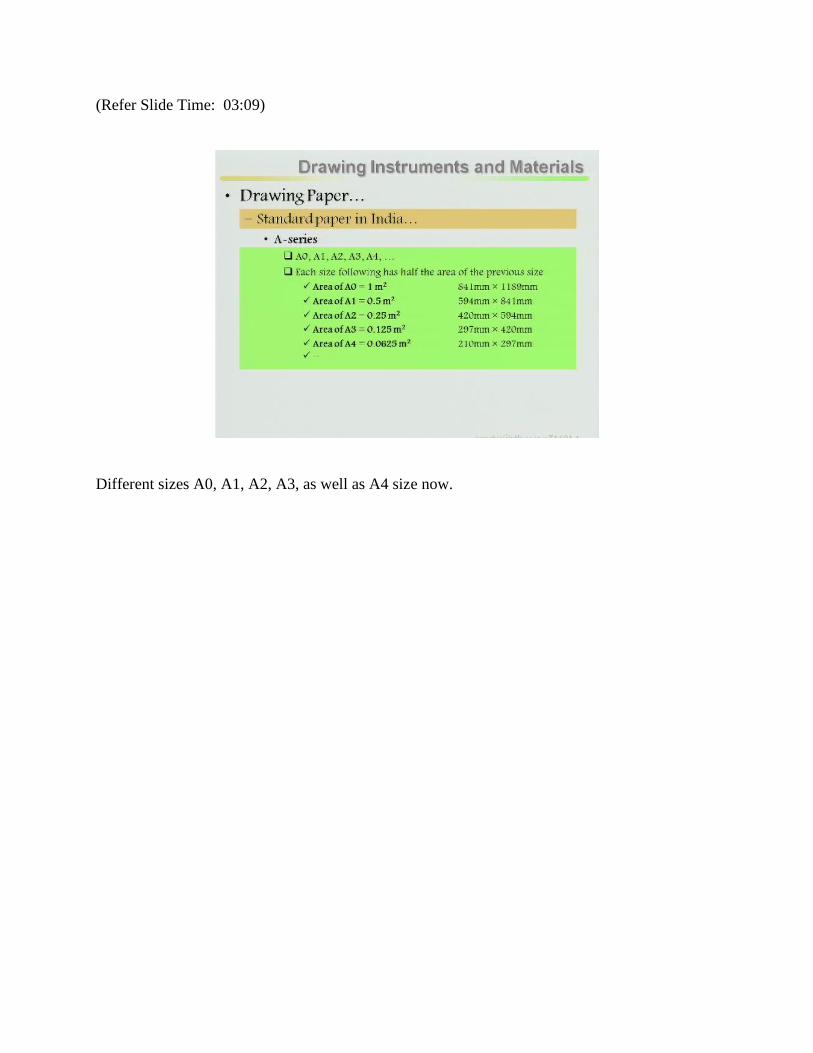
Different sizes A0, A1, A2, A3, as well as A4 size now.
(Refer Slide Time: 03:18)
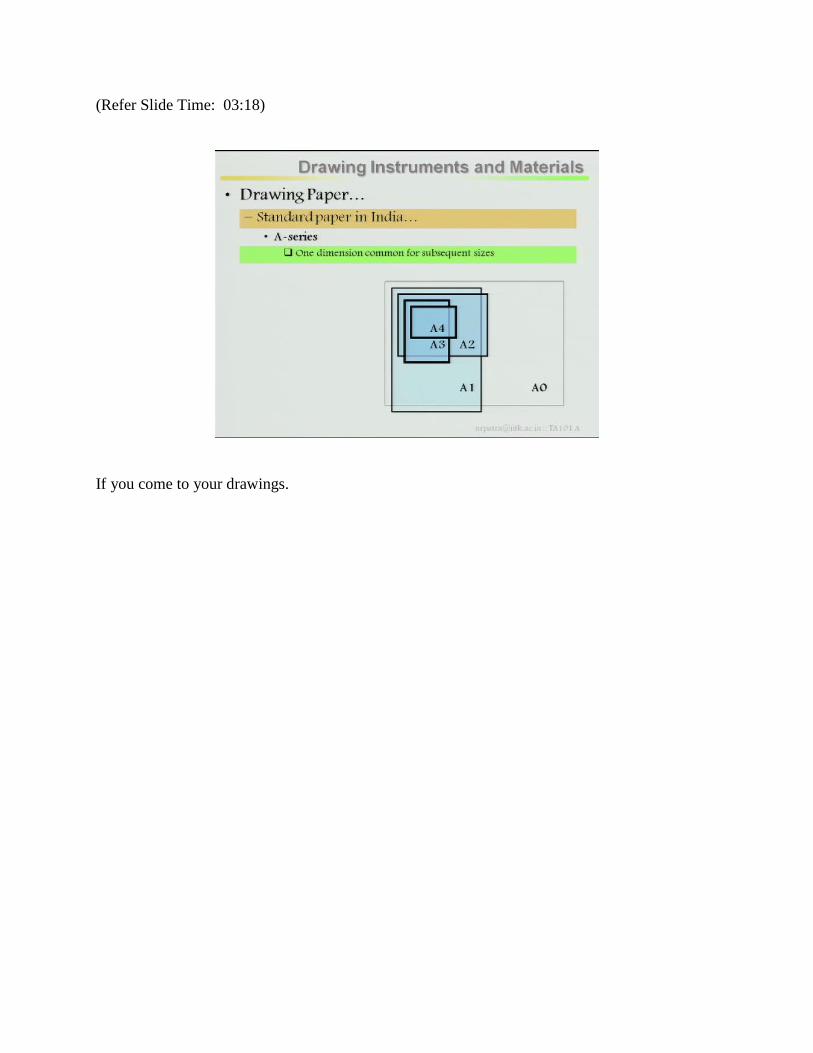
If you come to your drawings.
(Refer Slide Time: 03:19)
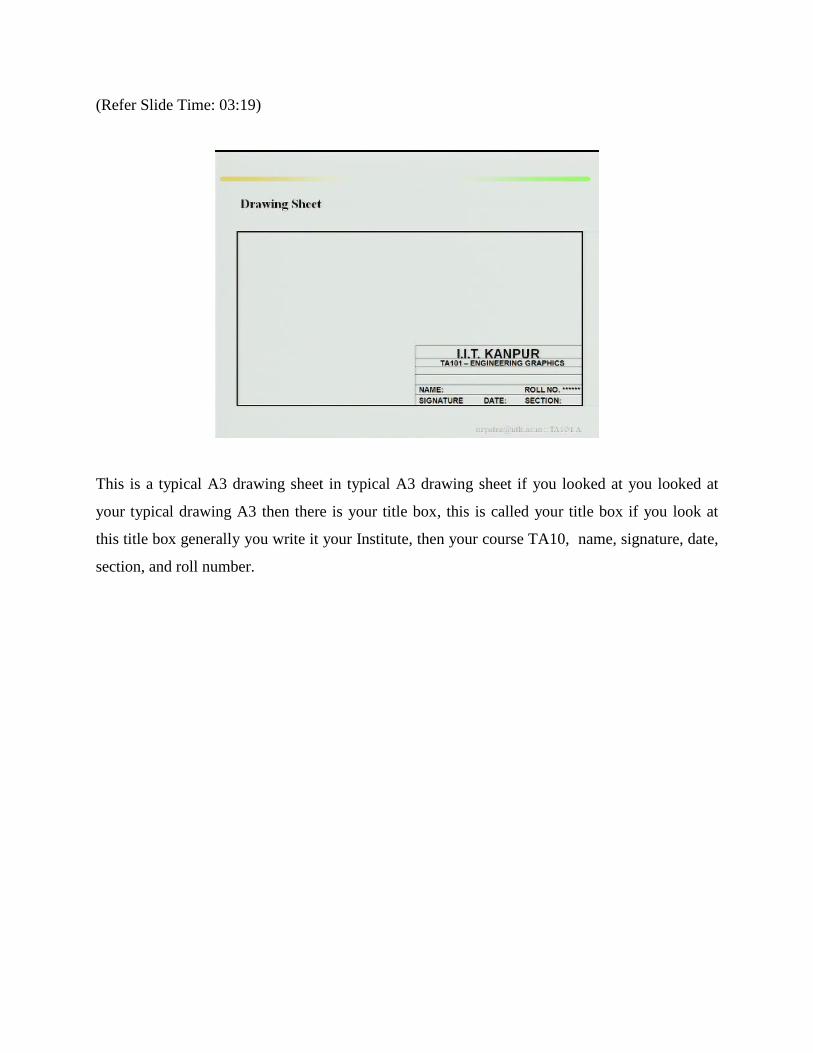
This is a typical A3 drawing sheet in typical A3 drawing sheet if you looked at you looked at
your typical drawing A3 then there is your title box, this is called your title box if you look at
this title box generally you write it your Institute, then your course TA10, name, signature, date,
section, and roll number.
(Refer Slide Time: 03:46)
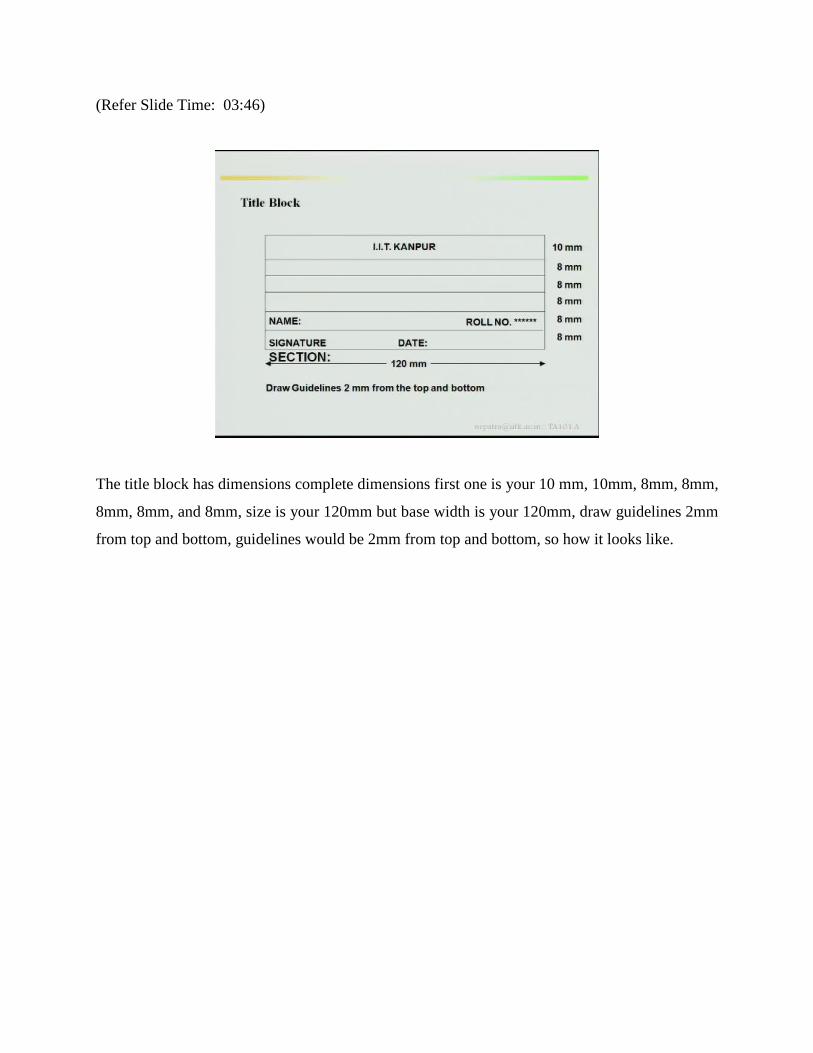
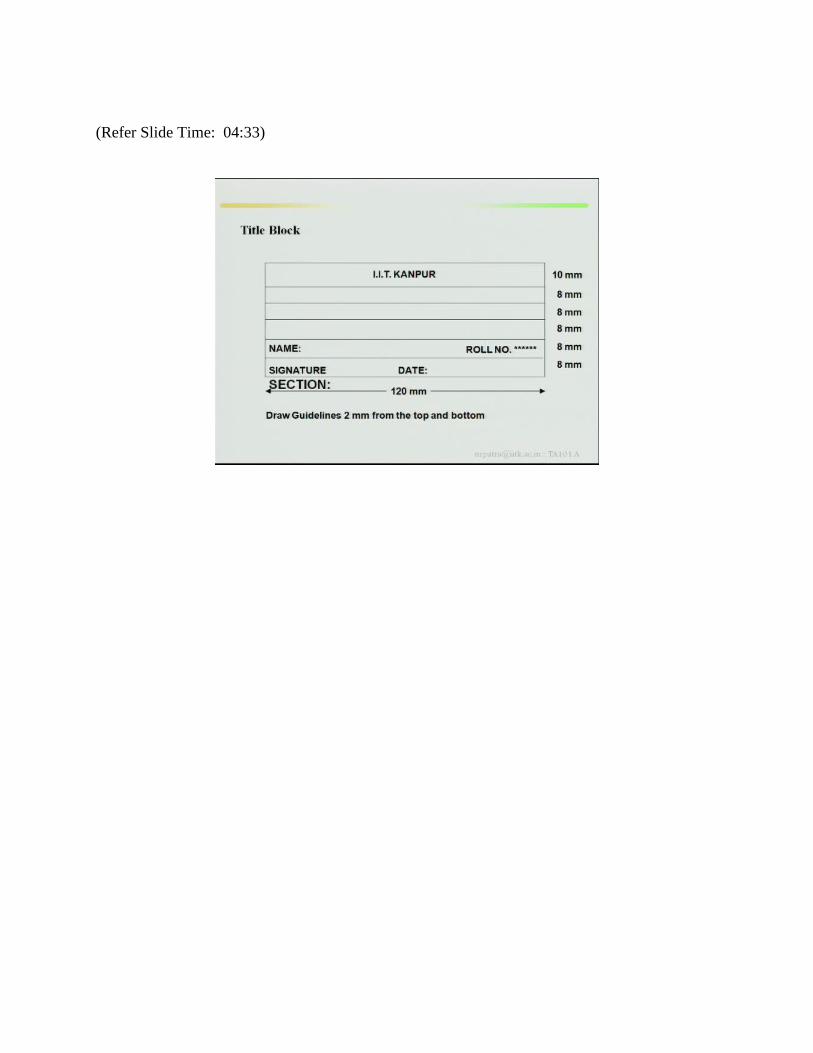
The title block has dimensions complete dimensions first one is your 10 mm, 10mm, 8mm, 8mm,
8mm, 8mm, and 8mm, size is your 120mm but base width is your 120mm, draw guidelines 2mm
from top and bottom, guidelines would be 2mm from top and bottom, so how it looks like.
(Refer Slide Time: 04:22)
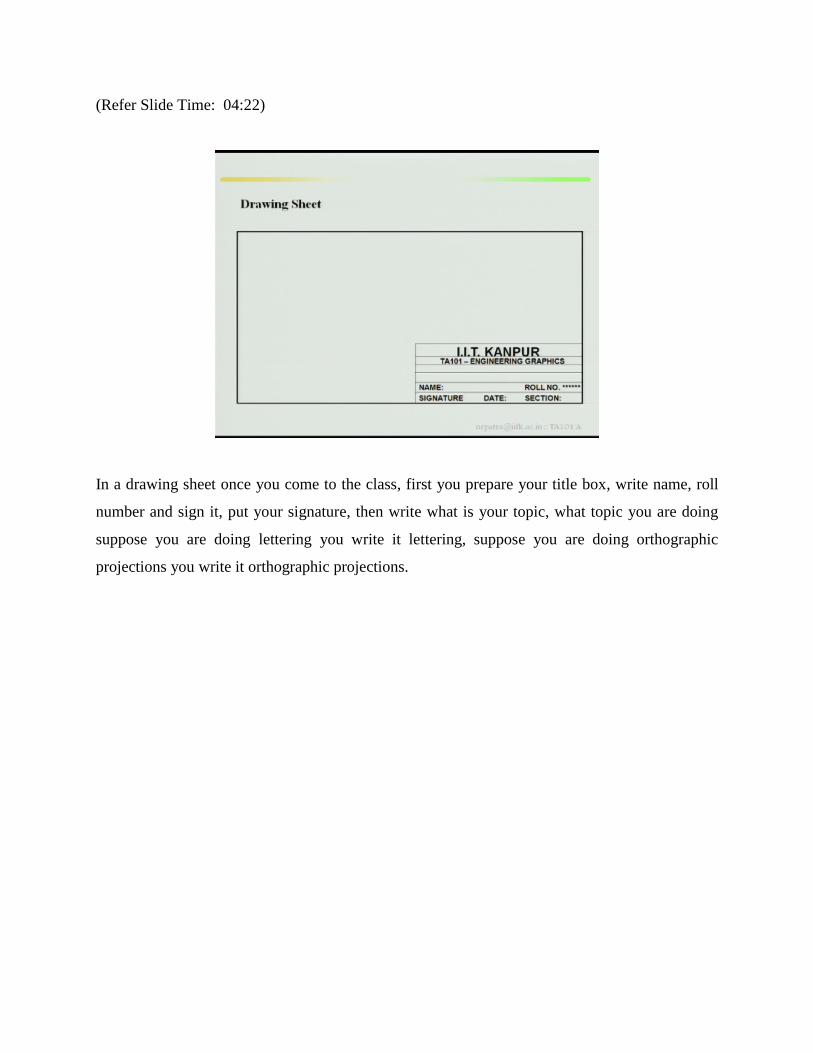
In a drawing sheet once you come to the class, first you prepare your title box, write name, roll
number and sign it, put your signature, then write what is your topic, what topic you are doing
suppose you are doing lettering you write it lettering, suppose you are doing orthographic
projections you write it orthographic projections.
(Refer Slide Time: 04:33)
(Refer Slide Time: 04:35)
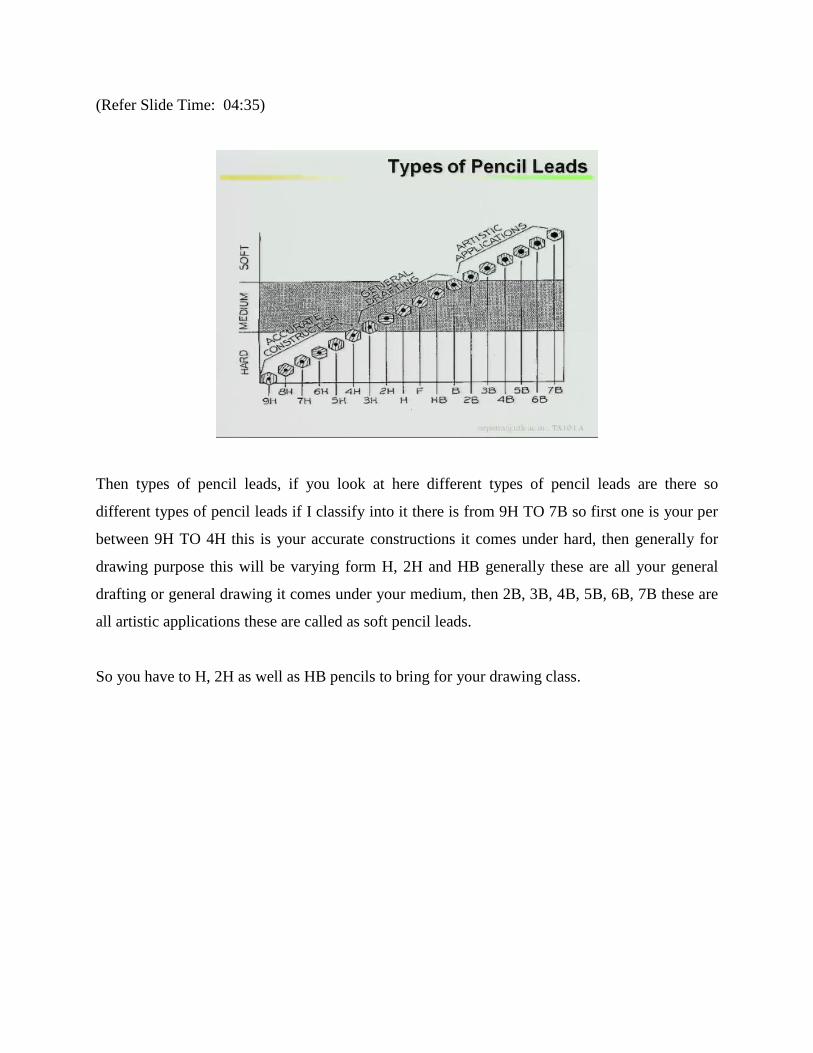
Then types of pencil leads, if you look at here different types of pencil leads are there so
different types of pencil leads if I classify into it there is from 9H TO 7B so first one is your per
between 9H TO 4H this is your accurate constructions it comes under hard, then generally for
drawing purpose this will be varying form H, 2H and HB generally these are all your general
drafting or general drawing it comes under your medium, then 2B, 3B, 4B, 5B, 6B, 7B these are
all artistic applications these are called as soft pencil leads.
So you have to H, 2H as well as HB pencils to bring for your drawing class.
(Refer Slide Time: 05:30)
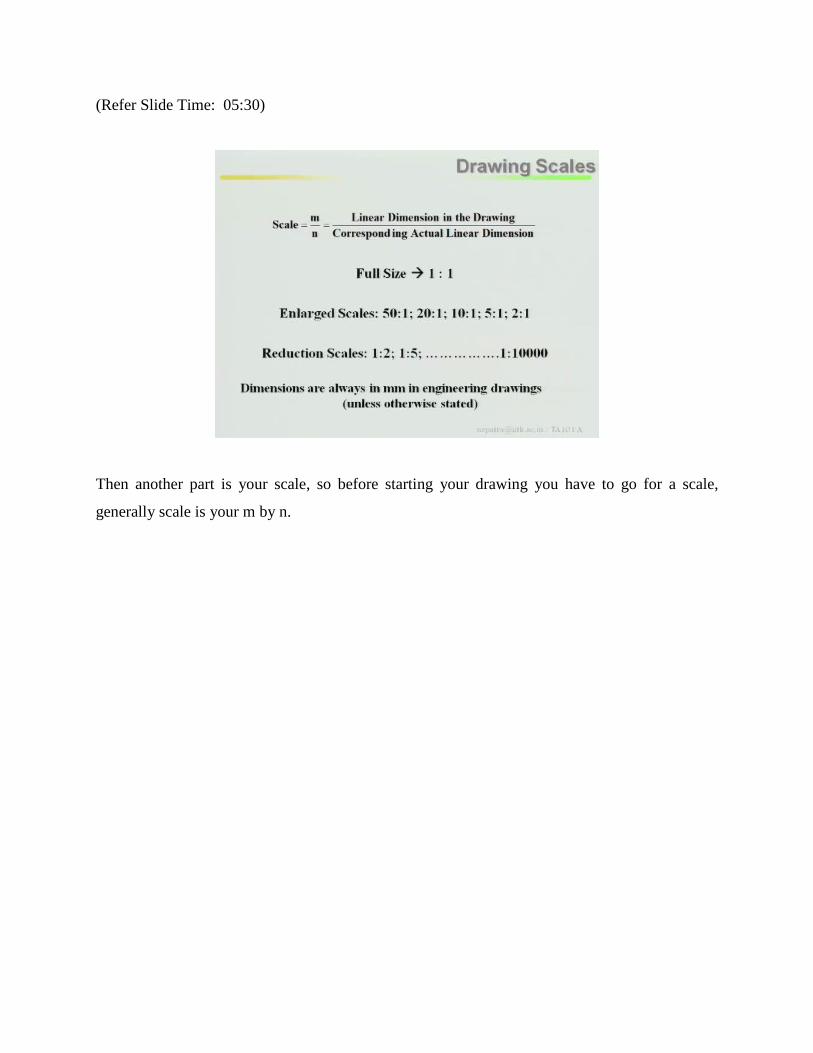
Then another part is your scale, so before starting your drawing you have to go for a scale,
generally scale is your m by n.
(Refer Slide Time: 05:39)
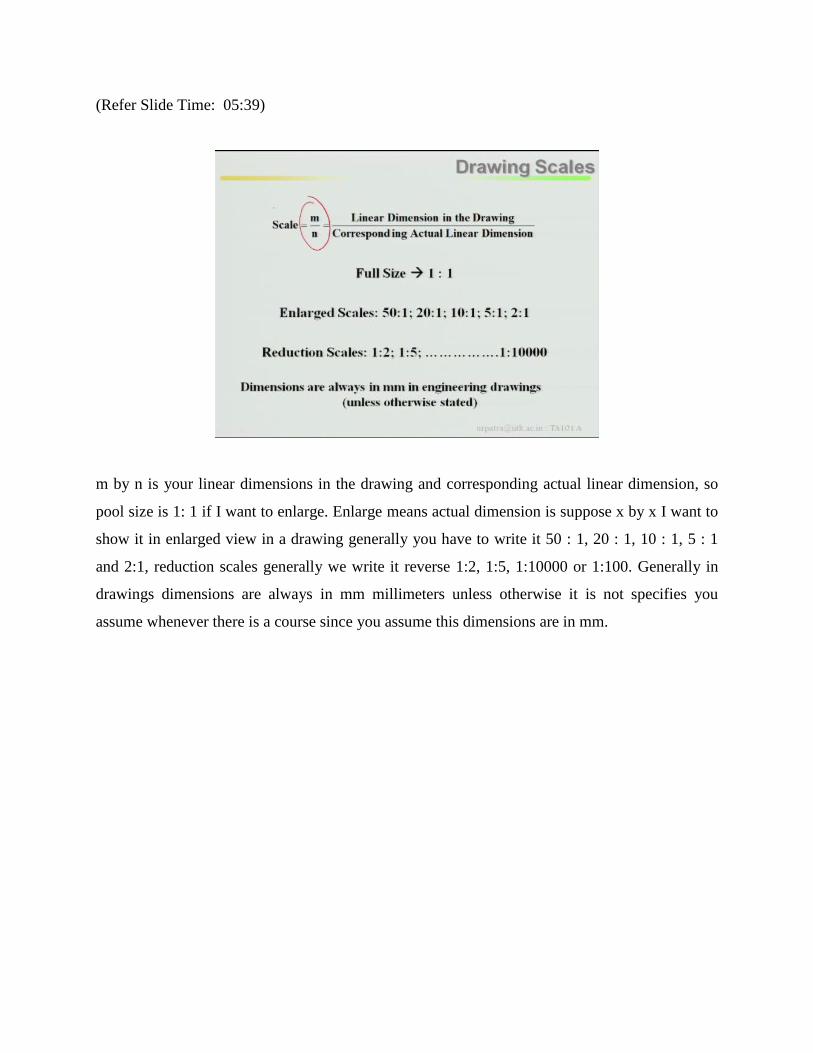
m by n is your linear dimensions in the drawing and corresponding actual linear dimension, so
pool size is 1: 1 if I want to enlarge. Enlarge means actual dimension is suppose x by x I want to
show it in enlarged view in a drawing generally you have to write it 50 : 1, 20 : 1, 10 : 1, 5 : 1
and 2:1, reduction scales generally we write it reverse 1:2, 1:5, 1:10000 or 1:100. Generally in
drawings dimensions are always in mm millimeters unless otherwise it is not specifies you
assume whenever there is a course since you assume this dimensions are in mm.
(Refer Slide Time: 06:30)
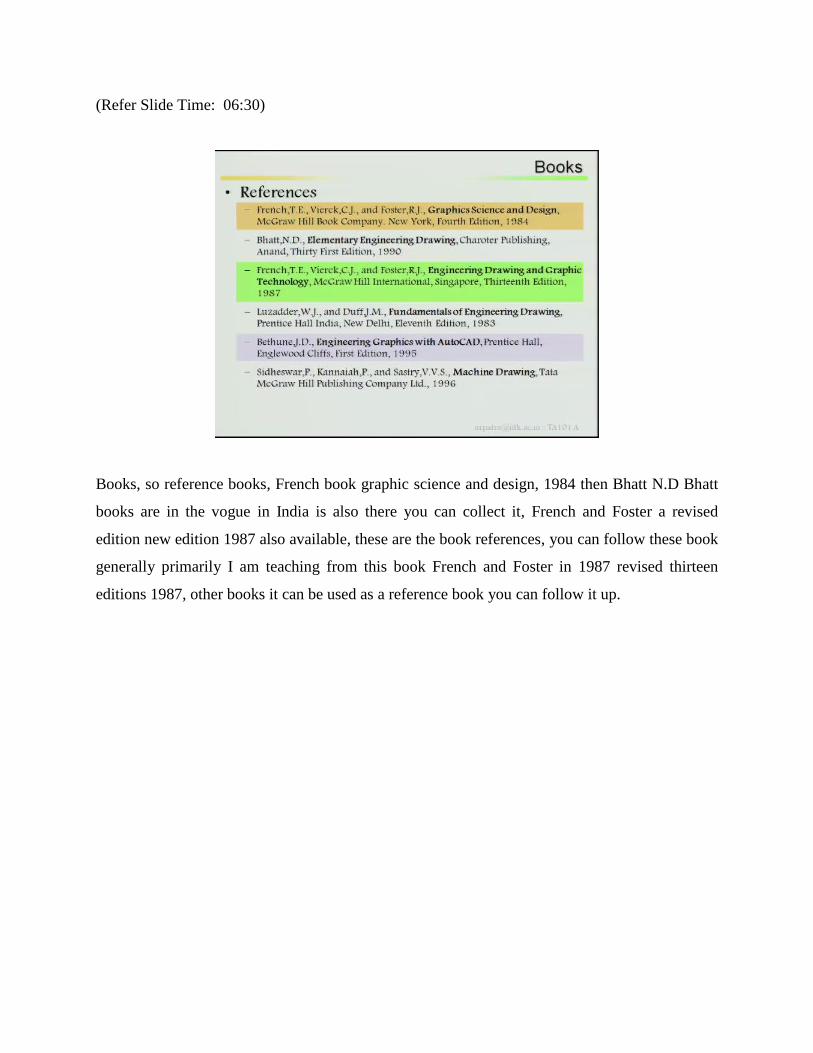
Books, so reference books, French book graphic science and design, 1984 then Bhatt N.D Bhatt
books are in the vogue in India is also there you can collect it, French and Foster a revised
edition new edition 1987 also available, these are the book references, you can follow these book
generally primarily I am teaching from this book French and Foster in 1987 revised thirteen
editions 1987, other books it can be used as a reference book you can follow it up.
(Refer Slide Time: 07:10)
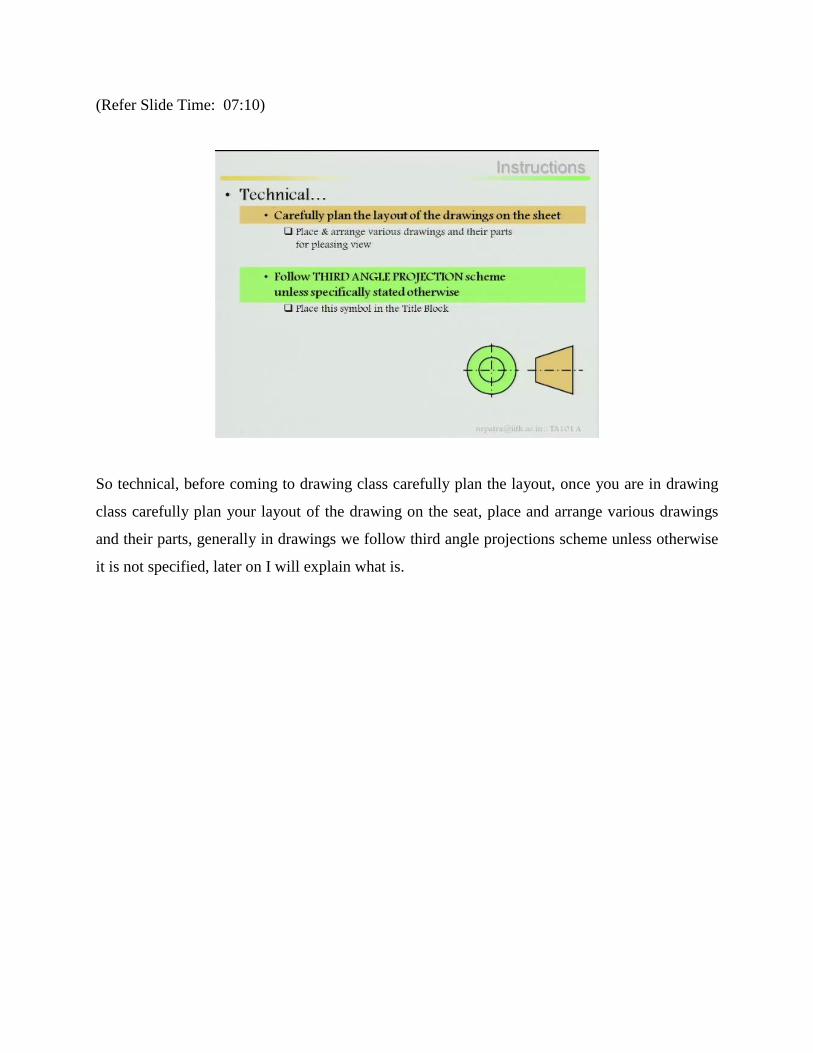
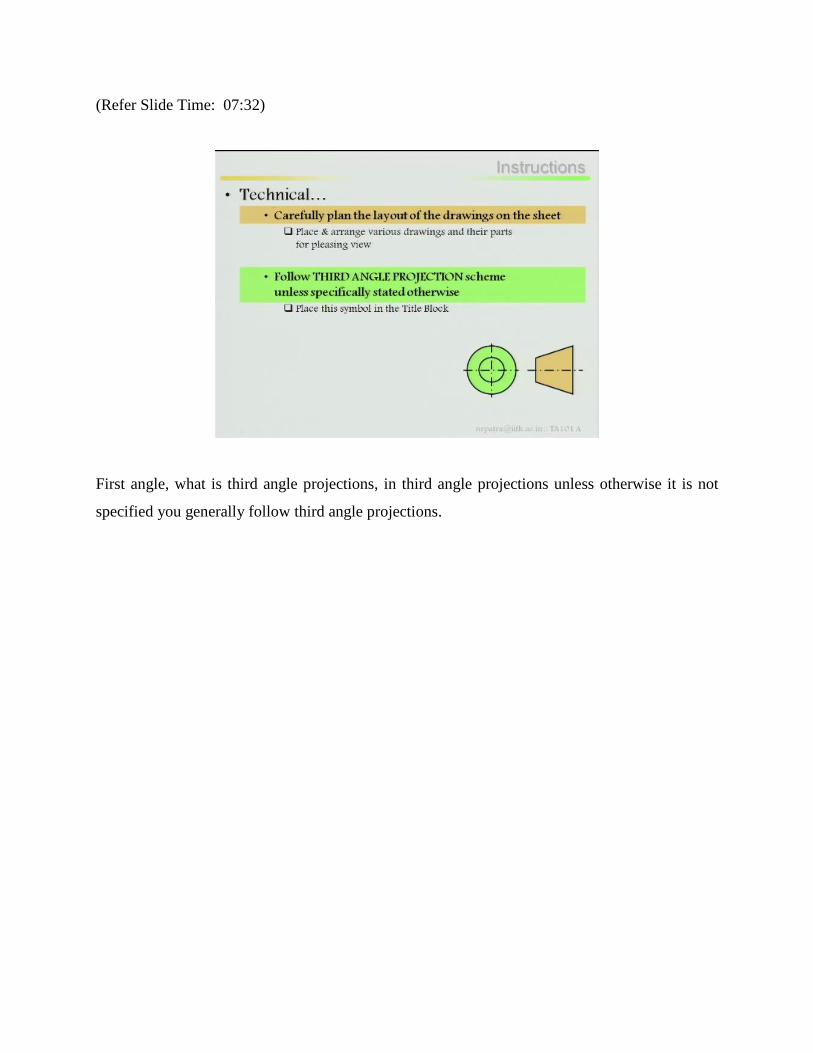
So technical, before coming to drawing class carefully plan the layout, once you are in drawing
class carefully plan your layout of the drawing on the seat, place and arrange various drawings
and their parts, generally in drawings we follow third angle projections scheme unless otherwise
it is not specified, later on I will explain what is.
(Refer Slide Time: 07:32)
First angle, what is third angle projections, in third angle projections unless otherwise it is not
specified you generally follow third angle projections.

(Refer Slide Time: 07:43)
Then can be different choose appropriate scale for drawing in an exercise as I said earlier.
(Refer Slide Time: 07:48)
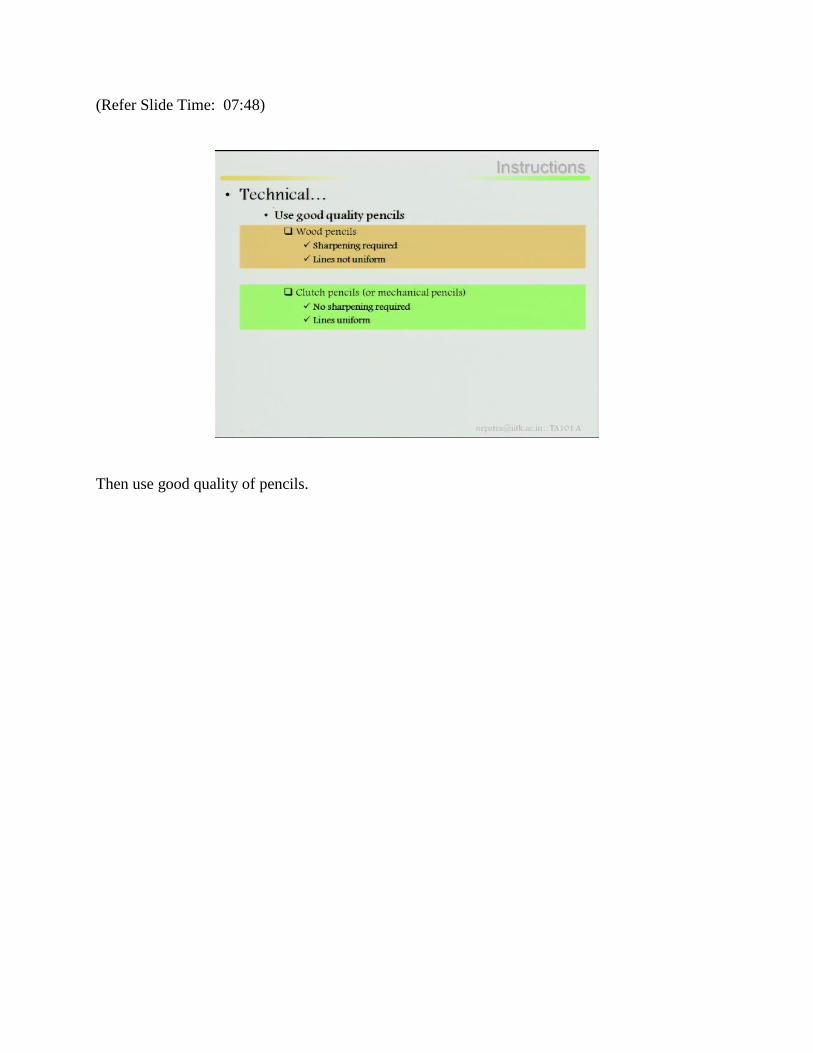
Then use good quality of pencils.

(Refer Slide Time: 07:52)
Then these are the pencils, grade 2 expenses as I said earlier, constructions lines and projectors,
hatching dimensions lines, generally it has been done by means of your 2H pencils, then grade H
pencils or H pencils particularly for objects lines, lettering, HB pencils lettering and sketching,
grade 2B pencils generally free hand sketching or artistics, this is all about introductions of your
engineering graphics or TA101 course.

(Refer Slide Time: 08:32)
Then first part of this course is lettering, generally in engineering graphics in general normal life
you are writing lettering, you are writing your name, you are signing your writing letters, while
drafting also drafting essay or drafting a letter but here in engineering lettering is, lettering has
to be followed proper procedure, if I look at the pencil.
(Refer Slide Time: 09:01)
Strokes one is alphabets ABCD, other is your numbers, numbers is your 1, 2, 3, 4, 5, 6.
(Refer Slide Time: 09:08)
Now start with your alphabets.

(Refer Slide Time: 09:13)
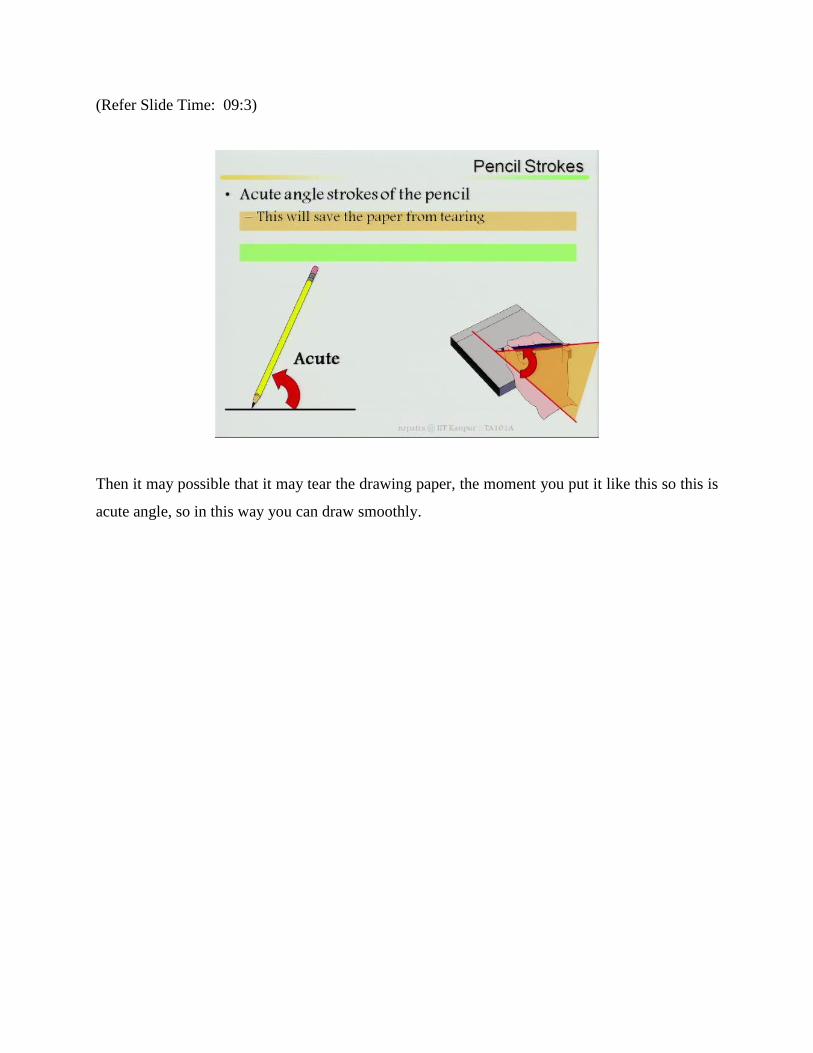
Look at this how the pencils you can put it, acute angle strokes of the pencils, once you keep if it
is your drawing sheets, drawing paper, you put your pencils in acute angle, this will save the
paper from theory, suppose if I have put my pencil like this.
(Refer Slide Time: 09:3)
Then it may possible that it may tear the drawing paper, the moment you put it like this so this is
acute angle, so in this way you can draw smoothly.
(Refer Slide Time: 09:46)
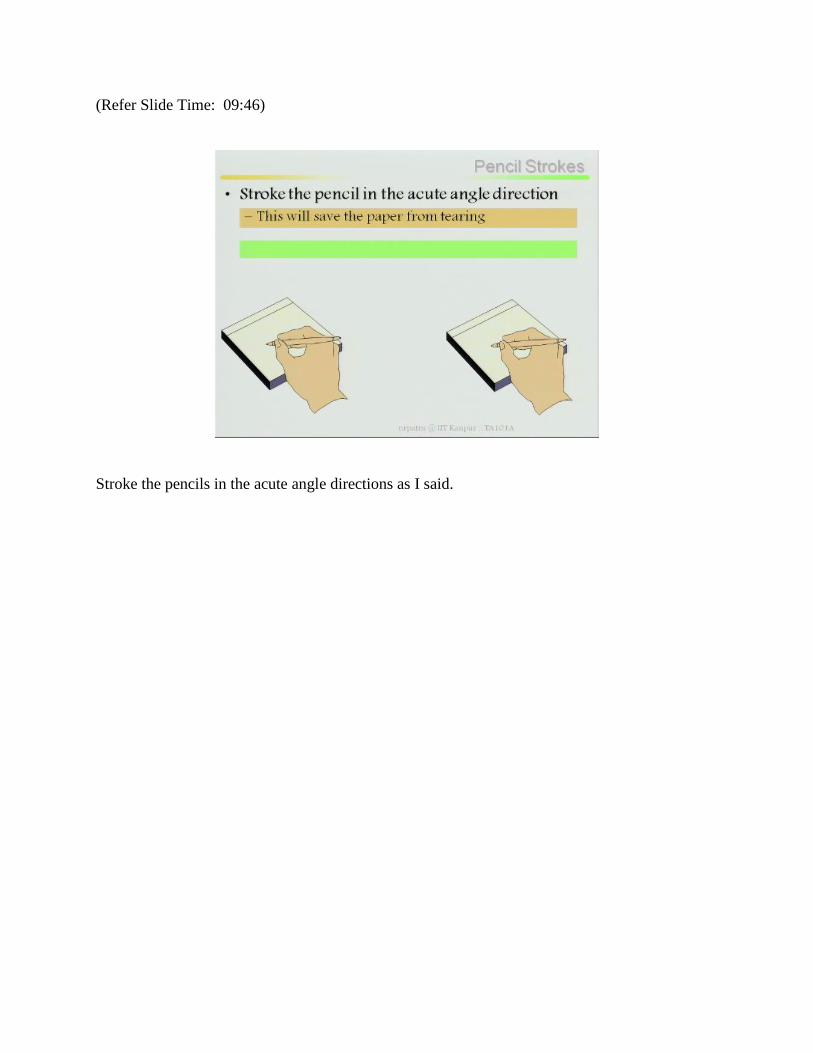
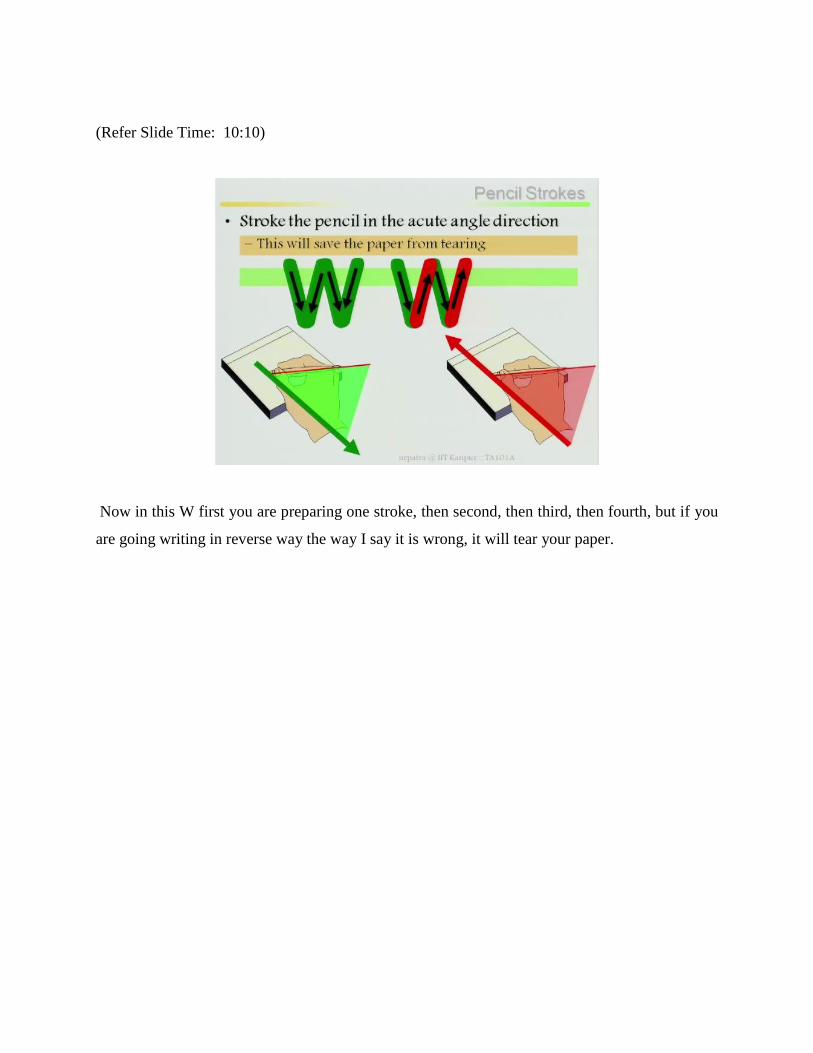
Stroke the pencils in the acute angle directions as I said.
(Refer Slide Time: 09:52)
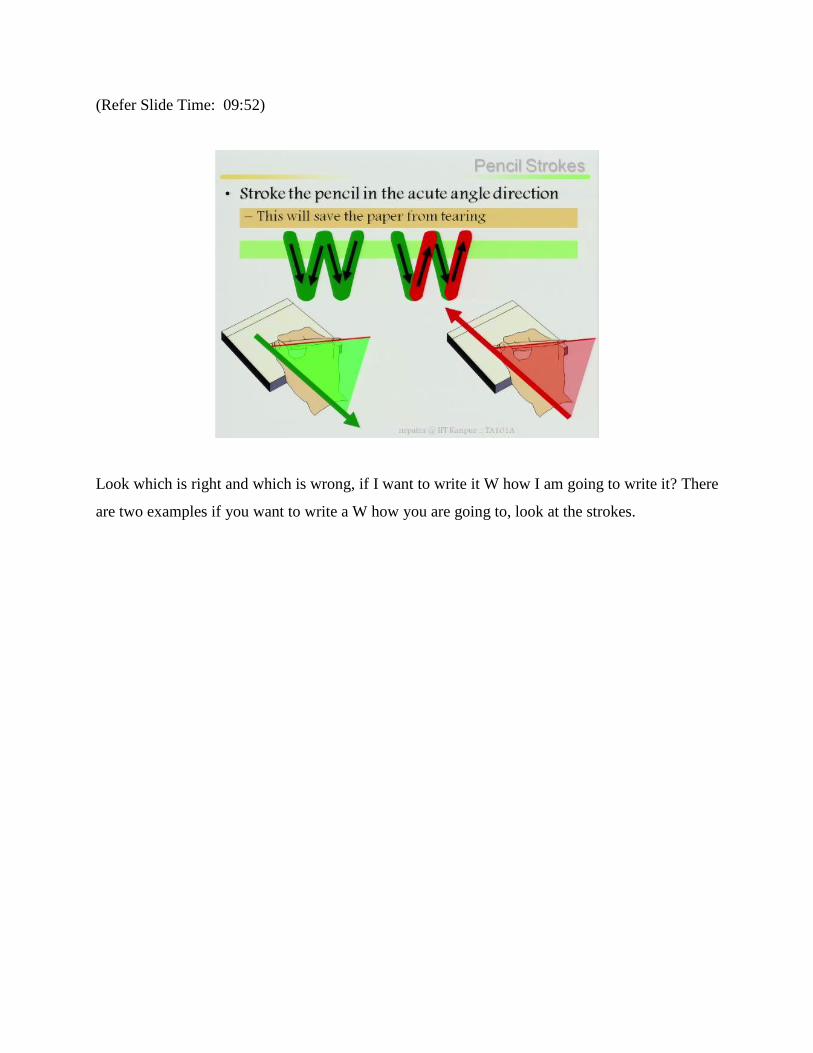
Look which is right and which is wrong, if I want to write it W how I am going to write it? There
are two examples if you want to write a W how you are going to, look at the strokes.
(Refer Slide Time: 10:12)
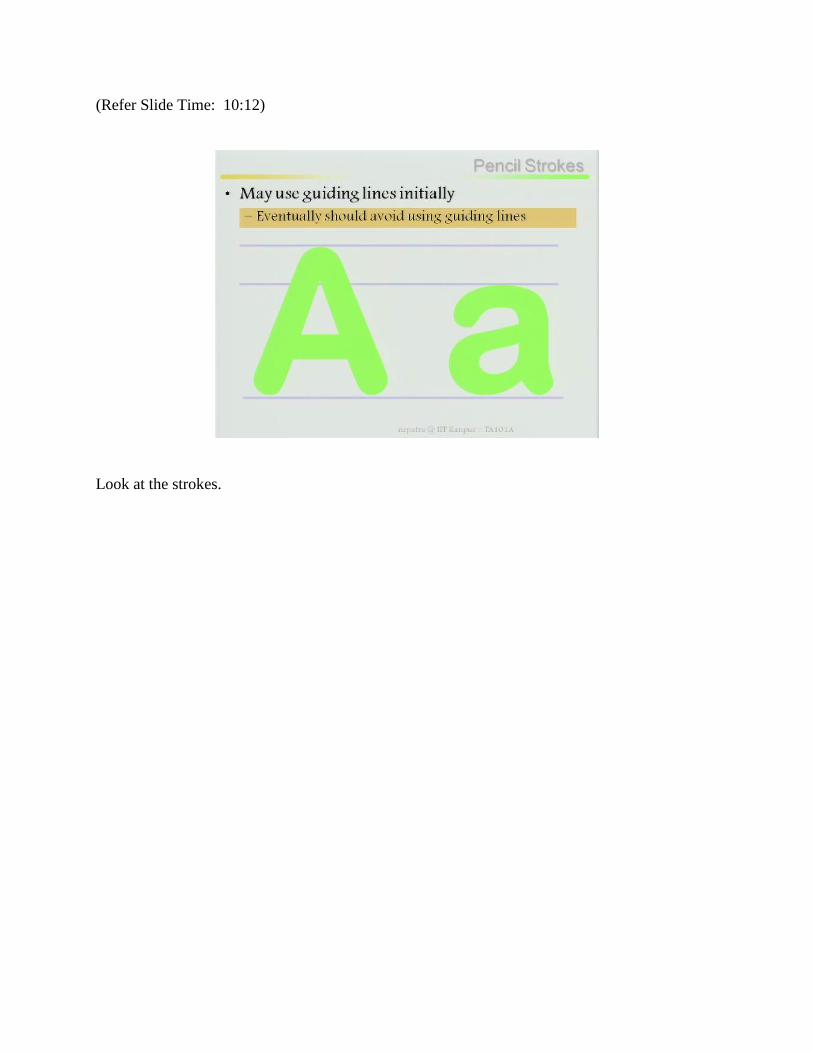
Look at the strokes.
(Refer Slide Time: 10:10)
Now in this W first you are preparing one stroke, then second, then third, then fourth, but if you
are going writing in reverse way the way I say it is wrong, it will tear your paper.
(Refer Slide Time: 10:37)
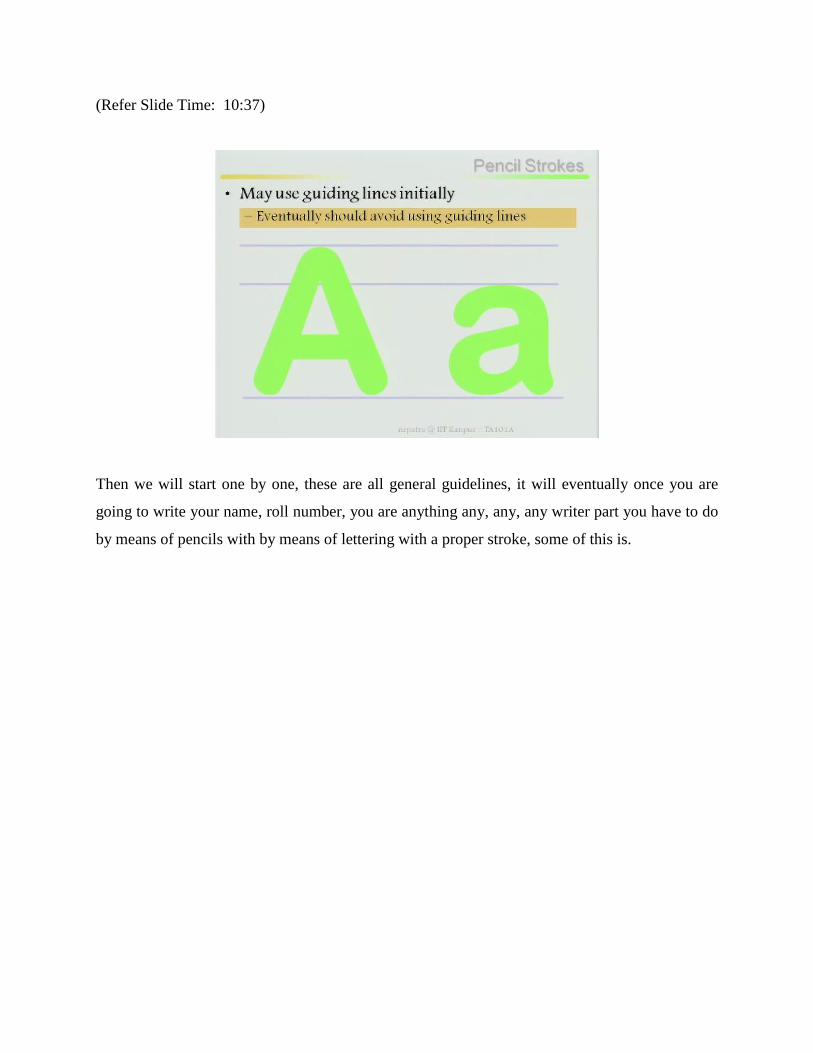
Then we will start one by one, these are all general guidelines, it will eventually once you are
going to write your name, roll number, you are anything any, any, any writer part you have to do
by means of pencils with by means of lettering with a proper stroke, some of this is.
(Refer Slide Time: 10:56)
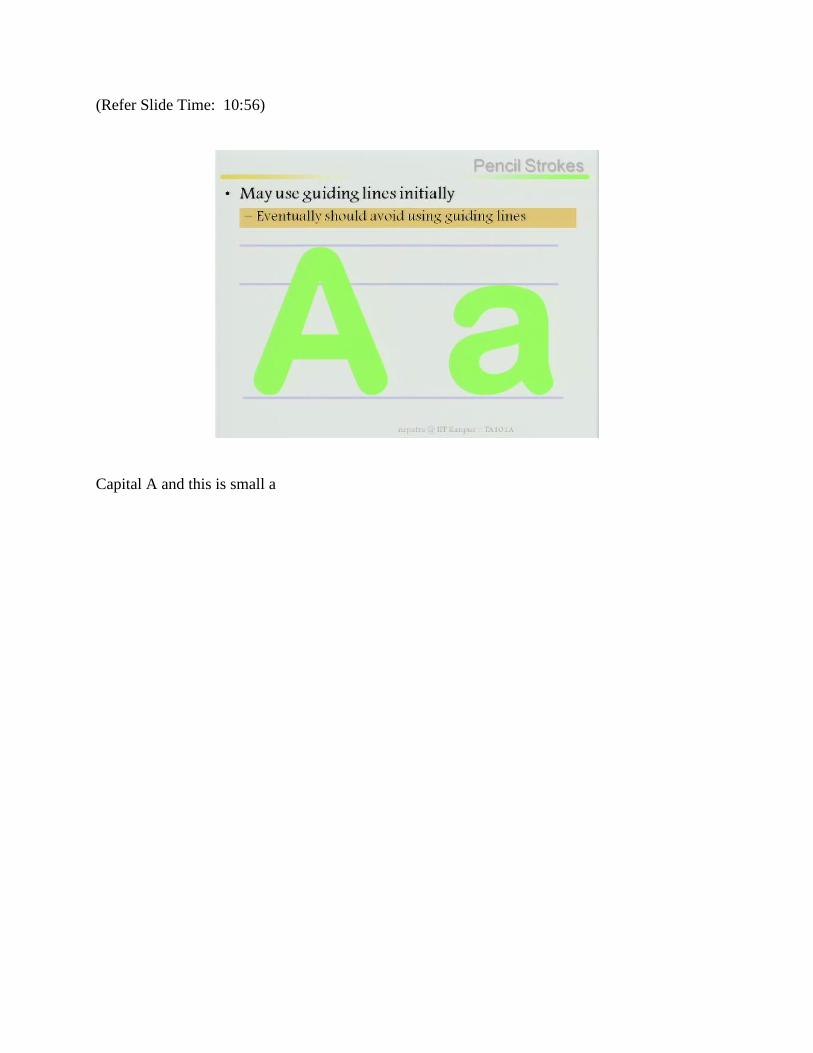
Capital A and this is small a
(Refer Slide Time: 10:59)
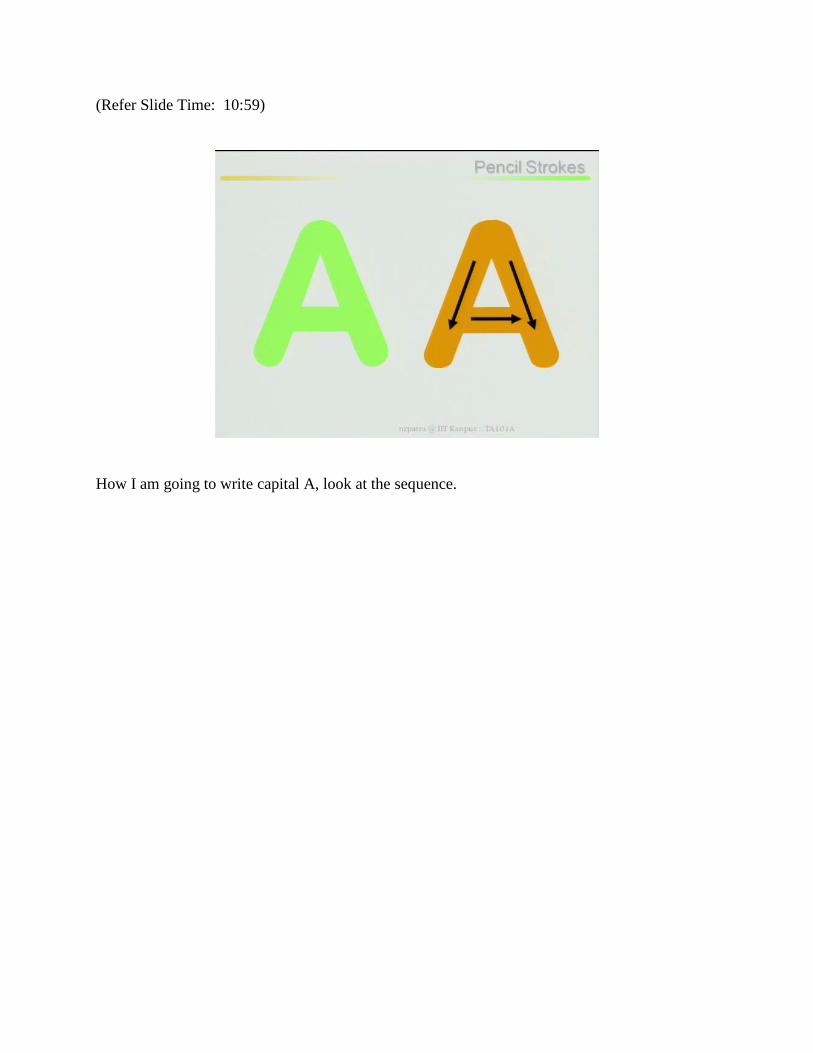
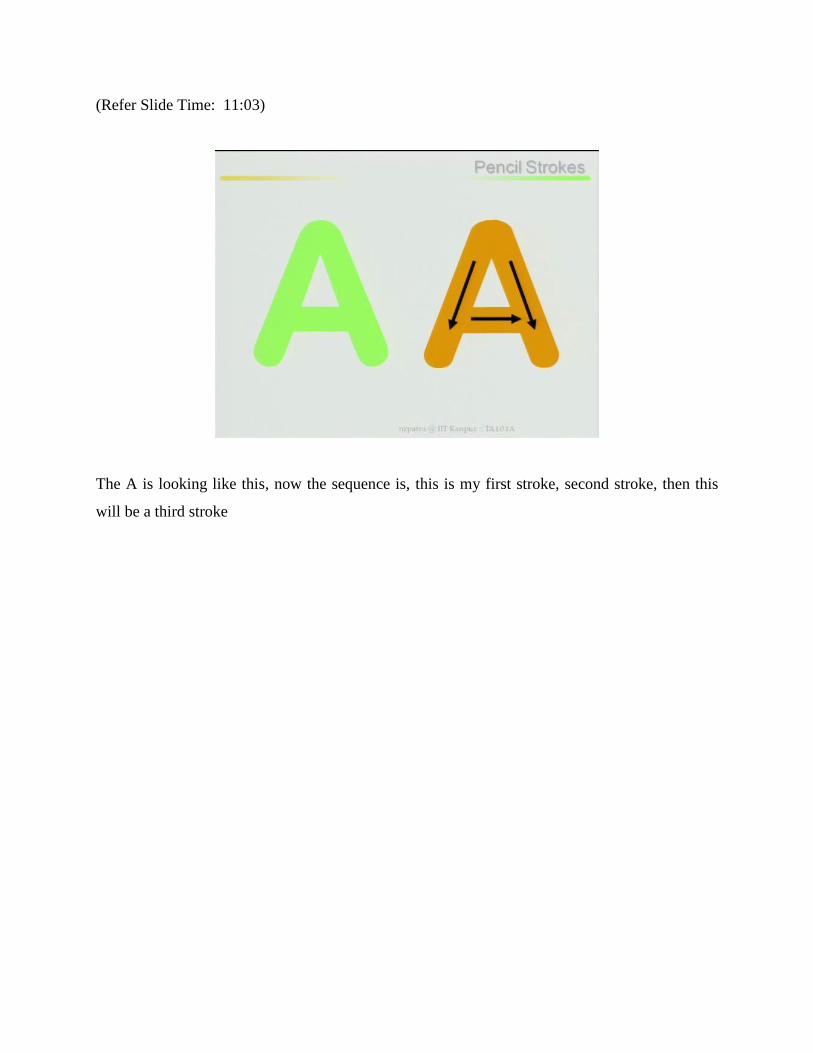
How I am going to write capital A, look at the sequence.
(Refer Slide Time: 11:03)
The A is looking like this, now the sequence is, this is my first stroke, second stroke, then this
will be a third stroke

(Refer Slide Time: 11:12)
Similarly B look at the B, B is your first stroke, second stroke, then first stroke, second stroke,
then third stroke, it completes your B.
(Refer Slide Time: 11:31)
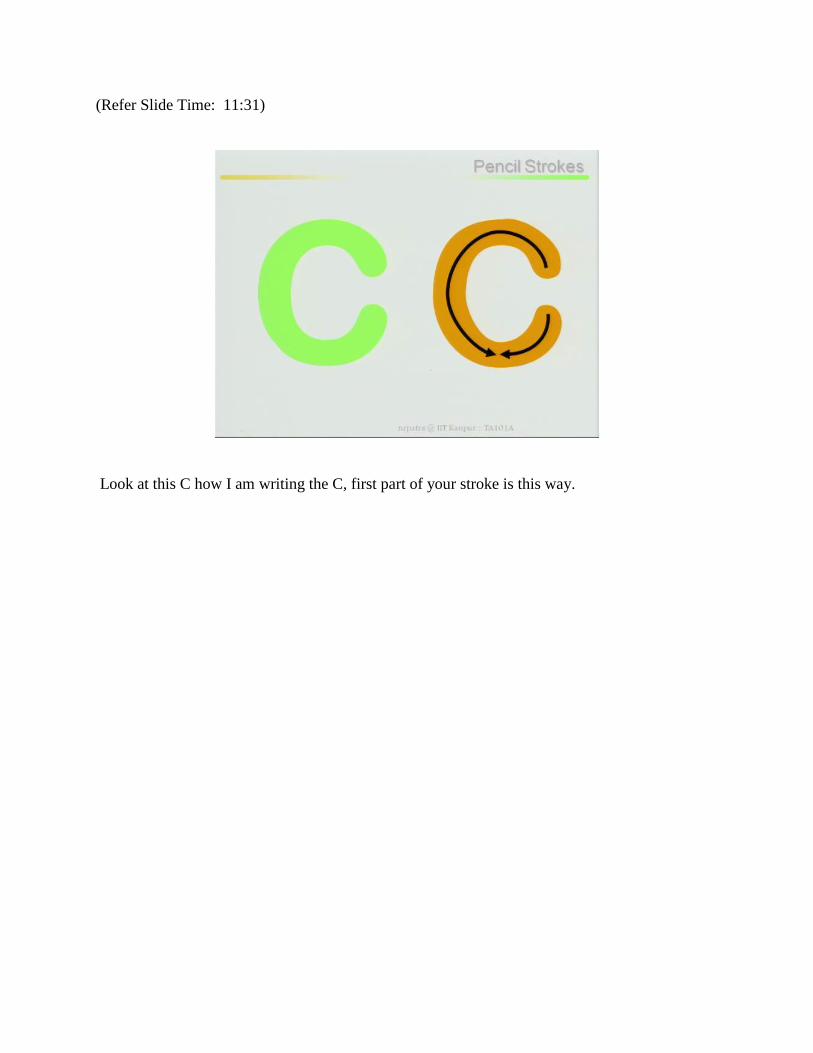
Look at this C how I am writing the C, first part of your stroke is this way.

(Refer Slide Time: 11:39)
Look at this, this is half almost more than half part, then you cover with this another part, this
cover your C in engineering drawing.

(Refer Slide Time: 11:50)
Then come to D first part of your D is a simple stroke, stroke on then D will be covering this
way, this is your D, similarly.

(Refer Slide Time: 12:02)
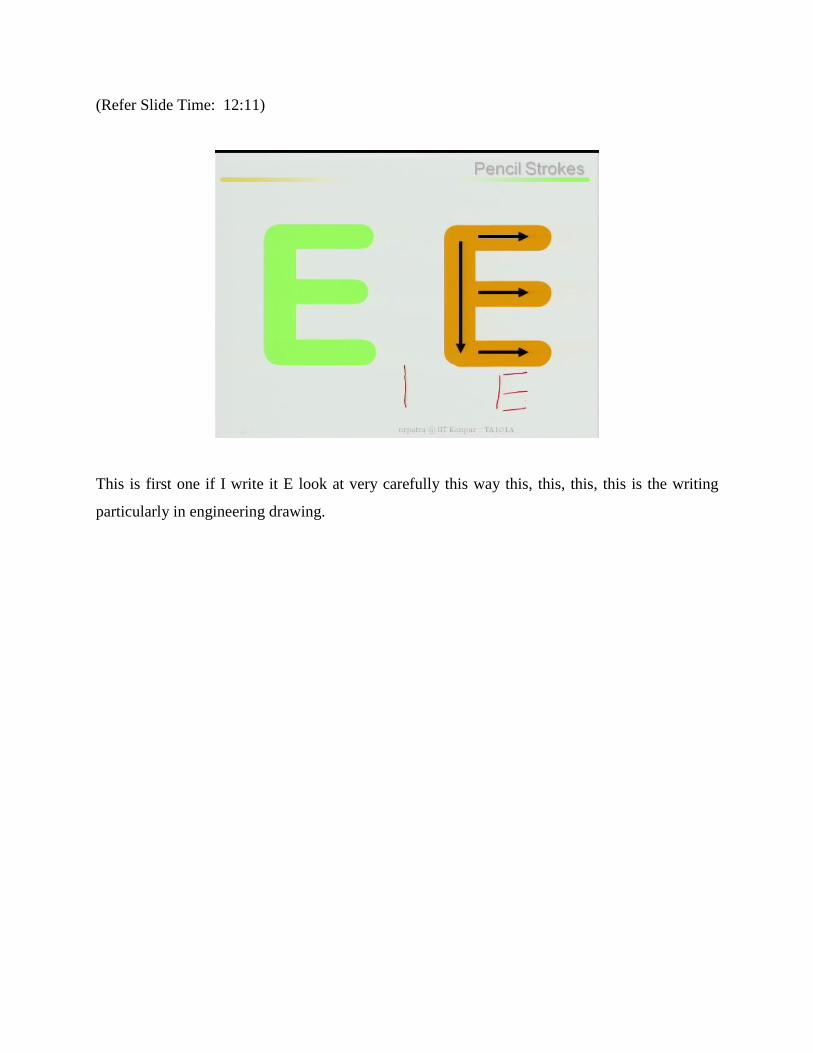
E, is E is very simple, stroke one, two, three, and four, first one is your vertically.
(Refer Slide Time: 12:11)
This is first one if I write it E look at very carefully this way this, this, this, this is the writing
particularly in engineering drawing.
(Refer Slide Time: 12:25)
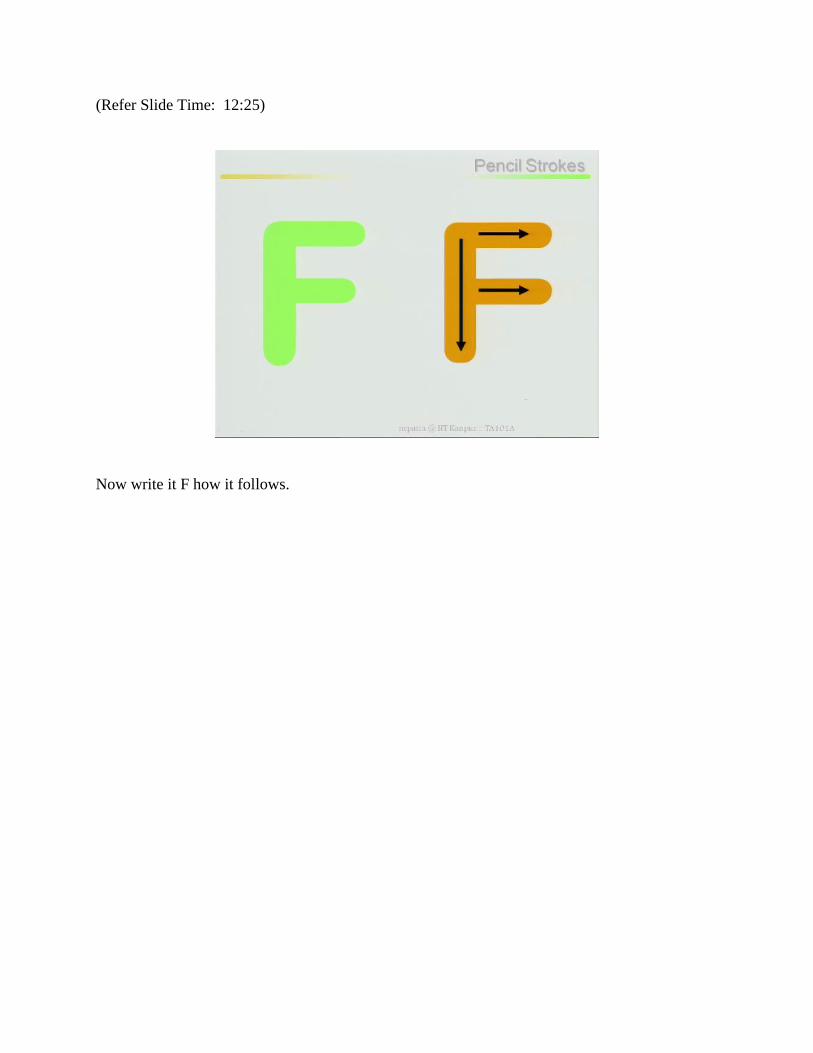
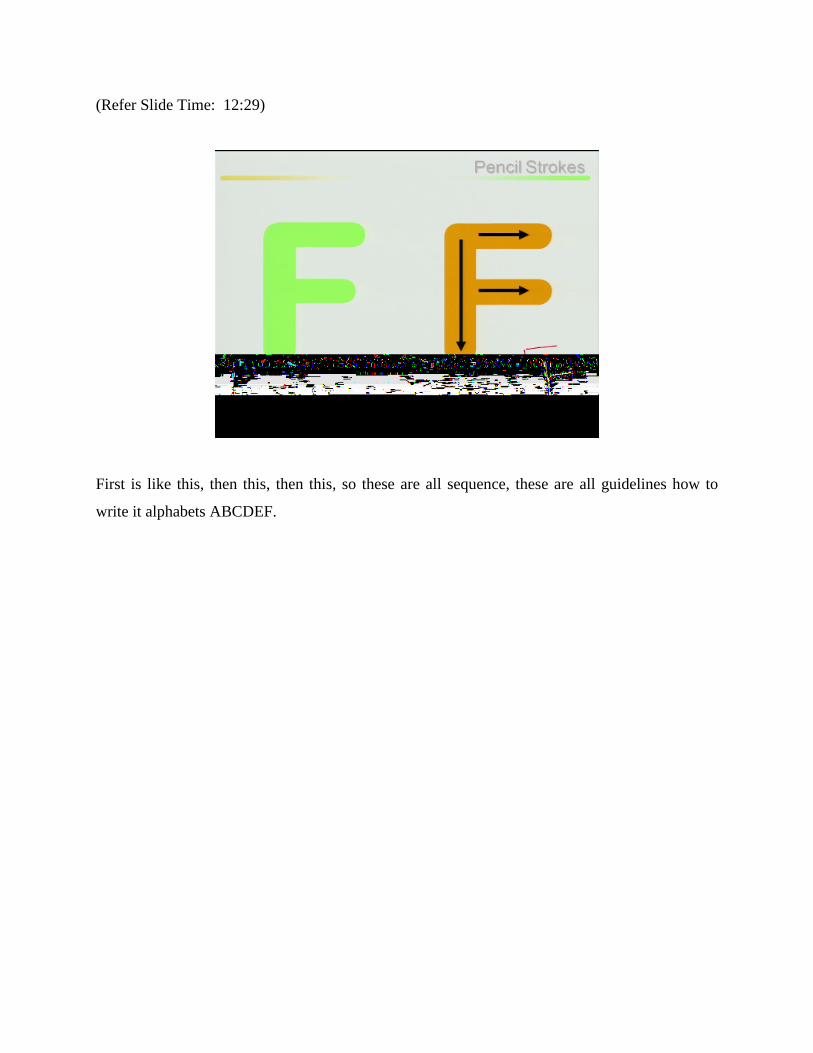
Now write it F how it follows.
(Refer Slide Time: 12:29)
First is like this, then this, then this, so these are all sequence, these are all guidelines how to
write it alphabets ABCDEF.
(Refer Slide Time: 12:36)
Then similarly G

(Refer Slide Time: 12:44)
Similarly I.

(Refer Slide Time: 12:46)
J

(Refer Slide Time: 12:49)
Then similarly K
(Refer Slide Time: 12:51)
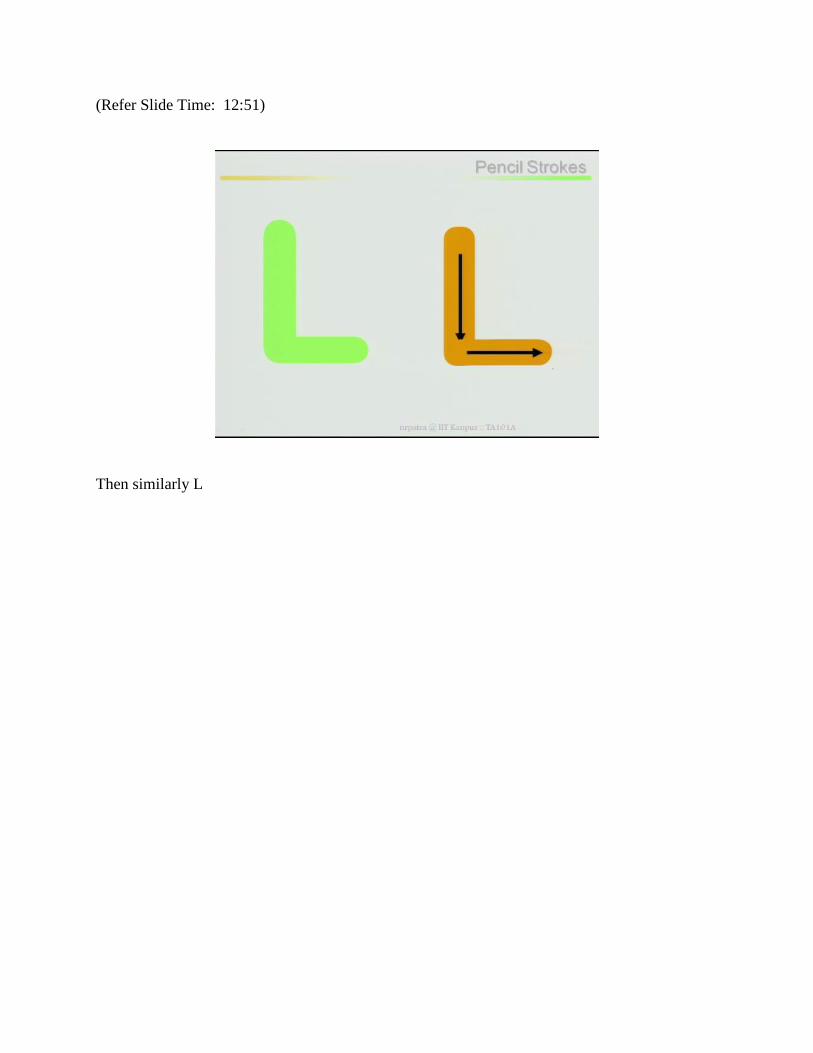
Then similarly L
(Refer Slide Time: 12:55)
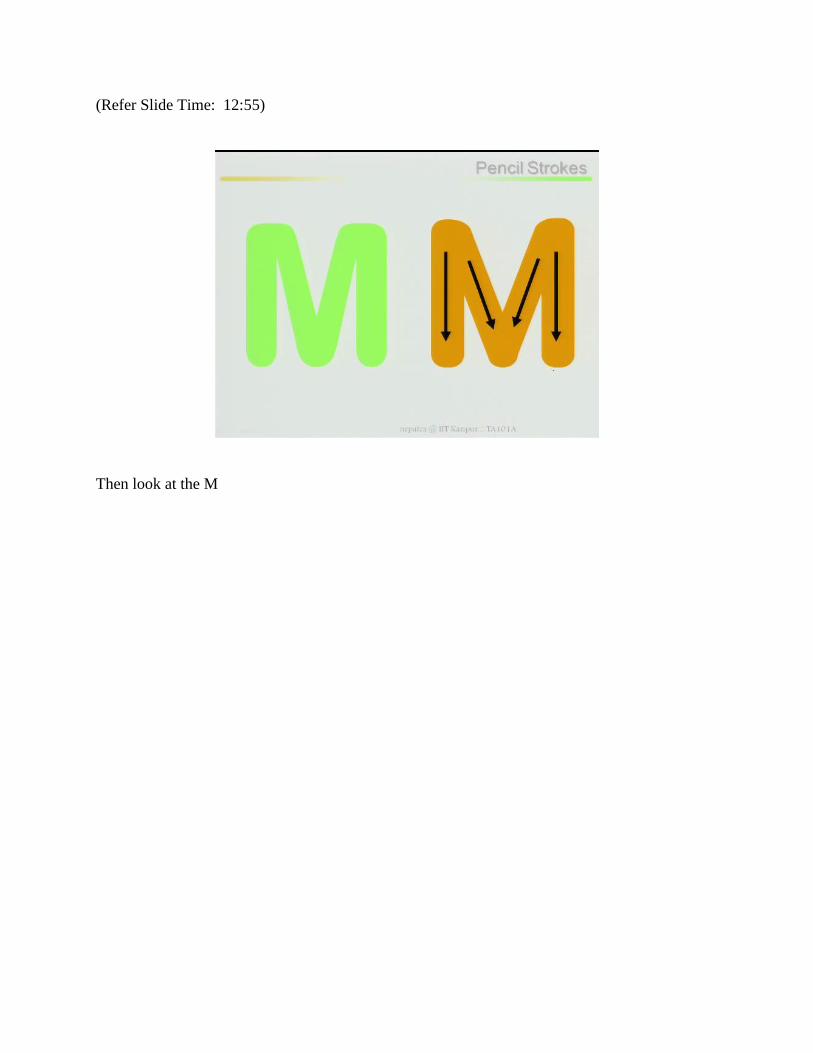
Then look at the M
(Refer Slide Time: 12:59)
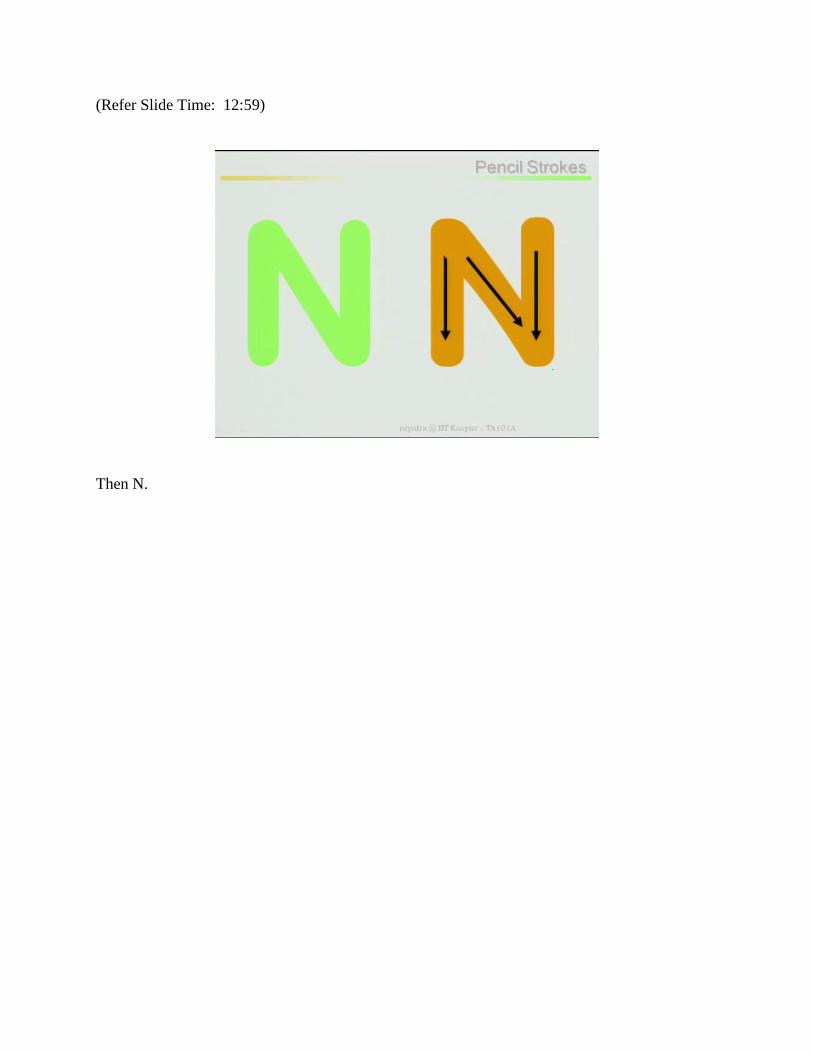
Then N.

(Refer Slide Time: 13:01)
O, O is typically, its covers O is if you look at here O, first part of your O is

(Refer Slide Time: 13:11)
This way then completes this way, sometimes in normal practice we are writing O like this, this
is as far us as engineering drawing is concerned this is not correct, so you are writing O this way,
then second stroke will be this way, this completes your O.
(Refer Slide Time: 13:32)
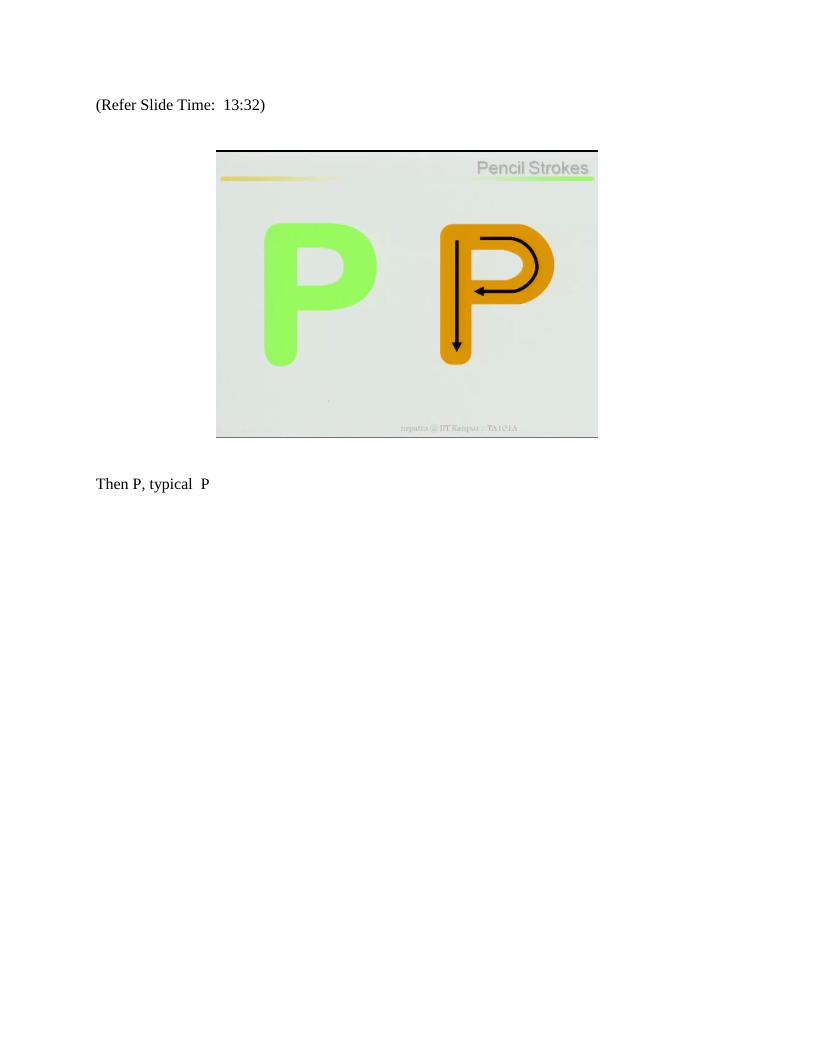
Then P, typical P
(Refer Slide Time: 13:38)
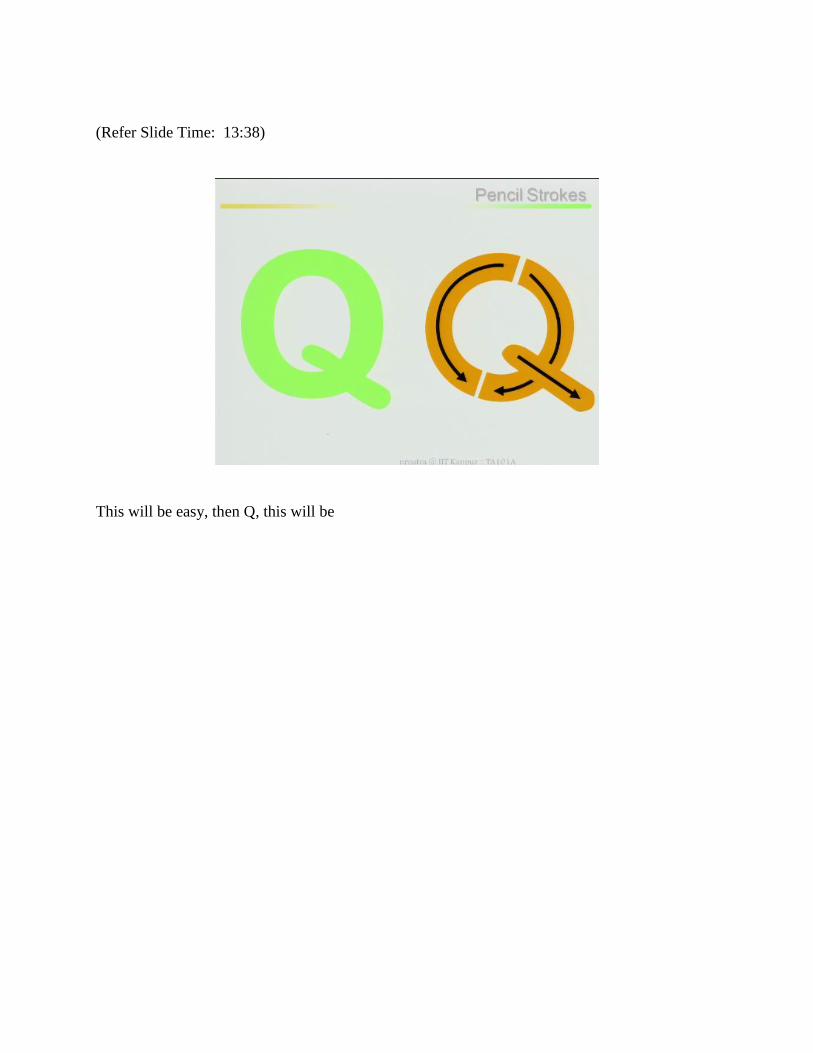
This will be easy, then Q, this will be

(Refer Slide Time: 13:42)
Then R, stroke one, stroke two, and stroke three, if you look at your R how do I write the R?
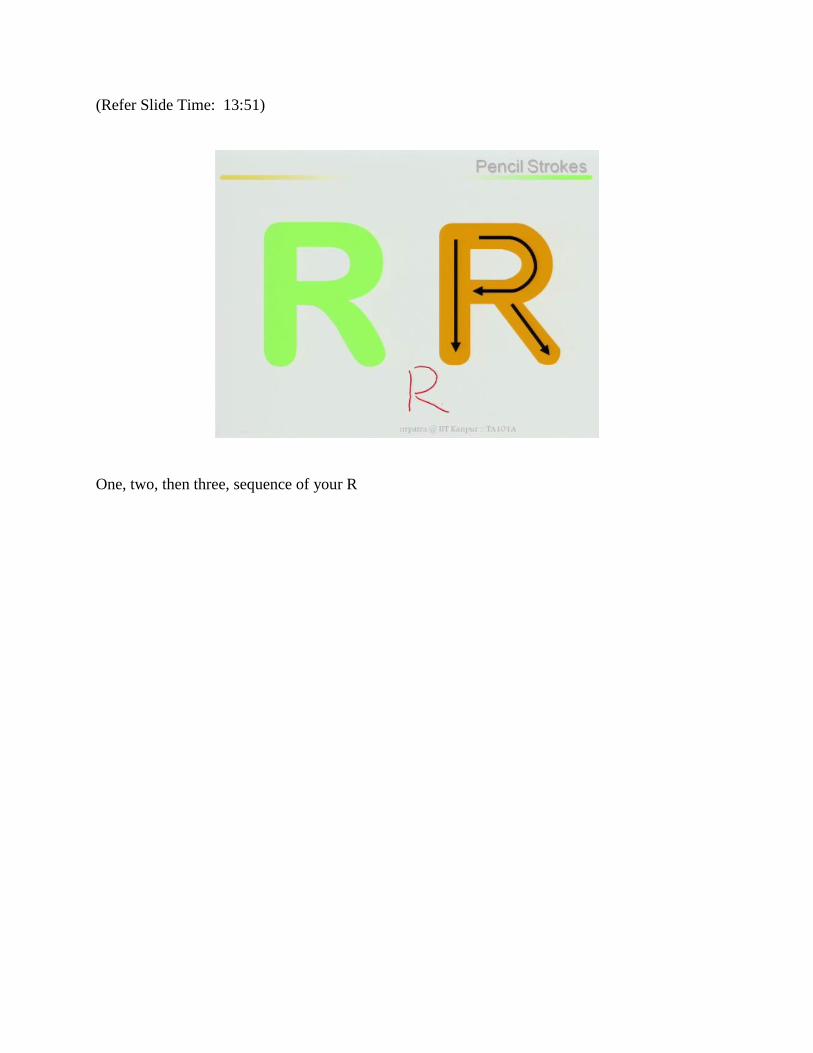
(Refer Slide Time: 13:51)
One, two, then three, sequence of your R

(Refer Slide Time: 13:59)
Then S
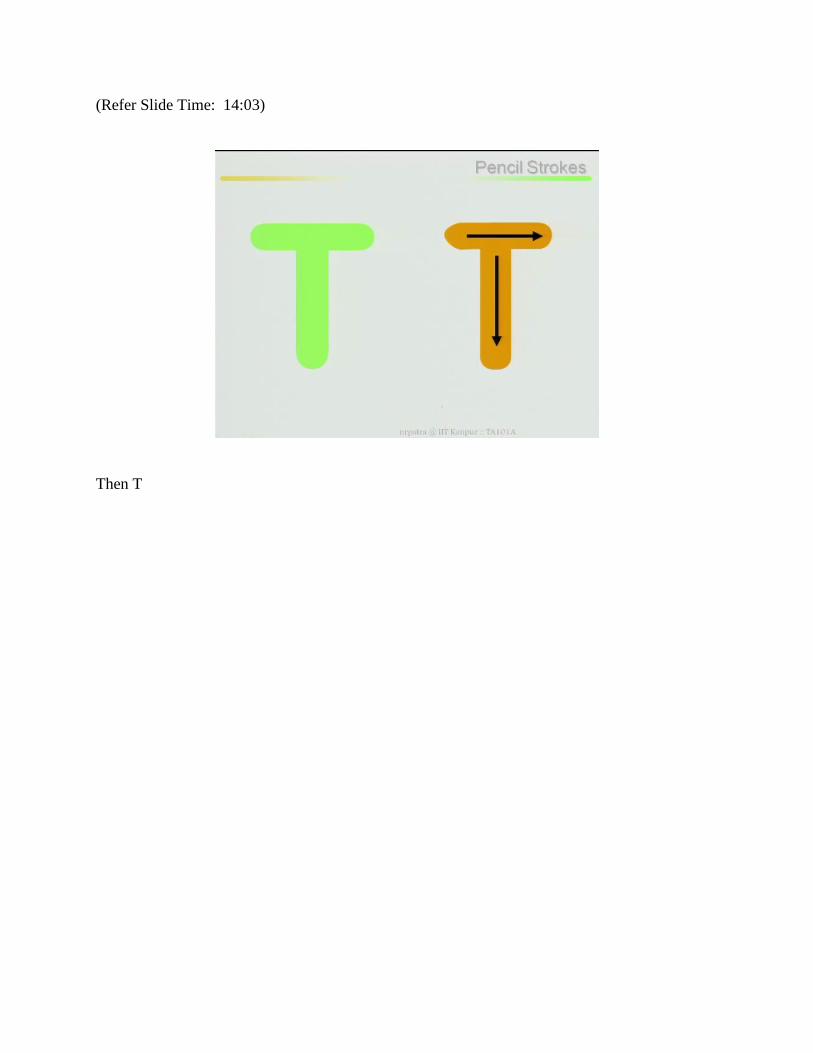
(Refer Slide Time: 14:03)
Then T
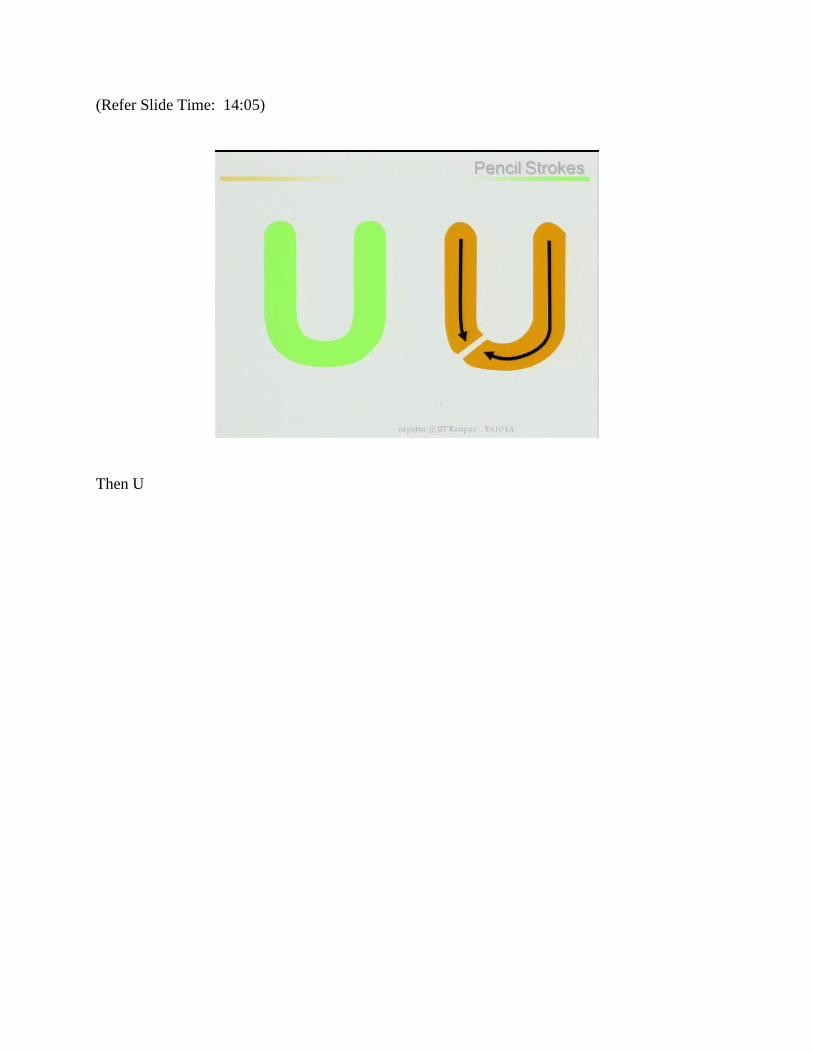
(Refer Slide Time: 14:05)
Then U

(Refer Slide Time: 14:07)
V

(Refer Slide Time: 14:09)
As I said W are layer, this is you are W
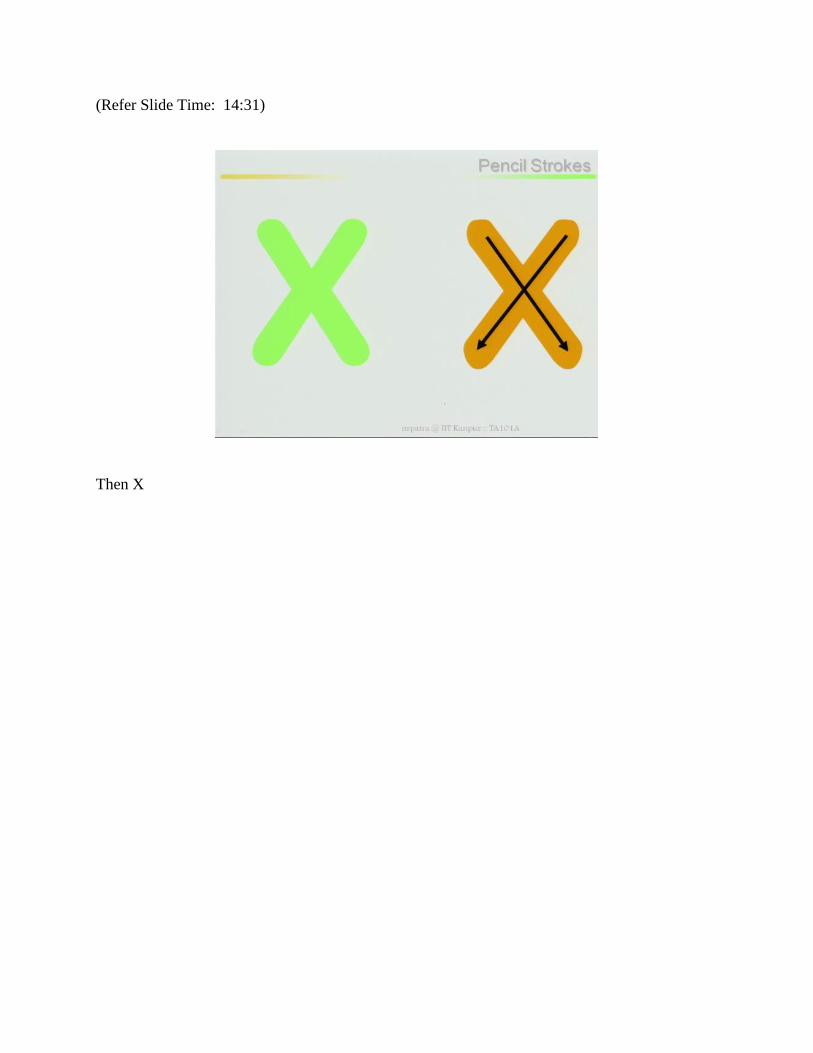
(Refer Slide Time: 14:31)
Then X
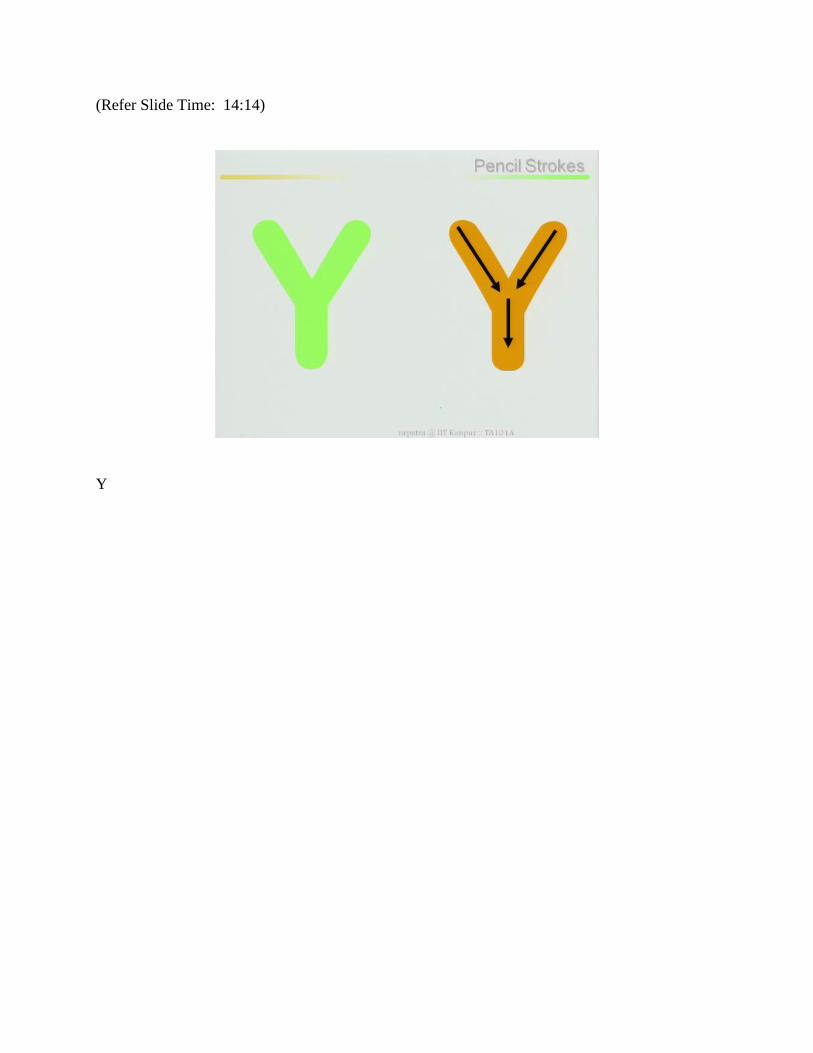
(Refer Slide Time: 14:14)
Y
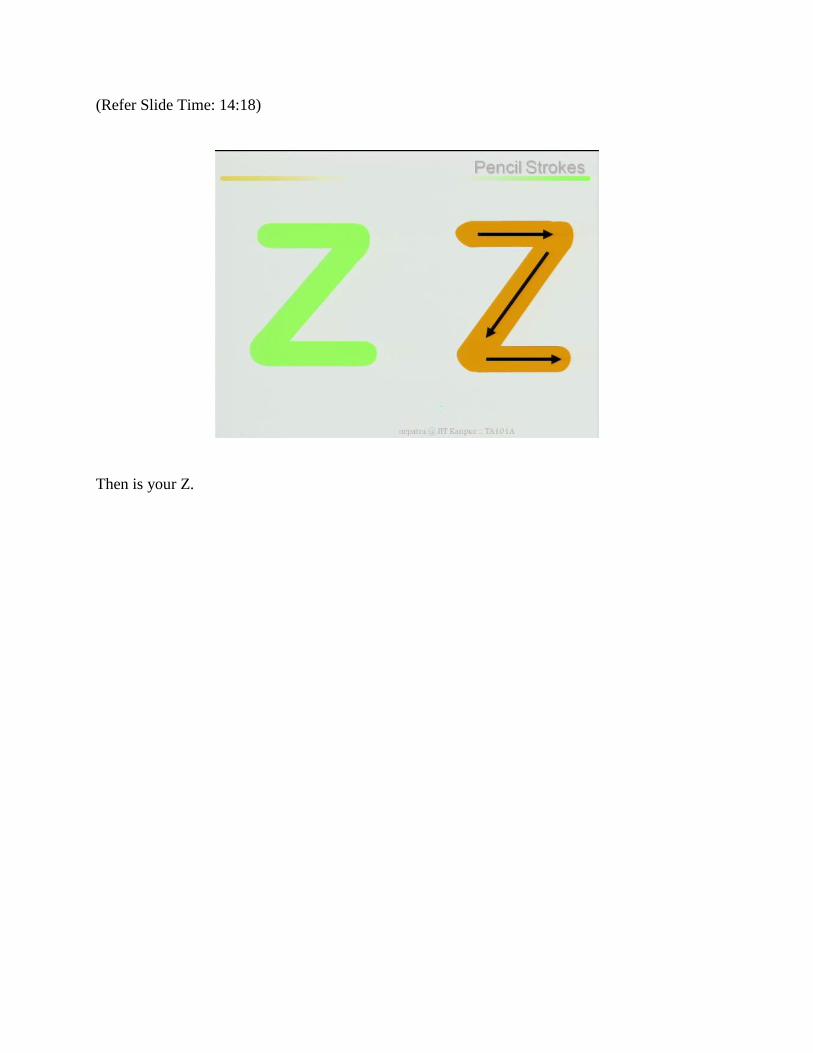
(Refer Slide Time: 14:18)
Then is your Z.
(Refer Slide Time: 14:21)
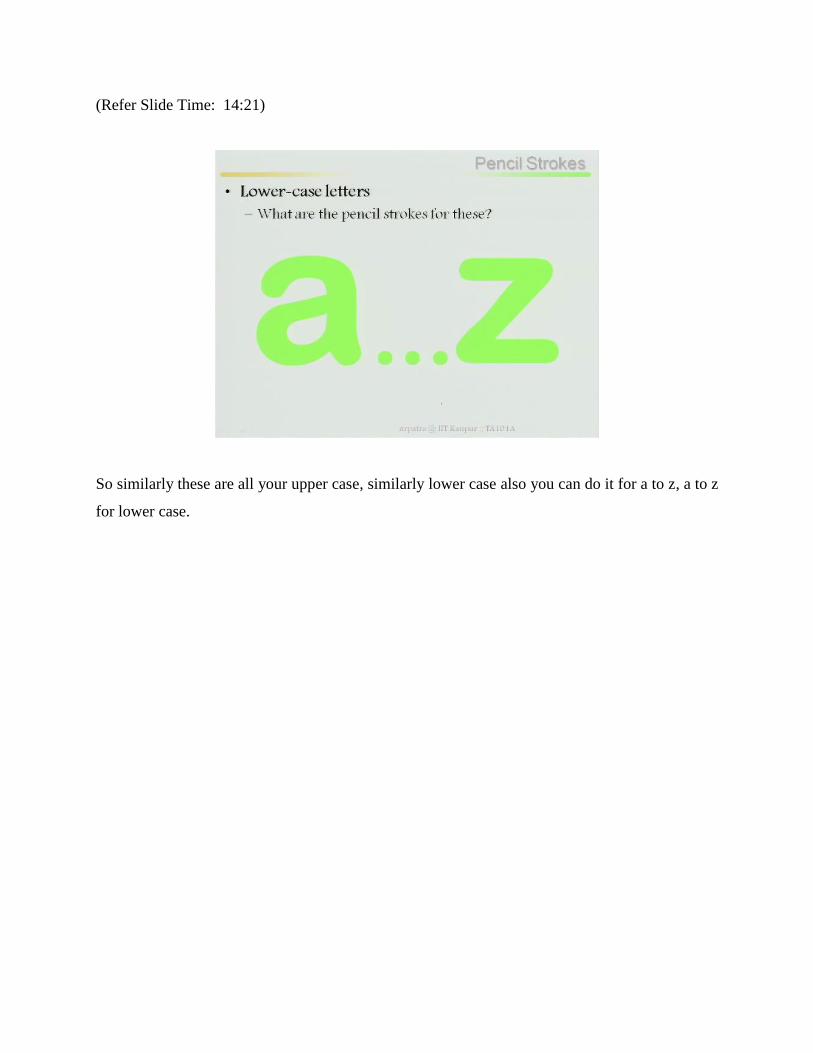
So similarly these are all your upper case, similarly lower case also you can do it for a to z, a to z
for lower case.

(Refer Slide Time: 14:30)
Then come to the numbers, in case of numbers.
(Refer Slide Time: 14:36)
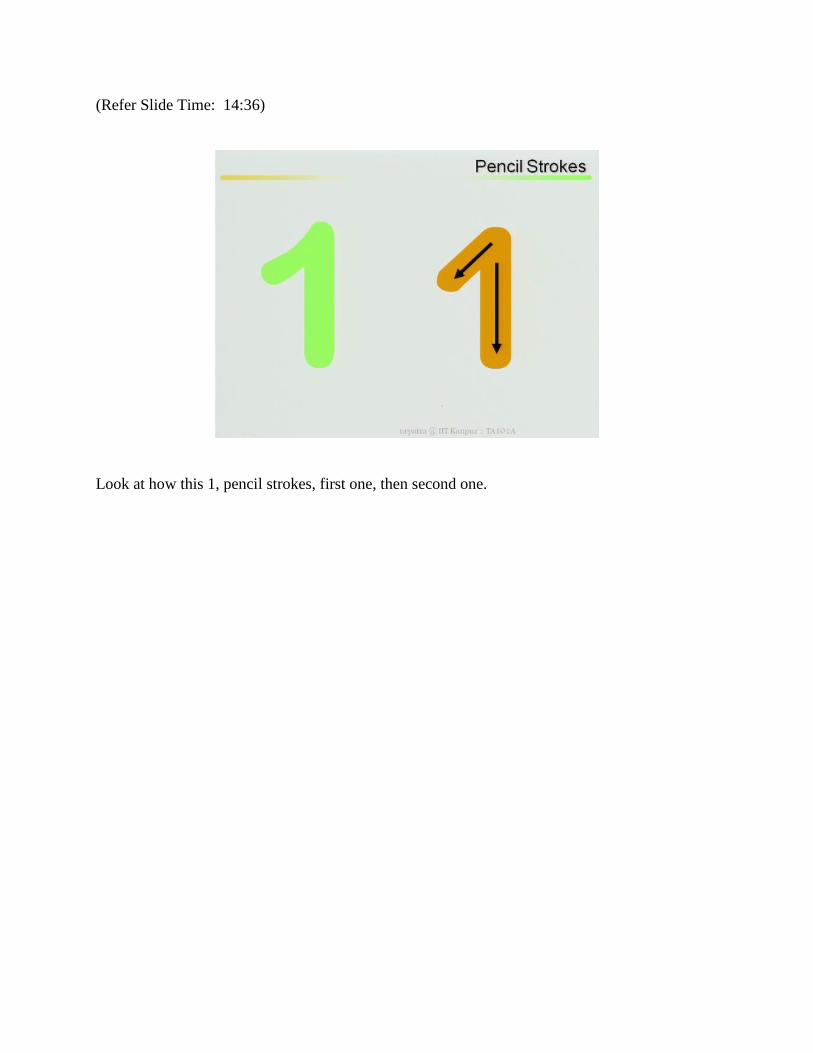
Look at how this 1, pencil strokes, first one, then second one.
(Refer Slide Time: 14:46)
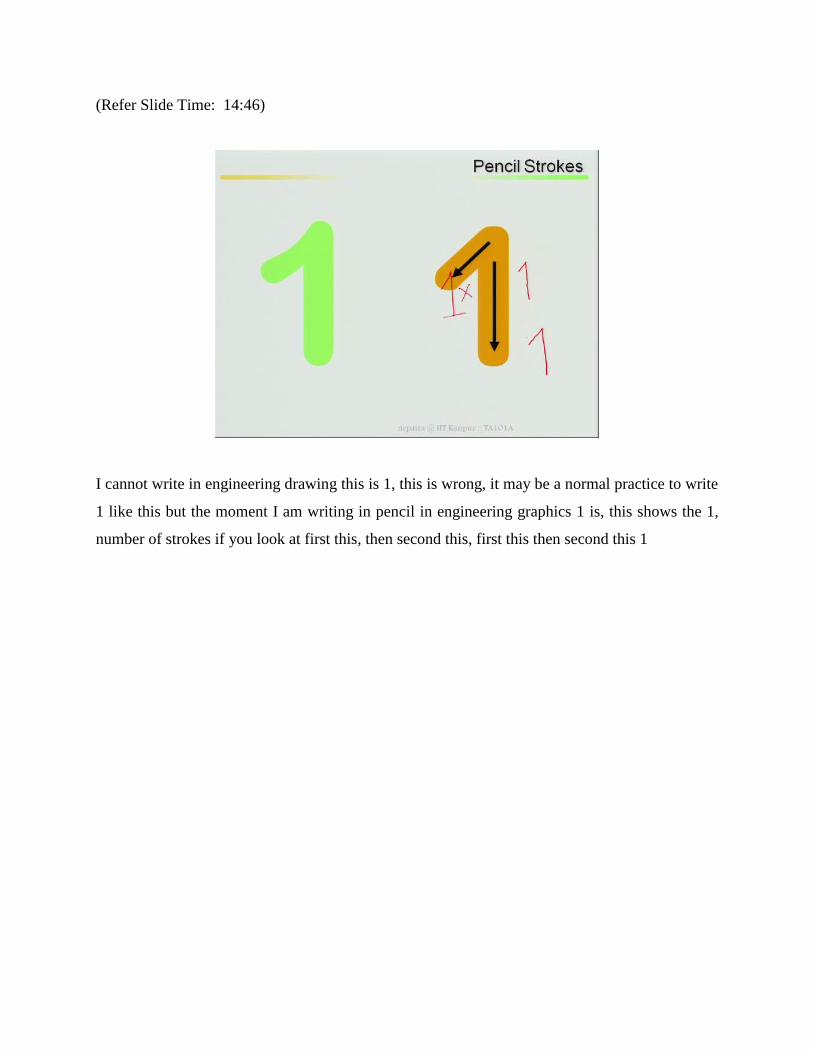
I cannot write in engineering drawing this is 1, this is wrong, it may be a normal practice to write
1 like this but the moment I am writing in pencil in engineering graphics 1 is, this shows the 1,
number of strokes if you look at first this, then second this, first this then second this 1

(Refer Slide Time: 15:08)
Similarly 2
(Refer Slide Time: 15:14)
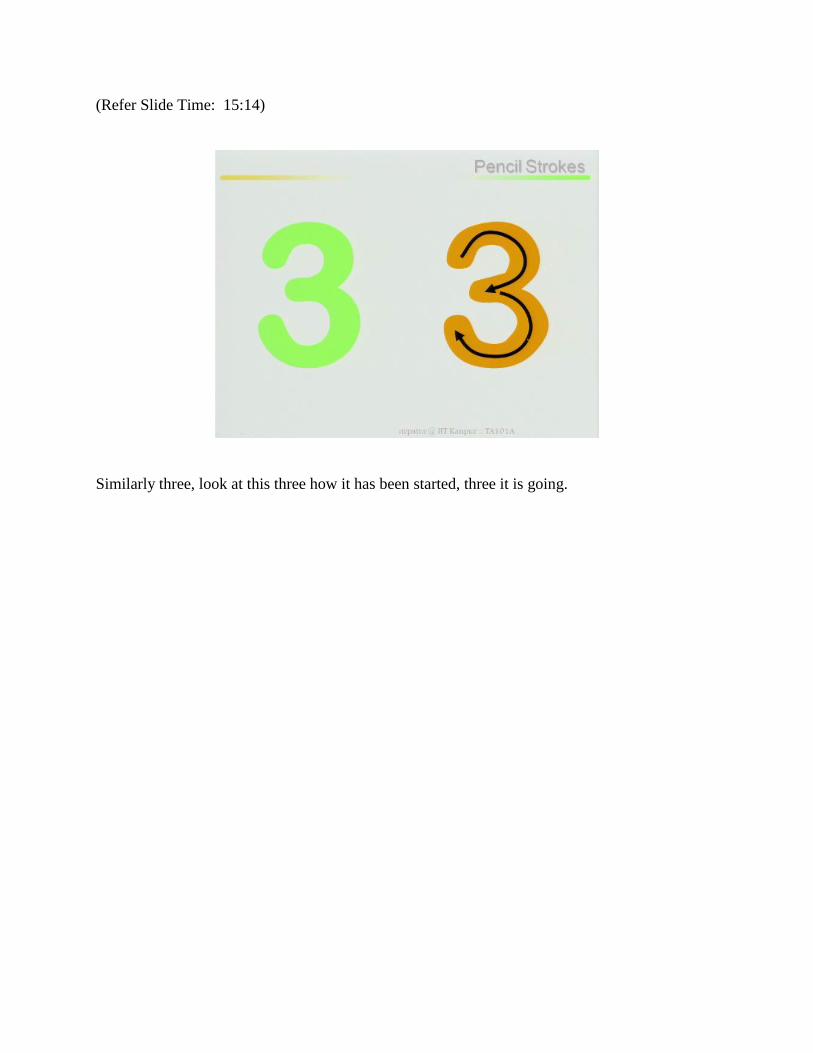
Similarly three, look at this three how it has been started, three it is going.
(Refer Slide Time: 15:22)
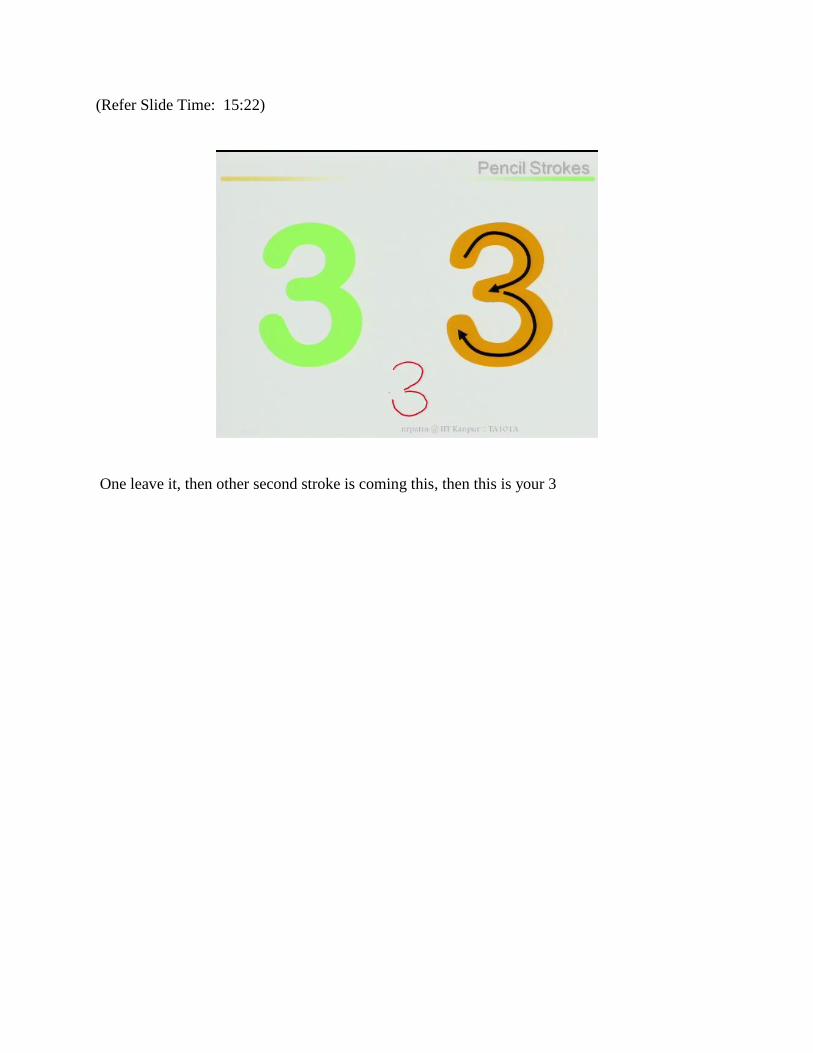
One leave it, then other second stroke is coming this, then this is your 3

(Refer Slide Time: 15:30)
4
(Refer Slide Time: 15:33)
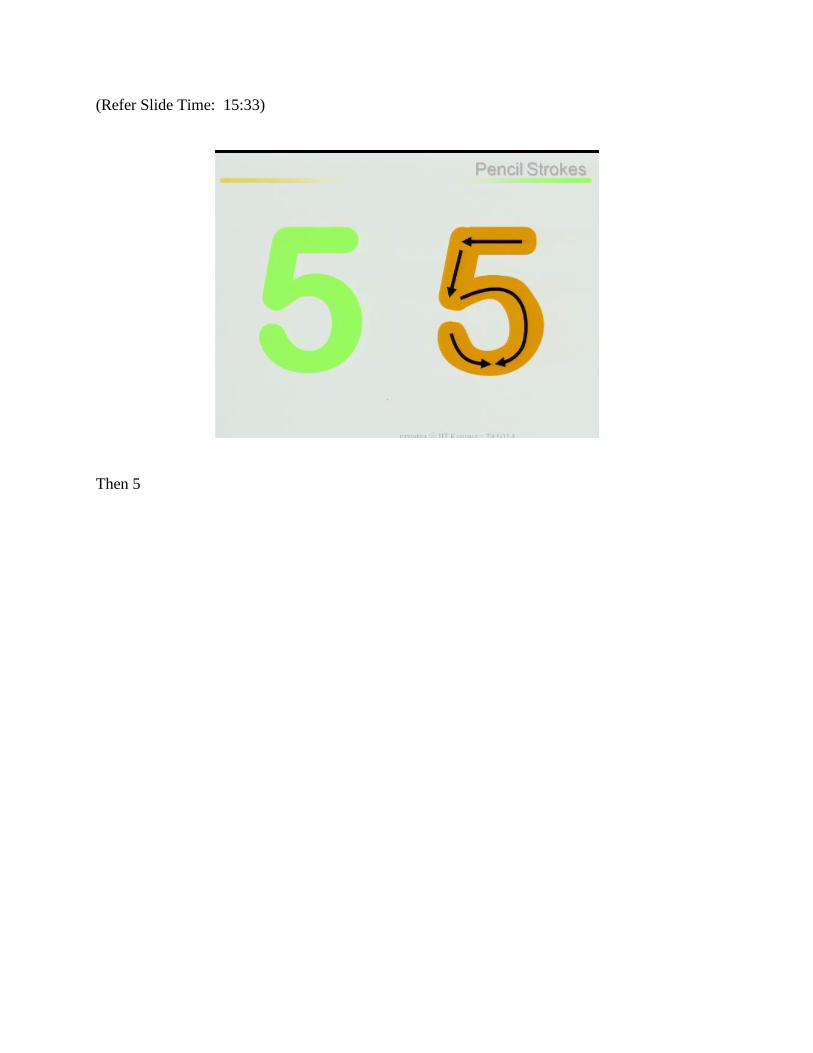
Then 5

(Refer Slide Time: 15:37)
6
(Refer Slide Time: 15:40)
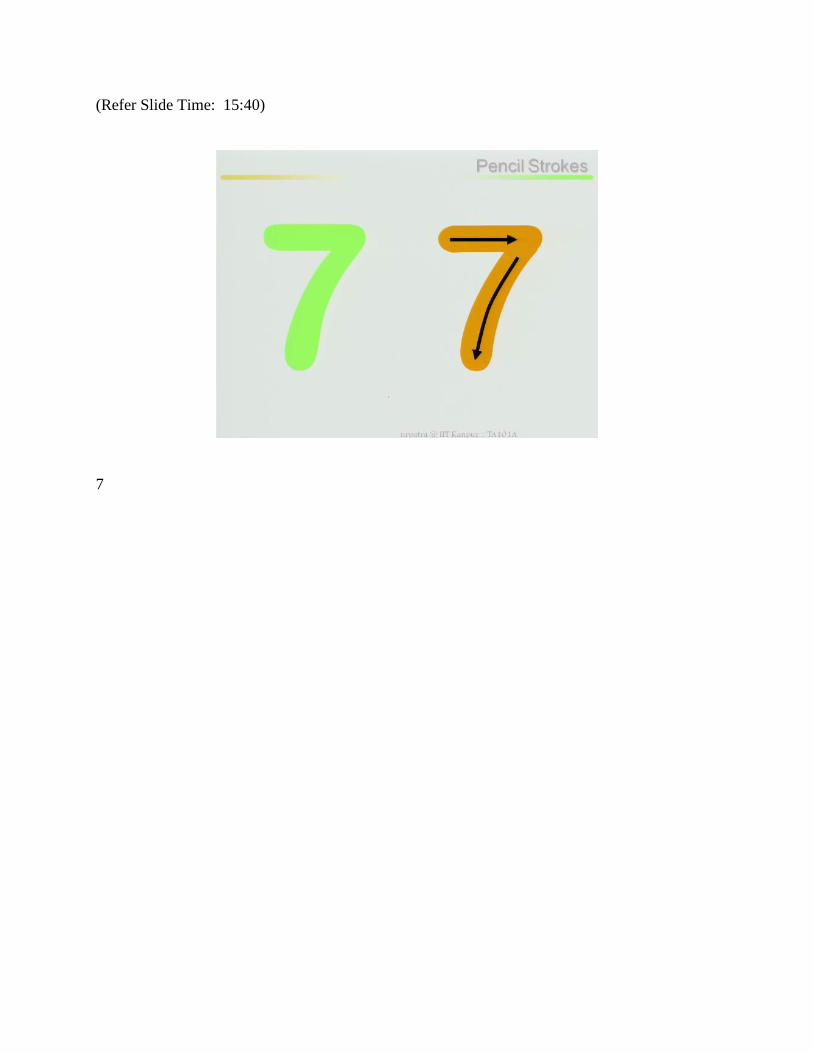
7
(Refer Slide Time: 15:43)
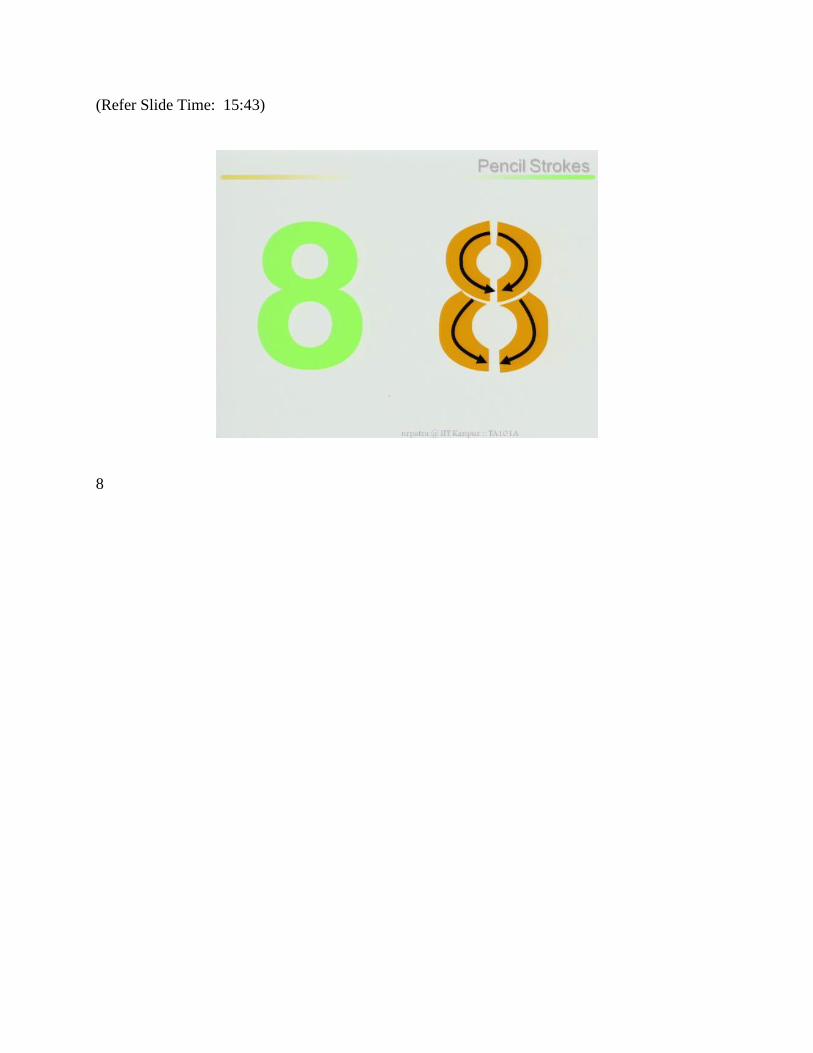
8
(Refer Slide Time: 15:47)
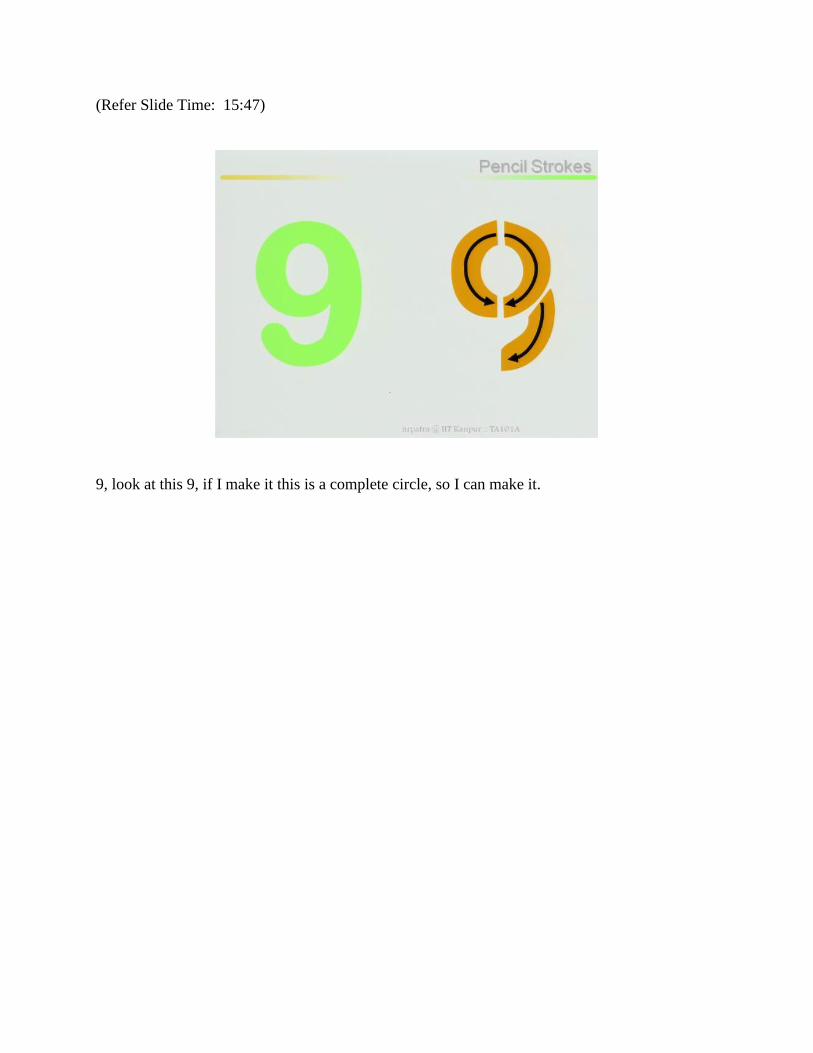
9, look at this 9, if I make it this is a complete circle, so I can make it.

(Refer Slide Time: 15:58)
This, this, then here I will start here, then it covers by this, this completes the 9.
(Refer Slide Time: 16:09)
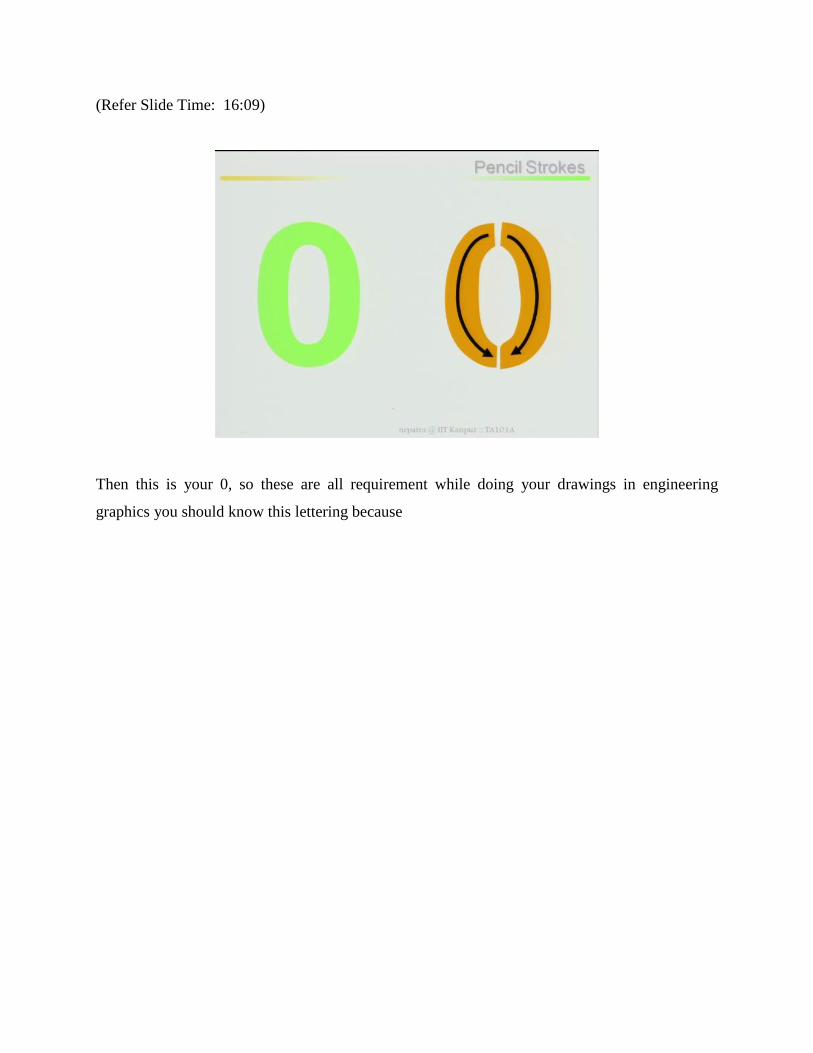
Then this is your 0, so these are all requirement while doing your drawings in engineering
graphics you should know this lettering because
(Refer Slide Time: 16:20)
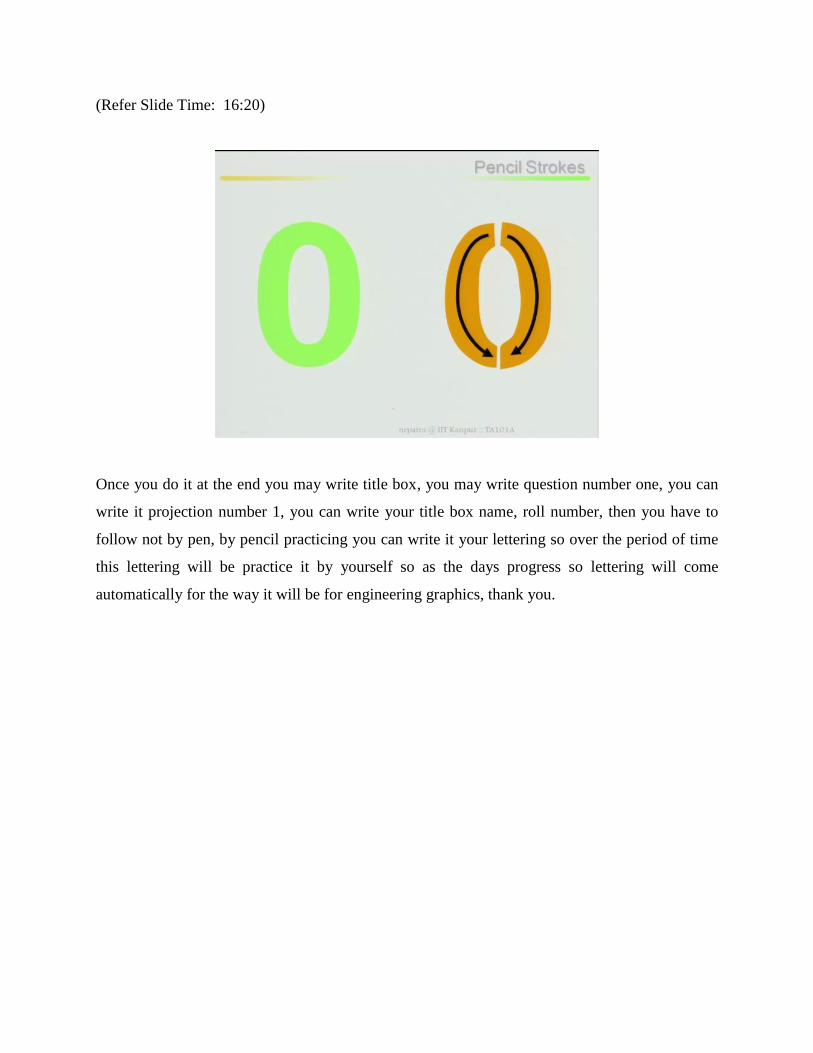
Once you do it at the end you may write title box, you may write question number one, you can
write it projection number 1, you can write your title box name, roll number, then you have to
follow not by pen, by pencil practicing you can write it your lettering so over the period of time
this lettering will be practice it by yourself so as the days progress so lettering will come
automatically for the way it will be for engineering graphics, thank you.
(Refer Slide Time: 16:53)
Acknowledgement
Ministry of Human Resource & Development
Prof. Satyaki Roy
Co-ordinator, NPTEL IIT Kanpur
NPTEL Team
Sanjay Pal
Ashish Singh
Badal Pradhan
Tapobrata Das
Ram Chandra
Dilip Tripathi
Manoj Shrivastava
Padam Shukla
Sanjay Mishra
Shubham Rawat
Shikha Gupta
K. K. Mishra
Aradhana Singh
Sweta
Ashutosh Gairola
Dilip Katiyar
Sharwan
Hari Ram
Bhadra Rao

Puneet Kumar Bajpai
Lalty Dutta
Ajay Kanaujia
Shivendra Kumar Tiwari
an IIT Kanpur Production
©copyright reserved


![[ACM-ICPC] Top-down & Bottom-up](https://img.pdfslide.net/doc/110x75/555602efd8b42a8a5f8b55b0/acm-icpc-top-down-bottom-up.jpg)