Embed Size (px)
Citation preview

A PRACTICAL GUIDE
Innovators’Guidebook
Center for Care Innovations, 2013–2014


Editors: Sarah Frankfurth, Ioulia Kachirskaia, Pooja Merai
Contributors: Ioulia Kachirskaia, Lyn Denend, Jenna Tregarthen, Stefanos Zenios, Sarah Frankfurth, Roza Do, Veenu Aulakh, Chris Conley
Design: gravitytank
“Six Principles for Working Differently” framework by Gravity Tank, Inc. Selected content adapted from “Reflections on Design Thinking” generated from the Design for Service Innovation course at Stanford Graduate School of Business (Copyright © 2012 by the Board of Trustees of the Leland Stanford Junior University). The design thinking methodology was adapted from Bootcamp Bootleg, developed at the Hasso Plattner Institute at Stanford (d.school) and is under Creative Commons license. Worksheets were created de novo as well as adapted from the Institute for Healthcare Improvement, Bootcamp Bootleg and gravitytank.
The materials in this work are protected by copyright. For permission request, please contact [email protected].
Center for Care Innovations, 2013–2014.
The Innovators’ Guidebook was made possible through funding from the Blue Shield of California Foundation.
ATTRIBUTIONS

2 | Innovators’ Guidebook
The health care safety net is working to transform itself into a model to emulate. To get there, it will need to find innovative solutions to the problems facing it today. But innovation isn’t just a great idea, it’s a process that involves deeply understanding the problem, listening to people’s needs and generating solutions that truly meet them. This book is your guide for that journey. It will take you through the innovation process with techniques, methods, tips and worksheets to help you at each step along the way. Each section of the guidebook offers you a sample agenda for your team meetings that will keep your project moving ahead.
We hope that this guidebook will support a culture of innovation at your organization. Share it widely with your staff and use it whenever you take on a new problem!
We encourage you to leverage this resource as a:
• Guide to prepare you for each step of the innovation process.
• Source of inspiration and comfort when you come up against challenges.
• Reference for problem-solving strategies.
• Reminder that the learning is in the journey!
ABOUT THE INNOVATION PROCESS
This guidebook presents a methodology for innovation that combines creative and analytical approaches, and relies on the collaboration of a multidisciplinary team. As you learn about the process, remember design thinking is highly iterative, not linear. Be prepared to cycle through the various stages of the process as you gain more insights to refine your focus and ensure you’re tackling a core need head-on!
The Innovators’ Guidebook was developed for health centers working with the Center for Care Innovation’s Safety Net Innovations program.
INTRODUCTION
ABOUT THIS BOOK

Center for Care Innovations | 3
AGENDA Each chapter begins with an agenda. Check-boxes list key tasks to do in order to stay on track. Innovation is a very time-intensive process and sticking to the agenda will allow you to stay on track during this 17-week process.
SYMPTOM CHECK Symptom Check boxes are places to check-in individually or as a team to verify that you are on track with an innovation-conducive mindset.
WORKSHEETS External worksheets provide greater detail for certain key exercises. These worksheets can be printed out for use by your team. Look out for
“Worksheet” next to a download icon.
TOOLBOX DOWNLOAD Toolbox items are additional, but not critical, tools that are available online. Detailed instructions for the Toolbox items can also be downloaded from an online source. Look out for
“Toolbox Download” next to a download icon.
INTRODUCTION
HOW TO USE THIS BOOK

4 | Innovators’ Guidebook
The chapters in this book are organized according to the six principles of design thinking:
INTRODUCTION
HOW TO USE THIS BOOK

Center for Care Innovations | 5
INTRODUCTION
CONTENTS & CALENDAR
NOTEThe innovation process does not accommodate last-minute spurs of productivity. Each step takes time and often depends on other team members and parties. Please use this calendar as a guide to stay on track!
WEEK 1 | PAGE 6
Understanding your Team Get to know your team. Establish mechanisms of decision-making and feedback. Create a plan for meetings throughout the rest of the program.
WEEK 2–3 | PAGE 13
Choose Your Challenge Survey problem areas, your team’s resources and organizational fit. Select a problem area to work on. Generate a Process Map outlining activities, roles, and resources involved.
WEEK 4–6 | PAGE 21
See & Experience Decide on the process of capturing and sharing insights. Conduct interviews, observations, and immersions.
WEEK 7–8 | PAGE 35
Dimension & Diagram Dimension and diagram experiences to identify insights and opporunity areas. Build frameworks as organization tools and to help ideate.
WEEK 9 | PAGE 44
Question & Reframe Ask why and question the typical ways things are done. Create a point of view (POV) for your target user. Create POVs for stakeholders.
WEEK 10–11 | PAGE 52
Imagine & Model Choose which aspects of your ideas you will prototype. Create an interactive prototype for each idea. Make arrangements for prototype testing with users and stakeholders.
WEEK 12–14 | PAGE 70
Test & Shape Test prototypes with your users and capture feedback. Iterate on your most promising prototype by incorporating user feedback.Assess feasibility of promising prototypes with the Business Model Canvas. Get input from stakeholders on the feasibility and potential of your top prototypes.
WEEK 15–17 | PAGE 85
Pitch & CommitAssemble user and stakeholder feedback.Map out resources you have and need in order to implement the solution. Revisit the Process Map. Incorporate changes in your new solution.

6 | Innovators’ Guidebook
WHAT?
A functioning team is critical to the success of your innovation endeavor. Understanding your team’s strengths, gaps in expertise and maintaining open communication channels throughout the process will give your team a great shot at completing the innovation challenge in one piece, and enjoying the process.
WHY?
Innovation leverages the various experiences and backgrounds of team members to come up with less obvious, more transformative ways to solve problems. In fact, it relies on diverse and functioning teams. A healthy and self-aware team will be more productive and will enable its members to be less inhibited in expressing their creative ideas.
HOW?
• Understand the composition of your team to leverage their strengths, allow each member opportunities for growth and to fill gaps in expertise with external resources.
• Keep channels of communication open through feedback sessions.
• Maintain a hierarchy-free flat structure to allow all team members to function in a less inhibited state and unleash creativity.
• Respect Flare and Focus stages.
• Divide and conquer.
Agenda WEEK ONE
� Get to know your team. Establish mechanisms of decision-making and feedback
� Create a plan for meetings for the rest of the program
INTRODUCTION
UNDERSTANDING YOUR TEAM

Center for Care Innovations | 7
TOOLBOX
SkillShareAssess what skills your innovation team has—and what skills are missing. As a team, download and work through the Skill Share worksheet.
Newly-formed teams will benefit from this exercise of mapping each team member’s skills and interests. Even teams that have worked together in the past will find that getting to know each other in this different dimension is valuable. Not only can you discover your fellow team member bakes awesome cookies (and will bring them to team meetings), you can see where each person’s strengths lie, and what they want to focus on while working on this innovation project.
Two tangible goals of this exercise are:
1. Allocate tasks that resonate with a person’s skills and developmental interests.
2. Identify the missing skills and make a plan for how to acquire them.
Thanks to Julian Gorodosky, PhD, “d.shrink” at the Stanford d.school, for conceptualizing and sharing this exercise.
INTRODUCTION
UNDERSTANDING YOUR TEAM
Toolbox Download: Skill Share
Business
IT
Medicine
Project Management

8 | Innovators’ Guidebook
TEAM FEEDBACK // TOOLBOX I Like, I WishThe innovation process you are embarking on leverages the creative potential of a diverse team—and also relies on the team to function. Your team, just like any other, will face tough patches when decisions need to be made and differences of opinion occur. It is important to agree on a mechanism for feedback and communication that works for your team and will maintain team health throughout the process.
The “I Like, I wish” format works for many teams. During periodic check-ins, each team member expresses what they like about the way the team is functioning, and what they wish were different.
Download the “I Like, I Wish” worksheet and see if it works for your team.
Thanks to Julian Gorodosky, PhD, “d.shrink” at the Stanford d.school, for conceptualizing and sharing this exercise.
INTRODUCTION
UNDERSTANDING YOUR TEAM
Toolbox Download: I Like, I Wish

Center for Care Innovations | 9
Flat StructureGetting things done and keeping the project moving are important. Assigning a project manager might help with these efforts.
At the same time, make an effort to maintain an environment where all team members are free and uninhibited to speak up, make suggestions for alternative directions or share out crazy ideas. You want to draw out the creative side of your team members, which will make the process even more fun.
Some ways to maintain a flat structure:
• Take turns leading team meetings.
• Agree on a process to make decisions that allows everyone to feel heard.
• Embrace goofiness. When you meet as a team find time to be silly and not take yourselves too seriously. Reward the most “out there” idea.
INTRODUCTION
MAINTAINING YOUR TEAM
Catalyst Method: Collaborative Cycle
Catalyst Method: Facilitating a Reflective Discussion

10 | Innovators’ Guidebook
stages with the highest energy and creativity. Treasure these flare stages and protect them from behaviors that do not belong there (such as narrowing down ideas, thinking why they will not work or self-editing). When the whole team is aware there will be dedicated time later to think about feasibility or make selections, they will be more free to think outside the box and your team will face less friction and fewer hurt feelings.
It’s been said that smart people can make even bad ideas work. (Imagine what they can do with good ideas!)
The innovation process is structured to get a lot of ideas out (so that you don’t commit to the very first one that comes to mind), but to still have structure when you need to make selections.
Flare stages have the goal of going for quantity. This is when you capture observations, generate ideas and make prototypes. These are the
INTRODUCTION
MAINTAINING YOUR TEAM
Flare and Focus
Focus stages have the intention of synthesizing information and making decisions. Here, your whole team is mentally prepared to sacrifice ideas that won’t make it. Going through idea eliminations in a dedicated focus mindset is easier and much less personal.
As a team and as a team member, be conscious whether you are in a Flare stage or a Focus stage. Be mindful of not mixing mindset and behaviors between these two stages.

Center for Care Innovations | 11
Accepting a ‘divide and conquer’ strategy was critical for gaining more observation time.
Divide and ConquerSome steps on the innovation process are particularly time-intensive. How can you accomplish it all, while juggling all your other commitments?
• Arrange as many user and stakeholder engagements in advance as possible.
• Divide various techniques and approaches among your team members.
• Debrief frequently to make sure everyone is on the same page.
INTRODUCTION
MAINTAINING YOUR TEAM
Formulating an Innovation Opportunity. You will start by selecting a problem area to focus on, then immerse yourself in understanding the problem and formulate a concise opportunity statement. The goal of this stage is to see things from the point of view of your end users (and not through data) to uncover root causes of the problem. Why? So that you spend the rest of the innovation process addressing the root cause of the problem and the needs of the people experiencing the problem.
FRAMING THE CHALLENGE
12 | Innovators’ Guidebook

Center for Care Innovations | 13
WHAT?
The process of balancing and prioritizing needs, expectations, values and opportunities to decide what problem you will work to resolve.
WHY?
Explicitly understanding and articulating your aspirations and expectations serves as a strong foundation for problem selection, team formation and success!
Throughout the design process, you can revisit your aspirations and expectations periodically. You may find that they grow and change as your work on your innovation challenge evolves, or that the problem itself and organizational priorities evolve.
HOW?
1. Compile a list of pressing problems you see in your organization, related to the larger areas of interest: Access to Primary Care, Care Teams with Patients as Core Members, Transitions from Hopstial to Primary Care.
2. Seek information about your organization’s priorities, goals and resources. Find alignment between each team member’s personal passions and organizational goals—or collectively reevaluate organizational goals.
3. Evaluate potential project areas against your team’s resources, access to users and stakeholders for each problem, and how ready your organization is to accept change in this problem niche.
4. Communicate your reasons for choosing to work on the project with the team so everyone understands each other’s values, aspirations, and expectations.
5. Trust that whatever innovation challenge you take on, you will have a valuable learning experience and have innovation tools under your belt to apply anywhere.
FRAMING THE CHALLENGE
CHOOSE YOUR INNOVATION CHALLENGE
Agenda WEEKS 2 & 3
� Survey problem areas, your team’s resources and organizational fit.
� Select a problem area to work on.
� Identify users, stake-holders and experts to engage. Reach out to arrange meetings.

14 | Innovators’ Guidebook
Choosing a ProblemYour team is embedded in your organization, and each of you has observed or experienced problems begging to be solved. For the innovation endeavor, it is important to select a problem you are all passionate about, as well as one with organizational support that can move forward.
Take another look at each problem and reflect on your personal preferences and organizational goals. Use the worksheets as a point for discussion.
PROBLEM:
Why do you want to pursue it? Who will be served by solving this problem? How much of a pain point and a priority is this problem for your organization?
Now, survey logistical considerations for each problem. Keep in mind you have not yet spent time validating the need, nor designing a real solution. When thinking about logistical considerations, focus on the general problem area, not a solution. In other words, be solution-agnostic.
FRAMING THE CHALLENGE
CHOOSE YOUR INNOVATION CHALLENGE
PROBLEM:
Perceived risk of failure Level of resources anticipated Availability of staff to work on this problem Incremental or disruptive innovation needed?
Worksheet: Choosing a Problem
TIP Think about the range of individuals, groups, and organizations you’ll need to engage to successfully design a solution to your innovation challenge. Who are they? How accessible are they? How critical will their engagement be to the success of your project? What are their vested interests? How difficult or easy might it be to get them to adopt a change?
Be sure the organization’s mission, priorities, and limitations align with your goals. Is the organization capable of implementing technology solutions, or only low-cost ‘workaround’ solutions? Really understand the organization and be aware of its goals and limitations.

Center for Care Innovations | 15
The need for more information
It would have been helpful to have more background information. How did the problem originate? What work has been done previously? Why hasn’t it worked?
I would have loved more information about the business realities of the idea before launching into it. Specifically, I wanted to know more about what had been done in the space, who the competition might be, and what regulatory barriers might get in the way.
Impact
I wanted an opportunity to have a big impact.
I was concerned that the market might be very small.
The hesitation I had, had to do with the difficulty of understanding how much room there was for making an impact, and for developing something novel and innovative.
Champions
Who in your organization is determined to have this seen through?
FRAMING THE CHALLENGE
CHOOSE YOUR INNOVATION CHALLENGE
What former innovators say…
16 | Innovators’ Guidebook
TOOLBOX
Deciding on a ProblemA useful way to visualize everyone’s preferences is to use a Decision Matrix. Label each of the problems on the table as 1, 2, 3, 4, etc. Individually, fill out where each problem falls on your scale of enthusiasm versus organizational priority. Compare each team member’s matrices and discuss.
For a more direct way to visualize where everyone stands, draw the matrix on a large sheet of poster paper. Individually, place your preferences on the poster with sticky notes. Hint: use sticky notes of different colors for each person. Look for commonalities and address discrepancies through discussion. Make sure everyone gets a chance to express why they voted this way—you might uncover an angle you hadn’t thought about.
FRAMING THE CHALLENGE
CHOOSE YOUR INNOVATION CHALLENGE
Toolbox Download Decision Matrix
TIP Don’t be discouraged if you are selecting only one problem to focus on from the multitude of problems you may see. Find a niche you can make a difference in and move one step at a time. Sometimes, you need to see success with a smaller, manageable problem before tackling a bigger one.
If it is helpful for your team to evaluate each member’s preferences though this matrix, change the axes labels and compare everyone’s votes against other parameters.
For example:
• Perceived Risk• Organizational Priority • Feasability • Access to Enough Users • Level of Resources Available
Center for Care Innovations | 17
Why not focus on solutions?The goal of an innovation project is to create a solution people will use and that will solve their need. Keeping your mind clear of any solution you believe is the right one will allow you to listen and observe with an unbiased mind, and therefore come closer to what others need versus what you think they need.
Plus, what appears to be a need is not always a need but the result of a problem. For example, when patients miss appointments, you might think the solution is to remind them of their appointments. After talking to patients, you may find what they really need is a more convenient way to cancel an appointment they already know they cannot make. In fact, this is what a team in Design for Service Innovation 2012 found.
At this stage in the innovation process, do your best to focus on the problem.
FRAMING THE CHALLENGE
CHOOSE YOUR INNOVATION CHALLENGE
SYMPTOM CHECK Do you find yourself thinking about a particular solution that will solve the problem you see? Have you been thinking about this solution when choosing the problem, describing its impact, or lining up stakeholders to interview?
Diagnosis: You are experiencing a case of premature solution commitment.
18 | Innovators’ Guidebook
Elevator PitchNow that your team has narrowed down a problem to tackle, set the stage for further exploration by formulating where you are starting from. Why is this important? Your team will be interacting with lots of parties in this project—having a concise problem statement your team agrees on will let you quickly get to the point and capture people’s attention.
PROBLEM: What is the problem you are trying to solve?
AIM: What is the big picture goal? What does your team want to accomplish?
IMPACT: Why is this problem important? Who will benefit from solving it?
THE ASK: How can they help? (brainstorm for patients, staff, external stakeholders, etc).
FRAMING THE CHALLENGE
CHOOSE YOUR INNOVATION CHALLENGE
Mapping StakeholdersThere are many parties who directly and indirectly interface with the problem you have selected. In order to understand the problem comprehensively, as well as to eventually design a solution that will be accepted by all stakeholders, it is important to brainstorm who all of the possible stakeholders are in your problem niche.
Once you map out the stakeholders, create a plan for how and when you will reach out to them to understand what they care about and what the pain points are from their point of view.
WHO IS A STAKEHOLDER?
Anyone who will affect whether your solution is successful. Think about all possible individuals: patients, their families, their employers, your staff, your administration, payers, etc.
STAKEHOLDER
How are they involved in the process with the problem?
What activities do they perform?
How to engage them?
Who on the team is responsible for contacting this stakeholder?
Worksheet: Elevator Pitch
Worksheet: Stakeholder Map

Center for Care Innovations | 19
FRAMING THE CHALLENGE
CHOOSE YOUR INNOVATION CHALLENGE
TOOLBOX
Rapid Design ThinkingBefore you get started on understanding your user’s needs, have some fun and try this exercise that lets you and your team experience the entire innovation process. (After all, did you really think the innovation process would be all work and no fun?)
Whether you are working on a problem where people’s lives and well-being are at stake, or creating a fun tooth-brushing experience for your kids, the process of innovation still holds.
Download the exercise, pair up, and design a fun experience for your team member, a family member, or even a stranger at the bus stop.
The warm-up takes an hour to complete. Keep an eye on the clock—the idea is to zoom through the process at a fast pace. Go ahead, get your feet wet—you will use all of these skills in the steps to come.
The Design Thinking ProcessIt is a process of deeply understanding a need from the point of view of the user, and then going through rapid cycles of building and testing until you create a solution that works and meets the need of your user.
Some design thinking principles:
• solution-agnostic at early stages• assumption-free• step-wise• user-centric• need-centric• iterative• fail fast and fail often• test, don’t debate!
Toolbox Download: Design Thinking Warm-up

20 | Innovators’ Guidebook
Mapping the Chosen ProblemGenerating a visual map of your chosen problem will help you see it from more angles and in more detail, and also see more clearly who interfaces with the problem when you are identifying stakeholders. As you learn more about your problem, update the map.
EXAMPLE The ScoopA fire station clinic portal is being designed to meet the healthcare needs of the local underserved population and to absorb patients from overburdened neighborhood hospitals, at the same time utilizing the qualified paramedic workforce.
What is known: Where the clinic will be located.
What is not known: What services would the clinic provide? Are paramedics appropriate providers for this scope of services? What physical setup should the clinic have to accommodate the services to be provided?
Goal: To design these processes in a way that serves the community best, as well as uses limited resources in the most optimal manner.
FRAMING THE CHALLENGE
CHOOSE YOUR INNOVATION CHALLENGE
Worksheet: Process Map

Start every project with observing and gathering evidence from the context or situation you want to design for. While you may have worked in the industry for many years or are quite familiar with a particular aspect of everyday life, spending time really looking at and understanding what happens in a given context leads to insight. This is no time for stereotypical descriptions, conventional understanding, or common sense. It’s critical you immerse yourself in the world of who you’re designing for, see it with fresh eyes, and question why it is the way it is.
SEE & EXPERIENCE
Center for Care Innovations | 21

22 | Innovators’ Guidebook
SEE & EXPERIENCE
GAIN EMPATHY
WHAT?
Uncovering deep needs that are important to the stakeholders you are designing for, by identifying with or vicariously experiencing their feelings, thoughts, and attitudes. The goal is to move beyond the obvious and understand the underlying needs and causes.
WHY?
You are immersing yourself in a human-centered innovation approach. To effectively design solutions for the people who need them, you must first understand the way they think, what they feel, the behaviors they engage in and the values they hold. The process of developing a deep understanding of the stakeholders affected by a problem reveals unexpected and surprising insights about their needs. Applying this process can take you from what you “believe” is the need to what the user actually experiences as the need.
HOW?
To gain empathy, you:
1. Assume a beginner’s mindset. Don’t judge. Question everything. Be truly curious. Really listen. Be a voracious learner.
2. Talk to users. Use interviewing for empathy skills to uncover underlying needs.
3. Immerse yourself in the problem. Walk in your user’s shoes, observe what’s not being said.
4. Capture your learnings in quotes, sketches, photographs to get the whole team up to speed and look for needs and insights.
Agenda WEEKS 2 & 3
� Decide on the process of capturing and sharing insights
� Conduct interviews, observations, and immersions
� Saturate working space with insights and observations
Any fool can know. The point is to understand.—Albert Einstein (physicist)
Center for Care Innovations | 23
Source: MLC Learning Design
SEE & EXPERIENCE
GAIN EMPATHY
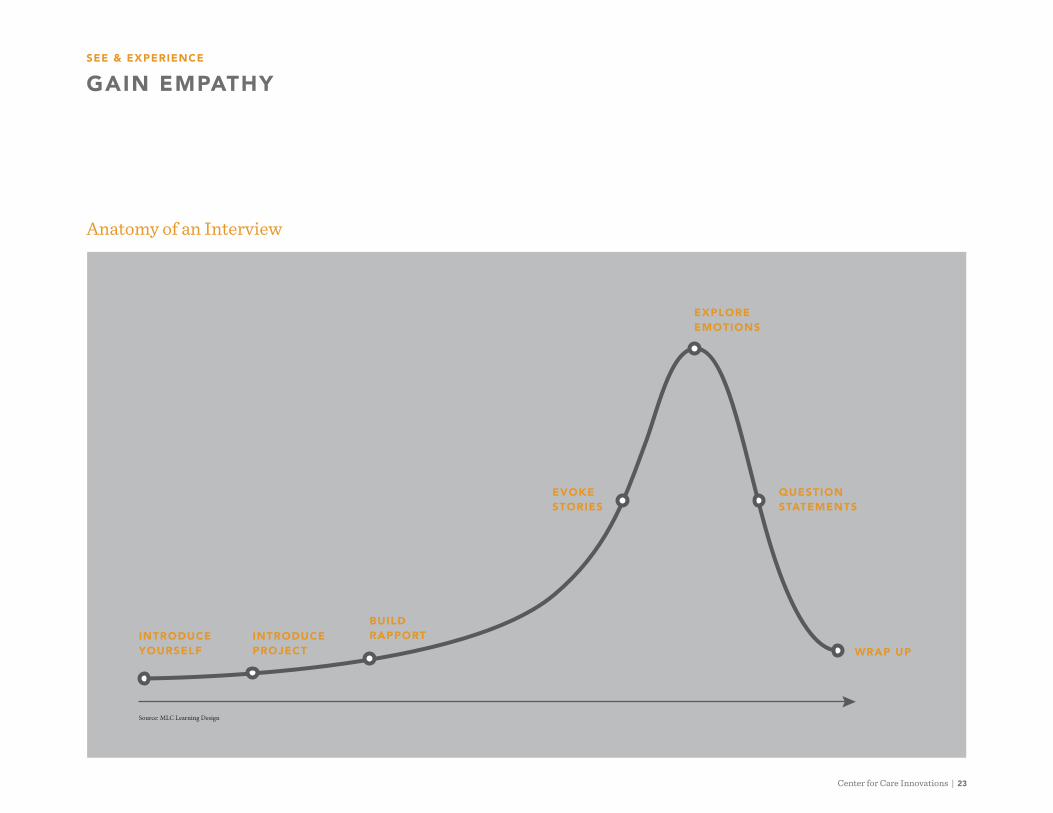
Anatomy of an Interview
INTRODUCE YOURSELF
INTRODUCE PROJECT
BUILD RAPPORT
EVOKE STORIES
EXPLORE EMOTIONS
QUESTION STATEMENTS
WRAP UP
24 | Innovators’ Guidebook
SEE & EXPERIENCE
GAIN EMPATHY
Tips for Effective Interviewing1. Don’t say “usually” or “typically” when
asking a question. You are looking for stories from specific instances that will give you the richness of detail you need. “Tell me about the last time you decided to schedule an appointment.” “What is the one most frustrating thing for you about getting to the hospital?”
2. If someone says “I think,” states a belief, or seems to prefer one thing over another, then the conversation is not over! Ask “WHY is this important to you?”
3. Use no more than 10 words to ask any single question.
4. Avoid leading question or questions that afford “yes” or “no” answers. Rephrase them to be open-ended questions.
5. Once you ask a question, let the conversation go on as long as it has to. Try not to rush the interviewee.
6. A little silence goes a long way. Give people time to process their thoughts. And pause between questions—sometimes interviewees offer interesting insights when trying to fill a gap in the conversation.
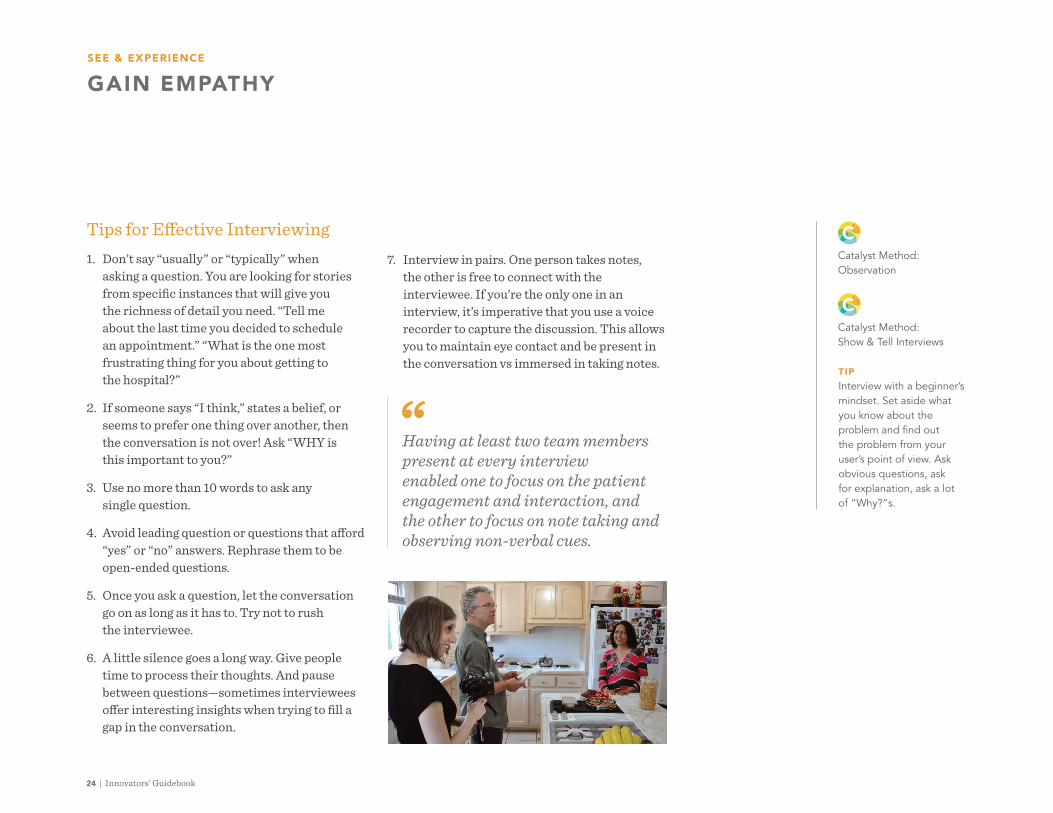
7. Interview in pairs. One person takes notes, the other is free to connect with the interviewee. If you’re the only one in an interview, it’s imperative that you use a voice recorder to capture the discussion. This allows you to maintain eye contact and be present in the conversation vs immersed in taking notes.
TIP Interview with a beginner’s mindset. Set aside what you know about the problem and find out the problem from your user’s point of view. Ask obvious questions, ask for explanation, ask a lot of “Why?”s.
Having at least two team members present at every interview enabled one to focus on the patient engagement and interaction, and the other to focus on note taking and observing non-verbal cues.
Catalyst Method: Observation
Catalyst Method: Show & Tell Interviews
Center for Care Innovations | 25
SEE & EXPERIENCE
GAIN EMPATHY
In-person interview or a survey?Surveys have limitations for uncovering problems. Use interviewing for empathy to discover needs—and use a survey to find out how prevalent the need is.
Why do we care about quotes?It is amazing how a direct quote can be so powerful in capturing your user’s experience. These quotes will become little gems that inspire your team as you move through the innovation process—and will also help you communicate the problem to stakeholders as you work on getting their buy-in.
A lot of the power of the innovation process comes from these qualitative insights. If you are used to focusing on the power of data, make a point to look for these qualitative gems when you interview and observe.
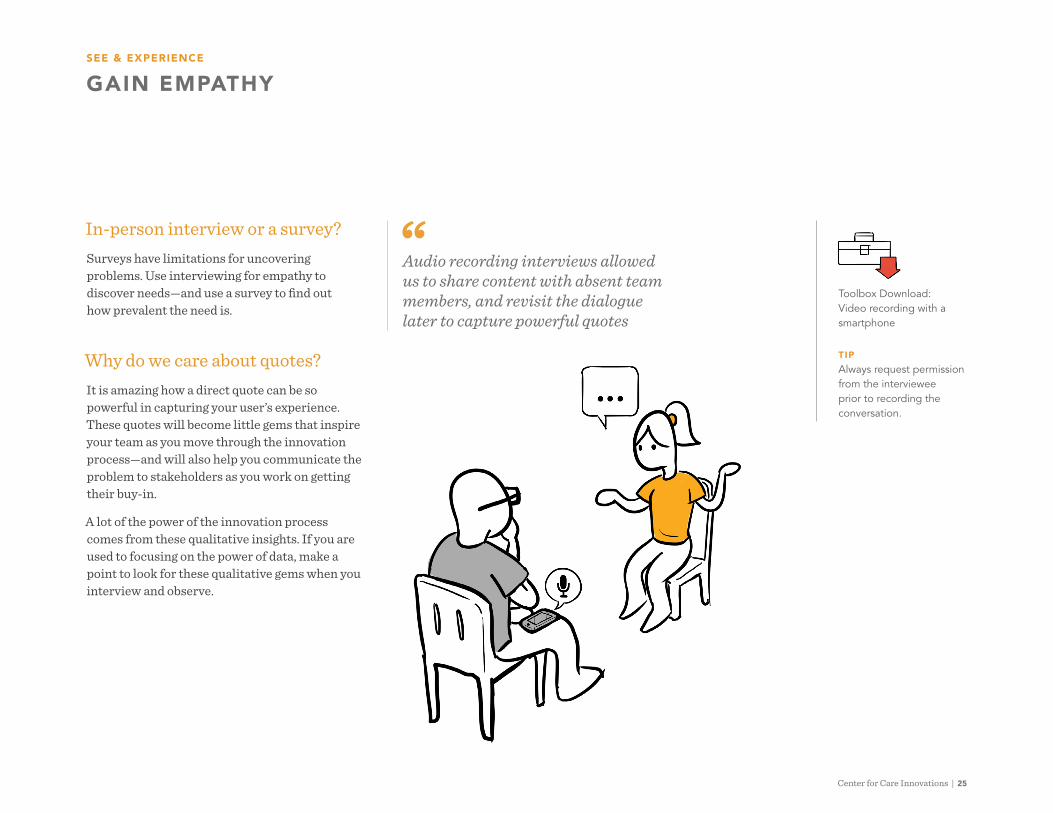
TIP Always request permission from the interviewee prior to recording the conversation.
Toolbox Download: Video recording with a smartphone
Audio recording interviews allowed us to share content with absent team members, and revisit the dialogue later to capture powerful quotes

26 | Innovators’ Guidebook
Set a productive environment for an interview:
We were expecting a formal meeting in an office where we could run through our list of questions. Instead, we had the conversation in the middle of a busy hospital lobby with our backpacks on and notebooks in hand.
Watch out for leading questions:
It was all too easy to fall into the trap of asking leading questions, limiting my ability to gain authentic, candid insight into interviewees’ pain points.
Read between the lines:
People who were conscious of their status were at times more focused on not saying the wrong thing (or self-glorifying) than providing a real answer. They were reluctant to comment on how they saw others in the organization being efficient or inefficient.
Give yourself enough time:
Interviews with patients were done when they were waiting for a doctor. Time was short and it was difficult to establish a good relationship and trust with that pressure.
SEE & EXPERIENCE
GAIN EMPATHY
Watch out for these common interview snafus.CASE STUDY
Petaluma Health CenterPetaluma Health Center focused on the breakdown of communication in the period between hospital discharge and patients’ first visit to the primary care team at the health center. The members of their Innovation Team, an interdisciplinary group, used interviews as a stimulus and guide in developing the solution. They talked with a range of informants including hospitalists, emergency room doctors, a skilled nursing facility doctor, a Visiting Nurses Association representative, hospital administrators, hospital and PHC case managers, a pharmacist, and a number of patients and their families. Importantly, the interviews revealed just how much some patients did not understand—including in some cases why they had been hospitalized and what they needed to do after discharge to maximize healing. It became clear that the solution needed to re-connect high-risk PHC patients with their primary care teams as soon as possible after discharge, to avert complications and the possible need for readmission.
Link to full case study: http://www.careinnovations.org/uploads/Petaluma_Case_Study.pdf
Center for Care Innovations | 27
SEE & EXPERIENCE
GAIN EMPATHY
Extreme UsersWHAT’S AN EXTREME USER?
Interviews with extreme users will give you more powerful insights. Pick an aspect of the problem you are exploring and find people who push the system to its limits. These are your extreme users.
Interview patients who make or cancel the most appointments, have to travel the farthest to get to your clinic; interview staff who work during peak hours; interview physicians whose appointments are in most demand.
The way extreme users cope with the system can more clearly highlight what’s missing.
INTERVIEWING IS HARDWORK! Interviewing at first seems like a straight-forward task. But effective interviewing is hard work.
Interviewing for empathy is not the way we normally communicate, especially with strangers. It takes us way out of our comfort zone. The more you practice it, the more natural it will come to you. At the beginning, take time for thoughtful preparation of open-ended questions, connecting
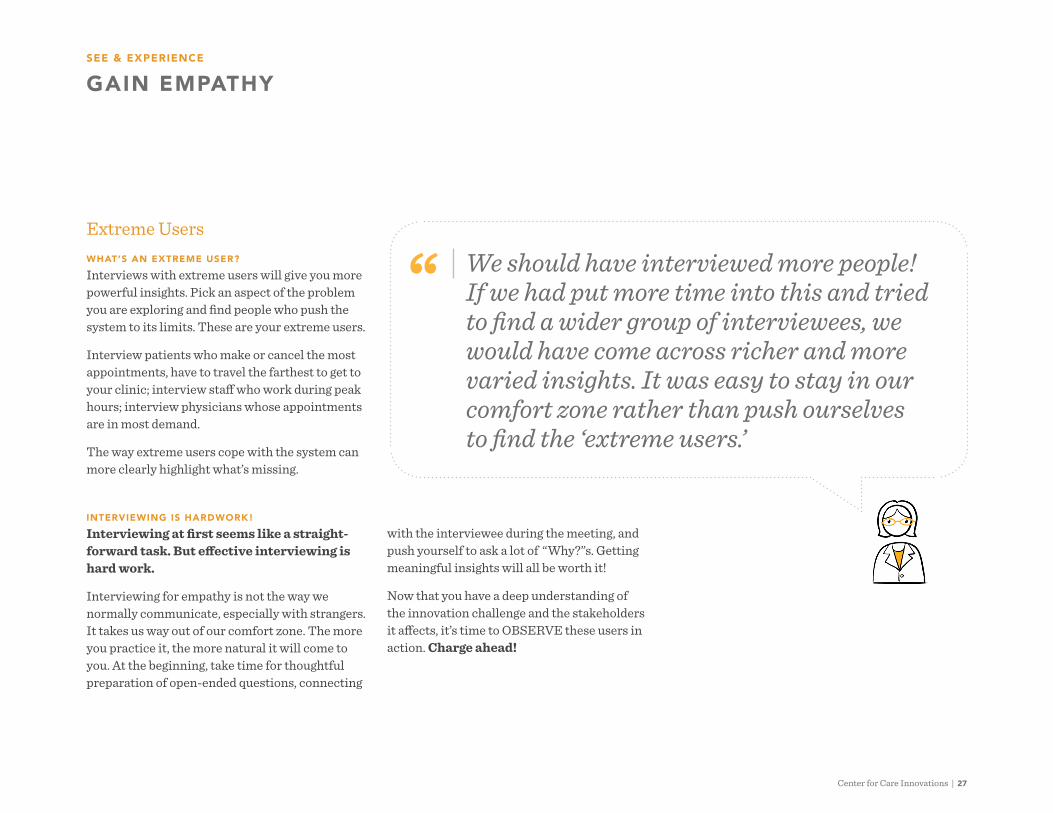
We should have interviewed more people! If we had put more time into this and tried to find a wider group of interviewees, we would have come across richer and more varied insights. It was easy to stay in our comfort zone rather than push ourselves to find the ‘extreme users.’
with the interviewee during the meeting, and push yourself to ask a lot of “Why?”s. Getting meaningful insights will all be worth it!
Now that you have a deep understanding of the innovation challenge and the stakeholders it affects, it’s time to OBSERVE these users in action. Charge ahead!
28 | Innovators’ Guidebook
Be a Fly on the WallWhen observing a situation, it is helpful to break it down. This activates your mind to look for details—and helps you see a familiar situation in a new light. Capture your observations as if you will be sharing them with someone who has never experienced the situation:
WHAT?
What is happening? What actions are taking place? Whether it is a patient searching for a form in her bag, or a physician being asked to sign something while on the phone—notate in detail what you see. What does the room look like? How does it feel? Note what you see in the environment, as if you are seeing it for the first time. What are the physical objects present in this process? Who is present in the situation? How can you describe them? What are their emotional states? Are they frustrated? Occupied? Comfortable? Are they alone? With family?
HOW?
How are the objects used? Look for things that aren’t there: what is missing? How are objects NOT used? In what way is the user interacting with the environment? With other individuals? Observe and notate both what you see happening, as well as your impressions about the nature of the interactions.
SEE & EXPERIENCE
GAIN EMPATHY
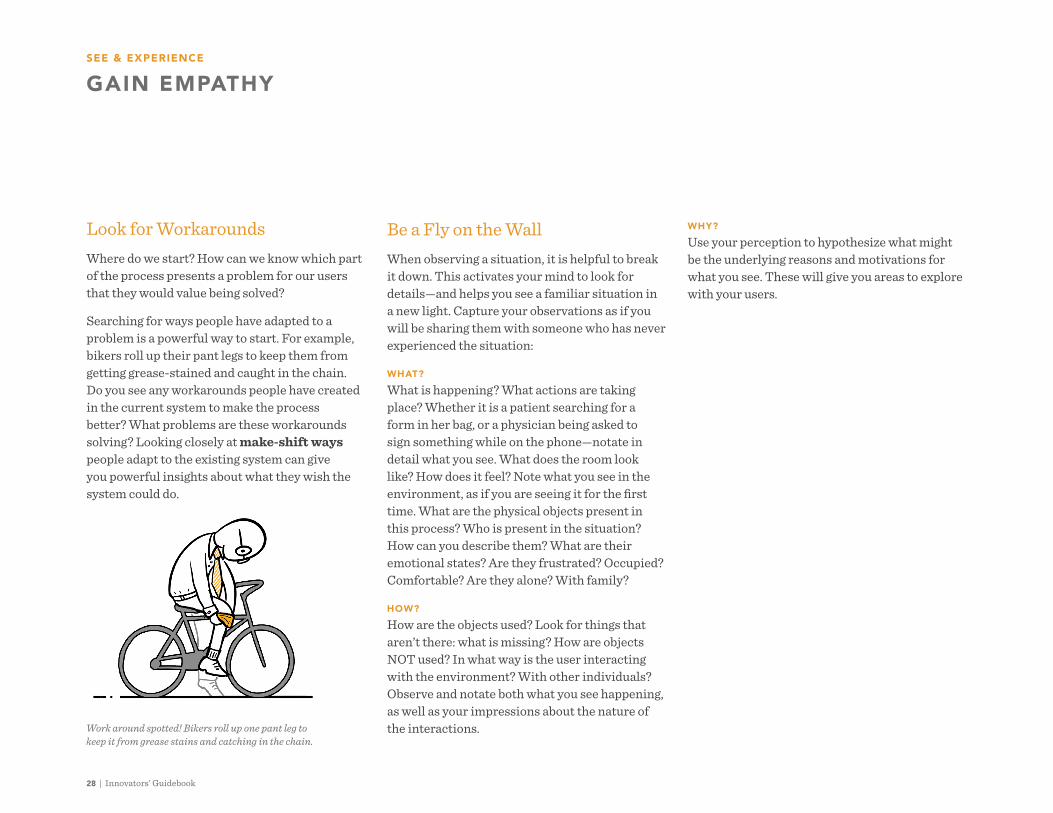
Look for WorkaroundsWhere do we start? How can we know which part of the process presents a problem for our users that they would value being solved?
Searching for ways people have adapted to a problem is a powerful way to start. For example, bikers roll up their pant legs to keep them from getting grease-stained and caught in the chain. Do you see any workarounds people have created in the current system to make the process better? What problems are these workarounds solving? Looking closely at make-shift ways people adapt to the existing system can give you powerful insights about what they wish the system could do.
WHY?
Use your perception to hypothesize what might be the underlying reasons and motivations for what you see. These will give you areas to explore with your users.
Work around spotted! Bikers roll up one pant leg to keep it from grease stains and catching in the chain.

Center for Care Innovations | 29
SEE & EXPERIENCE
GAIN EMPATHY
The most important thing in communication is to hear what isn’t being said. –Peter F. Drucker (management consultant)
The things unsaid
Interviews are good to get details, but observations clearly allow you to see the steps that lead to pain points. You can see how people really react and how they feel.
Contradictions between words and behavior hold insights
Observations give you insights about what people actually do, not just what they tell you.
They let you see the things that aren’t there
The biggest insight that I gained through the observation phase was to be aware of not only what the observations are telling you, but what they aren’t telling you. I believe that as humans we have a confirmation bias—we are looking to affirm our current beliefs rather than challenging them.
Observe and immerse yourself in your user’s environment. Why spend time doing observations?

30 | Innovators’ Guidebook
Capture ObservationsRecording what you have observed is key for the next step in the innovation process—honing down on an area of opportunity. It is also important for remembering what you saw, as well as to bring the rest of your team up to speed.
Use photographs to capture moments in the process you were surprised by, those that seemed key to understanding the process, those that really capture the pain point of your user, etc. Jot down quotes that inspired you or captured something interesting.
Start synthesizing by grouping ideas into themes—see what common themes emerge once you process notes from different interviews and observations. Sticky notes can help with the process: try different ways to group the information to see new trends.
IMPORTANT
This is the time to observe, not to select. You will have time to process and select the relevant information at the next step. Capture everything that seems interesting or helps you understand the process.
SEE & EXPERIENCE
GAIN EMPATHY
Walk in your user’s shoesAn irreplaceable way to get empathy for your user’s pain points is to go through the process they are going through. If you are examining the process of making appointments in your clinic, call and make one—and then call and see how easy it is to cancel it. Go through registration, the waiting room, the exam room and the checkout as your user would.
What is the point? To build empathy, but also to discover things your user just could not notice. If your patient has been going to your clinic for ten years, he is probably so used to the routine that nothing might seem worth mentioning when you interview him about his experience. Or there may be things that will show you the problem is really not what you thought it was.
Sort your observations with an Empathy MapCapture what your user says, does, thinks and feels. Look for contradictions—great insights can lie here. Empathy mapping will help you start to make sense of the data you’re collecting. See the method Empathy Mapping under the Dimension and Diagram principle for details on how.
Center for Care Innovations | 31
SEE & EXPERIENCE
GAIN EMPATHY
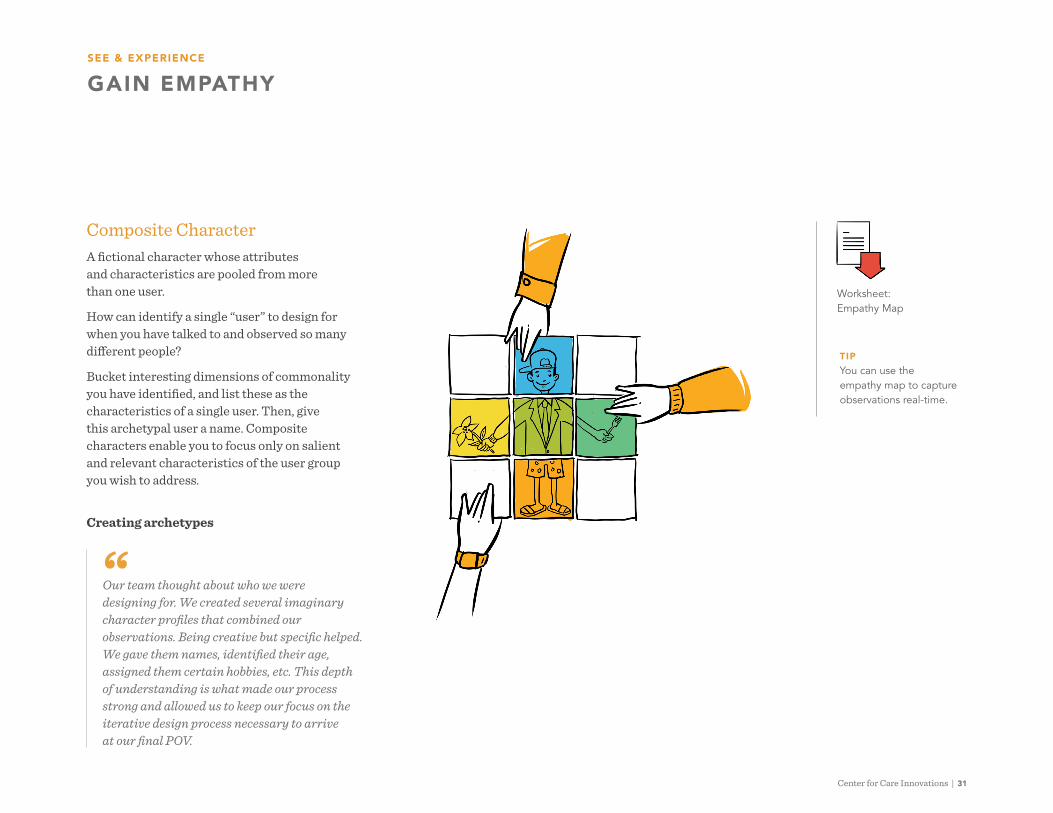
Composite CharacterA fictional character whose attributes and characteristics are pooled from more than one user.
How can identify a single “user” to design for when you have talked to and observed so many different people?
Bucket interesting dimensions of commonality you have identified, and list these as the characteristics of a single user. Then, give this archetypal user a name. Composite characters enable you to focus only on salient and relevant characteristics of the user group you wish to address.
TIP You can use the empathy map to capture observations real-time.
Worksheet: Empathy Map
Creating archetypes
Our team thought about who we were designing for. We created several imaginary character profiles that combined our observations. Being creative but specific helped. We gave them names, identified their age, assigned them certain hobbies, etc. This depth of understanding is what made our process strong and allowed us to keep our focus on the iterative design process necessary to arrive at our final POV.
32 | Innovators’ Guidebook
SEE & EXPERIENCE
GAIN EMPATHY
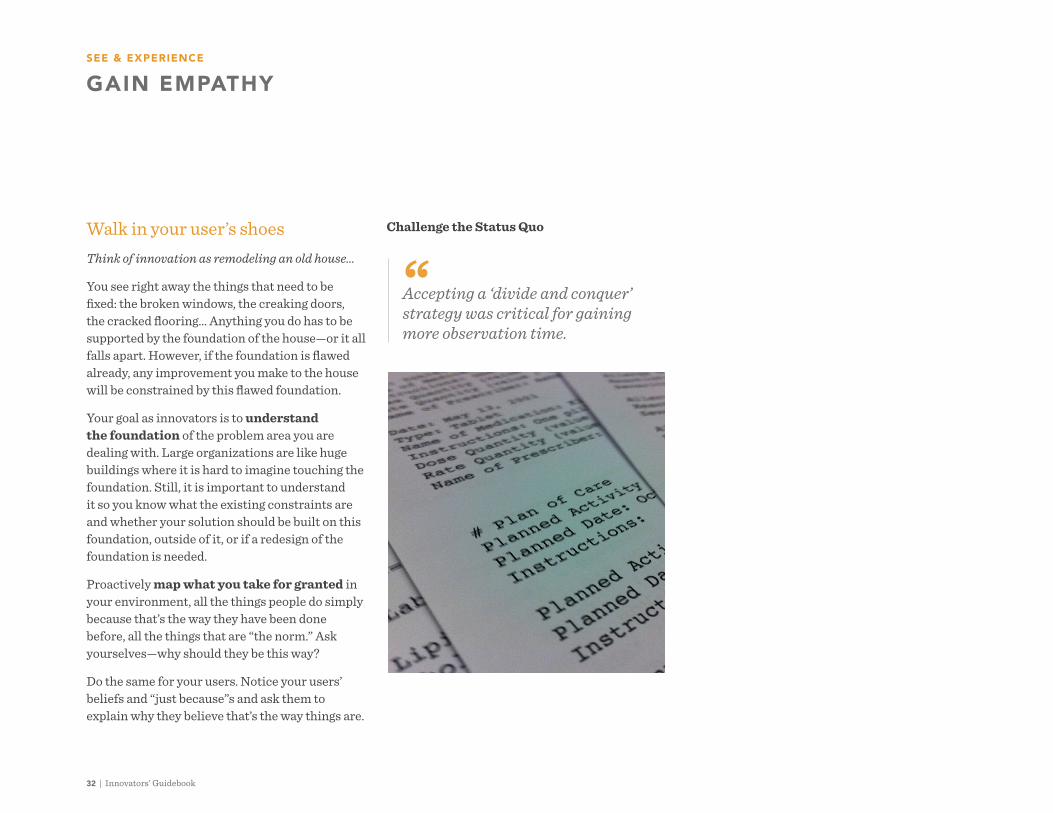
Walk in your user’s shoesThink of innovation as remodeling an old house…
You see right away the things that need to be fixed: the broken windows, the creaking doors, the cracked flooring… Anything you do has to be supported by the foundation of the house —or it all falls apart. However, if the foundation is flawed already, any improvement you make to the house will be constrained by this flawed foundation.
Your goal as innovators is to understand the foundation of the problem area you are dealing with. Large organizations are like huge buildings where it is hard to imagine touching the foundation. Still, it is important to understand it so you know what the existing constraints are and whether your solution should be built on this foundation, outside of it, or if a redesign of the foundation is needed.
Proactively map what you take for granted in your environment, all the things people do simply because that’s the way they have been done before, all the things that are “the norm.” Ask yourselves—why should they be this way?
Do the same for your users. Notice your users’ beliefs and “just because”s and ask them to explain why they believe that’s the way things are.
Challenge the Status Quo
Accepting a ‘divide and conquer’ strategy was critical for gaining more observation time.

Center for Care Innovations | 33
SEE & EXPERIENCE
GAIN EMPATHY
Colonoscopy Follow-UpWatching for constraints can reveal insights…
One team worked on a project that dealt with patient non-compliance with follow-up colonoscopy procedures. The clinic hoped to better understand why patients were not adhering to their doctors’ orders, and how they could improve their colonoscopy follow-up rates.
To evaluate this problem, the team needed a strong understanding of the entire colon cancer screening process. Screening begins with a take-home stool test that can detect the presence of blood. Patients whose test results are positive need to be further tested via colonoscopy. Through the observation process, the team determined that there were issues that could affect adherence at multiple steps in the screening process.
According to one team member: “Observing a healthcare worker giving the take-home stool test kit to a patient uncovered various constraints under which the medical staff work. For example, the screening test is only one of many issues that have to be discussed with the patients in
the 10–15 minutes before his physician sees them. Although the staff would like to make sure the patients have a good understanding of what is asked of them and why, there is no time for in-depth interaction. Sitting through one such session, I found myself barely keeping up with the fast-paced explanation of the test by a nurse. I had many unanswered questions, and it appeared that the patient did too. It was obvious that the staff member really cared for the patient—she was not being quick out of carelessness, but due to the circumstances of time pressure.”
Although the staff would like to make sure the patients have a good understanding of what is asked of them and why, there is no time for in-depth interaction.
SEE & EXPERIENCE
GAIN EMPATHY

34 | Innovators’ Guidebook
SEE & EXPERIENCE
GAIN EMPATHY
Mind the gaps in your perception!By virtue of being human, you will quickly become habituated to your environment. Your mind will auto-focus on information it identifies as relevant and interesting to you, while sometimes missing the bigger picture, which is right under your nose! Observation can be limited by seeing things the same way. Your challenge is to consider how to look at the same situation through a totally different lens.
Become an observation master by…Imagine you are a first-timer. Try to examine the current situation with naïve first-time eyes. Become aware of whether you have started assimilating to the environment—how would you see it differently if it were totally new to you?
Experience what your users are experiencing. At least once, go though the process you are aiming to innovate as if you were the user (the patient, the nurse, the receptionist, the physician). Observe the pain points you are experiencing. Go back to your users and find out whether they are experiencing the same pain points but didn’t know it.
Capture your observations in a meaningful way. Create process maps, mind maps, and highlight pain points you have observed with photographs, sketches and quotes.
With interviews and observations under your belt, you’re prepared to tackle the creation of your point of view. Full steam ahead!
Identify the different dimensions of your problem and create simple diagrams to improve your understanding and collaboration with others. Just as you would ask a patient about different dimensions of their life to better assess their health, so should you identify the different dimensions of your project. These dimensions can be used in simple diagrams with arrows and annotation to help you visualize your project, its complexities, and how you might solve for them. Diagramming isn’t about drawing well. It’s about identifying elements and their relationships and representing them with basic arrangements, shapes, lines, and arrows—then adding information with annotation. Different layers of annotation can be used to address different categories of information.
DIMENSION & DIAGRAM
Center for Care Innovations | 35
36 | Innovators’ Guidebook
WHAT?
At this point you may be feeling excited to have spoken with users but also overwhelmed by the amount of data collected. The hardest part is knowing where to start and what to do when you get stuck. Don’t worry, there are many tools you can use to systematically approach analysis to find meaningful insights and opportunities from your research. This is the point in the process where you’ll go from Flare to Focus to discover what’s important to users and what can lead to opportunities.
WHY?
Real world problems are highly unstructured and complicated, so in order to create meaningful solutions, we need a structured approach to making sense of them. This is where dimensioning and diagramming come into play.
Dimensioning an experience means looking at it from many different angles to understand it fully and decide what is important. Diagramming those dimensions helps to structure the data in a way that’s shareable and approachable.
When you come back from field research, make time for analysis sessions to dimension and diagram. This will ensure you make the most of the research you gathered and effectively transition into making solutions that matter to users. As you get started, don’t worry about the story you’re going to tell and focus on downloading what you’ve learned.
HOW?
1. Start with your observations—write down on sticky notes what you noticed, heard and saw in the field. Put the sticky notes up and start clustering them to find themes.
2. Translate observations to insights. Find commonalities, pain points, irony, and nuances in observed behavior.
3. Explore dimensions of the experience and sketch them out in simple diagrams.
4. Combine, connect and layer the dimensions to create a framework for brainstorming ideas.
5. Find opportunities by addressing the pain points, needs and desires in your insights.
Agenda WEEK 7–8
� Perform a debrief or analysis session with team members as soon as possible after fieldwork
� Cluster observations to find insights
� Address the insights with opportunities that solve problems for users
� Create frameworks as a way to synthesize data and make visual representations of what you learned
DIMENSION & DIAGRAM
MAKING MEANING OF DATA

Center for Care Innovations | 37
DIMENSION & DIAGRAM
ANALYSIS AND SYNTHESIS
Make sense of the data through analysis and synthesis sessions.
1 // GATHER BITS OF DATA
Gather data such as observations and quotes on sticky notes.
2 // CLUSTER THE THEMES
Find patterns and higher level themes and move the sticky notes into buckets or sections.
3 // FIND RELATIONSHIPS
Review the themes to see if any relationships are evident between them.
4 // OPPORTUNITY AREAS
Translate the themes into early opportunity areas.
Catalyst Method: Empathy Mapping
Catalyst Method: Affinity Clustering
Catalyst Method: Problem Statement Matrix
38 | Innovators’ Guidebook
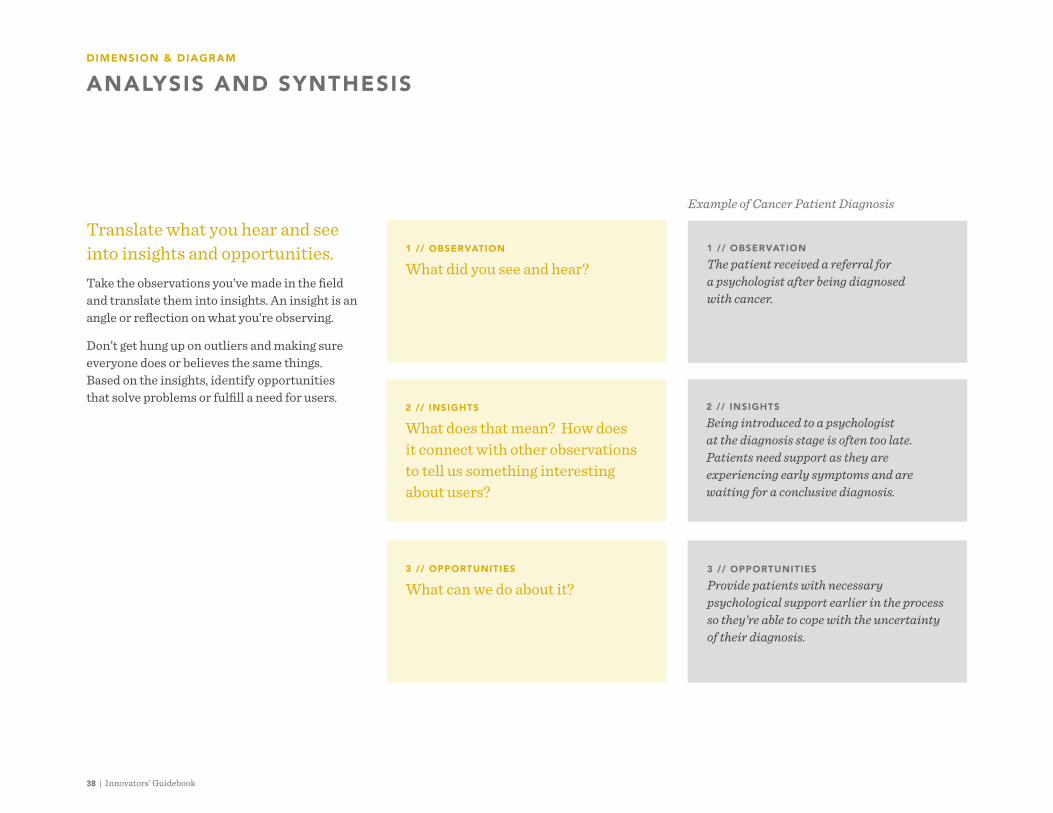
Translate what you hear and see into insights and opportunities. Take the observations you’ve made in the field and translate them into insights. An insight is an angle or reflection on what you’re observing.
Don’t get hung up on outliers and making sure everyone does or believes the same things. Based on the insights, identify opportunities that solve problems or fulfill a need for users.
1 // OBSERVATION
What did you see and hear?
2 // INSIGHTS
What does that mean? How does it connect with other observations to tell us something interesting about users?
3 // OPPORTUNITIES
What can we do about it?
1 // OBSERVATION The patient received a referral for a psychologist after being diagnosed with cancer.
2 // INSIGHTS Being introduced to a psychologist at the diagnosis stage is often too late. Patients need support as they are experiencing early symptoms and are waiting for a conclusive diagnosis.
3 // OPPORTUNITIES Provide patients with necessary psychological support earlier in the process so they’re able to cope with the uncertainty of their diagnosis.
DIMENSION & DIAGRAM
ANALYSIS AND SYNTHESIS
Example of Cancer Patient Diagnosis
Center for Care Innovations | 39
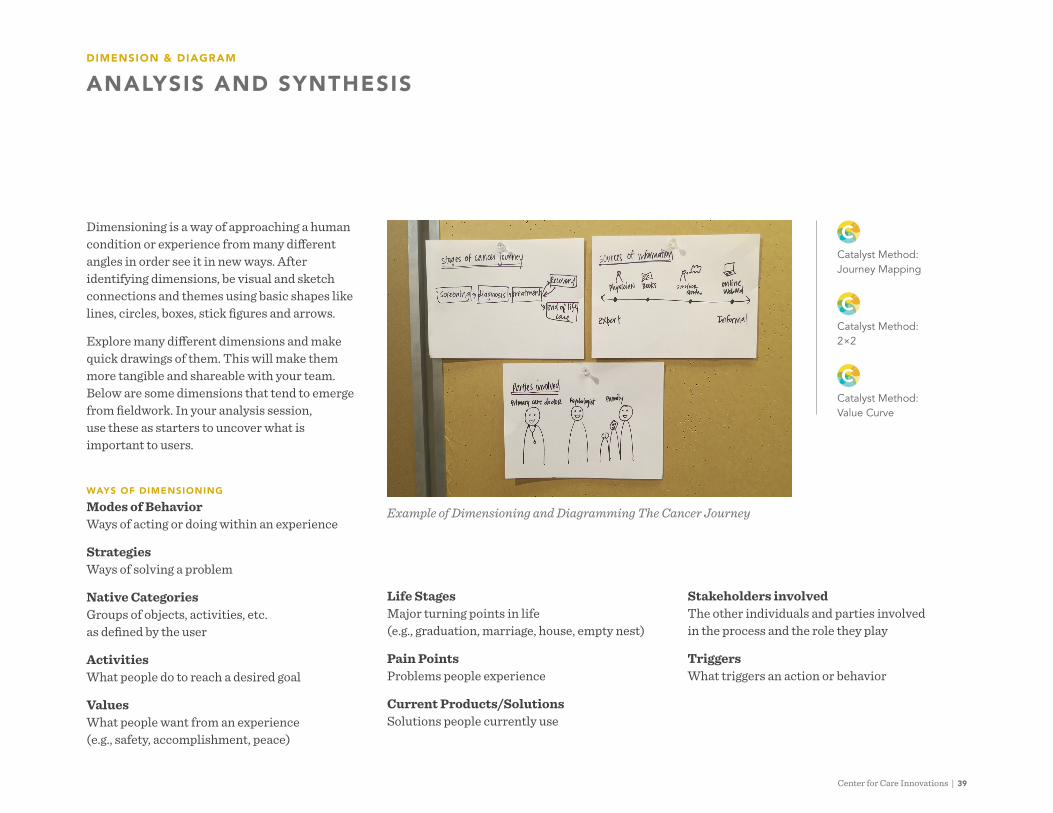
Dimensioning is a way of approaching a human condition or experience from many different angles in order see it in new ways. After identifying dimensions, be visual and sketch connections and themes using basic shapes like lines, circles, boxes, stick figures and arrows.
Explore many different dimensions and make quick drawings of them. This will make them more tangible and shareable with your team. Below are some dimensions that tend to emerge from fieldwork. In your analysis session, use these as starters to uncover what is important to users.
WAYS OF DIMENSIONING Modes of Behavior Ways of acting or doing within an experience
Strategies Ways of solving a problem
Native Categories Groups of objects, activities, etc. as defined by the user
Activities What people do to reach a desired goal
Values What people want from an experience (e.g., safety, accomplishment, peace)
Life Stages Major turning points in life (e.g., graduation, marriage, house, empty nest)
Pain Points Problems people experience
Current Products/Solutions Solutions people currently use
Example of Dimensioning and Diagramming The Cancer Journey
Catalyst Method: Journey Mapping
Catalyst Method: 2×2
Catalyst Method: Value Curve
DIMENSION & DIAGRAM
ANALYSIS AND SYNTHESIS
Stakeholders involved The other individuals and parties involved in the process and the role they play
Triggers What triggers an action or behavior
40 | Innovators’ Guidebook
CASE STUDY
Petaluma Health CenterWith no mechanism in place to alert primary care teams when a patient visits the ED or is hospitalized, some patients were not receiving timely primary follow-up care after discharge, increasing the risk of avoidable and costly readmissions. Mark Richman, MD, who practices both emergency and primary care medicine at LADHS Olive-View Medical Center, saw this problem first-hand when he discovered during clinic visits that some of his primary care patients had been hospitalized without his knowledge, and with no indication in the medical record.
He brought engaged hospital case managers (responsible for coordinating post-discharge care) and primary care managers to bridge this critical gap. They began by observing existing care transition processes and using the design firm gravitytank’s mobile research app dScout to
understand various stakeholders’ perspectives on the problem. A key step was identifying which end-user in the care team should receive the emailed notice and be responsible for routing the information to the rest of the care team. This turned out to be the care managers. A journey map helped the innovation team understand the work load and “pain points” of these pivotal care team members, so they could design a solution meeting their needs. Says Dr. Richman,
“Understanding that while patients are the ultimate beneficiaries of this program, care managers were the true users, and designing a solution for them, was powerful.”
Link to full case study: http://www.careinnovations.org/uploads/OVMC_Case_Study.pdf
DIMENSION & DIAGRAM
ANALYSIS AND SYNTHESIS
Center for Care Innovations | 41
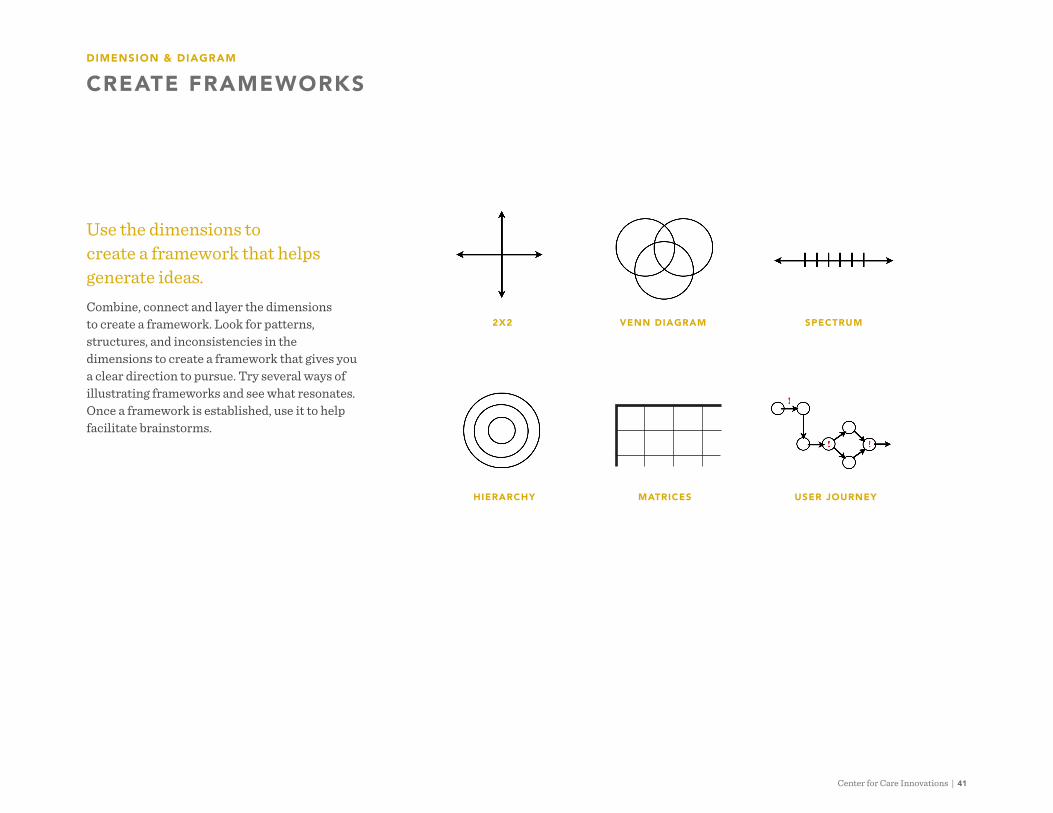
Use the dimensions to create a framework that helps generate ideas.Combine, connect and layer the dimensions to create a framework. Look for patterns, structures, and inconsistencies in the dimensions to create a framework that gives you a clear direction to pursue. Try several ways of illustrating frameworks and see what resonates. Once a framework is established, use it to help facilitate brainstorms.
2X2
HIERARCHY
VENN DIAGRAM
MATRICES
SPECTRUM
USER JOURNEY
DIMENSION & DIAGRAM
CREATE FRAMEWORKS

42 | Innovators’ Guidebook
DIMENSION & DIAGRAM
CREATE FRAMEWORKS
EXAMPLE OF A FRAMEWORK
The Cancer JourneyThe following framework represents the stages of treatment a cancer patient needs and the parties involved in their care. The goal of the framework is to identify opportunities to better support the patient and the parties involved. The framework should generate questions for brainstorming like:
• What are the gaps and inconsistencies in care?
• Should additional parties be involved? Should fewer parties be involved?
• How can we ease the transitions?
• Are there alternative treatment options?
The Cancer Journey
PRIMARY CARE
PREVENTION SCREENING DIAGNOSIS TREATMENT
RECOVERY/SURVIVORSHIP
END-OF-LIFE CARE
PSYCHOSOCIAL & PALLIATIVE CARE
Center for Care Innovations | 43
DIMENSION & DIAGRAM
MAKING MEANING OF DATA
Moving on
Some tips on frameworks… The process of creating a framework is not a search for “truth.” A framework is simply a temporal tool for optimizing structured thinking when creating a unique, valuable idea that resonates with people. Come up with many of them but prioritize frameworks that have a ‘so what.’ Many frameworks and insights will be true but useless. This means they have interesting tidbits of information but don’t actually get you anywhere. It’s hard to leave those behind, but make it your goal to find the true but useful ones capable of priming your team to come up with lots of great ideas during ideation. There’s no silver bullet to developing frameworks and the best way to test if a framework is good is by brainstorming ideas based on it. If it leads you to many ideas then roll with it—if it doesn’t, then leave it behind.

Question the familiar, the status quo, and typical ways things are done. When you’re good at your job, people expect you to have all the answers. And we’re often rewarded for our knowledge of our industry’s conventions. But figuring out new, better ways of doing things requires questioning how things are done today. “Why do I have to go to a counter to rent my car?” “Why can’t I subscribe to a cab service?” Questioning the status quo opens up new space for thinking and imagination. Apply this principle in every stage of your project—when visiting the field, in small conversations, reviews of research, evaluating ideas. Question things creatively and cover different dimensions—what makes it good, what makes it bad, could it be done differently, can something be eliminated? Could it use low-tech, high-tech, or just a simpler approach? Unlike most questions you get, don’t be so quick to answer them. Let the question force exploration and insights.
QUESTION & REFRAME
44 | Innovators’ Guidebook
Center for Care Innovations | 45
QUESTION & REFRAME
CREATING POINT OF VIEW
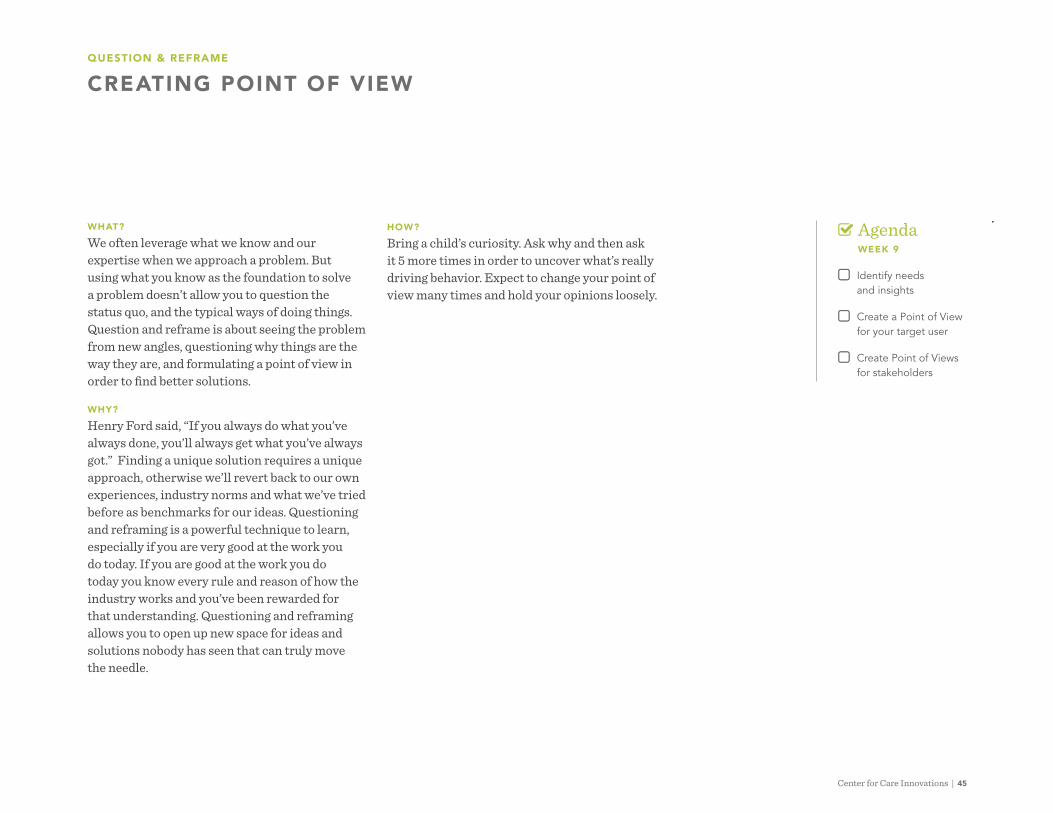
WHAT?
We often leverage what we know and our expertise when we approach a problem. But using what you know as the foundation to solve a problem doesn’t allow you to question the status quo, and the typical ways of doing things. Question and reframe is about seeing the problem from new angles, questioning why things are the way they are, and formulating a point of view in order to find better solutions.
WHY?
Henry Ford said, “If you always do what you’ve always done, you’ll always get what you’ve always got.” Finding a unique solution requires a unique approach, otherwise we’ll revert back to our own experiences, industry norms and what we’ve tried before as benchmarks for our ideas. Questioning and reframing is a powerful technique to learn, especially if you are very good at the work you do today. If you are good at the work you do today you know every rule and reason of how the industry works and you’ve been rewarded for that understanding. Questioning and reframing allows you to open up new space for ideas and solutions nobody has seen that can truly move the needle.
HOW?
Bring a child’s curiosity. Ask why and then ask it 5 more times in order to uncover what’s really driving behavior. Expect to change your point of view many times and hold your opinions loosely.
Agenda WEEK 9
� Identify needs and insights
� Create a Point of View for your target user
� Create Point of Views for stakeholders
46 | Innovators’ Guidebook
QUESTION & REFRAME
CREATING POINT OF VIEW
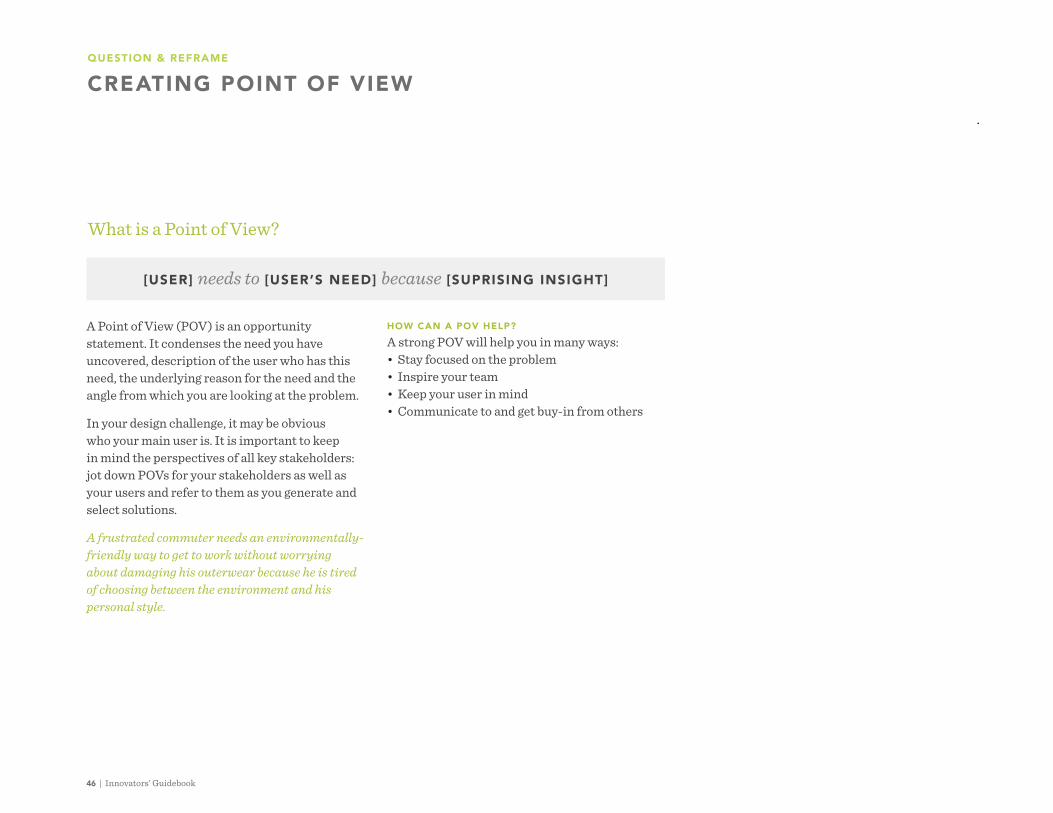
A Point of View (POV) is an opportunity statement. It condenses the need you have uncovered, description of the user who has this need, the underlying reason for the need and the angle from which you are looking at the problem.
In your design challenge, it may be obvious who your main user is. It is important to keep in mind the perspectives of all key stakeholders: jot down POVs for your stakeholders as well as your users and refer to them as you generate and select solutions.
A frustrated commuter needs an environmentally-friendly way to get to work without worrying about damaging his outerwear because he is tired of choosing between the environment and his personal style.
HOW CAN A POV HELP?
A strong POV will help you in many ways:• Stay focused on the problem• Inspire your team• Keep your user in mind• Communicate to and get buy-in from others
[USER] needs to [USER’S NEED] because [SUPRISING INSIGHT]
What is a Point of View?

Center for Care Innovations | 47
Leaping from understanding the problem to a POVTo write a helpful POV, you need a solid description of the user, a clear need, and an insight (something remarkable you have uncovered about why the need is there or why the user is the way she is).
For example, in the case of a biker who wants to protect the environment from pollution but hates his pant leg getting caught in his bicycle chain, this might look like:
Health check for your POV• Does it have a solution in it?
(re-write it so it doesn’t)
• Does it have a clear need that is neither too abstract nor too specific?
• Does it have an interesting insight? (What is the non-obvious insight you found that will drive your innovation?)
• Does it convey the mental and emotional state of your user? (to inspire you)
NEEDS
protect pants
remember to protect pants
not pay for new pants
not look untidy in front of colleagues
uphold moral values
INSIGHTS
will give up on being environmentally-friendly if it means pants will be damaged
bothered with cost of getting new pants
feels too distinguished to bare his legs yet forgets to bring the velcro band to tie his pants
USER ATTRIBUTES
frazzled
rushed
frustrated
groggy
style-consious
environmentally-consious
QUESTION & REFRAME
FRAME THE OPPORTUNITY
Catalyst Method: 3-Part Observations
Catalyst Method: Analogous Examples
Catalyst Method: “Ways of…” Statements

48 | Innovators’ Guidebook
POV#1 is very narrow and has a solution embedded in it: the only direction our brainstorm can go is to find various ways to tie pants. You don’t want to limit yourself at this point to one way to solve a problem.
In POV #2, any potential solution is still tied to the bike and the chain, however it opens up more options: you can tie the pants, you can roll the pants up, you can change into shorts when biking, etc.
POV #3 is still tied to a bike, yet allows us to think beyond the chain and has the flexibility to explore ways to modify either the pants or the bike.
POV #4 is the most abstract, freeing us from connections to the bike as the mode of
Pyramid of AbstractionPOV is a tool that can help you frame the problem—or the opportunity—in a way that can lead to a generative, but still productive, brainstorm of solutions. Experiment up and down the ladder of abstraction to generate a POV that has the most helpful scope for your problem.
For biker example, you can frame this problem at multiple levels:
1. A frustrated biker needs a way to tie the leg of his pants when biking.
2. A frustrated biker needs a way to prevent his pants from getting caught in his bicycle chain.
3. A frustrated commuter needs a way not to have damaged pants when he bikes to work.
4. A frustrated commuter needs a way to get to work without worrying about damaging his outerwear.
5. A frustrated commuter needs a way to travel without worrying about his clothes.
QUESTION & REFRAME
FRAME THE OPPORTUNITY
transportation and allowing us to think of the final goal, e.g., arriving at work without damaging his clothes.
POV #5 may capture the high-level emotional need of the user, but may be too broad to give any direction of what kinds of solutions to start thinking about.
Scope the POV so it gives you enough freedom to rethink the status quo, yet not so open you don’t know where to begin or which direction to take.
LESS ABSTRACT
1. Roll Pants
2. Keep pants out of chain
3. Keep pants intact
4. Keep clothes intact
5. Travel without worry
MORE ABSTRACT
pyramid of abstraction for bikers
Center for Care Innovations | 49
What’s so good about having a great POV?
QUESTION & REFRAME
FRAME THE OPPORTUNITY
A great POV:
• Inspires the team.
• Keeps the team grounded.
• Captures the hearts and minds of the stakeholders.
• Fuels brainstorming.
• Allows team members to determine the relevance of competing ideas.
• Saves teams from the impossible task of developing concepts trying to be all things to all people.
The POV helped us ensure that we were working on something that was actionable, largely applicable, and resonated most with our potential user base.
The POV is insanely useful because it focused us whenever we wanted to go astray or look into all the other applications of ideas we came up with.
It really guided us in the brainstorming of solutions.
The POV reminded us who exactly we were trying to help most directly.
It was easy, in conversations with outsiders or in sessions with our team, to get excited about different features or get distracted planning something that wasn’t core to the product. This is when the POV came in handy—as a tool to help us keep each other on course without generating conflict.

50 | Innovators’ Guidebook
QUESTION & REFRAME
FRAME THE OPPORTUNITY
Keep in mind that POVs often evolve over time…
Just be careful you don’t let the ‘tail wag the dog’…
Our POVs evolved as we talked to more patients and staff and better understood their pain points. Our original POVs didn’t get at the heart of what we were trying to achieve. Our original POVs dealt more with the state of mind of our users, rather than getting at what the problem is. As our thinking about their needs evolved, our POV evolved to reflect that.
So many times we started to change our POV to fit some new solution we had come up with, but we realized that you run into problems when you try to make needs fit solutions.
NOTE OF CAUTION
While a consensus approach enables most teams to avoid conflict, it can sometimes result in the selection of a “safe” or obvious POV. Too often, the most vocal member(s) of the group persuade others to think or vote as they do. Consider capturing the diversity of perspective by enabling independent voting (e.g., allowing each member to mark the three POVs they are most attracted to), and then facilitate a thoughtful discussion to uncover the reasons why opinions differ before re-voting or making a decision.
A POV should be inspiring, not just accurateDon’t forget the bigger pictureA POV is a tool to keep you focused on a distinct area of opportunity in this problem space. Capturing the opportunity in an inspiring POV statement can help the team generate ideas.
However, don’t let your team get bogged down in making it perfect: it is a means to the end of creating a solution for the bigger problem.
If the POV is unexciting and doesn’t motivate you, then move on to something that does. We spent weeks working around a POV that was accurate, but unappealing for the majority of the team. If the POV doesn’t excite you, it’s going to be hard to continue to move on.

Center for Care Innovations | 51
Moving onCut yourself some slack!
The decision to pursue one user, insight, or need over another can be a stressful process. Why? Inherent in a decision to carry something forward, is a decision to leave something else behind. Perceived opportunity costs can cause tension and competition within teams. But remember, you don’t have to figure out the
“right” answer straight away.
The POV is your friend. It is there to help you focus, inspire you, and remind you of the need you have uncovered and decided to work on. Don’t get bogged down with the details of the POV at the start—let the phrasing of it evolve as you move through the stage. If you struggle with writing a meaningful and captivating POV, ask yourself, “Have I really found a deep need that I am excited about, or is it time to go out there and search some more?”
Now that you have a POV that defines the need(s) of your user, you’re ready to come up with some potential solutions to the problem. Keep up the good work!
QUESTION & REFRAME
FRAME THE OPPORTUNITY
Generate a lot of ideas and model some of them to push your project forward. Michael Polanyi, the Hungarian polymath said,
“To have a great idea, you have to have lots of ideas.” The Dyson vacuum was the culmination of more than 4,000 prototypes. As for vacuums, so for innovation! Imagining lots of different ways to address a problem is called, “populating the solution space.” No problem or situation has a single solution. Great solutions often have hundreds of new ideas in them. Brainstorming and thinking up ideas any time of the day ultimately helps you create a solution that succeeds. And don’t be deceived by verbal descriptions of ideas. Visualize and model them. At first a sketch and then a paper model. Make a prototype to try. At each iteration you’ll better understand your idea and get much more meaningful feedback from others.
IMAGINE & MODEL
52 | Innovators’ Guidebook

Center for Care Innovations | 53
WHAT?
The process of “flaring” or “going wide” to generate as many possible concepts or solution ideas as you can. The goal is to explore a wide solution space, in terms of both the quantity and diversity of ideas. From this collection of ideas, you can identify the strongest concepts to prototype and test with users.
WHY?
Ideation enables you to transition beyond identifying problems to exploring solutions. When done well, ideation helps you unlock your creativity and look past immediately obvious solutions. It also allows you to harness the collective perspectives and strengths of your team as you uncover and explore unexpected territory.
HOW?
1. Prepare. Initiate ideation by generating 5–10 “what are ways of ” questions based on your POV. They should be broad enough to catalyze a wide range of possible solutions, but narrow enough to have helpful boundaries. For example “what are ways of giving each shopper a personal checkout experience?”
2. Generate ideas. Invest in the creative process. Be intentional about setting aside plenty of time to come up with ideas, and experiment with different techniques.
3. Narrow ideas. Take a systematic approach to choosing which ideas to pursue. The goal is to select a small set of possible solutions to take into prototyping.
IMAGINE & MODEL
IDEATION
Agenda WEEK 10
� Write Ways of State-ments for your Point of View
� Generate many diverse ideas
� Select 1–4 ideas to prototype

54 | Innovators’ Guidebook
“Ways of…” Statements“Ways of…” Statements help your team explore different aspects of the POV and carry out more focused brainstorms. See the example below.
Notice that you are exploring ways to meet the need not only from your organization’s point of view, but from all possible angles that the need can be addressed. You never know which way will work the best in the end.
A full-time working Mom
pick up her sick kid from daycare without thinking about canceling her doctor’s appointment
her worry about her kid’s health is compounded by the guilt for not canceling an appointment
having the doctor be notified without her involvement?proactively checking with her if she can still make it?taking care of her kid at her appointment?having daycare care for sick kids?making her not feel guilty?making the doctor be okay if she doesn’t show up?
What are ways of…
IMAGINE & MODEL
IDEATION
[USER] needs to [USER’S NEED] because [SUPRISING INSIGHT]
Generate lots of “Ways of…” Statements for your POV. Choose the ones you are excited about and conduct a brainstorm for each
“Ways of…” Statement you’ve chosen.

Center for Care Innovations | 55
IMAGINE & MODEL
IDEATION
Generate Ideas | BrainstormWHAT?
A brainstorm is a group activity to rapidly come up with a lot of ideas. It is an interactive way to build on ideas of others, think fast, and end far from the initial ideas you started with.
STARTING A BRAINSTORM:
• Get off your chairs. Keep the energy high!
• Let time pressure help you—set a time for each “Ways of…” brainstorm.
• Free your mind to think outside the box—get all your ideas out in the open at the start.
BRAINSTORMING RULES
1. Defer judgment. No blocking! No finding reasons why it won’t work!
2. Encourage wild ideas. Think outside the box.
3. Build on the ideas of others. No “buts,” only “ands.”
4. Go for quantity. More is better! Make quantity your goal.
5. One idea at a time. Let others have their say.
6. Stay focused on the topic.
7. Be visual. Sketch your ideas.
8. Include a headline for each concept.
9. Keep it short. Save conversations for later.
TIP Designate a facilitator for the session who is charged with keeping the group on track. You should also choose an approach for documenting your ideas. You can assign a scribe to visually document the solutions called out by the team. Or you can take an “all in” approach, with each person verbally sharing and writing down their own ideas on sticky notes.
Catalyst Method: Concept Sheets
56 | Innovators’ Guidebook
IMAGINE & MODEL
IDEATION
Leave your inhibitions at the door!There is no such thing as a bad idea when ideating! Be comfortable sharing half-baked, crazy ideas. And stay conscious about recognizing and putting aside non-constructive thoughts. It may feel counterintuitive at first, but do your best to proactively encouraging unrealistic ideas—as strange as it may sound, the best ideas are often born out of the very worst.
Watch out for group-thinkGroup-think is a phenomenon that can occur when decision-making groups seek to avoid conflict. Groups with one particularly respected or vocal member are very susceptible to this behavior, as participants often agree with an influential leader. As group-think increases, the quality and diversity of ideas decreases!
You can diagnose group-think by recognizing these common symptoms: conforming behaviors, rationalization, stereotyping, self-censorship, pressure to agree, and the presence of the
“thought police” in the group.
The best way to break out of group-think is to recognize that it is happening and to structure a series of exercises designed explicitly to stimulate differing opinions. Revisit the nine rules of brainstorming to try to help team members feel “safe” expressing divergent views.
SYMPTOM CHECK Have you observed that your team is following ideas of a more outspoken member?
Diagnosis: Your team may be suffering from
“group-think”.
Treatment:Structure exercises to bring out different opinions and revisit the nine rules of brainstorming.

Center for Care Innovations | 57
There are lots of different ways to brainstorm…Warm up with a crazy brainstormImagine there are no constraints whatsoever. Forget about being practical. How do you imagine the situation might work under these conditions? What unreal, crazy ways can this be accomplished? This brainstorm is useful for getting out of the mindset of constraints and remembering the limitations of the system. It’s also great to get inspiration—yes, it might be crazy, but is there any truth here that we can take away from this?
Explore constraints with ideal brainstormsWhat do we envision as the ideal situation for this area? What specific attributes make this situation ideal? How would the stakeholders feel/behave in this situation? This is great for inspiration and getting everyone on the same page as to what they are trying to achieve.
Get inspired by analogous brainstormsIn many ways, this is one of the bread-and-butter innovation tools. How do we see other industries or entities tackling similar issues or achieving
IMAGINE & MODEL
IDEATION
the results we want? Another way to use this technique is to ask: where do we see the same problem and why is that industry failing to solve it? Analogous brainstorming is great for getting inspired by the ways things work (or failing) elsewhere and seeing possible blind spots in your own processes.
Explore blind spots with sabotage brainstormsWhat are all the ways we can fail and NOT meet the need? What ways can we think of that will not give the result we want? How can we design this process that will make it fail miserably? This can help with outlining risk factors for the success of a process, uncovering the possible blind spots of risk factors (“wait, that’s how it’s done now!”) or even just feeling free to create something silly—which could be used to unleash the mind when things get stagnant.
Act out ideas with bodystormsCreate a set—or take your team to a real environment harboring the process you are redesigning. Bring artifacts, act out your user’s journey, and generate ideas on the fly in this life-sized brainstorm.
The more ideas, the better. If you think you were successful coming up with 20 ideas, then dare yourself to come up with 80 next time. And when you get to 80 ideas, try for 200.”

58 | Innovators’ Guidebook
IMAGINE & MODEL
IDEATION
SYMPTOM CHECK Do you find yourself thinking that your idea or someone else’s just won’t work?
Diagnosis: You are suffering from the “No, but…” (aka “devil’s advocate”) syndrome.
Treatment: Be patient. There will be time later on to dissect each idea for feasibility. Focus on generating ideas and find inspiring things to take even from the crazy ones.
Come back with fresh eyes
What should you do if you run out of ideas?
One idea for getting your creative juices flowing is to impose a temporary constraint on the team. For example, you might ask yourself questions like, “What if our solution had to be made specifically for the morning?” or “How would Nike do this?” or “What if money was not an option?” Use these temporary filters only for as long as they’re useful.
I was able to generate many ideas after walking away from the problem for a while.

Center for Care Innovations | 59
IMAGINE & MODEL
IDEATION
Being self-conscious is the enemy of ideation!
Celebrate half-baked ideas
The problem that I faced when ideating is I become overly concerned about how my ideas will be perceived. Most of my ideas never leave my mind because of my internal calculations and scrutinizing.
My teammates were helpful in processing half-baked ideas. Once I shared them, people were able to elaborate on them. This ‘concept/comment’ loop was critical in sparking other ideas.
Judgment is the “cooler” for ideation!
We deferred all judgment during brainstorming and went for quantity. The trick was not to give any idea more than a few seconds of our time when it was stated and documented. We quickly moved on to other ideas until we were ready to converge or begin evaluating possible solutions.
Involving outsiders
Asking another team to join our brainstorming session was great. I think it helps to get an outside perspective because it forced us to explain our problem simply but effectively so that the other group’s contributions would be productive. It felt good that they were so engaged in offering ideas—they really wanted to help us.

60 | Innovators’ Guidebook
IMAGINE & MODEL
IDEATION
Narrow Down IdeasAt this point, you will have generated many ideas. How do you pick the ones to prototype? Before worrying about feasibility, get the ideas you are excited about into the hands of users.
TECHNIQUES TO NARROW
Idea morphing Visually represent your ideas (e.g., by writing them on sticky notes) and then look for synergistic ways to reduce the total number by combining entire ideas or selectively mixing elements of weaker ideas to form a stronger one.
Sticky note voting Each team member gets three sticky notes to place next to the ideas that are most appealing to them.
Four category voting Choose one or two ideas from the following four categories: (1) the rational, (2) the most likely to delight the user, (3) the long shot, and (4) the darling (most likable to the team).
Bingo selection Select ideas that inspire you to build different kinds of prototypes—a physical, digital, and experience prototype.
2×2 Decision Matrix A Decision Matrix is a useful way to prioritize ideas with teammates. Choose criteria to label the axis and plot ideas to visualize what is important.
FEELING STUCK?
Don’t debate—test! If you can’t agree on which ideas to prototype, let your users decide—build rough versions of ideas and get user feedback.
Toolbox Download: Decision Matrix
TIPLet go of “my idea.” One great advantage of our team was that no one was too personally invested in any single idea. So we were able to try a few possibilities and openly discuss them.

Center for Care Innovations | 61
WHAT?
A physical, interactive representation of your solution. Creating a series of prototypes allows you to advance your thinking about each element of the solution and, eventually, how they will come together to address your problem. A prototype also provides a mechanism for actively engaging users in evaluating and guiding aspects of the solution as they interact with these physical models.
WHY?
The point is to get feedback on how well your solution is—or is not—solving the need of your users. The value of prototyping is in testing an idea early before a lot of time or resources are invested in it.
• Build to think. Creating rough representations of your solutions will further your understanding of what the solution might look like.
• Get answers. The most basic prototypes enable you to test the functionality of an idea (will it work?). More sophisticated prototyping will get deeper feedback by testing different aspects.
• Gain more empathy. By observing how your users interact with your prototype, you can get closer to understanding how to meet their needs.
A picture is worth a thousand words. A good prototype is worth a thousand pictures.–Tom Kelley (innovation guru)
IMAGINE & MODEL
PROTOTYPING
• Get unstuck. Teams can easily get bogged down with conflicting opinions about different aspects of an idea. Prototypes help advance these discussions by making them more concrete and eliminating miscommunication.
HOW?
Initially, a prototype is not a fully-functional product or service. Instead, it expresses a particular aspect of an idea the designer wants to explore further. These prototypes should be made quickly, using simple designs and surrogate materials so you can rapidly and inexpensively accumulate insights. Over time, through multiple iterations of the prototype–test loop, your models will become more refined on their way to representing a complete functional solution.
Here’s how to get started:
1. Identify the idea you want to prototype. Break it down into separable, buildable, testable components and decide which ones you want to test.
2. Brainstorm different ways to represent the aspects you want to test.
3. Build your prototypes fast, cheap, and in low-fidelity.
Agenda WEEK 11
� Choose which aspects of your ideas you will prototype
� Create an interactive prototype for each idea
� Make arrangements for prototype testing with users and stakeholders
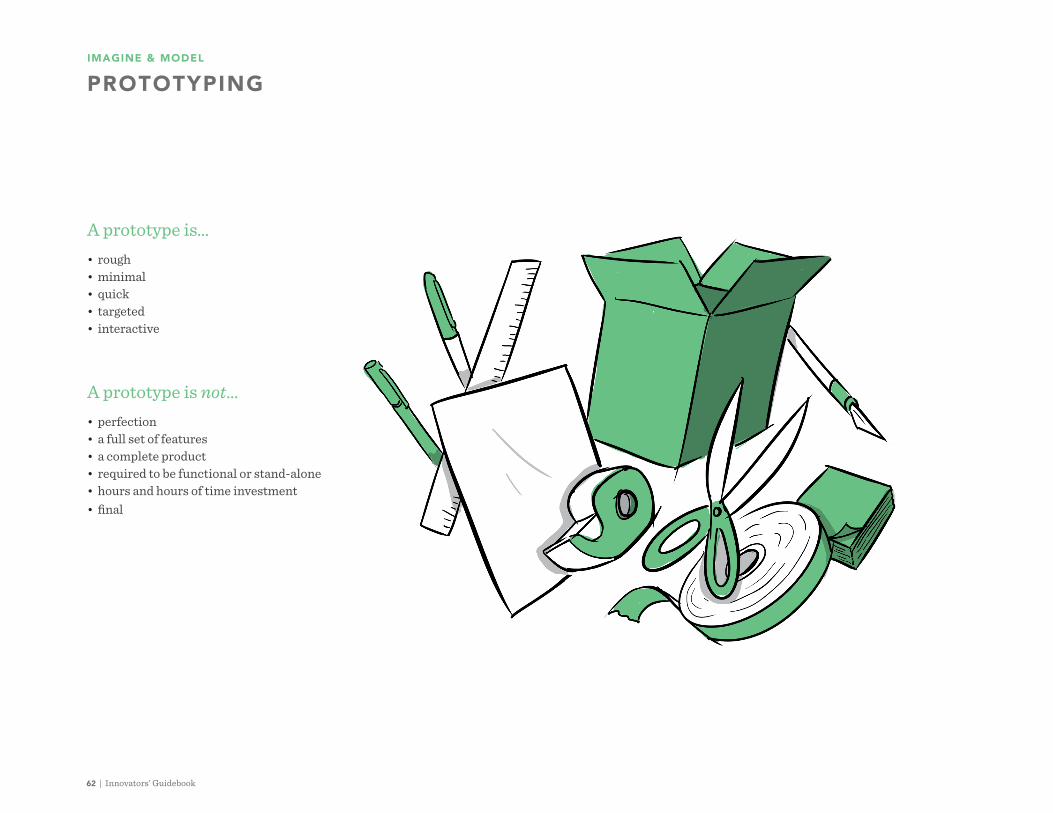
62 | Innovators’ Guidebook
IMAGINE & MODEL
PROTOTYPING
A prototype is…• rough• minimal • quick• targeted• interactive
A prototype is not…• perfection• a full set of features• a complete product• required to be functional or stand-alone• hours and hours of time investment• final

Center for Care Innovations | 63
“It is often very easy to confuse ideas and prototypes. It took us quite a bit of time to understand the concept that our users should be able to ‘interact’ with the prototype. Once we got over this challenge, the experience of building and sharing our prototype with users proved to be a tremendously rewarding experience.”
A PHYSICAL OBJECT
Cardboard, foam core, glue, paper, markers— use these simple materials.
IMAGINE & MODEL
PROTOTYPING
A USER INTERFACE
Paper and pen sketches of sequences of screen shots can take your user through an experience navigating a digital interface.
A MINIATURE SET
Model railroads and doll houses are back! Use foam core and push pins to create a scale model of the space you are innovating in. Go through the process to find pitfalls. Get your users to show you how they would behave in this space. Give them materials and have them build what they would like to see.
ROLE-PLAY
Create a life-size set—or go to the actual environment and modify it with simple materials to be the way you envision it. Act out all the steps of the process. Bring in your users and have them navigate this new environment.
STORYBOARD
Illustrate the distinct steps of your user’s journey with rough sketches. Use them to communicate your vision of the solution to others. Keep the steps modular so users can rearrange the sequence and have blank panels handy to add new steps to the journey or sketch out alternative scenarios.

64 | Innovators’ Guidebook
Tips for starting your prototypingFail Quickly, Fail Cheaply There are two opposing purposes to prototyping: Will it work? and How can it fail?
Building a minimal prototype that represents a feature you want to test quickly and cheaply allows you to move on before investing a lot of resources.
Prototype for interaction A prototype will give the most meaningful insights when a user can interact with it in a way that is close to the final version of the solution. So, even if you are testing an aspect of the final solution, aim to make it interactive.
Break it down As tempting as it might be to create a complete version of the final solution, building a separate prototype for different aspects of the solution will give you more insight into what works for your users.
IMAGINE & MODEL
PROTOTYPING
TIP The less sophisticated the prototype looks, the easier it is for users to provide constructive feedback.
Want to make it even easier? Give your users a choice: create two versions of the same pro-totype. Why? It is much easier for users to tell you they prefer one over the other instead of telling you what they don’t like about one prototype.
Identify what you want to test with each version of your prototype. Each prototype should be designed to answer a particular question when tested.

Center for Care Innovations | 65
IMAGINE & MODEL
PROTOTYPING
Prototyping Myth 1You can easily prototype a product but you can’t prototype a service—you just need to launch the whole thing to test whether it works.
It may be true that testing the design of a water bottle may be more intuitive. But services can be broken down into prototype-able components as well. Look at the example in the next chapter. To make things easier, prototyping can test an analogous behavior, not only the actual behavior in the final context. For example, it can test whether patients like to share their struggles with a chronic disease with fellow patients—without ever creating a functional virtual platform they might eventually use.
Catalyst Method: Service Prototype
Catalyst Method: Storyboards
Catalyst Method: Paper Models

66 | Innovators’ Guidebook
Testing an iPad application with foam core and paper
IMAGINE & MODEL
PROTOTYPING
Prototyping Myth 2You need to hire a designer or a programmer to get any meaningful feedback for digital offerings.
There is so much valuable feedback you can gather with the simplest of prototypes made out of paper and glue. Scrappy prototyping and smart planning can give you the feedback you need to move to the next step. Prototypes do increase in complexity—but they do that through rounds of testing.
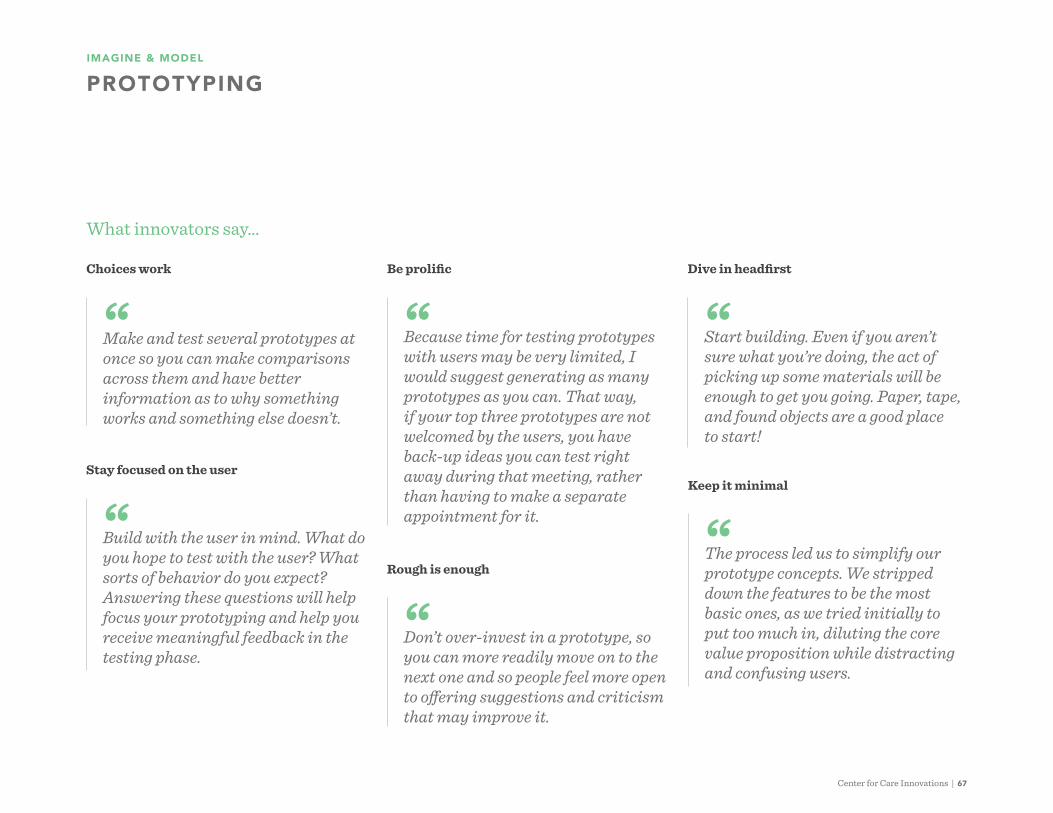
Center for Care Innovations | 67
What innovators say…
IMAGINE & MODEL
PROTOTYPING
Choices work Be prolific
Make and test several prototypes at once so you can make comparisons across them and have better information as to why something works and something else doesn’t.
Because time for testing prototypes with users may be very limited, I would suggest generating as many prototypes as you can. That way, if your top three prototypes are not welcomed by the users, you have back-up ideas you can test right away during that meeting, rather than having to make a separate appointment for it.
Dive in headfirst
Keep it minimal
Start building. Even if you aren’t sure what you’re doing, the act of picking up some materials will be enough to get you going. Paper, tape, and found objects are a good place to start!
The process led us to simplify our prototype concepts. We stripped down the features to be the most basic ones, as we tried initially to put too much in, diluting the core value proposition while distracting and confusing users.
Rough is enough
Don’t over-invest in a prototype, so you can more readily move on to the next one and so people feel more open to offering suggestions and criticism that may improve it.
Stay focused on the user
Build with the user in mind. What do you hope to test with the user? What sorts of behavior do you expect? Answering these questions will help focus your prototyping and help you receive meaningful feedback in the testing phase.
68 | Innovators’ Guidebook
IMAGINE & MODEL
PROTOTYPING
TIP The hardest part is getting started. So, don’t delay! A common prototyping mantra is
“Fail fast, fail often!”
Moving on…Don’t get attached!
Teams almost always struggle at the onset of the prototyping stage. In general, they spend far too much time talking about which solution, or aspect of a solution, to build. If you wait too long before you start creating, you have a tendency to fall in love with the idea(s) you’re discussing. Once you get emotionally involved with the solution or its key features, you won’t want to see your baby fail. The risk is that you may start defining test conditions that will ensure the model succeeds.
Conversely, when you jump in and start building prototypes more readily, you’re far less likely to become wedded to any given feature or solution.
You don’t have to see the whole staircase, just take the first step.—Martin Luther King, Jr. (activist)
Through the building process, you advance your thinking and more quickly discover the value of the “letting go” process associated with rapid iterations of the prototype–test loop.
As you begin getting consistent, positive feedback from users about certain aspects of your solution, that’s the time to start thinking about “going steady” with an idea. Be on the lookout for those elements that are brilliantly received—they’re the ones that deserve your attachment (and are worth pursuing!).
Center for Care Innovations | 69
IMAGINE & MODEL
PROTOTYPING
Strike a balance!Prototypes are explicitly intended to allow users to experience some aspect of your solution (not have you tell them about it!). In designing and building a prototype, you need to be sure the model is well-developed enough to support the target user experience when it’s time for testing.
On the other hand, remember that, at its core, each prototype is little more than a prop that’s meant to simulate a specific interaction. Be careful not to over-invest in terms of your time and energy. Ask yourself frequently, “What is the minimum we have to build to get the key idea across?”
This can be a tricky balancing act often requiring a bit of trial and error. Teams usually get the hang of it after building their first few prototypes.
Prepare to come back here again…Prototyping and testing (the next step in the design thinking process) are part of a highly iterative, frequently-repeated loop. Prototyping gets your ideas out of your head, while testing reveals users’ explicit, unspoken, and perhaps even subconscious requirements, preferences, and decision-making criteria. Allowing yourself to be guided by frequent user feedback to build what works can save you a lot of energy and resources.
Once you build your prototypes, it’s time to test them. Press forward to the next step in the innovation process!

Share what you’re working on early and often. The current mantra in software startups is: “no concept survives its first contact with the customer.” That’s because new ideas need to be seen and tested by those you’re designing for. The feedback, much of it constructive, will help you make the concept better by shaping it in response. You don’t need to agree or disagree with any of the feedback—you just need to hear it. People who are unable to receive all kinds of feedback to make their work better will struggle with the process of innovation. Don’t make the mistake of keeping your work a secret. Learn to share rough ideas early and freely, striking up conversations with others, asking what they think, how they might improve it, or what they would advise. You’ll get great support for your effort because you engage and listen to others’ ideas.
TEST & SHAPE
70 | Innovators’ Guidebook
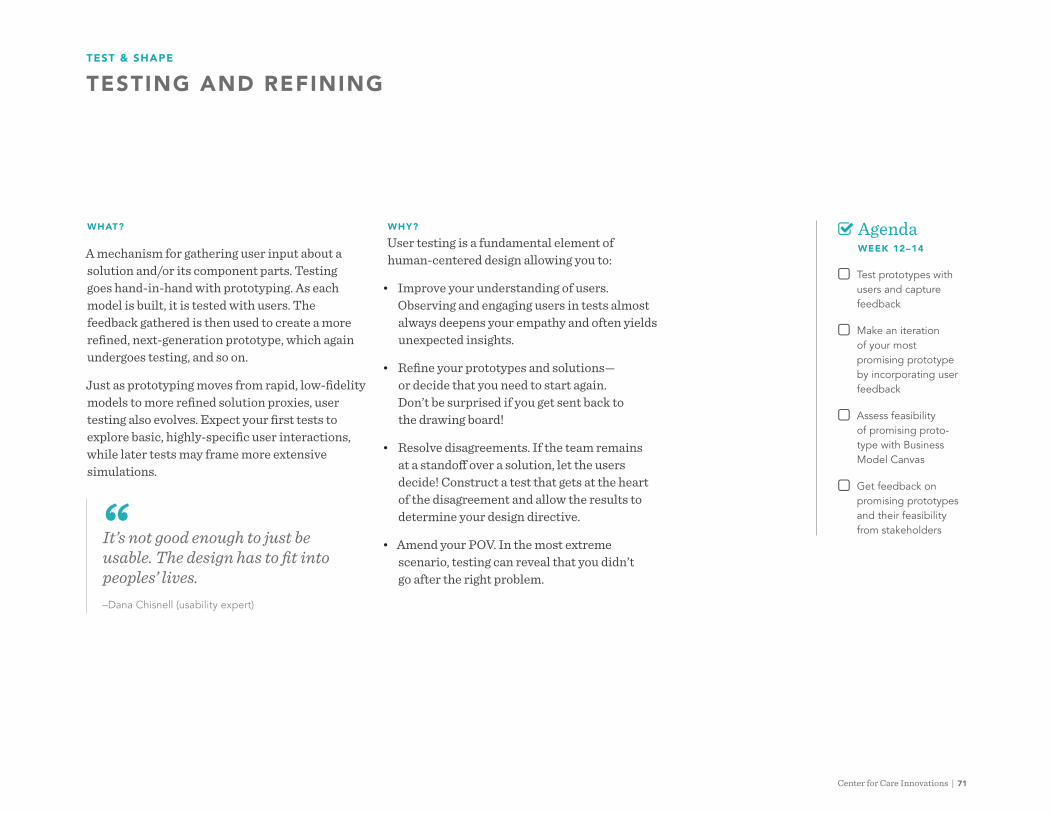
Center for Care Innovations | 71
WHAT?
A mechanism for gathering user input about a solution and/or its component parts. Testing goes hand-in-hand with prototyping. As each model is built, it is tested with users. The feedback gathered is then used to create a more refined, next-generation prototype, which again undergoes testing, and so on.
Just as prototyping moves from rapid, low-fidelity models to more refined solution proxies, user testing also evolves. Expect your first tests to explore basic, highly-specific user interactions, while later tests may frame more extensive simulations.
TEST & SHAPE
TESTING AND REFINING
WHY?
User testing is a fundamental element of human-centered design allowing you to:
• Improve your understanding of users. Observing and engaging users in tests almost always deepens your empathy and often yields unexpected insights.
• Refine your prototypes and solutions— or decide that you need to start again. Don’t be surprised if you get sent back to the drawing board!
• Resolve disagreements. If the team remains at a standoff over a solution, let the users decide! Construct a test that gets at the heart of the disagreement and allow the results to determine your design directive.
• Amend your POV. In the most extreme scenario, testing can reveal that you didn’t go after the right problem.
Agenda WEEK 12–14
� Test prototypes with users and capture feedback
� Make an iteration of your most promising prototype by incorporating user feedback
� Assess feasibility of promising proto-type with Business Model Canvas
� Get feedback on promising prototypes and their feasibility from stakeholdersIt’s not good enough to just be
usable. The design has to fit into peoples’ lives.–Dana Chisnell (usability expert)
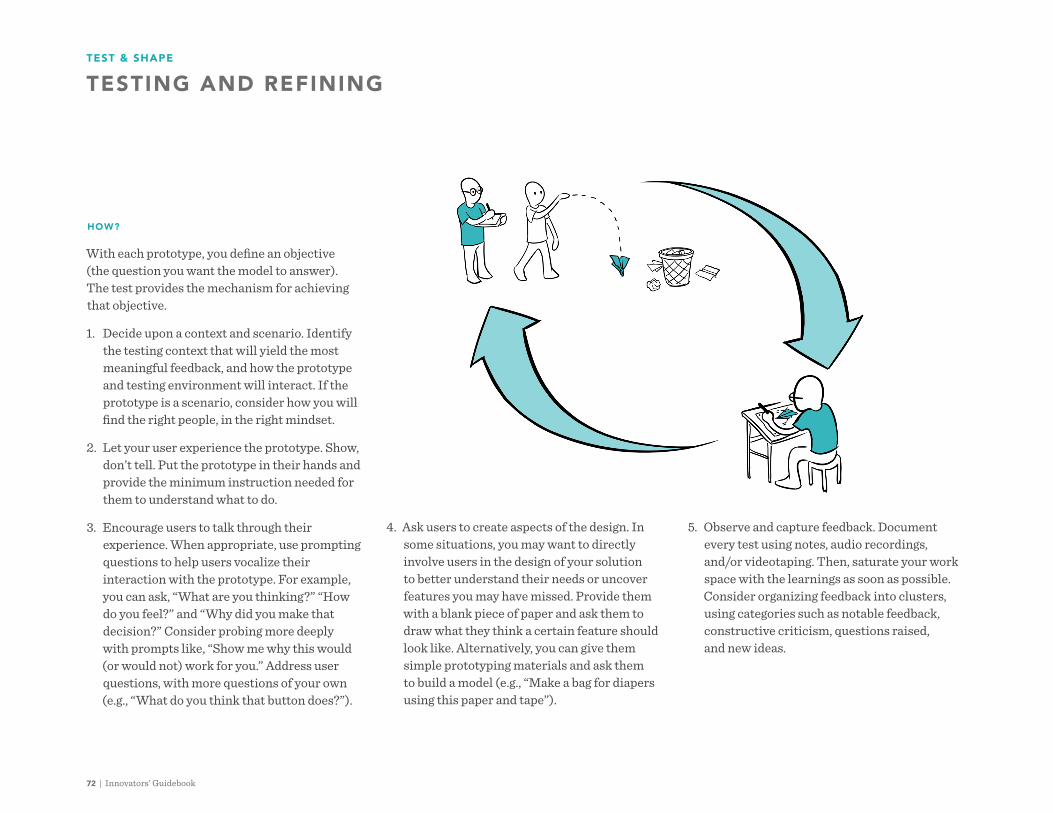
72 | Innovators’ Guidebook
HOW?
With each prototype, you define an objective (the question you want the model to answer). The test provides the mechanism for achieving that objective.
1. Decide upon a context and scenario. Identify the testing context that will yield the most meaningful feedback, and how the prototype and testing environment will interact. If the prototype is a scenario, consider how you will find the right people, in the right mindset.
2. Let your user experience the prototype. Show, don’t tell. Put the prototype in their hands and provide the minimum instruction needed for them to understand what to do.
3. Encourage users to talk through their experience. When appropriate, use prompting questions to help users vocalize their interaction with the prototype. For example, you can ask, “What are you thinking?” “How do you feel?” and “Why did you make that decision?” Consider probing more deeply with prompts like, “Show me why this would (or would not) work for you.” Address user questions, with more questions of your own (e.g., “What do you think that button does?”).
4. Ask users to create aspects of the design. In some situations, you may want to directly involve users in the design of your solution to better understand their needs or uncover features you may have missed. Provide them with a blank piece of paper and ask them to draw what they think a certain feature should look like. Alternatively, you can give them simple prototyping materials and ask them to build a model (e.g., “Make a bag for diapers using this paper and tape”).
TEST & SHAPE
TESTING AND REFINING
5. Observe and capture feedback. Document every test using notes, audio recordings, and/or videotaping. Then, saturate your work space with the learnings as soon as possible. Consider organizing feedback into clusters, using categories such as notable feedback, constructive criticism, questions raised, and new ideas.
Center for Care Innovations | 73
We will set aside two hours during a time when the urgent care center is not as busy. We will draw and set up signs and arrows with instructions in English and Spanish and four different tables. We will have a staff member at each table to ask them about level of pain, location of pain and check them in.
We will see whether staff-solicited responses about pain intensity and location correspond to the line each patient self-selected.
We will get qualitative feedback after the patient has received care—or in the interval of waiting for care—on how they felt about this process.
Making a planHow to approach testing for the first time?
• Decide on the idea you want to test.
• What is the aspect of the idea you want to focus on?
• Who are your testers?
• How will you test that aspect?
• What is the readout of your test?
• How will you get qualitative feedback?
EXAMPLE
A physical experience testing planWe’d like to test a new way for patients to self-triage when they come to urgent care. They would go directly to the relevant line based on degree of pain and location of pain.
The aspect we want to test is the ability of patients to independently make these calls without staff navigating them.
Our testers will be all the patients that walk through the door during a set period of time.
TEST & SHAPE
TESTING AND REFINING
Catalyst Method: User Feedback with Prototypes
Catalyst Method: Rapid Experiments

74 | Innovators’ Guidebook
EXAMPLE
A virtual experience testing planWe’d like to test the idea of a last-minute auction for an available appointment by sending a text message to our patients.
We’d like to test how users feel about the notification about an available appointment.
We will approach patients in the waiting room or patients leaving an appointment who might have time to chat.
We will prepare a script of the text messages we plan to test. When approaching patients, we will ask permission to play out the scenario with them in real-time and ask for a phone number to text. We will use our own phones and send a text message to the patient’s phone. We will follow up with text messages as planned in our script. If the patient is not able to receive a text message at the moment, we will bring sketches of phone screenshots with the text messages and ask the patient to walk us through how they would respond to such messages. We will give the patient a pen to write down their responses on the mock screenshot.
We will observe whether the idea might work for these patients, whether our messaging is clear,
and whether the patient can respond without training in a way that would be productive for this service.
Most of this session is solicitation of qualitative feedback. We will ask a lot of “Why’s?” and aim to understand what the user feels and thinks about this approach.
When you accumulate sufficient feedback from this low-resolution test and have promising results, you can proceed to a more sophisticated test—an experiment.
EXAMPLE
A virtual experience experimentWe’d like to test the idea of a last-minute auction for an available appointment.
The part that we think is most likely to make the whole service fail is the real-time notification. So, it will be important to test whether our way of notifying patients about a last-minute opening will actually reach them.
We will choose 10 people who tried to book an appointment for this week but could not get in and are now scheduled at a later time.
TEST & SHAPE
TESTING AND REFINING
We will send a text message to these 10 people. The message will read: “This is a message from your clinic. We can see you today at 2pm. Please reply YES if you can make it or NO if you want to keep your existing appointment.” We will allocate a clinical staff member who will actually be able to see these patients should they respond positively to the message.
We will note how many replies we get and how fast upon sending this message we received a reply.
We will arrange a phone call with these individuals (or see them in person after their future appointment) to find out how they felt about the notification. If they answered, what went through their mind? What would have made it easier for them to respond? If they had not answered, why not?

Center for Care Innovations | 75
Testing is where the rubber hits the road in the design thinking process…
TEST & SHAPE
TESTING AND REFINING
TIP Find ways your prototype can fail. Think of it: when you are not there, what if your offering fails? If it does, wouldn’t you like to know as soon as possible all the ways it can fail? Testing doesn’t just test how well the offering is liked and meets the need—but also how it can fail to meet the need. The good news is—you can rebuild it and make it not fail.
Testing our prototypes allowed us to see what the user saw.
The most rewarding part of the process was seeing a patient actually respond to our solution.
It allowed us to observe whether the prototype was innately of interest to patients, rather than asking them.
We always prototyped as if we knew we were right, but we tested as if we thought we were wrong—testing provides the chance to refine our solutions and make them better.
76 | Innovators’ Guidebook
Whether good or bad, user feedback is essential to making progress toward a meaningful solution to your problem…
TEST & SHAPE
TESTING AND REFINING
Our testing helped us understand what parts of the interface worked well and which were confusing.
The most surprising aspect of the final solution was that we took off so many features which we thought were absolutely necessary. When we tested our final prototype, we found that our users liked it much better than the one with so many other features.
The insight that our prototype was ‘cluttered’ made a lot of impact on our solution.
We had to figure out how to deal with feedback that was counterintuitive. It forced us to take a bold step on our product, which was a really scary thing to do, but it made us feel more confident in our thinking and the value the solution provided to users.
Center for Care Innovations | 77
TEST & SHAPE
TESTING AND REFINING
TIP #1 While group user testing can be an effective way to get feedback from larger numbers of people in a shorter period of time, be aware of group dynamics! Sometimes people will be biased by what others say, or they won’t feel comfortable being honest if their opinion conflicts with someone with a higher rank.
TIP #2 Testing a prototype in familiar surroundings is helpful, especially with early versions. But as the prototype evolves, it becomes increasingly important to test with your targeted users and under circumstances that resemble the imple-mentation environment as closely as possible.
There are many different approaches to user testing…
We tested our prototypes through one-on-one interactions that were quite opportunistic. We spoke with whomever we could find in the clinic, and also took the prototype out in the areas where we lived. One teammate went to a big grocery store in order to get feedback from our target population.
I think we got the most useful feedback when we simply watched potential users interact with the interface, to see what they understood, how they used it, what parts they were interested in, and where they got stuck.

78 | Innovators’ Guidebook
TEST & SHAPE
TESTING AND REFINING
SYMPTOM CHECK Do you find yourself
“selling” the prototype to your users?
Diagnosis: You might have become too attached to a prototype you really want to work.
Treatment: Set an expectation in your team that you are expected to fail a few times before you tap into something that works.
TIP The more tests, the better! While eventually user testing will reach diminishing returns, teams rarely fail from being thorough in the number and types of tests they schedule with their users.
Testing shouldn’t be an after-thought. Make sure you reserve plenty of time to share your prototypes with users.
We did not leave enough time for testing. By the time we reached out to the people that we wanted to use for testing, it was almost impossible to meet with them and incorporate their feedback in our final project.
I would line up people to test the prototype even before the prototype is complete. I found that getting on peoples’ calendars was one of the biggest challenges, and for that reason, it’s important to plan two steps ahead.
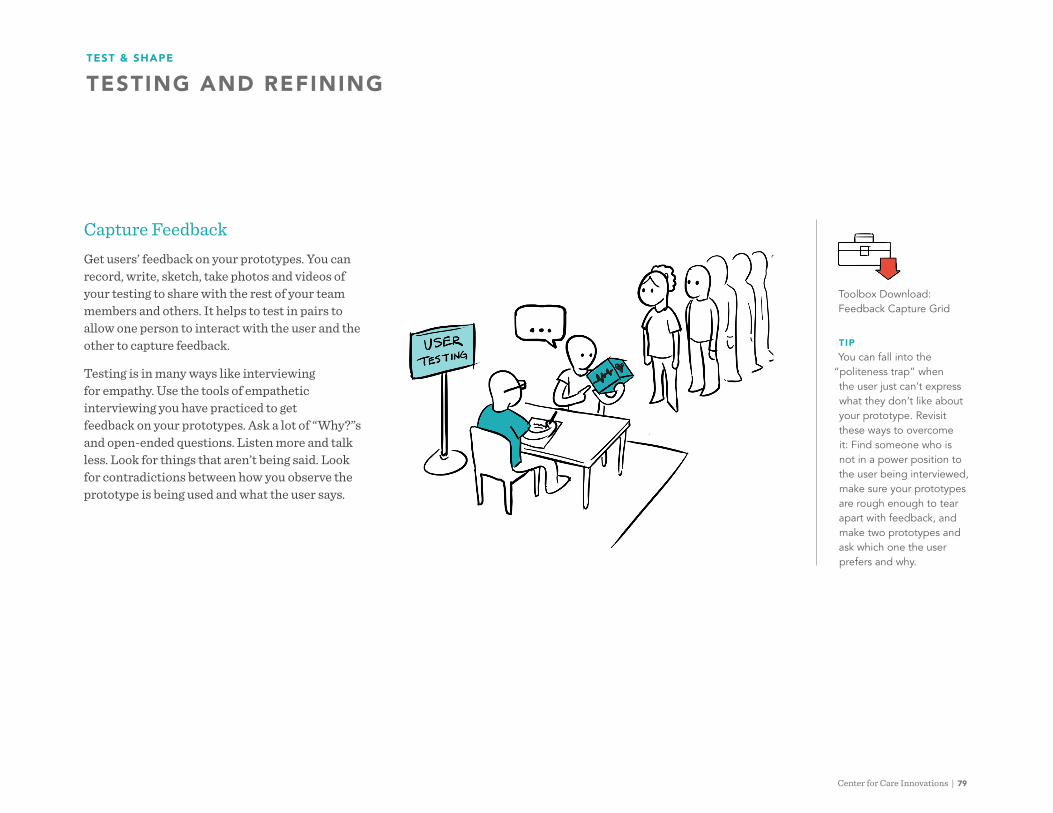
Center for Care Innovations | 79
Capture FeedbackGet users’ feedback on your prototypes. You can record, write, sketch, take photos and videos of your testing to share with the rest of your team members and others. It helps to test in pairs to allow one person to interact with the user and the other to capture feedback.
Testing is in many ways like interviewing for empathy. Use the tools of empathetic interviewing you have practiced to get feedback on your prototypes. Ask a lot of “Why?”s and open-ended questions. Listen more and talk less. Look for things that aren’t being said. Look for contradictions between how you observe the prototype is being used and what the user says.
TEST & SHAPE
TESTING AND REFINING
Toolbox Download: Feedback Capture Grid
TIP You can fall into the
“politeness trap” when the user just can’t express what they don’t like about your prototype. Revisit these ways to overcome it: Find someone who is not in a power position to the user being interviewed, make sure your prototypes are rough enough to tear apart with feedback, and make two prototypes and ask which one the user prefers and why.
80 | Innovators’ Guidebook
EXAMPLE
Fire Station Health PortalIn its efforts to help its partner determine an appropriate scope of services for its new clinics, the Fire Station Health Portal team developed a preliminary prototype based on a simple matrix concept that evaluated the
“potential severity” (x axis) of a condition and the “cost of treatment” (y axis).
They tested this early concept with a key stakeholder within the partner organization. As one team member described, “During the process, we allowed him to ask any questions as well as give us feedback. I think having the physical prototype and allowing him to interact with it worked well. It allowed us to observe first-hand how a future user might act. Most importantly, this engagement gave us confidence in our prototype and the idea that it hoped to achieve. It also influenced our perspective on our tool and in future iterations of the prototype.”
From here, the team entered an iterative prototype-test-prototype-test cycle that led them to their final design:
TEST & SHAPE
TESTING AND REFINING
“With our next version, we set out to make the tool manipulative and user-friendly. And so, we started with a corkboard prototype. We placed the medical conditions on push pins that could be easily moved, and we again color-coded them as screening, diagnosis, or treatment. We took this prototype to doctors, medical professionals, and the Alameda County Health Care Services Agency so they could rank the conditions based on different sets of axes and we could observe them interacting with the tool. We added more medical conditions after suggestions from our test users and improved usability by including a side board where users could easily pick up and displace pins.
With the third prototype, we sought to offer a more durable and professional tool. Some users had commented they felt somewhat childish or foolish with the corkboard version, so we strived to offer a more serious look to our tool and built it out of plastic using the Machine Shop on campus. This prototype featured a magnetic board that
Having a physical prototype worked well… it gave us confidence…
could also be easily manipulated. It also inspired us to name the tool Service Scope and develop an accompanying logo.
Although perhaps not unpredictable, our next prototype could be considered our most crazy because it opened another realm of possibilities and direction for our project. With some help, we developed a Java-based application for Service Scope. It mirrored the look and interactivity of our physical tool, but added an important data capture feature. The results were immediately fed into an algorithmic tool instead of having to manually add up the pins in each quadrant and then compute the results. Moreover, this prototype made widespread distribution and sharing of data much more manageable and realistic.
Overall, our prototypes got progressively more formal as the design process continued. The increased feeling of professionalism seemed to render legitimacy to our idea, which many users appreciated.”
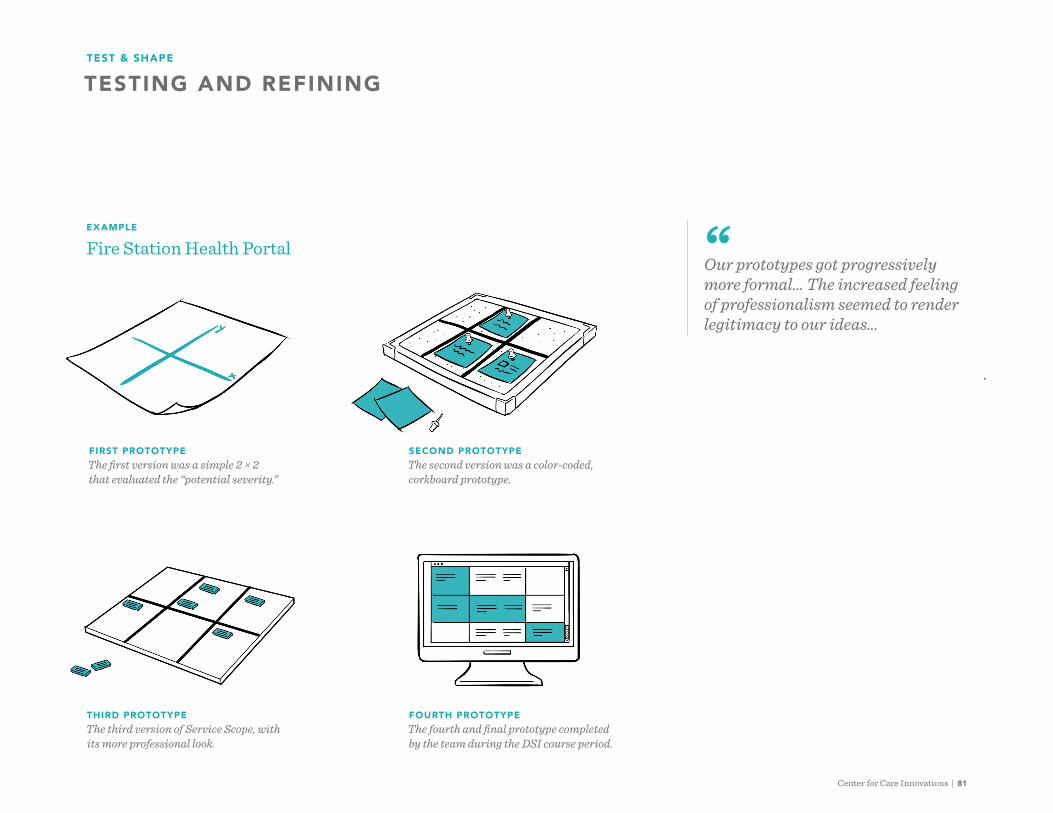
Center for Care Innovations | 81
TEST & SHAPE
TESTING AND REFINING
Our prototypes got progressively more formal… The increased feeling of professionalism seemed to render legitimacy to our ideas…
THIRD PROTOTYPE The third version of Service Scope, with its more professional look.
SECOND PROTOTYPE The second version was a color-coded, corkboard prototype.
FIRST PROTOTYPE The first version was a simple 2 × 2 that evaluated the “potential severity.”
FOURTH PROTOTYPE The fourth and final prototype completed by the team during the DSI course period.
EXAMPLE
Fire Station Health Portal

82 | Innovators’ Guidebook
Keep in mind this other advice as you prepare to test your prototypes.
TEST & SHAPE
TESTING AND REFINING
Ask more ‘why’ questions. A lot of times we received conflicting feedback from different users. In these cases, it would have been helpful if we had been more direct in asking for the reasoning behind their opinions. With this information, we could think more logically and completely about both sides of the feedback to arrive at the most appropriate conclusion.
The more authentic the audience for the test phase, the better.
Asking WhyIt can be uncomfortable to ask several “why?” questions in a row. In some cultures, it’s not customary for strangers to be so curious, and you may feel as though you’re being too intrusive. To feel more at ease, remember you are driven by the desire to understand your user so you can better serve them (if that’s not the case, you may need to rethink your approach!). It might also be helpful to experiment with different kinds of “why?” questions so the conversation flows more smoothly. For example, “I see that X is important to you. Could you tell me in what ways it is important?” “You mentioned you always go about Y this way. What other way might you consider doing Y?”
TIP Test your prototype with all the stakeholders, not just the solution’s direct user. Who are the decision-makers and other key partners that need to be onboard to make this work? Tailor how you test your solution with each party to better address what you need from them specifically.
Center for Care Innovations | 83
TEST & SHAPE
TESTING AND REFINING
Looking through a practical lensYour first rounds of prototype testing are to make sure that one of your solutions meets the need of the users. Once you have convincing feedback that you are on the right track, think about feasibility: how will users access this solution? How will you make it work? Whom do you have to partner with? How self-sustainable is it?
A helpful tool to brainstorm the practical aspects of your solution is the Business Model Canvas. Use it as a brainstorming tool to generate hypotheses about how you can make this work—and plan ways to test these hypotheses. This can involve talking to decision-makers and stakeholders in your organization, experts in the field, and other ways to get answers. Iterate on the hypotheses as you gather information.
Worksheet: Business Model Canvas
Catalyst Method: Business Model Canvas

84 | Innovators’ Guidebook
Moving onTesting can be disheartening at times!
During the testing stage, if you ever find yourself tempted to “sell” your idea to users by pointing out all of its incredible features, remember that failure fuels successful innovation. Collecting constructive feedback is far more valuable than inviting praise.
Testing is your opportunity to identify the “Achilles heel” of your solution in a low-risk way, before it becomes a deal-breaker!
BE EXHAUSTIVE
Structure your tests to explore how users interact with your design, but also craft them to uncover information that can affect user adoption. What would cause people to start using your solution? How will they find it? Can they afford it? How effective will the distribution channel you’re thinking about be in reaching your target users? Will key stakeholders agree to partner with you? Find ways to test every aspect of your solution with all parties who will play a role in getting it into the hands of the user.
TEST & SHAPE
TESTING AND REFINING
Master testing, and you’ll become an iteration Jedi!
Getting into the habit of testing ideas and acting on user feedback is a valuable skill set you’ll take away from this journey. The better you get at assessing user feedback, identifying the most relevant input, and using it to iterate your design, the more progress you’ll be able to drive on this and other innovation challenges.
If you’re ready to launch your solution, you’ll see that you have more iterative work ahead! You may have tapped into a great need and devised a great product or service to match. But to take flight (and keep soaring), your solution must continue to adapt with your users and their evolving needs. Make it happen!
Discouragement and failure are two of the surest stepping stones to success.—Dale Carnegie (self improvement pundit)
Put together a short, but compelling case for your project including the user need, the insight and proposed solution direction, summary of work to date, the real challenges you face, the investments necessary, and its ultimate value should you be successful. This pitch will be important for securing local support, partnerships, financial resources, and organizational commitments. The pitch should be short, but well-rounded and not just a description of the solution. Demonstrate your commitment to the project by being both an advocate of it as well as a good listener to those who help shape it. Make small progress and share it. People who see the idea moving forward will gain respect for it and interest in its success.
PITCH & COMMIT
Center for Care Innovations | 85

86 | Innovators’ Guidebook
WHAT?
The realization of the concept you developed. As your idea is developed and validated through the design thinking process, you should be devising a strategy to stimulate its uptake by key stakeholders/users.
Implementation can mean a number of different things, depending on the nature of your project. You can generate the solution yourself. You can outsource the development of the solution. You might work closely with an external organization to bring the solution to life. During the implementation stage you will begin to address funding and other challenges associated with releasing your idea “into the wild”!
WHY?
Without the creation and execution of an implementation plan, your good idea will never reach its intended audience or have its desired impact. Building a strong implementation plan is one of the most important things you can do to make sure your solution makes a difference!
Through a preliminary implementation of a beta product/service or a pilot roll-out of a new idea, you will also gather increasingly detailed user feedback you can incorporate into your solution to continue improving it. Moreover, the process
of identifying and gaining buy-in from funding partners and other key stakeholders provides an important foundation for bringing your solution to scale over time.
That said, every team faces an important decision at this stage of the design process. You must decide whether the need you identified and the solution you developed are compelling enough to warrant your continued effort.
HOW?
To implement, or not to implement? Revisit your values and expectations in relation to the project, and what you learned about the need, problem space, and solution through the design thinking process. What are the opportunity costs and credits if you decide to commit to an implementation path? Take time to reflect on these issues as you and your team decide whether to move your idea forward.
1. Define your approach. There are a number of potential options for moving forward. Brainstorm your options, taking into account the different elements of the Business Model Canvas.
2. The purpose of this exercise is to identify the risks and requirements of each implementation path and your likelihood
of success navigating each one. Highlight the highest risks and think of ways to mitigate them.
3. Build momentum and support. Find trusted mentors and supporters who can advise you through the decision-making process for creating your implementation plan. Then, spring into action!
Agenda WEEK 15–17
� Assemble user and stakeholder feedback
� Map out resources you have and need in order to implement the solution
� Revisit Process Map. Change to incorporate the new solution
� Prepare presentation and pitch
PITCH & COMMIT
DEVELOP AND LAUNCH

Center for Care Innovations | 87
There are lots of reasons why teams don’t implement their projects. By keeping these issues in mind, you may be able to avoid these potential pitfalls…
PITCH & COMMIT
DEVELOP AND LAUNCH
For our team, the main reason we didn’t continue working on our project was our lack of team cohesion.
Our team tried to address too many needs at the same time, so we didn’t have a clear path forward.
Team dynamics
Lack of focus
I wish I had a better idea of the organization’s limitations. Had we known these limitations, we would have revised our proposal to be something that was feasible given the partner’s budget and infrastructure, and aligned with its short-term organizational goals.
I think it is hugely important to know who all of the influencers are in the organization and what the organizational history is at the outset of the project. It’s easy to overlook a key decision-maker in a new project, and this was one of our pitfalls.
External constraints
Catalyst Method: Pitch Deck
Catalyst Method: Elevator Pitch
Catalyst Method: Solution Map

88 | Innovators’ Guidebook
Even though we didn’t want to think about ease of implementation in the beginning of the design thinking process, it would have been highly useful for us to do so as it might have changed which solutions we tested.
For teams that will stay involved in the implementation process, take some good advice from those who have come before you…
One issue that we focused on more as we started to prepare for project implementation was the issue of ‘flow.’ Any new solution has to integrate successfully into existing workflows or improve the flow in a way that’s beneficial to all stakeholders. I suggest that the teams spend time understanding the current workflow and analyzing how their solution fits in well before it’s time to get serious about implementation.
I would advise teams to gain a very clear understanding of the organizational goals and limitations. Before implementation, I would recommend running the solution by as many stakeholders as possible to catch any “show-stoppers” before your launch.
PITCH & COMMIT
DEVELOP AND LAUNCH
Worksheet: Process Map
TIP Get out of the building! When deciding whether to move forward with a particular plan to implement, identify the pos-sible “deal breakers” in your approach. Then, prototype and test these, just as you did your solution. For example, if implementation requires you to gain buy in from a particular company, speak with decision-makers in the organization to find out what it would take for them to come onboard, or try to sell your product or service to them and
see what happens!

Center for Care Innovations | 89
Moving on…A win-win situation Not every team will have the opportunity to take its solution forward. Sometimes this is because it’s not the right solution to address the need, or maybe it’s not the right need. In other cases, the need and solution may be strong, but the team and/or the organization face some barrier (e.g., a cultural or policy issue). Or, perhaps they simply don’t have the time, energy, or resources to pursue it.
Just remember your efforts weren’t in vain, even if your solution isn’t implemented. Think about all the learning that occurred (for you and your organization)! Having been through the design thinking process, you’re almost certainly a more aware individual, a more thoughtful analyst, and a better designer. And you can use these skills on future projects to make a meaningful impact.
PITCH & COMMIT
DEVELOP AND LAUNCH
For those who do have the opportunity to implement your solution, hold on to your hats! There are sure to be many twists and turns on the road ahead, but it’s an exhilarating ride!
A solid implementation plan requires plenty of strategic thinking and lots of hard work. But don’t expect to know exactly what to do. Use your network of mentors and other coaches to help point you in the right direction.
With the innovation process in your toolkit, there’s no telling what you might accomplish next. Go forth and innovate!

90 | Innovators’ Guidebook
Your team has now arrived at the end of the first stage of your innovation endeavor. During the preceding weeks, you have been hard at work defining and formulating the need, generating a plethora of ideas, and bringing several of them to life. Importantly, your user has been there with you throughout the entire process—from understanding the problem to shaping your prototypes with feedback.
If the need you have identified is strong and one of your prototypes meets that need well and in a feasible way, your team is ready to make preparations for launch. Be exhaustive about the resources you will need and the timeline for when it can happen.
Regardless of whether your team is moving forward with the solution, give yourselves a big hand. Not only have you learned a new way of thinking and approaching the problem—skills that will continue to serve you—but you have also learned a whole lot by going through this process as a team. Get ready to tackle new challenges!
CONCLUSION
THE SIX PRINCIPLES

Center for Care Innovations | 91
…a good negotiation where you first need to understand your opponents’ needs and their emotional connection to the situation, and then go through a range of potential solutions to find the one that satisfies both parties.
Going through the innovation process is like…At the beginning of the book, we made a point of telling you that your greatest learnings will come from the journey. Here are a few more examples of how students have described the innovation journey.
CONCLUSION
LEARNINGS
…dancing with a new partner. You learn to follow him, you try new moves, you find where the harmony lies for the two of you, all while needing to hear the music and not step on anyone’s feet.
…jumping into the deep-end of the pool. You want to completely immerse yourself in the project and get deep very quickly, rather than just staying at the surface.
…going up a steep hill. It takes a lot of effort and you don’t know what will be on the other side, but as you get closer to the top, you begin to see what comes next. Getting to the top is exhilarating.
…being in a spinning teacup at an amusement park. Sometimes, it feels like you are going around in circles and you don’t really know where you are headed. But eventually you get there and have enjoyed the experience.
…seeing and feeling your ideas, rather than thinking them.


![[Tutorial] Tifa's Bootleg](https://img.pdfslide.net/doc/110x75/55cf9768550346d033917a84/tutorial-tifas-bootleg.jpg)