Embed Size (px)
Citation preview
Rev 06/06/19 Page 1 of 4www.bmracing.com
Technical Support (866) 464-6553
1
2
3
Installa on Instruc ons81161
2015 19 FORD F 1502.7L, 3.0L, 3.3L, 3.5L, 5.0L ENGINE
Automa c Transmission
ITEM # PART # DESCRIPTION QTY.1 4001777-88 Shi Handle Body 12 2480446-88 Push Bu on Switch 12MM 13 3401652 8.5" Black Nylon Cable Tie 1
81161Rev 06/06/19 Page 2 of 4
www.bmracing.comTechnical Support (866) 464-6553
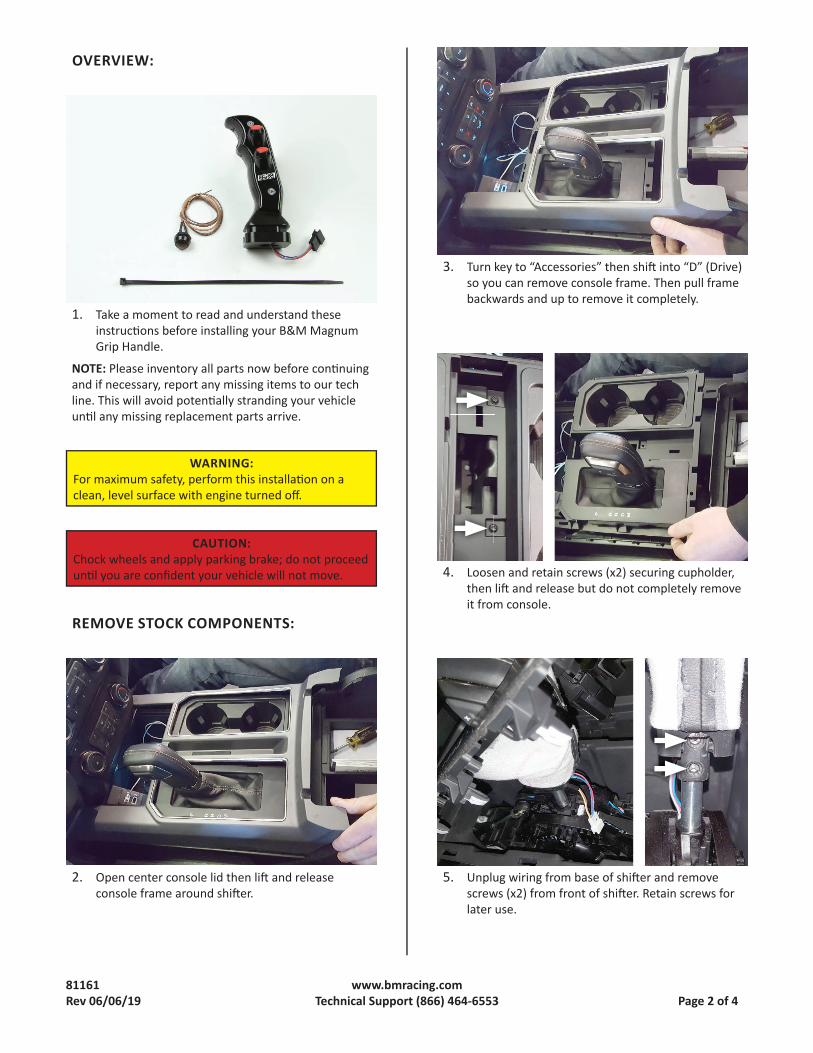
3. Turn key to “Accessories” then shi into “D” (Drive) so you can remove console frame. Then pull frame backwards and up to remove it completely.
4. Loosen and retain screws (x2) securing cupholder, then li and release but do not completely remove it from console.
5. Unplug wiring from base of shi er and remove screws (x2) from front of shi er. Retain screws for later use.
2. Open center console lid then li and release console frame around shi er.
REMOVE STOCK COMPONENTS:
OVERVIEW:
1. Take a moment to read and understand these instruc ons before installing your B&M Magnum Grip Handle.
NOTE: Please inventory all parts now before con nuing and if necessary, report any missing items to our tech line. This will avoid poten ally stranding your vehicle un l any missing replacement parts arrive.
WARNING:For maximum safety, perform this installa on on a clean, level surface with engine turned off .
CAUTION:Chock wheels and apply parking brake; do not proceed un l you are confi dent your vehicle will not move.
81161Rev 06/06/19 Page 3 of 4
www.bmracing.comTechnical Support (866) 464-6553
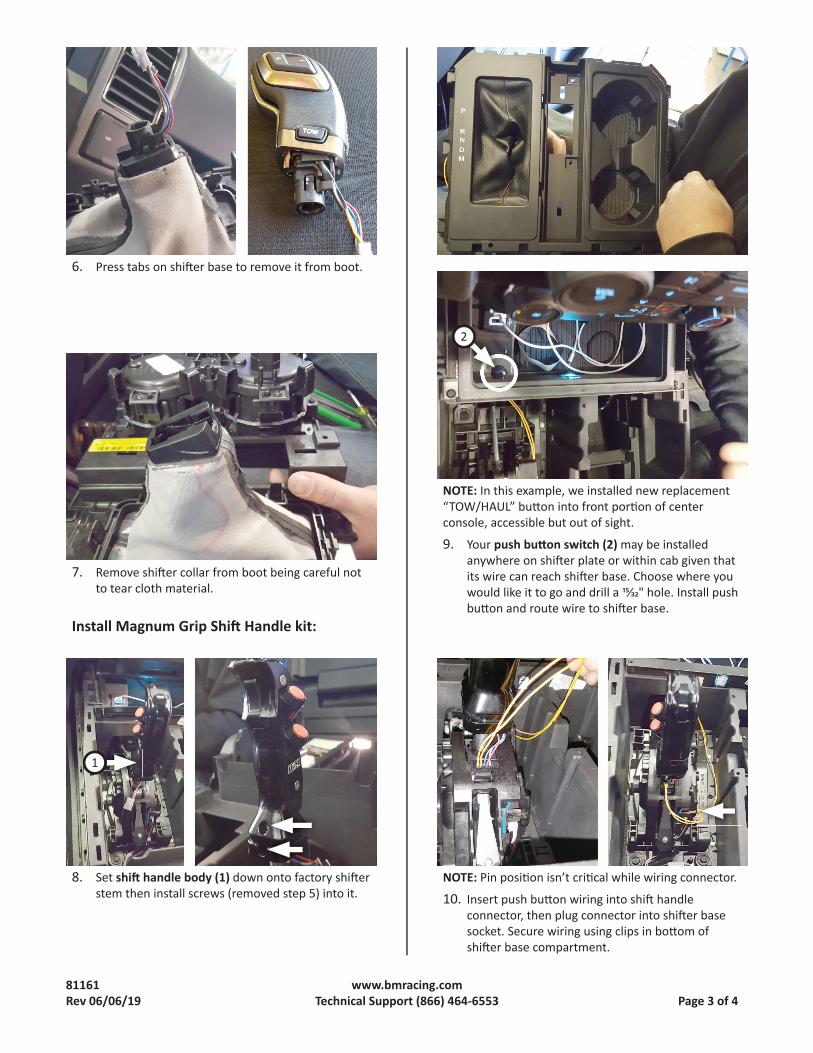
9. Your push bu on switch (2) may be installed anywhere on shi er plate or within cab given that its wire can reach shi er base. Choose where you would like it to go and drill a ⁄ " hole. Install push bu on and route wire to shi er base.
10. Insert push bu on wiring into shi handle connector, then plug connector into shi er base socket. Secure wiring using clips in bo om of shi er base compartment.
6. Press tabs on shi er base to remove it from boot.
7. Remove shi er collar from boot being careful not to tear cloth material.
8. Set shi handle body (1) down onto factory shi er stem then install screws (removed step 5) into it.
Install Magnum Grip Shi Handle kit:
1
2
NOTE: In this example, we installed new replacement “TOW/HAUL” bu on into front por on of center console, accessible but out of sight.
NOTE: Pin posi on isn’t cri cal while wiring connector.
81161Rev 06/06/19 Page 4 of 4
www.bmracing.comTechnical Support (866) 464-6553
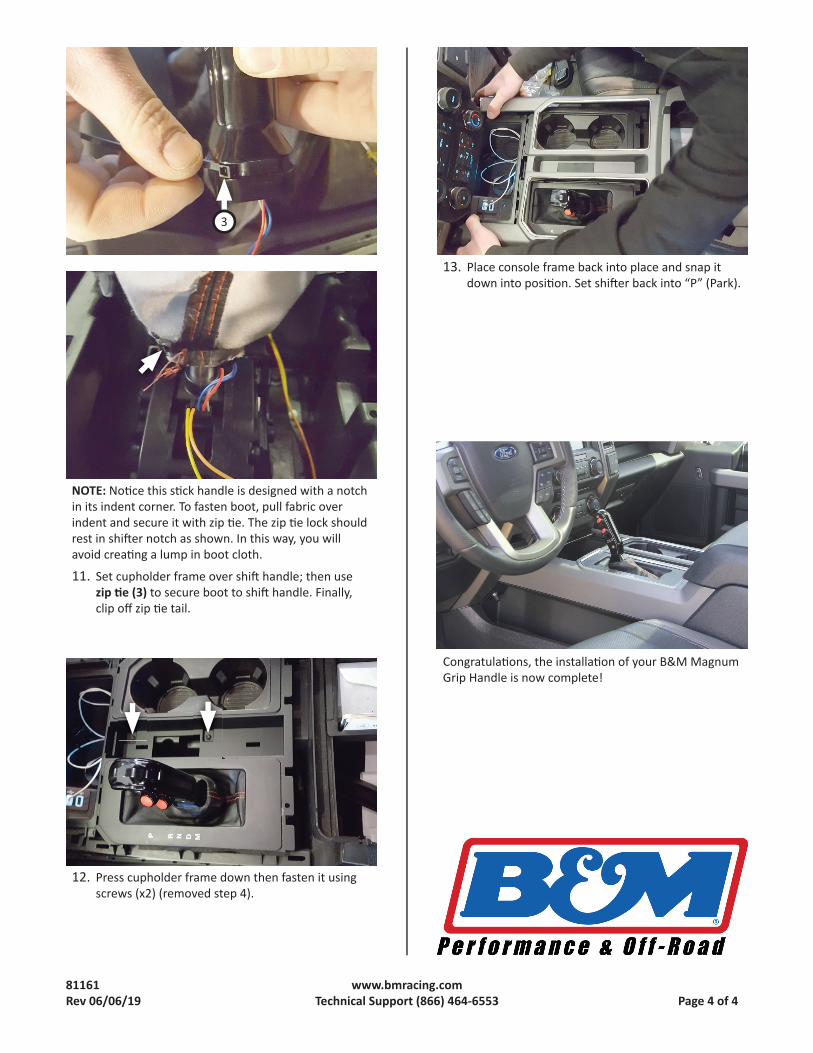
13. Place console frame back into place and snap it down into posi on. Set shi er back into “P” (Park).
11. Set cupholder frame over shi handle; then use zip e (3) to secure boot to shi handle. Finally, clip off zip e tail.
12. Press cupholder frame down then fasten it using screws (x2) (removed step 4).
Congratula ons, the installa on of your B&M Magnum Grip Handle is now complete!
NOTE: No ce this s ck handle is designed with a notch in its indent corner. To fasten boot, pull fabric over indent and secure it with zip e. The zip e lock should rest in shi er notch as shown. In this way, you will avoid crea ng a lump in boot cloth.
3