Embed Size (px)
Citation preview
Installation Guide NSi AutoStoreTM 6.0
Installation Guide – AutoStore 6.0
2
1/10 Copyright 2012 Notable Solutions, Inc.
TABLE OF CONTENTS
PREREQUISITES .............................................................................................................................................................. 3
INSTALLATION: UPGRADING FROM AUTOSTORE 5.0 .................................................................................................... 4
INSTALLATION: NEW INSTALLATION ............................................................................................................................. 8
LICENSING .................................................................................................................................................................... 17
GETTING STARTED ....................................................................................................................................................... 34
© 2012 Notable Solutions Inc. THE INFORMATION CONTAINED IN THIS DOCUMENT IS SUBJECT TO CHANGE WITHOUT NOTICE. NOTABLE SOLUTIONS INC. MAKES NO WARRANTY OF ANY KIND WITH RESPECT TO THIS INFORMATION. NOTABLE SOLUTIONS INC. SPECIFICALLY DISCLAIMS THE IMPLIED WARRANTY OF MERCHANTABILITY AND FITNESS FOR A PARTICULAR PURPOSE. NOTABLE SOLUTIONS INC. SHALL NOT BE LIABLE FOR ANY DIRECT, INDIRECT, INCIDENTAL, CONSEQUENTIAL, OR OTHER DAMAGE ALLEGED IN CONNECTION WITH THE FURNISHING OR USE OF THIS INFORMATION.
Installation Guide – AutoStore 6.0
3
1/10 Copyright 2012 Notable Solutions, Inc.
PREREQUISITES
Hardware
Windows operating system (OS) running on computer with at least a 2 GHz Processor
Minimum 2 GB of RAM is necessary but 4 GB or greater is recommended
Minimum of 10 GB of hard disk space
NIC Card
Software
Supported Windows operating systems:
Windows 7 (32\64 bit) Professional SP1 Windows 2008 R2 Standard\Enterprise SP1 Windows 2008 (32\64 bit) Standard \Enterprise – with the latest service pack
Windows 2003 R2 (32\64 bit) Standard\Enterprise – with the latest service pack
Windows 2003 (32 bit) Standard\Enterprise – with the latest service pack
Additional software:
Microsoft .NET Framework 3.5
Microsoft .NET Framework 4.0
Remaining prerequisites will be installed during the installation process.

Installation Guide – AutoStore 6.0
4
1/10 Copyright 2012 Notable Solutions, Inc.
INSTALLATION: UPGRADING FROM AUTOSTORE 5.0
1. If a previous installation of AutoStore exists on your system, you will need to uninstall this version of
AutoStore in order to continue with the installation of AutoStore 6. If you continue without uninstalling, you
will receive a notification and the installation will stop. Select “Finish” to continue.
Note that when upgrading from AutoStore 5.0 to AutoStore 6 many components have been moved to a
“Sunset” category. Components that are under this category will continue to be supported but will no longer
receive software updates. These components will not be provided with the default AutoStore 6 installation.
In order to install any of these components, you must use the Update Services option within the AutoStore 6
Process Designer to download and install.
Installation Guide – AutoStore 6.0
5
1/10 Copyright 2012 Notable Solutions, Inc.
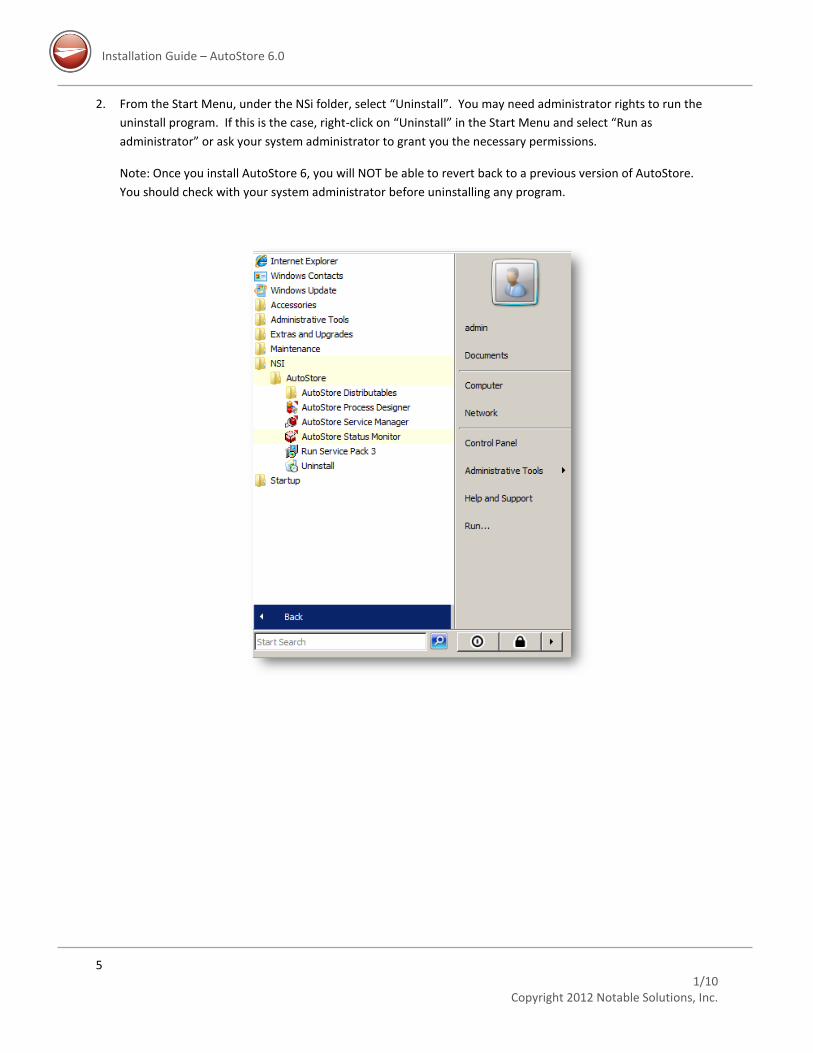
2. From the Start Menu, under the NSi folder, select “Uninstall”. You may need administrator rights to run the
uninstall program. If this is the case, right-click on “Uninstall” in the Start Menu and select “Run as
administrator” or ask your system administrator to grant you the necessary permissions.
Note: Once you install AutoStore 6, you will NOT be able to revert back to a previous version of AutoStore.
You should check with your system administrator before uninstalling any program.
Installation Guide – AutoStore 6.0
6
1/10 Copyright 2012 Notable Solutions, Inc.
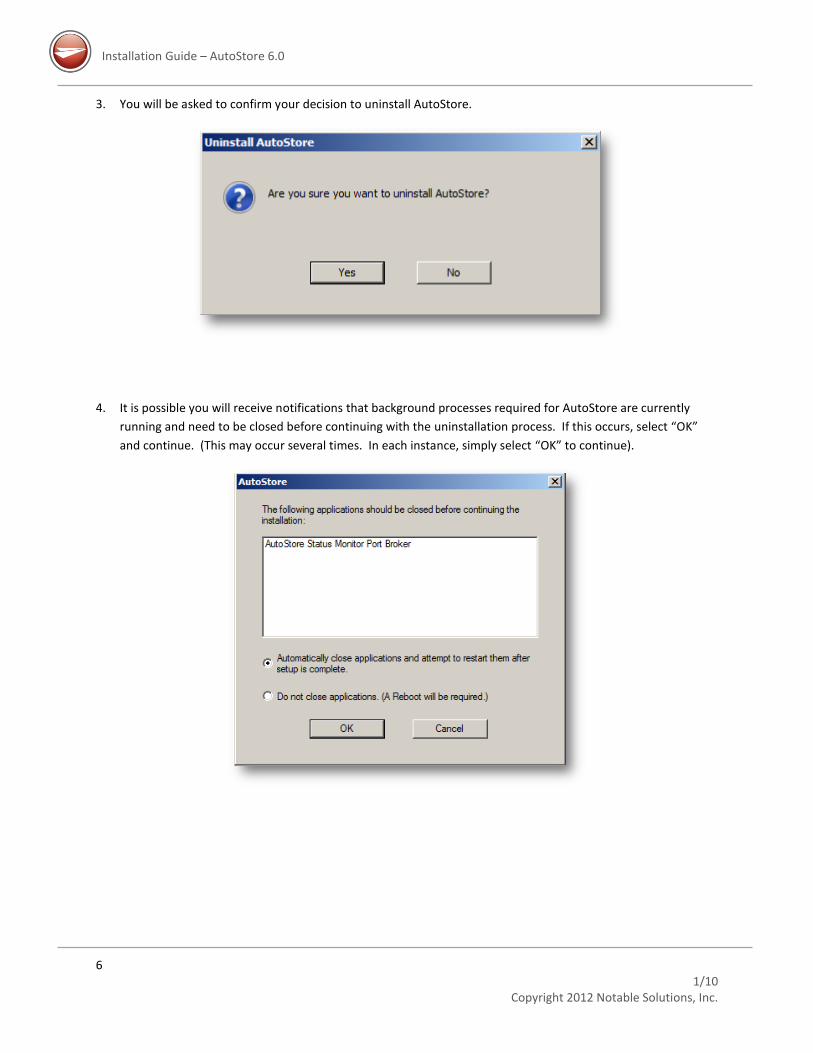
3. You will be asked to confirm your decision to uninstall AutoStore.
4. It is possible you will receive notifications that background processes required for AutoStore are currently
running and need to be closed before continuing with the uninstallation process. If this occurs, select “OK”
and continue. (This may occur several times. In each instance, simply select “OK” to continue).
Installation Guide – AutoStore 6.0
7
1/10 Copyright 2012 Notable Solutions, Inc.
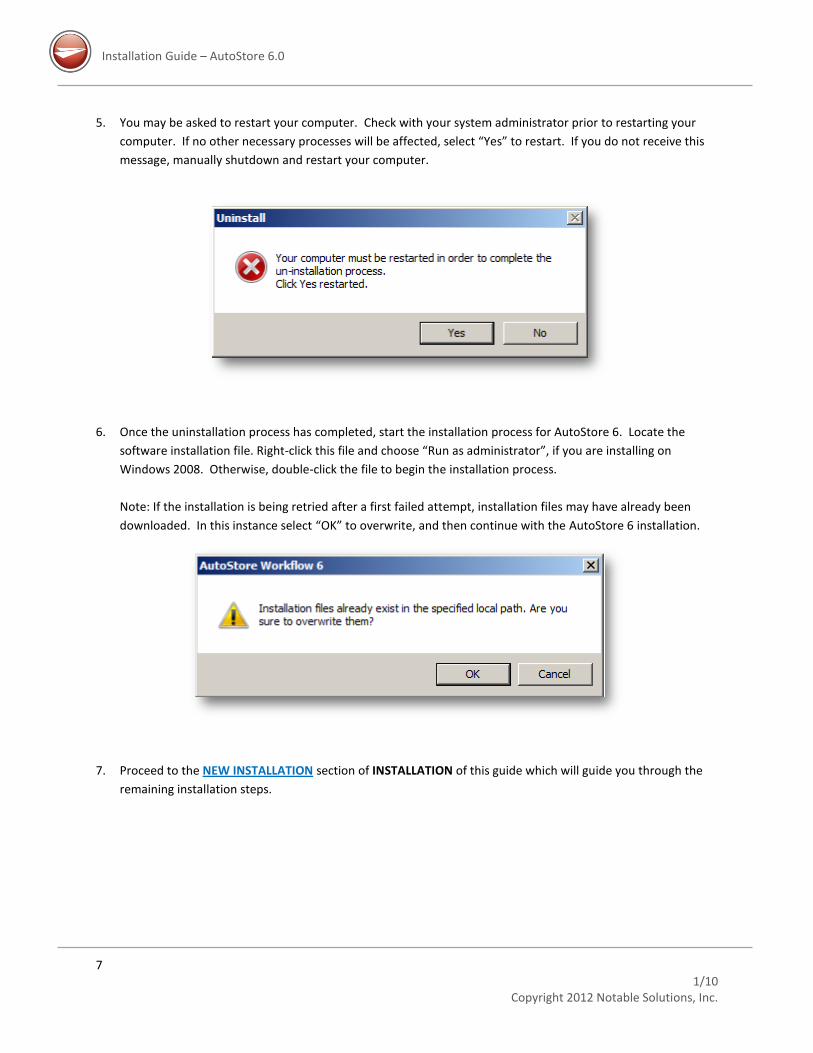
5. You may be asked to restart your computer. Check with your system administrator prior to restarting your
computer. If no other necessary processes will be affected, select “Yes” to restart. If you do not receive this
message, manually shutdown and restart your computer.
6. Once the uninstallation process has completed, start the installation process for AutoStore 6. Locate the
software installation file. Right-click this file and choose “Run as administrator”, if you are installing on
Windows 2008. Otherwise, double-click the file to begin the installation process.
Note: If the installation is being retried after a first failed attempt, installation files may have already been
downloaded. In this instance select “OK” to overwrite, and then continue with the AutoStore 6 installation.
7. Proceed to the NEW INSTALLATION section of INSTALLATION of this guide which will guide you through the
remaining installation steps.
Installation Guide – AutoStore 6.0
8
1/10 Copyright 2012 Notable Solutions, Inc.
INSTALLATION: NEW INSTALLATION
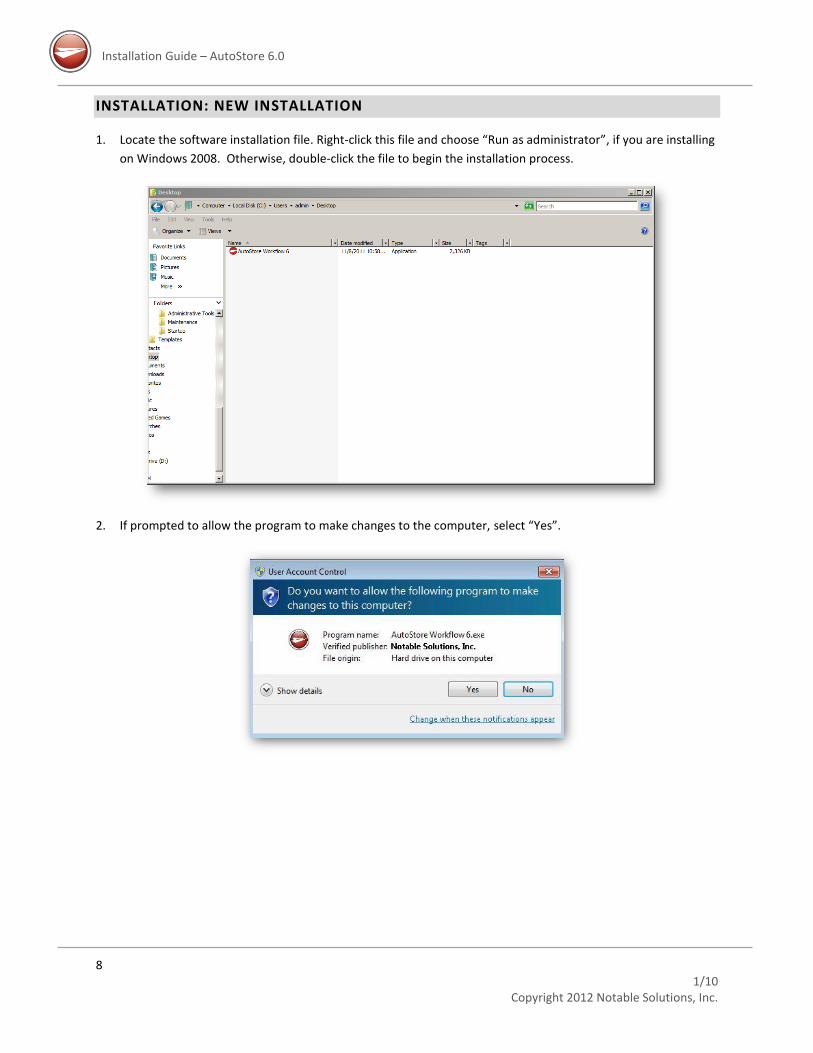
1. Locate the software installation file. Right-click this file and choose “Run as administrator”, if you are installing
on Windows 2008. Otherwise, double-click the file to begin the installation process.
2. If prompted to allow the program to make changes to the computer, select “Yes”.
Installation Guide – AutoStore 6.0
9
1/10 Copyright 2012 Notable Solutions, Inc.
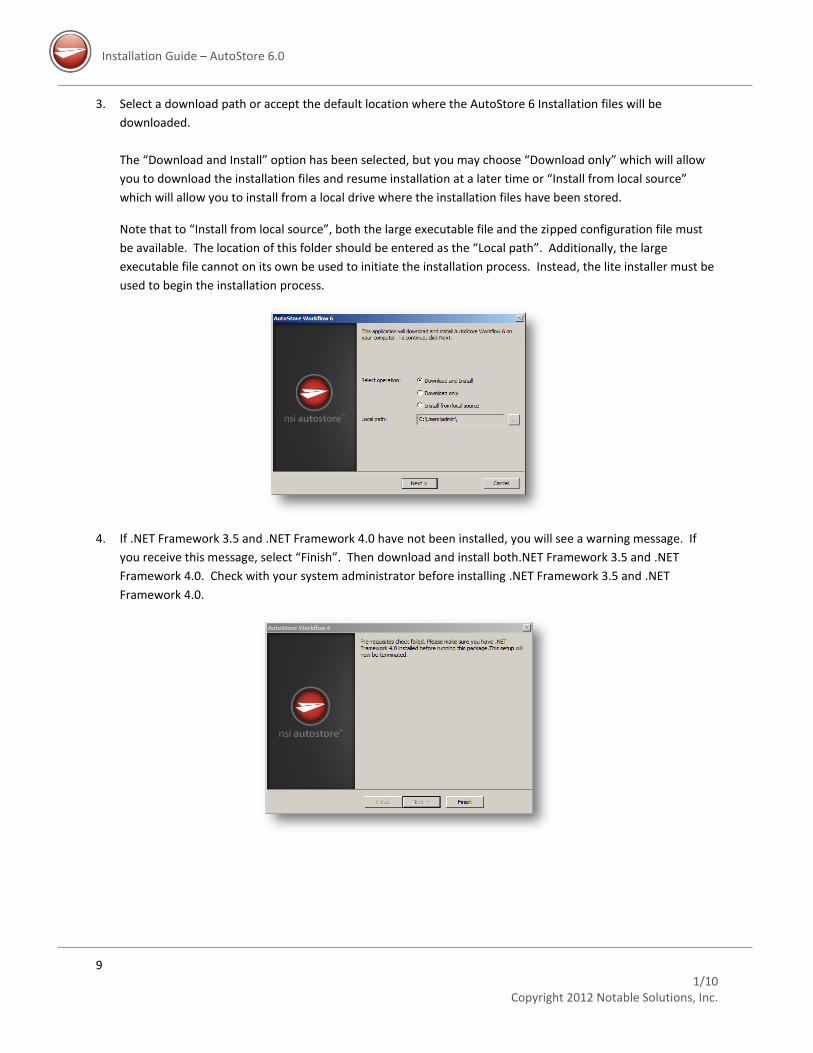
3. Select a download path or accept the default location where the AutoStore 6 Installation files will be
downloaded.
The “Download and Install” option has been selected, but you may choose “Download only” which will allow
you to download the installation files and resume installation at a later time or “Install from local source”
which will allow you to install from a local drive where the installation files have been stored.
Note that to “Install from local source”, both the large executable file and the zipped configuration file must
be available. The location of this folder should be entered as the “Local path”. Additionally, the large
executable file cannot on its own be used to initiate the installation process. Instead, the lite installer must be
used to begin the installation process.
4. If .NET Framework 3.5 and .NET Framework 4.0 have not been installed, you will see a warning message. If
you receive this message, select “Finish”. Then download and install both.NET Framework 3.5 and .NET
Framework 4.0. Check with your system administrator before installing .NET Framework 3.5 and .NET
Framework 4.0.
Installation Guide – AutoStore 6.0
10
1/10 Copyright 2012 Notable Solutions, Inc.
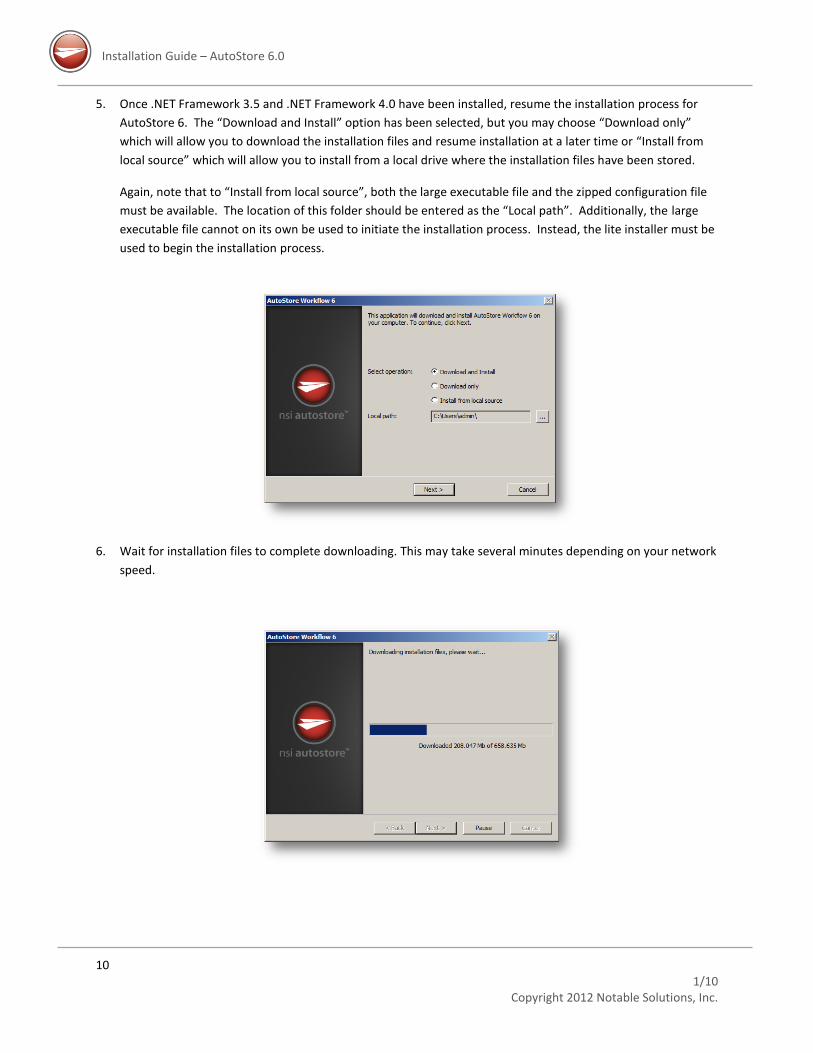
5. Once .NET Framework 3.5 and .NET Framework 4.0 have been installed, resume the installation process for
AutoStore 6. The “Download and Install” option has been selected, but you may choose “Download only”
which will allow you to download the installation files and resume installation at a later time or “Install from
local source” which will allow you to install from a local drive where the installation files have been stored.
Again, note that to “Install from local source”, both the large executable file and the zipped configuration file
must be available. The location of this folder should be entered as the “Local path”. Additionally, the large
executable file cannot on its own be used to initiate the installation process. Instead, the lite installer must be
used to begin the installation process.
6. Wait for installation files to complete downloading. This may take several minutes depending on your network
speed.

Installation Guide – AutoStore 6.0
11
1/10 Copyright 2012 Notable Solutions, Inc.
7. The AutoStore installer may install additional software that is required prior to installation of AutoStore 6.
Select “Install” to continue. Check with your system administrator before installing any of these items.
Note: At this point in the installation process, if your previous installation of AutoStore was unlicensed
(licenses were expired), you will need to enter your Maintenance Contract ID to receive a Unlock Key to
proceed with installation. If you encounter this message, please see the section labeled LICENSING AFTER
UPGRADING FROM AN UNLICENSED AUTOSTORE 5.0 INSTALLATION which can be found in the LICENSING
section of this guide.
Installation Guide – AutoStore 6.0
12
1/10 Copyright 2012 Notable Solutions, Inc.
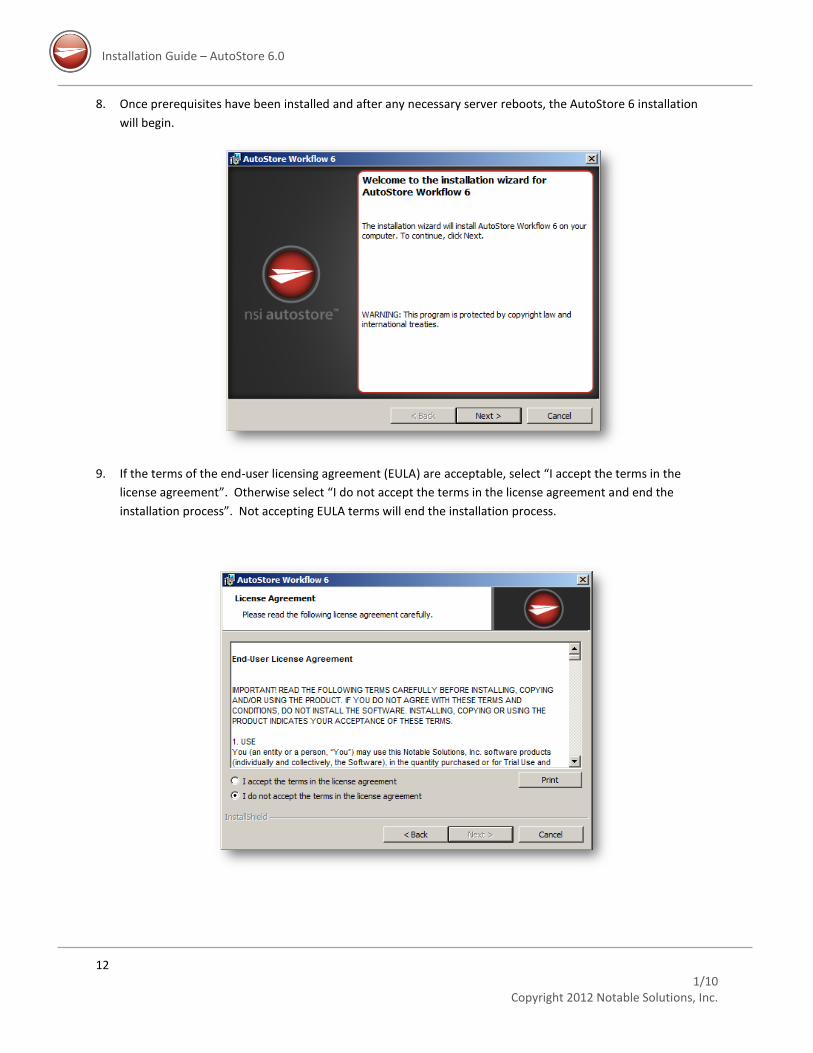
8. Once prerequisites have been installed and after any necessary server reboots, the AutoStore 6 installation
will begin.
9. If the terms of the end-user licensing agreement (EULA) are acceptable, select “I accept the terms in the
license agreement”. Otherwise select “I do not accept the terms in the license agreement and end the
installation process”. Not accepting EULA terms will end the installation process.
Installation Guide – AutoStore 6.0
13
1/10 Copyright 2012 Notable Solutions, Inc.
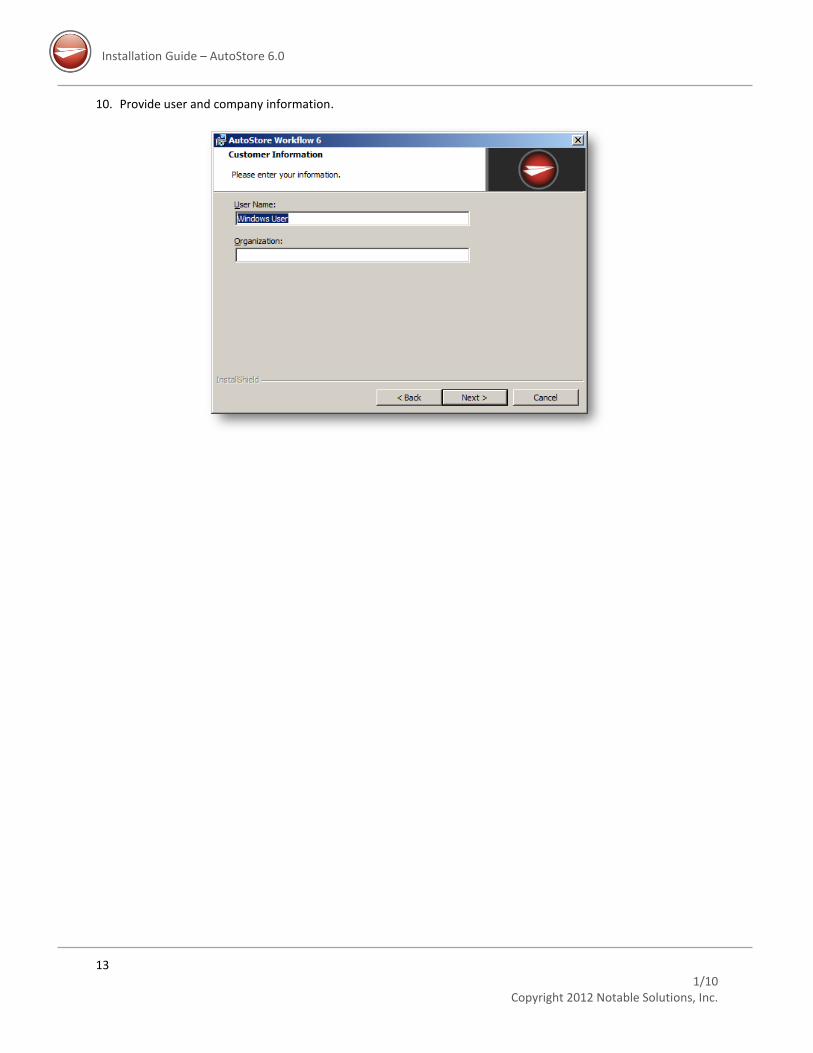
10. Provide user and company information.
Installation Guide – AutoStore 6.0
14
1/10 Copyright 2012 Notable Solutions, Inc.
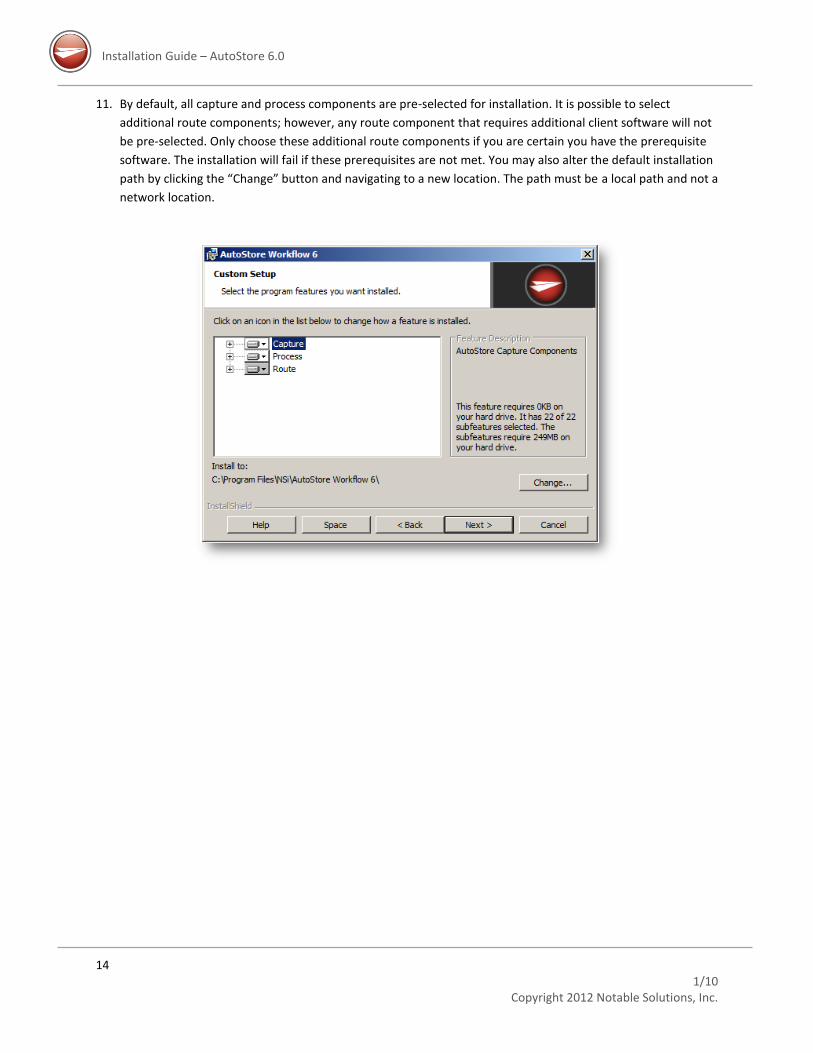
11. By default, all capture and process components are pre-selected for installation. It is possible to select
additional route components; however, any route component that requires additional client software will not
be pre-selected. Only choose these additional route components if you are certain you have the prerequisite
software. The installation will fail if these prerequisites are not met. You may also alter the default installation
path by clicking the “Change” button and navigating to a new location. The path must be a local path and not a
network location.
Installation Guide – AutoStore 6.0
15
1/10 Copyright 2012 Notable Solutions, Inc.
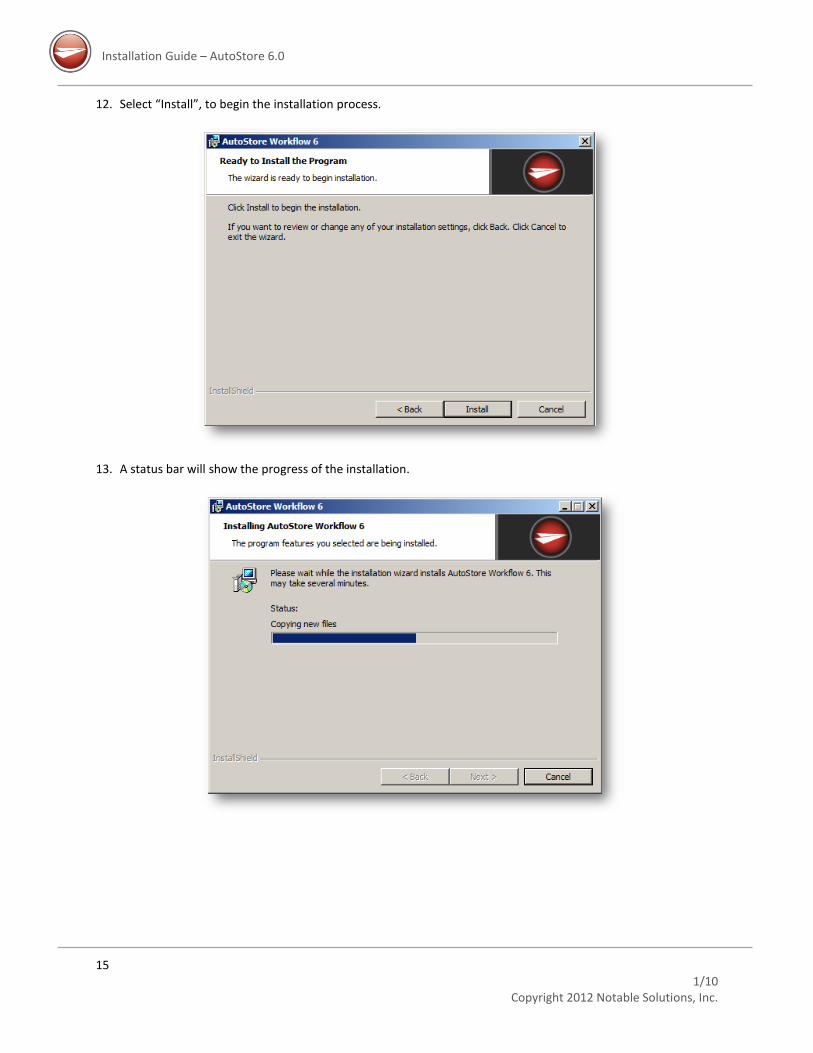
12. Select “Install”, to begin the installation process.
13. A status bar will show the progress of the installation.
Installation Guide – AutoStore 6.0
16
1/10 Copyright 2012 Notable Solutions, Inc.
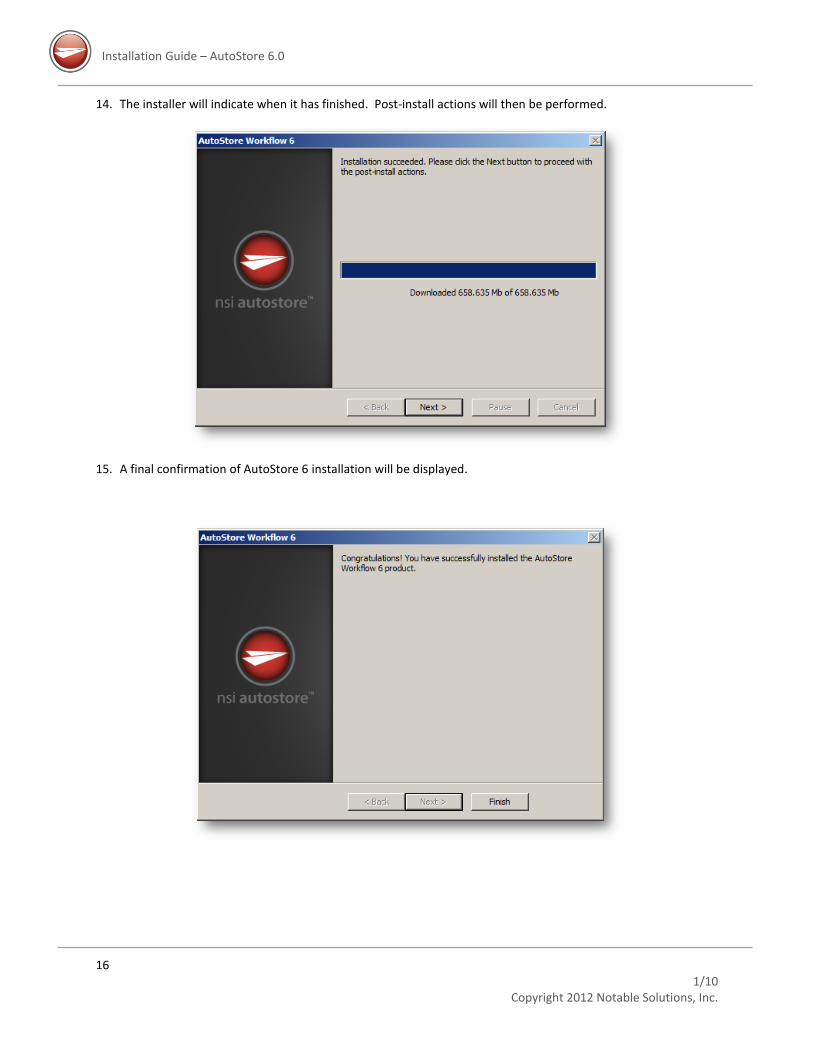
14. The installer will indicate when it has finished. Post-install actions will then be performed.
15. A final confirmation of AutoStore 6 installation will be displayed.
Installation Guide – AutoStore 6.0
17
1/10 Copyright 2012 Notable Solutions, Inc.
LICENSING
Three licensing scenarios exist:
Licensing after upgrading from a licensed AutoStore 5.0 installation
Licensing a new installation of AutoStore 6
Licensing after upgrading from an unlicensed AutoStore 5.0 installation
LICENSING AFTER UPGRADING FROM A LICENSED AUTOSTORE 5.0 INSTALLATION
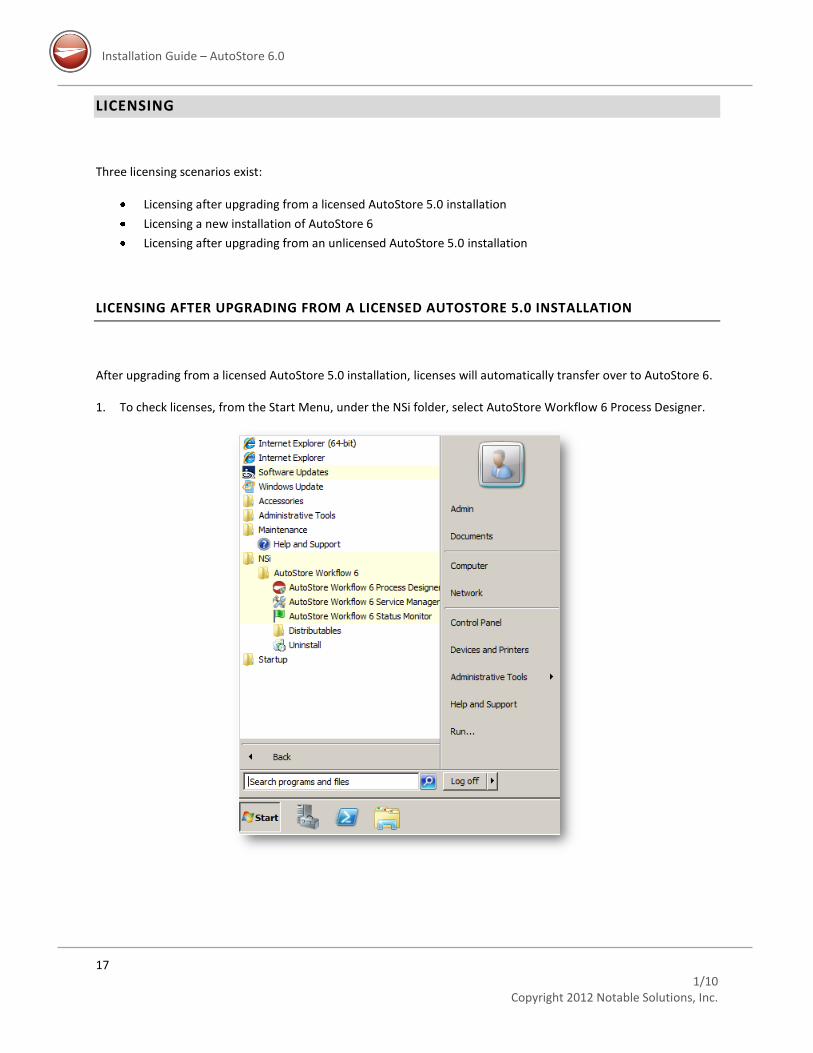
After upgrading from a licensed AutoStore 5.0 installation, licenses will automatically transfer over to AutoStore 6.
1. To check licenses, from the Start Menu, under the NSi folder, select AutoStore Workflow 6 Process Designer.
Installation Guide – AutoStore 6.0
18
1/10 Copyright 2012 Notable Solutions, Inc.
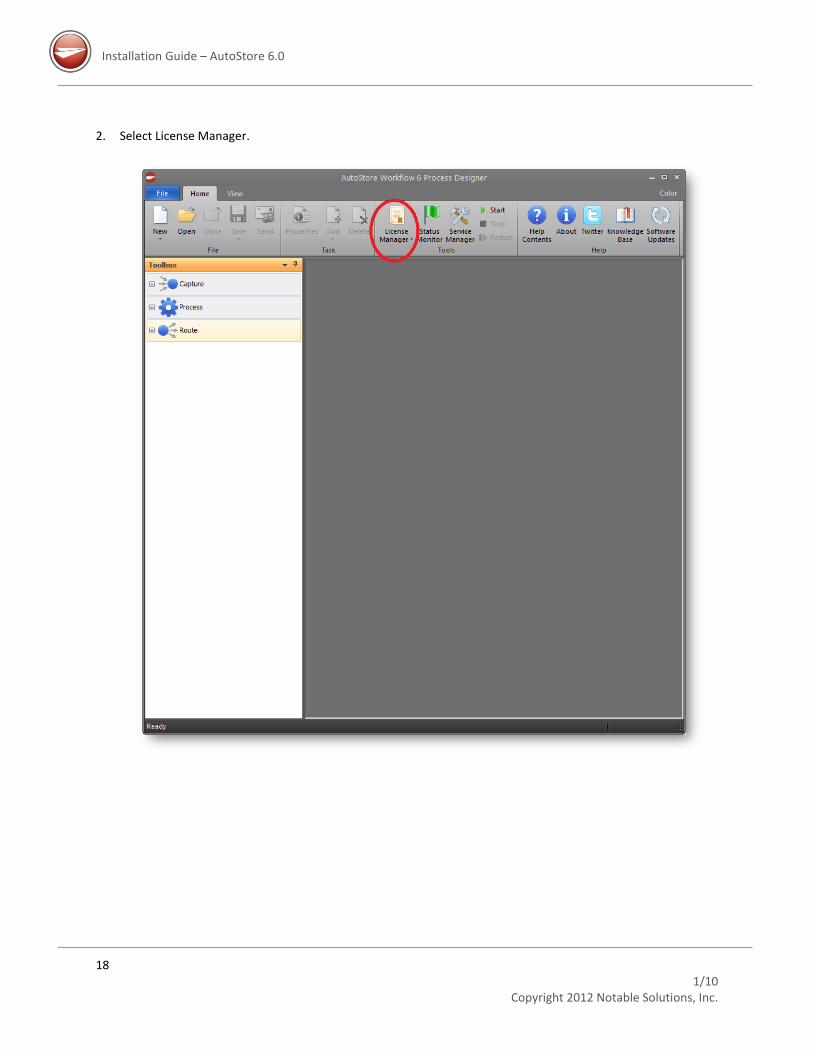
2. Select License Manager.
Installation Guide – AutoStore 6.0
19
1/10 Copyright 2012 Notable Solutions, Inc.
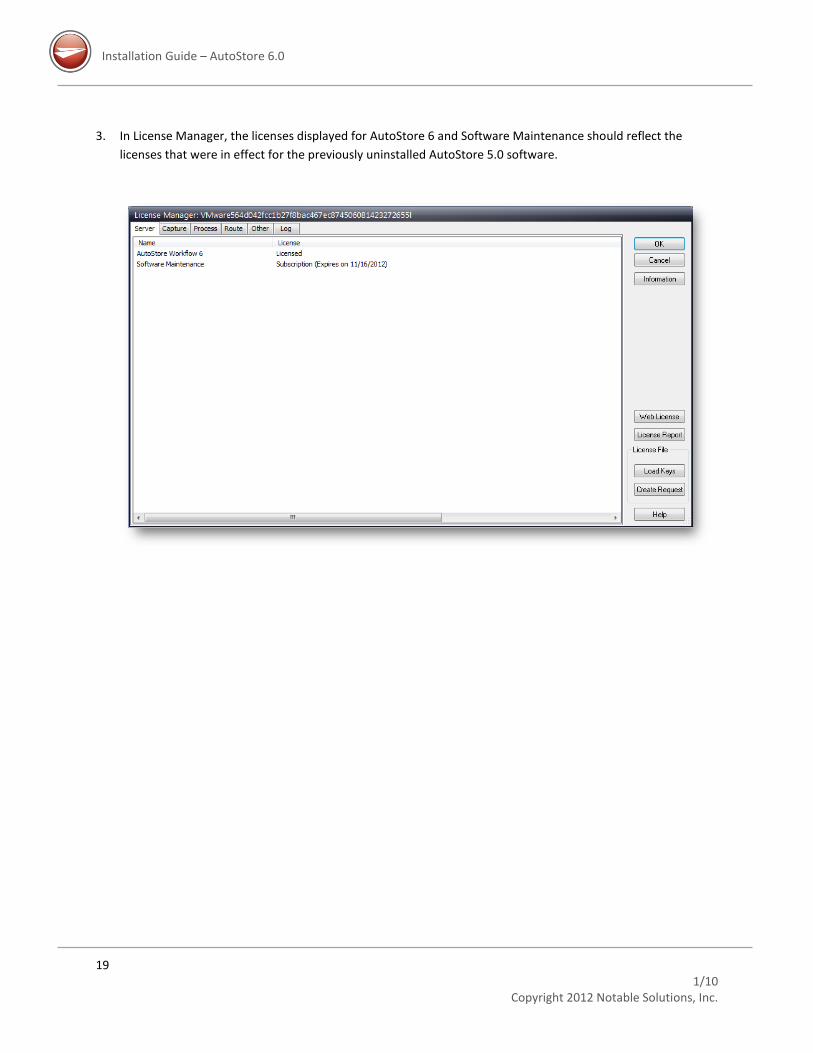
3. In License Manager, the licenses displayed for AutoStore 6 and Software Maintenance should reflect the
licenses that were in effect for the previously uninstalled AutoStore 5.0 software.
Installation Guide – AutoStore 6.0
20
1/10 Copyright 2012 Notable Solutions, Inc.
LICENSING A NEW INSTALLATION OF AUTOSTORE 6
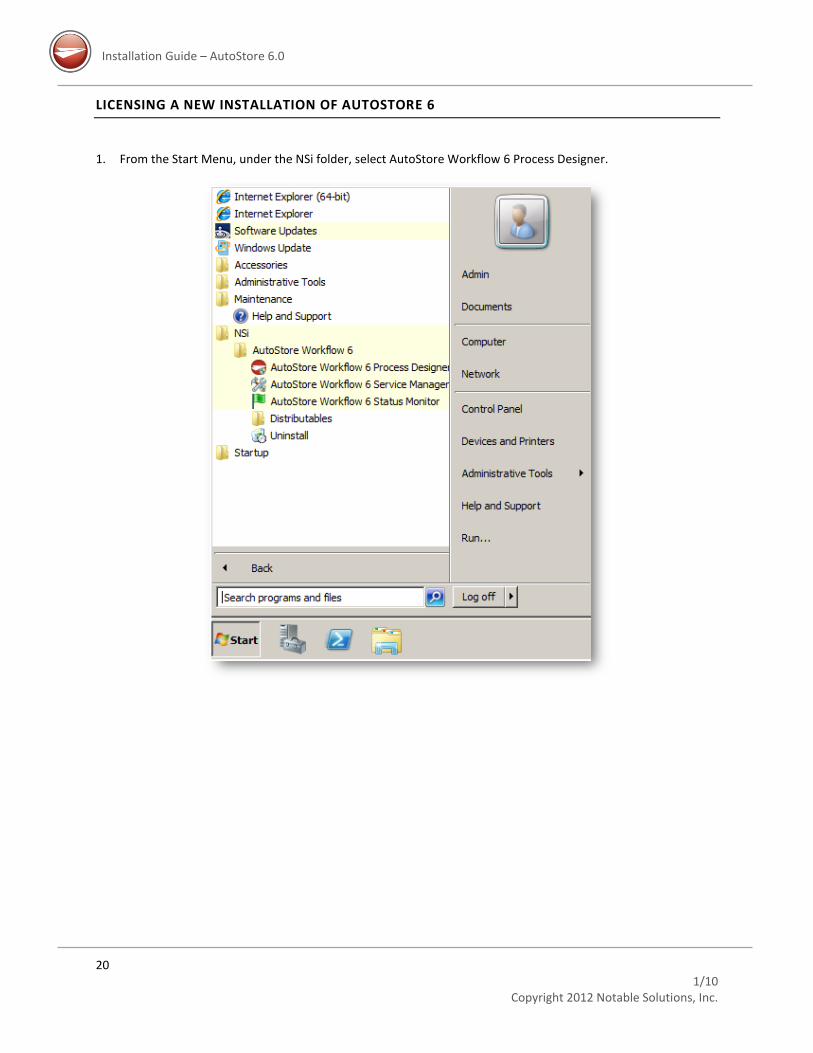
1. From the Start Menu, under the NSi folder, select AutoStore Workflow 6 Process Designer.
Installation Guide – AutoStore 6.0
21
1/10 Copyright 2012 Notable Solutions, Inc.
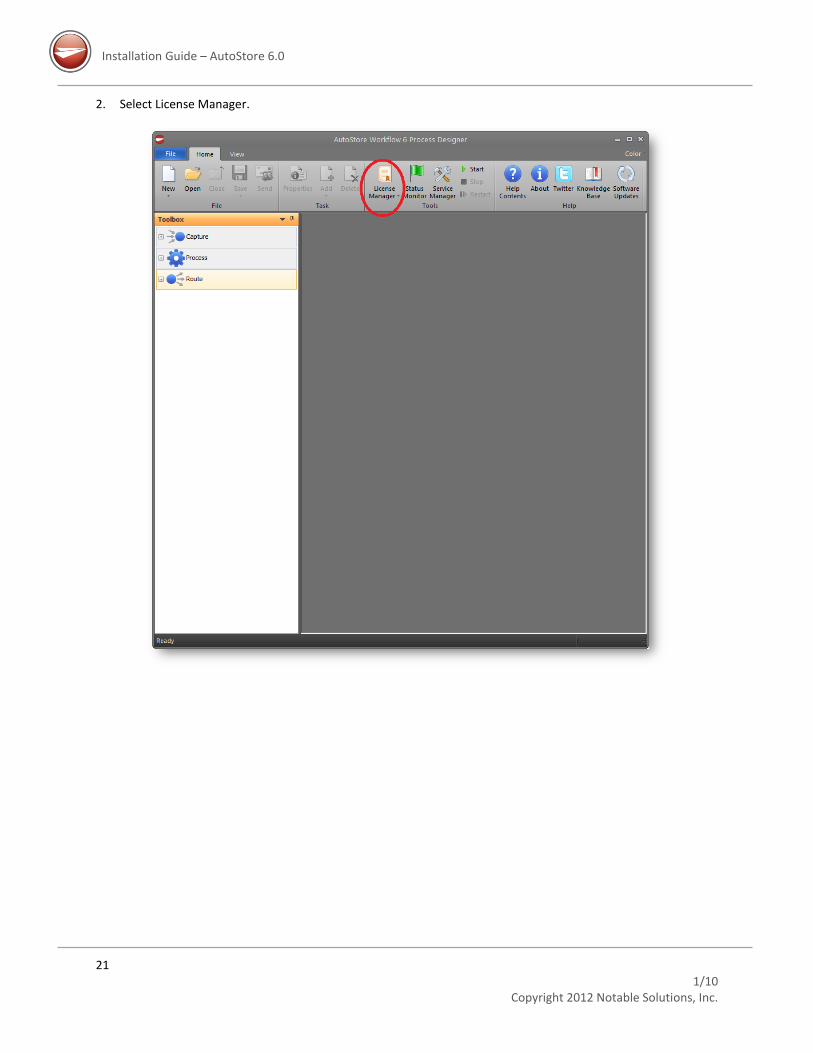
2. Select License Manager.
Installation Guide – AutoStore 6.0
22
1/10 Copyright 2012 Notable Solutions, Inc.
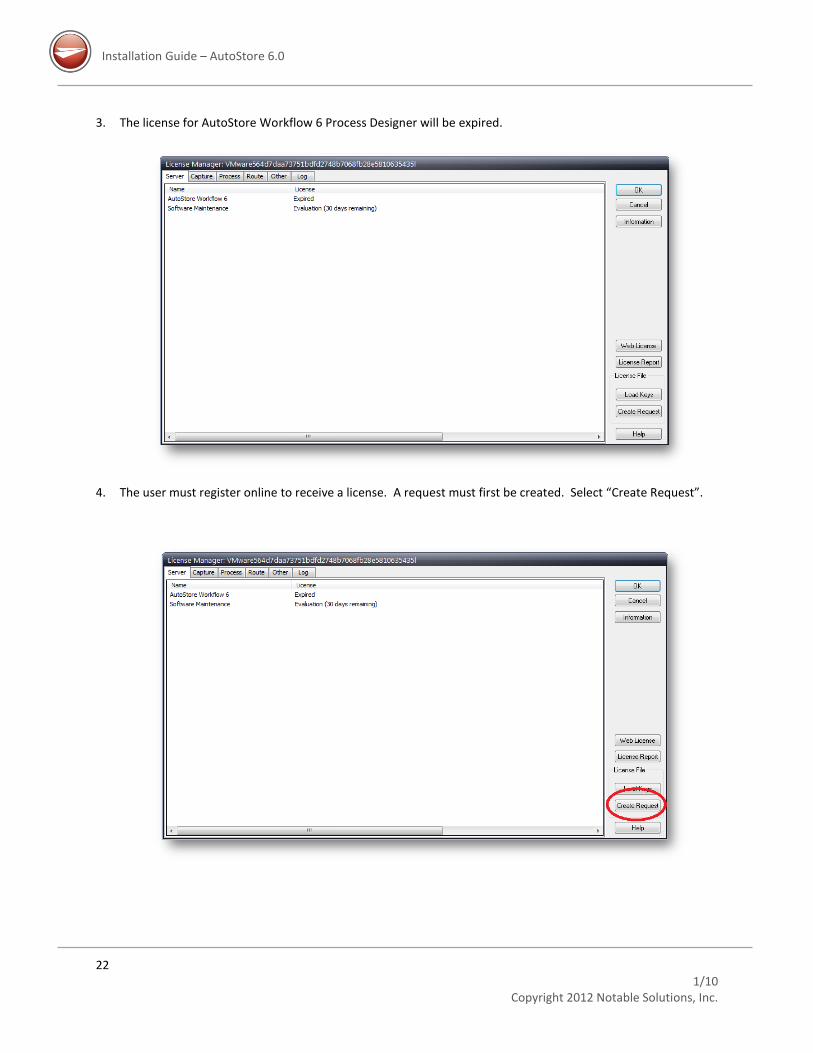
3. The license for AutoStore Workflow 6 Process Designer will be expired.
4. The user must register online to receive a license. A request must first be created. Select “Create Request”.
Installation Guide – AutoStore 6.0
23
1/10 Copyright 2012 Notable Solutions, Inc.
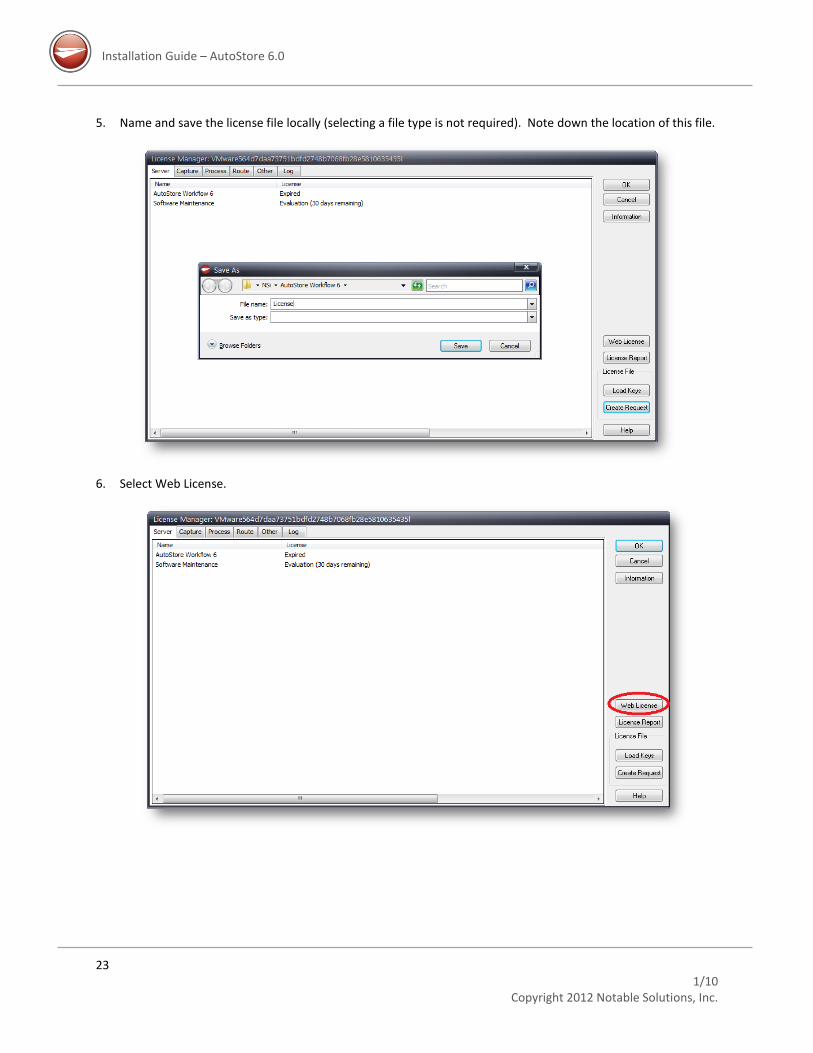
5. Name and save the license file locally (selecting a file type is not required). Note down the location of this file.
6. Select Web License.
Installation Guide – AutoStore 6.0
24
1/10 Copyright 2012 Notable Solutions, Inc.
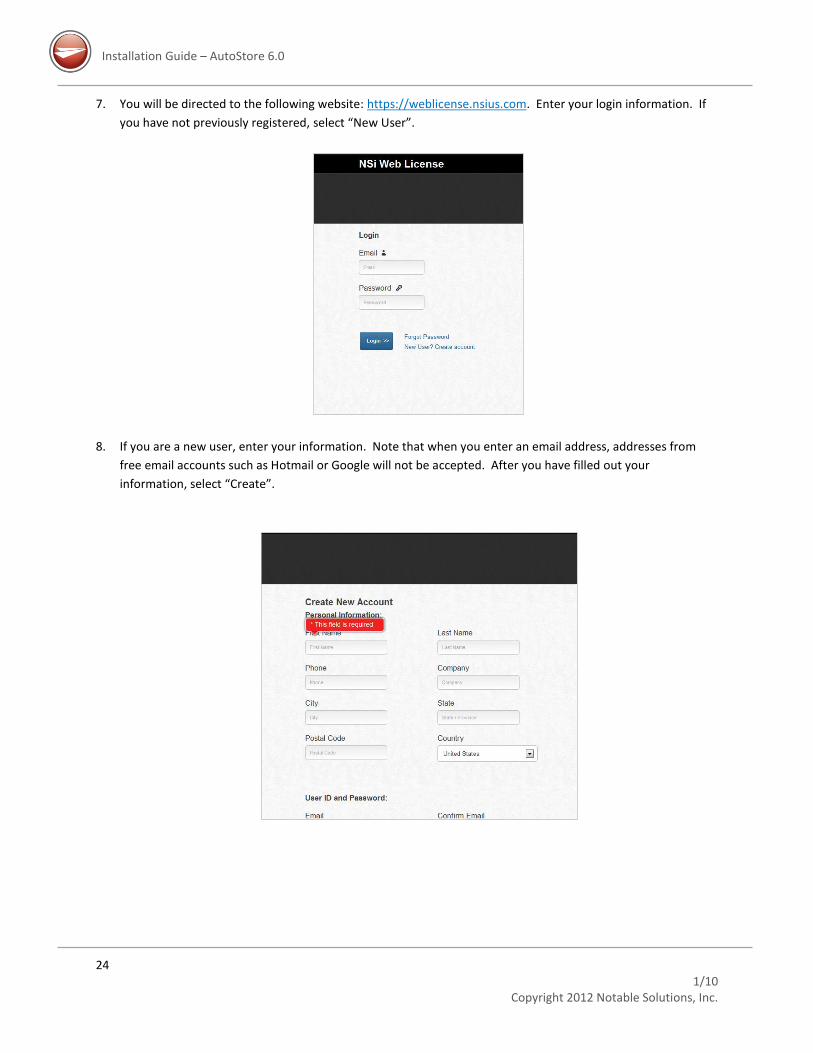
7. You will be directed to the following website: https://weblicense.nsius.com. Enter your login information. If
you have not previously registered, select “New User”.
8. If you are a new user, enter your information. Note that when you enter an email address, addresses from
free email accounts such as Hotmail or Google will not be accepted. After you have filled out your
information, select “Create”.

Installation Guide – AutoStore 6.0
25
1/10 Copyright 2012 Notable Solutions, Inc.
9. You will receive a confirmation email. Select the link in the email to confirm your account registration.
Return to the licensing website and login into your newly created account.
10. If selecting “Evaluation” as the license type from the drop down menu, then browse and enter the location of
the request file that was previously created. Select Submit. Proceed to the next step.
Installation Guide – AutoStore 6.0
26
1/10 Copyright 2012 Notable Solutions, Inc.
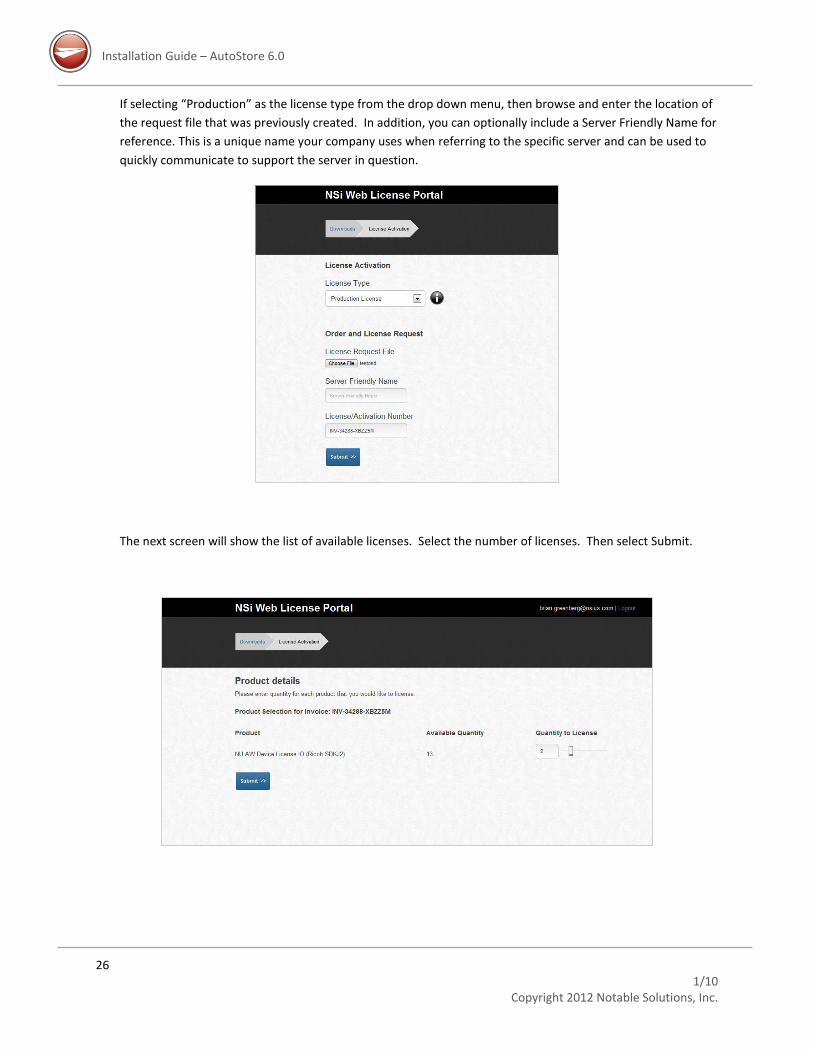
If selecting “Production” as the license type from the drop down menu, then browse and enter the location of
the request file that was previously created. In addition, you can optionally include a Server Friendly Name for
reference. This is a unique name your company uses when referring to the specific server and can be used to
quickly communicate to support the server in question.
The next screen will show the list of available licenses. Select the number of licenses. Then select Submit.
Installation Guide – AutoStore 6.0
27
1/10 Copyright 2012 Notable Solutions, Inc.
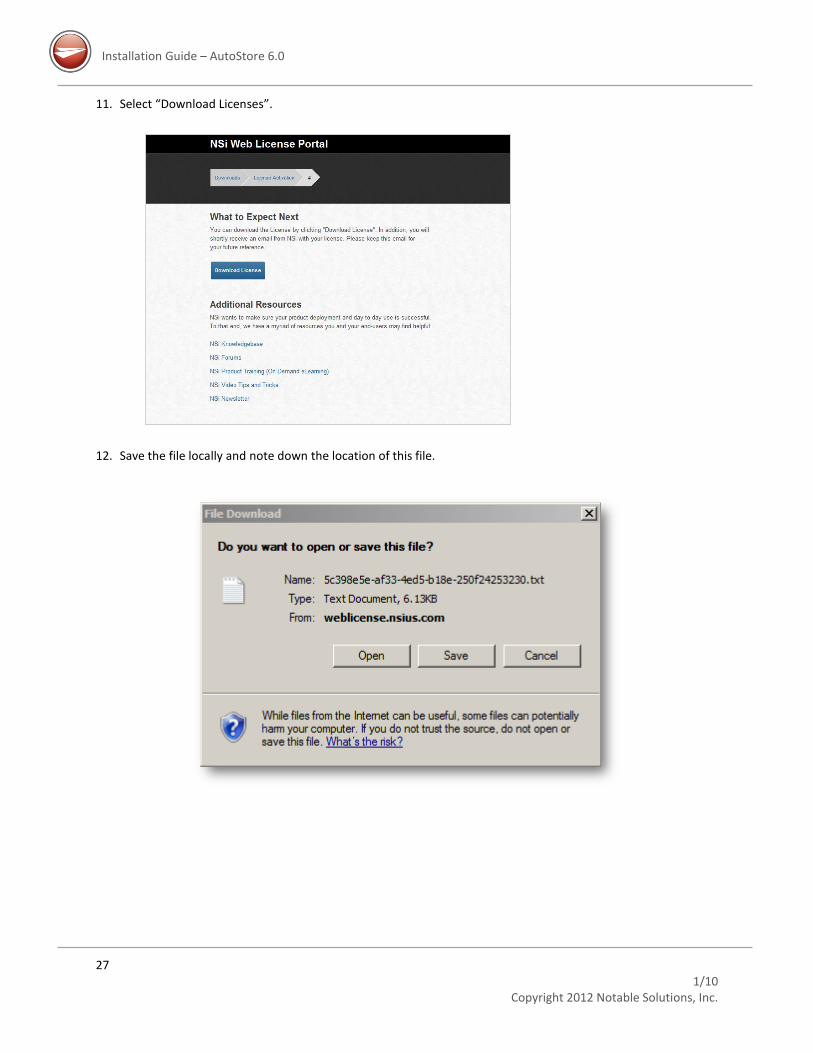
11. Select “Download Licenses”.
12. Save the file locally and note down the location of this file.
Installation Guide – AutoStore 6.0
28
1/10 Copyright 2012 Notable Solutions, Inc.
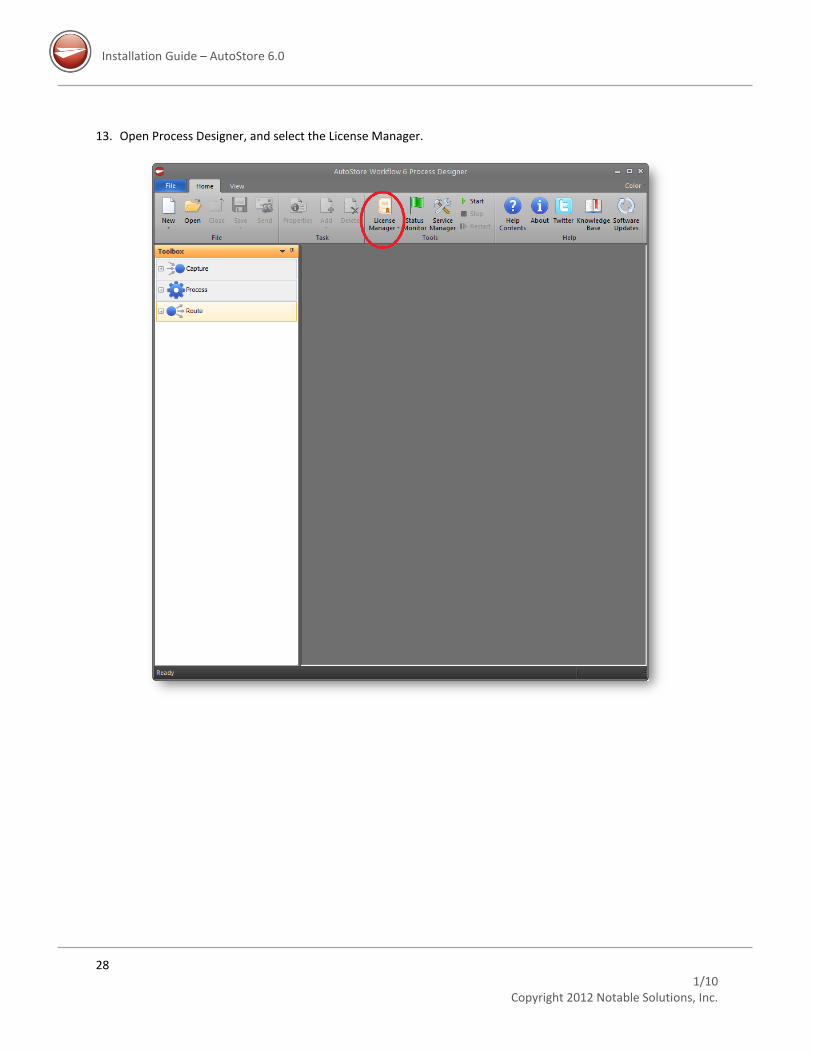
13. Open Process Designer, and select the License Manager.
Installation Guide – AutoStore 6.0
29
1/10 Copyright 2012 Notable Solutions, Inc.
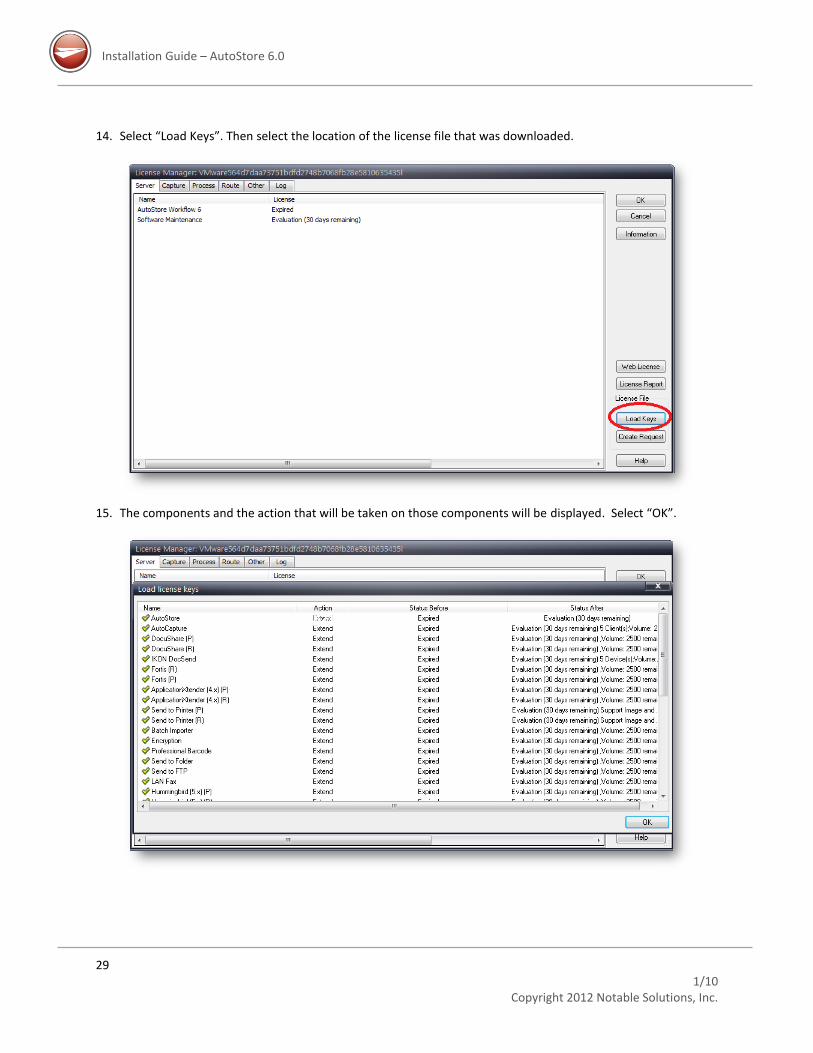
14. Select “Load Keys”. Then select the location of the license file that was downloaded.
15. The components and the action that will be taken on those components will be displayed. Select “OK”.
Click Here
Installation Guide – AutoStore 6.0
30
1/10 Copyright 2012 Notable Solutions, Inc.
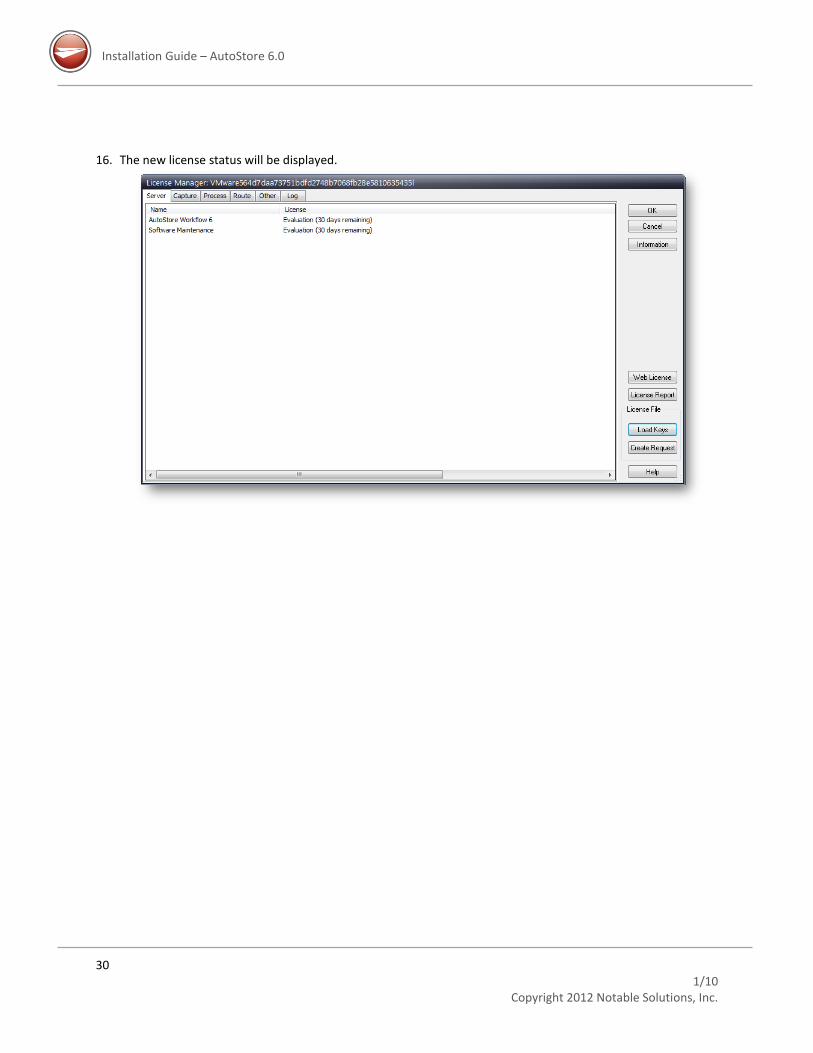
16. The new license status will be displayed.

Installation Guide – AutoStore 6.0
31
1/10 Copyright 2012 Notable Solutions, Inc.
LICENSING AFTER UPGRADING FROM AN UNLICENSED AUTOSTORE 5.0 INSTALLATION
In this licensing scenario, licenses for AutoStore Workflow 6 and Software Maintenance are expired. To proceed
with licensing, you must have your Maintenance Contract ID number available.
1. The installation process continues once you enter your Maintenance Contract ID. After entering the
Maintenance Contract ID, select “Get Key”.
Installation Guide – AutoStore 6.0
32
1/10 Copyright 2012 Notable Solutions, Inc.
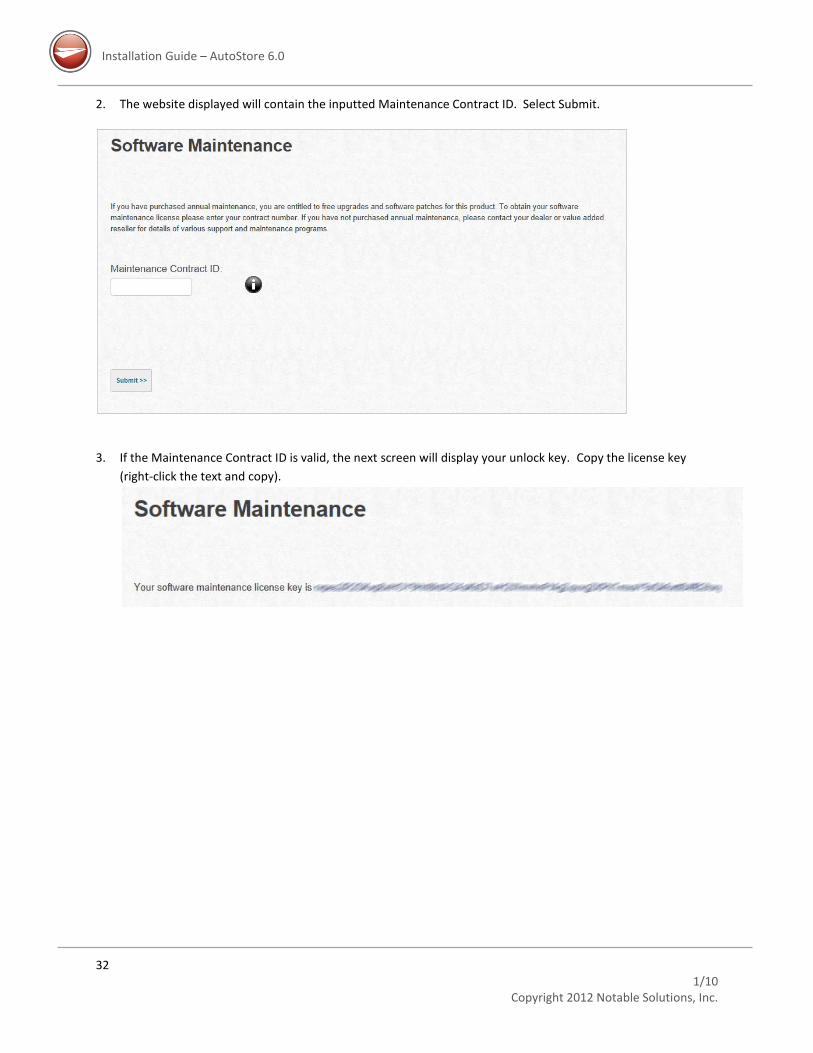
2. The website displayed will contain the inputted Maintenance Contract ID. Select Submit.
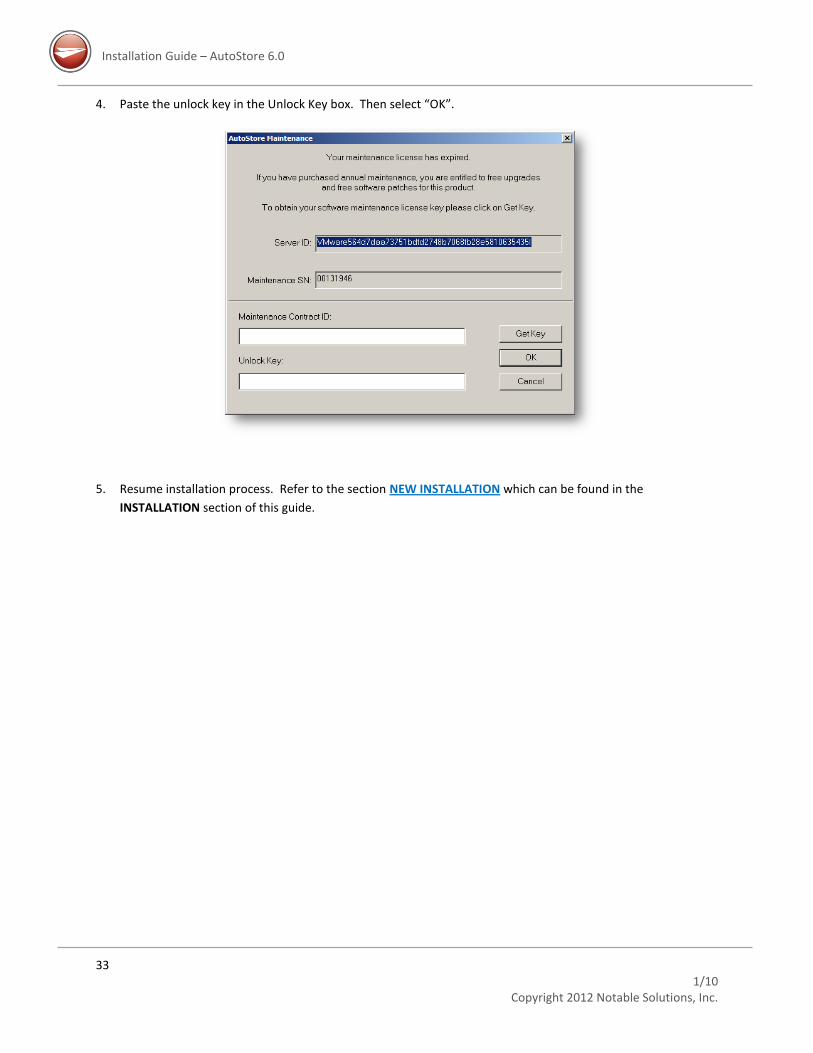
3. If the Maintenance Contract ID is valid, the next screen will display your unlock key. Copy the license key
(right-click the text and copy).
Installation Guide – AutoStore 6.0
33
1/10 Copyright 2012 Notable Solutions, Inc.
4. Paste the unlock key in the Unlock Key box. Then select “OK”.
5. Resume installation process. Refer to the section NEW INSTALLATION which can be found in the
INSTALLATION section of this guide.
Installation Guide – AutoStore 6.0
34
1/10 Copyright 2012 Notable Solutions, Inc.
GETTING STARTED
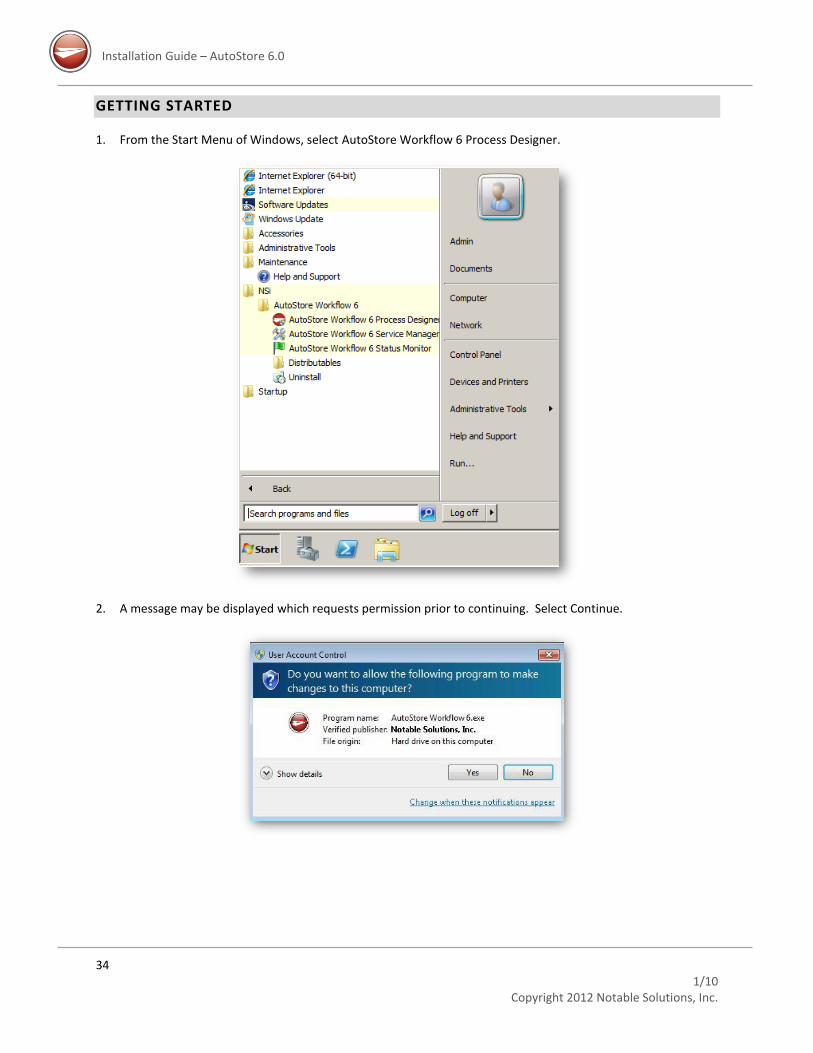
1. From the Start Menu of Windows, select AutoStore Workflow 6 Process Designer.
2. A message may be displayed which requests permission prior to continuing. Select Continue.
Installation Guide – AutoStore 6.0
35
1/10 Copyright 2012 Notable Solutions, Inc.
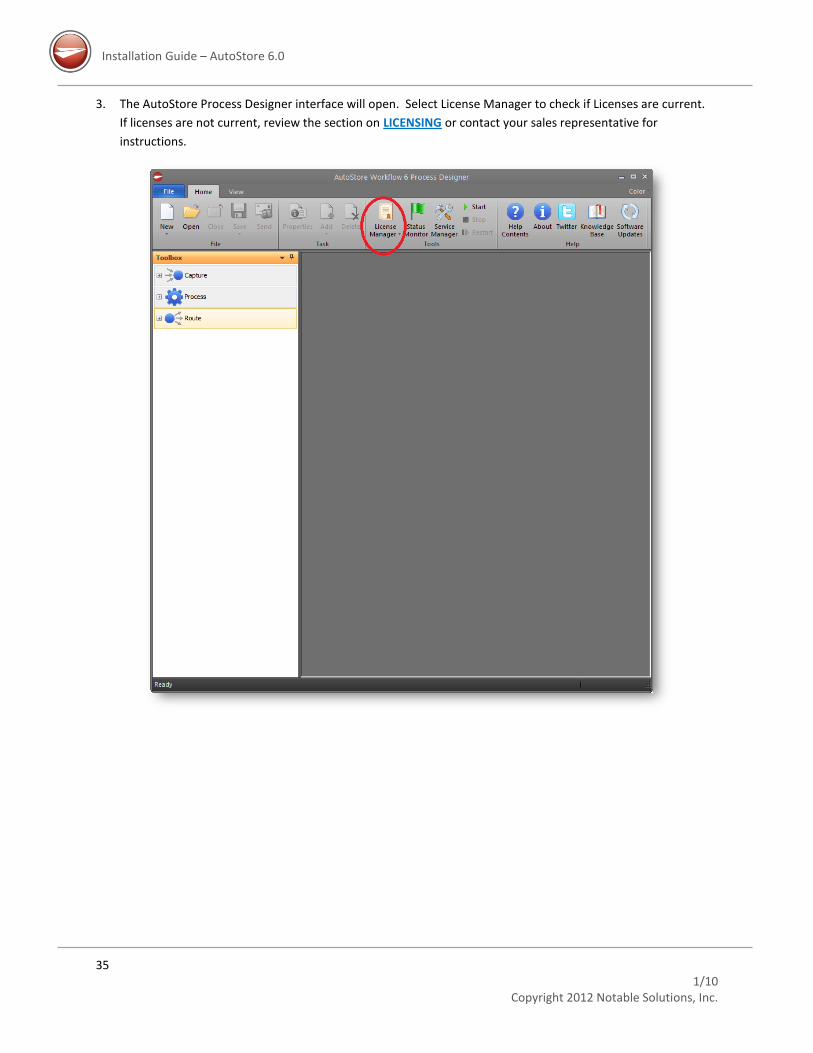
3. The AutoStore Process Designer interface will open. Select License Manager to check if Licenses are current.
If licenses are not current, review the section on LICENSING or contact your sales representative for
instructions.
Installation Guide – AutoStore 6.0
36
1/10 Copyright 2012 Notable Solutions, Inc.
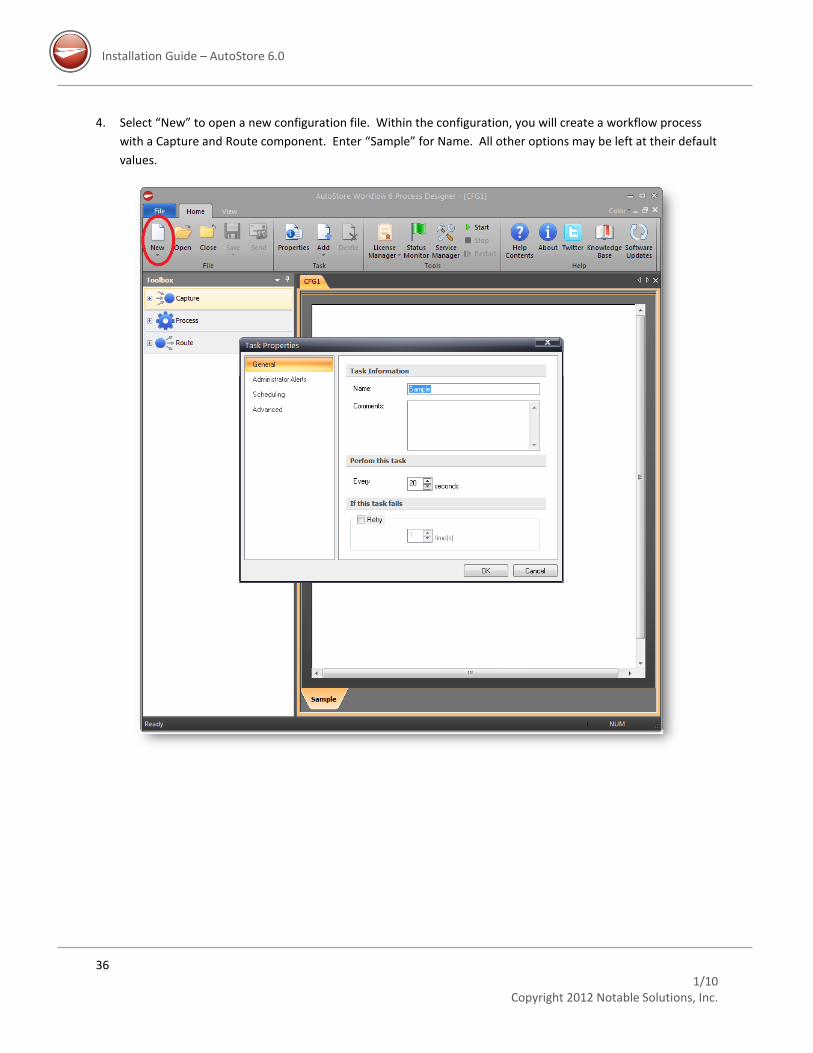
4. Select “New” to open a new configuration file. Within the configuration, you will create a workflow process
with a Capture and Route component. Enter “Sample” for Name. All other options may be left at their default
values.
Installation Guide – AutoStore 6.0
37
1/10 Copyright 2012 Notable Solutions, Inc.
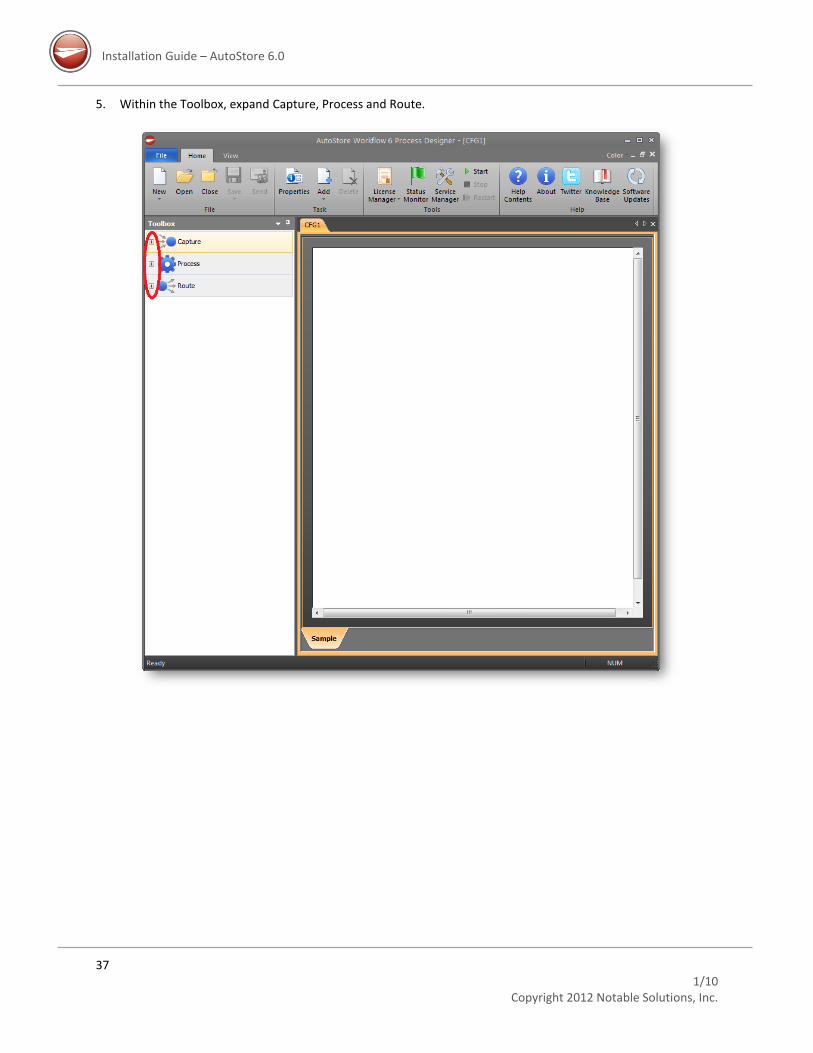
5. Within the Toolbox, expand Capture, Process and Route.
Installation Guide – AutoStore 6.0
38
1/10 Copyright 2012 Notable Solutions, Inc.
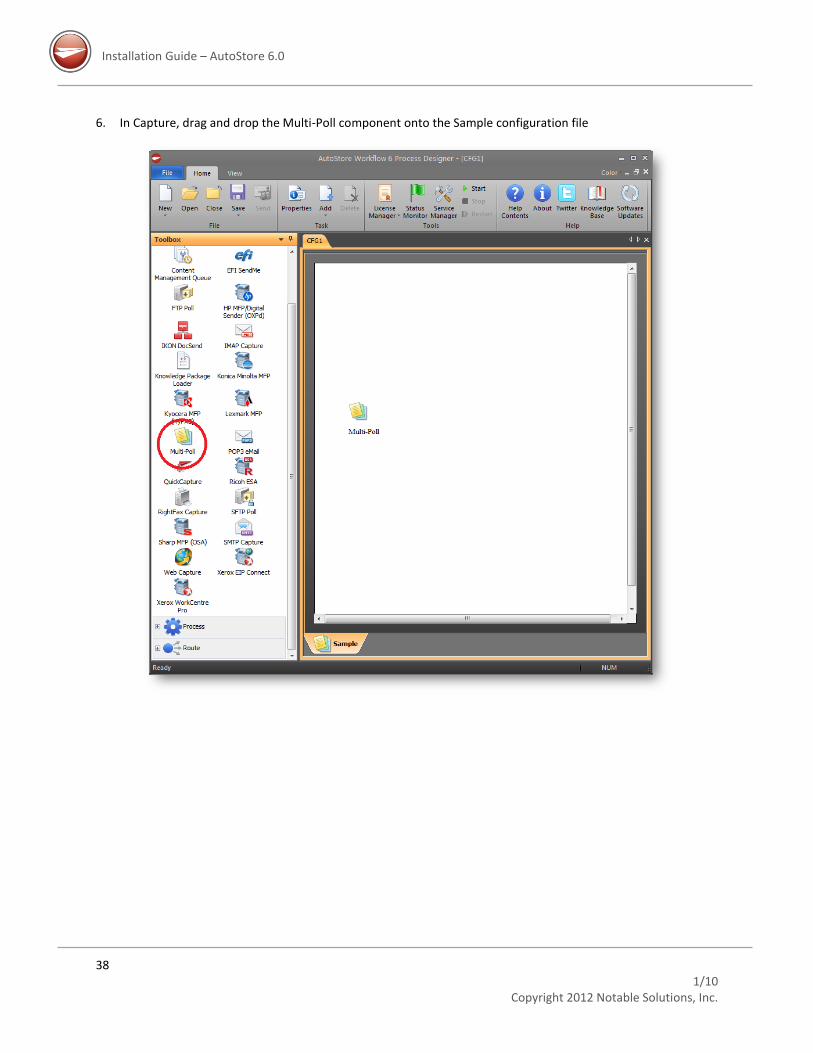
6. In Capture, drag and drop the Multi-Poll component onto the Sample configuration file
Installation Guide – AutoStore 6.0
39
1/10 Copyright 2012 Notable Solutions, Inc.
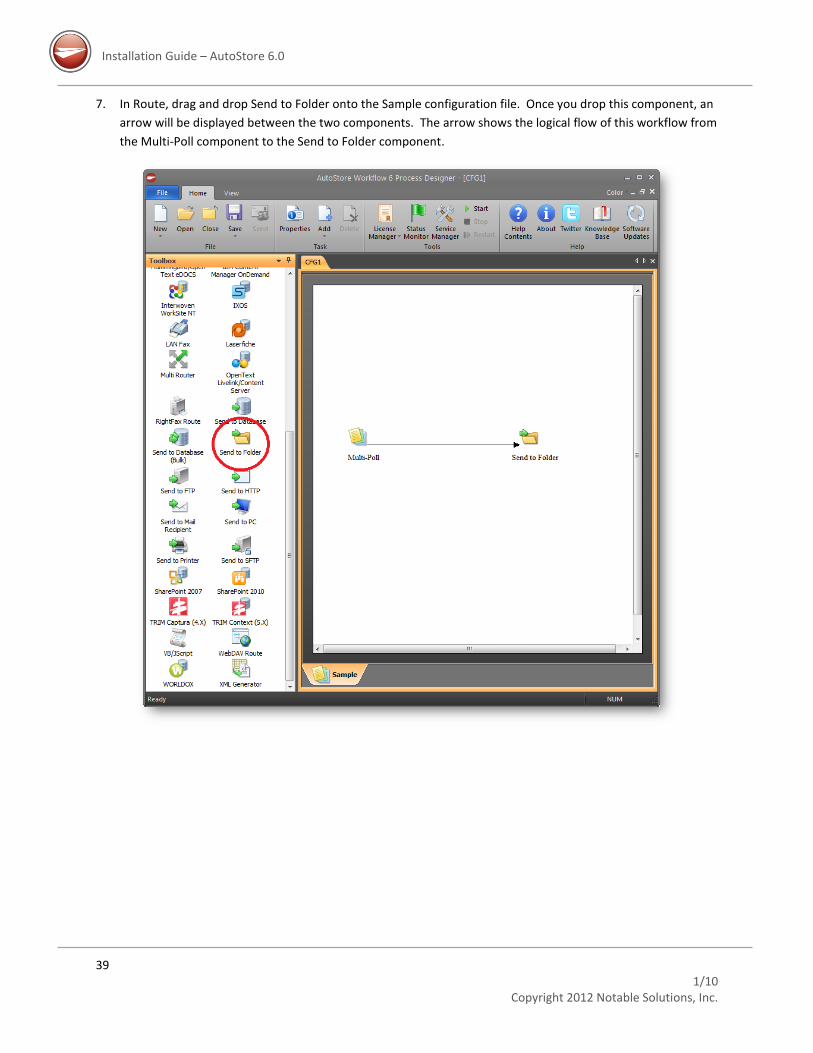
7. In Route, drag and drop Send to Folder onto the Sample configuration file. Once you drop this component, an
arrow will be displayed between the two components. The arrow shows the logical flow of this workflow from
the Multi-Poll component to the Send to Folder component.
Installation Guide – AutoStore 6.0
40
1/10 Copyright 2012 Notable Solutions, Inc.
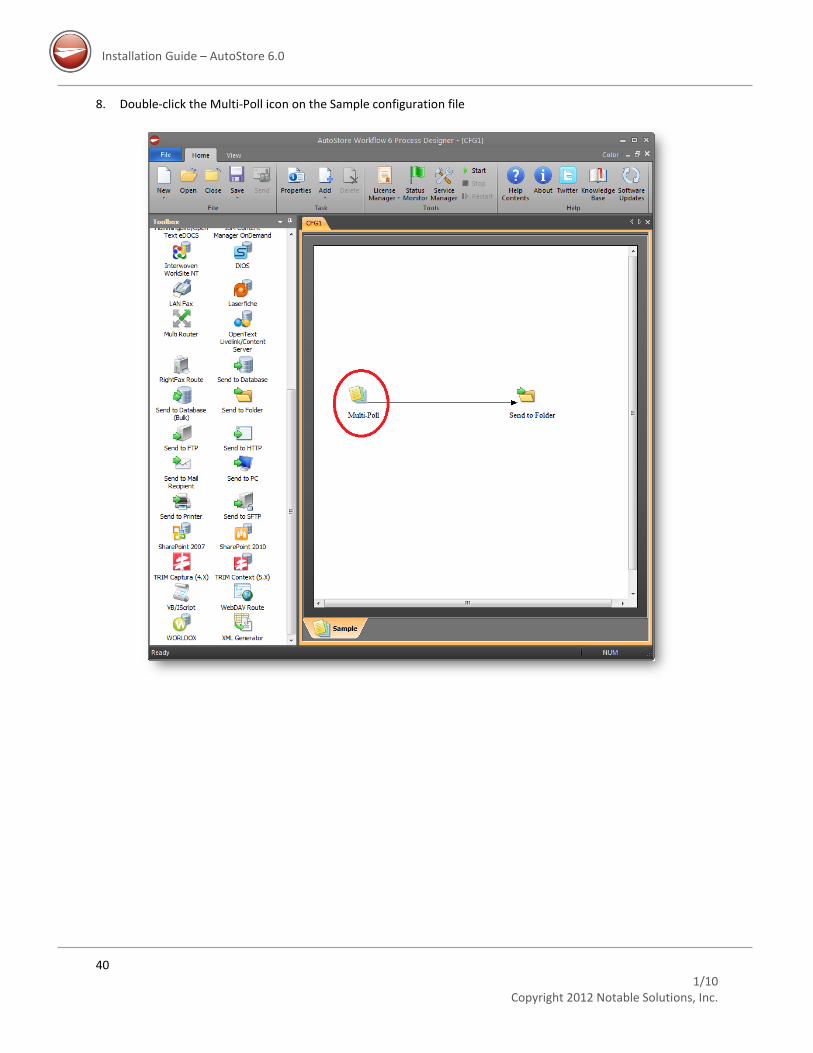
8. Double-click the Multi-Poll icon on the Sample configuration file
Installation Guide – AutoStore 6.0
41
1/10 Copyright 2012 Notable Solutions, Inc.
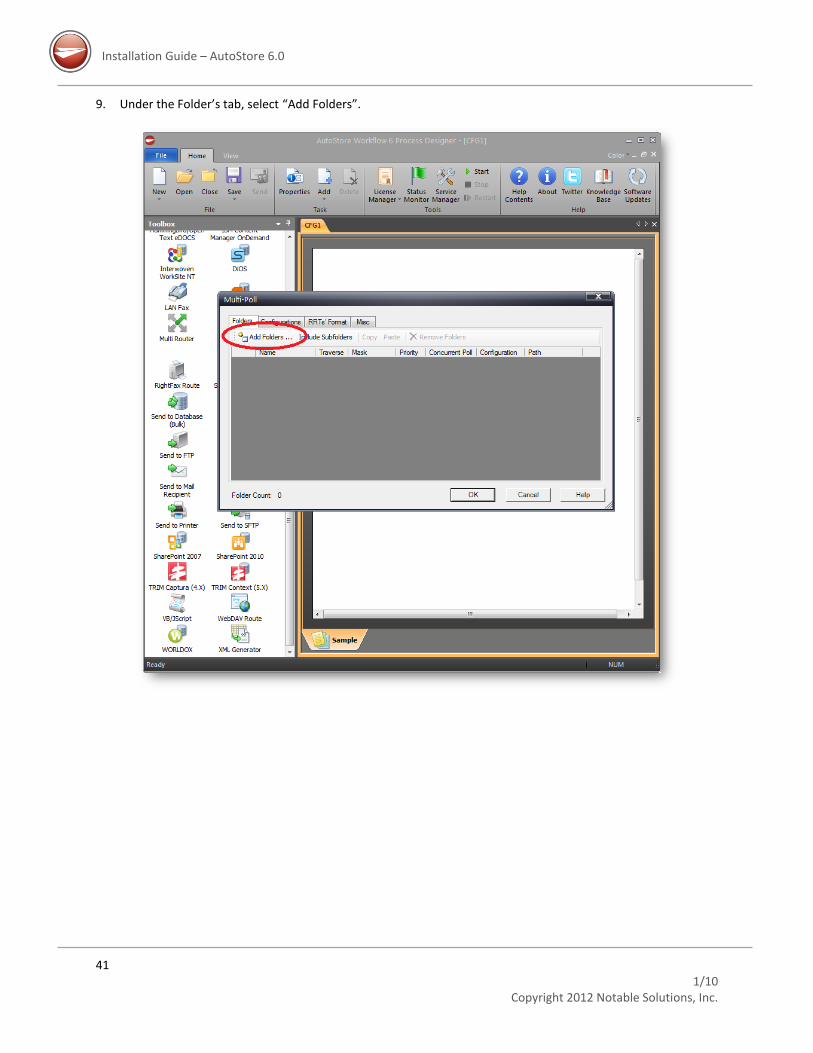
9. Under the Folder’s tab, select “Add Folders”.
Installation Guide – AutoStore 6.0
42
1/10 Copyright 2012 Notable Solutions, Inc.
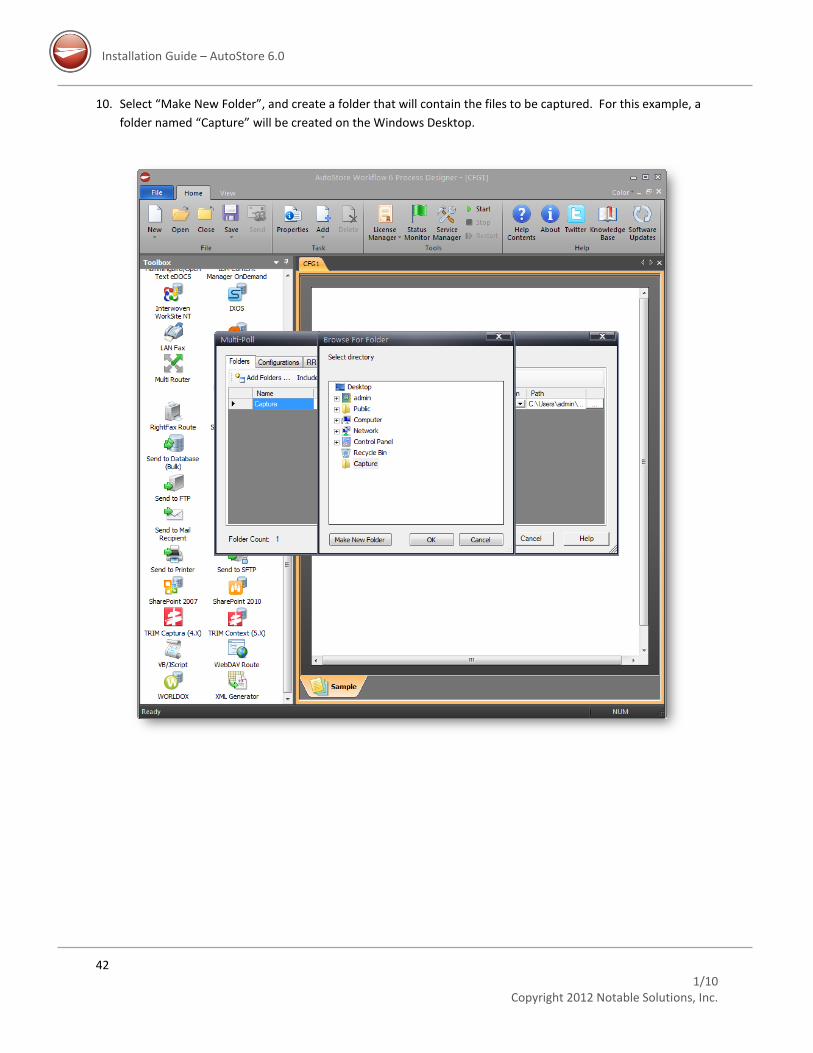
10. Select “Make New Folder”, and create a folder that will contain the files to be captured. For this example, a
folder named “Capture” will be created on the Windows Desktop.
Installation Guide – AutoStore 6.0
43
1/10 Copyright 2012 Notable Solutions, Inc.
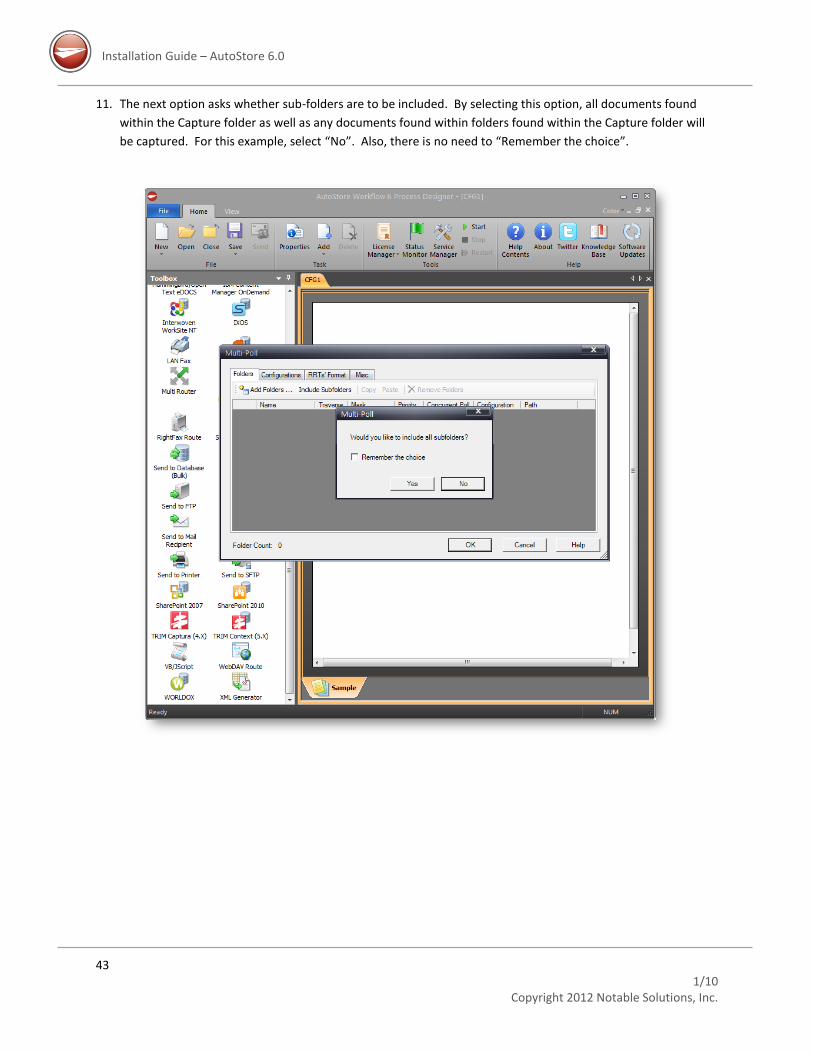
11. The next option asks whether sub-folders are to be included. By selecting this option, all documents found
within the Capture folder as well as any documents found within folders found within the Capture folder will
be captured. For this example, select “No”. Also, there is no need to “Remember the choice”.
Installation Guide – AutoStore 6.0
44
1/10 Copyright 2012 Notable Solutions, Inc.
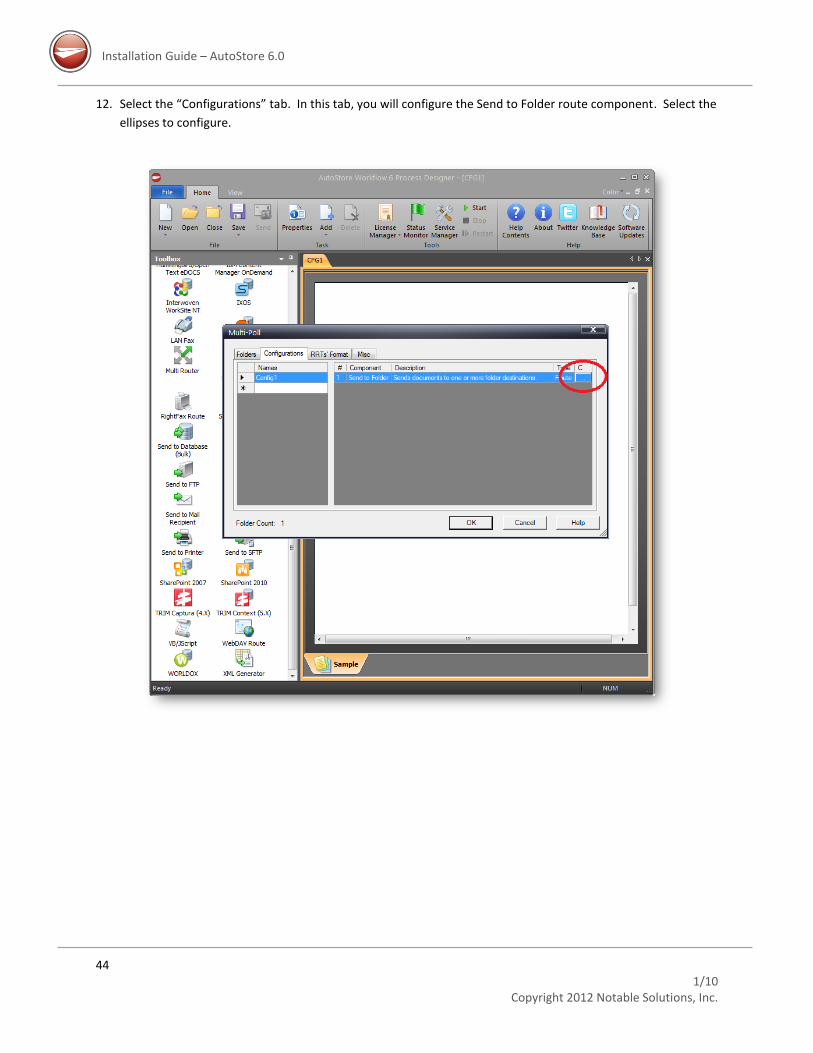
12. Select the “Configurations” tab. In this tab, you will configure the Send to Folder route component. Select the
ellipses to configure.
Installation Guide – AutoStore 6.0
45
1/10 Copyright 2012 Notable Solutions, Inc.
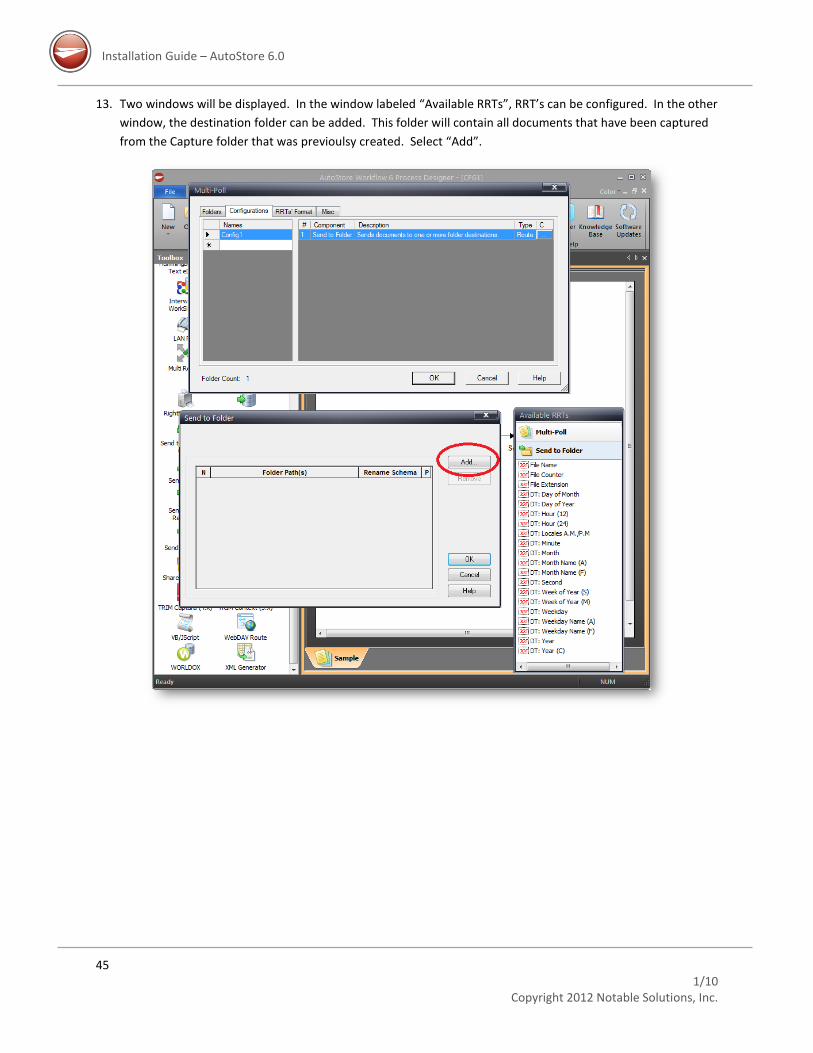
13. Two windows will be displayed. In the window labeled “Available RRTs”, RRT’s can be configured. In the other
window, the destination folder can be added. This folder will contain all documents that have been captured
from the Capture folder that was previoulsy created. Select “Add”.
Installation Guide – AutoStore 6.0
46
1/10 Copyright 2012 Notable Solutions, Inc.
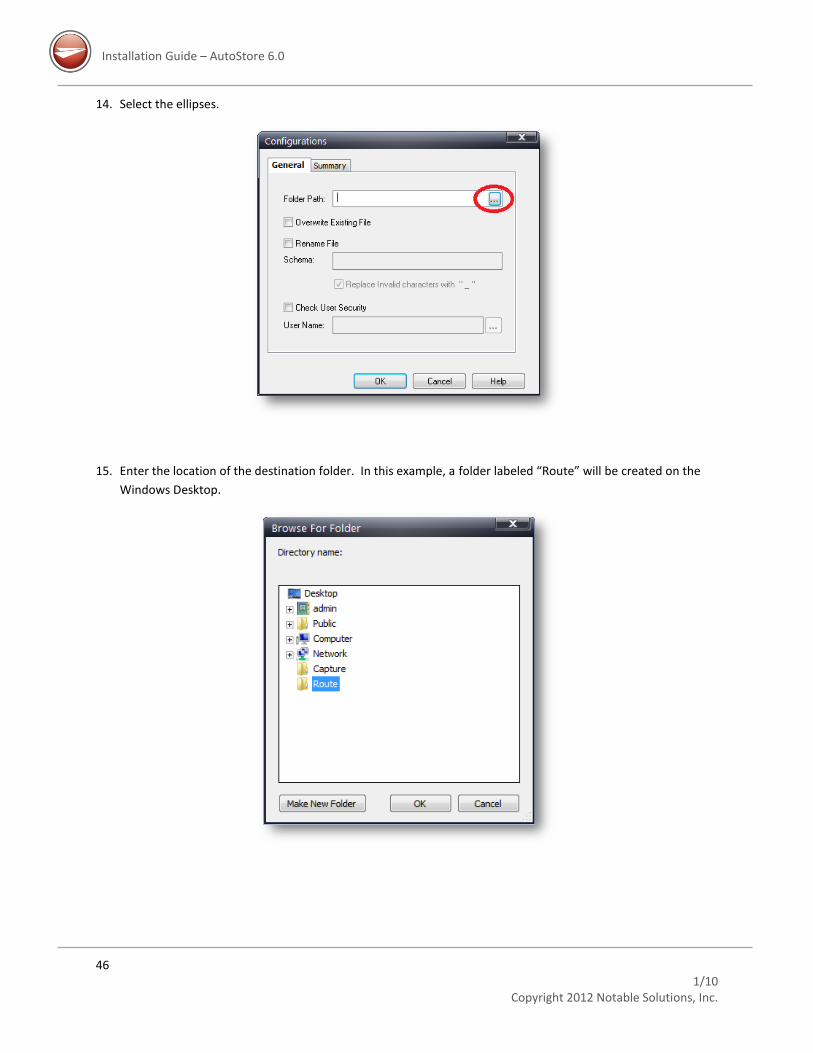
14. Select the ellipses.
15. Enter the location of the destination folder. In this example, a folder labeled “Route” will be created on the
Windows Desktop.
Installation Guide – AutoStore 6.0
47
1/10 Copyright 2012 Notable Solutions, Inc.
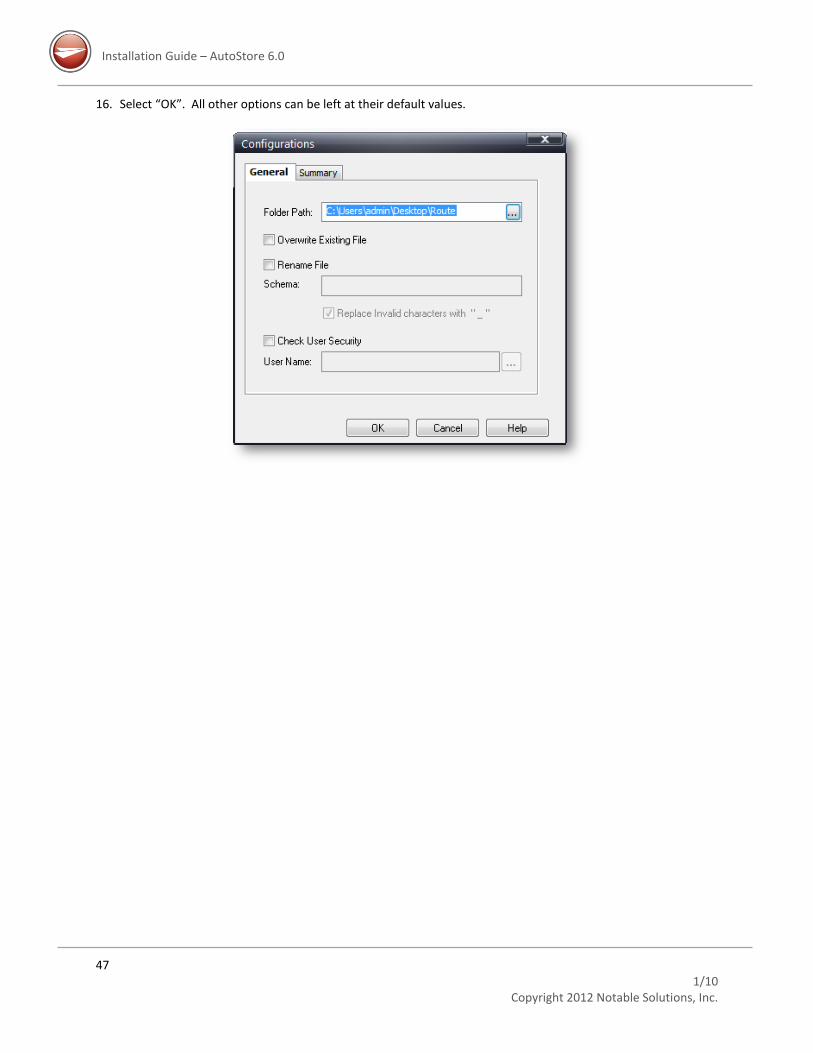
16. Select “OK”. All other options can be left at their default values.
Installation Guide – AutoStore 6.0
48
1/10 Copyright 2012 Notable Solutions, Inc.
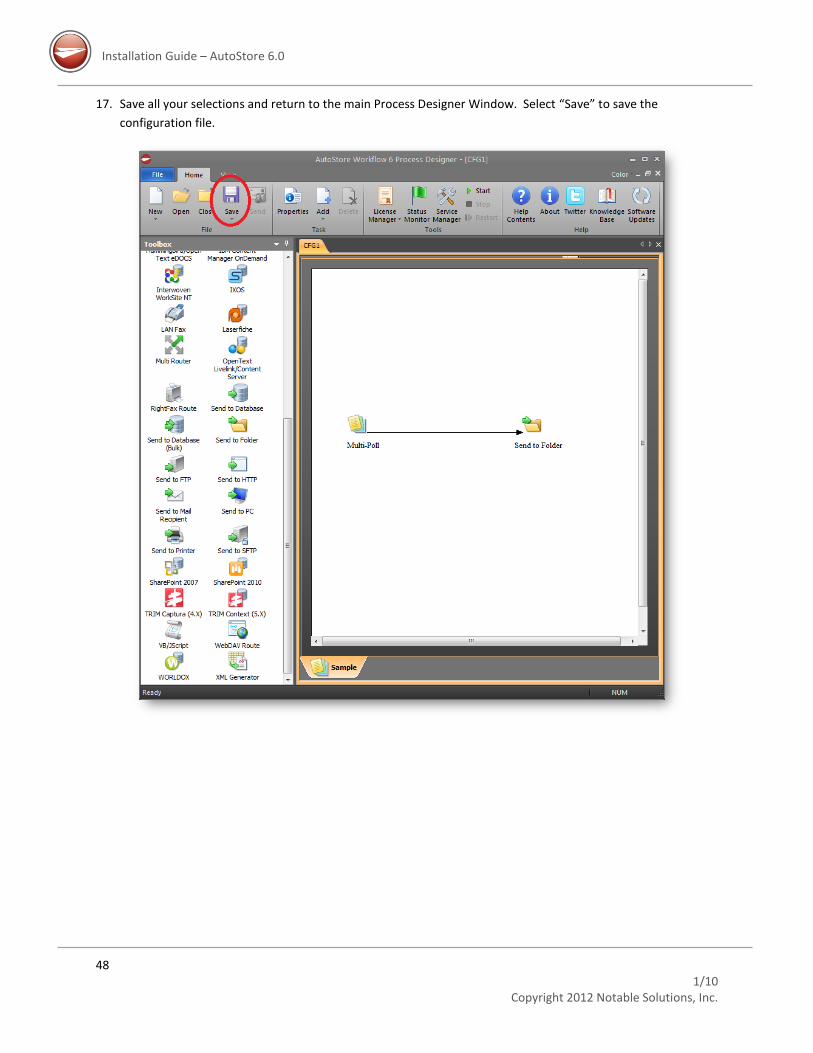
17. Save all your selections and return to the main Process Designer Window. Select “Save” to save the
configuration file.
Installation Guide – AutoStore 6.0
49
1/10 Copyright 2012 Notable Solutions, Inc.
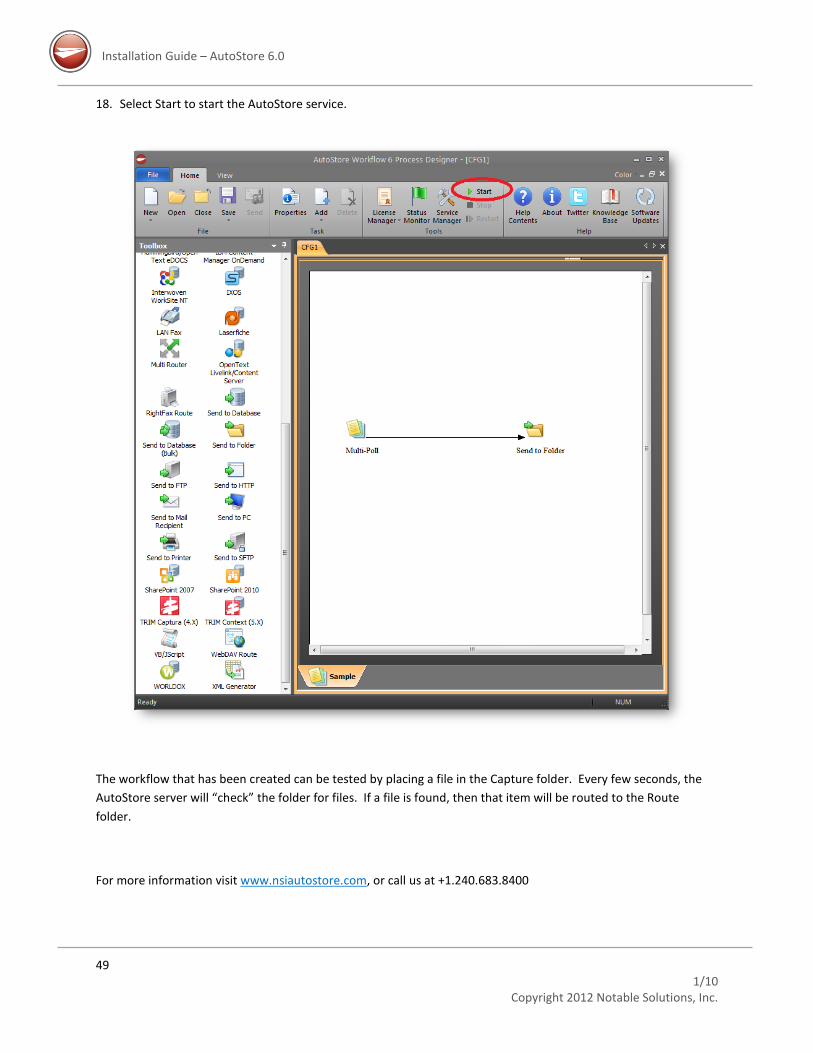
18. Select Start to start the AutoStore service.
The workflow that has been created can be tested by placing a file in the Capture folder. Every few seconds, the
AutoStore server will “check” the folder for files. If a file is found, then that item will be routed to the Route
folder.
For more information visit www.nsiautostore.com, or call us at +1.240.683.8400