Embed Size (px)
Citation preview
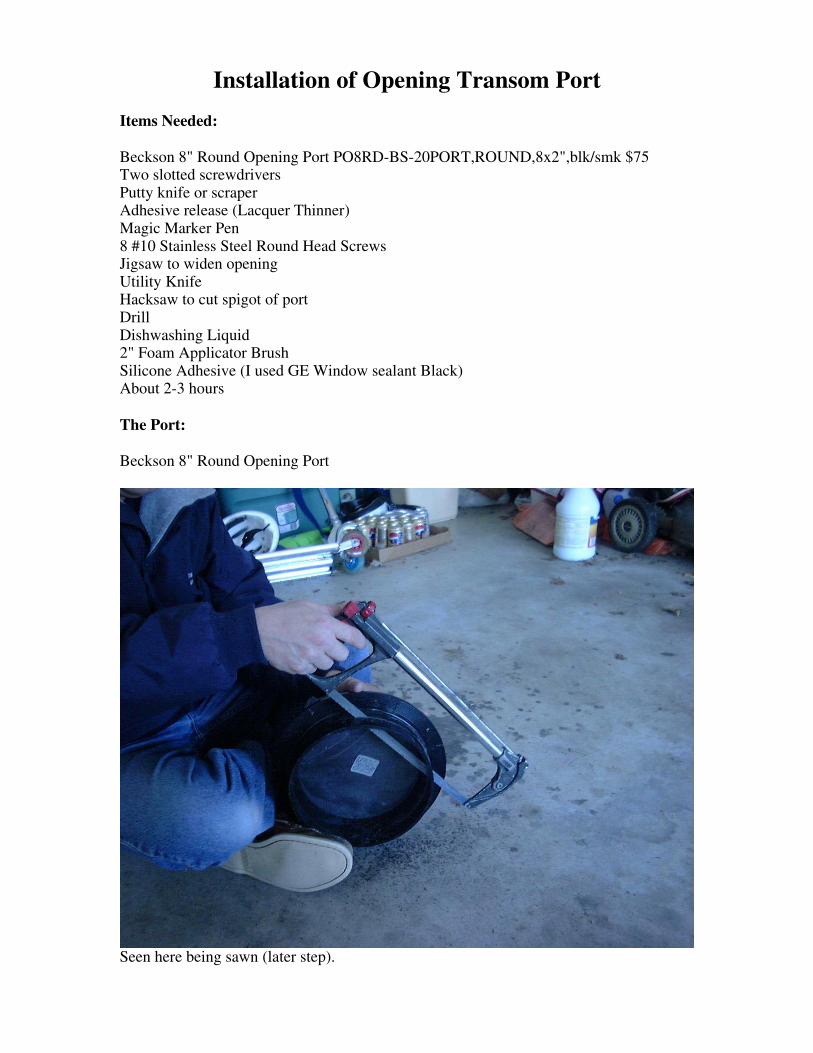
Installation of Opening Transom Port
Items Needed: Beckson 8" Round Opening Port PO8RD-BS-20PORT,ROUND,8x2",blk/smk $75 Two slotted screwdrivers Putty knife or scraper Adhesive release (Lacquer Thinner) Magic Marker Pen 8 #10 Stainless Steel Round Head Screws Jigsaw to widen opening Utility Knife Hacksaw to cut spigot of port Drill Dishwashing Liquid 2" Foam Applicator Brush Silicone Adhesive (I used GE Window sealant Black) About 2-3 hours The Port: Beckson 8" Round Opening Port
Seen here being sawn (later step).
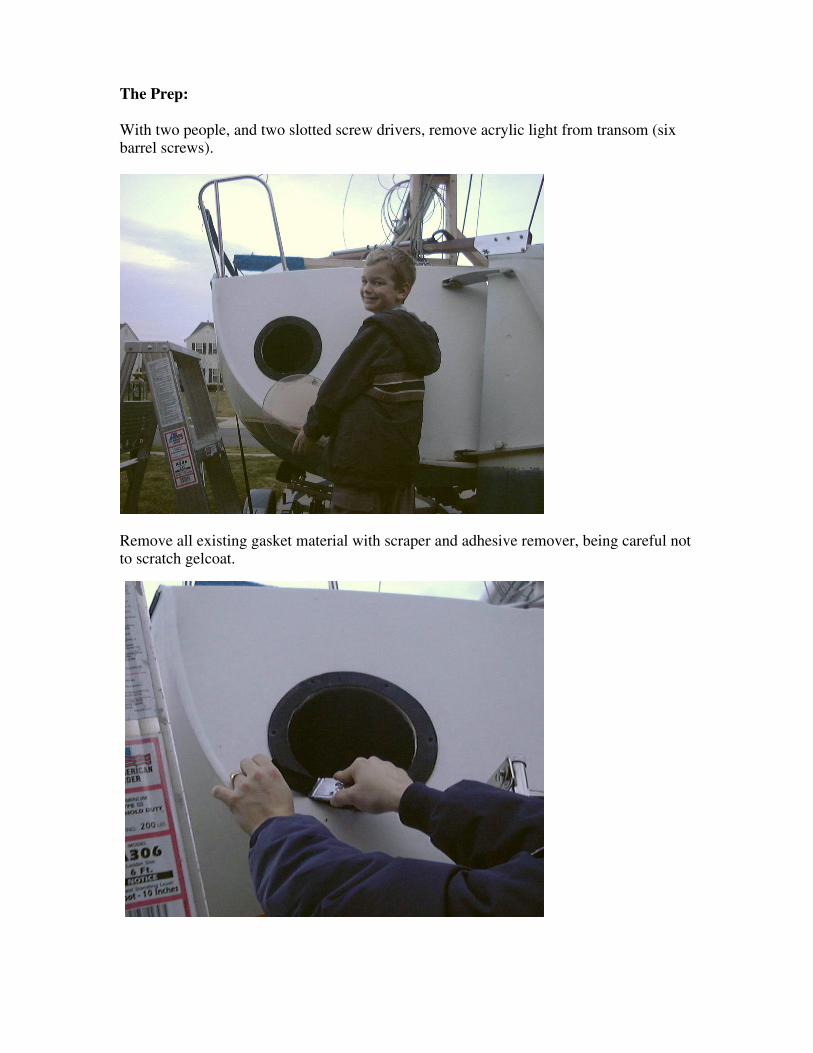
The Prep: With two people, and two slotted screw drivers, remove acrylic light from transom (six barrel screws).
Remove all existing gasket material with scraper and adhesive remover, being careful not to scratch gelcoat.
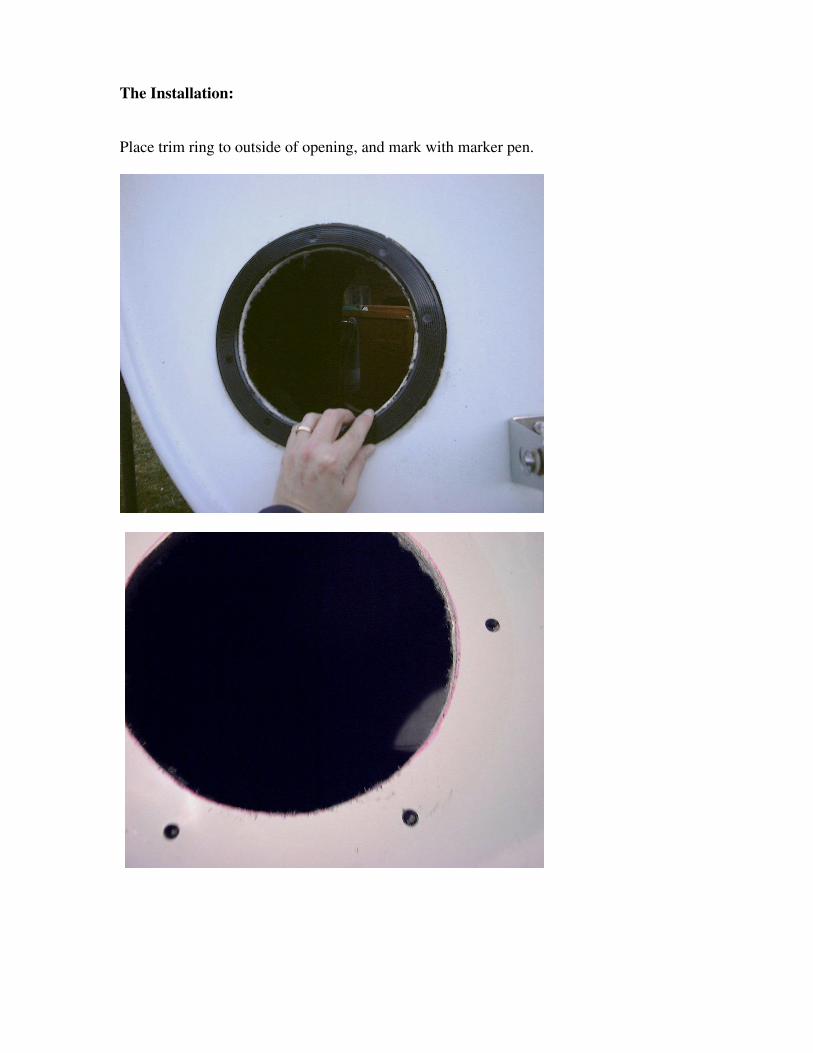
The Installation: Place trim ring to outside of opening, and mark with marker pen.
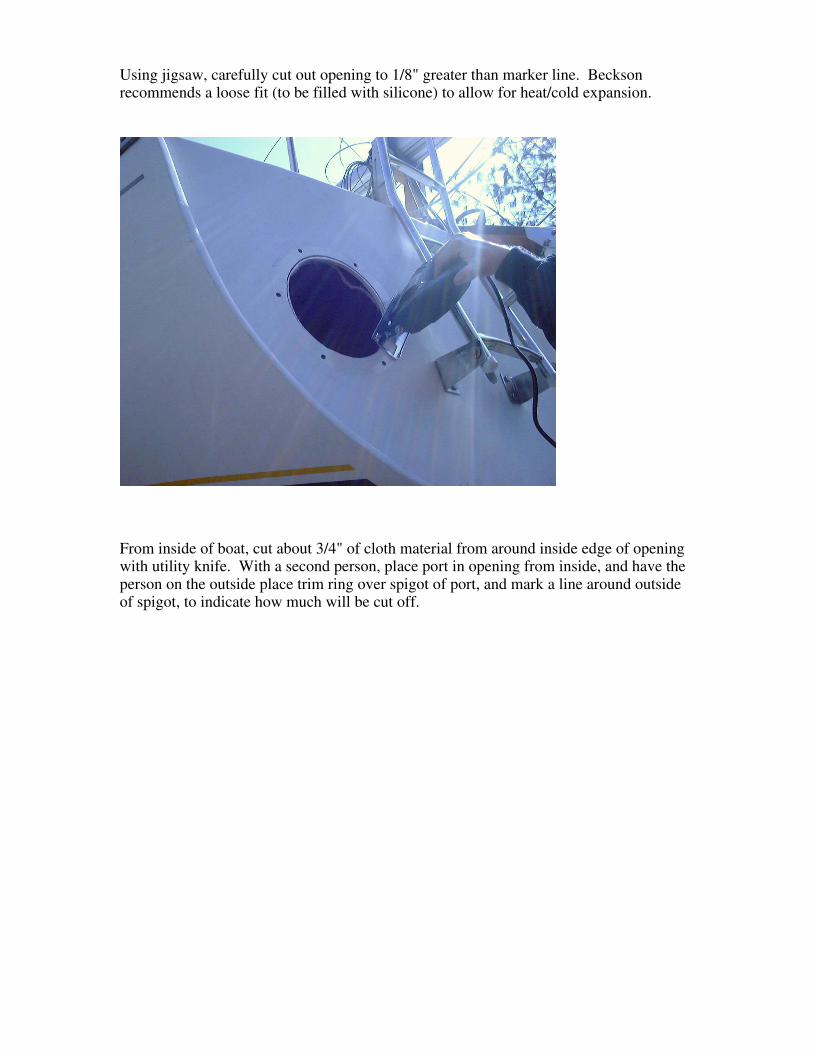
Using jigsaw, carefully cut out opening to 1/8" greater than marker line. Beckson recommends a loose fit (to be filled with silicone) to allow for heat/cold expansion.
From inside of boat, cut about 3/4" of cloth material from around inside edge of opening with utility knife. With a second person, place port in opening from inside, and have the person on the outside place trim ring over spigot of port, and mark a line around outside of spigot, to indicate how much will be cut off.
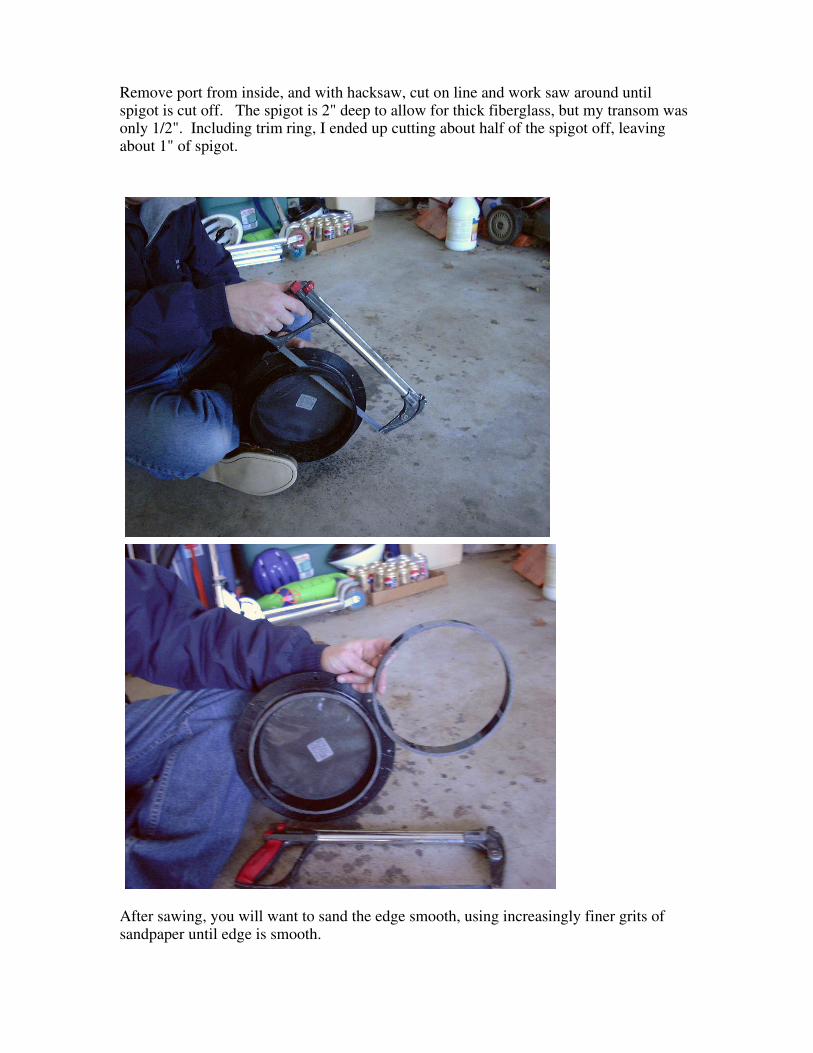
Remove port from inside, and with hacksaw, cut on line and work saw around until spigot is cut off. The spigot is 2" deep to allow for thick fiberglass, but my transom was only 1/2". Including trim ring, I ended up cutting about half of the spigot off, leaving about 1" of spigot.
After sawing, you will want to sand the edge smooth, using increasingly finer grits of sandpaper until edge is smooth.
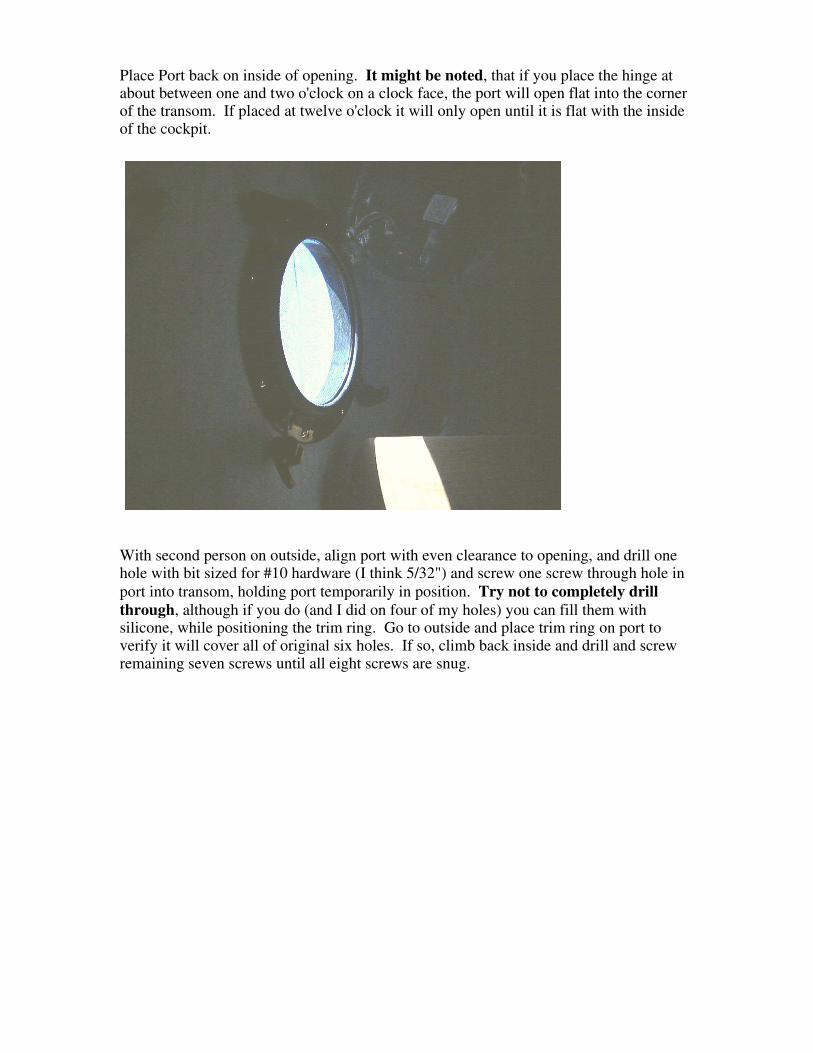
Place Port back on inside of opening. It might be noted, that if you place the hinge at about between one and two o'clock on a clock face, the port will open flat into the corner of the transom. If placed at twelve o'clock it will only open until it is flat with the inside of the cockpit.
With second person on outside, align port with even clearance to opening, and drill one hole with bit sized for #10 hardware (I think 5/32") and screw one screw through hole in port into transom, holding port temporarily in position. Try not to completely drill through, although if you do (and I did on four of my holes) you can fill them with silicone, while positioning the trim ring. Go to outside and place trim ring on port to verify it will cover all of original six holes. If so, climb back inside and drill and screw remaining seven screws until all eight screws are snug.
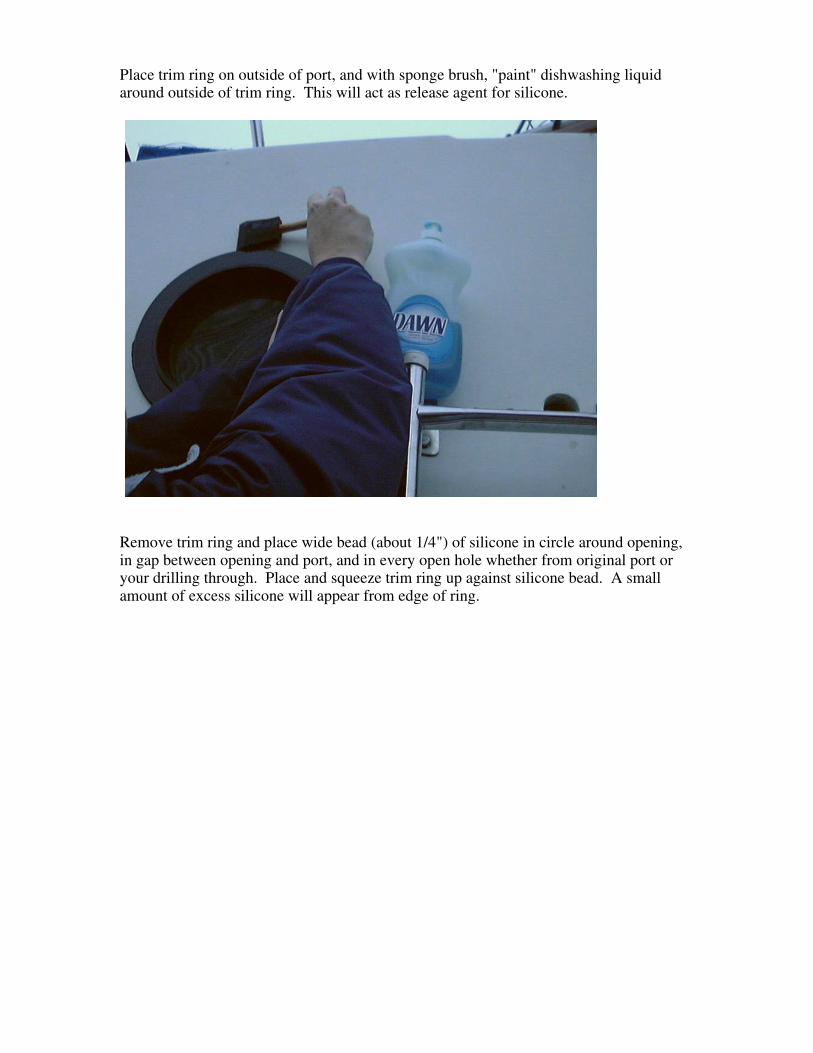
Place trim ring on outside of port, and with sponge brush, "paint" dishwashing liquid around outside of trim ring. This will act as release agent for silicone.
Remove trim ring and place wide bead (about 1/4") of silicone in circle around opening, in gap between opening and port, and in every open hole whether from original port or your drilling through. Place and squeeze trim ring up against silicone bead. A small amount of excess silicone will appear from edge of ring.
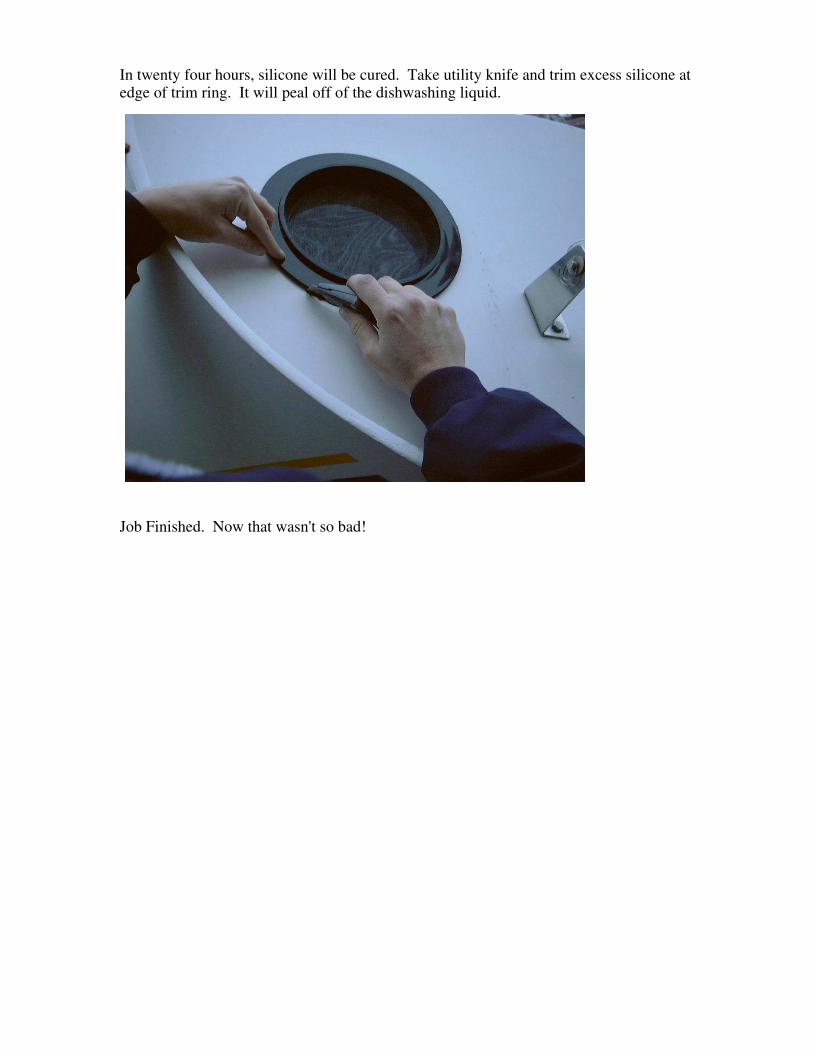
In twenty four hours, silicone will be cured. Take utility knife and trim excess silicone at edge of trim ring. It will peal off of the dishwashing liquid.
Job Finished. Now that wasn't so bad!