Embed Size (px)
Citation preview
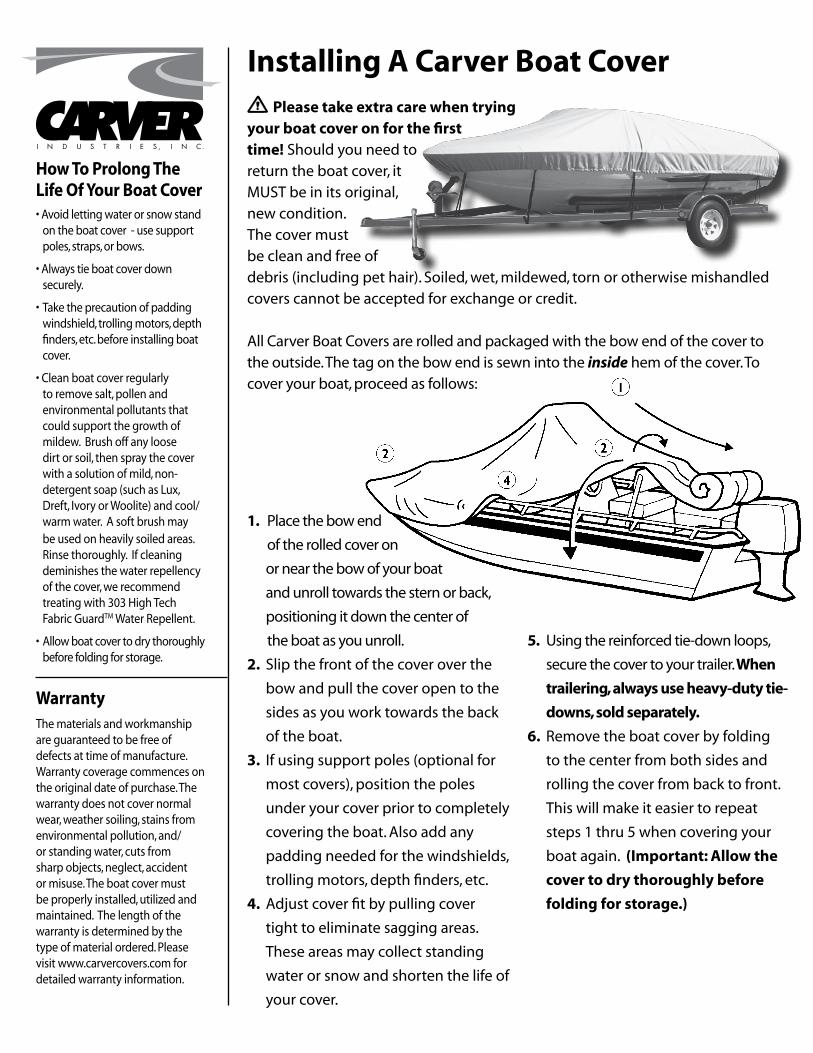
Please take extra care when trying your boat cover on for the first time! Should you need to return the boat cover, it MUST be in its original, new condition. The cover must be clean and free of debris (including pet hair). Soiled, wet, mildewed, torn or otherwise mishandled covers cannot be accepted for exchange or credit.
All Carver Boat Covers are rolled and packaged with the bow end of the cover to the outside. The tag on the bow end is sewn into the inside hem of the cover. To cover your boat, proceed as follows:
1. Place the bow end
of the rolled cover on
or near the bow of your boat
and unroll towards the stern or back,
positioning it down the center of
the boat as you unroll.
2. Slip the front of the cover over the
bow and pull the cover open to the
sides as you work towards the back
of the boat.
3. If using support poles (optional for
most covers), position the poles
under your cover prior to completely
covering the boat. Also add any
padding needed for the windshields,
trolling motors, depth finders, etc.
4. Adjust cover fit by pulling cover
tight to eliminate sagging areas.
These areas may collect standing
water or snow and shorten the life of
your cover.
5. Using the reinforced tie-down loops,
secure the cover to your trailer. When
trailering, always use heavy-duty tie-
downs, sold separately.
6. Remove the boat cover by folding
to the center from both sides and
rolling the cover from back to front.
This will make it easier to repeat
steps 1 thru 5 when covering your
boat again. (Important: Allow the
cover to dry thoroughly before
folding for storage.)
WarrantyThe materials and workmanship are guaranteed to be free of defects at time of manufacture. Warranty coverage commences on the original date of purchase. The warranty does not cover normal wear, weather soiling, stains from environmental pollution, and/or standing water, cuts from sharp objects, neglect, accident or misuse. The boat cover must be properly installed, utilized and maintained. The length of the warranty is determined by the type of material ordered. Please visit www.carvercovers.com for detailed warranty information.
Installing A Carver Boat Cover
I N D U S T R I E S , I N C .
How To Prolong The Life Of Your Boat Cover• Avoid letting water or snow stand
on the boat cover - use support poles, straps, or bows.
• Always tie boat cover down securely.
• Take the precaution of padding windshield, trolling motors, depth finders, etc. before installing boat cover.
• Clean boat cover regularly to remove salt, pollen and environmental pollutants that could support the growth of mildew. Brush off any loose dirt or soil, then spray the cover with a solution of mild, non-detergent soap (such as Lux, Dreft, Ivory or Woolite) and cool/warm water. A soft brush may be used on heavily soiled areas. Rinse thoroughly. If cleaning deminishes the water repellency of the cover, we recommend treating with 303 High Tech Fabric GuardTM Water Repellent.
• Allow boat cover to dry thoroughly before folding for storage.
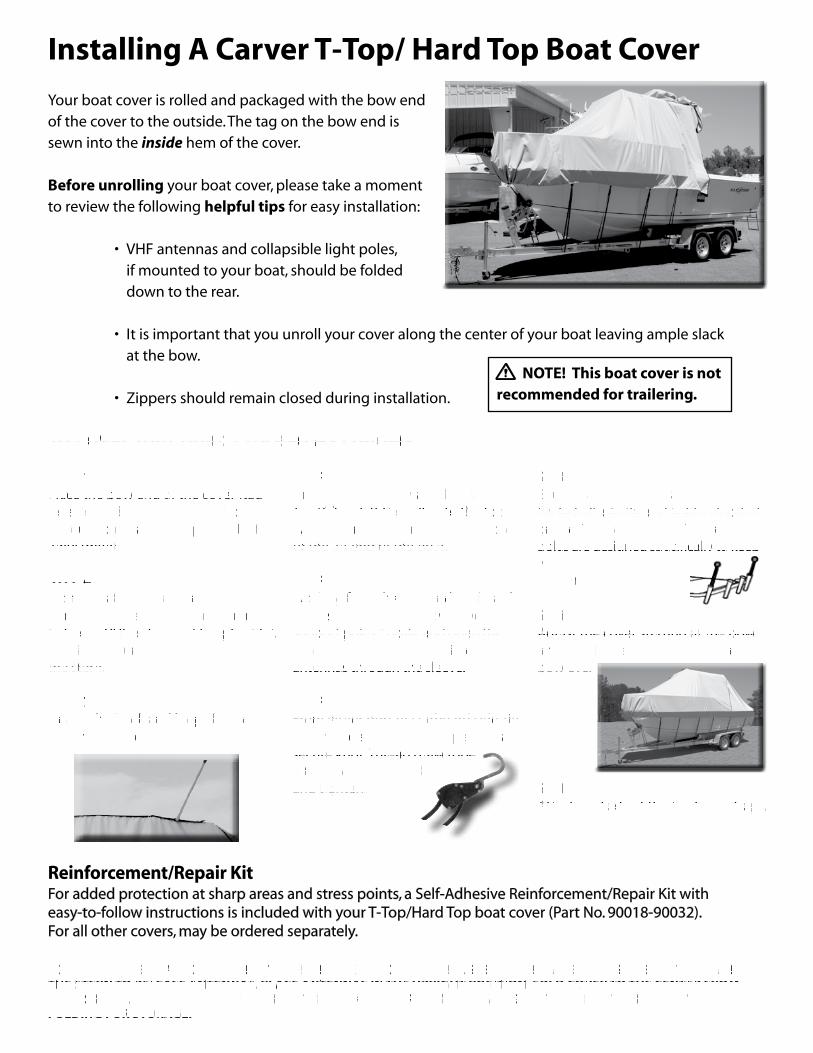
Installing A Carver T-Top/ Hard Top Boat Cover
Your boat cover is rolled and packaged with the bow end of the cover to the outside. The tag on the bow end is sewn into the inside hem of the cover.
Before unrolling your boat cover, please take a moment to review the following helpful tips for easy installation:
• VHF antennas and collapsible light poles, if mounted to your boat, should be folded down to the rear.
• It is important that you unroll your cover along the center of your boat leaving ample slack at the bow.
• Zippers should remain closed during installation.
Reinforcement/Repair KitFor added protection at sharp areas and stress points, a Self-Adhesive Reinforcement/Repair Kit witheasy-to-follow instructions is included with your T-Top/Hard Top boat cover (Part No. 90018-90032).For all other covers, may be ordered separately.
To Cover Your Boat, Proceed As Follows:
STEP 1Place the bow end of the cover (tag side down) loosely on top of bow of your boat leaving ample slack of adjustment.
STEP 4From the aft end, grasp roll and unroll the cover taking care to remain between VHF antennas (if applicable). Continue to unroll the cover toward the stern.
STEP 7Fasten the hook and loop closure on the antenna sleeve.
STEP 2Unroll the cover toward the Hard-Top/T-Top. Lift the roll onto the top. With cover stationary on top, proceed to the aft end of the boat.
STEP 5Working from the port and starboard sides, spread the boat cover over the support poles. Locate and open the antenna sleeve. Carefully direct the antennas through the sleeve.
STEP 8From either port or starboard side, tie off one side of the draw rope with a secure knot. Thread draw rope into rope ratchet (included) and tighten.
STEP 3Equally space the two support poles (included) into the rod holders located on the T-Top or Hard Top. The support poles are designed specifically to keep weight and pressure off the antennas.
STEP 6Adjust the cover starting at the bow and attach the sewn-in bow strap to bow eye.
STEP 9Attach and adjust the tie down straps.
TO REMOVE THE BOAT COVER, UNFASTEN THE HOOK & LOOP ANTENNA SLEEVE AND CAREFULLY SLIDE COVER TOWARD THE STERN TO RELEASE ANTENNAS. PLACE ANTENNAS IN THE UPRIGHT POSITION. FOLD COVER TO THE CENTER FROM BOTH SIDES AND ROLL FROM THE BACK TO THE FRONT. IMPORTANT: ALLOW THE COVER TO DRY THOROUGHLY BEFORE FOLDING FOR STORAGE.
NOTE! This boat cover is not recommended for trailering.
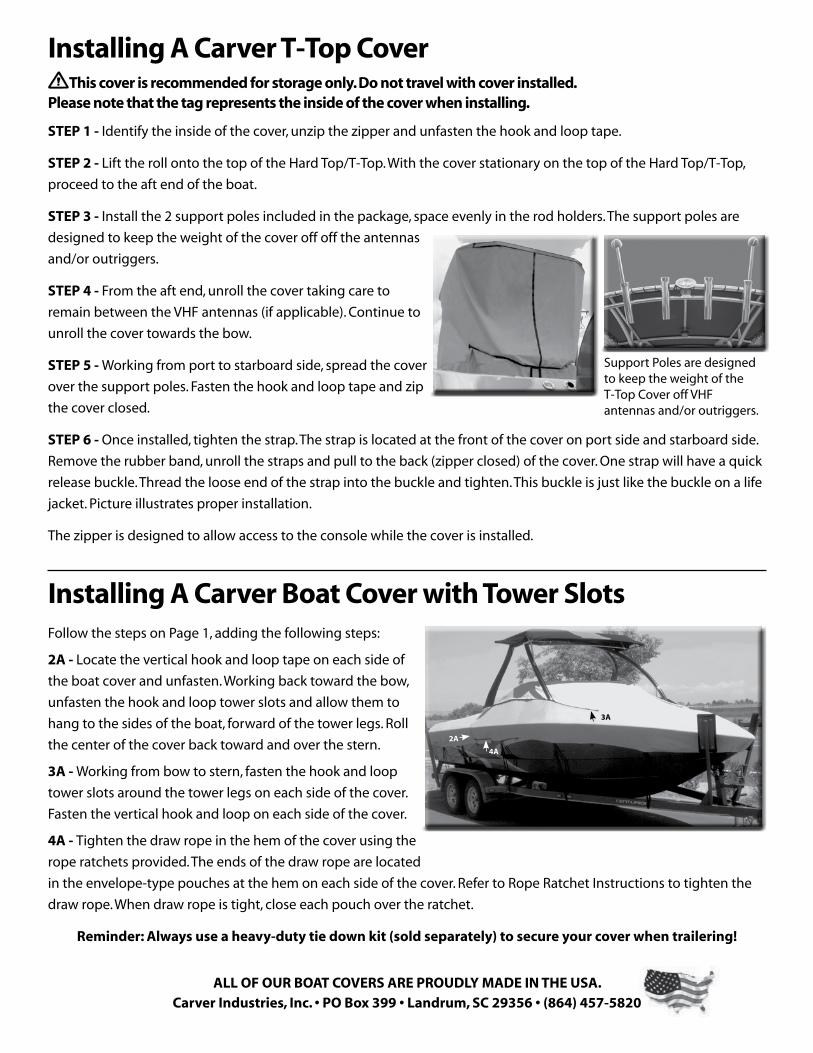
Installing A Carver T-Top Cover This cover is recommended for storage only. Do not travel with cover installed. Please note that the tag represents the inside of the cover when installing.
STEP 1 - Identify the inside of the cover, unzip the zipper and unfasten the hook and loop tape.
STEP 2 - Lift the roll onto the top of the Hard Top/T-Top. With the cover stationary on the top of the Hard Top/T-Top,
proceed to the aft end of the boat.
STEP 3 - Install the 2 support poles included in the package, space evenly in the rod holders. The support poles are
designed to keep the weight of the cover off off the antennas
and/or outriggers.
STEP 4 - From the aft end, unroll the cover taking care to
remain between the VHF antennas (if applicable). Continue to
unroll the cover towards the bow.
STEP 5 - Working from port to starboard side, spread the cover
over the support poles. Fasten the hook and loop tape and zip
the cover closed.
STEP 6 - Once installed, tighten the strap. The strap is located at the front of the cover on port side and starboard side.
Remove the rubber band, unroll the straps and pull to the back (zipper closed) of the cover. One strap will have a quick
release buckle. Thread the loose end of the strap into the buckle and tighten. This buckle is just like the buckle on a life
jacket. Picture illustrates proper installation.
The zipper is designed to allow access to the console while the cover is installed.
Installing A Carver Boat Cover with Tower SlotsFollow the steps on Page 1, adding the following steps:
2A - Locate the vertical hook and loop tape on each side of
the boat cover and unfasten. Working back toward the bow,
unfasten the hook and loop tower slots and allow them to
hang to the sides of the boat, forward of the tower legs. Roll
the center of the cover back toward and over the stern.
3A - Working from bow to stern, fasten the hook and loop
tower slots around the tower legs on each side of the cover.
Fasten the vertical hook and loop on each side of the cover.
4A - Tighten the draw rope in the hem of the cover using the
rope ratchets provided. The ends of the draw rope are located
in the envelope-type pouches at the hem on each side of the cover. Refer to Rope Ratchet Instructions to tighten the
draw rope. When draw rope is tight, close each pouch over the ratchet.
Reminder: Always use a heavy-duty tie down kit (sold separately) to secure your cover when trailering!
ALL OF OUR BOAT COVERS ARE PROUDLY MADE IN THE USA.Carver Industries, Inc. • PO Box 399 • Landrum, SC 29356 • (864) 457-5820
4A
2A
3A
Support Poles are designed to keep the weight of the T-Top Cover off VHF antennas and/or outriggers.

Mildew Prevention and TreatmentNo matter how carefully maintained, every boat is a target for a case of mildew. What causes mildew and what are the most sensible ways to prevent and treat it?
Mildew needs five things to grow and flourish: A food source, a temperature range comfortable to humans, moisture, darkness and stagnant (unmoving) air. Break any of these and the mildew will have more difficulty growing.
Mildew is a form of fungus present everywhere in the world. It is a primitive plant form that feeds on other plants and produces microscopic, seed-like spores that float freely. It takes dark, damp conditions to encourage their growth. Conditions just like those found on a boat.
Synthetic boat cover fabrics do not support the growth of mildew. Natural boat cover fabrics (those containing cotton) can support the growth of mildew, but such fabrics are treated with mildew inhibitors that will, with proper care, typically outlast the warranty period of the cover. However, dirt, pollen and other environmental particles that embed between the fibers of any boat cover fabric are gourmet fare for mildew and therefore, no boat cover fabric can prevent mildew from growing.
Since mildew is easier to prevent than to eliminate, the first concern should be prevention.
An essential boat-keeping chore should be a regular cleaning of the interior, especially prior to boat cover installation. Any form of dirt (from food crumbs to suntan lotion to pollen) can become a foothold for mildew.
Provide good ventilation under the cover. Utilize boat cover accessories such as vents which are invaluable in improving air circulation and allowing moisture from condensation to escape.
Mildew cannot survive in light and heat, so take wet gear out of your boat and spread it in the sun before stowing. Expose all sides to the sunlight and turn items like life jackets inside-out for full effect. Allow your boat to dry in the sun before installing your cover.
Silica gel and activated alumna are porous granules that absorb up to half their weight in moisture from the atmosphere and can be purchased inexpensively at hardware stores. Using a double thickness of nylon stocking as a container, hang suspended in the boat, under the cover. These products can be reused after drying for about an hour in a 300 degree vented oven.
Even the best preventative measures sometimes are not enough, and you have to rid your boat of mildew.
Start with a complete cleaning of the boat’s interior. Avoid strong laundry detergents since phosphates are a delicacy for mildew. Use low-phosphate soap for normal scrubbing and a mild alkali, such as washing soda or trisodium phosphate for stubborn mildew. Be sure to rinse the area thoroughly.
Most remedies rely on sodium hypochlorite (household bleach) to remove mildew. A good, strong, all-around solution is ½ cup household bleach per gallon of water. Do not use liquid detergents in combination with bleaches. Scrub the affected surfaces with a soft brush, using rubber gloves and eye protection. Rinse thoroughly.
For cleaning our boat covers and bimini top canvas, we highly recommend 303 Fabric & Vinyl Cleaner which is safe and effective. Be aware that repeated cleanings can diminish the water repellency of certain marine canvas. To restore water repellency to factory-new levels, we highly recommend 303 High Tech Fabric Guard. For more information, please visit our website, www.carvercovers.com or www.303products.com.
Remember that anything used to kill or remove mildew will wash or wear away over time, so be prepared for repeated treatments as part of your maintenance routine.
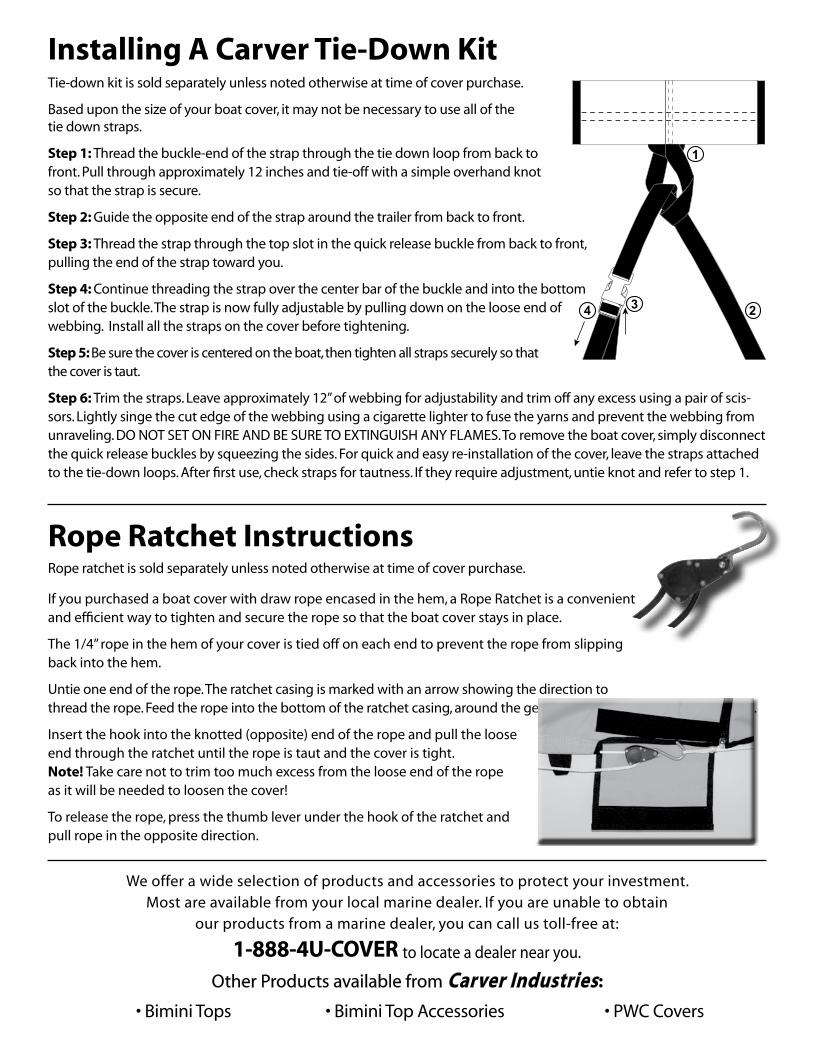
Installing A Carver Tie-Down KitTie-down kit is sold separately unless noted otherwise at time of cover purchase.
Based upon the size of your boat cover, it may not be necessary to use all of the tie down straps.
Step 1: Thread the buckle-end of the strap through the tie down loop from back to front. Pull through approximately 12 inches and tie-off with a simple overhand knot so that the strap is secure.
Step 2: Guide the opposite end of the strap around the trailer from back to front.
Step 3: Thread the strap through the top slot in the quick release buckle from back to front, pulling the end of the strap toward you.
Step 4: Continue threading the strap over the center bar of the buckle and into the bottom slot of the buckle. The strap is now fully adjustable by pulling down on the loose end of webbing. Install all the straps on the cover before tightening.
Step 5: Be sure the cover is centered on the boat, then tighten all straps securely so that the cover is taut.
Step 6: Trim the straps. Leave approximately 12” of webbing for adjustability and trim off any excess using a pair of scis-sors. Lightly singe the cut edge of the webbing using a cigarette lighter to fuse the yarns and prevent the webbing from unraveling. DO NOT SET ON FIRE AND BE SURE TO EXTINGUISH ANY FLAMES. To remove the boat cover, simply disconnect the quick release buckles by squeezing the sides. For quick and easy re-installation of the cover, leave the straps attached to the tie-down loops. After first use, check straps for tautness. If they require adjustment, untie knot and refer to step 1.
Rope Ratchet InstructionsRope ratchet is sold separately unless noted otherwise at time of cover purchase.
If you purchased a boat cover with draw rope encased in the hem, a Rope Ratchet is a convenient and efficient way to tighten and secure the rope so that the boat cover stays in place.
The 1/4” rope in the hem of your cover is tied off on each end to prevent the rope from slipping back into the hem.
Untie one end of the rope. The ratchet casing is marked with an arrow showing the direction to thread the rope. Feed the rope into the bottom of the ratchet casing, around the gear and back out through the bottom.
Insert the hook into the knotted (opposite) end of the rope and pull the loose end through the ratchet until the rope is taut and the cover is tight. Note! Take care not to trim too much excess from the loose end of the rope as it will be needed to loosen the cover!
To release the rope, press the thumb lever under the hook of the ratchet and pull rope in the opposite direction.
1
234
We offer a wide selection of products and accessories to protect your investment. Most are available from your local marine dealer. If you are unable to obtain
our products from a marine dealer, you can call us toll-free at:
1-888-4U-COVER to locate a dealer near you.
Other Products available from Carver Industries:
• Bimini Tops • Bimini Top Accessories • PWC Covers

Carver AccessoriesBoat Cover Tie Down KitThis is an efficient and sure method for securing a boat cover for trailering Constructed of 1” black polypropylene webbing and convenient quick-release buckles. Unlike bungee cords, these durable tie-downs don’t stretch, so they won’t tear your cover or damage your boat. Each kit contains twelve 8’ straps.
Boat Cover Support PolesPrevent dry rot and mildew! These lightweight telescoping poles are designed to support your cover so that water does not pool. Available in three styles. Each style is constructed of anodized aluminum tubing which can be adjusted to desired height.
Boat Cover Support SystemThe easiest most cost-effective way to extend the life of your boat cover. Eliminates virtually all possible areas that could collect water and allow it to pool, causing damage to the cover. Includes adjustable anodized aluminum pole, system center, strap set and simple installation instructions. Two systems can be easily connected for pontoon boats!
Boat Cover Storage BagThis strong, lightweight and breathable storage bag is ideal for storing your boat cover when not in use. Convenient draw cord with barrel lock keeps bag securely closed. Bag is roomy 30" x 36" to accommodate virtually any size boat cover.
Boat Cover Reinforcement / Repair KitThis repair kit is an ideal way to prolong the life of your boat cover. Kit includes one yard of self-adhesive material. Use it to add extra padding to stress points from windshields, trolling motors, etc. or to patch wear areas and tears that may develop over time. Simply cut to desired size and apply to clean, dry surface.
Suction Cup Tie DownsPerfect for hundreds of tie down applications where there simply isn’t an anchor point, cleat, or other device to anchor conventional tie downs. Giant 3-1/4” suction cups with toggle ball ties stick to boat finishes, auto finishes and windows. Great for boat covers! 6” ties stretch to 11”. 4 per pack.
303 Fabric/Vinyl CleanerRecommended by Sunbrella®. This product contains no soaps, detergents or solvents. 303 Fabric and Vinyl Cleaner is your BEST choice for cleaning indoor and outdoor fabrics, upholstery, carpeting and vinyl. Perfect for cleaning boat covers and bimini top canvas. Non-toxic, biodegradable and rinses residue free. 32 oz Trigger Sprayer. For general cleaning, use 4 oz. per 1 gallon of warm water.
303 High Tech Fabric GuardRecommended by Sunbrella®. Powerful enough to protect fabrics in the harshest environment . . . outdoors. On outdoor fabrics, 303 High Tech Fabric Guard restores lost water repellency and stain repellency to factory new levels. Resists soiling, impedes mildew formation and helps protect against the sun’s harmful UV rays. Proper maintenance with 303 Products will add to the life of your boat cover or bimini top canvas, save you money and it’s easy! 32 oz. Trigger Sprayer covers 150 to 200 square feet.
You can judge a boat by its cover!www.carvercovers.com
I N D U S T R I E S , I N C .
Adjustable Support Pole w/ Boat Vent IIReplace a conventional support pole with one that provides an air vent to reduce moisture, heat and mildew under the cover. Includes adjustable anodized aluminum pole, boat vent and simple installation instructions.
Rope RatchetNo more fumbling with knots to secure your cover or elastic straps that come loose. The rope ratchet allows you to tighten your cover to proper tension then releases with a convenient thumb lever. Accommodates 1/4” rope which is standard on all Carver Custom Covers and many Styled-To-Fit Boat Covers.
Universal Motor CoversAvailable in our primary boat cover fabrics to match your boat cover, our Universal Motor Coversare a great option if you are upgrading your motoror simply need a replacement motor cover! Available in nine sizes, each cover has 1/4” draw rope sewn into the hem for easyinstallation and snug fit.