Embed Size (px)
Citation preview

University of Kentucky Purchasing Division 322 Peterson Service Building Lexington, KY 40506-0005
A n E q u a l O p p o r t u n i t y U n i v e r s i t y
INVITATION FOR BIDS
CCK-2268-18 UKGS OR Flooring ADDENDUM # 1
11-27-17
ATTENTION: This is not an order. Read all instructions, terms and conditions carefully.
IMPORTANT: BID AND ADDENDUM MUST BE RECEIVED BY 12-7-17. LEXINGTON, KY TIME Bidder must acknowledge receipt of this and any addendum as stated in the Invitation for Bids. Please see the enclosed for clarification to the bid document.
The bid date is being changed to 12-7-17. Enclosed are the clarifications to the bid document.
OFFICIAL APPROVAL SIGNATURE UNIVERSITY OF KENTUCKY
________________________________________
JIM SUTTON ________________________________________
Contracting Officer / (859) 257-5406 Typed or Printed Name
product data sheet
nora® dryfix ADHESIVE TAPE
Page 1 of 3
1 Product Name / Manufacturer Product 1.1nora® dryfix is easy and fast-to-use adhesive tape that is used to install specific nora® flooring products (2mm - 4mm). It is odorless, free of organic solvents, formaldehyde, asbestos, lindane, rosins, plasticizers or any other volatile components. It is non-flammable and freeze-thaw stable and will not dry out or become brittle.
Manufacturer 1.2nora systems, Inc. 9 Northeastern Blvd. Salem, NH 03079 800-336-5096 603-894-1021 www.nora.com/us
2 Technical Data Unit: 31.49 inches by 82 feet (0.8m x 25m) tape 2.1covered by white wax paper. Packaging: White box. 2.2
Shelf life: 2 years min.; if expired do not use. 2.3
Storage: Room temperature and away from 2.4direct sunlight. Freeze/Thaw stable: Stable per ASTM D7149 2.5at 0°F (- 18°C). Open time: No limit. Substrate to be dust free. 2.6
Moisture in concrete tolerance: ≤ 85% RH 2.7following the protocol of ASTM F2170 (Standard Test Method for Determining Relative Humidity in Concrete Floor Slabs Using in situ Probes).
VOC Content: VOC content is < 2.5 grams/liter; 2.8product is in compliance with SCAQMD Rule 1168 Standard for Rubber Floor Adhesives, which has a VOC limit of 60. LEED Contribution: nora dryfix adhesive is in 2.9compliance with the VOC limits of SCAQMD Rule 1168 required by LEED and can contribute to
LEED Credit 4.1-Low Emitting Materials, Adhesives & Sealants. In addition it is also GREENGUARD Children & Schools Certified. Coverage: ~215 square feet per roll 2.10
Warranty: As detailed in the nora® Limited 2.11Warranty. For complete details go to www.nora.com/us.
Application: Cover entire substrate where 2.12flooring is being installed.
Ideal Working Temperature: 68ºF ± 5ºF 2.13(17-23ºC)
Castor Chairs: Immediately after installation. 2.14
Heavy Foot Traffic: Immediately after 2.15installation.
Heavy Rolling Loads: Immediately after 2.16installation.
Wet Cleaning: Immediately after installation. 2.173 Installation
Site Conditions: 3.1The area to receive flooring, must be fully enclosed, weather tight and climate controlled at the normal service ambient temperature and humidity (except walk in freezers or similar) or 68°F ± 5°F and 50% ± 10% ambient relative humidity (RH) for 48 hours before, during and 72 hours after the installation. The flooring and all accessories must be acclimated within this area or nearby with the same climate condition for at least 48 hours prior to installation. Areas of the flooring subjected to direct sunlight, for example through doors or windows, must have them covered using blinds, curtains, cardboard or similar for 24 hours prior, throughout and for a period of 72 hours after the installation.
Page 2 of 3
nora flooring must not be installed when dew point occurs (a surface temperature at which condensation occurs). The substrate surface must be at least 5°F above dew point when installing nora products. Example: If the ambient conditions are 70°F and 65% RH, the dew point is 57°F and you must not proceed with the installation, unless the surface temperature is at a minimum of 62°F. Dew point calculation charts are available on the web. For preparation of substrates and subfloor conditions, follow the written instructions as outlined in the nora installation guide and ASTM F710 – Standard Practice for Preparing Concrete Floors to Receive Resilient Flooring.
Note: The surface of any patch, leveler or concrete must be clean and dust free or primed using a water-based primer that is not film forming, diluted 1:1 with clean cold potable water. Mat Bond Testing: Conducting mat bond tests will help determine the compatibility of the flooring adhesive to the substrate surface, including the preparation and all other products to be used. There are several factors that can influence the outcome of a bond test, therefore it is important to follow the protocol. The responsible party must ensure that the tests are conducted only at a time when subfloor and jobsite conditions comply with those requirements which are outlined in this installation guide and ASTM F710 – Standard Practice for Preparing Concrete Floors to Receive Resilient Flooring. The area where the testing is being performed, must be fully enclosed, weather tight and climate controlled at the normal service ambient temperature and humidity (except walk in freezers or similar) or 68°F ± 5°F and 50% ± 10% ambient relative humidity (RH) for 48 hours before, during and 72 hours after the installation. Mat Bond tests are recommended to determine the compatibility of the flooring system. Install an appropriate number of 2 foot square bond tests using nora dryfix and roll with a 100lb roller. Use tape or similar to seal all of the edges to the substrate. No foot traffic (12 hrs.) or rolling loads. After 24 hours, assess the bond test by starting at a corner and pulling up the entire piece if possible. The success or failure is determined by the test administrator’s visual interpretation and amount of physical effort required when removing the floor
covering. Removal of the sample should be very difficult, and then it can be considered successful providing no sign of moisture is found. It is the responsibility of the installing party to determine the suitability of the subfloor being covered. Bond tests are required for nora products applied directly over the properly prepared substrates.
Installation Guidelines: 3.2Following the nora Installation Guide, the nora dryfix tape must be installed prior to dry fitting the flooring materials. The surface of any patch, leveler or concrete must be clean and dust free or primed using a water-based primer that is not film forming, diluted 1:1 with clean cold potable water. Unroll the nora dryfix tape into position. Overlap all seams by at least 1/2” and press into place using a broom or similar to remove any air bubbles. Allow a minimum of 15 minutes before cutting seams. If the tape stretched during the installation process it will return to its original size.
Trace cut all seams without damaging the substrate, resulting in no overlaps or gaps, then remove the excess material. The use of a straight edge is recommended. If any trash or debris is trapped underneath the tape, remove it and replace that section of dryfix. Dry lay the flooring as detailed in the nora installation guide and uplift half the area and vacuum the back of the flooring along with the surface of the wax paper. Remove the protective wax paper, fold or roll the wax paper for ease of disposal, leaving approximately 4” and fold that under the flooring. Replace flooring onto the exposed tape and do not stand on it until you are sure of correct positioning, as it is still possible to reposition it. Use a suitable heavy roller to remove any air bubbles and ensure a good bond. Weld all seams with either nora heat or cold weld as specified (prevent any traffic on the cold weld for 8 hours). This can be performed immediately. For detailed instructions, please refer to the proper section of the nora installation guide. nora systems, Inc. cannot accept any liability for seams that open up or peak due to climate/temperature change if seams are not welded.
Page 3 of 3
Clean up: Do not wash or perform any maintenance of the floor for a minimum of 72 hours after cold welding to allow it to cure and do not perform any high speed burnishing for at least five days. For areas with heat welded seams, cleaning can begin immediately. Note: If nora dryfix tape is used over existing flooring, nora systems, Inc. accepts no liability for any failure due to other manufacturers’ flooring products or the possible breakdown of that flooring bond from the subfloor for any reason. Providing both the moisture test and Mat Bond test have acceptable results then the installation may continue.
Dated: February 2016
product data sheet
nora® nTx 020 SURFACE BOND ENHANCER
Page 1 of 5
1 Product Name / Manufacturer 1.1 Product
nora® nTx 020 is a 1 component Polyurethane resin surface bond enhancer for use with the nora® nTx system only for porous and non-porous substrates.
1.2 Manufacturer nora systems, Inc. 9 Northeastern Blvd. Salem, NH 03079 800-336-5096 603-894-1021 www.nora.com/us
2 Technical Data 2.1 Unit: 1 component surface bond enhancer
2.2 Packaging: 2.5 gallon plastic container 2.3 Shelf life: Minimum 1 year 2.4 Storage: Room temperature, away from direct
sunlight and dry area
2.5 Freeze/Thaw stable: Stable per ASTM D7149 at 0°F (- 18°C).
2.6 Cure time: 1-2 hours 2.7 Moisture in concrete tolerance: Per the
flooring requirements
2.8 VOC content: VOC content is 0 grams/liter; product is in compliance with the SCAQMD Rule 1168 Standard for Architectural Sealants, which has a VOC limit of 250
2.9 LEED Contribution: nora® nTx 020 is in compliance with the VOC limits of SCAQMD Rule 1168 required by LEED and can contribute to LEED Credit 4.1 Low Emitting Materials, Adhesives & Sealants
2.10 Coverage: Approximately 875 s/f per 2.5 gallon unit
2.11 Warranty: See nora® nTx Limited Warranty. For complete details go to www.nora.com/us.
2.12 Ideal Working Temperature: 60°F / 15°C to 75°F / 24°C, 40 % to 65 % relative humidity
2.13 Foot Traffic: Prevent any traffic on the seams until the nora cold weld has cured for approximately 8 hours.
2.14 Castor Chairs: When dry & cured 2.15 Heavy Foot Traffic: When dry & cured
2.16 Heavy Rolling Loads: When dry & cured 2.17 Wet Cleaning: Wet mopping – after 8 hours,
machine scrub after 24 hours and if required to buff floors – after 72 hours.
3 Installation 3.1 Site Conditions
It is mandatory to use nora nTx 020, which is a surface bond enhancer for all nora nTx installations on the surface of the properly prepared substrate. It is the responsibility of the installing party to determine the suitability of the subfloor and substrate being covered. The prepared substrate must be smooth and ridge free, using an approved underlayment following the manufacturer’s written usage instructions (refer to the Subfloor Preparation section of the nTx installation guide.) Note: To minimize tile run off or gapping, specify a floor flatness tolerance, to be agreed upon by the owner, general contractor and flooring contractor, prior to the installation. The area to receive flooring, must be fully enclosed, weather tight and climate controlled at the normal service ambient temperature and humidity (except walk in freezers or similar) or 68°F ± 5°F and 50% ± 10% ambient relative humidity (RH) for 48 hours before, during and 72
Page 2 of 5
hours after the installation. The flooring and all accessories must be acclimated within this area or nearby with the same climate condition for at least 48 hours prior to installation. Areas of the flooring subjected to direct sunlight, for example through doors or windows, must have them covered using blinds, curtains, cardboard or similar for 24 hours prior, throughout and for a period of 72 hours after the installation. nora flooring must not be installed when dew point occurs (a surface temperature at which condensation occurs.) The substrate surface must be at least 5°F above dew point when using nora nTx products. Example: If the ambient conditions are 70°F and 65% RH, the dew point is 57°F and you must not proceed with the installation, unless the surface temperature is at a minimum of 62°F. Dew point calculation charts are available on the web. Mat Bond Testing: Bond tests are required for nora nTx 020 applied directly over the substrate after proper preparation using all of the products proposed for the project. This will help determine the compatibility of the preparation method and products. Apply nTx 020 to the substrate as described within this installation guide. The bonding of the nora nTx flooring is not required as that is not being evaluated. After it is fully cured (approximately 1-2 hours), use a hand scraper and try to remove the nTx 020 from the substrate. If the nTx 020 is able to be removed in ~1/2 inch size pieces or greater, then a problem may exist, contact the nora technical department immediately (please send photos). If the nTx 020 is very difficult to remove then it can be deemed acceptable and you may proceed with the installation using the same preparation protocol. CONCRETE - NEW CONSTRUCTION WITH SLAB INTERNAL RELATIVE HUMIDITY OF 85%RH OR BELOW
All concrete subfloors on or below grade must have a permanent effective vapor retarder with a minimum thickness of 0.010 inches and a permeance of 0.1 y, as described in ASTM E1745 Standard Specification for Plastic Water Vapor Retarders Used in Contact with Soil or Granular Fill under Concrete Slabs, is required under all on- or below-grade concrete floors. The concrete subfloor should not be subject to shrinking, curling, cracking or moving in any way
prior to the application of any nora products. nora systems, Inc., accepts no liability for failure or complaint due to slab movement of any kind. Do not install over expansion joints; use a purpose built expansion joint covering system. Clean out all dormant saw cuts and cracks to remove any laitance, dirt, debris, sealers and any visible moisture. To achieve this, use a suitable dustless concrete saw with a diamond blade or similar. If you are not sure they are dormant, contact the nora Technical Department. The concrete surface must be clean and smooth enough to prevent any surface irregularities from telegraphing through the flooring. All sealers or film forming curing compounds on the surface of the concrete must be removed by mechanical means. Use a Diamabrush™ Concrete Prep Plus Tool 100-grit (available from nora) or 25-grit on a rotary sanding machine. For large areas a light shot-blasting or brush-blasting may be the preferred method to remove it. Perform a Water Droplet Test in a sufficient number of places throughout the project to be certain of its removal. Surface cracks, grooves, depressions, control joints or other non-moving joints, and other irregularities must be filled or smoothed with latex modified patching or underlayment compound for filling or smoothing, or both. Patching or underlayment compound must be moisture-, mildew-, and alkali-resistant, and, for commercial installations, must provide a minimum of 3000 psi compressive strength when tested in accordance with ASTM C109/C109M Standard Test Method for Compressive Strength of Hydraulic Cement Mortars - Using 2-in. or 50mm Cube Specimens or ASTM C472 Standard Test Method for Physical Testing of Gypsum, Gypsum Plasters and Gypsum Concrete, whichever is appropriate. Warranties should be obtained by the manufacturers of the products used. CONCRETE - NEW CONSTRUCTION WITH SLAB INTERNAL RELATIVE HUMIDITY 86%RH AND ABOVE
Same as above except for the patching & leveling compound materials. The products used must have no moisture vapor emission limitations and be capable of being used on slabs that are tested to 100%RH, and have a minimum of 3,000 psi compressive strength.
Page 3 of 5
Warranties should be obtained by the manufacturers of the products used. CONCRETE – REFURBISHMENT
The concrete surface must be free of old adhesive residues, curing compounds, sealers or any other contaminate that could be considered a bond breaker. It must be clean, absorptive and smooth enough to prevent any surface irregularities from telegraphing through the flooring. Shot-blasting or brush-blasting is the recommended method to prepare the concrete surface; however, Scrape-Away cutter blades on a rotary sanding machine may be required first to remove heavy accumulations of old adhesives. The use of a Diamabrush™ Concrete Prep Plus Tool to prepare the concrete surface is acceptable; however, it is a slower and more time-consuming method. Perform the Water Droplet Test in a sufficient number of places throughout the project to be certain of its proper surface contaminant removal. Surface cracks, grooves, depressions, control joints or other non-moving joints, and other irregularities must be filled or smoothed with latex modified patching or underlayment compound for filling or smoothing, or both. Patching or underlayment compound must be moisture-, mildew-, and alkali-resistant, and, for commercial installations, must provide a minimum of 3,000 psi compressive strength when tested in accordance with ASTM C109/C109M Standard Test Method for Compressive Strength of Hydraulic Cement Mortars - Using 2-in. or 50mm Cube Specimens or ASTM C472 Standard Test Method for Physical Testing of Gypsum, Gypsum Plasters and Gypsum Concrete, whichever is appropriate. Warranties should be obtained by the manufacturers of the products used. Note: Patching and leveling compounds are not vapor barriers. When selecting products for use in refurbishment projects, it is a requirement that they do not have moisture limitations. The only exception to the requirement is if proper moisture testing has been performed and documented following the protocol of “ASTM F2170 Standard Test Method for Determining Relative Humidity in Concrete Slabs Using in situ Probes” and the moisture test results are ≤ 85%RH. In addition, if on or below grade then it must also have a confirmed working vapor retarder that meets the current requirements of ASTM E1745 Standard Specification for Plastic
Water Vapor Retarders Used in Contact with Soil or Granular Fill under Concrete Slabs. The vapor retarder must be placed directly underneath the concrete, above the granular fill. WATER DROPLET TEST To perform the water droplet test, simply place a dime sized droplet of water on clean concrete (without any patch or leveler.) The water must begin to absorb into the concrete within five minutes. If the water droplet does not absorb into the concrete substrate, then more mechanical preparation is required to remove whatever sealer, hardener, curing compound or other contaminate that is present on the substrate. For small areas, a Diamabrush™ Concrete Prep Plus Tool, 100-grit (available from nora), or 25-grit on a rotary sanding machine is recommended when used with a shop vacuum equipped with a HEPA filter and dust shroud (17-inch available from nora.) For large areas, shot blasting may be the preferred mechanical preparation method. Also recommended is a Dust Deputy (www.oneida-air.com) or similar and a suitable dust mask. Performing mat bond tests (refer to the Bond Test section of this guide) will also give a good indication of the suitability of the substrate. WOOD SUBFLOORS
All wood subfloors must be a total minimum thickness of 1-1/4 inch and overlaid with overlapping joints using APA (American Plywood Association) underlayment grade plywood, installed as per ASTM F1482 Standard Practice for Installation and Preparation of Panel Type Underlayments to Receive Resilient Flooring. Wooden substrates must not be in direct contact with concrete subfloors, even if built on sleepers. All suspended wood floors must have adequate under floor ventilation and a permanently effective vapor retarder or membrane placed directly on the ground beneath the air space. Do not install over oriented strand board (OSB), particleboard, Masonite, lauan, fire retardant treated plywood, or any similar unstable substrates. The plywood must be clean and free of any bond breaking contaminates, this may be achieved by sanding if required or replacing the plywood with new APA plywood. Any gaps at the seams must be filled and smoothed with suitable
Page 4 of 5
and flexible joint filler. Any ridges must be sanded smooth. GALVANIZED/STAINLESS STEEL AND ALUMINUM SUBFLOORS
Abrade the existing galvanized/stainless steel or aluminum by using mechanical systems – i.e., disk sander with 40-grit sandpaper. Clean the galvanized/stainless steel, or aluminum by sweeping and then wiping with 70% Isopropyl alcohol. Perform a mat bond test for the nora nTx 020 bonding agent as described in this nora nTx Installation Guide. REGULAR STEEL SUBFLOORS
All rust must be removed by sand blasting or other mechanical methods. To prevent the steel from rusting again, a primer such as Sherwin-Williams Re-coatable Epoxy Primer (Re-coatable Epoxy Primer; Part G-B67R5, Part H-B67V5 Hardener) or similar must be applied to the steel subfloor. Contact the Sherwin-Williams Company at 216-566-2902 for complete SDS and product installation instructions. Use only in well ventilated areas. Perform a mat bond test for the nora nTx 020 bonding agent as described in this nora nTx Installation Guide. OVER EXISTING FLOOR COVERINGS
nora nTx can be installed over existing smooth finished, non-cushioned backed and securely bonded floor coverings (e.g. VCT, natural rubber, linoleum, PVC.) The existing flooring must not have any voids that could telegraph through the nora flooring. nora nTx can also be installed over properly prepared existing terrazzo, ceramic and quarry tile floors. Note: The responsibility for determining if the old resilient flooring is well-bonded to the subfloor and is not textured or embossed enough to show through the new installation rests with the owner, general contractor and flooring contractor. Installations over existing resilient flooring may be more susceptible to indentations. To fill voids and/or surface irregularities, use a patching compound that is suitable for bonding to existing floor coverings. Sand the surface to a smooth finish as needed. A primer may be required so it is important to check with the patch manufacturer for specific mixing and installation instructions. Any product warranties
or performance guarantees are the responsibility of the selected manufacturer.
3.2 Installation Guidelines APPLICATION
Use a micro fiber paint roller and paint tray (DO NOT POUR DIRECTLY ON THE SUBSTRATE.) Apply a very thin, even layer of nora nTx 020. Avoid thick applications, puddling, dry spots and roller lines. The applied nora nTx 020 should have an opaque or clear, shiny appearance. If you see an orange peel appearance, immediately go over the surface again while it is still wet using a dry micro fiber paint roller to remove the excess. Note: Thick applications will need to be mechanically removed if left to dry. For areas that are being flashed coved, apply a thin and even coat of nora nTx 020 to the wall beneath the cap strip using a small paint roller. Note: If installing nora wall base and/or sanitary base it is not necessary to apply the nora nTx 020 to the wall. SECOND COAT For all on/below grade concrete subfloors without a confirmed effective vapor retarder meeting the requirements of ASTM E1745 Standard Specification for Plastic Water Vapor Retarders Used in Contact with Soil or Granular Fill under Concrete Slabs apply a second thin coat of nora nTx 020. Sanding or grinding is not required between applications of the first and second coat unless there is more than 24 hours between them. SANDING When fully dried to a tack-free state (approximately 90 minutes), lightly grind the surface smooth using a 100-grit Diamabrush™ Concrete Prep Plus Tool on a rotary sanding machine or 30-grit sanding discs on a rotary machine (note these will clog often.) When sanding smooth, avoid creating deep scratches into the product. Over sanding will require additional applications of the nora nTx 020. Another option is to back trowel to remove surface imperfections. Finish by removing all loose debris with a suitable vacuum cleaner.
Page 5 of 5
REPAIRING If the surface of the nora nTx 020 is compromised after grinding and/or sanding, or possibly damaged, the area will require repairing. Only after the nora nTx 020 is known to be completely dry, sand the affected area smooth and reapply the required amount of coats. If patching is required, remove the nora nTx 020 completely in the affected area, apply patch, sand smooth and remove any residual patching compound off the surface of the surrounding nora nTx 020. Clean the repaired area and apply the required amount of coats of nora nTx 020, blended in at the edges to avoid roller lines. Clean up: Clean tools and any spilled nora nTx using mineral spirits with a clean cloth immediately. If nora nTx has cured, it may not be possible. Disposal: Dispose in accordance with local, state and national legislation
Dated: August 2016
product data sheet
noraplan environcare™ nTx 3.0mm SHEET
Page 1 of 4
1 Product Name / Manufacturer 1.1 Product
noraplan environcare™ nTx 3.0mm sheet goods resilient floor covering, Article 157A
1.2 Manufacturer nora systems, Inc. 9 Northeastern Blvd. Salem, NH 03079 800-336-5096 603-894-1021 www.nora.com/us
1.3 Product Description nora® vulcanized rubber compound 913 with environmentally compatible color pigments that are free of toxic heavy metals like lead, cadmium or mercury.
1.4 Physical Characteristics Material Size: ~39.7’ x 48” (~11.8m x 1.22m) ≥ amount specified Thickness: ~0.012“ (~3.0mm) Dimensional Stability: Meets requirements Composition: Homogeneous rubber compound with a random scattered design. Color: 5 Standard colors; additional colors available with minimum order Surface: Smooth
2 Technical Data 2.1 Static Load Limit
ASTM F970, Residual compression of 0.003” with 800 lbs. achieved, ≤ 0.005” with 250 lbs. is required.
2.2 Rolling Load Limit ≤ 550 lbs. /sq. inch, with no forklift traffic.
2.3 Slip Resistance ASTM D2047 Static coefficient of friction, Neolite dry 0.93, Neolite wet 0.91 achieved, ≥ 0.5 is required (not recommended for ramps).
2.4 Flammability ASTM E648; NFPA 253; NBSIR 75 950, .82 achieved, ≥ 0.45 watts/sq. cm for Class 1 is required.
2.5 Smoke Density ASTM E662; NFPA 258; NBS, 282 (flaming) and 155 (non-flaming) achieved, < 450 is required.
2.6 Bacteria Resistance ASTM E2180 and ASTM G21, resistant to bacteria, fungi, and micro-organism activity.
2.7 VOC’s This flooring is GREENGUARD Gold Certified for Low VOC Emissions, Blue Angel Certified and CA 01350 Compliant.
2.8 Sound Absorption ASTM E2179 ∆ IIC 14, ISO 140 ∆ Lw 10 dB (compare only ∆ values).
2.9 Hardness ASTM D2240, Shore type “A”, 92 achieved, ≥ 85 is required.
3 Installation 3.1 Site Conditions
The area to receive flooring, must be fully enclosed, weather tight and climate controlled at the normal service ambient temperature and humidity (except for walk in freezers or similar) or 68ºF ± 5ºF and 50% ± 10% ambient relative humidity (RH) for 48 hours before, during and 72 hours after the installation. The flooring and all accessories must be acclimated within this area or nearby with the same climate condition for at least 48 hours prior to installation. Areas of the flooring subjected to direct sunlight, for example through doors or windows, must have them covered using blinds,
Page 2 of 4
curtains, cardboard or similar for 24 hours prior, throughout and for a period of 72 hours after the installation. nora flooring must not be installed when dew point occurs (a surface temperature at which condensation occurs). The substrate surface must be at least 5°F above dew point when using nora nTx products. Example: If the ambient conditions are 70°F and 65% RH, the dew point is 57°F and you must not proceed with the installation, unless the surface temperature is at a minimum of 62°F. Dew point calculation charts are available on the web.
3.2 Substrates Concrete - New Construction with Slab Internal Relative Humidity of 85%RH or Below: All concrete subfloors on or below grade must have a permanent effective vapor retarder with a minimum thickness of 0.010 inches and a permeance of 0.1 y, as described in ASTM E1745 Standard Specification for Plastic Water Vapor Retarders Used in Contact with Soil or Granular Fill under Concrete Slabs, is required under all on- or below-grade concrete floors. The concrete subfloor should not be subject to shrinking, curling, cracking or moving in any way prior to the application of any nora products. nora systems, Inc., accepts no liability for failure or complaint due to slab movement of any kind. Do not install over expansion joints; use a purpose built expansion joint covering system. Clean out all dormant saw cuts and cracks to remove any laitance, dirt, debris, sealers and any visible moisture. To achieve this, use a suitable dustless concrete saw with a diamond blade or similar. If you are not sure they are dormant, contact the nora Technical Department. The concrete surface must be clean and smooth enough to prevent any surface irregularities from telegraphing through the flooring. All sealers or film forming curing compounds on the surface of the concrete must be removed by mechanical means. Use a Diamabrush™ Concrete Prep Plus Tool 100-grit (available from nora) or 25-grit on a rotary sanding machine. For large areas a light shot-blasting or brush-blasting may be the preferred method to remove it. Perform a Water Droplet Test in a sufficient number of places throughout the project to be certain of its removal.
Surface cracks, grooves, depressions, control joints or other non-moving joints, and other irregularities must be filled or smoothed with latex modified patching or underlayment compound for filling or smoothing, or both. Patching or underlayment compound must be moisture-, mildew-, and alkali-resistant, and, for commercial installations, must provide a minimum of 3000 psi compressive strength when tested in accordance with ASTM C109/C109M Standard Test Method for Compressive Strength of Hydraulic Cement Mortars - Using 2-in. or 50mm Cube Specimens or ASTM C472 Standard Test Method for Physical Testing of Gypsum, Gypsum Plasters and Gypsum Concrete, whichever is appropriate. Warranties should be obtained by the manufacturers of the products used. Concrete - New Construction with Slab Internal Relative Humidity 86%RH and above: Same as above except for the patching & leveling compound materials. The products used must have no moisture vapor emission limitations and be capable of being used on slabs that are tested to 100%RH, and have a minimum of 3,000 psi compressive strength. Warranties should be obtained by the manufacturers of the products used. Concrete – Refurbishment: The concrete surface must be free of old adhesive residues, curing compounds, sealers or any other contaminate that could be considered a bond breaker. It must be clean, absorptive and smooth enough to prevent any surface irregularities from telegraphing through the flooring. Shot-blasting or brush-blasting is the recommended method to prepare the concrete surface; however, Scrape-Away cutter blades on a rotary sanding machine may be required first to remove heavy accumulations of old adhesives. The use of a Diamabrush™ Concrete Prep Plus Tool to prepare the concrete surface is acceptable; however, it is a slower and more time-consuming method. Perform the Water Droplet Test in a sufficient number of places throughout the project to be certain of its proper surface contaminant removal.
Page 3 of 4
Surface cracks, grooves, depressions, control joints or other non-moving joints, and other irregularities must be filled or smoothed with latex modified patching or underlayment compound for filling or smoothing, or both. Patching or underlayment compound must be moisture-, mildew-, and alkali-resistant, and, for commercial installations, must provide a minimum of 3,000 psi compressive strength when tested in accordance with ASTM C109/C109M Standard Test Method for Compressive Strength of Hydraulic Cement Mortars - Using 2-in. or 50mm Cube Specimens or ASTM C472 Standard Test Method for Physical Testing of Gypsum, Gypsum Plasters and Gypsum Concrete, whichever is appropriate. Warranties should be obtained by the manufacturers of the products used. Note: Patching and leveling compounds are not vapor barriers. When selecting products for use in refurbishment projects, it is a requirement that they do not have moisture limitations. The only exception to the requirement is if proper moisture testing has been performed and documented following the protocol of “ASTM F2170 Standard Test Method for Determining Relative Humidity in Concrete Slabs Using in situ Probes” and the moisture test results are ≤ 85%RH. In addition, if on or below grade then it must also have a confirmed working vapor retarder that meets the current requirements of ASTM E1745 Standard Specification for Plastic Water Vapor Retarders Used in Contact with Soil or Granular Fill under Concrete Slabs. The vapor retarder must be placed directly underneath the concrete, above the granular fill. Wood subfloors: All wood subfloors must be a total minimum thickness of 1-1/4 inch and overlaid with overlapping joints using APA (American Plywood Association) underlayment grade plywood, installed as per ASTM F1482 Standard Practice for Installation and Preparation of Panel Type Underlayments to Receive Resilient Flooring. Wooden substrates must not be in direct contact with concrete subfloors, even if built on sleepers. All suspended wood floors must have adequate under floor ventilation and a permanently effective vapor retarder or membrane placed directly on the ground beneath the air space. Do not install over oriented strand board (OSB), particleboard, Masonite, lauan, fire retardant
treated plywood, or any similar unstable substrates. The plywood must be clean and free of any bond breaking contaminates, this may be achieved by sanding if required or replacing the plywood with new APA plywood. Any gaps at the seams must be filled and smoothed with suitable and flexible joint filler. Any ridges must be sanded smooth. Galvanized/Stainless Steel and Aluminum subfloors: Abrade the existing galvanized/stainless steel or aluminum by using mechanical systems – i.e., disk sander with 40-grit sandpaper. Clean the galvanized/stainless steel, or aluminum by sweeping and then wiping with 70% Isopropyl alcohol. Perform a mat bond test for the nora nTx 020 bonding agent as described in this nora nTx Installation Guide. Regular Steel Subfloors: All rust must be removed by sand blasting or other mechanical methods. To prevent the steel from rusting again, a primer such as Sherwin-Williams Re-coatable Epoxy Primer (Re-coatable Epoxy Primer; Part G-B67R5, Part H-B67V5 Hardener) or similar must be applied to the steel subfloor. Contact the Sherwin-Williams Company at 216-566-2902 for complete SDS and product installation instructions. Use only in well ventilated areas. Perform a mat bond test for the nora nTx 020 bonding agent as described in the nora nTx Installation Guide. Over existing floor coverings: nora nTx can be installed over existing smooth finished, non-cushioned backed and securely bonded floor coverings (e.g. VCT, natural rubber, linoleum, PVC). The existing flooring must not have any voids that could telegraph through the nora flooring. nora nTx can also be installed over properly prepared existing terrazzo, ceramic and quarry tile floors. Note: The responsibility for determining if the old resilient flooring is well-bonded to the subfloor and is not textured or embossed enough to show through the new installation rests with the owner, general contractor and flooring contractor. Installations over existing resilient flooring may be more susceptible to indentations.
Page 4 of 4
nora® nTx 020 It is mandatory to use nora nTx 020, which is a surface bond enhancer for all nora nTx installations over properly prepared substrates. The installer must determine the suitability of the subfloor and final substrate to be covered. Bond tests are required for nora nTx 020 (refer to the Bond Test section in the nora nTx installation guide). Bond Test It is the responsibility of the installing party to determine the suitability of the subfloor being covered. Bond tests are required for nora nTx 020 applied directly over the properly prepared subfloor. This will help to determine the compatibility of the preparation method and products. Select the amount of tests and the appropriate locations. Each test plot should be approximately 1 square foot. Apply nora nTx 020 following the protocol described in the nora nTx Installation Guide. Note: Bond testing of the nora flooring itself is not required as that is not being evaluated. After the nora nTx 020 is fully cured, (approximately 1 to 2 hours) use a razor scraper and attempt to remove it from the substrate. If the nora nTx 020 can be removed in 1/2 inch sized pieces or greater, contact the nora Technical Department immediately (please forward photos.) If the nora nTx 020 is very difficult to remove then it can be deemed acceptable and you may proceed with the installation.
3.3 Heat Welding Optional (if required) nora® heat welding rod. Refer to the nora® nTx Installation Guide.
3.4 Cold Welding Optional (if required) nora® cold weld. Refer to the nora nTx Installation Guide.
3.5 Flash Coving Optional (if required) – Refer to the nora nTx Installation Guide.
3.6 Installation Guidelines Refer to the nora nTx Installation Guide. For complete details go to www.nora.com/us.
4 Care and Cleaning Refer to noraplan® product maintenance guides. For complete details go to www.nora.com/us.
5 Warranty nora nTx limited 5-year warranty and limited 5-year warranty. See nora® nTx and nora® Limited Warranties. For complete details go to www.nora.com/us.
Dated: September 2016
Product Data
Feather Edge Skim Coat
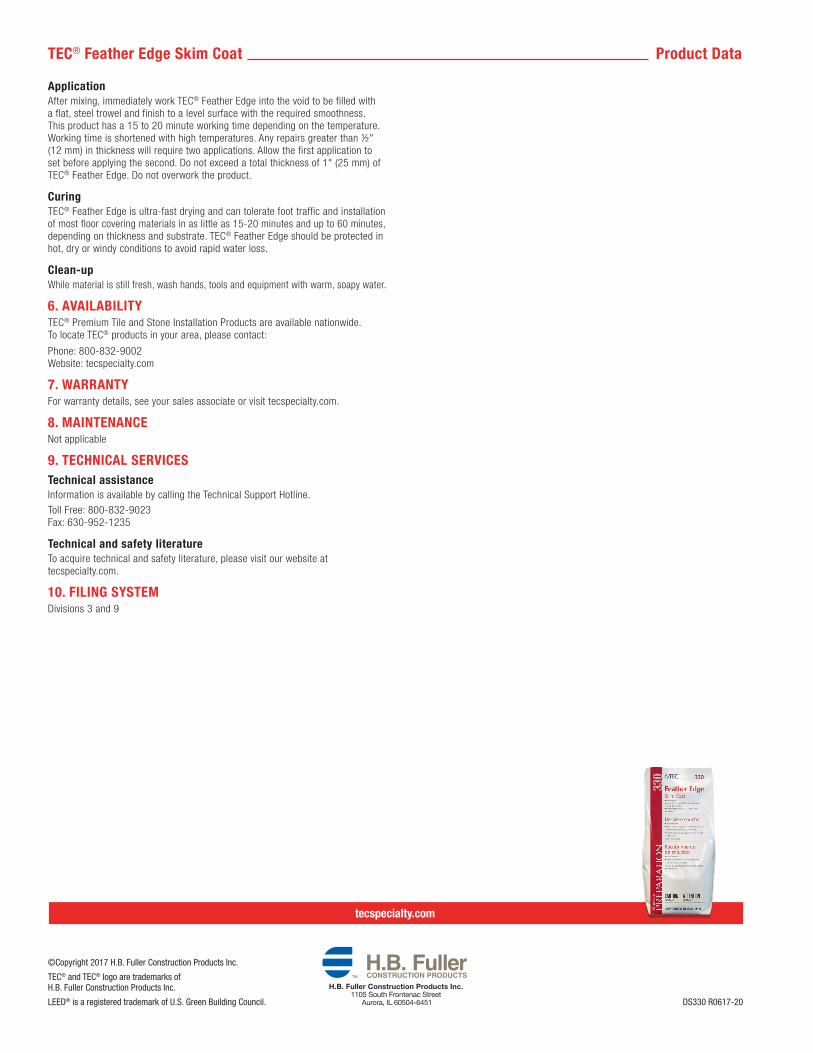
1. PRODUCT NAMETEC® Feather Edge Skim Coat (330)
2. MANUFACTURERH.B. Fuller Construction Products Inc. 1105 South Frontenac Street Aurora, IL 60504-6451 U.S.A. 800.552.6225 Office 800.952.2368 Fax tecspecialty.com
3. DESCRIPTIONTEC® Feather Edge Skim Coat is a high quality, cement-based compound designed to skim coat, smooth and level irregularities from featheredge up to ½" (12 mm). Rapidly sets to install most floor coverings in as little as 15-20 minutes, with exceptional performance. TEC® Feather Edge has superior bond strength. For most applications, the use of a primer is not required. Excellent for use over most substrates and provides a suitable surface for even the most demanding floor coverings, such as VCT, sheet vinyl, etc. Ideal product for use as an embossing leveler when mixed with TEC® Patch Additive (embossing applications require TEC® Patch Additive. No patch additive is required if surface has been primed with TEC® Multipurpose Primer).
Key Features and Benefits• Self-drying
• Fast setting - install flooring in as soon as 15-20 minutes
• Featheredge up to ½" (12 mm)
• Sandable
• Contributes to LEED® project points
• VOC 0
Packaging10 lb. plastic bags (4.54 kg) Product #3303863311
CoverageCoverages shown are approximate. Actual coverages may vary according to substrate conditions and thickness of applications.
Application Depth Approximate Coverage per 10 lbs. (4.54 kg)
1⁄8"(3 mm)
30-36 sq. ft.(2.8-3.3 m2)
1⁄4"(6 mm)
15-18 sq. ft.(1.4-1.7 m2)
1⁄2"(12 mm)
7.5-9 sq. ft.(0.7-0.8 m2)
Embossing 300-500 sq. ft.(27.9-46.5 m2)
Suitable SubstratesWhen properly prepared, suitable substrates include:• Concrete • Cement backerboards
• Concrete terrazzo • Ceramic tile, pavers, brick
• Quarry tile • Epoxy terrazzo
• Exterior grade plywood, C-C (plugged) or better
• Exterior grade lauan plywood—Type I Trademarked Exterior Grade, OVL, CC, BB.OVL face grades only (Note: Lauan plywood is an unacceptable substrate for installation of resilient, ceramic or marble tile)
• Vinyl composition tile (VCT), embossed resilient floor coverings—must be bonded well to an approved substrate and be single layer.*
• Adhesive residue (except tacky or pressure-sensitive adhesive)*
• Gypsum substrates** - minimum tensile bond strength 72 psi (0.5 MPa)
* Requires mixing with TEC® Patch Additive or, in lieu of the additive, prime substrate with TEC® Multipurpose Primer.
**Requires priming with TEC® Multipurpose Primer.
Substrate PreparationBefore application, make sure that all surfaces are structurally sound, dry and free from any oil, grease, dust, loose or peeling paint, sealers, floor finishes, curing compounds or any contaminant that would inhibit or prevent a solid bond. Concrete and cementitious substrates must be fully cured and free of any hydrostatic pressure and excessive moisture (RH 95% or lower). Any protrusions on the surface must be removed by sanding, scraping or chipping. Vacuum all dust before application. DO NOT cover existing building expansion or control joints.
StorageStore away from direct sunlight in a well-ventilated, cool, dry area. If storing after opening, remove all air from container and seal tightly.
Shelf LifeMaximum of 1 year from date of manufacture in unopened package.
Limitations
• For interior use only.
• Not for use in conditions with hydrostatic pressure or excessive moisture.
• Do not use as a wear surface or to patch over sealed concrete, tempered hardboard, particle board, strip wood flooring, over heavily cushioned flooring or perimeter bonded flooring.
• Do not apply when the temperature is below 50ºF (10ºC).
CautionsRead complete cautionary information printed on product container prior to use. For medical emergency information, call 1-888-853-1758.
This Product Data Sheet has been prepared in good faith on the basis of information available at the time of publication. It is intended to provide users with information about and guidelines for the proper use and application of the covered TEC® brand product(s) under normal environmental and working conditions. Because each project is different, H.B. Fuller Construction Products Inc. cannot be responsible for the consequences of variations in such conditions, or for unforeseen conditions.
4. TECHNICAL DATAPhysical Properties
TEC® Feather Edge Skim Coat (330)
Description
Physical State Dry powder
Color Gray
Compressive Strength (ASTM C109)
3600 psi (24.6 MPa)
Pot Life 15-20 minutes
Install Floor Covering* 15-60 minutes
StorageStore away from direct sunlight in a well-ventilated, cool, dry area. If storing after opening, remove all air from container and seal tightly.
Shelf LifeMaximum 1 year from date of manufacture inproperly stored, unopened package.
*Flooring installation after application is dependent on thickness, drying conditions, and type of flooring.
5. INSTALLATION INSTRUCTIONS
MixingMix only as much TEC® Feather Edge that can be used in a 15-20 minute time period. USE IMMEDIATELY after mixing. Add the bag of TEC® Feather Edge slowly into 2½ quarts (2.37 L) of clean, cool water while mixing at a low speed (not exceeding 300 rpm to prevent entraining air). For smaller amounts, use a mixing ratio of 2 parts powder to 1 part water. Mix thoroughly to a smooth, lump free consistency.
TEC® Patch Additive is required for use as an embossing leveler. When TEC® Patch Additive is needed, slowly add the entire bag of TEC® Feather Edge into 2½ quarts (2.37 L) of TEC® Patch Additive mixing at a low speed (not exceeding 300 rpm to prevent entraining air). Mix thoroughly to a smooth, lump-free consistency.
tecspecialty.com
H.B. Fuller Construction Products Inc.1105 South Frontenac Street
Aurora, IL 60504-6451
TEC® Feather Edge Skim Coat Product Data
©Copyright 2017 H.B. Fuller Construction Products Inc.
TEC® and TEC® logo are trademarks ofH.B. Fuller Construction Products Inc.
LEED® is a registered trademark of U.S. Green Building Council. DS330 R0617-20
ApplicationAfter mixing, immediately work TEC® Feather Edge into the void to be filled with a flat, steel trowel and finish to a level surface with the required smoothness. This product has a 15 to 20 minute working time depending on the temperature. Working time is shortened with high temperatures. Any repairs greater than ½" (12 mm) in thickness will require two applications. Allow the first application to set before applying the second. Do not exceed a total thickness of 1" (25 mm) of TEC® Feather Edge. Do not overwork the product.
CuringTEC® Feather Edge is ultra-fast drying and can tolerate foot traffic and installation of most floor covering materials in as little as 15-20 minutes and up to 60 minutes, depending on thickness and substrate. TEC® Feather Edge should be protected in hot, dry or windy conditions to avoid rapid water loss.
Clean-upWhile material is still fresh, wash hands, tools and equipment with warm, soapy water.
6. AVAILABILITYTEC® Premium Tile and Stone Installation Products are available nationwide. To locate TEC® products in your area, please contact:
Phone: 800-832-9002 Website: tecspecialty.com
7. WARRANTYFor warranty details, see your sales associate or visit tecspecialty.com.
8. MAINTENANCENot applicable
9. TECHNICAL SERVICESTechnical assistanceInformation is available by calling the Technical Support Hotline.
Toll Free: 800-832-9023 Fax: 630-952-1235
Technical and safety literatureTo acquire technical and safety literature, please visit our website at tecspecialty.com.
10. FILING SYSTEMDivisions 3 and 9