Embed Size (px)
Citation preview

T13 Concurrent Session Thursday 10/25/2007 1:30 PM JUMP TO:
Biographical Information
The Presentation
Related Paper
User Interface Testing with Microsoft Visual C#
Presented by:
Vijay Upadya, Microsoft
Presented at: The International Conference on Software Testing Analysis and Review
October 22-26, 2007; Anaheim, CA, USA
330 Corporate Way, Suite 300 , Orange Park, FL 32043 888-268-8770 904-278-0524 [email protected] www.sqe.com

Vijay Upadya Industry Experience: I’ve been involved in software test for over 9 years; the last 7 at Microsoft. I’m currently working in the Microsoft Visual C# group and I primarily focus on test strategy, test tools development and test process improvements for the team. Speaking Experience: Speaker at QAI International Quality Conference, Toronto, 2006.

User Interface testing with Microsoft Visual C#
A case study on Visual C# team’s approach to UI testing
Vijay Upadya,Microsoft

AgendaIntroductionProblem definitionPath to solution
TestabilityLayered approach to testing
ResultsConclusion

Objectives
How to test UI-centric components by by-passing the UI
How to design software with testability
How to leverage testability to adopt data driven testing

System under test (SUT) = Visual Studio.NET
Component under test = Visual C# code editor
Features under test = Refactoring, Formatting, etc
Test data = C# source code
Overview of SUT

System Under Test (SUT)

Way we tested before
SUT
Test 1
Execution stepsTest data
Test
Test 2
Execution stepsTest data

Code example – UI test
//Invokes rename dialogpublic void InvokeRenameDialog(string oldString, string newString){
//Search the string to be renamedif (Utilities.Find(oldString) != FindResult.Found)
throw new Exception(oldString +“ not found!“);
Utilities.DoRename(newString);
Utilities.Sleeper.Delay(waitDuration);
//Confirm preview changes window loadedif (!PreviewChangesRenameDialog.Exists(app))
throw new Exception("PreviewChanges window did not load!");
}
External External dependencydependency
UI SyncUI Sync

Problem definition
All test automation written through UIProduct UI changed constantly till very late in product cycleTests took unnecessary dependency on other features Larger surface area in tests increased probability of false failuresLots of test failures due to UI synchronization issues
Consequence
Automation generated high noiseTeam spent lot of time on investigating non-product related test failures
Investigated ways of testing the core functionality behind UI by by-passing it
Came up with list of test hooks in the product that tests could directly call into
Wrote minimal set of targeted UI tests
Path to solution

What is testability?
Testability is the characteristic of a piece of software that enables all of its code paths to be exercised by an automated test in an efficient manner. In other words: “How expensive is it to test?”
Testability is determined by the SOCK analysis:Simplicity, Observability, Control and Knowledge of
Expected Results.

Testability example – Rename refactoring
SimplicityHave clear separation between UI code and the code that actuallyperforms the refactoring
ObservabilityNeed following testability hook to the product to get validationinformationHRESULT RenameAndValidate(
/*in*/ BSTR oldName,
/*in*/ BSTR newName,
/*out, retval*/ BSTR *pValidationResult)
Testability example (cont…)
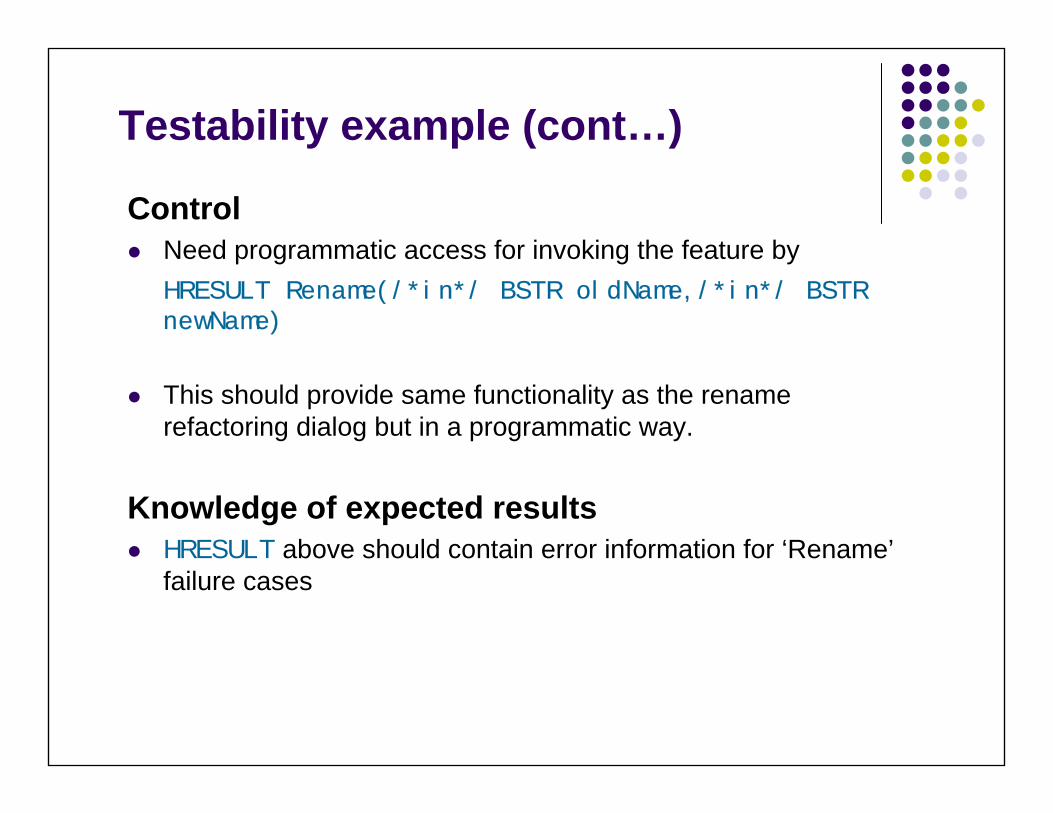
ControlNeed programmatic access for invoking the feature byHRESULT Rename(/*in*/ BSTR oldName,/*in*/ BSTR newName)
This should provide same functionality as the rename refactoring dialog but in a programmatic way.
Knowledge of expected resultsHRESULT above should contain error information for ‘Rename’failure cases

Why is testability important?
Reduces the cost of testing in terms of time and resourcesReduces the time to diagnose unexpected behaviorIncreases the effectiveness of tests and the quality of the product

Testability - Best Practices
Add "Testability" section to feature spec templates
Ask, "How are we going to test this?“ in spec reviews
Understand why and how a testability hook will be used before asking for it!
Prioritize testability hooks based on milestone exit criteria
Legacy code: It’s never too late to add testability

Layered approach to testing
UI Level
Object model level
Component level
Unit level
SUT
Integration tests
Scenario tests
Component tests
Unit tests
Test type

Layer definitions
UI levelFeatures are automated by manipulating UI elements such as windows and controls
Object model levelFunctionality accessed programmatically by by-passing the UI
Component levelMultiple components tested together but without the entire system being present.
Unit levelIndividual APIs are tested in isolation

Test EngineNewTest Engine
Layered approach – In action
UI Level
Object model level
Component level
Unit level
SUT
Test data 1
Test Intent
Target level= Object Model
Target level= UI
Test data 2
Test data 3
Test data n

Sample test intent file (XML) -Rename
<action name="CreateProject" />
<action name="AddFile" fileName="TC1.cs" /><action name="OpenFile" fileName="TC1.cs" /><action name=“Rename" startLoc="Begin"
oldName=“Class1" newName=“NewClass1" /><action name="AddConditionalSymbol" name="VERIFY" /> <action name="Build" /> <action name="Run" />
<action name="CleanProject" />

Sample test data file
class /*Begin*/Class1 {
public void Method() {}
}
class Test {
static int Main() {
#if VERIFYNewClass1 c = new NewClass1();c.Method();return 0;
#endif
return 1;
}}

Layered approach – Best Practices
Key to success of this approachSeparation of “test intent” from “test execution”Leverage testability hooks
This enablesRunning the same test on multiple test dataRunning the same test on multiple target levels

Results
Test robustness: ~100% test robustnessTest authoring: Easier and faster to write testsCoverage: High coverage as same tests run on multiple targetsPerformance: Tests run 70% faster than the previous UI testsCommunication: Increased interaction with developers and helped testers understand the components better

Conclusion
Test UI-centric components without using UIInvesting early on testability really pays offFocus on automating at non-UI levels to get highly maintainable testsUI testing doesn’t go away completelySeparating test intent from test execution helps in achieving high coverage

Questions?

User Interface Testing with Microsoft Visual C#
A case study on Visual C# teams approach to UI testing
Vijay Upadya Microsoft
08/07/2007

Abstract Manually testing software with a complex user interface (UI) is time-consuming and expensive. Historically the development and maintenance costs associated with automating UI testing have been very high. This paper presents a case study on the approaches and methodologies the Visual C# test team adopted as an answer to these testing challenges that plagued the team over many years. Paper explains how the team designed testability into the product Microsoft Visual Studio 2005. These features allowed the test team to create a robust and effective test suite that bypasses the UI completely. However testing through the UI is important to uncover integration issues in the product. This paper also explains how team developed an approach that enables reusing the same tests to exercise the features through UI and through testability APIs. These resulted in dramatic reduction of costs associated with developing and maintaining tests.

Introduction UI tests tend to be bug prone, hard to write and incur high maintenance costs. One approach that can make UI testing highly effective and efficient is to build testability into the product. Testability allows for high test coverage without actually having to go through UI. It also opens up new avenues for adopting other interesting testing methodologies like layered approach to testing and data driven testing. Problem During previous product cycles (Visual Studio 2003 and before), C# editor team focused on testing the editor by exercising the features through UI, the same way the end users would do. The tests interacted with system under test (SUT) via direct interaction with UI elements. This was achieved by writing collection of helper libraries that provide access to the UI elements – dialog box, controls, button and so on. Individual tests call into these libraries to drive SUT through UI. This approach was easy to get started and worked well when the feature set to be tested was small. However as the test bed grew, new problems started to manifest in various ways. Product UI changed often, resulting in frequent test breakages. Tests became dependent on other UI elements increasing the surface area for failures. Tests also had to deal with UI synchronization issues that are inherent to UI automation. All these issues created high maintenance costs, and the team spent most of their time fixing broken tests instead of finding new product issues. Solution The team investigated ways to improve this situation. We quickly realized that it was more important to test the logic behind the UI rather than the UI itself. By adding testability hooks that access the core functionality, the team was able to focus more on the product than the tests. This doesn’t mean that UI testing was abandoned. It only means that not all the tests need to go through the UI to test the core functionality. The team also found that by separating the test “intent” from test “data” and test “execution” details, the same tests can be reused to run both through UI and through testability APIs. The next two sections talks about the details of this approach.

Testability Testability means that a piece of software enables most or all of its code paths to be exercised by an automated test in an efficient manner. Testability is determined by the SOCK analysis -
• Simplicity: The degree to which the design of the architecture reduces the complexity of testing it.
• Observability: The ability of a software system to enable a test to obtain information about the system’s data, state and resource usage.
• Control: The characteristic of a system that enables a test to manipulate it programmatically.
• Knowledge of Expected Results: The degree to which a test can determine when a given scenario has succeed or not.
Let’s take an example of Rename refactoring feature in Visual Studio to illustrate how this was applied. Rename is a feature in C# editor that allows renaming of code constructs like method, field, and property and so on. This feature is exposed to the user through a dialog box that takes new name for the member to be renamed as input as shown in Figure 1 below. Note that rename is more than just find and replace of text. Rename has to keep the semantics of the program same while renaming. For example if there is a public and private method called ‘Foo’ and when user chooses to rename public method ‘Foo’, the rename feature should rename only the public method (definition and invocation) and not the private ‘Foo’ method.
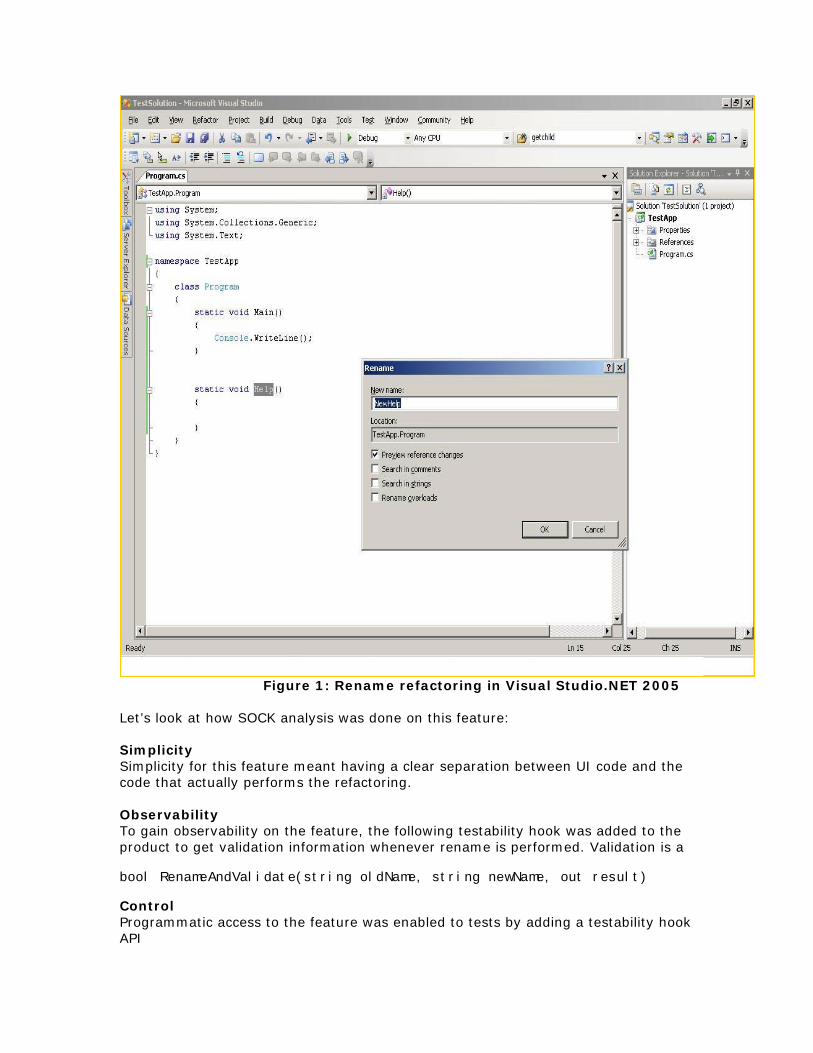
Figure 1: Rename refactoring in Visual Studio.NET 2005
Let’s look at how SOCK analysis was done on this feature: Simplicity Simplicity for this feature meant having a clear separation between UI code and the code that actually performs the refactoring. Observability To gain observability on the feature, the following testability hook was added to the product to get validation information whenever rename is performed. Validation is a bool RenameAndValidate(string oldName, string newName, out result) Control Programmatic access to the feature was enabled to tests by adding a testability hook API

bool Rename(string oldName, string newName) This API provides same functionality as the rename refactoring dialog but in a programmatic way. Knowledge of expected results The return value in the above Rename API gave information for ‘Rename’ failure cases. Benefits By applying testability, the test team gained the following benefits: • Reduces the cost of testing in terms of time and resources. Tests are much
easier and faster to write. • Reduces the time to diagnose unexpected behavior. Since the surface areas of
tests are small, it’s easy to pin point the cause of unexpected behavior. • Increases the effectiveness of tests and the quality of the product. Since
failures due to test issues are drastically reduced, effectiveness increases. Best practices Below are some best practices for the test teams to adopt testability: • Add a "Testability" section to feature-specification templates. This ensures that
testability gets looked at from the specification stage • Ask, "How are we going to test this?“ in spec reviews • Understand why and how a testability hook will be used before asking for it! • Prioritize testability hooks based on milestone exit criteria. It’s not practical to
add testability for all the features. • Legacy code: It’s never too late to add testability.
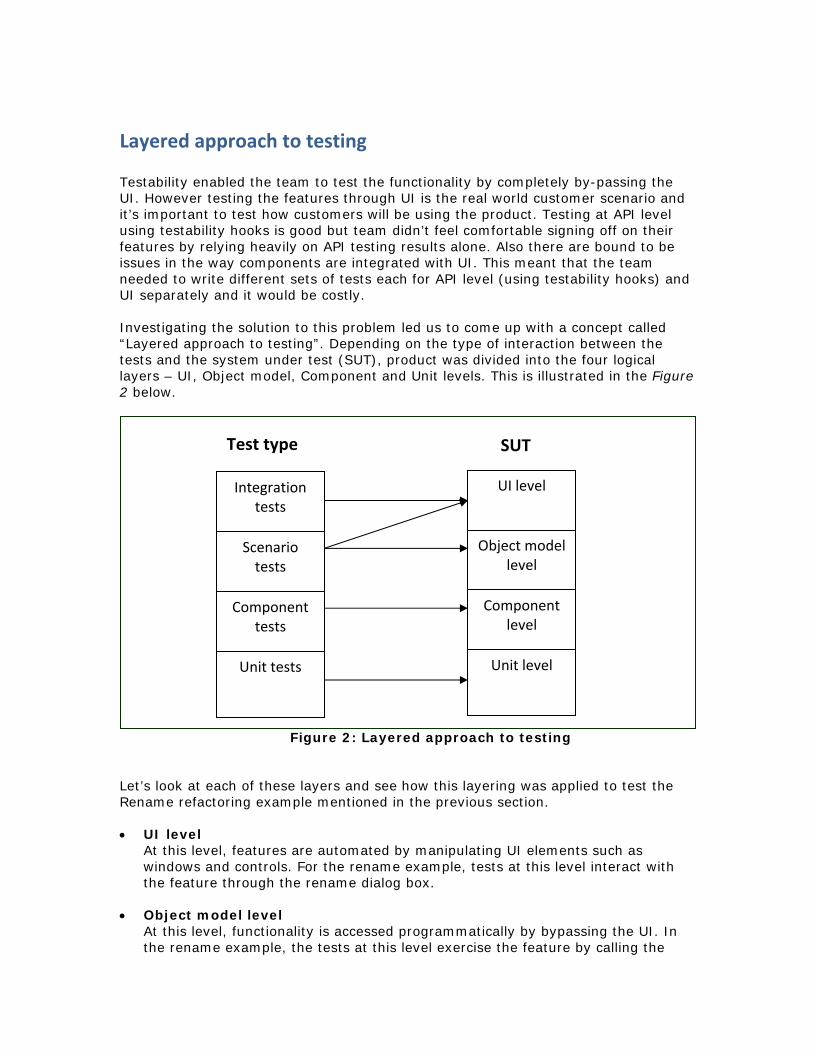
Layered approach to testing Testability enabled the team to test the functionality by completely by-passing the UI. However testing the features through UI is the real world customer scenario and it’s important to test how customers will be using the product. Testing at API level using testability hooks is good but team didn’t feel comfortable signing off on their features by relying heavily on API testing results alone. Also there are bound to be issues in the way components are integrated with UI. This meant that the team needed to write different sets of tests each for API level (using testability hooks) and UI separately and it would be costly. Investigating the solution to this problem led us to come up with a concept called “Layered approach to testing”. Depending on the type of interaction between the tests and the system under test (SUT), product was divided into the four logical layers – UI, Object model, Component and Unit levels. This is illustrated in the Figure 2 below.
Figure 2: Layered approach to testing
Let’s look at each of these layers and see how this layering was applied to test the Rename refactoring example mentioned in the previous section. • UI level
At this level, features are automated by manipulating UI elements such as windows and controls. For the rename example, tests at this level interact with the feature through the rename dialog box.
• Object model level At this level, functionality is accessed programmatically by bypassing the UI. In the rename example, the tests at this level exercise the feature by calling the
Integration tests
Scenario tests
Component tests
Unit tests
Test type
UI level
Object model level
Component level
Unit level
SUT
testability API to perform rename. The tests bypass the rename dialog completely.
• Component level At this level, multiple components are tested together but without the entire system (SUT) being present. In the rename example the tests targeting this level use the testability API to exercise the feature as in the object model level. But the difference here is that the Visual Studio is not loaded while running the tests. Instead only the C# editor and couple of other dependent components are loaded in isolation and tests directly interact with the editor component.
• Unit level
At this level, the Individual APIs are tested in isolation without taking into account the interactions between the components. Unit tests fall into this category. For the rename example, unit tests were written to test each public member in the classes that implement the feature.
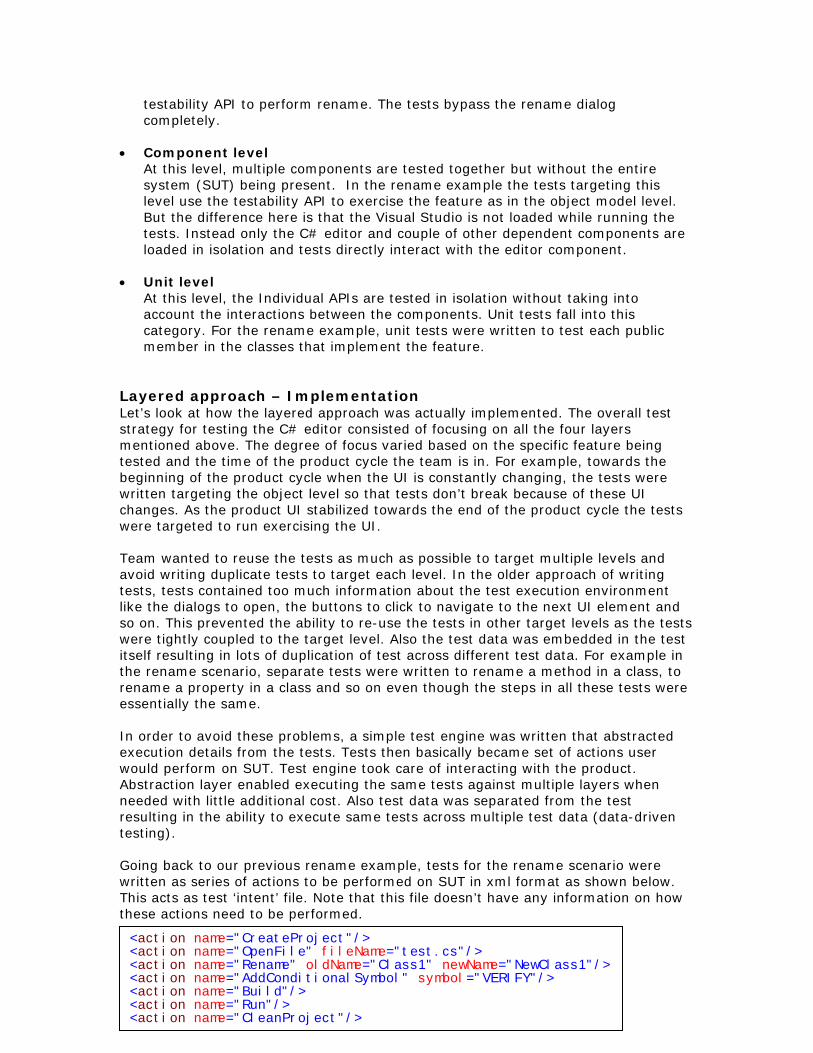
Layered approach – Implementation Let’s look at how the layered approach was actually implemented. The overall test strategy for testing the C# editor consisted of focusing on all the four layers mentioned above. The degree of focus varied based on the specific feature being tested and the time of the product cycle the team is in. For example, towards the beginning of the product cycle when the UI is constantly changing, the tests were written targeting the object level so that tests don’t break because of these UI changes. As the product UI stabilized towards the end of the product cycle the tests were targeted to run exercising the UI. Team wanted to reuse the tests as much as possible to target multiple levels and avoid writing duplicate tests to target each level. In the older approach of writing tests, tests contained too much information about the test execution environment like the dialogs to open, the buttons to click to navigate to the next UI element and so on. This prevented the ability to re-use the tests in other target levels as the tests were tightly coupled to the target level. Also the test data was embedded in the test itself resulting in lots of duplication of test across different test data. For example in the rename scenario, separate tests were written to rename a method in a class, to rename a property in a class and so on even though the steps in all these tests were essentially the same. In order to avoid these problems, a simple test engine was written that abstracted execution details from the tests. Tests then basically became set of actions user would perform on SUT. Test engine took care of interacting with the product. Abstraction layer enabled executing the same tests against multiple layers when needed with little additional cost. Also test data was separated from the test resulting in the ability to execute same tests across multiple test data (data-driven testing). Going back to our previous rename example, tests for the rename scenario were written as series of actions to be performed on SUT in xml format as shown below. This acts as test ‘intent’ file. Note that this file doesn’t have any information on how these actions need to be performed. <action name="CreateProject"/> <action name="OpenFile" fileName="test.cs"/> <action name="Rename" oldName="Class1" newName="NewClass1"/> <action name="AddConditionalSymbol" symbol="VERIFY"/> <action name="Build"/> <action name="Run"/> <action name="CleanProject"/>

The corresponding test data file for rename is a C# code file on which the rename needs to be done. The C# code below shows one such data file where rename is to be tested on a class name. The test intent file, test data and the target level on which the test needs to be executed is then input to the test execution engine. Test engine performs the following steps: • Read test intent and test data • Read target level • Execute test on the target level • Logs results This is illustrated in the Figure 3 below for the case where target level is set to object model.
class Class1 { public void Method() { } } class Test { static int Main() { #if VERIFY NewClass1 c = new NewClass1(); c.Method(); return 0; #endif return 1; }

Figure 3: Layered approach in action
To summarize, separating test intent from test execution and leveraging testability enabled • Running the same test on multiple test data • Running the same test on multiple target levels.
Test engine
UI level
Object model level
Component level
Unit level
Test Intent
Test data
Target = Object model
SUT

Results Below are the results team saw after adopting the above mentioned approach to test Visual C# 2005. • Test robustness: Near 100% test robustness as tests primarily targeted non UI
layers. • Test authoring: Tests were easier and faster to write because all the intricacies
of interacting with the SUT were abstracted out to test engine. Tester didn’t have to worry about figuring out how to get past the dialog, or how long to wait before the list box shows up, and so on.
• Coverage: High coverage as same tests was run on multiple targets and multiple test data.
• Performance: Tests ran 70% faster than the previous UI tests. • Communication: Increased interaction with developers as part of investigating
ideas for adding testability helped testers understand their components better.
Conclusion Maintenance and reliability of UI tests can be very challenging to test teams. By investing on testability early in the product cycle and focusing testing on non-UI layers can greatly reduce test development and maintenance costs. UI testing doesn’t go away completely. By separating test intent from test execution details, same tests can be reused to execute on both UI and non-UI levels for little additional costs.

Acknowledgements
Many thanks to Jason Cooke for reviewing this paper and giving valuable feedback. Special thanks to David Catlett for providing valuable insights on testability. I want to thank Daigo Hamura, Gabriel Esparza-Romero, and Rusty Miller for giving valuable guidance to the team on the project. Finally I want to thank the entire Visual C# team for assisting in efforts to make testing more efficient and productive.