Embed Size (px)
Citation preview

Meetinghouse Webcast GuideSet up, Create, and Receive Webcasts

Information in this document is subject to change without notice.©2009 Intellectual Reserve, Inc. All rights reserved. English approval: 1/09. PD50013943Printed in Utah, USA
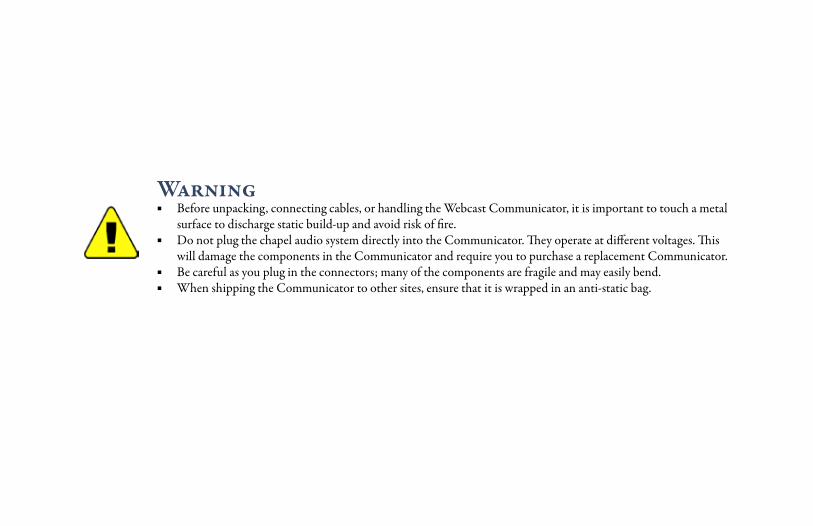
Warning ■ Before unpacking, connecting cables, or handling the Webcast Communicator, it is important to touch a metal
surface to discharge static build-up and avoid risk of fire. ■ Do not plug the chapel audio system directly into the Communicator. They operate at different voltages. This
will damage the components in the Communicator and require you to purchase a replacement Communicator. ■ Be careful as you plug in the connectors; many of the components are fragile and may easily bend. ■ When shipping the Communicator to other sites, ensure that it is wrapped in an anti-static bag.


Introduction to Meetinghouse Webcast | 1Possible Uses 2
Requirements | 3Requirements for Creating a Webcast 4Requirements for Receiving a Webcast 5Webcast Communicator 6Webcast Receiver 8Camera 9
Create a Webcast | 11Connect to the Internet 12Set up video/camera 12Set up audio 13Set up and test the Webcast Communicator 16Start a webcast 17
ContentsReceive a Webcast | 19
Connect audio to chapel audio system 19Connect to the Internet 20Connect projector or television for display 20Connect to the webcast 20
Appendix | 23Support 23Warranty 23Returns 23Glossary 24


1Meetinghouse Webcast Guide
Intr
od
uc
tIo
n
The Meetinghouse Webcast Guide explains how to set up, create, and receive a Meetinghouse Webcast, a one-way audio and video Web broadcast from a central location to one or more locations. This webcast is transmitted through the Internet to the Church webcast system. Receiving locations connect through the Internet to the Church webcast system to receive the webcast.
This guide is divided into three sections: a description of the system requirements, how to use the Meetinghouse Webcast Communicator to create a webcast, and how to receive a webcast. This guide describes several setup options that you can match to your meetinghouse requirements. The guide also includes a glossary, warranty, and support information. For more information about meetinghouse webcasts, refer to the resources on http://clerk.lds.org.
Introduction to Meetinghouse Webcast

2
Possible UsesMeetinghouse Webcast is for Church use only. Be sensitive when selecting appropriate meetings to webcast. Possible uses include:
■ Area, regional, or stake training ■ Regional or stake conferences ■ Regional or stake firesides
NOTE: Webcasts that include the participation of a General Authority should never be recorded.

3Meetinghouse Webcast Guide
req
uIr
emen
ts
Requirements for WebcastingWebcasting involves two or more locations: the location creating the webcast and the location(s) receiving it. These locations can be separate buildings, or different locations within the same building. Make sure you have the necessary requirements for each location.
If your location is broadcasting an event, you will use the Webcast Communicator to create the webcast.
If you will view an event being broadcast from a different location, you may use the Webcast Receiver or a computer to receive webcasts.

4
Requirements for Creating a WebcastYou should meet the following requirements to create a Meetinghouse Webcast:
■ A Stake Technology Specialist who has an understanding of the Internet and basic computer technologies ■ Internet at all locations that meet webcast quality requirements. See table on pg. 5. ■ Meetinghouse Internet, the Church firewall solution. More information may be found at http://clerk.lds.org. ■ Meetinghouse Webcast components
Required:- Meetinghouse Webcast Communicator- Meetinghouse Webcast Receiver or computer- High-quality camera - Adapters to connect to the building audio system, video system, projectors, etc. (based on setup)- CAT5 (or better) Ethernet cable that reaches from your building’s Internet data port to the Webcast Communicator. Optional:- Tripod- Small TV monitor from the library or portable DVD player (if the camera does not have a monitor/view finder)- Tape to cover exposed cables (do not use on wood surfaces)- Any necessary extension cords and power strips- Cables and adapters for audio (see pg. 13 for more information on setting up audio)

5Meetinghouse Webcast Guide
req
uIr
emen
ts
Requirements for Receiving a WebcastYour building should meet the following requirements to receive a Meetinghouse Webcast:
■ Meetinghouse Internet, the Church firewall solution (see http://clerk.lds.org) ■ Meetinghouse Webcast Receiver or computer with Microsoft Windows Media Player 9 or newer ■ CAT5 (or better) Ethernet cable that reaches from the Internet data port to your Webcast Receiver or computer ■ Projector and screen, television, or computer monitor ■ Cables to connect to the projector, or computer monitor ■ Cables and connectors to connect to the chapel’s audio system
Webcast quality Sending Receiving Webcast SpeedsGood 400K upload 300K download 200K (low)Better 500K upload 375K download 250K (medium)Best 600K upload 450K download 300K (high)Rule for calculation 2 X webcast speed 1.5 X webcast speed 150K to 750K
NOTE: The quality of the Internet will directly impact the quality of the Webcast.

6
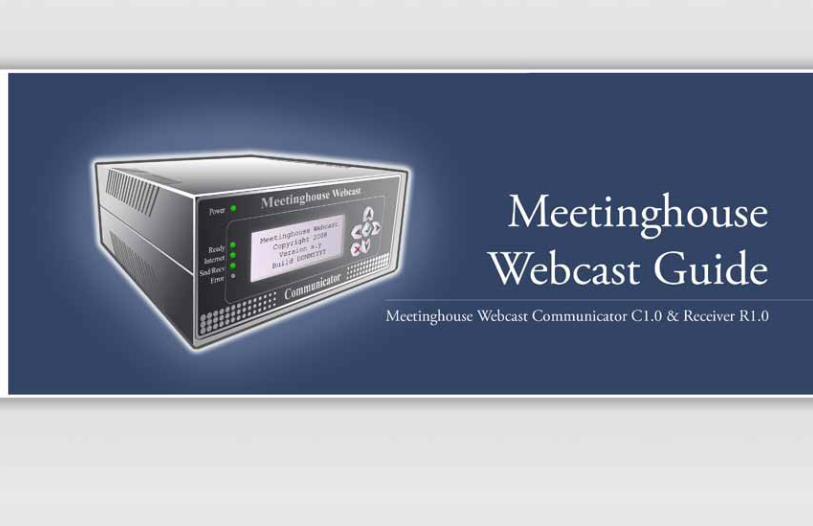
Meetinghouse Webcast CommunicatorThe Webcast Communicator creates the event through the Church webcast system. The Church webcast system assigns a URL of the webcast stream that can then be viewed by the Meetinghouse Webcast Receiver or a computer. The Webcast Communicator then connects to the Church webcast system and transmits the audio and video stream.
Front Panel
1. Device Screen 2. Accept/Yes 3. Cancel/No 4. Error Indicator 5. Send/Receive Indicator 6. Internet Connection Indicator 7. Ready Status 8. Power Indicator

7Meetinghouse Webcast Guide
req
uIr
emen
ts Back Panel 1. Serial Port 2. Ethernet Port 3. S-Video-In Port 4. Composite Video-In 3 5. Composite Video-In 2 6. Composite Video-In 1 7. Audio Line-In Jack 8. Speaker-Out Jack 9. MIC-In Jack 10. USB Ports 11. DVI Video-Out Port 12. DC Power Port 13. On/Off Switch

8
Webcast Receiver The Meetinghouse Webcast Receiver connects to the Church webcast system over the Internet and receives the webcast audio and video stream. You may use a computer connected to the Internet instead of a Webcast Receiver, if desired. The Webcast Receiver displays the webcast on a monitor or television.

9Meetinghouse Webcast Guide
req
uIr
emen
ts
CameraMeetinghouse Webcast requires a high quality video camera. An existing camera can be used or a new camera can be purchased in your area, if it meets the video camera requirements listed below. More information is available in the Meeting-house Webcast Guide (available at http://clerk.lds.org).
■ 10X optical zoom lens ■ Auto focus ■ Low light sensitivity ■ Option to disable “auto shutoff ” when not recording (allowing video to be streamed without recording) ■ At least one composite video out (RCA) port or one S-video outport ■ Ability to not display timestamp or other camera display information in video output

10

11Meetinghouse Webcast Guide
cr
eate
a W
ebc
ast
Create a Webcast
Follow these steps to create a webcast:
1. Connect to the Internet (pg. 12)2. Set up video/camera (pg. 12)3. Set up audio (pg. 13-15)4. Set up and test the Webcast Communicator (pg. 16)5. Start a webcast (pg. 17)
NOTE: When preparing for transmission of an event using the Webcast Communicator, please ensure that exposed cables are covered with tape so that they do not dislodge as members move throughout the chapel.

12
Step 1: Connect to the InternetConnect the CAT5 (or better) Ethernet cable to Webcast Communicator and the Internet data port.
Step 2: Set up video/cameraThe following instructions explain how to prepare the camera for a webcast.
1. Place the camera near the back of the room or the chapel in a secure, stable location (a sturdy tripod is recom-mended). If you are using the building video distribution system, locate the video distribution system outlet (usually located in the first overflow section of the chapel).
2. Connect the camera to the Webcast Communicator in one of two ways: a) Run the appropriate video cable (S-Video or Composite) from the camera’s “video out” to the corresponding
“video in” located on the back panel of the Webcast Communicator.b) Using the appropriate cable (Composite or S-Video), connect the camera “video out” to a building video distri-
bution system outlet. Video in the building video distribution system can be accessed from the satellite cabinet. Connect the video output to the appropriate “video in” port in the back of the Webcast Communicator.
NOTE: More information about video/camera set-up, including frequently asked questions and answers, can be found at http://clerk.lds.org. For instructions on how to set up your camera, refer to the manufacturer’s manual.

13Meetinghouse Webcast Guide
cr
eate
a W
ebc
ast
Step 3: Set up audioThe Webcast Communicator will need an audio input. There are three options that use the chapel audio system and one that uses a separate microphone. Each option involves different setup instructions. Use the option that best fits your situation.
Option A: Use the clerk’s desk or sacrament tableOption B: Use the Meetinghouse libraryOption C: Use a second microphone on the pulpitOption D: Use the existing hearing impaired receiver
Warning: Do not plug the chapel speakers or amplifiers directly into the Webcast Communicator. They operate at dif-ferent voltages. This will damage the components in the Webcast Communicator and require you to purchase a replacement Webcast Communicator.
Option A: Use the clerks’ desk, sacrament table, or pulpitThis option requires a cable to run from the clerk’s desk, sacrament table, or pulpit to the camera at the back of the chapel. This cable is either the video cable con-necting to the Webcast Communicator, or the audio cable from the “record out” port. The Webcast Communicator can be placed near the clerk’s table, the sacra-ment table, or at the rear of the chapel.
1. Locate the “record out” mini port found near the clerks’ desk or under the sacrament table, or find the “sound system out” at the side of the pulpit.
2. Connect the “audio in” on the Webcast Communicator to the “record out” mini jack with the Mini-to-Mini or Mini-to-RCA adapter.
Additional Requirements: Mini-to-Mini Adapter (1/8 inch
connector on both ends) or Mini-to-RCA Adapter
Tape (to tape the cables to the floor)

14
Option B: Use the Meetinghouse LibraryIf the meetinghouse library has a satellite panel, set up your Webcast Communicator there since it is out of the chapel. This minimizes possible interactions with small children and others during the webcast. The location is also close to components you will need to connect to the Webcast Com-municator. Although this is the most complex option, it provides the best webcast production quality.
1. Open the door to the satellite equipment rack. 2. Locate the modulator that is used for chapel overflow.
This is usually the highest channel number in the US. For example, if your rack has a channel 3 and a channel 10, and if channel 3 displays a picture while channel 10 does not, then the chapel output is probably on channel 10. The correct channel will show a picture when the camera is connected to the video input jack (located at the back of the chapel).
3. Open the back of the rack and find the modulator for the back of the chapel overflow. (There should be three cables: RF out, video in, and audio in.)
4. Unplug the “audio in” cable from the back of the chapel overflow modulator and plug it into one of the female con-nectors on the Y adapter.
5. Plug the male connector from the Y adapter into the back of the chapel overflow modulator.6. Plug the Mini-to-RCA adapter (side with the male RCA) into the last connector on the Y adapter.7. Plug the Mini-to-RCA adapter (side with the 1/8 inch) into the “audio in” on the Webcast Communicator.
NOTE: Please return all the cables to their original location when the webcast is complete.
Additional Requirements Y Adapter (an adaptor with a single male
connector and two female connectors) Mini-to-RCA Adapter (an adaptor with a
1/8 inch connector and a male RCA)

15Meetinghouse Webcast Guide
cr
eate
a W
ebc
ast
Option C: Use a second microphone on the pulpitThis option uses a separate microphone instead of the chapel audio system.
1. Mount alternate microphone near the pulpit or speaking location.2. Connect a microphone cable to the alternate microphone.3. Plug the microphone cable into the power adapter.4. Run the microphone cable to the Meetinghouse Webcast Communica-
tor. 5. Plug the XLR-to-Mini adapter into the microphone phantom power
supply and Mini Amp.6. Connect the Mini Amp with the Webcast Communicator using a 1/4
inch to 1/8 inch audio cable connector.NOTE: Cable should plug into the audio MIC-In port of the Webcast Communicator.
Option D: Use the existing hearing impaired receiverThis option works with wired or wireless amplifiers for the hearing impaired (for example, Comtek in the US). The sound will have less bass and a higher pitch be-cause of the sound changes required to assist the hearing impaired. You may need to turn down the volume on the Webcast Communicator to produce a more normal sound.
1. Locate a receiver for the hearing impaired. Use an extra receiver if you have members who regularly use the system. 2. Install a new battery to ensure the power lasts throughout the meeting.3. Connect the “audio in” on the Webcast Communicator to the Webcast Receiver with the Mini-to-Mini adapter.4. Receiver should automatically turn on when headphones are plugged into the port. 5. Test the volume by creating a test webcast (see next page).
Additional Requirements: XLR-to-Mini adapter (three-pin
XLR female to 1/8 inch male connector)
Tape (to cover exposed cables) Microphone from the Meetinghouse
Webcast kit or equivalent
Additional Requirements: Mini-to-Mini Adapter (1/8 inch
connector on both ends)
Additional Requirements: XLR-to-Mini adapter (three-pin
XLR female to 1/8 inch male connector)
Tape (to cover exposed cables) Alternate Microphone 1/4 inch to 1/8 inch audio cable
connector
Additional Requirements: XLR-to-Mini adapter (three-pin
XLR female to 1/8 inch male connector)
Tape (to cover exposed cables) Alternate Microphone 1/4 inch to 1/8 inch audio cable
connector Microphone Phantom Power
Supply and Mini Amp

16
Step 4: Set up and test the Webcast CommunicatorPrior to the event, turn on the Webcast Communicator and run a test webcast to ensure it is set up correctly.
1. Select Create Webcast from the main menu.2. Select your Unit ID. If this is not a choice, select Add and put in your unit ID. 3. Create a six-digit Event ID for your event and enter it into the Webcast Communicator.4. Select Video Source output (S-Video or Composite.)5. Select the Webcast Quality for your event.6. Select Test.
Have remote locations connect to the event (see pg. 19) and verify they can see the video and hear audio. Have someone talk at the pulpit so all receiving sites can verify audio. Make any necessary adjustments and click Accept to save the settings.
7. Push X to end the test and return to the main menu.
If the test had poor video quality, run the test again, but select a different webcast quality setting. Repeat steps 1-6 until you have acceptable quality.
Warning: Do not webcast your event in Test mode. Your event will likely fail.

17Meetinghouse Webcast Guide
cr
eate
a W
ebc
ast
Step 5: Start a webcastOn the day of the event, turn on the Webcast communicator and start the Webcast.
1. Select Create Webcast from the main menu.2. Select your Unit ID.3. Enter your six-digit event ID.4. Select Video Source output (S-Video or Composite.)5. Select the Webcast Quality that worked for your test.6. Select Webcast.
There is a 60-second buffer from the time the webcast starts until the receiving sites get the feed. This helps to minimize transmission issues. The buffer is longer than in Test mode, so you can see the benefits of the adjustments and changes you make.
7. When the meeting is over, push X to end the stream.8. Select Shutdown from the main menu. If you do not shut down, the receiving sites could still connect to an empty
feed.
►Create Webcast Setup Test Shutdown

18

19Meetinghouse Webcast Guide
rec
eIv
e a
Web
ca
st
Receive a WebcastDetermine whether to use a Meetinghouse Webcast Receiver or a computer for each receiving location.
Step 1: Connect audio to chapel audio system Connect the Meetinghouse Webcast Receiver or computer audio output to the chapel sound system by using an EJ-8 or EJ-10 multi-adapter input device (crab):
1. Connect the cable from the EJ-8 or EJ-10 crab to the Webcast Receiver (use the “audio out” port marked with headset icon) or computer headset output port .
2. Connect the EJ-8 or EJ-10 crab microphone output cable to the building microphone input jack.
NOTE: To remove distortion in the line, use the volume control knob on the crab. To adjust the volume in the chapel, use the pulpit volume control knob.
Step 2: Connect Webcast Receiver or computer to the Internet
Step 3: Connect projector to Webcast Receiver or computer for display
Step 4: Plug in the power and turn on the Webcast Receiver or computer
Additional Requirements: Mini-to-Mini Adapter (1/8 inch
connector on both ends)
Additional Requirements: EJ-8 or EJ-10 multi-adapter input
device or “crab” (usually available in the meetinghouse library)

20
Step 5: Connect to the webcastThere are two choices for making this connection:
Option A: Using a computer1. Open a Web browser and enter http://stream.lds.org/xxxxxx-yyyyyy, where xxxxxx is the unit ID and your event ID
is yyyyyy.
For example, if your unit ID is 123321 and your event ID is 012109, the URL would be http://stream.lds.org/123321-012109.
Option B: Using a Meetinghouse Webcast Receiver1. Enter Unit ID 2. Enter event ID3. Select OK

21Meetinghouse Webcast Guide
rec
eIv
e a
Web
ca
st

22

23Meetinghouse Webcast Guide
app
end
Ix
Appendix
SupportThe Global Service Desk can provide assistance to Stake Technology Specialists for Webcast Communicator and Receiver setup. Before you call the Global Service Desk for support, ensure you are connected and ready. They can provide limited assistance if you need help configuring your audio setup. They cannot answer questions about using or setting up your cam-era. You can also send e-mail questions to [email protected]. General instructions, including the most recent updates to this manual, are found at http://clerk.lds.org/webcast.
NOTE: Assistance is not available on Sundays.
WarrantyThe Meetinghouse Webcast Communicator and Receiver are covered by warranty for one year against defects in production. Should you experience a system failure, contact LDS Distribution to return the defective unit. Distribution will then send a replacement. If the manufacturer finds that failure is due to misuse and not a production defect, Distribution will bill the cost of the replacement unit to the requesting unit. LDS Distribution is not involved in problem resolution for any of the other components for the webcast. If you experience equipment failure with any of the other components, refer to the owner’s manual to resolve these issues.
ReturnsIf the Webcast Communicator was purchased through LDS Distribution, contact them directly. If the Webcast Communi-cator was received from an Area Office, contact the office.

24
Glossary ■ Buffer: Delay between live transmission and received webcast needed to compensate for Internet transmission
anomalies ■ CAT5: Standard cable that carries Internet signals ■ Church Webcast System: Infrastructure that converts the webcast stream and publishes it as a URL ■ Composite Video: A lower quality video signal than s-video ■ COMTEK: In the US, a remote microphone for those with impaired hearing ■ Connector/Adapter: A cable with connection types at each end to link equipment ■ Crab: Multi-input and output adapter box for a variety of audio ports ■ Mini: 1/8 inch cable ■ RCA Jack/Phono Connector/Cinch Connector: a type of electrical connector that is commonly for audio/video ■ Satellite Cabinet: A rack of audio/visual components located in some meetinghouse libraries ■ S-Video: A higher quality video signal than composite video ■ Webcast Communicator: Device that generates webcast stream ■ Webcast Receiver: Device that receives a webcast stream ■ XLR: A three-pin microphone plug