Embed Size (px)
Citation preview
METHODS & TOOLSPractical knowledge for the software developer, tester and project manager ISSN 1661-402XWinter 2016 (Volume 24 - number 4) www.methodsandtools.com
Methods & Tools Goes Kanban
There is a famous French proverb that is translated in English by "the shoemaker’s son alwaysgoes barefoot", but in French it is the shoemaker himself that wears bad shoes. It has been thecase of the Methods & Tools editor and the magazine publication process that was still workingwith constraints inherited from its early childhood in the 20th century as a paper newsletter.Even if I published the first article about Agile project management in 2004, I have continuedfor years to follow the rhythm of large quarterly releases. You can consider this as a verywaterfall big bang approach where I had to coordinate the delivery of authors and advertisersmaterial, discovering sometimes shortly before publication if everybody could respect therequirements or even just deliver something.
Thinking about it during 2016, I have decided that it was time to change: I had to remove theunnecessary constraints, limit the work in progress and avoid the waste of formatting everythingfor the PDF issue and then formatting again the same article for the web site. It was time toshow that I had learned something from the authors that offered some great Kanban articles toMethods & Tools. This Winter 2016 issue of Methods & Tools will be the last pdf issueproduced, but this is however not the end of this publication that is only two years away from itsquarter-century. I will continue to publish directly on the methodsandtools.com web site articlesand tools presentations. New articles will be presented in our monthly newsletters wheresubscribers will continue to find software development news, upcoming conferences, bookreviews and pointers to interesting web resources.
I will like to take the opportunity of this last PDF issue to thank again all the authors that sharedtheir knowledge with the readers of Methods & Tools. Our articles backlog is open toeverybody that has something interesting to share, so do not hesitate to contact us if you areinterested. I want to thank also all the sponsors that have supported Methods & Tools, even ifwe have always take the low-nuisance option of not pushing every week towards our readers awebinar registration or a white paper to download. Among them, special thanks to Inflectra andTechWell that have been partners for many years and will continue to support Methods & Toolsnext year. I wish you all a healthy and happy start of 2017.
InsideMaking Sprint Retrospectives Work....................................................................................... page 2
Embracing the Red Bar: Safely Refactoring Tests.................................................................. page 13
The Secret Sauce of Delivering Scrum Projects ..................................................................... page 22
doctest - the lightest C++ testing framework for unit tests ..................................................... page 26
MarkupKit -Open Source Declarative UI for iOS .................................................................. page 31
Retrospectives
Methods & Tools * Winter 2016 * Page 2
Making Sprint Retrospectives Work
Alison Gitelson, @AlisonGitelson,CanBeeDone, http://www.canbeedone.co.za/
Is the team getting better each sprint they complete? Is everyone pulling his or her weight? Doyour retrospectives really bring about improvement?
Scrum is an Agile framework designed to deliver quality results through teamwork and self-organization. It includes a deliberate time of reflection to review how the team is doing and tofind ways to do better. This takes place during the sprint retrospective [1].
The value of the sprint retrospective
Sprint retrospectives are an essential component of developing an Agile Scrum team. Just goingthrough the motions of “doing Scrum” doesn’t achieve the results that are expected from anAgile environment. For a team to be high performing, there needs to be a culture ofcollaboration, accountability, introspection, trust and honesty. From sprint to sprint, this cultureneeds to be developed and team members need to learn skills such as clear communication andassertiveness without aggression. The retro, guided by the ScrumMaster, is where much of thiscan be developed whilst fulfilling the valuable requirement of reflecting on the sprint.
The role of the ScrumMaster
I hear ScrumMasters say things like “I’ve done everything to make my team…”. TheScrumMaster isn’t there to make the team better. He or she is there to facilitate the teambecoming better [2]. Facilitate means [3] “to make easier: to help bring about”. A well-facilitated sprint retro will make it easier for the team to reflect and to make decisions that canlead to improvements in the next sprint. As the team develops the role of facilitating the retromay be rotated amongst team members.
Key elements for a worthwhile sprint retro
A quick internet search will elicit many articles on how to do a retro [4]. Most of them willfocus on the self-inspection / reflection process. Let’s take a look at a few of the key elementsthat are needed to make a retro worthwhile and some facilitation tools and skills to help that tohappen.
In order to have effective reflection, to be honest about where things could be better and howthey could become better there needs to be:
• a safe space
• contribution from everyone
• trust and honesty.

Retrospectives
Methods & Tools * Winter 2016 * Page 3
Ranorex Automated Testing Tool - Click on ad to reach advertiser web site
Retrospectives
Methods & Tools * Winter 2016 * Page 4
Creating a safe space
A space becomes safe when there is an agreed way of being in that space, which everyone helpsto enforce. What does that way of being need to be? I find the simplest way is to ask.
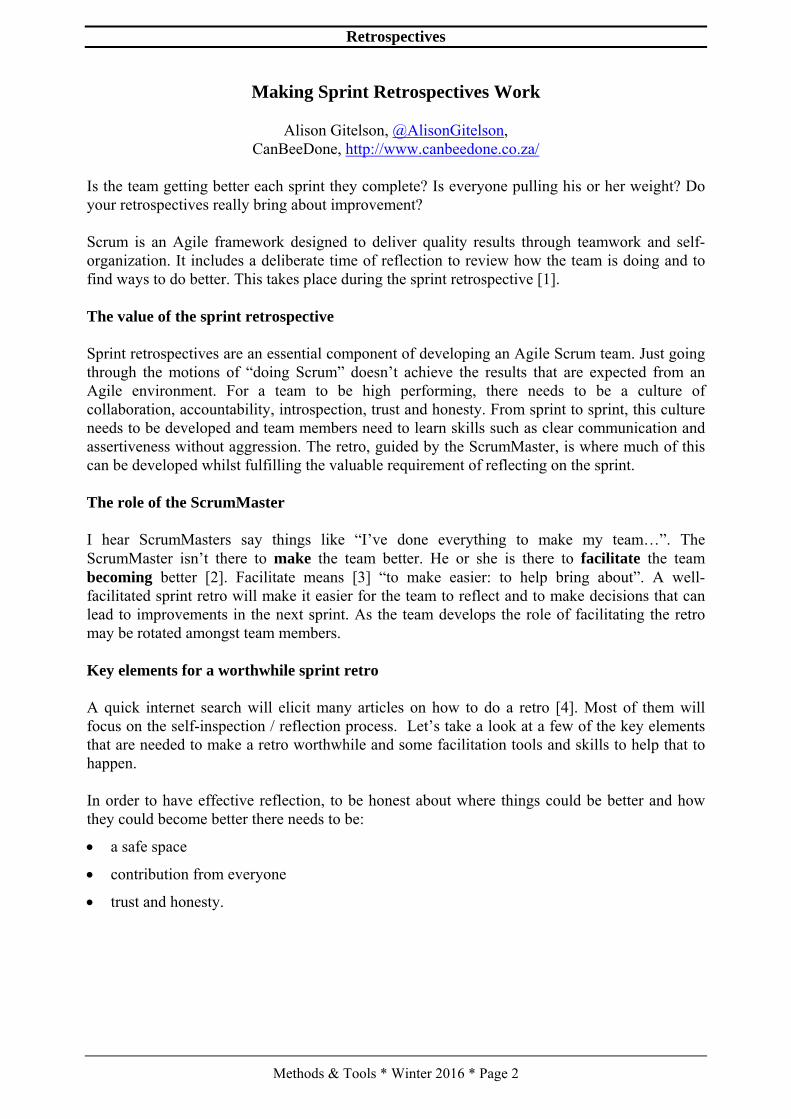
A fun way to do this is to set up two flipcharts on easels in the room where the retro is going tobe held. On one write “What would make me feel safe?” and on the other “What would makeme feel respected? As people arrive ask them to use the supplied markers to fill in their answers.
Retrospectives
Methods & Tools * Winter 2016 * Page 5
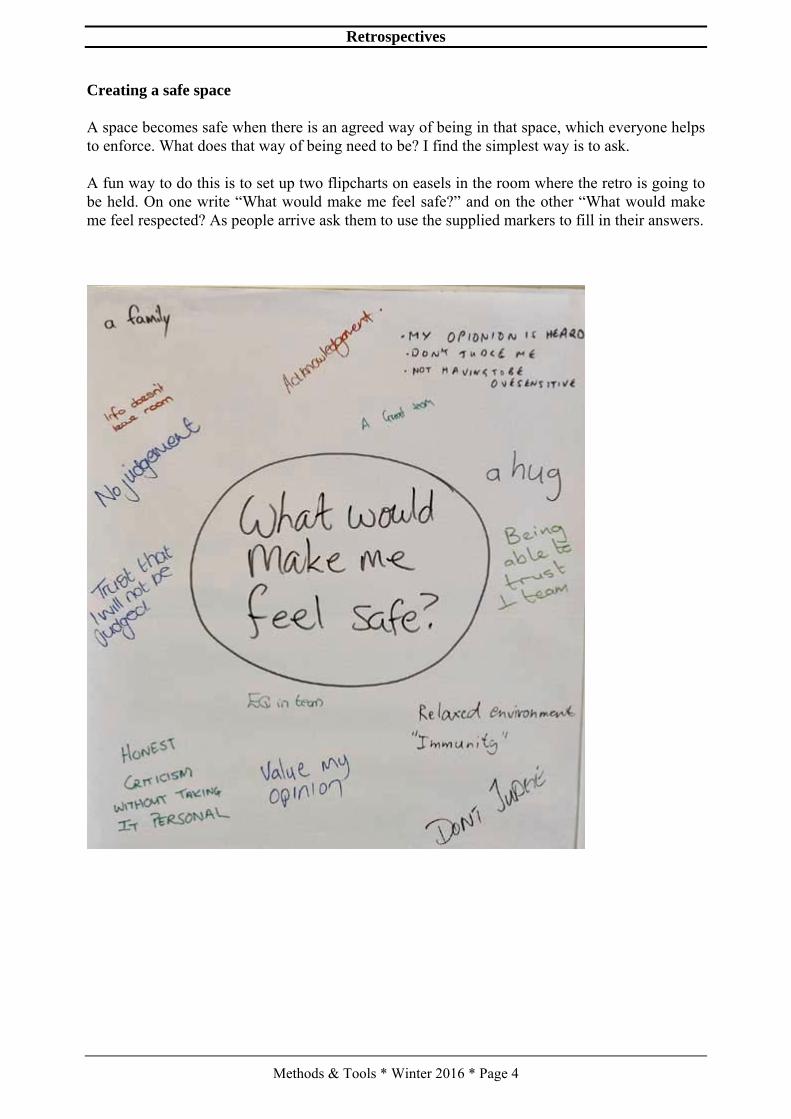
Example of the outcome of a "safe space" exercise performed at the beginning of a workshop
Start your retro with a welcome and an initial check-in and then let everyone present stand at theeasels and review both charts. Ask for clarification of anything that isn’t understood and askwhether anyone has something to add that is missing. Then ask if as a group you would all beable to “be” in a manner that would allow for the expressed needs to be met. Perhaps use a fistof five poll [5] to get everyone’s level of agreement. Ask those showing 4’s, 3’s or lower whattheir reservations might be and explore until the group has found the needs that will makeeveryone feel safe and respected being sure that this still allows for honest reflection andinteraction.
Suggest that these are stuck up on the wall as reminders. And ask if it would be okay to use thesame ones at each subsequent retro until someone feels a review is necessary. (You may wish touse the original posters or to redraw them without duplicates etc)
Following a simple structure for each retro also helps to make the space safe. Structure is like apattern, it helps us feel secure as we know what to expect. A sensible structure is one that guidespeople into the place where honest reflection can take place and it guides the group to actionabledecisions. Within the structure there is plenty of room for variety.
Retrospectives
Methods & Tools * Winter 2016 * Page 6
SpiraTeam Complete Agile ALM Suite - Click on ad to reach advertiser web site
Retrospectives
Methods & Tools * Winter 2016 * Page 7
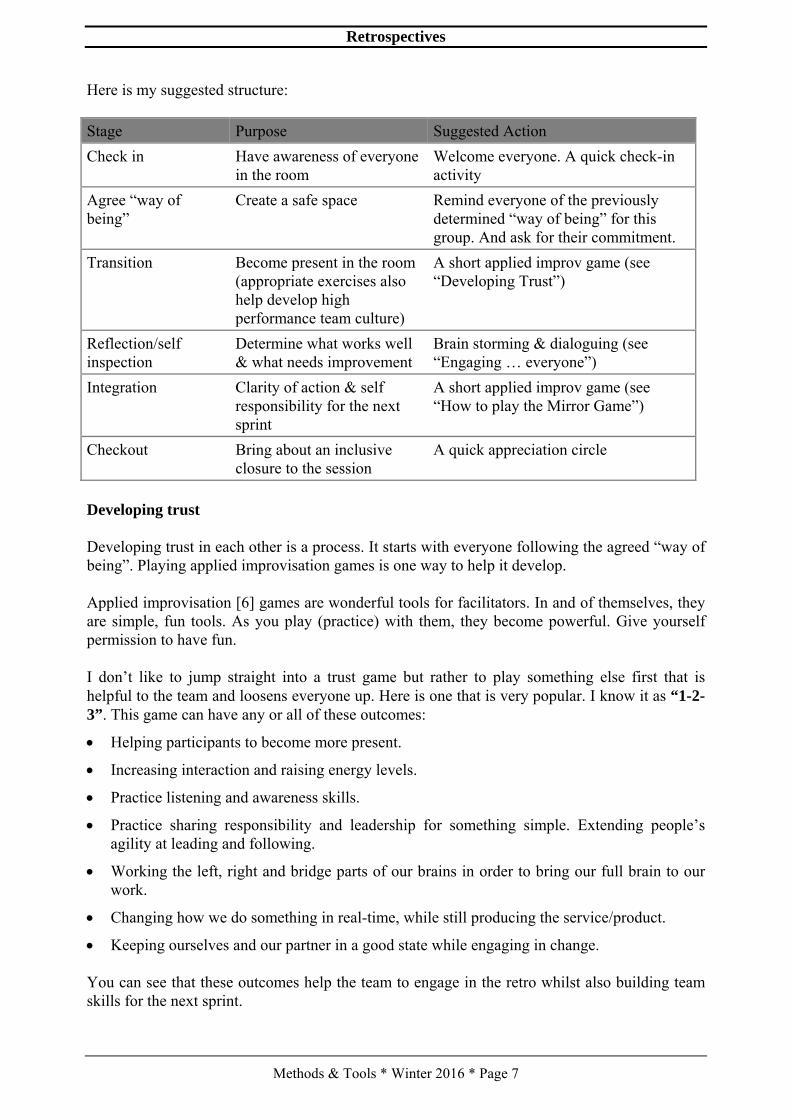
Here is my suggested structure:
Stage Purpose Suggested ActionCheck in Have awareness of everyone
in the roomWelcome everyone. A quick check-inactivity
Agree “way ofbeing”
Create a safe space Remind everyone of the previouslydetermined “way of being” for thisgroup. And ask for their commitment.
Transition Become present in the room(appropriate exercises alsohelp develop highperformance team culture)
A short applied improv game (see“Developing Trust”)
Reflection/selfinspection
Determine what works well& what needs improvement
Brain storming & dialoguing (see“Engaging … everyone”)
Integration Clarity of action & selfresponsibility for the nextsprint
A short applied improv game (see“How to play the Mirror Game”)
Checkout Bring about an inclusiveclosure to the session
A quick appreciation circle
Developing trust
Developing trust in each other is a process. It starts with everyone following the agreed “way ofbeing”. Playing applied improvisation games is one way to help it develop.
Applied improvisation [6] games are wonderful tools for facilitators. In and of themselves, theyare simple, fun tools. As you play (practice) with them, they become powerful. Give yourselfpermission to have fun.
I don’t like to jump straight into a trust game but rather to play something else first that ishelpful to the team and loosens everyone up. Here is one that is very popular. I know it as “1-2-3”. This game can have any or all of these outcomes:
• Helping participants to become more present.
• Increasing interaction and raising energy levels.
• Practice listening and awareness skills.
• Practice sharing responsibility and leadership for something simple. Extending people’sagility at leading and following.
• Working the left, right and bridge parts of our brains in order to bring our full brain to ourwork.
• Changing how we do something in real-time, while still producing the service/product.
• Keeping ourselves and our partner in a good state while engaging in change.
You can see that these outcomes help the team to engage in the retro whilst also building teamskills for the next sprint.
Retrospectives
Methods & Tools * Winter 2016 * Page 8
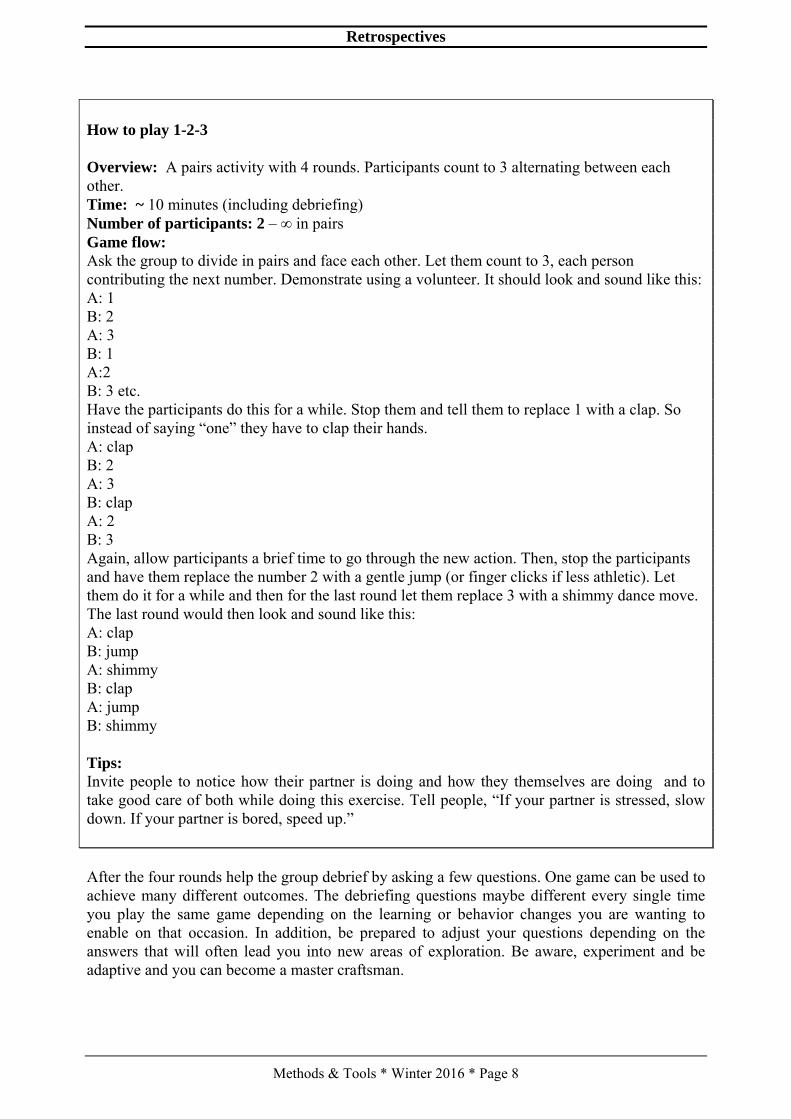
How to play 1-2-3
Overview: A pairs activity with 4 rounds. Participants count to 3 alternating between eachother.Time: ~ 10 minutes (including debriefing)Number of participants: 2 – ∞ in pairsGame flow:Ask the group to divide in pairs and face each other. Let them count to 3, each personcontributing the next number. Demonstrate using a volunteer. It should look and sound like this:A: 1B: 2A: 3B: 1A:2B: 3 etc.Have the participants do this for a while. Stop them and tell them to replace 1 with a clap. Soinstead of saying “one” they have to clap their hands.A: clapB: 2A: 3B: clapA: 2B: 3Again, allow participants a brief time to go through the new action. Then, stop the participantsand have them replace the number 2 with a gentle jump (or finger clicks if less athletic). Letthem do it for a while and then for the last round let them replace 3 with a shimmy dance move.The last round would then look and sound like this:A: clapB: jumpA: shimmyB: clapA: jumpB: shimmy
Tips:Invite people to notice how their partner is doing and how they themselves are doing and totake good care of both while doing this exercise. Tell people, “If your partner is stressed, slowdown. If your partner is bored, speed up.”
After the four rounds help the group debrief by asking a few questions. One game can be used toachieve many different outcomes. The debriefing questions maybe different every single timeyou play the same game depending on the learning or behavior changes you are wanting toenable on that occasion. In addition, be prepared to adjust your questions depending on theanswers that will often lead you into new areas of exploration. Be aware, experiment and beadaptive and you can become a master craftsman.
Retrospectives
Methods & Tools * Winter 2016 * Page 9
Some ideas for questions could be:
• What was interesting about the exercise?
• What did it feel like counting like this?
• What made it difficult? Or easy?
• What ways did you find to make it easier for your partner?
• Was there anything else you noticed?
You can play this game again and again with variations to embed new behaviors into the body.There is a video of a group playing a more complex variation here [7]. If you build up a toolboxof a few different games and alternate between them, asking different questions each time, itkeeps it interesting.
Include one game or activity in each retro to continue to build the team members' skills incommunication and assertiveness and to build a team culture of collaboration, accountability,introspection, trust and honesty.
Here is a game that helps to build trust. I know it as “Trust Walk”. It can be used to:
• Develop trust and connection
• Practice sharing leadership
• Practice communication
• Become aware of the needs of a partner
• Become adaptable.
How to play “Trust Walk”
Overview: Working in pairs one person is lead around through pressure on their back whilstkeeping their eyes closed.Time: 10 - 15 minutes (including debriefing)Number of participants: 2 – ∞ in pairsGame flow:Ask the group to divide into pairs.First demonstrate with one person. Person closes their eyes and faces forward. You stand behindthem with your hand on their upper back, in the middle at shoulder blade height. Press gentlybut firmly and tell them that means they walk straightforward. When you stop pushing (but keepyour hand on the back) that signals stop. Slide your hand to the left side over the shoulder bladethat means to turn to the right and vice versa for the right side.Now invite the pairs to decide who will lead first. The other person closes their eyes and startsfollowing the directions from “the leader”. After a couple of minutes stop everyone and invitethem to share with their partner what they need from each other in order to either receive or givethe lead better. Then let them try again for a few minutes.Swap over and repeat.Tips: Remind that there is no talking, only laughter allowed
Retrospectives
Methods & Tools * Winter 2016 * Page 10
Debrief questions (ideas only, adjust to match your purpose):How did it feel to be lead? To lead?Did discussing needs with your partner change anything?What was interesting to you about the exercise?Participants will often say something about trust and or communication. Once that happens youcan explore further with more questions.
Engaging, and eliciting honest input, from everyone in the room
When the space feels safe to everyone and there is mutual trust and respect it becomes easier toelicit honest feedback and more people are willing to contribute. However even in such anenvironment some people will struggle to contribute. This maybe because they are moreintroverted or because they need time to think before they speak.
To encourage quieter people to participate, sometimes break into small groups from two to fourpeople. After allowing some discussion time, let each group give feedback to the larger group.A useful way to ensure everyone participates fully and equally is to play a “Mirror Game”.This can be used to• Help people find their voice• Clarify thoughts• Reinforce intentions – breathe life into change• Practice listening• Experience being heard
How to play the Mirror Game
Overview: A pairs activity. One partner states something. The other person repeats it back tothem and they swap over to repeat.The “material” being stated can vary considerably depending on where this is being used.Time: 5 – 10 minutes (includes debriefing)Number of participants: 2 – ∞Game flow:Ask the group to divide into pairs.Explain how the round will work: Person A tells person B what their answer is to the question /what their new action will be (or whatever topic). Person B repeats (mirrors) the message backto Person A and asks if they got it right. If they didn’t Person A says the missed part again.Tell them how much time you will be giving them (30s to 2mins depending on the topic) and touse all of their time. Signal the start for Person A and again when the time is up and it is PersonB’s chance to repeat.Swap over so that Person B begins and repeat as above.Debrief questions (ideas only, adjust to match your purpose):What was that like?How did it feel to speak your action/change commitment out loud?What was it like to have your words repeated back to you?What was it like to listen to the other person?Was there anything else you noticed?
Retrospectives
Methods & Tools * Winter 2016 * Page 11
During the course of the sprint remind the team to pay attention to what works and what doesn’tand perhaps to make notes so that they can come to the retro already prepped.
As I mentioned in the beginning, a quick internet search will return lots of methods for doingthe self-inspection / reflection part of the retro [8]. I suggest you try out as many as interest youand the team, and alternate between them. This caters for the variety of personalities in the roomand prevents boredom.
Sometimes a team hasn’t yet developed the courage to mention real issues which are eitherholding back performance directly or indirectly through lowering trust and collaboration withinthe team: what we might call “the elephant in the room”.
Many teams have as part of their “agreed way of being” the need for people to be honest. If thatis the case with your team, remind them of their agreement.
Some carefully crafted questions can help to elicit more honest answers. Here are a fewsuggestions:
• What are the three things we could talk about that are uncomfortable?
• What is a question that you wish someone else would ask?
• What bugs you so much that you think of it on your way home? Or it wakes you up in themiddle of the night?
• What is it that we have been too nervous/polite/scared to raise?
• What’s the something that’s missing from this discussion/team?
When the self-inspection/reflection process is finished there must be clarity on at least one areathat the team will work on improving during the next sprint. Ensure that clear agreement hasbeen reached. Ask:
• Did we identify a real problem area that is worthy of improving upon?
• Did we identify some new approaches / solutions that we believe will have value?
• Are we clear on exactly what will be different (no wishy-washy generalities)?
• Does everyone understand his or her part?
• Have concerns been addressed?
The “Mirror Game” can be used here to quickly share in pairs what each person is committingto do differently during the next sprint.
Making your sprint retrospective work
Improving the depth and honesty of retrospectives is an iterative process. If you use the ideasgiven above, have fun and make small adjustments to suit your team you will unlock the powerof good retrospectives.
Retrospectives
Methods & Tools * Winter 2016 * Page 12
References
1. Sprint Retrospective: https://www.mountaingoatsoftware.com/agile/scrum/sprint-retrospective
2. The Scrum Master Role: http://scrummethodology.com/the-scrummaster-role/
3. Merriam Webster’s Learner’s Dictionary: http://www.merriam-webster.com/dictionary/facilitate
4. The Four Questions of a Retrospective: https://www.infoq.com/articles/4-questions-retrospective
5. Fist of Five Voting: http://agileforall.com/learning-with-fist-of-five-voting/
6. Applied Improvisation Network: http://appliedimprovisation.network/
7. 1-2-3 game: http://vimeo.com/75513073
8. Retrospective WWW Activity: http://www.funretrospectives.com/www-activity-worked-well-kinda-worked-didnt-work/
Refactoring Tests
Methods & Tools * Winter 2016 * Page 13
Embracing the Red Bar: Safely Refactoring Tests
M. Scott Ford, @mscottfordChief Code Whisperer at Corgibytes, http://corgibytes.com/about
Do you ever refactor your test code? If not, I hope you consider making this part of your normalpractice. Test code is still code and should adhere to the same high standards as the code that isrunning directly in production.
As important as it is, refactoring your test code is actually a little risky. It is very likely that youcould turn a perfectly valid test into one that always passes, regardless of whether or not thecode that it covers is correct. Let’s explore a technique for protecting against that possibility.
But before I dive into the nitty-gritty, let me tell you where I discovered this technique and whyI feel it should be part of everyone’s refactoring practice.
Backstory
I first read about “Refactoring Against the Red Bar” [1] years ago while subscribed to a blogthat was published by Michael Feathers. The article is still available, which is good, because itturns out that Michael Feathers isn’t the originator of this idea either. He discovered it whiletalking with Elizabeth Keogh at the XP2005 conference, and his article points his readers to anarticle that she wrote about the technique. [2]
I am often guilty of assuming that because I have read something once, that everyone elsealready knows about it. And that happens with this technique as well. I was at the first MobProgramming conference held by Agile New England in Cambridge, MA, and I wasparticipating in a mob where one of the members suggested refactoring the tests. I mentionedthe risk of invalidating the tests by doing that and that we should refactor against the red bar todefend against it. The initial response was a mixture of blank stares and confused looks. Once Idescribed the technique and demonstrated its merits by navigating the mob, people were veryexcited, and several asked why they’d never encountered the technique before. I mentioned itsorigin, and I was encouraged by the rest of the mob to promote the idea further.
That lead to both this article and a talk that I presented at Agile DC 2016. And, that is also whyI am rehashing someone else’s idea: it is a really good one, and more people need to hear aboutit. A big thanks to Elizabeth and Michael for their earlier work on this technique.
What Makes TDD Work So Well?
The short answer is that when you strictly follow the TDD steps, you are guaranteed that yourtests will fail if the implementation breaks. And that is the bedrock that makes it so safe tocontinue refactoring your code.
In case that is not super clear, there are three simple steps to TDD that we continue to repeatuntil our application does everything that we want it to do.
1. Write a failing test
2. Write the simplest production code possible that will make it pass
3. Refactor production code to make the implementation clean
4. Do we need more tests? If ‘yes’ then start back at 1, if ‘no’ then we’re done
Refactoring Tests
Methods & Tools * Winter 2016 * Page 14
Rapise Rapid & Flexible Test Automation - Click on ad to reach advertiser web site
Refactoring Tests
Methods & Tools * Winter 2016 * Page 15
I kind of lied about there being only 3 steps. There’s an important bit that the typical TDDprocess description glosses over. What often gets left out is a check step that I have includedabove as step number four.
I find that to be a very important addition to the process. If you don’t know that step is coming,you sometimes try to violate the most important clause of step 2: the simplest production codepossible. And I think this is worth demonstrating with a simple example.
TDD Example: Calculator.Add()
My favorite kata to use to demonstrate this concept is building a simple calculator using TDDand starting with the addition function. Although, I am using ruby for the code samples, pleaseremember that this technique is not language specific. I will intentionally avoid any rubyfeatures that might not read well for those less familiar with the language.
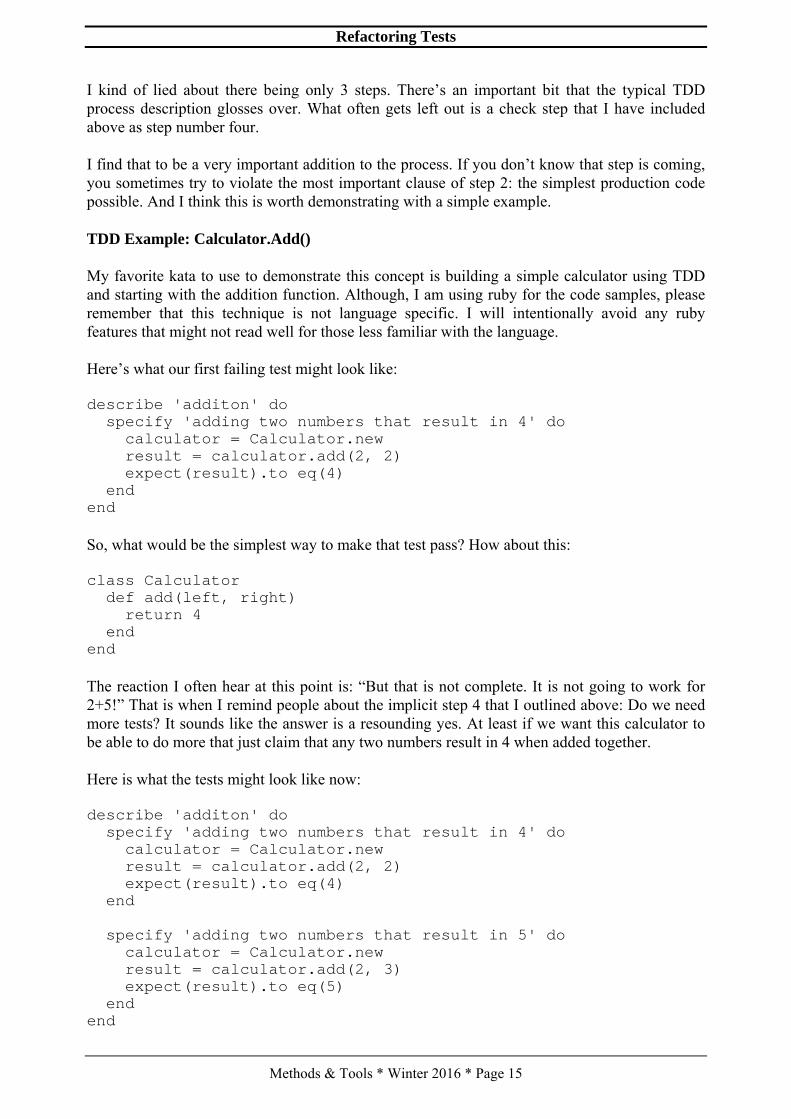
Here’s what our first failing test might look like:
describe 'additon' do specify 'adding two numbers that result in 4' do calculator = Calculator.new result = calculator.add(2, 2) expect(result).to eq(4) endend
So, what would be the simplest way to make that test pass? How about this:
class Calculator def add(left, right) return 4 endend
The reaction I often hear at this point is: “But that is not complete. It is not going to work for2+5!” That is when I remind people about the implicit step 4 that I outlined above: Do we needmore tests? It sounds like the answer is a resounding yes. At least if we want this calculator tobe able to do more that just claim that any two numbers result in 4 when added together.
Here is what the tests might look like now:
describe 'additon' do specify 'adding two numbers that result in 4' do calculator = Calculator.new result = calculator.add(2, 2) expect(result).to eq(4) end
specify 'adding two numbers that result in 5' do calculator = Calculator.new result = calculator.add(2, 3) expect(result).to eq(5) endend
Refactoring Tests
Methods & Tools * Winter 2016 * Page 16
And now we have a failing test that confirms the objection to the original implementation: justreturning 4 isn’t good enough.
So what is the easiest way to make just the new test pass? Well, that would be to return 5.
class Calculator def add(left, right) return 5 endend
And that will cause our new test to pass. But we have a problem. Our previous test is nowfailing.
So what is the easiest way to make them both pass? That would be to actually do the work.
class Calculator def add(left, right) return left + right endend
Now, we have two tests that are working together to force our implementation to work the waywe want it to. And it is by only having both tests that we’re able to safely refactor.
That is how TDD is able to guarantee that our test suite is a complete description of ourproduction code. But that guarantee gets invalidated as soon as we just simply refactor our testcode.
Why is it dangerous to blindly refactor test code?
Strictly speaking refactoring should never result in a change in behavior. That would violate thedefinition of refactoring: changing an implementation without changing its behavior. Butmistakes sometimes happen, especially if you are working without an automated refactoring tooland you are applying the refactoring by hand. And keep in mind that a bug in your refactoringtool isn’t likely, but it is not impossible, either. [3]
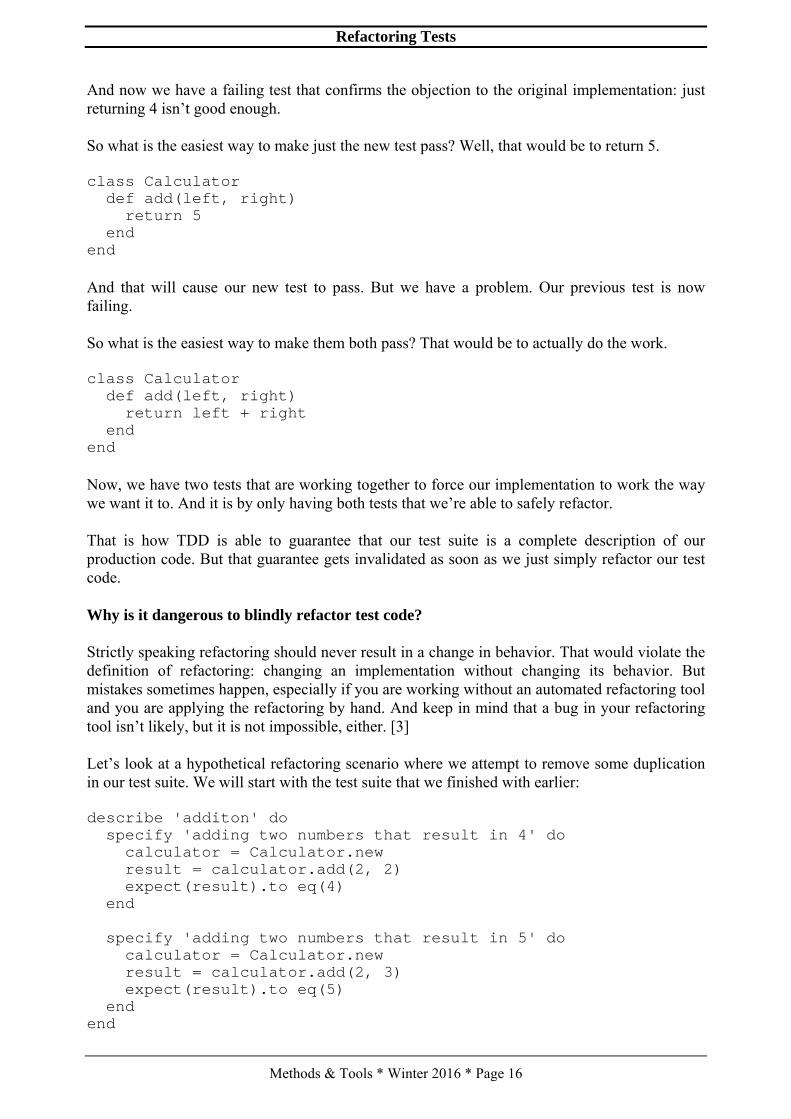
Let’s look at a hypothetical refactoring scenario where we attempt to remove some duplicationin our test suite. We will start with the test suite that we finished with earlier:
describe 'additon' do specify 'adding two numbers that result in 4' do calculator = Calculator.new result = calculator.add(2, 2) expect(result).to eq(4) end
specify 'adding two numbers that result in 5' do calculator = Calculator.new result = calculator.add(2, 3) expect(result).to eq(5) endend

Refactoring Tests
Methods & Tools * Winter 2016 * Page 17
TechWell Events & Training - Click on ad to reach advertiser web site
Refactoring Tests
Methods & Tools * Winter 2016 * Page 18
Let’s refactor this to remove some of the duplication:
describe 'additon' do [ { left: 2, right: 2, result: 4 }, { left: 2, right: 3, result: 5 } ].each do |example| specify "adding two numbers that result in#{example[:result]}" do calculator = Calculator.new result = calculator.add(example[:left], example[:right]) end endend
If we were to run that, it will pass. But did you catch the mistake that was made during therefactoring? The assertion has been removed by accident. The code should look like this:
describe 'additon' do [ { left: 2, right: 2, result: 4 }, { left: 2, right: 3, result: 5 } ].each do |example| specify "adding two numbers that result in#{example[:result]}" do calculator = Calculator.new result = calculator.add(example[:left], example[:right]) expect(result).to eq(example[:result]) endend
How do we defend against breaking our tests when we refactor them?
When we refactor our production code, it is the safety provided by our test suite that lets ussafely refactor our production code. So how can we get that same safety when we need torefactor our test code? To do that, we have to break our production code in a way that will causethe tests we want to refactor to fail. If they don’t fail, then we’ve got a problem. Either we didn’tbreak the production code correctly, or our tests didn’t work in the first place. If we can’t forceour tests to fail, then they’re not doing us any good and that would need to be addressed beforecontinuing any further.
Once those tests fail correctly, we can refactor them. And after every tiny refactoring we do, thetests should still fail. If any of those tests start to pass, then we’ve made a mistake in ourrefactoring somewhere. That is what would have happened with the mistake that was introducedin the example above.
After we’re done refactoring our tests, we can revert the changes we made to break ourproduction code, and that should cause all of our refactored tests to start passing. If any of ourtests still fail, then we’ve also made a mistake in our refactoring. But this time, instead ofcreating a test that always passes, we’ve created one that always fails.
Refactoring Tests
Methods & Tools * Winter 2016 * Page 19
Before we walk through a couple of examples, let’s simplify the workflow a little bit for review.
1. Break our production code to cause our test to fail2. Refactor our test code3. Ensure that our tests still fail4. Revert changes to production code5. Verify that tests once again pass
A Red Bar Refactoring Example
Let’s start with the example code that we created in the TDD example above.
describe 'additon' do specify 'adding two numbers that result in 4' do calculator = Calculator.new result = calculator.add(2, 2) expect(result).to eq(4) end
specify 'adding two numbers that result in 5' do calculator = Calculator.new result = calculator.add(2, 3) expect(result).to eq(5) endend
And here’s the production code that makes those tests pass:
class Calculator def add(left, right) return left + right endend
Time to refactor our tests. There’s a little bit of duplication in there. Here is what I see:• The Calculator class is instantiated by every test• Each test just calls add with different parameters and expects a different result
Let’s tackle just the first one while refactoring against the red bar.
The first step is to force the tests we’re changing to fail by intentionally breaking the productioncode. This should do that:
class Calculator def add(left, right) return 0 endend
We verify that by running our test suite and making sure that the tests that we want to changeare failing. It is okay if more tests are failing, too. But it is very important that all of the teststhat you intend to refactor are failing. If the tests that you want to refactor are not failing, thenyou need to keep changing your production code until they do. And if you are unable to makethose tests fail, then you need to jump down to the “What if something goes wrong?” section.
Refactoring Tests
Methods & Tools * Winter 2016 * Page 20
Now, we can safely extract the instantiation of the Calculator class, which might look somethinglike this:
describe 'additon' do let(:calculator) { Calculator.new }
specify 'adding two numbers that result in 4' do result = calculator.add(2, 2) expect(result).to eq(4) end
specify 'adding two numbers that result in 5' do result = calculator.add(2, 3) expect(result).to eq(5) endend
Now the creation logic for building a proper Calculator instance has been factored out into onespot.
We need to re-run our test suite to make sure that we didn’t make a mistake. Remember, though,we’re actually expecting the tests to fail.
In this case, our tests still fail in the way we expected them to. So we can now proceed byrestoring the original implementation of our production code:
class Calculator def add(left, right) return left + right endend
Finally, we run our test suite to make sure that everything is passing.
What if something goes wrong?
There are a few points during the red bar refactoring process where you might encounter asurprise. I mentioned these earlier, but I am reiterating them for easy reference.
I am changing my production code, but I can’t make my tests fail!
If you encounter this issue, then you already have a test that is producing a false positive. Youhave a couple of options at this point.
1. Delete the test and treat the production code as untested, legacy code
A test that always passes is providing just as much value as one that is always failing. At best,reading it will give you an indication about the test authors’ original intent, but it is essentiallydocumentation that is drifted out of sync with your implementation. Deleting the test is aperfectly acceptable option in this scenario. Your test suite will be no weaker without the falsepositive test than it was. Now that you have discovered the false positive, it is best to go aheadand write something that covers the production code the test was intending to run.
Refactoring Tests
Methods & Tools * Winter 2016 * Page 21
2. Review change history and try to restore a working version of the test
Take a peek at the tests history in your change control system if you have that available. If youdiscover that you are looking at the first version of the test that was committed, then this test hasalways been a false positive, and you’ll need to follow the previous option instead. If there ishistory for the test that you are working on, then attempt to revert those changes while yourproduction code is still modified to simulate a failure. If the older version of the test fails, thenyou can revert your production code modifications, and see if the test passes. If so, then youhave found a valid version of the test. If that version still has some refactoring that you’d like todo, then you can go ahead and start the process over again.
I refactored my test, and the production code is broken, but now the test is passing!
In this scenario, you have broken your test. The easiest way to see this is to remove a criticalassertion that would otherwise force the test to fail, or perhaps a subtle change has been made tothe way the test setup process was running. Revert the changes that you have made to your testand try again.
I have successfully refactored my test, and I have reverted my changes to the productioncode, but now the test is still failing!
Take a close look at the reason that the test is failing. I have seen this scenario happen mostoften because of an invalid type reference or syntax error. Since you are refactoring against thered bar, those things can sometimes slip into your test as you are refactoring. In this case, fixingthat error should make your tests pass again, but you will want to repeat your production codechanges to double-check that you haven’t accidentally introduced a false positive while trying toget the test to pass again. It is also possible that you have added an assertion that the productioncode can’t make pass or the test setup is different than it used to be, and the logic that used to berunning no longer applies. If this is the case, then you’ll need to revert the changes that you havemade to your test and start over.
What have we learned?
Following this simple technique is a great way to safely ensure that your tests suite stillcorrectly tests your production code while you are refactoring your test code. This is a practicethat I follow anytime that I modify a test, and I have been doing so successfully for several yearsnow. It is practically second nature at this point.
References
1. Michael Feathers, Refactoring Against the Red Bar,http://butunclebob.com/ArticleS.MichaelFeathers.RefactoringAgainstTheRedBar2. Elizabeth Keogh, Refactoring Tests (or: How I Learned to Stop Worrying and Love the RedBar) http://sirenian.livejournal.com/21808.html3. Jay Bazuzi, Extract Method introduces a bug in this corner case,http://jbazuzicode.blogspot.ch/2016/05/extract-method-introduces-bug-in-this.html
This article was originally published on http://corgibytes.com/blog/2016/09/20/refactoring-against-the-red-bar/ and is reproduced here with permission. It was inspired by a talk that Scottgives on the subject at the Agile DC 2016 conference.
Scrum
Methods & Tools * Winter 2016 * Page 22
The Secret Sauce of Delivering Scrum Projects
Jesus Mendez, @chuzzete,Seedbox Technologies, www.jesusmendez.ca
A typical project life cycle is composed of different phases. From the original idea, until theproject is released and then supported, there are many things to consider ensuring it gets donewithin the scope, budget, time, and quality standards you aspire to reach. All of this, whilekeeping risks under control and customers delighted.
One successful way to deliver a project that reduces risk, increases customer satisfaction, andprovides a reliable ROI is through Scrum, one of the most popular Agile frameworks of buildingproducts, generally software, iteratively.
But, what elements shall we consider when delivering Scrum projects so it can be doneconsistently and successfully?
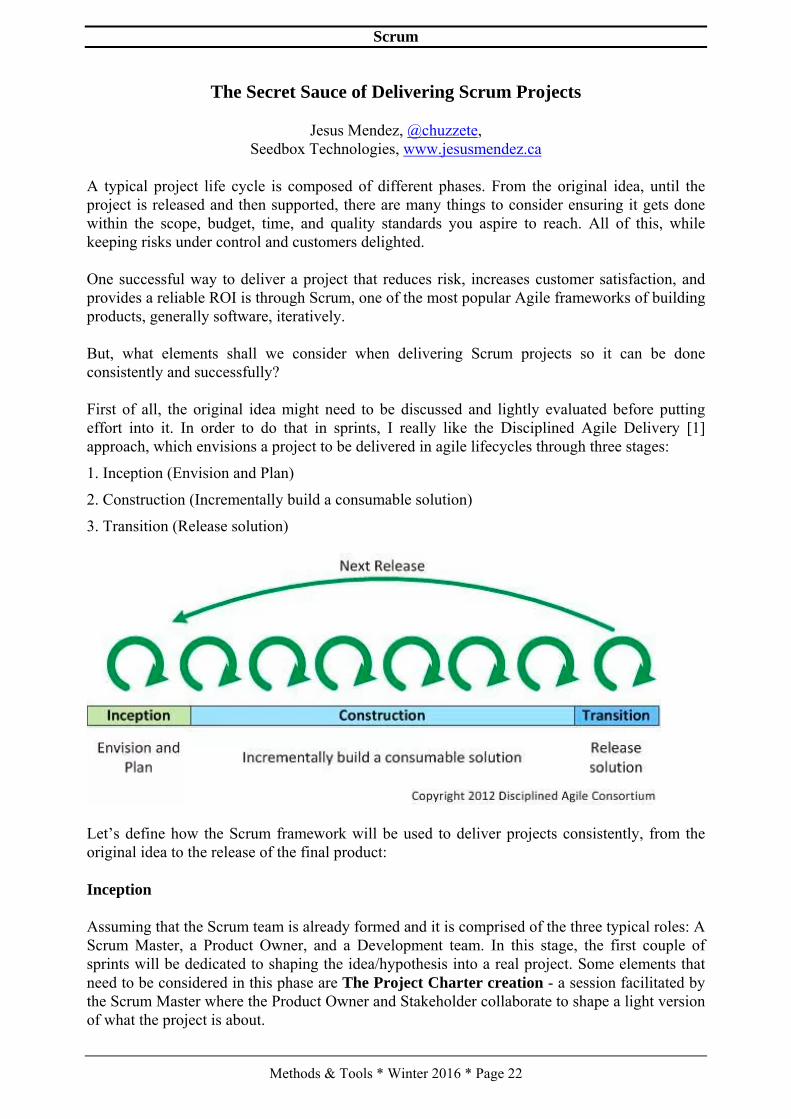
First of all, the original idea might need to be discussed and lightly evaluated before puttingeffort into it. In order to do that in sprints, I really like the Disciplined Agile Delivery [1]approach, which envisions a project to be delivered in agile lifecycles through three stages:
1. Inception (Envision and Plan)
2. Construction (Incrementally build a consumable solution)
3. Transition (Release solution)
Let’s define how the Scrum framework will be used to deliver projects consistently, from theoriginal idea to the release of the final product:
Inception
Assuming that the Scrum team is already formed and it is comprised of the three typical roles: AScrum Master, a Product Owner, and a Development team. In this stage, the first couple ofsprints will be dedicated to shaping the idea/hypothesis into a real project. Some elements thatneed to be considered in this phase are The Project Charter creation - a session facilitated bythe Scrum Master where the Product Owner and Stakeholder collaborate to shape a light versionof what the project is about.
Scrum
Methods & Tools * Winter 2016 * Page 23
YouTrack Issue Tracker - Click on ad to reach advertiser web site
Scrum
Methods & Tools * Winter 2016 * Page 24
Within this one-hour meeting, normally the team will find answers to the following questions:• What do we want to achieve? (Product Owner)• Why do we need to do it now? (Product Owner)• What are the high-level acceptance criteria to consider the project a success? (Product
Owner with Stakeholder(s) input)• What is the minimum viable product that could be delivered to test our idea/hypothesis?
(Optional and dependent on how the organization wants to release its products)
Once the project charter is created, the Scrum Master prepares and then facilitates a meeting tohelp all parties collaborate on the project and create a shared understanding of it. I have calledthis meeting ‘Let’s collaborate’ This is a session facilitated by the Scrum Master to helpStakeholder(s) share/validate the idea/hypothesis with the Scrum Team. The goal of thismeeting is to get everyone involved in the project on the same page (common and sharedunderstanding) and will have a time limit of two to four hours. Normally within this session, theteam will answer the following questions:• Is the idea/hypothesis technically viable with the resources available at the moment?
(Development Team)• Depending on the approach in terms of product development (MVP or not MVP), what kind
of framework is required to support the product vision?• What are the high-level pieces that compose the MVP (To be released in a maximum of 2
weeks)? (Development Team) (Optional)• How long will it take to get the project done? (High-level estimate in terms of sprints).• Shall we continue with it or not? (Stakeholder(s) to answer)
Once the meeting is done, the Scrum Master helps the Product Owner to create the plan for theupcoming iterations, based on the meeting outcome and then suggests that the Product Ownercommunicates the plan to the team, for final validation and approval.
Project Approval
By the end of this meeting, I encourage stakeholders to make the decision and approve or rejectthe project. This will ease the process and reduce the amount of time wasted on unnecessaryvalidations.
Construction
If the project has been approved, now is the time for the team to start building a Proof ofConcept or even the first consumable. In order to succeed in the construction phase, I stronglyrecommend planning and running at least one product backlog grooming session per sprint;focusing on the product backlog items written during the Inception phase. Doing this willguarantee the team staying focused on the project recently discussed, which will have a directimpact on the quality of what will be delivered by the end of the sprint.
Another element to consider if we are going to make a great ‘secret sauce’ of delivering Scrumprojects, is to set sprint goals and track how the sprint backlog is being eliminated throughthe sprint. In addition to setting sprint goals, I also teach the team the importance of staying insync daily. Every Scrum Master will tend to apply their favorite technique to help the teammake daily stand-ups fun, simple, and interesting. What really matters here is to help them sharewhere the sprint is, in terms of the sprint goal, how to keep the sprint status visible and easy to
Scrum
Methods & Tools * Winter 2016 * Page 25
understand in one view. For this purpose, I strongly recommend using a physical Scrum board,where the team can display all the information necessary to be in sync and coordinated for theduration of the sprint. Once the sprint has been planned, and the Scrum team has startedeliminating product backlog items from the sprint backlog, it is the responsibility of the ScrumMaster and the Product Owner to help the team stay focused during the sprint, whencompleting the sprint backlog.
By the end of the sprint, it is time to demonstrate what the development team has completed. Atthe sprint review, the most important event of the sprint is to increase collaboration andgive/get feedback about the product and its evolution. The secret here is for the Scrum Master tocreate the conditions to make people feel that the meeting is fun, organized, and it is worthwhilecoming to every single sprint. It is very important for the Product Owner to keep thestakeholders informed and interested about the project progression by leading the teamaccordingly.
At this point of the construction cycle, it is now time to recognize what worked, what didn’t,and what requires improvement by analyzing in a retrospective what the Scrum team has done.Again the Scrum Master is a key factor to help the team create self-awareness about whathappened during the sprint and provide the team with some tools and techniques to mastercontinuous improvement. The sprint retrospective will be considered helpful by the team if itbrings value to them or at least if they feel like it is something that is not an easy task. But withgood preparation, a good Scrum Master will use their facilitation skills to create a container forthe team to help them grow by learning from their mistakes and celebrating every single timejust for giving it a try. But remember, you need the right people working together, so theneverything that I have mentioned so far can happen. So please, pay attention to people’sselection process and don’t forget to include the Scrum team and empower them to be part ofthe decision-making process. Keep in mind that for Scrum to work, every role matters.
Transition
The Scrum teams that I have worked with are responsible for releasing the final product intoproduction without further assistance. If that’s the case, then I would suggest helping them withcreating a definition of done per user story, in common agreement with the product owner. Also,to work on a software release strategy, which involves a combination of conditions that have tobe met when releasing a product into a production environment. Given that we are operating initerations, helping the team to find a way to ensure that every single time that a consumableproduct is released, the customer is aware and delighted with the final result because that iswhat really matters in determining if the Scrum project is a successful one.
Conclusion
There is no magic or secret sauce to delivering a Scrum project that will work every time, but Ithink if you are structured, consistent, patient, and passionate about continuous improvementand there is a good understanding of the what and why of the project and you have the rightpeople motivated towards building products to delight customers, then you are guiding yourteam through the right path. Continue trying and experimenting, and all the learning experiencewill give you exactly what you need.
References
1. Scott Ambler, http://www.disciplinedagiledelivery.com/lifecycle/
doctest
Methods & Tools * Winter 2016 * Page 26
doctest - the lightest C++ testing framework for unit tests
Viktor Kirilov, @KirilovVik
doctest is a fully open source light and feature-rich C++98 / C++11 single-header testingframework for unit tests and Test-Driven Development (TDD).
It is inspired by the unittest {} functionality of the D programming language and Python'sdocstrings - tests can be considered a form of documentation and should be able to reside nearthe production code which they test. This isn't possible (or at least practical) with any othertesting framework for C++.
Web Site: https://github.com/onqtam/doctestVersion tested: 1.1.3System requirements: C++98 or newerLicense & Pricing: MIT, freeSupport: as issues through the GitHub project page
Introduction
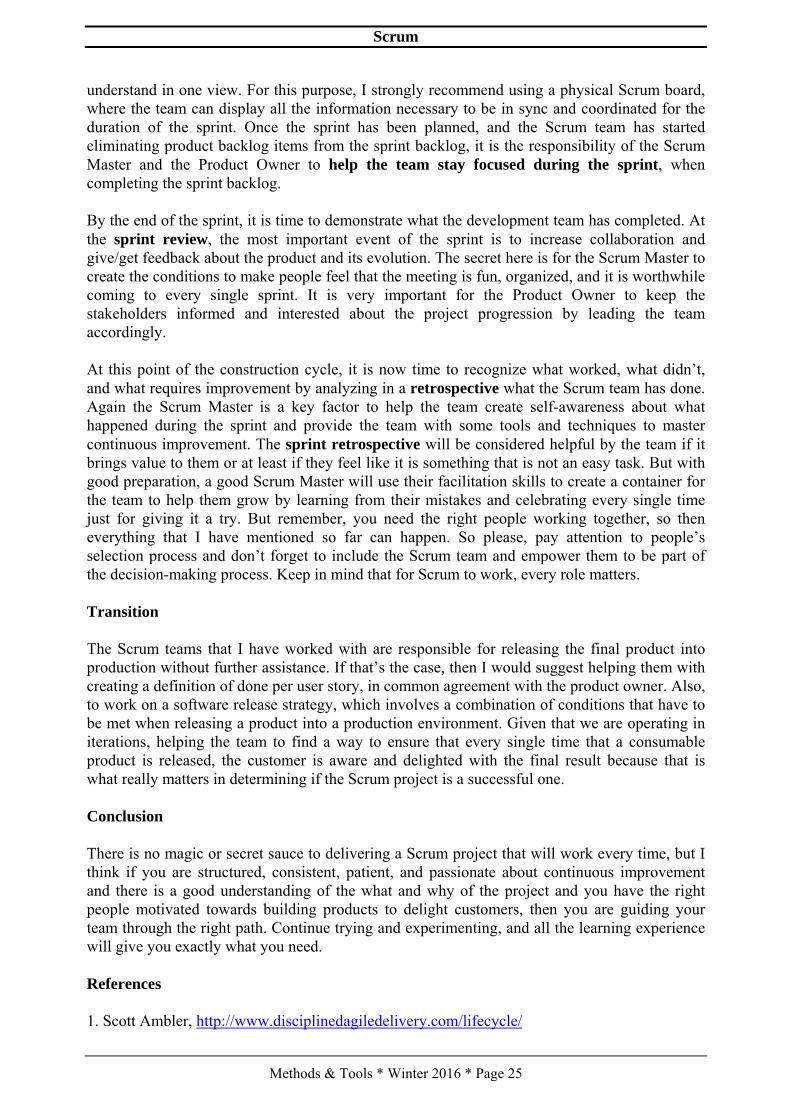
A complete example with a self-registering test that compiles to an executable looks like this:
#define DOCTEST_CONFIG_IMPLEMENT_WITH_MAIN#include "doctest.h"
int fact(int n) { return n <= 1 ? n : fact(n - 1) * n; }
TEST_CASE("testing the factorial function") { CHECK(fact(0) == 1); // will fail CHECK(fact(1) == 1); CHECK(fact(2) == 2); CHECK(fact(10) == 3628800);}
And the output from that program is the following:
[doctest] doctest version is "1.1.3"[doctest] run with "--help" for options========================================================main.cpp(6)testing the factorial function
main.cpp(7) FAILED! CHECK( fact(0) == 1 )with expansion: CHECK( 0 == 1 )
========================================================[doctest] test cases: 1 | 0 passed | 1 failed |[doctest] assertions: 4 | 3 passed | 1 failed |
doctest
Methods & Tools * Winter 2016 * Page 27
Note how a standard C++ operator for equality comparison is used - doctest has one coreassertion macro (it also has for less than, equals, greater than...) - yet the full expression isdecomposed and the left and right values are logged. This is done with expression templates andC++ trickery. Also the test case is automatically registered and you don't need to manually insertit to a list.
Doctest is modeled after Catch [1] that is currently the most popular alternative for testing inC++. You can check out the differences in the FAQ [7]. Currently a few things that Catch hasare missing but doctest will eventually become a superset of Catch.
Motivation behind the framework - how is it different
There are many C++ testing frameworks - Catch [1], Boost.Test [2], UnitTest++ [3], cpputest[4], googletest [5] and many other [6]. What makes doctest different is that it is ultra light oncompile times (by orders of magnitude) and is unintrusive.
The key differences between doctest and the others testing frameworks are:• Ultra light - below 10ms of compile time overhead for including the header in a source file• The fastest possible assertion macros - 50 000 asserts can compile for under 30 seconds
(even under 10 sec)• Subcases - an intuitive way to share common setup and teardown code for test cases
(alternative to fixtures)• Offers a way to remove everything testing-related from the binary with the
DOCTEST_CONFIG_DISABLE identifier• Doesn't pollute the global namespace (everything is in the doctest namespace) and doesn't
drag any headers with it• Doesn't produce any warnings even on the most aggressive warning levels for MSVC / GCC
/ Clang• Weverything for Clang• /W4 for MSVC• Wall -Wextra -pedantic and over 50 other flags!• Very portable and well tested C++98 - per commit tested on CI with over 220 different
builds with different compilers and configurations (gcc 4.4-6.1 / clang 3.4-3.9 / MSVC2008-2015, debug / release, x86/x64, linux / windows / osx, valgrind, sanitizers...)
• Just one header and no external dependencies apart from the C / C++ standard library(which are used only in the test runner)
The unique ability that this framework provides
All the previously listed benefits allow the framework to be used in more ways than any other.Tests can be written directly in the production code!• This makes the barrier for writing tests much lower. You don't have to: 1. make a separate
source file 2. include a bunch of stuff in it 3. add it to the build system and 4. add it to sourcecontrol. You can just write the tests for a class or a piece of functionality at the bottom of itssource file or even header file!
• Tests in the production code can be thought of as documentation or up-to-date comments,showing how an API is used (correctness enforced by the compiler).
• Testing internals that are not exposed through the public API and headers becomes easier.• Test-driven development (TDD) in C++ has never been easier!
doctest
Methods & Tools * Winter 2016 * Page 28
The framework can still be used like any other even if the idea of writing tests in the productioncode doesn't appeal to you. This is the biggest power of the framework and is not available inother tools
There are many other features [8] and a lot more are planned in the roadmap [9].
The main() entry point
As we saw in the example above, a main() entry point for the program can be provided by theframework. If however you are writing the tests in your production code you probably alreadyhave a main() function. The following code example shows how doctest is used from a usermain():
#define DOCTEST_CONFIG_IMPLEMENT#include "doctest.h"int main(int argc, char** argv) { doctest::Context ctx; ctx.setOption("abort-after", 5); // default - stop after 5failed asserts ctx.applyCommandLine(argc, argv); // apply command line -argc / argv ctx.setOption("no-breaks", true); // override - don't breakin the debugger int res = ctx.run(); // run test cases unlesswith --no-run if(ctx.shouldExit()) // query flags (and --exit) rely on this return res; // propagate the result ofthe tests // your code goes here return res; // + your_program_res}
With this setup the following 3 scenarios are possible:
• running only the tests (with the --exit option)
• running only the user code (with the --no-run option)
• running both the tests and the user code
This must be possible if you are going to write the tests directly in the production code.
Also this example shows how defaults and overrides can be set for command line options.
Please note that the DOCTEST_CONFIG_IMPLEMENT_WITH_MAIN orDOCTEST_CONFIG_IMPLEMENT identifiers should be defined before including theframework header - but only in one source file - where the test runner will get implemented.Everywhere else, you can just include the header and write some tests. This is a commonpractice for single-header libraries that need a part of them to be compiled in one source file (inthis case the test runner).
doctest
Methods & Tools * Winter 2016 * Page 29
Removing everything testing-related from the binary
You might want to remove the tests from your production code when building the release buildthat will be shipped to customers. The way this is done using doctest is by defining theDOCTEST_CONFIG_DISABLE preprocessor identifier in your whole project.
The effect that identifier has on the TEST_CASE macro for example is the following. It getsturned into an anonymous template that never gets instantiated:
#define TEST_CASE(name) \ template <typename T> \ static inline void ANONYMOUS(ANON_FUNC_)()
This means that all test cases are trimmed out of the resulting binary - even in Debug mode! Thelinker doesn't ever see the anonymous test case functions because they are never instantiated.
The ANONYMOUS() macro is used to get unique identifiers each time it is called. It uses the__COUNTER__ preprocessor macro which returns an integer with 1 greater than the last timeeach time it gets used. For example:
int ANONYMOUS(ANON_VAR_); // int ANON_VAR_5;int ANONYMOUS(ANON_VAR_); // int ANON_VAR_6;
Subcases - the easiest way to share setup / teardown code between test cases
Suppose you want to open a file in a few test cases and read from it. If you don't want to copy /paste the same setup code a few times you might use the Subcases mechanism of doctest.
TEST_CASE("testing file stuff") { printf("opening the file\n"); FILE* fp = fopen("path/to/file", "r");
SUBCASE("seeking in file") { printf("seeking\n"); // fseek() } SUBCASE("reading from file") { printf("reading\n"); // fread() } printf("closing...\n"); fclose(fp);}
The following text will be printed:
opening the fileseekingclosing...opening the filereadingclosing...
doctest
Methods & Tools * Winter 2016 * Page 30
As you can see the test case was entered twice and each time a different subcase was entered.Subcases can also be infinitely nested. The execution model resembles a DFS traversal, eachtime starting from the start of the test case and traversing the "tree" until a leaf node is reached,that is one that hasn't been traversed yet. Then the test case is exited by popping the stack ofentered nested subcases.
Compile time benchmarks
So there are 3 types of compile time benchmarks that are relevant for doctest:
• cost of including the header
• cost of assertion macros
• how much the build times drop when all tests are removed with theDOCTEST_CONFIG_DISABLE identifier
In summary:• Including the doctest header costs around 10ms compared to 430ms of Catch, so doctest is
25-50 times lighter• 50 000 asserts compile for roughly 60 seconds which is around 25% faster than Catch• 50 000 asserts can compile for as low as 10 seconds if alternative assert macros are used (for
power users)• 50 000 asserts spread in 500 test cases just vanish when disabled with
DOCTEST_CONFIG_DISABLE - less than 2 seconds!
In the benchmarks page [10] you can see the setup and more details for the benchmarks.
Conclusion
The doctest framework is really easy to get started with and is fully transparent and unintrusive.Including it and writing tests will be unnoticeable both in terms of compile times and integration(warnings, build system, etc). Using it will speed up your development process as much aspossible. No other framework is so easy to use! The development of doctest is supported withdonations.
References
1. https://github.com/philsquared/Catch2. http://www.boost.org/doc/libs/1_60_0/libs/test/doc/html/index.html3. https://github.com/unittest-cpp/unittest-cpp4. https://github.com/cpputest/cpputest5. https://github.com/google/googletest6. https://en.wikipedia.org/wiki/List_of_unit_testing_frameworks#C.2B.2B7. https://github.com/onqtam/doctest/blob/master/doc/markdown/faq.md#how-is-doctest-
different-from-catch8. https://github.com/onqtam/doctest/blob/master/doc/markdown/features.md9. https://github.com/onqtam/doctest/blob/master/doc/markdown/roadmap.md10. https://github.com/onqtam/doctest/blob/master/doc/markdown/benchmarks.md
MarkupKit
Methods & Tools * Winter 2016 * Page 31
MarkupKit -Open Source Declarative UI for iOS
Greg Brown, https://gkbrown.org/
MarkupKit is an open-source framework for simplifying development of native iOSapplications. It allows developers to construct user interfaces declaratively using a human-readable markup language rather than visually using Interface Builder, similar to howapplications are built for Android and .NET.
Web Site: https://github.com/gk-brown/MarkupKitVersion presented: 2.5System requirements: XCode 8, iOS 8+License & Pricing: Open source (Apache-2.0)Support: https://gitter.im/MarkupKit/Lobby
For example, the following markup creates an instance of `UILabel` and sets the value of its`text` property to "Hello, World!":
<UILabel text="Hello, World!"/>
The output produced by this markup is identical to the output of the following Swift code:
let label = UILabel()label.text = "Hello, World!"
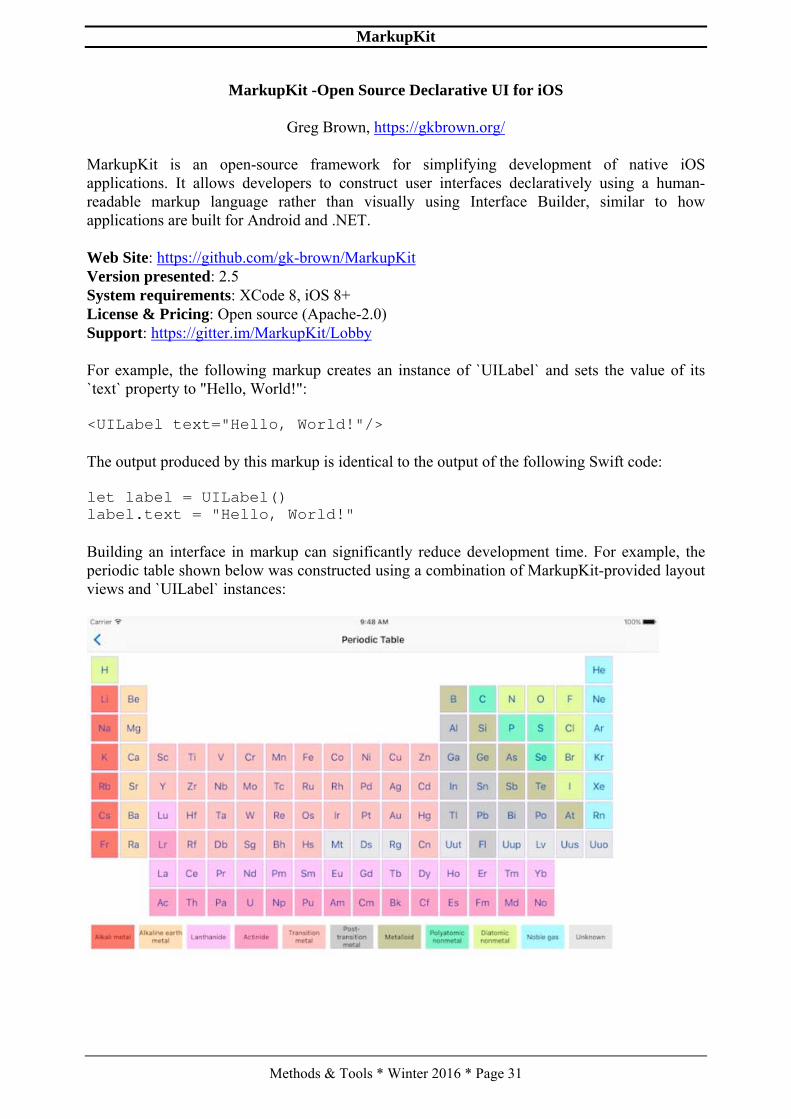
Building an interface in markup can significantly reduce development time. For example, theperiodic table shown below was constructed using a combination of MarkupKit-provided layoutviews and `UILabel` instances:
MarkupKit
Methods & Tools * Winter 2016 * Page 32
Creating this view in Interface Builder would be an arduous task. Creating it programmaticallywould be even more difficult. However, it is almost trivial in markup. The complete source codefor this example can be found on https://github.com/gk-brown/MarkupKit/blob/master/MarkupKitExamples/PeriodicTableViewController.xml.
Using markup also helps to promote a clear separation of responsibility. Most, if not all, aspectsof a view's presentation can be specified in the view declaration, leaving the controllerresponsible solely for providing the logic for the view's behavior.
This presentation introduces the MarkupKit framework and provides an overview of some of itskey features, including property templates, outlets and actions, localization, and auto layout.
Document Structure
MarkupKit uses XML to define the structure of a user interface. The hierarchical nature of anXML document parallels the view hierarchy of an iOS application, making it easy to understandthe relationships between views.
Elements
Elements in a MarkupKit document typically represent instances of `UIView` or its subclasses.As the XML parser reads elements, the corresponding class instances are dynamically createdand added to the view hierarchy.
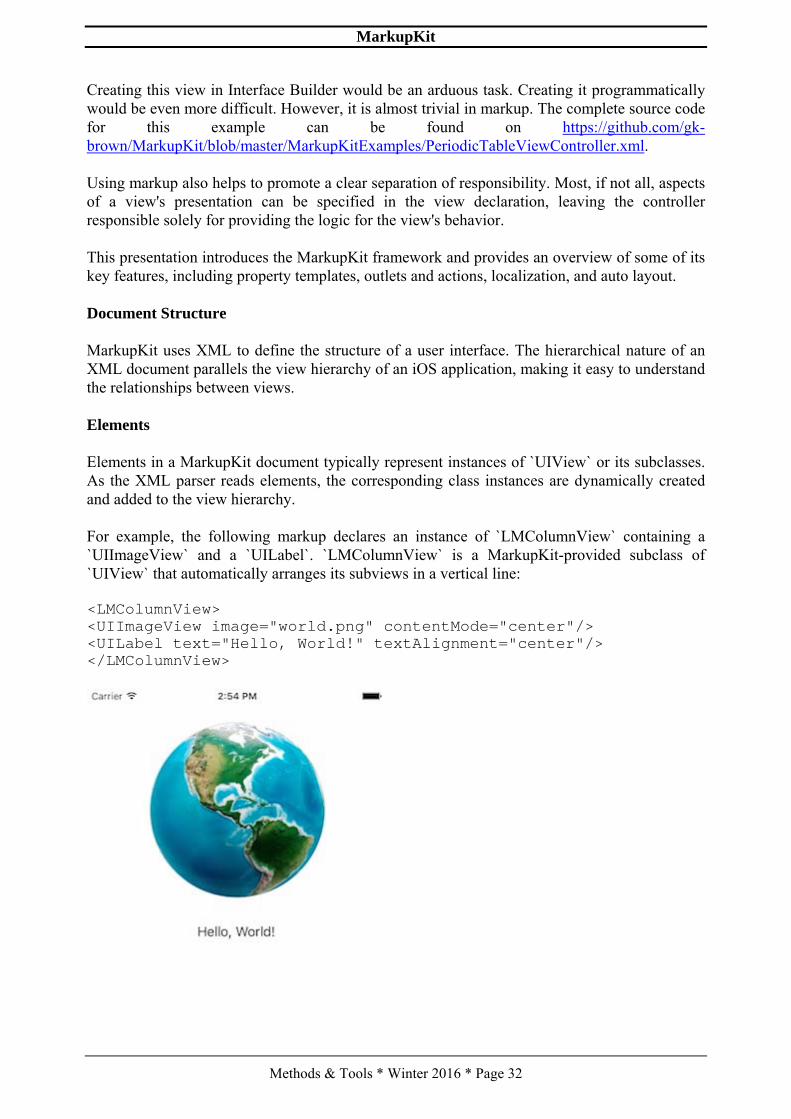
For example, the following markup declares an instance of `LMColumnView` containing a`UIImageView` and a `UILabel`. `LMColumnView` is a MarkupKit-provided subclass of`UIView` that automatically arranges its subviews in a vertical line:
<LMColumnView><UIImageView image="world.png" contentMode="center"/><UILabel text="Hello, World!" textAlignment="center"/></LMColumnView>
MarkupKit
Methods & Tools * Winter 2016 * Page 33
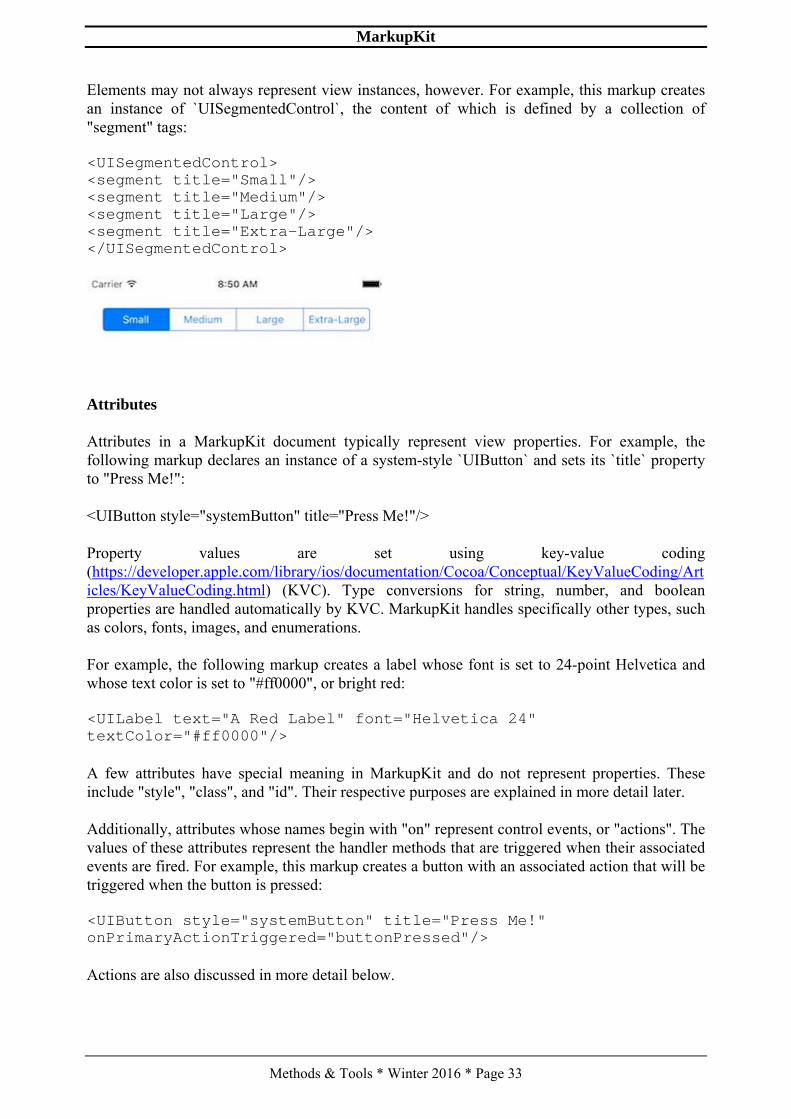
Elements may not always represent view instances, however. For example, this markup createsan instance of `UISegmentedControl`, the content of which is defined by a collection of"segment" tags:
<UISegmentedControl><segment title="Small"/><segment title="Medium"/><segment title="Large"/><segment title="Extra-Large"/></UISegmentedControl>
Attributes
Attributes in a MarkupKit document typically represent view properties. For example, thefollowing markup declares an instance of a system-style `UIButton` and sets its `title` propertyto "Press Me!":
<UIButton style="systemButton" title="Press Me!"/>
Property values are set using key-value coding(https://developer.apple.com/library/ios/documentation/Cocoa/Conceptual/KeyValueCoding/Articles/KeyValueCoding.html) (KVC). Type conversions for string, number, and booleanproperties are handled automatically by KVC. MarkupKit handles specifically other types, suchas colors, fonts, images, and enumerations.
For example, the following markup creates a label whose font is set to 24-point Helvetica andwhose text color is set to "#ff0000", or bright red:
<UILabel text="A Red Label" font="Helvetica 24"textColor="#ff0000"/>
A few attributes have special meaning in MarkupKit and do not represent properties. Theseinclude "style", "class", and "id". Their respective purposes are explained in more detail later.
Additionally, attributes whose names begin with "on" represent control events, or "actions". Thevalues of these attributes represent the handler methods that are triggered when their associatedevents are fired. For example, this markup creates a button with an associated action that will betriggered when the button is pressed:
<UIButton style="systemButton" title="Press Me!"onPrimaryActionTriggered="buttonPressed"/>
Actions are also discussed in more detail below.

MarkupKit
Methods & Tools * Winter 2016 * Page 34
Property Templates
Often, when constructing a user interface, the same set of property values are applied repeatedlyto instances of a given type. For example, an application designer may want all buttons to have asimilar appearance. While it is possible to simply duplicate the property definitions across eachbutton instance, this is repetitive and does not allow the design to be easily modified later. Everyinstance must be located and modified individually, which can be time consuming and errorprone.
MarkupKit allows developers to abstract common sets of property definitions into CSS-like"property templates", which can then be applied by name to individual view instances. Thismakes it much easier to assign common property values as well as modify them later.
Property templates are specified using JavaScript Object Notation (JSON) (http://www.json.org)and may be either external or inline. Inline templates are defined within the markup documentitself, and external templates are specified in a separate file.
For example, the following JSON document defines a template named "greeting", whichcontains definitions for "font" and "textAlignment" properties:
{ "greeting": {"font": "Helvetica 24","textAlignment": "center" }}
Templates are added to a MarkupKit document using the `properties` processing instruction(PI). The following PI adds all properties defined by _MyStyles.json_ to the current document:
<?properties MyStyles?>
Inline templates simply embed the entire template definition within the processing instruction:
<?properties { "greeting": {"font": "Helvetica 24","textAlignment": "center" }}?>
Templates are applied to view instances using the reserved "class" attribute. The value of thisattribute refers to the name of a template defined within the current document. All propertyvalues defined by the template are applied to the view. Nested properties, such as"titleLabel.font", are supported.
For example, given the preceding template definition, the following markup would produce alabel reading "Hello, World!" in 24-point Helvetica with horizontally centered text:
<UILabel class="greeting" text="Hello, World!"/>
MarkupKit
Methods & Tools * Winter 2016 * Page 35
Multiple templates can be applied to a view using a comma-separated list of template names; forexample:
<UILabel class="bold, red" text="Bold Red Label"/>
Outlets
The reserved "id" attribute can be used to assign a name to a view instance. This creates an"outlet" for the view that makes it accessible to calling code. Using KVC, MarkupKit "injects"the named view instance into the document's owner (generally either the view controller for theroot view or the root view itself), allowing the application to interact with it.
For example, the following markup declares an instance of `UITextField` and assigns it an ID of"textField":
<UITextField id="textField"/>
The owning class might declare an outlet for the text field in Objective-C like this:
@property (nonatomic) IBOutlet UITextField *textField;
or in Swift, like this:
@IBOutlet var textField: UITextField!
In either case, when the document is loaded, the outlet will be populated with the text fieldinstance, and the application can interact with it just as if it was defined in a storyboard orcreated programmatically.
Actions
Most non-trivial applications need to respond in some way to user interaction. UIKit controls(subclasses of the `UIControl` class) fire events that notify an application when such interactionhas occurred. For example, the `UIButton` class fires the`UIControlEventPrimaryActionTriggered` event when a button instance is tapped.
While it would be possible for an application to register for events programmatically usingoutlets, MarkupKit provides a more convenient alternative. Any attribute whose name beginswith "on" (but does not refer to a property) is considered a control event. The value of theattribute represents the name of the action that will be triggered when the event is fired.
For example, the following markup declares an instance of `UIButton` that calls the`buttonPressed:` method of the document's owner when the button is tapped:
<UIButton style="systemButton" title="Press Me!"onPrimaryActionTriggered="buttonPressed:"/>
For example:
@IBAction func buttonPressed(_ sender: UIButton) {// Handle button press}
MarkupKit
Methods & Tools * Winter 2016 * Page 36
Localization
If an attribute's value begins with "@", MarkupKit attempts to look up a localized version of thevalue before setting the property.
For example, if an application has defined a localized greeting in _Localizable.strings_ asfollows:
"hello" = "Hello, World!";
the following markup will produce an instance of `UILabel` with the value of its `text` propertyset to "Hello, World!":
<UILabel text="@hello"/>
If a localized value is not found, the key will be used instead. This allows developers to easilyidentify missing string resources at runtime.
MarkupKit Classes
MarkupKit includes a number of classes to help simplify application development. Some of themost common are discussed below.
LMViewBuilder
`LMViewBuilder` is the class that is actually responsible for loading a MarkupKit document. Itprovides the following class method, which, given a document name, owner, and optional rootview, deserializes a view hierarchy from markup:
+ (UIView *)viewWithName:(NSString *)name owner:(nullableid)owner root:(nullable UIView *)root;
The `name` parameter represents the name of the view to load. It is the file name of the XMLdocument containing the view declaration, minus the _.xml_ extension.
The `owner` parameter represents the view's owner. It is often an instance of`UIViewController`, but this is not strictly required. For example, custom table and collectionview cell classes often specify themselves as the owner.
The `root` parameter represents the value that will be used as the root view instance when thedocument is loaded. This value is often `nil`, meaning that the root view will be specified by thedocument itself. However, when it is not `nil`, it means that the caller is providing the root view.In this case, the reserved `<root>` tag can be used as the document's root element to refer to thisview.
For example, a view controller that is defined by a storyboard already has an established viewinstance when `viewDidLoad` is called. The controller can pass itself as the view's owner andthe value of its `view` property as the `root` argument. This allows the navigational structure ofthe application (i.e. segues) to be defined in a storyboard, but the content of individual views tobe defined in markup.
MarkupKit
Methods & Tools * Winter 2016 * Page 37
Layout Views
Auto layout is an iOS feature that allows developers to create applications that automaticallyadapt to device size, orientation, or content changes. An application built using auto layoutgenerally has little or no hard-coded view positioning logic, but instead dynamically arrangesuser interface elements based on their preferred or "intrinsic" content sizes.
Auto layout in iOS is implemented primarily via layout constraints, which, while powerful, arenot particularly convenient to work with. To simplify the process, MarkupKit provides thefollowing set of view classes, whose sole responsibility is managing the size and position oftheir respective subviews:
• LMRowView - arranges subviews in a horizontal line• LMColumnView - arranges subviews in a vertical line• LMLayerView - arranges subviews in layers, like a stack of transparencies
These classes use layout constraints internally, allowing developers to easily take advantage ofauto layout while eliminating the need to manage constraints directly.
LMRowView
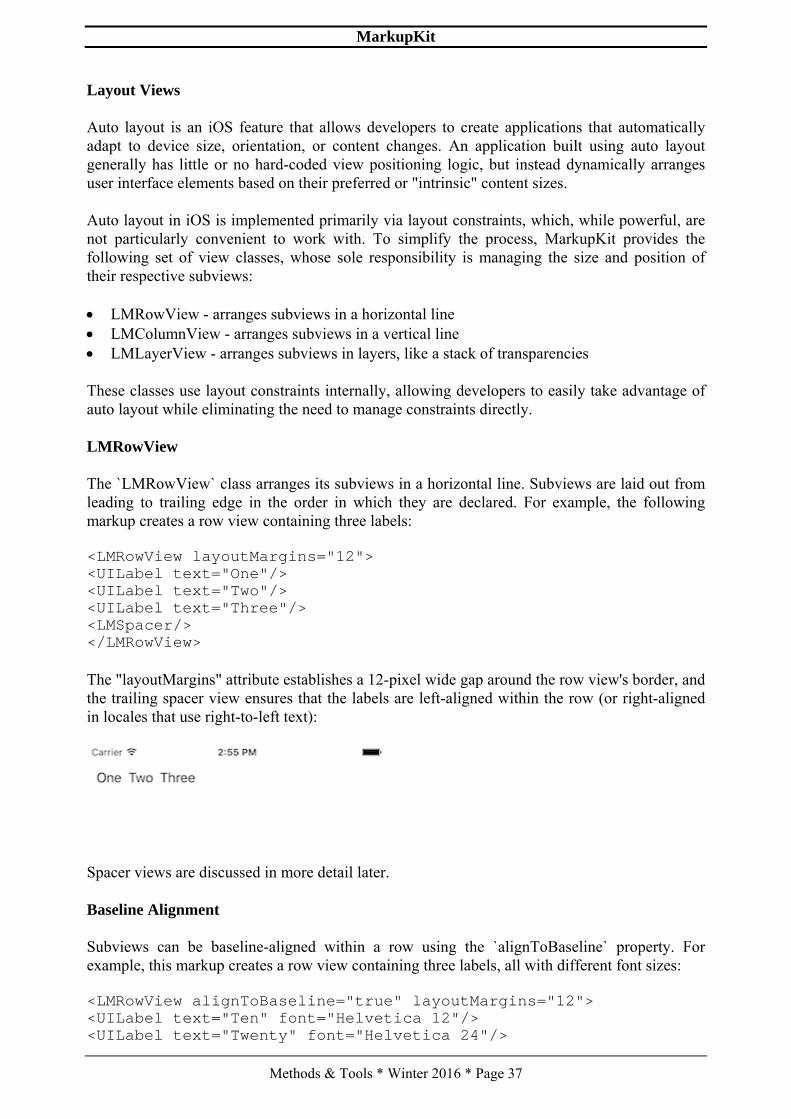
The `LMRowView` class arranges its subviews in a horizontal line. Subviews are laid out fromleading to trailing edge in the order in which they are declared. For example, the followingmarkup creates a row view containing three labels:
<LMRowView layoutMargins="12"><UILabel text="One"/><UILabel text="Two"/><UILabel text="Three"/><LMSpacer/></LMRowView>
The "layoutMargins" attribute establishes a 12-pixel wide gap around the row view's border, andthe trailing spacer view ensures that the labels are left-aligned within the row (or right-alignedin locales that use right-to-left text):
Spacer views are discussed in more detail later.
Baseline Alignment
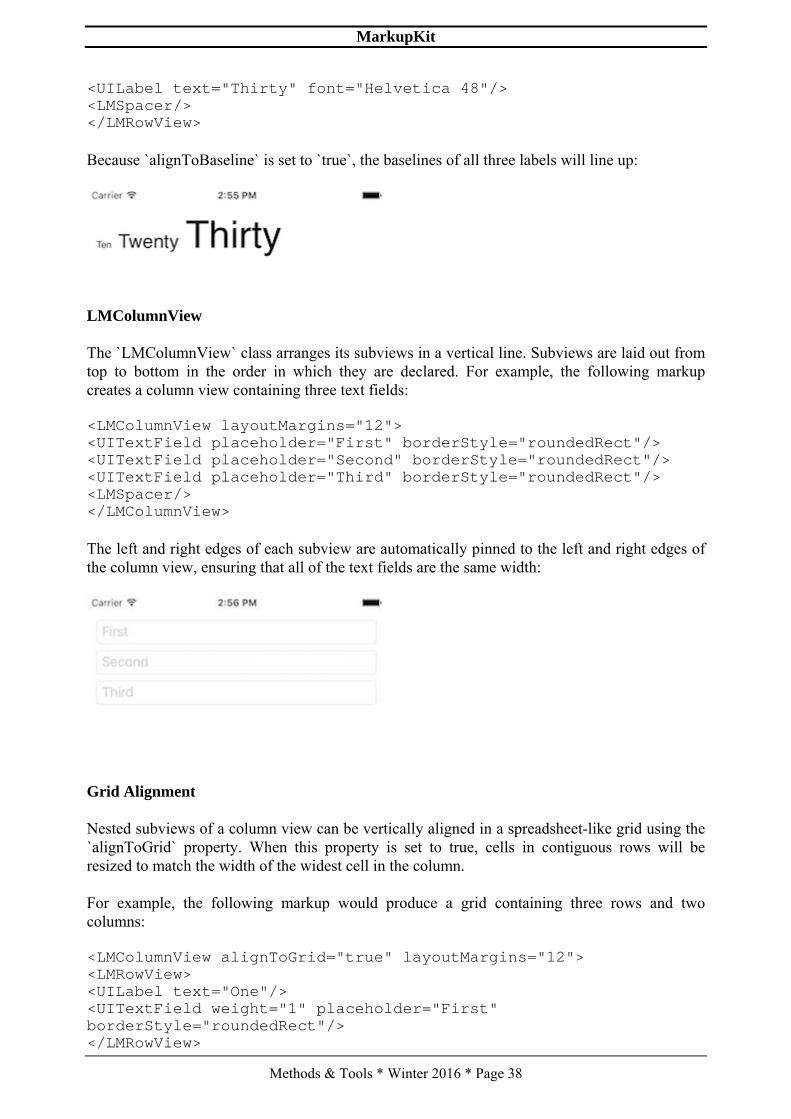
Subviews can be baseline-aligned within a row using the `alignToBaseline` property. Forexample, this markup creates a row view containing three labels, all with different font sizes:
<LMRowView alignToBaseline="true" layoutMargins="12"><UILabel text="Ten" font="Helvetica 12"/><UILabel text="Twenty" font="Helvetica 24"/>
MarkupKit
Methods & Tools * Winter 2016 * Page 38
<UILabel text="Thirty" font="Helvetica 48"/><LMSpacer/></LMRowView>
Because `alignToBaseline` is set to `true`, the baselines of all three labels will line up:
LMColumnView
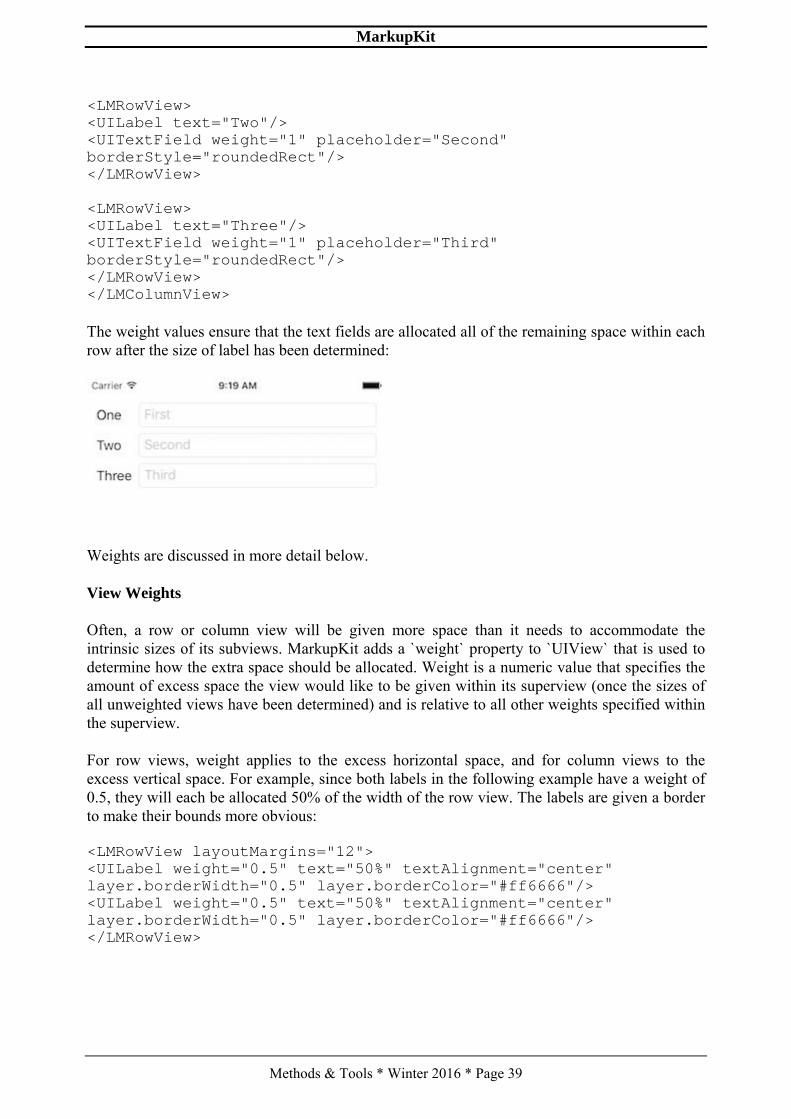
The `LMColumnView` class arranges its subviews in a vertical line. Subviews are laid out fromtop to bottom in the order in which they are declared. For example, the following markupcreates a column view containing three text fields:
<LMColumnView layoutMargins="12"><UITextField placeholder="First" borderStyle="roundedRect"/><UITextField placeholder="Second" borderStyle="roundedRect"/><UITextField placeholder="Third" borderStyle="roundedRect"/><LMSpacer/></LMColumnView>
The left and right edges of each subview are automatically pinned to the left and right edges ofthe column view, ensuring that all of the text fields are the same width:
Grid Alignment
Nested subviews of a column view can be vertically aligned in a spreadsheet-like grid using the`alignToGrid` property. When this property is set to true, cells in contiguous rows will beresized to match the width of the widest cell in the column.
For example, the following markup would produce a grid containing three rows and twocolumns:
<LMColumnView alignToGrid="true" layoutMargins="12"><LMRowView><UILabel text="One"/><UITextField weight="1" placeholder="First"borderStyle="roundedRect"/></LMRowView>
MarkupKit
Methods & Tools * Winter 2016 * Page 39
<LMRowView><UILabel text="Two"/><UITextField weight="1" placeholder="Second"borderStyle="roundedRect"/></LMRowView>
<LMRowView><UILabel text="Three"/><UITextField weight="1" placeholder="Third"borderStyle="roundedRect"/></LMRowView></LMColumnView>
The weight values ensure that the text fields are allocated all of the remaining space within eachrow after the size of label has been determined:
Weights are discussed in more detail below.
View Weights
Often, a row or column view will be given more space than it needs to accommodate theintrinsic sizes of its subviews. MarkupKit adds a `weight` property to `UIView` that is used todetermine how the extra space should be allocated. Weight is a numeric value that specifies theamount of excess space the view would like to be given within its superview (once the sizes ofall unweighted views have been determined) and is relative to all other weights specified withinthe superview.
For row views, weight applies to the excess horizontal space, and for column views to theexcess vertical space. For example, since both labels in the following example have a weight of0.5, they will each be allocated 50% of the width of the row view. The labels are given a borderto make their bounds more obvious:
<LMRowView layoutMargins="12"><UILabel weight="0.5" text="50%" textAlignment="center"layer.borderWidth="0.5" layer.borderColor="#ff6666"/><UILabel weight="0.5" text="50%" textAlignment="center"layer.borderWidth="0.5" layer.borderColor="#ff6666"/></LMRowView>
MarkupKit
Methods & Tools * Winter 2016 * Page 40
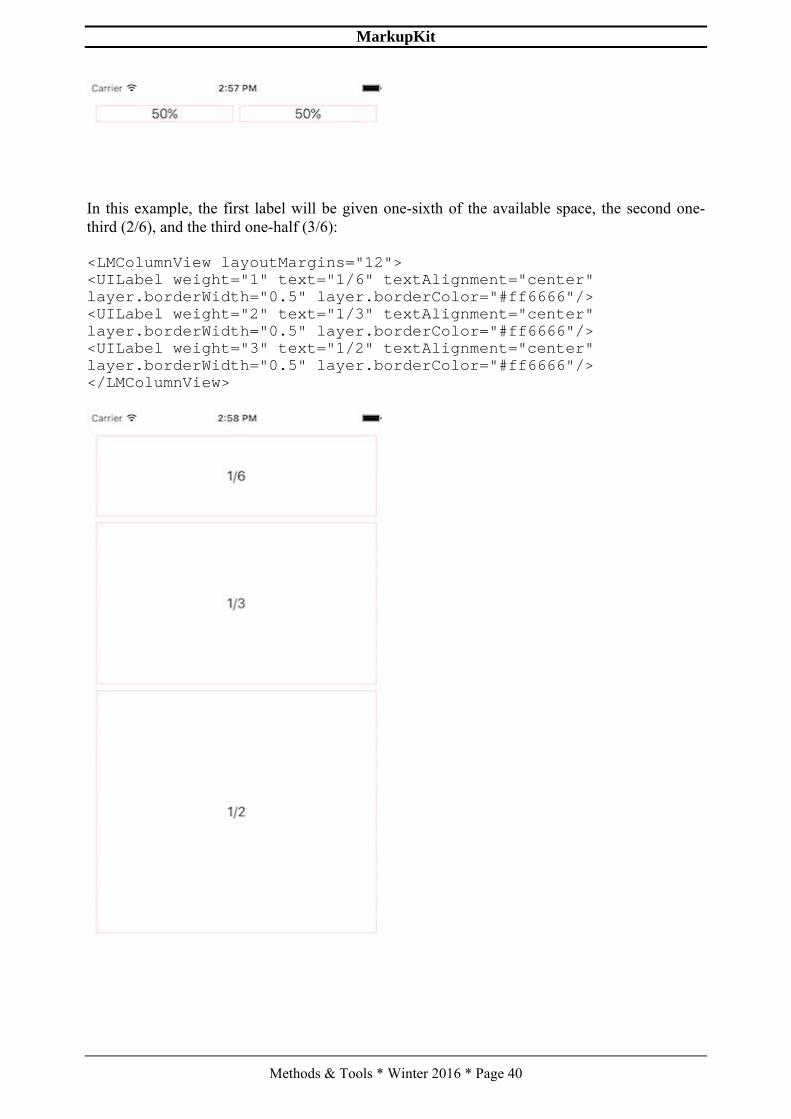
In this example, the first label will be given one-sixth of the available space, the second one-third (2/6), and the third one-half (3/6):
<LMColumnView layoutMargins="12"><UILabel weight="1" text="1/6" textAlignment="center"layer.borderWidth="0.5" layer.borderColor="#ff6666"/><UILabel weight="2" text="1/3" textAlignment="center"layer.borderWidth="0.5" layer.borderColor="#ff6666"/><UILabel weight="3" text="1/2" textAlignment="center"layer.borderWidth="0.5" layer.borderColor="#ff6666"/></LMColumnView>
MarkupKit
Methods & Tools * Winter 2016 * Page 41
Spacer Views
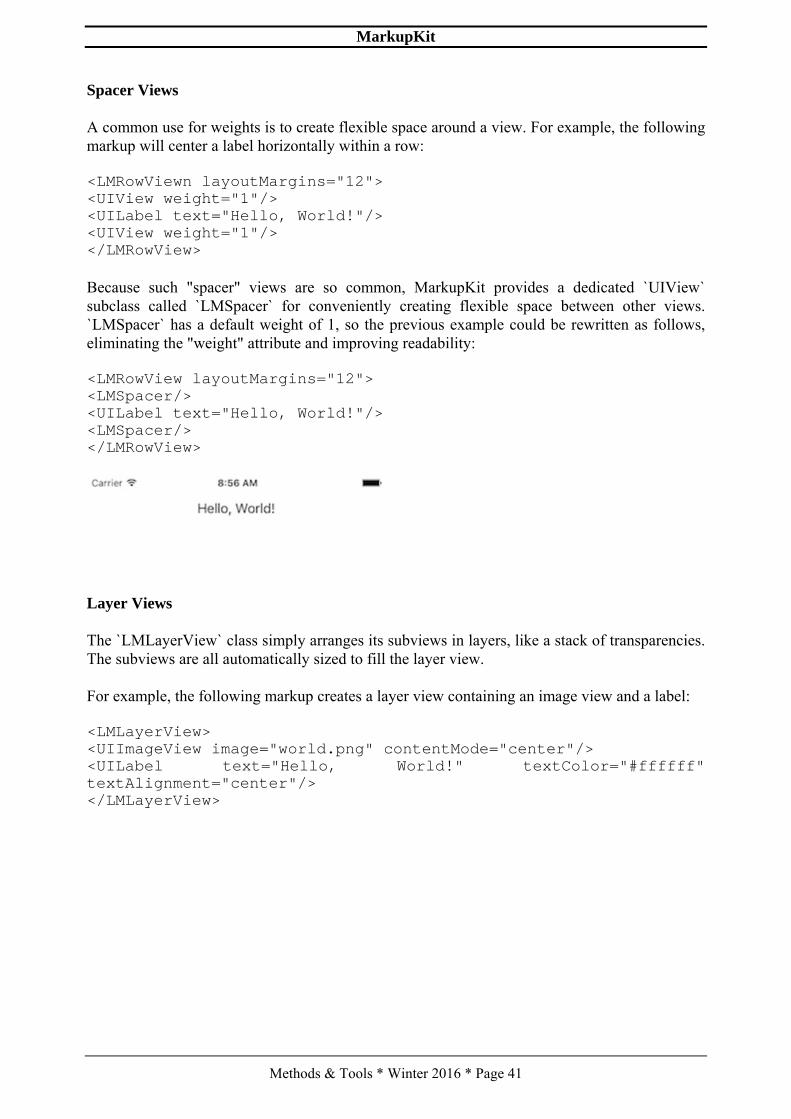
A common use for weights is to create flexible space around a view. For example, the followingmarkup will center a label horizontally within a row:
<LMRowViewn layoutMargins="12"><UIView weight="1"/><UILabel text="Hello, World!"/><UIView weight="1"/></LMRowView>
Because such "spacer" views are so common, MarkupKit provides a dedicated `UIView`subclass called `LMSpacer` for conveniently creating flexible space between other views.`LMSpacer` has a default weight of 1, so the previous example could be rewritten as follows,eliminating the "weight" attribute and improving readability:
<LMRowView layoutMargins="12"><LMSpacer/><UILabel text="Hello, World!"/><LMSpacer/></LMRowView>
Layer Views
The `LMLayerView` class simply arranges its subviews in layers, like a stack of transparencies.The subviews are all automatically sized to fill the layer view.
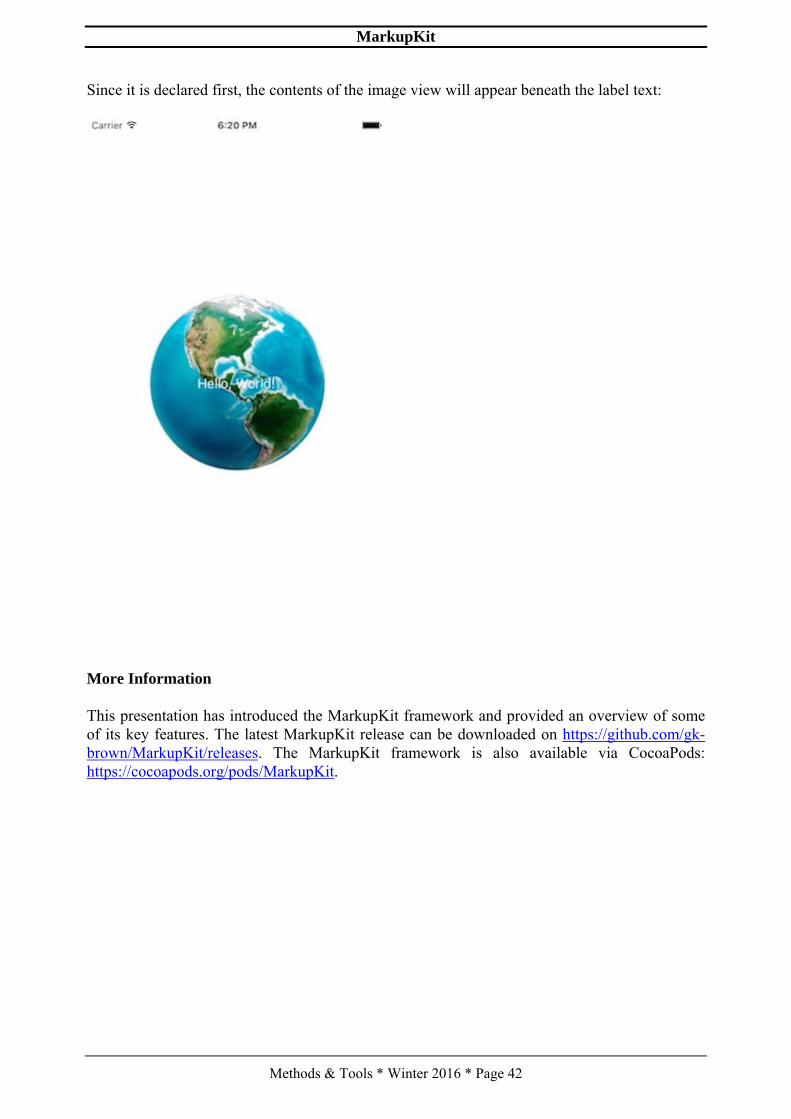
For example, the following markup creates a layer view containing an image view and a label:
<LMLayerView><UIImageView image="world.png" contentMode="center"/><UILabel text="Hello, World!" textColor="#ffffff"textAlignment="center"/></LMLayerView>
MarkupKit
Methods & Tools * Winter 2016 * Page 42
Since it is declared first, the contents of the image view will appear beneath the label text:
More Information
This presentation has introduced the MarkupKit framework and provided an overview of someof its key features. The latest MarkupKit release can be downloaded on https://github.com/gk-brown/MarkupKit/releases. The MarkupKit framework is also available via CocoaPods:https://cocoapods.org/pods/MarkupKit.
Classified Advertising
Methods & Tools * Winter 2016 * Page 43
Stay Up to Date with TechWell Conferences. TechWell providescutting-edge concepts, practical solutions, and today's mostrelevant topics at conferences held throughout the year aroundthe country, and even in Canada. TechWell brings you face-to-face with the best speakers, networking, and ideas. Join theTechWell mailing list to stay up to date with the conferenceevent calendar, discounts, and exclusive promotions. The 2017conference dates have been released and conference content willcontinue to come out this fall, stay in the know so you can planwhich program is right for you.
Sign up now for TechWell updates
TimeShiftX – Travel in Time, Test with Ease. TimeShiftX lets youtime travel your software stack into the future or past for timeshift testing of all date and time sensitive functionality andcode such as year-end, daylight savings, leap year, billing,policies, etc. Employ instant time travel inside ActiveDirectory & Kerberos without code changes, manual work, orserver isolation.
Start your free trial today!
Advertising for a new Web development tool? Looking to recruitsoftware developers? Promoting a conference or a book?Organizing software development training? This classifiedsection is waiting for you at the price of US $ 30 each line.Reach more than 50'000 web-savvy software developers and projectmanagers worldwide with a classified advertisement in Methods &Tools. Without counting the 1000s that download the issue eachmonth without being registered and the 60'000 visitors/month ofour web sites! To advertise in this section or to place a pagead simply http://www.methodsandtools.com/advertise.php
METHODS & TOOLS is published by Martinig & Associates, Rue des Marronniers 25,CH-1800 Vevey, Switzerland Tel. +41 21 922 13 00 www.martinig.chEditor: Franco Martinig ISSN 1661-402XFree subscription on : http://www.methodsandtools.com/forms/submt.phpThe content of this publication cannot be reproduced without prior written consent of the publisherCopyright © 2016, Martinig & Associates


![Scrap Creations [Catálogo EK Tools] Tools.pdf · tgols succ- j dece succ— tools tools tools . tools tools tools tokls tgols tools . Cutter bee 60; too 15 tools](https://img.pdfslide.net/doc/110x75/5b09bbc97f8b9abe5d8d1d96/scrap-creations-catlogo-ek-tools-toolspdftgols-succ-j-dece-succ-tools-tools.jpg)