Embed Size (px)
Citation preview
8/27/2017 1
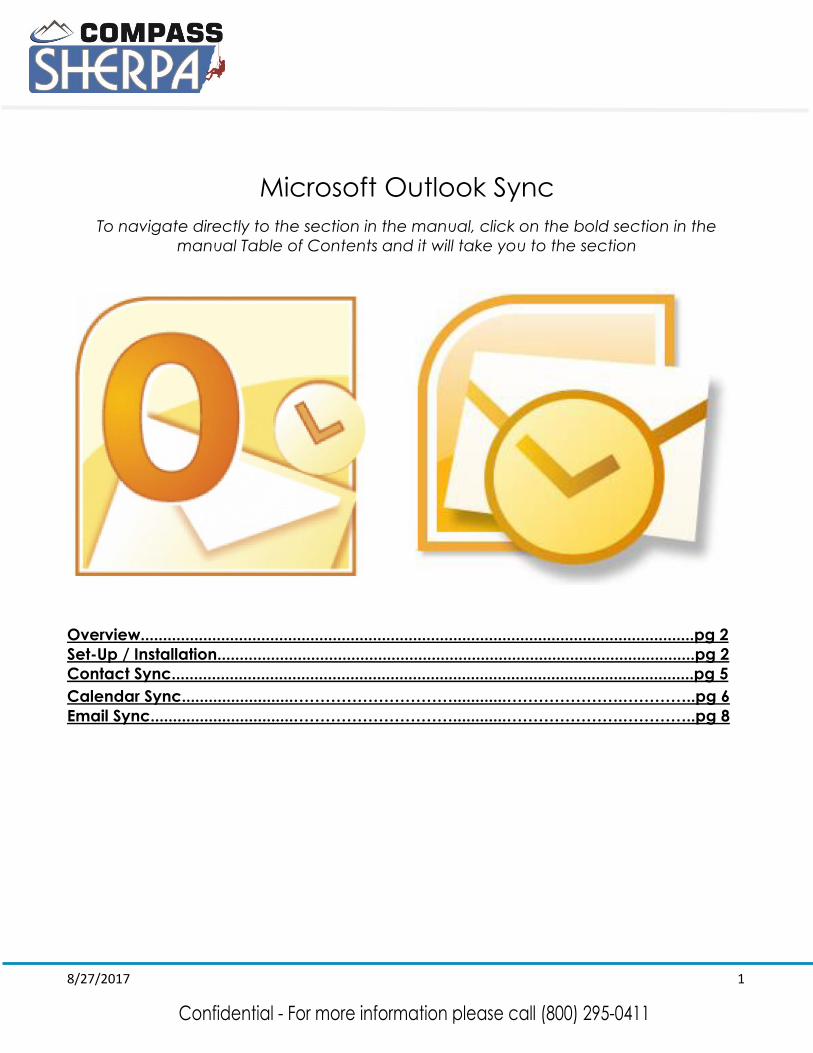
Microsoft Outlook Sync
To navigate directly to the section in the manual, click on the bold section in the
manual Table of Contents and it will take you to the section
Overview............................................................................................................................pg 2
Set-Up / Installation...........................................................................................................pg 2
Contact Sync.....................................................................................................................pg 5
Calendar Sync.........................…………………………............………………….…………..pg 6
Email Sync................................…………………………............………………….…………..pg 8
8/27/2017 2
Outlook Sync Overview:
With the enhanced Microsoft Outlook integration, not only can you send emails,
contacts and calendar appointments through Sherpa into Outlook, but you can have
Sherpa automatically sync emails, contacts and updated calendar appointments into
Outlook (or vice versa, from Outlook into Sherpa) once they have been marked to sync.
Just prompt Sherpa to sync and any incoming emails, contact names or calendar
appointments will automatically send and update each other whether you update
them in Sherpa or Outlook. This feature is compatible with Sherpa SQL databases, and
Outlook 2007and newer.
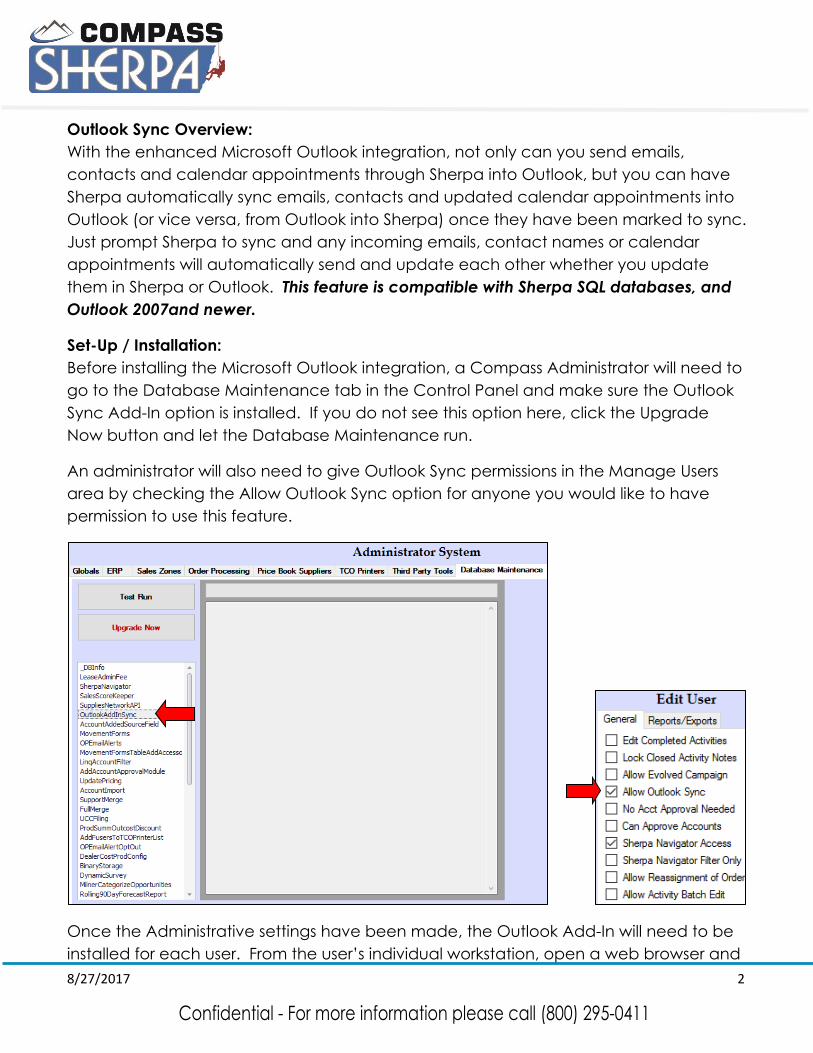
Set-Up / Installation:
Before installing the Microsoft Outlook integration, a Compass Administrator will need to
go to the Database Maintenance tab in the Control Panel and make sure the Outlook
Sync Add-In option is installed. If you do not see this option here, click the Upgrade
Now button and let the Database Maintenance run.
An administrator will also need to give Outlook Sync permissions in the Manage Users
area by checking the Allow Outlook Sync option for anyone you would like to have
permission to use this feature.
Once the Administrative settings have been made, the Outlook Add-In will need to be
installed for each user. From the user’s individual workstation, open a web browser and
8/27/2017 3
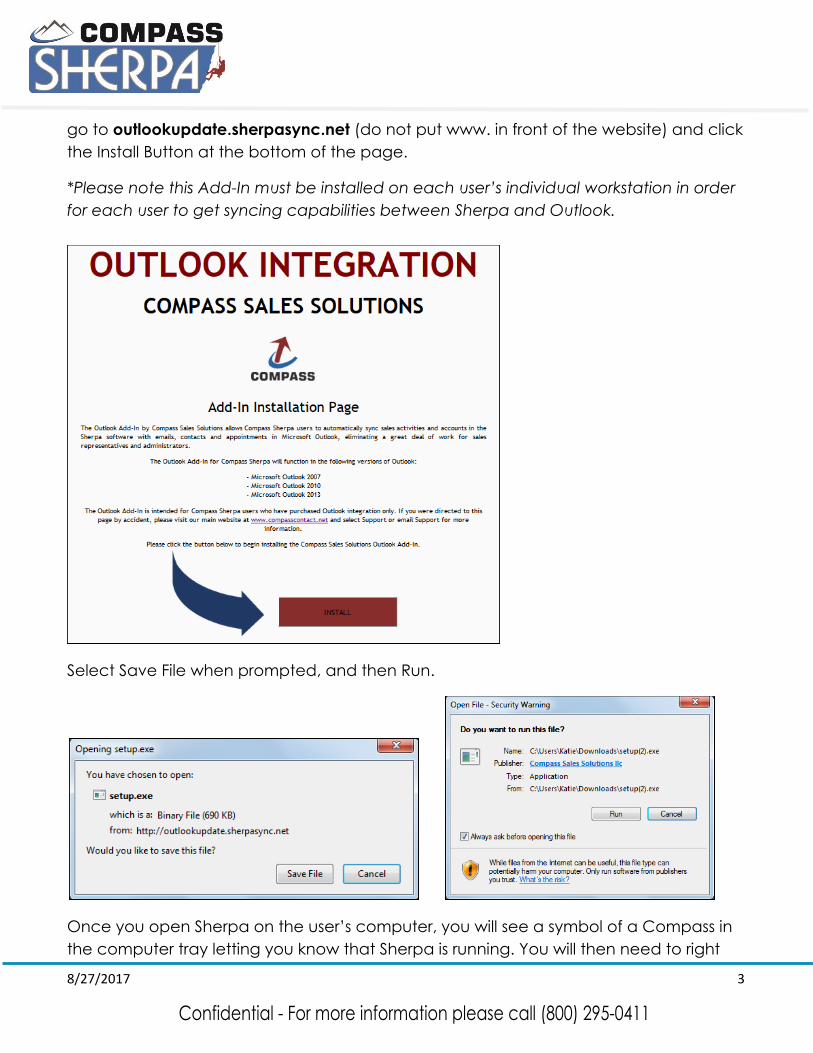
go to outlookupdate.sherpasync.net (do not put www. in front of the website) and click
the Install Button at the bottom of the page.
*Please note this Add-In must be installed on each user’s individual workstation in order
for each user to get syncing capabilities between Sherpa and Outlook.
Select Save File when prompted, and then Run.
Once you open Sherpa on the user’s computer, you will see a symbol of a Compass in
the computer tray letting you know that Sherpa is running. You will then need to right
8/27/2017 4
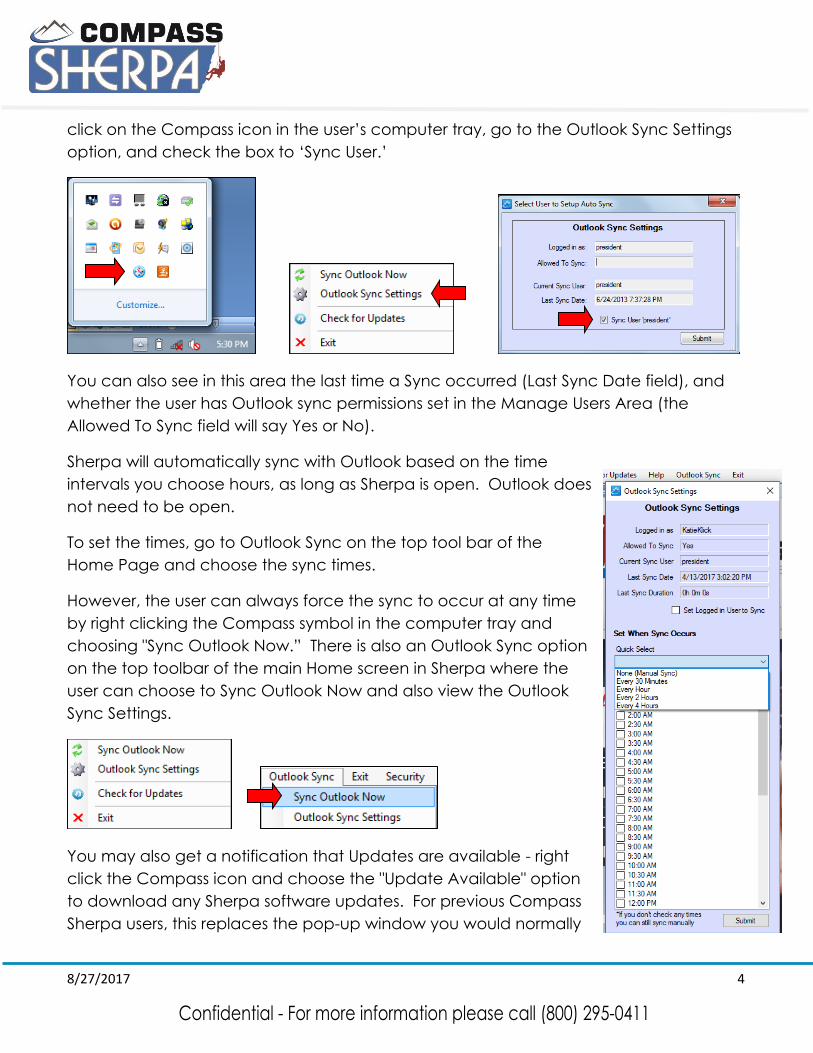
click on the Compass icon in the user’s computer tray, go to the Outlook Sync Settings
option, and check the box to ‘Sync User.’
You can also see in this area the last time a Sync occurred (Last Sync Date field), and
whether the user has Outlook sync permissions set in the Manage Users Area (the
Allowed To Sync field will say Yes or No).
Sherpa will automatically sync with Outlook based on the time
intervals you choose hours, as long as Sherpa is open. Outlook does not need to be open.
To set the times, go to Outlook Sync on the top tool bar of the
Home Page and choose the sync times.
However, the user can always force the sync to occur at any time
by right clicking the Compass symbol in the computer tray and
choosing "Sync Outlook Now.” There is also an Outlook Sync option
on the top toolbar of the main Home screen in Sherpa where the
user can choose to Sync Outlook Now and also view the Outlook
Sync Settings.
You may also get a notification that Updates are available - right
click the Compass icon and choose the "Update Available" option
to download any Sherpa software updates. For previous Compass
Sherpa users, this replaces the pop-up window you would normally
8/27/2017 5
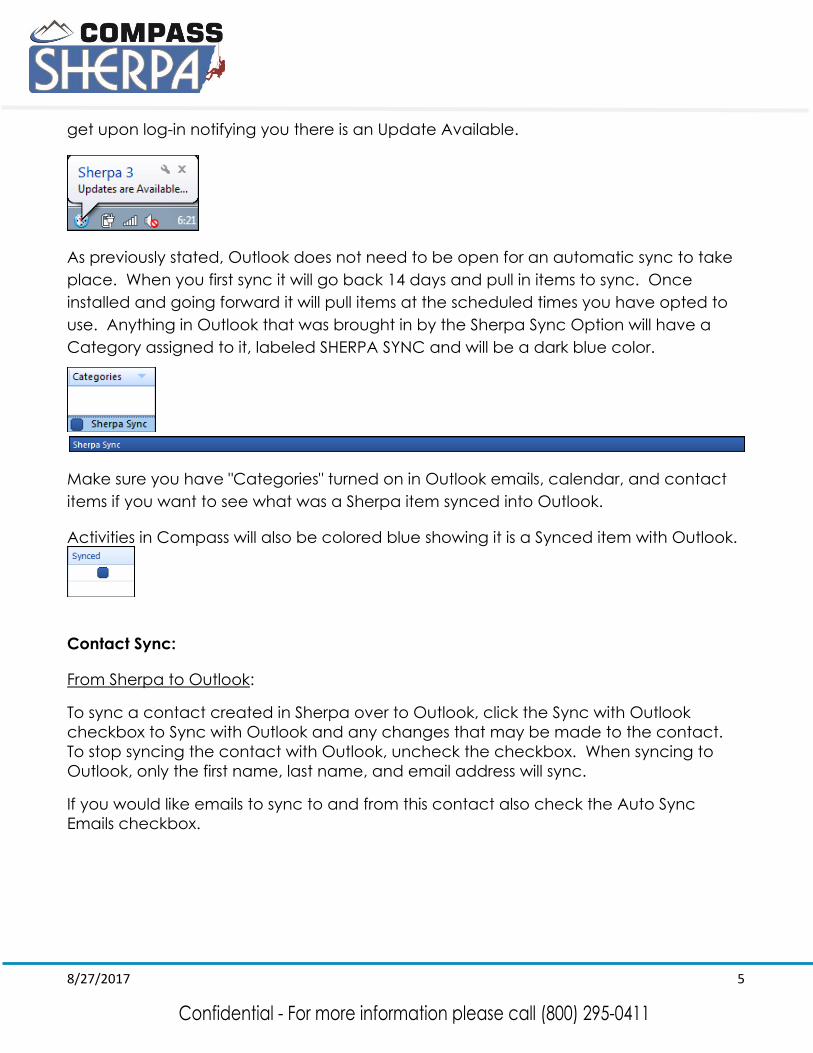
get upon log-in notifying you there is an Update Available.
As previously stated, Outlook does not need to be open for an automatic sync to take
place. When you first sync it will go back 14 days and pull in items to sync. Once installed and going forward it will pull items at the scheduled times you have opted to use. Anything in Outlook that was brought in by the Sherpa Sync Option will have a
Category assigned to it, labeled SHERPA SYNC and will be a dark blue color.
Make sure you have "Categories" turned on in Outlook emails, calendar, and contact
items if you want to see what was a Sherpa item synced into Outlook.
Activities in Compass will also be colored blue showing it is a Synced item with Outlook.
Contact Sync:
From Sherpa to Outlook:
To sync a contact created in Sherpa over to Outlook, click the Sync with Outlook
checkbox to Sync with Outlook and any changes that may be made to the contact.
To stop syncing the contact with Outlook, uncheck the checkbox. When syncing to
Outlook, only the first name, last name, and email address will sync.
If you would like emails to sync to and from this contact also check the Auto Sync
Emails checkbox.
8/27/2017 6
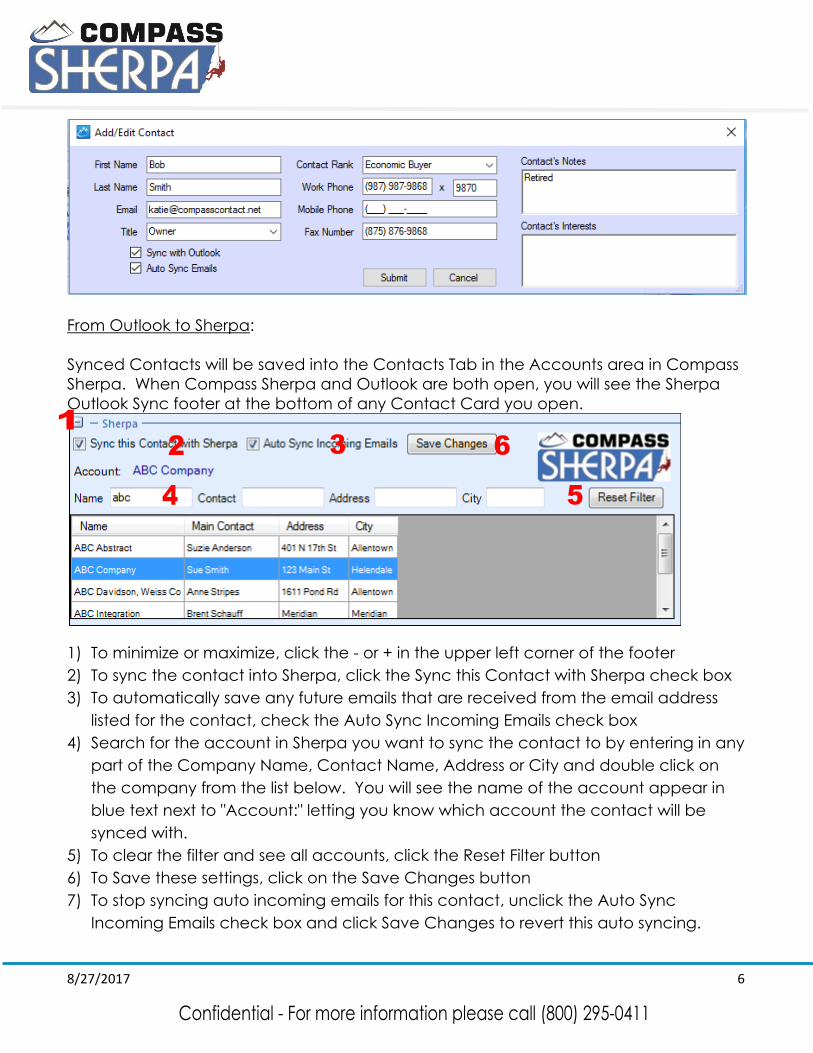
From Outlook to Sherpa:
Synced Contacts will be saved into the Contacts Tab in the Accounts area in Compass
Sherpa. When Compass Sherpa and Outlook are both open, you will see the Sherpa
Outlook Sync footer at the bottom of any Contact Card you open.
1) To minimize or maximize, click the - or + in the upper left corner of the footer
2) To sync the contact into Sherpa, click the Sync this Contact with Sherpa check box
3) To automatically save any future emails that are received from the email address
listed for the contact, check the Auto Sync Incoming Emails check box
4) Search for the account in Sherpa you want to sync the contact to by entering in any
part of the Company Name, Contact Name, Address or City and double click on
the company from the list below. You will see the name of the account appear in
blue text next to "Account:" letting you know which account the contact will be
synced with.
5) To clear the filter and see all accounts, click the Reset Filter button
6) To Save these settings, click on the Save Changes button
7) To stop syncing auto incoming emails for this contact, unclick the Auto Sync
Incoming Emails check box and click Save Changes to revert this auto syncing.
8/27/2017 7
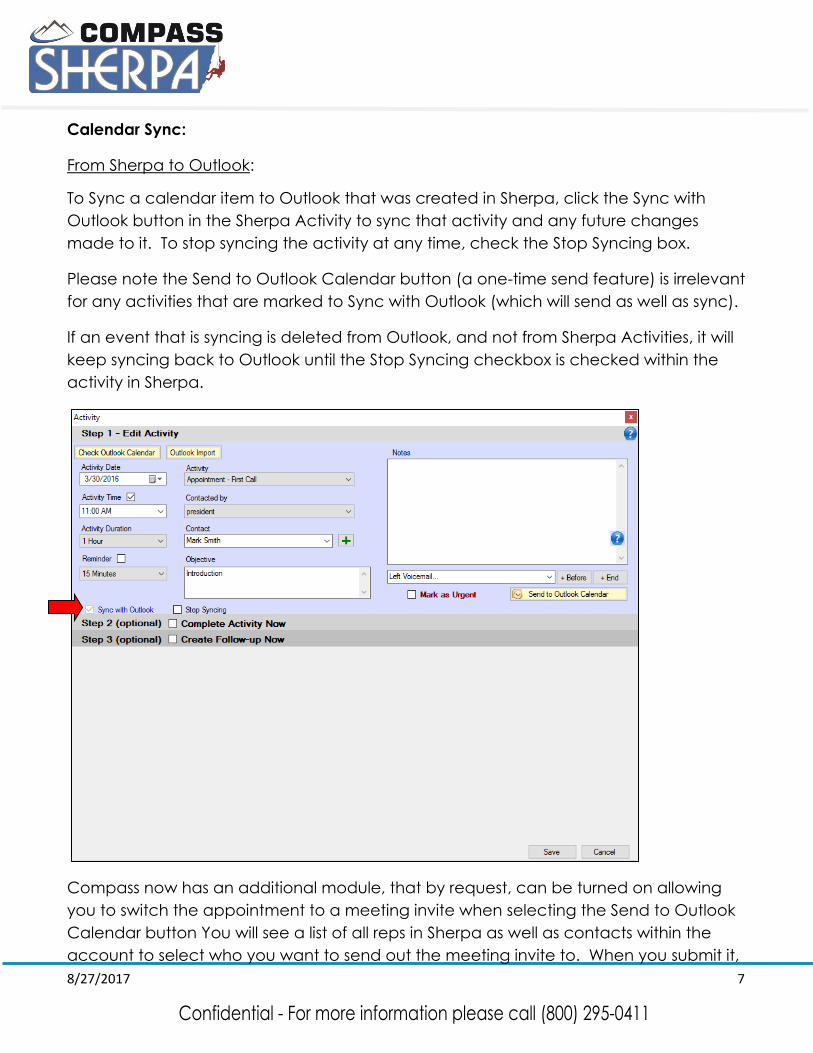
Calendar Sync:
From Sherpa to Outlook:
To Sync a calendar item to Outlook that was created in Sherpa, click the Sync with
Outlook button in the Sherpa Activity to sync that activity and any future changes
made to it. To stop syncing the activity at any time, check the Stop Syncing box.
Please note the Send to Outlook Calendar button (a one-time send feature) is irrelevant
for any activities that are marked to Sync with Outlook (which will send as well as sync).
If an event that is syncing is deleted from Outlook, and not from Sherpa Activities, it will
keep syncing back to Outlook until the Stop Syncing checkbox is checked within the
activity in Sherpa.
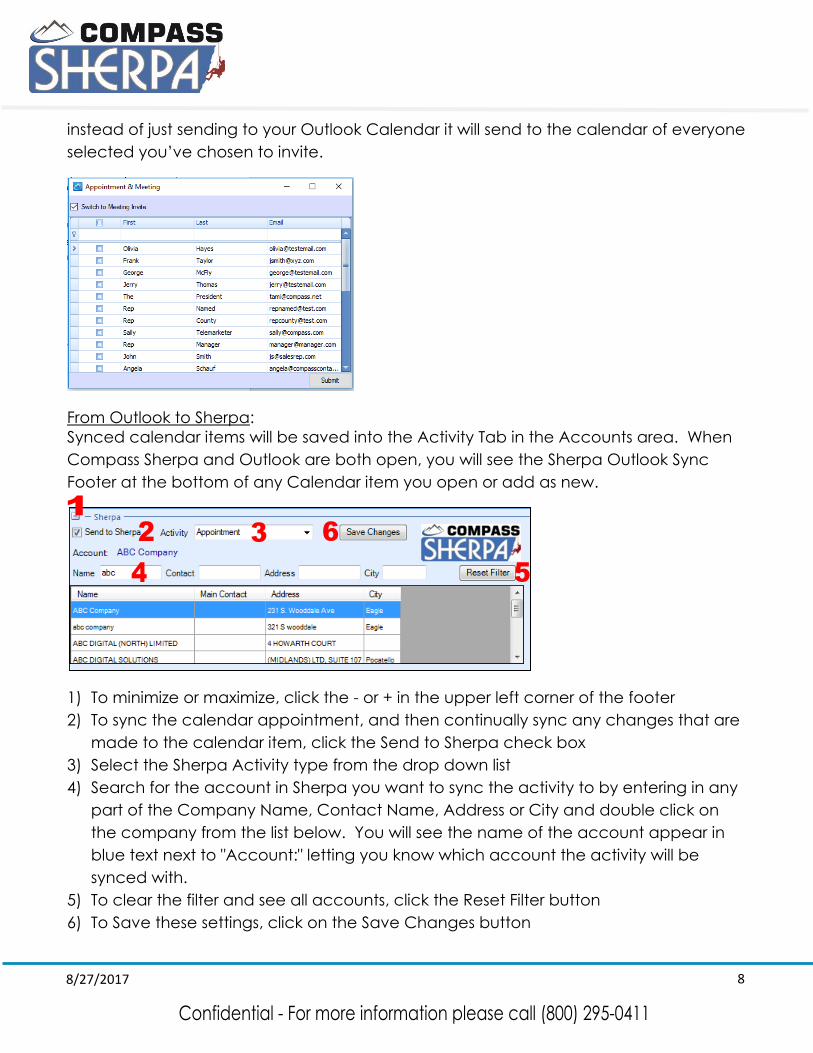
Compass now has an additional module, that by request, can be turned on allowing
you to switch the appointment to a meeting invite when selecting the Send to Outlook
Calendar button You will see a list of all reps in Sherpa as well as contacts within the
account to select who you want to send out the meeting invite to. When you submit it,
8/27/2017 8
instead of just sending to your Outlook Calendar it will send to the calendar of everyone
selected you’ve chosen to invite.
From Outlook to Sherpa:
Synced calendar items will be saved into the Activity Tab in the Accounts area. When
Compass Sherpa and Outlook are both open, you will see the Sherpa Outlook Sync
Footer at the bottom of any Calendar item you open or add as new.
1) To minimize or maximize, click the - or + in the upper left corner of the footer
2) To sync the calendar appointment, and then continually sync any changes that are
made to the calendar item, click the Send to Sherpa check box
3) Select the Sherpa Activity type from the drop down list
4) Search for the account in Sherpa you want to sync the activity to by entering in any
part of the Company Name, Contact Name, Address or City and double click on
the company from the list below. You will see the name of the account appear in
blue text next to "Account:" letting you know which account the activity will be
synced with.
5) To clear the filter and see all accounts, click the Reset Filter button
6) To Save these settings, click on the Save Changes button
8/27/2017 9
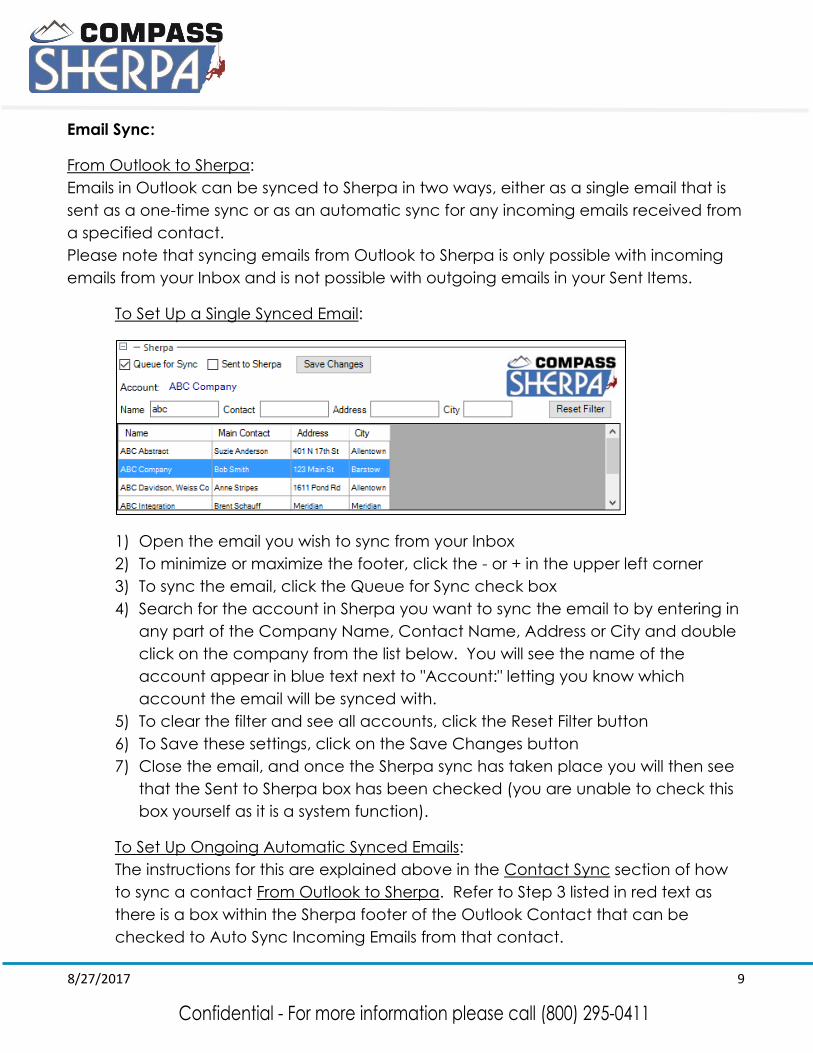
Email Sync:
From Outlook to Sherpa:
Emails in Outlook can be synced to Sherpa in two ways, either as a single email that is
sent as a one-time sync or as an automatic sync for any incoming emails received from
a specified contact.
Please note that syncing emails from Outlook to Sherpa is only possible with incoming
emails from your Inbox and is not possible with outgoing emails in your Sent Items.
To Set Up a Single Synced Email:
1) Open the email you wish to sync from your Inbox
2) To minimize or maximize the footer, click the - or + in the upper left corner
3) To sync the email, click the Queue for Sync check box
4) Search for the account in Sherpa you want to sync the email to by entering in
any part of the Company Name, Contact Name, Address or City and double
click on the company from the list below. You will see the name of the
account appear in blue text next to "Account:" letting you know which
account the email will be synced with.
5) To clear the filter and see all accounts, click the Reset Filter button
6) To Save these settings, click on the Save Changes button
7) Close the email, and once the Sherpa sync has taken place you will then see
that the Sent to Sherpa box has been checked (you are unable to check this
box yourself as it is a system function).
To Set Up Ongoing Automatic Synced Emails:
The instructions for this are explained above in the Contact Sync section of how
to sync a contact From Outlook to Sherpa. Refer to Step 3 listed in red text as
there is a box within the Sherpa footer of the Outlook Contact that can be
checked to Auto Sync Incoming Emails from that contact.


![Microsoft Outlook[1]](https://img.pdfslide.net/doc/110x75/557200f44979599169a06b0e/microsoft-outlook1.jpg)