Embed Size (px)
Citation preview

8/3/2019 Microsoft Word - Cookies in Creatividades Latinas Tut
http://slidepdf.com/reader/full/microsoft-word-cookies-in-creatividades-latinas-tut 1/12
Creatividades Latinas Creatividades Latinas Creatividades Latinas Creatividades Latinas Mis recetas Favoritas
Nanny Scherer
Cookies in CREATIVIDADES LATINAS
TUTORIAL
Decorate Cookies Using FondantFondant is popular for decorating cakes, but it's also a great medium for decorating cookies. If you're
making cookies for a contest or for a party where you really want to impress the guests, then fondant is t
way to go.
Instructions
Cover the entire cookie with fondant for a sleek, smooth appearance. Make a batch of quick pour fondan
pour it into an icing bag, add a tip and pour the fondant over the cookie. Use a small spatuala on the edg
and then let the fondant dry.
Add fondant decorations to cookies covered with fondant by rolling out a sheet of fondant and usi
mini cookie cutters to cut out small shapes. You can cut out small fondant circles by using the bottom of
clean pen cap.
Make fondant hat cookies for a tea party or girl's birthday party. Bake a batch of round sugar cooki
and attach with icing half of a large marshmallow or a small, round cookie to the top. Roll out fondant an
cut a circle larger than the cookie, drape over the cookie, trim the edges and decorate with fondant flowe
and ribbon.
Make imprinted fondant by rolling out a sheet of fondant. Then take a textured material, such as lac
and lay it on top of the fondant. Secure the material with tape and firmly roll over the material with a
rolling pin so that the texture is embedded into the fondant. Cut the fondant into the shape of your cook
and apply it to cookies fresh from the oven so that the heat attaches the fondant to the cookie.
Ice cookies with regular icing and make fondant flowers, shapes, ribbons and other decorations and
attach to the icing. You can make pink fondant ribbons for breast cancer cookies, red, white and blue star
for July 4th cookies or black and orange stripes for Halloween cookies.
Decorating CookiesDecorating cookies can be as simple as dipping cookies into melted Candy Melts®, outlining and filling
cut-out cookies with poured fondant or adding designs in buttercream icing. Decorate your favorite cut-
out cookie with icing in fun colors and flavors. We'll show you how to get started with icing basics and
leave the rest up to your imagination!
Cookie decorating techniques
• When you consider a baked cookie your palette, just about anything amazing can be created.
• Decorating with buttercream

8/3/2019 Microsoft Word - Cookies in Creatividades Latinas Tut
http://slidepdf.com/reader/full/microsoft-word-cookies-in-creatividades-latinas-tut 2/12
• Decorating with fondant
• Decorating with royal icing
• Decorating with candy
Outlining and Filling Cookie
A quick and easy way to give a professional-looking finish to all yourbaked goods!
Steps
Step 1
Make Quick-Pour Fondant; follow recipe directions to reach pouring consistency.
Step 2
Place cooled cakes or cookies on cooling rack positioned over cookie sheet or pan.
Step 3
Pour or pipe icing on center of item, spreading to edges with a spatula so that icing drips down and cove
sides. Let dry.

8/3/2019 Microsoft Word - Cookies in Creatividades Latinas Tut
http://slidepdf.com/reader/full/microsoft-word-cookies-in-creatividades-latinas-tut 3/12
Covering Cookie with Candy Melts
A quick and easy way to give a professional-looking finish to all yourbaked goods! For Candy Melts®, melt following package directions.
Steps
Step 1
Place cooled cookies on cooling grid positioned over cookie sheet or pan. Cookies that will be covered
completely should be turned bottom side up.
Step 2
Melt Candy Melts following package directions.
Step 3
Pour or pipe candy or icing on center of item, spreading to edges with a spatula so that candy or icing
drips down and covers sides. Let dry.
8/3/2019 Microsoft Word - Cookies in Creatividades Latinas Tut
http://slidepdf.com/reader/full/microsoft-word-cookies-in-creatividades-latinas-tut 4/12
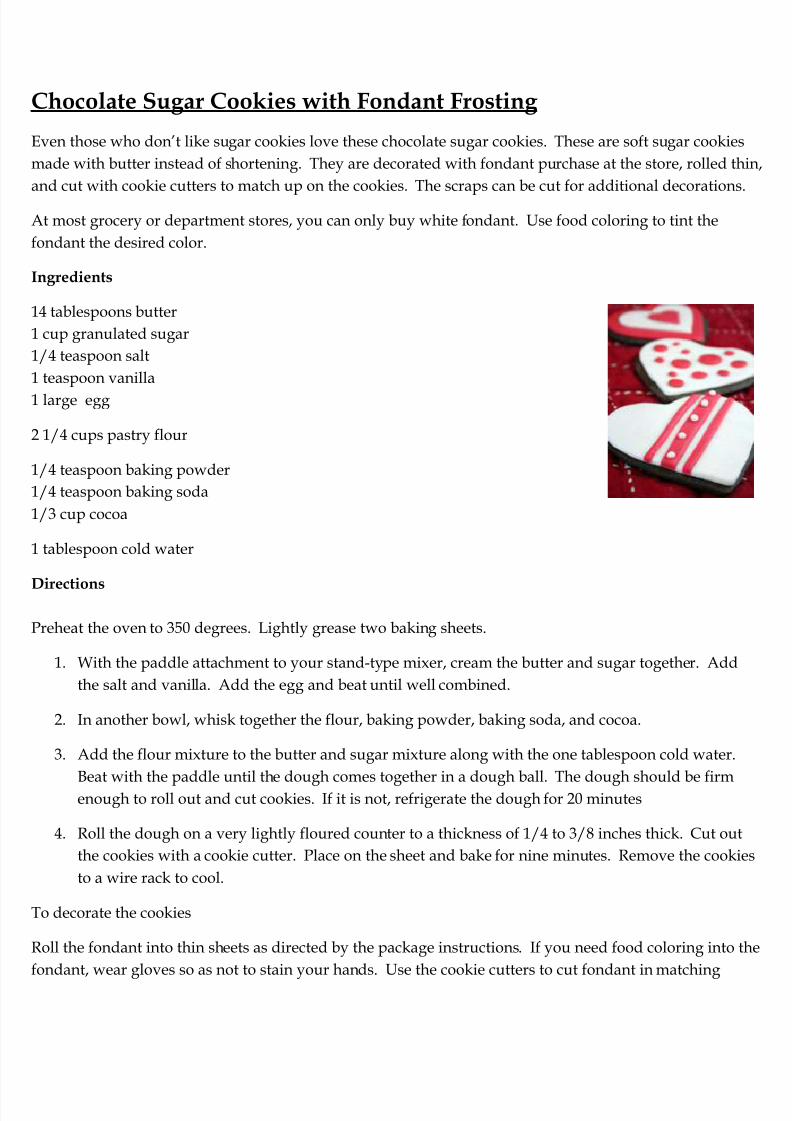
Chocolate Sugar Cookies with Fondant Frosting
Even those who don’t like sugar cookies love these chocolate sugar cookies. These are soft sugar cookies
made with butter instead of shortening. They are decorated with fondant purchase at the store, rolled th
and cut with cookie cutters to match up on the cookies. The scraps can be cut for additional decorations
At most grocery or department stores, you can only buy white fondant. Use food coloring to tint the
fondant the desired color.
Ingredients
14 tablespoons butter
1 cup granulated sugar
1/4 teaspoon salt
1 teaspoon vanilla
1 large egg
2 1/4 cups pastry flour
1/4 teaspoon baking powder
1/4 teaspoon baking soda
1/3 cup cocoa
1 tablespoon cold water
Directions
Preheat the oven to 350 degrees. Lightly grease two baking sheets.
1. With the paddle attachment to your stand-type mixer, cream the butter and sugar together. Add
the salt and vanilla. Add the egg and beat until well combined.
2. In another bowl, whisk together the flour, baking powder, baking soda, and cocoa.
3. Add the flour mixture to the butter and sugar mixture along with the one tablespoon cold water.
Beat with the paddle until the dough comes together in a dough ball. The dough should be firmenough to roll out and cut cookies. If it is not, refrigerate the dough for 20 minutes
4. Roll the dough on a very lightly floured counter to a thickness of 1/4 to 3/8 inches thick. Cut out
the cookies with a cookie cutter. Place on the sheet and bake for nine minutes. Remove the cooki
to a wire rack to cool.
To decorate the cookies
Roll the fondant into thin sheets as directed by the package instructions. If you need food coloring into t
fondant, wear gloves so as not to stain your hands. Use the cookie cutters to cut fondant in matching

8/3/2019 Microsoft Word - Cookies in Creatividades Latinas Tut
http://slidepdf.com/reader/full/microsoft-word-cookies-in-creatividades-latinas-tut 5/12
shapes to the cookies. Use a bench scraper or offset spatula to lift the cut frosting shapes off the countert
and onto the cookies. Decorate with buttercream frosting, royal icing, or additional cuts of fondant.
Rolling Out Dough
A professional-looking cookie must start with a beautiful undecorated cookie. Follow these steps for
perfectly baked cookies every time. Use tools like perfection strips or a rolling pin with rings for even
thickness. Roll the dough directly on parchment paper or a silicone mat to eliminate the need of picking
the cutout cookie and tranfering which may distort the shape.
Must Haves:
Perfection Strips or Rolling Pin with Rings.
Parchment Paper or Silicone Mat
Chill dough if the recipe calls for chilling. This is very important. Your dough will be very sticky and
uncoraportive if it is not chilled properly. Place dough on parchment paper or a silicone mat. Roll dough
between perfection strips (Strips of plastic that come in various thickness- shown in picture A) or Roll w
a rolling pin that has rings attached (picture B). Both perfection strips or the rolling pin with rings will
make the cookies be an even thickness every time. Cut out the shapes, leaving 1/2" all around each cut-o
Remove excess dough (picture C) and transfer parchment paper or silicone mat to a cookie sheet.

8/3/2019 Microsoft Word - Cookies in Creatividades Latinas Tut
http://slidepdf.com/reader/full/microsoft-word-cookies-in-creatividades-latinas-tut 6/12
Making a Parchment Cone
A parchment cone can be used in place of pastry/decorating
bags. They allow for easy clean-up (just throw away when
done!). They also give an excellant fine point. Although theytake some time to master, they are an invaluable time-saving
tool.
Parchment Triangles
Fold corner A to meet corner B, forming a cone (picture A).
Fold corner C to meet corner B, keeping the cone shape and a
tight point at D (picture B). Cross over corners A and C,
making a W. Always keep D in a tight point. Cut the end to fa tip, or cut a small hole for piping. Tip- you may use tape to
secure the cone's position.

8/3/2019 Microsoft Word - Cookies in Creatividades Latinas Tut
http://slidepdf.com/reader/full/microsoft-word-cookies-in-creatividades-latinas-tut 7/12
Run Sugar
Run sugar icing is the classic cookie icing. It is a smooth textured icing that forms a very hard crust. It is
made by taking royal icing at it's fluffiest form and adding water to make it flow. When it dries, you can
stack the cookies. This type of icing takes several hours to dry. The icing has a simple, flavor with some
crunch.
8 cups powdered sugar
4 Tablespoons meringue powder
1 Tablespoon gum arabic
1/2 teaspoon cream of tarter
2/3 cup water
Additional water
Food Color
First, mix-up royal icing (use this recipe or follow instructions on the commercial royal icing)- In small
mixing bowl, combine water, meringue powder and cream of tarter. Beat until stiff peaks form. In separa
bowl, combine powdered sugar and gum arabic. Mix thouroughly, then add to meringue. Beat on low,
then medium speed until stiff peaks form. After the royal icing has been mixed, Divide the mixture into
several small containers and cover with wet towel. Add a small amount of water to each batch until it us
just barely fluid, NOT watery. Test consistency by dropping a small amount from spoon onto waxed
paper. It should smooth itself in about 10 seconds. If it runs too much, add more powdered sugar. If it is
too thick, add a bit more water. Remember: keep this icing covered when you are not using it. It dries ou
quickly. Place the icing in a bag with a tip #3 or #4. Outline the area to be covered. Quickly fill in the
outline. If the icing is running off the cookie, too much water was added to the royal icing. If the icing is
not smooth, add a bit more water to the royal icing. When icing crusts, pipe adjoining color. For added
dimension or outlining, allow icing to harden (several minutes) and pipe on the top.

8/3/2019 Microsoft Word - Cookies in Creatividades Latinas Tut
http://slidepdf.com/reader/full/microsoft-word-cookies-in-creatividades-latinas-tut 8/12
Basic Bouquet Instructions
Follow these directions to create almost any cookie bouquet.
Silicone Mat
Cookie sheet with at least side sideless
sucker sticks
BAKING INSTRUCTIONS
Picture 1. Chill dough if required in the recipe. Place cookie dough between perfection strips on a silicon
baking mat(shown) or parchment paper. Roll over the perfection strips, leveling the dough. Perfection
strips are strips of plastic in different thicknesses. They will give your cookies an exact thickness, quickly
and automatically! Perfection strips are available at cake and candy supply stores. Rolling pin rings are a
alternative to perfection strips. The rings can be added to the rolling pin. Another wonderful product use
in baking is a silicone mat (parchment paper may be used the same way). Avoid distorted shaped cookie
by rolling out the dough on a silicone baking mat or parchment paper, then transferring the mat or pape
to a cookie sheet. 2. Cut out the shapes, keeping all the shapes in the same direction. When cutting, keep
mind where the sticks will be placed so that other cutout cookies will not be in the way of the sticks.
Remove excess dough from around the cookies. 3. For each cookie, start at the bottom and gently twist a
sucker stick until it reaches to 3/4 of the top, using your pointer finger from the other hand to prevent th
sucker stick from breaking through the dough.Transfer silicone baking mat or parchment paper to a coo
sheet and bake according to recipe instructions. ASSEMBLING INSTRUCTIONS Bake and cool the cook
on a stick. Decorate as desired. Line the vase with plastic wrap. Mix recipe for candy clay. Place the
kneaded candy clay in the lined vase, filling the vase 3/4 full. Arrange cookies. Position sticks in the vas
The sticks should be various lengths. Place the longest sticks in the back, working your way to the shorte
sticks in the front. Traditionally, styrofoam is used in the vase to keep stable the cookies on a stick. While
that is fine, there are several reasons why candy clay is an excellent alternative. It weighs more than
styrofoam, keeping your projects more stable. It is more forgiving if you change your mind where you
would like the cookie sticks to be placed. Finally, it is edible and delicious!

8/3/2019 Microsoft Word - Cookies in Creatividades Latinas Tut
http://slidepdf.com/reader/full/microsoft-word-cookies-in-creatividades-latinas-tut 9/12
Fondant Iced Cookies
The flexibility of fondant allow for a variety of textures and
unique finishes while providing a sweet flavor to cookies.
Rolled FondantRolling PinPerfections Strips or a Rolling Pin with RingsSilicone MatFood ColorButtercream Icing or Piping GelSpatula
Bake and cool cookies. Set aside. Color fondant with food coloring if desired. Place fondant on a siliconemat or surface dusted with powdered sugar (make sure surface is very clean). Roll fondant between
perfection strips or a rolling pin with rings. Cut out fondant piece with the same cookie cutter used in
baking. Spread buttercream icing or piping gel on the baked and cooled cookie and attach cut-out piece.
accent with molded fondant pieces- Lightly spray mold with a cooking spray. Wipe any excess spray. Fil
the mold with fondant. Push additional fondant onto fondant in mold and pull out. Attach to cookie wit
piping gel.
8/3/2019 Microsoft Word - Cookies in Creatividades Latinas Tut
http://slidepdf.com/reader/full/microsoft-word-cookies-in-creatividades-latinas-tut 10/12
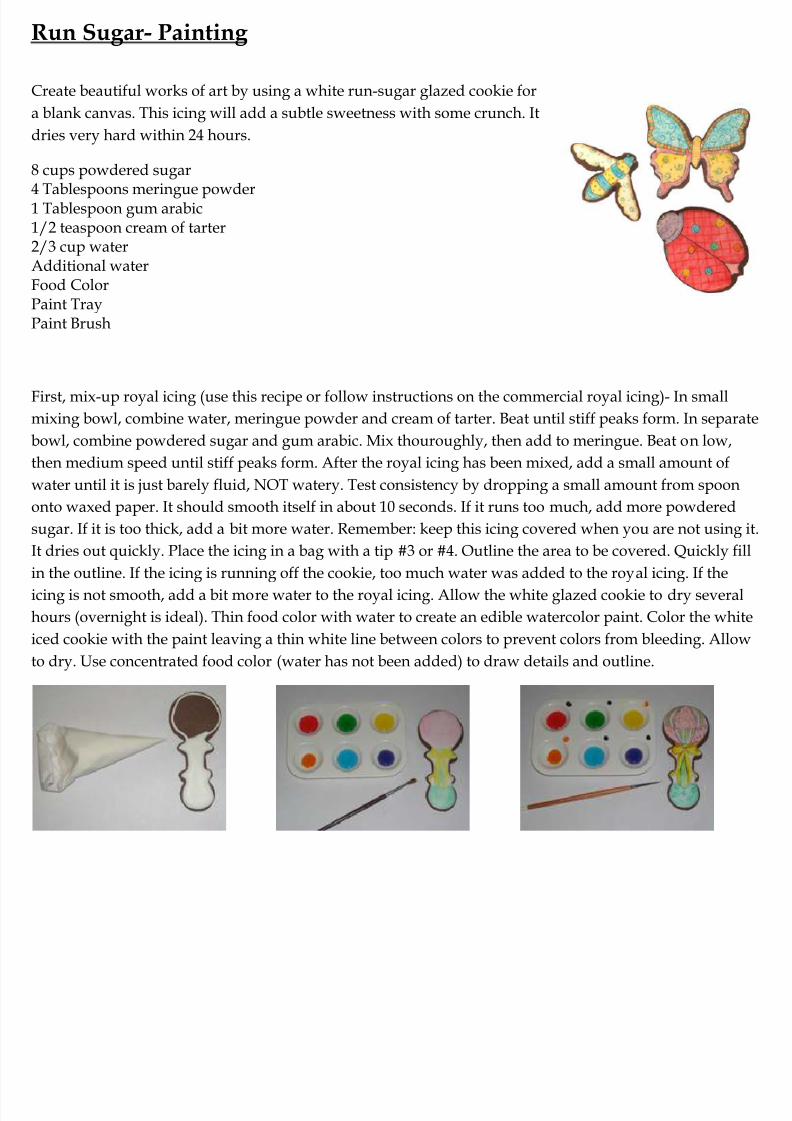
Run Sugar- Painting
Create beautiful works of art by using a white run-sugar glazed cookie for
a blank canvas. This icing will add a subtle sweetness with some crunch. It
dries very hard within 24 hours.
8 cups powdered sugar
4 Tablespoons meringue powder1 Tablespoon gum arabic1/2 teaspoon cream of tarter2/3 cup waterAdditional waterFood ColorPaint TrayPaint Brush
First, mix-up royal icing (use this recipe or follow instructions on the commercial royal icing)- In smallmixing bowl, combine water, meringue powder and cream of tarter. Beat until stiff peaks form. In separa
bowl, combine powdered sugar and gum arabic. Mix thouroughly, then add to meringue. Beat on low,
then medium speed until stiff peaks form. After the royal icing has been mixed, add a small amount of
water until it is just barely fluid, NOT watery. Test consistency by dropping a small amount from spoon
onto waxed paper. It should smooth itself in about 10 seconds. If it runs too much, add more powdered
sugar. If it is too thick, add a bit more water. Remember: keep this icing covered when you are not using
It dries out quickly. Place the icing in a bag with a tip #3 or #4. Outline the area to be covered. Quickly fi
in the outline. If the icing is running off the cookie, too much water was added to the royal icing. If the
icing is not smooth, add a bit more water to the royal icing. Allow the white glazed cookie to dry several
hours (overnight is ideal). Thin food color with water to create an edible watercolor paint. Color the whi
iced cookie with the paint leaving a thin white line between colors to prevent colors from bleeding. Allow
to dry. Use concentrated food color (water has not been added) to draw details and outline.

8/3/2019 Microsoft Word - Cookies in Creatividades Latinas Tut
http://slidepdf.com/reader/full/microsoft-word-cookies-in-creatividades-latinas-tut 11/12
Sugar Cookie Recipe
After trying over 50 sugar cookie recipes, I found this one to be my absolute favorite. I love this basic sug
cookie recipe for many reasons. It taste great. It is simple with few ingredients. It will maintain it's shape
which makes the dough ideal for molding. You must chill the dough for a couple hours (or overnight is
great) or it will be very sticky to work with.
1 cup Butter, softened
1 3-ounce package cream cheese, softened
3/4 cup sugar
1 egg
1 teaspoon vanilla
3 cups all purpose flour
In large mixer bowl combine all cookie ingredients, except flour. Beat at medium speed, scraping bowl
often until creamy. Reduce speed to low; add flour. Beat, scraping bowl often, until well mixed. Divide
dough into 2 equal portions; wrap in plastic wrap and refrigerate unitl firm (at least 2 hours). Heat oven
350°.
Roll out on lightly floured surface OR parchment paper.
Bake for 7 to 10 minutes or until edges are very lightly browned.
Remove from cookie sheets; cool completely.

8/3/2019 Microsoft Word - Cookies in Creatividades Latinas Tut
http://slidepdf.com/reader/full/microsoft-word-cookies-in-creatividades-latinas-tut 12/12
Chocolate Cut-Out Recipe
Yummy! Crisp chocolate cut-outs with a brownie-cookie type flavor. This dough should be chilled for an
hour or two (or overnight) or it may be sticky to roll.
1/2 cup butter
3/4 cup sugar
1 egg
1 teaspoon vanilla
1 1/2 cups all purpose flour
1/3 cup unsweetened cocoa
1/2 teaspoon baking powder
1/2 teaspoon baking soda
1/4 teaspoon salt
In large mixer bowl beat butter, sugar, egg and vanilla until well blended. In medium bowl, stir together
flour, cocoa, baking powder, baking soda and salt; add to butter mixture and blend well. Refrigerate
dough about 1 hour or until firm enough to roll. Preheat oven to 325°. On lightly floured surface or
parchment paper, roll out dough. Bake 5 to 7 minutes or until no indentation remains when touched.Remove from cookie sheets; cool completely.
@creatividadeslatinas2011/ [email protected]/ www.creatividadeslatinas.com