Embed Size (px)
Citation preview

1
CONTENTS
Introduction 2 Important points about this course 2 Aims of course 3 Laboratory write-ups 3 Laboratory notebooks 3 Suggested notebook format 4 Sample laboratory notebook 6 Safety 8 Reaction monitoring 11 Thin layer chromatography (TLC) 11 Choice of solvent for TLC 12 Analysis of TLC 13 Purification techniques 14 Recrystallisation 14 Choice of solvent 14 Mixed solvent systems 15 Column Chromatography 16 Experiments 19 Writing up 23 Appendix 1:: Write-up proforma 26 Appendix 2: Learning outcomes and marking scheme: 30

2
Organic Chemistry
Year 3
Introduction
It is of vital importance that you read thoroughly the information obtained in this course
manual BEFORE attending the COMPULSORY pre-lab talk. If you cannot attend the
pre-lab talk you must produce a written explanation (sickness requires a doctors
certificate).
IMPORTANT
◊ You will be working individually on a unique experiment.
◊ The majority of you will be undertaking the synthesis of novel compounds (i.e. some
compounds may have never been previously prepared by anyone in the world).
◊ As novel compounds will be prepared the safety hazards associated with them will be
unknown!! All compounds must thus be treated as highly toxic and safety procedures
(see later) must be followed AT ALL TIMES!! Failure to comply with safety
procedures will lead to EXCLUSION FROM THE LABORATORY.
◊ We have designed this practical with the intention that your compounds could be
used in the pharmaceutical research process. We believe this gives you a unique
insight into the application of synthetic chemistry.
◊ As a consequence all new compounds must be checked for purity and structural
information obtained in order to determine the quality of the product. Analysis will
be undertaken by infrared and nuclear magnetic resonance spectroscopy and melting
point determination (where applicable). It is important to emphasise that with novel
compounds you will not be able to compare your melting point/spectroscopic results
with any previously reported. Therefore great emphasis will be placed upon purity of
your samples.
◊ More marks will be awarded for purity of compounds than quantity of compounds. It
is better to fail to complete all the experiments required but obtain very pure
compounds than to rush and finish all the experiments and produce poor quality
compounds. This will be reflected in the marking scheme (see later).
◊ When you are preparing unique compounds you obviously cannot follow a written
procedure as there will not have been a previously published reported method. In
these situations the experimental procedure must be devised by yourself in
collaboration with a demonstrator.

3
◊ The laboratory notebook and written experimental must be set out in the way shown
in the example write-up section.
◊ You may be required to perform computer database searches using
BEILSTEIN/CROSSFIRE/SCIFINDER in order to determine if your compounds are
novel or not.
Aims of Course
The main aim is to give you experience of how to do original chemical research as
opposed to repeating simple experiments. You will learn how to design an experiment,
assess the success or otherwise of your experiment, characterise fully the physical
properties of new compounds using spectroscopic techniques, and keep a standard
laboratory notebook that would stand up to legal scrutiny should any results be
patentable.
Laboratory Write-ups
During your first two years at Warwick you have been instructed in various lab courses
on “the best way to write up a laboratory report”. You may have discovered that
different disciplines (e.g. Physical, Inorganic and Organic Chemistry) often require you
to write your reports in different ways. This is often confusing for the student, but it is
important to realise that different disciplines put emphasis on different aspects of the
write-up for simple undergraduate experiments. Individuals or individual research
groups (academic or industrial) will develop their own style for recording experimental
data as will different Chemical Journals (e.g. Journal of Organic Chemistry gives
different guidelines to Organic and Biomolecular Chemistry), however there are certain
pieces of vital information which should be included, particularly when making novel
compounds.
A record of your experimental work should be kept in two complementary forms; the
laboratory notebook and the data sheet.
Laboratory notebook.
This should be treated as a diary of events, and should contain exact details of the
experiment with all observations (no matter how trivial they seem). It MUST be written
up at the bench as you perform the experiment and include the date, observations,
weightings and mishaps entered as well (see later). Under no circumstances must results
be written on rough paper and then transferred to the notebook later. It is more important

4
that the notebook be an accurate record of an experiment than for it to be in your neatest
writing. All mistakes must be crossed out (not tipexed or ripped out).
Suggested notebook format
General layout
Start each experiment on the next free right hand page of the notebook. Assign your
experiment a reference number, normally your initials followed by the number of the
experiment (i.e. AJC 1)
The Date
The date should be entered.
Reaction Scheme
This is always included at the top of the page so that individual experiments can easily be
found. Write the reaction scheme that you expect. If the reaction does not turn out as
expected (i.e. an unexpected product is formed) then you can cross out the initial product
and add the actual product (preferably in a different coloured ink).
Literature references (if there are any).
Add any literature references to the procedure that you are using, you may have to do a
database search (see later) to get this information.
The procedure
An exact account of the procedure including spillages, observations, mishaps etc. All
amounts of materials (including mole quantities, molecular weight, and equivalents of
reagents should be added). The procedure should be brief (see Fig 1, Sample Laboratory
Notebook, and compare to Fig 2, Sample DataSheet).
Reaction monitoring
When carrying out a reaction you need to be able to assess when the reaction has
finished. This is particularly important when you are the first person to attempt a
reaction as you cannot follow other guidelines. This analysis is most widely carried out
using TLC (thin layer chromatography) and it is very important to include a visual
representation of the TLC plate(s) giving the eluent solvent system and the visualisation
technique used (see section on reaction monitoring)

5
Details of workup and purification
Describe accurately but briefly the method of work-up (i.e. the solvent used in extraction,
any washings e.g. water, brine etc.). If the compound is purified by recrystallisation you
must include the solvents used. If you purify your compound by column chromatography
(see later) you must include details of the solvent system for elution. If purified by
distillation the type of set-up, b.p. and pressure must be recorded. If more than one
compound is isolated they should be given different reference numbers (i.e. AJC1a,
AJC1b, etc.)
Concluding remarks
Include any comments that you wish to make about the reaction or those that you feel
may enable you to perform it more efficiently next time.

6
Sample Laboratory Notebook
31/12/2009 Ref AJC 12
+
H2N
Cl
O
H N
O
mw = 107 mw = 189mw = 118.5
Et2O
Ref., B. R. Henke, A. J. Koulis, and C. H. Heathcock, J. Org. Chem., 1992, 57, 7056
Substance Quant Mwt mmoles Equiv. Source
Acid chloride 1.16 g 118.5 9.8 1.0 AJC 11
Benzylamine 2.10 g 107 19.6 2.0 Aldrich
Diethylether 40 mL
Method
To benzylamine (2.10g), in diethylether (30mL) was
added 4-pentenoyl chloride (1.16g) in diethylether
(10mL). Heat is evolved and a white ppt. formed. After
two hours TLC showed no starting material. The mixture
was washed with 10% HCl (10mL), NaHCO3 (10mL), and
water (10mL), dried and the solvent removed by
evaporation (1.7g, crude)
AJC 12 White crystals (1.5g, 81%)-NMR, IR and
MS:-AJC 12 (see Data sheet)
Comment:
Next time add acid chloride to mixture at 0˚C.
2 hrs
1:1 pet-EtOAc
AJC 12
SM RM
H N
O
Ph
C12H15NOmw = 189

7
You should characterise your compounds in order to confirm their structures. There are a
vast number of spectroscopic techniques which can be utilised for determining structure
and purity information on compounds. Due to the increasing number of such techniques
there is some debate as to what constitutes a rigorous structure and purity analysis. For
this course it is expected that you obtain the spectroscopic data required in the write-
up/characterisation instructions section.
For information only; at research level the following data is normally required for known
and previously unknown compounds, respectively.
Known compounds Unknown compounds
Melting or boiling point* Melting or boiling point*
TLC details (including Rf and eluent) TLC details (including Rf and eluent)
1H NMR (include MHz) 1H NMR (include MHz)
Infrared Infrared
Mass spectrum
Elemental analysis
* If you prepare only a small quantity of a liquid sample (i.e. less than 2-3g) you can
dispense with the boiling point determination.
While your laboratory note-book is a day to day diary of your experiments at some point
it often becomes necessary to write a formal report or a paper on your experiments. In the
organic laboratory course this will take the form of a single write-up at the end of the
course.

8
SAFETY
1. EYES.
◊ Approved safety glasses or goggles must be worn at all times in the laboratory.
Remember that a splash of sulphuric acid or sodium hydroxide solution, both of
which are highly corrosive to optical tissue, could come from your neighbour's
bench as well as your own, so be vigilant at all times. In the event of any substance
entering the eyes, wash copiously with water WHILE SHOUTING FOR HELP.
◊ Contact lenses are strongly discouraged in the laboratory, since they may impede
rapid washing of the eye in the event of contamination. Students who insist on
wearing contact lenses under their safety spectacles must wear a badge to alert
demonstrators in the event of contamination of the eye.
2. CLEANLINESS.
Treat all compounds in the laboratory as if they were toxic. NEVER put anything
in your mouth. Spillages on hands, face or clothes must be washed off
immediately with copious amounts of soap and water. Contamination of the eyes
is particularly serious (see 1 above). All spillages on the bench or floor must be
wiped up immediately. Whether or not you suspect contamination always wash
your hands before leaving the laboratory.
3. FIRE
Most organic solvents are flammable and should never be handled near a naked
flame. The danger of fire increases with decreased boiling point and is greatest
(amongst the common solvents) with diethyl ether and light petroleum ether. In
the case of this laboratory course, Bunsen burners and other naked flames MUST
NOT BE USED. In the event of FIRE you should immediately SHOUT for
assistance from a demonstrator.
4. TOXIC VAPOURS
Most solvent vapours are toxic and must not be inhaled. Among the common
laboratory solvents and reagents this applies particularly to chlorocarbons such as chloroform (CHC13) and dichloromethane (DCM, CH2C12), and to some aqueous
reagents such as conc. hydrochloric acid and conc. nitric acid. Organic solvents
must never be boiled off in the open laboratory; use a fume cupboard).
5. SMOKING, EATING, DRINKING

9
All are banned absolutely in the laboratory. Never put anything into your mouth.
6. ACCIDENTS.
An accident book is kept by Mrs. Jane Emmerson, the technician in charge of the
Undergraduate Teaching Laboratories, and ALL ACCIDENTS SHOULD BE
REPORTED TO HER AND TO THE SENIOR DEMONSTRATOR AS SOON
AS POSSIBLE.
7. DEMONSTRATORS
When in doubt, seek advice. The demonstrators are there to assist and to guide
you in all aspects of the practical class.
8. HOT OIL BATHS
Hot oil baths are dangerous, and carry the risk of burns if spilled or splashed, and
of fire if overheated. If possible, use an aluminium heating block instead. The
following precautions must be observed with oil baths:
◊ Ensure that the oil bath is not overfull, that the oil is clean, and that the container
is not leaking.
◊ Assemble all apparatus, check that water hose connections are secure, and have
the apparatus inspected for safety by a demonstrator, before starting to heat the
oil bath.
◊ If the oil bath starts to smoke while heating, switch off the heater and inform a
demonstrator immediately.
◊ Never leave a heated oil bath unattended.
◊ Never attempt to move a hot oil bath, or to rearrange apparatus in a hot oil
bath.
◊ Keep all flammable solvents at a safe distance from the oil bath.
◊ If an oil bath does catch fire, shout for assistance from a demonstrator, switch
off the heater if that can be done safely, and stand clear. The demonstrators will
be responsible for extinguishing the fire.
9. DISTILLATION
◊ Distillation (as against reflux) must be conducted from a water bath or an oil
bath. Electric heating mantles must not be used.
10
◊ Add boiling chips to liquids before heating them to boiling at atmospheric
pressure; if the liquid is to be distilled at reduced pressure use an air-bleed. Do
not add boiling chips to liquids which are near to their boiling points
10. DIETHYLETHER SOLUTIONS
Diethylether and diethylether solutions must never be distilled unless they are
peroxide-free. To test diethylether for peroxides, shake a sample with an equal
volume of 2% potassium iodide in water. Add to the mixture 5 drops of dilute
hydrochloric acid. If the diethylether layer turns yellow or brown notify the
demonstrator; the diethylether which gives this reaction must not be used.
11. MISCELLANEOUS.
• Many reactions are dangerously exothermic. Never mix reagents rapidly, unless
you are sure of the consequences.
• Never add water to conc. sulphuric acid. Add boiling chips to liquids before
boiling or distilling at atmospheric pressure.
• Broken glass and disposable Pasteur pipettes should be disposed of immediately
in the 'glass only" bin. Keep your bench and sink clean and tidy at all times.
• Never mix strong oxidising agents (e.g. HNO3) with organic solvents (e.g.
acetone).
• Stands and clamps must be strong enough to support the apparatus being used;
use a size of apparatus which matches the scale on which you are working.
• Keep sinks free from filter papers and other solid wastes.
• All samples including bottles of chemicals must be clearly and correctly labelled;
return laboratory chemicals to their proper places as soon as you have finished
with them.
12. WASTE CHEMICALS, SOLVENTS AND SOLID WASTES
All chemicals should be disposed of in the correct manner. Do not pour waste
solvents down the sink! Use the waste solvent containers provided. Do not
through away waste solids in the bins use the containers provided.
13. COSHH REGULATIONS
It is a LEGAL requirement that you complete a COSHH assessment for each
reaction before you begin practical work. It must be checked by the academic in
charge. You will be instructed how to fill out these forms in the pre-lab talk.

11
REACTION MONITORING
Thin layer chromatography (TLC)
Most reactions that you have carried out previously have involved following “recipes”
which have been tried and tested. The conditions and time required for these reactions to
reach completion would have been well established. When carrying out new reactions,
particularly novel reactions, it is necessary to be able to follow the progress of the
reaction. The idea that you can guess the time that a reaction will take (even if you are
following a literature procedure) is very dangerous. Every reaction you carry out in this
lab class should be monitored to evaluate progress. TLC enables this progress to be
monitored and will enable you to make a decision as to when the reaction has finished
and how many different products have been formed. When a compound or mixture of
compounds is placed on a TLC plate and eluted with a solvent each different component
will move up the TLC plate at a different rate. Hence, running a TLC plate that contains
both a starting material spot and crude reaction mixture spot will enable you to follow the
progress of the reaction.
1) Dissolve up a little of your starting material (ca. 5 mg) in a suitable solvent (ca.1
mL) [normally CH2Cl2 but other solvents can be used].
2) Use a TLC spotter to spot a small amount of starting material solution about 1cm
from the bottom of the TLC plate. Place two spots next to one another (the spots
should be kept as small as possible). Make sure the two spots are both the same
distance from the bottom of the plate.
3) It is important to use a clean TLC spotter to add
further spots of the crude reaction mixture to the
TLC. Again spot two spots with one of the
spots placed at the same position as one of the
starting material spots (Fig a). This is known as
a comparative TLC. There should be three
spots on the bottom of the plate.
4) Place the TLC plate upright in a tank lined with
filter paper, containing the chosen solvent (see
choice of solvent). Make sure the solvent level
in the tank is below the spots on the TLC plate. Allow the solvent to rise up the
TLC plate and remove the TLC plate when solvent almost reaches the top (about
1cm from top, fig b).
reaction mixture (RM)
starting material (SM)
co-spot of SM and RM
(Fig a)

12
reaction mixture (RM)
starting material (SM)
co-spot of SM and RM
(Fig. a)
cover
solvent
tlc plate
filter paper
(Fig. b)
reaction mixture (RM)
starting material (SM)
co-spot of SM and RM
(Fig. c)
solvent front
5) Visualise the spots (fig c). There are three general ways to visualise spots:
a) View under a UV lamp:
b) Stain plate with iodine (see demonstrator):
c) Treat plate with commercial stain and heat (see demonstrator).
Typical stains include ninhydrin, phosphomolybdic acid, and potassium
permanganate. Each type of stain is useful for visualising a certain type of
functional group e.g. ninhydrin (amines), potassium permanganate (alcohols,
acids), phosphomolybdic acid (general).
Consult a demonstrator to determine which should be best for your reaction.
6) Measure the Rf of any spots that are visualised and make conclusions as to the
state of the reaction. If the reaction has not finished, repeat this process one hour
later.
Choice of solvent for TLC.
The ability to determine the correct solvent system comes with experience and you must
find it by trial and error. A suitable starting point might be to test individual solvents
first for simplicity (ether, ethyl acetate, hexane, methanol, DCM etc.) although a mixture
of solvents (e.g. low polarity 40/60 petroleum ether and high polarity ethyl acetate) in an
appropriate ratio might be required. The polarity of the solvent system can then be easily
adjusted by changing the proportions of these two solvents. For example if after elution
the spots are low on the TLC plate (fig d) a more polar solvent system should be used
(i.e. increase the proportion of ethyl acetate, fig e). Alternatively, if the spots are all at
the top of the plate (fig f) a less polar system (more 40/60 pet ether) should be utilised
(fig g). If the constituent spots do not travel up the plate even in neat ethyl acetate then
more polar additives (e.g. methanol) should be added in various proportions. Remember
if you are making a compound with very polar groups (i.e. carboxylic acid, alcohols,
amines etc.) then you will probably require a very polar solvent to elute your TLC. If
this is the case you should try mixtures of ethyl acetate and methanol (methanol is the

13
more polar solvent of the pair). Try starting with pure ethyl acetate and then 10:1 ethyl
acetate/MeOH increasing the proportion of MeOH if the spots still run near the baseline.
Consult a demonstrator if you are experiencing problems.
(Fig. d)
1/1 pet ether ethyl acetate
more polar
1/10 pet ether ethyl acetate
1/1 pet ether ethyl acetate
less polar
10/1 pet ether ethyl acetate
(Fig. e) (Fig. f) (Fig. g))
When spots are too low When spots are too high
On occasions, particularly with acidic and basic compounds, you will find that it is
difficult to obtain clean spots on the TLC plate. Instead you often get streaking. If this
occurs you should add ONE DROP of either acetic acid (if your compound is acidic) to
the eluent or ONE DROP of triethylamine (if your compound is basic) to the eluent and
repeat the elution.
Analysis of TLC.
If the TLC indicates that there is no starting material (fig h) then stop the reaction. Note
a special case in (fig i). Now it is apparent why it is necessary to run a third co-spot of
both starting material and product mixture. If you had just eluted one spot of each
without a co-spot (fig j) you may have been fooled into thinking the reaction was
incomplete. If there is starting material present (fig k) you should leave your reaction for
a further hour and then try again. The number of non starting material spots shown on
the TLC indicates the number of different products formed in the reaction (i.e. fig l,
shows two products have been formed).
No starting material left
Starting material left
No starting material left but two products
(h) (k) (l)
No starting material left
(i)
Same as (b) but no co-spot
(j)

14
PURIFICATION TECHNIQUES
Recrystallisation
You will be required to purify any compounds that you produce. This is necessary in
order to obtain physical data on the compounds. If the compounds that you produce are
crystalline the best, cheapest and quickest way to purify them is by recrystallisation. In
previous lab courses you have been told which solvent to use in the recrystallisation
process. However, if you have prepared new compounds you will not know this
information and you must determine the correct solvent system to use yourself.
Choice of solvent
If a compound which is similar in structure to the substance that you wish to purify has
been made before (and a reference is available) you should try the same solvent system
that was used for the reported compound as an initial test. Remember that polar
compounds (e.g. alcohols, amines, carboxylic acids) will dissolve preferentially in polar
solvents (alcohols, water, acetic acid etc.) while non-polar compounds will preferentially
dissolve in non-polar solvents (e.g. petroleum ether, toluene).
Find a suitable solvent by carrying out small scale tests (on about 100 mg). The most
desirable characteristics for a solvent are ;
a) high ability to dissolve the substance to be purified at elevated temperature but
comparatively low solubility at ambient temperature or below (ice);
b) a relatively low boiling point (<110 ˚C). The choice of solvent cannot be made on
theoretical grounds, but must be determined by experiment.
Place 0.1 g in a test tube and add cold solvent dropwise with shaking, after about 1mL
has been added heat the solvent to determine if the substance dissolves (care if solvent is
flammable). If the sample dissolves in 1mL of cold solvent or under gentle warming the
solvent is unsuitable. If all the solid does not dissolve then more solvent is added in 0.5
mL portions and again heated as before. If 5 mL of solvent has been added and the
compound does not dissolve on heating, the substance is regarded as sparingly soluble
and rejected. If, however, the compound does dissolve (or almost completely dissolves),
then the tube is cooled to determine if crystallisation occurs. If crystallisation does not

15
occur after cooling (ice-salt), or scratching with a glass rod the solvent is rejected.
Another solvent can be tried in a clean test-tube.
Mixed solvent systems
It is often the case that a substance is found to be far too soluble in one solvent and too
insoluble in another solvent. In this case a mixed solvent system (using both solvents)
can be used. The two solvents must be miscible however! Recrystallisation is attempted
by initially dissolving the substance at the boiling point of the solvent in which it is
soluble. Then the hot solvent in which the substance is insoluble is cautiously added
until a slight turbidity is produced. The turbidity is then cleared by the addition of a few
drops of the hot first solvent and the mixture is allowed to cool to room temperature.
Brief recap on how to carry out a recrystallisation on a large scale.
Use a conical flask not a beaker as this minimises evaporation of hot solvent.
1) Dissolve substance in minimum of hot solvent (determined as above). NOTE
IT IS OFTEN EASY TO BE MISLED INTO ADDING FAR TOO MUCH
SOLVENT IF THE CRUDE IS CONTAMINATED WITH INSOLUBLE
IMPURITIES SUCH AS SILICA OR MAGNESIUM SULPHATE.
2) Filter the hot solution ONLY IF AN UNACCEPTABLE (USE YOUR
JUDGEMENT) AMOUNT OF INSOLUBLE MATERIAL IS SUSPENDED
IN THE SOLUTION. If the compound completely dissolves you should MISS
OUT this step.
3) Allow the solution to cool. You may use ice / scratch the flask to induce
crystallisation.
4) Filter off the crystals and wash with some COLD solvent, drain off washings
under suction. After careful washing allow the crystals to dry in the air and then
remove the last traces of solvent under vacuum (dessicator) or in a drying pistol.

16
Chromatographic purification.
This is probably the most important of all the skills an organic chemist requires. Before
you embark on any chromatography you should be experienced with running TLC on
your crude mixture.
Procedure for running a flash column.
SAFETY NOTE: SILICA DUST IS VERY TOXIC IF INHALED, YOU SHOULD
ALWAYS AVOID BREATHING IT IN AND ALWAYS HANDLE IT IN A FUME
CUPBOARD. LARGE VOLUMES OF SOLVENT ARE ALSO USED IN
CHROMATOGRAPHY AND YOU SHOULD TAKE PRECAUTIONS TO AVOID
BREATHING IN THE VAPOURS (FUMECUPBOARD) OR EXPOSING THEM TO
NAKED FLAMES OR ELECTRICAL SPARKS.
1) Solvent choice
You need to identify the eluent mixture that you will require to run your column. Run
TLCs to find the solvent system that gives a good separation of components in the
mixture. If the spots are close together use a solvent system in which they appear at Rf
0.2-0.4. If the components are well separated use the solvent system which gives an Rf
of 0.2-0.4 for the lower spot. Normally, the solvent system that is best suited for
chromatography will be that in which the product spot (if you can identify it) on TLC has
a Rf of about 0.3.
2) Quantity of silica and size column to be used.
The amount of silica and size
of column required will
depend upon the amount of
material you have to separate
as well as how close together
the components of the
mixture are by TLC. When
the components are well
separated (fig a) then a ratio
of 20:1 silica:material should
be sufficient. If the
0.75
0.50
0.25
Rf
use 20:1 silica/sample
0.75
0.50
0.25
Rf
use 100:1 silica/sample
Fig. a Fig. b

17
components are close together (fig b) then up to 100:1 silica:material can be employed.
Check with a demonstrator to determine how much silica and the size column that you
require.
3) Preparation of column.
i) Weigh out the required amount of silica in a conical flask and make up a slurry
with the required solvent.
ii) Plug the chosen column with a roll of cotton wool.
iii) Mount the column vertically using a clamp stand.
iv) VERY CAREFULLY add the silica slurry to the column in small portions via a
powder funnel. DO NOT ALLOW THE SOLVENT TO DROP BELOW THE
LEVEL OF THE SILICA.
v) When all the solvent has been loaded, leave about 1-2cm of
solvent above the silica and sprinkle some sand onto the top of the
column (ca.2-3mm). Force the excess solvent through the column
until there is a small layer left above the sand. Once prepared you
can leave the column for a short period of time but once you load
the sample onto the column you should carry out the remaining
steps as quickly as possible.
4) Load the sample.
i) Dissolve the sample in the minimum amount of solvent,
preferably the solvent that you will run the column in.
If this is not possible you may use a few drop of
CH2Cl2 to dissolve your sample.
ii) Load the solution on to the top of the column very
carefully, taking care not to disturb the sand or silica at
the top of the column. This is best facilitated using a
Pasteur pipette and by running the solvent down the walls of the column.
iii) Wash down any remaining liquid on the sides of the column with the smallest
amount of clean solvent.
iv) Once all the solvent and compound have been added allow the level of the liquid
to drop so that the top of the sand is JUST STARTING TO GET DRY.
5) Addition of solvent.
Add the solvent (that you will run the column in) to the top of the column very carefully.
YOU MUST NOT DISTURB THE SAND OR SILICA IN ANY WAY. This can best
silica
sand
pipette
tap
Loading sample

18
be accomplished by adding the solvent via repeated additions using a Pasteur pipette.
Once a good head of solvent is present you can pour the rest of the solvent in carefully.
6) Running the column.
Apply pressure to the top of the column and collect fractions continually. It is important
to maintain a relatively fast flow rate through the column. The solvent should run, rather
than drip. You should collect fractions in test-tubes. You may require up to fifty so
make sure that you have these to hand before you start running the column. Collect the
fractions as you run the column. A good guide to how much solvent to collect in each
tube can be arrived at by dividing the amount of silica used by half. For example if you
used 40g of silica then you should collect approximately 20mL fractions. ALWAYS BE
CAREFUL NOT TO LET THE COLUMN RUN DRY.
7) Monitoring the fractions
After you have collected about 30 fractions analyse the contents of each tube by TLC.
This is achieved by using a large TLC plate. You should spot each fraction on the TLC
plate (up to ten fractions per TLC). Elute the TLC in the normal manner (using the
solvent system from the column) and visualise. You should obtain TLC like that in the
diagram below. If you do not detect any spots then your compound has not yet eluted
from the column. You should collect another 20 fractions and repeat the process.
elute with solvent used in column
1 2 6 7 8 9 103 4 51 2 6 7 93 4 5 8 10
Spot fractions on TLC In this example to obtain pure compounds combine fractions 1-3 for product 1 and fractions 6-9 for product 2
Product 1
Product 2
8) Isolating the products
Combine all the fractions which contain the same spot (i.e. fractions 6-9) and remove the
solvent in vacuo to isolate the desired product. If two spots are separated you should
isolate each product separately and submit both pure compounds for spectroscopic
analysis to determine which is your product.

19
EXPERIMENTS
Objective
The objective of the experiments is for each of you to generate one of a number of
members of a library of compounds using a common sequence of reactions. The
transformations which you will undertake are shown in the Scheme below. You should
note that the illustrated route is a general one, but each of you will make only one
derivative, i.e. one final compound.
Scheme for parallel synthesis
OH
OX
step 1DMF, K2CO3
Cl
ClorCl
F
or O
OX
Y
step2NaBH4MeOH, H2O
O
OHX
YO
OX
Y
Z
Cl
or
base, solvent.
X groups Y groups Z groups
H
Cl
Me
Br
X=Me, Cl, Br, H
Cl
F
O
Total permutations: 4 x 4 x 4 = 64!
step 3
O
Cl
OOCl
Oor or HH
O
O
O
Br
BrorCl
OCl
Oor
CCl3
Br
O
O
Me
MeCCl3

20
Your exact target molecule will be assigned (by drawing at random from a ‘hat’) at the
start of the course.
Note: The actual amounts which you will use in the experiments will, of course, depend
on the molecular mass of the exact reagents which you use. All reagents should be
treated as hazardous and toxic, contained in the fume cupboard at all times unless in
sealed containers and disposed of in an appropriate manner.
Experimental procedures:
Step 1) Substitution of the phenolic group.
For this step a mild base will be used to deprotonate the phenolic hydroxy group. Too
strong a base will result in the unwanted formation of an enolate. The resulting phenolic
anion is a good nucleophile and will react with one of the four chosen electrophilic
reagents which are to be employed.
Note you MUST start with 5g of the ortho-hydroxy acetophenone (whichever one it
is) and BASE YOUR CALCULATIONS ON THIS.
A typical experimental procedure is as follows (adapted from C. Chen, Y.-F. Zhu and K.
Wilcoxen, J. Org. Chem., 2000, 65, 2574-2576): A solution of ortho-hydroxy
acetophenone (5g, 36 mmol, 1 eq.) in dry DMF (dimethylformamide) (80mL or slightly
more if required) at room temperature was treated with potassium carbonate (12.5g,
90mmol), para-chlorobenzyl chloride (5.8g, 36 mmol, 1.0 eq – make sure you use same
no. of equivalents if you have a different electrophile) and tetraethylammonium iodide
(0.6g, 2.5 mmol, catalytic amount). This solution was stirred at room temperature
overnight (or until the next laboratory day).
After this time, pour the DMF reaction mixture into an excess of stirred water (about 200
mL) and stir for 5 minutes - any solid that forms should be filtered off and recrystallised.
If a solid does not form then follow the sequence below to extract the product:
Diethylether (50 mL) was added and the resulting solution was thoroughly mixed. The
diethyether layer was then separated and the aqueous layer was extracted with further

21
diethyether (2 x 50 mL).*∗ ALL of the diethylether fractions were combined, washed
with water (2 x 20 mL) *, dried (sodium or magnesium sulfate), filtered and the solvent
removed under vacuum (rotary evaporator).
The crude product was then purified by recrystallisation or any other appropriate process
depending upon the physical state of the product. 1H NMR and IR spectra should be
recorded.
Try purification by recrystallisation first (you will have to experiment with some
solvents) and make sure that the final compound has been dried for at least 30 minutes in
a desiccator before any data is recorded (see below). You must carry out a TLC analysis
of your purified product against the ortho-hydroxy acetophenone starting material to
establish that they have fully reacted and that the product is pure. Do not TLC the
alkylating reagent, as this has hazardous properties. This will also establish which
solvent you need for TLC analysis in subsequent steps.
CAUTION: Benzyl and allyl halides are lacrymatory and irritant and should be
handled with great care. They not be removed from the fume cupboard other than
in a sealed container and any gloves which have been in contact with them should
not be used outside the fume cupboard. All used glassware should be soaked
overnight with dilute NaOH solution before cleaning. All benzylic chlorides and
bromides and the other electrophilic reagents used in this step should be treated
with the same degree of caution.
Step 2) Reduction of the ketone to an alcohol
Sodium borohydride will be used to achieve the required reduction in this procedure.
This is probably the most common method for the synthesis of racemic alcohols.
A typical procedure is as follows; Add your substrate (5.0g) to a solution of methanol (40
mL) and water (4 mL). At room temperature, with stirring, carefully add one molar
equivalent of sodium borohydride (calculate the amount that you need and check with a
demonstrator before starting the experiment).* Leave the solution stirring for about 1 h.
and then check the reaction by TLC after one hour or so. If the reduction is not complete ∗ As an extra precaution, in order to remove the DMF, it is recommended that the combined ether extracts are washed twice with ca. 20 mL of water before being dried and filtered.

22
then leave it stirring for longer and check at hourly intervals. At the end of the reaction
the methanol should be removed using a rotary evaporator. Water (50 mL for a 5g scale)
should be added. The product is then extracted with diethylether (ca. 3 x 50 mL). The
combined diethylether extracts should be dried (sodium or magnesium sulfate), filtered,
and the solvent removed under vacuum to give a crude product which is then purified by
a suitable method and characterised as required.
* As a rough guide, 5g of a compound of mass 200g/mol is 5/200 or 0.025 mol. One
equivalent of sodium borohydride (mass 38 g/mol) is 0.025 x 38 or 0.95g. You will have
to know the molecular mass of your ketone in order to carry out an accurate calculation.
NB: It is unlikely that your reaction will be carried out on a larger scale than that
described above.
Step 3) Formation of the ester.
In the final step you will make one of four possible ester derivatives, as indicated by the
structure of your desired final compound. For this step of your synthetic sequence, we
would like you to devise a procedure for the reaction. This should be achieved by
consulting textbooks of your choice and by using databases, such as Beilstein Crossfire
and/or Scifinder Scholar, where available. You should try to find an actual procedure for
the reaction. The most important points, however, are that you need to identify a base
and a solvent for the reaction, and devise a suitable work-up and isolation procedure.
Typical widely used bases might include triethylamine, pyridine or another mild base
whilst typical solvents might be THF, DCM, ether, hexane or ethyl acetate however you
are not restricted to these bases and solvents. Experience has shown that the use of an
excess of base often gives an improved result over the use of a stoichiometric amount.
Take into account the cost and likely availability of any reagents you may wish to use
and ensure that you discuss your chosen process with a demonstrator before starting the
reaction.
CAUTION: All benzylic chlorides and bromides, acyl chlorides and the other
electrophilic reagents used in this step should be treated with the same degree of
caution. None should leave the fume cupboard at any time. Dichloromethane should
also be regarded as highly toxic and handled with due care.
________________________________________________________________________

23
Writing up your work
You should write up your experiments in an A4 bound-booklet (i.e. the same as in year 1
and 2) as you go along using the format described earlier in this manual. The
experimentals do not have to be neat but should contain all the important information
such as quantities of material used, yield, procedure in detail etc.
At the end of the laboratory course, when all the experiments have been completed, you
should write up the results of your work, together with an analysis of your data. This
should then be handed in to the undergraduate office by the deadline given at the end of
the course.
The write-up should be a maximum of 4 sides of A4 in length, written on the
proforma required (see Appendix 2) and taped or stuck into your laboratory book
after the individual records of each experiment. This will include the following
sections, with brief details of the procedure; there is no need to write out the entire
procedure from the laboratory manual. The pieces of data underlined below must be
obtained and added as an appendix after the write-up. i.e. you need to hand in your
laboratory book with the write-up and spectra stuck in it.
Section 1: A summary of your experimental results (consisting of the following components): Step 1: Product:
O
O
X
Y
A listing of names and quantities of reagents used. Any modifications to the general procedure. Details of purification and yield as (mass, moles, %), TLC details of the reaction as it was followed and illustrations of plates – NOT the original plates, as they contain hazardous materials. Melting point if applicable. Illustration of the particular derivative you have made. Retain a small sample (<50mg) and hand it in.
24
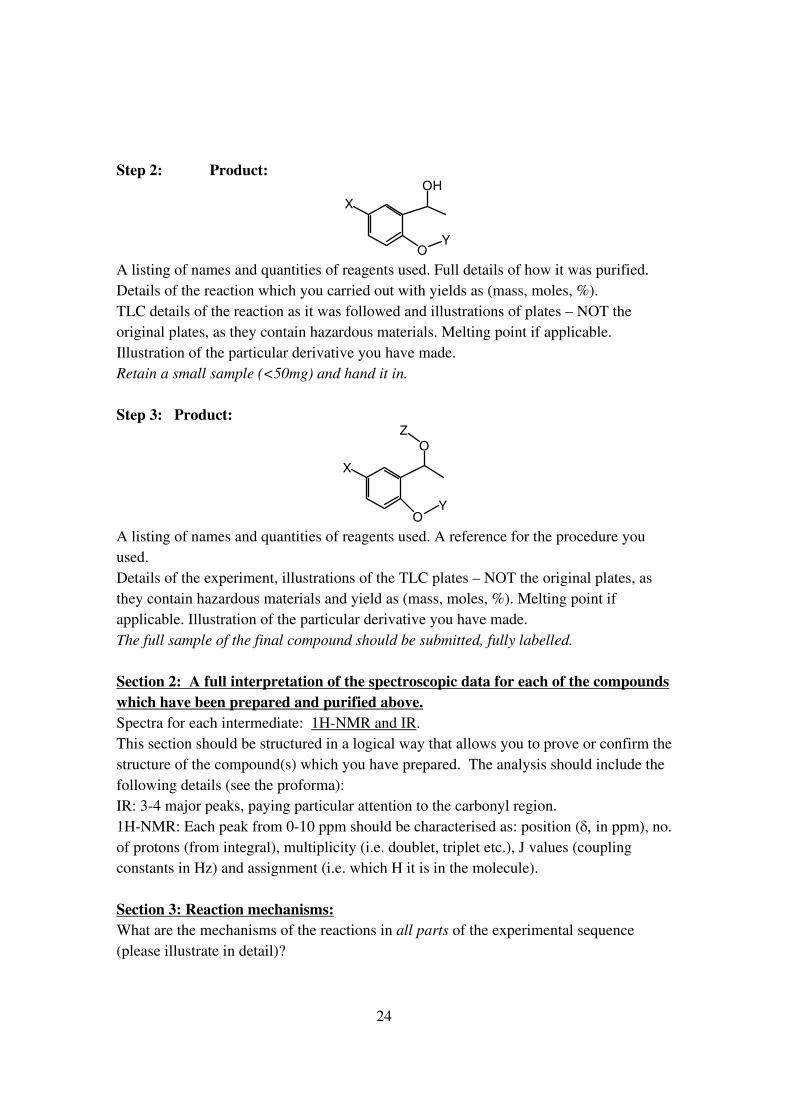
Step 2: Product:
O
X
Y
OH
A listing of names and quantities of reagents used. Full details of how it was purified. Details of the reaction which you carried out with yields as (mass, moles, %). TLC details of the reaction as it was followed and illustrations of plates – NOT the original plates, as they contain hazardous materials. Melting point if applicable. Illustration of the particular derivative you have made. Retain a small sample (<50mg) and hand it in. Step 3: Product:
O
X
Y
OZ
A listing of names and quantities of reagents used. A reference for the procedure you used. Details of the experiment, illustrations of the TLC plates – NOT the original plates, as they contain hazardous materials and yield as (mass, moles, %). Melting point if applicable. Illustration of the particular derivative you have made. The full sample of the final compound should be submitted, fully labelled. Section 2: A full interpretation of the spectroscopic data for each of the compounds which have been prepared and purified above. Spectra for each intermediate: 1H-NMR and IR. This section should be structured in a logical way that allows you to prove or confirm the structure of the compound(s) which you have prepared. The analysis should include the following details (see the proforma): IR: 3-4 major peaks, paying particular attention to the carbonyl region. 1H-NMR: Each peak from 0-10 ppm should be characterised as: position (δ, in ppm), no. of protons (from integral), multiplicity (i.e. doublet, triplet etc.), J values (coupling constants in Hz) and assignment (i.e. which H it is in the molecule). Section 3: Reaction mechanisms: What are the mechanisms of the reactions in all parts of the experimental sequence (please illustrate in detail)?
25
_______________________________________________________________________ Marking Scheme
A full marking scheme, featuring a breakdown of the allocation of marks, is given at the
end of this laboratory manual.
Notes
• Your general competence will be assessed throughout the course by the
demonstrators. They will note your attention to safety matters and your experimental
technique. They will note your ability to answer questions about the experiment you
are doing and the quality of the planning of each experiment you undertake. They
will also take particular note of the general cleanliness and tidiness of your work. If
you work in an unclean and messy way (e.g. if you do not immediately attend to solid
or liquid spills), you will have marks deducted.
• You have been given explicit guidance in the manual on how to keep a proper record
of your experiments. The importance of keeping an accurate laboratory notebook
cannot be overemphasised. If in doubt as to whether or not something should be
recorded, remember the basic criterion that your experiments should be recorded in
sufficient detail that another worker could repeat them exactly. (When you have
written up an experiment, imagine that you are another chemist and ask yourself if
you could repeat the experiment as described exactly.) Remember that work not
recorded accurately = work not done.
• Sample quality is of paramount importance. The two things that are essential are that
(i) the compounds you make are adequately characterised and that (ii) they are pure
and that you have evidence of their purity. Remember that you must retain a reference
sample of each compound you make, properly labelled with its structure, your name
and the page number of you laboratory notebook in which its preparation is
described. It is normally sufficient to retain 100 mg of a compound as a reference
standard. If for whatever reason your data are incomplete when you come to write up
your report, with a reference sample in hand, you will, always be able to obtain the
missing data. Your reference samples will be used by the demonstrators to allocate a
mark for “quality of samples” (see above).

26
APPENDIX 1: Write-up proforma (to be downloaded as word document from):
http://www2.warwick.ac.uk/fac/sci/chemistry/research/willsgroup/teaching_materials. SUBMISSION DEADLINE: 12.00 noon Friday 8th June 2012
Year 3 Organic Chemistry Laboratory Report. 2011-2012 academic year Please read these instructions carefully:
Any text in red can be deleted. Type your write up into this pro-forma or print it out and write on in (leaving suitable spaces where
required). You can change the spacing between each heading and prompt, but you should not change the font size or
type. However, the finished report should not exceed four pages in total (not counting the appended spectra).
Paste this report into your laboratory book, with the three IR and three NMR spectra (see below), and hand it in o the undergraduate office.
Student name: ______________________________
Section 1: Summary of experimental results. Part One: Alkylation of the ortho-hydroxy acetophenone: i) List reagents used (name, mass in g, no. moles): ii) Describe any changes to the laboratory procedure (do not write out the full procedure):
iii) Give the yield of product you obtained (mass in g, no. moles, % obtained, solvent from which it was recrystalised if applicable), and melting point if it was a solid, and a picture of the TLC plate with solvents used: iv) Confirm that you have handed in a labelled (with your name and a diagram of the
compound) sample by ticking this box: � v) Draw a picture of your step 1 product, or insert from chemical-drawing software: Part Two: Reduction of the ketone: i) List reagents used (name, mass in g, no. moles):

27
ii) Describe any changes to the laboratory procedure (do not write out the full procedure). iii) Give the yield of product you obtained (mass in g, no. moles, % obtained, solvent from which it was recrystalised if applicable), and melting point if it was a solid, and a picture of the TLC plate with solvents used: iv) Confirm that you have handed in a labelled (with your name and a diagram of the
compound) sample by ticking this box: � v) Draw a picture of your step 2 product, or insert from chemical-drawing software: Part Three: Acylation of the alcohol: i) List reagents used (name, mass in g, no. moles): ii) Provide a reference for the procedure you used, and the reaction that relates to your work: iii) Describe the full procedure which you followed, including pictures of the TLC plate with solvents used: iv) Give the yield of product you obtained (mass in g, no. moles, % obtained, solvent from which it was recrystalised if applicable), and melting point if it was a solid: v) Confirm that you have handed in a labelled (with your name and a diagram of the
compound) sample by ticking this box: � vi) Draw a picture of your step 3 product, or insert from chemical-drawing software:
28
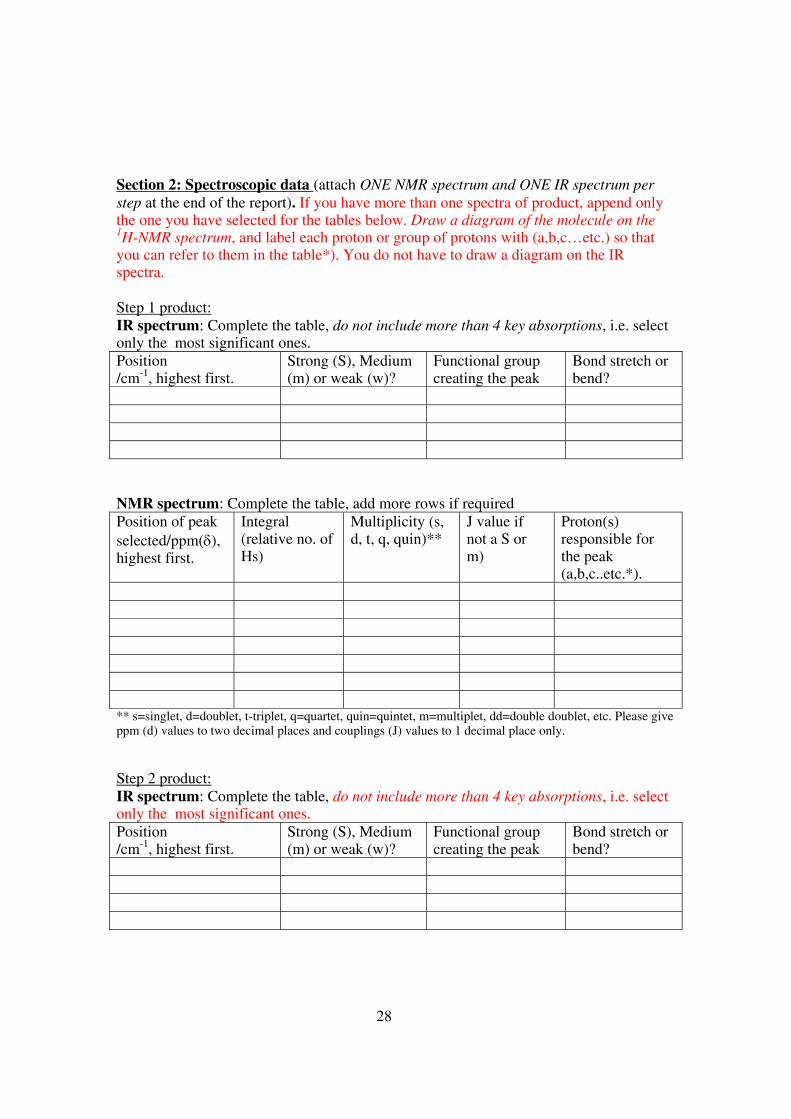
Section 2: Spectroscopic data (attach ONE NMR spectrum and ONE IR spectrum per step at the end of the report). If you have more than one spectra of product, append only the one you have selected for the tables below. Draw a diagram of the molecule on the 1H-NMR spectrum, and label each proton or group of protons with (a,b,c…etc.) so that you can refer to them in the table*). You do not have to draw a diagram on the IR spectra. Step 1 product: IR spectrum: Complete the table, do not include more than 4 key absorptions, i.e. select only the most significant ones. Position /cm-1, highest first.
Strong (S), Medium (m) or weak (w)?
Functional group creating the peak
Bond stretch or bend?
NMR spectrum: Complete the table, add more rows if required Position of peak selected/ppm(δ), highest first.
Integral (relative no. of Hs)
Multiplicity (s, d, t, q, quin)**
J value if not a S or m)
Proton(s) responsible for the peak (a,b,c..etc.*).
** s=singlet, d=doublet, t-triplet, q=quartet, quin=quintet, m=multiplet, dd=double doublet, etc. Please give ppm (d) values to two decimal places and couplings (J) values to 1 decimal place only. Step 2 product: IR spectrum: Complete the table, do not include more than 4 key absorptions, i.e. select only the most significant ones. Position /cm-1, highest first.
Strong (S), Medium (m) or weak (w)?
Functional group creating the peak
Bond stretch or bend?

29
NMR spectrum: Complete the table, add more rows if required Position of peak selected/ppm(δ), highest first.
Integral (relative no. of Hs)
Multiplicity (s, d, t, q, quin)**
J value if not a S or m)
Proton(s) responsible for the peak (a,b,c..etc.*).
** s=singlet, d=doublet, t-triplet, q=quartet, quin=quintet, m=multiplet, dd=double doublet, etc. Please give ppm (d) values to two decimal places and couplings (J) values to 1 decimal place only. Step 3 product: IR spectrum: Complete the table, do not include more than 4 key absorptions, i.e. select only the most significant ones. Position of peak /cm-1, highest first.
Strong (S), Medium (m) or weak (w)?
Functional group creating the peak
Bond stretch or bend?
NMR spectrum: Complete the table, you may add more rows if required. Position selected/ppm(δ), highest first.
Integral (relative no. of Hs)
Multiplicity (s, d, t, q, quin)**
J value(s) if not m or s)
Proton(s) responsible for the peak (a,b,c..etc.*).
** s=singlet, d=doublet, t-triplet, q=quartet, quin=quintet, m=multiplet, dd=double doublet, etc. Please give ppm (d) values to two decimal places and coulings (J) values to 1 decimal place only. Section 3: Reaction mechanisms: Illustrate below (free hand or computer-drawn) the reaction mechanisms for each step of the synthesis you have carried out:

30
31
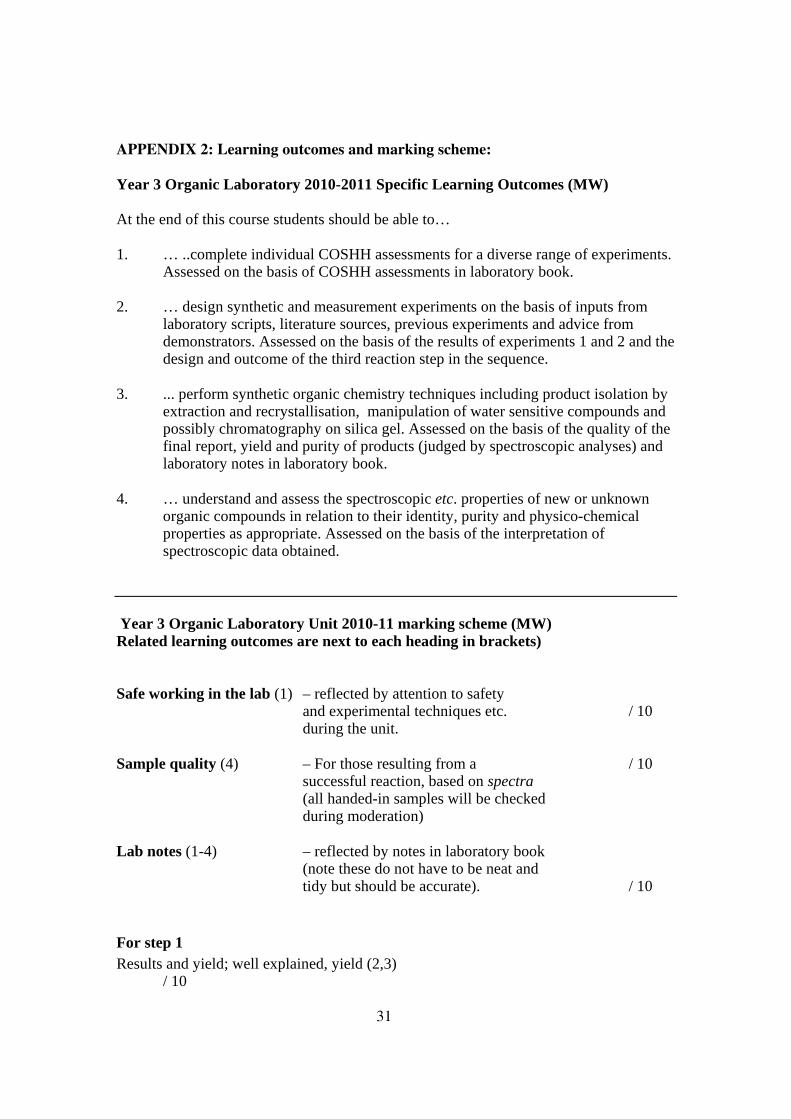
APPENDIX 2: Learning outcomes and marking scheme: Year 3 Organic Laboratory 2010-2011 Specific Learning Outcomes (MW) At the end of this course students should be able to… 1. … ..complete individual COSHH assessments for a diverse range of experiments.
Assessed on the basis of COSHH assessments in laboratory book. 2. … design synthetic and measurement experiments on the basis of inputs from
laboratory scripts, literature sources, previous experiments and advice from demonstrators. Assessed on the basis of the results of experiments 1 and 2 and the design and outcome of the third reaction step in the sequence.
3. ... perform synthetic organic chemistry techniques including product isolation by
extraction and recrystallisation, manipulation of water sensitive compounds and possibly chromatography on silica gel. Assessed on the basis of the quality of the final report, yield and purity of products (judged by spectroscopic analyses) and laboratory notes in laboratory book.
4. … understand and assess the spectroscopic etc. properties of new or unknown
organic compounds in relation to their identity, purity and physico-chemical properties as appropriate. Assessed on the basis of the interpretation of spectroscopic data obtained.
Year 3 Organic Laboratory Unit 2010-11 marking scheme (MW) Related learning outcomes are next to each heading in brackets) Safe working in the lab (1) – reflected by attention to safety and experimental techniques etc. / 10 during the unit. Sample quality (4) – For those resulting from a / 10
successful reaction, based on spectra (all handed-in samples will be checked
during moderation) Lab notes (1-4) – reflected by notes in laboratory book
(note these do not have to be neat and tidy but should be accurate). / 10
For step 1 Results and yield; well explained, yield (2,3) / 10

32
Quality of spectroscopic interpretation (4) / 10
For step 2 Results and yield; well explained, yield (2,3) / 10 Quality of spectroscopic interpretation (4) / 10
For step 3 Results and yield; well explained, yield (2,3) / 10 And Quality of spectroscopic interpretation (4) Reactions which failed consistently at this stage, i.e. due to not-reactivity of a particular reagent may not count towards the final mark count. Instead the marks for steps 1 and 2 will be adjusted to compensate. Design of experiment based on literature precedents (2) /10 Mechanisms (2) /10
Total /100 Loss of marks; Students should be advised that marks will be reduced by 10% i) if an experiment is not accompanied by a signed (by an academic) safety assessment, ii) if the final report is over 4 pages in length (with margins, but not counting spectra, which may be added as an appendix). Marks will also be reduced if the report is handed in late without permission or good reason.