Embed Size (px)
Citation preview
SusanFerdon,EDTECH552SP11
Module 7, Server Project
Overview
The goal of this project was to set up my home computer to be a server and
create a webpage to be hosted by that server. The assignment required that I download
and install an Apache server and use no-IP to set up dynamic DNS, to allow the server
to be found when my ISP changes the IP address of the computer the server is on. My
computer is a MacBook Pro running Windows XP on Parallels and, when at home, I
connect to the Internet via Comcast wireless Netgear router. I also have an AT&T USB
modem that is used for Internet access when away from home or work. My initial plan
was to set up the server on the Parallels side of my Mac using my home wireless
network. I encountered some difficulty along the way, as you will see in the procedures
listed below, and finally ended up using my husband’s Windows laptop as the server.
The website template I selected was Pedestrian from www.freecsstemplates.org.
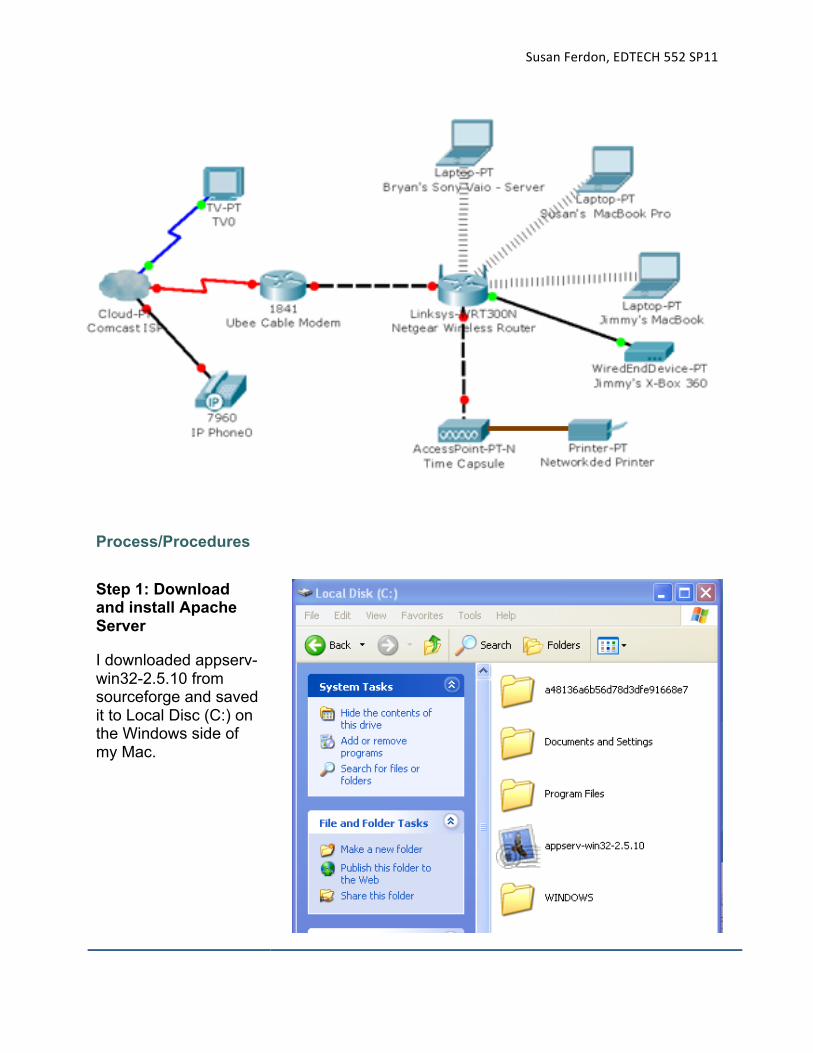
Network Layout
The Internet Service Provider (ISP) for my home network is Comcast cable. A
Netgear router is connected to a Ubee cable modem which provides a wireless network.
The Sony Vaio laptop, acting as server, is currently connected to the Netgear router
with an Ethernet cable. The diagram below shows wireless connection to the Comcast
network named Ferdon Home Network. The laptops also connect wirelessly to the Time
Capsule - it backs up the Macs and provides wireless access to the printer. In making
the diagram, it was not possible to show the USB connection from the printer to the
Time Capsule so that line (brown) was drawn in outside of Packet Tracer. Another thing
that was not possible using Packet Tracer is an accurate representation of the coaxial
cable. One coaxial cable enters the house and is connected to splitters so the one cable
splits into three. One cable goes to the TV, another goes to the phone, and the third
goes to the Ubee RF Cable modem. Only the TV allowed coaxial cable (blue jagged
line) to be shown in Packet Tracer. A more accurate representation would show the
phone and Ubee cable modem connecting to the ISP with blue jagged lines as well.
SusanFerdon,EDTECH552SP11
Process/Procedures
Step 1: Download and install Apache Server
I downloaded appserv-win32-2.5.10 from sourceforge and saved it to Local Disc (C:) on the Windows side of my Mac.

SusanFerdon,EDTECH552SP11
Step 2: Confirm Installation
Upon installation, the Installation Wizard asked if I wanted to unblock the application (firewall) and I did. When URL http://127.0.0.1 was entered into a browser (again, in Parallels) the content that appeared confirmed that installation was successful.
Step 3: PHP
I entered URL http://127.0.0.1/phpinfo and PHP information appeared.
SusanFerdon,EDTECH552SP11
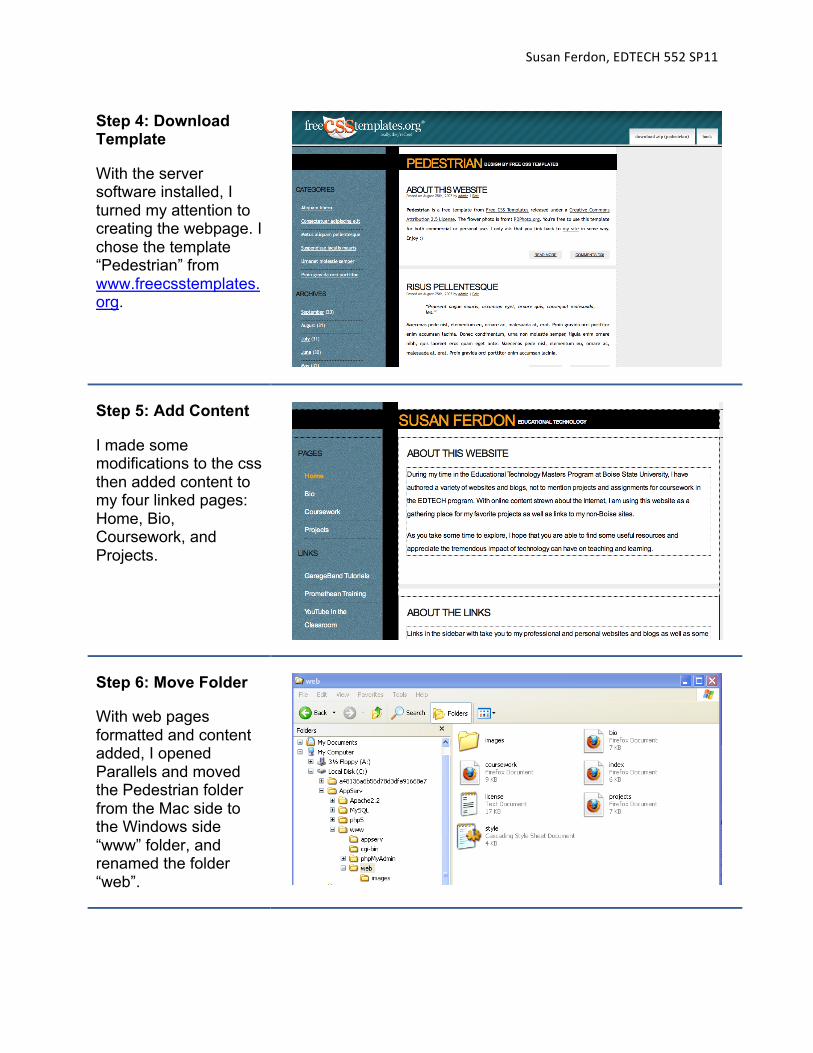
Step 4: Download Template
With the server software installed, I turned my attention to creating the webpage. I chose the template “Pedestrian” from www.freecsstemplates.org.
Step 5: Add Content
I made some modifications to the css then added content to my four linked pages: Home, Bio, Coursework, and Projects.
Step 6: Move Folder
With web pages formatted and content added, I opened Parallels and moved the Pedestrian folder from the Mac side to the Windows side “www” folder, and renamed the folder “web”.
SusanFerdon,EDTECH552SP11
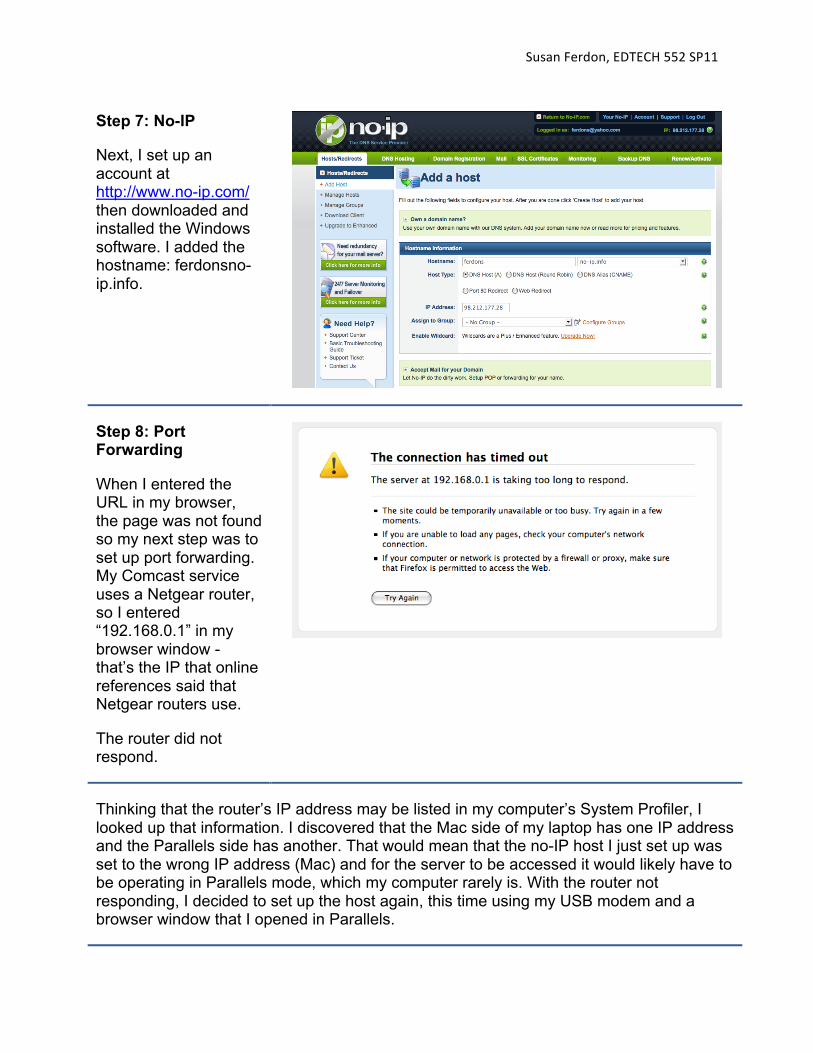
Step 7: No-IP
Next, I set up an account at http://www.no-ip.com/ then downloaded and installed the Windows software. I added the hostname: ferdonsno-ip.info.
Step 8: Port Forwarding
When I entered the URL in my browser, the page was not found so my next step was to set up port forwarding. My Comcast service uses a Netgear router, so I entered “192.168.0.1” in my browser window - that’s the IP that online references said that Netgear routers use.
The router did not respond.
Thinking that the router’s IP address may be listed in my computer’s System Profiler, I looked up that information. I discovered that the Mac side of my laptop has one IP address and the Parallels side has another. That would mean that the no-IP host I just set up was set to the wrong IP address (Mac) and for the server to be accessed it would likely have to be operating in Parallels mode, which my computer rarely is. With the router not responding, I decided to set up the host again, this time using my USB modem and a browser window that I opened in Parallels.
SusanFerdon,EDTECH552SP11
I later learned that the reason the router did not respond was that it uses 192.168.1.1, not 192.168.0.1. Either way, I wanted to go through my USB modem at this point in hopes that it would be easier to set up and would also keep my home network more secure.
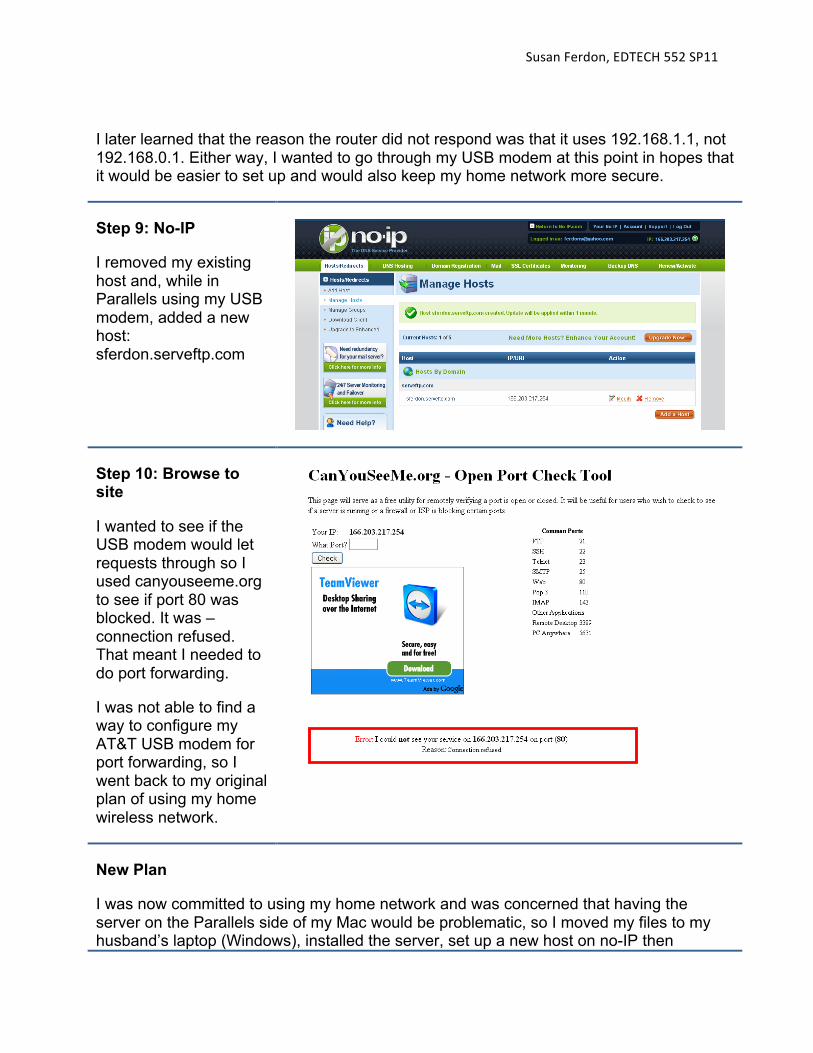
Step 9: No-IP
I removed my existing host and, while in Parallels using my USB modem, added a new host: sferdon.serveftp.com
Step 10: Browse to site
I wanted to see if the USB modem would let requests through so I used canyouseeme.org to see if port 80 was blocked. It was – connection refused. That meant I needed to do port forwarding.
I was not able to find a way to configure my AT&T USB modem for port forwarding, so I went back to my original plan of using my home wireless network.
New Plan
I was now committed to using my home network and was concerned that having the server on the Parallels side of my Mac would be problematic, so I moved my files to my husband’s laptop (Windows), installed the server, set up a new host on no-IP then
SusanFerdon,EDTECH552SP11
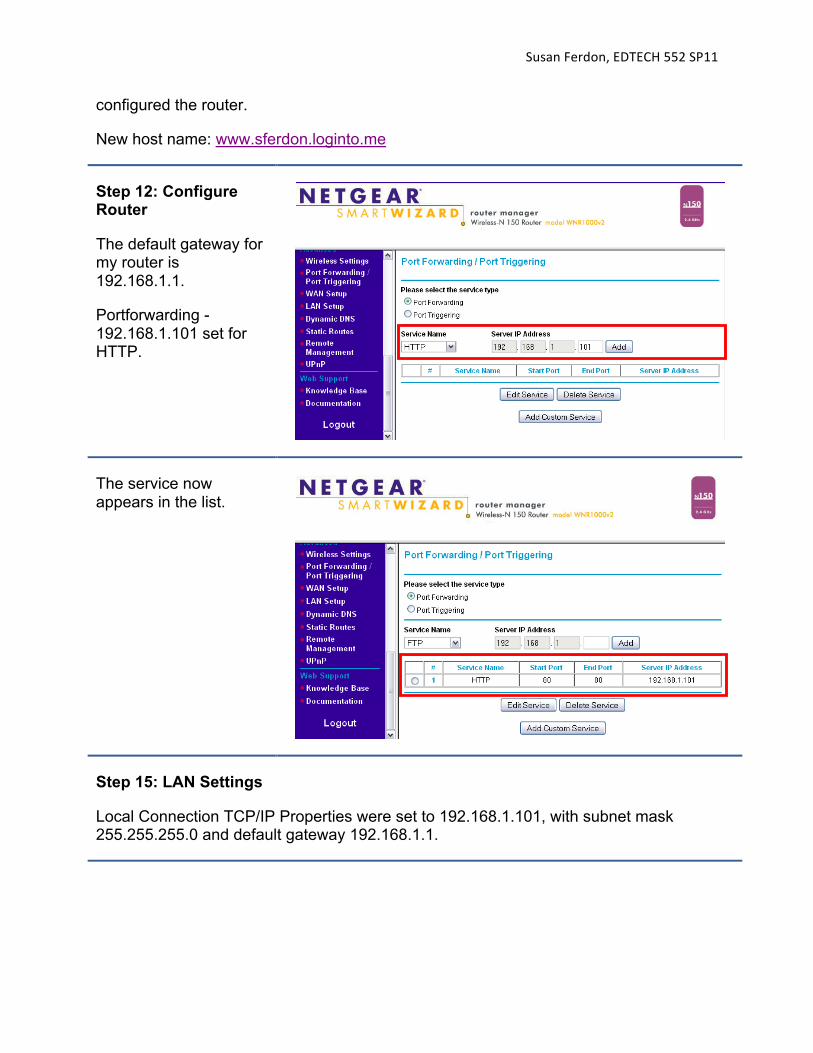
configured the router.
New host name: www.sferdon.loginto.me
Step 12: Configure Router
The default gateway for my router is 192.168.1.1.
Portforwarding - 192.168.1.101 set for HTTP.
The service now appears in the list.
Step 15: LAN Settings
Local Connection TCP/IP Properties were set to 192.168.1.101, with subnet mask 255.255.255.0 and default gateway 192.168.1.1.
SusanFerdon,EDTECH552SP11
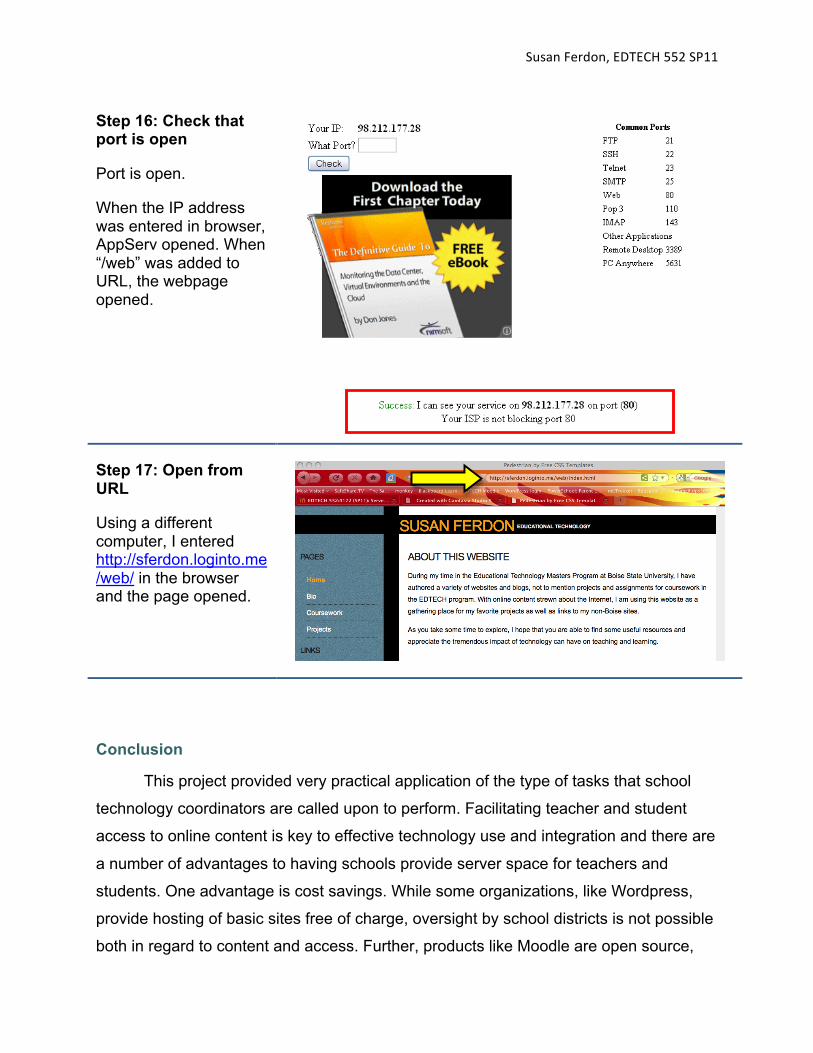
Step 16: Check that port is open
Port is open.
When the IP address was entered in browser, AppServ opened. When “/web” was added to URL, the webpage opened.
Step 17: Open from URL
Using a different computer, I entered http://sferdon.loginto.me/web/ in the browser and the page opened.
Conclusion
This project provided very practical application of the type of tasks that school
technology coordinators are called upon to perform. Facilitating teacher and student
access to online content is key to effective technology use and integration and there are
a number of advantages to having schools provide server space for teachers and
students. One advantage is cost savings. While some organizations, like Wordpress,
provide hosting of basic sites free of charge, oversight by school districts is not possible
both in regard to content and access. Further, products like Moodle are open source,
SusanFerdon,EDTECH552SP11
therefore free of charge, but hosting services charge based on the number of users.
Hosting websites and Learning Management Systems on school equipment means that
access can be controlled and there is in-house support at no additional cost, aside from
hardware requirements. PHP and MySQL environments, like Moodle, Joomla and
Wordpress provide a means for teachers communicate and provide content to students
in a customizable format that is easy to access.
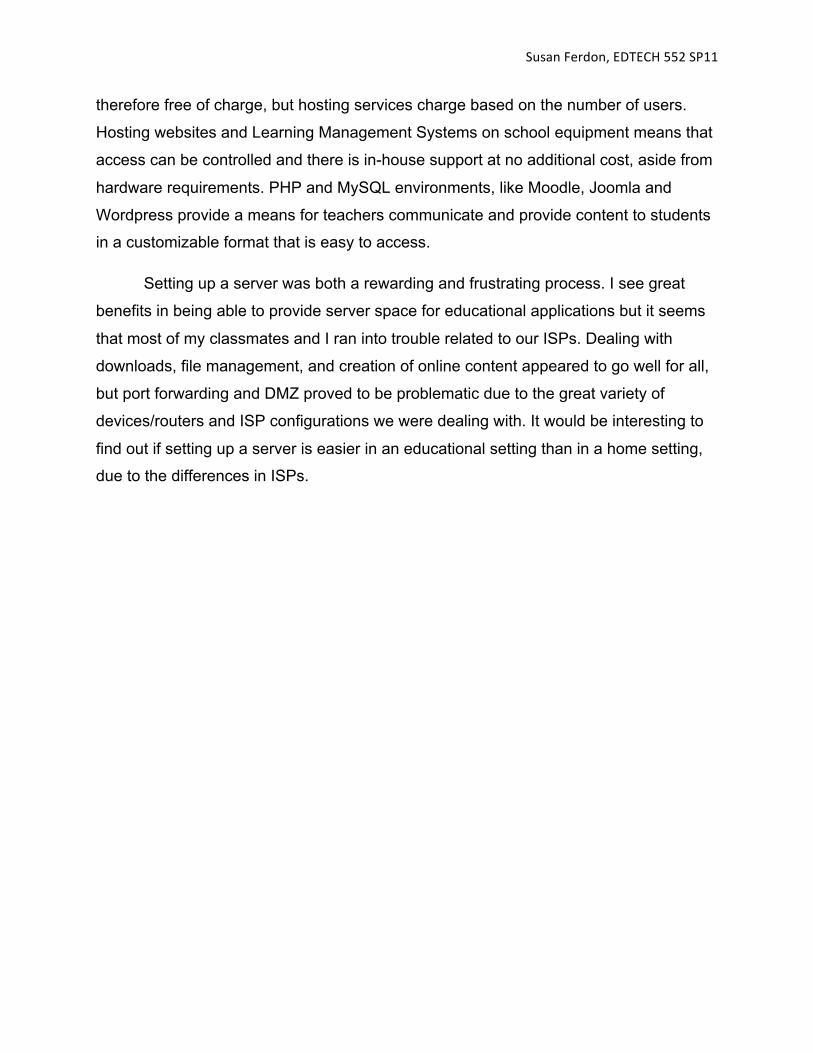
Setting up a server was both a rewarding and frustrating process. I see great
benefits in being able to provide server space for educational applications but it seems
that most of my classmates and I ran into trouble related to our ISPs. Dealing with
downloads, file management, and creation of online content appeared to go well for all,
but port forwarding and DMZ proved to be problematic due to the great variety of
devices/routers and ISP configurations we were dealing with. It would be interesting to
find out if setting up a server is easier in an educational setting than in a home setting,
due to the differences in ISPs.
SusanFerdon,EDTECH552SP11
Module 7, Server Project – Extra Credit
Overview
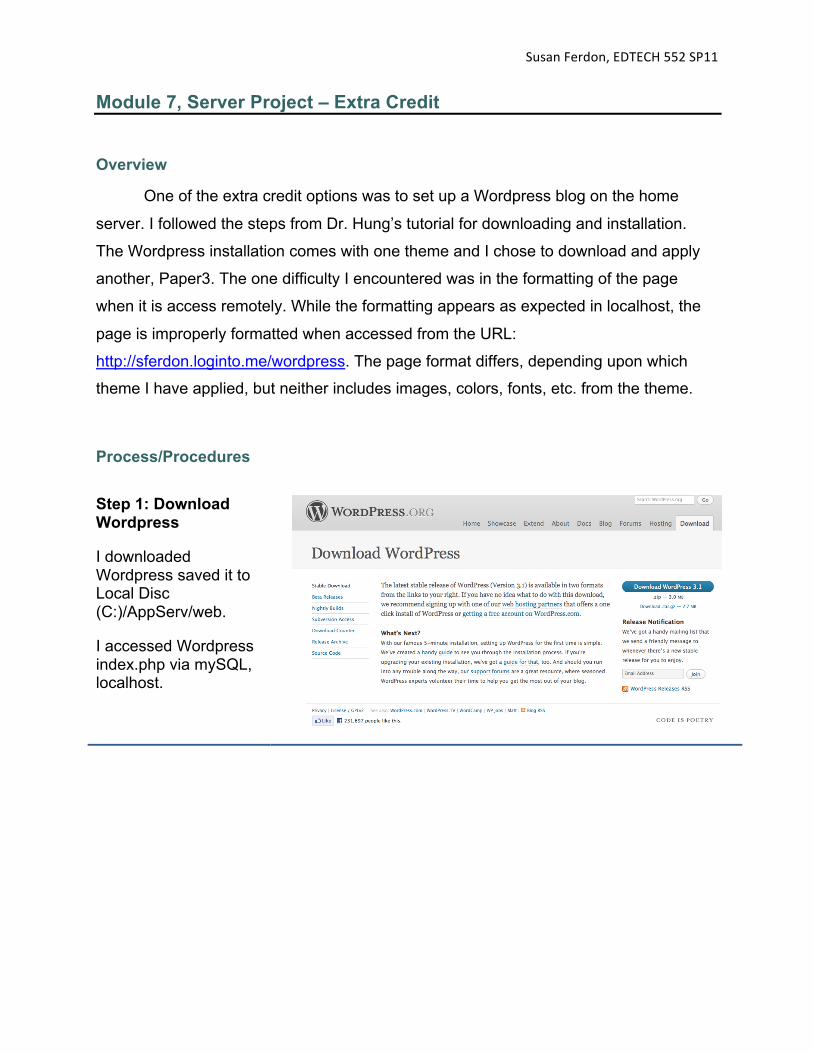
One of the extra credit options was to set up a Wordpress blog on the home
server. I followed the steps from Dr. Hung’s tutorial for downloading and installation.
The Wordpress installation comes with one theme and I chose to download and apply
another, Paper3. The one difficulty I encountered was in the formatting of the page
when it is access remotely. While the formatting appears as expected in localhost, the
page is improperly formatted when accessed from the URL:
http://sferdon.loginto.me/wordpress. The page format differs, depending upon which
theme I have applied, but neither includes images, colors, fonts, etc. from the theme.
Process/Procedures
Step 1: Download Wordpress
I downloaded Wordpress saved it to Local Disc (C:)/AppServ/web.
I accessed Wordpress index.php via mySQL, localhost.
SusanFerdon,EDTECH552SP11
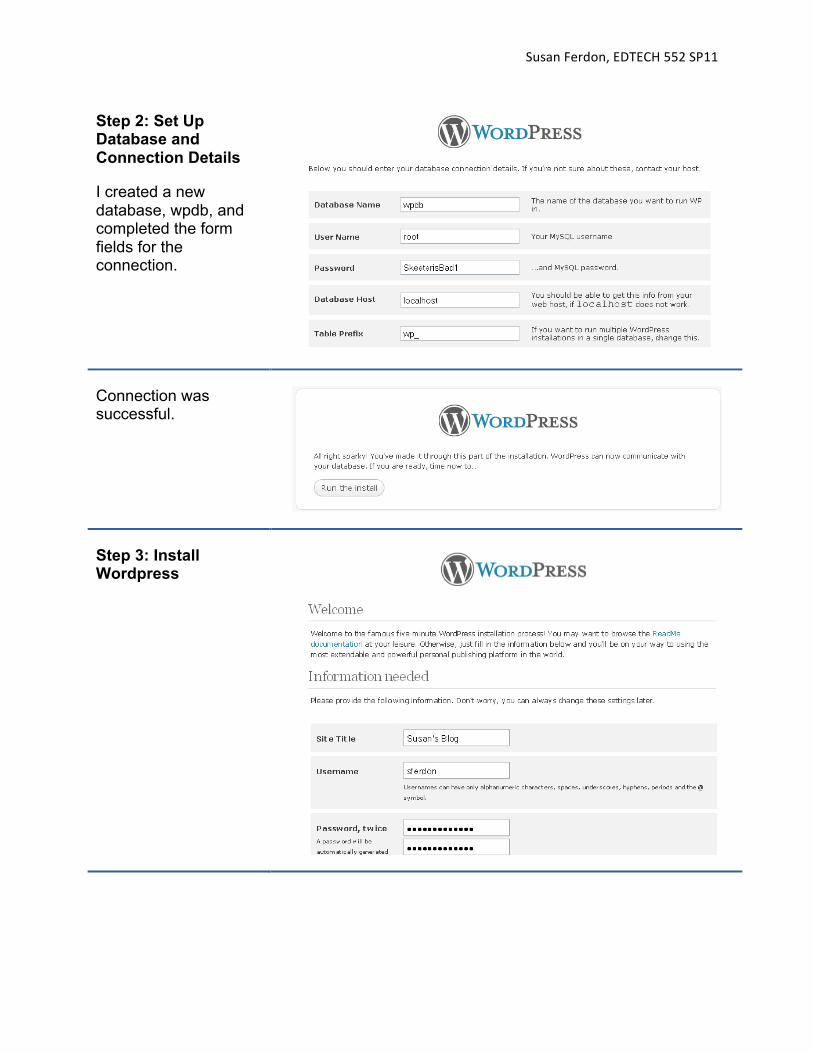
Step 2: Set Up Database and Connection Details
I created a new database, wpdb, and completed the form fields for the connection.
Connection was successful.
Step 3: Install Wordpress
SusanFerdon,EDTECH552SP11
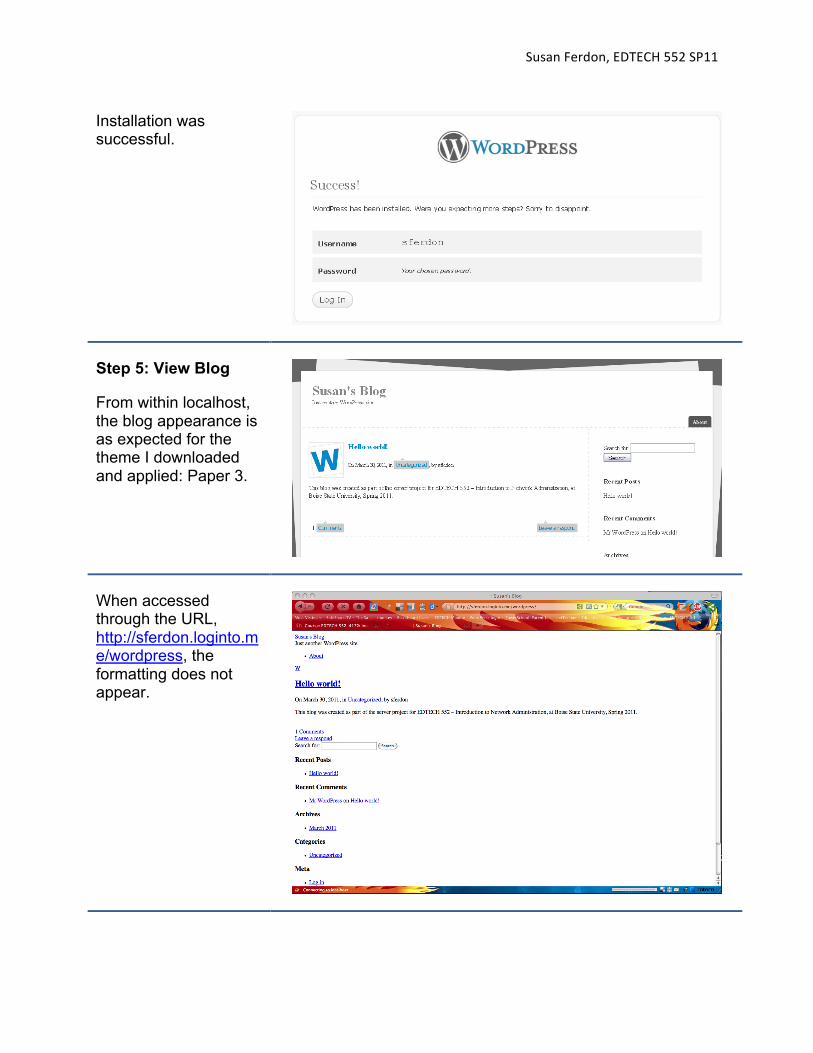
Installation was successful.
Step 5: View Blog
From within localhost, the blog appearance is as expected for the theme I downloaded and applied: Paper 3.
When accessed through the URL, http://sferdon.loginto.me/wordpress, the formatting does not appear.
SusanFerdon,EDTECH552SP11
Closing Thoughts
Having locally hosted blogs will make it easy for school technology coordinators
to help teachers get blogs up and running. However, I noticed a tremendous difference
in loading time between my simple four-page website and the database-driven blog.
The Wordpress blog has many more files to begin with and I added very little to it.
Loading time was such that, if I were a casual visitor, I would have given up before the
page loaded. School network administrators must be very aware of processing needs or
students and teachers will have a very difficult time accessing the content.