Embed Size (px)
Citation preview

UELT Moodle: Essentials (updated 12/7/2017) 1
Moodle: Essentials (Boost) Moodle is the Virtual Learning Environment (VLE) for the University of Kent. You can use Moodle to provide course materials such as hand-outs, lecture notes and PowerPoint presentations to your students. You can also use Moodle in more interactive ways which require input from your students; discussion forums, quizzes and assignment drop-boxes are available.
Moodle is easy to use, and should be very straightforward for anyone who is comfortable using the web. This document will provide you with an understanding of Moodle’s basic features, and will show you how to set up your modules, add and manage content, and make your module available to students.
Logging in
To access Moodle you need to open a web browser like Safari or Chrome.
1. In the address line of your browser, type the address moodle.kent.ac.uk/ (note: no www!), then click the Go button or hit Enter.
You will be taken to the Kent IT Account Logon page.
2. Enter your Kent username (e.g. abc1) and password, then click Login.
You will now see the Moodle front page.
Moodle Training Site
We have created a version of Moodle designed specifically for training. In this Moodle you will find several training modules, which contain training documents and videos on various elements of Moodle. To visit the Moodle training site, go to moodle.kent.ac.uk/training and log in as above.
You’ll notice that the site looks very similar to “live” Moodle, and all the standard resource and activity types are provided here. You can create your own training module, to use during formal training sessions and otherwise in any way you like, by following the instructions at the top of the front page.
Getting Started
Profile Bar – This drop-down menu, accessible from every page by clicking on your name (right), provides useful links, along with the logout button.
Bread-crumbs – You will find a “bread-crumb” trail on every page other than the front page. Bread-crumbs are displayed in the main content section, above the current module title. They indicate how you navigated to the current page and enable you to retrace your path back to your module page (DP6175: School…) or the front page (Home):
Help Icons – In several places within Moodle you will see help icons like this . Clicking this icon will open a new window displaying information about the related item.
Helpdesk Link – In the footer of every page you’ll find a link to contact the IS Helpdesk. Clicking the link will open your email program and address a message to the Helpdesk.
Popular sections
Module Content Rollover (p4)
Adding Content (p8)
Availability (p12)
UELT Moodle: Essentials (updated 12/7/2017) 2
Front Page
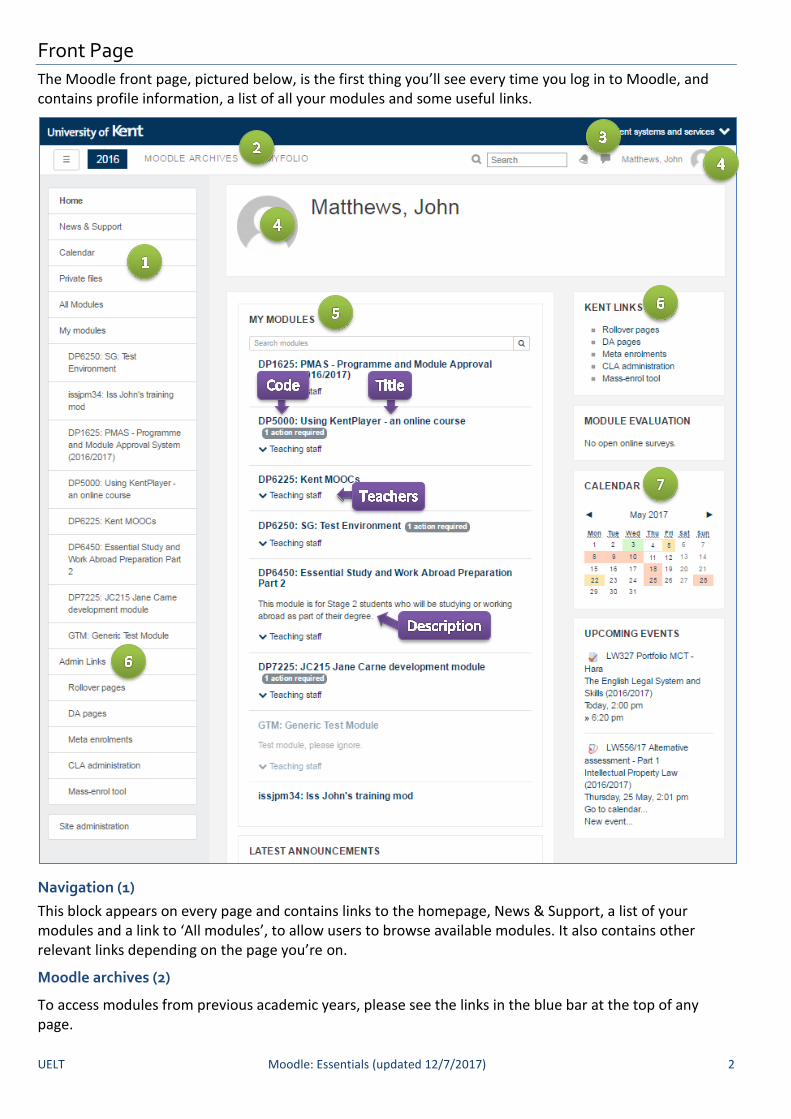
The Moodle front page, pictured below, is the first thing you’ll see every time you log in to Moodle, and contains profile information, a list of all your modules and some useful links.
Navigation (1)
This block appears on every page and contains links to the homepage, News & Support, a list of your modules and a link to ‘All modules’, to allow users to browse available modules. It also contains other relevant links depending on the page you’re on.
Moodle archives (2)
To access modules from previous academic years, please see the links in the blue bar at the top of any page.
UELT Moodle: Essentials (updated 12/7/2017) 3
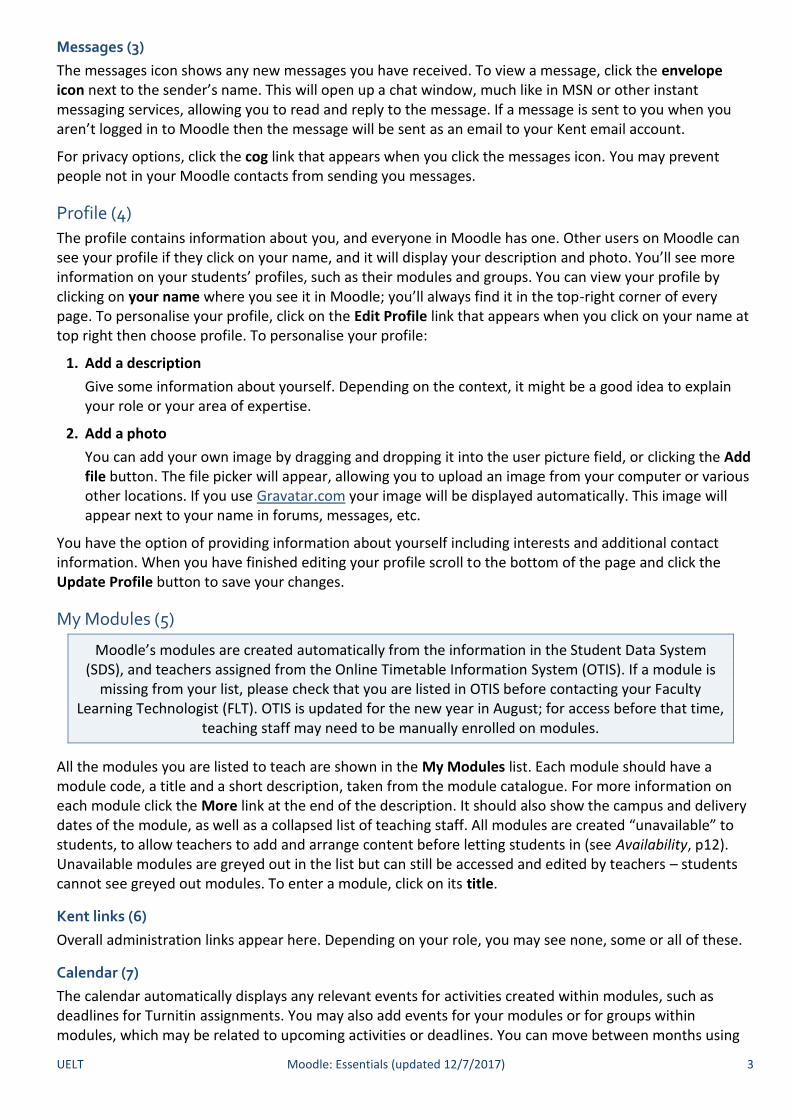
Messages (3)
The messages icon shows any new messages you have received. To view a message, click the envelope icon next to the sender’s name. This will open up a chat window, much like in MSN or other instant messaging services, allowing you to read and reply to the message. If a message is sent to you when you aren’t logged in to Moodle then the message will be sent as an email to your Kent email account.
For privacy options, click the cog link that appears when you click the messages icon. You may prevent people not in your Moodle contacts from sending you messages.
Profile (4)
The profile contains information about you, and everyone in Moodle has one. Other users on Moodle can see your profile if they click on your name, and it will display your description and photo. You’ll see more information on your students’ profiles, such as their modules and groups. You can view your profile by clicking on your name where you see it in Moodle; you’ll always find it in the top-right corner of every page. To personalise your profile, click on the Edit Profile link that appears when you click on your name at top right then choose profile. To personalise your profile:
1. Add a description
Give some information about yourself. Depending on the context, it might be a good idea to explain your role or your area of expertise.
2. Add a photo
You can add your own image by dragging and dropping it into the user picture field, or clicking the Add file button. The file picker will appear, allowing you to upload an image from your computer or various other locations. If you use Gravatar.com your image will be displayed automatically. This image will appear next to your name in forums, messages, etc.
You have the option of providing information about yourself including interests and additional contact information. When you have finished editing your profile scroll to the bottom of the page and click the Update Profile button to save your changes.
My Modules (5)
Moodle’s modules are created automatically from the information in the Student Data System (SDS), and teachers assigned from the Online Timetable Information System (OTIS). If a module is
missing from your list, please check that you are listed in OTIS before contacting your Faculty Learning Technologist (FLT). OTIS is updated for the new year in August; for access before that time,
teaching staff may need to be manually enrolled on modules.
All the modules you are listed to teach are shown in the My Modules list. Each module should have a module code, a title and a short description, taken from the module catalogue. For more information on each module click the More link at the end of the description. It should also show the campus and delivery dates of the module, as well as a collapsed list of teaching staff. All modules are created “unavailable” to students, to allow teachers to add and arrange content before letting students in (see Availability, p12). Unavailable modules are greyed out in the list but can still be accessed and edited by teachers – students cannot see greyed out modules. To enter a module, click on its title.
Kent links (6)
Overall administration links appear here. Depending on your role, you may see none, some or all of these.
Calendar (7)
The calendar automatically displays any relevant events for activities created within modules, such as deadlines for Turnitin assignments. You may also add events for your modules or for groups within modules, which may be related to upcoming activities or deadlines. You can move between months using
UELT Moodle: Essentials (updated 12/7/2017) 4
the arrows, or see a larger and more detailed calendar by clicking on the month name.
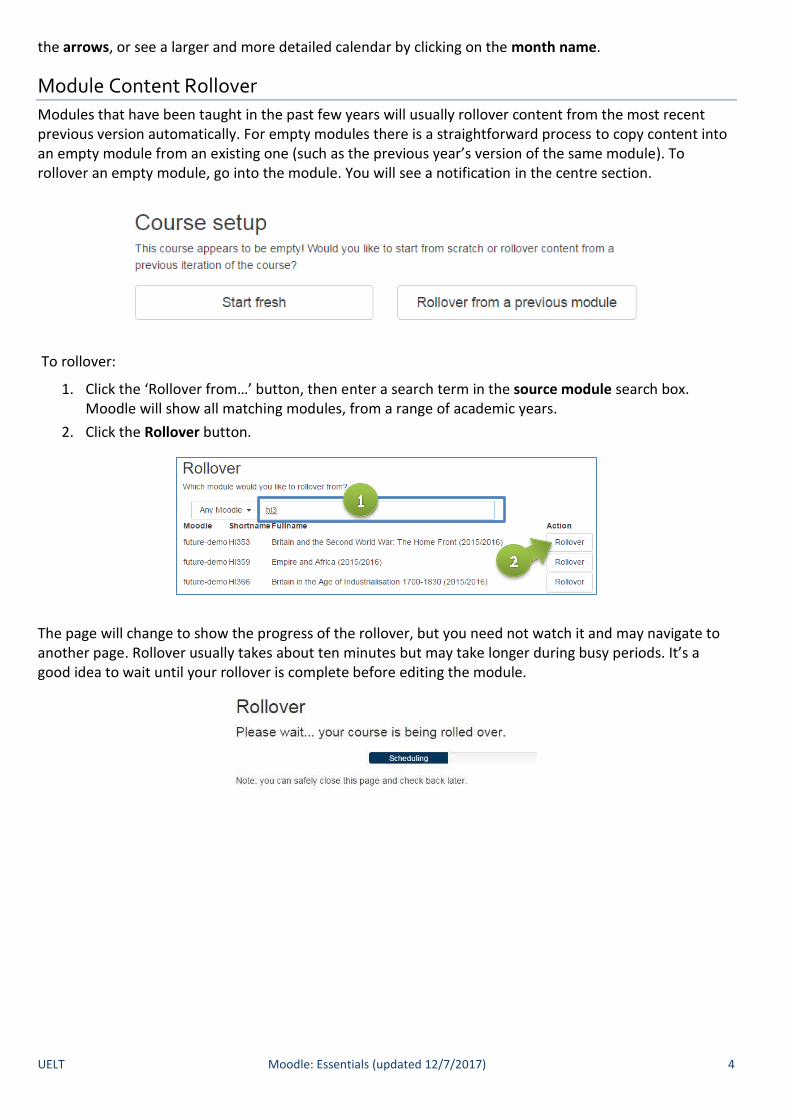
Module Content Rollover
Modules that have been taught in the past few years will usually rollover content from the most recent previous version automatically. For empty modules there is a straightforward process to copy content into an empty module from an existing one (such as the previous year’s version of the same module). To rollover an empty module, go into the module. You will see a notification in the centre section.
To rollover:
1. Click the ‘Rollover from…’ button, then enter a search term in the source module search box. Moodle will show all matching modules, from a range of academic years.
2. Click the Rollover button.
The page will change to show the progress of the rollover, but you need not watch it and may navigate to another page. Rollover usually takes about ten minutes but may take longer during busy periods. It’s a good idea to wait until your rollover is complete before editing the module.
UELT Moodle: Essentials (updated 12/7/2017) 5
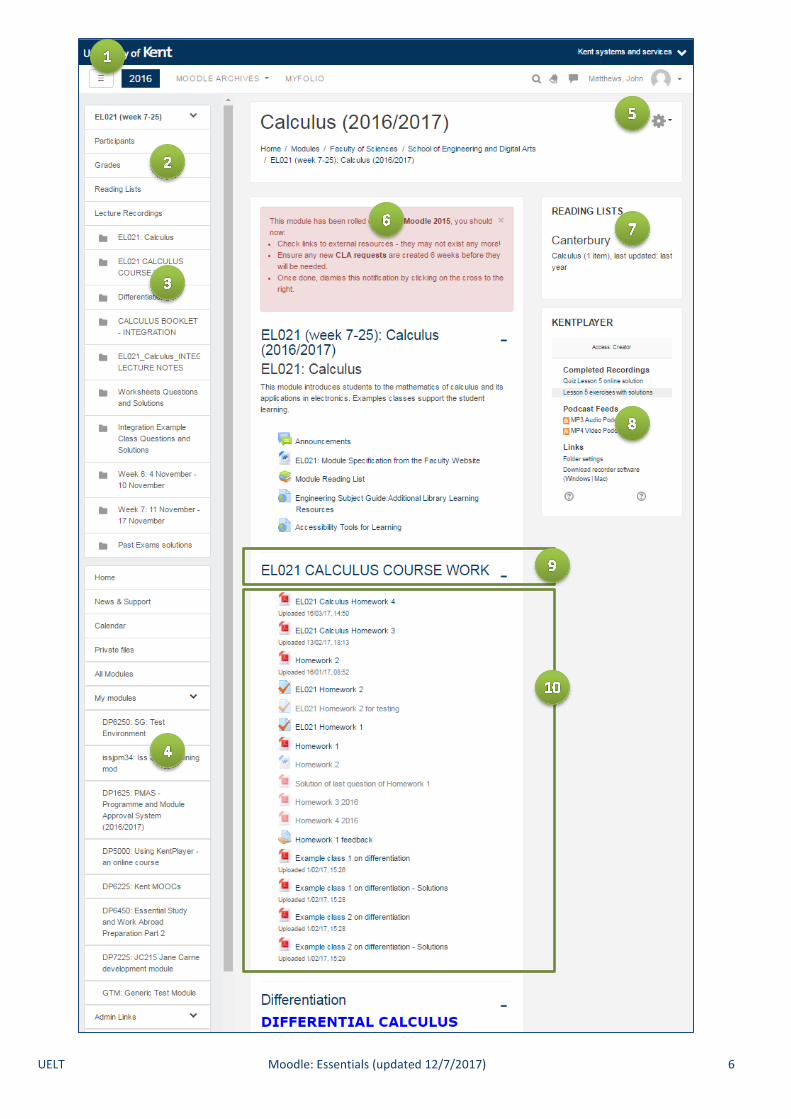
Modules
Each module (see screen shot on next page) consists of several content sections and a few blocks. You can add optional blocks, but there are fixed blocks in each module.
Hide navigation (1)
Use the ‘burger menu’ to hide and show the left navigation menu; creating more space is particularly useful on mobile devices.
Navigation (2)
On a module page this block shows links to Participants (a list of all users enrolled on the module), Grades, Reading Lists and Lecture Recordings.
In-module navigation (3)
Section headings appear on the left-hand side, allowing you to jump down the page.
List of enrolled modules (4)
To go to other modules, use the links on the left-hand side, or return to the home page by clicking on the year at top left.
Context menu (5)
The cog icon gives access to administrative functions, including turn editing on.
Notifications (6)
These are module-specific, not visible to students and intended to help you set up your module. To make a module visible to students, click the pencil icon next to the notification and change the setting to ‘show’.
Reading Lists (7)
This block links to the electronic reading list linked to the module, if one has been created on the library system. Contact the library if you need help with reading lists.
KentPlayer (8)
Any recordings made to the module’s folder will appear in this block. With editing switched on, you may also drag them into the main content area in the middle.
Sections (9)
Each module consists of numbered boxes called sections. Each section has a title (9) and a content area below (10), separated by a line. Each section is titled with a week’s date spread; it is recommended you replace this with a title.
Note: Newly created modules have no content, and so the sections appear as titles only.
Module Layout
The following sections will show how to transfer content from existing modules and add your own, but you should also think about how you want to arrange the content of your modules.
The top section of every module is populated with the module name, but it’s a good idea to add some text explaining a little about the module itself and, crucially, how you intend to use Moodle for the module. The top section is also the best place to put generic information and resources related to the module so you could, for instance, upload the module handbook.
All other sections can be used in whatever way you choose. However, before you start you should decide on the layout you will use. We recommend Weekly layout, where each section represents one week of the module, helping students find all relevant content for each week in one place.
Whichever layout you choose, give each section a title, plus (ideally) some descriptive information within the summary field, e.g. general information about the topic or any particularly important content.
UELT Moodle: Essentials (updated 12/7/2017) 6
UELT Moodle: Essentials (updated 12/7/2017) 7
Editing your module
The first thing you need to do to add or manage content in your modules is to Turn editing on. You will find
this option within the cog menu at the top right .
Managing Sections
With editing on, sections can be rearranged (by dragging the Move icon in the top-left corner) and hidden (Choose Edit-Hide week). You can edit the section title and the text-based summary, to provide descriptive information about the content of the section, by clicking the edit section icon. However, sections can’t be deleted.
To increase or reduce the number of sections in your module, click the plus or minus icon below the very last section on the page. If you reduce the number of sections, those at the bottom of the page are removed from view; any content within them still exists and can be restored by increasing the number of sections.
If your module has lots of content, you can simplify the students’ view of the module by enabling “One section per page”. To do this:
1. Choose the cog icon, top right, then choose Edit Settings.
2. Under Module format, select Show one section per page next to Course layout.
3. Scroll to the bottom of the page and click the Save changes button.
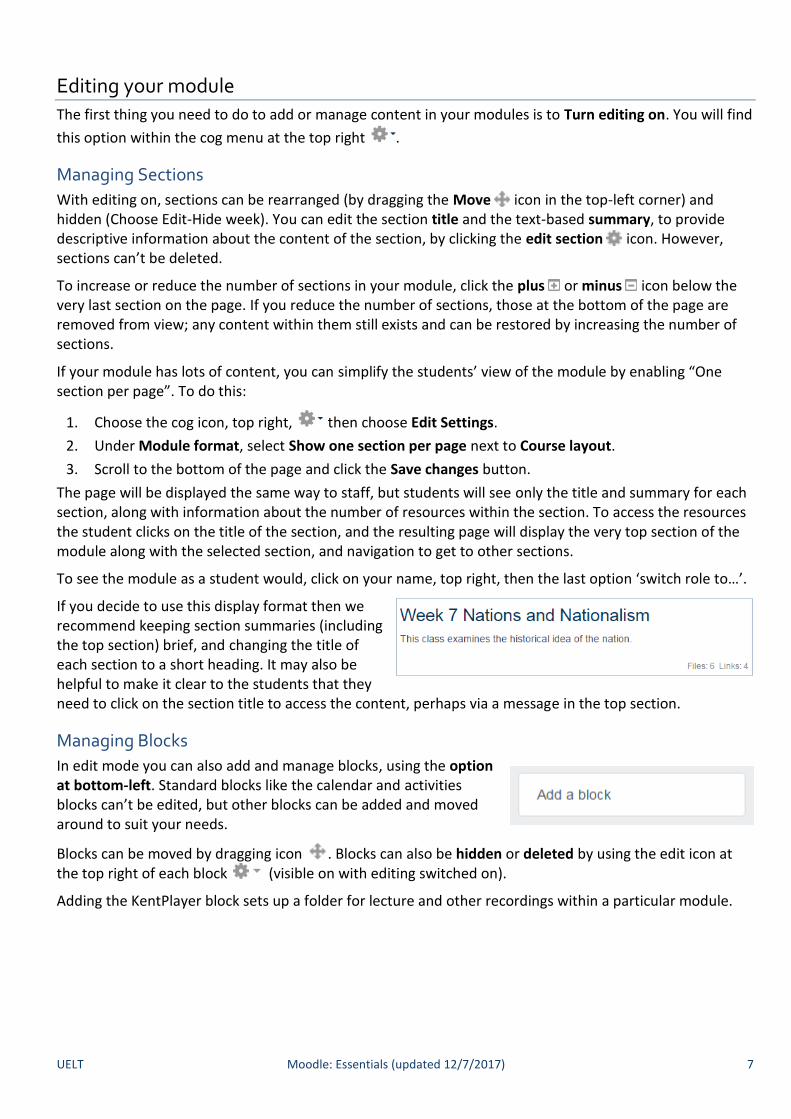
The page will be displayed the same way to staff, but students will see only the title and summary for each section, along with information about the number of resources within the section. To access the resources the student clicks on the title of the section, and the resulting page will display the very top section of the module along with the selected section, and navigation to get to other sections.
To see the module as a student would, click on your name, top right, then the last option ‘switch role to…’.
If you decide to use this display format then we recommend keeping section summaries (including the top section) brief, and changing the title of each section to a short heading. It may also be helpful to make it clear to the students that they need to click on the section title to access the content, perhaps via a message in the top section.
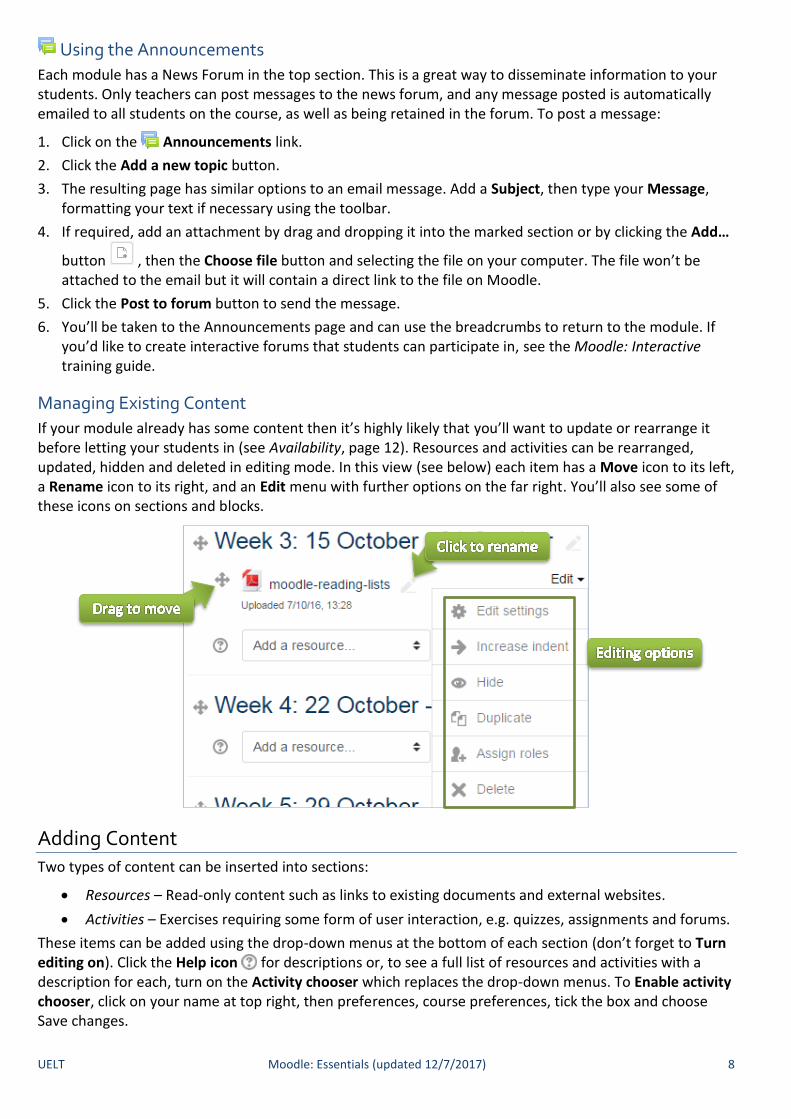
Managing Blocks
In edit mode you can also add and manage blocks, using the option at bottom-left. Standard blocks like the calendar and activities blocks can’t be edited, but other blocks can be added and moved around to suit your needs.
Blocks can be moved by dragging icon . Blocks can also be hidden or deleted by using the edit icon at the top right of each block (visible on with editing switched on).
Adding the KentPlayer block sets up a folder for lecture and other recordings within a particular module.
UELT Moodle: Essentials (updated 12/7/2017) 8
Using the Announcements
Each module has a News Forum in the top section. This is a great way to disseminate information to your students. Only teachers can post messages to the news forum, and any message posted is automatically emailed to all students on the course, as well as being retained in the forum. To post a message:
1. Click on the Announcements link.
2. Click the Add a new topic button.
3. The resulting page has similar options to an email message. Add a Subject, then type your Message, formatting your text if necessary using the toolbar.
4. If required, add an attachment by drag and dropping it into the marked section or by clicking the Add…
button , then the Choose file button and selecting the file on your computer. The file won’t be attached to the email but it will contain a direct link to the file on Moodle.
5. Click the Post to forum button to send the message.
6. You’ll be taken to the Announcements page and can use the breadcrumbs to return to the module. If you’d like to create interactive forums that students can participate in, see the Moodle: Interactive training guide.
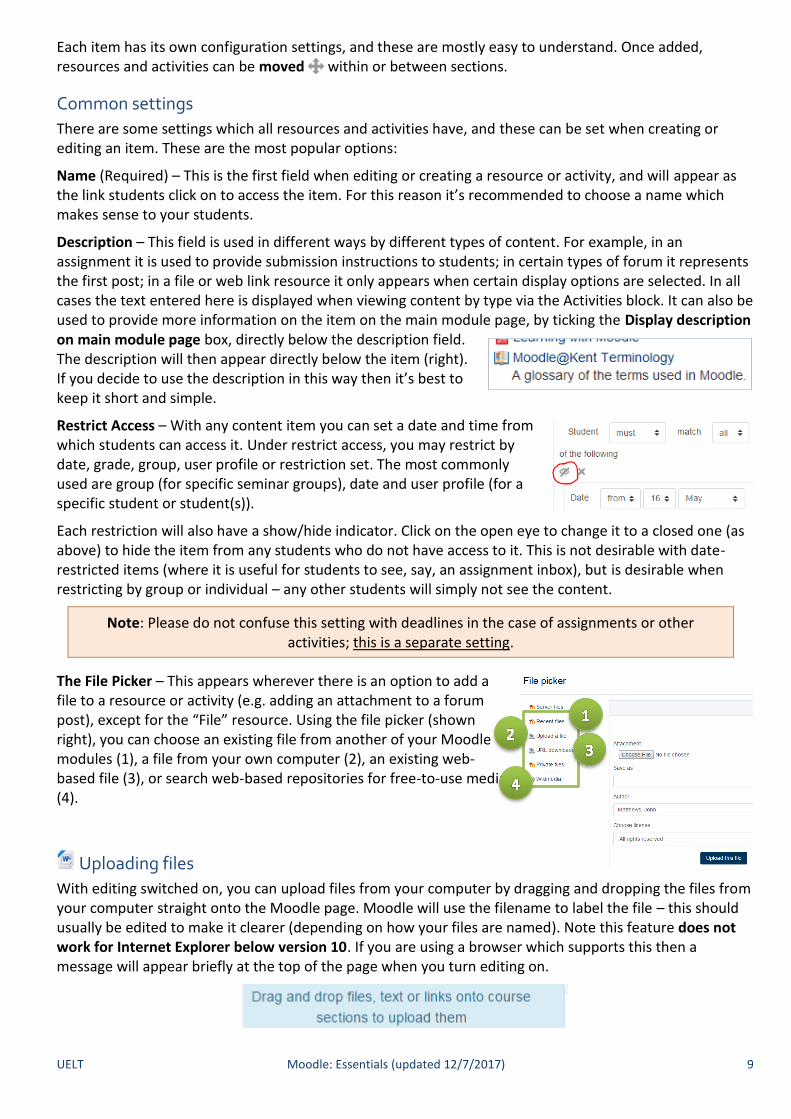
Managing Existing Content
If your module already has some content then it’s highly likely that you’ll want to update or rearrange it before letting your students in (see Availability, page 12). Resources and activities can be rearranged, updated, hidden and deleted in editing mode. In this view (see below) each item has a Move icon to its left, a Rename icon to its right, and an Edit menu with further options on the far right. You’ll also see some of these icons on sections and blocks.
Adding Content
Two types of content can be inserted into sections:
Resources – Read-only content such as links to existing documents and external websites.
Activities – Exercises requiring some form of user interaction, e.g. quizzes, assignments and forums.
These items can be added using the drop-down menus at the bottom of each section (don’t forget to Turn editing on). Click the Help icon for descriptions or, to see a full list of resources and activities with a description for each, turn on the Activity chooser which replaces the drop-down menus. To Enable activity chooser, click on your name at top right, then preferences, course preferences, tick the box and choose Save changes.
UELT Moodle: Essentials (updated 12/7/2017) 9
Each item has its own configuration settings, and these are mostly easy to understand. Once added, resources and activities can be moved within or between sections.
Common settings
There are some settings which all resources and activities have, and these can be set when creating or editing an item. These are the most popular options:
Name (Required) – This is the first field when editing or creating a resource or activity, and will appear as the link students click on to access the item. For this reason it’s recommended to choose a name which makes sense to your students.
Description – This field is used in different ways by different types of content. For example, in an assignment it is used to provide submission instructions to students; in certain types of forum it represents the first post; in a file or web link resource it only appears when certain display options are selected. In all cases the text entered here is displayed when viewing content by type via the Activities block. It can also be used to provide more information on the item on the main module page, by ticking the Display description on main module page box, directly below the description field. The description will then appear directly below the item (right). If you decide to use the description in this way then it’s best to keep it short and simple.
Restrict Access – With any content item you can set a date and time from which students can access it. Under restrict access, you may restrict by date, grade, group, user profile or restriction set. The most commonly used are group (for specific seminar groups), date and user profile (for a specific student or student(s)).
Each restriction will also have a show/hide indicator. Click on the open eye to change it to a closed one (as above) to hide the item from any students who do not have access to it. This is not desirable with date-restricted items (where it is useful for students to see, say, an assignment inbox), but is desirable when restricting by group or individual – any other students will simply not see the content.
Note: Please do not confuse this setting with deadlines in the case of assignments or other activities; this is a separate setting.
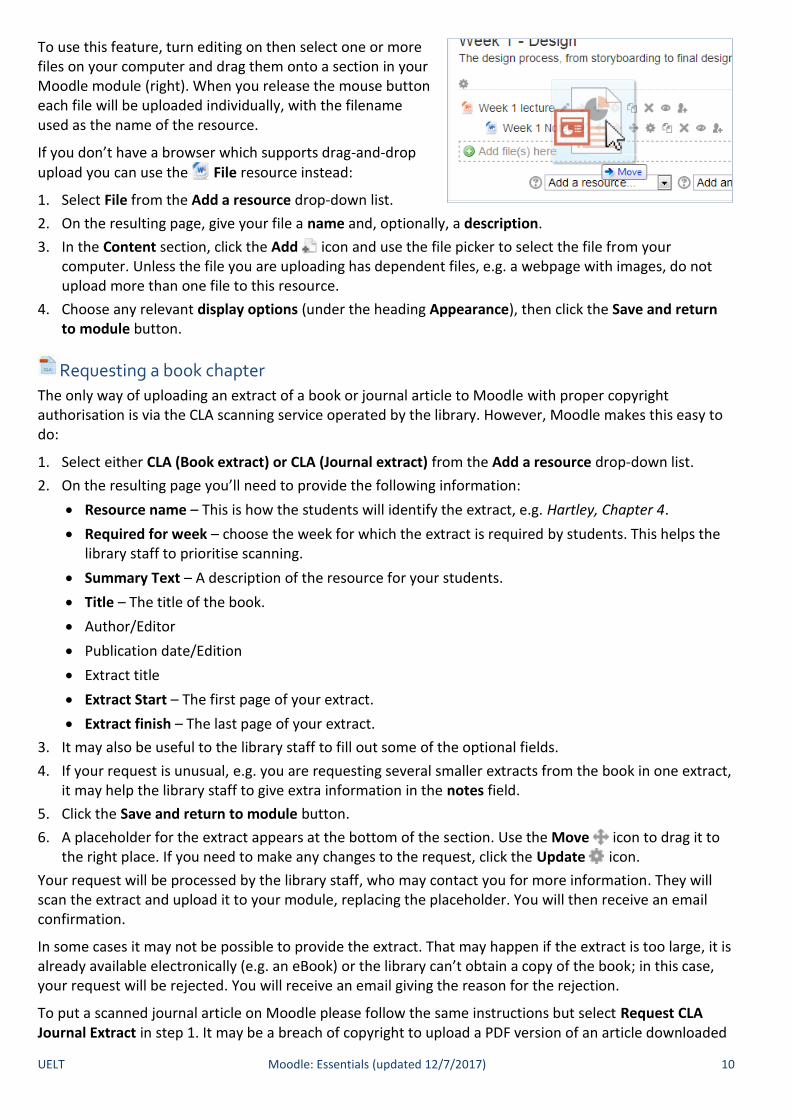
The File Picker – This appears wherever there is an option to add a file to a resource or activity (e.g. adding an attachment to a forum post), except for the “File” resource. Using the file picker (shown right), you can choose an existing file from another of your Moodle modules (1), a file from your own computer (2), an existing web-based file (3), or search web-based repositories for free-to-use media (4).
Uploading files
With editing switched on, you can upload files from your computer by dragging and dropping the files from your computer straight onto the Moodle page. Moodle will use the filename to label the file – this should usually be edited to make it clearer (depending on how your files are named). Note this feature does not work for Internet Explorer below version 10. If you are using a browser which supports this then a message will appear briefly at the top of the page when you turn editing on.
UELT Moodle: Essentials (updated 12/7/2017) 10
To use this feature, turn editing on then select one or more files on your computer and drag them onto a section in your Moodle module (right). When you release the mouse button each file will be uploaded individually, with the filename used as the name of the resource.
If you don’t have a browser which supports drag-and-drop upload you can use the File resource instead:
1. Select File from the Add a resource drop-down list.
2. On the resulting page, give your file a name and, optionally, a description.
3. In the Content section, click the Add icon and use the file picker to select the file from your computer. Unless the file you are uploading has dependent files, e.g. a webpage with images, do not upload more than one file to this resource.
4. Choose any relevant display options (under the heading Appearance), then click the Save and return to module button.
Requesting a book chapter
The only way of uploading an extract of a book or journal article to Moodle with proper copyright authorisation is via the CLA scanning service operated by the library. However, Moodle makes this easy to do:
1. Select either CLA (Book extract) or CLA (Journal extract) from the Add a resource drop-down list.
2. On the resulting page you’ll need to provide the following information:
Resource name – This is how the students will identify the extract, e.g. Hartley, Chapter 4.
Required for week – choose the week for which the extract is required by students. This helps the library staff to prioritise scanning.
Summary Text – A description of the resource for your students.
Title – The title of the book.
Author/Editor
Publication date/Edition
Extract title
Extract Start – The first page of your extract.
Extract finish – The last page of your extract.
3. It may also be useful to the library staff to fill out some of the optional fields.
4. If your request is unusual, e.g. you are requesting several smaller extracts from the book in one extract, it may help the library staff to give extra information in the notes field.
5. Click the Save and return to module button.
6. A placeholder for the extract appears at the bottom of the section. Use the Move icon to drag it to the right place. If you need to make any changes to the request, click the Update icon.
Your request will be processed by the library staff, who may contact you for more information. They will scan the extract and upload it to your module, replacing the placeholder. You will then receive an email confirmation.
In some cases it may not be possible to provide the extract. That may happen if the extract is too large, it is already available electronically (e.g. an eBook) or the library can’t obtain a copy of the book; in this case, your request will be rejected. You will receive an email giving the reason for the rejection.
To put a scanned journal article on Moodle please follow the same instructions but select Request CLA Journal Extract in step 1. It may be a breach of copyright to upload a PDF version of an article downloaded
UELT Moodle: Essentials (updated 12/7/2017) 11
from an online journal, unless this has been specifically allowed by the publisher.
Linking to an external web site
It is often useful to link to an external website, and this resource can also be used to link directly to online journal articles (contact your subject librarian for information). If your browser supports drag-and-drop
upload (see Uploading files) you can drag links directly from other webpages into your module. Alternatively:
1. Select Link from the Add a resource drop-down list.
2. On the resulting page you’ll need to provide a name for, and (optionally) a description of, the web link.
3. Type the site’s web address (URL) in the External URL box in the same format you would use to visit the page in an internet browser (e.g. http://www.google.com).
4. Click the Save and return to module button, or Save and display if you’d like to check your settings.
5. The link appears at the bottom of the section. Use the Move icon to drag it to the right place.
Creating a web page
Sometimes it is better to create a web page within your Moodle module than to upload a document. It requires less internet bandwidth and no specific software, plus you don’t have to worry about which version of the document you’re working on. Web pages are particularly useful when you have too much information to fit comfortably in a section summary.
1. Select Page from the Add a resource drop-down list.
2. On the resulting page you’ll need to provide a name for, and optionally a description of, your page.
3. In the next section you’ll find the same text editor as in the summary section. Type the content of your web page in here. Format your text and add images using the toolbar.
4. Click the Save and return to module button, or Save and display if you’d like to see your finished page.
5. The page appears at the bottom of the section. Use the Move icon to drag it to the right place.
UELT Moodle: Essentials (updated 12/7/2017) 12
Creating a label
Labels help to organise content within a section, essentially creating subheadings in the content area. Labels can be moved around just like any other resource, and individual items can then be indented below the label to provide structure. To do this:
1. Select Label from the Add a resource drop-down list.
2. On the resulting page, type the text of your label into the text editor. Avoid using too much formatting as this may look messy. Instead opt for bold or italic for emphasis.
3. Click the Save and return to module button.
4. The label appears at the bottom of the section. Use the Move icon to drag it to the right place.
Tip: If you just want to provide a description of an existing resource, add text to the resource’s Description field instead, and tick the Display description on main module page check box.
Managing Students
There are a number of options relating to students that you need to know about.
Availability
When your module is created your students are enrolled straight away, but the module is inaccessible to students to give you time to set up the module and allow you to decide when students can access it. At this stage the module appears on the students’ front page, but it is greyed out and if they try to enter the module they are advised that the module is not yet available. Once you’ve uploaded and arranged the content of your module, you must make it available to your students.
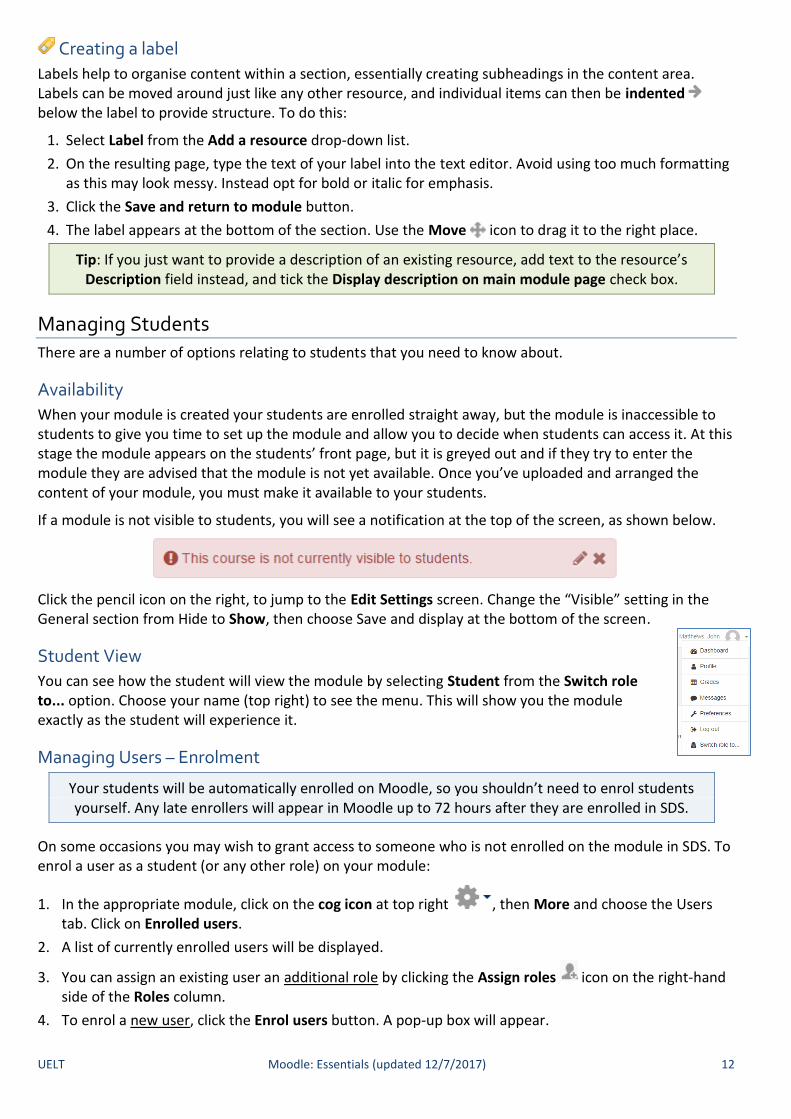
If a module is not visible to students, you will see a notification at the top of the screen, as shown below.
Click the pencil icon on the right, to jump to the Edit Settings screen. Change the “Visible” setting in the General section from Hide to Show, then choose Save and display at the bottom of the screen.
Student View
You can see how the student will view the module by selecting Student from the Switch role to... option. Choose your name (top right) to see the menu. This will show you the module exactly as the student will experience it.
Managing Users – Enrolment
Your students will be automatically enrolled on Moodle, so you shouldn’t need to enrol students yourself. Any late enrollers will appear in Moodle up to 72 hours after they are enrolled in SDS.
On some occasions you may wish to grant access to someone who is not enrolled on the module in SDS. To enrol a user as a student (or any other role) on your module:
1. In the appropriate module, click on the cog icon at top right , then More and choose the Users tab. Click on Enrolled users.
2. A list of currently enrolled users will be displayed.
3. You can assign an existing user an additional role by clicking the Assign roles icon on the right-hand side of the Roles column.
4. To enrol a new user, click the Enrol users button. A pop-up box will appear.

UELT Moodle: Essentials (updated 12/7/2017) 13
5. In the Assign roles drop-down list, select the appropriate role, e.g. ‘Student’.
6. Optionally, set any relevant enrolment options.
7. Search for the user by surname in title case, e.g. ‘Smith’ (students can also be found by username, but staff cannot, as this search only searches for name and email address).
8. Click the Enrol button next to the correct user.
9. Click the Finish enrolling users button when you're done.
Depending on your browser’s settings, the pop-up box may be replaced by a page with two columns. Though this page looks different it works in a similar way and has the same options.
Note: Manually enrolled students cannot access CLA-scanned book or journal extracts due to licensing restrictions.
Managing Students – Groups
Moodle automatically creates seminar groups and delivery groups using information in SDS.
You can also create your own groups of students, and use groupings to manage access to certain content in your module. You’ll find instructions on this in the Moodle:Interactive training guide.
What happens next?
You can continue to use your module for the duration of the academic year, and there are many more features available for which there are other training documents (see Help & Support, below). At the end of the year you don’t need to do anything extra; your students will continue to have access to the module for the duration of their study at the University so that they can review the resources and retrieve any content they submitted to Moodle. The content of the module will rollover into next year’s version, which will be created during the Summer. As existing students need to have continuing access to the module:
Don’t significantly change the content of the module in preparation for rollover.
Don’t hide the module from students at the end of the year.
Help & Support
For general help using Moodle, contact your Faculty Learning Technologist (FLT). If you are having problems accessing Moodle, contact the Helpdesk on 01227 82 4888, or email [email protected]. Other training guides are available on the eLearning website: https://www.kent.ac.uk/elearning/moodle/
For general training documents and information, visit Moodle Docs (http://docs.moodle.org).
UELT Moodle: Essentials (updated 12/7/2017) 14
Frequently Asked Questions
One of my modules is missing from my module list. What should I do? Connect takes information from the timetable to enrol teachers in Moodle. You may need to contact
your school’s timetable convenor to update the timetables for your module. If you are not timetabled to teach a module but still need access, the module convenor or admin staff can manually enrol you.
My module has no description. What should I do? Connect takes information from the online module catalogue to populate the module description. You
need to create or update the online module catalogue entry for the module. Contact your school’s administrative staff for help.
My file is too big to upload. How can I upload it? Send details of the file to your FLT who will provide advice on reducing the file size or recommend
alternative options.
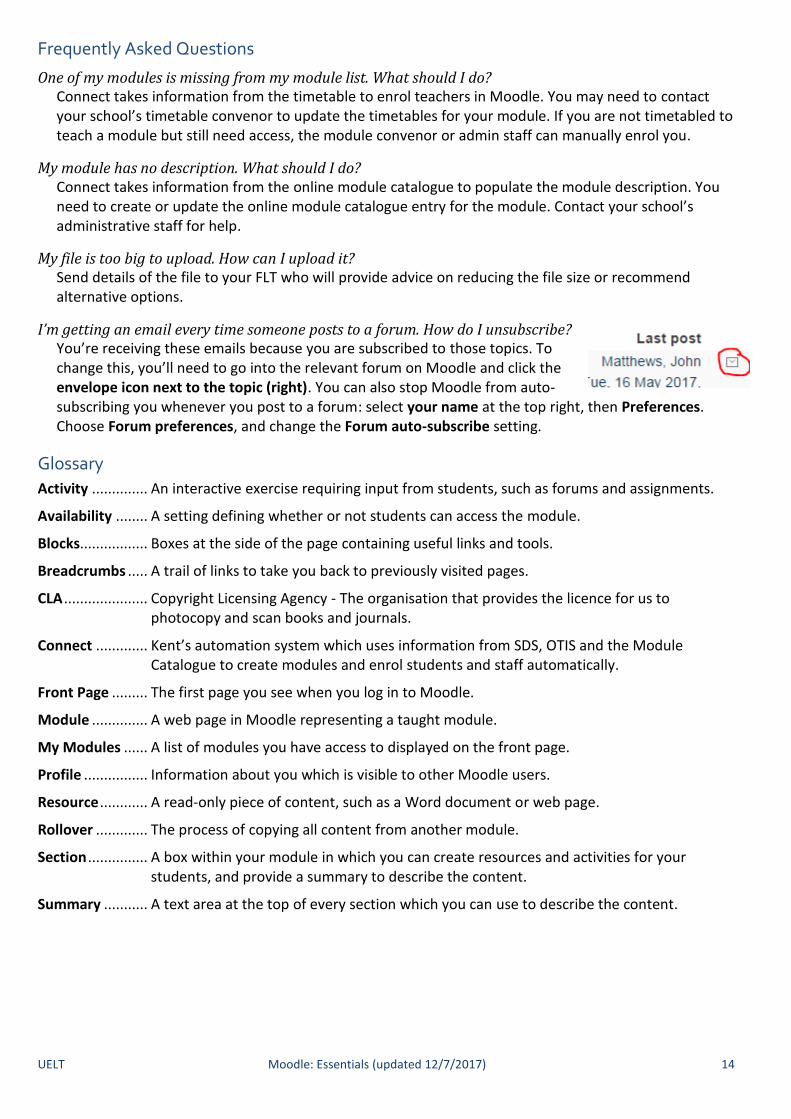
I’m getting an email every time someone posts to a forum. How do I unsubscribe? You’re receiving these emails because you are subscribed to those topics. To
change this, you’ll need to go into the relevant forum on Moodle and click the envelope icon next to the topic (right). You can also stop Moodle from auto-subscribing you whenever you post to a forum: select your name at the top right, then Preferences. Choose Forum preferences, and change the Forum auto-subscribe setting.
Glossary
Activity .............. An interactive exercise requiring input from students, such as forums and assignments.
Availability ........ A setting defining whether or not students can access the module.
Blocks................. Boxes at the side of the page containing useful links and tools.
Breadcrumbs ..... A trail of links to take you back to previously visited pages.
CLA ..................... Copyright Licensing Agency - The organisation that provides the licence for us to photocopy and scan books and journals.
Connect ............. Kent’s automation system which uses information from SDS, OTIS and the Module Catalogue to create modules and enrol students and staff automatically.
Front Page ......... The first page you see when you log in to Moodle.
Module .............. A web page in Moodle representing a taught module.
My Modules ...... A list of modules you have access to displayed on the front page.
Profile ................ Information about you which is visible to other Moodle users.
Resource ............ A read-only piece of content, such as a Word document or web page.
Rollover ............. The process of copying all content from another module.
Section ............... A box within your module in which you can create resources and activities for your students, and provide a summary to describe the content.
Summary ........... A text area at the top of every section which you can use to describe the content.