Embed Size (px)
Citation preview

How to build a pizza oven in...
my pizza ovenCONSTRUCTION GUIDE
10steps!

My name is Renato and i am a pizza fanatic!Everything started at the architecture university in Bra-zil, where i learned how to build and enjoy pizza ovens!
I decided to start a movement called Mypizzaoven where i can spread and share the knowlodge and pleasures of hav-ing your own pizza oven!
Maybe it’snt the best way of build ovens or the right way following the italian 2000 years traditions, but it’s my way of building it...and i can say it works just fine:)
People say i am crazy on sharing this kind of informa-tion...that i could be rich if i keep it secret...like the Coca-cola formula!
But i can say that is not being rich that move’s me making ovens...or even keeping secrets...is the pure happiness of closing the dome, firing it up and drinking a beer with dirty tasty pizzas! That makes me RICH!
The only thing i ask you in exchange for this “precious” information is if you could send me a picture from the oven, so i can post it on my website:) Yeah!!!!
I believe in people more then bricks,I also believe that bricks can bring people together!
P.s...you can contact me if doens’t work!
3
Hello Everyone

step 1Finding some friends
step 10 Cooking pizzas
step 2Graving the foundation
step 3Building the base
step 9Finishing the oven
start

Way to do it
step 4Making the bed
5
step 5Setting up the oven
step 6Making leem
step 7Starting the dome
step 8Arch and chimney

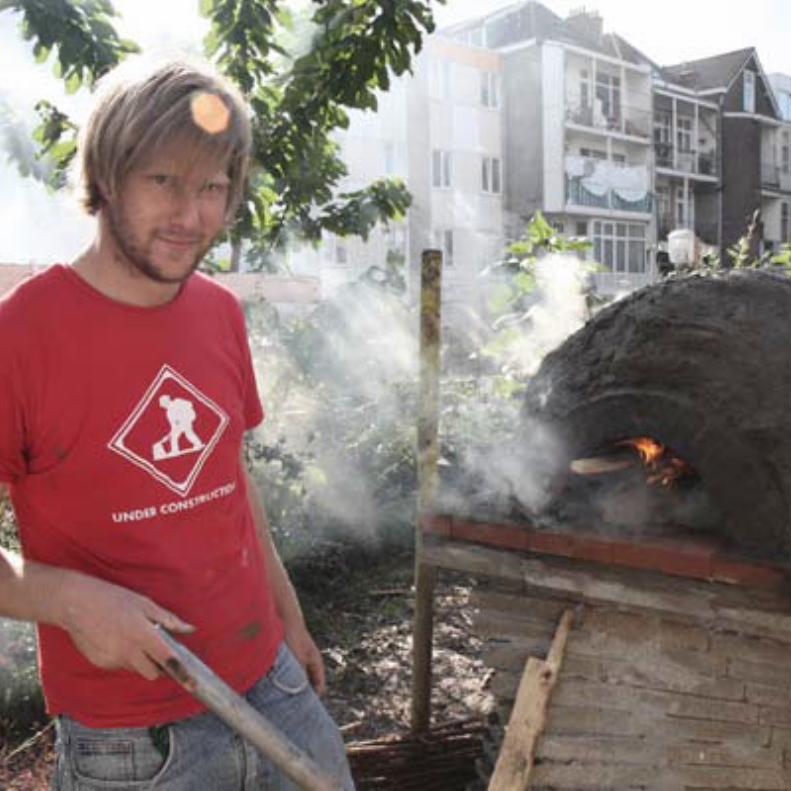
You will need them...or at least one of them!!!
They will be handy not just for building the oven or moving all the materials, but for sure for eating the pizza! They will help you doing stupid jobs like breaking bricks, making cement, bringing sandwiches and drinks...
They will tell you are crazy, but in that important moment where you will be closing the dome, their hands will be priceless!
First grab your phone and look after some really nice people how is willing to join you in a three days construction adventure!
After that, call them and let them know they will never forget this next three days...and tell them they should not stress about life or further problems, and building a pizza oven is once in a life time experi-ence you will be talking about to your own grandchildren!
If your friend already got grandchildren, maybe he can arrange them for the building as well:)
step 1 Finding some friends
Materials
contact listagenda
phone/e-mail/facebook 7

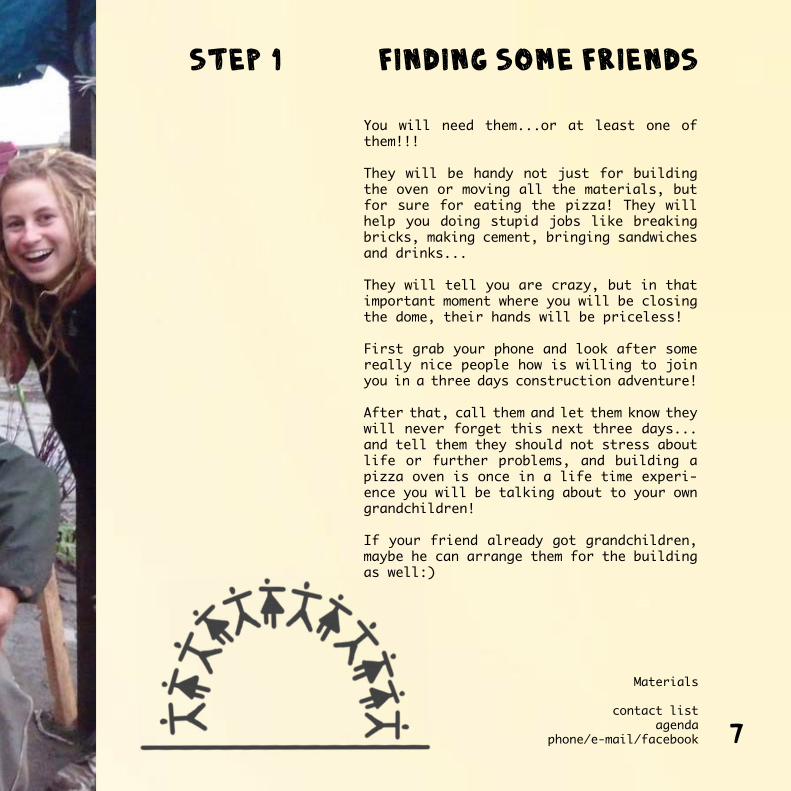
Everything starts from under! But before graving the foundation whole, choose care-fully the location. Take in consideration these important aspects:
A - WindThe main wind direction is important for avoiding smoking problems... try to place the door of the oven and chamine aligned with the wind
B - Position from the basePizza ovens are not barbecues...normally we punish someone to cook the barbecue plac-ing him(of her) away from the party! The pizza oven should normally be part of the party...so locate it wisely:)
C - Distance from your kitchen:)When cooking pizzas we are normally in con-stant connection with the kitchen...plac-ing the oven to far from the kitchen will cause you unecessary exercise! The pizza oven is your outside kitchen!
9
step 2 graving the foundation


step 2 graving the foundation
After choosing the location for you oven, you can start graving the foundation whole!
Size : 1200 mm x 1200mm x 300 mm
Compact the soil with your feet or some-thing heavy and try to put it on level!
Spread 15 kg sand ( it could be the graving sand) uniformly and spread 5 kg cement
Add +- 2,5 liter water to the soil/cement mixture and place the 8 concrete blocks.Make cement and add under the edges placing the last 4 blocks. After that build the 4 tiles at the corners from your foundation.
Check the level and cover the foundation with earth!
Materials
12 concrete blocks( 1000mmX300mmX100mm)50 kg sand25 kg cement4 concrete tiles (300mmX300mm)
11


Hum... the base! The main concept of the base is bringing the oven on a certain height!So actually there are no recepy for the base, just a lot of creativity and sense of construction...
BUT, if you are not willing to think and experience on the field of architecture, here goes the most basic and nice base I already did! The Gaudi concrete tiles ver-sion:
On top of your foundation make four col-lumns on a 1000 mm range from each other
Start pilling them up with some fine con-crete in between the tiles! (Make the tiles wet, so they will absove better the con-crete)
13
step 3 building the base

ready
brazilian base
gaudi collumn
twisted collumn

step 3 building the base
Turn every tile the same distance on his axe...the bigger the turn, bigger the twist on the collum.
Always check the level between the col-lums...correct it with the amount of con-crete between the tiles!
Normally i make ovens with 1100 mm height...for achieveing this height you will place +- 18 tiles per colum!
When achieved the top of the collum, place 4 concrete blocks between the collums
After that, place 5 concrete blocks in the opposite direction, making a really stable table:)
Materials
76 “stoeptegels” (300mmX300mmX50mm)7 concrete blocks( 1000mmX300mmX100mm)25 kg cement75 kg sand
15
fundation
base tiles
gaudi collums
concrete beams
concrete table

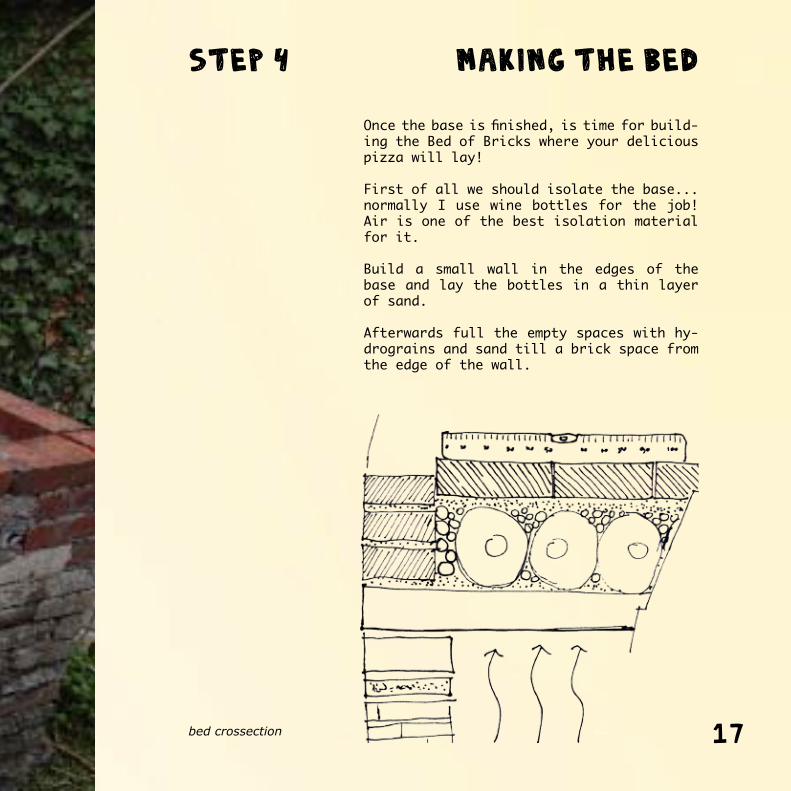
Once the base is finished, is time for build-ing the Bed of Bricks where your delicious pizza will lay!
First of all we should isolate the base...normally I use wine bottles for the job! Air is one of the best isolation material for it.
Build a small wall in the edges of the base and lay the bottles in a thin layer of sand.
Afterwards full the empty spaces with hy-drograins and sand till a brick space from the edge of the wall.
17
step 4 making the bed
bed crossection


step 4 making the bed
Materials
40 liter isolation balls75 kg sand50 fire bricks +- 50 wine bottles
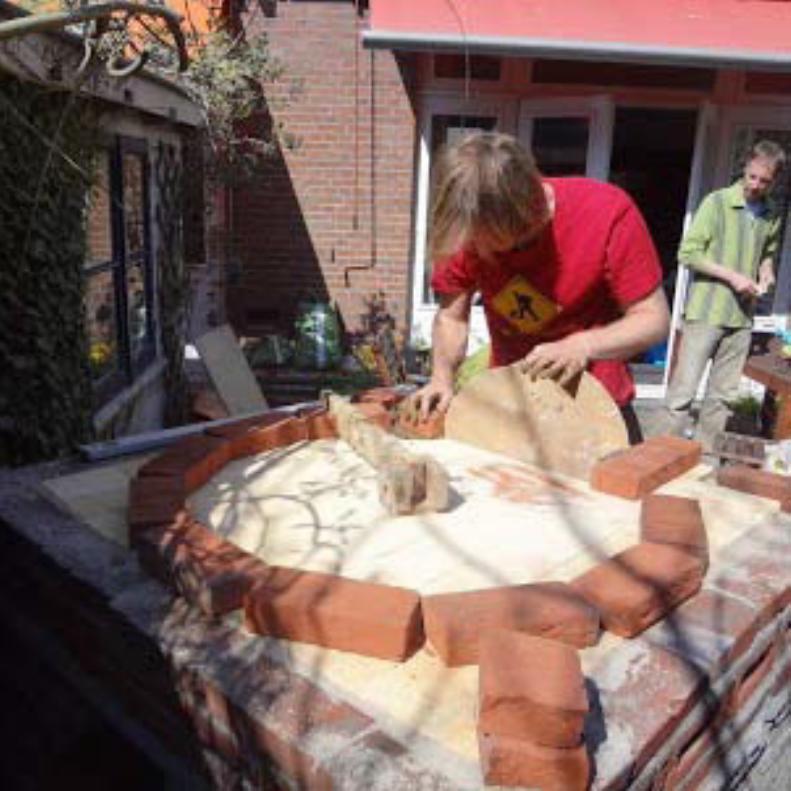
The best is use the same kind of bricks for this part, avoiding unregularities in your bed!
Settel the bricks on a fishnet pattern and try to place the brick without any space between them.
Pay attention on the entrance and on the middle of the base. The bricks should lay on the same level otherwise you will have problems with the pizza padle later on:)
When all the bricks are on place, you can start sanding the bed with a half brick for reducing the sharp edges of the bricks...
...and voila’...your bed is finished:) Sweet hot dreams for you Marguerita!
19
slicing the bricks into the bed

From now on you can set away all fear of getting intoxicated by the chemistry prop-erties of the cement and set fully your hands in the mud:)
But first, we need to set up the oven and produce some useful instruments!
First of all...the door: It’s 400mm wide and 200mm heightand 100mm deeper! It could be wood or steel!
Then is time for the compass...this instru-ment will help you making the dome! It’s a mobile piece of wood with one center point and it can rotate on the base and in the height for placing the bricks.
Set up the bricks circle with the compass and place the door. Pay attention the en-trance bricks should be placed middle of the brick circle.
step 5 setting up the oven
21wooden door 100x200x400mm wooden compass 400mm


From now on you can set away all fear of getting intoxicated by the chemistry prop-erties of the cement and set fully your hands on the mud:)
The nicest thing about a clay oven is that you can build it with your hands...besides being fun the mud is really good for your skin:)
Normally i manage the clay with three basic materials: River clay, sugar and sand!When i was in Brasil, i could take earth clay from our soil...but here in Holland is quite difficult beacuse the ony thing i can find in this land is sand and water!
The proportions are really important...the clay will bring resistence and warm coefi-ciency, the sand will add volume and the sugar will keep it all together...the meas-ures are:
10 kg clay / 25 kg sand / 4 kg sugar
It’s important all the three ingredients should be well mixed for the best results!When the clay is done...is time for build-ing!
step 6 making clay!
23
Materials
40 kg river clay100 kg sand16 kg sugar
too dry
too wet
perfect!

First row above the door
Renato and the compass
Paul at work!
First brick for the door
getting the dome angle,always 90 degrees between the compass teeth and the brick
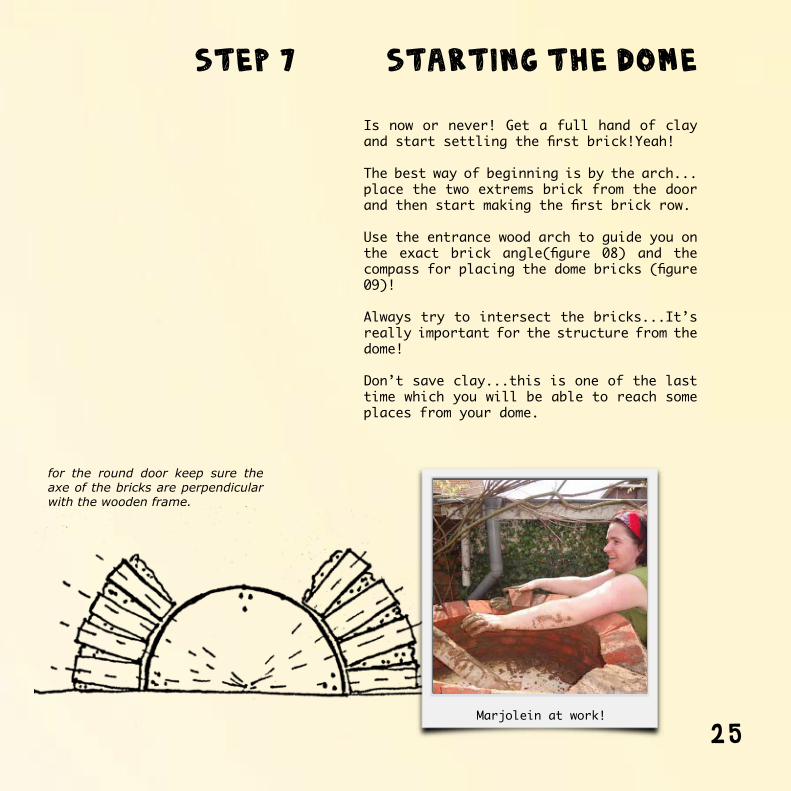
Is now or never! Get a full hand of clay and start settling the first brick!Yeah!
The best way of beginning is by the arch...place the two extrems brick from the door and then start making the first brick row.
Use the entrance wood arch to guide you on the exact brick angle(figure 08) and the compass for placing the dome bricks (figure 09)!
Always try to intersect the bricks...It’s really important for the structure from the dome!
Don’t save clay...this is one of the last time which you will be able to reach some places from your dome.
25
step 7 starting the dome
Marjolein at work!
for the round door keep sure the axe of the bricks are perpendicular with the wooden frame.


step 7 starting the dome
27
A great tip whick i learned is to lock your arch bricks with the dome row...like that your door will participate on the structure and bring much more resistance to the oven.
Another tip is to place small bricks/pieces of brick to fill in the empty spaces created by the brick angle from the dome...they lock the structure (figure 10)
How far you gets...how small and narrow will be the rows... It helps to have 3/4 bricks or 1/2 bricks at your disposable...with them is easier to make the top layers.
Materials
+- 200 bricks1 steel pipe for the chimney


One of the most exciting moments of build-ing a pizza oven is closing the entrance arch. After doing that you will realize that your oven is a brick structure!
The top brick from the arch is called the Key stone...you can recognize it in old building and ruins...is always the most detailed brick from the arch. This brick is responsible for the resistance of the arch.
The best way of closing the arch is ham-mering the brick into his final position. It helps if the brick is in a “V” shape, falling easily into his place.
Realize that you can use small pieces of brick to fill the empty spaces and reenforc-ing the arch.
step 08 arch and chimney
29
The keystone,fit it to close the structure

First option, chimney at the back.
Really important is the height of the pipe, which should be equal or bigger then the diameter of the oven.
Second option, chimney at the door
It will need a bigger door then usual, but it will give you the possibility of cooking bread.

Once the arch is ready, is time for making the opening for the chimney!
There are two options for it:1- at the door itself2- at the rear from the oven
The first option give you the possibility to close totaly the cooking chamber for making bread, but it have some consequences for the power of the fire.
The second option is better for cooking, but it looses more heat then the first one.
In Brasil i’ve learned the second option, but after speaking with some winter proof experts from the north I realize the cli-mate conditions influences a lot the per-fomrmance of the oven, ledding me for the option one:) The size of the opening is 15% of the in-side measuremt of the oven, and the height of the chimney is the just a little bit bigger then the diameter of the oven.
step 08 arch and chimney
31opening of the chimney located at the first row after the door


Yeah...now we came to the Wow phase! Clos-ing the dome is always my favorite part! It feels like i am an architect:)
Here you will need some help from your friends...specially from their hands! How far you goes with the oven rows, how narrow the structure gets! Try to use the compass as far as you can. It will assure you get a round oven in the end!
Another thing the compass does is keeping the bricks in their original position, but i think you already know if you arrived at this phase:)
At certain point it will be impossible to use it anymore, so take it out and try to lock the dome. Normally there are several keystones for the dome. The idea is that the bricks lock themselves and creates the dome!
Try to place them at such way that i will be impossible to the bricks to fall into the structure. After that use small bricks to fill in the empty spaces between the key-stone bricks. Use the hammer!
And voila...you have build your own pizza oven! Now you just have to give him a name ( really important) and add the isolation layer!
33
step 09 Finishing the oven


step 09 Finishing the oven
The isolation layer will define the per-formance of your oven. In tropical coun-tries this layer is not important as in cold countries, due the fact that the out-side temperature is higher. That also helps cooking pizzas in the summer then in the winter.
Once the oven is ready we will have to make the stro-clay misture. First of all make a clay mixture with more water then usual.
At this step you will need a half stro-bale. Pick one hand of stro and mix it with the clay. Turning the stro inside the clay bowl trying to make “bread” from it.
For covering the hole oven you will need a lot of bread. Is kind of a hard job, so lot’s of friends and drinks needed for a smooth task:)
After the stro-clay layer is ready, is time for finishing up the oven. The last layer is quite important...it will protect you oven from the rain, wind and cold.
Clay and rain are actually not so good friends...i’ve tried lot’s of things for solving this problem, but i still didn’t find up the master solution. My best shot was a mixture between clay - sand - kalk on the proportion 10 - 25 - 5. Another good solution is building a roof...your choice!
35
Materials
1 strobale40 kg river clay75 kg sand8 kg sugar5 kg kalk


All this work will pay off at this step...first of all, relax and take a drink!
Now, let’s fire this baby up! The first fire is quite important! I always fire my ovens at the same day of their construction...it have two simple reasons, one that i am hungry and the other is that i am not so patience!
I’ve learned that the best option is to wait some days until the clay is dry, then you can fire your oven. Like that it will reduce the sizes of your cracks!
When you fire your oven up, you will realize that the outside skin will crack. This is a property from the clay. It reduces size when it got warm up. There are a few tips for trying to avoid this stuff like waiting to fire the oven up when he is dry, or using calk on the top layer!
What i do is pretty much accepting the fact that it happens...this doesn’t have so much influence in the performance of the oven, and the work trying to avoid it is quite frustrating! If you want specific info about it, you can consult this webpages and memos:
37
step 10 Cooking pizzas


step 10 Cooking pizzas
The first fire should be the one who nobody will forget...imagine how hell should look like, them you got it the level of fire you should do at your first fire:) Using dry wood helps keeping the smoke levels acceptable and building a high chimney would provide you the exact fire!
For cooking pizzas, you will have to move the fire aside! The best spot for your heat is in the opposite side of the chimney! Af-ter that you can blast the dirty residues away with you steel pipe and start cooking pizzas!
You soon will realize is not so simple how it looks like...but i can assure you will cook better and better with the ex-perience...it’s like riding a bike, you will fall in the beginning but will manage in the end! Don’t worry about the burned extremes from your pizza...sometimes they can be healthy!
That’s it folks...i hope it’s enough! I can say that building pizza ovens and cooking pizzas are this kind of things that eve-ryone has their own way...and who is me telling what is right or wrong? What i do can say is the way i do my things...and it definitely works:) And i hope you can build it too!!! Let’s go for it and build this world a better pizza place! YEAH!!!
39


“We believe in people more then bricks,and we also believe that bricks can bring people together!”
Renato Jeuken
Many thanks for Paul and Marjolein for the pictures, Jan van Schaik for the helpful inspiring experiment, Kiko Denzer and Hannah Field for writing “Build your own Earth Oven”, it was my source of inspiration. And special thanks for the mypizza-oven community...without you guys it was impossible to start
this project!
YEAH!!! 24-12-2013