Embed Size (px)
Citation preview
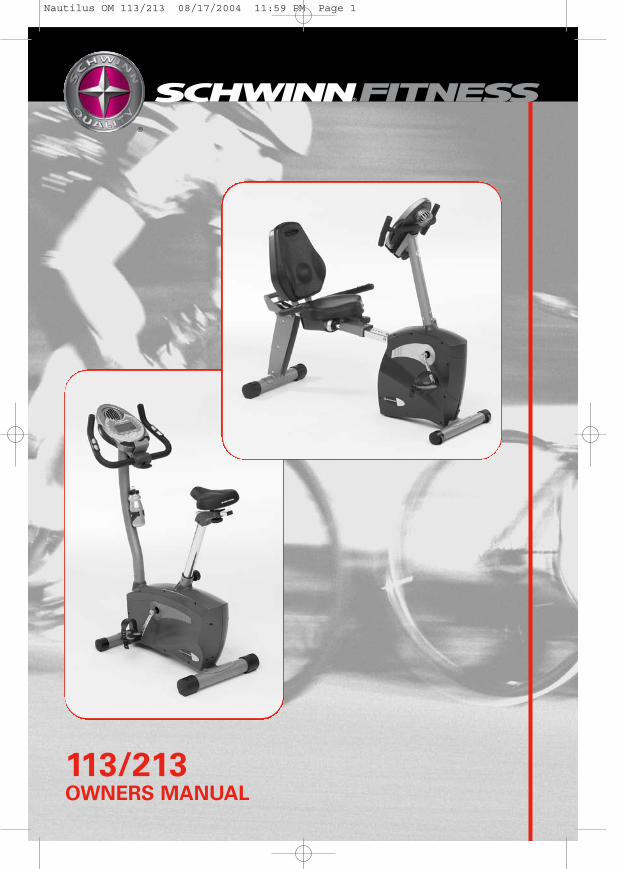
113/213OWNERS MANUAL
®
Nautilus OM 113/213 08/17/2004 11:59 PM Page 1
SA
FE
GU
AR
DS
FITNESS SAFEGUARDS ANDWARNINGS
Before starting any exercise program, consult with your physician or healthprofessional. He or she can help establish the correct exercise frequency, intensity(target heart rate zone) and time appropriate for your particular age and condition.
The following 3 warnings listed below are also located on the computer consolemast of the exercise bike. Failure to follow any of these safeguards may result ininjury or serious health problems.
• Read and understand the Owner’s Manual and operation instructions prior to use. If you do not have an Owner’s Manual, call 1-800-864-1270 to obtain one.
• If you feel any unusual pain or tightness in your chest, shortness of breath or dizziness, feel faint or have any discomfort while you exercise, STOP! Consult your physician.
• Keep children and pets away.
OTHER IMPORTANT SAFEGUARDSAND WARNINGS
• Do not exceed maximum user weight of 136 kg (300 lb.)• It is the responsibility of the owner to ensure that all users of this equipment
are adequately informed of all precautions.• Use this equipment only on a solid level surface. Cover the floor or carpet
beneath this equipment for protection.• Read the Warning Label located on the computer console mast.• Do not place fingers or any other objects into moving parts of the exercise
equipment.• This equipment is designed for use by persons aged 13 years and older.
Teenagers should be supervised.• Always wear athletic shoes for foot protection. Avoid wearing loose clothing
that may become entangled in the drive mechanism.• Warn bystanders to keep a safe distance, especially from the moving pedals.
Do not allow anyone to touch the bike while it is in operation.• This equipment is for home use only. Do not use in a commercial, institutional,
or rental setting.• Care should be taken when mounting or dismounting the exercise bicycle.• Do not operate in damp or wet conditions.• Follow proper set-up and guidance as outlined in the Owner’s Manual and
Assembly Instructions. Only use the bike as outlined in usage instructions of the Owner’s Manual.
• Prior to each use inspect the bike for loose, broken, or worn parts. Do not use if found in this condition. The safety of the equipment can only be ensured if it is regularly examined and maintained. (See Maintenance section ofthe Owner’s Manual)
• Refer to the Maintenance section in the Owner’s Manual and disconnect power supply before servicing the bike.
• Replace Warning Label if damaged, illegible, or removed.• We recommend that a minimum distance of 1 meter (39 inches) surrounding
the bike is kept clear of all obstructions, including children, bystanders, and pets. This is to ensure adequate clearance for easy access to the bike and to avoid any possible contact with the moving pedals.
3
Nautilus OM 113/213 08/18/2004 12:00 AM Page 2
4
Nautilus OM 113/213 08/18/2004 12:00 AM Page 3
SC
HW
INN
BIO
-FIT
™C
OM
FO
RT
SY
ST
EM
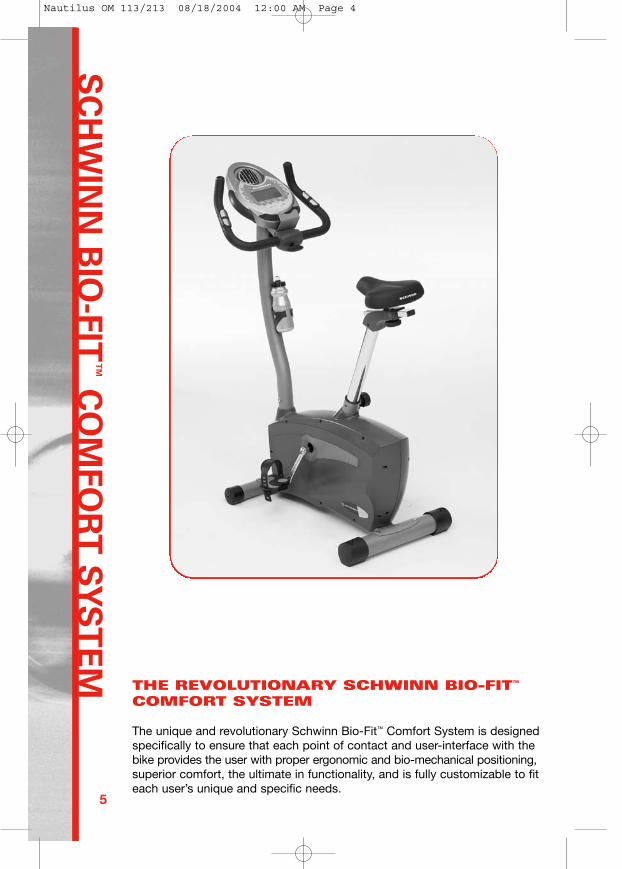
THE REVOLUTIONARY SCHWINN BIO-FIT™
COMFORT SYSTEM
The unique and revolutionary Schwinn Bio-Fit™ Comfort System is designedspecifically to ensure that each point of contact and user-interface with thebike provides the user with proper ergonomic and bio-mechanical positioning,superior comfort, the ultimate in functionality, and is fully customizable to fiteach user’s unique and specific needs.
5
Nautilus OM 113/213 08/18/2004 12:00 AM Page 4
FE
AT
UR
ES
Other features:
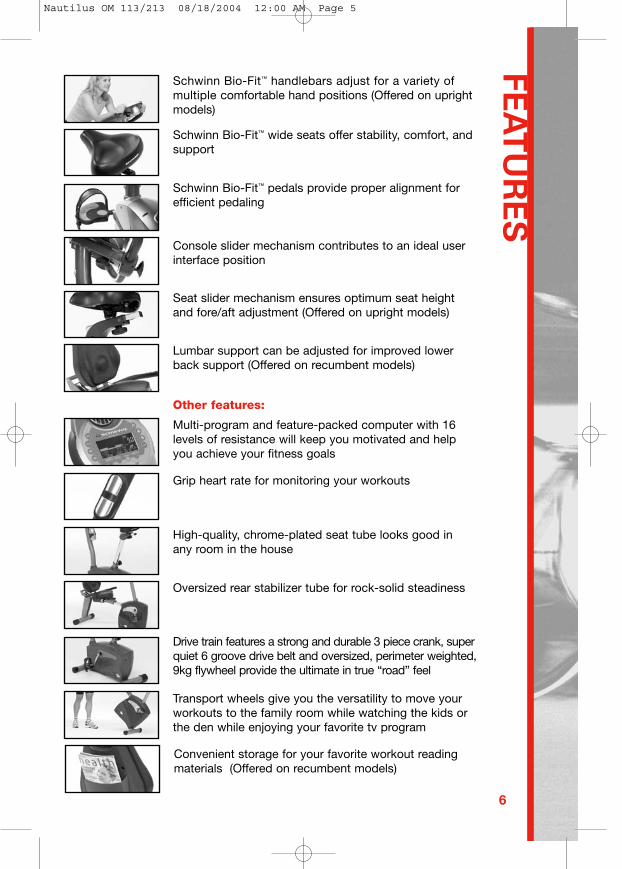
Schwinn Bio-Fit™ handlebars adjust for a variety ofmultiple comfortable hand positions (Offered on uprightmodels)
Schwinn Bio-Fit™ wide seats offer stability, comfort, andsupport
Schwinn Bio-Fit™ pedals provide proper alignment forefficient pedaling
Console slider mechanism contributes to an ideal userinterface position
Seat slider mechanism ensures optimum seat heightand fore/aft adjustment (Offered on upright models)
Lumbar support can be adjusted for improved lowerback support (Offered on recumbent models)
Multi-program and feature-packed computer with 16levels of resistance will keep you motivated and helpyou achieve your fitness goals
Grip heart rate for monitoring your workouts
High-quality, chrome-plated seat tube looks good inany room in the house
Oversized rear stabilizer tube for rock-solid steadiness
Drive train features a strong and durable 3 piece crank, superquiet 6 groove drive belt and oversized, perimeter weighted,9kg flywheel provide the ultimate in true “road” feel
Transport wheels give you the versatility to move yourworkouts to the family room while watching the kids orthe den while enjoying your favorite tv program
6
Convenient storage for your favorite workout readingmaterials (Offered on recumbent models)
Nautilus OM 113/213 08/18/2004 12:00 AM Page 5
CO
NG
RA
TU
LA
TIO
NS
!
CONGRATULATIONS!
Thank you for making the Schwinn bike a part of your exercise and fitnessactivities. For years to come, you’ll be able to rely on Schwinn craftsmanshipand durability as you pursue your personal fitness goals.
The Schwinn bike should enable you to shape and monitor your workouts to:
▲ Increase your energy level
▲ Increase cardiovascular and aerobic fitness
▲ Increase lower body muscle strength
▼ Decrease your overall percentage of body fat
Whether you are just getting started in an exercise program or are alreadyin good shape, the Schwinn bike is designed to be an efficient, easy andfun way to achieve an enhanced level of fitness. You can pedal your way toa slimmer and healthier body. The on-board digital computer enables youto accurately monitor your progress by tracking time, speed, distance andapproximate Calories burned. This Owner’s Manual contains all theinformation you need to operate and enjoy your Schwinn exercise bike.Also included are general fitness guidelines. Please read this Owner’sManual in its entirety before getting onto the bike and working out. So let’sget started.
Take your time and have fun!
7
Nautilus OM 113/213 08/18/2004 12:00 AM Page 6
TA
BLE
OF C
ON
TE
NT
STABLE OF CONTENTS
Operation........................................................................................... 9How to use the Schwinn exercise bike........................ 9How to use the Schwinn exercise bike computer ....... 11
Maintenance...................................................................................... 29Moving your Schwinn exercise bike............................ 29Leveling your Schwinn exercise bike .......................... 29Maintenance ................................................................ 29
Fitness Guidelines…………………………………………………........ 30Exercise and Health...................................................... 30Your New Home Fitness Program................................ 30Steps to Getting Started............................................... 31Components of Fitness................................................. 32Cardiovascular Fitness.................................................. 32Muscular Strength......................................................... 32Flexibility........................................................................ 33Nutrition......................................................................... 34Understand Caloric Balance......................................... 34Eat a Variety of Foods................................................... 34Drink Water.................................................................... 34Eat More Often / Portions............................................. 34Monitoring Your Intensity.............................................. 35Training Zones.............................................................. 35Beating the Dropout Odds........................................... 37Suggested Readings.................................................... 38
Schwinn® Fitness Limited Warranty............................................... 39
Workout Log……………………………………………………………… 40
8
Nautilus OM 113/213 08/18/2004 12:00 AM Page 7
OP
ER
AT
ION
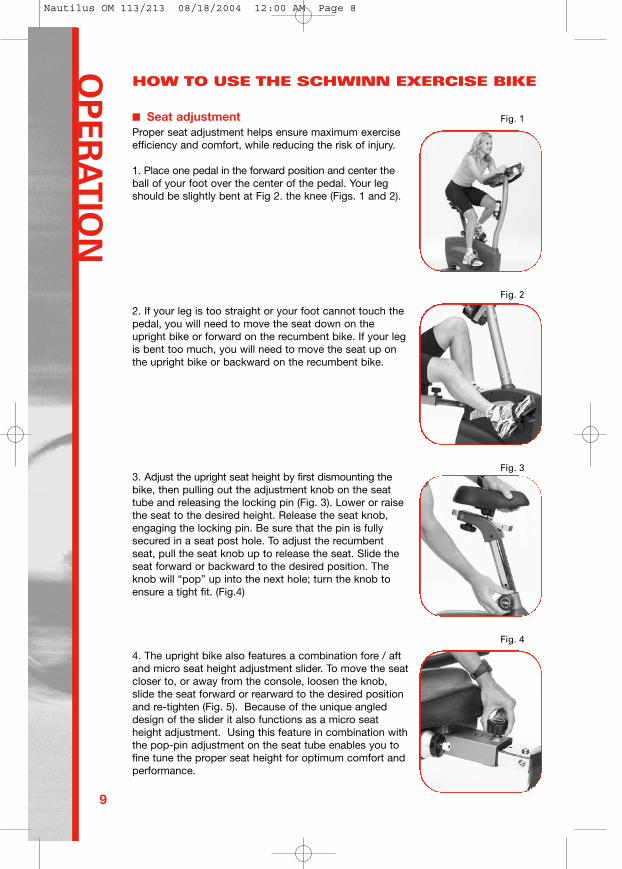
■ Seat adjustmentProper seat adjustment helps ensure maximum exerciseefficiency and comfort, while reducing the risk of injury.
1. Place one pedal in the forward position and center theball of your foot over the center of the pedal. Your legshould be slightly bent at Fig 2. the knee (Figs. 1 and 2).
2. If your leg is too straight or your foot cannot touch thepedal, you will need to move the seat down on theupright bike or forward on the recumbent bike. If your legis bent too much, you will need to move the seat up onthe upright bike or backward on the recumbent bike.
3. Adjust the upright seat height by first dismounting thebike, then pulling out the adjustment knob on the seattube and releasing the locking pin (Fig. 3). Lower or raisethe seat to the desired height. Release the seat knob,engaging the locking pin. Be sure that the pin is fullysecured in a seat post hole. To adjust the recumbentseat, pull the seat knob up to release the seat. Slide theseat forward or backward to the desired position. Theknob will “pop” up into the next hole; turn the knob toensure a tight fit. (Fig.4)
4. The upright bike also features a combination fore / aftand micro seat height adjustment slider. To move the seatcloser to, or away from the console, loosen the knob,slide the seat forward or rearward to the desired positionand re-tighten (Fig. 5). Because of the unique angleddesign of the slider it also functions as a micro seatheight adjustment. Using this feature in combination withthe pop-pin adjustment on the seat tube enables you tofine tune the proper seat height for optimum comfort andperformance.
9
Fig. 1
Fig. 2
Fig. 3
Fig. 4
HOW TO USE THE SCHWINN EXERCISE BIKE
Nautilus OM 113/213 08/18/2004 12:00 AM Page 8
OP
ER
AT
ION
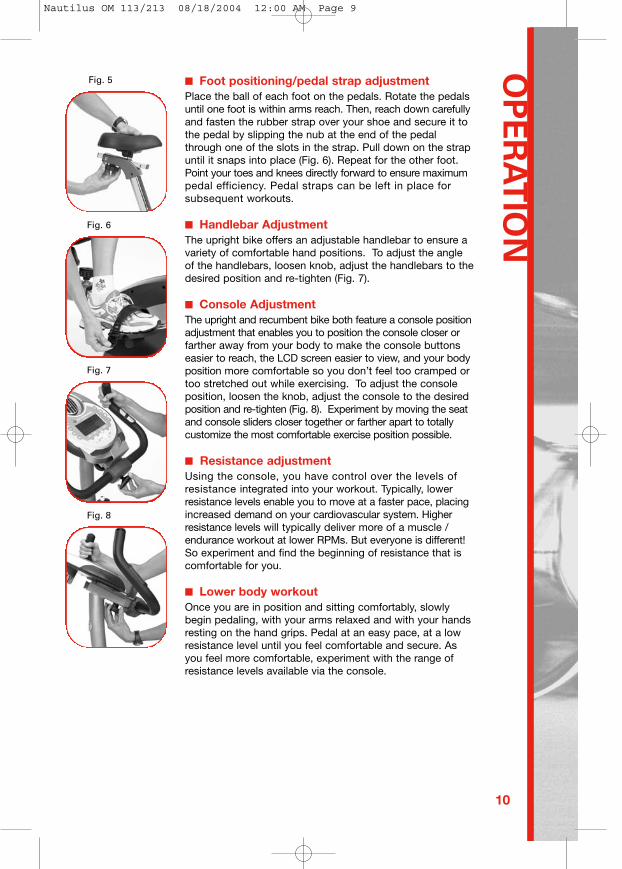
■ Foot positioning/pedal strap adjustmentPlace the ball of each foot on the pedals. Rotate the pedalsuntil one foot is within arms reach. Then, reach down carefullyand fasten the rubber strap over your shoe and secure it tothe pedal by slipping the nub at the end of the pedalthrough one of the slots in the strap. Pull down on the strapuntil it snaps into place (Fig. 6). Repeat for the other foot.Point your toes and knees directly forward to ensure maximumpedal efficiency. Pedal straps can be left in place forsubsequent workouts.
■ Handlebar AdjustmentThe upright bike offers an adjustable handlebar to ensure avariety of comfortable hand positions. To adjust the angleof the handlebars, loosen knob, adjust the handlebars to thedesired position and re-tighten (Fig. 7).
■ Console AdjustmentThe upright and recumbent bike both feature a console positionadjustment that enables you to position the console closer orfarther away from your body to make the console buttonseasier to reach, the LCD screen easier to view, and your bodyposition more comfortable so you don’t feel too cramped ortoo stretched out while exercising. To adjust the consoleposition, loosen the knob, adjust the console to the desiredposition and re-tighten (Fig. 8). Experiment by moving the seatand console sliders closer together or farther apart to totallycustomize the most comfortable exercise position possible.
■ Resistance adjustmentUsing the console, you have control over the levels ofresistance integrated into your workout. Typically, lowerresistance levels enable you to move at a faster pace, placingincreased demand on your cardiovascular system. Higherresistance levels will typically deliver more of a muscle /endurance workout at lower RPMs. But everyone is different!So experiment and find the beginning of resistance that iscomfortable for you.
■ Lower body workoutOnce you are in position and sitting comfortably, slowlybegin pedaling, with your arms relaxed and with your handsresting on the hand grips. Pedal at an easy pace, at a lowresistance level until you feel comfortable and secure. Asyou feel more comfortable, experiment with the range ofresistance levels available via the console.
10
Fig. 5
Fig. 6
Fig. 7
Fig. 8
Nautilus OM 113/213 08/18/2004 12:00 AM Page 9

OP
ER
AT
ION
USING THE COMPUTER
Using the ComputerYour Schwinn bike is equipped with a versatile computer console whichincludes:
• Quick Start• 1 Manual program • 10 profile programs• 3 Heart Rate Control programs• 2 Custom user-defined programs• Time Trial program• Fitness Test • Calorie Goal• BMI (Body Mass Index)• Recovery Mode• Results Mode
This console provides you with important information about your workoutas well as controls the resistance levels. The following sections willdescribe how to utilize the many functions provided by this computer. Keepthis manual accessible for future reference, as you will want to experimentwith the various functions while you become familiar with the bike.
Computer Console DesignBefore we discuss using the specific functions of the computer, let’s getfamiliar with the display, the different features, and various buttons locatedon the console.
Computer Features
11
Nautilus OM 113/213 08/18/2004 12:00 AM Page 10
OP
ER
AT
ION
■ LCD DisplayThe large LCD (Liquid Crystal Display) screen located in the center of theconsole is your information center. This display is divided into sections thatprovide information about your workout and any preset information youmay have input into the computer. The display provides a large main windowthat indicates the PROGRAM selection and RESISTANCE LEVEL. Thesmaller windows across the bottom show INTERVAL TIME and TIME, RPMand WATTS, DISTANCE, and HEART (PULSE) RATE. The next larger windowon the right side of the display shows SPEED and CALORIES, ENGLISH orMETRIC operating mode, and the CYCLIST ICON with spinning wheelsrelative to your SPEED. The icon also indicates that the program is running.
The large main area of the display shows the program profile you are using.Within this profile are “bricks”, or rectangles, that are stacked vertically andindicate the relative resistance level and course profile. The computer iscapable of offering 16 different levels of resistance. One “brick” representsthe lowest level and eight “bricks” represent the highest level. You can viewthe level you are exercising in by referencing the Level numbers displayedon the left and right side of the “brick” display. Levels 1, 3, 5, 7, 9, 11, 13,and 15 display on the left side and Levels 2, 4, 6, 8, 10, 12, 14, and 16 dis-play on the right. The highest value displayed is the resistance level youare working out in.
In addition, you will notice that there are 12 columns of these “bricks” linedup horizontally across the bottom of the center of the display. Each ProfileProgram is 50 columns or “intervals” long so each of these columns or“intervals” represents one fiftieth of your workout time. For example, if youenter a workout time of 25 minutes, each column or “interval” time will lasta duration of 30 seconds. Since the display shows the first 12 columns ofyour workout program, as you progress through the workout, the programwill scroll to the left. The flashing “bricks” on the leftmost column let youknow where you are in your workout and other columns to the right showthe upcoming course profile.
The Manual, Heart Rate Control, Custom and Time Trial programs will dis-play in the 12 interval columns as viewed on the LCD screen and do notscroll as you advance through the workout.
■ Alphanumeric Display
Within the LCD display the computer features a “message center” thatprompts you to input specific data and values to make the bike easy tooperate and gets you to your workout quickly.
12
Nautilus OM 113/213 08/18/2004 12:00 AM Page 11
OP
ER
AT
ION
USING THE 113/213 COMPUTER
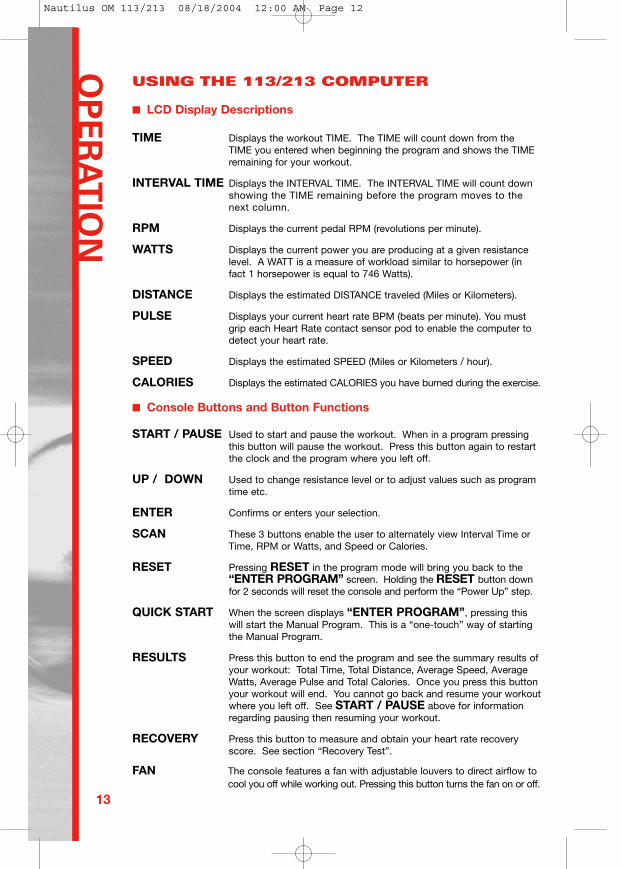
■ LCD Display Descriptions
TIME Displays the workout TIME. The TIME will count down from the TIME you entered when beginning the program and shows the TIME remaining for your workout.
INTERVAL TIME Displays the INTERVAL TIME. The INTERVAL TIME will count down showing the TIME remaining before the program moves to the next column.
RPM Displays the current pedal RPM (revolutions per minute).
WATTS Displays the current power you are producing at a given resistance level. A WATT is a measure of workload similar to horsepower (in fact 1 horsepower is equal to 746 Watts).
DISTANCE Displays the estimated DISTANCE traveled (Miles or Kilometers).
PULSE Displays your current heart rate BPM (beats per minute). You must grip each Heart Rate contact sensor pod to enable the computer to detect your heart rate.
SPEED Displays the estimated SPEED (Miles or Kilometers / hour).
CALORIES Displays the estimated CALORIES you have burned during the exercise.
■ Console Buttons and Button Functions
START / PAUSE Used to start and pause the workout. When in a program pressing this button will pause the workout. Press this button again to restart the clock and the program where you left off.
UP / DOWN Used to change resistance level or to adjust values such as program time etc.
ENTER Confirms or enters your selection.
SCAN These 3 buttons enable the user to alternately view Interval Time or Time, RPM or Watts, and Speed or Calories.
RESET Pressing RESET in the program mode will bring you back to the “ENTER PROGRAM” screen. Holding the RESET button down for 2 seconds will reset the console and perform the “Power Up” step.
QUICK START When the screen displays “ENTER PROGRAM”, pressing this will start the Manual Program. This is a “one-touch” way of starting the Manual Program.
RESULTS Press this button to end the program and see the summary results ofyour workout: Total Time, Total Distance, Average Speed, Average Watts, Average Pulse and Total Calories. Once you press this button your workout will end. You cannot go back and resume your workoutwhere you left off. See START / PAUSE above for information regarding pausing then resuming your workout.
RECOVERY Press this button to measure and obtain your heart rate recovery score. See section “Recovery Test”.
FAN The console features a fan with adjustable louvers to direct airflow to cool you off while working out. Pressing this button turns the fan on or off.
13
Nautilus OM 113/213 08/18/2004 12:00 AM Page 12
OP
ER
AT
ION
USING THE 113/213 COMPUTER
■ Auto Shut-Off (Sleep Mode)
The console will automatically shut off in approximately 2 minutes withoutuse or input. There is no on/off switch.
■ Information Mode
The computer enables you to switch between English or Metric units bypressing and holding the UP and DOWN buttons simultaneously for 3seconds. Use the UP or DOWN button to select “ENGLISH” or “METRIC”and press ENTER to confirm. The computer will enter the InformationMode. In the Information Mode, by following the displayed menu andprompts, you will be able to:
Select ENGLISH measurement units which sets the computer for:• Miles• Miles/hour• Pounds• Inches
Or select METRIC measurement units which sets the computer for:• Kilometers• Kilometers/hour• Kilograms• Centimeters
See Total DistanceSee Total Hours
Press “ENTER” and then the software version will display. Press “ENTER”again to exit the Information Mode and the computer will bring you to the“ENTER PROGRAM” mode.
■ Grip Heart Rate
This Schwinn bike is equipped with grip heart rate sensors located on thehandlebars. You must contact these sensors with both hands so the com-puter can detect your pulse. The computer uses information detected bythe grip heart rate sensors for many of the software features. Make sureyou are griping the pods and look for the flashing “heart” icon and pulserate located on the lower right portion of the LCD display (to the left of theCYCLIST icon) indicating that a pulse signal is being received. This isextremely important for the Heart Rate Control and Fitness Test programs.The computer must receive a steady, consistent signal for the duration ofthese programs to operate correctly. If there is no display please see thesection titled “IMPORTANT Things You Should Know Before Exercising”for more information.
14
Nautilus OM 113/213 08/18/2004 12:00 AM Page 13
OP
ER
AT
ION
15
SOFTWARE FEATURES
Quick Start:
This is a “one-touch” way of starting the Manual Program.
1 Manual Program:
You manually adjust the resistance level during your workout to make theprogram easier or more challenging.
10 Profile programs:
The computer offers a variety of fun and exciting profile programs to keepyou motivated and on track to achieving your fitness goals:
Profile Program 1 Ride in the ParkProfile Program 2 Rolling HillsProfile Program 3 PlateauProfile Program 4 Speed IntervalsProfile Program 5 Strength IntervalsProfile Program 6 Pyramid IntervalsProfile Program 7 Ramp Interval 1Profile Program 8 Ramp Interval 2Profile Program 9 Pikes PeakProfile Program 10 Cross-Training
3 Heart Rate Control (H.R.C) Programs
These programs enable you to choose to workout in 3 different heart ratezones; 60% to 70% of max. heart rate, 70% to 80% of max. heart rate, and80% to 90% of max. heart rate. The zones are calculated based upon yourage and the percent of maximum heart rate you select to exercise in.
***Please note: You must grip the heart rate sensor pods located on thehandlebars for the computer to read your pulse and for the Heart RateControl programs to work effectively.
60% - 70% of maximum heart rate – General Fitness Zone – Fat BurningExercise within this zone improves general fitness, begins to developendurance, and contributes greatly to weight control and management byutilizing mostly fat Calories for energy.
70% - 80% of maximum heart rate – Aerobic Workout Zone – EnduranceTraining Exercise within this zone increases overall fitness, improvescardiovascular efficiency and endurance.
80% - 90% of maximum heart rate – Anaerobic Workout Zone –Performance Training Exercise within this zone maximizes fitness and athleticperformance. ***We strongly recommend you consult with your physicianbefore exercising in this zone***
Nautilus OM 113/213 08/18/2004 12:00 AM Page 14
OP
ER
AT
ION
2 Custom User-defined Programs
These programs enable you to set up, store into memory and then workoutin 2 different course profiles that you customize.
Time Trial
This program enables you to workout against a “pacer” to determine howlong it takes you to cover a preset distance. You preset the speed of the“pacer” as the baseline of your workout and race to the end of the presetdistance. At the end of the Time Trial the computer displays the watts,distance, speed, etc. that you have achieved.
Fitness Test
The Fitness Test is one of the best ways to measure improvements in yourphysical fitness level. The test measures your fitness by comparing yourpower output (in Watts) to your Heart Rate. In general, as you become“more fit,” you will produce more power (Watts) at a given Heart Rate.
As the test starts, the power (Watts) slowly increases. This means that youwill work harder, and as a result, your heart rate increases. The Wattscontinue to increase automatically until your heart rate reaches the “TestZone.” This zone is individually computed to be near 75% of your maxi-mum Heart Rate. When you reach the “Test Zone” the bike holds theWatts steady for three minutes. This is to allow you to reach a steady state(where your Heart Rate has become basically steady).
At the end of the three minutes, the computer measures your Heart Rate,and the power (Watts.) These numbers, (along with information about yourage and weight,) are put into a formula and produce a “Fitness Score.”
Note: The Fitness Test is an excellent way to measure changes in your ownfitness level. It is not designed to be used to compare one person’s scoreto another person’s score. This is because the test protocol only “estimates”your “Maximum Heart Rate.”
Calorie Goal:
The Calorie Goal feature lets you select an amount of Calories you wouldlike to burn during your workout.
When selecting “CALORIE GOAL”, use the UP and DOWN buttons toselect the amount of Calories you wish to “burn” from 10 to 990. Eachincrement will change the Calories by 10. Confirm your selected value bypressing the ENTER button.
The console will prompt you to choose a profile program. Use the UP orDOWN buttons to select a profile program and press the ENTER button toconfirm your selection. During the program the Calorie display will countdown from the number of Calories you entered to 0. 16
Nautilus OM 113/213 08/18/2004 12:00 AM Page 15
OP
ER
AT
ION
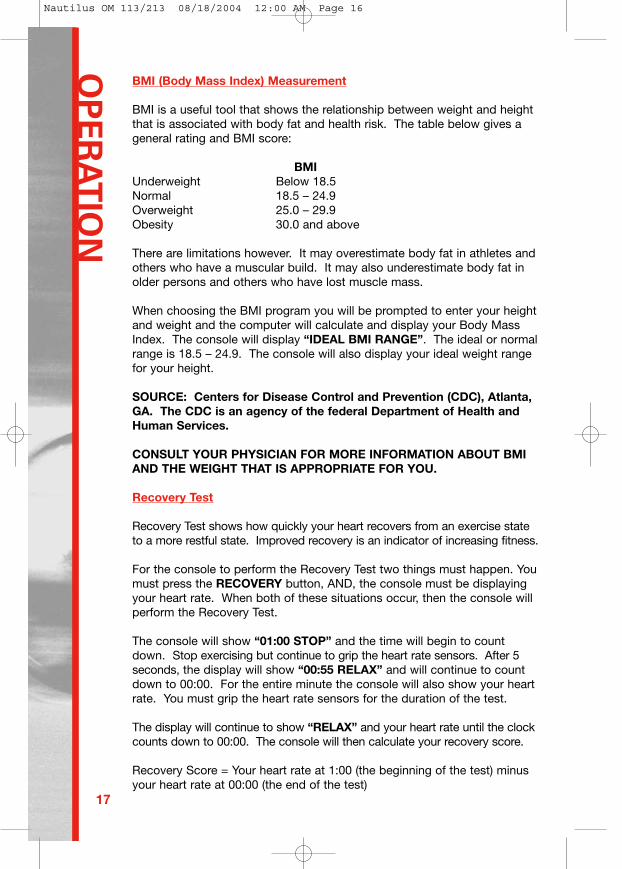
BMI (Body Mass Index) Measurement
BMI is a useful tool that shows the relationship between weight and heightthat is associated with body fat and health risk. The table below gives ageneral rating and BMI score:
BMIUnderweight Below 18.5Normal 18.5 – 24.9Overweight 25.0 – 29.9Obesity 30.0 and above
There are limitations however. It may overestimate body fat in athletes andothers who have a muscular build. It may also underestimate body fat inolder persons and others who have lost muscle mass.
When choosing the BMI program you will be prompted to enter your heightand weight and the computer will calculate and display your Body MassIndex. The console will display “IDEAL BMI RANGE”. The ideal or normalrange is 18.5 – 24.9. The console will also display your ideal weight rangefor your height.
SOURCE: Centers for Disease Control and Prevention (CDC), Atlanta,GA. The CDC is an agency of the federal Department of Health andHuman Services.
CONSULT YOUR PHYSICIAN FOR MORE INFORMATION ABOUT BMIAND THE WEIGHT THAT IS APPROPRIATE FOR YOU.
Recovery Test
Recovery Test shows how quickly your heart recovers from an exercise stateto a more restful state. Improved recovery is an indicator of increasing fitness.
For the console to perform the Recovery Test two things must happen. Youmust press the RECOVERY button, AND, the console must be displayingyour heart rate. When both of these situations occur, then the console willperform the Recovery Test.
The console will show “01:00 STOP” and the time will begin to countdown. Stop exercising but continue to grip the heart rate sensors. After 5seconds, the display will show “00:55 RELAX” and will continue to countdown to 00:00. For the entire minute the console will also show your heartrate. You must grip the heart rate sensors for the duration of the test.
The display will continue to show “RELAX” and your heart rate until the clockcounts down to 00:00. The console will then calculate your recovery score.
Recovery Score = Your heart rate at 1:00 (the beginning of the test) minusyour heart rate at 00:00 (the end of the test)
17
Nautilus OM 113/213 08/18/2004 12:00 AM Page 16
OP
ER
AT
ION
The display will show “SCORE (Recovery Score)”. This will remain on thedisplay for 5 seconds, then you can press RESULTS to view a summary ofyour workout and end the program you are working out in or press STARTto resume working out where you left off.
The higher the Recovery Test score value, the quicker your heart rate is returningto a more restful state and is an indication of improving fitness. By recordingthese values over time you can see the trend toward better health!
When you press the RECOVERY button and there is no heart rate signal ordisplay, the console will show “NEED HR” and the HEART RATE ICON onthe display will blink. This message will show for 5 seconds, then theProgram will resume. You must see your heart rate on the display and thenyou must push the RECOVERY button again to perform the test.
Helpful Tip: For a more relevant score, try to obtain a steady heart rate for3 minutes before pressing the RECOVERY button. This will be easier toachieve, and obtain the best result, in the Quick Start or Manual programso you can control level of resistance.
***Please note: The RECOVERY button does not function when you are inthe BMI program.
Results Mode
When you complete a program the Results Mode will automatically displayand show your basic workout statistics. Manually pressing this button duringyour workout will also end the program and then give you your basic workoutstatistics. You cannot return to your workout after pressing this button.
To have the option of either ending your workout and seeing your workoutresults, or pausing your workout so you can return to where you left off,perform the following steps:
To STOP or PAUSE the program: Press the START / PAUSE button topause your workout. The display will show “PRESS RESULT OR PRESSSTART”. Then if you press the RESULTS button the computer will showyour workout results and end the program, or if you press START / PAUSEthe computer will resume the program where you left off.
In Results Mode the console will display:
“GREAT JOB” This will hold for approximately 3 seconds.“YOUR RESULTS” This will hold for approximately 3 seconds
The display will show the following workout results:
SPEED: showing Average SpeedTIME: showing Total TimeDISTANCE: showing Total Distance
18
Nautilus OM 113/213 08/18/2004 12:00 AM Page 17
OP
ER
AT
ION
CALORIES: showing Total CaloriesWATTS: showing Average WattsHEART RATE: showing Average Heart Rate.
Pressing the RESET button will bring you back to the “ENTER PROGRAM”mode. After 60 seconds the console will automatically return to the“ENTER PROGRAM” mode.
• IMPORTANT Things You Should Know Before Exercising
A. The values calculated or measured by the computer are for exercise reference purposes only, NOT FOR MEDICAL PURPOSES.Please consult your physician before starting any exercise program. He or she can help establish the exercise frequency, intensity, (including determining your maximum and minimum heart rate and target heart rate zones) and the exercise time appropriate for your particular age and condition. If you have any pain or tightness in your chest, an irregular heart beat, shortness of breath, feel faint or have any discomfort while youexercise, STOP! Consult your physician before continuing.
B. Pulse rate — The pulse rate will be displayed after the system hasdetected 4 stable pulse signals. Pulse rate is then updated after receiving every two signals.
***Please Note: If your heart rate goes above 199, the “1” will flash. So a heart rate of 224 will be displayed as 124, and the 1 will be flashing***
C. Pulse rate readout — While the grip heart rate feature is a quick and convenient way to check your heart rate, it is generally not as accurate as a wireless transmitter belt and is subject to occasionalmis-readings and interference. You may, from time to time find inconsistencies with the heart rate display on your display console.There are many external factors that can affect the heart rate display.Some factors that influence the reliability of the heart rate signal include the environment where the equipment is used and even the physiology of the users themselves. Electromagnetic interferenceproduced by such items as televisions, computers, microwave ovens, cellular and cordless telephones and florescent lights can also have an effect on the heart rate display on your equipment. By moving the product away from such items, you may be able to avoid many heart rate display problems.
D. Resistance Control — You can control the resistance of the bike by using the UP or DOWN buttons. You increase the resistance bypressing the UP button or decrease the resistance by pressing
19
Nautilus OM 113/213 08/18/2004 12:00 AM Page 18
OP
ER
AT
ION
20
DOWN button. You will notice a slight lag in time while the electronicbrake adjusts to your input, so make sure to allow for this and don’t over-compensate.
E. Sleep Mode - The console will enter a “Sleep” mode and the systemwill turn off automatically if there is no input for approximately 2 minutes. Press any button to return the computer to its pre-“Sleep” state or press and hold the RESET button for 2 seconds to clear the computer.
Nautilus OM 113/213 08/18/2004 12:00 AM Page 19
OP
ER
AT
ION
21
CONSOLE OPERATION
■ Console Operation – Quick Start
QUICK START: Press QUICK START to take you immediately to theManual program. Resistance level will be Level 1. Time will start from00:00 and count up.
Changing Levels: You can increase or decrease the resistance level bypressing the UP or DOWN buttons at any time.
To STOP or PAUSE the program: Press the START / PAUSE button topause your workout. The display will show “PRESS RESULT OR PRESSSTART”. Then if you press the RESULTS button the computer will showyour workout results and end the program, or if you press START / PAUSEthe computer will resume the program where you left off.
■ Console Operation – Manual program
Select Program: Press any button to power up the console and “ENTERPROGRAM” appears in the alphanumeric display. To access the Manualprogram, scroll through the display by using the UP or DOWN buttons untilyou reach “MANUAL”, then press ENTER.
Enter Level: You will then be prompted in the alphanumeric display to“ENTER LEVEL”, (1 – 16). Select the desired resistance level by using theUP or DOWN buttons and then press ENTER to confirm your selection.The default resistance level will be the last level a user entered (previousworkout).
Enter Time: You will then be prompted in the alphanumeric display to“ENTER TIME”. Select the desired Time by using the UP or DOWN buttonsand then press ENTER to confirm your selection. The default Time will bethe last Time a user entered (previous workout). The minimum time youcan enter is 2:00.
Enter Weight: You will then be prompted in the alphanumeric display to“ENTRWEIGHT (lbs. or kgs.)”. Select the appropriate weight by using theUP or DOWN buttons and then press ENTER to confirm your selection.
Start: You will then be prompted in the alphanumeric display to “PRESSSTART”. “MANUAL” will display confirming you are about to start the“MANUAL” program. You can now begin exercising!
Changing Levels: You can increase or decrease the resistance level bypressing the UP or DOWN buttons at any time.
To STOP or PAUSE the program: Press the START / PAUSE button tostop or pause your workout. The display will show “PRESS RESULT OR
Nautilus OM 113/213 08/18/2004 12:00 AM Page 20
OP
ER
AT
ION
22
PRESS START”. Then if you press the RESULTS button the computer willshow your workout results and end the program, or if you press START /PAUSE the computer will resume the program where you left off.
■ Console Operation – Selecting a profile program
Select Program: Press any button to power up the console and “ENTERPROGRAM” appears in the alphanumeric display. To access the profileprograms, scroll through the display by using the UP or DOWN buttonsuntil you reach “PROGRAMS”, then press ENTER. The program profileand name will appear in the display. Use the UP or DOWN buttons toselect your desired program. Press ENTER to confirm your selection.
Enter Level: You will then be prompted in the alphanumeric display to“ENTER LEVEL”, (1 – 16). Select the desired resistance level by using theUP or DOWN buttons and then press ENTER to confirm your selection.The default resistance level will be the last level a user entered (previousworkout).
Enter Time: You will then be prompted in the alphanumeric display to“ENTER TIME”. Select the desired Time by using the UP or DOWN buttonsand then press ENTER to confirm your selection. The default Time will bethe last Time a user entered (previous workout). The minimum time youcan enter is 2:00.
Enter Weight: You will then be prompted in the alphanumeric display to“ENTRWEIGHT (lbs. or kgs.)”. Select the appropriate weight by using theUP or DOWN buttons and then press ENTER to confirm your selection.
Start: You will then be prompted in the alphanumeric display to “PRESSSTART”. The preset program you selected will display confirming yourselected program. You can now begin exercising!
To STOP or PAUSE the program: Press the START / PAUSE button topause your workout. The display will show “PRESS RESULT OR PRESSSTART”. Then if you press the RESULTS button the computer will showyour workout results and end the program, or if you press START / PAUSEthe computer will resume the program where you left off.
■ Console Operation – “H R C” (Heart Rate Control)
***Please note: You must grip the heart rate sensor pods located on thehandlebars for the computer to read your pulse and for the Heart RateControl programs to work effectively.
Select Program: Press any button to power up the console and “ENTERPROGRM” appears in the alphanumeric display. To access the heart ratecontrol programs, scroll through the display by using the UP or DOWNbuttons until you reach “H R C” then press ENTER.
Nautilus OM 113/213 08/18/2004 12:00 AM Page 21
OP
ER
AT
ION
23
Enter Age: You will then be prompted in the alphanumeric display to“ENTER AGE”. Select your Age by using the UP or DOWN buttons andthen press ENTER to confirm your selection.
Enter Heart Rate Zone: You will then be prompted in the alphanumericdisplay to enter your desired workout heart rate zone. Use the UP orDOWN buttons to scroll through:
• H.R.C. 60% - 70% of maximum heart rate – General Fitness Zone – Fat Burning
Exercise within this zone improves general fitness, begins to develop endurance, and contributes greatly to weight control and management by utilizing mostly fat Calories for energy.
• H.R.C. 70% - 80% of maximum heart rate – Aerobic Workout Zone – Endurance Training
Exercise within this zone increases overall fitness, improves cardiovascular efficiency and endurance.
• H.R.C. 80% - 90% of maximum heart rate – Anaerobic Workout Zone – Performance Training
Exercise within this zone maximizes fitness and athletic performance.***We strongly recommend you consult with your physician beforeexercising in this zone.
Each zone will flash 3 times followed by the heart beats per minute (BPM)associated with that zone. These will also flash 3 times. Select the appropriatezone by using the UP or DOWN buttons and then press ENTER to confirmyour selection.
Enter Time: You will then be prompted in the alphanumeric display to“ENTER TIME”. Select the desired Time by using the UP or DOWN buttonsand then press ENTER to confirm your selection. Minimum Time you canenter is 12:00.
Enter Weight: You will then be prompted in the alphanumeric display to“ENTRWEIGHT (lbs. or kgs.)”. Select the appropriate weight by using theUP or DOWN buttons and then press ENTER to confirm your selection.
Start: You will then be prompted in the alphanumeric display to “PRESSSTART”. “H R C” will display confirming your selection. You can nowbegin exercising!
Changing Levels: You can only increase or decrease the resistance levelby pressing the UP or DOWN buttons when in the first interval columnwhich is the “warm-up column”. This enables you to set your starting
Nautilus OM 113/213 08/18/2004 12:00 AM Page 22

OP
ER
AT
ION
24
warm-up level. A longer warm-up at lower resistance can burn moreCalories than a shorter warm-up at higher resistance. After the programexits the first interval “warm up column” the UP or DOWN buttons becomeinoperative and the program automatically adjusts the resistance to bringyou into your selected zone.
The program is designed to slowly bring you up to your selected heart rateworkout zone, hold you within that zone by reading your heart rate andadjusting the level of resistance to keep your workout within that zone, thenat the end of the program slowly bring you down into a cool down zone byreducing the resistance level in the last two columns.
As a precaution if your heart rate is above your selected heart rate zoneand the resistance level is at the minimum level for 30 seconds, the message“SLOW DOWN” will appear in the alphanumeric display. If after one moreminute, your heart rate is still above your selected heart rate zone, themessage “STOP” will be displayed and the program will end
To STOP or PAUSE the program: Press the START / PAUSE button topause your workout. The display will show “PRESS RESULT OR PRESSSTART”. Then if you press the RESULTS button the computer will showyour workout results and end the program, or if you press START / PAUSEthe computer will resume the program where you left off.
CONSULT YOUR PHYSICIAN FOR THE HEART RATE ZONE APPROPRIATEFOR YOU.
■ Console Operation – “CUSTOM 01” and “CUSTOM 02” (User-defined)
Select Program: Press any button to power up the console and “ENTERPROGRM” appears in the alphanumeric display. To access the Custom 01and Custom 02 programs, scroll through the display by using the UP orDOWN buttons until you reach “CUSTOM PROGS” then press ENTER.“CUSTOM 01” will flash. Use the UP or DOWN buttons to alternatebetween the two programs. Press ENTER to confirm your selection.
Enter Time: You will then be prompted in the alphanumeric display to“ENTER TIME”. Select the desired Time by using the UP or DOWNbuttons and then press ENTER to confirm your selection. The default Timewill be the last Time a user entered (previous workout). The minimum timeyou can enter is 2:00.
Enter Weight: You will then be prompted in the alphanumeric display to“ENTRWEIGHT (lbs. or kgs.)”. Select the appropriate weight by using theUP or DOWN buttons and then press ENTER to confirm your selection.
Start: You will then be prompted in the alphanumeric display to “PRESSSTART”. Depending on your choice when entering “CUSTOM PROGS”,“CUSTOM 01” or “CUSTOM 02” will display confirming your selection.You can now begin exercising, set up, or change your custom program.
Nautilus OM 113/213 08/18/2004 12:00 AM Page 23
OP
ER
AT
ION
25
To set up a custom program: You can set up your custom programprofile in each interval as you exercise. The flashing “bricks” indicate yourposition and interval location within the program. Use the UP or DOWNbuttons to select your desired resistance level as the program progressesthrough each interval. This profile will be stored into memory, which can thenbe accessed the next time you want to exercise within this custom program.
To change an existing custom program, simply use the UP or DOWNbuttons as you exercise in each interval to override your old customprogram. This new profile will automatically be stored into memory and willthen be the new default custom program.
To STOP or PAUSE the program: Press the START / PAUSE button topause your workout. The display will show “PRESS RESULT OR PRESSSTART”. Then if you press the RESULTS button the computer will showyour workout results and end the program, or if you press START / PAUSEthe computer will resume the program where you left off.
■ Console Operation – “T.T. PROGRAM” (Time Trial)
Select Program: Press any button to power up the console and “ENTERPROGRM” appears in the alphanumeric display. To access the Time Trialprogram, scroll through the display by using the UP or DOWN buttons untilyou reach “T.T.PROGRAM” then press ENTER.
Enter Distance: You will then be prompted in the alphanumeric display to“ENTER DIST”. Select the desired distance by using the UP or DOWNbuttons and then press ENTER to confirm your selection. You can selectthe desired distance in 1/10 of a mile or kilometer increments.
Enter Pacer Speed: You will then be prompted in the alphanumeric displayto enter “PACER SPEED”. Select the desired pacer speed by using theUP or DOWN buttons and then press ENTER to confirm your selection.You can select the desired pacer speed in 1/10 mile or kilometer increments.
Enter Weight: You will then be prompted in the alphanumeric display to“ENTRWEIGHT (lbs. or kgs.)”. Select the appropriate weight by using theUP or DOWN buttons and then press ENTER to confirm your selection.
Start: You will then be prompted in the alphanumeric display to “PRESSSTART”. “T.T.PROGRAM” will display confirming your selection. You cannow begin exercising! The PACER is represented by the top flashing“brick” and you are represented by the bottom flashing “brick”.
Changing Levels: You can increase or decrease the resistance level bypressing the UP or DOWN buttons at any time. Changing levels in thisprogram is like changing gears on a bike. To increase or decrease yourspeed use the UP and DOWN buttons.
Nautilus OM 113/213 08/18/2004 12:00 AM Page 24
OP
ER
AT
ION
26
END OF PROGRAM: The program ends when you complete your presetdistance.
To STOP or PAUSE the program: Press the START / PAUSE button topause your workout. The display will show “PRESS RESULT OR PRESSSTART”. Then if you press the RESULTS button the computer will showyour workout results and end the program, or if you press START / PAUSEthe computer will resume the program where you left off.
■ Console Operation – “FITNESS TEST”
***Please note: You must grip the heart rate sensor pods located on thehandlebars for the computer to read your pulse and for the program towork effectively.
Select Program: Press any button to power up the console and “ENTERPROGRM” appears in the alphanumeric display. To access the FitnessTest, scroll through the display by using the UP or DOWN buttons until youreach “FITNESS TEST” then press ENTER.
Enter Age: You will then be prompted in the alphanumeric display to“ENTER AGE”. Select your Age by using the UP or DOWN buttons andthen press ENTER to confirm your selection.
Enter Weight: You will then be prompted in the alphanumeric display to“ENTRWEIGHT (lbs. or kgs.)”. Select the appropriate weight by using theUP or DOWN buttons and then press ENTER to confirm your selection.
Start: You will then be prompted in the alphanumeric display to “PRESSSTART”. “FITNESS TEST” will display confirming your selection. You cannow begin the Fitness Test.
The program begins at level 1. The program will automatically adjust tobring you into a pre-determined “Test Zone” based upon an estimatedmaximum heart rate. Once you are in the “Test Zone” the resistance levelwill remain constant. The Time clock will begin to count down from 3:00.During the last 30 seconds, the console will record the average watts, andthe average heart rate and generate a “Fitness Score”.
It is important to keep your RPM’s steady for the whole 3:00 minutes tohelp maintain a steady heart rate.
The Fitness Test is an excellent way to measure changes in your own fitnesslevel. It is not designed to be used to compare one person’s score toanother person’s score. This is because the test protocol only “estimates”your “Maximum Heart Rate.”
***Please note: The Fitness Test program is a special program thatrequires un-interrupted exercise. After the initial Fitness Test program set-up,certain button functions become inoperative after starting the program:
Nautilus OM 113/213 08/18/2004 12:00 AM Page 25
OP
ER
AT
ION
27
UP or DOWN buttonsSTART / PAUSE buttonRESULTS buttonRECOVERY button
■ Console Operation – “CALORIE GOAL”
“CALORIE GOAL” enables you to select an amount of Calories you wouldlike to burn and lets you choose a profile program to achieve that goal.Your exercise is complete when the Calories count down to 0.
Select Program: Press any button to power up the console and “ENTERPROGRAM” appears in the alphanumeric display. To access Calorie Goal,scroll through the display by using the UP or DOWN buttons until youreach “CALORIE GOAL” then press ENTER.
Enter Calories: You will then be prompted in the alphanumeric display to“ENTER CALS”. Select the desired Calories to burn by using the UP orDOWN buttons and then press ENTER to confirm your selection. Next, aprofile program and name will appear in the display. Use the UP or DOWNbuttons to select your desired profile program. Press ENTER to confirmyour selection.
Enter Level: You will then be prompted in the alphanumeric display to“ENTER LEVEL”, (1 – 16). Select the desired resistance level by using theUP or DOWN buttons and then press ENTER to confirm your selection.The default resistance level will be the last level a user entered (previousworkout).
Enter Weight: You will then be prompted in the alphanumeric display to“ENTRWEIGHT (lbs. or kgs.)”. Select the appropriate weight by using theUP or DOWN buttons and then press ENTER to confirm your selection.
Start: You will then be prompted in the alphanumeric display to “PRESSSTART”. “CALORIE GOAL” will display confirming your selection. Youcan now begin exercising!
Time will begin counting up and Calories will begin counting down fromyour preset Calorie Goal value until the display reaches 0. When you havereached your Calorie Goal the computer will display “GREAT JOB”, then“YOUR RESULTS”. The display will show a summary of your workout:Total Time, Total Distance, Average Speed, Average Watts, Average Pulse,and Total Calories.
Changing Levels: You can increase or decrease the resistance level bypressing the UP or DOWN buttons at any time.
To STOP or PAUSE the program: Press the START / PAUSE button topause your workout. The display will show “PRESS RESULT OR PRESSSTART”. Then if you press the RESULTS button the computer will show
Nautilus OM 113/213 08/18/2004 12:00 AM Page 26
OP
ER
AT
ION
28
your workout results and end the program, or if you press START / PAUSEthe computer will resume the program where you left off.
■ Console Operation – “BMI” (Body Mass Index)
BMI is a useful tool that shows the relationship between weight andheight that is associated with body fat and health risk.
Select Program: Press any button to power up the console and “ENTERPROGRAM” appears in the alphanumeric display. To access BMI, scrollthrough the display by using the UP or DOWN buttons until you reach“BMI” then press ENTER.
Enter Weight: You will then be prompted in the alphanumeric display to“ENTRWEIGHT (lbs. or kgs)”. Select the appropriate weight by using theUP or DOWN buttons and then press ENTER to confirm your selection.
Enter Height: You will then be prompted in the alphanumeric display to“ENTRHEIGHT (in. or cent.)”. Select the appropriate height by using theUP or DOWN buttons and then press ENTER to confirm your selection.
The computer will calculate and display your Body Mass Index.Then the Ideal BMI will display: 18.5 to 24.9Then your ideal weight will display.
***Please note: The BMI program is a special program that requires certainspecific input so certain buttons become inoperative while in the BMIprogram. The following buttons only work during the set-up phase of theprogram and become inoperative after you start the program:
START / PAUSE buttonENTER buttonUP or DOWN buttonsRESULTS buttonRECOVERY button
CONSULT YOUR PHYSICIAN FOR MORE INFORMATION ABOUT BMIAND THE WEIGHT THAT IS APPROPRIATE FOR YOU.
Nautilus OM 113/213 08/18/2004 12:00 AM Page 27
MA
INT
EN
AN
CE
MAINTENANCE OF YOUR SCHWINN EXERCISE BIKE
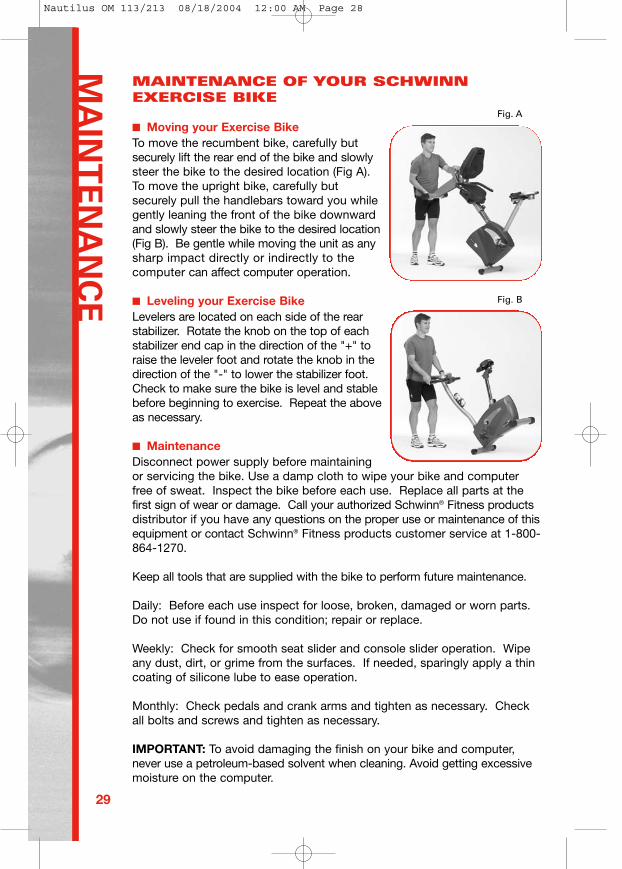
■ Moving your Exercise BikeTo move the recumbent bike, carefully butsecurely lift the rear end of the bike and slowlysteer the bike to the desired location (Fig A).To move the upright bike, carefully butsecurely pull the handlebars toward you whilegently leaning the front of the bike downwardand slowly steer the bike to the desired location(Fig B). Be gentle while moving the unit as anysharp impact directly or indirectly to thecomputer can affect computer operation.
■ Leveling your Exercise BikeLevelers are located on each side of the rearstabilizer. Rotate the knob on the top of eachstabilizer end cap in the direction of the "+" toraise the leveler foot and rotate the knob in thedirection of the "-" to lower the stabilizer foot.Check to make sure the bike is level and stablebefore beginning to exercise. Repeat the aboveas necessary.
■ MaintenanceDisconnect power supply before maintainingor servicing the bike. Use a damp cloth to wipe your bike and computerfree of sweat. Inspect the bike before each use. Replace all parts at thefirst sign of wear or damage. Call your authorized Schwinn® Fitness productsdistributor if you have any questions on the proper use or maintenance of thisequipment or contact Schwinn® Fitness products customer service at 1-800-864-1270.
Keep all tools that are supplied with the bike to perform future maintenance.
Daily: Before each use inspect for loose, broken, damaged or worn parts.Do not use if found in this condition; repair or replace.
Weekly: Check for smooth seat slider and console slider operation. Wipeany dust, dirt, or grime from the surfaces. If needed, sparingly apply a thincoating of silicone lube to ease operation.
Monthly: Check pedals and crank arms and tighten as necessary. Checkall bolts and screws and tighten as necessary.
IMPORTANT: To avoid damaging the finish on your bike and computer,never use a petroleum-based solvent when cleaning. Avoid getting excessivemoisture on the computer.
29
Fig. A
Fig. B
Nautilus OM 113/213 08/18/2004 12:00 AM Page 28
FIT
NE
SS
GU
IDE
FITNESS GUIDELINES
■ Exercise and Health
It is not a secret that lack of exercise is increasingly becoming a major health issue.Obesity is on the rise, and being overweight can contribute to an increased risk in heartattack, diabetes, high blood pressure and other life threatening illnesses.
Most people do not get enough activity during the day to make up for the time theyspend at their desks, driving their cars or sitting in front of their televisions. We havelearned that exercising is not simply something we must do to look good and have agreat body. Exercise is a requirement for health, and overall wellness, not to mentionit can help you feel great!
The good news is that we are seeing more and more research that indicates we don’thave to work out intensely to see the benefits. Sure, it is great if you can workout for30-40 minutes at a time, five days a week. But it is not essential. Shorter bouts ofexercise can have a great effect (especially if you are just starting out), and a little bit ofexercise at a time is much better than none at all.
And what is really exciting is that research indicates that whether you are young orold, people who workout at light to moderate intensities may have an easier time stickingto their exercise programs than those people who work out harder and more often.
So, you do not need to be an athlete or a fitness ”die-hard” to benefit from exercise…you just need to get started, work out at levels that are comfortable and enjoyable toyou and stick with it!
■ Your New Home Fitness Program
There are many great reasons why home exercise equipment has increased inpopularity over the years, but topping the list is convenience. For any fitness program tobe successful, it must be something you will stick to on a regular basis. With homeexercise equipment, you can roll out of bed, put on a pair of sweats and start workingout while the coffee is brewing. No getting in the car and having to drive to the healthclub. No standing in line waiting for the equipment to become available.
And there is the comfort and safety factor. Who wants to walk or run outside when itis dark or is raining? Or try to ride a bike in the middle of heavy traffic? With yourhome exercise equipment, you can exercise in the comfort and security of your air-conditioned home.
Privacy and cleanliness are also important. Now you can exercise without feelingrushed or that anyone is looking at you (which is great if you are embarrassed aboutcarrying around a few extra pounds). No more sharing sweaty equipment, or wonderingif you will catch athlete’s foot in the health club shower.
The biggest advantage, however, may simply be the time factor. With work schedulesever-changing and busy family obligations, a home gym offers the benefit of beingable to work out when it is most convenient for you. No classes to time your schedulearound, or peak times to avoid. This is especially convenient if you have children athome.
It couldn’t be easier!
30
Nautilus OM 113/213 08/18/2004 12:00 AM Page 29
FIT
NE
SS
GU
IDE
STEPS TO GETTING STARTED
Once you have made the commitment to start exercising at home, here aresome suggestions that may help you stay motivated.
The first step is the most difficult. Any new habit is difficult to establish atfirst, but it can be done. Be patient, and plan to start slow and easy. Less ismore when you are first starting out … don’t overdo it!
Get a physical exam. If you have been inactive for several years or new toan exercise program, be sure to ask your doctor before beginning any exerciseprogram. Especially if you are over 30, have health problems or have a historyof heart disease in your family.
Plan for your home fitness center. Set aside an area or a room in yourhouse or apartment that is exclusively for fitness, and make sure that it isas comfortable as possible, so you’ll enjoy using it. If you like music,watching television or looking outside while exercising, make sure thesethings are accessible. Remember, if you don’t enjoy the space you areexercising in, you won’t be motivated to continue your program.
Find an exercise buddy. Research has shown that starting an exerciseprogram with someone can increase your chances of sticking to it. If youhave a buddy that is also starting a program, you can encourage, motivateand challenge each other.
Make fitness a part of your schedule. Include it in your daily planner justas you would any other appointment. Plan ahead for the week so that youcan be sure to fit it in. Even if you are pressed for time one day, a littleexercise is better than none at all. Do what you can to fit it in, even if youhave less time than you hoped for.
Use positive affirmations. Affirmations will help you program yoursubconscious to accept new beliefs. Saying to yourself a couple of times aday, “I am living a healthier lifestyle by exercising several times per week athome,” can help you stay on track.
Set goals. Setting goals can be helpful in keeping you motivated, butremember to keep them realistic. Short-term and long-term goals can makethis easier. How many days do you want to exercise this week? How manyworkouts would you like to have done in 90 days or a year?
31
Nautilus OM 113/213 08/18/2004 12:00 AM Page 30
FIT
NE
SS
GU
IDE
32
COMPONENTS OF FITNESS
Over the past 25 years, many people have focused on walking, running, cycling,swimming and other types of aerobic activity as their only means of exercise.
However, we have learned that two other components of fitness are just asimportant. These other two components are muscle strength and flexibility.So in addition to having a strong heart and lungs, we also need to be able topick up a full bag of groceries and tie our shoes without having to sit down.
When developing your home fitness program, it is only appropriate that youdevelop all three components in order to achieve balanced overall fitness.Let’s take a look at all three components:
Cardiovascular fitness is training the heart and lungs to be stronger anddeliver more oxygen throughout your body with less effort. It can help reducethe risk of heart disease, and help you manage your weight. It is the cornerstoneof fitness, and can be achieved in many ways such as walking or running on thetreadmill or outdoors, climbing stairs, cycling, or using a StairMaster® orswimming in the pool or ocean.
For many years, it was suggested that moderate level cardiovascular activity(activities that make you sweat and breathe and a moderate pace) should bedone 3 – 4 days a week for 15 – 45 minutes at a time. It is now recommended thatyou attempt to do some cardiovascular activity EVERY day, if possible.
The good news is that the cardiovascular activity does not need to bemoderately intensive everyday, nor does it need to be sustained for 15 – 45minutes at a time.
So while it is ideal to challenge your heart and lungs by doing something likea strong power walk every other day for 15 – 45 minutes, it is more importantto make sure you do at least a little bit of cardiovascular activity every day,even if you don’t do it for very long or very intensely.
For example, you might try using your Schwinn® exercise bicycle for ascheduled, moderate level workout for 20 – 30 minutes on Monday,Wednesday, Friday and Sunday (see the intensity monitoring section forfurther details on how hard to workout). On the other days, you might trygoing for a leisurely stroll 10 minutes in the morning and in the evening (orwhenever you can fit it in).
Whatever you do, just make sure you get your body moving, and your heartand lungs pumping for some period of time every day.
Muscular Strength is training your muscles to remain strong using resistancesuch as dumbbells, elastic tubing or your body weight. In the past decade,we have learned that building or maintaining muscular strength is extremelyimportant for a balanced fitness program. And it is especially important as weget older.
Nautilus OM 113/213 08/18/2004 12:00 AM Page 31
FIT
NE
SS
GU
IDE
We have learned through a variety of studies that those individuals who justtrain aerobically (without strength training) do maintain their cardiovascularendurance over the years, but they generally lose lean muscle mass as theyget older. However, those individuals who combine strength training andcardiovascular training can maintain their lean body mass as they get older.What this means is that if you just do cardiovascular activity, your body willnaturally lose muscle mass as you get older, and that means that you willactually get “fatter” as you age, unless you incorporate strength training.
We have also learned that consistent strength training helps maintain boneand muscle mass as we get older. For women, strength training (along withcardiovascular training) may also protect against post-menopausal bone lossand osteoporosis in their later years.
And strength training is not complicated. It is recommended that you do 8 – 12repetitions of 8 – 10 major muscle groups at least 2 days a week. However,you don’t have to do all these exercises at once. You can break them up intoshorter workouts throughout the day. For example, you can do just upperbody exercises in the morning, and your lower body exercises in the evening.Or, you can alternate strength exercises with cardiovascular exercise (oftenknown as circuit training) by switching back and forth every couple of minutes.
The best part is you don’t need complicated equipment or fancy machines.You can do everything you need to do with a simple pair of dumbbells, or youcan try Nautilus’® new Select Tech dumbbells, which provide you a widevariety of weight options in a revolutionary all-in-one dumbbell. You can useelastic tubing, or simply do body weight exercises such as push-ups or lunges.
Flexibility is being able to bend, reach, twist and turn with comfort and easeas we perform daily tasks, play or exercise. It is perhaps the most ignoredcomponent of fitness, but certainly the easiest one to incorporate into ourdaily lives because it can be done anywhere and almost at any time.
To maintain your flexibility, you simply need to stretch. This could be as simpleas reaching for your toes, or reaching overhead when you wake up in themorning. Or maybe you enjoy it so much that you would be interested in tryingthe Nautilus® yoga workout video. You can even incorporate stretching intoyour strength training workouts by stretching the muscles you have usedimmediately after you have completed your exercise set.
Like cardiovascular training, it is recommended that you stretch every day.However, you do not need to create a formalized program. You can simplymake sure that you stretch your major muscle groups throughout the day.Make sure you include your thighs, calves, hamstrings, back, chest, neck andshoulders.
Do what feels good, but also remember to mix it up. Don’t just do traditional“reach and hold” stretches. Also, try gently moving through a range of motionthat is comfortable to you. For example, you don’t have to stretch your necksimply by pulling on your head with your hand. You can also just rotate theneck slowly around and look side to side.
33
Nautilus OM 113/213 08/18/2004 12:01 AM Page 32
FIT
NE
SS
GU
IDE
NUTRITION
Of course, every good health and fitness program will also include a goodnutrition component. Good nutrition is likely the most important factor inmaintaining ideal body weight and managing weight loss.
There are a variety of schools of thought regarding which nutrition program,diet or eating plan is best. While we do not promote or endorse any particularone, here are some things to consider that will help you get on the road toa healthy diet:
Understand Caloric Balance. How many Calories you intake, and howmany Calories you burn off will determine whether you will gain or loseweight day to day. It is impossible to achieve weight loss without some sortof “Caloric deficit” that can be obtained through cutting Calories, or burningoff more than you take in. The wisest approach is to do a little of both –cutting Calories and exercising. It is the only proven long-term weightmanagement program that is successful. You should ensure that you areconsuming at least 1,200 Calories per day total. A total weight loss of nomore than 2 lbs. per week is recommended for long-term weight management.
Eat a variety of foods. Regardless of your eating plan, you should be sureto include a variety of foods in your diet, maximizing your intake of fruitsand vegetables whenever possible. Colorful meals and snacks that aredivided amongst the 4 food groups will ensure that you obtain the nutrientsneeded for your body to function at optimal levels. Any diet that focuses onjust one food group source or processed foods can be unhealthy in thelong run, and should be avoided. Don’t focus too much on any particularmeal or snack, but rather on your overall intake of a variety of differentfoods during any given day.
Drink water. Our bodies are made up of over 70% water, and most of usdon’t drink enough. Carry water with you everywhere you go, and drink asoften as you can. This helps the body function at optimum levels, and cansignificantly help with weight management.
Eat more often and be mindful of your portions. Research has shownthat it can be helpful to eat smaller meals more often versus 3 larger mealsa day if you are looking to promote healthy weight maintenance or weightloss. And we have discovered that many portions we eat are much largerthan necessary, and can be laden with Calories. So, try snacking more andnot eating so many large meals, and share your snacks or food with others(or break your portions in half) to help manage your Caloric intake.
34
Nautilus OM 113/213 08/18/2004 12:01 AM Page 33
FIT
NE
SS
GU
IDE
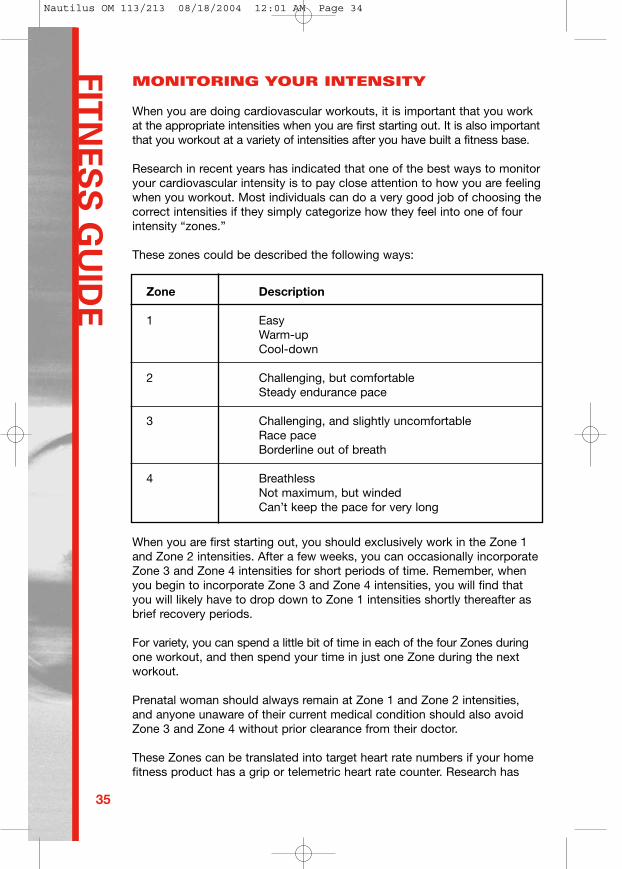
MONITORING YOUR INTENSITY
When you are doing cardiovascular workouts, it is important that you workat the appropriate intensities when you are first starting out. It is also importantthat you workout at a variety of intensities after you have built a fitness base.
Research in recent years has indicated that one of the best ways to monitoryour cardiovascular intensity is to pay close attention to how you are feelingwhen you workout. Most individuals can do a very good job of choosing thecorrect intensities if they simply categorize how they feel into one of fourintensity “zones.”
These zones could be described the following ways:
When you are first starting out, you should exclusively work in the Zone 1and Zone 2 intensities. After a few weeks, you can occasionally incorporateZone 3 and Zone 4 intensities for short periods of time. Remember, whenyou begin to incorporate Zone 3 and Zone 4 intensities, you will find thatyou will likely have to drop down to Zone 1 intensities shortly thereafter asbrief recovery periods.
For variety, you can spend a little bit of time in each of the four Zones duringone workout, and then spend your time in just one Zone during the nextworkout.
Prenatal woman should always remain at Zone 1 and Zone 2 intensities,and anyone unaware of their current medical condition should also avoidZone 3 and Zone 4 without prior clearance from their doctor.
These Zones can be translated into target heart rate numbers if your homefitness product has a grip or telemetric heart rate counter. Research has
35
Zone Description
1 EasyWarm-upCool-down
2 Challenging, but comfortableSteady endurance pace
3 Challenging, and slightly uncomfortable Race paceBorderline out of breath
4 BreathlessNot maximum, but windedCan’t keep the pace for very long
Nautilus OM 113/213 08/18/2004 12:01 AM Page 34
FIT
NE
SS
GU
IDE
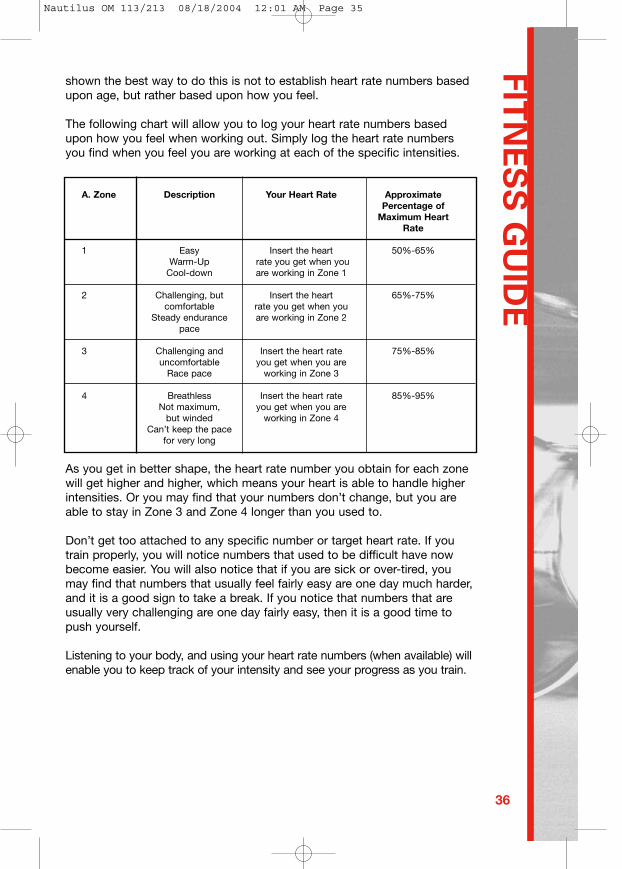
shown the best way to do this is not to establish heart rate numbers basedupon age, but rather based upon how you feel.
The following chart will allow you to log your heart rate numbers basedupon how you feel when working out. Simply log the heart rate numbersyou find when you feel you are working at each of the specific intensities.
As you get in better shape, the heart rate number you obtain for each zonewill get higher and higher, which means your heart is able to handle higherintensities. Or you may find that your numbers don’t change, but you areable to stay in Zone 3 and Zone 4 longer than you used to.
Don’t get too attached to any specific number or target heart rate. If youtrain properly, you will notice numbers that used to be difficult have nowbecome easier. You will also notice that if you are sick or over-tired, youmay find that numbers that usually feel fairly easy are one day much harder,and it is a good sign to take a break. If you notice that numbers that areusually very challenging are one day fairly easy, then it is a good time topush yourself.
Listening to your body, and using your heart rate numbers (when available) willenable you to keep track of your intensity and see your progress as you train.
36
A. Zone Description Your Heart Rate Approximate Percentage of
Maximum HeartRate
1 Easy Insert the heart 50%-65%Warm-Up rate you get when you
Cool-down are working in Zone 1
2 Challenging, but Insert the heart 65%-75%comfortable rate you get when you
Steady endurance are working in Zone 2pace
3 Challenging and Insert the heart rate 75%-85%uncomfortable you get when you are
Race pace working in Zone 3
4 Breathless Insert the heart rate 85%-95%Not maximum, you get when you are
but winded working in Zone 4Can’t keep the pace
for very long
Nautilus OM 113/213 08/18/2004 12:01 AM Page 35
FIT
NE
SS
GU
IDE
BEATING THE DROPOUT ODDS
The Surgeon General’s Report on Physical Activity and Health summarizesa few main points:
1. Regular physical activity offers substantial improvements in health and well-being for a majority of Americans.
2. If you exercise regularly, you’ll reduce your risk of heart attack, cancer, diabetes, high blood pressure, osteoporosis and even the common cold.
3. Regular exercise, regardless of the intensity, can help you control stress, sleep problems and depression.
The benefits of exercise and activity are AMAZING! And yet, only 22 percentof Americans engage in exercise for 20 minutes a day. And even amongindividuals who begin exercise programs, the dropout rate is about 50 percent.
So, how do you beat these odds? The answer appears to be in how yourstart and maintain your exercise program as well as how you create a habitof exercise.
Why are you starting an exercise program? For most individuals, it is tolose weight and look better, which are great reasons. However, sincechanges in your body shape and size can be gradual, and won’t happenovernight, it is important to focus on other benefits so that you will remainmotivated.
Thrive on the energy that exercise gives you. Watch your health risks scoresgo down. Pay attention to how much easier everyday activity is. Notice howmuch better you are sleeping. These kind of additional benefits will continue tokeep you motivated if you make them just as important to you as weight loss.
Additionally, try not to view exercise as punishment. Look at it as an investmentin your health. If you don’t feel motivated to workout one day, think ofsomething that is appealing to you that is active, and change your workout.Try not to let your workout become routine or mundane, and alwaysremember that some exercise is better than none at all. So, if you feel youare not motivated to continue, stop your workout early, or skip a day. It justmight be the thing you need to get you excited about your next workout.
Possibly the most important thing is to keep progressing your exercise programslowly. Big increases in time or intensity can set you up for injury, andcause you to drop out. Unless you are a world-class athlete, there is noreason to workout at world-class levels. Remember to give yourself somedays off and get proper rest.
Finally, try to anticipate lapses. If you are traveling, or your schedule isbecoming busier, and you are fearful you may get off track, try planningahead. For example, book a hotel that has a workout facility or change up
37
Nautilus OM 113/213 08/18/2004 12:01 AM Page 36
FIT
NE
SS
GU
IDE
your workout so that you keep your interest high and your boredom low.The bottom line is you must be creative and innovative to keep up your fitnessprogram. With some imagination and planning, it is easy to do.
Exercise is one of life’s joys. It energizes you, helps you look and feel betterand puts you on the road to better health. Your home fitness equipmentand gym is worth its weight in gold. Congratulations on making the choiceto get started!
Suggested Reading:
The Complete Home Fitness Handbook by Edmund Burke, Human KineticsPublisher.
Full Body Flexibility by Jay Blahnik, Human Kinetics Publisher.
Building Strength and Stamina by Wayne Wescott, PhD, Human KineticsPublisher.
Cross-Training for Dummies by Tony Ryan and Martica Heaner, ForDummies Publisher.
38
Nautilus OM 113/213 08/18/2004 12:01 AM Page 37
WA
RR
AN
TY
INFO
RM
AT
ION
39
SCHWINN® FITNESS INC. LIMITED WARRANTY FOR EXERCISE PRODUCTS
All Schwinn exercise products are warranted to the retail purchaser to be free from defects inmaterials and workmanship. Warranty coverage valid to the original purchaser only and proof ofpurchase will be required. Any product sold or placed in an application not recommended bySchwinn Fitness will void any warranty coverage set forth by Schwinn Fitness warranty policiesand procedures.
TIME PERIODResidential Environment: 10 years on frame 1 year on mechanical and electrical6 months on wear items90 days on labor
This warranty excludes wear items that need to be replaced due to normal wear and tear.
THIS WARRANTY DOES NOT COVER1. Any component on original equipment which carries a separate consumer warranty of theparts supplier.2. Normal wear and tear.3. Any damage, failure or loss caused by accident, misuse, neglect, abuse, improper assembly,improper maintenance, or failure to follow instructions or warnings in the Owner’s Manual.4. Use of products in a manner or environment for which they were not designed.
LIMITATIONSThe foregoing warranties are in lieu of and exclude all other warranties not expressly set forthherein, whether express or implied by operation of law or otherwise, including, but not limited to,warranties of merchantability or fitness for a particular purpose. Schwinn shall in no event beliable for incidental or consequential losses, damages or expenses in connection with its exerciseproducts. Schwinn’s liability hereunder is expressly limited to the replacement of goods not com-plying with this warranty or, at Schwinn’s election, to the repayment of an amount of the purchaseprice of the exercise product in question. Some states do not permit the exclusion or limitation ofimplied warranties or incidental or consequential damages, so the preceding limitations andexclusions may not apply to you.
PROCEDURESWarranty service will be performed by Schwinn or an authorized Schwinn Fitness Dealer. Theoriginal purchaser must provide proof of purchase. Service calls and/or transportation to andfrom the Authorized Schwinn Dealer is the responsibility of the purchaser.1. Schwinn will have the option to repair or replace any exercise product(s), which require warrantyservice.2. Schwinn will replace any equipment frame that is structurally defective with a new frame orreplace the unit with a unit of equal value. Schwinn is not responsible for labor charges inreplacing defective frames.3. In the event a product cannot be repaired, Schwinn will apply a limited credit reimbursementtoward another Schwinn exercise product of equal or greater value.4. Schwinn is not responsible for dealer labor charges for component changeovers completedafter the labor-related warranty period(s) stated herein.5. If you elect to repair an exercise product or part yourself, using the services of someone otherthan an Authorized Schwinn Fitness Dealer, or use a replacement part not supplied by Schwinn,Schwinn shall not be liable for any cost, damage, failure or loss caused by the use of suchunauthorized service or parts.6. See your Authorized Schwinn Fitness Dealer for service or write to:
Technical Services DepartmentSchwinn Fitness Inc.1886 Prairie WayLouisville, CO 80027
Or call 1-800-864-1270 for assistance or questions.
Nautilus OM 113/213 08/18/2004 12:01 AM Page 38
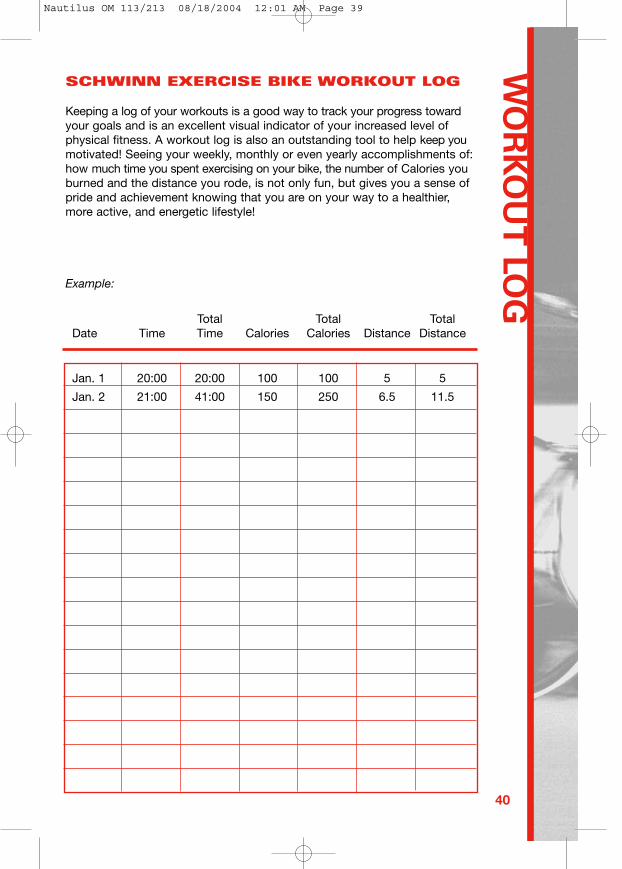
WO
RK
OU
T L
OG
SCHWINN EXERCISE BIKE WORKOUT LOG
Keeping a log of your workouts is a good way to track your progress towardyour goals and is an excellent visual indicator of your increased level ofphysical fitness. A workout log is also an outstanding tool to help keep youmotivated! Seeing your weekly, monthly or even yearly accomplishments of:how much time you spent exercising on your bike, the number of Calories youburned and the distance you rode, is not only fun, but gives you a sense ofpride and achievement knowing that you are on your way to a healthier,more active, and energetic lifestyle!
Example:
40
Total Total TotalDate Time Time Calories Calories Distance Distance
Jan. 1 20:00 20:00 100 100 5 5
Jan. 2 21:00 41:00 150 250 6.5 11.5
Nautilus OM 113/213 08/18/2004 12:01 AM Page 39
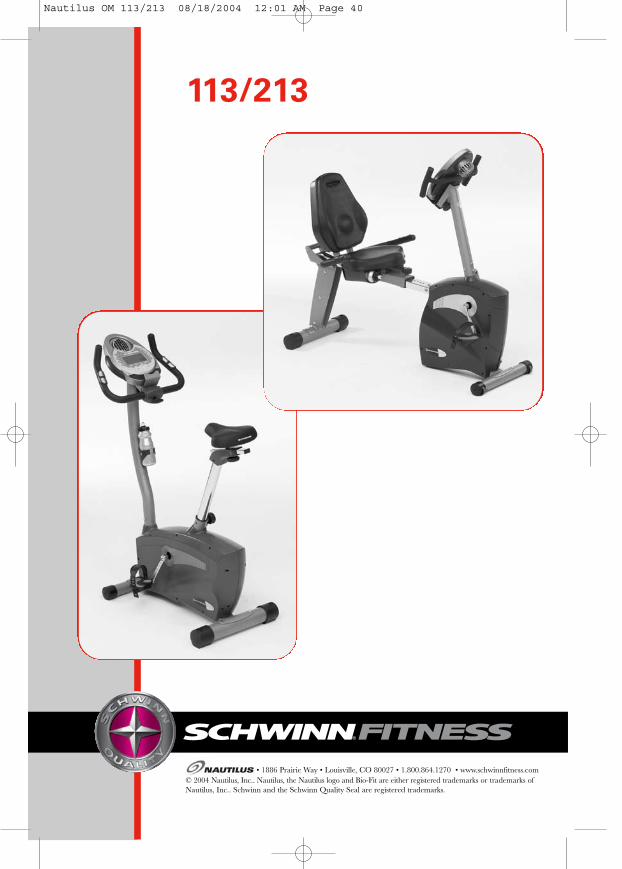
• 1886 Prairie Way • Louisville, CO 80027 • 1.800.864.1270 • www.schwinnfitness.com© 2004 Nautilus, Inc.. Nautilus, the Nautilus logo and Bio-Fit are either registered trademarks or trademarks ofNautilus, Inc.. Schwinn and the Schwinn Quality Seal are registered trademarks.
113/213
Nautilus OM 113/213 08/18/2004 12:01 AM Page 40