Embed Size (px)
Citation preview
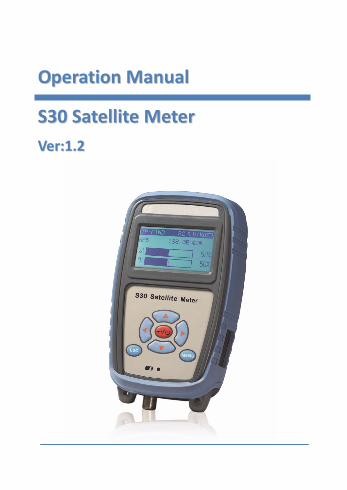
OOppeerraattiioonn MMaannuuaall
SS3300 SSaatteelllliittee MMeetteerr
VVeerr::11..22

I
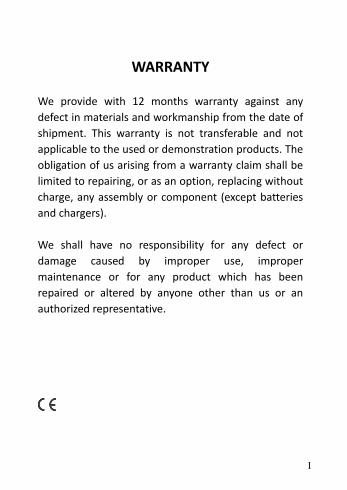
WARRANTY
We provide with 12 months warranty against any
defect in materials and workmanship from the date of
shipment. This warranty is not transferable and not
applicable to the used or demonstration products. The
obligation of us arising from a warranty claim shall be
limited to repairing, or as an option, replacing without
charge, any assembly or component (except batteries
and chargers).
We shall have no responsibility for any defect or
damage caused by improper use, improper
maintenance or for any product which has been
repaired or altered by anyone other than us or an
authorized representative.
II
INDEX 1.General Introduction .................................................. 1
2.Panel Introduction ..................................................... 2
2.1 Appearance .................................................... 2
2.2 Keypad ........................................................... 3
2.3 Display Description ........................................ 4
3. Power Supply ............................................................ 5
3.1 Battery ........................................................... 5
3.2 Charging ......................................................... 6
4. Using the Instrument ................................................ 7
4.1 Fast Searching ................................................ 7
4.2 Spectrum Function ......................................... 8
4.3 Angle Calculate ............................................ 11
4.4 Setup ............................................................ 12
4.5 DISEqC .......................................................... 20
4.6 SaTCR ........................................................... 20
5. Create User Channel Plan ........................................ 24
5.1 Upload and Download Channel Plan ............ 24
6. Specification ............................................................ 25
7. Accessories .............................................................. 27
S30 Satellite Meter Operation Manual
1
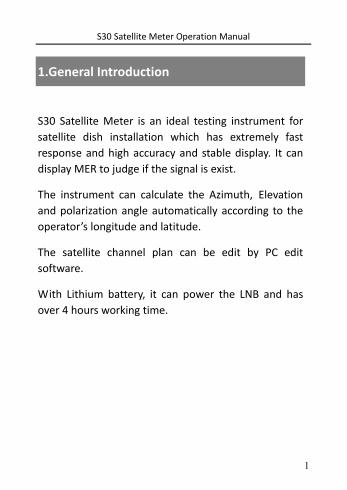
1.General Introduction
S30 Satellite Meter is an ideal testing instrument for
satellite dish installation which has extremely fast
response and high accuracy and stable display. It can
display MER to judge if the signal is exist.
The instrument can calculate the Azimuth, Elevation and polarization angle automatically according to the
operator’s longitude and latitude.
The satellite channel plan can be edit by PC edit
software.
With Lithium battery, it can power the LNB and has
over 4 hours working time.

S30 Satellite Meter Operation Manual
2
2.Panel Introduction
2.1 Appearance
RF Input
LCD
Selection
Charging Indicator
Power on/off
Charging Port
USB Port
Main Menu
Return
S30 Satellite Meter Operation Manual
3
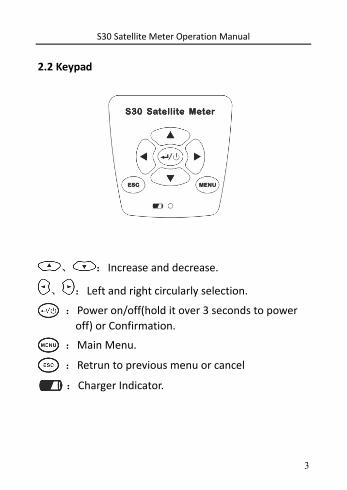
2.2 Keypad
、 :Increase and decrease.
、 :Left and right circularly selection.
:Power on/off(hold it over 3 seconds to power
off) or Confirmation.
:Main Menu.
:Retrun to previous menu or cancel
:Charger Indicator.
S30 Satellite Meter Operation Manual
4
Signal Strength
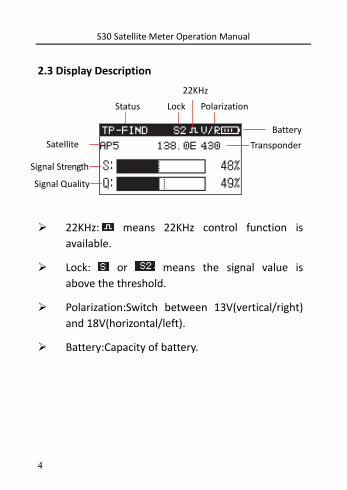
2.3 Display Description
22KHz: means 22KHz control function is
available.
Lock: or means the signal value is
above the threshold.
Polarization:Switch between 13V(vertical/right)
and 18V(horizontal/left).
Battery:Capacity of battery.
Status Lock
22KHz
Polarization
Battery
Satellite
Signal Quality
Transponder
S30 Satellite Meter Operation Manual
5
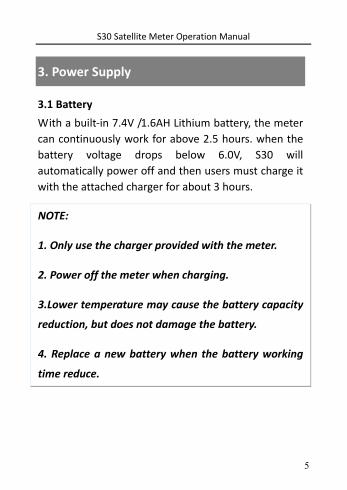
3. Power Supply
3.1 Battery
With a built‐in 7.4V /1.6AH Lithium battery, the meter
can continuously work for above 2.5 hours. when the
battery voltage drops below 6.0V, S30 will
automatically power off and then users must charge it
with the attached charger for about 3 hours.
NOTE:
1. Only use the charger provided with the meter.
2. Power off the meter when charging.
3.Lower temperature may cause the battery capacity
reduction, but does not damage the battery.
4. Replace a new battery when the battery working
time reduce.
S30 Satellite Meter Operation Manual
6
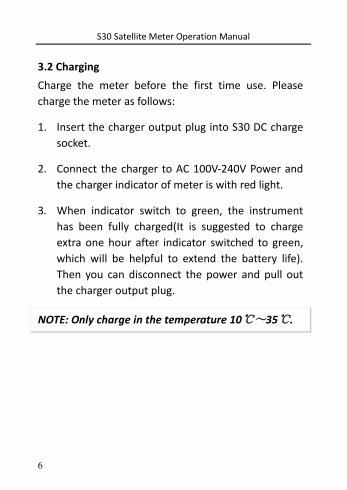
3.2 Charging
Charge the meter before the first time use. Please
charge the meter as follows:
1. Insert the charger output plug into S30 DC charge
socket.
2. Connect the charger to AC 100V‐240V Power and
the charger indicator of meter is with red light.
3. When indicator switch to green, the instrument
has been fully charged(It is suggested to charge
extra one hour after indicator switched to green,
which will be helpful to extend the battery life).
Then you can disconnect the power and pull out
the charger output plug.
NOTE: Only charge in the temperature 10℃~35℃.
S30 Satellite Meter Operation Manual
7
4. Using the Instrument
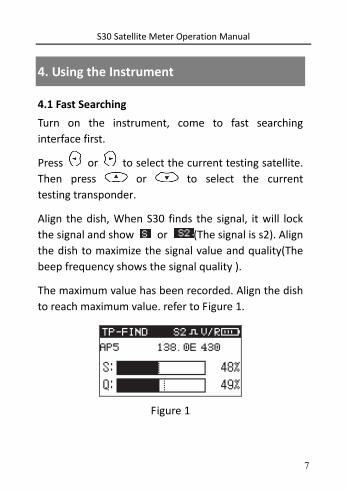
4.1 Fast Searching
Turn on the instrument, come to fast searching
interface first.
Press or to select the current testing satellite.
Then press or to select the current
testing transponder.
Align the dish, When S30 finds the signal, it will lock
the signal and show or (The signal is s2). Align
the dish to maximize the signal value and quality(The
beep frequency shows the signal quality ).
The maximum value has been recorded. Align the dish
to reach maximum value. refer to Figure 1.
Figure 1
S30 Satellite Meter Operation Manual
8
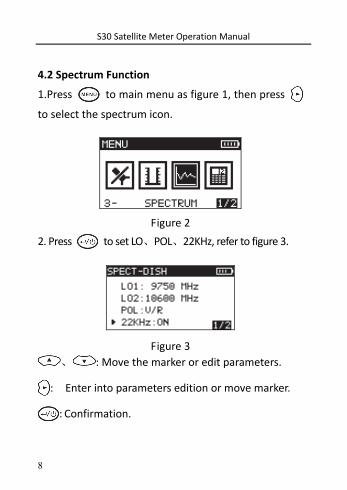
4.2 Spectrum Function
1.Press to main menu as figure 1, then press
to select the spectrum icon.
Figure 2
2. Press to set LO、POL、22KHz, refer to figure 3.
Figure 3
、 : Move the marker or edit parameters.
: Enter into parameters edition or move marker.
: Confirmation.
S30 Satellite Meter Operation Manual
9
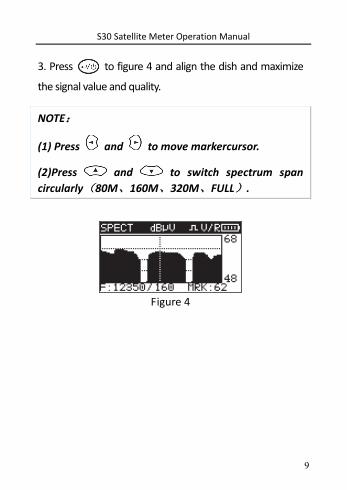
3. Press to figure 4 and align the dish and maximize
the signal value and quality.
NOTE:
(1) Press and to move markercursor.
(2)Press and to switch spectrum span
circularly(80M、160M、320M、FULL).
Figure 4
S30 Satellite Meter Operation Manual
10
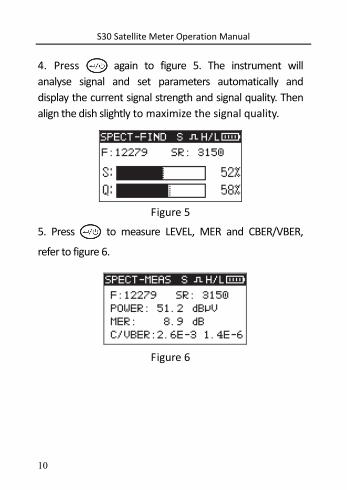
4. Press again to figure 5. The instrument will
analyse signal and set parameters automatically and
display the current signal strength and signal quality. Then
align the dish slightly to maximize the signal quality.
Figure 5
5. Press to measure LEVEL, MER and CBER/VBER,
refer to figure 6.
Figure 6
S30 Satellite Meter Operation Manual
11
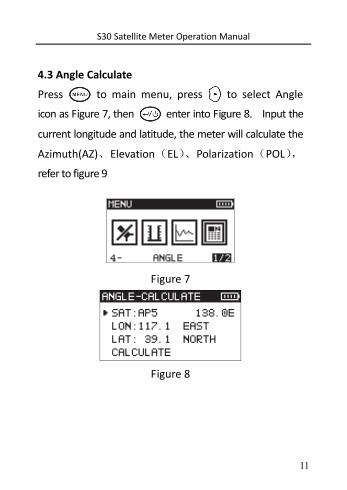
4.3 Angle Calculate
Press to main menu, press to select Angle
icon as Figure 7, then enter into Figure 8. Input the
current longitude and latitude, the meter will calculate the
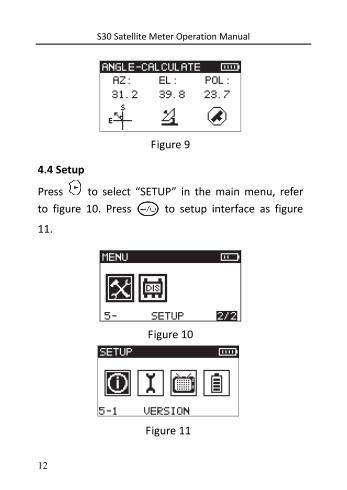
Azimuth(AZ)、Elevation(EL)、Polarization(POL),
refer to figure 9
Figure 7
Figure 8
S30 Satellite Meter Operation Manual
12
Figure 9
4.4 Setup
Press to select “SETUP” in the main menu, refer
to figure 10. Press to setup interface as figure
11.
Figure 10
Figure 11
S30 Satellite Meter Operation Manual
13
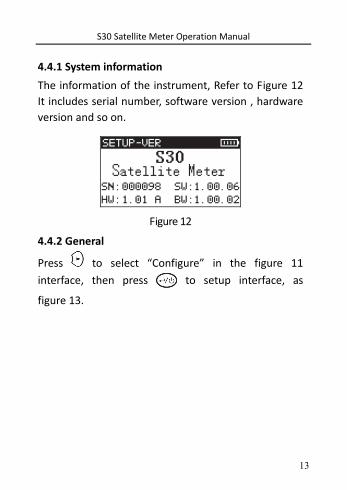
4.4.1 System information
The information of the instrument, Refer to Figure 12
It includes serial number, software version , hardware
version and so on.
Figure 12
4.4.2 General
Press to select “Configure” in the figure 11
interface, then press to setup interface, as
figure 13.
S30 Satellite Meter Operation Manual
14
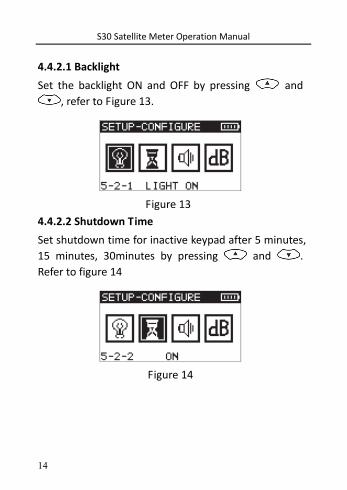
4.4.2.1 Backlight
Set the backlight ON and OFF by pressing and
, refer to Figure 13.
Figure 13
4.4.2.2 Shutdown Time
Set shutdown time for inactive keypad after 5 minutes,
15 minutes, 30minutes by pressing and .
Refer to figure 14
Figure 14
S30 Satellite Meter Operation Manual
15
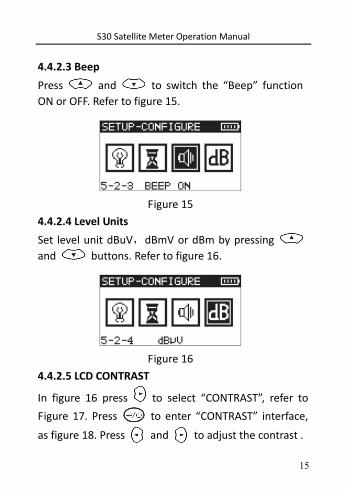
4.4.2.3 Beep
Press and to switch the “Beep” function
ON or OFF. Refer to figure 15.
Figure 15
4.4.2.4 Level Units
Set level unit dBuV,dBmV or dBm by pressing
and buttons. Refer to figure 16.
Figure 16
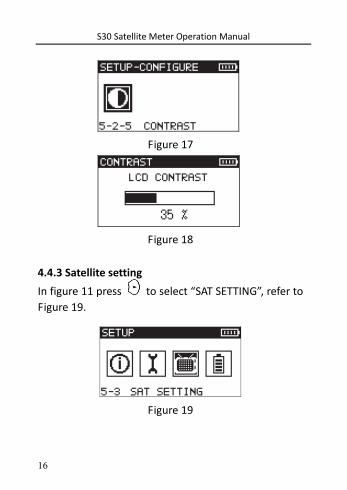
4.4.2.5 LCD CONTRAST
In figure 16 press to select “CONTRAST”, refer to
Figure 17. Press to enter “CONTRAST” interface,
as figure 18. Press and to adjust the contrast .
S30 Satellite Meter Operation Manual
16
Figure 17
Figure 18
4.4.3 Satellite setting
In figure 11 press to select “SAT SETTING”, refer to
Figure 19.
Figure 19
S30 Satellite Meter Operation Manual
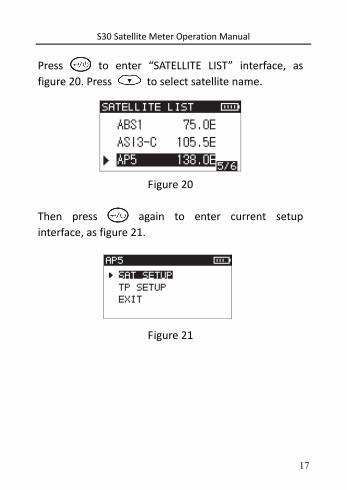
17
Press to enter “SATELLITE LIST” interface, as
figure 20. Press to select satellite name.
Figure 20
Then press again to enter current setup
interface, as figure 21.
Figure 21
S30 Satellite Meter Operation Manual
18
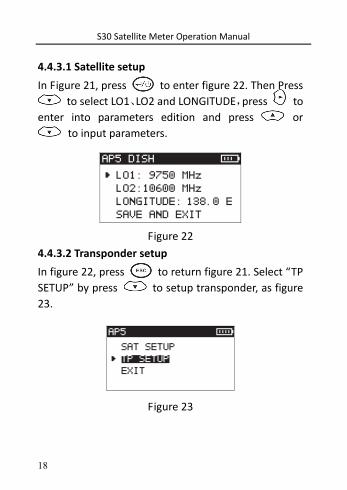
4.4.3.1 Satellite setup
In Figure 21, press to enter figure 22. Then Press
to select LO1、LO2 and LONGITUDE,press to enter into parameters edition and press or
to input parameters.
Figure 22
4.4.3.2 Transponder setup
In figure 22, press to return figure 21. Select “TP
SETUP” by press to setup transponder, as figure
23.
Figure 23
S30 Satellite Meter Operation Manual
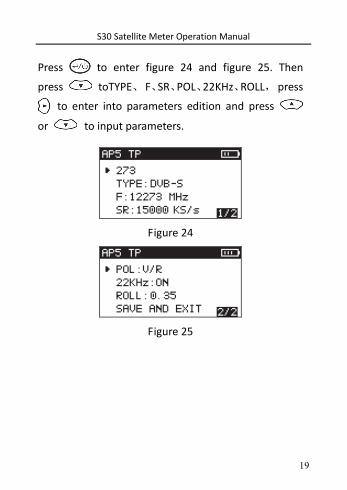
19
Press to enter figure 24 and figure 25. Then
press toTYPE、 F、SR、POL、22KHz、ROLL, press
to enter into parameters edition and press
or to input parameters.
Figure 24
Figure 25
S30 Satellite Meter Operation Manual
20
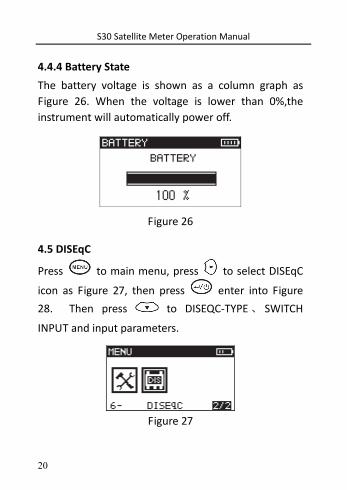
4.4.4 Battery State
The battery voltage is shown as a column graph as
Figure 26. When the voltage is lower than 0%,the
instrument will automatically power off.
Figure 26
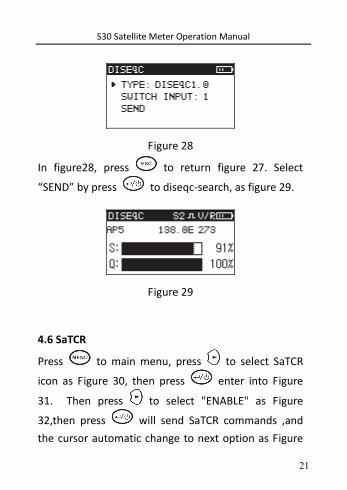
4.5 DISEqC
Press to main menu, press to select DISEqC
icon as Figure 27, then press enter into Figure
28. Then press to DISEQC‐TYPE、 SWITCH
INPUT and input parameters.
Figure 27
S30 Satellite Meter Operation Manual
21
Figure 28
In figure28, press to return figure 27. Select
“SEND” by press to diseqc‐search, as figure 29.
Figure 29
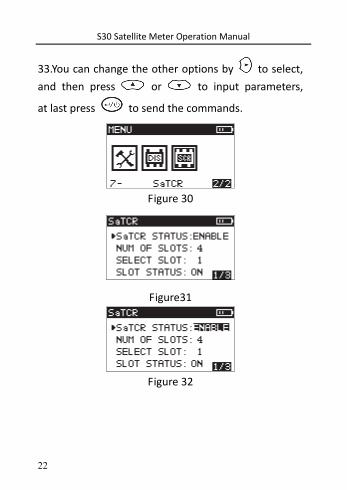
4.6 SaTCR
Press to main menu, press to select SaTCR
icon as Figure 30, then press enter into Figure
31. Then press to select "ENABLE" as Figure
32,then press will send SaTCR commands ,and
the cursor automatic change to next option as Figure
S30 Satellite Meter Operation Manual
22
33.You can change the other options by to select,
and then press or to input parameters,
at last press to send the commands.
Figure 30
Figure31
Figure 32
S30 Satellite Meter Operation Manual
23
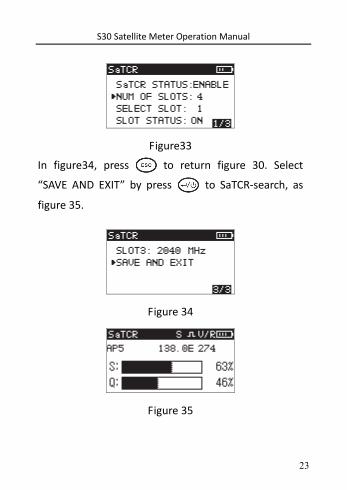
Figure33
In figure34, press to return figure 30. Select
“SAVE AND EXIT” by press to SaTCR‐search, as
figure 35.
Figure 34
Figure 35
S30 Satellite Meter Operation Manual
24
5. Create User Channel Plan
In order to enhance your work efficiency, please
create user channel plan before test. S30 will detect all
effective channels automatically and save in this
channel plan.
5.1 Upload and Download Channel Plan
The instrument can be connected with PC by USB
cable to upload and download channel plan.
S30 Satellite Meter Operation Manual
25
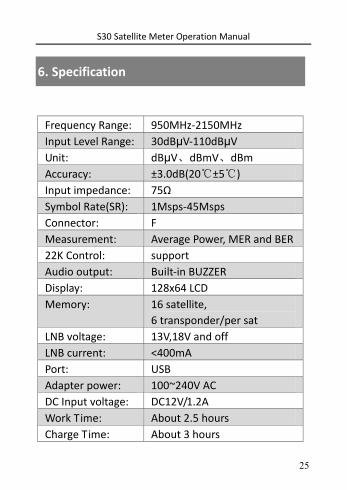
6. Specification
Frequency Range: 950MHz‐2150MHz
Input Level Range: 30dBμV‐110dBμV Unit: dBμV、dBmV、dBm
Accuracy: ±3.0dB(20℃±5℃)
Input impedance: 75Ω
Symbol Rate(SR): 1Msps‐45Msps
Connector: F
Measurement: Average Power, MER and BER
22K Control: support
Audio output: Built‐in BUZZER
Display: 128x64 LCD
Memory: 16 satellite,
6 transponder/per sat
LNB voltage: 13V,18V and off
LNB current: <400mA
Port: USB
Adapter power: 100~240V AC
DC Input voltage: DC12V/1.2A
Work Time: About 2.5 hours
Charge Time: About 3 hours
S30 Satellite Meter Operation Manual
26
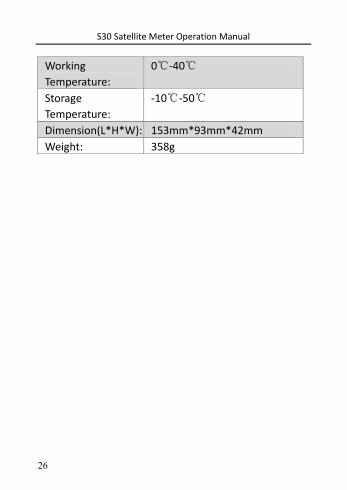
Working
Temperature:
0℃‐40℃
Storage
Temperature:
‐10℃‐50℃
Dimension(L*H*W): 153mm*93mm*42mm
Weight: 358g
S30 Satellite Meter Operation Manual
27
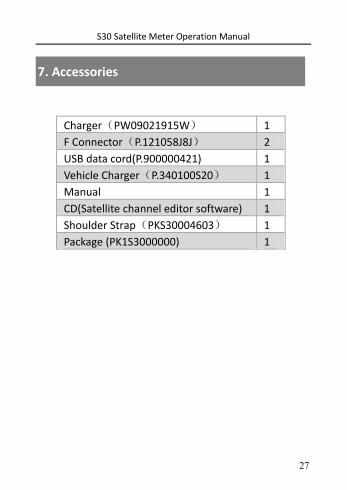
7. Accessories
Charger(PW09021915W) 1
F Connector(P.121058J8J) 2
USB data cord(P.900000421) 1
Vehicle Charger(P.340100S20) 1
Manual 1
CD(Satellite channel editor software) 1
Shoulder Strap(PKS30004603) 1
Package (PK1S3000000) 1


![DIGITAL SATELLITE METER · satellite meter, after 6-7 seconds later, the main menu will appear . 1. Satellite Finding Go to main menu, Use [A][B]](https://img.pdfslide.net/doc/110x75/5f43824048f55715b62c1347/digital-satellite-meter-satellite-meter-after-6-7-seconds-later-the-main-menu.jpg)