Embed Size (px)
Citation preview
Order Entry
For Supplies Warehouse, Surplus and PPE These steps partner with the visual guide found on following pages: pages 4.
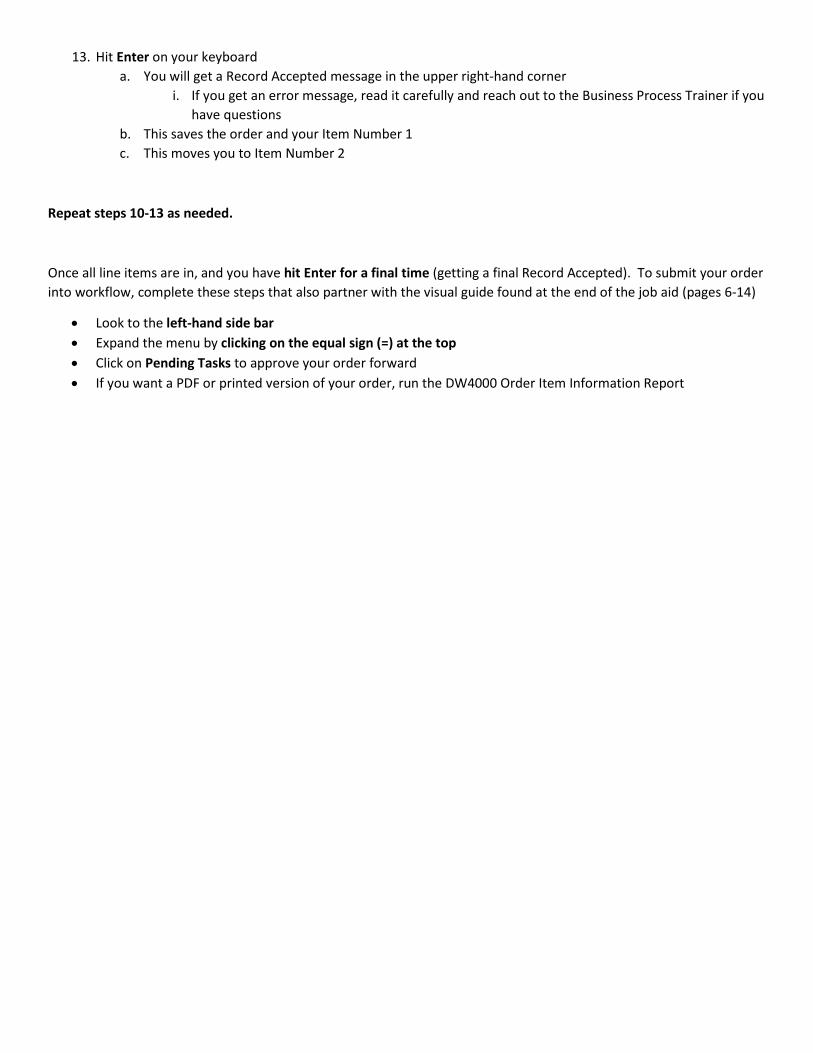
To get started, click the grey + sign
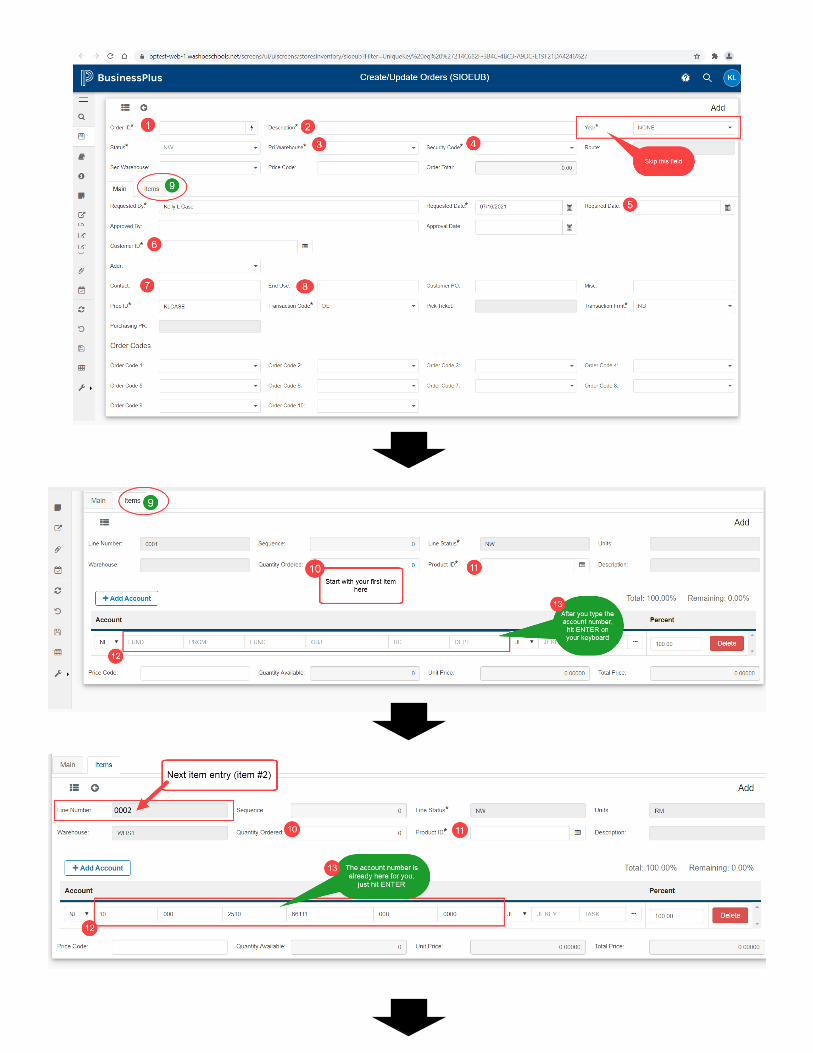
1. Select the Order ID number a. SIORDERN for Supplies Warehouse, for Surplus, or for PPE b. Always write your order number down for your records
2. Type a Description a. You can type whatever you like: office supplies, supplies, PPE, etc.
3. Choose the Primary Warehouse a. WHS1 for Supplies Warehouse b. SURPLUS for your Surplus Property c. PPE for all PPE orders
4. Select a Security Code a. This may be auto filled for you, if not, use the pull-down to select the correct code
5. Select a Required Date a. Choose a date that you would like your items delivered
6. Type your Customer ID a. This is your 3-digit site RC number
7. Type your phone number in the Contact field a. This will help folks contact you if they have questions about your order
8. Type the End Use a. This will help identify where your order should end up b. You can type whatever you like: office number, school name, site name, etc.
9. Click on the Items tab 10. Type the Quantity Ordered
a. Be sure to pay attention to how the warehouse catalog has items grouped in per unit quantities 11. Type the Product ID
a. You can free type in this field or use the look-up to browse the catalog listings b. After typing in the Product ID, make sure the Description field matches what you want to order. If it
does not, correct the Product ID. 12. Type the Account number
a. Type the fully qualified NL account number b. All (non-custodial) Supplies Warehouse, Surplus or PPE orders will use object code 66111 c. There is no charge for Surplus or PPE, but the system needs a place holder in the account number fields,
you won’t be charged for these items.
13. Hit Enter on your keyboard a. You will get a Record Accepted message in the upper right-hand corner
i. If you get an error message, read it carefully and reach out to the Business Process Trainer if you have questions
b. This saves the order and your Item Number 1 c. This moves you to Item Number 2
Repeat steps 10-13 as needed.
Once all line items are in, and you have hit Enter for a final time (getting a final Record Accepted). To submit your order into workflow, complete these steps that also partner with the visual guide found at the end of the job aid (pages 6-14)
• Look to the left-hand side bar • Expand the menu by clicking on the equal sign (=) at the top • Click on Pending Tasks to approve your order forward • If you want a PDF or printed version of your order, run the DW4000 Order Item Information Report
Warehouse Order Entry
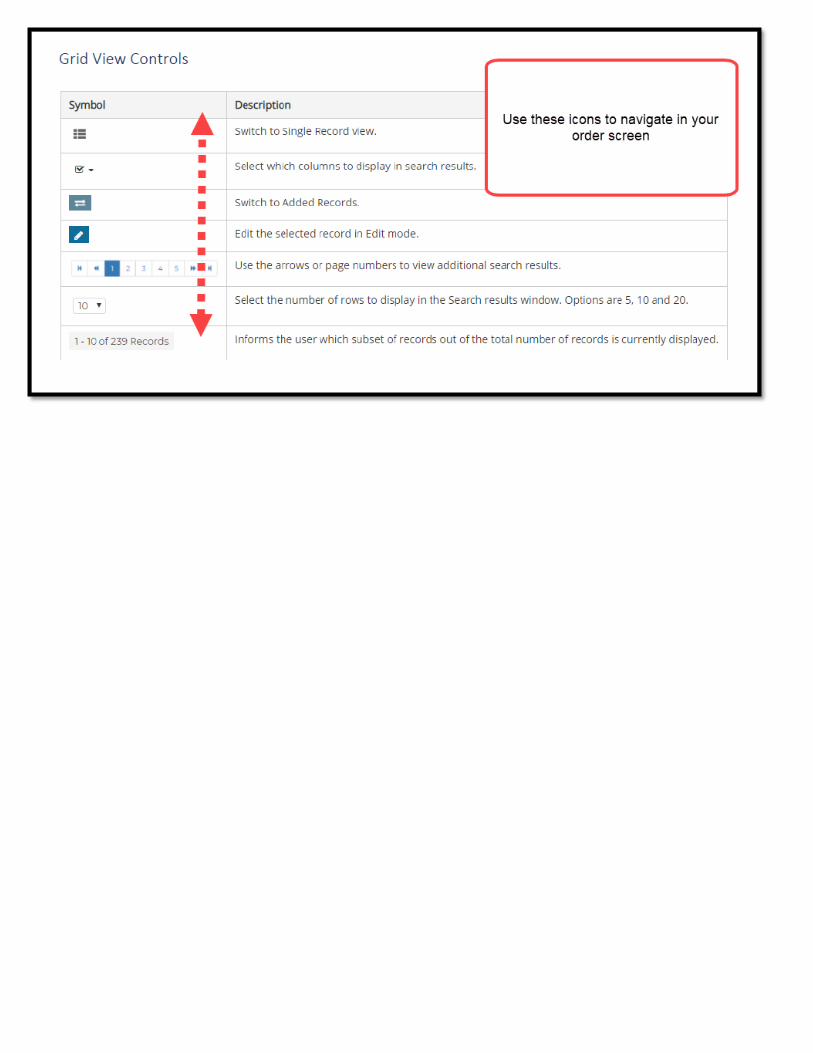
Navigating to your order screen:
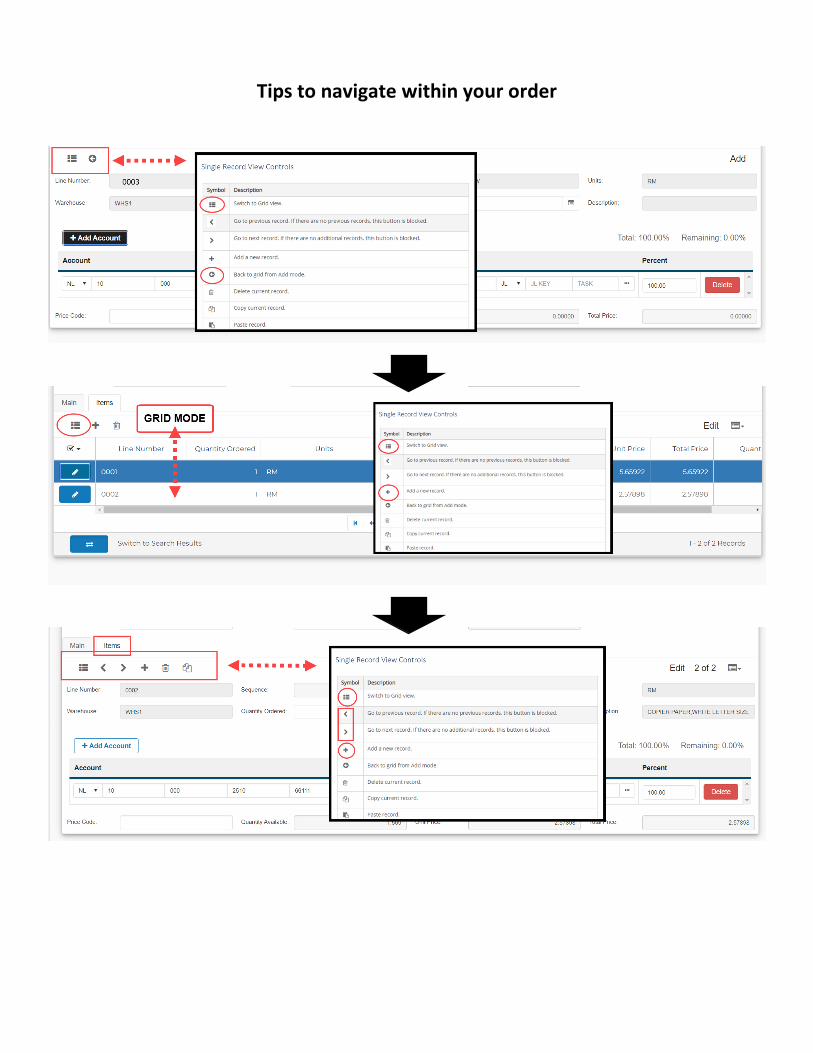
Tips to navigate within your order
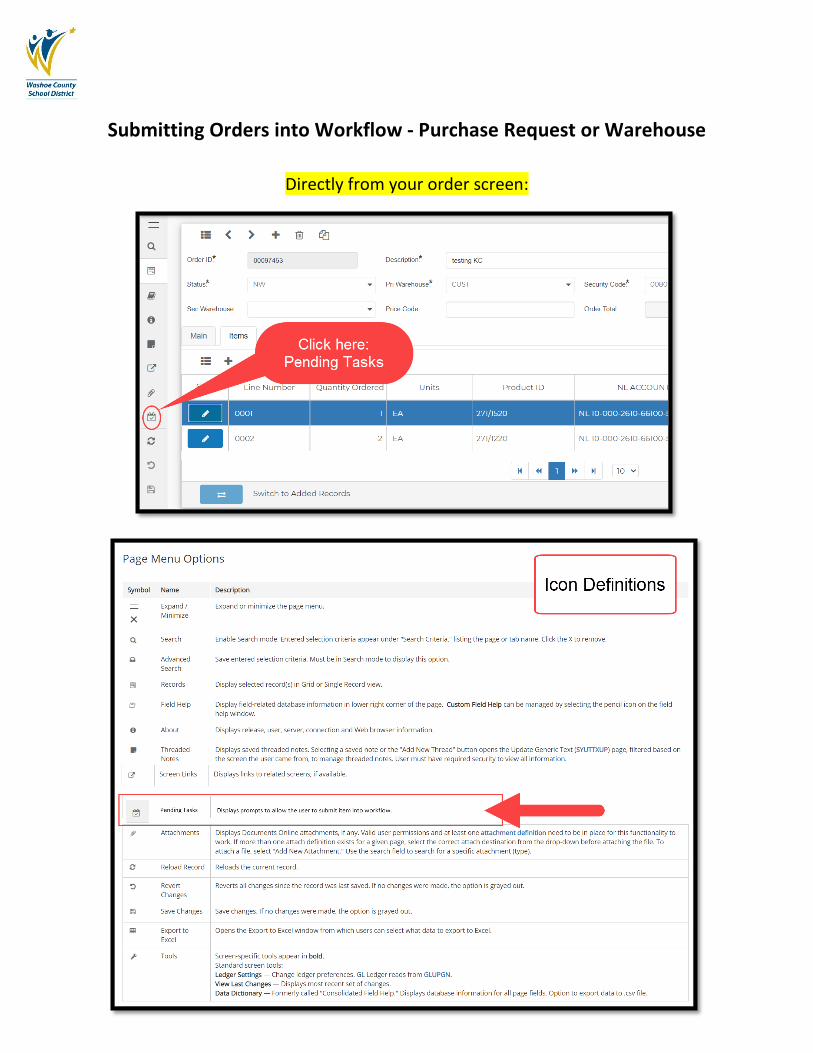
Submitting Orders into Workflow - Purchase Request or Warehouse
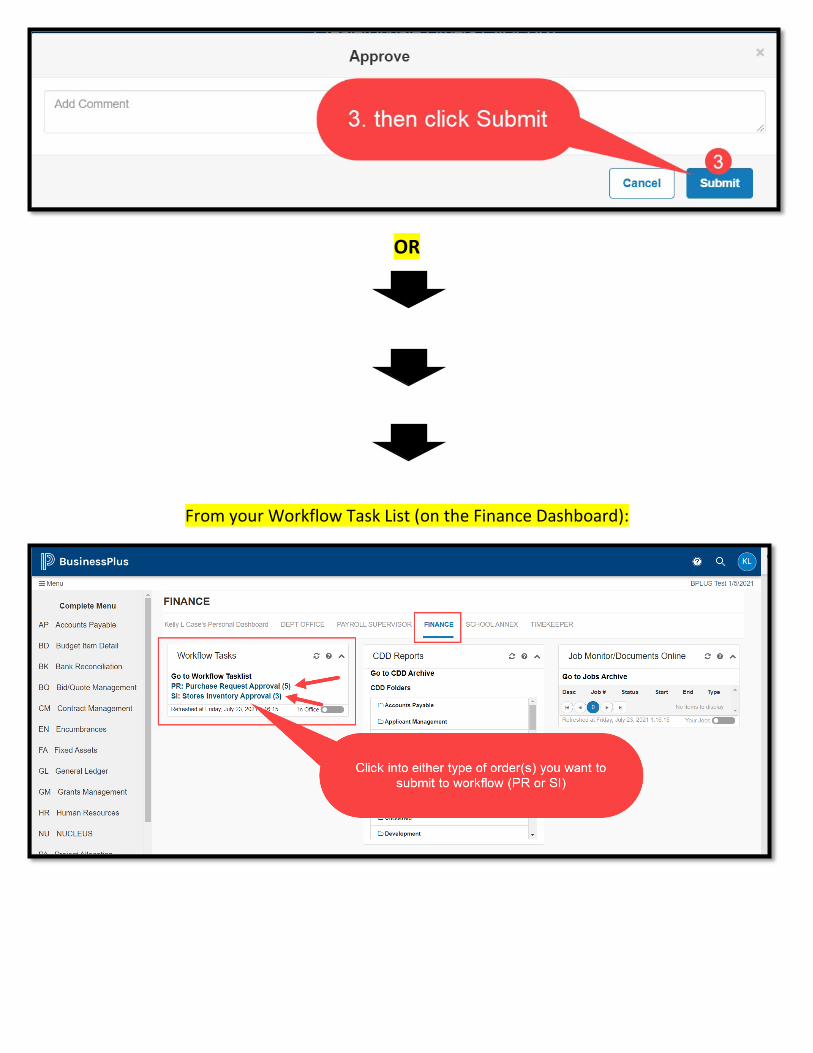
Directly from your order screen:
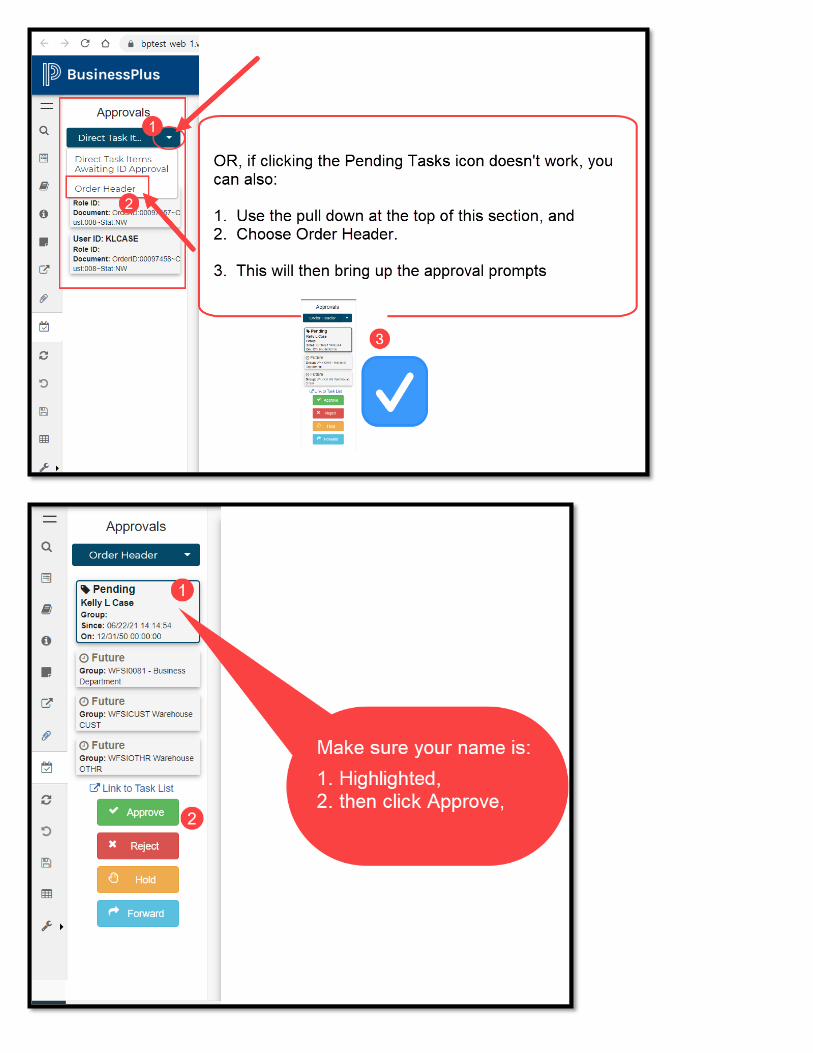
OR
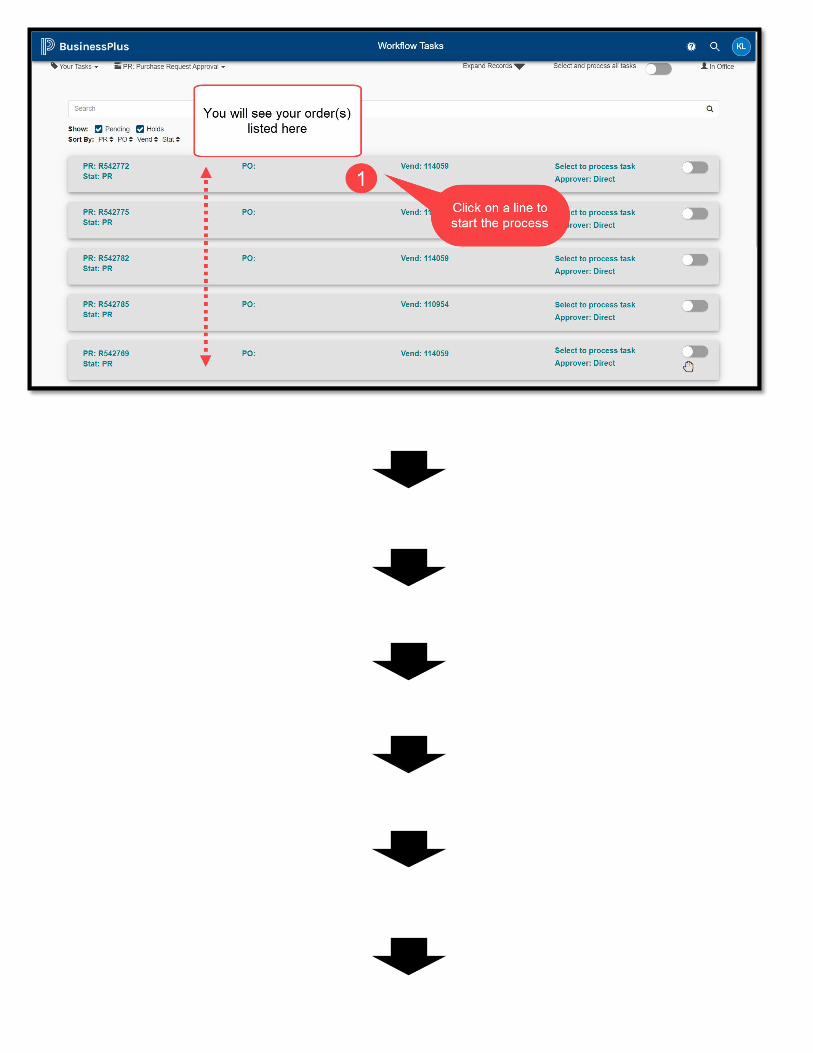
From your Workflow Task List (on the Finance Dashboard):
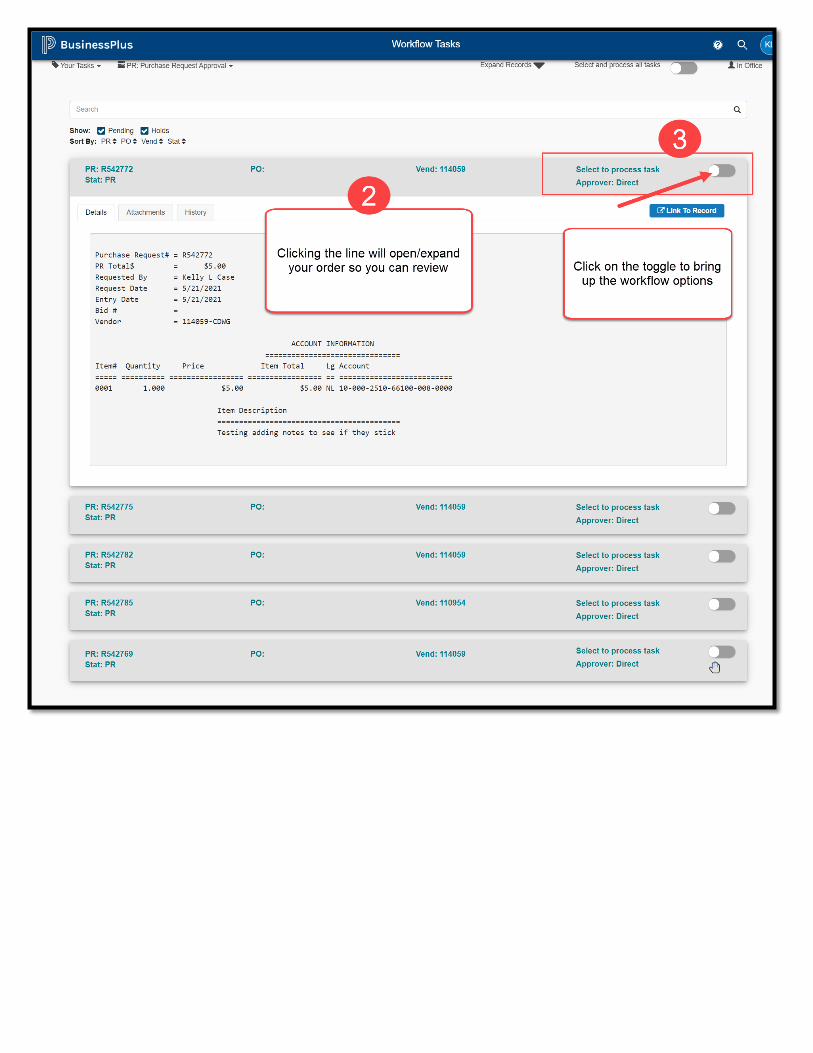
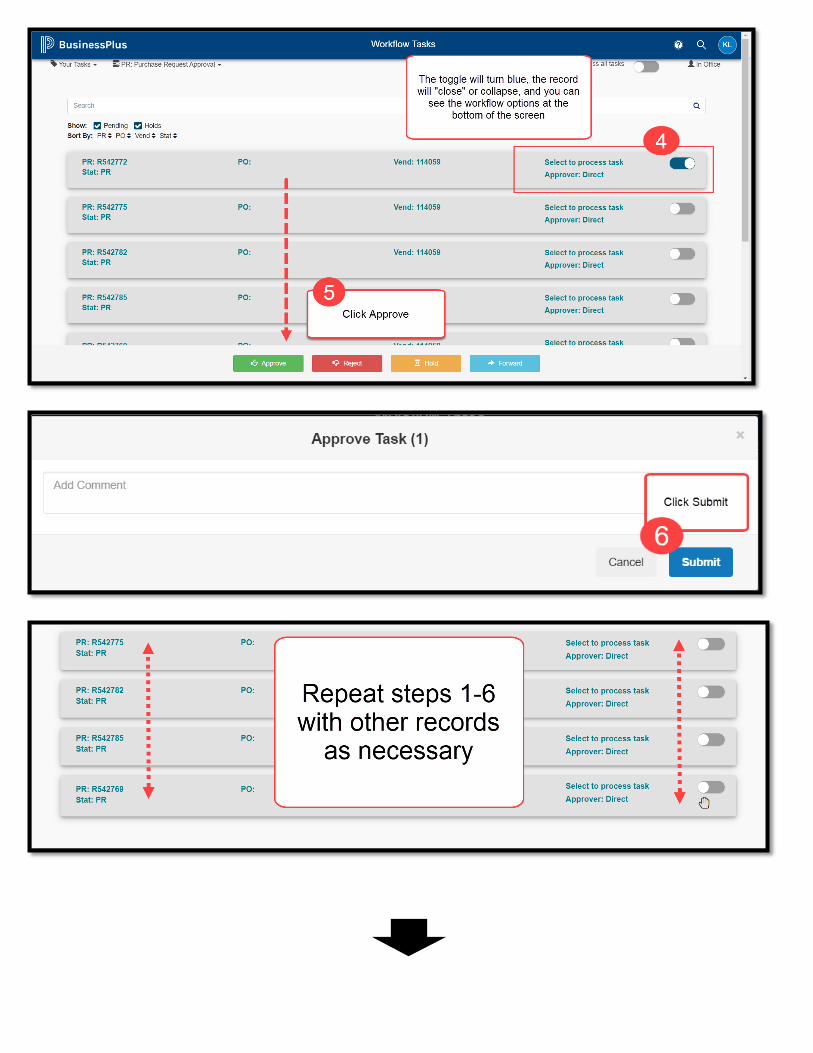
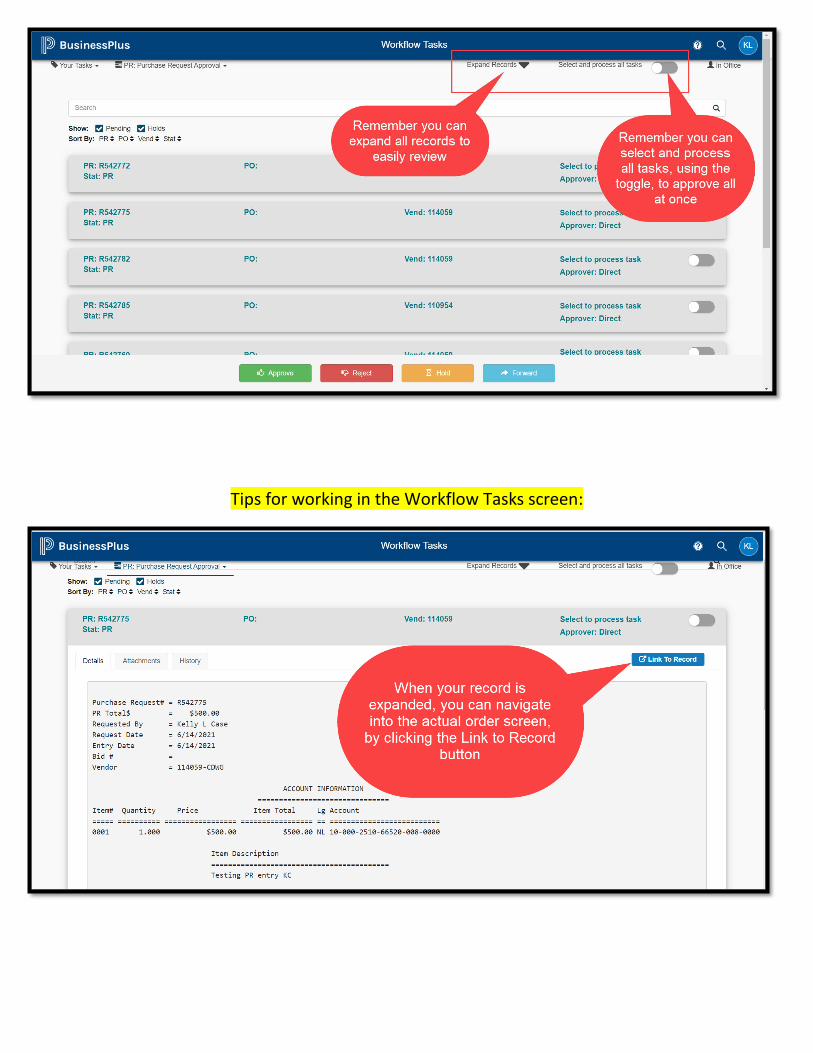
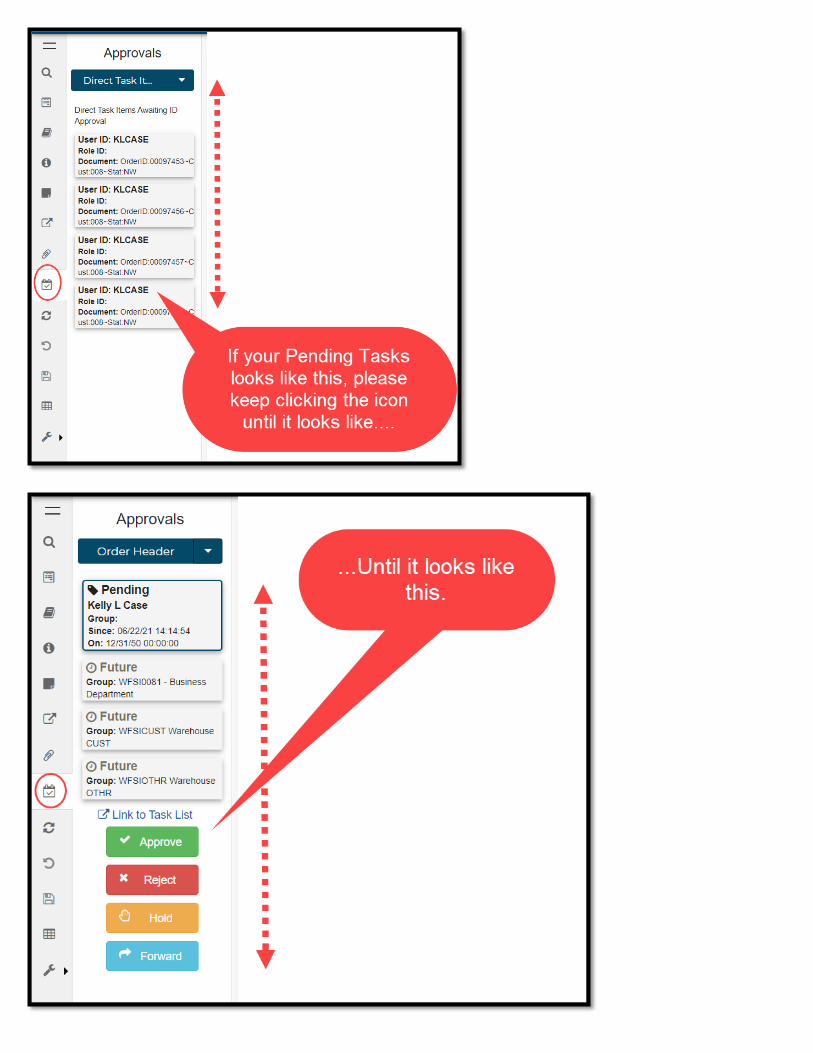
Tips for working in the Workflow Tasks screen:


![aloqm 100] held — 6 JO alou ppe— 9 ppe ppe —L SŒOI-D d]eqs ... · aloqm 100] held — 6 JO alou ppe— 9 ppe ppe —L SŒOI-D d]eqs — papuadsns — pawawînv S-3d13-]8 qaqgqÐ](https://img.pdfslide.net/doc/110x75/5e6e0ef84965d5587c49d91e/aloqm-100-held-a-6-jo-alou-ppea-9-ppe-ppe-al-soi-d-deqs-aloqm-100.jpg)