Embed Size (px)
Citation preview

SAFETY GUIDEFOR
CAREER AND TECHNICAL EDUCATION
Dr. Terry BergesonState Superintendent of Public Instruction
Mary Alice HeuschelDeputy SuperintendentLearning and Teaching
Mickey LahmannAssistant Superintendent
Curriculum and Instruction
Rob FieldmanDirector
Career and Technical Education
Moe BroomProgram Supervisor
Technology and Industry Pathway
Compiled and Edited by: Mike Opp
Former Program SupervisorTechnology and Industry Pathway
Technical Assistance by: Robbie Stanford and Jennifer Olsen
Career and Technical Education
This material is available in alternative format upon request. Contact Career and Technical Education, 360-725-6241, TTY 360-664-3631. The Office of Superintendent of Public Instruction complies with all federal and state rules and regulations and does not discriminate on the basis of race, color, national origin, sex, disability, age, or marital status.
May 2002 (Updated September 2002)
Section 1 Page 1

TABLE OF CONTENTS
Guide Intent.................................................................................................................................. 5Introduction.................................................................................................................................. 6Purpose........................................................................................................................................ 7Definition...................................................................................................................................... 8
Section I—Instructor InformationLegal Duties of Instructor...................................................................................................11-14Managing Risk........................................................................................................................15Career and Technology Education Program Standards....................................................16-17Safety and the Law............................................................................................................18-22Safety Forms..................................................................................................................... 23-33Career and Technical Education Facilities Checklist..............................................................34WAC Codes....................................................................................................................... 35-38WISHA Standards.................................................................................................................. 39
Free Services…………………………………………………………………………………………40Section II—General Safety Practices...........................................................................41
Hazardous Waste...................................................................................................................42Eye Safety......................................................................................................................... 43-46Ergonomics....................................................................................................................... 47-48MSDS................................................................................................................................ 49-52Electrical Protection...........................................................................................................53-57Portable Ladder Safety......................................................................................................58-63Fire Safety......................................................................................................................... 64-69First Aid............................................................................................................................. 70-73General Safety Practices...................................................................................................74-85Automotive Technology.....................................................................................................86-92Auto Body Collision Repair................................................................................................93-99Commercial Foods........................................................................................................100-101Drafting.......................................................................................................................... 102-103Construction Trades......................................................................................................104-117Graphic Arts..................................................................................................................118-119Metal Trades–Machine Shops.......................................................................................120-121Welder........................................................................................................................... 122-123Agriculture..................................................................................................................... 124-125Business and Office Occupations..................................................................................126-127Health Occupations.......................................................................................................128-131Family and Consumer Sciences....................................................................................132-135Marketing....................................................................................................................... 136-137Trade and Industrial Education......................................................................................138-145Computer Use/Online Rules..........................................................................................146-148
Section III—Machine Specific Safety Rules and TestsTRANSPORTATION TRADES.............................................................................................149Air Chisel....................................................................................................................... 150-151Air Sanding Tools..........................................................................................................152-153Drill Press......................................................................................................................154-157Gas Forge.....................................................................................................................158-161Grinder..........................................................................................................................162-164Impact Wrench..............................................................................................................165-167
Section 1 Page 2

TABLE OF CONTENTS (continued)
Section III—Machine Specific Safety Rules and Tests Parts Washer..........................................................................................................168-169Portable Drill...........................................................................................................170-173Portable Grinder......................................................................................................174-176Sand Blaster...........................................................................................................177-178Service Jack............................................................................................................179-180Soldering Station.....................................................................................................181-184Storage Batteries....................................................................................................185-186TIG and MIG Welder...............................................................................................187-189Tire Changer...........................................................................................................190-191MANUFACTURING/WELDING/METALS TRADES.......................................................192Arc Welder..............................................................................................................193-196Buffer......................................................................................................................197-199Crucible Furnace.....................................................................................................200-203Grinder....................................................................................................................204-206Drill Press................................................................................................................207-210Horizontal Milling Machine......................................................................................211-214Metal Lathe.............................................................................................................215-217Oxyacetylene Welder..............................................................................................218-220Portable Belt Sander...............................................................................................221-223Portable Drill...........................................................................................................224-226Portable Grinder......................................................................................................227-229Sheet Metal Machines.............................................................................................230-231Soldering Station.....................................................................................................232-234Spinning Lathe........................................................................................................235-237Tig and Mig Welder.................................................................................................238-240Spot Welder............................................................................................................241-242Manual and Power Shears......................................................................................243-245CONSTRUCTION/WOOD TRADES..............................................................................246Band Saw................................................................................................................247-251Belt Finishing Sander..............................................................................................252-254Circular Saw Portable.............................................................................................255-257Disc Sander............................................................................................................258-261Jig/Bayonet Saw.....................................................................................................262-264Jointer..................................................................................................................... 265-268Motorized Miter Box................................................................................................269-273Planer/Surfacer.......................................................................................................272-280Portable Belt Sander...............................................................................................281-283Portable Drill...........................................................................................................284-286Portable Finishing Sander.......................................................................................287-289Portable Router.......................................................................................................290-293Radial Arm Saw......................................................................................................294-298Scroll Saw...............................................................................................................299-303Table Saw...............................................................................................................304-306Wood Lathe.............................................................................................................307-311Uniplane..................................................................................................................312-313Portable Electric Plane............................................................................................314-315Wood Shaper..........................................................................................................316-317GRAPHIC ARTS/COMMUNICATION TRADES.............................................................318Hot Glue Gun................................................................................................................. 319Cutter............................................................................................................................. 320Platemaker..............................................................................................................321-322Drill................................................................................................................................. 323Press.......................................................................................................................324-326
Section 1 Page 3

TABLE OF CONTENTS (continued)
Screen Printing.......................................................................................................327-328Tools.............................................................................................................................. 329Photography ...........................................................................................................330-333Studio Lighting........................................................................................................334-337Photo Finishing Equipment.....................................................................................338-341Print Dryer...................................................................................................................... 342Dry Mount Press.....................................................................................................343-344CULINARY ARTS..........................................................................................................345Blender....................................................................................................................346-347Broiler...................................................................................................................... 348-349Buffalo Chopper......................................................................................................350-351Convection Oven....................................................................................................352-353Conventional Oven.................................................................................................354-355Deep Fat Fryer........................................................................................................356-357Food Processor.......................................................................................................358-359Gas Cheese Melter.................................................................................................360-361Gas Range..............................................................................................................362-363Griddle....................................................................................................................364-365Large Food Mixer....................................................................................................366-367Meat Grinder...........................................................................................................368-369Power Meat Saw.....................................................................................................370-371Slicer....................................................................................................................... 372-373Steamers........................................................................................................................ 374Steam Kettle...........................................................................................................375-376Steam Table............................................................................................................377-378Tilting Brazier..........................................................................................................379-380Toaster.................................................................................................................... 381-382Vertical Power Shredder.........................................................................................383-384TECHNOLOGY EDUCATION........................................................................................385Hot Glue Gun................................................................................................................. 386Robotics.................................................................................................................. 387-390Soldering Station.....................................................................................................391-394
Section IV—General Safety/ Unit of Instruction with tests....................................................395Equipment Safety Notes................................................................................................396GENERAL SAFETY UNIT TEXT EXAMPLESGeneral Safety—Part I............................................................................................397-399General Safety—Part II...........................................................................................400-402Sample Safety Unit of Instruction............................................................................403-411Hand Tool...............................................................................................................412-414Portable Power Tool...............................................................................................415-417Power Equipment....................................................................................................418-420Sheet Metal Machine .............................................................................................421-422Milling Machine.......................................................................................................423-424Metal Squaring Shear.............................................................................................425-426
Section V—NIOSH Checklists for Programs..........................................................................427
Section VI................................................................................................................................... 428Color Coded Signs..................................................................................................429-456Resources...............................................................................................................457-461
Section 1 Page 4

GUIDE INTENT
This guide is intended to be a reference document that complements other printed
materials on this subject that are produced and made available at the state and
national level.
Industrial committees, whose members are actively engaged in these occupations
and who represent a major part of trade and industrial education in the state of
Washington, have validated this safety guide. Career and technical education
program course objectives should prepare students to meet these safety standards.
Workers meeting these standards, as established by industry, will have the best
safety record in the world of work.
This document is solely for informational purposes. It does not purport to be
exhaustive of its subject matter. The authors of this material make no warranty as to
the accuracy or completeness of the information contained in this document. The
authors further assume no liability or responsibility for loss or damage suffered due to
reliance on this material.
Section 1 Page 5

INTRODUCTIONThe safety mistakes a student/technician/instructor makes today could have future ramifications both personally and environmentally. This guide is designed to help instructors/teachers instill safety awareness in their students. It is also intended to alert the school district staff to their areas of responsibility and, at the same time, to reduce accidents and exposure to litigation.
Effective safety awareness education leads to safer attitudes and safety consciousness, which, in turn, lead to safer working practices and accident prevention within the CTE laboratory.
The task of overcoming the “it can’t happen to me” attitude is a big one and requires that safety awareness be an integral part of the every day instruction program.
In addition to the traditional safety point of view in both personal and area safety, new emphasis should be considered in COMPONENT safety, in that new, sophisticated, and computerized equipment must be well cared for because of high replacement costs. One will find that safe operators that save people will also save equipment.
A more recently recognized safety problem concerns hazardous waste and hazardous waste disposal. An unsafe act today could have serious effects years from now.
Safety consciousness requires that the student be educated in safety generally and specifically. The teacher, in working to develop a positive attitude toward safety, should teach the student to ask “Is what I am about to do unsafe in any way to myself, to others, or to property?” It is essential that the instructional methods lend themselves to positive safety attitude development. This includes (1) a clean and orderly working environment, (2) the awareness of possible accident situations where respect replaces fear, (3) the importance of rules and regulations, (4) the necessity to teach the correct way to perform the first time, (5) the knowledge and skills in the use and the proper maintenance of tools and machines, (6) the reinforcement of safe operating procedures, and (7) proper respect for hazardous wastes and hazardous waste disposal.
The Safety Guide for Career and Technical Education (CTE) is developed by participation from industry representatives who represent Washington Industrial Safety and Health Act (Labor and Industries/ WISHA), Department of Health (DOH), Office of Superintendent of Public Instruction (OSPI), and CTE advisory committee. We encourage all users of the guide to recognize that the practices specified or recommended include some that are already required by code or law and others that are recommendations, which may help promote safety practices in Washington State. Please report any information that may be used to update and improve the safety guide to OSPI.
Section 1 Page 6

Student participation greatly increases the effectiveness of any safety education program. Students should be actively involved in planning and presenting programs and demonstrations that involve the subject of safety as well as the care and maintenance of tools and machines.
Section 1 Page 7

PURPOSEPURPOSE
To reduce and eliminate accidents in educational shops, labs, and the workplace by:
Having instructors aware of dangers and risks to themselves, the students, and visitors.
Providing the instructors with knowledge to be able to make the lab, shop, classroom, or workplace a safe environment and meet Labor and Industries/ WISHA and DOH standards.
Providing recommendations to improve the safe environment for learning or working.
Providing examples of important records and forms for evidence of compliance.
Providing a basic understanding of the educator’s legal responsibilities.
Providing rules and regulations of Labor and Industries / WISHA and DOH.
Provide a framework for teachers to include safety awareness or safety training in their curriculum and daily instructional practices.
Section 1 Page 8

DEFINITION
SAFETY IS
FREEDOM FROM
DANGER, RISKS, OR ACCIDENTS
THAT MAY RESULT IN
INJURY, DEATH, OR PROPERTY DAMAGE.
“Every year over 6,000 Americans die from workplace injuries. An estimated 50,000
people die from illnesses caused by workplace chemical exposures and 6,000,000
people suffer non-fatal workplace injuries. Injuries, alone cost the economy more than
$110,000,000 a year.”
The New OSHA Reinventing Workers Safety and Health
Section 1 Page 9

SECTION I
Section 1 Page 10

Legal Duties of Instructor
DUTY TO INSTRUCT—foreseeable
“An instructor who does NOT instruct properly could place a student in a dangerous situation where the lack of appropriate information might contribute to an accident.”
“A prudent instructor must ANTICIPATE and EXPLAIN/DEMONSTRATE any problems that could arise for each experience and instruct proper safety to the students.”
DUTY OF SUPERVISION
Instructors are responsible for APPROPRIATE BEHAVIOR on the student’s part.
If one student hurts another, it is the instructor who is the responsible adult.
Instructors must teach and maintain CLASSROOM CONTROL.
The instructor is IN LOCO PARENTIS—You are the local parent and the responsible adult during the educational experience.
DUTY TO MAINTAIN
Instructors are responsible for seeing that EQUIPMENT is kept in safe working order.
To further delineate the role of the instructor in safety and the expectations of society, the following issues are addressed:
Underlying reason and prudence. Facility, tool, and equipment concerns. Personal and student training, education, and preparedness. Present judiciary support, direction, and definition.
Section 1 Page 11

Underlying Reason and PrudenceLabor and Industries / WISHA dictates what an instructor can do to protect students, self, and others while providing a learning experience for eager, young minds. DOH dictates student safety. The court system understands that an instructor(s) who is doing everything reasonable and prudent and within the law (i.e., Labor and Industries / WISHA) under the given circumstances to supervise students working in a shop environment is doing what he or she should do to maintain a safe learning environment.
As you, the instructor ponder your concerns involving facility, hand tools, power tools, and equipment that may pose a risk to students, you must take reasonable and prudent steps to prevent accidents from happening.
Facility, Tool, and Equipment ConcernsAs we know, nothing is 100 percent safe. A person can be injured as simply as self-impalement by a pencil or tripping down a set of stairs, if not used correctly. Do we not use pencils and stairs, then? Society has provided you a “nod of its head” by realizing that you teach a discipline that is outstanding compared to any other at this level of education. Society WANTS you to give students this experience that no other school discipline can offer. Society trusts you to do it, do it well, and do it safely as long as you comply with society’s laws as an employee (Labor and Industries / WISHA).
As a professional, it is reasonable and prudent that you maintain relatively clean, uncluttered facilities. Properly working tools and equipment, safety signs, posters, and floor markings where applicable, safety guards, the wearing of Personal Protective Equipment (PPE), etc., are examples of reasonable and prudent measures and examples of Labor and Industries / WISHA requirements to protect all persons in the shop environment. Should there be a facility, tool or equipment concern that you as the professional feel does not allow safe education to take place in a reasonable and prudent manner, immediately contact your supervisor to resolve how to bring the article in question back into reasonable and prudent compliance. Also, be fair in developing your paradigm of what reason and prudence entails. Look at the scenario from society’s point of view. The phrase “not everything goes” is critical in the CTE educational environment. That’s part of what makes you a professional. All instructors are obligated to follow all LAB Labor and Industries / WISHA regulations at all times.
Section 1 Page 12

Often middle and junior high schools get the “hand-me-downs” from high school programs because they do not receive CTE enhancement dollars to assist in properly maintaining their facilities and equipment. Please conceptualize what a reasonable and prudent person would think a student at the middle/junior high school age should be experiencing in this environment and what operations they should be performing. In the following section, Managing Risk, there are recommendations for the junior high/middle school age appropriators for power equipment usage.
Personal and Student Training, Education, and Preparedness
It is crucial that you, as a professional, obtain and keep current your credentials and training so that you, in turn, may provide your students with a quality, safe learning experience. It is your responsibility to obtain the necessary training, experience, degree, etc. as outlined by the Office of Superintendent of Public Instruction (OSPI) to obtain/maintain valid credentials as recognized by the certification section of OSPI and society as a whole that you are licensed to teach career and technical education in the state of Washington. It is required that you be appropriately certified.
Nonlicensed and nonendorsed instructors employed with assignments involving career and technical education classes should NOT operate tools, equipment and machinery, nor allow their students to do the same. Since each unlicensed and/or unendorsed individual possesses a different history of training and experience, the CTE administrator in your local district will make reasonable and prudent accommodations, requirements, and limitations of the individual instructor.
There is a higher liability to the instructor and school district if a noncertified instructor is used.
It is reasonable and prudent for a professional instructor to provide all students with adequate safety training. This could include, but is not limited to:
Safety demonstrations—attentively watched by all. Safety videos. The proper and adequate wearing of personal protective equipment
(PPE) appropriate to the industry or program area. Safety quizzes and tests, etc. Students demonstrate proficiency in facility, tool, and equipment
safety to the instructor, who uses his or her professional assessment in allowing the student to utilize shop facilities.
Section 1 Page 13

Training by example is of utmost importance. A reasonable and prudent instructor will adhere to the standards imposed by Labor and Industries / WISHA as a professional imposes these same standards upon his or her students. Impressionable minds are quick to see the level of dedication or lack thereof in their instructor. It is imperative that you personify the example of safe and enjoyable learning that you desire your students show you.
If there is ambiguity, doubt, disapproval, or curiosity concerning any issue of personal and student training, education and preparedness, contact another instructor, your CTE supervisor, or OSPI education specialist that can give you the appropriate information in allowing you to obtain and maintain a reasonable and prudent effort to keep students safe while learning.
Present Judiciary Support, Direction, and DefinitionWe, as a society, have always recognized the need for applied education. Society as a whole then is placed with the burden of finding, training, and otherwise supporting those who society chooses to teach this valuable content area. YOU are the professional who has accepted the charge from society to do just that. Society trusts you to follow the laws implemented by the society— Labor and Industries / WISHA, DOH, and OSPI.
Section 1 Page 14

MANAGING RISK
The school, as the employer, needs to provide the teacher with the basic requirements for equipment, training, and time for that training.
Teachers are responsible for seeing that equipment in the lab or shop is kept in safe operating condition, according to applicable State and Federal laws (Labor and Industries / WISHA—OSHA—ANSI).
Teachers are responsible for providing instruction and demonstrating the safe and proper operation procedures for each piece of power equipment, portable power hand tools, hand tools, cleaning, and/or finishing procedures.
Teachers must plan ahead and be aware of potential dangers and problems.
Teachers must have and maintain order and control in the classroom and/or lab (shop).
Teachers must teach a proper degree of respect for the dangers that are inherent in the lab or shop.
Teachers should never leave students unattended.
Teachers cannot delegate the responsibility of a class to a student (TA).
Students must have received and demonstrate or show they have read and understand a copy of the safety rules for each piece of equipment that they may use.
Students must pass a general shop safety test with a score of 100 percent.
The teacher should keep safety test scores until the student is 21 years old. (A sample of the safety test shall be available upon request.)
Students need to sign a document that they will not use any equipment until they have passed a safety test, have observed a demonstration on that piece of equipment, and have the instructor’s permission.
Parents should sign a parent awareness document before the student uses any equipment.
Do not underestimate the seriousness of an accident. Call 911—and provide emergency care until medical responders arrive.
After the pressure of an event has subsided, complete an incident report stating the facts of what occurred and submit to district risk manager (or appropriate district official). Go over the report with the student for a learning experience.
Keep your own copy of records and affidavits.
CTE directors, administrators, principals, counselors, and teachers must be reasonable and prudent in seeing that classes are not overloaded.
Section 1 Page 15

Career and Technical Education Program Standards
The standards serve as a basis for curriculum, instruction, equipment, and facilities for an approved CTE program. The program standards indicate the requirements for a safety program that meets applicable WISHA laws as applied to each approved program in career and technical education.
Instruction: Curriculum and instruction must be directly related to industry standards, local advisory committees, CTE program standards, and course/program outcomes. Instruction is outcome-based, and verification of competence is determined by mastery of course outcomes. Instruction in proper and safe use of any equipment, required for mastery and competency, shall be provided within the approved program.
Equipment and Facilities: Equipment and facilities are consistent with the industry, is appropriate to support the curriculum identified in the state curriculum framework, and maintained in a manner that meets safety requirements and applicable WISHA laws.
Instructional Staff: Instructional staff must hold a valid Washington State CTE certificate appropriate for the programs they teach. Instructors must keep technical and professional skills current through the CTE program standards and business/industry advisory committee involvement. This ensures students are provided accurate and safe state-of-the-art information.
Program Advisory Committee: Each state-approved CTE program must be supported by a program advisory committee made up of individuals who are working in the occupational area.
Section 1 Page 16

Appropriate Tools and Equipment
Identifying appropriate tools and equipment for your labInstructors:
Due to the nature of career and technical education (CTE) offering actual hands-on, performance-based education, there may be concern (as the instructor) that an accident or injury may occur in your school technology and/or CTE labs to yourself, a student, or others that you will be held liable without refute. The purpose of this page is to help you, the instructor, identify appropriate tools and appropriate equipment for your lab.
First , it is important that you understand what the Office of Superintendent of Public Instruction, Labor and Industries / WISHA, DOH, and your school districts, expect FROM you as well as the support they can GIVE you concerning these issues:
Underlying reason and prudence.
Facility, tool, and equipment concerns.
Personal and student training, education, and preparedness.
Present judiciary support, direction, and definition.
These issues are discussed in detail in the legal duties of the instructor section of this manual. Please review them!
Second , it is important that you understand both the curriculum and the student body that you are teaching. You need to have appropriate standards and the objectives for each of the courses that you are teaching.
Third , select appropriate activities for both the curriculum and the students you will be teaching.
Fourth , choose the appropriate tools and equipment to teach each course.
Fifth , get your principal’s and your district CTE director’s approval of your curriculum, standards and the objectives, activities, and the tools and equipment for the courses you are teaching.
**Remember: Any piece of equipment that is in need of maintenance or in need of repair should not be used until properly maintained and repaired. Disable it or remove it. No student or individual should be allowed to use a piece of equipment or a tool without the proper instruction on safety and operation. Do not allow tools or equipment to be used without the proper supervision.
Section 1 Page 17

Safety and the Law
1. Risk of suit is often greatly exaggerated in your minds; however, it is ever present.
2. We will show you that there is more protection for you than you think. Fear of litigation should NOT restrict effective, safe teaching and learning. Participatory activities should remain interesting and exploratory. They should not become sterile and ineffective.
3. We cannot insulate ourselves from danger at any time in our lives. This program is to teach you RESPONSIBILITY and forethought.
4. We hope to make safety in the lab a HABIT in your teaching career.
5. We believe that knowledge is the key to any potential problems.
6. The law requires adherence to regulations and requirements (see “negligence” on next page). THIS IS WHAT GOOD SAFETY IS ALL ABOUT.
Section 1 Page 18

Child Labor Regulationswww.lni.wa.gov/scs/workstandards/teenworker.htm
Prohibited Occupations for Nonagricultural EmployeesThe child labor rules that apply to nonagricultural employment depend on the age of the young worker and the kind of job to be performed. Fourteen years old is the minimum age for nonagricultural employment covered by the Fair Labor Standards Act (FLSA). In addition to restrictions on hours, the Secretary of Labor has found that certain jobs are too hazardous for anyone less than 18 years of age to perform. There are additional restrictions on where and in what jobs 14- and 15-year-olds can work. These rules must be followed unless one of the FLSA’s child labor exemptions applies. Washington State enforces the laws under the Federal FLSA plus additional state labor regulations.
A youth 18 years or older may perform any job, whether hazardous or not. A youth 16 or 17 years old may perform any nonhazardous job (WAC 296-125-
030).Hazardous OccupationsEighteen is the minimum age for employment in nonagricultural occupations declared hazardous by the Secretary of Labor. The rules prohibiting working in hazardous occupations (HO) apply either on an industry basis or on an occupational basis, no matter what industry the job is in. Parents employing their own children are subject to these same rules. Some of these hazardous occupations have definitive exemptions. In addition, limited apprentice/student-learner exemptions apply to those occupations marked with an asterisk who are at least 16 years old and enrolled in an approved program. Those individuals 18 years of age or older are not subject to special job or occupation restrictions. Individuals of all ages are entitled to all of the health and safety protections under the Washington Industrial Safety and Health Act (Labor and Industries / WISHA). HO#1 Manufacturing and storing of explosives.
HO#2 Driving a motor vehicle and being an outside helper on a motor vehicle.
HO#3 Coal mining.
HO#4 Logging and saw milling.
HO#5 Power-driven woodworking machines. *
HO#6 Exposure to radioactive substances.
HO#7 Power-driven hoisting apparatus.
HO#8 Power-driven metal forming, punching, and shearing machines. *
HO#9 Mining, other than coal mining.
HO#10 Meat packing or processing (including the use of power-driven meat slicing machines). *
HO#11 Power-driven bakery machines.
Section 1 Page 19

HO#12 Power-driven paper-product machines. *
HO#13 Manufacturing brick, tile, and related products.
HO#14 Power-driven circular saws, band saws, and guillotine shears. *
HO#15 Wrecking, demolition, and ship breaking operations.
HO#16 Roofing operations. *
HO#17 Excavation operations. *
More details about the above listings can be obtained by reviewing the child labor regulations.
Section 1 Page 20

A youth 14 or 15 years old may not work in the manufacturing or mining industries or in any hazardous job (see the list of hazardous occupations). In addition, a 14- or 15-year-old may not work in the following occupations (WAC 296-125-033).
Communications or public utilities jobs. Construction or repair jobs. Driving a motor vehicle or helping a driver. Manufacturing and mining occupations. Power-driven machinery or hoisting apparatus other than typical office
machines. Processing occupations. Public messenger jobs. Transporting of persons or property. Workrooms where products are manufactured, mined, or processed. Warehousing and storage.
Section 1 Page 21

The Law Defined PLAINTIFFS—the people doing the suing.
DEFENDANTS—the people being sued.
Classroom injuries are usually tried in a STATE trial court.
APPELLATE court—appeals from the state court’s decisions.
STATE court—consists of a judge and/or jury.
BURDEN OF PROOF—The plaintiff must prove that damage has been done to
them by the defendant due to the defendant’s negligence.
NEGLIGENCE—Conduct that falls below the standard established by law or the
profession to protect others from harm. It is failure to do something that a
reasonable person would do (omission) or the doing of something that a reasonable
person would not do (commission). Teachers must conduct themselves
professionally.
REASONABLE—Moderate, rational, not excessive or extreme.
PRUDENT—Cautious, discreet, managing very carefully.
Section 1 Page 22

Proximate CauseWHERE DOES THE BLAME LIE?
COMPARATIVE NEGLIGENCE—plaintiff may still recover even if they were also negligent —though their award is reduced. Students will generally be held accountable for their actions but ONLY if they are fully informed beforehand.
FIRST AID—“Good Samaritan” law exempts anyone from rendering simple first aid to a student in immediate danger. (Remember your blood borne pathogen training to protect yourself.)
DOCUMENTATIONThe Statute of Limitations in the state of Washington for tort liability lawsuits is three years. Parents cannot waive their minor child’s rights. In the event of an accident to a minor child, that child can file a claim for damages on their own behalf once they reach the age of majority. The Statute of Limitations begins to run on their 18th birthday until they reach the age of 21.If you have an incident in your classroom, do the following:
1. Complete an incident report including the time, date, and circumstances. Be factual—do not state opinions.
2. Get the principal’s signature on the incident report.3. Forward the original incident report to the district’s risk manager (or appropriate
district official) for timely reporting to your insurer. Keep a copy in a PERMANENT file that you save.
DO NOT RELY upon releases or waivers as a substitute for safety precautions.
Section 1 Page 23

SAFETY FORMS
Section 1 Page 24

Permission Form
has our/my permission to operate the (student’s name)equipment in the shop/laboratory at School. It is understood that instruction in safe operation will be given before he/she is allowed to use any piece of equipment and that he/she will be properly supervised at all times.
In case of accident, it is preferred that he/she be given treatment by:
Dr.
or Dr.
Home phone number is:
Father’s work phone number is:
Mother’s work phone number is:
If neither parent can be reached at the above numbers, please notify: at (responsible person) (phone number)
Date:
Signed: (father/legal guardian)
(mother/legal guardian)
Section 1 Page 25

Statement of Acknowledgement
This is to certify that I have received safety instructions in/on
.
My instructor has demonstrated to me how to operate each machine correctly
and safely. I promise to observe all safety precautions, and if ever in doubt
regarding any operation, I will consult my instructor and obtain the necessary
information.
Signed
Date
Section 1 Page 26

Student Medical Information Sheet
All information must be completed and this form returned before a student will be allowed to operate any power equipment in the laboratories. This information will be used to make this class as safe as possible and to expedite emergency help if needed.
Student Name
City State Zip
Parents/Guardians’ Name
Address if different from above
City State Zip
Parent/legal guardian work telephone number
Parent/legal guardian work telephone number
Family doctor
Address
In case of serious accident, please notify:
Name Relation
Address
Telephone number Extension
Section 1 Page 27

Confidential Information
Does your child have any physical or mental impairment that may be of concern the CTE instructor?( ) Yes ( ) No If yes, please specify:
During the school year does the student take medication of any type that may limit activities or effect vision, hearing, balance, or other senses? ( ) Yes ( ) No
If yes, please specify:
Allergies to medicine?
I have read the attached information describing the technical education course. I promise the information above is correct and true. I will inform the instructors of any changes that may occur this year relevant to my child in the safe operation of this course.
Signature Date
If more space is needed for comments, please continue below.
Section 1 Page 28

AUTHORIZATION TO CONSENT TO TREATMENT OF A MINOR
Name of Minor
I authorize any of the employees/volunteers of the Name of school
to consent to medical treatment of the minor when I cannot be contacted and to consent such medical treatment to include, without limitation, x-ray examination, anesthetic, medical, dental, or surgical examination or treatment and general hospital care. No prior determination of life-threatening emergency or danger of serious or permanent injury resulting from delay of treatment need be made under this authorization.
I SPECIFICALLY CERTIFY AND AGREE THAT:Except as indicated at the end of this paragraph, this authorization is given in advance of any specific diagnosis, treatment, or hospital care being required but is given to provide authority and power on the part of the adult to give specific consent to any and all examinations, treatment or hospital care.(Exception:
)
I will indemnify and hold harmless from any expenses or claims of any nature any person or entity which provide or causes to be provided examination, treatment or hospital care pursuant to this authorization (except to the extent such person or entity is negligent therein) and conditionally agree to make or cause to be made, by assignment of third party benefits or otherwise, full and complete payment for such examination, treatment, or hospital care.
I am the person having the power to consent to medical treatment of such minor.This authorization shall remain effective for the school year, unless revoked by the physical destruction of the original hereof, such destruction being the only method of actual notice of the revocation of it.
All blanks of this authorization were filled in before I signed this authorization.
Parent/legal guardian Date
Insurance company Insurance company telephone number
Group number
Certification number Social security number
Section 1 Page 29

INSURANCE WAIVER
Although every attempt is made to ensure a safe learning environment for our students,
accidents do occur. Parents and guardians should be aware that in the event your child
is injured at school, the district does not carry student medical insurance and will not
cover the medical expenses from an accident, whether at school or at home. At the time
your child enrolls, you should receive an enrollment brochure for OPTIONAL student
accident insurance.
I, the parent/guardian of Parent/guardian Name of student
acknowledge the opportunity to participate in the school insurance program. I do not
want to be enrolled in the school insurance program.Name of student
He/she is covered under my family policy with our own insurance coverage.
Please fill in the additional information in the event of an accident. If your child is
enrolled in the school insurance program, please indicate school insurance as the
company.
We, , carry accident and health insurance onName of parent
with .Name of student Insurance company Policy number
Section 1 Page 30

STUDENT SAFETY PERFORMANCE RECORD
School: Teacher:
Program: Per. : Yr.:
has observed SAFE operating Student name
procedures, has passed the required SAFETY exam with 100 percent, and ispermitted to operate the following items/equipment dated according to accepted SAFETY regulations.
Enter Date CompletedItem/Tool Equipment Teacher
DemonstrationWritten test
100%Performance Test
100%
The teacher will keep this record until the student exits the program.
Section 1 Page 31

TEACHER OBSERVATION REPORT OF STUDENTS
Teacher(s):
School:
Class Period: Subject:
Unsafe Acts or Distractions 100% Demonstrates SAFE and good working habits and participation.1. -20% Failure to wear personal SAFETY gear.2. -20% Horseplay.3. -20% Poor housekeeping practices.4. -20% Improper handling or disposal of hazardous materials.5. -10% Poor participation.6. -10% Using equipment without permission.
Student Names
Date(s)
Total Grade
Mon/ /
Tue/ /
Wed/ /
Thur/ /
Fri/ /
Section 1 Page 32

ACCIDENT REPORT FORM
Date of report: Name: Address: School: Sex: Age: Grade:
Date and time of accident: Describe the injury in detail and indicate the part of the body affected.
What was the student doing when injured?
How did the accident occur?
Name the object or substance that directly injured the student.
If treated, name and address of the physician or hospital.
Prepared by:
Building principal:
Section 1 Page 33

ACCIDENT REPORT SUMMARY
Date Nature of Injury
Source of InjuryHazardous Condition or
Unsafe ActCategory Part
Section 1 Page 34

CAREER AND TECHNICAL EDUCATION FACILITIES CHECKLIST
(from website www.k12.wa.us/facilities/healthsafetyguide.asp)
The checklist is a guide that includes requirements (by code or law) and recommendations to help promote good health and safety practices in schools.
The following deals specifically with vocational/CTE instruction areas and are copied on the following pages.
ADMINISTRATIVE CODE CROSS REFERENCE TABLE
http://www.lni.wa.gov/WISHA/corerules/resources/crossreference.htm
Section 1 Page 35

WAC or Other Code Reference Required/RecommendedS=SatisfactoryU=UnsatisfactoryOSPI-DOH School Health and Safety Guide
Required WAC or OtherL. VOCATIONAL INSTRUCTION AREAS Recommended Code ReferenceL 001S U
Reference should be made to the most current edition of the Safety Guide for Vocational, Trade and Industrial, and Technology Education, published by OSPI. This manual provides instruction and checklists for vocational education curriculum areas.
X OSPI and DOH recommendation
L 002S U
Based on the OSPI manual and good safety practice, school shop teachers should pay close attention to students' personal protective equipment needs. Student-oriented safety training in vocational and arts and crafts hazards should be given, tested, and documented.
X DOH recommendation
L 003S U
Floors shall be clean and kept free of oil and other slippery substances.
X 246-366-140296-24-73503
L 004S U
Floors shall be free of obstacles so there are no slip, trip, or fall hazards. Hazard areas shall be plainly marked. In metal and wood shops, areas around equipment shall be marked with a two-foot safety zone. Projections shall be plainly marked.
X 246-366-140296-24-13501296-24-150 Part G
L 005S U
All power tools shall be safe, properly labeled, and protected with correct belts, guards, and electrical connections.
X 246-366-140296-24-65501 & 15001 and 16501
L 006S U
Machine guarding shall meet WAC 296-24. Safety guards must be properly adjusted and functional for safe machine operation.
X 296-24 - 150 Part C296-24-15001
Section 1 Page 36

L 007S U
Hand tools shall be properly maintained and kept in a safe condition.
X 246-366-140296-24-65501
L 008S U
Safety stands (jack stands) shall be available and used correctly by students and staff.
X 246-366-140296-24-67005
L 009S U
General operating instructions and safety reminder signs shall be posted on or near moving machinery and shop equipment.
X 246-366-140296-24-135
L 010S U
Shop safety rules shall be displayed in plain view of room occupants.
X 246-366-140296-24-020
L 011S U
Unstable equipment (e.g., drill presses, band saws, etc.) shall be secured to the floor or a table/stand to prevent tipping. Stand mounted equipment shall be fastened to the floor to prevent tipping.
X 246-366-140296-24-15003
WAC or Other Code Reference Required/RecommendedS=SatisfactoryU=UnsatisfactoryOSPI-DOH School Health and Safety Guide
Required WAC or OtherL. VOCATIONAL INSTRUCTION AREAS Recommended Code ReferenceL 012S U
Materials (e.g., lumber, metal, etc.) shall be stored in a manner that will prevent personal injury. Proper storage shall be provided for metal stock as required by WISHA.
X 246-366-1402906-24-21503296-24-078
L 013S U
All electrical panels, devices and connections shall be labeled and maintained in a safe condition.
X 246-366-140296-24-95605
L 014S U
Hazardous and/or combustible waste shall not be allowed to accumulate. Such waste shall be removed from the shop area and properly disposed of as required by DOE regulations.
X 246-366-140296-62-40009296-155-020173-303
Section 1 Page 37

L 015S U
Waste oil storage and disposal shall comply with DOE regulations. Oil spilled around storage barrels shall be cleaned up immediately. Containers need to be closed when not in use.
X 246-366-140296-62-40009
L 016S U
A non-asbestos fire blanket shall be provided, identified, readily available, and visible to students and staff.
X 246-366-140296-62-40009
L 017S U
Project storage shall be adequate and safe. X 246-366-140296-62-40025
L 018S U
Emergency eye wash stations shall be within 50 feet or ten seconds of all student workstations and shall provide 2.5 gpm for at least 15 minutes at 25 PSI or less. Bottled water eye wash stations do not meet the current WISHA and DOH requirements. They may be supplementary to units meeting the above specifications.
X 246-366-140296-62-130
L 019S U
All grinders shall have proper tool rests and eye safety shields. X 246-366-140296-24-078
L 020S U
Eye protective devices (safety glasses, goggles, full-face shields) are identified, visible, readily accessible and used by students and staff.
X 246-366-140296-24-70003ANSI 2.87.1
L 021S U
Mechanical ventilation shall be provided for all arc and gas welding/cutting tables in order to prevent welding vapors from traveling through the breathing zone.
X 246-366-140296-24-71503296-24-71505
WAC or Other Code Reference Required/RecommendedS=SatisfactoryU=Unsatisfactory
Section 1 Page 38
OSPI-DOH School Health and Safety Guide
Required WAC or Other
L. VOCATIONAL INSTRUCTION AREAS Recommended Code Reference
L 022S U
Welding curtains or shields shall be provided at booths and other welding areas.
X 246-366-140296-24-69007296-24-71501
L 023S U
Safety signs should be posted where needed; e.g., "turn on ventilation," "wear eye protection." L&I does not require signs; but when signs are utilized, uniform design, including wording, shape and color, are mandated.
x 246-366-140296-24-135 B-2296-24-14005,7,9
L 024S U
Master shut-offs shall be provided and identified for electricity and gas in all shop areas. A shut-off for water is recommended but not required.
X 246-366-140296-24-110 A-4296-24-16505
L 025S U
Compressed gas cylinders must be properly labeled, maintained, stored and secured, with caps in place, to prevent damage to the cylinder valve. Cylinder restraining devices must be adequate to prevent tipping and /or 'rocketing'. In-use cylinders must be secured either to a hand-truck or structure.
X 246-366-140296-24-68201,3
L 026S U
The gas welding/cutting area shall comply with state fire code and WISHA requirements. Eye protection shields shall be provided.
X 246-366-140296-24-680 Part I296-24-68507
L 027S U
All flammable liquids shall be stored in UFC and NFPA approved flammable storage cabinets with self-closing doors. Flammable wastes must be disposed of in approved flammable waste containers. Cabinets shall be locked or located in a locked room when not in use.
X 246-366-140296-24-33009UFC 79.0258
L 028S U
All solvents for parts cleaning shall be stored in approved containers. Class 1 flammable liquids shall not be used. Fusible links on solvent tank lids shall be in place and shalloperate as designed.
X 246-366-140296-24-33009296-24-40507
Section 1 Page 39

L 029S U
Wood burning stoves shall not be used in school buildings. X 246-366-140
L 030S U
Flammable finish areas and paint spray rooms shall have approved ventilation, filters, lighting, storage cabinets, and separation from other rooms.
X 246-366-140296-24-370UFC
L 031S U
Filters in the paint spray booth/room shall be changed or cleaned as required.
X 246-366-140296-24-370UFC
L 032S U
Only Class 1 electrical, explosion-proof lights, fan or other electrical devices shall be allowed in flammable finish areas.
X 246-366-140
WAC or Other Code Reference Required/RecommendedS=SatisfactoryU=UnsatisfactoryOSPI-DOH School Health and Safety Guide
Required WAC or Other
L. VOCATIONAL INSTRUCTION AREAS Recommended Code Reference
L 033S U
Ventilation and exhaust systems shall be installed in all shop areas in compliance with L&I WISHA rules. Ventilation and
X 246-366-140296-62-11003
Section 1 Page 40

exhaust systems shall be installed in all shop areas in compliance with L&I WISHA rules.
L 034S U
Chip and sawdust collection systems shall be installed in all wood shops.
X 246-366-140296-62-11003
L 035S U
Non-skid surfacing shall be used within the operator use zone of all stationary equipment.
X OSPI Vocational Safety Guide296-24-15005
Section 1 Page 41

Labor and Industrieswww.LNI.WA.gov
Labor and industries consists of three major divisions and they are: Industrial Insurance (i.e.-compensation) WISHA (i.e.-health and safety enforcement) Specialty Compliance Services (i.e.-employment standards,
labor regulations, and etc.)
WISHA STANDARDSWashington Industrial Safety and Health Act (WISHA)
www.LNI.wa.gov/wisha/topics/wisha.htm
For a Safety question or complaint call 1-800-4-BE-SAFE. For additional 800 numbers look at www.lni.wa.gov/home/direct.htm
ADMINISTRATIVE CODE CROSS REFERENCE TABLE
http://www.lni.wa.gov/WISHA/corerules/resources/crossreference.htm
Section 1 Page 42

Free Information and Services
Safety Magazine —Free Construction and Engineering—Safety Magazine
(refer to www.cesmag.com for details.)
Labor and In dustries Safety Consultant—Free WISHA provides a free consultation by either a safety or
health professional at the request of the employer, such as a school. The consultation would be for the employee since the employee is obligated to follow all WISHA regulations at all times, but it would clearly benefit the students as well.
An employee can file a complaint that prompts an inspection, and could be kept confidential, it they felt that a hazard exists.
A basic description of both a consultation and inspection can be found at: http://www.lni.wa.gov/wisha/concerns.htm or by calling 1-800-4BE-SAFE.
1-800 Numbers To get a list of other 1-800 numbers go to
www.lni.gov/home/direct.htm . For safety questions or complaints you can call 1-800-4-BE-SAFE.
Section 1 Page 43

SECTION IIGeneral Safety Practices
Section 2 Page 44

HAZARDOUS WASTE
Safety Suggestions
You must be prepared to handle a spill of hazardous waste or materials BEFORE it happens.
Product warning label and MSDS are the best sources of information to prepare you for a spill.
No matter how small the spill, the instructor must be informed immediately. It is against the law to pour hazardous materials or wastes down a drain or dump
them into a sewer. You could be fined heavily or jailed (in extreme cases) if you do. Hazardous waste generated in general industrial shops can include solvents and
solvent waste, batteries (leads) and battery acid, paint waste, and chemical waste. The MSDS can tell you how to dispose of the product. The Resource Conservation Recovery Act requires that a designated person in a
facility be responsible for hazardous waste from the time it is generated until it is disposed of.
Hazardous Waste DisposalTo access a Guide to Environmental Issues from the U.S. Environmental Protection Agency Office of Solid Waste and Emergency Response go to:
http://www.epa.gov/Epadocs/guide/
The guide offers basic information on numerous environmental topics. Frequently asked questions are answered in plain English, and an extensive glossary gives non-bureaucratic definitions for more than 200 environmental terms. The guide includes synopses of federal environmental laws and six pages of telephone numbers and hotlines.
Section 2 Page 45

Eye Protection Information
Phototropic (photochromic) lenses change depth of tint when exposed to varying degrees of ultraviolet light—that is, they darken when exposed to sunlight and fade when removed from the sunlight. These lenses do comply with current American National Standards Institute (ANSI) Z87.1 standards with limitations.
Photochromic lenses have limitations in operations requiring critical visual acuity or fast reaction to visual stimuli, particularly in operations where the wearer passes from outdoors to indoors in the course of his/her work activity. Also, these types of lenses should not be used as a substitute for the proper protection in hazardous optical radiation environments, for example, certain laboratory and shop operations such as welding or foundry work.
If an individual must wear tinted lenses, as prescribed by an eye specialist, industrial quality eye and face protection devices appropriate for the hazard involved should also be worn.
Posting of Eye Hazardous AreasThe entrance to all shops, laboratories or other areas that require industrial quality eye protection should be posted with a sign indicating the requirements. In addition, machines, equipment or process areas and laboratories requiring operators to wear specific eye and face protection should be posted with warning signs.Visitors must wear the protective devices that are required in the area. Extra devices should be available at all times to lend to visitors. Devices called “visitors specs” do not meet ANSI standards.
Fitting and MaintenanceSafety eyewear must be fitted properly. It should be the responsibility of the person in charge of dispensing safety glasses or goggles to see that properly fitted and adjusted eyewear is provided for each individual.
Lenses of eye protectors must be kept clean. Restricted vision due to dirty lenses is sometimes a contributing factor to accidents. Eye protective devices that are shared shall be disinfected between uses.
Section 2 Page 46

Cleaning and Disinfecting ProceduresThe following cleaning procedures are recommended in the ANSI Z87.1. Products shall be cleaned according to the manufacturer’s instructions. If none are available, clean with mild soap and warm water solution by soaking the device in the soap solution maintained at 120°F for 10 minutes. Rinse thoroughly and allow to air dry. Use appropriate glove protection and other personal protective equipment as required of hazardous and combustible standards apply.
To disinfect, completely immerse the protector for 10 minutes in a solution of modified phenol, hypochlorite, quaternary ammonium compound or other disinfections reagent in a strength specified by the manufacturer of the protective equipment at room temperature of 20°C (68°F).
Remove protector from solution and suspend in a clean, dry place for air-drying at room temperature or with heated air. Do not rinse because this will remove the residual effect of the disinfectant.
Spray type disinfectant solutions and bactericides may be utilized when such pressurized spray solutions can be demonstrated to provide comparable disinfections with the immersion procedure outlined above. Store dry devices in a clean, dustproof container or area.
Protectors showing the need for extensive cleaning should be disassembled to the extent possible without tools prior to the washing and disinfections procedure.
We recommend each student have their own pair of safety glasses and goggles to reduce spread of eye disease.
Inspection of ProtectorsInstructors and students should make a visual inspection of their eye protectors prior to use. Protective devices with broken parts, heat distortion, or excessive scratches on the lens are unsuitable for use and should not be worn. Pitted and scratched lenses may reduce vision and also, along with worn-out headbands, seriously reduce protection. Replace defective parts with new ones.
Section 2 Page 47

Eye Protective Devices
**The illustrations shown are only representative of protective devices commonly available at the time of the writing of this standard. Protective devices do not need to take the forms shown, but they must meet the requirements of the standard.
NOTES1. Care shall be taken to recognize the possibility of multiple and
simultaneous exposure to a variety of hazards. Adequate protection against the highest level of each of the hazards must be provided.
2. Operations involving heat may also involve optical radiation. Protection from both hazards shall be provided.
3. Face shields shall only be worn over primary eye protection.4. Filter lenses shall meet the requirements for shade designations.
Section 2 Page 48

5. Persons whose vision requires the use of prescription (Rx) lenses shall wear either protective devices fitted with prescription (Rx) lenses or protective devices designed to be worn over regular prescription (Rx) eyewear.
6. Wearers of contact lenses shall also be required to wear appropriate covering eye and face protection devices in a hazardous environment. It should be recognized that dusty and/or chemical environments might represent an additional hazard to contact lens wearers.
7. Caution should be exercised in the use of metal frame protective devices in electrical hazard areas.
8. Welding helmets or hand shields shall be used only over primary eye protection.
9. Nonsided shield spectacles are available for frontal protection only.
American National Standard Institute Z87.1Reprinted from American National Standards Practice for Occupational and Educational Eye and Face Protection, ANSI Z87.1.
Section 2 Page 49

ERGONOMICS
For more information about ergonomics visit WISHA Services at
www.lni.wa.gov/wisha/ergo/default.htm
Section 2 Page 50

Elements of Ergonomics ProgramA Primer Based on Workplace Evaluations of Musculoskeletal Disorders
Section 2 Page 51

MATERIALS SAFETY DATA SHEETS (MSDS)
AND WASTE DISPOSAL
Section 2 Page 52

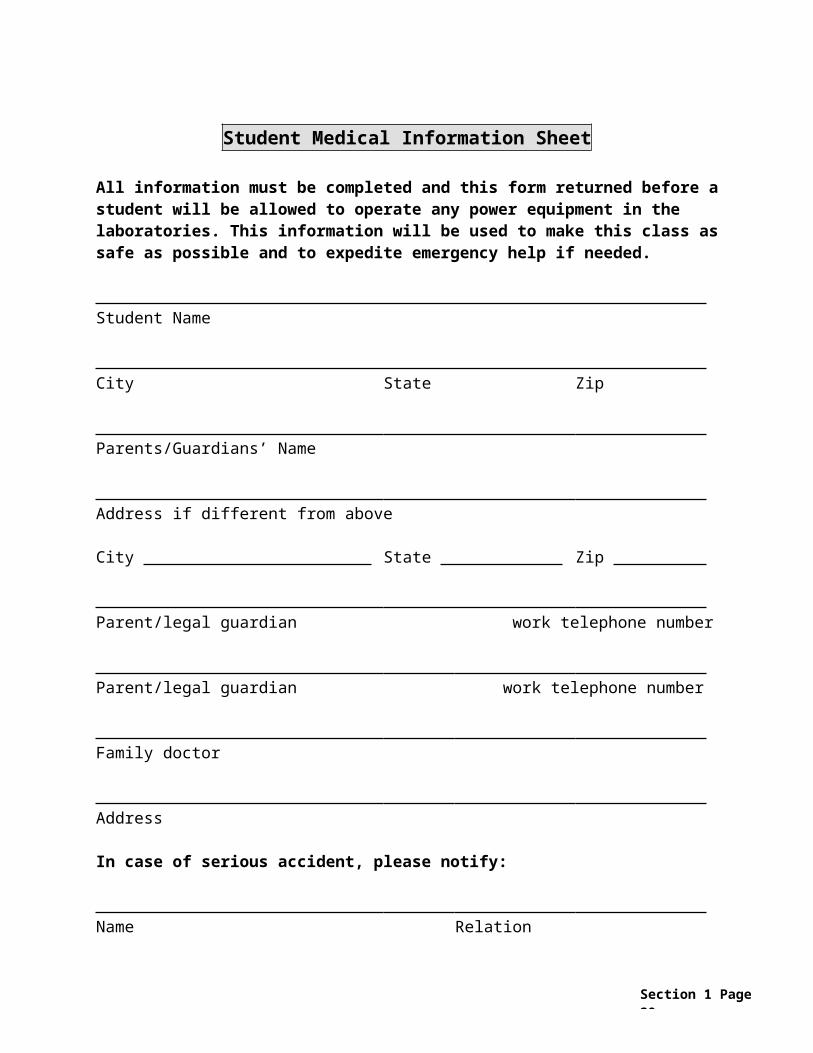
Hazardous Communication
“Right-to-Know”—MSDS
Whenever chemicals are handled, used or stored on the school premises, the administration, instructors, and students should be familiar with the Federal Hazard Communication Standard. Reference should be made to WISHA Hazard Communication Standard. The purpose of this set of regulations was to “protect” employees from the potentially adverse effects of hazardous chemicals that they might come into contact with in their workplace. Initially, this regulation affected only manufacturers of potentially hazardous chemicals and the companies that used them. Since that time the law has been amended and the state has adopted laws to cover additional types of facilities and operations. It is imperative that CTE educators become familiar with these laws and how they affect them. MSDS must be reviewed with all on how to use the chemicals.
The intent of all the “Right-to-Know” regulations is basically the same “to protect employees from possible adverse effects of any potentially hazardous chemicals that they may encounter in their workplace.” This “intent” weaves its way through all aspects of the laws and regulations and is especially important when students are in contact with various chemicals.
Materials Safety Data Sheets (MSDS)
Every lab or shop is required to have a readily accessible file containing materials safety data sheets (MSDS) for all hazardous chemicals and materials used in the facility.
MSDS can be obtained from the supplier or manufacturer. There are also several websites with comprehensive lists that you can download. For a list of Internet sites just type:http://www.ilpi.com/msds/index.html
Examples:RUST-OLEUM—PAINT THINNER MATERIALS SAFETY DATA SHEETNSN: 801000F003789Manufacturer's CAGE: 08882 Part No. Indicator: B Part Number/Trade Name: PAINT THINNER
Section 2 Page 53

Flammable and Combustible Liquids Read the manufacturer’s label information and MSDS before using a product. Withdraw only as much material as you will need to complete the immediate
operation. Always wear proper eye protection. Dispose of waste materials in approved containers. Use a funnel when pouring into a smaller container. Follow instructions for handling and mixing catalysts with resins and finishes. Never pour catalyst back into the container. Always add catalyst to resin, not resin to catalyst. Add acid to water, not water to
acid. Do not apply resin, paint, or other finishing material near areas used for flame cutting,
welding, grinding, soldering, or other high temperature operations. Store materials in original containers or approved containers that are properly
labeled. Wear rubber gloves to minimize chances of skin irritation. Wash hands and other exposed skin areas before leaving the classroom. Store volatile materials in approved fireproof cabinets or specially designed areas. Remove clothing that may have become accidentally soaked with epoxy, polyester
resins, and other potentially dangerous substances. Be certain the fire extinguisher located in work area is suited for application to a fire
caused by the materials being used in the work area. If you are unsure of materials or procedures to complete an operation, ask the
instructor for help.Some of the more hazardous flammable liquids are listed below in approximate order of hazard.
Starting fluid Alcohol Gasoline Shellac Aerosol cans Japan dryer Catalysts Kerosene Carburetor
cleaner Paint, oil
Acetone Resin (polyester)
Lacquer thinner Stain/varnish Adhering liquid
(printing) Danish oil
Section 2 Page 54

Paint thinnerChemical SafetyToday’s CTE educators must be conscious of potential chemical hazards. New concerns are being raised daily about the potential long-term effect chemicals might have on students, instructors, and the environment. Unless handled and used with rigorous care, all chemicals have the potential to cause injury and illness. For safe, effective use of chemicals, the following guidelines are suggested:
Become familiar with every chemical before you use it. Know what it does and how it does it. Find out about the specific safety precautions, what protective equipment to wear, signs of illness associated with use, and what to do with empty containers and leftovers. Advise students of these facts. The label on the chemical container will provide most of the information you need. Your dealer is a good source of information.
Use the least toxic chemical that will still be effective. Make sure that nonworkers are out of the work area. When using a chemical that could harm you if it came in contact with your body,
wear personal protective equipment—unlined liquid-proof gloves, liquid-proof hat with brim, boots, clothing, chemical goggles, face shields, and an appropriate respirator for the chemical being used.
To protect ground water, be careful of spills when mixing and loading. If a spill occurs, clean it up and report it promptly.
Dry chemical dust can irritate your lungs and throat. Also, handling dry chemicals can dry out and irritate your hands.
Consult the Washington State Department of Ecology for steps on how to safely dispose of empty containers and leftover chemicals. Don’t dump them into any unapproved places where they could pollute ground water, wells, streams, or harm people and animals.
With lower toxicity chemicals, less stringent measures will usually suffice, but they must still be adequate. Follow label recommendations, and limit exposure to any chemical you’re using. If possible, avoid breathing dust, vapors, or spray. Avoid splashes and spills when handling. Don’t eat until you’ve washed thoroughly.
If someone is splashed or doused with a toxic chemical or inhales or ingests a toxic chemical use water to flush immediately, then call the poison control center immediately. Be ready to tell them what the chemical was and the suspected level of exposure the victim suffered.
Store chemicals in their original labeled containers and in their proper storage location.
Section 2 Page 55

ELECTRICAL PROTECTION
Understanding the electrical resistance of the body
Current is forced through the resistance of a circuit by voltage, which is electrical pressure or force. A lower resistance in the circuit allows more current to pass through the circuit for a given amount of voltage. If the human body is thought of as a circuit, then the amount of current that can flow between any two points of the body depends on the resistance between those two points at that time and the amount of voltage or electrical pressure applied. Normally, skin resistance is high. This high resistance tends to impede the current flowing into and out of the body. However, there are several conditions that can lower skin resistance drastically and which permit a larger amount of current to pass through the body with the same voltage applied.
The average body resistance is over 100,000 ohms. However, if the skin is wet from perspiration or other moisture, or if the pulse rate is high, the body’s resistance can be as low as a few hundred ohms. Also, if the skin is broken with a cut or an abrasion, a lesser voltage is required at that point to force the same amount of current through the body.
Precautions to be used when working with electronic circuits
1. Practice a precaution used by experienced technicians. Try to keep one hand in your pocket or behind you when you are making voltage and current measurements. If two hands are in contact with the circuit or if one hand is in contact with the circuit and the other hand is in contact with ground (such as a metal panel or the case of a piece of test equipment), the current path is across the chest where the heart and lungs are located. THIS IS EXTREMELY DANGEROUS.
2. Do not work on electronic circuits when the power is on.
3. Electrolytic and other large capacitors can hold a voltage charge for several hours after the power is removed. Make it a habit to check if they are fully discharged by shorting them with a screwdriver with an insulated handle or clip lead before working on a circuit.
4. Do not work on electronic equipment while standing on a damp floor or when leaning on any metal object.
5. Certain components, such as resistors and vacuum tubes, get quite hot. Give them time to cool off before removing them.
6. Know the location of and how to use an available fire extinguisher.
7. Be sure equipment is in proper working order before using it.
Section 2 Page 56

Electrical equipment
Electrical equipment is found in nearly every vocational subject area. Students shall be taught the dangers present in electrical equipment and wiring and learn how to protect themselves and others from injury.
Points to remember:
1. All electrical wiring needs to be in compliance with the National Electrical Code.
2. Never use temporary wiring. All extension cords for tools and appliances must be three-wire parallel ground with grounding lug plugs. Do not overload the circuit.
3. Treat all electrical equipment as if it is “live.”
4. Never bypass safety interlocks (i.e., circuit breakers, fuses, etc).
5. Never work on electrical equipment alone; always have someone else nearby.
6. While working on electrical equipment, stand on rubber mats or wooden floors. Wear protective gloves and hat.
7. Use safety light in closed or fume-laden areas. When working in a closed area, or in a place where fumes could collect, one should use only approved, sealed safety lights and explosion-proof equipment. Some explosions in the past haven’t killed anyone, but the bare wires whipping around as a result of the big boom electrocuted those present.
8. Make sure that grounding is proper and complete. Most electrical industrial equipment comes with carefully designed grounding provisions. Most cords use three or four-wire cable to ensure one’s safety by providing a built-in low-resistance path to ground in case of a short circuit. Don’t guess about this. If there is any doubt about the condition or function of any electrical equipment one may have to use, get help from authorized and trained personnel instead of taking a chance.
9. Touching a bare wire, an exposed socket, or a faulty electrical tool or appliance may give a person an electrical shock. Shock hazards also exist inside various types of electronic equipment and around power lines. The possibility of shock is greatly increased if the person is also in contact with a ground surface or if the floor or his/her body is wet.
Section 2 Page 57

In attempting to rescue someone who is in contact with an electrical source, one should:
1. Shut off the current quickly.
2. Attempt to move the victim away from the conductor using some sort of insulating material if the current cannot be shut off quickly.
3. Not touch the victim until electrical contact is broken. Use a wooden pole, such as a broom handle, to separate the victim and the conductor. A large cloth, such as a coat, may be used.
4. Move the victim quite a distance from the conductor as a line conductor may cling to the victim.
5. Apply CPR immediately if the victim is not breathing. Speed is essential. In 600 cases studied, 70 percent recovered when artificial respiration was applied within three minutes. Another minute of delay reduced the figure to 58 percent. Five minutes is too long—the chances are slim.
Sure death
Two hundred thirty milliamperes of current flowing through one’s body in the region of the heart is well within the band of current flows labeled “SURE DEATH.” This is the area where the heart stops pumping and just trembles ineffectually (ventricular fibrillation). Naturally, the effect of current flow on the body varies not only with its intensity, but also with the path it follows.
Effects of electric shock
To get an idea of the effects of so-called “low voltage” shock, let’s see what happens when a sixty-cycle alternating current at 110 volts passes through a person from hand-to-hand or hand-to-foot. As the current flow gradually increases, the following effects become apparent:
1. 1 to 8 MILLIAMPERES—a sensation of shock; not very painful. A person can still let go because muscle control is not lost.
2. 8 to 15 MILLIAMPERES—painful shock, but still one can let go. The hazard up through this amount of current flow often comes from the so-called “fright reaction” or recoil when the shock occurs. People have fallen from ladders and other high locations or have bumped their heads hard enough to cause unconsciousness, increasing the possibility of continued current flow; thus prolonging the exposure.
Section 2 Page 58

3. 15 to 20 MILLIAMPERES—loss of muscle control begins, and the person cannot let go in spite of the painful shock. At 25 MILLIAMPERES one will be “frozen” to the point of contact. At 20 to 50 MILLIAMPERES—severe muscle contractions include those muscles controlling breathing. In addition to the difficulty in breathing, the victim may be “knocked out.”
4. 50 to 75 MILLIAMPERES—almost certain unconsciousness.
5. 75 to 100 MILLIAMPERES—as the current nears 100 MA, the person is almost certain to die. Ventricular fibrillation sets in and the heart no longer circulates blood in the body. Even after the current is cut off, no pulse can be detected. Artificial respiration should be attempted. However, unless a trained physician can restore the natural rhythmic action of the heart by massage or controlled electrical shock treatment, using special equipment usually found only in hospitals, it’s almost impossible to save the victim’s life. Usually, the maximum time limit for resumption of natural heart function under these circumstances is about six minutes. (Closed heart massage is taught in many first aid courses. This technique, applied by a person trained in its use, may save a life if used prior to the arrival of medical personnel.)
6. 0.20 to 2 AMPERES—this intensity of flow will paralyze the nerves near the diaphragm or the nerve centers at the base of the brain. Breathing will be cut off.
7. 2 AMPERRES and over—the person will suffer severe burns due to “frying” of the body fluids and to external arcing at the point of contact. In addition, internal burns of the slow-healing type will also occur. This latter fact might seem academic under the circumstances, but a peculiar thing sometimes happens when flows of above 10 AMPs occur for very short periods. The severe muscle contractions the person experiences may prevent ventricular fibrillation. After release, if the proper first aid is administered soon enough, he/she might survive if the heart picks up its regular pumping rhythm again.
The tabulation above is a general guide only. Naturally there will be variations due to individual circumstances. The physical condition of the victim may be a factor. But an important thing to remember is that fewer low-voltage victims can be revived than those receiving 1,000 volts or more.
Section 2 Page 59

What one must know about electricity1. If the body becomes part of a circuit, either as the load or as the conductor and
the load, a person will get an electrical shock.
2. The body will become part of the circuit if one comes in contact with both a source of potential and a ground while one’s total resistance is low enough to allow a flow of current.
3. Current flow is what kills or injures—the voltage only pushes the current through body resistance.
4. Direct current (DC) is generally considered to carry less shock hazard than alternating current (AC) for a given voltage, but it is likely to burn more severely since the arcs from DC are more persistent than those from AC.
5. Body resistance is highly variable, principally because of the changes in skin resistance from one body area to another due to the thickness and amount of moisture on the surface.
6. Electrical energy sources (AC or DC)—operating with an open circuit potential of 30 volts or more, with a capability of delivering 2.5 milliamperes or more into a short circuit—are hazardous to a person.
7. Low voltage (less than 600 volts) can be more dangerous than high voltage. Statistics show that 62 percent of victims recovered after being knocked out by potentials over 1,000 volts; for lower voltages, only 39 percent recovered.
8. The seriousness of electrical shock depends on the balance between several factors: the voltage, the body resistance, the amount of current flow and its path through the body, the duration of contact, and the condition of the body organs in the current path.
9. The most hazardous currents are those in the frequency range from 20 to 100 cycles per second (cps). Currents of higher frequencies are less hazardous because they tend to flow on the surface of conductors rather than through the conductors themselves. High-frequency current will cause electrical shock but to a lesser extent.
10. The current required to operate just one 100-watt light bulb is eight to ten times the amount that is needed to kill a person.
Section 2 Page 60

PORTABLE LADDER SAFETY
Section 2 Page 61

CONSTRUCTION TRADESPORTABLE LADDERS (OSHA/NIOSH)
PORTABLE WOOD LADDERSThis section is intended to prescribe rules and establish minimum requirements for the construction, care, and use of the common types of portable wood ladders in order to ensure safety under normal conditions of usage.
Ladder standards—Standards have been established by the American National Standards Institute (ANSI) that covers wood stepladders and extension ladders. Any stepladder or extension ladder with ANSI seal conforms to the standards for wood ladders.
Materials—The following requirements are applicable to all wood parts. They shall be free from sharp edges and splinters and they shall be sound and free (by accepted visual inspection) from shake, wane, compression failures, decay, or other irregularities. Low-density wood shall not be used.
PORTABLE STEPLADDERSStepladders longer than 20 feet shall not be supplied. Stepladders as hereinafter specified shall be of three types.
1. TYPE IA—Extra heavy-duty professional—duty rating of 300 pounds.
2. TYPE I—Industrial stepladder, 3 to 20 feet for heavy duty (such as those used by utilities, contractors, and industry)—duty rating of 250 pounds.
3. TYPE II—Commercial stepladder, 3 to 12 feet for medium duty (such as those used by painters, offices, and light industry)—duty rating of 225 pounds.
4. TYPE III—Household stepladder, 3 to 6 feet for light duty (such as light household use)—duty rating of 200 pounds.
The weight of the user—including clothing, tools, and materials—must not exceed the duty rating.
GENERAL REQUIREMENTS1. A uniform step spacing shall be employed which shall be not more than 12
inches. The steps shall be parallel and level when the ladder is in a position for use.
2. The minimum width between side rails at the top, inside to inside, shall be not less than 11 ½ inches. From top to bottom, the side rails shall be spread at least 1 inch for each foot of length of the stepladder.
Section 2 Page 62

3. A metal spreader or locking device of sufficient size and strength to securely hold the front and back sections in open positions shall be a component of each stepladder. The spreader shall have all its sharp points covered or removed to protect the user. For a Type III ladder, the pail shelf and spreader may be combined in one unit.
TYPE IA, I, II, III LADDERS
SINGLE LADDER—Single ladders longer than 3 feet shall not be supplied.
TWO-SECTION LADDER—Two-section extension ladders longer than 60 feet shall not be supplied. All ladders of this type shall consist of two sections; one to fit within the side rails of the other, and both arranged in such a manner that the upper section can be raised and lowered.
SECTIONAL LADDER—Assembled combinations of sectional ladders longer than the lengths specified in this subdivision shall not be used.
TRESTLE AND EXTENSION TRESTLE LADDER—Trestle ladders extension sections, or base sections of extension trestle ladders longer than 20 feet, shall not be supplied.
PAINTER’S STEPLADDER—Painter’s stepladders longer than 12 feet shall not be supplied.
MASON’S LADDER—A mason’s ladder is a special type of single ladder intended for use in heavy construction work. Mason’s ladders longer than 40 feet shall not be supplied.
TROLLEY AND SIDE-ROLLING LADDERS—Trolley ladders and side-rolling ladders longer than 20 feet shall not be supplied.
CARE OF LADDERS
1. Ladders shall be maintained in good condition at all times. The joint between the steps and side rails shall be tight, all hardware and fittings shall be securely attached, and the moveable parts shall operate freely without binding or undue play.
2. Metal bearings of locks, wheels, pulleys, etc., shall be frequently lubricated.3. Frayed or badly worn rope shall be replaced.4. Safety feet and other auxiliary equipments shall be kept in good condition to
ensure proper performance.5. Ladders shall be inspected frequently and those which have developed defects
shall be withdrawn from service for repair or destruction and tagged or marked as “DANGEROUS—DO NOT USE.”
6. Rungs should be kept free of grease or oil.
Section 2 Page 63

USE OF LADDERS
1. Portable rung and cleat ladders shall, where possible, be used at such a pitch that the horizontal distance from the top support to the foot of the ladder is one quarter of the working length of the ladder (the length along the ladder between the foot and top support). The ladder shall be so placed as to prevent slipping, or it shall be lashed or held in position. Ladders shall not be used in a horizontal position as platforms, runways, or scaffolds.
2. More than one person shall not use ladders for which dimensions are specified at a time, nor with ladder jacks and scaffold planks where use by more than one person is anticipated. In such cases, specially designed ladders with larger dimensions of the parts should be procured.
3. Portable ladders shall be placed so that the side rails have a secure footing. The top rest for portable rung and cleat ladders shall be reasonably rigid and shall have ample strength to support the applied load.
4. Ladders shall not be placed in front of doors opening toward the ladder unless the door is blocked open, locked, or guarded.
5. Ladders shall not be placed on boxes, barrels, or other unstable bases in order to obtain additional height.
6. To support the top of the ladder at a window opening, a board shall be attached across the back of the ladder, extending across the window and providing firm support against the building walls or window frames.
7. When ascending or descending, the user shall face the ladder.8. Ladders with broken or missing steps, rungs, or cleats; broken side rails; or other
faulty equipment shall not be used. Improvised repairs shall not be made.9. Short ladders shall not be spliced together to provide long sections.
10. Ladders made by fastening cleats across a single rail shall not be used.11. Ladders shall not be used as guys, braces, or skids or for other than their
intended purposes.12. The tops of the ordinary types of stepladders shall not be used as steps.13. On two-section extension ladders, the minimum overlap for the two sections in
use shall be as follows:
Size of ladder (feet) Overlap feetUp to and including 36 3
Over 36 up to and including 48 4
Over 48 up to and including 60 5
Section 2 Page 64

14. Portable rung ladders with reinforced rails shall be used only with the metal reinforcement on the underside. Ladders of this type should be used with great care near electrical conductors, since the reinforcing itself is a good conductor.
15. No ladder shall be used to gain access to a roof unless the top of the ladder shall extend at least 3 feet above the point of support at the eave, gutter, or roofline.
16. Only the user shall make adjustment of extension ladders. This is to be done when standing at the base of the ladder, so that the user may see that the locks are properly engaged. Adjustment of extension ladders from the top of the ladder (or any level over the locking device) is a dangerous practice and should not be attempted. Adjustment should not be made while the user is standing on the ladder.
17. The middle and top sections of sectional or window cleaner’s ladders shall not be used for the bottom section unless the user equips them with safety shoes.
18. Extension ladders shall always be erected so that the upper section is resting on the bottom section.
19. The user should equip all portable rung ladders with nonsolid bases when there is a hazard of slipping. Nonsolid bases are not intended as a substitute for care in the safe placing, lashing, or holding of a ladder that is being used upon oily, metal, concrete, or slippery surfaces.
20. The bracing on the back legs of stepladders is designed solely for increasing stability and not for climbing.
21. Hangers should be used for storing ladders horizontally in order to prevent sag and permanent set. At least three should be used for each ladder.
PORTABLE METAL LADDERS (OSHA/NIOSH)
1. Requirements are not part of this section because of the wide variety of metals and design possibilities. However, the design shall be such as to produce a ladder without structural defects or accident hazards—such as sharp edges, burrs, etc. The metal selected shall be of sufficient strength to meet the test requirements and shall be protected against corrosion unless it’s inherently corrosion-resistant.
2. The spacing of rungs or steps shall be on 12-inch centers.3. Rungs and steps shall be corrugated, knurled, dimpled, or coated with skid-
resistant material or shall be otherwise treated to minimize the possibility of slipping.
Section 2 Page 65

LADDER TOP
BUCKET SHELFTOP STEP
SPREADER
ANGLE BRACE
SHOE
Section 2 Page 66

FIRE SAFETY
Section 2 Page 67

The Fire TriangleTo produce fire, three things must be present at the same time.
If any one of the three is missing, a fire cannot be started; or with the removal of any one element, the fire will be extinguished.
FUEL
HEAT
HEATFUELHEAT FUEL
OXYGEN
OXYGEN OXYGEN
Section 2 Page 68

Section 2 Page 69

Standard Letter Symbolsfor Fire Extinguishers
GREEN RED BLUE YELLOW
ORDINARY FLAMMABLE ELECTRICAL COMBUSTIBLECOMBUSTIBLES LIQUIDS EQUIPMENT METALS
Distinctive letters, shapes, and colors mark extinguishers according to the classes of fires on which they should be used.
A
CB
D
Section 2 Page 70

Types of Fire Extinguishers
Dry Chemical extinguishers are usually rated for multipurpose use. They contain an extinguishing agent and use a compressed, nonflammable gas propellant.
Halon or halatron extinguishers contain a gas that interrupts the chemical reaction that takes place when fuels burn. These types of extinguishers are often used to protect valuable electrical equipment since they leave no residue to clean up.
Water extinguishers contain water and compressed gas and should be used on Class A (ordinary combustibles) fires.
Carbon Dioxide (C0²) extinguishers are most effective on Class B and C (liquids and electrical) fires. Since the gas disperses quickly, these extinguishers are only effective from 3 to 8 feet. The carbon dioxide is stored as a compressed liquid in the extinguisher.
Section 2 Page 71

This Is Your New ABCDs ofPortable Fire Extinguishers
A fire extinguisher is a storage container for an extinguishing agent such as water or chemicals. It is designed to put out a small fire, not a big one.An extinguisher is labeled according to whether the fire on which it is to be used occurs in wood or cloth, flammable liquids, electrical, or metal sources. Using one type extinguisher on another type fire can make the fire much worse. So learn how extinguishers are labeled and used.Traditionally the labels A, B, C, or D have been used to indicate the type of fire on which an extinguisher is to be used.Recently pictograms have come into use. These picture in blue the type of fire on which an extinguisher is to be used. Shown in black with a red slash are pictures of fires on which the extinguisher is not to be used. For example, on a class “A” type, the following symbols would appear:
NFPA 10, Standard for Portable Fire Extinguishers, recommends that extinguishers be labeled with pictograms. However, the user may find the traditional A, B, C, D labels or both the pictograms and the A, B, C, D labels on an extinguisher.
You need an extinguisher at home.If you plan to buy one extinguisher, a multipurpose dry chemical labeled ABC puts out most types of fires—wood, paper, and cloth, flammable liquid, or electrical fires.If you buy more than one, you might want to get a BC for the kitchen, an A for the living room, and an ABC for the basement or garage.
Fire extinguishers where you work.It is management’s job to have extinguishers available for use and your job to know how they work.
Buying and maintaining an extinguisher.1. Extinguishers come in dry chemical, foam, carbon dioxide, water or halon types.
Whatever type you buy, a testing laboratory should label it.
Section 2 Page 72

2. The higher the number rating on the extinguisher, the more fire it puts out. High-rated ones are often (not always) the heavier models. Make sure you can hold and operate the one you buy for home use or be required to use at work.
3. Ask your dealer how to have your extinguisher serviced and inspected. Recharge it after ANY use. A partially used extinguisher might as well be empty.
4. Extinguishers should be installed away from potential fire hazards and near an escape route.
ABCDs
Class A—Extinguish ordinary combustibles by cooling the material below its ignition temperature and soaking the fibers to prevent re-ignition.
Fires in paper, cloth, wood, rubber, and
many plastics require a water-type
extinguisher labeled A.
Class B—Extinguish flammable liquids, greases or gases by removing the oxygen, preventing the vapors from reaching the ignition source or inhibiting the chemical chain reaction.
Fires in oils, gasoline, some paints, lacquers, grease in a frying pan
or in the oven, solvents, and other flammable liquids
require an extinguisher labeled B.
Class C—Extinguish energized electrical equipment by using an extinguishing agent that is not capable of conducting electrical currents.
Fires in wiring, fuse boxes, energized
electrical equipment, and other electrical sources require an
extinguisher labeled C.
Class D—Extinguish combustible metals such as magnesium, titanium, potassium, and sodium with dry powder extinguishing agents specially designated for the material involved.
Combustible metals such as magnesium and sodium require
special extinguishants labeled D.
Section 2 Page 73

FIRST AID
Section 2 Page 74

Accidents and First Aid
INSIST THAT ACCIDENTS, NO MATTER HOW SMALL,BE REPORTED TO YOU.
Always fill out a report form and submit it through the proper channels in your district.
1. WASH OFF AREA—Wash with water any area that might have something spilled on it.
2. FLOOD ANY BURNED AREA WITH COLD WATER—This will draw the heat away from the burn. Continue to do this until further help can be obtained. You should NOT apply any ointments.
3. COMPRESS THE WOUND—All first aid kits should have large sterile pads. After removing any foreign material from a cut, compress it to stop the bleeding. You should NOT apply any ointment or tourniquets.
4. WASH SPILLS TO THE EYES AND SKIN FOR 15 FULL MINUTES—Use an eye wash bottle or station and hold the eyes wide open. If eye washes are unavailable then splash water from your hands. If there is any danger from caustics then eye safety glasses should be worn.
5. DO NOT TREAT MAJOR INJURIES YOURSELF, CALL FOR ASSISTANCE OR 911—All certificated career and technical education employees maintain a valid CPR and First Aide Card and the records of this requirement be maintained at the local level.
6. POISON CONTROL CENTER—1-800-456-7707.
First Aide Certification for the instructors of CTE programs is the local districts responsibility and is a condition of local employment.
Section 2 Page 75
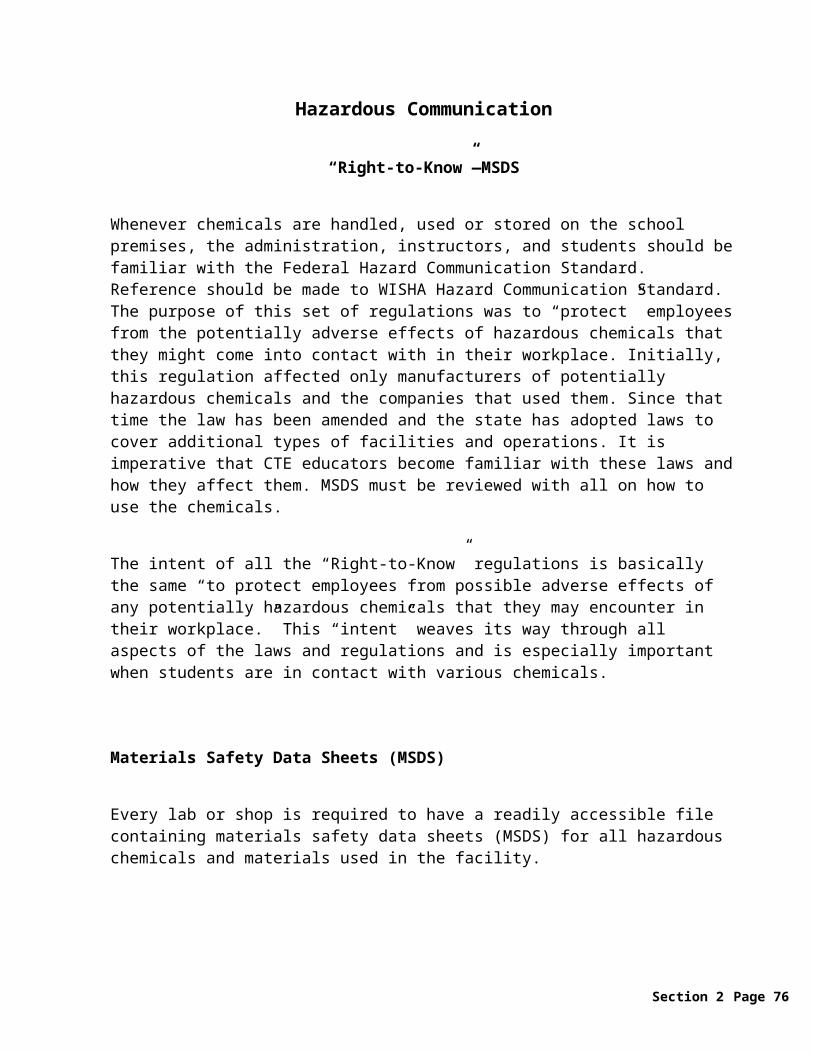
GENERAL SAFETY PRACTICES
1.1-1.13 Washington
Section 2 Page 76

GENERAL SAFETY PRACTICES
BODY MECHANICS1. Use proper muscle groups and distribute the workload.2. Both hands are used to pick up heavier objects.3. Lifting heavy objects alone is avoided. Help is requested.4. Pushing is preferred to pulling.5. Leg muscles are used to lift heavy objects rather than back muscles.6. Bending and unnecessary twisting of the body for any length of time is avoided.7. Work is done at the proper level.8. Two people carry long pieces of materials.9. Do not lift heavy loads above shoulder level.
PERSONAL PROTECTION1. Confine long hair so that it is not exposed to machinery and does not interfere
with vision.2. Require the wearing of safety goggles, glasses, or other eye protection when
there is a danger of eye injury.3. Provide respirators for use where harmful dusts or fumes exist (see WISHA
rules). ** Respirator use requires appropriate certification, fit testing, and supervision to insure that there is proper fit, training, and inspection are all taking place.
4. Determine the physical defects and limitations of all students so that they will not be assigned tasks detrimental to their health or physical condition.
5. Prohibit the wearing of loose clothing in the laboratory and shop areas.6. Require students to remove rings and other jewelry while working in the
laboratory and shop areas.7. Where noise levels are excessive over long periods of time, ear protection should
be worn.8. Protective apparel, including safety shoes, aprons, shields, and gloves, are worn
properly as required by the nature of the task.9. Provisions are made for cleaning and sterilizing respirators, masks, and goggles.
10. Head protection is worn in all areas where there is danger of falling and/or flying objects.
Section 2 Page 77

FACILITY CONDITION1. Aisles, machines, benches, and other equipment are arranged to conform to good
safety practices.2. Stairways, aisles, and floors are maintained, clean, dry, and unobstructed with no
protruding objects.3. Walls, windows, and ceilings are clean, maintained in good repair, and free of
protrusions.4. Illumination is safe, sufficient, and well placed.5. Ventilation and temperature controls are proper for conditions.6. Fire extinguishers and other necessary fire equipment are properly selected, adequately
supplied, properly located, inspected, and periodically recharged as required.7. Exits are properly identified and illuminated.8. Lockers and drawers are clean, free of hazards, and doors kept closed.9. Personnel know the procedures for notification of fire and evaluation of premises.
10. Laboratories and workplaces are free from excessive dust, smoke, and airborne toxic materials.
11. Utility lines and shutoffs are properly identified.12. Stairways, floor openings, and overhead storage areas are properly guarded with
rails and toe boards and have the proper clearances.
HOUSEKEEPING PRACTICES1. Provide for the storage and daily removal of all sawdust, metal cuttings, rags, and
other waste materials.2. Provide properly marked boxes, bins, or containers for various kinds of scrap
stock and rags.3. Utilize sturdy racks and bins for material storage, arranged to keep material from
falling on students and to avoid injuries from protruding objects.4. Employ a standard procedure to keep floors free of oil, water, and foreign
material.5. Provide for the cleaning of equipment and facilities after each use.6. Provide regular custodial service in addition to end of class cleanup.7. Prohibit the use of compressed air to clean clothing, equipment, and work areas.8. Keep walkways and work areas free of all obstructions.9. Floor surfaces must be maintained in a “nonskid” condition.
10. Tools and materials are stored orderly and safely.11. File cabinets and other tall cabinets are required to be anchored.
Section 2 Page 78

EQUIPMENT1. All equipment should be operated in accordance with specifications as stated in
the owner’s manual.2. Machines and apparatus are arranged so that operators are protected from
hazards of other machines or passing individuals.3. Point of operation zones are properly identified and guarded.
4. Permanent enclosure guards properly protect pulleys, gears, and belts.
5. Guards are removed only for repair purposes and then replaced immediately.
6. Equipment control switches for each machine are easily available to the operator.
7. Machines are turned off when the instructor is out of the room and/or if the machine is unattended.
8. Proper cleaning equipment is used (avoid air for cleaning purposes).
9. Nonskid areas are maintained around dangerous equipment.
10. A preventive maintenance program is established for all equipment.
11. Machines are guarded to comply with WISHA code.
12. Cutting tools are kept sharp, clean, and in safe working order.
13. All hoisting devices are maintained in a safe operating condition and specified load ratings are easily identified.
14. Machines that are defective or being repaired are clearly marked and made inoperable by locking out the machine power switch.
15. Machines and apparatus are marked with proper color code.
16. Equipment cords and adapters are maintained in a safe working condition.
17. Adjustment and repair of any machine is restricted to experienced persons.
18. Ladders are maintained and stored properly.
19. Machines designated for fixed location are securely anchored.
Section 2 Page 79

RECORDKEEPING
1. Always keep an adequate record of accidents and report it through properchannels in your district.
2. An analysis of accidents is made for the purpose of corrective action.
HAND TOOLS1. Instruct students to select the right tools for each job.
2. Establish regular tool inspection procedures to ensure tools are maintained in
safe condition.
3. Instruct students in the correct use of tools for each job.
4. Provide proper storage facilities.
5. Do not lay tools on operating machinery or equipment.
6. Keep tools out of aisles and working spaces where they may become tripping
hazards.
7. Do not put sharp objects or tools in pockets. This could result in cuts or being
stabbed.
Section 2 Page 80

SCAFFOLDS
1. The footing or anchorage for scaffolding is sound, rigid, and capable of carrying the maximum intended load without settling or displacement.
2. Unstable objects such as barrels, boxes, loose bricks, or concrete blocks cannot be used to support scaffold or planks.
3. No scaffold will be erected, moved, dismantled, or altered except under the supervision of the instructor.
4. Guard rails and toe boards will be installed on all open sides of platforms more than 10 feet above the ground or floor.
5. Scaffolds 4–10 feet, having a minimum horizontal of less than 45 inches in either direction, will have standard guardrails installed on all open sides and ends of the platform.
6. Scaffolds and their components will be capable of supporting without failure four times the maximum intended load.
7. All planking of platforms will be overlapped a minimum of 12 inches or secured from movement.
8. An access ladder or equivalent safe access will be provided.9. Scaffold planking will extend over their end supports not less than 6 inches or
more than 12 inches.10. The use of shore or lean-to scaffolds is prohibited.11. The poles, legs, or uprights of a scaffold will be plumb and securely and rigidly
braced to prevent swaying and displacement.
Section 2 Page 81

COLOR CODING1. RED
Fire. Red shall be used as the basic color for the identification of fire protection equipment and apparatus.Stop: Emergency stop bars, buttons, or electrical switches on hazardous machines shall be red.Danger: Safety cans and safety signs shall be painted red.
2. ORANGEOrange shall be used as the basic color for designating dangerous parts of machines or energized equipment. Orange shall be used to emphasize hazards when enclosure doors are open or when gear bolts or other guards around moving equipment are open or removed, exposing unguarded hazards.
3. YELLOWYellow shall be the basic color for designating caution and for marking physical hazards. Solid yellow, yellow and black stripes, or checkers (or yellow with suitable contrasting background) should be used interchangeably using the combination that will attract the most attention.
4.GREENGreen shall be used to designate safety and the location of first aid equipment (other than firefighting equipment).
5.BLUEBlue shall be the basic color for designation of caution, limited to warning against the starting, use of, or the movement of equipment under repair or being worked upon.
6.PURPLEPurple shall designate radiation hazards.
7.BLACK AND WHITEBlack, white, or a combination of these two shall be the basic colors for designation of traffic and housekeeping markings.
Section 2 Page 82

NOISE CONTROLThe ability to hear is a precious gift. Without it, it is difficult to lead a fully productive life either on or off the job. Noise can destroy hearing, create physical and psychological stress, and thereby contribute to accidents in addition to the obvious cause by making it impossible to hear warning signals. Practical arts and vocational education laboratories and shops are not exempt from noise pollution considerations, particularly if maximization of learning and safety are the goal!Noise is an unwanted sound. It is a form of energy or vibration that is conducted through the atmosphere. There are four variables that can affect the intensity of noise and its potential danger.1. The level of the sound, as measured in decibels (dB).2. The length of time to which one is exposed to the sound.3. The numbers and lengths of quiet (recovery) periods between periods of sound.4. Individual sensitivity to or tolerance for sound.Table 1.1 indicates that workers cannot be exposed to a sound level that exceeds 90dB on the average for an eight-hour day. It should be noted that the standards in this table apply only to work; i.e., day-to-day environments, and schools are typically different. In some cases, however, vocational courses approximate the work situation and, hence, these standards might well apply. Furthermore, it also deserves noting that instructor exposure is often the equivalent of industry despite the fact that student exposure is not. Since hearing is affected by the totality of the noise that one is exposed to, any precautions are appropriate.Fortunately, noise exposure can be controlled. No matter what noise problems occur in the laboratory and workplace, the technology exists to reduce the hazard. The responsibility to correct noise problems rests on the individuals, i.e., supervisors, teachers, etc., involved. In general, there are three basic ways to control noise.1. Source Control
The best and most effective approach to control noise is to control it at its source since in this way no further hearing danger is posed and, therefore, other control methods are probably not needed. Techniques of noise source control include:a. Reduction of impact noise.a. Reduction of the speed of moving and rotating parts.b. Reduction of pressures and flow velocities in circulating systems.c. Reduction of flow resistance in circulation systems.d. Balancing of rotating parts.e. Reduction of friction in rotating, sliding, and moving parts.f. Isolation of vibration within equipment.g. Reduction of the size of the surface radiation areas.h. Application of vibration-damping materials to vibrating parts and surfaces.
Section 2 Page 83

2. Path ControlIf source control is not possible, the next best approach is to control the noise along its path. Although such controls limit the number of persons exposed to the noise, they do not always eliminate the noise problem for all persons affected. In path control, noise is blocked or reduced before it is heard. This can be accomplished by:a. Containing or enclosing the noise.b. Absorbing the noise along its path.c. Deflecting the noise away from our ears.d. Separating the noise from the hearer.
3. Hearing ProtectionFinally, ear protection equipment is available. This is not as desirable as either source or path control because it affords protection only to those wearing the equipment. Students must be willing to wear hearing protectors whenever they are exposed to potentially dangerous noise. Certain conditions and activities can reduce the effectiveness of the hearing protectors themselves.
TABLE 1.1 PERMISSIBLE NOISE EXPOSURES
Duration per Day in Hours Sound Level—DBA—Slow Response8 856.2 924 953 972 1001 ½ 1021 105½ 110¼ or less 115
Free safety and health consulting and education services are available from the state of Washington Department of Labor and Industries, Division of Industrial Safety and Health. To contact the Voluntary Services section nearest you, call 1-800-LISTENS.
Section 2 Page 84

HEARING PROTECTION
Cotton should not be used as protection against abrasive sound. While a wad of cotton may minimize waves of certain frequencies, it fails to alter the intensity thus providing a false sense of security.
Sound is measured by two fundamental characteristics: frequency (related to pitch) or number of waves per second and intensity level (related to loudness). The human ear reacts to frequencies ranging from 20 cycles per second to about 20,000. Sound at a level of 85 db. begins to lead to a loss of hearing, depending on (1) the intensity, (2) the frequency, (3) the duration of exposure, and (4) individual sensitivity. The following are examples of noise and the approximate db for each.
Busy street traffic at about 100 feet...............................................60 db.Office tabulating machines (electric typewriter, etc.).....................80 db.20 feet from subway......................................................................90 db.Pneumatic diesel shovel (idling)....................................................90 db.Diesel shovel (idling).....................................................................90 db.Automatic screw machines.................................................95 to 105 db.Wire rope stranding machine............................................102 to 108 db.Header..............................................................................103 to 108 db.Circular saw......................................................................105 to 115 db.Between two compressors..........................................................110 db.Drop hammer (depending on size)...................................110 to 135 db.Punch press................................................................................112 db.Between two drills, 20 feet apart.................................................117 db.Five feet from pneumatic press...................................................130 db.40 feet from jet engine.................................................................138 db.59 feet from rocket engine...........................................................150 db.
Section 2 Page 85

EMERGENCY ACTION
Emergency CommunicationsIt is recommended that the following be implemented to ensure proper channels of communication during an emergency:1. Procedures should be reviewed with the administration and employees to set
methods of communication in the event an emergency occurs.2. Order of notification under the following conditions:
a. If serious injury (uncontrollable situation)—school nurse—ambulance—principal—parents
b. If serious injury (controlled situation)—school nurse—principal—parents
3. Telephonea. Each department should have communication with the building office.b. Emergency telephone numbers should be conspicuously posted and the
procedure posted for dialing “outside.”4. A card file should be maintained in each school for all students. This card should
include the names and telephone numbers of parents or guardians to be notified in the case of injury.
First AidGeneralAll certificated career and technical education employees maintain a valid CPR and First Aide Card and the records of this requirement be maintained at the local level.
Administering1. Qualified personnel should administer first aid.2. Do not diagnose illness or prescribe or administer medication of any sort.3. Disperse crowds if accident is serious and keep the area as quiet as possible.4. Stick to basic procedures:
a. Call for aid.b. Stop bleeding.c. Treat for shock.d. Mouth-to-mouth resuscitation (if breathing has stopped).e. Cardiopulmonary resuscitation (CPR) (if required).
Section 2 Page 86

Transportation1. Parents shall be notified immediately of all cases of illness or injury. If the student is
to be sent home or elsewhere, the parents should arrange for the transportation. The principal should take appropriate action for the best interest of the student.
2. When the injury is serious, do not attempt to move the student except for first aid procedures until professional medical help arrives.
3. If a school is uniquely located where special transportation may be required, procedures should be established at the beginning of the school year.
Section 2 Page 87

SECTION II
..............................
AUTOMOTIVE TECHNOLOGY
Section 2 Page 88

AUTOMOBILE MECHANICAUTOMOBILE TECHNICIAN
Safety is one aspect of the automotive repair industry that cannot be overemphasized. A good mechanic is a safe mechanic. If there is fast way or a safe way to do the job, take the safe way. Otherwise, you may not get the job done at all.
Listed below are some of the potential exposures and safety precautions that you will be confronted with.
GENERAL PRECAUTIONS1. Oil or adjust moving parts only if authorized.2. Use caution when working near the fan and belt.3. Whenever possible, work with the engine switch in the “OFF” position.4. The fan belt should be tightened only when the engine is stopped.5. Always consider the engine and exhaust system to be “HOT.”6. Do not pour gasoline from an open container into the carburetor.7. Use extreme care when welding on vehicles—provide fire protection.8. Do not work directly above another student.9. Wait for the radiator to cool before removing the cap.
10. Make sure that hoods are secured in an open position when working on the engine.11. WHEN “PULLING ENGINES” BE SURE THAT ROPES OR SLINGS ARE
PROPERLY FASTENED. DON’T STAND OR LIE UNDER AN ENGINE OR TRANSMISSION FASTENED TO A CHAIN OR LIFTING STRAP. THE CHAIN/STRAP COULD FAIL AND YOU COULD BE CRUSHED.
PERSONAL HEALTH HAZARDS1. Wear appropriate personal protecting equipment while spray painting. THIS
INCLUDES SPRAY PAINT CANS.2. Do not clean hands in solvent or gasoline. These materials are explosive and also
can cause a skin rash.3. Avoid back strain when it is necessary to lift parts from the engine. Crouch down and
let your legs/thighs do the work.4. Never place hands in front of a high-pressure grease gun.5. Keep open wounds properly dressed and covered.6. Eliminate loose clothing and confine long hair. (This includes chains and long
earrings.)7. Never spray compressed air into the skin or eyes. A FATAL INJURY COULD
RESULT.8. Wear safety glasses when under a vehicle. This will protect your eyes from falling
debris—dirt, and, glass, metal, etc.9. Wash hands and clothing frequently—this prevents skin problems and prevents tools
from slipping out of your hands.
Section 2 Page 89

JACKING AND HOISTING1. Do not jack up the vehicle if anyone is under it.2. Jack stands must be used when working under vehicles. When using a hoist, it must
have air/hydraulic backup controls and/or locks.3. Avoid excessive shaking of the vehicle when on jack stands.4. Have the instructor inspect the jack stand supports before students work under any
vehicle.5. Long jack handles are a serious tripping hazard and they should be barricaded or
raised out of position.6. Do not use bumper jacks.7. Do not run an engine when the car is on the hoist or on jack stands.8. Caution should be observed when lowering a vehicle.9. Follow rules 1–8 when at home or on parking lots—not all jacking and hoisting
accidents happen in the shop.
DRIVING AND LOCATING THE VEHICLE FOR WORK1. Do not wear eye protection with restricted vision when driving a vehicle in the shop.2. Only students with valid driver licenses and with the instructor’s permission should
drive vehicles.3. Work should not be performed on vehicles parked in heavily traveled areas or on
public thoroughfares.4. Towing or pushing should be done only with instructor approval.5. Have a fellow student guide you when parking a vehicle in a congested area.6. Someone must be in the driver’s seat of a vehicle when the engine is being started.7. Reckless driving or “peeling-out” in the work area is forbidden and constitutes a
major safety violation that could cause termination of your participation in the auto mechanic program.
GREASES, OILS, FUELS, AND SOLVENTS1. Clean up all spills immediately and ventilate the area.2. Use only approved solvents for cleaning parts. Do not use gasoline. Wear gloves
when cleaning parts with solvents.3. Be sure that there is proper ventilation before an engine is started.4. Keep oil-soaked rags in approved rag waste containers.5. Check fuel connections for leaks before starting an engine.6. Keep flammable liquids in closed, approved containers.7. Clean up all oil/fuel/solvent spots and/or spills before a “test” drive. Don’t expect
someone else to secure your mess.8. Use drip pan for all vehicles stored overnight.
Section 2 Page 90

AIR PRESSURE
1. Use an air gauge when inflating tires. Do not over inflate tires.2. When inflating truck tires that have a snap ring, the tire should be confined within an
approved cage.3. Never aim an air hose at another student or at yourself.
WRENCHES AND TOOLS
1. Keep all tools clean and free of oil and grease.2. Keep tools picked up from the floor.3. Make certain that wrenches fit properly4. Hammers with loose handles should not be used.5. Use tools only for the purpose for which they are designed—never use a file as a pry
bar.6. Creepers should be stood on end or stored in a rack when not in use.7. Do not use chisels or punches with “mushroom” heads.8. The palm of your hand is not a tool. Install wheel covers with a rubber mallet.
CARBON MONOXIDE
Carbon monoxide is a poisonous gas caused by incomplete burning of gasoline or other fuels. It is present in gaseous form when the engine is running. Even a small amount of carbon monoxide in your body can be fatal. That is why it is imperative that you never run an engine in a poorly ventilated area.
Don’t beat your ........head against a brick wall—pick up tools when not in use.
Section 2 Page 91

COMPRESSED GAS—The most commonly used gases for cutting and welding are oxygen and acetylene. However, you may also be using hydrogen, nitrogen, Maap gas, argon, helium, Freon, ammonia, propane (liquefied petroleum gas), carbon dioxide, or sulphur dioxide in some of your projects.
To use them safely you need to know their characteristics and be sure you are using the right bottle. There is no standard color code for compressed gas bottles! Read the labels.
Treat compressed gas cylinders with the greatest respect. There is an immense amount of power in each cylinder. Careless handling resulting in valve or cylinder damage can produce instant death for you or your friends. Use a cart or hand truck for moving cylinders.
FLAMMABLE GASES—Acetylene, hydrogen, propane, and Maap gas are highly flammable. They are normally handled in compressed gas cylinders or tanks. Acetylene is dissolved in acetone (Maap gas and propane are liquefied by pressure), so it is especially important that these cylinders be kept upright when in use.
They will all form violently explosive mixtures with air or oxygen, so valves, regulators, hoses and other equipment must be tight and in good repair. Shut off valves and regulators when they are not in use!
Store spare flammable gas cylinders in a well-ventilated location, separated by a fire resistant barrier—preferably outside.
All gas cylinders must be secured and stored erect at all times. When storing or moving, cylinder caps must be in place. Students should not move cylinders unless secured to carts.
OXYGEN—For shop use, this gas is in a class by itself. It will combine with many common materials and under the right conditions will cause these materials to burn violently or to explode. Oxygen under high pressure can cause oils to explode. NEVER USE OIL ON ANY OXYGEN VALVE OR REGULATOR EQUIPMENT!
NONFLAMMABLE GASES—these include nitrogen, argon, helium, Freon, sulphur dioxide, and to some extent ammonia, which is flammable only in high concentrations. Some are odorless, and others (sulphur dioxide, ammonia) have extremely strong odors. None will support life, so adequate ventilation of the use is essential. Read up on the specific characteristics and detailed safety precautions for the gas you will use and discuss them with your instructor before proceeding.
Section 2 Page 92

Auto Shop Safety—Privately Owned Vehicle Repairs
Many school districts have auto shop classes in which students make repairs to vehicles owned by students, community members, and/or the district. These activities can create liability exposures for school districts. The following information can help reduce the frequency and/or severity of losses associated with auto shops.
Security
If the school district auto shop class agrees to repair another person’s vehicle, then the district must take reasonable steps to ensure that the automobile is stored safely. The district has care, custody, and control of the vehicle. To prevent vandalism or theft of the vehicle, the following steps are recommended:
Lock all the vehicle doors. Secure the vehicle within a locked garage or locked fenced area. Ensure that the owner has removed all personal property from the vehicle.
Key Control
The teacher is responsible for collecting all vehicle ignition keys and securing them. Students should not have access to vehicle ignition keys. Auto shop teachers should:
Keep the keys to all vehicles in a locked area under their control Keep a log of the keys checked out to students for vehicle repair during class, and
ensure all keys are collected at the end of class.
Customer Repair Authorization Forms
Vehicle repairs in auto shop class expose the school district to product liability claims. If a customer suffers an accident and can prove the cause of the accident was mechanical failure due to negligent repair, the district may be liable. For this reason, it is strongly recommended that auto shop classes do not perform brake repairs.
To limit exposure, include the following in all customer repair authorization forms:
Before any vehicle repair work ensues, inform the customer that high school students will make repairs.
Require the customer to provide written authorization for auto shop class repairs. Ensure that NO EXPRESS OR IMPLIED WARRANTY is given. Require that the
customer accepts vehicle repair AS IS. Include a statement that the district does not assume liability for loss or theft of
personal property.
Section 2 Page 93

Test Driving Vehicles
Test-driving a vehicle requires a person to drive a defective vehicle for diagnostic purposes or a repaired automobile to determine if all repairs have been made adequately. Test-driving an automobile is inherently dangerous. There is the possibility of mechanical failure resulting in a wreck. If test-driving on a public roadway, the risk is increased due to traffic concerns.
Young drivers are twice as likely to experience an automobile crash due to their lack of driving experience. According to the Insurance Institute for Highway Safety, the automobile crash death rate for 16-year-olds nearly doubled from 1975 to 1996. The institute cites high-risk circumstances such as night driving and driving with other teens in the car as factors in these statistics. The best loss control method to reduce this exposure is to allow only a district employee (e.g., auto shop teachers) to test drive vehicles. Limit the number of student passengers to reduce the exposure.
However, if it is your district’s choice to allow students to test drive vehicles, the following suggestions are made to limit this exposure:
Require student to be 18 years old and/or have at least one year of driving experience.
Require student to have successfully completed a driver’s education course. Ensure the student has a valid Washington State motor vehicle license. Obtain a driving abstract to ensure student has received no moving
violations/accidents. Require students to obtain express permission from the teacher prior to test
drives. Obtain from the student a signed parent permission slip that informs of the
inherent risks. Test drive vehicles on district property in a safe place away from traffic whenever
possible. Test drive vehicles only during the full daylight hours. Do not test drive vehicles during inclement weather. Do not allow other student passengers in the car. Due to the potential of catastrophic accidents prohibit students from test-driving
vehicles that have had brake repairs.
Also, remember that general liability and property coverage specifically excludes automobile racing. Do not allow students to build, repair, practice, or prepare any car intended for racing, speed or demolition contests, or any stunt activity.
For more information regarding auto shop liability, please contact YOUR LOSS CONTROL SERVICE REPRESENTATIVE.
Section 2 Page 94

SECTION II
AUTO BODY COLLISION REPAIR
Section 2 Page 95

AUTO BODY COLLISION REPAIR
Safety is one aspect of the automotive repair industry that cannot be overemphasized. A good mechanic is a safe mechanic. If there is a fast way or a safe way to do the job, take the safe way. Otherwise, you may not get the job done at all.
Listed below are some of the potential exposures and safety precautions that you will be confronted with.
GENERAL PRECAUTIONS1. Oil or adjust moving parts only if authorized.2. Use caution when working near the fan and belt.3. Whenever possible, work with the engine switch in the “OFF” position.4. The fan belt should be tightened only when the engine is stopped.5. Always consider the engine and exhaust system to be “HOT”.6. Do not pour gasoline from an open container into the carburetor.7. Use extreme care when welding on vehicles—provide fire protection.8. Do not work directly above another student.9. Wait for the radiator to cool before removing the cap
10. Make sure that hoods are secured in an open position when working on the engine.11. When “pulling engines,” be sure that ropes or slings are properly fastened.
PERSONAL HEALTH HAZARDS1. Wear appropriate personal protective equipment while spray painting. THIS
INCLUDES SPRAY PAINT CANS.2. Do not clean hands in solvent or gasoline. These materials are explosive and also
can cause a skin rash.3. Avoid back strain when it is necessary to lift parts from the engine.4. Never place hands in front of a high-pressure grease gun.5. Keep open wounds properly dressed and covered.6. Eliminate loose clothing and confine long hairs. (This includes chains and long
earrings.)
Section 2 Page 96

JACKING AND HOISTING
1. Do not jack up the vehicle if anyone is under it.2. Jack stands must be used when working under vehicles. When using a hoist, it must
have air/hydraulic backup controls and/or locks.3. Avoid excessive shaking of the vehicle when on jack stands.4. Have the instructor inspect the jack stand supports before students work under any
vehicle.5. Long jack handles are a serious tripping hazard and they should be barricaded or
raised out of position.6. Do not use bumper jacks.7. Do not run an engine when the car is on the hoist or on jack stands.8. Caution should be observed when lowering a vehicle.
DRIVING AND LOCATING THE VEHICLE FOR WORK
1. Clean up all spills immediately and ventilate the area.2. Use only approved solvents for cleaning parts. Do not use gasoline.3. Be sure that there is proper ventilation before an engine is started.4. Keep oil-soaked rags in approved rag waste containers.5. Check fuel connections for leaks before starting an engine.6. Keep flammable liquids in closed, approved containers.
AIR PRESSURE1. Use an air gauge when inflating tires.2. When inflating truck tires that have a snap ring, the tire should be confined within an
approved cage.3. Never aim an air hose at another student or at yourself.
WRENCHES AND TOOLS1. Keep all tools clean and free of oil and grease.2. Keep tools picked up from the floor.3. Make certain that wrenches fit properly.4. Hammers with loose handles should not be used.5. Use tools only for the purpose for which they are designed—never use a file as a pry
bar.6. Creepers should be stood on end or stored in a rack when not in use.7. Do not use chisels or punches with “mushroom” heads.8. The palm of your hand is not a tool. Install wheel covers with a rubber mallet.
Section 2 Page 97

CARBON MONOXIDECarbon monoxide is a poisonous gas caused by incomplete burning of gasoline or other fuels. It is present in gaseous form when the engine is running. Even a small amount of carbon monoxide in your body can be fatal. That is why it is imperative that you never run an engine in a poorly ventilated area.
COMPRESSED GASThe most commonly used gases for cutting and welling are oxygen and acetylene. However, you may also be using hydrogen, nitrogen, Maap gas, argon, helium, Freon, ammonia, propane (liquefied petroleum gas), carbon dioxide, or sulphur dioxide in some of your projects.
To use them safely you need to know their characteristics and be sure you are using the right bottle. There is an immense amount of power in each cylinder. Careless handling resulting in valve or cylinder damage can produce instant death for you or your friends. Use a cart or hand truck for moving cylinders.
FLAMMABLE GASESAcetylene, hydrogen, propane, and Maap gas are highly flammable. They are normally handled in compressed gas cylinders or tanks. Acetylene is dissolved in acetone (Maap gas and propane are liquefied by pressure), so it is especially important that these cylinder be kept upright when in use.
They will all form violently explosive mixtures with air or oxygen, so valves, regulators, hoses and other equipment must be tight and in good repair. Shut off valves and regulators when they are not in use!
Store space flammable gas cylinders in a well-ventilated location, separated by a fire- resistant barrier—preferably outside.
All gas cylinders must be secured and stored erect at all times. When moving, cylinder caps must be in place. Students should not move cylinders unless secured to carts.
OXYGENFor shop use, this gas is in a class by itself. It will combine with many common materials and under the right conditions will cause these materials to burn violently or to explode. Oxygen under high pressure can cause oils to explode. NEVER USE OIL ON ANY OXYGEN VALVE OR REGULATOR EQUIPMENT! If you change cylinders, always have the instructor check your work before opening the valve.
NONFLAMMABLE GASESThese include nitrogen, argon, helium, Freon, sulphur dioxide, and to some extent ammonia, which is flammable only in high concentrations. Some are odorless, and others (sulphur dioxide, ammonia) have extremely strong odors. None will support life so adequate ventilation of the use area is essential. Read up on the specific characteristics
Section 2 Page 98
and detailed safety precautions for the gas you will use and discuss them with your instructor before proceeding.
DUSTS, FUMES, AND COMBUSTIBLE METALSDust or fumes (fine metal particles from burning) found in the industrial arts laboratory can be irritating to some people. Some can be highly flammable or explosive and possibly cause serious or permanent illness.
It is important to control classroom exposure by:1. Using the ventilation equipment to remove dust from your work area.2. Sweeping or vacuuming and properly disposing of dust produced.3. Wear an appropriate respirator (check with WISHA regulations) when working on
dust producing operations.4. Consulting your instructor before cutting, welding, or grinding on galvanized metals.5. Asbestos dust is a particular hazard that requires extra precaution when cutting or
drilling or machining. Appropriate respirators (according to WISHA regulations) and protective clothing must be worn when working with this material. Asbestos Hazard Emergency Response Act (AHERA) requires schools to develop a “management plan” and make this plan available to all concerned persons, including faculty, staff, parents, or other interested parties.
6. Certain metals such as magnesium are flammable and unstable and should not be used in the industrial arts laboratory.
7. When working with lead or zinc, whether burning, welding, soldering, melting, or machining, good ventilation is essential.
FLAMMABLE AND COMBUSTIBLE LIQUIDS1. Flammable and combustible liquids are essential in many industrial arts classes
(refer to fire code requirements). They must be stored and used in a manner that will provide a high degree of safety.
2. Always read the label on the container before using any of these materials.
FLAMMABLE AND COMBUSTIBLE LIQUIDS ARE POTENTIALLY DANGEROUS BECAUSE:1. Many produce vapors that are heavier than air and can accumulate along floors or
other low points, lying in wait for a stray spark.2. Many are readily oxidized or release heat in curing so that rags or waste coated with
them will catch fire spontaneously.3. Vapors from some have harmful effects and can cause damage to nervous and/or
waste elimination systems of the body.4. All are poisonous if taken internally.5. Most will remove protective oils from the skin, and repeated exposure can cause
dermatitis (skin rash).6. Nearly all will burn violently. Such fires are difficult to extinguish without proper
extinguishing agents.
Section 2 Page 99

7. When burning, most flammable liquids will produce dense black smoke that may drive you from the room before the fire can be put out.
Section 2 Page 100

STORE AND HANDLE FLAMMABLE AND COMBUSTIBLE LIQUIDS SAFELY:1. Be sure the exhaust fan or vents are operating in the flammable liquids storeroom.2. Draw out only as much as you need for your class period or particular operation.3. Dump waste or excess materials only in covered metal containers as directed by the
instructor.4. Use a funnel when pouring into a small container.5. Clean up spills and drips immediately, disposing of the rags and waste material as
instructed.6. Read and follow instructions for handling and mixing catalysts with resins or finishes.7. Never pour catalysts back into the bottle.8. Always add catalyst to resin, not resin to catalyst.9. Never apply resin, paint or other finishing material near areas used for cutting,
welding, grinding, or other hot work.10. Be sure that the working area is well ventilated.11. Store thinners and solvents only in original purchase containers or approved cans.12. Use rubber gloves to minimize chances of skin irritation when working with epoxy
and polyester resins.13. Wash hands and other exposed skin areas before leaving the shop.
Some of the more hazardous flammable liquids that you may encounter in your shop activities are (listed in approximate order of hazard):
Starting fluid**Aerosol cans
Gasoline*Catalysts M.E.K. PeroxideCarburetor cleanerAcetoneLacquer and lacquer thinnerAdhering liquid (for silk-screen process)Paint thinnerAlcoholShellac
*Japan dryerKerosenePaintResin (polyester)Stain and varnishDanish oil
*These materials could accelerate spontaneous combustion or could react violently when mixed with organic material.
**The hazard could vary greatly depending upon the propellant used in the can.
Section 2 Page 101

SECTION II
COMMERCIAL FOODS
Section 2 Page 102

COMMERCIAL FOODS
BAKER COOKCHEF PASTRY CHEF
INTRODUCTION
Safety in the commercial foods industry is as large a concern as in any other field. Many
people fail to realize that in the food preparation areas equipment and personnel can
pose potentially dangerous situations. Some of these hazards include burns from hot
stoves, ovens, pans, and/or liquids; cuts from sharp knives, meat and/or vegetable
cutting equipment; falls on slippery floors; fumes from cleaning materials; and electric
shock from unsafe operating conditions of electrical appliances. It is important that
students and staff be aware of the specific kinds of hazards presented by equipment
used where food is prepared commercially. These include machines that are used to
bake, cook, cut, divide, mix, slice, dice, etc. Therefore, it is important that students and
instructors become familiar with the many potentially hazardous conditions and
operations when using food preparation and cooking equipment.
Section 2 Page 103

DRAFTING
Section 2 Page 104

DRAFTING —STUDENT RESPONSIBILITIES
1. It is your (the student’s) responsibility to keep your work areas clean. It is also
your responsibility to keep equipment clean and secure in its proper storage
place.
2. It is your responsibility to report any safety hazard accident or fire danger to your
instructor immediately.
3. It is your responsibility to conduct yourself in a safe manner and not to abuse
equipment. You must “ACT SAFELY” in all your actions while in the drafting
classroom.
Section 2 Page 105

CONSTRUCTION TRADES
Section 2 Page 106

CONSTRUCTION TRADES
BRICKLAYER PLUMBERCARPENTER BOILERMAKERROOFER FRAMERELECTRICIAN CABINETMAKERPAINTER MILLWRIGHT
INTRODUCTION
The construction trades encompass many professions, each of which carries its own
particular set of safety hazards in addition to many common to other fields. The following
pages will cover many of those hazards that may be encountered by students as they
work in these fields and give safety tips that can help prevent injuries and/or death.
These potential hazards include electric shock from unsafe machinery or conditions
while working around electric wiring; falls from ladders, rooftops, or cluttered floors; cuts
from saws or other sharp tools; working with hazardous materials such as asbestos; and
working with materials that emit dangerous fumes such as paint and/or solvents.
Section 2 Page 107

BRICKLAYER
“I’M A BRICKLAYER…WHAT CAN HURT ME?”
Bricklayers face many chemicals and other health hazards on the job. These health hazards are often hidden, so you might not know you’re being exposed or affected. Common health hazards you may face are:
*Hydrochloric acid in masonry cleaners. *Lime dust in cement.*Asbestos added to cements. *Silica dust in cement.*Epoxy resins in wall coatings.
You can also face other hazards while on the job, including hazards from other work going on around you.
Bricklayers also face many safety hazards on the job. You’re probably familiar with many of the obvious ones, such as:
Being struck by falling objects. Strains from lifting and moving heavy equipment. Falls from ladders and platforms. Eye injuries.
HOW CAN I SPOT THESE HAZARDS?One way you can spot possible health hazards on the job is by using your senses of sight, hearing, smell, and touch. Visible clouds of dust, eye, and nose irritation or skin rashes could indicate possible hazards.
HOW CAN HAZARDS BE CONTROLLED?Once you’ve found hazards, there are three basic ways they can be controlled:1. The most effective way is to eliminate the hazard through engineering controls. For
example, asbestos-free cement should be substituted for asbestos-containing cement.
2. Another way is to modify work practices. For example, wetting down surfaces when cutting concrete blocks will lower exposure to dust.
3. And, finally, you can use personal protective gear when you are exposed to a hazard. For example, chemical goggles and gloves will protect you when working with acids.
While it is always best to eliminate the hazard, personal protective gear is widely used on construction sites. This gear must be used and maintained properly—if not, it won’t protect you.
Section 2 Page 108

WHAT ARE MY RIGHTS?
As a construction worker, you have rights to protect your health and safety on the job.
Your employer must tell you about the hazards of the cements, acids, and other
materials you work with. If necessary, you can file a complaint with the Department of
Labor and Industries requesting an inspection into hazards on your job. These are only
two of the rights you have under state law. If you belong to a union you may have
additional rights.
WHAT SHOULD I TELL MY DOCTOR?
Because the health effects of exposures can take years to show up, you need to keep
records of your workplace hazards. For example, lung damage by silica dust can take
years to show up. Your work health history is important for your doctor to know. It can
also be vital in worker compensation claims, union grievances, and for OSHA
complaints.
Section 2 Page 109

CARPENTER
“I’M A CARPENTER…WHAT CAN HURT ME?”Carpenters face many chemicals and other health hazards on the job. These health hazards are often hidden, so you might not know you’re being exposed or affected. Common health hazards you may face are:
*Wood dust. *Wood preservatives in treated woods.*Hand-arm vibration from power tools. *Lead and heavy metals in paints.*Cold. *Hearing loss from excessive noise levels.
You can also face other hazards while on the job, including hazards from other work going on around you.
Carpenters also face many safety hazards on the job. You’re probably familiar with many of the obvious ones, such as:
Being struck by falling objects. Strains from lifting and moving heavy equipment. Falls from ladders and platforms. Eye injuries.
HOW CAN I SPOT THESE HAZARDS?One way you can spot possible health hazards on the job is by using your senses of sight, hearing, smell, and touch. Visible clouds of dust, eye, and nose irritation or skin rashes could indicate possible hazards.
HOW CAN HAZARDS BE CONTROLLED?Once you’ve found hazards, there are three basic ways they can be controlled:1. The most effective way is to eliminate the hazard through engineering controls. For
example, asbestos-free cement should be substituted for asbestos-containing cement.
2. Another way is to modify work practices. For example, wetting down surfaces when cutting concrete blocks will lower exposure to dust.
3. And, finally, you can use personal protective gear when you are exposed to a hazard. For example, chemical goggles and gloves will protect you when working with acids.
While it is always best to eliminate the hazard, personal protective gear is widely used on construction sites. This gear must be used and maintained properly—if not, it won’t protect you.
Section 2 Page 110

WHAT ARE MY RIGHTS?
As a construction worker, you have rights to protect your health and safety on the job.
Your employer must tell you about the hazards of the wood dust, wood preservatives,
and other materials you work with. If necessary, you can file a complaint with the
Department of Labor and Industries requesting an inspection into hazards on your job.
These are only two of the rights you have under state law. If you belong to a union you
may have additional rights.
WHAT SHOULD I TELL MY DOCTOR?
Because the health effects of exposures can take years to show up, you need to keep
records of your workplace hazards. For example, lung damage by wood dust can take
years to show up. Your work health history is important for your doctor to know. It can
also be vital in worker compensation claims, union grievances, and for OSHA
complaints.
Section 2 Page 111

ELECTRICAL WORKER
“I’M AN ELECTRICAL WORKER…WHAT CAN HURT ME?”Electrical workers face many chemicals and other health hazards on the job. These health hazards are often hidden, so you might not know you’re being exposed or affected. Common health hazards you may face are:
*Epoxy resins from cable coatings. *PCBs in older transformers.*Solvents, such as ethylene chloride. *Isocyanides from wire covering.*Fumes from soldering.
You can also face other hazards while on the job, including hazards from other work going on around you.
Electrical workers also face many safety hazards on the job. You’re probably familiar with many of the obvious ones, such as:
Being struck by falling objects. Strains from lifting and moving heavy equipment. Falls from ladders and platforms. Eye injuries.
HOW CAN I SPOT THESE HAZARDS?One way you can spot possible health hazards on the job is by using your senses of sight, hearing, smell, and touch. Visible clouds of dust, eye and nose irritation, or skin rashes could indicate possible hazards.
HOW CAN HAZARDS BE CONTROLLED?Once you’ve found hazards, there are three basic ways they can be controlled:1. The most effective way is to eliminate the hazard through engineering controls. For
example, substitute a cadmium-free solder for one containing cadmium. Avoid using very toxic solvents such as benzene or toluene.
2. Another way is through work practices, like washing your hands before eating or smoking or leaving work to remove metal fume contamination.
3. And finally, you can use personal protective gear when you are exposed to a hazard. For example, you should wear the proper gloves when working around equipment leaking PCBs or the proper respirator when soldering in a confined area.
While it is always best to eliminate the hazard, personal protective gear is widely used on construction sites. This gear must be used and maintained properly—if not, it won’t protect you.
Section 2 Page 112

WHAT ARE MY RIGHTS?
As a construction worker, you have rights to protect your health and safety on the job.
Your employer must tell you about the hazards of the solvents, solders, fluxes, and other
materials you work with. If necessary, you can file a complaint with the Department of
Labor and Industries requesting an inspection into hazards on your job. These are only
two of the rights you have under state law. If you belong to a union you may have
additional rights.
WHAT SHOULD I TELL MY DOCTOR?
Because the health effects of exposures can take years to show up, you need to keep
records of your workplace hazards. For example, exposure to solvents may cause liver
damage many years later. Your work health history is important for your doctor to know.
It can also be vital in worker compensation claims, union grievances, and for OSHA
complaints.
Section 2 Page 113

PAINTER
“I’M A PAINTER……WHAT CAN HURT ME?”Painters face many chemicals and other health hazards on the job. These health hazards are often hidden, so you might not know you’re being exposed or affected. Common health hazards you may face are:
*Solvents. *Confined work spaces.*Epoxy resins in paint. *Isocyanine paints.*Metals in paint pigments, such as lead or chromate.
You can also face other hazards while on the job, including hazards from other work going on around you.
Painters also may face many safety hazards on the job. You’re probably familiar with many of the obvious ones, such as:
Being struck by falling objects. Strains from lifting and moving heavy equipment. Falls from ladders and platforms. Eye injuries. Inhalation of toxic materials and solvents.
HOW CAN I SPOT THESE HAZARDS?One way you can spot possible health hazards on the job is by using your senses of sight, hearing, smell, and touch. Visible clouds of dust, eye and nose irritation, or skin rashes could indicate possible hazards.
HOW CAN HAZARDS BE CONTROLLED?Once you’ve found hazards, there are three basic ways they can be controlled:1. The most effective way is to eliminate the hazard through engineering controls. For
example, paints without lead or chromate pigments should be substituted for paints with these pigments. Be sure that confined workspaces are well ventilated.
2. Another way is through work practices, like washing your hands before eating or smoking or leaving work to remove metal pigment contamination.
3. And finally, you can use personal protective gear when you are exposed to toxic fumes. Follow directions for application, ventilation, and handling procedures (see containers and MSDS).
While it is always best to eliminate the hazard, personal protective gear is widely used on construction sites. This gear must be used and maintained properly—if not, it won’t protect you.
Section 2 Page 114

WHAT ARE MY RIGHTS?
As a construction worker, you have rights to protect your health and safety on the job.
Your employer must tell you about the hazards of the solvents, pigments, and other
materials you work with. If necessary, you can file a complaint with the Department of
Labor and Industries requesting an inspection into hazards on your job. These are only
two of the rights you have under state law. If you belong to a union you may have
additional rights.
WHAT SHOULD I TELL MY DOCTOR?
Because the health effects of exposures can take years to show up, you need to keep
records of your workplace hazards. For example, exposure to solvents may cause
damage to your nervous system that doesn’t appear until many years later. Your work
health history is important for your doctor to know. It can also be vital in worker
compensation claims, union grievances, and for OSHA complaints.
Section 2 Page 115

PLUMBER
“I’M A PLUMBER…WHAT CAN HURT ME?”Plumbers and boilermakers face many chemicals and other health hazards on the job. These health hazards are often hidden, so you might not know you’re being exposed or affected. Common health hazards you may face are:
*Metal dust from cutting pipes. *Confined work spaces.*Asbestos from lagging around pipes. *Eye injuries.*Fumes from welding and soldering.
You can also face other hazards while on the job, including hazards from other work going on around you.
Plumbers and boilermakers also face many safety hazards on the job. You’re probably familiar with many of the obvious ones, such as:
Being struck by falling objects. Strains from lifting and moving heavy equipment. Falls from ladders and platforms. Eye injuries.
HOW CAN I SPOT THESE HAZARDS?One way you can spot possible health hazards on the job is by using your senses of sight, hearing, smell, and touch. Visible clouds of dust, eye and nose irritation, or solvent odors can indicate possible hazards.
HOW CAN HAZARDS BE CONTROLLED?Once you’ve found hazards, there are three basic ways they can be controlled:
1. The most effective way is to eliminate the hazard through engineering controls. For example, substitute a cadmium-free solder for one containing cadmium.
2. Another way is to limit the amount of time you are exposed to the hazard. Your supervisor may limit the time you spend each day doing work in hot, confined spaces.
3. And finally, you can use personal protective gear when you are exposed to a hazard. For example, you can use the appropriate respirator to protect you from metal dust when you are cutting pipe.
While it is always best to eliminate the hazard, personal protective gear is widely used on construction sites. This gear must be used and maintained properly—if not, it won’t protect you.
Section 2 Page 116

WHAT ARE MY RIGHTS?
As a construction worker, you have rights to protect your health and safety on the job.
Your employer must tell you about the hazards of the solvents, solders, fluxes, and other
materials you work with. If necessary, you can file a complaint with the Department of
Labor and Industries requesting an inspection into hazards on your job. These are only
two of the rights you have under state law. If you belong to a union you may have
additional rights.
WHAT SHOULD I TELL MY DOCTOR?
Because the health effects of exposures can take years to show up, you need to keep
records of your workplace hazards. For example, exposure to asbestos dust can cause
cancer up to 40 years later. Your work health history is important for your doctor to
know. It can also be vital in worker compensation claims, union grievances, and for
OSHA complaints.
Section 2 Page 117

ROOFER “I’M A ROOFER…WHAT CAN HURT ME?”
Roofers face many chemicals and other health hazards on the job. These health hazards are often hidden, so you might not know you’re being exposed or affected. Common health hazards you may face are:
*Solvents used in new roofing systems and clean up.*Radiation from sunlight (increased sensitivity caused by skin contact with many roofing materials).
*Coal, tar, pitch in roofing materials.*Asbestos during removal of old roofing tiles.*Hot asphalt.
You can also face other hazards while on the job, including hazards from other work going on around you.
Roofers also face many safety hazards on the job. You’re probably familiar with many of the obvious ones, such as:
Being struck by falling objects. Strains from lifting and moving heavy equipment. Falls from ladders and platforms. Eye injuries. Injuries from prolonged time spent in kneeling positions.
HOW CAN I SPOT THESE HAZARDS?One way you can spot possible health hazards on the job is by using your senses of sight, hearing, smell, and touch. Visible clouds of dust, eye and nose irritation, or skin rashes could indicate possible hazards.
HOW CAN HAZARDS BE CONTROLLED?Once you’ve found hazards, there are three basic ways they can be controlled:
1. The most effective way is to eliminate the hazard through engineering controls. For example, less toxic solvents such as acetone or ethanol should be used rather than very toxic solvents such as benzene or gasoline. Exhaust fans can be used to provide good ventilation in confined spaces, if properly used.
2. Another way is to modify your work practices to help avoid the hazard. For example, you should try to work upwind if possible during heat welding.
3. And finally, you can use personal protective gear when you are exposed to a hazard. For example, you should use the appropriate respirator to protect you from the gases and fumes released during application of materials.
4. Use protective devices to protect knees and joints.5. Utilize safety restraint lines in accordance with OSHA, WISHA, and industry
standards to protect injuries sustained from falling.
Section 2 Page 118

While it is always best to eliminate the hazard, personal protective gear is widely used on construction sites. This gear must be used and maintained properly—if not, it won’t protect you.
WHAT ARE MY RIGHTS?
As a construction worker, you have rights to protect your health and safety on the job.
Your employer must tell you about the hazards of the solvents, asphalts, and other
materials you work with. If necessary, you can file a complaint with the Department of
Labor and Industries requesting an inspection into hazards on your job. These are only
two of the rights you have under state law. If you belong to a union you may have
additional rights.
WHAT SHOULD I TELL MY DOCTOR?
Because the health effects of exposures can take years to show up, you need to keep
records of your workplace hazards. For example, exposure to asbestos dust can cause
cancer up to 40 years later. Your work health history is important for your doctor to
know. It can also be vital in worker compensation claims, union grievances, and for
OSHA complaints.
Section 2 Page 119

SECTION II
GRAPHIC ARTS
Section 2 Page 120

GRAPHIC ARTS
General Safety Concerns in Graphics
In the graphic arts lab you will be using many hand tools, chemicals, electrical devices and machines, all of which represent potential safety hazards.
The following equipment safety sheets and tests represent some of these areas of concern. However, most accidents in the graphics lab occur when students are using simple hand tools or handling paper, plates, chemicals, and other materials that they use every day.
Some important areas of GENERAL SAFETY CONCERN are:
Hand toolsX-acto knives and razor bladesFelt pens (toxic)
Hand paper cuttersCompassesScissorsT-squares and trianglesScribing tools
FurnitureStoolsGlass light tablesCarts/hand truck/dollies
GeneralToxic chemicalsFlammable materials and chemicalsSkin irritantsWax (hot)Paper (sharp)Metal plates (sharp)Oily rags and other fire hazardsElectrical hazardsLifting hazardsStorage hazardsRoller, gears, cylinders
PLEASE REFER TO THE GENERAL SAFETY INFORMATION TO REVIEW THE ABOVE SAFETY CONCERNS.
Section 2 Page 121

METAL TRADES—MACHINE SHOPS
Section 2 Page 122

METAL TRADES—MACHINE SHOP
MACHINIST METAL FABRICATORSHEET METAL WORKER
Introduction
Specific knowledge of machinery and tools is a large part of safety in the metal trades.
General safety in the facility is primary, but specific safety concerning individual
machines or tools is paramount to an overall safe environment. The following pages deal
with specific machinery and tools.
Section 2 Page 123

WELDER
Section 2 Page 124

WELDING
WELDING, CUTTING, AND BRAZING
Introduction
The use of welding, cutting, and brazing equipment is common throughout many
occupational trades. The improper use of this equipment can be extremely dangerous
for those performing the work or those in the general vicinity of the activity. Therefore, it
is imperative that proper procedures be followed before doing these specialized tasks.
Special efforts must be made to evaluate the procedures used while operating the
equipment. Consideration should be given to the storage and handling of the specific
gases and to the availability and use of personal protective equipment (refer to
appropriate LABOR AND INDUSTRIES/ WISHA requirements and fire code
requirements).
Section 2 Page 125

AGRICULTURE
Section 2 Page 126

SAFETY PRACTICES FOR AGRICULTURAL EDUCATION
People employed in agricultural fields often work with considerable potential hazard. It is the function of this listing to recognize some of these hazards as they relate to agricultural education and to assist in correcting them. Students working in supervised occupational experience programs under the direction of a cooperating employer must comply with regulations set forth by Labor and Industries /WISHA.
1. In areas where acids and hazardous chemicals are used (milk-testing equipment and battery acids), an eye flush and shower must be available.
2. No riders are allowed on tractors, crawlers, skidders, or other machinery.
3. Tractors, crawlers, and skidders are equipped with roll bars, power take-off shields, fire extinguishers, and slow moving vehicle signs.
4. Safe tractor operations are taught to all operators.
5. Chain saws are equipped with anti-kickback chains.
6. Special protective apparel and equipment are provided for students logging with chain saws.
7. A safe distance of 1½-tree heights is maintained from anyone engaged in tree felling.
8. During outdoor laboratories, all personnel are moved to a place of safety when electrical storms, high winds, or unusual and threatening weather conditions occur.
9. Pesticides are used and stored in accord with manufacturers’ specifications (see state pesticide requirements).
10. Appropriate safety instruction and certification are provided. It is the districts responsibility as a condition of local employment.
Section 2 Page 127

BUSINESS AND OFFICE OCCUPATIONS
Section 2 Page 128

SAFETY PRACTICES FOR BUSINESS AND OFFICE OCCUPATIONS
Although accidental injuries in business and office occupations are usually not as severe as in other areas, a few additional safety practices merit attention.
1. Casters on swivel chairs are securely fixed to the bases of the chairs.
2. Adjustment features on chairs are maintained so that they will work properly.
3. Drawers on desks and file cabinets have safety stops.
4. Guards are placed on paper cutters.
5. File drawers, office furniture, and other equipment do NOT extend out into aisles.
6. Card index files, dictionaries, and heavy objects are kept off the top of file cabinets and other furniture.
7. Only one filing drawer at a time is opened.
8. Punctures and cuts from paper are given immediate attention.
9. Office machines that creep during operation are secured.
10. Office machines are NOT placed near the edges of tables or desks.
11. Power is turned OFF on electrical equipment during electrical storms.
12. Grasping the plug, not by pulling the cord, disconnects electrical cords.
13. Electrical cords of office machines are arranged to avoid tripping hazards.
14. Reprographic processes are not confined to a separate small room unless the room is vented to the outside.
15. Pointed items like tacks and razor blades are stored with points concealed.
16. File personnel wear rubber finger guards to avoid cuts and injury.
17. If cords must cross the floor, they are covered with rubber channels.
18. Electrical outlets placed on floors are located where they will NOT be accidentally kicked or used as foot rests.
19. Telephone and electrical outlets do NOT protrude into passages that people use.
20. Maintenance personnel move desks and files.
21. Loose clothing and jewelry should NOT be worn if working around moving machinery such as printing machines, paper shredders, etc.
22. Use appropriate methods or devices to control screen glare when computers or word processors are used.
Section 2 Page 129

HEALTH OCCUPATIONS
Section 2 Page 130

SAFETY PRACTICES FOR HEALTH OCCUPATIONS EDUCATIONSafety is an important part of any occupation, but a health care worker has a special obligation to be concerned about the safety of the patient. Since Health Occupations training takes place in both a classroom laboratory setting and a clinical setting, specific safety practices for each area should be considered.
Classroom Laboratory1. Horseplay or practical jokes cause accidents and, therefore, have no place in the
laboratory.2. Use proper body mechanics at all times.
a.Maintain a broad base of support by keeping the feet 6–8 inches apart.b.Use the stronger and larger muscles of your body. These are located in the
shoulders, upper arms, thighs, and hips.c.Bend from the hips and knees to get close to an object.d.Use the weight of the body to help push or pull an object. Whenever possible,
push or pull rather than lift.e.Carry heavy objects close to the body.f.Avoid twisting the body as you work. Turn feet and entire body and face the
direction in which you are working.g.Avoid unnecessary bending and reaching and bending for long period of time.h.Get help from a coworker to move heavy objects or patients whenever
necessary.3. While working with a partner in patient simulations, observe all safety precautions
taught in caring for a patient.4. Exercise care in handling equipment and solutions.5. Keep electric cords to electric beds, sterilizers, and other equipment in good
repair and have ground connectors.6. Equip wheels on beds, stretchers, and wheelchairs with locking devices.7. Place crank on adjustable bed under the frame so that it is out of the way.8. Do not operate or use any equipment until instructed on how to use it.9. Check labels three times before contents are used and discard unlabeled bottles.
10. Some solutions can be injurious or poisonous; therefore, avoid contact with eyes and skin. Use only as directed.
11. Attend to the immediate removal of spilled liquids, broken glass, and other hazards.
12. Observe fire safety procedures.13. Know the evacuation route for responding to a fire alarm.14. Know location of and how to operate fire extinguishers.15. Know location of and how to activate fire alarm.16. All exits should be clearly marked with exit signs.17. Know the procedure for responding to a tornado alarm.18. Keep the laboratory clean and neat with all equipment and supplies in their proper
locations at all times.19. Report any injury or accident, no matter how minor, to the instructor immediately.20. A unit on “safety procedures” that includes all of the above should be taught and
an exam given to each student.
Section 2 Page 131

Clinical Facility
1. Always observe the rules for proper body mechanics as outlined in the previous section on classroom laboratory safety. Proper medical aseptic techniques should be followed.
2. Observe personal hygiene measures.
3. Wash hands before and after giving patient care, after urinating or having a bowel movement, and before handling or preparing food.
4. Hold linens and equipment away from uniform.
5. Avoid shaking linens and other equipment; use a damp cloth to remove any dust.
6. Clean from the cleanest area to the dirtiest area.
7. Clean away from the body and uniform.
8. Pour contaminated liquids directly into sinks or toilets.
9. Avoid sitting on the patient’s bed. You will pick up microorganisms and transfer them to the next surface that you sit on.
10. Do not take equipment from one patient’s room to use for another patient, even if the equipment is unused.
11. Properly clean, disinfect, and/or sterilize material and equipment used by one person before being reused.
12. Maintain method of isolation recommended for a patient.
13. Exercise care in handling equipment and solutions as outlined in the section on classroom laboratory safety.
14. Identify patient accurately.a. Call patient by name.b. Check identification wristbands.c. Check the name on the patient’s bed or record.
15. Do NOT perform any procedures on patients unless instructed to do so. Make sure you have proper authorization.
16. Put patient’s possessions in a safe place. Encourage family members to take care of any valuables.
Section 2 Page 132

17. Always explain the procedure so that the patient knows what you are going to do, and never perform a procedure if a patient refuses to allow you to do it.
18. Observe your patient closely during any procedure, and report any changes.
19. Observe proper techniques for transporting and transferring patients.
20. Adjust height of bed and side rails for patient safety.
21. Place furniture and equipment for convenient and safe use.
22. Obtain patient and/or family consent for treatment.
23. Observe fire safety procedures.a. Obey all NO SMOKING signs.b. Extinguish matches, cigarettes, and any other flammable items completely.c. Dispose of combustible materials in appropriate containers.d. Remove spark conducing equipment or materials before beginning procedures
using oxygen and other explosive gases.e. Know how to activate institutional fire alarm systems.f. Know location of and how to operate fire extinguishers.g. Remain calm and follow institution’s routine for fire in patient area.h. Always use stairs to evacuate; do NOT use elevators.
24. Follow established procedures for security of medical supplies and controlled substances.
25. Report any injury or accident, no matter how minor, to the immediate supervisor immediately.
Section 2 Page 133

FAMILY AND CONSUMER SCIENCES EDUCATION
Section 2 Page 134

SAFETY PRACTICESFOR FAMILY AND CONSUMER SCIENCES EDUCATION
In the field of family and consumer sciences education (FACSE) there are approved methods of working and safe procedures for using space and equipment. Following is a more specific listing of safety practices unique to this area.
General
1. Follow the operator’s manual for each appliance for safe operating practices, maintenance procedures, and further safety practices.
2. Keep abreast of current information on the use and safety of appliances and equipment.
3. Inspect appliances and equipment regularly to be certain that they are in safe, proper operating condition.
4. Have an expert check for electrical safety in appliances that have been bumped, dropped, or exposed to other mishaps.
5. Have sturdy stepladder or safe step stool handy for reaching high places.6. Plug cord into electrical appliance first, then into wall outlet.7. Always disconnect cord from wall outlet before removing from appliance.8. Grasp plug rather than cord when removing from outlet or appliance.9. Avoid using small appliances and cords in an area where they can accidentally
fall into a sink while connected.10. Always handle electrical equipment/appliances with dry hands.
Clothing and Textiles
1. Place pins and needles in pincushions or pin cases.2. Store scissors and other sharp tools in holders or secure place.3. Arrange the electric cord of the sewing machine on the floor so that it will not
cause anyone to stumble.4. Close sewing machine carefully to avoid damaging electric cord.5. Avoid putting excessive weight or pressure on sewing machine leaf.6. Use a well-balanced, rigid ironing board.7. Use a nonflammable or treated ironing board cover.8. Each sewing machine shall be equipped with a guard permanently attached to the
machine so that the operator’s fingers cannot pass under the needle.
Foods and Nutrition
1. Use flat-bottomed and well balanced cooking utensils, avoiding those with copper or cadmium-plated interiors.
2. Avoid using inexpensive tin-plated utensils which have sharp corners and raw edges exposed.
3. Do NOT use ceramic ware if the glaze is cracked.
Section 2 Page 135

4. Turn handles of cooking utensils inward on top of range and work areas, and match pot with burner size.
5. Check handles of utensils to be sure that they are securely attached.6. Handle hot pans with dry potholders or mitts.7. Clean microwave ovens regularly and check periodically with a special instrument
to ensure that there is no microwave radiation leakage.8. Locate microwave ovens with due regard to the possibility of fire and personal
injury.9. Place microwave ovens on noncombustible foundations, accessible from all sides
and adequately spaced to permit the proper functioning of exhaust systems.10. Dry food thoroughly before deep fat frying and fill pan only one-third full of fat,
carefully controlling the temperature.11. Keep knives sharp and stored carefully, preferably in slotted racks.12. Insert beaters of electric mixer before plugging mixer into the power source.13. Utensils are used in the bowl of an electric mixer only when the mixer is not
operating.14. Unplug toaster before using a utensil to remove a piece of toast.15. Guard grinders, choppers, and disposals, and use a mechanical device to feed
the food.16. Clean exhaust hoods and ducts regularly, and guard fan blades that are 7 feet or
less from the floor.17. Store foods properly to control contamination, using tightly covered containers in
racks or bins off the floor.18. Store grease containers away from range, and clean oven and broiler pans to
prevent accumulation of grease.19. Locate gas range away from window and locate towel racks away from range.20. Avoid eating or sampling in the kitchen while preparing foods and cleaning.21. Pest control is adequately exercised.22. Blades on food grinders, choppers, and slicers must be adequately guarded.23. Do NOT place hot cooking containers in an area where other people may come in
contact with them.24. The wooden pusher shall be used to force meat or food into the worm feed of the
food grinder. Under NO circumstances shall operators use their fingers.25. Persons in the kitchen area shall wear a cap or other suitable hair covering. Hair
shall be tucked under head covering to prevent it from being caught in rotating machinery.
26. Do NOT use an ingredient from an unmarked container.27. Do NOT place hot equipment where others may come in contact with it.28. Clean sharp cutting utensils individually. Do NOT place in sink.29. Bowl-locking devices shall be of a positive type that requires the attention of the
operator for unlocking (vertical mixer).30. Horizontal dough mixers shall be equipped with a full enclosure over the bowl that
is always closed while the agitator is in motion.
Section 2 Page 136

31. Slicing machines shall be provided with a device to push food through the slicer knives.
32. No one assigned to food handling or preparation shall be permitted to work if he/she:a. Has an infectious, contagious, or communicable disease.b. Has a fever.c. Has a skin eruption.d. Has a cough lasting more than three weeks.e. Have other suspicious symptoms.
Housing and Home Furnishings
1. Craft knives must be sorted in a secure place.2. Follow manufacturers’ directions for using hot glue guns and other small
equipment.
Section 2 Page 137

MARKETING
Section 2 Page 138

SAFETY PRACTICES FOR MARKETING EDUCATION
A safe environment is an essential part of a quality marketing education program. The following are further considerations when inspecting safety conditions in the marketing store/laboratory and classroom.
1. Store, classroom, and storage areas are free of:
a. Sharp edges (also check for burrs on desks, file cabinets, shelves, and counters).b. Pulled-out drawers.c. Obstructing materials (e.g., extension cords and school supplies).d. Protruding merchandise or stock.e. Display overhangs.f. Litter on floor, tables, counters, desks, and shelves.
g. Defective glass counters that may be chipped or cracked or have uneven edges (durable synthetic surfaces are free from this trouble).
h. Fire-hazard wastebaskets (sufficient noncombustible containers are used).2. Heavy fixtures or merchandise which could fall and cause injury are secured or
placed at floor level.3. Fixture glass is tempered; this prevents easy breaking of display case or countertops
upon sudden impact with hard objects.4. Proper ventilation and/or exhaust are provided in area around sign-making machine,
duplicating equipment, and other required areas.5. Carefully check spring-loaded typing desk before opening to avoid the typewriter
table snapping out.6. Avoid standing on a castered stool and other unstable furniture. Check brake on
rolling ladder.7. Avoid carrying excessive loads or stacks that may impair vision and/or strain back.8. Pencils, pens, and other sharp items are NOT stored in a glass container with points
outward.9. Avoid working close to knives or scissors with the points or sharp edges toward the
worker—no knives or scissors are left on a work surface with the points toward the user; also, always hand a pointed instrument to another person with the point away from the recipient.
10. All paper cutters have a guard.11. Drawers on desks and file cabinets have safety stops—avoid stepping near open
drawers.12. NO spindle (spike) file is allowed.
Section 2 Page 139

TECHNOLOGY AND INDUSTRY EDUCATION
Section 2 Page 140

SAFETY PRACTICES FOR INDUSTRIAL TECHNOLOGY EDUCATION The following are further safety practices to consider in the technology education area.
Transportation1. Close car doors, hood, and trunk lid, and make sure no one is inside before raising
vehicles on a lift.2. Know the load limits of lifts and jacks and do NOT overload them.3. Vehicles are checked for proper positioning just before they leave the floor.4. Do NOT lock the hoist controls of lift and jacks in the open or shut position.5. On lifts not fitted with safety catches or provided with accommodations for the
insertion of a safety bar, jack stands should be immediately placed under the front and rear of the vehicle.
6. In pulling operation, NEVER stand directly behind a jack. Stand to one side. Ensure that the area is cleared of all other personnel before starting the pull.
7. When a student is required to work under a jacked-up vehicle, no other person shall work on that vehicle.
8. Jacks are checked periodically to see that they are in good condition.9. Vehicles on jacks are cribbed, blocked, or secured at once.
10. Support stands are used after the vehicle has been raised with a hydraulic jack.11. NO internal combustion engine should be started and allowed to run in the shop area
until the exhaust ventilation (tail pipe exhaust system) has been connected and operating.
12. Double-check to see that all controls are in proper starting position before attempting to start engine or motor.
13. All power-driven belts, chains, marine propellers, gears, and cutting blades should be guarded to prevent accidental contact during repairs that require operation of the equipment.
14. Do NOT leave running engine unattended.15. NO riders are allowed on vehicles, crawlers, skidders, or other machinery.16. Safe vehicle operations are taught to all operators.17. Test engines should be securely mounted to the bench or test stand.18. NEVER open a pressurized radiator or air-conditioning system while the engine is hot.19. Proper procedures should be adhered to when fueling all engines.20. Extreme care shall be taken with flames, heat, or sparks in operations or procedures
that involve repairing, replacing, or coming in close contact with fuel systems and tanks.
21. Gas and liquid coolants used in automotive air conditioners must be handled with care, especially those stored under pressure.
22. Battery charging areas are ventilated and designated as NO SMOKING areas.23. Where batteries are serviced, methods must be provided for:
a. Flushing and neutralizing spilled electrolyte.b. Fire protection.c. Adequate ventilation to prevent hydrogen gas buildup (hydrogen gas given off
during battery charging is explosive).d. Quick drenching of workers if acid is splashed or spilled.
Section 2 Page 141

24. Open flames, spark producing apparatus, and electric arc must be excluded from the battery service area.
25. Tools and other metallic objects shall be kept away from the tops of uncovered batteries.
26. Prohibit the use of compressed air to clean clothing, equipment, and work area.27. Air tank drain valve on compressor shall be opened frequently to prevent excessive
accumulation of liquid.28. Relief valves on compressor shall be maintained in good operating condition and
tested at regular intervals.29. Pressure control gauges on compressors shall be protected and maintained in good
operating condition.30. When working on small engines, disconnect spark plug wire to prevent accidental
start.31. NEVER place any part of the body under the blade enclosure or in grass discharge
chute while lawn mower is running.32. Safety racks (cage) or equivalent protection should be provided and used when
inflating, mounting or dismounting tires with split rims or lock rings.33. All paint should be in storage cabinet when NOT in use.34. Low-flash paint thinners are used for equipment cleaning only under ventilated
situation.35. Portable lamps are removed during spray operations.36. NO SMOKING signs are posted in spray area, paint room, paint booth, and paint
storage area.37. The spray is at least 20 feet from flame, sparks, electric motors, or other ignition
sources.38. Electric lamps in spray area are enclosed and guarded.39. The spray area is kept clean of combustible residue.40. Spray booth floors and baffles are noncombustible.41. Spray booths have explosion-proof lights or are lighted through sealed, clear panels.42. Mechanical ventilation is utilized during spraying and drying operations.43. Spray booths have independent exhaust systems.44. Exhaust rates meet minimum requirements.45. Air exhausted from spray operation is removed from the ventilation system.46. Ducts have access doors to allow cleaning.47. Intake air is free of contaminants.48. Make-up air heater is located outside the spray booth.49. Over-spray filters have pressure gauges to indicate need for filter replacement.50. The spray area used for drying with portable heaters or heat lamps is kept clean of
over-spray deposits.51. The infrared apparatus is kept out of the spray area during spraying operations.52. The spray area is completely ventilated before using drying apparatus.
Section 2 Page 142

Communications
1. NEVER place fingers or hands in machinery while in operation.2. Handle paper carefully to prevent cuts.3. Stack materials properly.4. Handle paper cutter knives (on or off the machine) very carefully.5. Only one person must operate a machine at a time.6. Watch for accidental double cycling on the cutter blade on electric cutters.7. Make sure camera lights are disconnected before adjustment or maintenance.8. Watch out for hot arcs and lights.9. Do NOT move in darkroom until eyes adjust. Walk with arms extended.
10. Avoid handling electrical equipment with wet hands.11. Do NOT talk to others while operating equipment.12. Do NOT operate equipment at excessive speeds.13. Do NOT overload pallets or tables.14. NEVER work in the pressroom or darkroom alone. A second person must be
present to assist in case of an accident.15. Use and store pencils, pens, tacks, and other sharp objects properly.16. Do NOT lean back on stools or chairs balancing weight on the rear legs.
Electricity/Electronics
1. Turn power OFF and/or unplug before working on any circuit.2. Use an isolation transformer when working with any AC line-operated item.3. Discharge electrolytic capacitors.4. Use only one hand inside of equipment or panels, even if power is removed.5. Avoid touching grounded points with other parts of the body.6. Be extra cautious around water, as it is an excellent conductor of electricity.7. Use caution in handling or working near cathode ray tubes as they explode
dangerously if broken.8. Frames of electric motors, regardless of voltage, must be grounded.9. Noncurrent-carrying metal parts of fixed equipment that may become energized
must be grounded under any of the following circumstances:a. In wet or damp locations.b. If in electrical contact with metal.c. When in a hazardous location.
10. Before repairs on electrically powered equipment are begun, the main switch should be locked in the OFF position.
11. Electrical installations, modifications, and alterations shall conform to federal, state, and local municipality standards, codes, and specifications.
Section 2 Page 143

Materials and Processes
1. All materials stored in tiers shall be stacked, racked, blocked, interlocked, or otherwise secured to prevent sliding, falling, or collapsing.
2. Always check scaffolding ladders and temporary walkways before using.3. NEVER carry tools with sharp points or edges in your pockets.4. NEVER try to stop a machine with hands or other parts of the body after turning it
off.5. Used lumber shall have all nails withdrawn.6. Manual adjusting and gauging (callipering) of work shall NOT be permitted while
machine is running.7. Remove chuck keys and other equipment before starting machine.8. Do NOT throw refuse in machine coolant. This contaminates the coolant and can
spread disease.9. Use brush, vacuum, or special tools for removing chips.
10. Care shall be taken not to come in contact with projections on work or stock, faceplates, chucks, etc., while machine is operating.
11. Do NOT use wiping rag on revolving parts.12. Using the machine power to start the faceplate or chuck onto the spindle shall
NOT be permitted.13. Splashguards, shields, and other means should be employed to minimize contact
with cutting oils that may cause skin irritation.14. A “stock tube” should be employed when long sections of stock extend beyond
the machine. It is important that the bar stock fit completely inside the stock tube so that rotating ends are not exposed.
15. The work rests on offhand grinders are adjusted within a maximum of 1/8 inch from the wheel.
16. The tongue guards on offhand grinders are adjusted within a maximum of 1/4 inch from the wheel.
17. Safety set screws are provided on all lathe dogs and revolving accessories.18. No saw, cutter head, or tool collar is placed or mounted on a machine or bar
unless it is of proper size.19. Where a standard guard cannot be used, a feather board or jig is used in place,
as in grooving, jointing, etc.20. To eliminate the hazard of impalement, people shall NOT be permitted to work
above vertically protruding reinforcing steel unless it has been protected.21. Bull float and vibrator handles shall be constructed of nonconductive materials or
shall be insulated to protect operator when he/she might come in contact with energized electrical conductors.
22. Formwork and shoring shall be designed, erected, supported, braced, and maintained so that they will safely support all vertical and lateral loads that may be upon them during placement of concrete.
23. Powered and rotating type concrete troweling machines that are manually guided shall be equipped with a control switch that will automatically shut off the power whenever the operator removes his/her hands from the handles.
Section 2 Page 144

24. Knife blades or blades of jointers shall be installed and adjusted so that they do not protrude more than 1/8 inch beyond the cylindrical body of the head.
25. NEVER place the tool rest below the center of the piece being turned on the lathe.
26. NEVER let the cutting edge of a lathe tool get under the wood being turned.27. Don’t attempt too heavy a cut with the machine. Take several light cuts.28. NEVER attempt to plane or joint very short stock. (See manufacturer’s
specifications.)29. NEVER attempt to make an adjustment while the machine is running.30. Always turn the power OFF immediately after using the machine.31. Saw blade should project through the table just far enough to cut the stock.32. When pushing material over table saw, the operator should stand to the side.33. NEVER attempt to clear saw table of chips or dust by hand while the machine is
running. Use a stick to push it off.34. When using a band saw, stand in front of it, and NEVER step around to the side,
in line with the direction of the travel of the band saw wheel. This is to prevent injury should the blade break.
35. Always use as heavy a blade as possible for the work to be done.36. Make sure band saw blade guides are set properly; if not properly set, the blade
will strain, kink, and break.37. The practice of inserting wedges between the saw disc and the collar to form
what is commonly known, as a “wobble saw” shall NOT be permitted.38. Push sticks or push blocks shall be provided at each machine requiring their use
and the operator, when required by the work being done, must use them.39. No device or attachment facilitating mixture of air or oxygen with flammable gases
should be used prior to consumption except at the burner or in a standard torch.40. All welding equipment and apparatus for gas and arc welding, cutting, and
brazing meet American Welding Society Standards.41. Under NO condition shall acetylene by generated, piped, or utilized at a pressure
in excess of 15 p.s.i. gauge pressure.42. All compressed gas cylinders are legibly marked as to gas content with either the
chemical or trade name. Such marking shall be by means of stenciling, stamping, or labeling not readily removable.
43. All gas cylinders are kept away from radiator and other sources of heat.44. Inside of building, cylinders are stored in a well-protected, well-ventilated, dry
location at least 20 feet from highly combustible materials such as oil, excelsior, or other substances likely to cause or accelerate fire.
45. Cylinders are stored in specifically assigned places away from elevators, stairs, or gangways.
46. Cylinders are stored or located where they will not be knocked over or tampered with by unauthorized persons. A chain or other suitable device should secure them.
47. Cylinders are NOT kept in unventilated enclosures.48. Empty cylinders have their valves closed and protective caps on.49. Cylinder valve protective caps are in place, hand-tight except when cylinder is in
use.
Section 2 Page 145

50. Acetylene cylinders are stored valve end up.51. Oxygen cylinders in storage are separated from fuel-gas cylinders or combustible
materials a minimum distance of 20 feet or by a noncombustible barrier at least 5 feet high having a fire-resistance rating of at least one half hour.
52. Cylinders, cylinder valves, couplings, regulators, hoses, and apparatus are kept free from oily or greasy substances.
53. Oxygen cylinders or apparatus are NOT handled with oily hands or gloves.54. A jet of oxygen is NOT permitted to strike an oily surface or greasy clothes, and it
is not permitted to enter a fuel oil or other storage tank.55. Cylinders are NOT dropped or struck or permitted to strike each other violently.56. Unless cylinders are secured on a special truck, regulators are removed and
valve protection caps are in place before cylinders are moved.57. Cylinders are NOT placed where they might become part of an electric circuit.58. Cylinders are NOT dropped or used as rollers or supports.59. Before connecting regulator or cylinder valve, the valve is opened slightly for an
instant and then closed.60. The cylinder valve is always opened slowly.61. An acetylene cylinder valve is NOT opened more than one and one-half turns of a
spindle and preferably no more than three-fourths of a turn.62. The acetylene-opening wrench is left in position on the cylinder valve while in use
so that it can be shut off quickly if needed.63. For a manifold system, one acetylene wrench is available for immediate use at
each station.64. When work is finished, cylinder valves are closed, and torch and regulator valves
are opened, then closed, to bleed remaining pressurized gas from regulator and lines.
65. Acetylene cylinders in a manifold system are installed with flash arresters.66. Each oxyacetylene cylinder lead is equipped with a backflow check valve.67. Piping for manifolds for acetylene is steel or wrought iron.68. The generally recognized colors are red for acetylene and other fuel-gas hoses,
green for oxygen hoses, and black for inert gas and air hoses.69. Hoses showing leaks, burns, worn places, or other defects rendering them unfit
for service are repaired or replaced.70. Gauges or oxygen regulators are marked “USE NO OIL.”71. Tilting and rolling on their bottom edges move cylinders.72. Cylinders containing oxygen, acetylene, or other fuel gases are NOT taken into
confined spaces.73. Torches are lit by friction lighters or other approved devices and NOT by matches.74. When welding under wet or other conditions causing perspiration, steps are taken
to reduce shock hazard.75. On all types of arc welding machines, control apparatus are enclosed except for
the operating wheels, levers, or handles.76. Terminals for welding leads are protected from accidental electrical contact by
personnel or by metal objects.
Section 2 Page 146

77. Chains, wire ropes, cranes, hoists, and elevators are NOT used to carry welding current.
78. All ground connections are checked to determine that they are mechanically strong and electrically adequate for required current.
79. Cables with splices or defects should NEVER be used.80. Machines that have become wet are thoroughly dried and tested before being
used.81. Protective shields, ventilations, or fire curtains are installed to protect against
sparks, harmful rays, and flames.82. Tests shall be conducted in accordance with manufacturers’ instructions and
accepted industry practice.
Section 2 Page 147

COMPUTER USE
Section 2 Page 148

COMPUTER-USAGE GUIDELINES
Treat this computer like you’d treat your own—with respect.
Always ask permission before using this computer.
Use this computer only for school-related activities: homework, research, etc.
Respect other people’s files on this computer. Do not change, copy, delete, read,
or otherwise access files that are not yours.
Do not install or remove any software on this computer.
Remember that others need to use this computer, too. Do not monopolize it.
All software on this computer is copyrighted. Do not copy, distribute, or alter it in
any way.
ONLINE RULES
Never give out personal information anywhere on the Internet.
Be concerned about getting personal e-mail messages from anyone online asking
you for personal information, attempting to arrange private meetings, etc.
Do not bypass any security measures installed on this computer.
Talk with your teacher immediately if you observe/are involved with any violations
of the first three rules listed above.
Never use the Internet to harm other people in any way.
Always ask for permission to use pictures or text from someone’s website in your
work.
Treat other online users as you would like to be treated—with respect.
Protect your password(s).
“Lurk” before you leap; read what others have written before you post your
comments.
While at school, use the Internet only for school-related activities, homework,
research, etc.
Section 2 Page 149

SECTION III
MACHINE-SPECIFIC SAFETY RULES AND TESTS
Section 3 Page 150

TRANSPORTATION TRADES
Air ChiselAir Sanding ToolsDrill PressGas ForgeGrinderImpact WrenchParts WasherPortable DrillPortable GrinderSand BlasterService JackSoldering StationStorage BatteriesTIG and MIG WelderTire Changer
Section 3 Page 151

Air Chisel
SAFETY SUGGESTIONS
1. Always wear gloves when operating an air chisel.
2. Always wear a protective face shield in addition to proper eye protection.
3. Never point the air chisel toward a person or object who/that could be injured/damaged.
4. Make sure to have a safety collar screwed on tightly to the chisel to prevent the chisel bit from accidentally shooting off of the chisel gun.
5. Keep the chisel bits sharp.
6. Place metal scraps in the garbage can.
7. Keep fingers away from the chisel while it’s in use.
Section 3 Page 152

Safety Quiz—Air Chisel Student NameClass Date Grade
1. You must wear a face shield to protect your face. T F
2. Gloves are necessary to protect your hands from injury on sharp metal edges. T F
3. Make sure by the end of the week that all metal trimmings are in the garbage. T F
4. By holding onto the chisel bit, you can direct the bit more accurately. T F
5. Goggles must be worn every time an air chisel is used. T F
Section 3 Page 153

Air Sanding Tools
SAFETY SUGGESTIONS
1. Always wear proper eye protection.
2. You must wear a particle mask when sanding automotive plastics and paints.
3. Sanding tools must be operated in a well-ventilated area.
4. Air sanding tools should be hooked up to a vacuum system if at all possible to eliminate as much of the dust particles as possible.
5. Coveralls should be worn to protect clothing.
6. Never operate tools over the recommended air pressure.
7. Never leave tools laying on car when not in use.
8. Keep tools clean and in good repair.
Section 3 Page 154

Safety Quiz—Air Sanding Tools Student Name Class Date Grade
1. Ventilation is not a safety consideration when sanding with air tools. T F
2. Sanding dust from fillers and paints must be removed from the air by means of vacuum connection to the tool and/or use of a particle mask. T F
3. The use of higher than recommended air pressure will only make the tool work faster. T F
4. One mark of a good technician is that he/she keeps tools clean. T F
Section 3 Page 155

Drill Press NotesRequirements:Proper eye protection must be worn—operate only with instructor’s permission and after properinstructions have been received.1. Always use a piece of scrap wood and set the table or stop to keep from drilling into the tabletop.2. Use a clamp or vise grips to secure/fasten your wood to the table.3. Make sure that your scrap wood, good wood, and any clamp you are using are the ONLY objects
on the table. Other objects can get caught in the machine and cause injuries.4. Use a “V-block” clamp for C02 cars, round or irregular shaped stock.5. Select the right size and type of bit. Wood bits for wood; metal bits for metal.6. Use a center punch for a guide whenever possible. Always use a center punch when drilling into
metal or hard woods.7. Do not panic if the bit gets stuck in the wood. Turn the machine off. When it has completely
stopped, remove the bit from your wood.8. Select the correct drilling speed. For metal or hard woods and large drill bits you should use a
slower speed.9. Always remove the chips from the table after the machine is turned off and is no longer moving.
Use a table brush, never your hands.10. As with any machine, if it is not working properly you should always turn it off, unplug it, and tell a
teacher.
Section 3 Page 156

Section 3 Page 157

Drill Press Written Test
Use the correct heading and write the answers on your own paper. Use the BEST answer to complete thefollowing:1. You ( Should Should not) use a piece of scrap wood and a clamp or vise grip
when usingthe drill press.
2/3. Objects other than your wood and clamps ( Should Should not) be removed from the tabletop because they can ______________________________________
4. Use a ( C-Block V-Block) to clamp down C02 cars and irregular stock.
5. The type of bit you select for drilling ( Is Is not) important.
6. You ( Should Should not) use a center punch when drilling into metal or hard woods.
7. You should use a ( Faster Slower) drill speed when drilling into metals, hard wood, and with
larger drill bits.
8/9. ( Do Do not) panic if the bit gets stuck in the wood, you should:
10. You should remove chips from the table with your ( Hand Table broom).
11. As with any machine, if it is NOT working properly you should:
List five safety procedures you should do before you operate this machine:
12.
13.
14.
15.
16.
Section 3 Page 158

Drill Press Written Test Key1. Should2. Should3. Get caught in the machine, thrown, and cause an injury.4. V-Block5. Is6. Should7. Slower8. Do not9. Turn it off and carefully remove the drill bit and get help if you need it.
10. Table broom11. Turn it off, unplug it, and tell the teacher.
List five safety procedures you should do before you operate this or any machine:
1. Tuck in your shirt.2. Secure your hair.3. Remove jewelry.4. Wear Z87 safety glasses.5. Work with a partner.6. Listen for and report any problems immediately.7. Make sure that all guards are in place and working.8. No horseplay.9. Keep work area clean.
10. Protect hands.
Section 3 Page 159

Drill Press Hands-On TestName: ___________________________________ Date: _________________________________
Subject: __________________________________ Per: __________________________________
1. What does it do? _______________________________________________________________
2. Why is it useful? _______________________________________________________________
3. Can the student identify this machine (point to it)? ( Yes No)
4. Identify the following parts:
On/off switch Head support safety collar Column
Tilting table Motor Tilt angle lock knob
Base Belt guard
Key chuck Depth stop
Pilot wheel feed Table-locking clamp
5. Safety procedures followed before using the machine:
Shirt tucked in Z87 safety glasses
Hair secured Checks kick back zone
Remove jewelry Gets help from/helps partner as needed
6. Procedures for operating machine (teacher designate):
Depth stop—makes sure that it is set to avoid drilling into the tabletop.
Scrap wood—uses to avoid drilling into the tabletop.
Left hand—holds the wood flat or it’s clamped down.
Right hand—guides the wheel feed (or vice versa).
Feet—facing the machine.
Key chuck—tightens down the chuck key in at least two places (righty tighty /lefty
loosy).
Eyes—watching to see where the bit is going and making sure that the body goes
nowhere near it.7. Makes two safe and successful operations:
a) Yes Nob) Yes No
8. Makes sure that the machine has been shut down properly, that the area is clean, and puts tools
away. Yes No
Section 3 Page 160

Gas Forge Notes
Requirements:Proper eye protection must be worn—operate only with instructor’s permission and after proper instructions have been received.
1. As with any machine you must wear proper eye protection, pass ALL tests with 100 percent, and have your teacher’s permission to operate it.
2. Make sure that the area is clear of any type of flammable material and make sure the area is well-ventilated.
3. Keep top OPEN while lighting.4. Follow all sequential instructions for igniting gas and air; review them if you have
questions about operating procedures.5. Use tongs or pliers to handle HOT metal.6. To be SAFE, treat all metal that may be around the furnace as being HOT.7. Wear leather gloves, like for welding, and long-sleeved shirts when handling HOT
material.8. ALL unattended/unused HOT metal should be placed in a specific designated area.9. Make sure that you stand so that your face is protected when quenching metal.
10. Shut off the “GAS” first and “AIR” last when you are finished using the forge.11. MAKE SURE that all of the valves are tightly turned OFF when the forge is not being
used.12. It doesn’t matter if they are WARM or HOT; quench the tongs before putting them
away.
Section 3 Page 161

Gas Forge Written Test
Use the correct heading and write the answers on your own paper. Use the BEST answer to completethe following:
1. You ( Should Should not) make sure that the area is clear of any type of flammablematerial and that the area is well ventilated.
2. Keep the top ( Open Closed) while lighting.3. You should use tongs or pliers to handle ( Hot Cold) metal.4. To be SAFE you ( Should Should not) treat all metal that may be around the
furnace as if it is HOT.5/6. Wear ( Cloth Leather) gloves and ( Long Short) sleeved shirts when
handling HOTmaterial.
7. ALL unattended/unused HOT metal ( should be placed in a specific area designated andmarked Just placed near the forge).
8. Make sure that you ( Sit Stand) so that your face is protected when quenching metal.
9/10. You should FIRST shut off the ( Air Gas) and ( Air Gas) LAST when you are finishedusing the forge.
11. MAKE SURE that all of the valves are tightly turned ( On Off).12. You should ( Quench Do nothing to) the tongs before putting them away.
List five SAFETY procedures you should do before you operate this machine:13. _____________________________________________________________14. _____________________________________________________________15. _____________________________________________________________16. _____________________________________________________________17. _____________________________________________________________
Section 3 Page 162

Gas Forge Written Test Key1. Should
2. Open
3. Hot
4. Should
5. Leather
6. Long
7. Should be placed in a specific area designated and marked.
8. Stand
9. Gas
10. Air
11. Off
12. Quench
List five safety procedures you should do before you operate this or any machine:
1. Tuck in your shirt.
2. Secure your hair.
3. Remove jewelry.
4. Wear Z87 safety glasses.
5. Work with a partner.
6. Listen for and report any problems immediately.
7. Make sure that all guards are in place and working.
8. No horseplay.
9. Keep work area clean.
10. Protect hands.
Section 3 Page 163

Gas Forge Hands-On Test
Name: ___________________________________ Date: _________________________________
Subject: __________________________________ Per: __________________________________
1. What does it do? _______________________________________________________________
2. Why is it useful? _______________________________________________________________
3. Can the student identify this machine (point to it)? (Yes No)
4. Identify the following parts:
Lid Work rack Blower
Lid handle Air control Gas control
Fire box Blower motor Igniter switch
Fire brick
5. Safety procedures followed before using the machine:
Shirt tucked in Z87 safety glasses
Hair secured Checks kick-back zone
Remove jewelry Gets help from/helps partner as needed
6. Procedures for operating machine (teacher designate):
___________________________________________________________________
___________________________________________________________________
___________________________________________________________________
___________________________________________________________________
___________________________________________________________________
___________________________________________________________________
___________________________________________________________________
7. Makes two safe and successful operations:
a) Yes No
b) Yes No
8. Makes sure that the machine has been shut down properly, that the area is clean, and puts tools
away. Yes No
Section 3 Page 164

Grinder NotesRequirements:Proper eye protection must be worn—operate only with instructor’s permission and after properinstructions have been received.1. With this machine you must wear proper eye protection, a face shield, pass ALL tests with 100percent,
and have your teacher’s permission to operate it.
2. Set the tool rest and spark deflector so that they are 1/16 inch to 1/8 inch away from the wheel.
3. Hold work firmly and securely with both hands. Remember that small pieces require special set-ups.
4. Never stand directly in front of the grinding wheel. Stand to the side when you start this machine.
5. Grind using only the face of the wheel, never use the sides.
6. Press material against the wheel with just enough pressure that you cause a steady, even
removal of metal. This will happen with practice; do not become discouraged on your first try.
7. Again, move stock slowly and evenly across the face of the wheel, not the sides.
8. Never leave the machine until the grinding wheels have come to a complete stop, even if
someone will be using it right after you do.
9. Grinder must be secured to prevent tipping.
Section 3 Page 165

Grinder Written TestUse the correct heading and write the answers on your own paper. Use the BEST answer to complete thefollowing:1. With this machine you must wear proper eye protection, a _______ __________,
pass ALL tests with 100 percent, and have your teacher’s permission to operate it.
2. Set tool rest and spark deflector so that they are ( 1/8 inch ¼ inch ½ inch) away from the wheel.
3. Hold work firmly and securely with ( One both) hand(s).
4. Remember that small pieces ( Will Will not) require special set-ups.
5. You should stand ( Directly in front of To the side) when you start this
machine.
6. Grind using the ( Face Sides) of the wheel.
7. Press material against the wheel with ( A lot of Just enough) pressure so that
you cause a steady and even removal of metal.
8. Again, move stock slowly and evenly across the ( Face Sides) of the wheel.
9. You can leave the machine when the grinding wheels have come to a ( Half Full) stop.
List five SAFETY procedures you should do before you operate this or any machine:
10. __________________________________________________
11. ___________________________________________________
12. ___________________________________________________
13. ___________________________________________________
14. ___________________________________________________
Section 3 Page 166

Grinder Written Test KeyUse the correct heading and write the answers on your own paper. Use the BEST answer to complete thefollowing:
1. Face shield
2. 1/8 inch
3. Both
4. Will
5. To the side
6. Face
7. Just enough
8. Face
9. Full
List five safety procedures you should do before you operate this or any machine:
1. Tuck in your shirt.
2. Remove jewelry.
4. Wear Z87 safety glasses
5. Work with a partner.
6. Listen for and report any problems immediately.
7. Make sure that all guards are in place and working.
8. No horseplay.
9. Keep work area clean.
10. Protect hands.
Section 3 Page 167

Impact Wrench Notes
Requirements:
Proper eye protection must be worn—operate only with instructor’s permission and after properinstructions have been received.1. Be sure the trigger is in the “OFF’ position before connecting the air supply.2. Use only black impact sockets designed for use with power equipment.3. Secure all work with clamps or tightly in a vise.4. Set torque control for correct tightness before starting the job.5. Be sure both hands are free to properly operate the impact tool.6. Maintain balance and firm footing at all times.7. Always use the tool in short bursts of power.
10. Disconnect the airline at the tool when not in actual use.
Section 3 Page 168
Impact Wrench Written Test
Use the correct heading and write the answers on your own paper. Use the BEST answer to completethe following:
1. Be sure all work ( Is Is not) secured with clamps or tightly in a vise.2. ( Firm Flexible) footing is required of the operator at all times.3. The ( Chrome Black) sockets are designed for impact wrenches.4. The tool should be disconnected from the airline at the ( Hose whip Tool).5. The impact wrench must be ( Disconnected Connected) when not in actual
use.6. ( Long Short) bursts of power should always be used to operate the tool.7. If the machine is not working properly, you should:
List five SAFETY procedures you should do before you operate this or any machine:8. _______________________________________________________9. _______________________________________________________
10. _______________________________________________________11. _______________________________________________________12. ______________________________________________________
Section 3 Page 169

Impact Wrench Written Test Key1. Is2. Firm3. Black4. Tool5. Disconnected6. Short7. Turn it off; unplug it; and tell your teacher
List five safety procedures you should do before you operate this or any machine:8. Tuck in your shirt.9. Secure your hair.
10. Remove jewelry.11. Wear Z87 safety glasses.12. Work with a partner.13. Listen for and report any problems immediately.14. Make sure that all guards are in place and working.15. No horseplay.16. Keep work area clean.17. Protect hands.
Section 3 Page 170

Parts Washer
SAFETY SUGGESTIONS
1. Use in well-ventilated area.
2. Wear approved goggles or face shield.
3. Use cleaning solvents with relatively high flash points (temperature at which vapors will ignite when brought into contact with an open flame).
4. Do not spill or splash solvent on clothing.
5. When brushing parts in solvent, use a nylon or brass bristle brush to avoid sparks.
6. A large tank of solvent must have a lid that is held open by a fusible link (holding device that will melt and drop the lid in the event of a fire).
7. Wash hands and arms thoroughly when cleaning job is complete. Apply hand-cream or lanolin after washing.
8. Avoid prolonged skin exposure to all types of solvents. USE GLOVES. If any rash or redness on skin appears—stop using solvent on skin immediately—use gloves.
Section 3 Page 171

Safety Quiz—Parts Washer Student Name Class Date Grade
1. When brushing parts in solvent, a nylon or brass bristle brush should be used to avoid sparks. T F
2. It is not necessary to wear goggles or a face shield when washing parts. T F
3. A fusible link to hold the lid open is not necessary on parts wash tanks. T F
4. Parts wash tanks should be placed in a well-ventilated area. T F
5. It is not necessary to wash your hands after washing parts in solvents. T F
Section 3 Page 172

Portable Drill Notes
Requirements:
Proper eye protection must be worn—operate only with instructor’s permission and after proper instructions have been received.
1. Select the correct drill bit just like you would for the drill press.2. Secure a piece of scrap wood and the good wood to the table so that it will not
move around while drilling.3. Make sure that the switch is OFF, the chuck key is removed, and that your work
area is clean and dry BEFORE you plug the drill in and turn it ON!4. Drill with straight, even, and steady pressure.5. When drilling deep holes, withdraw the drill bit several times to clear the area. This
helps to provide a SAFE and even drilling process.6. As with any machine DO NOT PANIC if something “goes wrong.” Turn it OFF,
unplug it, and tell a teacher.
Section 3 Page 173
Portable Drill Written Test
Use the correct heading and write the answer on your own paper. Use the BEST answer to completethe following:
1. You ( Should Should not) secure a piece of scrap wood to your worktable.2/3. Make sure that the drill is switched ( on off) and that the work area is clean
and ( dry wet).4. You ( Should Should not) drill with straight, steady, even pressure.5. To provide for a SAFE and even drilling process, you need to clear the area as you
drill. To do this you need to ___________________________________.6. As with any machine, if it is NOT working properly you should:______________________________________________________________________
List five SAFETY procedures you should do before you operate this machine:7. _____________________________________________________________8. _____________________________________________________________9. _____________________________________________________________
10. _____________________________________________________________11. _____________________________________________________________
Section 3 Page 174

Portable Drill Written Test Key
1. Should2. Off3. Dry4. Should5. Withdraw the bit to remove the sawdust6. Turn it off; unplug; and tell your teacher
List five safety procedures you should do before you operate this or any machine:1. Wear proper eye protection.2. Obtain instructor’s permission to use machine.3. Make sure the table is stable.4. Make sure the area is clean and dry before you plug the drill in.5. Withdraw the drill bit several times to clear the area when drilling deep holes.6. If something goes wrong, turn off the machine and tell the instructor.
Section 3 Page 175

Section 3 Page 176

Portable Grinder NotesRequirements:
Proper eye protection must be worn—operate only with instructor’s permission and after properinstructions have been received.
1. Be sure switch is in the “OFF” position before connecting the power source.2. Make all adjustments to pad and disc before turning on the power.3. Do not allow the edge of the disc to touch the edge of the stock.4. Stand clear of the spark line or spark area.5. Sand with a stroking motion; do not pause in one spot.6. When finished, disconnect the sander from power source and place the sander on its back.
Section 3 Page 177

Portable Grinder Written Test
Use the correct heading and write the answer on your own paper. Use the BEST answer to completethe following:
1. The sparks caused by grinding or sanding are ( Warm but not Hot and are) dangerous.
2. It ( Never is Is) safe to grind steady in one spot.3. You ( Are Are not) required to wear protective clothing while using this tool.4. Make all adjustments before turning ( Off On) the power.5. Never sand free handed. Use ( The table Your hands) to support the material.6. If the machine is not working properly you should:_______________________________________________________
List five SAFETY procedures you should do before you operate this machine:
7. _____________________________________________________________8. _____________________________________________________________9. _____________________________________________________________
10. _____________________________________________________________11. _____________________________________________________________
Section 3 Page 178

Portable Grinder Written Test Key1. Hot and are2. Never is3. Are4. On5. Table6. Turn equipment off; unplug it; and tell your teacher
List five safety procedures you should do before you operate this or any machine:
1. Tuck in your shirt.2. Secure your hair.3. Remove jewelry.4. Wear Z87 safety glasses.5. Work with a partner.6. Listen for and report any problems immediately.7. Make sure that all guards are in place and working.8. No horseplay.9. Keep work area clean.
10. Protect hands.
Section 3 Page 179

Sand Blaster Safety NotesSafety Rules:1. Always wear Z87 safety glasses.2. Keep the access door closed when blasting.3. Be sure that the exhaust system is working and the bag is attached.4. Point the nozzle at your project only.5. Never blast a wet object6. Remove all loose paper before blasting.Note: Do not etch the window. If you do, you will buy a new one!
Procedure/Steps:1. Remove all loose materials that could clog the intake line.2. Open the door and place your project inside the cabinet.3. Close the door.4. Turn on the light and exhaust fan.5. Hold the blasting nozzle approximately 1-inch away from the project.6. Keep moving the blasting nozzle around the project. Do not hold in one place for longer than 5
seconds.7. Stop when you have blasted your project design to the desired depth.8. Remove the project from the cabinet and check the design.9. Reblast the project if needed.
10. Close the door to the cabinet and turn off the light and exhaust fan.
Section 3 Page 180

Sand Blaster Safety Written Test
Use the correct heading and write the answers on your own paper. Use the BEST answer to completethe following:
WORD BANKAbrasive supply Gloves Sand blaster WetAir supply Lights Safety glasses WindowDoor Nozzle Silica sand 1 InchExhaust system Paper Switch 3 InchesGlass etching Pressure gauge Trigger 5 Inches
1. What is the name of this machine? ______________________________________________2. We will use this machine for? __________________________________________________3. These are worn to protect your eyes: ____________________________________________4. This must be closed to use the machine: _________________________________________5. This helps to remove dust from the air: __________________________________________6. You should not blast objects that are ____________________________________________7. Before blasting, remove all loose _______________________________________________8. Do not point the nozzle toward the ______________________________________________9. These protect your hands when using this machine: _________________________________
10. We use this material for our abrasive ____________________________________________11. Hold the nozzle this far away from your project: ____________________________________12. Check this object if there is no air pressure: ______________________________________
Section 3 Page 181

Service Jack
SAFETY SUGGESTIONS
1. When using the jack, be sure it is securely placed and lift saddle properly aligned to prevent slipping.
2. Once saddles are located, apply some pressure, then stop and examine these before lifting the car.
3. Never raise a car while someone is under it.
4. Always use car stands or supports before going under a raised car.
5. Inspect the jack for oil leaks or other malfunctions before using.
6. Never work under a vehicle supported only by a service jack.
7. If possible, use the service jack as a “backup” to your vehicles jack stands. Bring the saddle just to the cross member (lifting point) and lock.
Section 3 Page 182

Safety Quiz—Service Jack Student Name Class Date Grade
1. It is unsafe to work under a car that is supported with a service jack only. T F
2. It is a good safety practice to raise a car with someone under it. T F
3. It is necessary to inspect the lift saddles for proper alignment when raising a car.
T F
4. The service jacks should always be inspected for malfunctions before using. T F
5. Car stands on supports should be used before anyone goes under a raised car.
T F
Section 3 Page 183

Soldering Station/Pencil Notes
Requirements:
Proper eye protection must be worn—operate only with instructor’s permission and after proper instructions have been received.
1. Operate only with instructor’s permission and after you have received instruction.2. Remove jewelry, eliminate loose clothing, and confine long hair.3. Make sure all guards are in place and operating correctly.4. Always wear eye protection.5. Avoid serious burns by treating all soldering equipment as though it was hot.6. Always place equipment back in holder after use. Never lay it on the bench.7. Handle all soldering equipment with caution.8. Solder over the bench top to prevent hot solder from dropping on the operator’s legs.
Section 3 Page 184

Soldering Station/Pencil Written Test
Use the correct heading and write the answers on your own paper. Use the BEST answer to completethe following:
1. Eye protection ( Should Should not) be worn at all times in the laboratory.2. ( Only the tip All of) of the soldering equipment is hot when it is on.3. The soldering equipment should be ( In its holder Laid on the bench) after use.4. ( It feels cool to Do not) let any of the melted solder touch your skin.
List five SAFETY procedures you should do before you operate this machine:5. _____________________________________________________________6. _____________________________________________________________7. _____________________________________________________________8. _____________________________________________________________9. _____________________________________________________________
Section 3 Page 185

Soldering Station/Pencil Written Test Key
1. Should2. All of3. In its holder4. Do not
List five safety procedures you should do before you operate this or any machine:
1. Tuck in your shirt.2. Secure your hair.3. Remove jewelry.4. Wear Z87 safety glasses.5. Work with a partner.6. Listen for and report any problems immediately.7. Make sure that all guards are in place and working.8. No horseplay.9. Keep work area clean.
10. Protect hands.
Section 3 Page 186

Section 3 Page 187

Storage Batteries
The storage battery that you are most likely to come in contact with is the automotive storage batter. Because of its compact size and the fact that it is so common, sometimes we tend to become careless in our use of the battery.
SAFETY SUGGESTIONS
1. Batteries should be stored or charged only in well-ventilated areas. Do not breathe fumes of battery acid. Battery caps should be removed during charging.
2. All sources of ignition should be remote from the battery storage area (i.e., no smoking, no lighted matches, no sparking from tools). Do not touch or “fiddle” with battery charging clamps while the charger is activated or has just finished charging.
3. Do not work on batteries while on discharge or charge.
4. Proper protective clothing should be worn when handling batteries (i.e., rubber gloves, face shield, apron).
5. Metal jewelry such as rings, bracelets, or necklaces should not be worn around batteries.
6. Deluge showers and eye baths should be provided adjacent to the battery charging area.
7. Acid spills can be neutralized with a weak ammonia solution or a bicarbonate of soda solution or dilated by large quantities of water applied immediately.
8. Battery chargers should be connected or disconnected only when charger is off and caps are in place.
9. Disconnect battery ground (─) cables before performing any major component removal from vehicles.
Some of the more serious potential hazards from batteries are:
1. Explosion due to improper connections.
2. Acid spills by incorrectly handling.
3. Back strain from improper lifting.
Section 3 Page 188

Safety Quiz—Storage Batteries Student Name Class Date Grade
1. It is OK to light a welder near a car while its battery is being charged. T F
2. A closet or small storeroom is a perfect place to charge batteries. T F
3. Jewelry such as rings, necklaces, and watches/bracelets should be taken off before charging a battery. T F
4. List three potentially serious hazards from batteries.
a.
b.
c.
5. If battery acid gets in the eyes, deluge them with massive amounts of water immediately and get help (aid unit). T F
Section 3 Page 189

TIG and MIG Welder NotesRequirements:
Proper eye protection must be worn—operate only with instructor’s permission and after properinstructions have been received.
1. Additional protective welding clothing, including a helmet, long-sleeved jacket, and gloves, must be worn to prevent burns from ultraviolet and infrared rays emitted while arc welding.
2. The helmet used for TIG and MIG welding should be equipped with a minimum number 12-density shade.
3. Be certain that the welder equipped with a high-frequency stabilizing unit is installed, maintained, and used according to the recommendations of both the manufacturer and the Federal Communications Commission.
4. Never touch the tungsten electrode or MIG wire while the welder is turned on. It is electrically “hot” and can cause a serious shock.
5. The exhaust system must be turned on prior to welding.
Section 3 Page 190

TIG and MIG Welder Written Test
Use the correct heading and write the answers on your own paper. Use the BEST answer to completethe following:
1. It is okay to do TIG or MIG welding ( Without With) a welding helmet.2. You ( Can Cannot) be shocked by touching the tungsten electrode while the TIG
welder is turned on.3. The high frequency switch must be turned ( Off On) while performing regular arc
welding.4. Both metal-arc welding and gas-shielded arc welding give off ultraviolet and infrared
radiation, which ( Can Cannot) burn unprotected skin.5. The helmet used for TIG and MIG welding should be equipped with a minimum
number ( 12 15) density shade.
List five SAFETY procedures you should do before you operate this machine:
6. _____________________________________________________________7. _____________________________________________________________8. _____________________________________________________________9. _____________________________________________________________
10. _____________________________________________________________
Section 3 Page 191

TIG and MIG Welder Test Key1. With2. Can3. Off4. Can5. 12
List five safety procedures you should do before you operate this or any machine:
1. Tuck in your shirt.2. Secure your hair.3. Remove jewelry.4. Wear Z87 safety glasses.5. Work with a partner.6. Listen for and report any problems immediately.7. Make sure that all guards are in place and working.8. No horseplay.9. Keep work area clean.
10. Protect hands.
Section 3 Page 192

Tire Changer
SAFETY SUGGESTIONS
1. Wear approved eye protection.
2. Use correct lifting techniques.
3. Deflate the tire by pushing the valve core.
4. Use the proper tools in all aspects of changing tires.
5. Truck tires using a split-rim assembly require the use of a safety cage.
6. Be sure that the wheel assembly is securely locked on the mounting machine.
7. Keep fingers away from the tire bead and wheel rim.
8. On tubed tires, be sure that the stem and core are inserted properly.
9. Release the tire wheel assembly from the mounting machine before the air pressure is built up.
10. Eliminate clutter of parts, old tires, etc., from the tire changer area. Have plenty of room to work!
Section 3 Page 193

Safety Quiz—Tire Changer Student Name Class Date Grade
1. There is absolutely no danger in using a tire-mounting machine. T F
2. Most any type of tool can be used in changing tires. T F
3. Truck tires using a split-rim assembly require the use of a safety cage. T F
4. It is not necessary to wear eye protection when using a tire-mountingmachine. T F
5. It is important that the stem and core be installed properly. T F
6. Fingers may be pinched between the tire bead and wheel rim. T F
7. Always use correct lifting techniques when handling tires. T F
Section 3 Page 194

MANUFACTURING/WELDING/METALS TRADES
Arc WelderBufferCrucible Furnace NotesGrinderDrill PressHorizontal Milling MachineMetal LatheOxyacetylene WelderPortable Belt SanderPortable DrillPortable GrinderSheet Metal MachinesSoldering StationSpinning LatheTig and Mig WelderSpot WelderManual and Power Shears
Section 3 Page 195

Arc Welder NotesRequirements:Proper eye protection must be worn—operate only with instructor’s permission and after properinstructions have been received.1. A welding helmet with a clean observation window must be worn.2. Keep sleeves and pants cuffs rolled down.3. Goggles must be worn for all chipping operations.4. Keep all flammable material away from working areas.5. Always wear leather gloves, apron, and shoes when welding.6. The floor area should be dry and kept clear of all obstructions.7. Closed containers should not be welded without the instructor’s permission.8. Report any overheating of the welding unit to the instructor at once.9. Screens to protect others must be in place before welding is started.
10. The exhaust system must be turned on prior to welding.
Section 3 Page 196

Arc Welder Written Test
Use the correct heading and write the answers on your own paper. Use the BEST answer to completethe following:
1. Flammable materials should be kept ( Near Away from) the working area.2. Chipping can be done ( With Without) goggles.3. Make sure all around you are ( Unaware Aware) that you are striking the arc.4. ( Always Never) wear a welding helmet.5. Gloves and protective clothing are ( Not necessary Necessary).6. Ventilation is ( Required Not necessary) during welding.7. A(an) ( Open Closed) container can be dangerous to weld.8. The welding area floor should be ( Dry Damp) for a good ground.
List five (5) SAFETY procedures you should do before you operate this machine:
9. _____________________________________________________________10. _____________________________________________________________11. _____________________________________________________________12. _____________________________________________________________13. _____________________________________________________________
Section 3 Page 197

Arc Welder Written Test Key1. Away from2. With3. Aware4. Always5. Necessary6. Required7. Closed
8. Dry
List five safety procedures you should do before you operate this or any machine:
1. Tuck in your shirt.2. Secure your hair.3. Remove jewelry.4. Wear Z87 safety glasses.5. Work with a partner.6. Listen for and report any problems immediately.7. Make sure that all guards are in place and working.8. No horseplay.9. Keep work area clean.
10. Protect hands.
Section 3 Page 198

Buffer Notes
Requirements:
Proper eye protection must be worn—operate only with instructor’s permission and after properinstructions have been received.1. The LEFT side is for BUFFING; the RIGHT side is for CLEANING!2. The buffer is to be used on plastics. Wood or metal will contaminate the wheel and cause it to
scratch and ruin your project.3. If you need more buffing compound, tell your teacher.4. Buffing compound is basically a very fine sanding compound. It causes the plastic to heat up
and melt, giving you a smooth finish. This means it can and will burn you if you touch it while it ison.
5. Make sure that all clothing, hair, and jewelry is secured or removed. They will get caught in thismachine.
6. Work with a partner in case something does go wrong.7. Hold your plastic with both hands, and buff toward the lower middle. Make sure you are holding
the plastic vertically or “UP/DOWN.” Never hold it horizontally “SIDEWAYS,” because this willruin the buffing wheels material.
8. Never buff at the top or very bottom of the wheel. Those are the spots where material easily getscaught and thrown, causing injuries.
9. Respect all machines, even the buffer as “nice” as it looks, can cause a serious injury!10. Remember, have patience and wait quietly behind the yellow line for your turn.11. As with any machine, if something goes wrong, turn it off, unplug it, and tell your teacher.
Section 3 Page 199

Buffer Written Test
Use the correct heading and write the answers on your own paper. Use the BEST answer to completethe following:
1. Wood and metal ( Will Will not) contaminate the buffing wheel.2. The buffing wheel will ( Burn Do nothing to) you.3. The buffing compound is basically a real ( Fine Rough) sanding compound.
4/5. You should buff the plastic by holding it ( Horizontally Vertically) and buffing in the( Lower Middle Upper) part of the wheel.
6. You should hold the material you are buffing with ( One Both) hand(s).7. The buffer ( Can Cannot) cause a serious injury.
8/9. Remember to wait ( Patiently Impatiently) behind the ( Red Yellow) line.10. If you are not careful, the buffer ( Will Will not) catch your material and throw it
causingpotential injuries.
11. If the machine is not working properly, you should:_______________________________________________________
List five SAFETY procedures you should do before you operate this machine:
12. _____________________________________________________________13. _____________________________________________________________14. _____________________________________________________________15. _____________________________________________________________16. _____________________________________________________________
Section 3 Page 200

Buffer Written Test Key
1. Will2. Burn3. Fine4. Vertically5. Lower middle6. Both7. Can8. Patiently9. Yellow
10. Will11. Turn it off, unplug it, and tell the teacher immediately.
List five safety procedures you should do before you operate this or any machine:
1. Tuck in your shirt.2. Secure your hair.3. Remove jewelry.4. Wear Z87 safety glasses.5. Work with a partner.6. Listen for and report any problems immediately.7. Make sure that all guards are in place and working.8. No horseplay.9. Keep work area clean.
10. Protect hands.
Section 3 Page 201

Buffer Hands-On Test
Name: ___________________________________ Date: _________________________________
Subject: __________________________________ Per: __________________________________
1. What does it do? _______________________________________________________________
2. Why is it useful? _______________________________________________________________
3. Can the student identify this machine (point to it)? (Yes No)
4. Identify the following parts:
On/Off Cleaning wheel
Buffing wheel Stand/base
5. Safety procedures followed before using the machine:
Shirt tucked in Z87 safety glasses
Hair secured Checks kick-back zone
Remove jewelry Gets help from/helps partner as needed
6. Procedures for operating machine (teacher designate):
Plastic—uses both hands to hold the plastic vertically and lower middle part of the wheel.
Hands—fingers stay at least 1-inch away from the buffing and cleaning wheels.
Feet—facing machine.
Eyes—watches to see where the fingers and plastic are going and makes sure that the
fingers are nowhere near the wheels.
7. Makes two safe and successful operations:
a) Yes No
b) Yes No
8. Makes sure that the machine has been shut down properly, that the area is clean, and puts tools
away. Yes No
Section 3 Page 202
Crucible Furnace Notes
Requirements:Proper eye protection must be worn—operate only with instructor’s permission and after proper instructions have been received.
1. As with any machine, you must wear proper eye protection, pass ALL tests with 100 percent, and have your teacher’s permission to operate it.
2. You must wear all necessary protective clothing; i.e., safety glasses, coats, leather gloves, face shield, shoes, and leg protectors.
3. Keep all flammable material away from the work area.4. Preheat cold metal before placing it in the crucible. Do not just throw or toss the
metal into crucible since that can cause a dangerous splash; use tongs to carefully place it inside.
5. Place the mold on the designated area BEFORE you begin to pour the metal.6. Move cautiously and carry molten metal close to the mold to help reduce possible
dangers.7. Be very careful and make sure that you do not step on any molten metal.8. Any unused and unattended metal should be placed in an area designated for this
purpose. Don’t pour molten metal over bare concrete. Moisture in concrete or molding sand will explode when exposed to moderate amounts of molten metal.
9. To shut down, make sure that you turn the “GAS” off first.
Section 3 Page 203

Crucible Furnace Written Test
Use the correct heading and write the answers on your own paper. Use the BEST answer to complete the following:
1. Safety glasses ( Are Are not) the only protective clothing that you need to wear.2. You ( Should Should not) keep all flammable material away from the working
area.3. You ( Do Do not) need to preheat cold metal before placing it in the crucible.4. To be SAFE you ( Should Should not) use the tongs to place metal inside the
crucible.5. Place mold in the designated area ( After Before) you begin to pour the metal.6. Move very cautiously and carry molten / melted metal up close to the mold to help
( Increase Reduce) possible dangers.7. It ( Is Is not) okay or SAFE to step on any molten metal.8. Any unused and unattended metal should be placed ( Anywhere In an area
designated).9. To shut down, make sure that you turn the ( Air Gas) off first.
List five SAFETY procedures you should do before you operate this machine:
10. _____________________________________________________________
11. _____________________________________________________________
12. _____________________________________________________________
13. _____________________________________________________________
14. _____________________________________________________________
Section 3 Page 204

Crucible Furnace Written Test Key1. Are not2. Should3. Do4. Should5. Before6. Reduce7. Is not8. In an area designated9. Gas
List five safety procedures you should do before you operate this or any machine:
1. Tuck in your shirt.2. Secure your hair.3. Remove jewelry.4. Wear Z87 safety glasses.5. Work with a partner.6. Listen for and report any problems immediately.7. Make sure that all guards are in place and working.8. No horseplay.9. Keep work area clean.
10. Protect hands.
Section 3 Page 205

Crucible Furnace Hands-On Test
Name: ___________________________________ Date: _________________________________
Subject: __________________________________ Per: __________________________________
1. What does it do? _______________________________________________________________
2. Why is it useful? _______________________________________________________________
3. Can the student identify this machine (point to it)? (Yes No)
4. Identify the following parts:
Lid Fire bow w/crucible Pilot
Lid handle Air control On/off switch
Fire brick Gas control Igniter switch
5. Safety procedures followed before using the machine:
Shirt tucked in Z87 safety glasses
Hair secured Checks kick-back zone
Remove jewelry Gets help from/helps partner as needed
6. Procedures for operating machine (teacher designate):
___________________________________________________________________
___________________________________________________________________
___________________________________________________________________
___________________________________________________________________
___________________________________________________________________
___________________________________________________________________
___________________________________________________________________
7. Makes two safe and successful operations:
a) Yes No
b) Yes No
8. Makes sure that the machine has been shut down properly, that the area is clean, and puts toolsaway. Yes No
Section 3 Page 206

Grinder NotesRequirements:
Proper eye protection must be worn—operate only with instructor’s permission and after properinstructions have been received.1. With this machine you must wear proper eye protection, a face shield, pass ALL tests with 100
percent, and have your teacher’s permission to operate it.
2. Set the tool rest and spark deflector so that they are 1/16 inch to 1/8 inch away from the wheel.
3. Hold work firmly and securely with both hands. Remember that small pieces require special set-ups.
4. Never stand directly in front of the grinding wheel. Stand to the side when you start this machine.
5. Grind using only the face of the wheel, never use the sides.
6. Press material against the wheel with just enough pressure that you cause a steady, evenremoval of metal. This will happen with practice; do not become discouraged on your first try.
7. Again, move stock slowly and evenly across the face of the wheel, not the sides.
8. Never leave the machine until the grinding wheels have come to a complete stop, even ifsomeone will be using it right after you do.
9. Grinder must be secured to prevent tipping.
Section 3 Page 207
Grinder Written TestUse the correct heading and write the answers on your own paper. Use the BEST answer to complete thefollowing:
1. With this machine you must wear proper eye protection, a _______ __________,
pass ALL tests with 100 percent, and have your teacher’s permission to operate it.
2. Set tool rest and spark deflector so that they are ( 1/8 inch 1/4 inch 1/2 inch) away from the wheel.
3. Hold work firmly and securely with ( One both) hand(s).
4. Remember that small pieces ( Will Will not) require special set-ups.
5. You should stand ( Directly in front of To the side) when you start this machine.
6. Grind using the ( Face Sides) of the wheel.
7. Press material against the wheel with ( A lot of Just enough) pressure so that
you cause a steady and even removal of metal.
8. Again, move stock slowly and evenly across the ( Face Sides) of the wheel.
9. You can leave the machine when the grinding wheels have come to a ( Half Full) stop.
List five SAFETY procedures you should do before you operate this or any machine:
10. __________________________________________________
11. ___________________________________________________
12. ___________________________________________________
13. ___________________________________________________
14. ___________________________________________________
Section 3 Page 208

Grinder Written Test KeyUse the correct heading and write the answers on your own paper. Use the BEST answer to complete the following:
1. Face shield
2. 1/8 inch
3. Both
4. Will
5. To the side
6. Just enough
7. Face
8. Full
List five safety procedures you should do before you operate this or any machine:
1. Tuck in your shirt.
2. Remove jewelry.
4. Wear Z87 safety glasses
5. Work with a partner.
6. Listen for and report any problems immediately.
7. Make sure that all guards are in place and working.
8. No horseplay.
9. Keep work area clean.
10. Protect hands.
Section 3 Page 209

Drill Press NotesRequirements:
Proper eye protection must be worn—operate only with instructor’s permission and after properinstructions have been received.1. Always use a piece of scrap wood and set the table or stop to keep from drilling into the tabletop.2. Use a clamp or vise grips to secure/fasten your wood to the table.3. Make sure that your scrap wood, good wood, and any clamp you are using are the ONLY objects
on the table. Other objects can get caught in the machine and cause injuries.4. Use a “V-block” clamp for C02 cars or round or irregular-shaped stock.5. Select the right size and type of bit. Wood bits for wood, metal bits for metal.6. Use a center punch for a guide whenever possible. Always use a center punch when drilling into
metal or hard woods.7. Do not panic if the bit gets stuck in the wood. Turn the machine off. When it has completely
stopped, remove the bit from your wood.8. Select the correct drilling speed. For metal or hard woods and large drill bits you should use a
slower speed.9. Always remove the chips from the table after the machine is turned off and is no longer moving.
Use a table brush, never your hands.10. As with any machine, if it is not working properly you should always turn it off, unplug it, and tell a
teacher.
Section 3 Page 210

Section 3 Page 211

Drill Press Written Test
Use the correct heading and write the answers on your own paper. Use the BEST answer to complete thefollowing:
1. You ( Should Should not) use a piece of scrap wood and a clamp or vise grip
when using this machine.
2/3. Objects other than your wood and clamps ( Should Should not) be removed
from the table top because they can ______________________________________.
4. Use a ( C-Block V-Block) to clamp down C02 cars and irregular stock.
5. The type of bit you select for drilling ( Is Is not) important.
6. You ( Should Should not) use a center punch when drilling into metal or hard
woods.
7. You should use a ( Faster Slower) drill speed when drilling into metals, hard
wood, and with larger drill bits.
8/9. ( Do Do not) panic if the bit gets stuck in the wood. You should:
10. You should remove chips from the table with your ( Hand Table broom).11. As with any machine, if it is NOT working properly you should:
List five safety procedures you should do before you operate this machine:
12. 13. 14. 15. 16.
Section 3 Page 212

Drill Press Written Test Key
1. Should
2. Should
3. Get caught in the machine, thrown, and cause an injury.
4. V-Block
5. Is
6. Should
7. Slower
8. Do not
9. Turn it off and carefully remove the drill bit and get help if you need it.
10. Table broom
11. Turn it off, unplug it, and tell the teacher.
List five safety procedures you should do before you operate this or any machine:
1. Tuck in your shirt.
2. Secure your hair.
3. Remove jewelry.
4. Wear Z87 safety glasses.
5. Work with a partner.
6. Listen for and report any problems immediately.
7. Make sure that all guards are in place and working.
8. No horseplay.
9. Keep work area clean.
10. Protect hands.
Section 3 Page 213

Drill Press Hands-On TestName: ___________________________________ Date: _________________________________
Subject: __________________________________ Per: __________________________________
1. What does it do?
_______________________________________________________________
2. Why is it useful?
_______________________________________________________________
3. Can the student identify this machine (point to it)? ( Yes No)4. Identify the following parts:
On/off switch Head support safety collar Column
Tilting table Motor Tilt angle lock knob
Base Belt guard
Key chuck Depth stop
Pilot wheel feed Table-locking clamp
5. Safety procedures followed before using the machine:
Shirt tucked in Z87 safety glasses
Hair secured Checks kick back zone
Remove jewelry Gets help from/helps partner as needed
6. Procedures for operating machine (teacher designate):
Depth stop—makes sure that it is set to avoid drilling into the tabletop.
Scrap wood—uses to avoid drilling into the tabletop.
Left hand—holds the wood flat or it’s clamped down.
Right hand—guides the wheel feed (or vice versa).
Feet—facing the machine.
Key chuck—tightens down the chuck key in at least two places (righty tighty/lefty loosy).
Eyes—watching to see where the bit is going and making sure that the body goes nowhere near it.
7. Makes two safe and successful operations:
a) Yes Nob) Yes No
8. Makes sure that the machine has been shut down properly, that the area is clean, and puts tools away. Yes No
Section 3 Page 214

Horizontal Milling Machine Notes
Requirements:
Proper eye protection must be worn—operate only with instructor’s permission and after proper instructions have been received.
1. As with any machine you must wear proper eye protection, pass ALL tests with 100
percent, and have your teacher’s permission to operate it.
2. Turn the power OFF before you make any measurements or adjustments.
3. Be sure cutter/tooling is tightly secured to machine spindle or arbor.
4. Be sure the holding device is mounted solidly to the table and the work is held firmly.
5. Never reach over or near the rotating center.
6. Cutters should not be handled with bare hands, make sure that you are wearing
protective gloves.
7. Always use a small brush like a table broom to remove chips and never clear chips
away while the machine is in operation. Don’t remove chips with hand as they are
sharp and will cut.
8. Do not leave the machine while it is working. Remain with the machine for the
duration of the cut.
9. Keep the floor around the machine clear of chips, and wipe up spilled cutting fluid
immediately.
10. Make sure that you store all oily rags used to wipe down the machine in an approved
metal container that can be closed tightly.
Section 3 Page 215

Horizontal Milling Machine Written TestUse the correct heading and write the answers on your own paper. Use the BEST answer to completethe following:
1. Turn the power ( On Off) before you make any measurements or adjustments.
2. Be sure the holding device ( Is Is not) mounted solidly to the table and the work
is held firmly.
3. You ( Can Cannot) SAFELY reach over or near the rotating center.
4. Cutters should be handled with ( Bare Gloved) hands.
5. You ( Should Should not) use a small brush like a table broom to remove
chips.
6. It ( Is Is not) SAFE to clear chips away while the machine is in operation.
7. It is ( Safe Unsafe) to leave the machine while it is working.
8. Keep the floor around the machine ( Clean Messy).9. You ( Do Do not) need to wipe up spilled cutting fluid immediately.
10. Make sure that you store all oily rags used to wipe down the machine in an approved ( Rubber Metal) container that can be closed tightly.
List five SAFETY procedures you should do before you operate this machine:
11. _____________________________________________________________12. _____________________________________________________________13. _____________________________________________________________14. _____________________________________________________________15. _____________________________________________________________
Section 3 Page 216

Horizontal Milling Machine Written Test Key1. Off
2. Is
3. Cannot
4. Gloved
5. Should
6. Is not
7. Unsafe
8. Clean
9. Do
10. Metal
List five safety procedures you should do before you operate this or any machine:
1. Tuck in your shirt.
2. Secure your hair.
3. Remove jewelry.
4. Wear Z87 safety glasses.
5. Work with a partner.
6. Listen for and report any problems immediately.
7. Make sure that all guards are in place and working.
8. No horseplay.
9. Keep work area clean.
10. Protect hands.
Section 3 Page 217

Horizontal Milling Machine Hands-On Test
Name: ___________________________________ Date: _________________________________
Subject: __________________________________ Per: __________________________________
1. What does it do? _______________________________________________________________
2. Why is it useful? _______________________________________________________________
3. Can the student identify this machine (point to it)? (Yes No)
4. Identify the following parts:
Over arm Cross-feed hand wheel Arbor support bracket
Table Table-raising crank Level for back gear
Cabinet base Power table feed Longitudinal feed handwheel
Arbor Saddle Knee
5. Safety procedures followed before using the machine:
Shirt tucked in Z87 safety glasses
Hair secured Checks kick-back zone
Remove jewelry Gets help from/helps partner as needed
6. Procedures for operating machine (teacher designate):
___________________________________________________________________
___________________________________________________________________
___________________________________________________________________
___________________________________________________________________
___________________________________________________________________
___________________________________________________________________
7. Makes two safe and successful operations:
a) Yes No
b) Yes No
8. Makes sure that the machine has been shut down properly, that the area is clean, and puts toolsaway. Yes No
Section 3 Page 218

Metal Lathe Notes
Requirements:
Proper eye protection must be worn—operate only with instructor’s permission and after properinstructions have been received.1. When operating this machine you must wear proper eye protection, a face shield, pass ALL tests
with 100 percent, and have your teacher’s permission to operate it.2. Never leave chuck key or wrench in the lathe chuck since they can be thrown easily, causing an
accident.3. Be sure that all parts of the carriage will clear any rotating part during the full length of the turning that
you will be doing.4. Place hands on the controls or at your sides, except when filing or polishing.5. Make sure the work is secure and the lathe is set at the correct speed and feed rate before you start.6. Handle chucks and face plates very carefully.7. Bring lathe to a complete stop before reversing.8. Remove tool holder and post before you begin to file or polish.9. Remove chips with a table broom brush, never by hand.
10. Do not stop a lathe chuck with anything. Allow it to slowly coast to a stop. Remember to keep hands and any other body parts away from all moving parts.
11. No loose clothing!
Section 3 Page 219

Metal Lathe Written Test
Use the correct heading and write the answers on your own paper. Use the BEST answer to completethe following:
1. When operating this machine you must wear proper eye protection, a ______ _____,
pass ALL tests with 100%, and have your teacher’s permission to operate it.
2. You should ( Leave Remove) the chuck key or wrench in the lathe chuck.
3. Be sure that all parts of the carriage will ( Clear Touch) any rotating part during
the full length of the cut.
4. Place hands on the controls or ( On the object At your sides), except when
filing or polishing.
5. Make sure work is ( Loose Secure) and lathe is set at correct speed and feed
rate before you start turning.
6. You ( Can Cannot) SAFELY adjust tool bit when tool holder is hand-held.
7. Bring lathe to a ( Half Full) stop before reversing.
8. Remove tool holder and post ( After Before) you begin to file or polish.
9. Remove chips with ( A table broom Your hands).10. You ( Should Should not) stop a lathe chuck with anything.
11. You ( Do Do not) need to keep hands and any other body parts away from all
moving parts.
12. It ( Is Is not) SAFE to wear loose clothing.
List five SAFETY procedures you should do before you operate this machine:
13. _____________________________________________________________
14. _____________________________________________________________
15. _____________________________________________________________
16. _____________________________________________________________
17. _____________________________________________________________
Section 3 Page 220

Metal Lathe Written Test Key
1. Face shield
2. Remove
3. Clear
4. At your sides
5. Secure
6. Cannot
7. Full
8. Before
9. A table broom
10. Should not
11. Do
12. Is not
List five SAFETY procedures you should do before you operate this or any machine:
1. Tuck in your shirt.
2. Secure your hair.
3. Remove jewelry.
4. Wear Z87 safety glasses.
5. Work with a partner.
6. Listen for and report any problems immediately.
7. Make sure that all guards are in place and working.
8. No horseplay.
9. Keep work area clean.
10. Protect hands.
Section 3 Page 221

Oxyacetylene Welder Notes
Requirements:
Proper eye protection must be worn—operate only with instructor’s permission and after properinstructions have been received.
1. Be sure cylinders are fastened with a chain as a protection against falling or rolling.2. Always close the cylinder valve and replace protective cover before moving the cylinder.3. Keep welding equipment free of oil and grease.4. Protective goggles and spark-resistant clothing must be worn when welding.5. Make sure that hoses are properly connected and all connections are tight.6. Keep all flammable material away from working area.7. Do not weld or cut on a closed container without instructor’s approval.8. The acetylene must never exceed 15-psi outlet pressure.9. Only use a friction torch lighter to ignite the torch.
10. Close the acetylene valve first if the torch backfires.11. Close cylinder valves when completing a welding job. Release or drain hoses.12. The exhaust system must be turned on prior to igniting the torch.
Section 3 Page 222

Oxyacetylene Welding Written Test
Use the correct heading and write the answers on your own paper. Use the BEST answer to complete the following:
1. ( Never Always) wear spark-resistant clothing.
2. Closed containers ( Are Are not) hazardous to weld or repair.
3. Eye protection ( Must be worn Is not necessary) for all welding, cutting, and
chipping operations.
4. The equipment should not be wiped down with ( Dry Oily) rags.
5. Acetylene pressure should be set at ( 20 15) psi.
List five SAFETY procedures you should do before you operate this machine:
6. _____________________________________________________________7. _____________________________________________________________8. _____________________________________________________________9. _____________________________________________________________
10. _____________________________________________________________
Section 3 Page 223

Oxyacetylene Welding Written Test Key
1. Always
2. Are
3. Must be worn
4. Dry
5. 15
List five safety procedures you should do before you operate this or any machine:
1. Tuck in your shirt.
2. Secure your hair.
3. Remove jewelry.
4. Wear Z87 safety glasses.
5. Work with a partner.
6. Listen for and report any problems immediately.
7. Make sure that any guards are in place and working.
8. No horseplay.
9. Keep work area clean.
10. Protect hands.
Section 3 Page 224

Portable Belt Sander Notes
Requirements:
Proper eye protection must be worn—operate only with instructor’s permission and after properinstructions have been received.
1. Check to see if the belt is worn or torn, tracking properly, and is the correct grit size for the job.
2. Before connecting to a power source, make sure the switch is “OFF.”
3. Start sander above the work, let rear of belt touch first then level the tool.
4. Keep the sander moving back and forth in the direction of the grain. Do not pause in one spot.
5. Lift the sander off the stock when stopping.
6. Always allow the sander to come to a complete stop before placing the sander on the table.
7. Keep electrical cord and dust bag away from working area.
8. When changing belts make sure the new belt runs as the arrow indicates.
Section 3 Page 225

Portable Belt Sander Written Test
Use the correct heading and write the answers on your own paper. Use the BEST answer to complete the following:
1. Safety glasses ( Are Are not) the only protective clothing that you need to wear.
2. Check belt ( Tracking Tension) carefully before starting work.
3. The machine should be ( Still moving At a complete stop) before placing it on the workbench.
4. The sander should be started ( Before After) it is on the work.
5. See that the trigger switch is ( Off On) before plugging in the machine.
6. Keep the sander ( Moving back and forth in the direction of the grain Pause in one spot).
7. Keep the electrical cord ( Wrapped around your neck Away) from working area.
8. If the machine is not working properly, you should:
_______________________________________________________
List five SAFETY procedures you should do before you operate this machine:
9. _____________________________________________________________
10. _____________________________________________________________
11. _____________________________________________________________
12. _____________________________________________________________
13. _____________________________________________________________
Section 3 Page 226

Portable Sander Written Test Key
1. Are
2. Tracking
3. At a complete stop
4. Before
5. Off
6. Moving back and forth in the direction of the grain
7. Away
8. Turn it off; unplug it, and tell your teacher.
List five safety procedures you should do before you operate this or any machine:
9. Tuck in your shirt.
10. Secure your hair.
11. Remove jewelry.
12. Wear Z87 safety glasses.
13. Work with a partner.
14. Listen for and report all problems immediately.
15. Make sure that any guards are in place and working.
16. No horseplay.
17. Keep work area clean.
18. Protect hands.
Section 3 Page 227

Portable Drill Notes
Requirements:
Proper eye protection must be worn—operate only with instructor’s permission and after properinstructions have been received.1. Select the correct drill bit just like you would for the drill press.2. Secure a piece of scrap wood and the good wood to the table so that it will not move around
while drilling.3. Make sure that the switch is OFF, the chuck key is removed, and that your work area is clean and
dry BEFORE you plug the drill in and turn it ON!4. Drill with a straight, even, and steady pressure.5. When drilling deep holes, withdraw the drill bit several times to clear the area. This helps to
provide a SAFE and even drilling process.6. As with any machine, DO NOT PANIC if something “goes wrong.” Turn it OFF, unplug it, and tell
a teacher.
Section 3 Page 228

Portable Drill Written Test
Use the correct heading and write the answers on your own paper. Use the BEST answer to complete the following:
1. You ( Should Should not) secure a piece of scrap wood to your worktable.
2/3. Make sure that the drill is switched ( on off) and that the work area is clean and
( dry wet).
4. You ( Should Should not) drill with straight, steady, even pressure.
5. To provide for a SAFE and even drilling process, you need to clear the area as you drill. To do this you need to ___________________________________.
6. As with any machine, if it is NOT working properly you should:
______________________________________________________________________
List five SAFETY procedures you should do before you operate this machine:
7. _____________________________________________________________
8. _____________________________________________________________
9. _____________________________________________________________
10. _____________________________________________________________
11. _____________________________________________________________
Section 3 Page 229

Portable Drill Written Test Key
1. Should
2. Off
3. Dry
4. Should
5. Withdraw the bit to remove the sawdust
6. Turn it off; unplug; and tell your teacher
Section 3 Page 230

Portable Grinder NotesRequirements:
Proper eye protection must be worn—operate only with instructor’s permission and after properinstructions have been received.
1. Be sure switch is in the “OFF” position before connecting the power source.2. Make all adjustments to pad and disc before turning on the power.3. Do not allow the edge of the disc to touch the edge of the stock.4. Stand clear of the spark line or spark area.5. Sand with a stroking motion; do not pause in one spot.6. When finished, disconnect the sander from power source and place the sander on its back.
Section 3 Page 231

Portable Grinder Written Test
Use the correct heading and write the answers on your own paper. Use the BEST answer to completethe following:
1. The sparks caused by grinding or sanding are ( Warm but not Hot and are) dangerous.
2. It ( Never is Is) safe to grind steady in one spot.
3. You ( Are Are not) required to wear protective clothing while using this tool.
4. Make all adjustments before turning ( Off On) the power.
5. Never sand freehanded. Use ( The table Your hands) to support the material.
6. If the machine is not working properly, you should:
_______________________________________________________
List five SAFETY procedures you should do before you operate this machine:
7. _____________________________________________________________
8. _____________________________________________________________
9. _____________________________________________________________
10. _____________________________________________________________
11. _____________________________________________________________
Section 3 Page 232

Portable Grinder Written Test Key
1. Hot and are
2. Never is
3. Are
4. On
5. Table
6. Turn equipment off, unplug it, and tell your teacher
List five safety procedures you should do before you operate this or any machine:
1. Tuck in your shirt.
2. Secure your hair.
3. Remove jewelry.
4. Wear Z87 safety glasses.
5. Work with a partner.
6. Listen for and report any problems immediately.
7. Make sure that all guards are in place and working.
8. No horseplay.
9. Keep work area clean.
10. Protect hands.
Section 3 Page 233

Sheet Metal Machines NotesRequirements:
Proper eye protection must be worn—operate only with instructor’s permission and after proper instructions have been received.
1. Keep hands and fingers clear of clamps, jaws, and rotating parts.
2. Never bend, roll, crimp, or bead metal that exceeds the capacity of the machine.
3. Make all rolls and bends smoothly and steadily.
4. Work with only one piece of metal at a time.
5. Remove burrs from the metal before attempting to work it in the machine.
6. Obtain help when working with large pieces of stock.
7. Never force levers or handles.
Section 3 Page 234

Sheet Metal Machines Written Test
Use the correct heading and write the answers on your own paper. Use the BEST answer to complete the following:
1. Sheet metal machines ( Cannot Can) be damaged by overloading.
2. Sharp burrs and edges ( Do not need to Should) be removed before attempting to place stock in machine.
3. Fingers must be kept ( Clear of Close to) moving parts.
4. Quarter-inch thick, mild steel stock ( Can Cannot) be formed on the sheet metal
machine.
5. If a handle jams, it ( Can Cannot) be tapped lightly with a hammer.
6. If the machine is not working properly, you should:
_____________________________________________________________
List five SAFETY procedures you should do before you operate this machine:
7. _____________________________________________________________
8. ____________________________________________________________
9. _____________________________________________________________
10. _____________________________________________________________
11. _____________________________________________________________
Section 3 Page 235

Sheet Metal Machines Written Test Key
1. Can
2. Should
3. Clear of
4. Cannot
5. Cannot
6. Turn equipment off, unplug it, and tell your teacher immediately.
List five safety procedures you should do before you operate this or any machine:
7. Tuck in your shirt.
8. Secure your hair.
9. Remove jewelry.
10. Wear Z87 safety glasses.
11. Work with a partner.
12. Listen for and report all problems immediately.
13. Make sure that any guards are in place and working.
14. No horseplay.
15. Keep work area clean.
16. Protect hands.
Section 3 Page 236

Soldering Station Pencil Notes
Requirements:
Proper eye protection must be worn—operate only with instructor’s permission and after properinstructions have been received.
1. Operate only with instructor’s permission and after you have received instruction.2. Remove jewelry, eliminate loose clothing, and confine long hair.3. Make sure all guards are in place and operating correctly.4. Always wear eye protection.5. Avoid serious burns by treating all soldering equipment as though it was hot.6. Always place equipment back in holder after use. Never lay it on the bench.7. Handle all soldering equipment with caution.8. Solder over the bench top to prevent hot solder from dropping on the operator’s legs.
Section 3 Page 237

Soldering Station Pencil Written Test
Use the correct heading and write the answers on your own paper. Use the BEST answer to complete the following:
1. Eye protection ( Should Should not) be worn at all times in the laboratory.
2. ( Only the tip All of) of the soldering equipment is hot when it is on.
3. The soldering equipment should be ( In its holder Laid on the bench) after
use.
4. ( It feels cool to Do not) let any of the melted solder touch your skin.
List five SAFETY procedures you should do before you operate this machine:
5. _____________________________________________________________6. _____________________________________________________________7. _____________________________________________________________8. _____________________________________________________________9. _____________________________________________________________
Section 3 Page 238

Soldering Station Pencil Written Test Key
1. Should
2. All of
3. In its holder
4. Do not
List five safety procedures you should do before you operate this or any machine:
1. Tuck in your shirt.
2. Secure your hair.
3. Remove jewelry.
4. Wear Z87 safety glasses.
5. Work with a partner.
6. Listen for and report any problems immediately.
7. Make sure that all guards are in place and working.
8. No horseplay.
9. Keep work area clean.
10. Protect hands.
Section 3 Page 239

Spinning Lathe Notes
Requirements:
Proper eye protection must be worn—operate only with instructor’s permission and after proper instructions have been received.
1. Beware of sharp-pointed metal edges when cutting metal discs to size and when getting them ready for spinning.
2. Make sure that the tool rest base, tool rest, and fulcrum pin are securely tightened in place before attempting to spin.
3. Never stand in line with the disc during a centering operation.4. Make certain the spinning tools are fitted solidly to the handle.5. Do not touch a spinning disc by hand.6. Use the correct tool for the operation and slowly force material to match the forming
chuck.7. Remove tool rest and pin when using steel wool or polishing.8. Seek instructor’s help, if in doubt about a specific operation.
Section 3 Page 240

Spinning Lathe Written Test
Use the correct heading and write the answers on your own paper. Use the BEST answer to complete the following:
1. You ( Do Do not) need to watch out for sharp-pointed metal edges when cutting the metal disc to size and when getting it ready for spinning.
2. Make sure that the tool rest base, tool rest, and fulcrum pin are ( Loosely Securely) tightened in place before attempting to spin.
3. It is SAFE to ( Stand to the side Stand in line with) the disc during a centering operation.
4. Make certain the spinning tools are fitted solidly to the ( Handle Rest base).
5. You ( Can Cannot) SAFELY touch a spinning disc by hand.
6. Use the correct tool for the operation and ( Slowly Quickly) force material to match the forming chuck.
7. You ( Should Should not) remove tool rest and pin when using steel wool or polishing.
8. If you have any doubts, you should: ___________________________
List five SAFETY procedures you should do before you operate this machine:
9. _____________________________________________________________
10. _____________________________________________________________
11. _____________________________________________________________
12. _____________________________________________________________
13. _____________________________________________________________
Section 3 Page 241

Spinning Lathe Written Test Key
1. Do
2. Securely
3. Stand to the side
4. Handle
5. Cannot
6. Slowly
7. Should
8. Seek instructor’s help
List five safety procedures you should do before you operate this or any machine:
9. Tuck in your shirt.
10. Secure your hair.
11. Remove jewelry.
12. Wear Z87 safety glasses.
13. Work with a partner.
14. Listen for and report any problems immediately.
15. Make sure that all guards are in place and working.
16. No horseplay.
17. Keep work area clean.
18. Protect hands.
Section 3 Page 242

TIG and MIG Welder NotesRequirements:
Proper eye protection must be worn—operate only with instructor’s permission and after properinstructions have been received.
1. Additional protective welding clothing, including a helmet, long-sleeved jacket, and gloves must be worn to prevent burns from ultraviolet and infrared rays emitted while arc welding.
2. The helmet used for TIG and MIG welding should be equipped with a minimum number 12-density shade.
3. Be certain that the welder equipped with a high-frequency stabilizing unit is installed, maintained, and used according to the recommendations of both the manufacturer and the Federal Communications Commission.
4. Never touch the tungsten electrode or MIG wire while the welder is turned on. It is electrically “hot” and can cause a serious shock.
5. The exhaust system must be turned on prior to welding.
Section 3 Page 243

TIG and MIG Welder Written Test
Use the correct heading and write the answers on your own paper. Use the BEST answer to complete the following:
1. It is okay to do TIG or MIG welding ( Without With) a welding helmet.
2. You ( Can Cannot) be shocked by touching the tungsten electrode while the TIG welder is turned on.
3. The high-frequency switch must be turned ( Off On) while performing regular arc welding.
4. Both metal-arc welding and gas-shielded arc welding give off ultraviolet and infrared radiation which ( Can Cannot) burn unprotected skin.
5. The helmet used for TIG and MIG welding should be equipped with a minimum number ( 12 15) density shade.
List five SAFETY procedures you should do before you operate this machine:
6. _____________________________________________________________
7. _____________________________________________________________
8. _____________________________________________________________
9. _____________________________________________________________
10. _____________________________________________________________
Section 3 Page 244

TIG and MIG Welder Test Key1. With
2. Can
3. Off
4. Can
5. 12
List five safety procedures you should do before you operate this or any machine:
1. Tuck in your shirt.
2. Secure your hair.
3. Remove jewelry.
4. Wear Z87 safety glasses.
5. Work with a partner.
6. Listen for and report any problems immediately.
7. Make sure that all guards are in place and working.
8. No horseplay.
9. Keep work area clean.
10. Protect hands.
Section 3 Page 245

Spot Welder
SAFETY SUGGESTIONS
1. Always wear a protective face shield in addition to proper eye protection.
2. Do not weld with wet hands or in a damp area.
3. Do not touch the tips, tongs, or welded material after welding as they become very hot.
4. Never leave the spot welder unattended with the electrical cord plugged in.
5. The metal being spot-welded must be clean and dry.
6. When spot welding galvanized material, remove the galvanize from the area being welded.
Section 3 Page 246

Safety Quiz—Spot Welder Student Name Class Date Grade
1. The spot welder should be used in a wet, damp work area. T F
2. The spot welder should always be left plugged in and the current left on. T F
3. After welding, the tips of the spot welder are very hot. T F
4. The metal being spot-welded must be clean and dry. T F
Section 3 Page 247

Manual and Power Shears
SAFETY SUGGESTIONS
1. Never go beyond the capacity of the shear.
2. Always be certain that the metal is under the hold-down bar or lugs before cutting.
3. Keep fingers clear of the hold-down bar or lugs.
4. Always keep fingers clear of the blade and never override the safety barriers that guard the blade.
5. Before operating the treadle, be sure that the feet of the operator and of any observers are clear.
6. Use gloves when handling sheet metal.
7. Whenever two people are needed to operate the shear, one shall be the operator, the other the helper.
8. If unable to view both sides of the shear, give a “clear” signal before bringing the blade down.
Section 3 Page 248

Safety Quiz—Manual and Power Shears Student Name Class Date Grade
Circle the correct answer:
1. What procedure or procedures would lower the chance of cut hands and fingers while shearing?
a. Stack metal before cutting.b. Remove burrs on metal before shearing.c. Wear gloves while handling metal.d. Both b and c.
2. How should metal be placed in the shear?
a. From the back of the shear.b. From the front of the shear.c. From the back of the shear by a helper.d. From the front of the shear under a lug or hold down bar.
3. Which would be the best procedure for two people shearing metal?
a. One operating, one helping.b. One person feeding metal, the other catching metal.c. Both people operating the shear.d. Both b and c.
4. What parts of the shear should you always keep clear of?
a. The blade.b. The hold-down bar or lugs.c. Under the treadle.d. All of the above.
5. Which procedure would be unsafe for operating a shear?
a. Wearing gloves.b. Keeping fingers clear of the blade.c. Allowing pieces to drop.d. Removing the guard before operating the shear.
Section 3 Page 249

CONSTRUCTION/WOODS TRADESBand SawBelt Finishing SanderPortable Circular SawDisc SanderJig/Bayonet SawJointerMotorized Miter BoxPlaner/SurfacerPortable Belt SanderPortable DrillPortable Finishing SanderPortable RouterRadial Arm SawScroll Saw NotesTable SawWood LatheUniplanePortable Electric PlaneWood Shaper
Section 3 Page 250

Band Saw Notes
Requirements:
Proper eye protection must be worn—operate only with instructor’s permission and after proper instructions have been received.
1. Adjust the blade guard to where it is ¼ inch above the highest part of the wood.
2. Use a push stick whenever possible and always when cutting small objects.
3. ONLY one person can use the machine at a time. Everyone should form a line and wait patiently and quietly behind the yellow line.
4. Never force your wood into the blade. Let the machine do the work.
5. If it is not working properly, turn it off and tell your teacher immediately.
6. Cut sharp curves on the scroll saw.
7. Avoid backing out of a cut. If there is no way to avoid it, then you need to turn the machine off, wait until the blade has completely stopped, and then carefully back out.
8. Your fingers should be on either side of the blade, but never in front of the blade.
9. Blades do occasionally break. If the blade breaks while you are operating it simply turn it off and send your partner to get the teacher. Never leave the machine or try to open the casing and fix it yourself.
10. Make sure that the dust collector is on and that the vent is open.
11. Round stock must be cut using the V-block to secure it. Also, never reach around the blade to remove your work.
12. Always use scrap wood to push or move scrap wood away from the blade.
13. Never leave the machine until it has come to a complete stop, then clean the table off by using a table broom, never your hands.
Section 3 Page 251

Band Saw Written Test
Use the correct heading and write the answers on your own paper. Use the BEST answer to complete the following:
1. Adjust the blade guard to where it is 1/4 inch above the ( Lowest Highest) part of the wood that you are cutting.
2. You ( Should Should not) use a push stick when cutting out your C02 car design.
3. You should wait behind the ( Air Yellow) line for your turn to use the machine.
4. ONLY ( One Three) person(s) can use this machine at a time.
5. You can SAFELY cut ( Slight Sharp) curves on the band saw.
6. You fingers should stay ( In front To either side) of the blade as you cut.
7. When cutting round or irregular-shaped stock you should use the ( C-block V-block) to secure it.
8. You should use ( Hand Table broom) to clean the top of the table off when you are finished.
9. You should use your ( Hand Scrap wood) to push wood away from the blade.
10. It ( Is Is not) SAFE to force wood into the blade.
11. Blades do occasionally break on this machine. If it does break you should:_____________________________________________________________
List five SAFETY procedures you should do before you operate this machine:
12. _____________________________________________________________13. _____________________________________________________________14. _____________________________________________________________15. _____________________________________________________________16. _____________________________________________________________
Section 3 Page 252

Band Saw Written Test Key
1. Highest
2. Should
3. Yellow
4. One
5. Slight
6. To either side
7. V-block
8. Table broom
9. Scrap wood
10. Is not
11. Turn it off and have someone get the teacher immediately.
List five safety procedures you should do before you operate this or any machine:
1. Tuck in your shirt.
2. Secure your hair.
3. Remove jewelry.
4. Wear Z87 safety glasses.
5. Work with a partner.
6. Listen for and report any problems immediately.
7. Make sure that all guards are in place and working.
8. No horseplay.
9. Keep work area clean.
10. Protect hands.
Section 3 Page 253

Band Saw Hands-On Test
Name: ___________________________________ Date: _________________________________
Subject: __________________________________ Per: __________________________________
1. What does it do? _______________________________________________________________
2. Why is it useful? _______________________________________________________________
3. Can the student identify this machine (point to it)? ( Yes—Band Saw Hands-On Test No)4. Identify the following parts:
On/off switch Lower wheel guard Miter gauge grove
Table Upper wheel guard Blade
Blade guard Rear blade guard Guidepost
Dust collector Kick-back zone
5. Safety procedures followed before using the machine:
Shirt tucked in Z87 safety glasses
Hair secured Checks kick back zone
Remove jewelry Gets help from/helps partner as needed
6. Procedures to set up for a cut:
Set guard 1/4 inch above thickest part of the wood.
Hands—fingers stay to the side of the blade, not in front of it.
Push stick—uses one when needed, ALWAYS with the CO2 car or to remove scrap.
Lowers guard—lowers the blade guard by hand, does not let it just drop.
Feet—facing machine.
Vents—double-check to see that they are on and open.
Eyes—watches to see where the blade is going and to make sure that the hand is nowherenear the blade.
7. Makes two safe and successful operations:
a) Yes No
b) Yes No
8. Makes sure that the machine has been shut down properly, that the area is clean, and puts toolsaway. Yes No
Section 3 Page 254

Section 3 Page 255

Belt Finishing Sander Notes
Requirements:
Proper eye protection must be worn—operate only with instructor’s permission and after properinstructions have been received.
1. Make sure there is adequate, strong tension on the belt and that it is not torn.
2. Make all adjustments, except final belt tracking, with the power off.
3. When changing belts, make sure the new belt runs as arrows indicate.
4. Adjust table to within 1/16 inch of the abrasive belt.
5. Sand on the down stroke of the belt sander.
6. Machine-sand only objects large enough to hold safely against the belt.
7. Move stock evenly and steadily over the abrasive surface of the sander.
8. Keep hands clear of the abrasive belt while operating and keep material flat on the table.
Section 3 Page 256

Belt Finishing Sander Written Test
Use the correct heading and write the answers on your own paper. Use the BEST answer to complete the following:
1. Safety glasses ( Are Are not) the only protective clothing that you need to wear.
2. Use a ( Push block Your fingers) to hold thin material against the belt.
3. The wood should be ( Wet Dry), with no resin, paint, or finish on it and with no nails or other hardware in it.
4. The abrasive belt on the sander must be in good condition. Belts containing small rips or burns are ( Permissible Not OK) to use.
5. The belt track must be adjusted with the power ( Off On).
6. The table must be ( 1 inch 1/16 inch) from the belt.
7. The work must be kept ( Stationary Moving) while sanding.
8. If the machine is not working properly, you should:_______________________________________________________
List five SAFETY procedures you should do before you operate this machine:
9. _____________________________________________________________10. _____________________________________________________________11. _____________________________________________________________12. _____________________________________________________________13. _____________________________________________________________
Section 3 Page 257

Belt Finishing Sander Written Test Key
1. Are
2. Push block
3. Dry
4. Not OK
5. On
6. 1/16 inch
7. Stationary
8. Turn if off, unplug, and tell your instructor.
List five safety procedures you should do before you operate this or any machine:
1. Tuck in your shirt.
2. Secure your hair.
3. Remove jewelry.
4. Wear Z87 safety glasses.
5. Work with a partner.
6. Listen for and report any problems immediately.
7. Make sure that all guards are in place and working.
8. No horseplay.
9. Keep work area clean.
10. Protect hands.
Section 3 Page 258

Portable Circular Saw Notes
Requirements:
Proper eye protection must be worn—operate only with instructor’s permission and after properinstructions have been received.
1. As with any machine, you must wear proper eye protection, pass ALL tests with 100 percent, and haveyour teacher’s permission to operate it.
2. All stock must be well supported and securely clamped down.3. Adjust the depth of cut to the thickness of the stock (material) plus 1/8 inch.4. Make sure the power cord is clear of the blade and that your work area is clean before you start
cutting.5. Check the base and angle adjustments to be sure they are tight.6. Always place the base of the saw on the stock you will be cutting. Make sure that the blade is
not actually touching the stock before you turn it on.7. Advance the saw blade slowly and evenly making sure that it cuts straight through the work.8. Never put the saw down until the blade has come to a complete stop!9. Always unplug the machine to change the blades or to make any kind of adjustments.
Section 3 Page 259
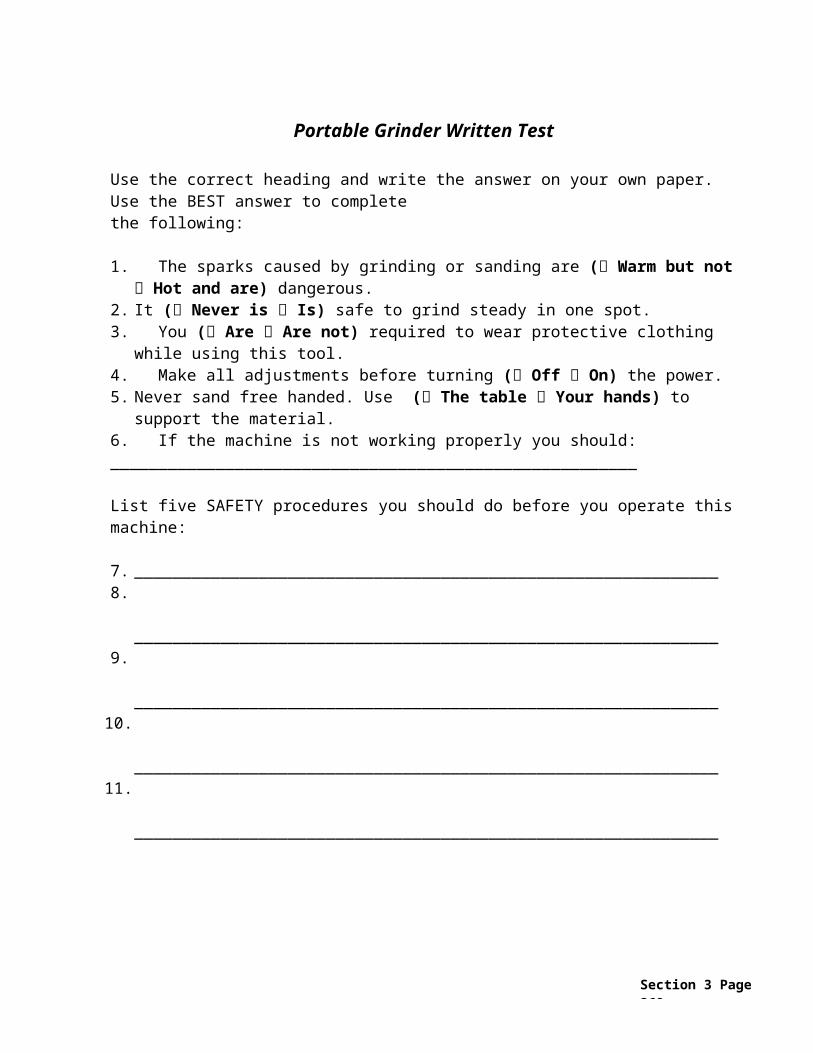
Portable Circular Saw Written Test
Use the correct heading and write the answers on your own paper. Use the BEST answer to complete the following:
1. As with any machine, you must wear proper eye protection, pass ALL tests at ( 85 percent 95 percent 100 percent), and have your teacher’s permission to operate it.
2. It ( Is Is not) important to make sure that all stock is supported and securely clamped down.
3. Adjust the depth of cut to the thickness of the stock (material) plus ( 1/8 inch 1/2 inch 3/4 inch)
4. The power cord ( Should Should not) be clear of the blade.
5. Your work area should be ( Clean Dirty) before you start cutting.
6. Check the base and angle adjustments to be sure they are ( Loose Tight).
7. Always place the base of the saw on the stock you will be cutting. Make sure that the blade ( Is Is not) actually touching the stock before you turn it on!
8/9. Advance the saw blade ( Slowly Quickly) and evenly making sure that it cuts ( Angled Straight) through the work.
10. You should sit the saw down when the blade has come to a ( Half Full) stop!
11. You should __________ the machine to change the blades or to make any kind of adjustments.
.List five SAFETY procedures you should do before you operate this or any machine:
12. 13. 14. 15. 16.
Section 3 Page 260

Portable Circular Saw Written Test Key
1. 100 percent
2. Is
3. 1/8 inch
4. Should
5. Clean
6. Tight
7. Is not
8. Slowly
9. Straight
10. Full
11. Unplug
List five safety procedures you should do before you operate this or any machine:
1. Tuck in your shirt.
2. Secure your hair.
3. Remove jewelry.
4. Wear Z87 safety glasses.
5. Work with a partner.
6. Listen for and report any problems immediately.
7. Make sure that all guards are in place and working.
8. No horseplay.
9. Keep work area clean.
10. Protect hands.
Section 3 Page 261

Disc Sander Notes
Requirements:
Proper eye protection must be worn—operate only with instructor’s permission and after properinstructions have been received.1. Check the abrasive disc for tears or loose areas. If it has any, report them immediately.2. The table should be 1/16 inch away from the disc.3. Always sand on the down-stroke side of the disc. Sanding on the up side will cause your wood to
get caught and thrown, potentially causing serious damage to yourself, lab partners, or schoolproperty.
4. The disc sander is just as dangerous as any saw. Keep all parts of your body away from the discas it rotates—especially your fingers. It can cut or tear part of your finger off.
5. Sand objects that you can SAFELY hold against the table.6. Remember always to hold your wood flat against the table. If you need wood sanded at an angle,
adjust the table accordingly.7. Move your wood at an even and steady pace/pressure across the surface of the rotating disc.8. Use just enough pressure to do the job. Too much pressure can ruin the disc, machine, and
cause injury to someone.9. Always make sure that the dust collector is turned ON and that the vent is OPEN.
10. Never leave the machine until it has come to a complete stop! You can help it stop by sandingdown a piece of scrap wood. Never jam a piece of scrap wood into the machine.
11. As with every machine, if it is not working properly turn it off and tell the teacher.12. Remember to have patience and wait quietly for your turn behind the yellow line.
Section 3 Page 262

Disc Sander Written Test
Use the correct heading and write the answers on your own paper. Use the BEST answer to complete thefollowing:
1. It ( Is Is not) important to check the abrasive disk for tears, or loose areas.
2. The table should be ( 1/2 inch 1/4 inch 1/16 inch) away from the disc.
3. You sand on the ( Left Right) side of the disc.
4/5. The disc sander ( is is not) a potentially dangerous machine, because it( Can cannot) cut or tear part of your finger off.
6. You can SAFELY sand ( Small Big) objects.
7. It ( Is Is not) necessary to hold your wood flat against the table.
8. You can use a piece of scrap wood to slow the disc sander down by ( Jamming it into the disc Sanding it carefully down).
9. You ( Should Should not) sand your wood with an even, steady pressure.
10. You should have patience and quietly wait for your turn behind the ( Red Yellow) line.
11. If the machine is not working properly you should: ____________________________
List five SAFETY procedures you should do before you operate this machine:
12. __________________________________________________________13. __________________________________________________________14. __________________________________________________________15. __________________________________________________________16. __________________________________________________________
Section 3 Page 263

Disc Sander Written Test Key1. Is
2. 1/16 inch
3. Left
4. Is
5. Can
6. Big
7. Is
8. Sanding it carefully down.
9. Should
10. Yellow
11. If the machine is not working properly, you should:____________________________________________________________________________
List five safety procedures you should do before you operate this or any machine:
1. Tuck in your shirt.
2. Secure your hair.
3. Remove jewelry.
4. Wear Z87 safety glasses.
5. Work with a partner
6. Listen for and report any problems immediately.
7. Make sure that all guards are in place and working.
8. No horseplay.
9. Keep work area clean.
10. Protect hands.
Section 3 Page 264

Disc Sander Hands-On Test
Name: __________________________ Date: _________________________________
Subject: _________________________Per: __________________________________
1. What does it do?
_______________________________________________________________
2. Why is it useful?
_______________________________________________________________
3. Can the student identify this machine (point to it)? (Yes No)
4. Identify the following parts:
On/off switch Dust spout Power cord
Tilting table Lock knob Motor
Abrasive disc Rim guard
5. Safety procedures followed before using the machine:
Shirt tucked in Z87 safety glasses
Hair secured Checks kick-back zone
Remove jewelry Gets help from/helps partner as needed
6. Procedures for operating machine (teacher designate):
Wood—uses both hands to hold the wood flat against the table.
Hands—fingers stay at least 1-inch away from the abrasive disc.
Scrap wood—uses it to slowly sand the disc to a stop.
Feet—facing the machine.
Eyes—watches to see where the material is going and makes sure that the hands are nowhere near the disc.
7. Makes two safe and successful operations:
a) Yes No
b) Yes No
8. Makes sure that the machine has been shut down properly, that the area is clean, and puts tools away. Yes No
Section 3 Page 265

Jig/Bayonet Saw NotesRequirements:
1. As with any machine, you must wear proper eye protection, pass ALL tests with 100 percent and have your teacher’s permission to operate it.
2. Select the correct blade for the stock (material) and clamp the blade down tightly in the chuck.
3. Always disconnect the saw to change blades or make adjustments of any kind.
4. Use vise or clamps to securely hold the stock (material) that you will be cutting. A C-clamp, wood clamp, or quick grips are the easiest ones to use.
5. Keep a constant and even cutting pressure. Do not force the blade into the work. Just like with any saw, if it’s not cutting, there is a reason!
6. Do not attempt to cut curves that are so tight that the blade can be twisted and then broken.
7. Never sit this saw or any power tool down on the workbench until it has completely stopped. If you are not going to use it again immediately, you should also unplug it so that it does not get accidentally turned on before you need it again.
Section 3 Page 266

Jig/Bayonet Saw Written Test
Use the correct heading and write the answers on your own paper. Use the BEST answer to complete the following:
1. As with any machine, you must wear proper eye protection, pass ALL tests with 100
percent, and you ( Do Do not) need your teacher’s permission to operate it.
2. Selecting the correct blade for the stock (material) ( Is Is not) important.
3. You should clamp the blade down ( Lightly Tightly) in the chuck.
4. Always leave the saw ( Disconnected Connected) when you change blades or make adjustments of any kind.
5. Use vise or clamps, like a ( C-clamp V-clamp) to securely hold the stock (material) that you will be cutting.
6. Keep a constant and ( Even Uneven) cutting pressure.
7. You ( Should Should not) force the blade into the work.
8. You can safely cut ( Tight Slight) curves.
9. You can safely sit this saw down on the workbench when ( You are through with it It has completely stopped).
10. If you are not going to use it again immediately, you should
___________________________________________________________________
List five SAFETY procedures you should do before you operate this or any machine:
11. _________________________________________________________________
12. _________________________________________________________________
13. __________________________________________________________________
14. __________________________________________________________________
15. __________________________________________________________________
Section 3 Page 267

Jig/Bayonet Saw Written Test Key1. Do
2. Is
3. Tightly
4. Disconnect
5. C-clamp
6. Even
7. Should not
8. Slight
9. It has completely stopped
10. Unplug it so that it does not get accidentally turned on until you need it again.
List five safety procedures you should do before you operate this or any machine:
1. Tuck in your shirt.
2. Secure your hair.
3. Remove jewelry.
4. Wear Z87 safety glasses.
5. Work with a partner.
6. Listen for and report any problems immediately.
7. Make sure that all guards are in place and working.
8. No horseplay.
9. Keep work area clean.
10. Protect hands.
Section 3 Page 268

Jointer NotesRequirements:
Proper eye protection must be worn—operate only with instructor’s permission and after properinstructions have been received.
1. Always keep the knives of the jointer sharp. Dull knives tend to cause kickbacks and will result inpoor planning. Report dull knives to the teacher immediately.
2. The fence should be tight. Never adjust the fence while the jointer is running.3. Adjust the depth of cut before you turn the jointer on. The maximum safe plane thickness is 1/16
inch.4. Be sure that the guard is in place and operating with ease. If the regular guard is removed, a
special guard must be provided.5. Always allow the machine to come to full speed before using it.6. Check all stock for knots, splits, metal particles, and other imperfections. Remove them before
you plane the stock.7. Do not use the jointer on plywood or PARTICLEBOARD.8. Stand to the side of the jointer, never directly behind it. You want to be out of the way in case of a
kick back.9. Cut with the grain. Also, never joint the end of a board!
10. Always use a push stick or push block when the wood is below the height of the fence or when surfacing the wood.
11. Do not try to make too heavy of a cut. The maximum safe plane thickness is 1/16 inch.12. Use COMMON SENSE when stock is too thin or thick to joint safely.13. Never apply pressure to the board with your hand directly over the cutter head area.
Section 3 Page 269

Jointer Written Test
Use the correct heading and write the answers on your own paper! Use the BEST answer to completethe following:
1. ALWAYS keep the knives of the jointer ( Dull Sharp).2. It is ( Safe Dangerous) adjust the fence while the jointer is running.
3. Adjust the depth of cut ( After Before) you turn the jointer ON.
4. ( 1/2 inch 1/8 inch 1/16 inch) is the maximum SAFE plane thickness.
5. You should allow the machine to come to ( Half Full) speed before using it.
6. You ( Can Cannot) SAFELY use the jointer on PLYWOOD or PARTICLEBOARD.
7. Cut ( Against With) the GRAIN.
8. You ( Should Should not) use your hands to clean wood shavings from ANY table.
9. If you are facing and using the jointer, the kick-back danger area is to your ( Left Right).10. You ( Should Should not) turn the dust collector on before you start your work.
List five SAFETY procedures you should do before you operate this or any machine:
11. ________________________________________________________
12. ________________________________________________________
13. ________________________________________________________
14. ________________________________________________________
15. ________________________________________________________
Section 3 Page 270

Jointer Written Test Key1. Sharp
2. Dangerous
3. Before
4. 1/16 inch
5. Full speed
6. Cannot
7. With
8. Should not
9. Right
10. Should
List five safety procedures you should do before you operate this or any machine:
11. Tuck in your shirt.
12. Secure your hair.
13. Remove jewelry.
14. Wear Z87 safety glasses.
15. Work with a partner.
16. Listen for and report all problems immediately.
17. Make sure that any guards are in place and working.
18. No horseplay.
19. Keep work area clean.
20. Protect hands.
Section 3 Page 271

Jointer Hands-On Test
Name: __________________________ Date: _________________________________Subject: _________________________ Per: __________________________________
1. What does it do? _______________________________________________________________
2. Why is it useful? _______________________________________________________________
3. Can the student identify this machine (point to it)? (Yes No)
4. Identify the following parts:On/off switch Kick back zone GuardInfeed table Infeed table adjustment lever Cutter headOutfeed table Infeed depth of cut gauge FenceDust collector
5. Safety procedures followed before using the machine:Shirt tucked in Z87 safety glassesHair secured Checks kick-back zoneRemove jewelry Gets help from/helps partner as needed
6. Procedures for operating machine (teacher designate):Fence adjustment—makes sure that it is big enough and uses a push stick if
needed.Infeed table adjustment—1/16 inch maximum cut.Left hand—keeping board flush with the fence, but stays far away from the cutter
head.Right hand—guides the board, but stays away from the cutter head.Feet—facing the machines and does the “side step.”Vents—double-check to make sure that they are open.
7. Makes two safe and successful operations:a) Yes Nob) Yes No
8. Makes sure that the machine has been shut down properly, that the area is clean, and puts tools away. Yes No
Section 3 Page 272

Motorized Miter Box NotesRequirements:
Proper eye protection must be worn—operate only with instructor’s permission and after properinstructions have been received.
1. Disconnect power before making angle adjustments or changing blades.2. Always hold the work firmly against the fence and table.3. Allow the motor to reach full speed before starting a cut.4. Keep fingers outside of blade guards.5. Remove scrap stock from table when making multiple cuts. Use scrap to do this and not your fingers.6. Use the brake to stop the blade.
Section 3 Page 273

Motorized Miter Box Written Test
Use the correct heading and write the answer on your own paper. Use the BEST answer to completethe following:
1. Always hold the work firmly ( Away from Against) the fence and table.2. The machine ( Should Should not) be stopped by pushing a piece of scrap
against the side of the blade.3. The guard sections can easily be checked for proper operation ( Before After)
using the machine.4. The trigger switch and the brake button ( Can Cannot) be used together to gain
better control.5. Fingers should be kept ( Inside Outside) of the blade guards.6. If the machine is not working properly you should:
_______________________________________________________
List five SAFETY procedures you should do before you operate this machine:7. _____________________________________________________________8. _____________________________________________________________9. _____________________________________________________________
10. _____________________________________________________________11. _____________________________________________________________
Section 3 Page 274

Motorized Miter Box Written Test Key
1. Against2. Should not3. Before4. Cannot5. Outside6. Turn it off, unplug it, and tell your teacher immediately.
List five safety procedures you should do before you operate this or any machine:
1. Tuck in your shirt.2. Secure your hair.3. Remove jewelry.4. Wear Z87 safety glasses.5. Work with a partner.6. Listen for and report any problems immediately.7. Make sure that all guards are in place and working.8. No horseplay.9. Keep work area clean.
10. Protect hands.
Section 3 Page 275

Motorized Miter Box
1. Operate only with instructor’s permission and after you have received instruction.2. Remove jewelry, eliminate loose clothing, and confine long hair.3. Make sure all guards are in place and operating correctly.4. Always use proper eye protection.5. Be sure power is disconnected before making angle adjustments or changing
blades.6. Always hold the work firmly against the fence and table.7. Install a new table if adequate support has been cut away.8. Allow the motor to reach full speed before staring to cut.9. Use the brake to stop the blade before removing scrap or chips from the work
area.10. Be sure guard parts are functioning properly.
Section 3 Page 276

Safety Quiz—Motorized Miter Box Student Name Class Date Grade
1. The table on this machine can be cut so often that it no longer gives safesupport to the work. T F
2. The machine should be stopped by pushing a piece of scrap against the side of the blade. T F
3. The guard sections can easily be checked for proper operation beforestarting to use the machine. T F
4. The trigger switch and the brake button can be used together to gainbetter control. T F
5. A warped or twisted work piece is not really dangerous. T F
Section 3 Page 277

Planer/Surfacer Notes
Requirements:
Proper eye protection must be worn—operate only with instructor’s permission and after properinstructions have been received.
1. Keep your fingers away from the underside of the board as it is fed through the planer. Keep your hands away from the top of the board near the infeed roller.
2. Never stand directly behind the board or in front of the machine when planing, in case of a kickback.
3. Do not look into the throat of the planer from either side when the machine is in operation.
4. Always surface wood with the grain. NEVER run a piece cross grain5. Support long pieces of wood. These could throw the planer out of adjustment.6. Make sure the board is longer than the distance between the centers of the infeed
and outfeed rolls.7. Scrape all glue off the stock before running it through the planer.8. Before you make any adjustments, turn the power off and the check to make sure
that the cutter head is standing still. Do not remove shavings while cutter head is revolving.
9. Do not force stock into the planer; never lower the table when a piece of stock will not feed through. Turn off the power after the cutter head has stopped completely and then make the necessary corrections.
10. Do not take cuts deeper than 1/16 inch. The maximum SAFE cut depth is 1/16 inch. Plane to one desired thickness at a time.
11. Check all stock for knots, splits, metal particles, and other imperfections. Remove them before you plane the stock. Always use the exhaust system.
Section 3 Page 278

Planer/Surfacer Written Test
Use the correct heading and write the answer on your own paper! Use the BEST answer to completethe following:
1. NEVER stand directly behind the board or in front of the machine when planing, in case of a_____________________________________________
2. It ( Is Is not) SAFE to look into the throat of the planer from either side when the machine is in operation.
3. Plane your board down to ( One Two Three) desired thickness at a time.4. Support long pieces of wood, because these could _____________________5. Make sure the board is ( Longer Shorter) than the distance between the centers
of the in feed and out feed rolls.6/7. Before you make any adjustments turn the power ( On Off), and then check
to make sure that the cutter head is ( Moving Standing still).8. DO NOT take cuts deeper than ( 1/4 inch 1/8 inch 1/16 inch).9. ALWAYS surface wood ( Against With) the grain. NEVER run a piece cross
grain.10. You ( Can Cannot) SAFELY use the planer on plywood or particleboard.11. You ( Should Should not) check your wood for imperfections like metal, and
scrape off excess glue before you plane it.12. You ( Should Should not) panic if your wood gets stuck.
List five SAFETY procedures you should do before you operate this or any machine:
13. ___________________________________________________________________14. ___________________________________________________________________15. ___________________________________________________________________16. ___________________________________________________________________17. ___________________________________________________________________
Section 3 Page 279

Planer/Surfacer Written Test Key1. Kickback2. Is not3. One4. Throw the planer out of alignment5. Longer6. Off7. Standing still8. /16”9. With
10. Cannot11. Should12. Should notList five safety procedures you should do before operating this or any machine:
13. Tuck in your shirt.14. Secure your hair15. Remove jewelry.16. Wear Z87 safety glasses.17. Work with a partner.18. Listen for and report any problems immediately.19. Make sure that any guards are in place and working.20. No horseplay.21. Keep work area clean.22. Protect hands.
Section 3 Page 280

Planer/Surfacer Hands-On TestName: ___________________________________ Date: _________________________________Subject: __________________________________ Per: __________________________________1. What does it do? _______________________________________________________________2. Why is it useful? _______________________________________________________________3. Can the student identify this machine (point to it)? (Yes No)4. Identify the following parts:
On/Off switch Chip breaker Outfeed rollers Infeed rollersInfeed table Cutter head Outfeed tablePressure bar Clutch Elevating wheel
5. Safety procedures followed before using the machine:Shirt tucked in Z87 safety glasses Hair secured Checks kick back zone Remove jewelry Gets help from/helps partner as needed
6. Procedures for operating machine (teacher designate):Fingers—kept away from the underside and inside of the machine.Does not look into the throat of the machine.Keeps the wood straight and flat against the table.Vents—double-check to make sure that they are open.Does not force the wood, take time to readjust as needed.Does not panic if wood gets stuck, just readjusts.Feet – stands to the side.
7. Makes two (2) safe and successful operations:1) Yes No2) Yes No
8. Makes sure the machine has been shut down properly, that the area is clean, and puts tools away. Yes No
Section 3 Page 281

Section 3 Page 282

Planer–Surfacer
1. Operate only with instructor’s permission and after you have received instruction.
2. Remove jewelry, eliminate loose clothing, and confine long hair.
3. Make sure all guards are in place and operating correctly.
4. Always use proper eye protection.
5. A “backer board” should be used when planning thin stock.
6. Do not force material through planer.
7. Do not remove chip accumulation while machine is running.
8. Do not stand directly behind the machine or in the line of kick back.
9. Do not look into the throat of the surfacer when it is running.
10. Be sure to select the proper speed and depth of cut.
11. The board being surfaced must exceed the minimum length established for that particular machine (check with instructor).
Section 3 Page 283

Safety Quiz—Planer–Surfacer Student Name Class Date Grade
1. Instructor’s permission is required to operate the machine. T F
2. Eye protection is required to operate machine. T F
3. Chips may be removed while machine is running. T F
4. It is safe to plane wood with loose knots. T F
5. If material becomes stuck, it is safe to stop machine. T F
6. Line of sight should be through the throat of the machine. T F
7. Assistance should be obtained when planning long pieces of wood. T F
Section 3 Page 284

Portable Belt Sander Notes
Requirements:Proper eye protection must be worn—operate only with instructor’s permission and after proper
instructions have been received.
1. Check to see if the belt is worn or torn, tracking properly, and is the correct grit size for the job.
2. Before connecting to a power source, make sure the switch is “OFF.”
3. Start sander above the work, let rear of belt touch first then level the tool.
4. Keep the sander moving back and forth in the direction of the grain. Do not pause in one spot.
5. Lift the sander off the stock when stopping.
6. Always allow the sander to come to a complete stop before placing the sander on the table.
7. Keep electrical cord and dust bag away from working area.
8. When changing belts make sure the new belt runs as the arrow indicates.
Section 3 Page 285

Section 3 Page 286

Portable Belt Sander Written Test
Use the correct heading and write the answer on your own paper. Using the BEST answer to complete
the following:
1. Safety glasses ( Are Are not) the only protective clothing that you need to wear.
2. Check belt ( Tracking Tension) carefully before starting work.
3. The machine should be ( Still moving At a complete stop) before placing it on the
workbench.
4. The sander should be started ( Before After) it is on the work.
5. See that the trigger switch is ( Off On) before plugging in the machine.
6. Keep the sander ( Moving back and forth in the direction of the grain Pause in one spot).
7. Keep the electrical cord ( Wrapped around your neck Away) from working area.
8. If the machine is not working properly you should:
9. _______________________________________________________
10. List five SAFETY procedures you should do before you operate this machine:
11. _____________________________________________________________
12. _____________________________________________________________
13. _____________________________________________________________
14. _____________________________________________________________
15. _____________________________________________________________
Section 3 Page 287

Portable Sander Written Test Key
1.Are
2.Tracking
3.At a complete stop
4.Before
5.Off
6.Moving back and forth in the direction of the grain
7.Away
8.Turn it off, unplug it, and tell your teacher
List five safety procedures you should do before you operate this or any machine:
9.Tuck in your shirt.
10.Secure your hair.
11.Remove jewelry.
12.Wear Z87 safety glasses.
13.Work with a partner.
14.Listen for and report any problems immediately.
15.Make sure that all guards are in place and working.
16.No horseplay.
17.Keep work area clean.
18.Protect hands.
Section 3 Page 288

Portable Drill Notes
Requirements:Proper eye protection must be worn—operate only with instructor’s permission and after properinstructions have been received.1. Select the correct drill bit just like you would for the drill press.2. Secure a piece of scrap wood and the good wood to the table so that it will not move around
while drilling.3. Make sure that the switch is OFF, the chuck key is removed, and that your work area is clean and
dry BEFORE you plug the drill in and turn it ON!4. Drill with straight, even, and steady pressure.5. When drilling deep holes, withdraw the drill bit several times to clear the area. This helps to
provide a SAFE and even drilling process.6. As with any machine,DO NOT PANIC if something “goes wrong.” Turn it OFF, unplug it, and tell
a teacher.
Section 3 Page 289

Portable Drill Written Test
Use the correct heading and write the answers on your own paper. Using the BEST answer to completethe following:1. You ( Should Should not) secure a piece of scrap wood to your worktable.
2/3. Make sure that the drill is switched ( on off) and that the work area is clean and ( dry wet).
4. You ( Should Should not) drill with straight, steady, even pressure.5. To provide for a SAFE and even drilling process, you need to clear the area as you
drill. To do this you need to ___________________________________.6. As with any machine, if it is NOT working properly you should:______________________________________________________________________
_______List five SAFETY procedures you should do before you operate this machine:7. _____________________________________________________________8. _____________________________________________________________9. _____________________________________________________________
10. _____________________________________________________________11. _____________________________________________________________
Section 3 Page 290

Portable Drill Written Test Key1. Should2. Off3. Dry4. Should5. Withdraw the bit to remove the sawdust6. Turn it off; unplug; and tell your teacher
Section 3 Page 291

Portable Finishing Sander NotesRequirements:Proper eye protection must be worn—operate only with instructor’s permission and after properinstructions have been received.1. Before connecting the power cord, be sure the power switch is “OFF.”2. Check to see that the abrasive sheet is in good condition and installed properly.3. Start the sander above the work and set it down evenly; move slowly over a wide area.4. Lift the sander from the work before stopping the motor.5. Be sure the sander has stopped before placing the sander on the workbench.6. All work must be securely fastened in the holding device.7. Never carry any tool by its power cord.
Section 3 Page 292

Portable Finishing Sander Written Test
Use the correct heading and write the answers on your own paper. Using the BEST answer to completethe following:1. Be sure the trigger switch is in the ( Off On) position when plugging it in.2. Check the abrasive sheet to see if it is ( Loose Secure).3. Hold the sander by the ( Cord Handle).4. Pull the ( Plug Power cord) to remove the plug from the socket.5. Turn ( Off On) the sander before placing it on the work.6. Turn the sander off while it is ( On Off) the work piece.7. If the machine is not working properly, you should:_______________________________________________________List five SAFETY procedures you should do before you operate this machine:8. _____________________________________________________________9. _____________________________________________________________
10. _____________________________________________________________11. _____________________________________________________________12. _____________________________________________________________
Section 3 Page 293

Portable Finishing Sander Written Test Key1. Off2. Secure3. Handle4. Plug5. On6. Off7. Turn off equipment; unplug; and tell your teacher.List five safety procedures you should do before you operate this or any machine:1. Tuck in your shirt.2. Secure your hair.3. Remove jewelry.4. Wear Z87 safety glasses.5. Work with a partner.6. Listen for and report any problems immediately.7. Make sure that any guards all in place and working.8. No horseplay.9. Keep work area clean.
10. Protect hands.
Section 3 Page 294

Portable Router Notes
Requirements:1. You should never carry any portable tool by its power cord.2. Always check your wood for any defect that could cause the stock to tear out and
then throw that wood, potentially causing injury.3. Always use a fence to guide your wood and cut with the grain.4. Only when your work area is prepared should you plug it in and begin cuffing.5. Always use a face shield to protect your face.6. Always check to make sure that you are using the correct bit. Check the chart.
Section 3 Page 295

Portable Router Written Test
1. You ( Should Should not) carry any portable tool by its power cord.2. You should router to the ( Left Right) and remember to use the ______________
as a guide.3. You ( Do need Do not need) to use a face shield when cutting on the router.4. It ( Is Is not) safe to touch the router bit after you have used it because it will be
( Cold Hot)
5. As with any machine, if it is not working properly, you should:_____________________________________________________________________________
List five safety procedures you should do before you operate this or any machine:6. ______________________________________________________________7. ______________________________________________________________8. ______________________________________________________________9. ______________________________________________________________
10. ______________________________________________________________
Section 3 Page 296

Portable Router Written Test Key
1. Should not2. Left2. Fence3. Do need4, Is not4. Hot5. Turn it off, unplug, and tell your teacher.List five safety procedures you should do before you operate this or any machine:6. Tuck in your shirt.7. Secure your hair.8. Remove Jewelry.9. Wear Z87 safety glasses.
10. Work with a partner11. Listen for and report any problems immediately.12. Make sure that all guards are in place and working.13. No horseplay.14. Keep work area clean.15. Protect hands.
Section 3 Page 297

Portable Router Hands-On TestName: ___________________________________ Date: _________________________________Subject: __________________________________ Per: __________________________________1. What does it do? _______________________________________________________________2. Why is it useful? _______________________________________________________________3. Can the student identify this machine (point to it)? (Yes No)4. Identify the following parts:
On/Off switch Cord strain reliever Sub-baseLocking handle Housing Collet type chuckGuide knob Depth adjustment Motor safety disconnect
5. Safety procedures followed before using the machine:Shirt tucked in Z87 safety glassesHair secured Checks kick-back zoneRemove jewelry Gets help from/helps partner as needed
6. Procedures for operating machine (teacher designate):Router Adjustment—makes sure that it’s tightened down and makes a test cut on scrap wood.Fence Adjustment—checks the height and secures it.Left Hand—holds the wood flat and guides it through, but stays away from the bit.Right Hand—same.Feet—facing the machines and side steps.Eyes—watches to see where the bit is going and makes sure that the hand is nowhere near the
bit.Routers to the left when at all possible.
7. Makes two safe and successful operations:1) Yes No2) Yes No
8. Makes sure that the machine has been shut down properly, that the area is clean, and puts tools away. Yes No
Section 3 Page 298

Radial Arm Saw Notes
Requirements:Proper eye protection must be worn—operate only with instructor’s permission and after properinstructions have been received.1. Make all adjustments with the power off and the cutter head behind the fence.2. Make sure that the cutter is off, place the wood against the fence, and slowly “walk”
the blade forward to check your cut mark.3. Before you make any cut, wait until the exhaust system is turned on and the cutter
head is turning at full speed.4. If cutting long pieces of wood,get your partner to help support the length to your left.5. Never attempt to cut wood that is wider than 1’-0” Get teacher assistance for stock
that is wider.6. Place the wood against the fence, use your left hand to hold it flush and flat against
the table. Stand to the left of the blade and use your right hand to guide the blade across the wood.
7. Always make sure that the blade guard and kick-back fingers are properly adjusted before you attempt to rip the wood.
8. Feed the blade into the wood only as fast as it can smoothly cut without binding or “sticking.”
9. Always pull the blade through the wood and return it back behind the fence before making your next cut.
10. Always make sure that the machine is turned off and that the blade has stopped before you leave the machine.
11. As with any machine, if you think that it is not working properly, turn it off, unplug it, and get the teacher(s) to inspect it.
12. Always use common sense when operating this and any machine. Remove your jewelry, tuck your shirt in, wear Z87 safety glasses, work with a partner, and always keep your fingers and body away from the path of the blade.
13. Never, ever, place any part of your body directly in front of or behind the blade.
Section 3 Page 299

Radial Arm Saw Written TestUse the correct heading and write the answers on your own paper. Using the BEST answer to completethe following:
1/2. Make adjustments with the power ( On Off) and the cutter head ( Behind In front of) the fence.
3. BEFORE making any cut, wait until the cutter head is turning at ( One-half Full) speed.
4. The maximum SAFE width/size of a board that you can cut is ( 1’ – 0” 12 – 0” 1 – 6”).
5/6. ALWAYS make sure that the machine is turned ( On Off), and that the blade has stopped after before) you leave the machine.
7. As with any machine, if you think that it is not working correctly you should_____________________________________________________________
List five basic steps you should follow before and during the use of the arm saw:8. _____________________________________________________________9. _____________________________________________________________
10. _____________________________________________________________11. _____________________________________________________________12. _____________________________________________________________List five safety procedures you should do before you operate this machine:
13. ____________________________________________________________14. ____________________________________________________________15. ____________________________________________________________16. ____________________________________________________________17. ____________________________________________________________
Section 3 Page 300

Radial Arm Saw Written Test Key1. Off
2. Behind
3. Full
4. 1 – 0”
5. Off
6. Before
7. Turn it off and tell the teacher immediately.
List five basic steps you should follow before and during the use of the arm saw:
8.Walk the blade forward to check that it is lined up with your cut mark.
9. Check to make sure that the guards are in place and working.
10. Left hand holds the wood flat. Right hand guides the blade across.
11. Allow blade to come to full speed.
12. Cut all the way through the wood and return the blade behind the fence.
List five safety procedures you should do before you operate this or any machine:
1. Tuck in your shirt.
2. Secure your hair.
3. Remove jewelry.
4. Wear Z87 safety glasses.
5. Work with a partner.
6. Listen for and report any problems immediately.
7. Make sure that any guards are in place and working.
8. No horseplay.
9. Keep work area clean.
10. Protect hands.
Section 3 Page 301

Radial Arm Saw Hands-On TestName: ___________________________________ Date: _________________________________
Subject: __________________________________ Per: __________________________________
1. What does it do? _______________________________________________________________
2. Why is it useful? _______________________________________________________________
3. Can the student identify this machine (point to it)? (Yes No)
4. Identify the following parts:
On/Off switch Dept of cut gauge Cutter headKick-back zone
Table Miter cut scale Fence
Guard Miter lock knob Dust collector
5. Safety procedures followed before using the machine:
Shirt tucked in Z87 safety glasses Gets help from/helps partner as needed
Hair secured Checks kick-back zone Remove jewelry
6. Procedures for operating machine (teacher designate):
Right hand—guides the blade, but stays far away from it.
Feet—facing machine.
Vents—double-check to see that they are on and open.
Left hand—keeping board flush with fence, but staying far away from the blade.
Blade adjustment—make sure that it is set to the angle that is required (90, 45, etc.) to set up for a cut.
Board cut adjustment—1’ 0” is maximum cut.
Eyes—watches to see where the blade is going and makes sure that the hand is nowherenear the blade.
7. Makes two safe and successful operations:
1) Yes No
2) Yes No
8. Makes sure that the machine has been shut down properly, that the area is clean, and puts tools
away. Yes No
Section 3 Page 302

Section 3 Page 303

Scroll Saw Notes
Requirements:Proper eye protection must be worn—operate only with instructor’s permission and after properinstructions have been received.1. Make all adjustments with the power OFF.2. Make sure that you are lightly holding the wood flat against the table to keep the
wood from bouncing around and possibly being thrown out.3. Check to make sure that the teeth of the blade are pointing down and that the guide
assembly is flush with the wood.4. Use both hands to guide the wood through the cut. However, hands should remain to
the side of the blade, never in direct line with the blade.5. The scroll saw can hurt you as badly as the band saw. The smaller blade will not
save your hand or fingers.6. Never use your hand to clear the table. Always use a table broom or the chip blower.7. Scroll saw blades break very easily, so take your time to make the right cuts.
Remember, never force the wood and use the correct speed.8. “Hard” woods and tight curves should be cut using the slower speed.9. If the blade breaks, turn the machine off, unplug it, and tell the teacher immediately.
Never try to fix it yourself.10. You have to wait patiently and quietly for your turn on this machine, behind the yellow
line, just like with any machine.11. If for any reason you are not sure of the way to cut out an object, get your teacher’s
assistance. You may have to wait a little while, but you will be helped as soon as possible. Remember, have patience!
12. The machine must be turned off and at a complete standstill before you can leave it.
Section 3 Page 304

Scroll Saw Written Test
Use the correct heading and write the answer on your own paper. Using the BEST answer to completethe following:1. The scroll saw can be SAFELY used to cut ( Slight Tight) curves.2. Make any adjustments with the power ( On Off).3. Use ( both One) hand(s) to guide the wood through the blade.4. “Hard” woods and tight curves should be cut with a ( Faster Slower) speed.5. You should wait ( Patiently Impatiently) for your turn to use the machine.6. Picking the correct speed for cutting a design ( Is Is not) necessary.7. You ( Should Should not) force wood into the blade.8. If you are unsure of how to cut a design you ( Try it anyway Get assistance).
9/10.The machine should be turned ( On Off) and ( Still going Standing still) before you leave it.
11. Blades do occasionally break on this machine, if it does break you should:____________________________________________________
List five SAFETY procedures you should do before you operate this machine:12. _____________________________________________________________13. _____________________________________________________________14. _____________________________________________________________15. _____________________________________________________________16. _____________________________________________________________
Section 3 Page 305

Scroll Saw Written Test Key1. Tight2. Off3. Both4. Slower5. Patiently6. Is7. Should not8. Get assistance
9/10. Off/Standing still11. Turn equipment off, unplug it, and tell your teacher immediatelyList five safety procedures you should do before you operate this or any machine:1. Tuck in your shirt.2. Secure your hair.3. Remove jewelry.4. Wear Z87 safety glasses.5. Work with a partner.6. Listen for and report any problems immediately.7. Make sure that all guards are in place and working.8. No horseplay.9. Keep work area clean.
10. Protect hands.
Section 3 Page 306

Scroll Saw Hands-On TestName: ___________________________________ Date: _________________________________Subject: __________________________________ Per: __________________________________1. What does it do? _______________________________________________________________2. Why is it useful? _______________________________________________________________3. Can the student identify this machine (point to it)? (Yes No)4. Identify the following parts:
On/Off Hold down Table insertTable Guide post Upper chuckBlade Guide assembly BaseOver arm Belt and guard pulley
5. Safety procedures followed before using the machine:Shirt tucked in Z87 safety glassesHair secured Checks kick back zoneRemove jewelry Gets help from/helps partner as needed
6. Procedures for operating machine (teacher designate):Wood against—uses both hands to hold the wood flat on the table to keep it from bouncing around.Hands—fingers stay to the side of the blade, not in front of it.Scrap wood—use to remove scrap wood.Lowers guard—lowers the guide assembly by hand; does not let it just drop.Feet—facing machine.Eyes—watches to see where the blade is going and makes sure that the hand is nowhere near the blade.
7. Makes two safe and successful operations:a) Yes Nob) Yes No
8. Makes sure that the machine has been shut down properly, that the area is clean, and puts tools away. Yes No
Section 3 Page 307

Section 3 Page 308

Table Saw Notes
Requirements:Proper eye protection must be worn—operate only with instructor’s permission and after properinstructions have been received.1. Make sure you are dressed correctly for the job. Remove ties, scarves, jewelry, gloves, and keep long
hair tied back.2. Always wear safety goggles when operating a table saw.3. Keep guards in place at all times while using a table saw.4. Stand to the side of the saw during operation. Do not stand in line with the blade.5. Do not raise the blade more than ¼” inch above the wood’s surface.6. When you are cutting long stock, a helper should support the weight of the wood while the operator
does the pushing.7. Have your instructor inspect all special set-ups and dado heads.8. Adjustments on the machine should be made with power off and the blade stopped.9. Use a push stick when ripping narrow pieces of stock.
10. Turn on the exhaust system before beginning work.
Section 3 Page 309

Table Saw Written Test
Use the correct heading and write the answer on your own paper. Using the BEST answer to completethe following:1. Adjust the blade, just high enough to cut through the stock, ( Before After) the
power is turned on.2. Keep fingers ( Away from Close to) moving parts and never reach over the saw
blade.3. ( Always Never) make a cut without using the proper fences or gauges4. Be sure that the blade will clear both sides of the ( Fence Throat plate) before
turning on the power.5. Make ( No Any) adjustments while the machine is running.6. Never attempt to clear away scraps while the blade is ( Running Still).7. Before beginning any “special” cuts, always have ( The instructor Another
student) check the set up.8. Do not allow fingers to ( Come into direct line with Be on the side of) the
blade.9. ( Get help Just be careful) when sawing large stock.
10. ( Do not Do) cut cylindrical stock on this machine.11. When starting work or on special set ups, ( Cycle the switch quickly to see that
everything is working properly Have your instructor check your set-up).12. Clean the machine and the area around it with ( Your hands A brush) when
finished using.List five SAFETY procedures you should do before you operate this machine:
13. _____________________________________________________________14. _____________________________________________________________15. _____________________________________________________________16. _____________________________________________________________17. _____________________________________________________________
Section 3 Page 310

Table Saw Written Test Key1. Before2. Away from3. Never4. Fence5. No6. Running7. The instructor8. Come into direct line with9. Get help
10. Do not11. Have your instructor check your set-up12. With a brushList five safety procedures you should do before you operate this or any machine:1. Tuck in your shirt.2. Secure your hair.3. Remove jewelry.4. Wear Z87 safety glasses.5. Work with a partner.6. Listen for and report any problems immediately.7. Make sure that any guards are in place and working.8. No horseplay.9. Keep work area clean.
10. Protect hands.
Section 3 Page 311

Wood Lathe NotesRequirements:Proper eye protection must be worn—operate only with instructor’s permission and after properinstructions have been received.1. When operating this machine you must wear proper eye protection, a face shield, pass ALL tests with
100 percent, and have your teacher’s permission to operate it.2. Carefully examine all wood for checks, knots, or other defects before putting it on the lathe.3. Work must be balanced and securely held between centers or mounted on a faceplate.4. Rotate spindle by hand to check to make sure that you have enough clearance before starting the
turning.5. Tool rest must be set 1/8” away from the work piece and adjusted to the proper height for the tool
being used.6. Be sure the lathe is running at the proper speed for the operation.7. You should use caution and common sense to prevent turning tools from catching in the stock.8. Select and use the correct tool for the cut you plan to make.9. Even when wearing a face shield, you should also make sure that the safety shield is properly in
place.10. Remove tool rest and base before sanding or polishing.11. Use a table broom brush to clean off lathe when finished.
Section 3 Page 312

Wood Lathe Written TestUse the correct heading and write the answer on your own paper. Using the BEST answer to completethe following:1. When operating this machine you must wear proper eye protection, a ____ _______,
pass ALL tests with 100 percent, and have your teacher’s permission to operate it.2. You ( Should Should not) examine all wood for checks, knots, or other defects
before you put it on the lathe.3. Work must be balanced and securely held between ( Ends Centers) or mounted
on a faceplate.4. Rotate spindle by ( Hand Turning it on) to check to make sure that you have
enough clearance before start the turning.5. Tool rest must be set ( 1/8” ¼” ½”) away from the work piece and adjusted to
the proper height for the tool being used.6. Be sure the lathe is running at the ( Half Full) speed for the operation.7. You should use caution and _________ __________ to prevent turning tools from
catching in the stock.8. You ( Do Do not) need to select and use the correct tool for the cut you plan to
make.9. Since you will be wearing a face shield, you (should should not) also make sure
that the safety shield is properly in place.10. Remove the tool rest and base ( After Before) sanding or polishing.11. Use ( A table broom Your hands) to clean off lathe when finished.List five SAFETY procedures you should do before you operate this machine:12. _____________________________________________________________13. _____________________________________________________________14. _____________________________________________________________15. _____________________________________________________________16. _____________________________________________________________
Section 3 Page 313

Wood Lathe Written Test Key1. Face shield
2. Should
3. Centers
4. Hand
5. 1/8”
6. Full
7. Common sense
8. Do
9. Should
10. Before
11. A table broom
List five safety procedures you should do before you operate this or any machine:
1. Tuck in your shirt.
2. Secure your hair.
3. Remove jewelry.
4. Wear Z87 safety glasses.
5. Work with a partner.
6. Listen for and report any problems immediately.
7. Make sure that all guards are in place and working.
8. No horseplay.
9. Keep work area clean.
10. Protect hands.
Section 3 Page 314

Wood Lathe
1. Operate only with instructor’s permission and after you have received instruction.
2. Remove jewelry, eliminate loose clothing, and confine long hair.
3. Make sure all guards are in place and operating correctly.
4. Always use proper eye protection.
5. The tool rest must be close to the work when cutting tools are being used.
6. The cutting tools must be kept sharp.
7. Do not feel for smoothness of work while machine is running.
8. Work must be centered, balanced, and secured.
9. The tool rest must be removed while sanding.
10. Examine set up and turn work by hand before turning on power.
11. Shut off power while cleaning machine.
Section 3 Page 315

Safety Quiz—Wood Lathe Student Name Class Date Grade
1. The speed of the machine is not important for safe operation. T F
2. A space of 1- inch is safe between the tool rest and the work. T F
3. Eye protection is not necessary during operation. T F
4. Dull tools may be used. T F
5. It is safe to feel for smoothness while turning. T F
6. The tool rest should be removed while sanding. T F
7. It is safe to turn work that is not balanced. T F
8. Long sleeves may be worn while operating. T F
Section 3 Page 316

Uniplane
1. Operate only with instructor’s permission and after you have received instruction.
2. Remove jewelry, eliminate loose clothing, and confine long hair.
3. Make sure all guards are in place and operating correctly.
4. Always use proper eye protection.
5. Be sure switch is in off position before adjusting depth of cut, table tilt, or checking cutters.
6. The guard must be clean and slide freely before beginning the operation. Do not clamp in the up position.
7. Always use push stick or a push block when planning small material.
8. Continue moving the work piece past the cutter head until it is resting against the rear fence.
9. Do not brush chips or dust away from the point of operation until the machine has come to a full stop.
Section 3 Page 317
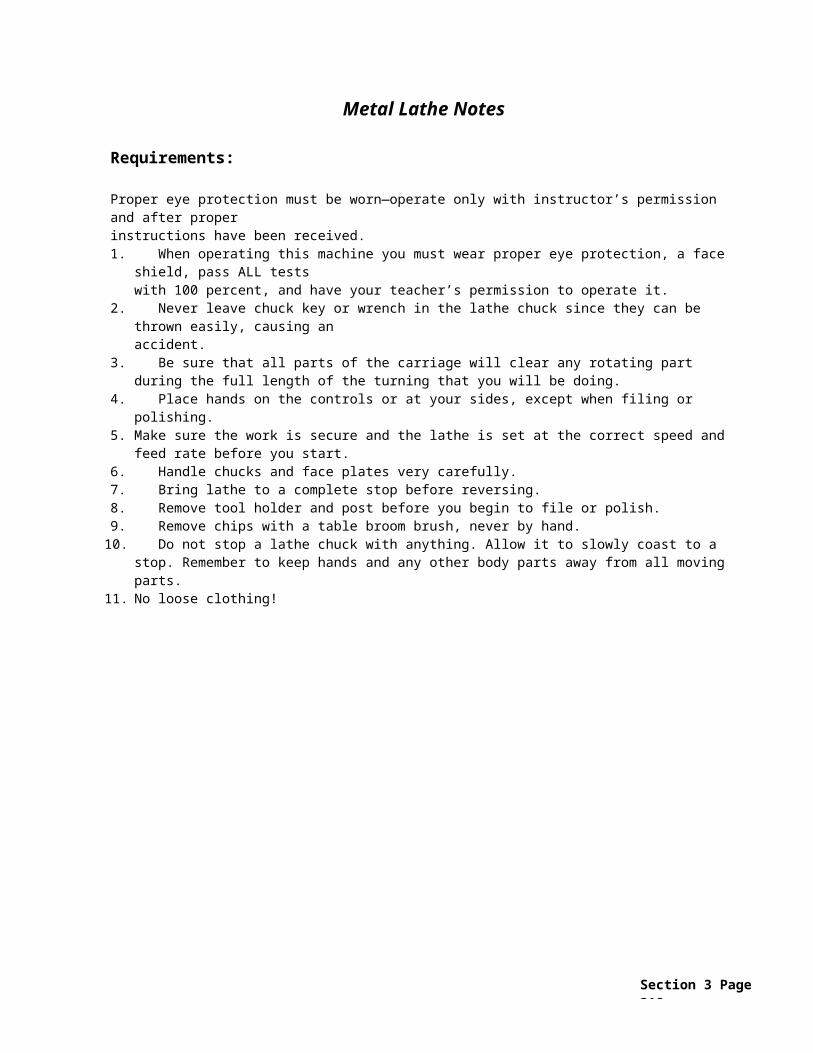
Safety Quiz—Uniplane Student Name Class Date Grade
1. The guard should be clamped in position to clear the work piece. T F
2. Loose cutters will give a rough cut but are not detrimental to safety. T F
3. The work piece should be moved through he machine to the rear fence before removing. T F
4. The machine must come to a full stop before it is safe to
leave the work area. T F
5. All adjustments should be made with the power off. T F
6. A lamp attachment contributes to safety. T F
Section 3 Page 318

Portable Electric Plane
1. Operate only with instructor’s permission and after you have received instruction.
2. Remove jewelry, eliminate loose clothing, and confine long hair.
3. Make sure all guards are in place and operating correctly.
4. Always use proper eye protection.
5. Before connecting to the power source, make sure the switch is in the off position.
6. Make all adjustments with the plane disconnected from the power source.
7. Place front shoe on the work piece, start motor, then move plane over work, keeping pressure and speed constant.
8. Keep fence and the rear shoe tightly against the work piece until the cutter has cleared the work.
9. Keep hands on handle and motor housing away from the cutter head.
10. Be sure of clearance for the motor.
Section 3 Page 319

Safety Quiz—Portable Electric Plane Student Name Class Date Grade
1. Since the cutter will not touch, it is all right to set the plane on the bench while still running. T F
2. The plane will cut deeper the more pressure is applied. T F
3. The plane should be disconnected before adjusting the depth of cut or the fence.T F
4. Eye protection is required when using a power plane. T F
5. The plane should be kept firmly against the work piece until the
cut is completed. T F
6. The chip deflector is of no real safety value and can be removed. T F
Section 3 Page 320

Wood Shaper
1. Operate only with instructor’s permission and after you have received instruction.
2. Remove jewelry, eliminate loose clothing, and confine long hair.
3. Make sure all guards are in place and operating correctly.
4. Always use proper eye protection.
5. All adjustments for cutter height and fence position should be made with the power off.
6. Guards and hold-downs should be checked for proper operation.
7. Choose the correct cutter and collars for the operation.
8. Expose only the amount of cutter necessary to do the job. Use additional fixtures if necessary.
9. Always use a starting pin for freehand shaping.
10. Use the smallest table insert possible.
11. Use three-wing one-piece cutters whenever possible.
12. Brush away dust and chips only when the machine has stopped.
Section 3 Page 321

Safety Quiz—Wood Shaper Student Name Class Date Grade
1. In most cases, guards and hold-downs only get in the way. T F
2. Often the special or custom fixtures must be made to do a job safely. T F
3. A starting pin is not necessary. T F
4. The largest table insert should always be used. T F
5. A brush should be used to brush away chips when the machine is running. T F
6. Three-wing cutters are safer than a cutter head. T F
Section 3 Page 322

GRAPHIC ARTS/COMMUNICATION TRADES
Hot Glue GunCutterPlatemakerDrillPressScreen PrintingToolsPhotographyStudio Lighting EquipmentPhoto Finishing EquipmentPrint DryerDry Mount Press
Section 3 Page 323

HOT GLUE GUN SAFETY NOTES
You will use a hot glue gun on some activities or projects. A HOT glue gun provides melted glue that dries quickly and provides a very strong bond.
Because the HOT glue can cause burns, you must follow these SAFETY rules when using the gun.
1. Never touch the melted glue or the nozzle of the glue gun.2. Do not put anything except glue sticks into the glue gun.3. Use the correct size glue sticks in the glue gun. Do not try to trim a glue stick that is
too big.4. Wait until the glue has melted completed before using it on your project. Test the
glue by squirting a small amount on a piece of scrap material. It should be runny and soft.
5. Be careful when holding glued pieces together. Melted glue can soak through thin or porous material and cause burns.
GLUE
NOZZLE
HANDLE
Section 3 Page 324

CUTTERTrue or False:
1. It is safe to reach carefully into the cutter and touch the blade. TF
2. Students are not to change the blade without the teacher's permission. TF
3. Students can throw trimmings on the floor to save time. TF
4. It is safe to use the cutter when your teammates are in the operator's zone. TF
5. It is safe to go over and operate the cutter at any time without teacher's permission. TF
Section 3 Page 325
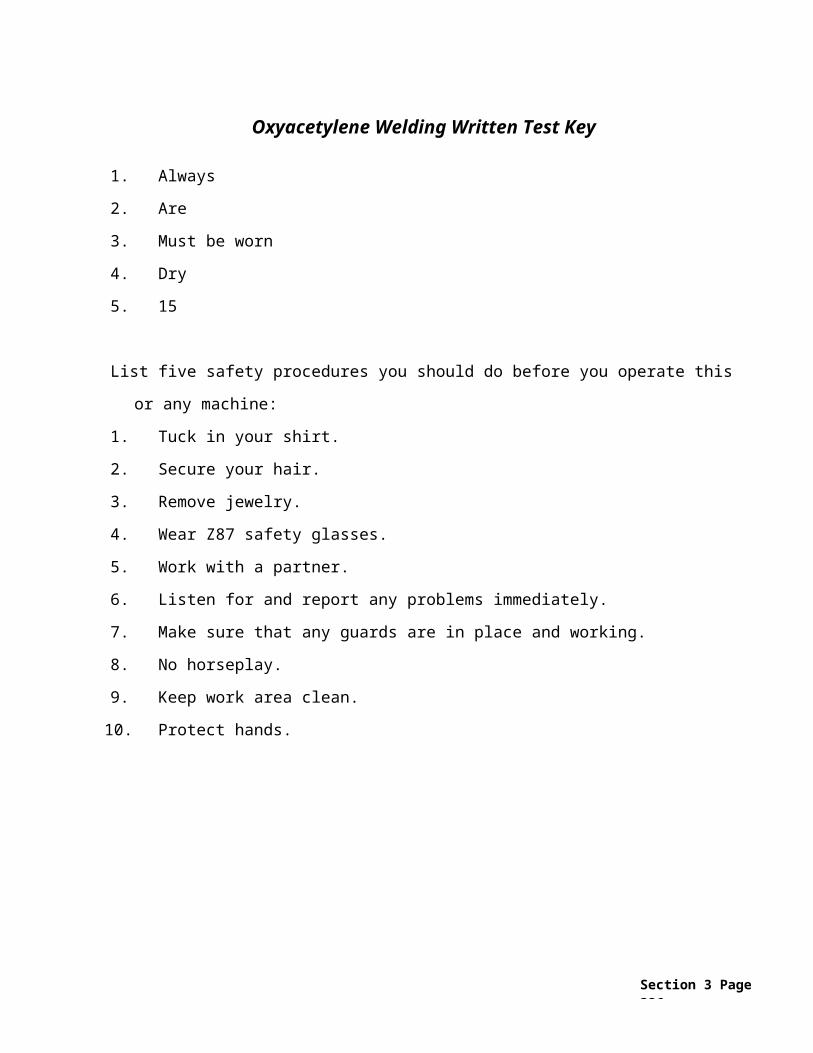
Section 3 Page 326

PLATEMAKER
True or False:
1. The platemaker should have the chemistry changed by the teacher only. TF
2. Never look into the light used for exposing the plate because it may be harmful to eyes. T
F3. All covers must be left in place during operation. T
F4. The glass copy board should always be lowered quickly to get good contact with the
artwork. TF
Write the correct name of the machine and its parts in the space provided below. A. ___________________________
1. ___________________________ 2. ___________________________
3. ___________________________4. ___________________________5. ___________________________
6. ___________________________ 7. ___________________________
8. ___________________________
Section 3 Page 327

Platemaker
Section 3 Page 328

DRILLTrue or False:
1. Be sure the paper guide is unfastened before turning on the machine T F2. Hold the paper loosely against the paper guide. T F3. Allow the foot pedal to return slowly.
T
F4. Use of the drill bit may cause it to become hot.
T
F
Section 3 Page 329

!1. Safety Precautions! !
!1. Safety Precautions
8.PaperGuide
7.StorageDrawer
9.StopGage
5.Star tandStopSwitches
6. Foot Pedal
4. Table
2. Hollow Drill Bit(s)
10.Motor
3. Back Gage
! STAY ALERT! This symbolmeans, CAUTION orWARNING: Personalsafety instructions! Payspecial attention to theinstructions in bold type.
Personal injury may result ifall precautions are not readand followed.
Section 3 Page 330
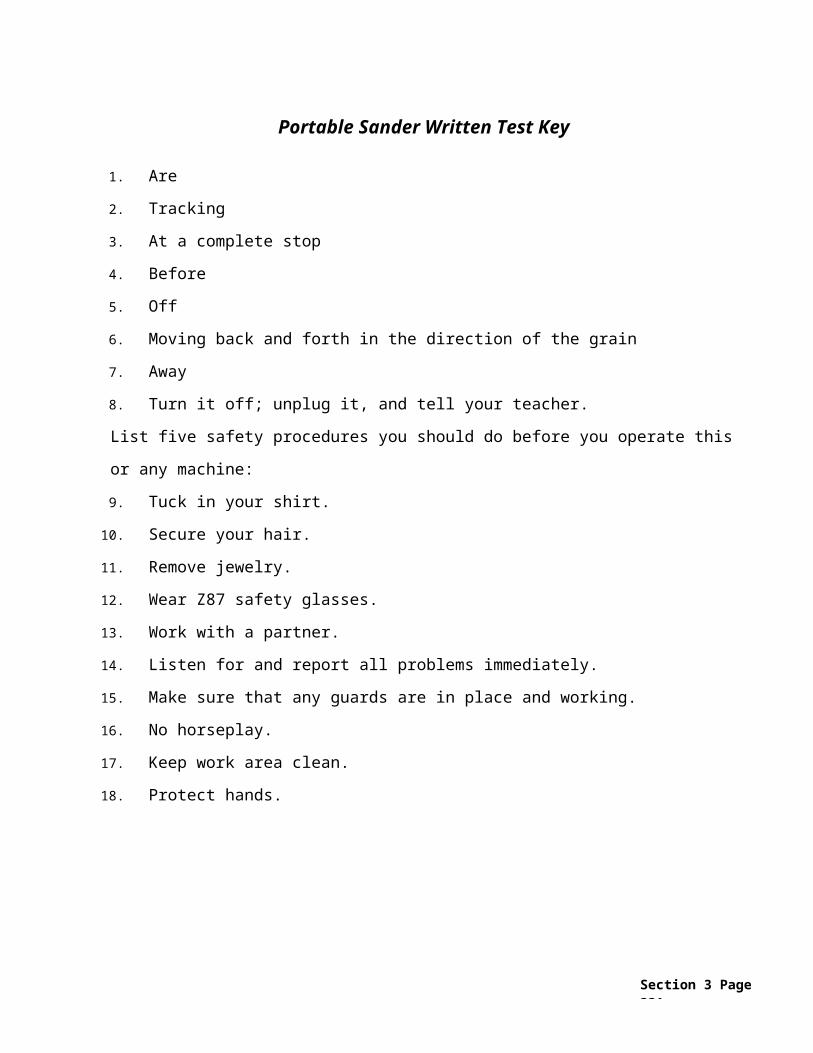
PRESSTrue or False:
1. It is safe to reach carefully across the press when it is operating. TF
2. Students are not to use any tools on the press without the teacher’s permission. TF
3. Final adjustments may be made while the press is running slowly. TF
4. Loose or dangling clothing should not be worn when one is working around the press.TF
5. It is best to avoid unnecessary conversation while running the press. TF
6. Gears need not be covered while the press is in operation if the operator is careful. TF
7. It is all right to leave the press running if one returns to it immediately. TF
Multiple Choice:_____ 8. Before operating the offset press, one should:
(a) Get the teacher’s permission. (b) Place all guards in position. (c) Have received instruction on how to operate it.(d) Have done all of these.
______ 9. Oily rags should always be placed:(a) In the wastebasket. (b) In the scrap box. (c) In a metal self-closing can.(d) Where the next person can find them.
______ 10. Scrap paper and other litter:(a) May be left on the floor to be swept up later.(b) Should be disposed of in the recycling box or in the waste can.(c) Can be ignored because they do not cause a safety hazard.(d) None of these.
______ 11. Before operating the offset press, one should: (a) Tuck in loose clothing and roll up long sleeves.(b) Remove rings, watches and other jewelry. (c) Tie back long hair.(d) Do all of these.
Section 3 Page 331

Write the correct name of the machine and it’s parts in the space provided. A. ________________________________
1. ___________________________ 2. ___________________________ 3. ___________________________ 4. ___________________________ 5. ___________________________ 6. ___________________________ 7. ___________________________ 8. ___________________________ 9. ___________________________10. ___________________________11. ___________________________12. ___________________________13. ___________________________14. ___________________________15. ___________________________16. ___________________________17. ___________________________18. ___________________________19. ___________________________20. ___________________________21. ___________________________22. ___________________________23. ___________________________24. ___________________________25. __________________________
Section 3 Page 332

PRESS
Section 3 Page 333

Screen PrintingTrue or False:1. Many screen inks and cleaners give off toxic fumes T F2. Photo stencil exposure lights are not very bright; therefore, no special
precautions need to be taken when working around such lights. T F3. Darkroom safety procedures need to be followed when preparing
materials for photo stencils. T F4. Flammable liquids should be stored in metal fireproof containers. T F
Multiple Choice:5. If a student does not understand the screen-printing operation, he/she should:
(a) Ask for the teacher’s help.(b) Ask another student who doesn’t know.(c) Go ahead as planned and hope it works.(d) Do none of these.
6. When working with screen inks and cleaners:(a) Get the teacher’s permission. (b) Wear appropriate eye protection.(c) Work only in well-ventilated area.(d) Do all of these.
7. After use, cleaning rags should be:(a) Placed in metal fireproof container.(b) Thrown in the waste can.(c) Left for the next student.(d) Rolled up in a neat bundle.
8. If oils or inks spill on the floor:(a) Be careful not to slip on it until clean-up time.(b) Clean it up at once.(c) Inform the teacher.
Section 3 Page 334

SCREEN PRINTER
Section 3 Page 335

TOOLS1. True or False:2. It is safe to lean or sit on light tables and glass stripping area because they have
unbreakable glass tops. T F3. It is safer to use a dull cutting tool than a sharp one. T F4. X-acto knives, razor blades, and/or scissors should never be carried in the pocket. T F5. To avoid burns when using the waxer, never turn it upside down and always be careful. T F6. It is a good safety practice to give tools back to the teacher or put them in their storage place after use. T F
3. PROCOTE stand
2. Wax Refill Lid and Reservoir
1. ON/OFF Switch (on the line cord)
4. 3 inch coating roller
Section 3 Page 336

Photography
1. Obtain the teacher’s permission before leaving class on a photography assignment.
2. Secure permission of models and owners of private property before taking photographs.
3. When taking a picture from a car, pull to the edge of the road, stop the car, and put on the brake before beginning to photograph.
4. Never place oneself or one’s model in danger when taking a photograph.
5. Treat the camera with care. Do not drop it or place it where it may get banged against solid objects.
6. Do not leave cameras and film in closed cars. The summer sun may superheat them.
7. Before mounting a camera on a tripod, be sure the tripod legs are secure.
8. Never ask a model to look directly into the sun or other bright light.
9. Do not set up foolhardy or dangerous pictures. The photographer is in charge of a photography session and should keep things under control.
10. Be sure to take the necessary training in diving techniques before attempting any underwater photography.
FLASH UNITS
1. Electrical contacts in the camera and the flash unit are to be kept clean. Use a rough cloth or a pencil eraser to clean them before using each new roll of film.
2. Be sure the photoflash batteries are fresh. Alkaline batteries are recommended for their long life and short recovery time. However, units that have unplated brass or copper electrical contacts should use zinc carbon batteries.
3. Use a lamp ejector to eject the spent bulbs. Do not pull the bulbs out by hand. They may break in the hand or foul the fittings.
4. Handle the flashbulbs carefully. Slight cracks may cause the bulb to shatter when fired.
Section 3 Page 337

5. Insert the first bulb in a series with the cord or the flash unit disconnected from the camera. If the flashbulb is inserted into a live socket, it may go off in the hand, causing cuts and/or burns if the glass shatters.
6. Always have the flash unit aimed away from oneself and others when connecting it. Several conditions may cause the unit to fire into the eyes as it is connected.
7. Always use a flashguard over the flash unit. Occasionally, flashbulbs shatter. A flashguard will protect both the photographer and subjects.
8. Never allow the flash unit to go off in an explosive atmosphere. Also, do not use flash equipment where there are volatile fumes, such as gasoline, etc.
9. Do not handle the flashbulbs immediately after firing. They are extremely hot and can burn. Use the ejector to eject the spent bulbs into a waste container (when they are cool).
10. Never drop freshly fired bulbs into a recommended voltage. Do not fire the flashbulbs with household current unless they are designed for such use.
11. Fire the flashbulbs only at the recommended voltage. Do not fire the flashbulbs with household current unless they are designed for such use.
12. Do not carry loose bulbs in a pocket or bag. Friction may break or ignite them.
SLIDE PROJECTORS AND MOVIE PROJECTORS
1. Be careful when using projector light bulbs. They become very hot and can cause burns.
2. Be careful not to catch the fingers in the moving gears of the projector.
3. Disconnect the power cord before opening the case to change a burned out light bulb.
4. When changing a bulb, one should be very careful not to crack the bulb and thus cut oneself.
5. Do not put your fingers near moving take-up reels of film, as severe cuts may result.
6. Do not let the projector light shine directly into the eyes of the audience.
Section 3 Page 338

7. When using a projector, do not lower the room light so much that the audience could not see to leave in an emergency.
8. Be careful the audience does not trip over extension cords running to the projector.
9. Be sure the projector is set on a solid surface where it will not fall.
10. When the projector session is finished, disconnect power cords and extension cords as soon as possible in order to prevent tripping. Then roll them up neatly and put them away.
Strobe lights
1. Know how to operate strobe equipment before using it.
2. Be extremely careful not to touch any hot parts.
3. Do not operate strobe lights with a frayed or damaged cord. If an extension cord is necessary, be sure it has suitable amperage rating.
4. Always unplug strobe equipment from the electrical outlet when it’s not in use.
5. Let the equipment cool completely before storing it away.
Section 3 Page 339

Safety Quiz—Cameras, Flash Units, Projectors Student Name Class Date Grade
1. Get permission of models and owners of private property before taking photographs. T F
2. Before mounting a camera on a tripod, be sure the tripod legs are secure. T F
3. Carefully remove used flashbulbs from the camera by hand. T F
4. Leaving cameras and film in closed and locked cars in the summer is a safething to do. T F
5. Do not exercise any special care in the handling of flashbulbs. They are sturdy. T F
6. Before beginning a slide show or movie, be sure the projector is on solid surface where it will not fall. T F
7. Carry both used and unused flashbulbs in a pocket. T F
8. Use a flashguard over the flash unit at all times in case a flashbulb shatters. T F
9. Take no special care of the projector’s moving parts. T F
MULTIPLE CHOICE
10. When taking a photograph, never endanger: (a) oneself, (b) the model, (c) the camera, (d) both a and b.
11. Before leaving the classroom to take photographs: (a) tell another student of one’s destination, (b) get the teacher’s permission, (c) put on a jacket, (d) invite a good friend to go along.
12. When taking a photograph from a car: (a) pull to the edge of the road and stop the car, (b) roll down the window, (c) drive slowly while taking the picture, (d) keep one hand on the steering wheel.
13. Never ask a model to look directly into: (a) the camera, (b) the sun, (c) empty space, (d) none of these.
14. When connecting the flash unit to the camera, always have it aimed: (a) toward one’s face, (b) toward the model, (c) toward bystanders, (d) always from oneself and others.
15. When changing a burned-out projector bulb: (a) let the bulb cool first, (b) disconnect the power cord, (c) be careful not to crack the bulb, (d) do all of these.
16. To protect the members of the audience during a movie or slide show: (a) do not let the projector light shine directly into their eyes, (b) do not have the room so dark a person could not see to leave if necessary, (c) be sure no one trips over extension cords running to the projector, (d) do all of these.
Section 3 Page 340

Studio Lighting Equipment
1. Do not handle any power cords or switch3es with damp hands or while standing on a damp floor.
2. Be sure that all electrical cords and connectors are in good condition before connecting them to the source of power. Tell the teacher immediately if frayed cords are found.
3. Exercise extreme caution with light hazards. The total of all photo lamps connected to a single household circuit should not exceed 1500 watts. Consult an electrician or electrical supply store before setting up a home studio.
4. When raising or lowering the lighting units, use extreme caution in securing the locking devices in order to avoid serious injury.
5. When working with the boom lighting units, use extreme caution to prevent injury from the heavy counter balance units and the possibility of a unit falling on another person.
6. Use caution when handling or moving spotlights. The housings become extremely hot after a few minutes of operation. Also, the bulb life is greatly decreased when the spotlights are moved while they’re still hot.
7. Do not place any floodlight reflector or spotlight head directly on the floor of the studio.
8. Take care not to place flammable screen materials too close to or in direct contact with hot lighting equipment.
9. Do not touch any hot lamp with the bare hands or splash any liquid on a hot lamp.
10. After using lighting units, lower all the heads to the lowest possible position, coil the electrical cords, and secure them to the light stand.
11. Be sure all props are firmly secured so they will not fall on models.
12. Tape down any temporary power cords running across the floor so no one will trip over them.
13. Place all studio lighting in such a way that the models do not look directly into the bright lights.
14. To protect the model, never adjust the boom light with the model in place. Always be sure the wing nuts and locks are tightened securely.
Section 3 Page 341

15. To adjust boom lights, two students are necessary; one to hold the balance the light, and one to tighten the wing nuts securely.
16. To prevent tripping, return all extension cords and electrical equipment to the proper storage place after each use.
Studio Light
1. Brightness Control (not shown)2. Tilting Handle3. Tripod Stand4. Barn Door Light Frame (not shown)
Section 3 Page 342

Safety Quiz—Studio Light Student Name Class Date Grade
1. Frayed electrical cords may be used when setting up studio lighting,a. if they are the only ones available. T F
2. Spotlights become only slightly warm during use. T F
3. It is all right to handle power cords or switches with damp handsa. if the electrical equipment is properly grounded. T F
4. Hot lighting equipment should never be placed close to flammablea. materials because it could cause a fire. T F
5. Any temporary power cords running across the floor should be taped a. to the floor to prevent tripping. T F
MULTIPLE CHOICE
6. The total of all photo lamps connected to a single household circuit should not be more than: (a) 50 watts, (b) 500 watts, (c) 1000 watts, and (d) 1500 watts.
7. Do not splash any liquid on a hot lamp or spotlight because: (a) the bulb may shatter, (b) the bulb will get wet, (c) it will make a mess, (d) the liquid is being wasted.
8, After use, all light cords should be: (a) coiled and secured to the light stand, (b) coiled and placed on the floor, (c) left plugged into studio outlets, (d) left taped to the floor.
9. Be sure all props are firmly secured so they don’t fall on the: (a) photographer, (b) camera, (c) model, (d) floor.
10. When adjusting studio boom lights: (a) only one student is needed, (b) two students are needed—one to hold the light and one to tighten the wing nuts, (c) three students are needed—two as in (b) above and one to give directions, (d) let everyone help.
11. When shooting high camera angles, stand on a: (a) chair, (b) stool, (c) ladder, (d) box.
12. In the studio, always keep one leg of the light and camera tripods pointing: (a) towards the model, (b) towards the camera, (c) away from the model, (d) away from the camera.
Section 3 Page 343

13. After use, extension cords and electrical equipment should be: (a) returned to storage, (b) pushed into a corner, (c) left in place for the next assignment, (d) none of these.
14. To protect the model: (a) always adjust the boom light with the model in place, (b) never adjust the boom light over the model’s head, (c) have the model looking directly into bright lights, (d) do none of these.
15. When climbing a stepladder, use: (a) the brace side, (b) the tread side, (c) the spread brace side, (d) any method at all.
16. When using a stepladder, be sure: (a) one spread brace is in position, (b) both spread braces are in position, (c) neither spread brace is in position, (d) none of these.
17. Before climbing a stepladder, make certain: (a) the feet are firmly placed, (b) the ladder is fully open, (c) the ladder is on a solid floor, (d) all of these.
A. 1. 2. 3. 4. 5. 6.
B. 1. 2. 3. 4.
Section 3 Page 344

Photo Finishing EquipmentHand-Operated Paper Cutter
1. Operate only with the teacher’s permission and after instructions have been received.
2. Use the paper cutter with great care as it can cause serious cuts and pinches.
3. When operating the paper cutter, keep the fingers behind the safety guard and never remove the guard.
4. To prevent cut fingers, use the safelight when cutting orthochromatic film in the darkroom. For cutting panchromatic film in total darkness, the cutting edge should be coated with fluorescent or luminescent paint.
5. Place a ruler, not the fingers, next to the blade to hold the paper flat.
6. When using a paper cutter, cut only one sheet of paper or film at a time. Do not use the paper cutter to cut anything except paper or film.
7. When finished, always close the cutting blade and fasten it with the safety lock.
Section 3 Page 345

Safety Quiz—Photo Finishing Equipment Student Name Class Date Grade
1. The guard should be removed before using the paper cutter. T F
2. The paper cutter may also be used to cut cloth, plastic, and thin pieces of wood. T F
3. The tacking iron must be returned to its proper holder after use to avoid fire danger or damage to the counter. T F
4. The heat setting for the dry mount press is to be decided by the teacher. T F
5. Spray adhesives and film cleaners are flammable and special precautions should be taken when using them. T F
6. The print dryer becomes only slightly warm during use. T F
7. The paper cutter can cause serious cuts and pinches. T F
8. A Person using the paper cutter should cut several pieces at one time to save energy and time. T F
9. The print dryer should not be used with wet hands or while standing on a wet floor. T F
MULTIPLE CHOICE
10. For cutting panchromatic film in total darkness, the cutting edge of the paper cutter should be coated with: (a) luminescent paint, (b) fluorescent paint, (c) latex paint, (d) a or b above.
11. When using spray adhesives or film cleaners, be sure to: (a) avoid breathing the fumes, (b) store them in a metal cabinet, (c) avoid using them around sparks or flames, (d) do all of these.
12. When using the tacking iron or dry mount press, extreme care should be taken due to: (a) the plug-in of the equipment, (b) the style of the equipment, (c) the high temperature of the equipment, (d) none of these.
13. Before using the paper cutter, the student should: (a) put on safety glasses, (b) have the teacher’s permission, (c) tie back long hair, (d) tuck in loose clothing.
14. When the paper cutter is not in use, the blade must be: (a) closed and locked, (b) open and locked, (c) closed and unlocked, (d) open and unlocked.
Section 3 Page 346

15. When using the dry mount press, keep the hands away from: (a) the base, (b) the matte, (c) the platen, (d) the mount.
16. To avoid burns, always draw the tacking iron away from: (a) the print edge, (b) the mount board, (c) the hand, (d) the print center.
17. To hold paper flat when using the paper cutter, use: (a) the left hand, (b) a ruler, (c) the right hand, (d) a piece of cardboard.
18. When using the paper cutter, cut the following number of sheets of paper at one time: (a) one, (b) two, (c) three, (d) five.
19. When closing the platen of the dry mount press, the only two things under the platen should be: (a) the print and tape, (b) the print and mount, (c) the mount and protective shield, (d) the mount and tape.
20. When finished with the dry mount press or tacking iron, always: (a) turn it off and unplug, (b) leave it plugged in for the next student, (c) unplug only, (d) turn off only.
21. Write the correct name of each item and its parts in the space provided.
A.
1. 3.
2. 4.
B.
1. 3.
2. 4.
C.
1. 5.
2. 6.
3. 7.
4. 8.
Section 3 Page 347

CUTTING TOOLS
1. Use all cutting tools (scissors, X-acto knives, matte knife, etc.) very carefully.
2. Keep all cutting tools sharp since dull blades can be dangerous.
3. Carry and store all cutting tools in a safe manner.
4. To prevent serious cuts, never try to catch a dropped cutting tool.
1. SCALE OF INCHES2. KNIFE3. GUARD4. PAPER TABLE
Section 3 Page 348

Print Dryer
1. Operate only with the teacher’s permission and after instructions have been received.
2. Be careful to avoid burns when using the print dryer. Its surfaces are hot.
3. Be sure the electrical cord to this machine is not worn and is properly grounded.
4. Do not use this machine with wet hands or while standing on a wet floor.
Section 3 Page 349

Dry Mount Press
1. Operate only with the teacher’s permission and after instructions have been received.
2. When using the dry mount press or tacking iron, students should be careful not to burn themselves.
3. Never test the heat of the press or tacking iron by touching.
4. Do not let your hands come into contact with the platen of the dry mount press. Also, do not close the press on your hands.
5. Dry mount with the heat setting prescribed by the teacher.
6. Do not lay the hot tracking iron down on papers or the counter top. Return it to its proper holder after each use.
7. When closing the platen of the dry mount press, be sure that the print and the mount are the only items under the platen.
8. Turn off and unplug the press or tacking iron when the job is finished.
Section 3 Page 350

SPRAY ADHESIVES AND FILM CLEANERS
1. Get instructions on how to use these materials properly and safely before proceeding.
2. Use spray adhesives and film cleaners in a well-ventilated place. They are flammable.
3. Avoid breathing the fumes. There is evidence that these fumes can seriously damage one’s health.
4. Do not use these materials in areas where others will have to breathe the fumes.
5. Treat these substances just like any other flammable material would be treated.
Section 3 Page 351

CULINARY ARTSBlenderBroilerBuffalo ChopperConvection OvenConventional OvenDeep Fat FryerFood ProcessorGas Cheese MelterGas RangeGriddleLarge Food MixerMeat GrinderPower Meat SawSlicerSteamersSteam KettleSteam TableTilting BrazierToasterVertical Power Shredder
Section 3 Page 352

Blender
1. Make sure all legs are in place.
2. Do not fill blender container more than 2/3 full.
3. Make sure blender container is attached to motor securely.
4. Clamp lid on tightly.
5. Start machine on low speed.
6. Do not put any hand tools in container while machine is on.
7. Make sure motor has stopped before removing container.
Section 3 Page 353
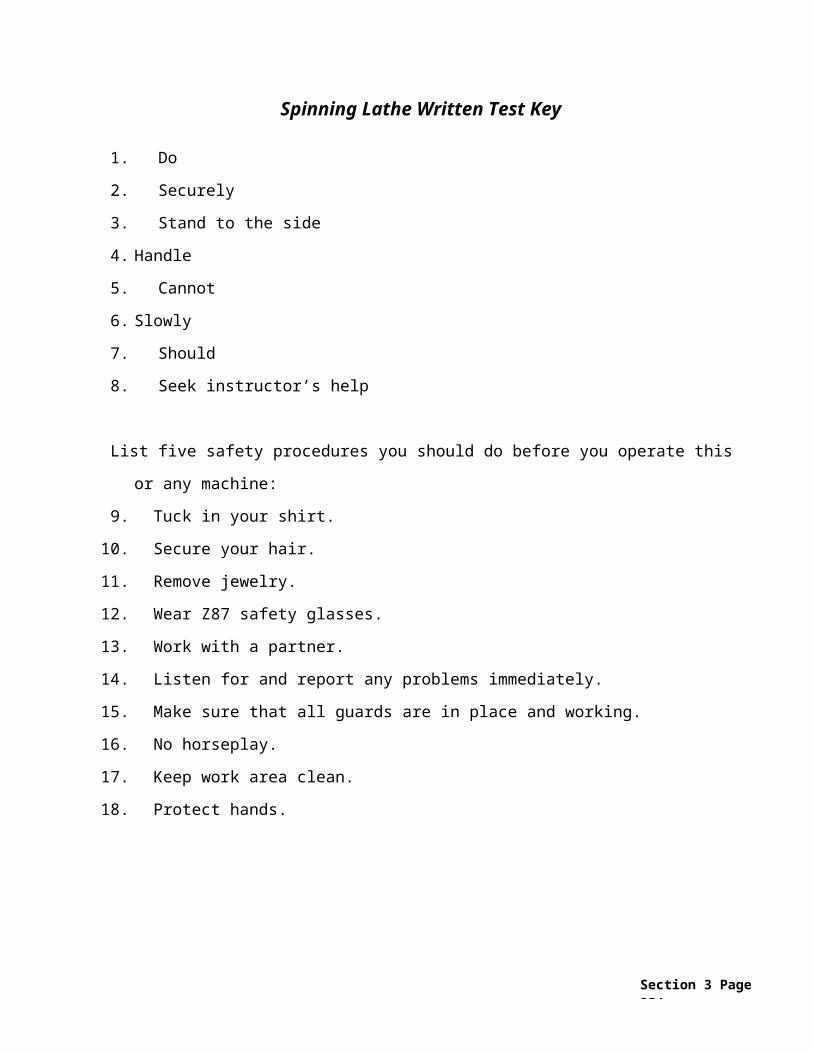
Safety Quiz—Blender Student Name Class Date Grade
1. Why is it important to make sure all the legs on the blender are in place?
2. Do not fill blender container more than how full?a. ½b. 1/3c. 2/3d. ¾
3. What hazard would occur by not putting the container top on securely?
4. Why is it important not to put hand tools in container while operating?
Section 3 Page 354

Broiler
1. Assemble tools necessary to use the broiler (e.g., tongs, wire brush).
2. Before turning on gas broiler, check to ensure that pilot lights are lit.
3. Have dry towels available.
4. Broiler bars must be wire brushed frequently while being used.
5. Broiler must be cleaned regularly to avoid fat build up.
6. Tray at bottom of broiler should be lined with aluminum foil and changed frequently (daily).
7. Ventilating hoods above broiler should be cleaned daily to avoid grease buildup.
Section 3 Page 355

Safety Quiz—Broiler Student Name Class Date Grade
1. Kitchen hoods above broilers need not be cleaned any more often than the rest of the hoods. T F
2. The tray at the bottom of the broiler needs to be changed once a month. T F
3. Broiler grids need to be wire brushed frequently to avoid buildup of grease. T F
4. Always check to insure that pilot lights are working before turning broiler on. T F
5. Tongs are widely used as a broiler tool. T F
Section 3 Page 356

Buffalo Chopper
1. Make sure the switch is in the off position while assembling the cutter.
2. Keep hands from under cover or in the bowl when it is operating.
3. Do not lift the lid until knives have stopped revolving.
4. Note that the leader knife is beveled on one side only. This knife is to be on the shaft first nearest the motor.
5. Always turn off machine before switching speeds.
6. Periodic lubrication of the bowl drive gear is needed. A yearly check should be done.
7. Make sure hand knob for knives is tightened before starting machine.
8. Use care not to overload the machine and to add food in such a way that the cuts are fairly uniform in size.
9. When using the attachments on the food cutter, it is a good practice to remove the knife unit.
10. When operating the dicer, slicer or any attachment, make sure the correct knife-cutting frame and pusher plate are assembled according to instructions.
Section 3 Page 357

Safety Quiz—Buffalo Chopper Student Name Class Date Grade
1. What is the best way to learn how to operate a food chopper?
a. Ask a friend.b. Obtain a booklet on the machine and read it.c. Figure it out yourself without help.
2. To prevent breakdown, how often should bowl gear be lubricated?
3. Must the machine be stopped to change speeds?
4. List three important precautions to observe when working with a food cutter.
5. When assembling the knives on a food cutter, which knife should be placed on the shaft first?
a. The one that is beveled on one side.b. The one that is beveled on both sides.
6. Which part of the machine tightens down the knives?
7. What part of the chopper should be removed for using attachments?
8. Can the food chopper be overloaded, thus causing injury?
Section 3 Page 358

Convection Oven
1. Preheat oven at least 15 minutes before use.
2. Circulating fan must be in operation at all times. Failure to practice this rule will cause the motor to overheat.
3. As with all ovens, always have dry towels or oven mitts available to remove food products.
4. When loading a convection oven, open the door and load quickly to avoid heat loss.
5. If using the timer located on the oven, remember that it does not control the oven temperature.
6. With a convection oven, always keep in mind that the required cooking time is shorter than that of a regular oven. Keep a chart on proper cooking temperatures for your particular oven.
7. Convection ovens must be kept clean. To operate efficiently, check your owner’s manual on the proper procedure to clean the interior of the oven.
8. Oven doors must close tightly for proper oven function.
9. Use oven lighting only to check food product. Do not run continuously.
Section 3 Page 359

Safety Quiz—Convection Oven Student Name Class Date Grade
1. Dry towels are best for removing food items from an oven. T F
2. An oven timer controls the operation of an oven. T F
3. Cooking times are identical for convection ovens or conventional baking ovens.
T F
4. Convection ovens must preheat at least one hour before use. T F
5. The circulation fan in a convection oven need not run unless there is food product in the oven. T F
6. Oven lights should only be used when checking food product. T F
Section 3 Page 360

Conventional Oven
1. For gas oven—make sure pilot is lit.
2. When examining contents, pull pans out with shelf rack they are on.
3. Remember inside of door will be hot.
4. Do not use oven door as a shelf.
5. Do not use excessive amount of water when cleaning inside of ovens.
6. Always use hot pads or a dry towel when removing contents from oven.
Section 3 Page 361

Safety Quiz—Conventional Oven Student Name Class Date Grade
1. When using a gas oven, what is important before setting a gas thermostat?
2. What part of the oven should not be used as a shelf?
3. Before opening oven door to examine contents, what should you have in your hands?
Section 3 Page 362

Deep Fat Fryer
1. Fill the fryer with fat to a level at least 2 inches above the heating elements and turn on heat. It is important to have the fat extend above heat elements when heat is on.
2. Do not heat higher or longer than necessary. At no time should the fat be heated over 400 degrees.
3. Keep the fryer free of sediment and salt.
4. Fryers should be placed where there is sufficient ventilation to prevent fire.
5. Do not overload fryer with food to prevent splattering.
6. Check the outlet to be sure that it is closed. Melted fats on floor are highly hazardous to all kitchen workers.
7. Submerge basket into hot fat cautiously in the event that moisture of food causes hot fat to bubble up.
8. Wash fryer with detergent and hot water, rinse with vinegar solution, then again with water. Dry fryer and elements before using again.
9. When fryer is on standby, the thermostat should be lowered to 200 degrees.
Section 3 Page 363

Safety Quiz—Deep Fryer Student NameClass Date Grade
1. How should the fryer well be cleaned?
2. Fryers can be placed anywhere in the kitchen area. T F
3. How much fat should there be in a fryer when ready to use?
4. It is okay to have impurities such as salt in the fryer when hot. T F
5. What temperature should the thermostat be set for when ready to use?
6. What will prevent spattering?
7. What position should the grease outlet be in?
8. What will cause fat to bubble up and cause damage or fire?
9. When fryer is not in use, should the temperature be lowered and to what degree, if any?
Section 3 Page 364

Food Processor
1. To protect against risk of electric shock, do not put base or motor in water or other liquid.
2. Unplug cord from outlet when not in use, before putting on or taking off parts, and before cleaning.
3. Do not operate with a damaged cord or plug.
4. Always use attachments that are made for your processor.
5. Never feed food into chute by hand when slicing or shredding; always use a food pusher.
6. Because blades and discs are sharp, handle carefully.
7. Blades or disc should come to a full stop before removing cover.
8. Never attempt to defeat the locking system of the processor. It is there for a safety reason.
9. Never use more products than the bowl will accommodate.
10. Do not use near hot surfaces. The cord may melt and cause injury to operator.
Section 3 Page 365

Safety Quiz—Food Processor Student Name Class Date Grade
1. Food may be fed into processor by any means available. T F
2. Can a processor be used with a damaged cord?
3. How much food can be put into a processor bowl at one time?
4. Why is the locking system built into the processor?
5. The processor may be used next to a stove or frying unit. T F
6. Can food be removed from the processor while it is in motion?
7. How should blades and disc be handled?
8. Can attachments be interchanged from one machine to another if they are different models?
9. When should the processor be unplugged?
10. Can the processor base unit be washed with the attachment? If the answer is no, why not?
Section 3 Page 366

Gas Cheese Melter
1. Make sure pilot is lit before turning machine on.
2. Check heating element for proper ignition while turning on.
3. Keep top and sides free of any excess grease.
4. All outer surfaces will be hot during operation.
5. Clean inside of melter frequently to prevent grease fires.
6. Use hot pads or towels when removing items from the melter.
7. Do not let top of food touch heating element.
8. Do not do “broiling” in the cheese melter.
Section 3 Page 367

Safety Quiz—Gas Cheese Melter Student Name Class Date Grade
1. What hazard could occur from the pilot not being lit when turning on cheese melter?
2. Grease fires can be a hazard when operating the cheese melter. T F
3. What precaution should be taken when removing food from the cheese melter?
4. Broiling steaks in the cheese melter is permissible if in a hurry. T F
5. The top of the cheese melter is a good place to keep food hot. T F
Section 3 Page 368

Gas Range
1. Wear an apron to keep clothes tight to your body, and keep sleeves rolled or tight.
2. Dry towels, oven mitts, and/or hot pads are a necessity.
3. Be careful not to allow towels, etc., to be ignited.
4. Check pilot light before turning on stove or oven.
5. Be sure gas knobs are turned off before relighting pilot light.
6. Be sure burners are off when not in use.
7. Pan handles should be kept inward.
8. Remove covers away from you to prevent steam burns.
9. Keep soda or salt on hand in case of grease fires.
10. Be sure floors are kept clean and grease free.
11. Never use water for a grease fire.
Section 3 Page 369

Safety Quiz—Gas Range Student Name Class Date Grade
1. Why should you wear your clothing snug and your sleeves rolled or snug?
2. What is the first thing you do after cleaning the range?
3. Why shouldn’t you use water on a grease fire?
4. What should you watch for when deglazing pans?
5. What is the purpose of lighting back burners first?
Section 3 Page 370

Griddle
1. Always assume that the griddle is hot.
2. Pan handles and tools should always lie inward.
3. Make sure exhaust fans are on during cooking and cleaning time.
4. Salt and soda should always be on hand in case of fire.
5. Keep check on your temperature setting.
6. Be sure all catch pans are clean
7. Floors should be kept clean and grease free.
8. Clothing should not be loose, making it possible to drag in hot grease.
9. Wiring should be checked and kept in good condition.
10. When putting ice or water on griddle for cleaning, watch out for steam burns.
11. Be careful in case the grill brick rolls.
12. Be careful not to splash oil.
Section 3 Page 371

Safety Quiz—Griddle Student Name Class Date Grade
1. Why should you check the grease trap daily?
2. What two ingredients found in the kitchen should you always have near the griddle?
3. What precautions should you take when cleaning the griddle?
4. Why is loose clothing a hazard when working around the griddle?
5. Why should pan handles always be kept inward?
Section 3 Page 372

Large Food Mixer
1. Check the mixer bowl for cleanness.
2. When placing the mixer bowl on the mixer support arm, make sure all three securing points are correctly inserted. There are three points. Two points are at the side and one is located on the back of the mixer bowl.
3. Insert the proper mixing attachment onto the mixer shaft. Caution: Use care when whipping food products that are hard. The whip tines can be bent or broken.
4. Check the mixer speed before turning the machine on. Never change speeds while the mixer is operating. Raise the mixer bowl before starting the mixer. Operate the mixer at a safe and proper speed.
5. Never place your hand or cooking utensil into the mixer bowl while the mixer is operating. Wait until the machine is completely stopped.
6. Lower the mixer bowl to remove mixer attachment.
7. Do not attempt to lift a heavy mixer bowl. Ask for assistance or use the proper mixer bowl dolly.
Section 3 Page 373

Safety Quiz—Large Food Mixer Student Name Class Date Grade
1. Hard food products should be started at a high mixer speed. T F
2. Under no condition should your hand be placed inside the bowl while the mixer is moving. T F
3. It is possible to change mixer speed when the mixer is operating. T F
4. Start the mixer with the bowl lowered, and then slowly raise the bowl to the raised position.
i. T F
5. Ask for help when lifting a heavy mixer bowl. T F
6. It is easiest to remove the mixer attachment while the mixer bowl is raised. T F
Section 3 Page 374

Meat Grinder
1. It is good practice to keep all the grinder parts in one drawer or shelf. This keeps parts from being misplaced.
2. When assembling the grinder, insert the grinder body into the hole at the top of any food mixer. You may have to remove the access plate to expose the hole. Tighten the thumbscrew securely.
3. Insert the worm gear into the grinder body. Make sure the fiber washer is on the end with the large square shaft end. Rotate the worm until it slides all the way into the drive hole.
4. Place the cutter blade with the edges facing out.
5. Select the desired grinding plate and push up against the cutting blade. Rotate the plate until the notch fits into the small peg at the bottom of the grinder body.
6. Thread the hand nut onto the threads of the grinder body, snug the hand nut to the grinder plate, and give a ¼ (quarter) turn to properly secure the parts together.
7. Place feed tray on top of feed tube on grinder body.
8. Set mixer speed to desired setting (usually #3).
9. Place product to be ground into feed tray. Turn on machine. Caution: Always use stomper to push product down feed tube.
10. Cut pieces to be ground small enough to easily fit down feed tube.
11. Place a cart or stand below grinder plate and place bowl close to grinder end.
12. Food wrap should be draped over the end of the grinder. This will keep product from falling straight down into the bowl.
Section 3 Page 375

Safety Quiz—Meat Grinder Student Name Class Date Grade
1. The cutting blade edges should face away from you when assembling the grinder. T F
2. It is not always necessary to use the stomper when pushing food down the feed tube.
T F
3. Place the pan receiving the ground product on the floor in front of the grinder.
T F
4. Keep all the grinder parts together to keep parts from being misplaced. T F
5. Never place fingers inside grinder feed tube. T F
6. Large pieces of meat can easily be pushed down the grinder feed tubes. T F
Section 3 Page 376

Power Meat Saw
1. Make sure saw is on level surface.
2. Check saw for proper set-up before turning on.
3. Turn saw on briefly and listen for proper set-up before adding meat.
4. Use all safety guards in operating.
5. Use truck to push meat through saw, not “free hand.”
6. Keep mind on task while working on machine.
7. Shut saw off and disconnect power before cleaning.
8. Turn saw off if blade “binds” while cutting. Do not wiggle or force product through blade.
9. Do not open blade covers while power is connected.
10. Be careful not to get water in motor during cleaning.
Section 3 Page 377

Safety Quiz—Power Meat Saw Student NameClass Date Grade
1. What is the easiest way to check if the meat saw is properly set-up?
2. What should be used to push the meat through the saw blade?
3. Why is it important to shut off the saw before cleaning?
4. What hazard could occur if your mind is not on your task while operating5. the meat saw
6. If the blade binds during operation, force meat against the saw blade or7. wiggle it free. T F
8. Turning away from saw to talk while operating it is recommended. T F
9. How many guards are on your meat saw?
10. It is not important for the saw to be level, since the blade will work anyway. T F
11. It is good practice to get the motor washed down with lots of water. T F
Section 3 Page 378

Slicer
OPERATING SLICER
1. Make sure slicer is put together properly and tightly.2. Procedures for slicing:
a. Plug slicer in.b. Adjust blade for desired thickness.c. Position food to be slicedd. Secure food with end weight.e. Turn on.f. Slice using end weight and handle only for motion.
3. Do not force food.4. People coming up behind slicer operator should use caution not to be distracting.5. Think “caution”—be careful of quick movements.6. Turn slicer off for loading and unloading of food.7. Always be sure blade has stopped before going any further.8. Close blade all the way when not in use.9. Be sure all wiring is in good condition.
10. Keep floor area clean.
CLEANING SLICER
1. Procedurea. Turn off—never attempt to clean until blade has completely stopped.b. Close blade all the way.c. Pull plug from socket.
2. Wash blade from side.3. Be careful not to hit blade when removing food tray.
SHARPENING SLICER BLADE
1. The blade should always be kept sharp.2. Do not use hand sharpener. Use the one on the machine, which is designed for it.3. Be careful to clean blade from the side after sharpening.4. The chef or supervisor should be consulted for supervision when sharpening
machine.
Section 3 Page 379
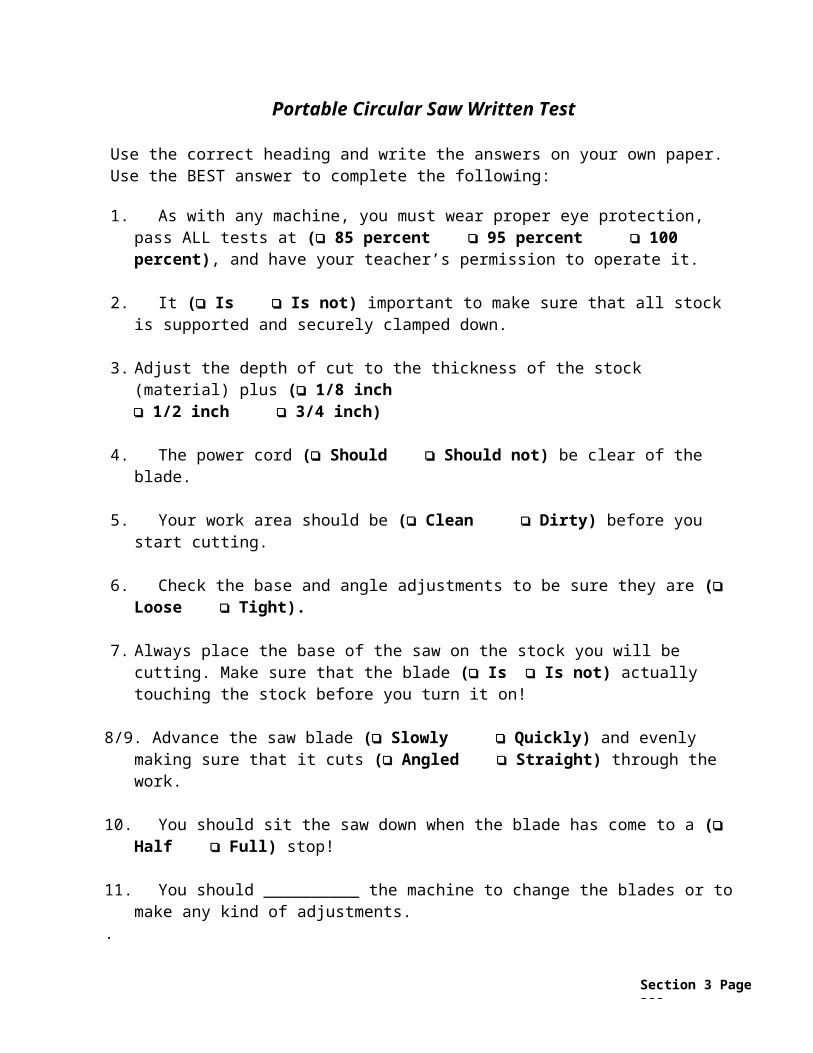
Safety Quiz—Slicer Student Name Class Date Grade
1. What is the proper procedure used when slicing foods on the slicer?
2. What is the proper procedure used for cleaning the slicer?
3. Why is forcing food through the slicer a dangerous practice?
4. What should the indicator knob be adjusted to when slicing is finished?
5. Why is it so important not to distract the operator when slicing?
6. What is the procedure for sharpening the slicer?
Section 3 Page 380

Steamers
1. Hand protection—hot gloves should be worn at all times.
2. Make sure pan supports are securely in position or door may not close sufficiently to produce proper steaming of product.
3. Close door and engage latch and lock the door handle in upright position before starting cooking cycle.
4. Do not force door at end of cooking cycle; wait until pressure reaches zero.
5. During stand-by periods, allow power to remain on with door ajar.
6. Wash and brush inside of cooker daily and do not allow food particles to fall into drain.
7. It is recommended at least once a week that the safety valve be operated manually while the steamer is pressurized. Use a long-handled kitchen tool to protect hands from steam blow down.
8. Automatic thermostat holds the cooking temperature in chamber at approximately 360˚F. Should the circuits malfunction, a safety thermostat opens at a temperature between 450 to 470˚F.
9. Door gaskets should be kept clean and free of food to prevent steam escaping, which may cause burns.
Section 3 Page 381

Steam Kettle
1. Always assume that the steam kettle is not.
2. Lift lid away from you to avoid steam burns.
3. Use proper equipment—long tongs, spoons, ladles, or paddles.
4. Do not leave utensils in tank.
5. When emptying, watch out for splashing.
6. Always be sure floor area around kettle is clean and dry.
7. Hot pads, oven mitts, and dry towels are essential.
8. When bleeding the lines (which should be done daily), wear heavy rubber gloves.
9. Be sure all wiring is wrapped and not frayed.
Section 3 Page 382

Safety Quiz—Steam Kettle Student NameClass Date Grade
1. What are the proper precautions for bleeding the petcock?
2. What is the first thing you assume about any steam kettle?
3. Why should you always have dry towels and/or oven mitts on your station?
4. What problems can condensation on the lid produce?
5. What is the purpose for lifting the lid away from you?
Section 3 Page 383

Steam Table
1. Always assume that it is hot.
2. Add water before turning on.
3. Be careful to use the correct amount of water.
4. Do not leave utensils in pans
5. Lift lids away from yourself and others on both sides of table.
6. Be sure that people around you are aware that you are removing pans.
7. Hot pads, oven mitts, and dry towels are a must.
8. Be sure all wiring is in good condition.
9. The underneath side of the steam table does get hot, so avoid touching the area.
10. To empty steam table, always turn off and allow water to cool. Scoop all water out until the remainder can be removed with a cloth.
Section 3 Page 384

Safety Quiz—Steam Table Student NameClass Date Grade
1. When should the water be placed in the steam table?
2. Why is it safer not to leave utensils in the pans?
3. What is the proper procedure for removing the cover from the steam table?
4. Why is filling the steam table with the right level of water so important?
5. What is the proper procedure for emptying the steam table?
Section 3 Page 385

Tilting Brazier
1. Follow the owner’s manual for your model in terms of starting the unit. (i.e., gas, or electric).
2. Never allow the unit to overheat when empty as this can cause warpage of the pan bottom. Do not heat an empty pan for more than 5 minutes at a setting higher than 300° F.
3. If possible, use wooden utensils in the brazier to avoid “dinging” the pan bottom.
4. Use the hand crank or electric switch to raise or cover the pan. Do so slowly to avoid spilling contents.
5. If the pan contains items in sauce or melted fat, they can slide forward suddenly during tilting and splash out the hot liquid.
6. Any item prepared will be easier to handle if the pan is first preheated.
7. Close the lid to braise or stew. Leave the vent open to vent out excess steam.
8. The unit will not heat any faster if the thermostat is turned to its highest setting.
9. When pouring liquid items out the pouring spout, try to place the bucket or pan as close to the spout as possible to avoid splashing.
10. To clean the unit, clean while still warm, but not hot. Use a mild detergent and rinse well.
11. When cleaning the electrical type of brazier, use caution, as the control box is not waterproof.
Section 3 Page 386

Safety Quiz—Tilting Brazier Student Name Class Date Grade
1. You cannot overheat a tilting brazier. T F
2. Use wooden utensils whenever possible to avoid “dinging” the brazier bottom. T F
3. Always start cooking in a “cold” brazier. T F
4. Clean your brazier while the unit is still hot. T F
5. The unit will heat faster if the thermostat is turned to maximum T F
6. Never preheat the pan for over five minutes at a temperature higher than 300º F. T F
7. An empty brazier that is too hot is in danger of warping. T F
Section 3 Page 387

Toaster
1. Make sure cord is in good condition.
2. Make sure table area is dry.
3. At no time should metal be stuck in toaster.
4. Unplug toaster before trying to remove stuck toast.
5. Use wood or plastic utensils to remove stuck toast.
6. Inside filaments are very fragile. Care should be taken not to break them when removing stuck pieces of toast.
7. Little or no water should be used when cleaning outside of machine.
8. Never lift toaster by placing fingers in toaster slot.
Section 3 Page 388

Safety Quiz—Toaster Student NameClass Date Grade
1. What part of the toaster should be checked regularly for safety reasons?
2. What should be done to the machine before removing stuck toast?
3. Why is it important to be careful when trying to remove stuck toast?
Section 3 Page 389

Vertical Power ShredderAttachment for Mixer
1. Make sure back case is securely attached to motor.
2. After assembling, briefly turn on machine, on low speed, to check for proper set-up.
3. Be sure to keep hands and fingers out of feed plate area during operation.
4. Keep apron strings, hair, and sleeves away from moving parts.
5. Always feed food into slicer or shredder with plunger.
6. Never open front door assembly while operating machine.
7. Never reach up into the shredder outlet while operating machine.
8. Never attempt to adjust parts while machine is on.
9. Set machine up in area that will allow room for catch pan to sit on secure surface.
10. Never force food into machine, let the machine set the pace.
11. Always replace motor hubcap after removing attachment.
Section 3 Page 390

Safety Quiz—Vertical Power Shredder Student Name Class Date Grade
1. What is the easiest way to check if the power shredder is properly set-up?
2. The proper tool for pushing the food into the shredder plate is?
a. Rubber spatulab. Spoonc. Plungerd. Tongs
3. Why is it important that apron strings are tied and hair is restrained while operating machine?
4. For one-person operation, it is recommended that you hold the catch pan while feeding food. T F
5. If food fails to fall out of shredder outlet, it’s best to turn off power before examining. T F
6. Pushing the food as hard as possible into the blades will get your job done faster. T F
7. What is the last thing you should do before being “done” with machine?
Section 3 Page 391

TECHNOLOGY EDUCATIONHot Glue GunRoboticsSoldering Station
Section 3 Page 392
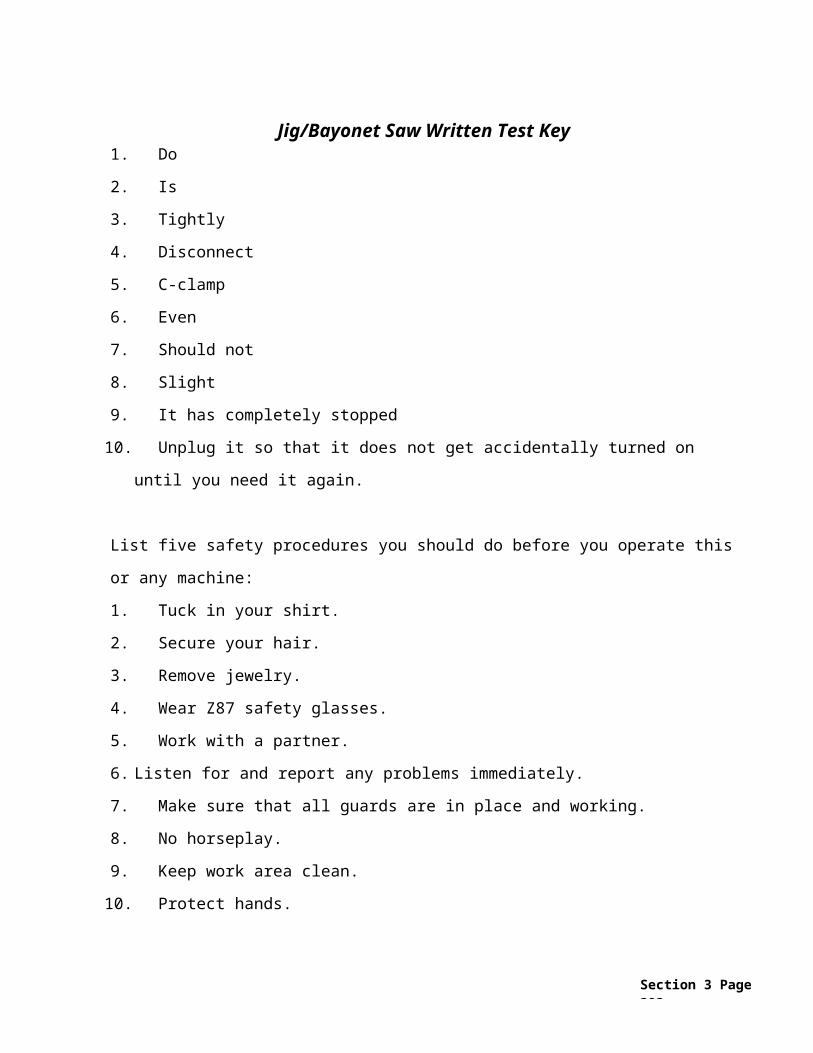
HOT GLUE GUN SAFETY NOTES
You will use a hot glue gun on some activities or projects. A HOT glue gun provides melted glue that dries quickly and provides a very strong bond.
Because the HOT glue can cause burns, you must follow these SAFETY rules when using the gun.
1. Never touch the melted glue or the nozzle of the glue gun.2. Do not put anything except glue sticks into the glue gun.3. Use the correct size glue sticks in the glue gun. Do not try to trim a glue stick that is
too big.4. Wait until the glue has melted completed before using it on your project. Test the glue by squirting a small amount on a piece of scrap material. It should be runny and soft.5. Be careful when holding glued pieces together. Melted glue can soak through thin or
porous material and cause burns.
Section 3 Page 393

Robotics Notes
Requirements:Proper eye protection must be worn—operate only with instructor’s permission and after properinstructions have been received.1. Operate only with instructor’s permission and after you have received instruction.2. Remove jewelry, eliminate loose clothing, and confine long hair.3. Make sure all guards are in place and operating correctly.4. Always use proper eye protection.5. When in the teach mode, use slow movements to jog the arm from point to point.6. Be sure the emergency stop button is functioning properly by testing it early in the
teach cycle.7. Care should be taken that the operator’s fingers and other body parts are kept out of
the work envelope.8. The operator must understand the program of robot actions and motions prior to the
use of the robot.
Section 3 Page 394

Robotics Written Test
Use the correct heading and write the answer on your own paper. Using the BEST answer to complete thefollowing:1. Move the robot arm (Slowly Quickly) from point to point when in the teach mode.2. The operator ( Does not Does) need to understand the program of robot actions and motions
prior to use of the robot.3. Eye protection ( Is not Is) required when operating robots in the technology lab.4. The operator must stay (Clear of Within) the work envelope when the robot is executing the
program.List five SAFETY procedures you should do before you operate this machine:5. _____________________________________________________________6. _____________________________________________________________7. _____________________________________________________________8. _____________________________________________________________9. _____________________________________________________________
Section 3 Page 395

Robotics Written Test Key
1. Slowly2. Does3. Is4. Clear ofList five safety procedures you should do before you operate this or any machine:1. Tuck in your shirt.2. Secure your hair.3. Remove jewelry.4. Wear Z87 safety glasses.5. Work with a partner.6. Listen for and report any problems immediately.7. Make sure that all guards are in place and working.8. No horseplay.9. Keep work area clean.
10. Protect hands.
Section 3 Page 396

Section 3 Page 397

Soldering Station/Pencil Notes
Requirements:Proper eye protection must be worn—operate only with instructor’s permission and after properinstructions have been received.1. Operate only with instructor’s permission and after you have received instruction.2. Remove jewelry, eliminate loose clothing, and confine long hair.3. Make sure all guards are in place and operating correctly.4. Always wear eye protection.5. Avoid serious burns by treating all soldering equipment as though it was hot.6. Always place equipment back in holder after use. Never lay it on the bench.7. Handle all soldering equipment with caution.8. Solder over the bench top to prevent hot solder from dropping on the operator’s legs.
Section 3 Page 398

Soldering Station/Pencil Written Test
Use the correct heading and write the answer on your own paper. Using the BEST answer to completethe following:1. Eye protection ( Should Should not) be worn at all times in the laboratory.2. ( Only the tip All of) of the soldering equipment is hot when it is on.3. The soldering equipment should be ( In its holder Laid on the bench) after use.4. ( It feels cool to Do not) let any of the melted solder touch your skin.List five SAFETY procedures you should do before you operate this machine:5. _____________________________________________________________6. _____________________________________________________________7. _____________________________________________________________8. _____________________________________________________________9. _____________________________________________________________
Section 3 Page 399

Soldering Station/Pencil Written Test Key
1. Should2. All of3. In its holder4. Do notList five safety procedures you should do before you operate this or any machine:1. Tuck in your shirt.2. Secure your hair.3. Remove jewelry.4. Wear Z87 safety glasses.5. Work with a partner.6. Listen for and report any problems immediately.7. Make sure that all guards are in place and working.8. No horseplay.9. Keep work area clean.
10. Protect hands.
Section 3 Page 400

Section 3 Page 401

SECTION IVGENERAL SAFETY
UNIT TEXT EXAMPLES
Section 4 Page 402

Equipment Safety Notes
A. Preparation1. Wear safety glasses for all machine operations.
2. Secure loose clothing and remove jewelry or clothing accessories that may catch
in the machine.
3. Clear area of scraps.
4. Position guards.
5. Set up machine for the specific operation. If the machine is computer controlled,
step through the program.
6. Position stock for the machine operation.
7. Consider physical demands and use a helper if necessary.
8. Check with instructor before performing the operation.
B. Task Performance1. Mentally review the operational procedure and machine safety rules.
2. Focus full attention on the machine operation.
3. Never leave the machine.
4. If a problem is encountered, stop the machine at a safe point.
5. Make machine or stock adjustments only when machine motion has stopped.
C. Termination1. Make sure machine is turned off and all motion has stopped.
2. Remove scrap material that accumulated during the operation.
3. Return the machine to its customary set-up.
Section 4 Page 403

General Safety – Part I
Requirements:Proper eye protection must be worn—operate only with instructor’s permission and after properinstructions have been received.
1. Always wear eye protection. Wear safety glasses, goggles or a face shield.
2. Get the instructor’s permission before you use the equipment.
3. Use the equipment only when the instructor is in the laboratory.
4. Report all accidents, near accidents, or injuries to the instructor immediately.
5. Don’t use tools or equipment that are in any way defective. Tell the instructor if a tool is dull or
broken or isn’t working properly.
6. Don’t use any equipment until you have been shown how to use it correctly and safely. Don’t use
it unless you understand the instructions.
7. Keep clothes tucked in and sleeves neatly rolled up. Loose clothing can get caught in a machine
and cause an injury.
8. If your hair is long, tie it back or wear a cap over it. Long hair can be caught in a moving machine.
9. Remove rings, bracelets, watches, and necklaces before you do any work in the laboratory.
Watches and jewelry should not be worn in the laboratory.
10. Wear protective shoes. Wear hard shoes or boots with rubber soles and rubber heels. Don’t wear sandals in the laboratory.
11. Wear approved ear protection around loud, noisy equipment.
12. Wear a dust mask or an air filter when working around a lot of wood dust. Wood dust can be
13. harmful if inhaled.
14. Use finishing materials, thinners, or other oily or flammable liquids only in well-ventilated areas.
15. Clean up spills. Don’t leave anything on the floor that someone could slip on.
16. Keep used rags in an approved, covered metal container. Damp, oily rags can ignite through
spontaneous combustion. The heat produced by oxidation is enough to start a fire.
18. Know where the fire extinguishers are located and know how to use them before there is an
emergency.
19. Keep cabinet doors and drawers closed.
20. Aisles have to be kept clear and free of litter, scraps, and materials. Don’t leave anything on the
floor that could be tripped over or slipped on.
21. Vises should be kept closed when they’re not in use.
Section 4 Page 404

General Safety Part I Written TestUse the correct heading and write the answer on your own paper. Using the BEST answer to complete
the following:
1. Always wear eye ( Protection Drops).2. Use equipment only with the instructor’s ( Protection Permission).3. ( Ignore Report) all accidents or injuries.
4. Do not use ( Defective Clean) equipment.
5. Never use equipment until you have been properly ( Instructed Protected) in its use.
6. Loose clothing can cause ( Protection Injuries).7. Long hair must be ( Tied back Braided) or covered with a cap.
8. No ( Jewelry Aprons) should be worn in the laboratory.
9. Wear ( Covered Closed) shoes or boots.
10. Approved protection earmuffs should be worn around ( Dirty Noisy) equipment.
11. A ( Dust mask Face shield) must be worn when working where there is wood dust.
12. Finishing materials should only be used in (Well ventilated Drafty) areas.
13. Always ( Ignore Clean up) spilled materials.
14. Used rags are to be kept in a covered ( Metal Plastic) container.
15. Locate the ( Fire extinguishers Air hoses) and learn how to use them.
16. Keep cabinet doors and drawers ( Open Closed).17. Never leave anything on the ( Floor Workbench) that could be slipped on or tripped over.
18. ( Open Close) vises when they are not in use.
Section 4 Page 405

General Safety Part I Written Test Key
1. Protection
2. Permission
3. Report
4. Defective
5. Instructed
6. Injuries
7. Tied back
8. Jewelry
9. Closed
10. Noisy
11. Dust mask
12. Well ventilated
13. Clean up
14. Metal
15. Fire extinguishers
16. Closed
17. Floor
18. Close
Section 4 Page 406

General Safety – Part II
Requirements:Proper eye protection must be worn—operate only with instructor’s permission and after properinstructions have been received.1. Keep workbenches clear and organized. Don’t pile up tools and don’t lay tools
down so they hang over the edge of the bench.2. Always use a brush or a rag to clear away sawdust and scraps. Never use your
hands to wipe off a surface.3. Use the right tool for the job. Use the tool only for what its designed to do. Use the
right size tool.4. Carry pointed or sharp tools with the point or edge held down toward the floor. This
will help avoid injuries if you bump into something or if someone bumps into you.5. When you hold a tool, hold it by the handle. When you hand someone a tool, hold it
so they can take it by the handle.6. When you’re finished with a tool, return it to its proper storage area. Return it to the
tool room, tool rack, or cabinet where it belongs.7. If you’re handling large or heavy materials, get someone to help you. Also, ask
someone to help or “tail-off” for you when you cut a large piece of material on a machine.
8. Lift with your legs, not with your back. Lifting improperly or carelessly can cause severe back injuries.
9. Be sure your hands are dry and that you’re standing on a dry floor when you use electrical devices.
10. Check the condition of the power cord. Don’t use the equipment if the insulation on the cord is damaged, cut, or frayed. Tell the instructor.
11. When you disconnect a power cord, pull the plug; don’t yank on the cord. Hold the plug and pull it out of the outlet.
12. Use all the recommended guards and safety devices on the power equipment. Never remove a guard without the instructor’s permission.
13. Disconnect the power equipment any time you need to make major changes or adjustments. Unplug the tool or machine or disconnect it at the circuit breaker panel. If you disconnect the circuit breaker, put up a sign: “Don’t Connect.”
14. Turn off the machine any time you make minor changes or adjustments. Never adjust equipment while it’s running. Wait for it to come to a complete stop before you make the adjustment.
15. Do not at any time leave a machine. Turn it off and stay with it until it comes to a complete stop.
16. When you approach a machine to use it, make sure the person who used it before you turned it off. Make sure it’s completely stopped.
17. Respect the safety zones. Stay away from anyone operating the power equipment. Don’t talk to them or distract them in any way. Don’t let anyone distract you when you’re using the equipment.
Section 4 Page 407

18. Concentrate on what you’re doing; give it your full attention. If you don’t feel well or if there’s some reason you can’t concentrate, tell your instructor.
19. Work at a safe speed. Don’t rush or hurry through a project. Working too fast is dangerous and it will result in poor craftsmanship.
Section 4 Page 408

General Safety Part II Written Test
Use the correct heading and write the answer on your own paper. Using the BEST answer to completethe following:1. Workbenches should be kept ( Clear Cluttered) and organized.2. Use ( Your hands A brush) or a rag to clear away scraps and sawdust.3. Tools should be used only for what they are ( Designed to do Easiest to use).4. ( Dull Sharp) tools should be carried with the edge or point held down toward the floor.5. A tool should always be held by the ( Cord Handle).6. When you are finished with a tool, return it to its ( Assigned storage area Where you found it).7. Ask for ( Permission Help) when you need to handle large or heavy material.8. Lift with your ( Neck Legs) not with your back.9. Never handle ( Electrical Writing) equipment if your hands are wet or if you are standing on a
wet floor.10. Equipment with a ( Damaged Clean) power cord should be reported to the instructor. It should
not be used.11. Don’t yank on the power cord to disconnect a tool. Pull the ( Plug Socket).12. Use all the recommended ( Guards Obstructions) and other safety devices when you operate
power equipment.13. Always disconnect the power equipment before you make any major ( Mistakes Adjustments).14. Never adjust equipment while it is ( Stopped Running).15. When you turn off a machine, stay with it until it is ( Almost Completely) stopped.16. Before you use a machine, make sure the person who used it before you has turned it off and it is
completely ( Stopped Clean).17. Don’t ( Distract Leave alone) anyone while they are operating the equipment.18. Using tools and equipment requires your complete ( Attention Help) at all times.19. Always work at a ( Fast Safe) speed.20. Never fool around or ( Play Concentrate) in the laboratory.
Section 4 Page 409

General Safety Part II Written Test Key1. Clear
2. A brush
3. Designed to do
4. Sharp
5. Handle
6. Assigned storage area
7. Help
8. Legs
9. Electrical
10. Damaged
11. Plug
12. Guards
13. Adjustments
14. Running
15. Completely
16. Stopped
17. Distract
18. Attention
19. Safe
20. Play
Section 4 Page 410

Safety Unit Information SheetI. Terms and definitions
A. Safety—State or condition of being safe; freedom from danger, risk or injury.
B. Accident—Includes any suddenly occurring, unintentional event, which causes injury or property damage.
C. First aid—Immediate, temporary care given to the victim of an accident or sudden illness until the services of a physician can be obtained.
II. Colors and application of the safety color codeA. Federal safety red—The basic color for the identification of:
1. Fire protection equipment and apparatus.
2. Portable containers of flammable liquids.3. Emergency stop bars, stop buttons, and emergency electrical stop switches or
machinery.B. Federal safety yellow—The basic color for designating:
1. Caution and for marking physical hazards.2. Waste containers for explosive or combustible materials.
3. Caution against starting, using, or moving equipment under repair.4. Identification of the starting point or power source of machinery.
C. Federal safety orange—The basic color for designating:1. Dangerous parts of machines.
2. Safety starter buttons.3. The exposed parts (edges only) of pulleys, gears, rollers, butting devices, and
power jaws.D. Federal safety purple—The basic color for designating:
1. Radiation hazards.E. Federal safety green—The basic color for designating:
1. Safety.2. Location of first aid equipment. (NOTE: This applies to equipment other than fire
fighting equipment.)F. Federal safety black and white—(used individually or in combination) The basic colors
for designating:1. Traffic flow.
2. Housekeeping purposes.
III. Personal safety rulesA. Wear shop clothing appropriate to the instructional activity being performed.
B. Confine long hair before operating rotating equipment.C. Always wear safety glasses; use suitable helmets and goggles for welding.
Section 4 Page 411

D. Remove ties when working around machine tools or rotating equipment.
E. Remove rings and other jewelry when working in the shop.F. Conduct yourself in a manner conducive to safe shop practices.
G. Use soap and water frequently as a method of preventing skin disease.
IV. General safety rulesA. Keep all hand tools sharp, clean, and in safe working order.
B. Report any defective tools, machines, or other equipment to the instructor.C. Make sure all guards and barriers are in place and adjusted properly before starting a
machine tool.D. Retain all guards and safety devices except with the specific authorization of the
instructor.E. Operate a hazardous machine only after receiving instruction on how to operate the
machine safely.F. Report all accidents to the instructor regardless of nature or severity.
G. Turn off the power and make certain the machine has stopped running before leaving.
H. Disconnect the power from machine tools before performing the maintenance task of oiling or cleaning.
I. Use solvent only after determining its properties, what kind of work it has to do, and how to use it.
J. Use correct properly fitting wrenches for nuts, bolts, and objects to be turned or held.K. Keep the shop or laboratory floor clean of scraps and litter.
L. Clean up any spilled liquids immediately.M. Oily rags or oil waste should be stored in metal containers with self-closing lids.
N. Clean the chips from a machine with a brush—not with a rag or the bare hands.O. Do not use compressed air to clean your person or clothing.
V. Methods used to maintain a clean and orderly shopA. Arrange machinery and equipment to permit safe, efficient work practices and ease in
cleaning.
B. Stack materials and supplies safely or store in proper place.C. Store tools and accessories safely in cabinets, on racks, or in other suitable devices.
D. Clear working areas and work benches of debris and other hazards.E. Clean and free floors from obstructions and slippery substances.
F. Free aisles, traffic areas, and exits of materials and other debris.G. Dispose of combustible materials properly or store in approved containers.
H. Store oily rags in self-closing or spring-lid metal containers.I. Know the proper procedures to follow in keeping the work area clean and orderly.
J. Keep sufficient brooms, brushes, and other housekeeping equipment readily available.
Section 4 Page 412

VI. Classes of firesA. Class A—Fires that occur in ordinary combustible materials such as wood, rags, and
rubbish.
B. Class B—Fires that occur with flammable liquids such as gasoline, oil, grease, paints, and thinners.
C. Class C—Fires that occur in or near electrical equipment such as motors, switchboards, and electrical wiring.
D. Class D—Fires that occur with combustible metals such as magnesium.
VII. Components of the fire triangleA. Fuel—Any combustible material.
B. Heat—Enough to raise the fuel to its ignition temperature.C. Oxygen—Necessary to sustain combustion. (Note: To produce fire, these three
elements are necessary and must be present at the same time. If any one of the three is missing, a fire cannot be started or, with the removal of any of them, the fire will be extinguished).
VIII. Equipment-specific test must be developed and administrated.
Section 4 Page 413

Section 4 Page 414

Safety UnitTest
1. Define the following terms:a. Safety—
b. Accident—
c. First aid—
2. Match the following colors of the safety color code with the correct statements of their use:
a. Designates caution. 1. Green
b. Used to identify the location of fire fighting equipment. 2. White
c. Designates the location of safety and first aid equipment. 3. Orange
d. Designates dangerous parts of equipment, which may 4. Purple
cut, crush, shock, or otherwise injure. 5. Black
e. Designates caution against starting equipment while 6. Red
it is being worked on or against the use of defective 7. Yellow
equipment.
f. Designates traffic flow.
g. Designates radiation hazards.
3. List five personal safety rules. a.
b.
c.
d.
e.
4. List eight rules for general shop safety.a.
b.
c.
d.
e.
f.
g.
h.
Section 4 Page 415

5. List five methods used to maintain a clean and orderly shop.a.
b.
c.
d.
e.
6. Match the classes of fire with the correct statement defining each class.a. Fires that occur with flammable liquids such as 1. Class A
gasoline, oil, or grease. 2. Class B
b. Fires that occur in ordinary combustible materials 3. Class C
such as wood, rags, and rubbish. 4. Class D
c. Fires that occur in or near electrical equipment such
as motors, switchboards, and electrical wiring.
d. Fires that occur with combustible metals such as
magnesium.
7. List the three components of the fire triangle.a.
b.
c.
8. Write the number or numbers of the fire extinguisher best suited to extinguish each class of fire.
a. Fires that occur with flammable liquids such as 1. pressurized water
gasoline, oil, or grease. 2. carbon dioxide (CO²)
b. Fires that occur in ordinary combustible materials 3. dry chemical
such as wood, rags, and rubbish. 4. soda acid
c. Fires that occur in or near electrical equipment such 5. foam
as motors, switchboards, and electrical wiring.
d. Fires that occur with combustible metals such as
magnesium.
(Note : If this has not been accomplished prior to the test, ask the instructor when the above activity should be completed.)
Section 4 Page 416

Section 4 Page 417

Safety Unit
Answers to Test1.
a. State or condition of being safe; freedom from danger, risk, or injury.
b. Includes any suddenly occurring, unintentional event, which causes injury or property damage.
c. Immediate, temporary care given the victim of an accident or sudden illness until the services of a physician can be obtained.
2.
a. 7
b. 6
c. 1
d. 3
e. 7
f. 2 and 5
g. 4
3. Any five of the following:
a.Wear shop clothing appropriate to the instructional activity being performed.
b. Confine long hair before operating rotating equipment.
c.Always wear safety glasses; use suitable helmets and goggles for welding.
d.Remove ties when working around machine tools or rotating equipment.
e.Remove rings and other jewelry when working.
f. Conduct yourself in a manner conducive to safe shop practices.
g.Use soap and water frequently as a method of preventing skin diseases.
4. Any eight of the following:
a. Keep all hand tools sharp, clean, and in safe working order.
b. Report any defective tools, machines, or other equipment to the instructor.
c. Retain all guards and safety devices except with the specific authorization of the instructor.
d. Operate a hazardous machine only after receiving instruction on how to operate the machine safely.
e. Report all accidents to the instructor regardless of nature or severity.
f. Turn off the power and make certain the machine has stopped running before leaving.
g. Make sure all guards and barriers are in place and adjusted properly before starting a machine tool.
h. Disconnect the power from machine tools before performing the maintenance task of oiling or cleaning.
Section 4 Page 418

i. Use a solvent only after determining its properties, what kind of work it has to do, and how to use it.
j. Use correct properly fitting wrenches for nuts, bolts, and objects to be turned or held.
k. Keep the shop or laboratory floor clear of scraps and litter.
l. Clean up any spilled liquids immediately.
m. Oily rags or oily waste should be stored in metal containers.
n. Clean the chips from a machine with a brush—not with a rag or the bare hands.
o. Do not use compressed air to clean your person or clothing.
5. Arrange machinery and equipment to permit safe, efficient work practices and ease in cleaning
a. Stack materials and supplies safely or store in proper place.
b. Store tools and accessories safely or store in proper place.
c. Clear working area and work benches of debris and other hazards.
d. Clean and free floors from obstructions and slippery substances.
e. Free aisles, traffic areas, and exits of materials and other debris.
f. Dispose of combustible materials properly or store in approved containers.
g. Store oily rages in self-closing or spring-lid metal containers.
h. Know the proper procedures to follow in keeping the area clean and orderly.
i. Keep sufficient brooms, brushes, and other housekeeping equipment readily available.
6.
a. 2
b. 1
c. 3
d. 4
7.
a. Fuel
b. Heat
c. Oxygen
8.
a. 2, 3, and 5
b. 2 and 3
c. 1, 4, and 5
d. 3
Section 4 Page 419

Hand Tool SafetyRequirements:Proper eye protection must be worn—operate only with instructor’s permission and after properinstructions have been received.1. Wear eye protection. Always wear safety glasses, goggles, or a face shield when you work in the
laboratory.2. Always use the right type of tool for the job. Use the tool designed for the work you want to do.3. Use the right size tool. Don’t try to do heavy work with a small, light tool; don’t try to do fine work with
large, heavy-duty tools. Use the tool that suits the work.4. Before you use a tool, check it to be sure it’s clean and in good condition.5. Never use your hands or fingers to test whether or not a tool is sharp. If the tool is as sharp as it
should be, you’ll cut yourself.6. Be sure the tool handle is fitted tightly and securely.7. Don’t use a dull, broken, or defective tool. Report defective or damaged equipment to the instructor.8. Always carry tools by the handle.9. When you carry a tool, hold it so the point or sharp edge is aimed down toward the floor.
10. Avoid holding the work with one hand while you use the tool with the other hand. Fasten the work down so you’ll have both hands to use the tools.
11. Plan the work so you can keep your balance. Always keep your weight on both feet, and don’t over-reach.
12. Don’t lay tools down near the edge of the bench. Don’t lay tools down where they could roll off, where someone could bump into them or where someone could trip over them.
13. Never aim a cutting tool toward your hands, arms, or body. Aim the tool away from you and away from others, whether you are working with it or just holding it.
14. Always keep your hands and arms out of the path of a cutting tool. Keep hands and arms behind the cutting edge.
15. When you are finished with a tool, return it to its assigned storage area. Don’t leave tools lying around.16. Use the tools only if you understand how to use them correctly and safely. If you’re not sure, check
with the instructor.
Section 4 Page 420

Hand Tool Safety Written TestUse the correct heading and write the answer on your own paper. Using the BEST answer to completethe following:1. Always wear ( Eye protection Loose clothing) in the shop.2. Use only the type of tools that are ( Defective Designed) for the work you are doing.3. Always use the right ( Size Small) tool for the job.4. Check tools to be sure they are sharp, ( Clean Large) and in good condition before you use them.5. Don’t use your ( Finger Shirt) to test whether or not a tool is sharp.6. Be sure the tool handle is fitted ( Loosely Tightly) and securely.7. Don’t use a tool that is dull, broken or ( Defective Working).8. Tools should always be carried by the ( Blade Handle).9. Carry sharp tools so the edge or the point is aimed down towards the ( Floor Ceiling).
10. The material should be fastened down so that ( Both No) hands are left free to use the tools.11. Plan the work so you can keep your ( Fingers Balance) at all times. Plan it so you don’t have to
overreach.12. Never lay tools down near the ( Edge Center) of the bench where they could roll off or where
someone could bump into them.13. ( Never Always) aim a cutting tool toward you or toward anyone else.14. Keep your hands and arms ( Near Away from) the cutting edge of the tool.15. Tools that are not in use should be returned to ( The assigned storage area Where you found
them).16. Tools should be used only if you understand how to use them ( Sort of Correctly) and safely.
Section 4 Page 421

Hand Tool Safety Written Test Key
1. Eye protection
2. Designed
3. Size
4. Clean
5. Finger
6. Tightly
7. Defective
8. Handle.
9. Floor.
10. Both
11. Balance
12. Edge
13. Never
14. Away from
15. Assigned storage area
16. Correctly
Section 4 Page 422

Portable Power Tool Safety
Requirements:Proper eye protection must be worn—operate only with instructor’s permission and after properinstructions have been received.1. Portable power tools produce a lot of wood chips and dust. You can prevent eye injuries by wearing
eye protection. Wear safety glasses, safety goggles, or a face shield.2. You must have the instructor’s permission before you use any of the power tools.3. Use power tools only when the instructor is present in the shop.4. Don’t wear loose clothing. Keep shirts tucked in and shirtsleeves rolled up neatly.5. Remove rings, watches, bracelets, and necklaces.6. Long hair must be tied back out of the way or tucked under a cap.7. The tool has to be sharp and in good condition. Check the blade, knives, or bit to make sure that they
are sharp and in good condition.8. Don’t over load or force a portable power tool. Use it only for what it was designed to do.9. Electricity should never be used around water or moisture. It can cause a severe electric shock. Be
sure your hands are dry and you’re standing on a dry floor when you handle electric power tools.10. Electrical power tools must be grounded or double insulated to prevent a possible electric shock. Don’t
use equipment that isn’t properly insulated or grounded.11. Check the power cord to make sure the insulation is in good condition. Don’t use the tool if the
insulation is broken, cut, or damaged in any way.12. Keep the tool disconnected when it is not in use. Plug it in when you are ready to use the tool, and pull
the plug as soon as you are finished.13. Check the switch before you plug in the tool. Always check the switch first to make sure it’s in the “off”
position before you plug it in.14. Keep the power cord well out of the way when the tool is operating. Keep the cord out of the path of
the tool.15. Always disconnect the tool before you make any changes or adjustments. Don’t make any changes or
adjustments while the tool is plugged in.16. When you disconnect a power tool, pull the plug. Don’t yank on the cord.17. Fasten the work down. Avoid holding the work with one hand and operating the tool with the other
hand.18. Hold the tool firmly. It may twist when you turn it on. Hold the tool so you always have control of it.19. Wait until the tool comes up to full speed before you start the cut.20. Don’t overreach. Keep yourself balanced.21. Wait until the tool has come to a complete stop before you set it down.22. Using a power tool will require all your attention. Don’t let anyone distract you. Keep your attention on
what you are doing so you can work safely at all times.
Section 4 Page 423

Portable Power Tool Safety Written TestUse the correct heading and write the answer on your own paper. Using the BEST answer to completethe following:1. You can prevent eye injuries by wearing eye ( Protection Glasses).2. Power tools may be used only with the instructor’s ( Protection Permission).3. The instructor must be ( Present Outside of) in the shop when you use power equipment.4. Do not wear ( Tight Loose) clothing in the shop.5. ( Safety equipment Jewelry) should be removed before you do any work in the shop.6. Long hair must be tied back or worn under a ( Cap Helmet) to keep it out of the way.7. The blades, knives or bits used with power tools must be ( Sharp Dull) and in good condition.8. Use the power tool only for what it was designed to do, and don’t force the tool or ( Overload
Twist) it.9. Be sure your hands are dry and you are standing on a ( Dry Wet) floor when you use electric
power equipment.10. Electric power tools must be ( Uninsulated Grounded) or double insulated to prevent a possible
shock.11. Never use a power tool that has a ( Damaged Good conditioned) power cord.12. Power tools should be ( Plugged In Disconnected) only while they are in use.13. Be sure the switch is in the ( Off On) position before you plug in the power tool.14. Keep the ( Power cord Material) out of the path of the tool.15. The power tool must be ( Disconnected Plugged in) before making any changes or adjustments
on the tool.16. When you disconnect the tool, pull the ( Power cord Plug), not the cord.17. The material you are working on should be ( Loose Fastened down).18. Hold the tool firmly so you always have ( Control Feel) of it.19. Be sure the tool is running at ( Slow speed Full speed) before you start the cut.20. Plan the cut so you don’t have to overreach. Keep yourself ( Balanced On tiptoe).21. Wait until the tool has come to a ( Almost Complete) stop before you set it down.22. Don’t let anything distract you. Pay ( Attention Distract) to what you are doing so you can do it
safely at all times.
Section 4 Page 424

Portable Power Tool Safety Written Test Key
1. Protection2. Permission3. Present4. Loose5. Jewelry6. Cap7. Sharp8. Twist9. Dry
10. Grounded11. Damaged12. Plugged in13. Off14. Power cord15. Disconnected16. Plug17. Fastened down18. Control19. Full speed20. Balanced21. A complete22. Attention
Section 4 Page 425

Power Equipment Safety
Requirements:Proper eye protection must be worn—operate only with instructor’s permission and after properinstructions have been received.1. Always wear eye protection.2. You must have the instructor’s permission before you use the equipment.3. Don’t use any of the power tools unless you’ve been shown how to use them correctly and safely.
Don’t use a tool until you understand how to use it properly.4. Power equipment may be used only when the instructor is in the shop. No power equipment may be
used unless the instructor is present.5. If you don’t feel well or if you can’t concentrate, tell the instructor. Don’t use any of the tools unless you
can give your full attention to what you are doing.6. Your hands must be dry when you work around electricity, and you must be standing on a dry floor.7. When you approach a machine, be sure the person who used it before you has turned it off and it’s
completely stopped.8. Check the cutting tool in the machine. The cutting tool must be sharp and in good condition.9. The cutting tool must be installed correctly and properly adjusted for the work.
10. Check to see that all the safety guards are in place and working properly. Use all the safety guards whenever possible.
11. Never remove a guard unless you have the instructor’s permission.12. If the machine doesn’t sound right or if it doesn’t work properly don’t use it. Turn it off and tell the
instructor.13. Use the machine only for what it was designed to do. For example: don’t overload the machine or use
it on something too small to be safe.14. If you have to make any adjustments or changes, get permission.15. Before making any major changes or adjustments, disconnect the power. Pull the plug or disconnect
the power at the circuit breaker.16 Minor adjustments should always be made with the machine turned off and completely stopped.18. Work in a well-lighted area. Stand so you can see clearly.19. Keep yourself balanced. Don’t overreach or put your weight on a machine.20. Check the condition of the material. The wood must be clean and free of defects. It must be clear of
hardware, paint, or finishes.21. Always wait for the machine to come up to full speed before starting the cut.22. Use an even, steady pressure to make the cut. Don’t force it or over, load the machine.23. If the material is large or heavy, get help. Ask someone to “tail-off” for you. The tail-off helper should
support the material while you control how it is moved into the cut.24. Get permission to use special set-ups, jigs, or attachments. Ask the instructor to double-check special
set-ups before you use them.25. Don’t let anyone distract you while you’re operating the machine. Keep your full attention on what you
are doing.26. Use a piece of scrap wood, a push stick or a brush to remove scraps around the cutting tool. Never
use your hands to clear away scraps or dust.27. Stay out of the danger zones when someone is using the equipment. Make sure that others stay clear
when you’re operating the equipment.28. When you are finished using equipment, turn it off and stay with it until it has come to a complete stop.29. Remove any special attachments or special cutting tools you may have used. Replace the guards if
you’ve removed them and readjust settings to their normal position.30. Use a brush to clean off the equipment, and then sweep the area around the machine.
Section 4 Page 426

Power Equipment Safety Written Test
Use the correct heading and write the answer on your own paper. Using the BEST answer to completethe following:1. Always wear eye ( Protection Contact Lenses).2. You must have the instructor’s ( Goggles Permission) before you use any of the equipment.3. Use the power equipment only if you understand how to use it correctly and ( Safely
Automatically).4. The ( Principal Instructor) must be present in the shop whenever you use the power equipment.5. Use the power tools only when you can give your full ( Attention Balance) to what you are doing.6. When you work with ( Electricity Wood), you must make sure your hands are dry and the floor
you stand on is dry.7. When you approach a machine to use it, make sure the person who used it before you turned it off
and it is completely ( Stopped Running).8. The cutting tool in the machine must be ( Dull Sharp) and in good condition.9. Be sure the ( Cutting Tool Brush) is installed properly and adjusted correctly for what you want to
do.10. Check to see that the ( Blades Guards) are in place and working properly.11. Do not ( Remove Attach) any of the safety guards unless you have the instructor’s permission.12. If a machine doesn’t work properly, or if it doesn’t ( Sound Remove) right, turn it off and tell the
instructor.13. Power tools should be used only for what ( You think They are designed to do).14. Get permission before you make any major ( Adjustments Signs) or changes on the equipment.15. Turn on Turn off) the power to the machine before you make any major changes or adjustments.16. If you disconnect the power at the circuit breaker panel, put up a ( Sign Piece of material) that
warns others not to connect it.17. The machine must be turned off and ( Completely Almost) stopped before any minor adjustments
are made.18. Work in ( Well Lighted Dimmed) areas so you can see clearly.19. Keep yourself ( On tiptoe Balanced). Don’t overreach or lean on a machine.20. The material must be clean, free of ( Defects Electricity), hardware or finishes.21. The cut must not be started until the machine is running at ( Slow Full) speed.22. Use an even, steady pressure to make the cut. Don’t ( Force Take it easy) it or over load the
machine.23. If the material is large or heavy, get help. Ask someone to ( Watch Tail off) for you.24. Ask the instructor to ( Check Ignore) any special set-ups or attachments before you use them.25. Don’t let anyone ( Distract you Use the equipment) while you operate the equipment.26. Use a piece of scrap wood, a push stick or ( A brush Your hands) to clear away scraps or dust.
Don’t use your hands.27. Stay clear of the ( Danger Zones Tail-off) when someone is operating a machine.28. Never leave a machine while it is still ( Running Stopped). The machine must be stopped before
you leave it.29. When you are finished, remove Attachments Materials) or special set-ups you may have used.30. ( Walk away from Sweep) the area around the equipment when you are finished with the work.
Section 4 Page 427

Power Equipment Safety Written Test Key1. Protection
2. Permission
3. Safely
4. Instructor
5. Attention
6. Electricity
7. Stopped
8. Sharp
9. Cutting tool
10. Guards
11. Remove
12. Sound
13. They are designed
14. Adjustments
15. Turn off
16. Sign
17. Completely
18. Well lighted
19. Balanced
20. Defects
21. Full
22. Force
23. Tail off
24. Check
25. District you
26. A brush
27. Danger zones
28. Running
29. Attachments
30. Sweep
Section 4 Page 428
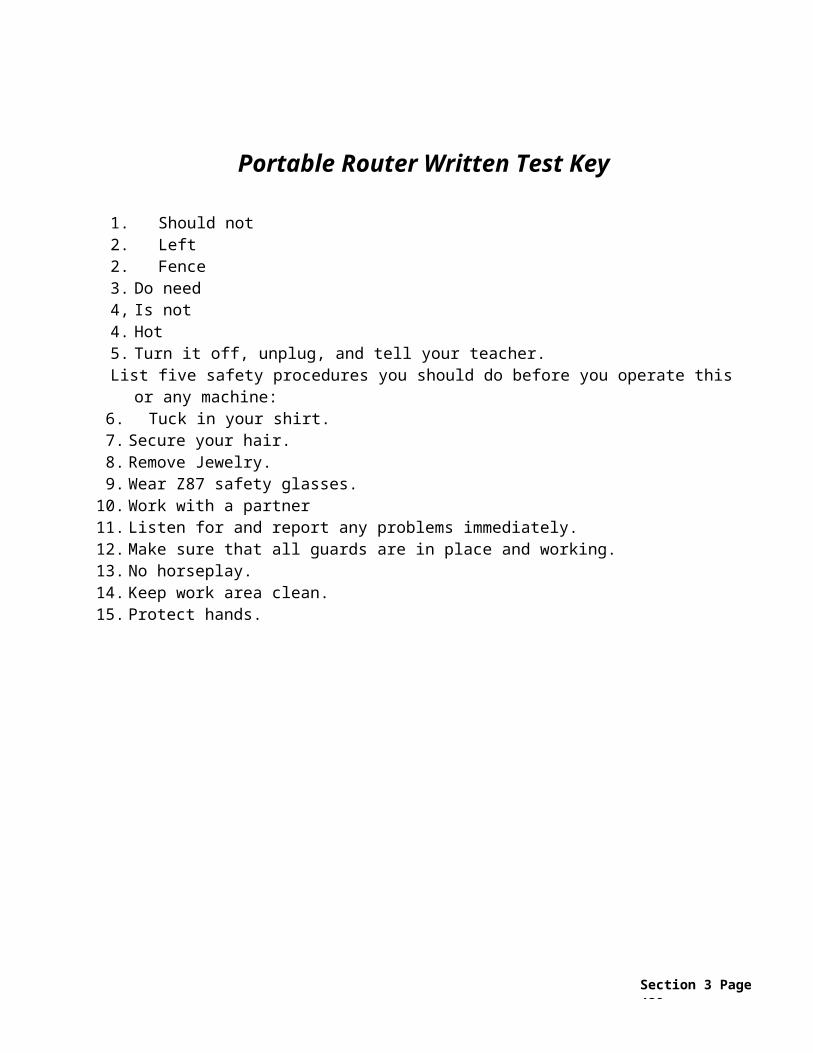
Sheet Metal Machine Safety
SAFETY SUGGESTIONS
1. Remove sharp burrs and edges from sheet metal before attempting to work it in the machines.
2. Never attempt to bend, roll, crimp, bead, etc., metal which is heavier than the capacity of the machine.
3. Keep hands and fingers clear of moving parts.
4. Never work more than one thickness of metal at one setup.
5. Avoid slamming or dropping the handles of the machine.
6. Be careful that moving parts or metal does not strike others.
7. Take care not to place hands in a position that will allow them to slip into the rolls, jaws, etc.
Section 4 Page 429

Safety Quiz—Sheet Metal Machines Student Name Class Date Grade
1. The infeed rolls of a roll machine are dangerous to the operator’s hands. T F
2. Overloading can damage sheet metal machines. T F
3. Sharp burrs and edges should be removed before attempting to place in the machine. T F
4. Fingers must be kept clear of moving parts. T F
5. Quarter inch mild steel stock can be formed on the sheet metal machine. T F
Section 4 Page 430

Milling Machine
OBTAIN PERMISSION FROM THE INSTRUCTOR BEFORE USING THIS MACHINE
SAFETY SUGGESTIONS
1. Make adjustments and measurements only when the machine is at a complete stop.
2. Material being machined must be properly secured.
3. Make sure the cutter is rotating in the right direction. Feed against the cutter unless the machine is capable of climb cutting.
4. Handle cutters carefully as they are sharp.
5. Keep fingers a minimum of 6-inch from the cutter.
6. Take care to prevent jamming the vise or the work into the column, cutter, etc.
7. Start your own machine and remain with it until you have turned it off and it has come to a complete stop.
8. Never clean chips away from cutter while machine is running.
Section 4 Page 431

Safety Quiz—Milling Machine Student Name Class Date Grade
1. On long cuts it is permissible to leave the machine while on automatic feed. T F
2. Cutters should be stored loosely on the work bench T F
3. Eye protection should be worn at all times. T F
4. Swarf chips can be wiped away with the hands. T F
5. The automatic rapid feed should not be used when the stock is closer6. than 6” from the cutter. T F
7. Handles should be disengaged when on automatic feed. T F
Section 4 Page 432

Metal Squaring Shear
OBTAIN PERMISSION FROM THE INSTRUCTOR BEFORE USING THIS MACHINE.
SAFETY SUGGESTIONS
1. Check set up and machine before operating.2. Never surpass the capacity of the machine.3. Feed and operate from the front of the operator’s position.4. Always keep your fingers away from the pressure bar and blade a minimum of 4
inches.5. Keep the foot that is not being used out from under the treadle.6. Allow small pieces to drop; do not attempt to catch them.7. Remove burrs before working; gloves or pads are recommended for handling
sheet metal, especially large pieces.8. Place scraps or trimmings in metal waste containers and return machine to normal
position.9. Whenever two people are needed to operate the shear, one shall be the operator,
the other the helper.
Section 4 Page 433

Safety Quiz—Metal Squaring Shear Student Name Class Date Grade
1. Feed and operate from the treadle side of the machine only. T F
2. It is permissible to let small pieces drop into a box as they are cut. T F
3. Two students may operate the shear together. T F
4. For some projects, the guard can be removed. T F
5. The foot treadle should be so arranged that there is a 2 inch floor clearance at the bottom of a stroke. T F
Section 4 Page 434

SECTION V
NIOSH CHECKLISTS FOR PROGRAMS
The National Institute for Occupational Safety and Health (NIOSH) and Environmental Safety is producing safety checklists for administrators, supervisors, and teachers in career and technical education. This is still in draft form and waiting for final approval. The September 11, 2001 disaster has slowed this process down. As soon as it becomes final, we will be including those program checklists for you in this section.
A CTE teacher should:o Conduct these inspections using a safety checklist.o Send a copy of the inspection report to the building principal and
the district risk management officer.o Since LABOR AND INDUSTRIES does apply to our vocational
education shops, any equipment not meeting Department of Labor and Industries safety standards must be taken out of service immediately until repairs are made.
Section 5 Page 435

SECTION VI
COLOR-CODED SIGNS
RESOURCES
Section 6 Page 436

Section 6 Page 437

Important Telephone Numbers
Please fill in and post these phone numbers appropriate to your local safety
and emergency response.
Emergency . . . . . . . . . . . . . . . . . . . . . . . . . . . 911
Fire . . . . . . . . . . . . . . . . . . . . . . . . . . . . . . . . . . 911
Hospital . . . . . . . . . . . . . . .
Washington Poison Control Center. .
District Safety Director . . .
School/Institution Main Office
Section 6 Page 438

Section 6 Page 439

Section 6 Page 440

Section 6 Page 441

Section 6 Page 442

Section 6 Page 443

DO NOT OPERATE WITHOUT PERSONAL PROTECTIVE EQUIPMENT/CLOTHING.
Section 6 Page 444

LID MUST BE CLOSED.
Section 6 Page 445

Section 6 Page 446

Section 6 Page 447

Section 6 Page 448

Section 6 Page 449

Section 6 Page 450

HEARING PROTECTION IS REQUIRED TO OPERATE THIS MACHINE.
Section 6 Page 451

Section 6 Page 452

TECHNOLOGY EDUCATION
VISITORS
MUST WEAR
E–Y–E PROTECTION.
Section 6 Page 453

WORK
SAFELY
Section 6 Page 454

NO HORSEPLAY
NO RUNNING
SAFETY EXAM REQUIRED BEFORE USING
TOOLS
OR
EQUIPMENT.
Section 6 Page 455

DO NOT OPERATE
WITHOUT PERSONAL PROTECTIVE
EQUIPMENT/CLOTHING.Section 6 Page 456

PLACE WASTELID MUST BE CLOSED
IN THIS CONTAINER.
Section 6 Page 457
DO NOT REMOVEG–U–A–R–D.
Section 6 Page 458

DANGER!
FUEL GAS—OPEN FLAMES—
NOT ALLOWED
ASK FOR INSTRUCTIONS BEFORE OPERATING.
Section 6 Page 459

HEARINGPROTECTION
REQUIRED TO OPERATE THIS MACHINE.
Section 6 Page 460

EYEPROTECTION
REQUIREDTO OPERATE THIS MACHINE.
Section 6 Page 461

ALL HANDS ARE
REQUESTED
TO HELP KEEP THIS PLACE
SAFE AND CLEAN.
Section 6 Page 462

Resources
Section 6 Page 463

Resources
The following list of groups, organizations, state agencies, and others is provided to assist instructors, program directors and others in their efforts to obtain information that will assist them in providing a safe environment for students of all ages. This list of resource groups should not be considered a comprehensive list of all of the possible resources that can be of assistance or who have information of the possible resources that can be of assistance or who have information about any of the elements of safety. Rather it should be viewed as a starting point and should be supplemented as new resources become available.
Appendix ISafety and Health Websites—U.S. Government Websites:Bureau of Labor Statistics http://stats.bls.gov/Centers for Disease Control and Prevention www.cdc.govConsumer Product Safety Commission www.cpsc.govEnvironmental Protection Agency www.epa.govFederal Emergency Management Agency www.fema.govFood and Drug Administration www.fda.govMine Safety and Health Administration www.msha.govNational Cancer Institute www.nci.nih.govNational Institute of Health www.nih.govNIOSH www.cdc.gov/niosh/homepage.htmlNational Weather Service—West. Reg. www.wrh.noaa.govOSHA www.osha.govUS Dept of Health and Human Services www.os.dhhs.govUS Dept. of Transportation www.dot.govUS Fire Administration www.usfa.fema.govUS Government Printing Office www.access.gpo.gov
Washington StateWash. State Dept of Ecology www.wa.gov/ecologyWash. State Dept of Health www.doh.wa.govWash. State Dept of Labor & Industries www.wa.gov/lni
OrganizationsAdvocates for Highway and Auto Safety www.saferoads.orgAmerican Conf. of Gov. Industrial Hygienists www.acgih.orgAmerican Industrial Hygiene Association www.aiha.orgAmerican Lung Association www.lungusa.orgAmerican National Standards Institute www.ansi.orgAmerican Red Cross www.redcross.orgASSE www.asse.orgCenter for Safety in the Arts www.artswire.orgHuman Factors and Ergonomics Society www.hfes.orgIlluminating Engineering Society of N. America www.iesna.org/Industrial Safety Equipment Assoc. www.safetycentral.orgInsurance Institutes for Highway Safety www.hwysafety.orgNational Air Duct Cleaners Association www.nadca.com/National School Board Association www.keepschoolssafe.orgMayo Clinic (offers weekly newsletter) www.mayohealth.org
Section 6 Page 464

Appendix ISafety and Health Websites (continued)National Fire Protection Agency www.nfpa.orgNational Safety Council www.nsc.org
General Information SourcesAssociated Industries of the Inland NW www.aiin.comThe Federal Register http://fr.cos.com/Fremont Compensation Insurance Group www.fremont.comLighting Design Lag www.northwestlighting.comMaterial Safety Data Sheets www.msds.pdc.cornell.edu/msdssrch.asp(accesses MSDS data from Cornell Univ.)Lighting www.lightingresource.comProfessional Development Associates www.pdanet.comSafety Online www.safetyonline.net“Safety Currents” (weekly newsletter) www.safetyonline.net/currents/home.htm“Safety on the Internet”—book www.govinst.comTraffic Safety Village www.drivers.comWorld Safety (monthly newsletter) www.worldsafety.com
Safety VendorsOxarc www.oxarc.comCole-Parmer Instruments Co. www.coleparmer.comGrainger www.grainger.comLab Safety www.labsafety.comSKC, Inc. www.skcinc.comMasune 1st Aid & Safety www.masune.comMoore Medical Corp. www.mooremedical.comHach www.hach.comJJ Keller www.jjkeller.comQuest Technologies www.quest-technologies.comCoastal Safety and Environmental www.coastal.comMitchell Instruments www.mitchellinstrument.comThe Safety Zone www.safety-zone.com
Section 6 Page 465

Appendix JSelected BibliographyNoise And Vibration Control The Science Instructor's Safer SourceEdited by Leo L. Beranek Chemical Catalog/Reference ManualLibrary of Congress # 78-148977 By Flinn Scientific, Inc.ISBN 07-004841-X P.O. Box 2A, 917 W. Wilson StreetPublished by McGraw Hill, Inc. Batavia, IL 60510
(312) 879-6900
Artist Beware Hazards in the Chemical LaboratoryBy Michael McCann, Ph.D. Edited by L. BretherickWatson-Guptill Publications, N.Y. ISBN 085186 41981515 Broadway Published by The Royal Society ofNew York, NY 10036 ChemistryLibrary of Congress Blackhorse Road# RC963.6.A78M32 702.B 79.18982 Letchworth, Herts, SG6 1Hn, ENGLANDISBN 0-8230-0295-0
Injury In America Prudent Practices for Disposal ofNational Academy Press Chemicals From Laboratories2101 Constitution Avenue, NW National Academy PressWashington, D.C. 20418 2101 Constitution Avenue, NWLibrary of Congress # 85-60999 Washington, D.C. 20418ISBN 0-309-03545-7 Library of Congress #
ISBN 0-309-03390-X
Washington Education Directory Health Hazards in Arts and CraftsBarbara Krohn and Associates Society for Occupational &835 Securities Building Environmental HealthSeattle, WA 98101 1341 G Street, NW, Suite 308(206) 622-3538 Washington, D.C. 20005
Edited by Michael McCann, Ph.D., & Gail BarazaniLibrary of Congress # 80-52060ISBN 0-931770-01-7
Noise and Noise Control Industrial Ventilation—17th EditionMalcolm J. Crocker/Frederick M. Kessler Committee on Industrial VentilationCRC Press, Inc. P.O. Box 161532000 Corporate Blvd., NW Lansing, MI 48901Boca Raton, FL 33431 Lithographed byLibrary of Congress # 75-2352 Edwards Brothers, Inc.ISBN#0-8493-5093-0 (Vol. 1) 2500 South State Street0-81819-064-3 Ann Arbor, MI 48104
0-8493-5094-8 (Vol. 2)
Section 6 Page 466

Health Hazards Manual for ArtistsBy Michael McCannNick Lyons Books32 West 21st StreetNew York, NY 10010ISBN 0-941130-06-1U.S. Dept of Health, Education & WelfareHEW Pub No. (NIOSH) 76-162Contract No. CDC-99-74-33For Sale by Superintendent of Documents
U.S. Dept. of Health, Education and WelfarePublic Health ServicesCenter for Disease ControlNational Institute for Occupational Safety and HealthDivision of Physical Sciences and EngineeringCincinnati, OH 45202
Industrial Noise Control—Fundamental and ApplicationsBy Lewis BellLibrary of CongressISBN 0-8247-1787-2Published byMarcel Dekker, Inc.270 Madison AvenueNew York, NY 10016
School Indoor Air QualityBest Management Practices ManualWashington State Department of HealthPO Box 47825Olympia, WA 98504Available at: www.doh.wa.gov/ehp/ts/iaq/pdf
Safety Guide for Career and Technology EducationOffice of Superintendent of Public InstructionPO Box 47200Olympia, WA 98504-7200
Special credit given to:
Utah State Office of Education Texas USDE Washington Industrial Safety and Health Administration (LABOR AND INDUSTRIES)
Section 6 Page 467