Embed Size (px)
Citation preview

Prepare learning resources
Training provider series: Planning an incomeoriented short training course
© Copyright EOSDP 2006Published by: PNG EOSDPWritten & developed by: PNG EOSDPProduced by: Uramina and Nelson Ltd.ISBN: 9980-937-99-XNational Library Service of Papua New Guinea
WWhhaattrreessoouurrcceess ddoo wwee
nneeeedd ffoorrttrraaiinniinngg??
YYoouu ccaann ggeett aalloott ooff eexxiissttiinnggrreessoouurrcceess ffrroommtthhee lliibbrraarryy
HHaannddoouuttss wwoorrkkbbooookkss

Contents
Prepare learning resources2
Introduction 3
Planning an income oriented short training course 4
What are learning resources? 5
Preparing learning resources 6
• Handouts 7
• How do I prepare a handout? 8
• Workbooks 9
• How do I write a workbook? 9
Step 1. Use the tasks as headings 10
Step 2. Use the steps as sub-headings 11
Step 3. Use the instructions for quality as safety as the content 12
Step 4. Add pictures and diagrams where appropriate 14
Step 5. Add activities for trainees 15
Step 6. Write an introduction and conclusion 16
Adapting existing learning resources 17
Conclusion 18
Assessment checklist 19
Appendix A: Session plan for jam making course 20
Appendix B: Sample handout for the mango jam making course 28
Appendix C: Sample handout for the training course – 30Making cocoa powder to earn an income

This module is part of a series on planning an income oriented short course. It has beenwritten for individuals or groupsinterested in organising and deliveringtraining for people with income earningideas. In particular, this book targets:
• training providers• community leaders• NGOs• church groups• individuals with some training
experience.
Prepare learning resources 3
Introduction
IItt mmeeaannss tthhiinnkkiinngg aabboouutt wwaayyss ttoo mmaakkee
ssoommee mmoonneeyy
WWhhaatt ddooeess iinnccoommeeoorriieenntteedd mmeeaann??
Learning outcome
The learning outcome for this module is as follows:
“At the end of this module you should be able to prepare learning resources for anincome oriented short training course using the formats provided.”
WWhhaatt’’ss aa lleeaarrnniinnggoouuttccoommee??
IItt’’ss aa ssttaatteemmeenntt wwhhiicchhiinnddiiccaatteess wwhhaatt yyoouu sshhoouullddbbee aabbllee ttoo ddoo aafftteerr yyoouuhhaavvee rreeaadd tthhrroouugghh tthhee
mmoodduullee aanndd ccoommpplleetteeddtthhee aaccttiivviittiieess..

Prepare learning resources4
IInneeeedd ttoo pprreeppaarreessoommee lleeaarrnniinngg
rreessoouurrcceess.. II’’vvee aallrreeaaddyyddoonnee mmiinnee.. TThheeccoouurrssee ssttaarrttssttoommoorrrrooww ssllooww
ccooaacchh..
This module will help you to prepare learning resources. It is only a guide for you to buildon.

Prepare learning resources 5
Planning an income oriented short training course
To plan an income oriented short training course you should follow this step by stepprocess. Preparing learning resources is the fifth step in the process.

Prepare learning resources6
What are learning resources?
Learning resources are used to help the trainee learn and include:
• handouts• workbooks.
What are learning resources?
HHeerree iiss aa lliisstt ooff tthheeiinnggrreeddiieennttss ffoorr mmaannggoojjaamm aanndd tthhee rreecciippeewwee wwiillll bbee uussiinngg iinn
ttooddaayy’’ss ttrraaiinniinngg
““TThhiissiiss ggrreeaatt
II ccaann ttaakkee tthhiisshhoommee aanndd iitt wwiillll
hheellpp mmee ttoorreemmeemmbbee rr wwhhaatt
wwee ddiidd..””

Prepare learning resources 7
Preparing learning resources
Before you can prepare learning resources you need to have written a session plan. Thesession plan helps you plan the information you are going to present to trainees during thetraining. Learning resources help the trainees to learn what you are training them to do. It isimportant that learning resources are consistent with the information you are going to cover.
If you have not completed a session plan you should refer to the module Write a sessionplan.
An example of a completed session plan is in Appendix A at the end of these notes.
HandoutsA handout is a good learning resource because trainees have written information to refer toduring the training and after the training is finished.
Handouts are good for listing instructions or a recipe that needs to be followed or fordiagrams that indicate how something is made. It is important to use pictures and diagramsinstead of lots of writing. When producing handouts you should make sure the content iseasy to read and that diagrams or pictures are clear.
Preparing learning resources

How do I prepare a handout?Look at your session plan and decide if there is any information you need to cover thatwould benefit the trainees if presented in handout. Consider parts of your training whereyou are referring to:
• a list of items or ingredients• a process for trainees to follow such as a recipe• the parts of an item such as a piece of equipment.
You should use pictures and diagrams where possible as these are often more effective thanlots of writing.
An example handout from the mango jam making course is in Appendix B at the end ofthese notes. Refer to the example and check to see that it is consistent with the session planin Appendix A.
An example of a handout using pictures to good effect is in Appendix C at the end ofthese notes.
Which of these two handouts below is easier to follow?
How are tey different?
Prepare learning resources8
Preparing learning resources
How to balance a book on your head
1. First get abook.
2. Place it flaton top ofyour head.
3. Stand still withthe book onyour head.
4. Don’t let thebook fall off.

Prepare learning resources 9
Preparing learning resources
WorkbooksThe book you are currently reading is an example of a workbook. Workbooks, likehandouts are a useful way of providing information to trainees. Workbooks have the added advantage of allowing you to build in activities and exercisesyou want to complete during the training. This helps the trainees to remember what you aretalking about and gives them something to refer back to later on.
If you are going to write a workbook for your training course you need to put the informationtogether in a way that will help the trainees to learn. This means that the information in yourworkbook should be presented in the same order that you would cover during the training.
How do I write a workbook?Use the session plan as a basis for your workbook. It contains information about the tasksthat need to be completed to achieve the learning outcome. For each task the session planincludes steps and instructions for quality and safety. These provide the framework for thecontent in your workbook. Tasks can be used as headings and steps as sub headings.Information about quality and safety can be included under these headings.
Follow these steps:
11 .. UUssee tthhee ttaasskkss aass hheeaaddiinnggss..
22.. UUssee tthhee sstteeppss aass ssuubb--hheeaaddiinnggss..
33.. UUssee tthhee iinnssttrruuccttiioonnss ffoorrqquuaalliittyy aanndd ssaaffeettyy aasstthhee ccoonntteenntt..
44.. AAdddd ppiiccttuurreess aanndd ddiiaaggrraammsswwhheerree aapppprroopprriiaattee..
55.. AAdddd aaccttiivviittiieess ffoorrttrraaiinneeeess..
66 .. WWrriittee aann iinnttrroodduuccttiioonnaanndd aa ccoonncclluussiioonn..

Use the tasks as headings
ExampleLet’s look at the jam making course as an example. Refer to the session planin Appendix A at the end of these notes.
Each of these tasks can become a heading in the workbook. Under each of these headingsyou could put the steps as sub headings and the instructions for quality and safety as thecontent.
Prepare learning resources10
Step 1. Use the tasks as headings
1
What are the tasks?
1. Sterilise the jars ✓
2. Prepare the ingredients ✓
3. Cook the fruit mixture ✓
4. Package and label the fruit ✓
5. Sell the jam ✓

Use the steps as sub-headings
The steps can be used to write sub headings for the workbook. Theheadings don’t have to be exactly the same wording as in the session planbut can be shortened to make the workbook more readable. Remember the
session plan is for the trainer, while the workbook is written for use by the trainees. It isimportant, however that the headings in the workbook contain the same idea as the stepsin the session plan.
Example
Using these steps as a basis the sub-headings in the workbook could be:
• Select jars for use in jam making• Wash jars and lids• Place jars and lids in the pot• Boil the jars • Allow the jars to dry.
Prepare learning resources 11
Step 2. Use the steps as sub-headings
Tasks Steps
1. Sterilise the 1.1 Select jars
jars 1.2 Wash the jars and lids
1.3 Put the clean jars and the lids on a rack in a pot with clean water
1.4 Put pot on the stove and bring the water to a boil
1.5 Stand sterilised jars on a drying rack to air dry
2

Use the instructions for quality and safetyas the content
ExampleRefer again to the jam making course as an example. What are the steps andinstructions for quality and safety for the first task?
Prepare learning resources12
Step 3. Use the instructions for quality and safety as the content
3
Tasks Steps Quality Safety
1. Sterilise the jars. 1.1 Select jars. Jars must be glass. Be careful of cuts fromUse recycles jars as broken glass.this reduces the cost.Inspect the jars carefully.If jars are cracked orchipped the jam willspoil.
1.2 Wash the jars and Use warm water and lids. detergent. After
washing make sure theglasses are rinsed toremove any detergent.
1.3 Put the clean jars This is important toand the lids on a keep. The jars awayrack in a pot with from direct contact clean water. with the heat source.
1.4 Put pot on the Boil jars for 10 Be careful of burnsstove and bring the minutes. from hot water.water to a boil.
1.5 Stand sterilised Wash hands beforejars on a drying handling sterilised jars.rack to air dry.

Using this information the workbook might look like this.
Task 1. Sterilise the jars
Select jars for use in jam makingJars for use in jam making must be made of glass. If you want toreduce the cost of jam making you could use recycled jars. It isimportant that the jars have tight fitting lids.
When selecting jars for use in jam making it is important that they arefree from any cracks or chips. These will cause the jam to spoil.
When handling the glass jars be careful to avoid any sharp edgesso that you don’t cut yourself.
Wash jars and lidsJars should be washed before they are sterilised to remove anyloose material. Use warm water and detergent to wash the glassesand rinse them thoroughly to remove any detergent.
Place jars and lids in the potTo prevent the jars from cracking place them on a rack and place themin a pot with clean water. The rack will keep the jars away from directcontact with the bottom of the pot which sits on the fire or stove.
Boil the jars Bring the water to the boil. Leave the jars in the boiling water forabout 10 minutes to ensure that any bacteria are killed.
When boiling the jars be careful not to burn yourself on the hotwater or the hot jars.
Allow the jars to dryStand the jars on a drying rack and allow them to air dry. Don’t drythem with a tea towel as this is likely to contaminate the jars. Makesure you wash your hands before handling the sterilised jars so thatyou don’t contaminate them.Be careful when handling the hot jars so that you don’t burn yourself.
Prepare learning resources 13
Step 3. Use the instructions for quality and safety as the content

Add pictures and diagrams whereappropriate
Pictures and diagrams make a significant difference to a handout. A pictureis usually more effective than words to give instructions about how
something should be done. The following picture could be used to illustrate how jars aresterilised in boiling water over a wood fire.
Prepare learning resources14
Step 4. Add pictures and diagrams where appropriate
4

Prepare learning resources 15
Add activities for trainees
Having activities for trainees to complete in the workbook is an effective wayof involving trainees in the training session. This will reinforce the trainingand help trainees to remember what you covered in the training.
Activities could include:
• answering questions related to the learning material• case studies• problem solving exercises.
ExampleIn the mango jam workbook questions about food hygiene could be added to the sectionon sterilising jars.
What is food hygiene?
––––––––––––––––––––––––––––––––––––––––––––––––––––––––––––
––––––––––––––––––––––––––––––––––––––––––––––––––––––––––––
––––––––––––––––––––––––––––––––––––––––––––––––––––––––––––
––––––––––––––––––––––––––––––––––––––––––––––––––––––––––––
Why is it important to practice good food hygiene?
––––––––––––––––––––––––––––––––––––––––––––––––––––––––––––
––––––––––––––––––––––––––––––––––––––––––––––––––––––––––––
––––––––––––––––––––––––––––––––––––––––––––––––––––––––––––
––––––––––––––––––––––––––––––––––––––––––––––––––––––––––––
How does sterilising the jars make the jam last longer?
––––––––––––––––––––––––––––––––––––––––––––––––––––––––––––
––––––––––––––––––––––––––––––––––––––––––––––––––––––––––––
––––––––––––––––––––––––––––––––––––––––––––––––––––––––––––
––––––––––––––––––––––––––––––––––––––––––––––––––––––––––––
Step 5. Add activities for trainees
5
Prepare learning resources16
Write an introduction and conclusion
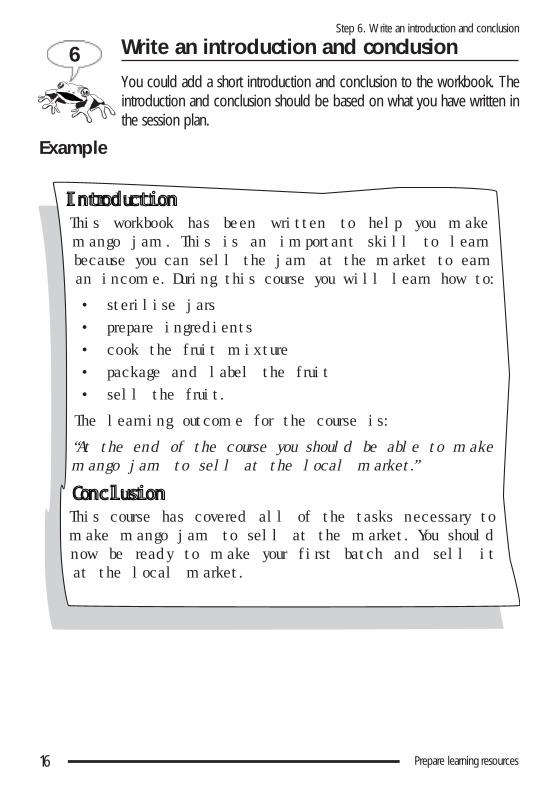
You could add a short introduction and conclusion to the workbook. Theintroduction and conclusion should be based on what you have written inthe session plan.
Example
Step 6. Write an introduction and conclusion
6
IInnttrroodduuccttiioonnThis workbook has been written to help you makemango jam. This is an important skill to learnbecause you can sell the jam at the market to earnan income. During this course you will learn how to:• sterilise jars• prepare ingredients• cook the fruit mixture• package and label the fruit• sell the fruit.The learning outcome for the course is:“At the end of the course you should be able to makemango jam to sell at the local market.”CCoonncclluussiioonnThis course has covered all of the tasks necessary tomake mango jam to sell at the market. You shouldnow be ready to make your first batch and sell itat the local market.

Prepare learning resources 17
Adapting existing learning resources
There may be resources already written and available to you which can be used for yourtraining course. It is important when using existing resources that you check if they aresuitable for the training you have planned. You should check that the information includedin the workbook or handout is consistent with what you want to present.
You might need to make some changes to the content to:
• make the information relevant to your group of trainees• adapt the content to local conditions or community requirements• adapt to available resources, equipment, facilities, and raw materials.
To adapt existing learning resources start with the session plan. Check that the learningresources you are going to use are consistent with your:
• learning outcome• tasks and steps• instructions for quality and safety.
Adapting existing learning resources

Prepare learning resources18
Conclusion
Conclusion
This module has been designed to help you to preparelearning resources for an income oriented short training course.
You should now be able to prepare handouts and workbooks,or adapt existing learning materials for your training courses. Wehope this has given you some ideas to try out in your owntraining situation.

Prepare learning resources 19
Assessment checklist
The following is an assessment checklist for preparing learning resources. For each criteriaplace either tick or a cross.
Criteria Handouts The information is clear and easy to read
Diagrams and pictures are appropriate and clear
The handout is effective in reinforcing the training
WorkbookThe workbook uses headings and sub-headings consistent with the tasks and steps in the session plan
The content of the workbook is consistent with the quality and safety instructions in the session plan
The workbook has appropriate diagrams or pictures that are clear
The information in the workbook is easy to read
The workbook has an introduction and conclusion
Assessment checklist

Prepare learning resources20
Appendix A: Session plan
App
endi
x A
: Ses
sion
plan
for
jam
mak
ing
cour
se
Sess
ion
plan
Cour
se t
itle:
Mak
ing
man
go ja
m t
o im
prov
e yo
ur in
com
e
Lear
ning
out
com
e: A
t th
e en
d of
the
cou
rse
you
shou
ld b
e ab
le t
o m
ake
man
go ja
m t
o se
ll at
the
loca
l mar
ket
Tim
eTa
sks
Step
s Q
ualit
ySa
fety
Tool
s, ra
w m
ater
ials,
Teac
hing
Minu
tes
equip
men
t, lea
rning
met
hods
mat
erial
s
60 m
ins
1.St
erilis
e 1.1
Selec
t jars
.Ja
rs mu
st be
glas
s. U
se re
cycle
d jar
s C
uts f
rom
Glas
s jars
with
lids
.De
mons
tratio
nth
e jar
s.as
this
redu
ces t
he c
ost.
brok
en g
lass
and
prac
tice.
1.2W
ash
the
jars a
nd li
ds.
Insp
ect t
he ja
rs ca
refu
lly. I
f jars
are
Burn
s fro
mC
lean
wate
r cra
cked
or c
hippe
d th
e jam
will
spoi
l.ho
t wate
r(fo
r was
hing
jars)
.
1.3Pu
t the
clea
n jar
s and
Large
pot
the
lids o
n a
rack
in a
(fo
r ste
rilizin
g jar
s).
pot w
ith c
lean
wate
r.
1.4Pu
t pot
on
the
stove
Boil
jars f
or 10
min
utes
.W
ire ra
ck (
to p
ut o
n an
d br
ing
the
wate
r to
the b
otto
m of
large
pot
).a
boil.
1.5St
and
sterili
sed
jars o
n a
Was
h ha
nds b
efor
e ha
ndlin
g ste
rilise
d Ki
tchen
tow
els (
for
dryin
g rac
k to
air
dry.
jars.
dryin
g jar
s).

Prepare learning resources 21
Appendix A: Session plan
Sess
ion
plan
Tim
eTa
sks
Step
s Q
ualit
ySa
fety
Tool
s, ra
w m
ater
ials,
Teac
hing
Minu
tes
equip
men
t, lea
rning
met
hods
mat
erial
s
75 m
ins
2.Pr
epare
2.
1Se
lect f
ruit.
Cho
ose
high
quali
ty fru
it. If
you
use
W
ear p
rotec
tive
Man
goes
(am
ount
De
mons
tratio
nth
eov
errip
e or
poo
r qua
lity fr
uit, t
he,
clothi
ng (a
pron
, hair
depe
nds o
n qu
antity
and
prac
tice.
ingred
ients.
entir
e ba
tch c
an b
e ru
ined
.ne
t, ru
bber
glo
ves)
.of
fini
shed
pro
duct)
If no
rubb
er g
love
sU
se ra
tio 5
:6:1.
are a
vaila
ble,
was
hFo
r 5 c
ups m
ango
pulp
,ha
nds b
efore
and
add
6 cu
ps o
f sug
ar,aft
erfo
od h
andl
ing.
an
d the
juice
of 1
lemo
n.
2.2
Was
h fru
it.W
ash
fruit
in c
lean
wate
r. If
the
Falls
(w
et,
Bask
et o
r oth
er
wate
r is
not c
lean,
you
will
have
tosli
pper
y flo
or).
cont
ainer
. Kni
fe,
find
some
way
to p
urify
it.
clean
, col
d w
ater,
Nev
er w
ash
mang
oes i
n ho
t wate
rbo
wl o
r col
ande
r,H
ot w
ater m
akes
man
goes
go
soft
kitch
en to
wel.
too
soon
.
2.3
Peel
and
slice
fruit
.M
ake
sure
the
piec
es a
re th
e sa
me si
ze.
Cut
s fro
m us
ing
Sharp
kni
fe.
Remo
ve a
ll sto
nes,
seed
s, an
d pi
ts. P
utkn
ives.
Bow
l.th
e fru
it in
a cle
an b
owl.
Use
woo
den,
Cut
ting
surfa
ce.
clay,
plas
tic, s
tainle
ss ste
el, o
r ena
melle
dbo
wls a
nd u
tensil
s only
. Cop
per,
bras
s,or
iron
bow
ls w
ill re
act w
ith th
e cit
ricac
id in
the
fruit
and
spoi
l the
jam.

Prepare learning resources22
Appendix A: Session plan
Sess
ion
plan
Tim
eTa
sks
Step
s Q
ualit
ySa
fety
Tool
s, ra
w m
ater
ials,
Teac
hing
Minu
tes
equip
men
t, lea
rning
met
hods
mat
erial
s
2.4
Cru
sh fr
uit.
Cru
sh th
e fru
it pi
eces
with
a c
lean
Bruis
es (
from
mash
er (
morta
r and
pes
tle)
or fr
uitim
prop
er u
sepr
ess.
of p
estle
).
2.5
Add
suga
r, lem
ons
Suga
r help
s pre
serve
the
jam fo
r a lo
ngBo
wl.
and
pecti
n.tim
e. T
he a
moun
t of s
ugar
will
depe
nd
Mea
surin
g cu
ps.
on th
e sw
eetn
ess o
f the
fruit
.St
orag
e co
ntain
er (
for
You
can
extra
ct pe
ctin
from
the
peels
su
gar).
of th
e ma
ngoe
s: jus
t boi
l the
pee
ls in
Lemo
n.w
ater.
The
stick
y pe
ctin
will
float
to th
e M
ango
pee
ls (if
mak
ingto
p of
the
wate
r.pe
ctin
–opt
iona
l ste
p).
This
shou
ld b
e do
ne a
head
of t
ime.
Mea
surin
g sp
oons
.To
avo
id p
ossib
le co
ntam
inati
on a
nd
Large
woo
den
spoo
n.
food
poi
soni
ng, k
eep
wor
k are
a(fo
r stir
ring
ingre
dien
ts).
abso
lutely
clea
n.

Prepare learning resources 23
Appendix A: Session plan
Sess
ion
plan
Tim
eTa
sks
Step
s Q
ualit
ySa
fety
Tool
s, ra
w m
ater
ials,
Teac
hing
Minu
tes
equip
men
t, lea
rning
met
hods
mat
erial
s
120
3.C
ook
3.
1Br
ing
the
fruit
Start
to c
ook
the
jam a
s soo
n as
the
Risk
of b
urns
.La
rge p
ot.
Demo
nstra
tion
mins
the
fruit
to th
e bo
il.fru
it ha
s bee
n w
ashe
d, st
oned
, and
cut
Wea
r pro
tectiv
e ne
t,Fru
it mi
xture
.an
d pr
actic
e.mi
xture
.up
. It i
s not
goo
d to
pre
pare
the
fruit
clothi
ng (a
pron
, hair
Woo
den
spoo
n w
ithan
d lea
ve it
unt
il yo
u co
me b
ack
from
rubb
er g
love
s).
long
han
dle
(for s
tirrin
g th
e fie
ld. T
he fr
uit w
ill lo
se it
s goo
d If
no ru
bber
glo
ves
mixtu
re).
colo
ur a
nd fl
avou
r. Bo
il to
con
cent
rate
are a
vaila
ble,
was
hKi
tchen
tow
el .
the
suga
r to
the
right
leve
l.yo
ur h
ands
for a
tSt
ove
(woo
d, g
as,
least
30 se
cond
s.ele
ctric,
cha
rcoal)
.
3.2
Stir
mixtu
re.
Stir
the
mixtu
re c
onsta
ntly
so it
doe
s Ta
ble
spoo
n or
ladl
e
not b
urn.
This
is im
porta
nt b
ecau
se(fo
r tes
ting
cons
isten
cyjam
s bur
n ea
sily
if yo
u do
n’t k
eep
and
taste
).sti
rring
.Ex
tra su
gar a
nd le
mon
(for c
orre
cting
taste
).
3.3
Test
the
mixtu
re.
The
jam is
read
y wh
en it
is th
ick e
noug
hby
takin
g sp
oonf
ul an
d lea
ving
it to
cool
.If
the su
rface
of a
the
jam w
rinkle
s whe
nyo
u pu
sh it
with
a fi
nger
, the
jam
is re
ady.
If its
not
thick
eno
ugh,
leav
e it
to c
ook
a litt
le lo
nger
.
3.4
Remo
ve th
e A
fter h
eatin
g yo
u ma
y wa
nt to
do
a
mixtu
re fr
om
taste
test t
o ma
ke su
re th
e jam
has
a
the
heat.
good
flav
our.

Prepare learning resources24
Appendix A: Session plan
Sess
ion
plan
Tim
eTa
sks
Step
s Q
ualit
ySa
fety
Tool
s, ra
w m
ater
ials,
Teac
hing
Minu
tes
equip
men
t, lea
rning
met
hods
mat
erial
s
60 m
ins
4.Pa
ckag
e 4.
1Pu
t jam
into
jam
Use
a fu
nnel
to p
our t
he h
ot ja
m in
to
Wea
r pro
tectiv
e ne
t,G
lass j
ars w
ith li
ds.
Demo
nstra
tion
and
label
jars.
the
hot v
ery
cont
ainer
s unt
il th
ey a
reclo
thing
(apr
on, h
airLa
bels.
and
prac
tice.
the
jars.
full.
Fillin
g th
e jar
s to
the
top
keep
s the
rubb
er g
love
s).
Glue
.air
out
. Kee
ping
the
air o
ut w
ill ma
ke
If no
rubb
er g
love
sSc
issor
s.th
e ja
m ke
ep a
long
time
.are
ava
ilabl
e, w
ash
Fabr
ic.yo
ur h
ands
for a
tlea
st 30
seco
nds
befo
re a
nd a
fter
food
han
dlin
g.
4.2
Seal
the
jars.
Mak
e su
re th
at th
e lid
s on
your
jars
are
Risk
of b
urns
from
Rubb
er b
ands
.se
aled
prop
erly.
If a
ny a
ir ge
ts in
to th
e ho
t jam
and
coo
king
Seali
ng (
paraf
fin)
wax
.jar
, the
jam
will
spoi
l quic
kly. U
se o
nly
uten
sils.
new
scre
w o
r pus
h-on
lids
, or p
araffin
wax
to se
al th
e jar
s. Le
t the
jars
cool
do
wn.
4.3
Labe
l the
jars.
Labe
ls he
lp to
iden
tify a
nd d
ecor
ateth
e co
ntain
ers.
Deco
rative
labe
ls or
acir
cle o
f brig
ht fa
bric
tied
over
the
lidca
n att
ract c
usto
mers.
4.4
Stor
e th
e jam
.St
ore
the
jars i
n a
cool
, dark
, well
-ve
ntila
ted
plac
e. T
he ja
m w
ill ke
ep
for m
any
mont
hs.

Prepare learning resources 25
Appendix A: Session plan
Sess
ion
plan
Tim
eTa
sks
Step
s Q
ualit
ySa
fety
Tool
s, ra
w m
ater
ials,
Teac
hing
Minu
tes
equip
men
t, lea
rning
met
hods
mat
erial
s
60 m
ins
5.Se
ll th
e 5.
1C
ost t
he ja
m.C
alcula
te th
e co
st of
all
of th
e Pa
per a
nd p
ens o
r De
mons
trate
jam.
ingre
dien
ts ne
eded
to m
ake
the
jam.
penc
ils.
and
prac
tice.
Calc
ulate
the
total
cos
t of m
akin
g th
ejam
, inc
ludin
g fu
el an
d ele
ctrici
ty co
sts.
5.2
Price
the
jam.
Decid
e on
the
amou
nt o
f pro
fit yo
u De
mons
trate
wan
t to
make
from
sellin
g th
e jam
and
and
prac
tice.
add
this
on to
the
cost
of m
akin
g it.
Che
ck th
at the
amo
unt y
ou w
ant t
o se
llthe
jam
for i
s a p
rice
the m
arket
will p
ay.
You
don’
t wan
t to
try a
nd se
ll th
e jam
for a
muc
h hig
her p
rice
than
oth
ers a
re
sellin
g th
e sa
me p
rodu
ct fo
r.
5.3
Mark
et th
e jam
.M
ake
up a
sign
to d
isplay
at t
he
marke
t to
tell
peop
le ab
out t
he ja
mth
at yo
u are
sellin
g.

Prepare learning resources26
Appendix A: Session plan
Sess
ion
plan
Tim
eTa
sks
Step
s Q
ualit
ySa
fety
Tool
s, ra
w m
ater
ials,
Teac
hing
Minu
tes
equip
men
t, lea
rning
met
hods
mat
erial
s
5.4
Sell
the
jam.
Mak
e ey
e co
ntac
t with
cus
tome
rs an
d
Role
play
ssm
ile. B
e pr
epare
d to
tell
them
abo
utsh
owin
g ho
wyo
ur ja
m. B
e he
lpfu
l as t
his w
ill to
app
roac
hen
cour
age
them
to b
uy th
e jam
.an
d sp
eak
toM
ake
sure
you
hav
e en
ough
cha
nge
to
custo
mers
atgiv
e to
cus
tome
rs if
they
nee
d it
whe
nth
e ma
rket.
they
are
buy
ing
the
jam.
Prac
tice
coun
ting
mone
y an
d ha
ndin
g ou
t.
5.5
Man
age
your
M
ake
sure
that
the
mone
y fro
m se
lling
Expl
anati
onmo
ney c
areful
ly.the
jam
is ke
pt se
cure
ly so
it is
not lo
stan
d di
scus
sion.
or st
olen
. It i
s a g
ood
idea
to b
ank
the
mone
y yo
u ha
ve m
ade
or u
se it
to b
uyin
gredi
ents
to m
ake
more
jam
for s
ale.

Prepare learning resources 27
Appendix A: Session plan
Tim
eCo
nclus
ion
Tool
s, ra
w m
ater
ials,
Teac
hing
Minu
tes
equip
men
t, lea
rning
met
hods
mat
erial
s
15 m
ins
Summ
arise
the
tasks
cov
ered
dur
ing
the
train
ing
•
Ster
ilise
jars.
•Pr
epare
ingre
dien
ts.•
Coo
k th
e fru
it mi
xture
.•
Pack
age
and
label
the
fruit.
•Se
ll th
e fru
it.Re
mind
train
ees o
f the
learn
ing
outco
mes.
Learn
ing
outco
me:
At t
he e
nd o
f the
cou
rse y
ou sh
ould
be
able
to m
ake
mang
o jam
.
Give
train
ees s
ome
feed
back
.
Tell
the
train
ees w
hat t
raini
ng is
nex
t.
Sess
ion
plan
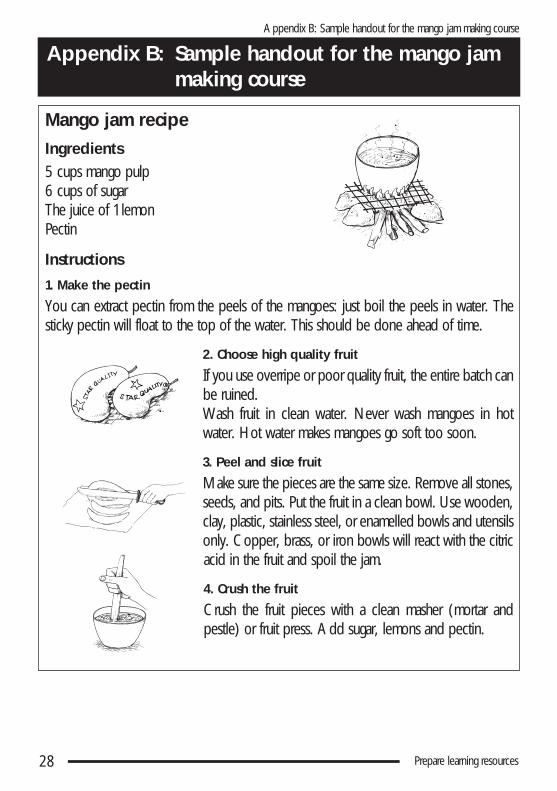
Mango jam recipe Ingredients5 cups mango pulp6 cups of sugarThe juice of 1 lemonPectin
Instructions
1. Make the pectin
You can extract pectin from the peels of the mangoes: just boil the peels in water. Thesticky pectin will float to the top of the water. This should be done ahead of time.
2. Choose high quality fruit
If you use overripe or poor quality fruit, the entire batch canbe ruined.Wash fruit in clean water. Never wash mangoes in hotwater. Hot water makes mangoes go soft too soon.
3. Peel and slice fruit
Make sure the pieces are the same size. Remove all stones,seeds, and pits. Put the fruit in a clean bowl. Use wooden,clay, plastic, stainless steel, or enamelled bowls and utensilsonly. Copper, brass, or iron bowls will react with the citricacid in the fruit and spoil the jam.
4. Crush the fruit
Crush the fruit pieces with a clean masher (mortar andpestle) or fruit press. Add sugar, lemons and pectin.
Prepare learning resources28
Appendix B: Sample handout for the mango jam making course
Appendix B: Sample handout for the mango jam making course

5. Cook the fruit mixture
Start to cook the jam as soon as the fruit has been washed,stoned, and cut up. It is not good to leave the fruit to sit as itwill lose its good colour and flavour. Bring the fruit to the boilto concentrate the sugar to the right level. Stir the mixtureconstantly so it does not burn. To test that the jam is thickenough, take a spoonful and leaving it to cool. If the surface ofthe jam wrinkles when you push it with a finger, the jam is ready.If it is not thick enough, leave it to cook a little longer. Oncethe jam mixture is cooked remove it from the heat. You maywant to do a taste test to make sure the jam has a good flavour.
6. Pour jam into jars
Use a funnel to pour the hot jam into sterilised jars until theyare full. Filling the jars to the top keeps the air out and will makethe jam keep a long time.
7. Seal the jars
Make sure that the lids on your jars are sealed properly. If anyair gets into the jar, the jam will spoil quickly. Use only newscrew or push-on lids, or paraffin wax to seal the jars. Let thejars cool down.
8. Label the jars for identification
You could also decorate to make them look more attractive.Store the jars in a cool, dark, well-ventilated place. The jam willkeep for many months.
Prepare learning resources 29
Appendix B: Sample handout for the mango jam making course
Prepare learning resources30
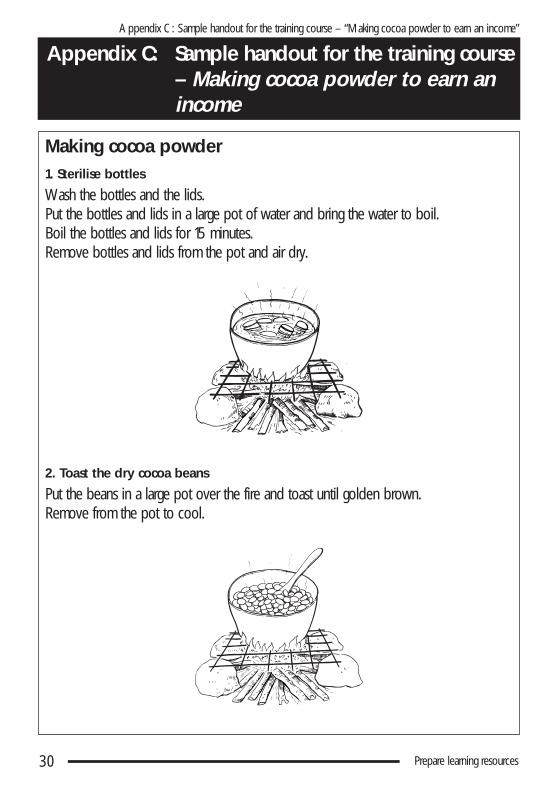
Making cocoa powder1. Sterilise bottles
Wash the bottles and the lids.Put the bottles and lids in a large pot of water and bring the water to boil.Boil the bottles and lids for 15 minutes.Remove bottles and lids from the pot and air dry.
2. Toast the dry cocoa beans
Put the beans in a large pot over the fire and toast until golden brown.Remove from the pot to cool.
Appendix C: Sample handout for the training course – “Making cocoa powder to earn an income”
Appendix C: Sample handout for the training course– Making cocoa powder to earn an income

Prepare learning resources 31
Appendix C: Sample handout for the training course – “Making cocoa powder to earn an income”
3. Grind the toasted cocoa beans
Put the toasted beans in a clean pounding jar.Pound the beans until fine enough for sifting.
4. Sift the pounded beans
Remove pounded beans from thepounding jar and sift cocoa powder.
5. Store in sterilised bottles
Put 2 cups of cocoa powder in each bottle.Cover and close bottles tight with lids.

Prepare learning resources32
Notes