Embed Size (px)
Citation preview
WHY grow Bodi? Because it:• is a low-maintenance home garden food plant that can be easily grown throughout
the year;• can be inter-planted with vegetables and ornamentals in the home garden.• replenishes soil nitrogen used up by other crops and is an excellent choice for
crop rotation.• can be grown in containers. (See factsheet on Container planting);• contains fiber, carbohydrates, calcium, iron, magnesium, phosphorus,
potassium, zinc and protein and are high in Vitamins A, C and B6. Legumes are similar to meat in nutrients, but with lower iron levels and no saturated fats.
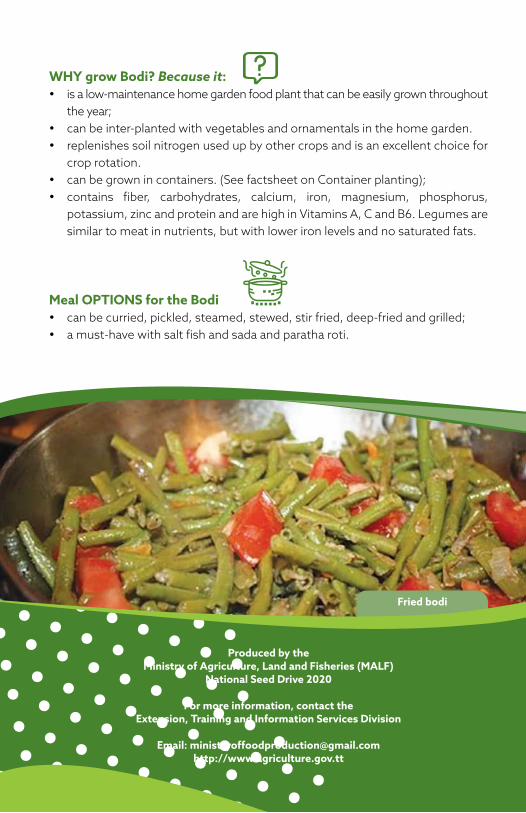
Meal OPTIONS for the Bodi • can be curried, pickled, steamed, stewed, stir fried, deep-fried and grilled; • a must-have with salt fish and sada and paratha roti.
Produced by the Ministry of Agriculture, Land and Fisheries (MALF)
National Seed Drive 2020
For more information, contact the Extension, Training and Information Services Division
Email: [email protected]://www.agriculture.gov.tt
Fried bodi
Ministry of Agriculture, Land and FisheriesGovernment of the Republic of Trinidad and Tobago
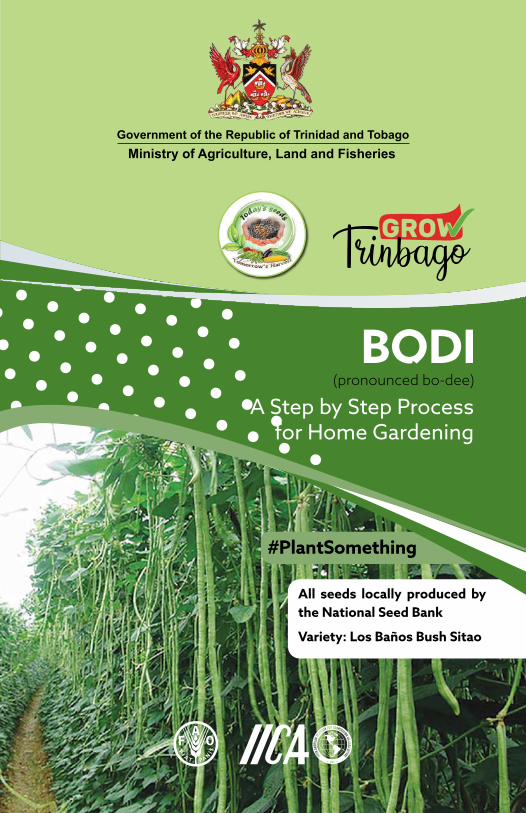
BODIA Step by Step Process
for Home Gardening
#PlantSomething
(pronounced bo-dee)
All seeds locally produced by the National Seed Bank
Variety: Los Baños Bush Sitao
Plant Fertilizing• To encourage root growth: Choose a complete fertilizer high in phosphorus
(such as 12:24:12). These fertilizers can easily be found in garden shops. Apply 5g (1 tsp) two (2) weeks after germination, at least 5 cm (2 in) away from the plant.
• To support plant growth and good yields: Continue fertilizing every 15 days with a granular (NPK) fertilizer high in potassium such as 12:12:17. Use 5g (1 tsp) per plant for the duration of the plant’s life.
NOTE: USE AS ADVISED. TOO MUCH applied TOO CLOSE can KILL the plant!
Plant Care [Cultural Practices]Maintain plant health by:• supporting the growing stem: the long type of bodi needs support to grow,
such as stakes, fences, walls, trellises and even other plants. • managing pests and diseases using biological agents and chemicals. The main
pests of bodi are black bean flies, aphids, spider-mites and nematodes. The main disease is the mosaic virus.
• using a combination of environmentally friendly pesticides, as recommended and appropriate, to target the specific pests. Always alternate pesticides and follow label instructions closely. Never use Sevin on bodi, peas or beans. This chemical will kill these plants.
Integrated Pest Management (IPM), based on cultural and biological methods, is the best approach to controlling pests and diseases in a home garden. Pesticides should be used as a last resort. (See Factsheet on “Integrated Pest Management for Home Gardeners”).
2. When and How to HARVESTPods are ready for harvest in about 7 to 8 weeks after sowing. Shorter types can be harvested in 5 to 6 weeks after sowing. Longer types should be harvested when pods are 30 to 45 cm. (12 to 18 ins.) long.
• Pick pods in the young stages every 2 to 3 days, before seeds mature or swell.• Use your fingers to carefully pick or pinch off pods. Try not to damage the
flower head of the plant as this will reduce its bearing life and affect yields.• Avoid pulling off pods which will cause stem stripping and the plant could die.
NOTE: Leave a few pods to dry on the plant to provide you with seeds for next planting.
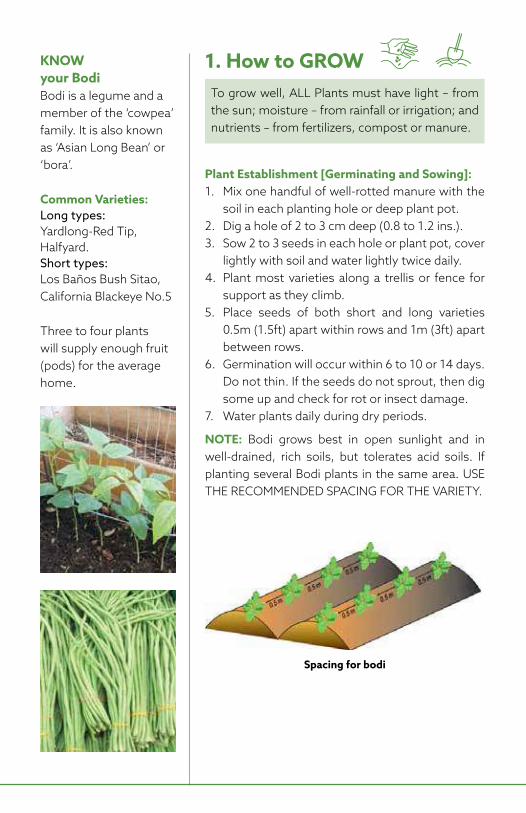
1. How to GROWTo grow well, ALL Plants must have light – from the sun; moisture – from rainfall or irrigation; and nutrients – from fertilizers, compost or manure.
Plant Establishment [Germinating and Sowing]:1. Mix one handful of well-rotted manure with the
soil in each planting hole or deep plant pot.2. Dig a hole of 2 to 3 cm deep (0.8 to 1.2 ins.).3. Sow 2 to 3 seeds in each hole or plant pot, cover
lightly with soil and water lightly twice daily.4. Plant most varieties along a trellis or fence for
support as they climb.5. Place seeds of both short and long varieties
0.5m (1.5ft) apart within rows and 1m (3ft) apart between rows.
6. Germination will occur within 6 to 10 or 14 days. Do not thin. If the seeds do not sprout, then dig some up and check for rot or insect damage.
7. Water plants daily during dry periods.
NOTE: Bodi grows best in open sunlight and in well-drained, rich soils, but tolerates acid soils. If planting several Bodi plants in the same area. USE THE RECOMMENDED SPACING FOR THE VARIETY.
Spacing for bodi
KNOW your BodiBodi is a legume and a member of the ‘cowpea’ family. It is also known as ‘Asian Long Bean’ or ‘bora’.
Common Varieties: Long types: Yardlong-Red Tip, Halfyard.Short types: Los Baños Bush Sitao, California Blackeye No.5
Three to four plants will supply enough fruit (pods) for the average home.
Plant Fertilizing• To encourage root growth: Choose a complete fertilizer high in phosphorus
(such as 12:24:12). These fertilizers can easily be found in garden shops. Apply 5g (1 tsp) two (2) weeks after germination, at least 5 cm (2 in) away from the plant.
• To support plant growth and good yields: Continue fertilizing every 15 days with a granular (NPK) fertilizer high in potassium such as 12:12:17. Use 5g (1 tsp) per plant for the duration of the plant’s life.
NOTE: USE AS ADVISED. TOO MUCH applied TOO CLOSE can KILL the plant!
Plant Care [Cultural Practices]Maintain plant health by:• supporting the growing stem: the long type of bodi needs support to grow,
such as stakes, fences, walls, trellises and even other plants. • managing pests and diseases using biological agents and chemicals. The main
pests of bodi are black bean flies, aphids, spider-mites and nematodes. The main disease is the mosaic virus.
• using a combination of environmentally friendly pesticides, as recommended and appropriate, to target the specific pests. Always alternate pesticides and follow label instructions closely. Never use Sevin on bodi, peas or beans. This chemical will kill these plants.
Integrated Pest Management (IPM), based on cultural and biological methods, is the best approach to controlling pests and diseases in a home garden. Pesticides should be used as a last resort. (See Factsheet on “Integrated Pest Management for Home Gardeners”).
2. When and How to HARVESTPods are ready for harvest in about 7 to 8 weeks after sowing. Shorter types can be harvested in 5 to 6 weeks after sowing. Longer types should be harvested when pods are 30 to 45 cm. (12 to 18 ins.) long.
• Pick pods in the young stages every 2 to 3 days, before seeds mature or swell.• Use your fingers to carefully pick or pinch off pods. Try not to damage the
flower head of the plant as this will reduce its bearing life and affect yields.• Avoid pulling off pods which will cause stem stripping and the plant could die.
NOTE: Leave a few pods to dry on the plant to provide you with seeds for next planting.
1. How to GROWTo grow well, ALL Plants must have light – from the sun; moisture – from rainfall or irrigation; and nutrients – from fertilizers, compost or manure.
Plant Establishment [Germinating and Sowing]:1. Mix one handful of well-rotted manure with the
soil in each planting hole or deep plant pot.2. Dig a hole of 2 to 3 cm deep (0.8 to 1.2 ins.).3. Sow 2 to 3 seeds in each hole or plant pot, cover
lightly with soil and water lightly twice daily.4. Plant most varieties along a trellis or fence for
support as they climb.5. Place seeds of both short and long varieties
0.5m (1.5ft) apart within rows and 1m (3ft) apart between rows.
6. Germination will occur within 6 to 10 or 14 days. Do not thin. If the seeds do not sprout, then dig some up and check for rot or insect damage.
7. Water plants daily during dry periods.
NOTE: Bodi grows best in open sunlight and in well-drained, rich soils, but tolerates acid soils. If planting several Bodi plants in the same area. USE THE RECOMMENDED SPACING FOR THE VARIETY.
Spacing for bodi
KNOW your BodiBodi is a legume and a member of the ‘cowpea’ family. It is also known as ‘Asian Long Bean’ or ‘bora’.
Common Varieties: Long types: Yardlong-Red Tip, Halfyard.Short types: Los Baños Bush Sitao, California Blackeye No.5
Three to four plants will supply enough fruit (pods) for the average home.
WHY grow Bodi? Because it:• is a low-maintenance home garden food plant that can be easily grown throughout
the year;• can be inter-planted with vegetables and ornamentals in the home garden.• replenishes soil nitrogen used up by other crops and is an excellent choice for
crop rotation.• can be grown in containers. (See factsheet on Container planting);• contains fiber, carbohydrates, calcium, iron, magnesium, phosphorus,
potassium, zinc and protein and are high in Vitamins A, C and B6. Legumes are similar to meat in nutrients, but with lower iron levels and no saturated fats.
Meal OPTIONS for the Bodi • can be curried, pickled, steamed, stewed, stir fried, deep-fried and grilled; • a must-have with salt fish and sada and paratha roti.
Produced by the Ministry of Agriculture, Land and Fisheries (MALF)
National Seed Drive 2020
For more information, contact the Extension, Training and Information Services Division
Email: [email protected]://www.agriculture.gov.tt
Fried bodi
Ministry of Agriculture, Land and FisheriesGovernment of the Republic of Trinidad and Tobago
BODIA Step by Step Process
for Home Gardening
#PlantSomething
(pronounced bo-dee)
All seeds locally produced by the National Seed Bank
Variety: Los Baños Bush Sitao
WHY grow Corn? Because:• it is easy to grow and it makes a perfect addition to any garden.• the right varieties can be grown in small spaces, in blocks, on raised beds or in
containers once properly pollinated .• 20 - 25 plants will allow for adequate pollination (from wind) and formation of grains
on the corn cob.• it grows well in almost any soil type but performs best in loose and crumbly fertile
soil.• it is a good source of carbohydrates, vitamins (B1, B5, C, and E), phosphorus,
magnesium, iron, zinc and fibre.
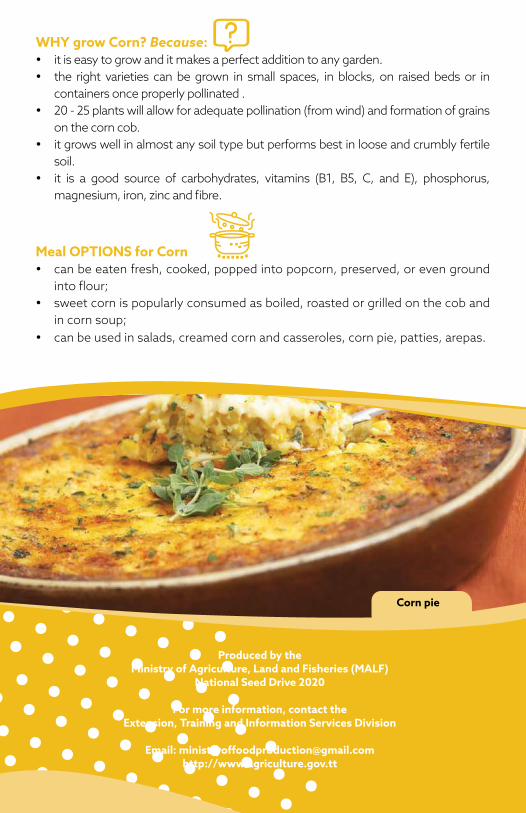
Meal OPTIONS for Corn• can be eaten fresh, cooked, popped into popcorn, preserved, or even ground
into flour;• sweet corn is popularly consumed as boiled, roasted or grilled on the cob and
in corn soup;• can be used in salads, creamed corn and casseroles, corn pie, patties, arepas.
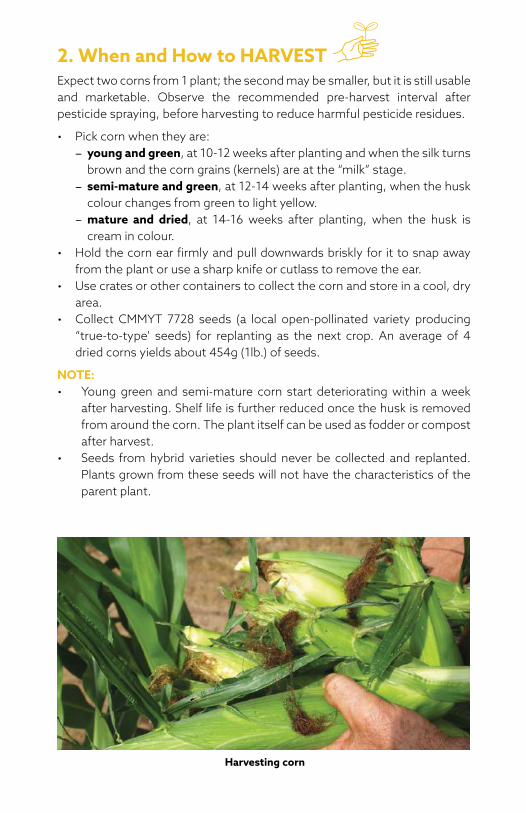
2. When and How to HARVESTExpect two corns from 1 plant; the second may be smaller, but it is still usable and marketable. Observe the recommended pre-harvest interval after pesticide spraying, before harvesting to reduce harmful pesticide residues.
• Pick corn when they are:− young and green, at 10-12 weeks after planting and when the silk turns brown and the corn grains (kernels) are at the “milk” stage.− semi-mature and green, at 12-14 weeks after planting, when the husk colour changes from green to light yellow.− mature and dried, at 14-16 weeks after planting, when the husk is cream in colour.
• Hold the corn ear firmly and pull downwards briskly for it to snap away from the plant or use a sharp knife or cutlass to remove the ear.
• Use crates or other containers to collect the corn and store in a cool, dry area.
• Collect CMMYT 7728 seeds (a local open-pollinated variety producing “true-to-type’ seeds) for replanting as the next crop. An average of 4 dried corns yields about 454g (1lb.) of seeds.
NOTE:• Young green and semi-mature corn start deteriorating within a week
after harvesting. Shelf life is further reduced once the husk is removed from around the corn. The plant itself can be used as fodder or compost after harvest.
• Seeds from hybrid varieties should never be collected and replanted. Plants grown from these seeds will not have the characteristics of the parent plant.
Ministry of Agriculture, Land and FisheriesGovernment of the Republic of Trinidad and Tobago
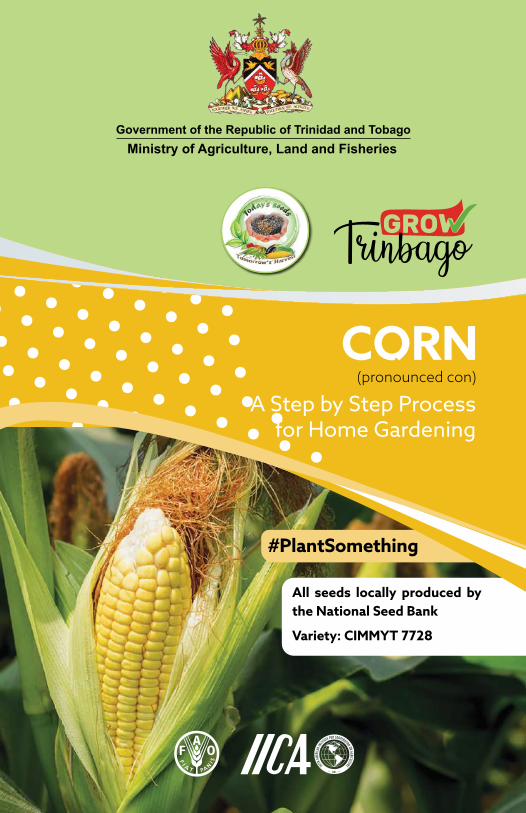
CORNA Step by Step Process
for Home Gardening
#PlantSomething
(pronounced con)
All seeds locally produced by the National Seed Bank
Variety: CIMMYT 7728Produced by the
Ministry of Agriculture, Land and Fisheries (MALF)National Seed Drive 2020
For more information, contact the Extension, Training and Information Services Division
Email: [email protected]://www.agriculture.gov.tt
Corn pie
Harvesting corn

1. How to GROWTo grow well ALL Plants must have light – from the sun; moisture – from rainfall or irrigation; and nutrients – from fertilizers, compost or manure.
Plant Establishment [Germinating and Sowing]:1. Choose an open spot, in full sunlight with good
wind flow and drainage. 2. Clear the spot of weed and other plants, turn
the soil well, adding limestone and well-rotted manure, if needed, to improve soil structure and fertility. (Contact the Ministry for a soil test to determine need for limestone).
3. Mark out 2 to 3 rows at spacing of 30cm (1ft) within rows and 90cm (3 ft.) between rows.
4. Dig holes of 2-3cm (0.8-1.2 inches) in light soil, and 5-6 cm (2.0-2.4 inches) in clay soils.
5. Sow 2 seeds in each hole. In clay soils and cover lightly with soil. It is best to use seedlings in areas where birds consume newly planted seeds.
6. Thin out 4-6 weeks after leaves emerge, leaving 1 plant per hole.
NOTE: Local variety (CIMMYT 7728) can grow as tall as 6 to 8 feet. Corn is best grown in blocks, close together for adequate pollination. USE THE SPACING RECOMMENDED FOR THE VARIETY.
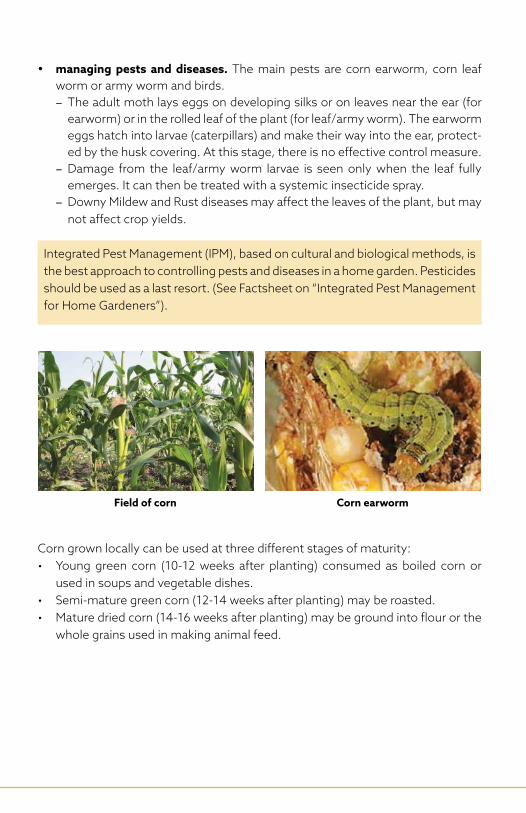
• managing pests and diseases. The main pests are corn earworm, corn leaf worm or army worm and birds. − The adult moth lays eggs on developing silks or on leaves near the ear (for earworm) or in the rolled leaf of the plant (for leaf/army worm). The earworm eggs hatch into larvae (caterpillars) and make their way into the ear, protect-ed by the husk covering. At this stage, there is no effective control measure. − Damage from the leaf/army worm larvae is seen only when the leaf fully emerges. It can then be treated with a systemic insecticide spray. − Downy Mildew and Rust diseases may affect the leaves of the plant, but may not affect crop yields.
Integrated Pest Management (IPM), based on cultural and biological methods, is the best approach to controlling pests and diseases in a home garden. Pesticides should be used as a last resort. (See Factsheet on “Integrated Pest Management for Home Gardeners”).
KNOW your CornCorn, also known as maize, is considered a vegetable when eaten whole, or a grain, when in kernel form. In either form, it provides food for humans and feed for animals. Field corn, also known as ‘dent corn’ or cow corn, usually ends up as animal feed, or in food products like chips and cornmeal. Sweet corn is picked while immature and enjoyed fresh.
Comon varieties: Field Corn: CIMMYT 7728 (local) and Pioneer HybridSweet Corn: Golden Sweet, King Sweet, UW-7
Spacing for corn
Field of corn
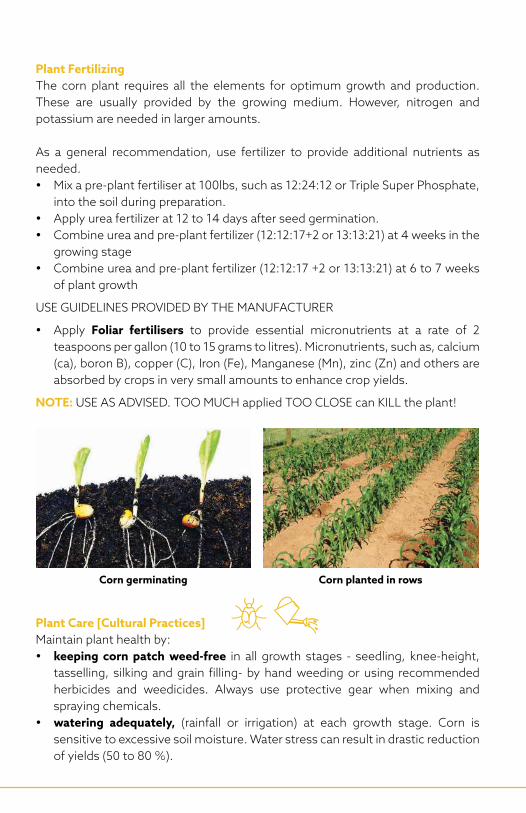
Corn germinating
Corn earworm
Corn planted in rows
Plant FertilizingThe corn plant requires all the elements for optimum growth and production. These are usually provided by the growing medium. However, nitrogen and potassium are needed in larger amounts.
As a general recommendation, use fertilizer to provide additional nutrients as needed. • Mix a pre-plant fertiliser at 100lbs, such as 12:24:12 or Triple Super Phosphate,
into the soil during preparation. • Apply urea fertilizer at 12 to 14 days after seed germination.• Combine urea and pre-plant fertilizer (12:12:17+2 or 13:13:21) at 4 weeks in the
growing stage• Combine urea and pre-plant fertilizer (12:12:17 +2 or 13:13:21) at 6 to 7 weeks
of plant growth
USE GUIDELINES PROVIDED BY THE MANUFACTURER
• Apply Foliar fertilisers to provide essential micronutrients at a rate of 2 teaspoons per gallon (10 to 15 grams to litres). Micronutrients, such as, calcium (ca), boron B), copper (C), Iron (Fe), Manganese (Mn), zinc (Zn) and others are absorbed by crops in very small amounts to enhance crop yields.
NOTE: USE AS ADVISED. TOO MUCH applied TOO CLOSE can KILL the plant!
Plant Care [Cultural Practices]Maintain plant health by:• keeping corn patch weed-free in all growth stages - seedling, knee-height,
tasselling, silking and grain filling- by hand weeding or using recommended herbicides and weedicides. Always use protective gear when mixing and spraying chemicals.
• watering adequately, (rainfall or irrigation) at each growth stage. Corn is sensitive to excessive soil moisture. Water stress can result in drastic reduction of yields (50 to 80 %).
Corn grown locally can be used at three different stages of maturity: • Young green corn (10-12 weeks after planting) consumed as boiled corn or
used in soups and vegetable dishes. • Semi-mature green corn (12-14 weeks after planting) may be roasted. • Mature dried corn (14-16 weeks after planting) may be ground into flour or the
whole grains used in making animal feed.
1. How to GROWTo grow well ALL Plants must have light – from the sun; moisture – from rainfall or irrigation; and nutrients – from fertilizers, compost or manure.
Plant Establishment [Germinating and Sowing]:1. Choose an open spot, in full sunlight with good
wind flow and drainage. 2. Clear the spot of weed and other plants, turn
the soil well, adding limestone and well-rotted manure, if needed, to improve soil structure and fertility. (Contact the Ministry for a soil test to determine need for limestone).
3. Mark out 2 to 3 rows at spacing of 30cm (1ft) within rows and 90cm (3 ft.) between rows.
4. Dig holes of 2-3cm (0.8-1.2 inches) in light soil, and 5-6 cm (2.0-2.4 inches) in clay soils.
5. Sow 2 seeds in each hole. In clay soils and cover lightly with soil. It is best to use seedlings in areas where birds consume newly planted seeds.
6. Thin out 4-6 weeks after leaves emerge, leaving 1 plant per hole.
NOTE: Local variety (CIMMYT 7728) can grow as tall as 6 to 8 feet. Corn is best grown in blocks, close together for adequate pollination. USE THE SPACING RECOMMENDED FOR THE VARIETY.
• managing pests and diseases. The main pests are corn earworm, corn leaf worm or army worm and birds. − The adult moth lays eggs on developing silks or on leaves near the ear (for earworm) or in the rolled leaf of the plant (for leaf/army worm). The earworm eggs hatch into larvae (caterpillars) and make their way into the ear, protect-ed by the husk covering. At this stage, there is no effective control measure. − Damage from the leaf/army worm larvae is seen only when the leaf fully emerges. It can then be treated with a systemic insecticide spray. − Downy Mildew and Rust diseases may affect the leaves of the plant, but may not affect crop yields.
Integrated Pest Management (IPM), based on cultural and biological methods, is the best approach to controlling pests and diseases in a home garden. Pesticides should be used as a last resort. (See Factsheet on “Integrated Pest Management for Home Gardeners”).
KNOW your CornCorn, also known as maize, is considered a vegetable when eaten whole, or a grain, when in kernel form. In either form, it provides food for humans and feed for animals. Field corn, also known as ‘dent corn’ or cow corn, usually ends up as animal feed, or in food products like chips and cornmeal. Sweet corn is picked while immature and enjoyed fresh.
Comon varieties: Field Corn: CIMMYT 7728 (local) and Pioneer HybridSweet Corn: Golden Sweet, King Sweet, UW-7
Spacing for corn
Field of corn
Corn germinating
Corn earworm
Corn planted in rows
Plant FertilizingThe corn plant requires all the elements for optimum growth and production. These are usually provided by the growing medium. However, nitrogen and potassium are needed in larger amounts.
As a general recommendation, use fertilizer to provide additional nutrients as needed. • Mix a pre-plant fertiliser at 100lbs, such as 12:24:12 or Triple Super Phosphate,
into the soil during preparation. • Apply urea fertilizer at 12 to 14 days after seed germination.• Combine urea and pre-plant fertilizer (12:12:17+2 or 13:13:21) at 4 weeks in the
growing stage• Combine urea and pre-plant fertilizer (12:12:17 +2 or 13:13:21) at 6 to 7 weeks
of plant growth
USE GUIDELINES PROVIDED BY THE MANUFACTURER
• Apply Foliar fertilisers to provide essential micronutrients at a rate of 2 teaspoons per gallon (10 to 15 grams to litres). Micronutrients, such as, calcium (ca), boron B), copper (C), Iron (Fe), Manganese (Mn), zinc (Zn) and others are absorbed by crops in very small amounts to enhance crop yields.
NOTE: USE AS ADVISED. TOO MUCH applied TOO CLOSE can KILL the plant!
Plant Care [Cultural Practices]Maintain plant health by:• keeping corn patch weed-free in all growth stages - seedling, knee-height,
tasselling, silking and grain filling- by hand weeding or using recommended herbicides and weedicides. Always use protective gear when mixing and spraying chemicals.
• watering adequately, (rainfall or irrigation) at each growth stage. Corn is sensitive to excessive soil moisture. Water stress can result in drastic reduction of yields (50 to 80 %).
Corn grown locally can be used at three different stages of maturity: • Young green corn (10-12 weeks after planting) consumed as boiled corn or
used in soups and vegetable dishes. • Semi-mature green corn (12-14 weeks after planting) may be roasted. • Mature dried corn (14-16 weeks after planting) may be ground into flour or the
whole grains used in making animal feed.
WHY grow Corn? Because:• it is easy to grow and it makes a perfect addition to any garden.• the right varieties can be grown in small spaces, in blocks, on raised beds or in
containers once properly pollinated .• 20 - 25 plants will allow for adequate pollination (from wind) and formation of grains
on the corn cob.• it grows well in almost any soil type but performs best in loose and crumbly fertile
soil.• it is a good source of carbohydrates, vitamins (B1, B5, C, and E), phosphorus,
magnesium, iron, zinc and fibre.
Meal OPTIONS for Corn• can be eaten fresh, cooked, popped into popcorn, preserved, or even ground
into flour;• sweet corn is popularly consumed as boiled, roasted or grilled on the cob and
in corn soup;• can be used in salads, creamed corn and casseroles, corn pie, patties, arepas.
2. When and How to HARVESTExpect two corns from 1 plant; the second may be smaller, but it is still usable and marketable. Observe the recommended pre-harvest interval after pesticide spraying, before harvesting to reduce harmful pesticide residues.
• Pick corn when they are:− young and green, at 10-12 weeks after planting and when the silk turns brown and the corn grains (kernels) are at the “milk” stage.− semi-mature and green, at 12-14 weeks after planting, when the husk colour changes from green to light yellow.− mature and dried, at 14-16 weeks after planting, when the husk is cream in colour.
• Hold the corn ear firmly and pull downwards briskly for it to snap away from the plant or use a sharp knife or cutlass to remove the ear.
• Use crates or other containers to collect the corn and store in a cool, dry area.
• Collect CMMYT 7728 seeds (a local open-pollinated variety producing “true-to-type’ seeds) for replanting as the next crop. An average of 4 dried corns yields about 454g (1lb.) of seeds.
NOTE:• Young green and semi-mature corn start deteriorating within a week
after harvesting. Shelf life is further reduced once the husk is removed from around the corn. The plant itself can be used as fodder or compost after harvest.
• Seeds from hybrid varieties should never be collected and replanted. Plants grown from these seeds will not have the characteristics of the parent plant.
Ministry of Agriculture, Land and FisheriesGovernment of the Republic of Trinidad and Tobago
CORNA Step by Step Process
for Home Gardening
#PlantSomething
(pronounced con)
All seeds locally produced by the National Seed Bank
Variety: CIMMYT 7728Produced by the
Ministry of Agriculture, Land and Fisheries (MALF)National Seed Drive 2020
For more information, contact the Extension, Training and Information Services Division
Email: [email protected]://www.agriculture.gov.tt
Corn pie
Harvesting corn
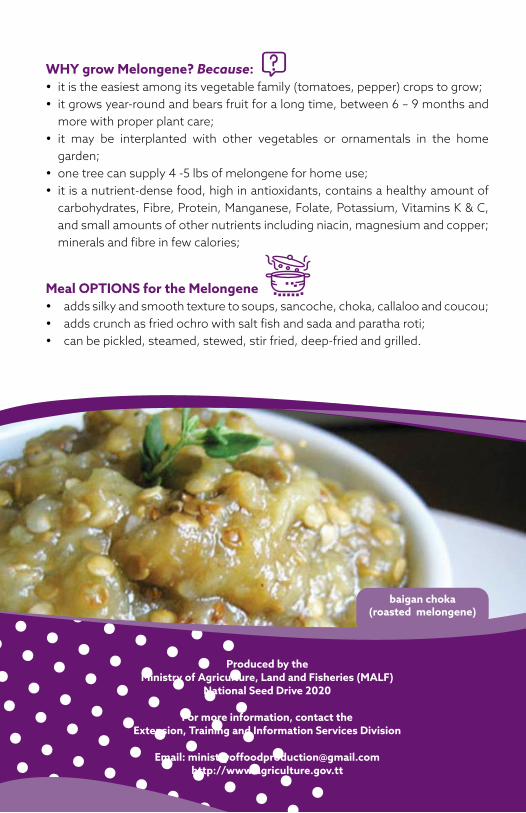
WHY grow Melongene? Because:• it is the easiest among its vegetable family (tomatoes, pepper) crops to grow;• it grows year-round and bears fruit for a long time, between 6 – 9 months and
more with proper plant care;• it may be interplanted with other vegetables or ornamentals in the home
garden;• one tree can supply 4 -5 lbs of melongene for home use; • it is a nutrient-dense food, high in antioxidants, contains a healthy amount of
carbohydrates, Fibre, Protein, Manganese, Folate, Potassium, Vitamins K & C, and small amounts of other nutrients including niacin, magnesium and copper; minerals and fibre in few calories;
Meal OPTIONS for the Melongene• adds silky and smooth texture to soups, sancoche, choka, callaloo and coucou;• adds crunch as fried ochro with salt fish and sada and paratha roti;• can be pickled, steamed, stewed, stir fried, deep-fried and grilled.
Produced by the Ministry of Agriculture, Land and Fisheries (MALF)
National Seed Drive 2020
For more information, contact the Extension, Training and Information Services Division
Email: [email protected]://www.agriculture.gov.tt
baigan choka(roasted melongene)
Ministry of Agriculture, Land and FisheriesGovernment of the Republic of Trinidad and Tobago
A Step by Step Process for Home Gardening
#PlantSomething
MELONGENE (pronounced melon-jen)
All seeds locally produced by the National Seed Bank
Variety: Long Purple
• During the growing stage: Apply 4 tablespoons High Nitrogen fertilizer (e.g. 20:10:10) in granular form or dissolved in water (water-salt) every 2 weeks until flowering.
• During the flowering stage and every two weeks for the lifetime of the plant: Apply High Potassium fertilizer (e.g. 12:12:17+2, plus Trace Elements) of 100g (7 tbsp) per plant, in granular form or dissolved in water (water-salt) AND One handful Calcium (granular or foliar) per plant.
NOTE: USE AS ADVISED. TOO MUCH applied TOO CLOSE can KILL the plant!
Plant Care [Cultural Practices]Maintain plant health by:• trimming or cutting back, which can result in a new flush of growth and prolong
the life of the crop.• watering adequately, including irrigation in dry conditions since melongene
needs a lot of water. However, the plant is very sensitive to water logging and proper drainage is important.
• managing pests and diseases, mainly mites, whiteflies, thrips, aphids and anthracnose, which cause deformation, unsightly and sunken spots and scarring on leaves and fruits, using biological agents and chemicals. Other pests include the melongene fruit worm, shot-hole beetle, borers, caterpillars, lace-wing bugs and sucking insects.
• using recommended and properly applied fungicides, insecticides and miticides to help control these pests and diseases. Always alternate pesticides and follow label instructions closely.
Integrated Pest Management (IPM), based on cultural and biological methods, is the best approach to controlling pests and diseases in a home garden. Pesticides should be used as a last resort. (See Factsheet on “Integrated Pest Management for Home Gardeners”).
2. When and How to HARVEST• Allow the melongene to grow to full size before harvesting for a higher volume crop.• Use protective clothing to harvest to minimise skin irritation from stem prickles. • Look for glossy, thin and firm skin; this is an indicator that they are ready!• Use a clean sharp knife or a pruner to cut the melongene, keeping a short piece
of the stem above the cap.• Handle and treat the melongene gently, as is easily bruised.• Cut one to see if the inner flesh is cream coloured. Seeds should be small and
barely visible. This is a sign that the melongene are ready for harvest.
NOTE: Regular harvests promote a heavier yields. Leaving the pod on the vine too long can cause the tough skin, large seeds and a bitter vegetable.
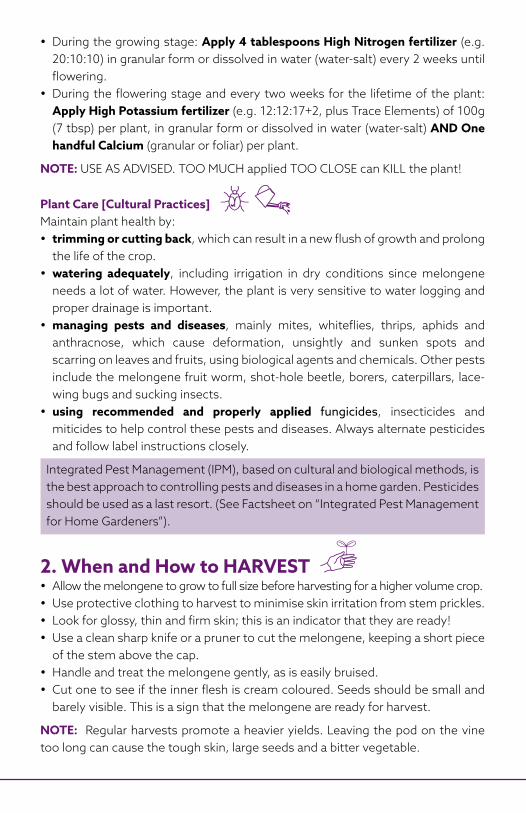
1. How to GROWTo grow well, ALL Plants must have light – from the sun; moisture – from rainfall or irrigation; and nutrients – from fertilizers, compost or manure.
Plant Establishment [Germinating and Sowing]:1. Choose an open spot, in full sunlight as this
plant does not do well in shaded areas.2. Mix two handfuls of well-rotted manure with
the soil in each planting hole or deep plant pot. Melongene grows best in soil which is rich in organic matter.
3. Dig deep holes of 1–2cm (0.39–0.79 in) as melongene is a deep-rooting crop, reaching depths of 35-50cm.
4. Sow 2 to 3 seeds in each hole or each plant pot, placing seeds about 2.5 cm (1 in) deep.
5. Thin out 3 – 4 weeks after germination and transplant seedlings, one per pot, or hole, in the late afternoon, with a spacing of 90 cm apart within rows, and 1.5 metres between rows.
6. Stake seedlings when planting or transplanting as s tall varieties may require stem support.
7. Water daily during dry periods, especially in clay soils and ensure that excess water drains off the planting area.
NOTE: If growing several plants in the same area, USE THE SPACING RECOMMENDED FOR THE VARIETY.
Plant Fertilizing• At Transplanting, to encourage root growth:
Choose a complete fertilizer high in phosphorus (such as 12:24:12) dissolved in 1 litre of water and apply to the roots and leaves (foliar method). This volume will fertilise 10 plants. These fertilizers can easily be found in garden shops. Repeat every 14 days for 4 weeks.
KNOW your MelongeneMelongene is part of the ‘vegetable’ family and is also known as eggplant, baigan, aubergine, brinjal or guinea squash.
It is related to tomato, pepper and potato plant family.
Common Varieties: Black DiamondLong PurpleLa PastoraAranguez (which is resistant to Anthracnose and tolerant to Bacterial Wilt)Farmers EarlyVictoria and Florida Market
• During the growing stage: Apply 4 tablespoons High Nitrogen fertilizer (e.g. 20:10:10) in granular form or dissolved in water (water-salt) every 2 weeks until flowering.
• During the flowering stage and every two weeks for the lifetime of the plant: Apply High Potassium fertilizer (e.g. 12:12:17+2, plus Trace Elements) of 100g (7 tbsp) per plant, in granular form or dissolved in water (water-salt) AND One handful Calcium (granular or foliar) per plant.
NOTE: USE AS ADVISED. TOO MUCH applied TOO CLOSE can KILL the plant!
Plant Care [Cultural Practices]Maintain plant health by:• trimming or cutting back, which can result in a new flush of growth and prolong
the life of the crop.• watering adequately, including irrigation in dry conditions since melongene
needs a lot of water. However, the plant is very sensitive to water logging and proper drainage is important.
• managing pests and diseases, mainly mites, whiteflies, thrips, aphids and anthracnose, which cause deformation, unsightly and sunken spots and scarring on leaves and fruits, using biological agents and chemicals. Other pests include the melongene fruit worm, shot-hole beetle, borers, caterpillars, lace-wing bugs and sucking insects.
• using recommended and properly applied fungicides, insecticides and miticides to help control these pests and diseases. Always alternate pesticides and follow label instructions closely.
Integrated Pest Management (IPM), based on cultural and biological methods, is the best approach to controlling pests and diseases in a home garden. Pesticides should be used as a last resort. (See Factsheet on “Integrated Pest Management for Home Gardeners”).
2. When and How to HARVEST• Allow the melongene to grow to full size before harvesting for a higher volume crop.• Use protective clothing to harvest to minimise skin irritation from stem prickles. • Look for glossy, thin and firm skin; this is an indicator that they are ready!• Use a clean sharp knife or a pruner to cut the melongene, keeping a short piece
of the stem above the cap.• Handle and treat the melongene gently, as is easily bruised.• Cut one to see if the inner flesh is cream coloured. Seeds should be small and
barely visible. This is a sign that the melongene are ready for harvest.
NOTE: Regular harvests promote a heavier yields. Leaving the pod on the vine too long can cause the tough skin, large seeds and a bitter vegetable.
1. How to GROWTo grow well, ALL Plants must have light – from the sun; moisture – from rainfall or irrigation; and nutrients – from fertilizers, compost or manure.
Plant Establishment [Germinating and Sowing]:1. Choose an open spot, in full sunlight as this
plant does not do well in shaded areas.2. Mix two handfuls of well-rotted manure with
the soil in each planting hole or deep plant pot. Melongene grows best in soil which is rich in organic matter.
3. Dig deep holes of 1–2cm (0.39–0.79 in) as melongene is a deep-rooting crop, reaching depths of 35-50cm.
4. Sow 2 to 3 seeds in each hole or each plant pot, placing seeds about 2.5 cm (1 in) deep.
5. Thin out 3 – 4 weeks after germination and transplant seedlings, one per pot, or hole, in the late afternoon, with a spacing of 90 cm apart within rows, and 1.5 metres between rows.
6. Stake seedlings when planting or transplanting as s tall varieties may require stem support.
7. Water daily during dry periods, especially in clay soils and ensure that excess water drains off the planting area.
NOTE: If growing several plants in the same area, USE THE SPACING RECOMMENDED FOR THE VARIETY.
Plant Fertilizing• At Transplanting, to encourage root growth:
Choose a complete fertilizer high in phosphorus (such as 12:24:12) dissolved in 1 litre of water and apply to the roots and leaves (foliar method). This volume will fertilise 10 plants. These fertilizers can easily be found in garden shops. Repeat every 14 days for 4 weeks.
KNOW your MelongeneMelongene is part of the ‘vegetable’ family and is also known as eggplant, baigan, aubergine, brinjal or guinea squash.
It is related to tomato, pepper and potato plant family.
Common Varieties: Black DiamondLong PurpleLa PastoraAranguez (which is resistant to Anthracnose and tolerant to Bacterial Wilt)Farmers EarlyVictoria and Florida Market
WHY grow Melongene? Because:• it is the easiest among its vegetable family (tomatoes, pepper) crops to grow;• it grows year-round and bears fruit for a long time, between 6 – 9 months and
more with proper plant care;• it may be interplanted with other vegetables or ornamentals in the home
garden;• one tree can supply 4 -5 lbs of melongene for home use; • it is a nutrient-dense food, high in antioxidants, contains a healthy amount of
carbohydrates, Fibre, Protein, Manganese, Folate, Potassium, Vitamins K & C, and small amounts of other nutrients including niacin, magnesium and copper; minerals and fibre in few calories;
Meal OPTIONS for the Melongene• adds silky and smooth texture to soups, sancoche, choka, callaloo and coucou;• adds crunch as fried ochro with salt fish and sada and paratha roti;• can be pickled, steamed, stewed, stir fried, deep-fried and grilled.
Produced by the Ministry of Agriculture, Land and Fisheries (MALF)
National Seed Drive 2020
For more information, contact the Extension, Training and Information Services Division
Email: [email protected]://www.agriculture.gov.tt
baigan choka(roasted melongene)
Ministry of Agriculture, Land and FisheriesGovernment of the Republic of Trinidad and Tobago
A Step by Step Process for Home Gardening
#PlantSomething
MELONGENE (pronounced melon-jen)
All seeds locally produced by the National Seed Bank
Variety: Long Purple
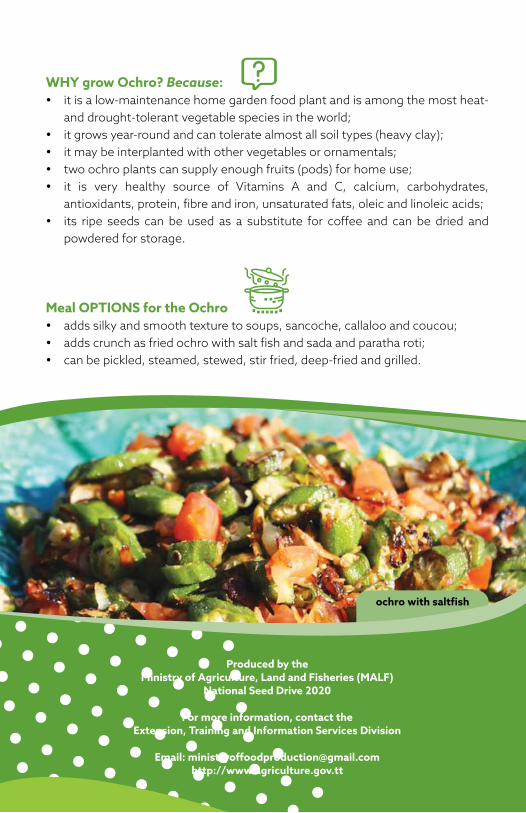
WHY grow Ochro? Because:• it is a low-maintenance home garden food plant and is among the most heat-
and drought-tolerant vegetable species in the world;• it grows year-round and can tolerate almost all soil types (heavy clay);• it may be interplanted with other vegetables or ornamentals;• two ochro plants can supply enough fruits (pods) for home use;• it is very healthy source of Vitamins A and C, calcium, carbohydrates,
antioxidants, protein, fibre and iron, unsaturated fats, oleic and linoleic acids;• its ripe seeds can be used as a substitute for coffee and can be dried and
powdered for storage.
Meal OPTIONS for the Ochro • adds silky and smooth texture to soups, sancoche, callaloo and coucou;• adds crunch as fried ochro with salt fish and sada and paratha roti;• can be pickled, steamed, stewed, stir fried, deep-fried and grilled.
Produced by the Ministry of Agriculture, Land and Fisheries (MALF)
National Seed Drive 2020
For more information, contact the Extension, Training and Information Services Division
Email: [email protected]://www.agriculture.gov.tt
ochro with saltfish
Ministry of Agriculture, Land and FisheriesGovernment of the Republic of Trinidad and Tobago
OCHROA Step by Step Process
for Home Gardening
#PlantSomething
(pronounced oh-cro)
All seeds locally produced by the National Seed Bank
Variety: White Ochro

Plant Fertilizing• To encourage root growth: Choose a complete fertilizer high in phosphorus
(such as 12:24:12). These fertilizers can easily be found in garden shops. Apply 5g (1 tsp) two (2) weeks after germination and at least 5 cm (2 in) away from the plant.
• To support plant growth and good yields: Continue fertilizing every 10 - 14 days for the duration of the plant life. Apply a granular (NPK) fertilizer high in potassium such as, 12:12:17, at a rate of 5g (1 tsp) per plant.
NOTE: USE AS ADVISED. TOO MUCH applied TOO CLOSE can KILL the plant!
Plant Care [Cultural Practices]Maintain plant health by:• trimming dry and yellowing plant parts with a clean, dry knife to encourage
new plant growth and more fruit formation. Leave a few ochroes to dry on the plant to provide you with seeds for next planting.
• managing pests and diseases using biological agents and chemicals. Ochro is a favourite for the Hibiscus Mealybug, whiteflies, aphids and mites.
• watering the soil area, NOT the plants and ensuring good drainage to avoid causing plant diseases, such as, stem end rot and powdery mildew and reduce fungal problems.
• using and properly applying recommended fungicides, insecticides and miticides to help control these pests and diseases. Always alternate pesticides and follow label instructions closely.
Integrated Pest Management (IPM), based on cultural and biological methods, is the best approach to controlling pests and diseases in a home garden. Pesticides should be used as a last resort. (See Factsheet on “Integrated Pest Management for Home Gardeners”).
2. When and How to HARVEST• Use a sharp, clean knife to cut the pods;• Leave about 2.5 cm (1 in) of the stem intact on the ochro.• Sample one or two to determine if they snap easily at the tips. This will indicate
that the majority of ochroes are ready for harvesting.• Pick ochroes every other day and store in a cool place.• Harvest/remove pods on time to encourage proper flowering and good yields.
NOTE: It is important to harvest the ochro when the pods are young as they become tough, woody and inedible if left on the plant too long. Local variety will be ready for harvesting approximately 60 days after planting or 4 - 7 days after flowering. Imported varieties can be harvested in 42 - 45 days after planting.
1. How to GROWTo grow well, ALL Plants must have light – from the sun; moisture – from rainfall or irrigation; and nutrients – from fertilizers, compost or manure.
Plant Establishment [Germinating and Sowing]:1. Soak seeds overnight to soften outer shell and
cut germination time by a week or more, to get ripe ochro sooner. Germination will occur between 6 days (for soaked seeds) and 3 weeks.
2. Mix one handful of well-rotted manure with the soil in each planting hole or deep plant pot.
3. Dig a hole of 1–2 cm (0.39–0.79 in) and keep soil moist. Seedlings require enough water.
4. Space holes 90 cm (36 ins) apart within rows and 120 cm (48 ins) apart between rows (imported Clemson Variety (short) requires closer spacing: within rows - 60 cm (24 ins); between rows 90 cm (36 ins).
5. Sow 2 to 3 seeds in each hole or plant pot, about 2.5 cm (1 in) deep.
6. Water daily during dry periods and ensure that excess water drains off the planting area.
7. Thin out after 3 weeks, leaving 1 strong plant per hole/pot and water daily. Transplant other plants as needed.
NOTE: If growing several plants in the same area, USE THE SPACING RECOMMENDED FOR THE VARIETY.
Spacing for ochroes
KNOW your OchroOchro is part of the ‘vegetable’ family and is also known as Okra, Okoro, Ladies Fingers and Gumbo.
It is also part of the Hibiscus plant family and is available in two varieties: the more popular green variety, and the red variety.
Common varieties: Red Ochro (grown in Tobago) and Clemson Spineless (imported).
WHY grow Ochro? Because:• it is a low-maintenance home garden food plant and is among the most heat-
and drought-tolerant vegetable species in the world;• it grows year-round and can tolerate almost all soil types (heavy clay);• it may be interplanted with other vegetables or ornamentals;• two ochro plants can supply enough fruits (pods) for home use;• it is very healthy source of Vitamins A and C, calcium, carbohydrates,
antioxidants, protein, fibre and iron, unsaturated fats, oleic and linoleic acids;• its ripe seeds can be used as a substitute for coffee and can be dried and
powdered for storage.
Meal OPTIONS for the Ochro • adds silky and smooth texture to soups, sancoche, callaloo and coucou;• adds crunch as fried ochro with salt fish and sada and paratha roti;• can be pickled, steamed, stewed, stir fried, deep-fried and grilled.
Produced by the Ministry of Agriculture, Land and Fisheries (MALF)
National Seed Drive 2020
For more information, contact the Extension, Training and Information Services Division
Email: [email protected]://www.agriculture.gov.tt
ochro with saltfish
Ministry of Agriculture, Land and FisheriesGovernment of the Republic of Trinidad and Tobago
OCHROA Step by Step Process
for Home Gardening
#PlantSomething
(pronounced oh-cro)
All seeds locally produced by the National Seed Bank
Variety: White Ochro
WHY grow Pigeon peas? Because it:• is a very hardy plant, 60% self-pollinated, requires no fertiliser use.• is a fast-growing, excellent plant to improve the health of the soils due to its
nitrogen-fixing qualities.• is an easy crop to manage as an annual shrub or a perennial plant, growing
1-2m in height (3 to 6 ft).• has a deep tap root system that makes it resistant to very dry conditions,
drawing water from deeper soil depths than most legumes, so will not interfere with the water uptake of other garden crops.
• has a productive life span for up to five years and is a prolific producer of seed.• can be grown along a fence and/or in a hedge row, providing shade cover for
short-term crops. • can be pruned and trimmed and the leaves used as feed for animals.• is good source of dietary fibre, and various vitamins: thiamine, magnesium,
phosphorus, potassium, copper, manganese, folate, and an excellent source of vegetarian protein. The protein content in split seeds is similar to soybean.
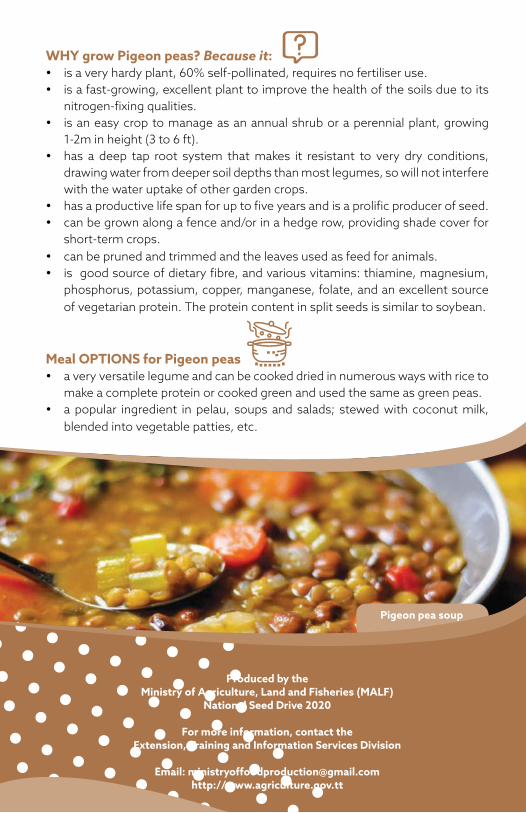
Meal OPTIONS for Pigeon peas• a very versatile legume and can be cooked dried in numerous ways with rice to
make a complete protein or cooked green and used the same as green peas.• a popular ingredient in pelau, soups and salads; stewed with coconut milk,
blended into vegetable patties, etc.
Produced by the Ministry of Agriculture, Land and Fisheries (MALF)
National Seed Drive 2020
For more information, contact the Extension, Training and Information Services Division
Email: [email protected]://www.agriculture.gov.tt
Pigeon pea soup
Ministry of Agriculture, Land and FisheriesGovernment of the Republic of Trinidad and Tobago
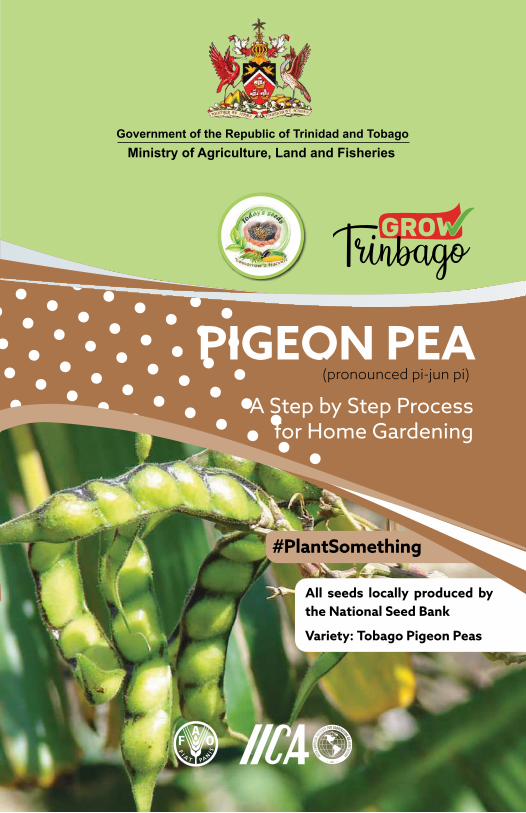
PIGEON PEAA Step by Step Process
for Home Gardening
#PlantSomething
(pronounced pi-jun pi)
All seeds locally produced by the National Seed Bank
Variety: Tobago Pigeon Peas
Plant Fertilizing
Fertilizing is not recommended as the plant grows well in soils with low phosphorus levels.
Plant Care [Cultural Practices]Maintain plant health by:• keeping the plants free from all weeds especially during the first 6 weeks after
seedlings emerge.• ensuring that the plants get enough and uniform watering even if the plant
can survive up to 6 months in very dry conditions.• managing pests and diseases,
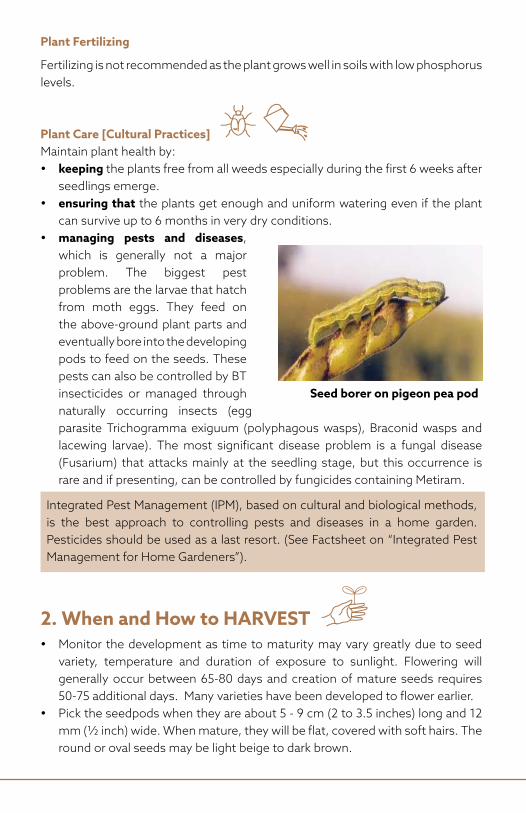
which is generally not a major problem. The biggest pest problems are the larvae that hatch from moth eggs. They feed on the above-ground plant parts and eventually bore into the developing pods to feed on the seeds. These pests can also be controlled by BT insecticides or managed through naturally occurring insects (egg parasite Trichogramma exiguum (polyphagous wasps), Braconid wasps and lacewing larvae). The most significant disease problem is a fungal disease (Fusarium) that attacks mainly at the seedling stage, but this occurrence is rare and if presenting, can be controlled by fungicides containing Metiram.
Integrated Pest Management (IPM), based on cultural and biological methods, is the best approach to controlling pests and diseases in a home garden. Pesticides should be used as a last resort. (See Factsheet on “Integrated Pest Management for Home Gardeners”).
2. When and How to HARVEST• Monitor the development as time to maturity may vary greatly due to seed
variety, temperature and duration of exposure to sunlight. Flowering will generally occur between 65-80 days and creation of mature seeds requires 50-75 additional days. Many varieties have been developed to flower earlier.
• Pick the seedpods when they are about 5 - 9 cm (2 to 3.5 inches) long and 12 mm (½ inch) wide. When mature, they will be flat, covered with soft hairs. The round or oval seeds may be light beige to dark brown.
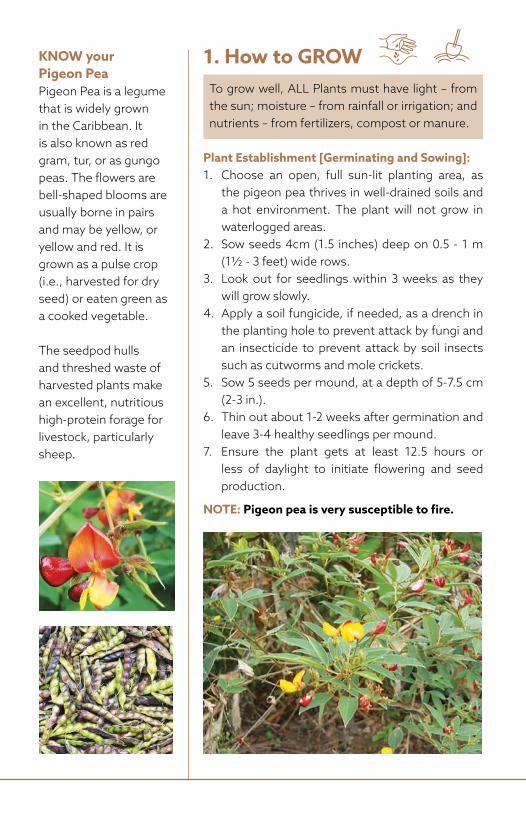
1. How to GROWTo grow well, ALL Plants must have light – from the sun; moisture – from rainfall or irrigation; and nutrients – from fertilizers, compost or manure.
Plant Establishment [Germinating and Sowing]:1. Choose an open, full sun-lit planting area, as
the pigeon pea thrives in well-drained soils and a hot environment. The plant will not grow in waterlogged areas.
2. Sow seeds 4cm (1.5 inches) deep on 0.5 - 1 m (1½ - 3 feet) wide rows.
3. Look out for seedlings within 3 weeks as they will grow slowly.
4. Apply a soil fungicide, if needed, as a drench in the planting hole to prevent attack by fungi and an insecticide to prevent attack by soil insects such as cutworms and mole crickets.
5. Sow 5 seeds per mound, at a depth of 5-7.5 cm (2-3 in.).
6. Thin out about 1-2 weeks after germination and leave 3-4 healthy seedlings per mound.
7. Ensure the plant gets at least 12.5 hours or less of daylight to initiate flowering and seed production.
NOTE: Pigeon pea is very susceptible to fire.
KNOW your Pigeon PeaPigeon Pea is a legume that is widely grown in the Caribbean. It is also known as red gram, tur, or as gungo peas. The flowers are bell-shaped blooms are usually borne in pairs and may be yellow, or yellow and red. It is grown as a pulse crop (i.e., harvested for dry seed) or eaten green as a cooked vegetable.
The seedpod hulls and threshed waste of harvested plants make an excellent, nutritious high-protein forage for livestock, particularly sheep.
Plant Fertilizing
Fertilizing is not recommended as the plant grows well in soils with low phosphorus levels.
Plant Care [Cultural Practices]Maintain plant health by:• keeping the plants free from all weeds especially during the first 6 weeks after
seedlings emerge.• ensuring that the plants get enough and uniform watering even if the plant
can survive up to 6 months in very dry conditions.• managing pests and diseases,
which is generally not a major problem. The biggest pest problems are the larvae that hatch from moth eggs. They feed on the above-ground plant parts and eventually bore into the developing pods to feed on the seeds. These pests can also be controlled by BT insecticides or managed through naturally occurring insects (egg parasite Trichogramma exiguum (polyphagous wasps), Braconid wasps and lacewing larvae). The most significant disease problem is a fungal disease (Fusarium) that attacks mainly at the seedling stage, but this occurrence is rare and if presenting, can be controlled by fungicides containing Metiram.
Integrated Pest Management (IPM), based on cultural and biological methods, is the best approach to controlling pests and diseases in a home garden. Pesticides should be used as a last resort. (See Factsheet on “Integrated Pest Management for Home Gardeners”).
2. When and How to HARVEST• Monitor the development as time to maturity may vary greatly due to seed
variety, temperature and duration of exposure to sunlight. Flowering will generally occur between 65-80 days and creation of mature seeds requires 50-75 additional days. Many varieties have been developed to flower earlier.
• Pick the seedpods when they are about 5 - 9 cm (2 to 3.5 inches) long and 12 mm (½ inch) wide. When mature, they will be flat, covered with soft hairs. The round or oval seeds may be light beige to dark brown.
1. How to GROWTo grow well, ALL Plants must have light – from the sun; moisture – from rainfall or irrigation; and nutrients – from fertilizers, compost or manure.
Plant Establishment [Germinating and Sowing]:1. Choose an open, full sun-lit planting area, as
the pigeon pea thrives in well-drained soils and a hot environment. The plant will not grow in waterlogged areas.
2. Sow seeds 4cm (1.5 inches) deep on 0.5 - 1 m (1½ - 3 feet) wide rows.
3. Look out for seedlings within 3 weeks as they will grow slowly.
4. Apply a soil fungicide, if needed, as a drench in the planting hole to prevent attack by fungi and an insecticide to prevent attack by soil insects such as cutworms and mole crickets.
5. Sow 5 seeds per mound, at a depth of 5-7.5 cm (2-3 in.).
6. Thin out about 1-2 weeks after germination and leave 3-4 healthy seedlings per mound.
7. Ensure the plant gets at least 12.5 hours or less of daylight to initiate flowering and seed production.
NOTE: Pigeon pea is very susceptible to fire.
KNOW your Pigeon PeaPigeon Pea is a legume that is widely grown in the Caribbean. It is also known as red gram, tur, or as gungo peas. The flowers are bell-shaped blooms are usually borne in pairs and may be yellow, or yellow and red. It is grown as a pulse crop (i.e., harvested for dry seed) or eaten green as a cooked vegetable.
The seedpod hulls and threshed waste of harvested plants make an excellent, nutritious high-protein forage for livestock, particularly sheep.
WHY grow Pigeon peas? Because it:• is a very hardy plant, 60% self-pollinated, requires no fertiliser use.• is a fast-growing, excellent plant to improve the health of the soils due to its
nitrogen-fixing qualities.• is an easy crop to manage as an annual shrub or a perennial plant, growing
1-2m in height (3 to 6 ft).• has a deep tap root system that makes it resistant to very dry conditions,
drawing water from deeper soil depths than most legumes, so will not interfere with the water uptake of other garden crops.
• has a productive life span for up to five years and is a prolific producer of seed.• can be grown along a fence and/or in a hedge row, providing shade cover for
short-term crops. • can be pruned and trimmed and the leaves used as feed for animals.• is good source of dietary fibre, and various vitamins: thiamine, magnesium,
phosphorus, potassium, copper, manganese, folate, and an excellent source of vegetarian protein. The protein content in split seeds is similar to soybean.
Meal OPTIONS for Pigeon peas• a very versatile legume and can be cooked dried in numerous ways with rice to
make a complete protein or cooked green and used the same as green peas.• a popular ingredient in pelau, soups and salads; stewed with coconut milk,
blended into vegetable patties, etc.
Produced by the Ministry of Agriculture, Land and Fisheries (MALF)
National Seed Drive 2020
For more information, contact the Extension, Training and Information Services Division
Email: [email protected]://www.agriculture.gov.tt
Pigeon pea soup
Ministry of Agriculture, Land and FisheriesGovernment of the Republic of Trinidad and Tobago
PIGEON PEAA Step by Step Process
for Home Gardening
#PlantSomething
(pronounced pi-jun pi)
All seeds locally produced by the National Seed Bank
Variety: Tobago Pigeon Peas
WHY grow Pumpkin? Because:• it is easy to grow in a home garden, thriving under full sun and performing well
in partial shade.• it grows on any fertile, well-drained soil. • it can be grown using seedlings or by direct seeding on the ground.• the waste can be fed to farm animals or livestock.• it is a highly nutrient dense food, low in calories but rich in the powerful
antioxidant beta carotene, vitamins A, B and C and minerals, all of which are also in its seeds, leaves, and juices.
Meal OPTIONS for Pumpkin• it is a very versatile vegetable and can be steamed, boiled or baked, preserved,
or ground into flour.• is popularly consumed as boiled, roasted, grilled or curried • prepared in soups, salads, stews, casseroles, pies, breads and other baked
pastries, etc.
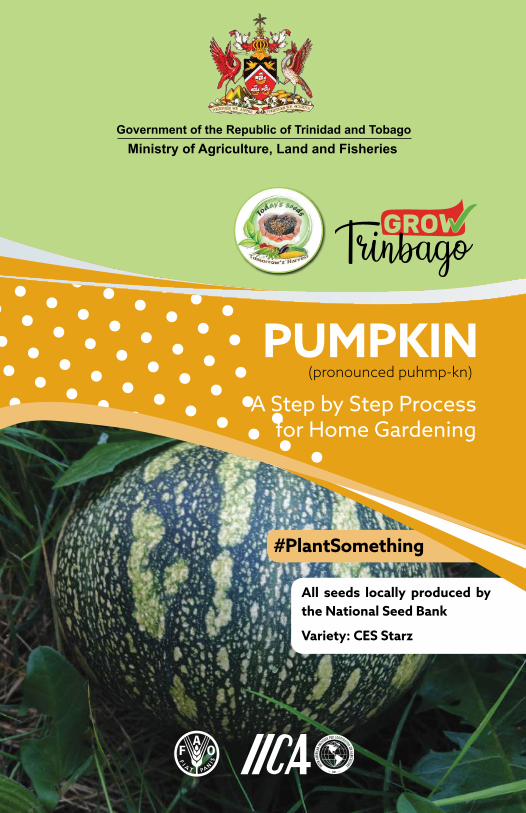
Ministry of Agriculture, Land and FisheriesGovernment of the Republic of Trinidad and Tobago
PUMPKINA Step by Step Process
for Home Gardening
#PlantSomething
All seeds locally produced by the National Seed Bank
Variety: CES Starz
(pronounced puhmp-kn)
2. When and How to HARVESTPumpkin matures in about 3½ months and usually yields about 5-7 good sized fruits or 45kg (100 lb) per mound. • Observe your crop. Signs that indicate maturity and readiness to harvest are:
− overall colour of the peel (rind) changes from shiny green to pale yellow.− colour of the rind that touches the soil, darkens.− stem and tendril close to the fruit begin to dry.− distinct separation layer appears between the stem and the fruit.− blossom end (opposite the stem) of the fruit is fully expanded.− absence of latex flow when a small incision is made at the stem. If you are using this method, make this incision small enough so that the rind can heal.
• Make a sharp clean cut when harvesting. Cut as close as possible to the fruit and ensure that the stem does not break off. Fruits without stems will not store very well.
• Store pumpkin at room temperature and at a relative humidity of 65 - 70% for up to 6 weeks or longer.
NOTE: To produce your own seeds for next planting: • Select seeds from mature, well-formed and disease-free pumpkins with a
uniform colour and a thick flesh. • Remove seeds from pulp, wash and sun-dry for 3-4 days, then dry in a shaded
area for another 3-4 days.• Monitor seeds, as they will germinate in 3-5 days and will be ready for
transplanting in 10-14 days. • Harden seedlings by allowing gradual exposure to full sunlight over 3 - 4 days
before planting in the garden.
For more information, see the factsheet “Selecting Seeds for the Home Garden”.
Produced by the Ministry of Agriculture, Land and Fisheries (MALF)
National Seed Drive 2020
For more information, contact the Extension, Training and Information Services Division
Email: [email protected]://www.agriculture.gov.tt
Curried pumpkin
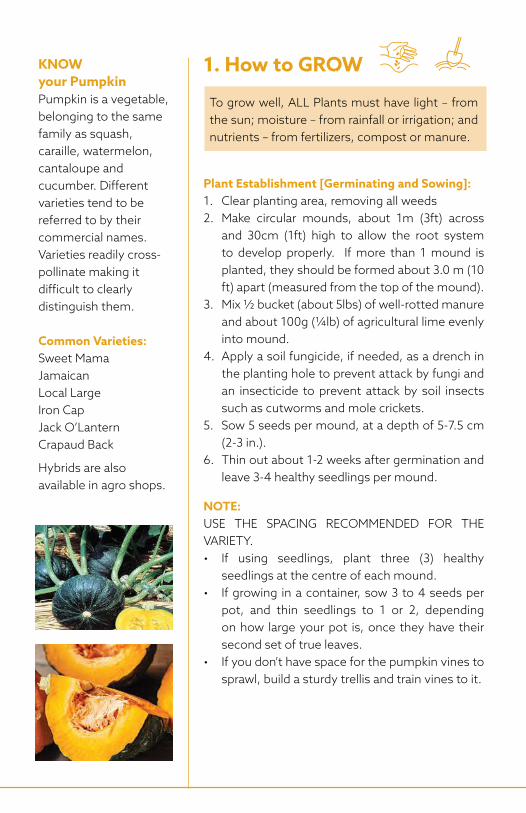
TABLE 1. Pests and diseases of pumpkin
PEST/DISEASE SYMPTOM CONTROL
Thrips (Thrips palmi) Scarring of fruit
• Discoloration, scarring, silvering
• Bronzing and deformation
• Dropping of leaves, flowers and fruits
• Adjust planting time to wetter seasons if possible.
• Use overhead irrigation if available.
• Apply mulch as moisture and weed control
• Ensure adequate weed control.
• Practice crop rotation • Use insecticides with
active ingredient example Abamectin.
Cucumber Worm (Diaphania nitidalis)
• Holes on fruit. • Insect droppings
outside holes.
• Use insecticides with active ingredient example Lambda Cyhalothrin.
Gummy Stem Blight (Didymella bryoniae)
• “V”- shaped yellowing and browning at the leaf margins.
• A gummy substance exudes from lesions or cracks in the stems and fruits.
• Treat seed with fungicide.
• Improve drainage. • Add limestone to reduce
soil acidity • Use a fungicide with
active ingredient example Carbendazim or Tebuconazole if necessary.
Cercospora Leaf Spot (Cercospora spp)
• Reddish brown / yellow spots are seen on the leaves.
• The centre of the spot may fall out leaving holes in the leaves.
• These spots merge and cause leaf drop.
• Improve drainage to avoid waterlogging
• Add limestone to reduce soil acidity
• Use a fungicide with active ingredient example Carbendazim or Tebuconazole if necessary.
Plant FertilizingFor direct seeding in ground:• Apply 25g (5tsp) of a high phosphate N:P:K fertilizer (e.g. 12:24:12) at the
middle of each mound, 1 week after seedlings emerge, around the plants.
When transplanting seedlings, apply:• 25g (5tsp) of a high phosphate N:P:K fertilizer (e.g. 12:24:12) to each mound,
1 week after transplanting.• 25g (5tsp) of Calcium Nitrate mixed with 25 g 12: 12: 17 + 2, about 5 weeks
after transplanting and distribute over the entire mound.• 75g (5tbsp) of 12: 12: 17 + 2, per mound, about 9 weeks after transplanting.
This last application may not be necessary if the crop looks quite healthy.
NOTE: Do not place the fertilizer too close to the plant. During lengthy dry conditions, fertilizer may be applied by “wet salting”. Dissolve 100 g (3.5 oz) of fertilizer in a 4 L of water (1 gal). Apply 250 ml (1 cup) of this mixture to the root area in each mound. Irrigate the plants immediately after “wet salting” to avoid fertilizer damage.
Plant Care [Cultural Practices]Maintain plant health by:• keeping the plants free from all weeds during the first 5 weeks. No further
weed control is necessary.• ensuring that the plants get enough and uniform watering (through rainfall or
irrigation).• managing pests and diseases. The main pests are Thrips, Cucumber Worm,
Gummy Stem Blight and Leaf Spot. (See Table 1)
Integrated Pest Management (IPM), based on cultural and biological methods, is the best approach to controlling pests and diseases in a home garden. Pesticides should be used as a last resort. (See Factsheet on “Integrated Pest Management for Home Gardeners”).
1. How to GROW
To grow well, ALL Plants must have light – from the sun; moisture – from rainfall or irrigation; and nutrients – from fertilizers, compost or manure.
Plant Establishment [Germinating and Sowing]:1. Clear planting area, removing all weeds 2. Make circular mounds, about 1m (3ft) across
and 30cm (1ft) high to allow the root system to develop properly. If more than 1 mound is planted, they should be formed about 3.0 m (10 ft) apart (measured from the top of the mound).
3. Mix ½ bucket (about 5lbs) of well-rotted manure and about 100g (¼lb) of agricultural lime evenly into mound.
4. Apply a soil fungicide, if needed, as a drench in the planting hole to prevent attack by fungi and an insecticide to prevent attack by soil insects such as cutworms and mole crickets.
5. Sow 5 seeds per mound, at a depth of 5-7.5 cm (2-3 in.).
6. Thin out about 1-2 weeks after germination and leave 3-4 healthy seedlings per mound.
NOTE: USE THE SPACING RECOMMENDED FOR THE VARIETY.• If using seedlings, plant three (3) healthy
seedlings at the centre of each mound. • If growing in a container, sow 3 to 4 seeds per
pot, and thin seedlings to 1 or 2, depending on how large your pot is, once they have their second set of true leaves.
• If you don’t have space for the pumpkin vines to sprawl, build a sturdy trellis and train vines to it.
KNOW your PumpkinPumpkin is a vegetable, belonging to the same family as squash, caraille, watermelon, cantaloupe and cucumber. Different varieties tend to be referred to by their commercial names. Varieties readily cross-pollinate making it difficult to clearly distinguish them.
Common Varieties: Sweet MamaJamaicanLocal LargeIron CapJack O’Lantern Crapaud Back
Hybrids are also available in agro shops.
Healthy pumpkin seedling Mound showing fertilizer application
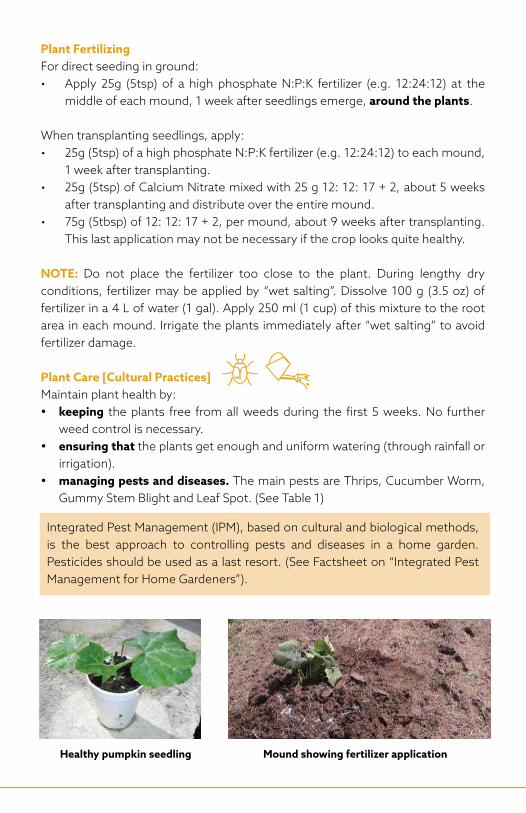
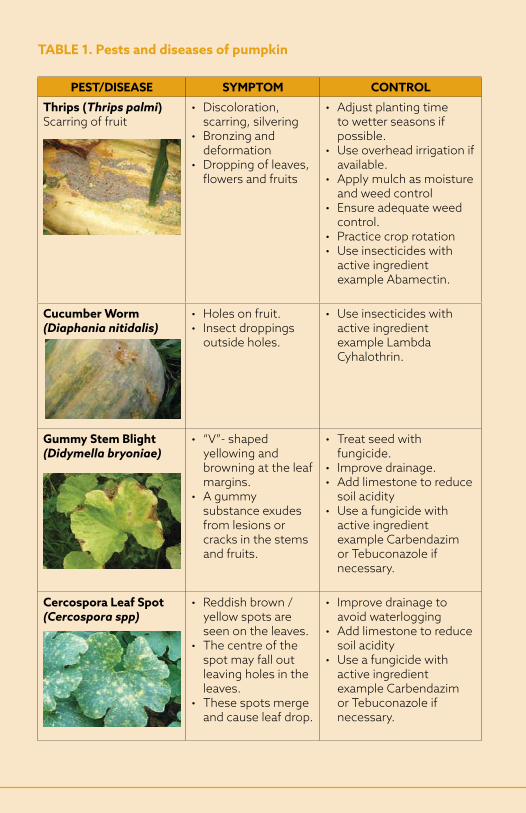
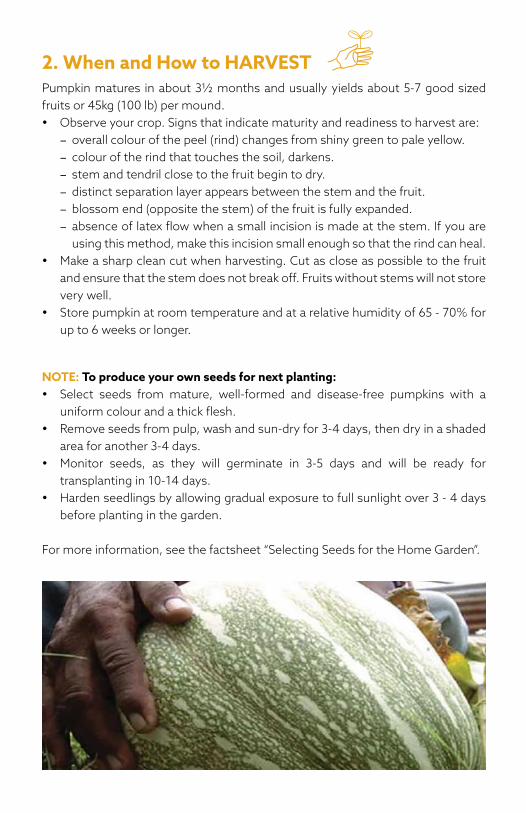
WHY grow Pumpkin? Because:• it is easy to grow in a home garden, thriving under full sun and performing well
in partial shade.• it grows on any fertile, well-drained soil. • it can be grown using seedlings or by direct seeding on the ground.• the waste can be fed to farm animals or livestock.• it is a highly nutrient dense food, low in calories but rich in the powerful
antioxidant beta carotene, vitamins A, B and C and minerals, all of which are also in its seeds, leaves, and juices.
Meal OPTIONS for Pumpkin• it is a very versatile vegetable and can be steamed, boiled or baked, preserved,
or ground into flour.• is popularly consumed as boiled, roasted, grilled or curried • prepared in soups, salads, stews, casseroles, pies, breads and other baked
pastries, etc.
Ministry of Agriculture, Land and FisheriesGovernment of the Republic of Trinidad and Tobago
PUMPKINA Step by Step Process
for Home Gardening
#PlantSomething
All seeds locally produced by the National Seed Bank
Variety: CES Starz
(pronounced puhmp-kn)
2. When and How to HARVESTPumpkin matures in about 3½ months and usually yields about 5-7 good sized fruits or 45kg (100 lb) per mound. • Observe your crop. Signs that indicate maturity and readiness to harvest are:
− overall colour of the peel (rind) changes from shiny green to pale yellow.− colour of the rind that touches the soil, darkens.− stem and tendril close to the fruit begin to dry.− distinct separation layer appears between the stem and the fruit.− blossom end (opposite the stem) of the fruit is fully expanded.− absence of latex flow when a small incision is made at the stem. If you are using this method, make this incision small enough so that the rind can heal.
• Make a sharp clean cut when harvesting. Cut as close as possible to the fruit and ensure that the stem does not break off. Fruits without stems will not store very well.
• Store pumpkin at room temperature and at a relative humidity of 65 - 70% for up to 6 weeks or longer.
NOTE: To produce your own seeds for next planting: • Select seeds from mature, well-formed and disease-free pumpkins with a
uniform colour and a thick flesh. • Remove seeds from pulp, wash and sun-dry for 3-4 days, then dry in a shaded
area for another 3-4 days.• Monitor seeds, as they will germinate in 3-5 days and will be ready for
transplanting in 10-14 days. • Harden seedlings by allowing gradual exposure to full sunlight over 3 - 4 days
before planting in the garden.
For more information, see the factsheet “Selecting Seeds for the Home Garden”.
Produced by the Ministry of Agriculture, Land and Fisheries (MALF)
National Seed Drive 2020
For more information, contact the Extension, Training and Information Services Division
Email: [email protected]://www.agriculture.gov.tt
Curried pumpkin
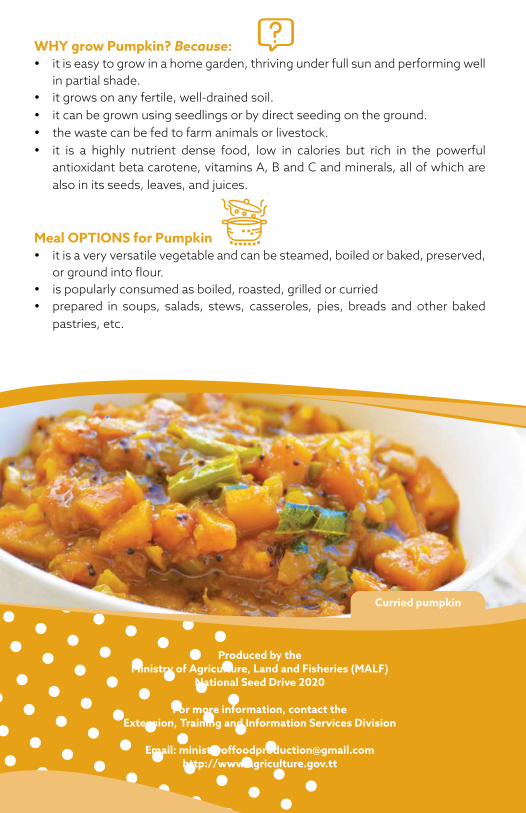