Embed Size (px)
Citation preview
8/14/2019 RecoRding Living and PostmoRtem fRiction Ridge ExemplaRs
http://slidepdf.com/reader/full/recording-living-and-postmortem-friction-ridge-exemplars 1/18
RecoRding living andpostmoRtem fRictionRidge exemplaRsBrent T. Cutro, Sr.
4.1 Introduction
C h a p t e r
C O N t e N t S
4.3 Recording Fingerprints, Palmprints,and Footprints of Living Subjects
4.4 Recording Postmortem FrictionRidge Detail
4.2 Equipment 4.6 Reviewers
4.5 Summary
4.7 References
3
3
5
10
17
18
18

8/14/2019 RecoRding Living and PostmoRtem fRiction Ridge ExemplaRs
http://slidepdf.com/reader/full/recording-living-and-postmortem-friction-ridge-exemplars 2/18
8/14/2019 RecoRding Living and PostmoRtem fRiction Ridge ExemplaRs
http://slidepdf.com/reader/full/recording-living-and-postmortem-friction-ridge-exemplars 3/18
Chapter 4
RecoRding living andpostmoRtem fRictionRidge exemplaRsBrent T. Cutro, Sr.
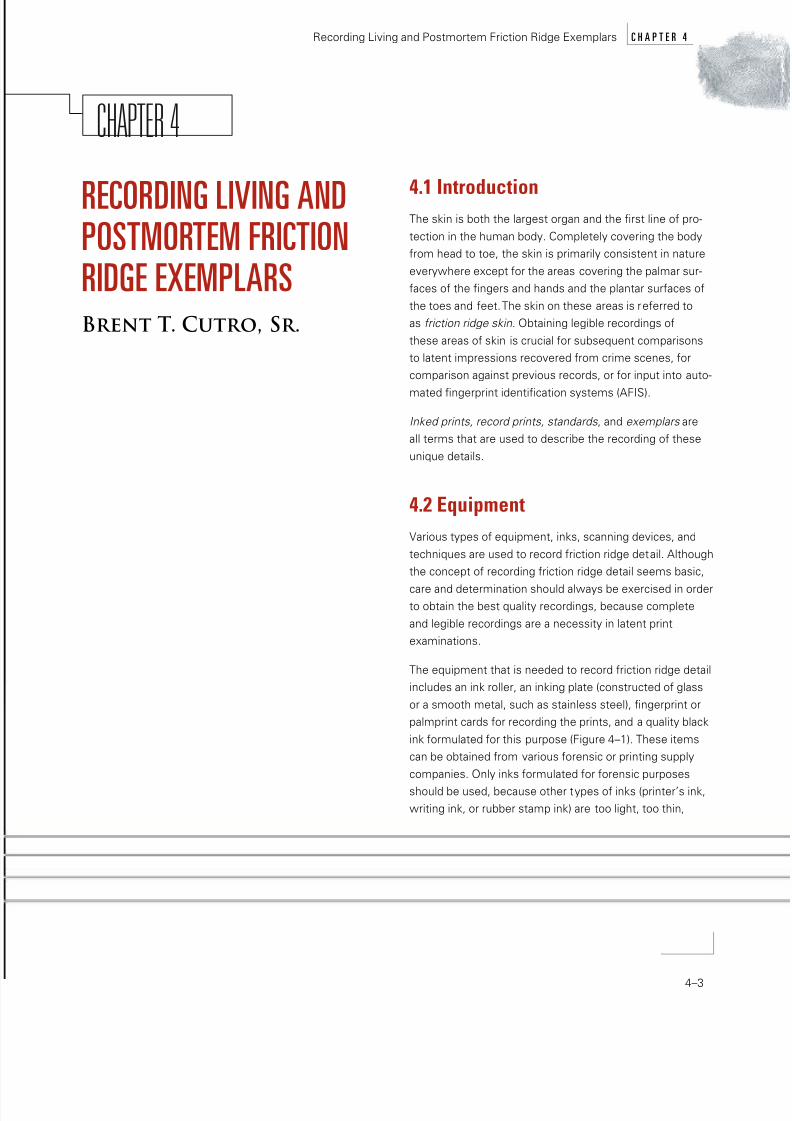
4.1 IntroductionThe skin is both the largest organ and the frst line o pro-
tection in the human body. Completely covering the bodyrom head to toe, the skin is primarily consistent in nature
everywhere except or the areas covering the palmar sur-aces o the fngers and hands and the plantar sur aces o
the toes and eet. The skin on these areas is re erred toas friction ridge skin . Obtaining legible recordings o
these areas o skin is crucial or subsequent comparisonsto latent impressions recovered rom crime scenes, orcomparison against previous records, or or input into auto-
mated fngerprint identifcation systems (AFIS).
Inked prints, record prints, standards , and exemplars areall terms that are used to describe the recording o these
unique details.
4.2 EquipmentVarious types o equipment, inks, scanning devices, and
techniques are used to record riction ridge detail. Althoughthe concept o recording riction ridge detail seems basic,
care and determination should always be exercised in orderto obtain the best quality recordings, because complete
and legible recordings are a necessity in latent printexaminations.
The equipment that is needed to record riction ridge detailincludes an ink roller, an inking plate (constructed o glass
or a smooth metal, such as stainless steel), fngerprint orpalmprint cards or recording the prints, and a quality black
ink ormulated or this purpose (Figure 4–1). These itemscan be obtained rom various orensic or printing supply
companies. Only inks ormulated or orensic purposesshould be used, because other types o inks (printer’s ink,writing ink, or rubber stamp ink) are too light, too thin,
4–3
Recording Living and Postmortem Friction Ridge Exemplars c h a p t e R 4

8/14/2019 RecoRding Living and PostmoRtem fRiction Ridge ExemplaRs
http://slidepdf.com/reader/full/recording-living-and-postmortem-friction-ridge-exemplars 4/18
or do not dry quickly enough on the recording cards; thisretained moisture could cause subsequent smearing o the
prints. An alternative to the ink-and-roller method is the useo micro-reticulated thermoplastic resin pads or ceramic
inking pads, both o which are impregnated with special
permanent and non ading inks. These products containenough ink to record up to 50,000 ngerprints and shouldlast approximately two years without replenishing. Cleanup
is easy, and the ink dries quickly on recording cards (Olsen,1978, pp 90–91). Advances in ink technology have improved
certain characteristics o some o these inks, resulting inmore user- riendly products.
A ngerprint stand is also use ul. The ngerprint stand canbe placed at a height that is necessary to com ortably
record riction ridge detail while conveniently holdingwithin its built-in storage bins all o the equipment needed
or this purpose.
The standard cards that are used to record prints are 8” x 8”.This size has space or two rows o ve rolled ngerprints
and space or plain or fat prints o the ngers under therows o rolled prints. These cards are white and are usu-
ally lightweight cardboard or heavy paper stock. Fingerprint
cards are handled countless times and may be stored in lesor many years. For these reasons, the texture and strengtho the card must be such that it will withstand requent
handling (Olsen, 1978, pp 59–60).
Figure 4–2 shows two rows o ngerprints ( rolled impres-
sions ) in the center o the card. The blocks begin with thethumb o the right hand as #1, the right index nger as #2,
and so on through the right little nger, #5. The le t handthen begins with the thumb, designated #6, the le t index
nger is #7, and so on through the le t little nger, #10.Another set o impressions would appear below these. They
are re erred to as plain , at , or simultaneous impressions
FIgurE 4–1Equipment and ink
used to record rictionridge exemplars.
FIgurE 4–2Two rows o rolled
impressions in center o fngerprint card.
4–4
c h a p t e R 4 Recording Living and Postmortem Friction Ridge Exemplars
8/14/2019 RecoRding Living and PostmoRtem fRiction Ridge ExemplaRs
http://slidepdf.com/reader/full/recording-living-and-postmortem-friction-ridge-exemplars 5/18
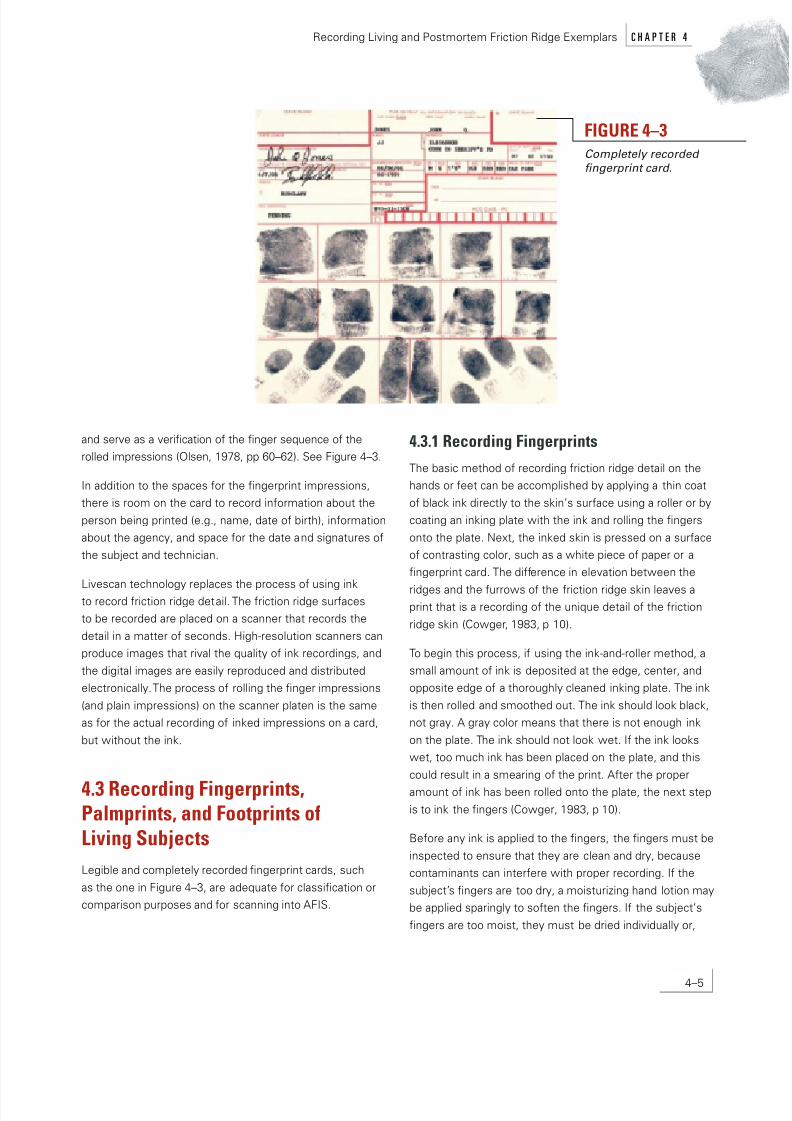
and serve as a verifcation o the fnger sequence o therolled impressions (Olsen, 1978, pp 60–62). See Figure 4–3.
In addition to the spaces or the fngerprint impressions,there is room on the card to record in ormation about the
person being printed (e.g., name, date o birth), in ormationabout the agency, and space or the date and signatures o
the subject and technician.
Livescan technology replaces the process o using inkto record riction ridge detail. The riction ridge sur acesto be recorded are placed on a scanner that records the
detail in a matter o seconds. High-resolution scanners canproduce images that rival the quality o ink recordings, and
the digital images are easily reproduced and distributedelectronically. The process o rolling the fnger impressions
(and plain impressions) on the scanner platen is the sameas or the actual recording o inked impressions on a card,
but without the ink.
4.3 reco din Fin e p ints,Palmp ints, and Footp ints ofLivin S bjectsLegible and completely recorded fngerprint cards, such
as the one in Figure 4–3, are adequate or classifcation orcomparison purposes and or scanning into AFIS.
FIgurE 4–3Completely recorded fngerprint card.
4.3.1 reco din Fin e p intsThe basic method o recording riction ridge detail on thehands or eet can be accomplished by applying a thin coat
o black ink directly to the skin’s sur ace using a roller or bycoating an inking plate with the ink and rolling the fngers
onto the plate. Next, the inked skin is pressed on a sur aceo contrasting color, such as a white piece o paper or afngerprint card. The di erence in elevation between the
ridges and the urrows o the riction ridge skin leaves aprint that is a recording o the unique detail o the riction
ridge skin (Cowger, 1983, p 10).
To begin this process, i using the ink-and-roller method, asmall amount o ink is deposited at the edge, center, andopposite edge o a thoroughly cleaned inking plate. The ink
is then rolled and smoothed out. The ink should look black,not gray. A gray color means that there is not enough ink
on the plate. The ink should not look wet. I the ink lookswet, too much ink has been placed on the plate, and this
could result in a smearing o the print. A ter the properamount o ink has been rolled onto the plate, the next step
is to ink the fngers (Cowger, 1983, p 10).
Be ore any ink is applied to the fngers, the fngers must be
inspected to ensure that they are clean and dry, becausecontaminants can inter ere with proper recording. I the
subject’s fngers are too dry, a moisturizing hand lotion maybe applied sparingly to so ten the fngers. I the subject’s
fngers are too moist, they must be dried individually or,
4–5
Recording Living and Postmortem Friction Ridge Exemplars c h a p t e R 4

8/14/2019 RecoRding Living and PostmoRtem fRiction Ridge ExemplaRs
http://slidepdf.com/reader/full/recording-living-and-postmortem-friction-ridge-exemplars 6/18
in case o excess moisture, wiped with an alcohol wipeand then dried. Regardless o what method o recording
is used (ink and roller, Porelon Pad, or scanning device),the ngers should be rolled away rom the body, and the
thumbs should be rolled toward the body ( thumbs in,
ngers out). This procedure allows the ngers and thumbsto be rolled rom an awkward position to a more relaxedposition and is less likely to produce smeared recordings.
To completely roll each nger, with the subject standingin ront o and acing the cardholder, the hand should be
rmly grasped in such a manner that the nger is extendedand the other ngers are out o the way. The inking plateand the cardholder should be side by side, with the card-
holder nearest the operator (Olsen, 1978, p 66). The hand isthen rotated so that the side o the nger can be placed on
the inking plate. While one o the operator’s hands grasps
the hand o the subject, the operator’s other hand holdsthe end o the nger or thumb being printed to keep itrom slipping, to apply light pressure, and to guide the roll
(Figure 4–4). Two key actors to remember are control andpressure (Cowger, 1983, p 11). For best results, the subject
should not help with the process and should be asked toremain in a relaxed posture. The nger or thumb is then
rotated 180° (i.e., nail edge to nail edge) and is immediatelyli ted rom the plate and rolled in the same manner in the
appropriate box on the ngerprint card that has been previ-ously placed in the cardholder.
The ngers and thumbs should be rolled on the card orscanning device in the same sequence in which the spac-
es appear on the card, starting with the right thumb andending with the le t little nger (Olsen, 1978, p 66). The
plain (i.e., fat or simultaneous) impressions are recorded
by grouping the ngers rom each hand and pressing themon the inking plate. The grouped ngers, numbers 2–5 and7–10, are then pressed on the ngerprint card or scanning
device in the appropriate boxes, taking care not to super-impose these impressions over the rolled impressions.
The thumbs are inked and recorded separately in thesame manner. The ngers and thumbs that are recorded inthese boxes should not be rolled rom side to side. As the
ngers and thumbs are li ted rom the card or scanningdevice, they should be rolled toward the tips o the ngers
by keeping pressure on the ngers and li ting the subject’s
wrists so as to record as much riction ridge detail as pos-sible toward the top o the pattern area.
4.3.2 reco din Palmp intsPalmprints are recorded in much the same manner as
ngerprints; however, a cylindrical device is o ten usedto acilitate the process to ensure complete recording o
all riction ridge detail. The palms are not pressed on aninking plate. Rather, the roller is loaded with ink rom the
inking plate and the ink roller is used to apply a thin coat
FIgurE 4–4Position o
operator’s hands.
4–6
c h a p t e R 4 Recording Living and Postmortem Friction Ridge Exemplars

8/14/2019 RecoRding Living and PostmoRtem fRiction Ridge ExemplaRs
http://slidepdf.com/reader/full/recording-living-and-postmortem-friction-ridge-exemplars 7/18
o ink directly to the hands rom the base and edges o thepalms to the tips o the ngers. Care must be exercised
to ensure complete coverage o ink to all areas containingriction ridge detail.
To record palmprints, a standard 8” x 8” card or heavy plainwhite bond paper is attached to a cylinder approximately 3”
in diameter. Removable adhesive tape or rubber bands maybe used to attach the paper to the cylinder. (Some techni-
cians pre er to let the paper “ride” across the cylinderwithout attaching it, taking care to prevent slippage.) The
inked palm is then rolled either rom the base o the palmtoward the ngers or rom the ngers to the base o the
palm. Either way is acceptable and is generally le t to thediscretion o the technician. Most technicians pre er begin-ning at the base o the palm and rolling toward the ngers
because this gives the technician more control over thesubject and position o the print on the card (Olsen, 1978,
p 74). The hand can simply be pulled rather than pushedacross the sur ace, which also tends to help prevent lateral
movement o the subject’s hand. The palm must be record-ed in one smooth, unceasing motion to prevent smudging
or distortion (Figure 4–5). Light pressure should also beapplied while rolling in order to maintain completeness andto adequately record the centers o the palms. (Extending
the thumb to the side will also help eliminate voids in thecenter o the recorded palm.) The thumbs are recorded
separately because o their position on the hand. Theextreme side o the palm, opposite o the thumb, re erred
to as the “writer’s palm” (i.e., the edge o the hypothenararea), is also recorded separately on the palmprint card.
The card is removed rom the cylinder and placed on a hardfat sur ace. This area o the palm is then pressed on the
palmprint card, with the little nger extended, to the righto the previously recorded palmprint or the right hand and
to the le t o the previously recorded palmprint or the le thand, i space allows. The thumb area o the palm (thenararea) is then recorded in the same manner and placed to
the le t side o the previously recorded right palmprint andto the right side o the previously recorded le t palmprint,
again, i space allows. I adequate space does not allowor the thenar and hypothenar areas to be recorded on
the same card, separate cards should be used or theserecordings.
An easy alternative method or recording palmprints iswith the use o a white adhesive li ting material, such as
Handiprint ® (Kinderprint Co.), and black ngerprint powder.The ngerprint powder is lightly applied with a so t nger-
print brush to the entire sur ace o the palm. The adhesivematerial is separated rom the backing and pressed onto
the palm while smoothing rom the center to the sides. Thefexible adhesive con orms to the creases and crevices othe palm with minimal slippage, which aids in producing a
high-contrast, completely recorded palmprint. The adhesiveli ter is then peeled rom the palm and placed onto a clear
acetate cover, thus preserving the impression or subse-quent comparisons.
FIgurE 4–5
Recording palmprint exemplars using a cylinder.
4–7
Recording Living and Postmortem Friction Ridge Exemplars c h a p t e R 4
8/14/2019 RecoRding Living and PostmoRtem fRiction Ridge ExemplaRs
http://slidepdf.com/reader/full/recording-living-and-postmortem-friction-ridge-exemplars 8/18
4.3.3 reco din Majo Case P intsMajor case prints * (also re erred to as major criminal prints )are a recording o all the riction ridge detail covering the
hands. I necessary, this may also include a recording o
all the riction ridge detail on the eet. In addition to legibleand completely recorded ngerprints and palmprints, majorcase prints include a legible and completely recorded set
o the tips o the ngers, rom just below the nail to thecenter o the ngers, rolled rom one side o the nail to the
other, as well as completely recorded lower joints o thengers, including the extreme sides. Major case prints are
o ten required or comparison to unknown impressionsthat have been collected rom crime scenes, and these
impressions may include areas o riction ridge detail thatare not routinely recorded.
To begin, a complete set o the subject’s ngerprintsshould be recorded as previously described. Next, all o
the remaining riction ridge detail on the phalangeal areaso the thumbs and ngers is recorded using 8” x 8” cards
or white bond paper rmly attached to the edge o a table.Beginning with the right thumb, a thin coat o ink is applied
to all o the riction ridge detail with an ink roller, rom thebase o the thumb to the tip, including the extreme sides
o the nger. Usually beginning at the lower le t cornero the paper, the extreme le t side o the thumb is rmly
pressed on the paper. The thumb is removed by li tingrom the base o the thumb to the tip. This will record the
extreme le t side o the thumb and tip. Next to this impres-
sion, the center o the thumb is placed on the paper and isremoved in the same manner, thus completely recordingthe riction ridge detail rom the base o the thumb to the
tip. The extreme right side o the thumb is then placed tothe right o the center portion, thus recording the extreme
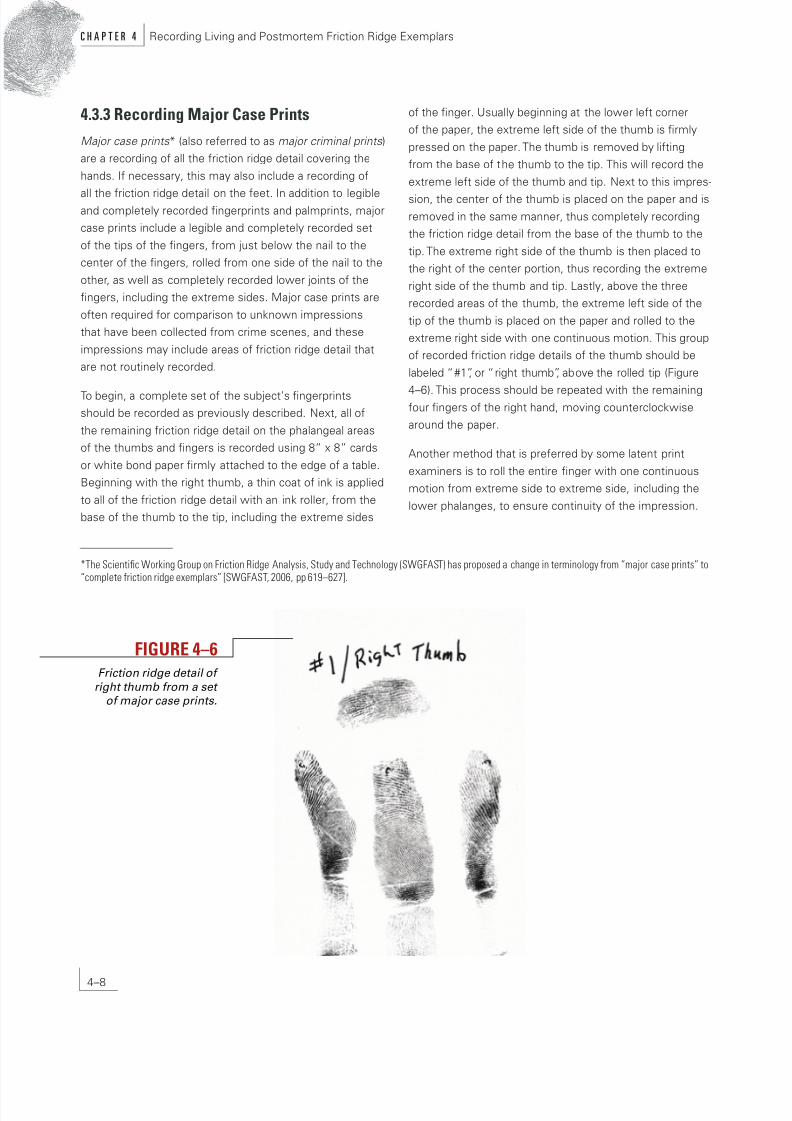
right side o the thumb and tip. Lastly, above the threerecorded areas o the thumb, the extreme le t side o the
tip o the thumb is placed on the paper and rolled to theextreme right side with one continuous motion. This groupo recorded riction ridge details o the thumb should be
labeled “#1”, or “right thumb”, above the rolled tip (Figure
4–6). This process should be repeated with the remainingour ngers o the right hand, moving counterclockwisearound the paper.
Another method that is pre erred by some latent print
examiners is to roll the entire nger with one continuousmotion rom extreme side to extreme side, including the
lower phalanges, to ensure continuity o the impression.
FIgurE 4–6Friction ridge detail o
right thumb rom a set o major case prints.
*The Scientifc Working Group on Friction Ridge Analysis, Study and Technology (SWGFAST) has proposed a change in terminology rom “major case prints”“complete riction ridge exemplars” [SWGFAST, 2006, pp 619–627].
4–8
c h a p t e R 4 Recording Living and Postmortem Friction Ridge Exemplars

8/14/2019 RecoRding Living and PostmoRtem fRiction Ridge ExemplaRs
http://slidepdf.com/reader/full/recording-living-and-postmortem-friction-ridge-exemplars 9/18
The tip areas are also positioned and recorded above these
impressions in the same manner.
This procedure is then repeated or the le t hand. To com-plete the major case print process, a legible and completely
recorded set o palmprints is then recorded in the previouslydescribed manner.
4.3.4 reco din Footp intsOn occasion it may become necessary to record a sub-
ject’s ootprints. The same basic procedures as with record-ing palmprints are used; however, because o the large size
o an adult oot, a larger cylinder and paper must be used.
The cylinder used or this process should be approximately
5” in diameter and should hold an 8.5” x 14” (legal size)
sheet o heavy white bond paper attached to the cylinder,as previously described. The oot should be rolled acrossthe paper in the same manner as the palmprints, in one
smooth, continuous motion rom the heel o the oottoward the toe, with the toes passing completely over thecylinder. Recordings o the eet may also be obtained by
applying ink to the bottoms o the subject’s eet with aroller and instructing the subject to walk across paper that
has been laid out on the foor. This, however, requires coop-eration rom the subject and may not produce satis actory
recordings, because excessive pressure and movemento the eet may blur or smear the impressions. Another
method (Olsen, 1978, p 75) is to mount a card or paperon a fat board. With the subject in a sitting position andwith the leg elevated and supported, the paper is pressed
against the subject’s inked oot.
4.3.5 un s al Ci c mstancesProblems ranging rom temporary disabilities (e.g., wounds
and blisters) to permanent disabilities (e.g., amputatedngers, extra ngers, webbed ngers, arthritis, or palsy)
may be present when obtaining known standards. The
occupation o the subject (e.g., brick layer) may also a ectthe ability to obtain legible recordings. In these cases, the
riction ridge detail may be a ected or worn to the pointthat a legible recording may be di cult. However, with
patience, skill, and some ingenuity, it is possible to obtainsatis actory recordings.
Obtaining legible recordings rom injured ngers or palmscan be di cult, so a notation o any temporary disabilities
(e.g., resh cuts, wounds, bandaged ngers, or large blisters)
should be made in the corresponding block on the nger-
print or palmprint card. I classi cation or input into an AFISdatabase is necessary, however, it is advisable to de er
recording the ngerprints o the subject, i possible, untila ter the temporary injury has healed.
Certain occupations can also pose problems to rictionridge skin, because people who consistently work with
their hands tend to have worn, rough, dr y, or damagedriction ridges on their ngers and palms, to the point that
it is di cult to obtain legible recordings o their riction ridgedetail. This problem may be overcome by applying skin-
so tening lotion to the hands and ngers prior to record-ing. In addition, applying a very small amount o ink to theinking plate (so as not to get ink into the urrows and to
ensure that only the tops o the ridges will be covered)may improve the ne detail (FBI, 1979, p 127).
These same techniques are also use ul when obtaining
known standards rom elderly individuals or small childrenwith very ne ridge detail. The use o ice held against theriction ridge skin may also acilitate the recording o the
ne detail (Olsen, 1978, p 83). On occasion, a subject’sriction ridges may be so ne that the ink completely cov-
ers the ridges and urrows. In these cases, instead o usingink, using a brush to lightly dust the riction ridge skin with
black ngerprint powder may be necessary to record thevery ne riction ridge detail. White opaque li ting material
(e.g., Handiprint®) with a transparent cover is then used to
record the impressions directly rom the ngers (Olsen,1978, p 84). The nger numbers should be marked on the
transparent covers to prevent any con usion and to ensurethe correct orientation o the impressions. The li ts are then
cut to t inside the appropriate blocks on the ngerprintcard and are secured with clear tape.
A notation o any permanent disabilities should be re-corded in the appropriate block on the ngerprint card
(e.g., “missing at birth” i the subject was born withoutcertain ngers). In cases o amputation, a notation should
be made in the appropriate block on the ngerprint card.I only a portion o the rst joint o the nger is a ected, it
should be recorded as completely as possible, and a nota-tion should be made.
In cases o bent or dis gured ngers, the tools (e.g., spe-cial ink rollers or spatulas and a curved strip holder) that are
used or obtaining prints rom deceased individuals can beused to record the riction ridge detail.
4–9
Recording Living and Postmortem Friction Ridge Exemplars c h a p t e R 4
8/14/2019 RecoRding Living and PostmoRtem fRiction Ridge ExemplaRs
http://slidepdf.com/reader/full/recording-living-and-postmortem-friction-ridge-exemplars 10/18
I a subject has more than 10 ngers (polydactyl), the
thumb and the 4 ngers next to the thumb should berecorded on the ngerprint card in the usual manner. Any
remaining ngers should be recorded on the other side othe card, and a notation should be made. Webbed ngers
(syndactyly) should be recorded as completely as possible,also with a notation on the card concerning this congenital
abnormality (FBI, 1979, p 128).
4.4 reco din Postmo tem F ictionrid e DetailOne o the most challenging, and also rewarding, aspectso latent print examination is the determination o the
identity o deceased individuals. Various methods and
techniques may be used to acilitate the success ul record-ing and preservation o postmortem riction ridge detail. Incircumstances involving unknown deceased in ants, it iso ten necessary to obtain postmortem ootprints, because
hospital personnel usually record only ootprint standardso newborn babies.
When decomposition, desiccation (dryness), or maceration
(separation and so tening o skin by soaking in liquid) o theriction ridge skin precludes satis actory recordings withtraditional methods, the hands, ngers, or eet o the de-
ceased may be surgically removed by a medical examinerand submitted to a laboratory, where advanced procedures
may be conducted.
Many techniques have been developed to e ectivelyprocess postmortem riction ridge skin. It is important to
realize that success ul development, recording, and indi-
vidualization o an o ten small area o available riction ridgeskin could be the most valuable lead in solving a homicide
case or in providing closure to a grieving amily. There ore,the latent print examiner must have experience and knowl-
edge in this area. The condition o the riction ridge skin willdictate the various methods and techniques that should be
used to success ully record valuable riction ridge detail.
Recording the riction ridge detail rom deceased individu-
als can, at times, present quite a challenge. Satis actoryrecordings o recently deceased individuals can most o ten
be per ormed much like recording the prints o live individu-als, utilizing some speci c tools to acilitate this process.Obtaining recordings o riction ridge detail rom skin that
is decomposed, mummi ed, charred, or macerated, how-ever, may be much more di cult.
4.4.1 gene al reco din of recentlyDeceased S bjectsI the hands are in reasonably good condition, obtainingsatis actory recordings o the riction ridge detail rom the
ngers is usually accomplished by straightening the ngersand fattening the palm. To acilitate this process, thedeceased should be positioned with the ace and palms
down on a table (prone position) (FBI, 1979, p 136). Thengers and palms should be clean and dry. I rigor mortis
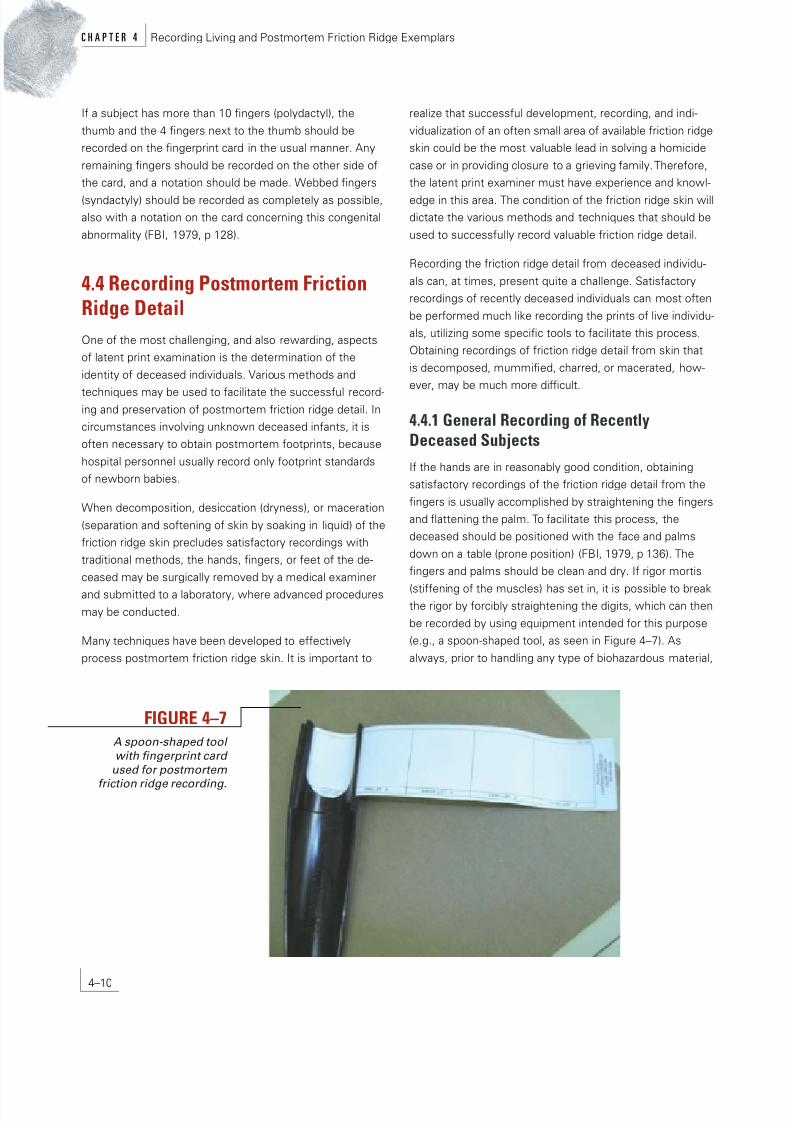
(sti ening o the muscles) has set in, it is possible to breakthe rigor by orcibly straightening the digits, which can then
be recorded by using equipment intended or this purpose(e.g., a spoon-shaped tool, as seen in Figure 4–7). As
always, prior to handling any type o biohazardous material,
FIgurE 4–7A spoon-shaped tool with fngerprint card
used or postmortem
riction ridge recording.
4–10
c h a p t e R 4 Recording Living and Postmortem Friction Ridge Exemplars

8/14/2019 RecoRding Living and PostmoRtem fRiction Ridge ExemplaRs
http://slidepdf.com/reader/full/recording-living-and-postmortem-friction-ridge-exemplars 11/18
care should be taken to ensure that personal protective
equipment (e.g., gloves, ace mask, and eye protection) isworn at all times.
I only the ngers are o concern, it is possible to print
them by pressing on the nger just above the knuckle. Thiswill straighten the nger and separate it rom the others,acilitating proper recording. The palm can be recorded by
bending it orward at the wrist. It may be possible to obtainadequate recordings by recording various areas o the palm
separately (Cowger, 1983, p 29). I rigor mortis is present,“It is better to take advantage o this condition than to try
to overcome it, by bending the wrist s till urther toward theinner orearm and pressing the ngers one at a time to-ward the palm or wrist. In this position, they separate and
straighten out in such a way that each nger can be printedwithout inter erence” (Olsen, 1978, p 85). “I breaking rigor
is di cult or ine ective, or i the hand is so curled thatthe ngers or palm will not straighten su ciently when
pressed inward, it may be necessary to cut the tendonswhich cause the curling to occur” (Cowger, 1983, p 29). (It
is advisable that only legally designated persons per ormthis activity, because there are restrictions in some jurisdic-tions concerning the dissection o human remains.)
There are many satis actory methods o applying ink to
the ngers o a deceased individual. One method is touse a spatula that contains a thin coat o ink that has been
applied by an ink roller. The ink is then trans erred to thengers by manually rolling it around the ngers. A standardngerprint card may then be cut into two strips o ve
blocks or into single blocks. A strip holder or spoon is usedto hold the strip. The strip or block is then placed in the
spoon with the top o the strip toward the handle o thespoon. The inked ngers are then rolled in their corre-
sponding blocks rom nail edge to nail edge, as previouslydescribed. This procedure is repeated on di erent strips
until legible impressions are obtained. I individual cardsare used, it is advisable to have more than ten squares cutand ready in case some o them are ruined or the pattern
area is not completely recorded (Olsen, 1978, p 86). An-other method or extremely di cult cases is to use black
ngerprint powder and white adhesive li ting material suchas Handiprint ®.
4.4.2 reco din Decomposed F ictionrid e SkinPutre ed skin (skin that is in a state o decomposition or
rotting) is ragile. Such putre action is usually a result o
various biological actors such as bacteria, ungi, or er-mentation. Parasites may have also in ltrated this necrotictissue. Extreme care should be exercised when examining
and handling this ragile riction ridge skin.
I , upon examination, riction ridge skin is present, discern-
ible, and not badly damaged, it may be possible, usingextreme care, to simply ink and record the riction ridge
skin. However, i the riction ridge skin is rubbery and isseparating rom the underlying tissues or is too ragile orthe technician to apply ink in the usual manner, the riction
ridge skin may be removed rom the underlying tissue. Theskin must then be cleaned and dried and may be recorded
by placing each nger, or riction ridge skin, over the techni-cian’s gloved nger or palm to ink and record as i the riction
ridge skin were the technician’s. As always, care in docu-menting which ngers are recorded is important. It is also
recommended to photograph the visible ridge detail priorto any technique that may cause urther deterioration othe riction skin.
A 10–15% soaking solution o ormaldehyde may be used in
extreme cases to rm up the skin to acilitate this process.
Formaldehyde, however, can cause the skin to becomevery rm and brittle, causing the skin to split. The skinshould soak or an hour or so until su ciently rm. Oncehardened, the riction ridge skin should be removed, patted
dry, and recorded (FBI, 1979, pp 143–144). Another similarmethod suggests soaking the ngers or riction skin in 10%
ormaldehyde solution or several hours. The skin is thenrinsed gently with running water, rinsed in laboratory-quality
isopropanol to remove any excess moisture, patted dry, andrecorded as previously described (Miller, 1995, p 603).
In many cases, especially i the decomposition is ad-
vanced, discernible riction ridge detail may not be presentbecause the top layers o riction ridge skin may be com-pletely decomposed or destroyed. In these instances, the
bottom layers or underside o the riction ridge skin, as wellas the dermis, may reveal discernible riction ridge detail
and can be recorded success ully.
4–11
Recording Living and Postmortem Friction Ridge Exemplars c h a p t e R 4
8/14/2019 RecoRding Living and PostmoRtem fRiction Ridge ExemplaRs
http://slidepdf.com/reader/full/recording-living-and-postmortem-friction-ridge-exemplars 12/18
One method that is used to record the underside o riction
ridge skin is lightly coating the underside o the epidermallayer o the riction ridge skin with ngerprint powder be ore
applying ink. The underside o the riction ridge skin is thenrolled on a section o the adhesive side o ngerprint li t tape
(Rice, 1988a, p 100).
To proceed, the riction ridge skin must be completely
dried by placing the skin between paper towels. With theunderside o the epidermal layer o the skin exposed, it is
lightly dusted with black ngerprint powder and positionedover the technician’s own gloved nger. The skin is then
coated using an ink roller in the usual manner or rolled onan inking slab that has been coated with ink to apply a thin,even coat o ngerprint ink. The ngerprint powder is nec-
essary to acilitate removal o the skin rom the tape. Theskin is then rolled across the adhesive side o a section o
transparent or rosted ngerprint tape. It is important tonote that the impression resulting rom this method on the
adhesive side o the tape will be in the correct orientationor comparison when placed adhesive-side down in the
appropriate block on the ngerprint card, or, i recordingpalms, on the palmprint card. The impressions will be ton-ally reversed (white ridges) because the urrows (valleys),
as opposed to the ridges, will be inked and recorded. Inecessary, tonal reversal can be corrected photographically
(Rice, 1988a, pp 98–100).
I the riction ridge skin is too brittle to attempt the previ-ously described methods, the underside o the rictionridge skin may be photographed. To accomplish this, “it
may be advisable to trim the skin, fatten it out betweentwo pieces o glass, and photograph it in that position”
(FBI, 1979, p 144).
The skin is trimmed by care ully and meticulously remov-ing the excess fesh by scraping, cutting, and trimminguntil only the riction ridge skin remains and can be fat-
tened satis actorily between two pieces o glass. Anothermethod to urther enhance riction ridge detail is to use
transmitted lighting. This is accomplished by shining alight through the skin toward the lens o the camera
when photographing. I the skin is still not transparentenough, soaking the skin in xylene or approximately ve
minutes be ore photographing or keeping the skin im-mersed in xylene while photographing is recommended.Once a suitable photograph is obtained, the negative may
be printed as necessary to provide correct orientation
o the impression or subsequent comparison to known
standards (FBI, 1979, pp 145–147).
4.4.3 reco din Mace ated F ictionrid e SkinMaceration occurs when riction ridge skin is immersed,
usually in water, or an extended period o time. The epider-mal layer absorbs water, o ten swells, and can loosen romthe dermis within a ew hours a ter immersion (FBI, 1979,
p 151).
I the riction ridge skin is not too badly damaged, the skinshould be care ully cleaned, wiped with alcohol, and record-ed as previously described or recently deceased subjects. I
the skin has separated rom the dermal layer and is wrin-kled, it may be possible to pull the skin rom the back o the
nger to smooth out the pattern area by pinching the skintightly. This will acilitate inking and recording (FBI, 1979, p
151). Stretching o the riction ridge skin in this manner mayalso acilitate the recording o palmprints and ootprints.
It is important to note that this type o process mayenlarge the pattern area o the ngers, which may be
signi cant when conducting an AFIS search with somesystems. The epidermis rom a “de-gloved” hand can be
as much as 33% larger than the dermis. For this reason, ian AFIS search does not reveal an individualization using
the original recording, the print should be searched again at70% o its original size (Leas, 2006).
In such instances when the skin is wrinkled but not pliable,thus not allowing the skin to be stretched smoothly across
the pattern area, tissue builder or glycerin may be injectedinto the bulb o the nger to round out the pattern area.
A string tied just above the injection site will help preventthe fuid rom escaping. O ten, the skin may be loose andsomewhat damaged yet have most o the pattern area
still intact. I this is the case, the riction ridge skin shouldbe care ully removed, cleaned, and placed in alcohol or
about one minute. The skin is then care ully placed over thetechnician’s gloved nger to acilitate inking and recording
(FBI, 1979, p 151).
As always, riction ridge detail may also be photographed
on the nger or cut and prepared, as previously describedor decomposed riction ridge skin, to be placed between
two pieces o glass and photographed with refected ortransmitted light. I no discernible riction ridge detail is
present on the outer layers o the epidermis, it is possible
4–12
c h a p t e R 4 Recording Living and Postmortem Friction Ridge Exemplars
8/14/2019 RecoRding Living and PostmoRtem fRiction Ridge ExemplaRs
http://slidepdf.com/reader/full/recording-living-and-postmortem-friction-ridge-exemplars 13/18
that the underside o the epidermis or the top o the dermismay be recorded or photographed, as described previously
or decomposed riction ridge skin.
For situations in which the epidermis is missing or has been
totally destroyed because o prolonged immersion in aliquid, a method known as osmotic rehydration (the boiling
method) can produce very satis actory results. This methodproduces the best results when used on hands or eet that
are so t and pliable, with no epidermis present, and with theridges o the dermis appearing fat. The hot water plumps
the dermis, thus acilitating the recording o the ridges. Toproceed, water is heated in a pot to just below boiling point(~200 °F) and maintained at this temperature. The riction
ridge skin being processed is immersed in the heatedwater or 10 seconds. A shorter time is recommended or
ne ridge detail (e.g., as children have) or where advanceddecomposition is present. A longer time, up to 30 seconds,
may be necessary at the examiner’s discretion. The raisedriction ridge detail should be care ully cleaned, i necessary,
with a so t-bristled toothbrush and water in the direction othe ridge fow, wiped with alcohol, and lightly dusted withblack ngerprint powder. A white adhesive li ting material is
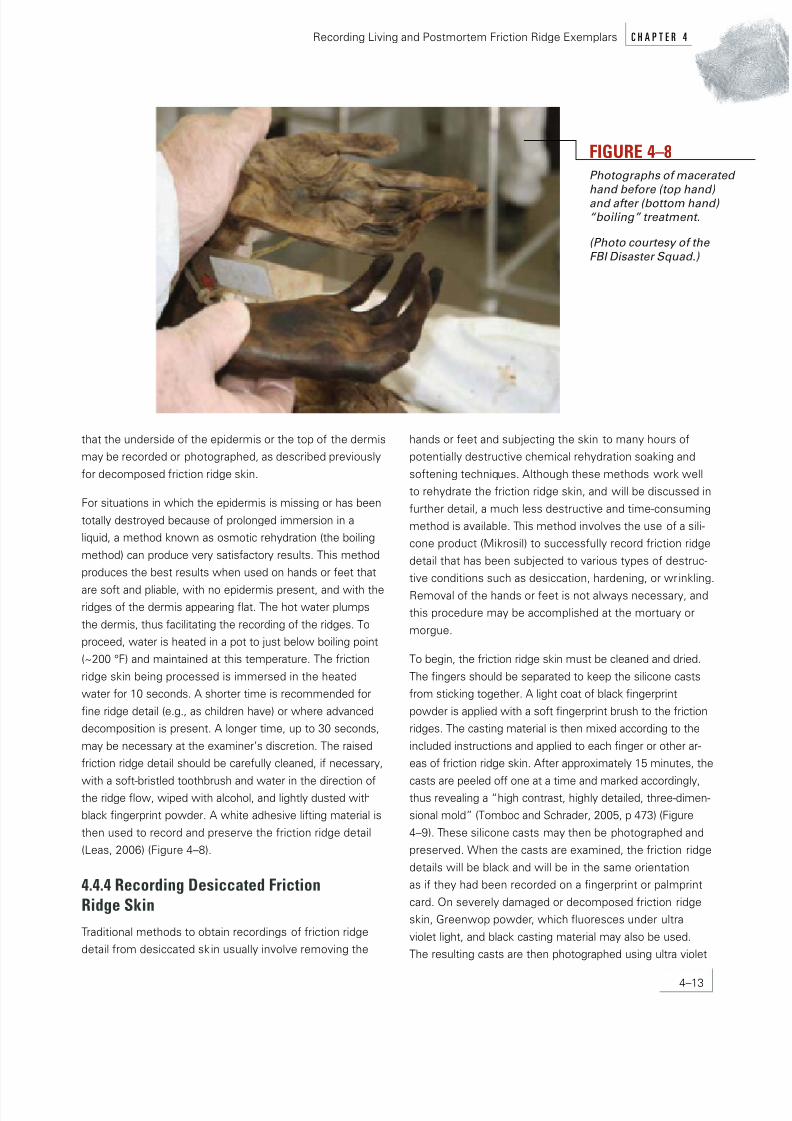
then used to record and preserve the riction ridge detail(Leas, 2006) (Figure 4–8).
4.4.4 reco din Desiccated F ictionrid e SkinTraditional methods to obtain recordings o riction ridgedetail rom desiccated skin usually involve removing the
hands or eet and subjecting the skin to many hours opotentially destructive chemical rehydration soaking and
so tening techniques. Although these methods work wellto rehydrate the riction ridge skin, and will be discussed in
urther detail, a much less destructive and time-consumingmethod is available. This method involves the use o a sili-cone product (Mikrosil) to success ully record riction ridge
detail that has been subjected to various types o destruc-tive conditions such as desiccation, hardening, or wrinkling.
Removal o the hands or eet is not always necessary, andthis procedure may be accomplished at the mortuary or
morgue.
To begin, the riction ridge skin must be cleaned and dried.
The ngers should be separated to keep the silicone castsrom sticking together. A light coat o black ngerprint
powder is applied with a so t ngerprint brush to the rictionridges. The casting material is then mixed according to the
included instructions and applied to each nger or other ar-eas o riction ridge skin. A ter approximately 15 minutes, the
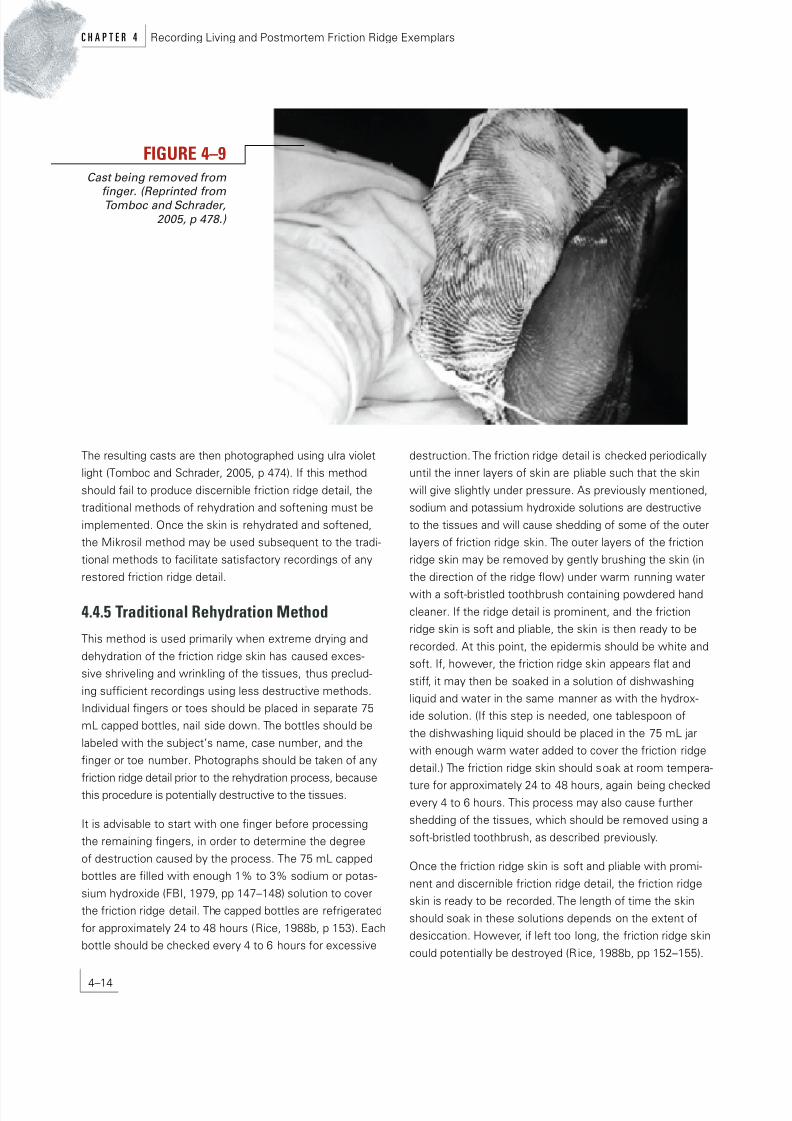
casts are peeled o one at a time and marked accordingly,thus revealing a “high contrast, highly detailed, three-dimen-sional mold” (Tomboc and Schrader, 2005, p 473) (Figure
4–9). These silicone casts may then be photographed andpreserved. When the casts are examined, the riction ridge
details will be black and will be in the same orientationas i they had been recorded on a ngerprint or palmprint
card. On severely damaged or decomposed riction ridgeskin, Greenwop powder, which fuoresces under ultra
violet light, and black casting material may also be used.The resulting casts are then photographed using ultra violet
FIgurE 4–8Photographs o macerated hand be ore (top hand) and a ter (bottom hand) “boiling” treatment.
(Photo courtesy o the FBI Disaster Squad.)
4–13
Recording Living and Postmortem Friction Ridge Exemplars c h a p t e R 4
8/14/2019 RecoRding Living and PostmoRtem fRiction Ridge ExemplaRs
http://slidepdf.com/reader/full/recording-living-and-postmortem-friction-ridge-exemplars 14/18
The resulting casts are then photographed using ulra violetlight (Tomboc and Schrader, 2005, p 474). I this method
should ail to produce discernible riction ridge detail, thetraditional methods o rehydration and so tening must be
implemented. Once the skin is rehydrated and so tened,the Mikrosil method may be used subsequent to the tradi-tional methods to acilitate satis actory recordings o any
restored riction ridge detail.
4.4.5 T aditional rehyd ation MethodThis method is used primarily when extreme drying and
dehydration o the riction ridge skin has caused exces-sive shriveling and wrinkling o the tissues, thus preclud-
ing su cient recordings using less destructive methods.Individual ngers or toes should be placed in separate 75mL capped bottles, nail side down. The bottles should be
labeled with the subject’s name, case number, and thenger or toe number. Photographs should be taken o any
riction ridge detail prior to the rehydration process, becausethis procedure is potentially destructive to the tissues.
It is advisable to start with one nger be ore processingthe remaining ngers, in order to determine the degree
o destruction caused by the process. The 75 mL cappedbottles are lled with enough 1% to 3% sodium or potas-
sium hydroxide (FBI, 1979, pp 147–148) solution to coverthe riction ridge detail. The capped bottles are re rigerated
or approximately 24 to 48 hours (Rice, 1988b, p 153). Eachbottle should be checked every 4 to 6 hours or excessive
destruction. The riction ridge detail is checked periodicallyuntil the inner layers o skin are pliable such that the skin
will give slightly under pressure. As previously mentioned,sodium and potassium hydroxide solutions are destructive
to the tissues and will cause shedding o some o the outerlayers o riction ridge skin. The outer layers o the rictionridge skin may be removed by gently brushing the skin (in
the direction o the ridge fow) under warm running waterwith a so t-bristled toothbrush containing powdered hand
cleaner. I the ridge detail is prominent, and the rictionridge skin is so t and pliable, the skin is then ready to be
recorded. At this point, the epidermis should be white andso t. I , however, the riction ridge skin appears fat and
sti , it may then be soaked in a solution o dishwashingliquid and water in the same manner as with the hydrox-ide solution. (I this step is needed, one tablespoon o
the dishwashing liquid should be placed in the 75 mL jarwith enough warm water added to cover the riction ridge
detail.) The riction ridge skin should soak at room tempera-
ture or approximately 24 to 48 hours, again being checkedevery 4 to 6 hours. This process may also cause urthershedding o the tissues, which should be removed using a
so t-bristled toothbrush, as described previously.
Once the riction ridge skin is so t and pliable with promi-
nent and discernible riction ridge detail, the riction ridgeskin is ready to be recorded. The length o time the skin
should soak in these solutions depends on the extent odesiccation. However, i le t too long, the riction ridge skin
could potentially be destroyed (Rice, 1988b, pp 152–155).
FIgurE 4–9Cast being removed rom
fnger. (Reprinted romTomboc and Schrader,2005, p 478.)
4–14
c h a p t e R 4 Recording Living and Postmortem Friction Ridge Exemplars
8/14/2019 RecoRding Living and PostmoRtem fRiction Ridge ExemplaRs
http://slidepdf.com/reader/full/recording-living-and-postmortem-friction-ridge-exemplars 15/18
4.4.6 reco din rehyd ated F ictionrid e SkinAlthough the rehydration process should cause the riction
ridge skin to become so t and pliable, the loose and wrinkledriction ridge skin may make recording di cult with somemethods. As always, to avoid con usion, the ngers should
be recorded one at a time. The previously described
method o recording rehydrated riction skin (Tomboc andSchrader, 2005, pp 471–479) has been ound to be suc-cess ul a ter rehydrating with traditional methods. How-
ever, another procedure (Rice, 1988b, pp 152–155) involvesthe use o tissue builder or glycerin to “ ll out” the riction
ridge skin by care ully injecting the material into the tipo the nger, rom the nail side toward the center o thenger, a ter the skin has been rehydrated.
To begin, the ngers should be tied with string around the
distal phalangeal joint ( rst joint) to prevent the materialto be injected rom escaping. Enough material is injected
into the nger to round out the riction ridge skin, enablingsuccess ul recording. A locking hemostat is then clampedto the nger as an extension o the nger to acilitate the
recording process. The nger must now be completely dr yor proper adhesion o the ngerprint ink. To accomplish
this, the nger should be gently dried with paper towelsand lightly dusted with ngerprint powder. Excess moisture
and powder may be removed by rolling the nger on papertowels until the ngers are su ciently dry. The riction
ridge skin is then coated with a thin layer o ngerprint
ink, either by rolling on an inked plate or by rolling ink on
the riction ridge skin with an ink roller. The nger is thenrecorded in the usual manner by applying light pressure
to the nail side o the nger while rolling it on an indexcard or other suitable recording card. This process shouldbe repeated until satis actory results are obtained. The
recorded prints are then placed in the appropriate blockson a standard ngerprint card.
I satis actory results cannot be obtained using this ink-
and-roll method, it is possible to obtain satis actory record-ings using powder and li ting tape (Rice, 1988b, p 155). Alight dusting o black ngerprint powder is applied to the
riction ridge detail. A piece o li ting tape is then placed onthe riction ridge detail at one side and lightly pressed over
the riction ridge detail to the other side while smoothing.The tape is then removed and placed on a piece o clear
mylar-type plastic. One might also use white opaque li tingsheets with a transparent cover (Olsen, 1978, p 98).
Putty can serve as a cushion on which to roll the nger.Putty (i.e., duct seal) is moldable and nondrying. (It is used
in plumbing and electrical work and is available in hardwarestores.) A ball o duct seal is placed on the working sur ace
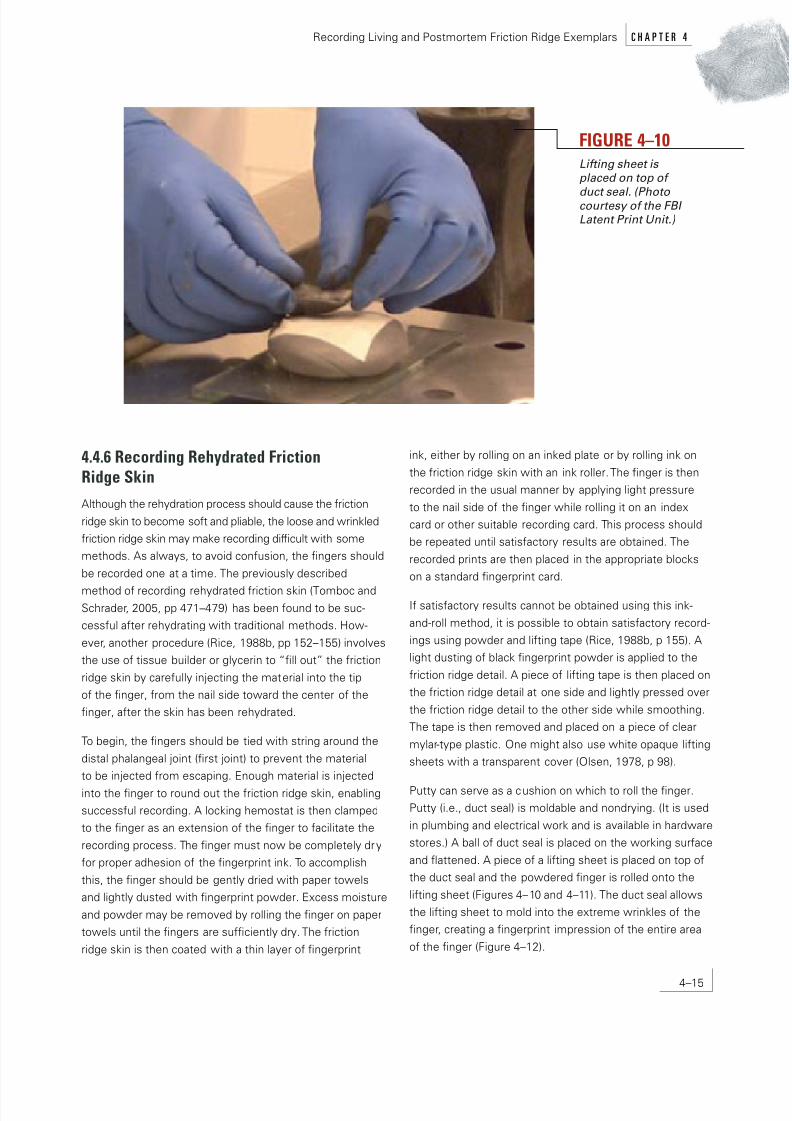
and fattened. A piece o a li ting sheet is placed on top othe duct seal and the powdered nger is rolled onto the
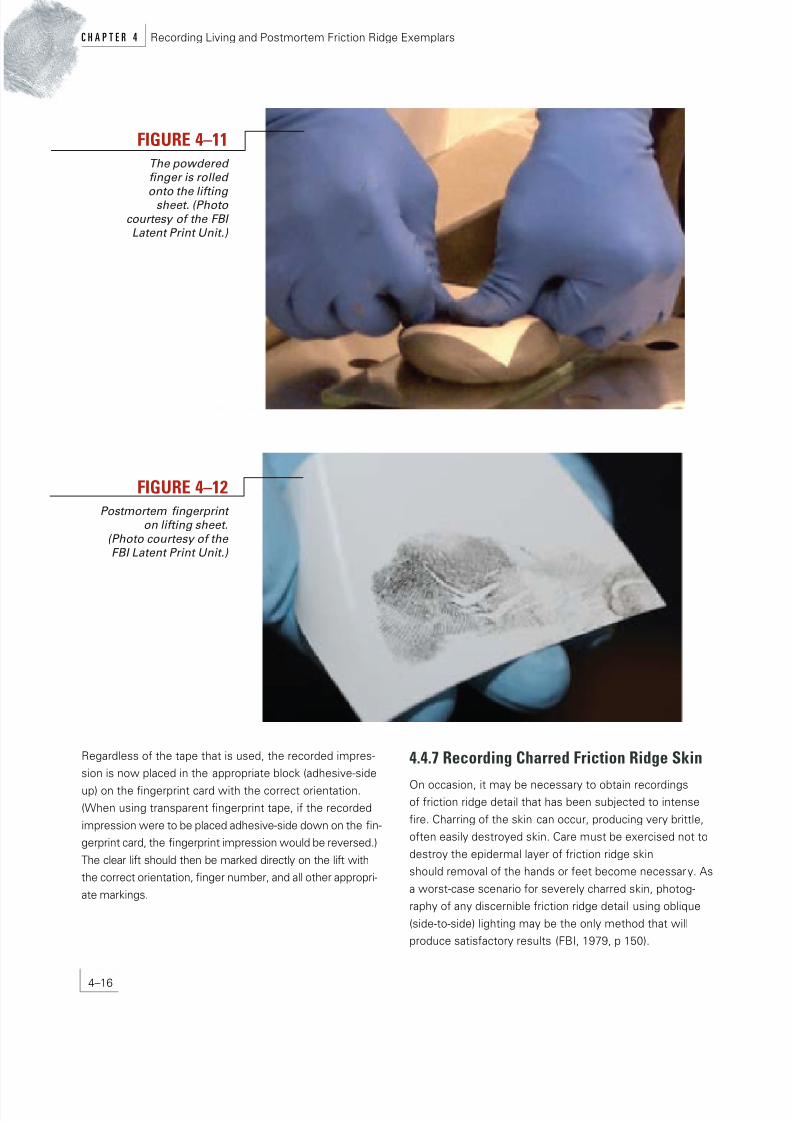
li ting sheet (Figures 4–10 and 4–11). The duct seal allowsthe li ting sheet to mold into the extreme wrinkles o thenger, creating a ngerprint impression o the entire area
o the nger (Figure 4–12).
FIgurE 4–10Li ting sheet is placed on top o
duct seal. (Photocourtesy o the FBI Latent Print Unit.)
4–15
Recording Living and Postmortem Friction Ridge Exemplars c h a p t e R 4
8/14/2019 RecoRding Living and PostmoRtem fRiction Ridge ExemplaRs
http://slidepdf.com/reader/full/recording-living-and-postmortem-friction-ridge-exemplars 16/18
Regardless o the tape that is used, the recorded impres-sion is now placed in the appropriate block (adhesive-side
up) on the ngerprint card with the correct orientation.(When using transparent ngerprint tape, i the recorded
impression were to be placed adhesive-side down on the n-gerprint card, the ngerprint impression would be reversed.)
The clear li t should then be marked directly on the li t withthe correct orientation, nger number, and all other appropri-
ate markings.
4.4.7 reco din Cha ed F iction rid e Skin
On occasion, it may be necessary to obtain recordingso riction ridge detail that has been subjected to intense
re. Charring o the skin can occur, producing very brittle,o ten easily destroyed skin. Care must be exercised not to
destroy the epidermal layer o riction ridge skinshould removal o the hands or eet become necessary. As
a worst-case scenario or severely charred skin, photog-raphy o any discernible riction ridge detail using oblique
(side-to-side) lighting may be the only method that willproduce satis actory results (FBI, 1979, p 150).
FIgurE 4–11The powdered fnger is rolled
onto the li ting sheet. (Photocourtesy o the FBI
Latent Print Unit.)
FIgurE 4–12Postmortem fngerprint
on li ting sheet.(Photo courtesy o the FBI Latent Print Unit.)
4–16
c h a p t e R 4 Recording Living and Postmortem Friction Ridge Exemplars
8/14/2019 RecoRding Living and PostmoRtem fRiction Ridge ExemplaRs
http://slidepdf.com/reader/full/recording-living-and-postmortem-friction-ridge-exemplars 17/18
The correct procedure to record riction ridge detail that
has been subjected to desiccation and charring will bedetermined by the level o destruction to the riction ridge
skin. Fortunately, in some cases, the riction ridge skin onthe ngers and palms is somewhat protected by the tight-
ening o the fexor muscles, ligaments, and tendons in thehands and arms which, as a result o intense heat, draw
the ngers into a tightly clenched st (pugilistic attitude).Intense heat also tends to cause a separation o the epider-mal layer rom the dermal layer o the r iction ridge skin.
One method involves completing the separation o the
epidermal layer rom the dermal layer o the skin throughre rigeration (Rice, 1992, pp 18–25). To acilitate inking andrecording, an ink roller is used to deposit a thin coat o ink
onto the pattern (ridge side) o the skin. The skin is thenfipped over and rolled on the backside, recording the ric-
tion ridge detail on a standard card.
To begin this procedure, the hands (or eet) are removed bya medical examiner or pathologist and placed into separatecontainers labeled with appropriate markings. The contain-
ers are then re rigerated or approximately 5 to 7 days,checking each day or skin separation. When the skin sepa-
rates, it is milky-white and looks “like a wrinkled latex glovethat is one size too large or the wearer” (Rice, 1992, p 19).
Subsequent to the removal o the skin, any loose, charredfesh or oreign material should be care ully removed by
lightly brushing with a so t-bristled toothbrush to exposeas much discernible riction ridge detail as possible. Inaddition, examinations should be conducted separately to
prevent any mix up o riction ridge skin. The riction ridgeskin is then removed rom the palms by care ully cutting
along the outer edges with curved-tip scissors. Incisionsare also made at the base o the palms, the base o the
ngers, and at the base o the thumbs. Friction ridge skinrom the eet is removed by making incisions along the
outer edges o the eet, at the base o the heels, and at thebase o the toes.
The connecting tissue between the epidermal and dermal lay-ers is then care ully cut with scissors pointed away
rom the skin. The epidermal layer o the skin is then li tedaway rom the dermal layer. The separated riction ridge skin
is then immersed in warm water or a ew seconds and islaid fat to enable urther gentle cleansing. A small amount odishwashing liquid is applied to a very so t-bristled toothbrush,
which is then very care ully used to clean out any remaining
debris by brushing in the direction o the ridge fow to preventdamage to the ridges. During this process, the skin should be
rinsed requently in clean, warm water. A ter the skin is su -ciently cleaned and rinsed, it should be care ully blotted dry
with paper towels.
To record the riction ridge detail rom this skin, an ink roller
is lightly coated with ink using an inking plate in the samemanner as when recording inked standards rom a live
person. The riction ridge skin to be recorded is then placedon a hard fat sur ace, ridge side up. With gentle pressure,
and while the skin is held in place, the ink is rolled ontothe skin. The skin is then fipped over, ridge side down,onto a standard 8” x 8” recording card, and while the skin
is held in place, the roller is then gently rolled across theskin, pressing the ink onto the card. This method should be
repeated until a satis actory recording is produced.
Fingers and toes can also be recorded in this manner, tak-ing care to remove, label, and examine them separately toprevent con usion. To remove the riction ridge skin rom
toes and ngers, incisions at the base o the digits, alongthe extreme sides, and around the insides o the nail are
recommended, being care ul not to damage any o the pat-tern areas. The riction ridge skin is then removed by cut-
ting the connecting tissue starting rom the base, as withremoval o the palm areas. Cleaning, drying, inking, and
recording are per ormed in the same manner as previouslydescribed (Rice, 1992, pp 18–25).
4.5 S mma yThe methods and techniques described in this chapter orrecording living and postmortem riction ridge detail are
appropriate or the vast majority o conditions and circum-stances. However, it is possible that an unusual circum-
stance will arise that may require extra patience and skillto achieve the most desirable results. Quality recordings
rom live subjects are usually not too di cult to obtain, aslong as the subject is cooperative. Recording postmortemriction ridge detail, however, may become more o a chal-
lenge because o the varying conditions o the riction ridgeskin. There are also many levels o di culty associated with
this endeavor, which is why proper training, experience, anddetermination are essential.
4–17
Recording Living and Postmortem Friction Ridge Exemplars c h a p t e R 4

8/14/2019 RecoRding Living and PostmoRtem fRiction Ridge ExemplaRs
http://slidepdf.com/reader/full/recording-living-and-postmortem-friction-ridge-exemplars 18/18
4.6 reviewe sThe reviewers critiquing this chapter were Herman Berg-man, Patti Blume, Mike Campbell, Sue Manci Coppejans,
Robert J. Garrett, Laura A. Hutchins, Bridget Lewis, Michelle
L. Snyder, Lyla A. Thompson, Juliet H. Wood, and Rodol o R.Zamora.
4.7 refe encesCowger, J. F. Friction Ridge Skin, Comparison and Identif- cation o Fingerprints; Elsevier Science Publishing Com-
pany: New York, 1983.
Federal Bureau o Investigation, U.S. Department o Jus-tice. The Science o Fingerprints; U.S. Government Printing
O ce: Washington, DC, 1979.
Leas, R. L. Program Manager, FBI Disaster Squad—Victim
Identi cation Unit, Quantico, VA. Personal communication,2006.
Miller, R. D. Recovery o Usable Fingerprint Patterns rom
Damaged Postmortem Friction Ridge Skin. J. Forensic Ident. 1995, 45 (6), 602–605.
Olsen, Sr., R. D., Scott’s Fingerprint Mechanics; Charles C.Thomas: Spring eld, 1978.
Rice, K. A. Printing o the Underside o the EpidermalSur ace o Decomposed Fingers. J. Forensic Ident. 1988a,
38 (3), 98–100.
Rice, K. A. The Re-Hydration and Printing o Mummi edFingers. J. Forensic Ident. 1988b, 38 (4), 152–156.
Rice, K. A. Printing the Deceased Who Have Been Subject-ed to Fire. J. Forensic Ident. 1992, 42 (1), 18–25.
Scienti c Working Group on Friction Ridge Analysis, Study
and Technology. Special Notice—Name Change or MajorCase Prints to Complete Friction Ridge Exemplars. J. Fo-
rensic Ident. 2006, 56 (4), 619–627.
Tomboc, R.; Schrader, M. Obtaining Fingerprint andPalmprint Impressions rom Decomposed Bodies or Burn
Victims Using the Mikrosil Casting Method. J. Forensic Ident. 2005, 55 (4), 471–479.
c h a p t e R 4 Recording Living and Postmortem Friction Ridge Exemplars