Embed Size (px)
Citation preview

HMS Provider Portal User Guide for Part B Providers
Version1. 11/09/2017 1
Region 4 Recovery Auditor
Provider Portal User Guide for Part B Providers

HMS Provider Portal User Guide for Part B Providers
Version1. 11/09/2017 2
Appendix
Section Page Knowledge Based Authentication (KBA) Login 4-7 Two Factor Authentication 8-9 Account Management 10-16 Managing Users 17-23 Web Users 24-26 Medical Record Tracking 27-28 Discussion and Correspondence Tracking 29-30 Appeals Tracking 31-32

HMS Provider Portal User Guide for Part B Providers
Version1. 11/09/2017 3
HMS Provider Portal User Guide for Part B Providers
The HMS Provider Portal is a web based application created by HMS Federal (HMS), the Centers for Medicare & Medicaid Services (CMS) Recovery Audit Contractor (RAC) for Region 4. The purpose of the website is to facilitate communication between the Recovery Auditor and the providers in Region 4.
Part B Providers may login to the website one of two ways:
• Answering Knowledge Based Authentication (KBA) questions (identity verification process), or
• Entering a username and password previously assigned to you.
This user guide explains the basic functions of the HMS provider portal website. It is divided into three sections:
• Section 1: Getting Started: This section guides the new user through the login process using knowledge based authentication where the primary facility representative can designate the facility contact to receive medical record request letters, designate the facility contact to receive improper payment letters, and provide other facility representative(s) access to this website.
• Section 2: Two Factor Authentication: This section guides the user through the Two Factor Authentication Login process, which requires for all users who log into the Region D provider Portal. The new login process will require each user to validate their identity through a one-time security code which will be sent to the email address the user registered on line when they created their user account.
Section 3: Managing Users: This section guides you through the process for editing
and deleting your contacts to receive letters; as well as adding, editing, and deleting your web user contacts. Access to this section requires KBA login and should only be accessed by the individual you designate responsibility for keeping your facility’s contact information current and accurate.
• Section 4: Web Users: This section explains how to login using a username and password and how to track requests for medical records.

HMS Provider Portal User Guide for Part B Providers
Version1. 11/09/2017 4
Note:
Section 1: Getting Started
This section explains how to create your facility’s account.
Knowledge Based Authentication (KBA) Login
The first time you access the provider portal, you must login using knowledge based authentication. The responses you provide to the questions presented is a means of identity verification.
Before you begin, be sure you have access to your own claims data. This information is part of the KBA Login process.
Step 1. Launch a web browser such as Microsoft Internet Explorer.
The racinfo.hms.com website supports Microsoft Internet Explorer 7.0 and Mozilla Firefox 3.6.
Step 2. Enter https://racinfo.hms.com in the address bar. The home page displays.
Step 3. A CPT Disclaimer appears.
Read the Disclaimer, and if you accept the Terms and Conditions of use, click on the Accept button.
Note
If you do not accept the Terms and Conditions of use and click on the Decline button, you will not be permitted to login to the website.
Step 4. From the top menu, click on Login.

HMS Provider Portal User Guide for Part B Providers
Version1. 11/09/2017 5
The login page displays. The Knowledge Based Authentication (KBA) displays on the left side of the screen.
Step 5. Click on the “Please note”: button and read the disclaimer.
Note:
If you do not click on the Please note button you will not be able to complete the KBA process.
Step 6. Select Part B Provider type from the Provider Type drop down menu.
The page refreshes to record your selection and displays the question, “What is your NPI Number?”
Step 7. Enter your NPI Number in the text box *Note: If NPI entered is associated with more than one Medicare Provider ID number the KBA will also ask for your Medicare ID Number (PTAN)
HMS Provider Portal User Guide for Part B Providers
Version1. 11/09/2017 6
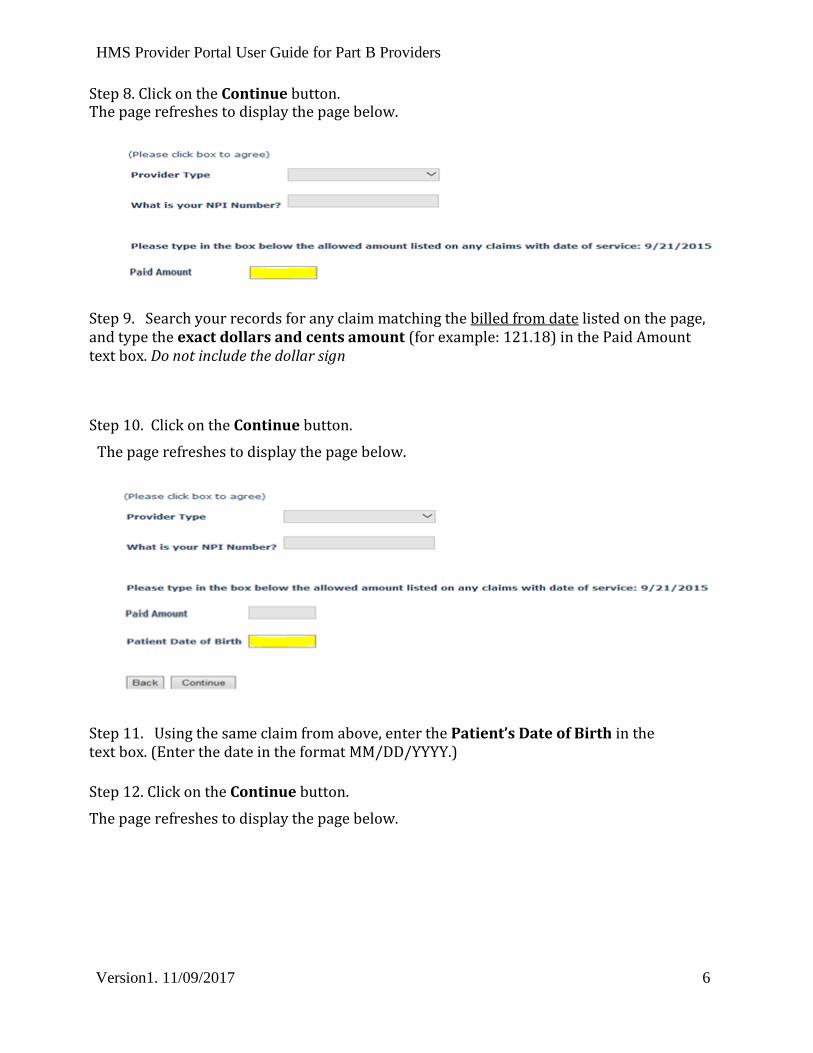
Step 8. Click on the Continue button. The page refreshes to display the page below.
Step 9. Search your records for any claim matching the billed from date listed on the page, and type the exact dollars and cents amount (for example: 121.18) in the Paid Amount text box. Do not include the dollar sign
Step 10. Click on the Continue button.
The page refreshes to display the page below.
Step 11. Using the same claim from above, enter the Patient’s Date of Birth in the text box. (Enter the date in the format MM/DD/YYYY.)
Step 12. Click on the Continue button. The page refreshes to display the page below.

HMS Provider Portal User Guide for Part B Providers
Version1. 11/09/2017 7
Step 13. Enter your email address in the text box and click the Continue button. Note: Please enter a valid email address. Access to this email will be required for all future login attempts.
Section 2: Two Factor Authentication This section guides you through the two factor authentication process, where you can:
• Request a secure user access code Instructions to obtain a temporary security code are displayed. Click “Next” to continue with the process of obtaining the identification code. If you already have the code, click on “Already have an Identification Code?” link and go to Step 15.

HMS Provider Portal User Guide for Part B Providers
Version1. 11/09/2017 8
Step 14 Confirm the email address to receive the code and click “Generate code” to obtain the identification code. If you already have the code, then click on “Already have an Identification Code?” link and go to Step 15
Step 15. Locate the email from “[email protected]” in your inbox. Retrieve “Your Identification Code”.
Step 16. Enter the Identification Code and click “Log Me In”

HMS Provider Portal User Guide for Part B Providers
Version1. 11/09/2017 9
Section 3 Account Management
This section guides you through the Account Management menu, where you can:
• Specify a contact to receive medical record request letters, • Specify a contact to receive improper payment letters, and • Add up to five additional website users.
1. Hover over the Account Management menu option and click on Contact
Information. The message below displays.
2. Click on the OK button to clear the
message. The page below displays.

HMS Provider Portal User Guide for Part B Providers
Version1. 11/09/2017 10
The Manage Contact Information page displays three columns:
• Address from Claims Processing Contractor (the information in this column is provided by your Claims Processing Contractor and cannot be altered),
• Contact to Receive Medical Record Request Letters, and • Contact to Receive Improper Payment Letters.
You must specify the contact who will receive Medical Record Request Letters and the contact who will receive Improper Payment Letters.
The information you provide is used for all communications for the designated area and must be maintained to ensure accuracy and timely mail delivery.
Add a Contact to Receive Medical Record Request Letters
Use this feature to designate someone in your facility to receive all medical record request letters.
1. Click on the Edit link in the second column, Contact to Receive Medical Record Request Letters. The page below displays.
2. Enter your Provider Name.
3. Enter the Contact Name.
4. Enter the Contact’s Title. Alternatively, select an option from the drop down menu.
5. Enter the Department.
6. Enter Affiliation/Ownership.
7. Enter the Contact’s Email Address.

HMS Provider Portal User Guide for Part B Providers
Version1. 11/09/2017 11
8. Enter the Street Address.
9. Enter the City.
10. Select from the State drop down menu.
11. Enter the ZIP Code.
12. Enter the Contact’s Phone Number and their Extension, (if applicable).
13. Enter the Contact’s Fax Number.
14. Enter a Password for the contact.
Note
Passwords must contain at least one letter, one number, and one symbol and be at least 8 characters long.
15. Enter the Password again in the Confirm Password field.
16. Click on the Add button.
A confirmation message displays the text, “Contact has been added successfully. [NAME], please use this username [email address] and password for all future RAC Info logins.”
17. Click on the OK button.
The message clears. The page refreshes, displaying the Manage Contact Information page. The contact information you enter is recorded and displayed immediately.

HMS Provider Portal User Guide for Part B Providers
Version1. 11/09/2017 12
18. If you prefer to designate the same contact to receive both the medical record
request letters and the improper payment letters, click on the “Make both contacts identical” checkbox.
The message below displays.
19. Click on the OK button to confirm the message. Alternatively, click on the Cancel button if you would like to designate a different contact to receive the improper payment letters.

HMS Provider Portal User Guide for Part B Providers
Version1. 11/09/2017 13
Add a Contact to Receive Improper Payment Letters
Use this feature to designate someone in your facility to receive all improper payment letters.
1. Click on the Edit link in the third column, Contact to Receive Improper Payment
Letters. The page below displays.
2. Enter your Provider Name.
3. Enter the Contact Name.
4. Enter the Contact’s Title. Alternatively, select an option from the drop down menu.
5. Enter the Department.
6. Enter Affiliation/Ownership.
7. Enter the Contact’s Email Address.
8. Enter the Street Address.
9. Enter the City.
10. Select from the State drop down menu.
11. Enter the ZIP Code.
12. Enter the Contact’s Phone Number and their Extension, (if applicable).
13. Enter the Contact’s Fax Number.
14. Enter a Password for the contact.

HMS Provider Portal User Guide for Part B Providers
Version1. 11/09/2017 14
Note
Passwords must contain at least one letter, one number, and one symbol and be at least 8 characters long.
15. Enter the Password again in the Confirm Password field.
16. Click on the Add button.
A confirmation message displays the text, “Contact has been added successfully. [NAME], please use this username [email address] and password for all future RAC Info logins.”
17. Click on the OK button.
The message clears. The page refreshes, displaying the Manage Contact Information page. The contact information you enter is recorded and displayed immediately.
The bottom of the page displays the link, Add Web User, which allows you to add up to five users. You may have a total of seven users: two contacts to receive letters and five additional web users.
Add a Web User
Use this feature to create a username and password for yourself (if you were not a designed letter recipient) and/or others who also need access to this website.
1. Click on the Add Web User link. The page below displays.
2. Enter your Provider Name.
3. Enter the Contact Name.
4. Enter the Contact’s Title. Alternatively, select an option from the drop down menu.

HMS Provider Portal User Guide for Part B Providers
Version1. 11/09/2017 15
5. Enter the Department.
6. Enter Affiliation/Ownership.
7. Enter the Contact’s Email Address.
8. Enter the Street Address.
9. Enter the City.
10. Select from the State drop down menu.
11. Enter the ZIP Code.
12. Enter the Contact’s Phone Number and their Extension, (if applicable).
13. Enter the Contact’s Fax Number.
14. Enter a Password for the contact.
Note
Passwords must contain at least one letter, one number, and one symbol and be at least 8 characters long.
15. Enter the Password again in the Confirm Password field.
16. Click on the Add button.
A confirmation message displays the text, “Contact has been added successfully. [NAME], please use this username (email address) and password for all future RAC Info logins.”
17. Click on the OK button.
The message clears. The page refreshes. In the Website Users section of the Manage Contact Information page, the grid displays the website user.

HMS Provider Portal User Guide for Part B Providers
Version1. 11/09/2017 16
Section 4: Managing Users
This feature allows the primary provider contact to manage users using the knowledge based authentication login.
As the primary provider contact you can: update your facility’s designated medical record request letters contact and designated receive improper payments letters contact; and add, edit, and delete additional web users.
1. Login to the website using knowledge based authentication.
2. Hover over the Account Management menu.
3. Click on the Contact Information option.
The page below displays.
This page displays three columns:
• Address from Claims Processing Contractor (the information in this column is provided by your Claims Processing Contractor and cannot be altered),
• Contact to Receive Medical Record Request Letters, and • Contact to Receive Improper Payment Letters.
The information you provide is used for all communications for the designated area and must be maintained to ensure accuracy and timely mail delivery.

HMS Provider Portal User Guide for Part B Providers
Version1. 11/09/2017 17
To Edit a Contact to Receive Medical Record Request Letters:
1. Click on the Edit link in the second column, Contact to Receive Medical Record Request Letters. The page below displays.
2. Edit any of the fields, except for Email Address.
Note
Once a contact has been added, you cannot change their email address. If the contact’s email address changes or was entered incorrectly, the contact must be deleted and entered as a new contact using the correct email address.
3. Click on the Update button.
A confirmation message displays the text, “Contact has been updated successfully.”
4. Click on the OK button.
The message clears. The page refreshes, displaying the Manage Contact Information page. The contact information you entered is recorded and displayed immediately.
To Delete a Contact to Receive Medical Record Request Letters:
1. Click on the Delete link in the second column, Contact to Receive Medical Record Request Letters.

HMS Provider Portal User Guide for Part B Providers
Version1. 11/09/2017 18
A confirmation message displays the text, “Are you sure you want to delete the Contact for Medical Record Request Letters?”
2. Click on the OK button.
The page refreshes, displaying the Manage Contact Information page.
To Edit Contact to Receive Improper Payment Letters:
This feature allows you to edit the contact information for the designated contact to receive improper payment letters.
1. Click on the Edit link in the third column, Contact to Receive Medical Record Request Letters. The page below displays.
2. Enter any of the fields except for email address.
Note
Once a contact has been added, you cannot change their email address. If their email address changes or was entered incorrectly, the contact needs to be deleted and entered as a new contact using the correct email address.
3. Click on the Update button.
HMS Provider Portal User Guide for Part B Providers
Version1. 11/09/2017 19
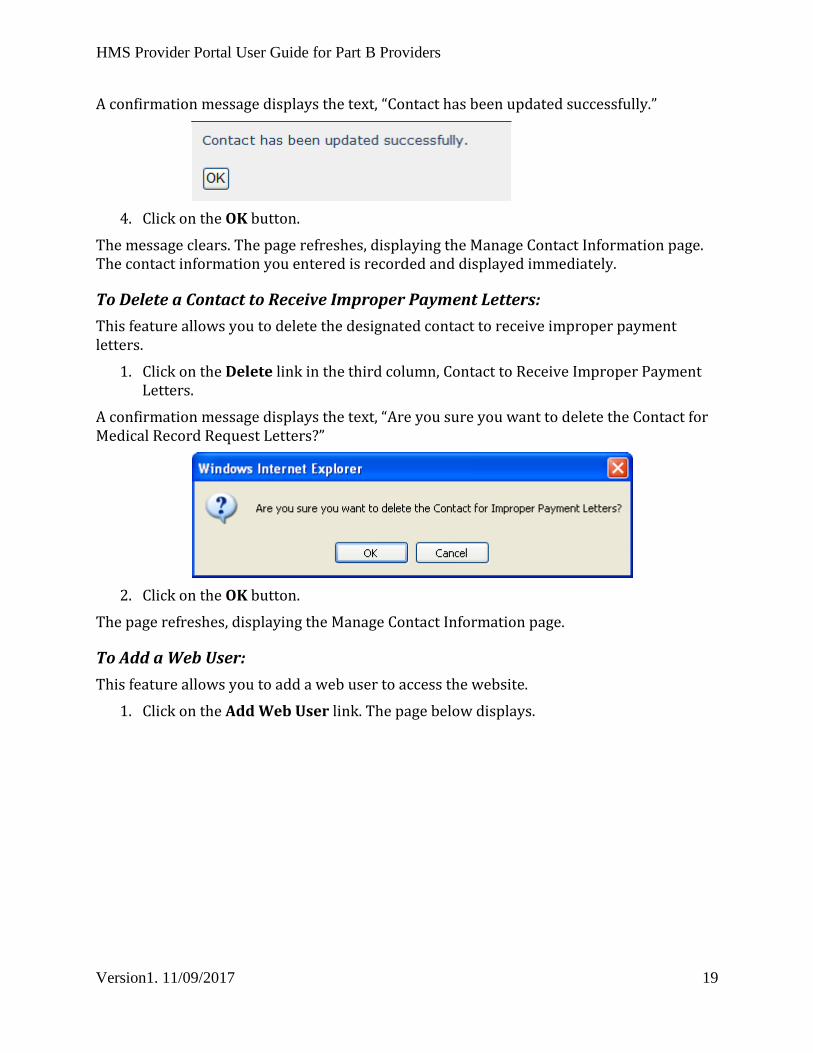
A confirmation message displays the text, “Contact has been updated successfully.”
4. Click on the OK button.
The message clears. The page refreshes, displaying the Manage Contact Information page. The contact information you entered is recorded and displayed immediately.
To Delete a Contact to Receive Improper Payment Letters:
This feature allows you to delete the designated contact to receive improper payment letters.
1. Click on the Delete link in the third column, Contact to Receive Improper Payment Letters.
A confirmation message displays the text, “Are you sure you want to delete the Contact for Medical Record Request Letters?”
2. Click on the OK button.
The page refreshes, displaying the Manage Contact Information page.
To Add a Web User:
This feature allows you to add a web user to access the website.
1. Click on the Add Web User link. The page below displays.

HMS Provider Portal User Guide for Part B Providers
Version1. 11/09/2017 20
2. Enter your Provider Name.
3. Enter the Contact Name.
4. Enter the Contact’s Title. Alternatively, select an option from the drop down menu.
5. Enter the Department.
6. Enter Affiliation/Ownership.
7. Enter the Contact’s Email Address.
8. Enter the Street Address.
9. Enter the City.
10. Select from the State drop down menu.
11. Enter the ZIP Code.
12. Enter the Contact’s Phone Number and their Extension, if applicable.
13. Enter the Contact’s Fax Number.
14. Enter a Password for the user.
Note
Passwords must contain at least one letter, one number, and one symbol and be at least 8 characters long.
15. Enter a Password again in the Confirm Password field.
16. Click on the Add button.

HMS Provider Portal User Guide for Part B Providers
Version1. 11/09/2017 21
The page refreshes. In the Website Users section of the Manage Contact Information page, the grid displays the website user.
To Edit a Web User:
This feature allows you to edit the contact information for a web user. The Edit link is located in the Manage Contact Information page, under the Website Users section.
1. Click on the Edit link. The page below displays.
2. Edit any of the fields except for email address.
Note
Once a web user has been added, you cannot change their email address. If the web user’s email address changes or was entered incorrectly, the web user needs to be deleted and entered as a new web user using the correct email address.
3. When you are finished, click on the Update button.
A confirmation message displays the text, “Contact has been updated successfully.”
HMS Provider Portal User Guide for Part B Providers
Version1. 11/09/2017 22
4. Click on the OK button.
The page refreshes. In the Website Users section of the Manage Contact Information page, the grid displays the updated contact information.
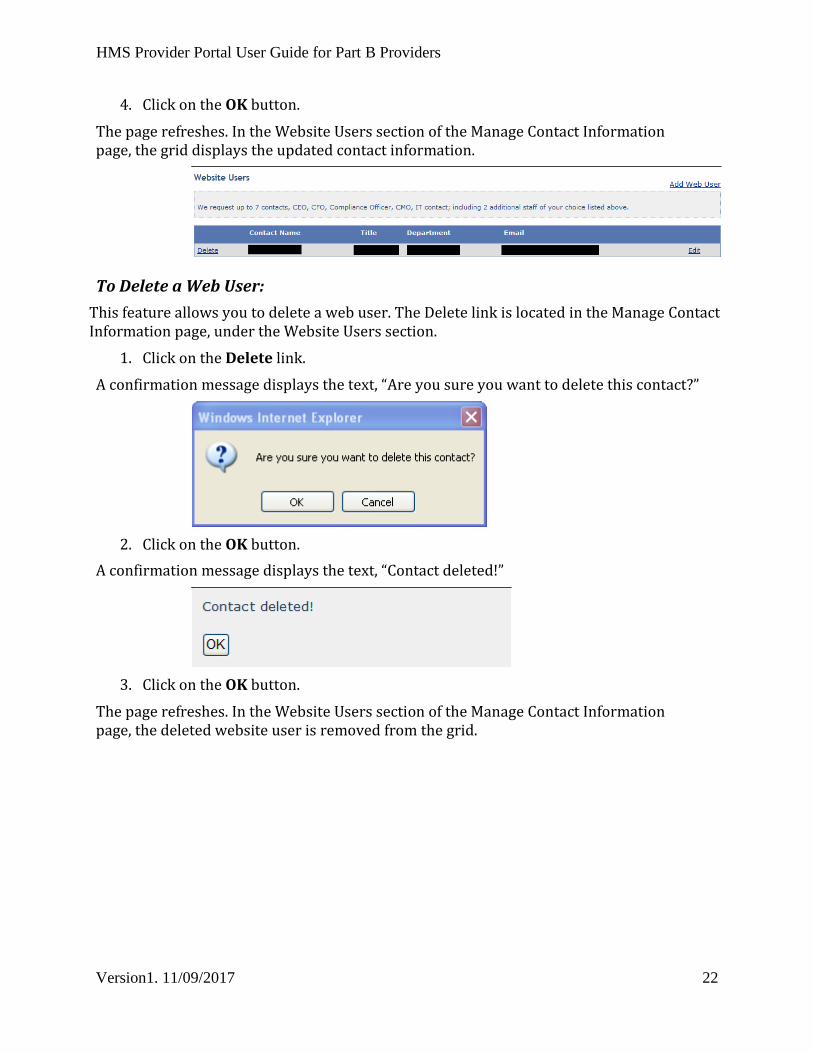
To Delete a Web User:
This feature allows you to delete a web user. The Delete link is located in the Manage Contact Information page, under the Website Users section.
1. Click on the Delete link.
A confirmation message displays the text, “Are you sure you want to delete this contact?”
2. Click on the OK button.
A confirmation message displays the text, “Contact deleted!”
3. Click on the OK button.
The page refreshes. In the Website Users section of the Manage Contact Information page, the deleted website user is removed from the grid.

HMS Provider Portal User Guide for Part B Providers
Version1. 11/09/2017 23
Section 5: Web Users
This section explains how to login using a username and password, how to change your password, and how to track requests for medical records.
Username and Password Login 1. Launch a web browser such as Microsoft Internet Explorer.
Note
The racinfo.com website supports Microsoft Internet Explorer 7.0 and Mozilla Firefox 3.6.
2. Enter https://racinfo.hms.com/ in the address bar. The home page displays.
3. Read the CPT Disclaimer and select Accept. From the top menu, click on Login.
The login page displays. The Provider Sign In displays on the right side of the screen.

HMS Provider Portal User Guide for Part B Providers
Version1. 11/09/2017 24
4. Enter your User Name in the User Name text box.
5. Enter your Password in the Password text box.
Note
If you forget your password, click on the Forget your password? link. When the page refreshes, enter your user name and click on the Submit button. A Provider Services Representative will send you an email with your new password. Alternatively, send an email to [email protected].
6. Click on the Please note box and read the disclaimer. Click on the Sign In button.
Note
By Clicking on the Please note box and Sign In you are agreeing to the Terms and Conditions of use. If you do not accept the terms and conditions you will not be permitted to login to the website.
The home page displays. New menu options are available to you.
Change Password
Use this feature to change your password.

HMS Provider Portal User Guide for Part B Providers
Version1. 11/09/2017 25
Note
You must be logged in as the user in order to change the password for the username.
1. From the top menu, scroll over Account Management and click on the Change Password
link. The Change Password page displays.
2. Enter your current Password.
3. Enter a New Password.
4. Enter the New Password again.
5. Click on the Change Password button.
Passwords must be a minimum of 8 characters long and contain at least one letter, one number, and one symbol. When you have successfully changed your password the Change Password Complete page displays.
6. Click on the Continue button to return to the Home page.
If you forget your password, send an email to [email protected] and include your user name.
HMS Provider Portal User Guide for Part B Providers
Version1. 11/09/2017 26
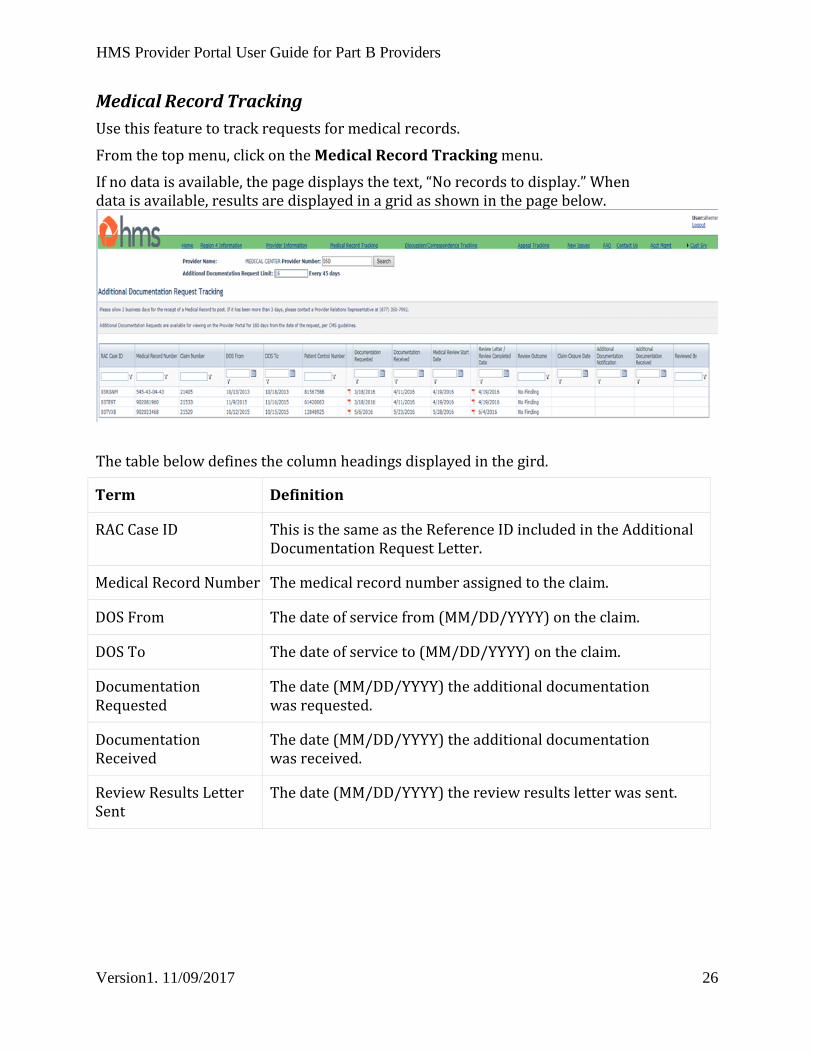
Medical Record Tracking
Use this feature to track requests for medical records.
From the top menu, click on the Medical Record Tracking menu.
If no data is available, the page displays the text, “No records to display.” When data is available, results are displayed in a grid as shown in the page below.
The table below defines the column headings displayed in the gird.
Term
Definition
RAC Case ID
This is the same as the Reference ID included in the Additional Documentation Request Letter.
Medical Record Number
The medical record number assigned to the claim.
DOS From
The date of service from (MM/DD/YYYY) on the claim.
DOS To
The date of service to (MM/DD/YYYY) on the claim.
Documentation Requested
The date (MM/DD/YYYY) the additional documentation was requested.
Documentation Received
The date (MM/DD/YYYY) the additional documentation was received.
Review Results Letter Sent
The date (MM/DD/YYYY) the review results letter was sent.

HMS Provider Portal User Guide for Part B Providers
Version1. 11/09/2017 27
To View Results
• Click on the right arrow to advance to the next page in the search results (if search results exceed one page).
• Click on the left arrow to advance to the previous page in the search results (if search results exceed one page).
• Click on the column heading once to sort in ascending order.
• Click on the column heading again to sort in descending order. To Filter Results
If you receive an Additional Documentation Request (ADR) letter, you may use the filter feature to search specifically for a certain claim using the RAC Case ID, Medical Record Number, DOS To, DOS From, Date Documentation Requested, Date Documentation Received, or Date Review Results Letter Sent.
1. Enter the Reference ID included in the Additional Documentation Request Letter in the RAC Case ID text box. (Alternatively, enter the Medical Record Number in the corresponding text box, or a valid date in DOS From or DOS To text boxes.)
2. Click on the filter icon
3. Select Contains from the choices displayed.
The page refreshes. The grid displays search results matching the criteria entered in the filter.

HMS Provider Portal User Guide for Part B Providers
Version1. 11/09/2017 28
Discussion and Correspondence Use this feature to track the discussion period and correspondence status on file at HMS..
From the top menu, click on the Discussion and Correspondence
If no data is available, the page displays the text, “No records to display.” When data is available, results are displayed in a grid as shown in the page below.
The table below defines the column headings displayed in the gird.
Term
Definition
RAC Case ID
This is the same as the Reference ID included in the Additional Documentation Request Letter.
Patient Control Number
Unique account number assigned by the provider to identifier a patients account. .
DOS From
The date of service from (MM/DD/YYYY) on the claim.
DOS To
The date of service to (MM/DD/YYYY) on the claim.
Discussion Received Date
The date (MM/DD/YYYY) the discussion period documentation was received
Discussion Determination
The final out of the Discussion Period Review
Discussion Determination Date
The date (MM/DD/YYYY) the discussion period review was completed.
Correspondence Received Date
The date (MM/DD/YYYY) the correspondence documentation was received.

HMS Provider Portal User Guide for Part B Providers
Version1. 11/09/2017 29
To View Results
• Click on the right arrow to advance to the next page in the search results (if search results exceed one page).
• Click on the left arrow to advance to the previous page in the search results (if search results exceed one page).
• Click on the column heading once to sort in ascending order.
• Click on the column heading again to sort in descending order. To Filter Results
If you submitted a written discussion period request, you may use the filter feature to search specifically for a certain claim using the RAC Case ID and Claim Number.
1. Enter the Reference ID included in the Review Results Letter or Informational Letter in the RAC Case ID text box. (Alternatively, enter the claim number in the corresponding text box, or a valid date in DOS From or DOS To text boxes.)
2. Click on the filter icon
3. Select Contains from the choices displayed.
The page refreshes. The grid displays search results matching the criteria entered in the filter.

HMS Provider Portal User Guide for Part B Providers
Version1. 11/09/2017 30
Appeals Tracking Use this feature to track the appeal status on file at HMS..
From the top menu, click on the Appeals Tracking
If no data is available, the page displays the text, “No records to display.” When data is available, results are displayed in a grid as shown in the page below.
The table below defines the column headings displayed in the gird.
Term
Definition
RAC Case ID
This is the same as the Reference ID included in the Additional Documentation Request Letter.
Patient Control Number
Unique account number assigned by the provider to identifier a patients account. .
DOS From
The date of service from (MM/DD/YYYY) on the claim.
DOS To
The date of service to (MM/DD/YYYY) on the claim.
Level of Appeal
The Medicare Appeal Level.
Disposition
The final ruling or outcome of the appeal.
Disposition Date
The date (MM/DD/YYYY) the appeal outcome was decided.

HMS Provider Portal User Guide for Part B Providers
Version1. 11/09/2017 31
To View Results
• Click on the right arrow to advance to the next page in the search results (if search results exceed one page).
• Click on the left arrow to advance to the previous page in the search results (if search results exceed one page).
• Click on the column heading once to sort in ascending order.
• Click on the column heading again to sort in descending order. To Filter Results
If you submitted a written discussion period request, you may use the filter feature to search specifically for a certain claim using the RAC Case ID and Claim Number.
1. Enter the Reference ID included in the Review Results Letter or Informational Letter in the RAC Case ID text box. (Alternatively, enter the claim number in the corresponding text box, or a valid date in DOS From or DOS To text boxes.)
2. Click on the filter icon
3. Select Contains from the choices displayed.
The page refreshes. The grid displays search results matching the criteria entered in the filter.