Embed Size (px)
Citation preview
Reliabilit
yMANUAL CARTRIDGE
UNLOADSuper DLT1
PresentedBy
Quantum Technical Services

Reliability Overview
• Understand why & how tapes get stuck
• Considerations
• Tape removal
• Detached leader
• Rewinding: when and how
• How It All Fits Together

Reliability Tools
• 5lbs. Torque driver
• Driver bits: #8 Torx, #2 Phillips
• Slotted Screwdriver
• ESD ground strap
• 9Volt battery
• Finger Cots or Latex Gloves
• Tweezers
• Non-contaminating probe
• Alcohol wipes

Reliability Drive Handling
• Reduce Damage to the drive– Take proper ElectroStatic Discharge (ESD)
precautions.
– Do not handle the drive without ESD protection/grounding.
– Ensure that proper tools are used
• Reduce Contamination– Latex gloves or finger cots to prevent
contamination.
– Use alcohol wipes to clean leader

Reliability Causes Of A Stuck Tape
• Faulty unload button– Try SCSI unload/eject command
• Detached leader
• Improper or no SCSI bus termination
• Another device on the bus was powered off
• Misalignment, Post-it or other label attached
• Wrong type of cartridge inserted (rare)– DLTtape III/IIIXT or Cleaning Tape III
Reliability Troubleshoot First
• Verify that the drive or bus is properly terminated
– Termination matches bus?
• Drive has good power?– Tried other sources (if possible)?
• If other devices on the bus, are they powered on?
– Were any devices powered off on an active bus?
• SCSI device/bus reset & eject command attempted?
• Device has been powered off and on?

Reliabilit
yDRIVE DISASSEMBLY

Reliability Table Top Cover
Removal
• Ensure that power is off and/or disconnected– Take proper ESD precautions
• Tool(s) – Phillips or Torx (it may vary)
• Cover screws are located on the bottom– Generally Phillips head screws
– Rotate counterclockwise direction
• Cover slides towards the rear of drive

Reliability Bezel Removal
• Tools– You will need a flat head screwdriver
– A little patience
• Care must be used in unlatching the clips– Don’t apply too much pressure
– The clips are delicate
• Start from the bottom sides – Do the bottom clips first
– Work upwards
– Slowly pivot the bezel outward from the bottom
– It should not be necessary to depress the top clips
Reliability Chassis Cover Removal
• There are three T8 Torx screws– One screw on each side of the chassis
(excluding the front)
– 5lbs. of torque is used to fasten these screws
• After removing the screws, grab the front of the cover and pivot cover back towards the rear
– You cannot pull the chassis cover straight up.
– The rear screw retainer is not flush with the rear

Reliabilit
yCARTRIDGE REMOVAL

Reliability Inspect Drive & Tape
Leader
• Visually inspect and determine the drive’s condition
– Is there tape on the take-up reel?
– Is tape fully rewound?
– Is take-up reel leader still attached?
– What is the position of the buckling arm?
• Purpose: determine first course of action– Proceed to eject tape
– Destroy tape, rewind, attach leader, etc.

Reliability If Tape Is On Take-up
Reel
• Destroying the tape is recommended– It limits the potential for damage to the heads
– If there is resistance, explain the risk of head damage
– Reattaching a leader is less invasive to the head
– Point out the head shield for protection from the leader
• A manual tape rewind is to be used only in an emergency situation.
– There must be a critical business need
– For instance, the data on the tape is unique

Reliability Manual Tape Ejection
• Tool– Fresh 9V Battery
• Considerations– Ensure power is off and power connector is
unplugged Never apply battery to the eject motor terminals
with power on Disconnect power connector from the tape drive
- Battery life is extended when disconnected
– Tape is clear of the take-up reel or is fully rewound
– Take-up reel leader is clear of tape or attached to buckling arm
– You may need to reverse the polarity first to reset the mechanism

Reliability Manual Tape Eject
• The tape cartridge is ejected by placing the contacts of a 9V battery on the contacts of the eject motor
• You may need to retract the buckling arm to reset the eject process

Reliability Manual Tape Eject
Negative (-) contact to rear post retracts the buckling arm
Postive (+) contact to rear post engages buckling arm and tape is ejected

Reliabilit
yTAPE REWIND
MANUAL AND POWER REWIND

Reliability Rewinding
Considerations
• Caution: The tape leader splice may hang on the tape head
– Stop and release the tension
– The splice should now pass over the head
• The buckle between the tape and take-up reel leaders will hang on the head
– Stop and carefully close the head shield
– Continue rewinding the buckle past the head

Reliability Manual Rewind
Supply Motor Access Hole
T8 Driver
Base Plate

Reliability Manual Rewind
• Carefully position the drive onto one of its sides– Locate the supply motor access hole on the
drive base plate
– Insert the T8 Torx driver into the access hole – Couple with the supply motor screw
– Rotate counterclockwise (right to left)
• Stop when there is any resistance– Visually inspect the tape path
– The leader splice or buckle could be hung on the head assembly or a roller
– It the motor is frozen, return the drive to the supplier.

Reliability Power Rewind
• Carefully position the drive onto one of its sides
• The supply motor access hole is located on the base plate
• Insert the T8 Torx driver into the access hole and couple with the supply motor screw
• Ensure power tool is set to reverse (counterclockwise) and keep RPM low

Reliability Power Rewind
• Caution: Using an electric power driver will damage the tape and the drive leaders if you do not stop before reaching the end of the tape
• Visually monitor tape rewind progress
• Stop before tape is fully rewound
• Switch to T8 hand tool to complete the rewind

Reliabilit
yDETACHED LEADER
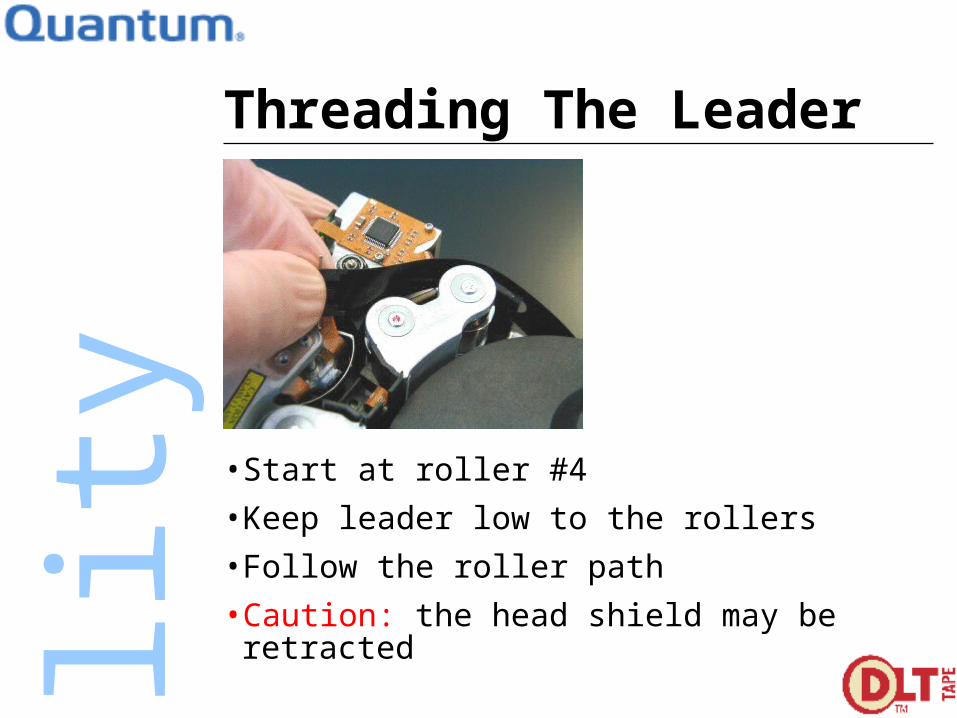
Reliability Threading The Leader
• Start at roller #4
• Keep leader low to the rollers
• Follow the roller path
• Caution: the head shield may be retracted

Reliabilit
yQuestions?