Embed Size (px)
Citation preview
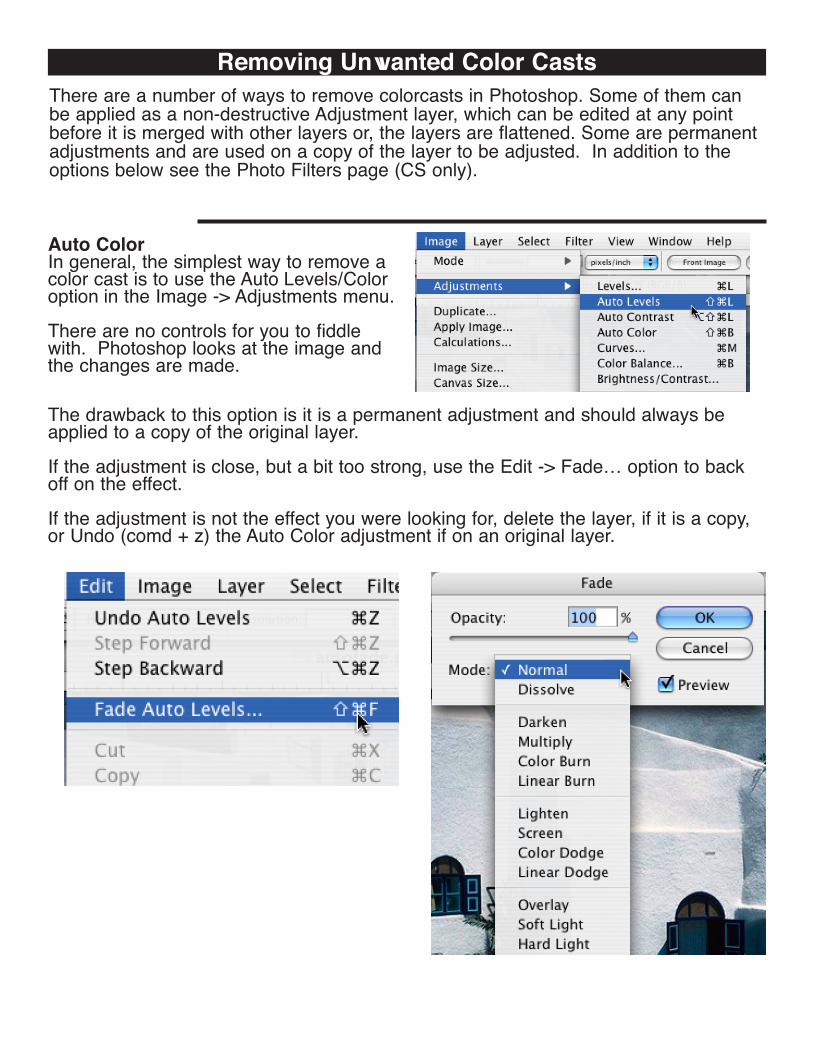
Removing Unwanted Color CastsThere are a number of ways to remove colorcasts in Photoshop. Some of them can be applied as a non-destructive Adjustment layer, which can be edited at any point before it is merged with other layers or, the layers are flattened. Some are permanent adjustments and are used on a copy of the layer to be adjusted. In addition to the options below see the Photo Filters page (CS only).
Auto ColorIn general, the simplest way to remove a color cast is to use the Auto Levels/Color option in the Image -> Adjustments menu.
There are no controls for you to fiddle with. Photoshop looks at the image and the changes are made.
The drawback to this option is it is a permanent adjustment and should always be applied to a copy of the original layer.
If the adjustment is close, but a bit too strong, use the Edit -> Fade… option to back off on the effect.
If the adjustment is not the effect you were looking for, delete the layer, if it is a copy, or Undo (comd + z) the Auto Color adjustment if on an original layer.
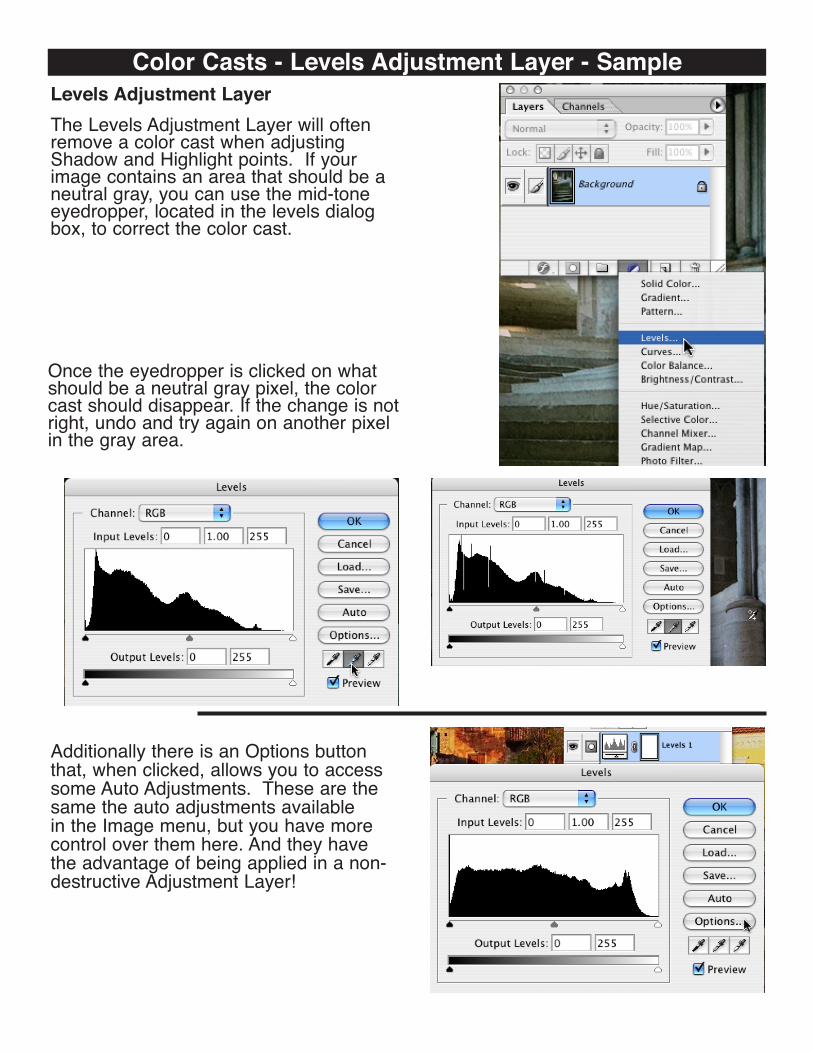
Title goes hereColor Casts - Levels Adjustment Layer - SampleLevels Adjustment LayerThe Levels Adjustment Layer will often remove a color cast when adjusting Shadow and Highlight points. If your image contains an area that should be a neutral gray, you can use the mid-tone eyedropper, located in the levels dialog box, to correct the color cast.
Once the eyedropper is clicked on what should be a neutral gray pixel, the color cast should disappear. If the change is not right, undo and try again on another pixel in the gray area.
Additionally there is an Options button that, when clicked, allows you to access some Auto Adjustments. These are the same the auto adjustments available in the Image menu, but you have more control over them here. And they have the advantage of being applied in a non-destructive Adjustment Layer!
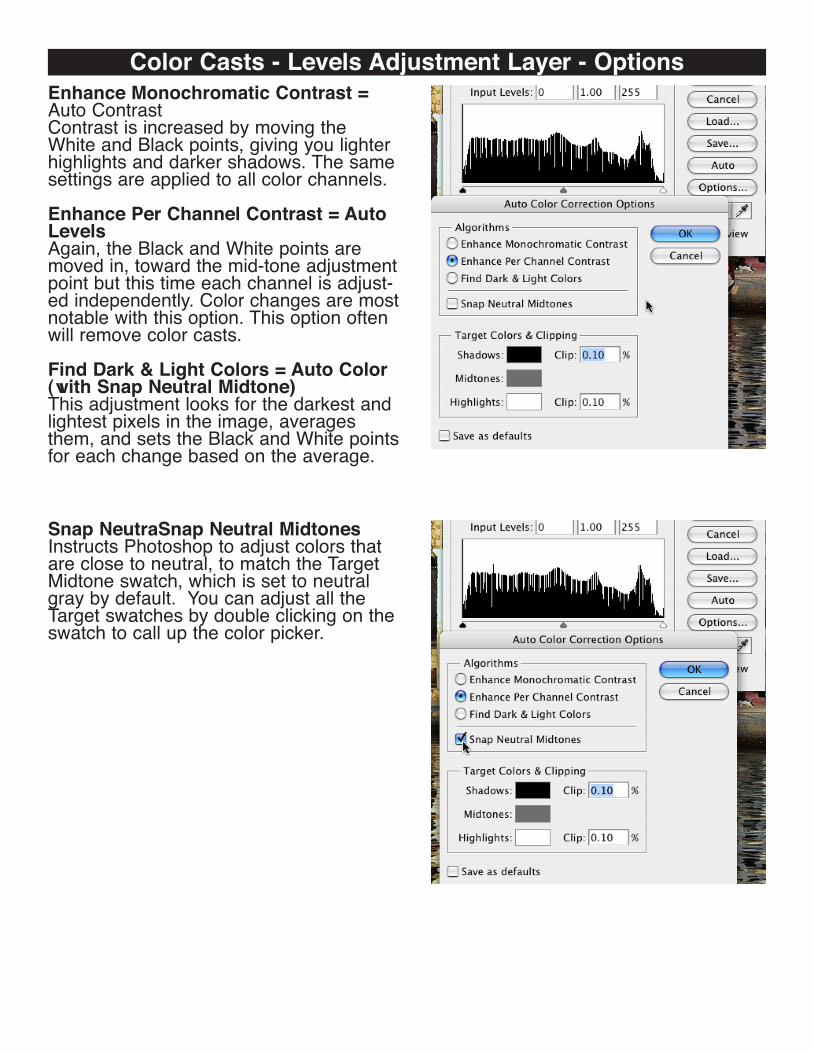
Color Casts - Levels Adjustment Layer - OptionsEnhance Monochromatic Contrast = Auto ContrastContrast is increased by moving the White and Black points, giving you lighter highlights and darker shadows. The same settings are applied to all color channels.
Enhance Per Channel Contrast = Auto LevelsAgain, the Black and White points are moved in, toward the mid-tone adjustment point but this time each channel is adjust-ed independently. Color changes are most notable with this option. This option often will remove color casts.
Find Dark & Light Colors = Auto Color (with Snap Neutral Midtone)This adjustment looks for the darkest and lightest pixels in the image, averages them, and sets the Black and White points for each change based on the average.
Snap NeutraSnap Neutral MidtonesInstructs Photoshop to adjust colors that are close to neutral, to match the Target Midtone swatch, which is set to neutral gray by default. You can adjust all the Target swatches by double clicking on the swatch to call up the color picker.
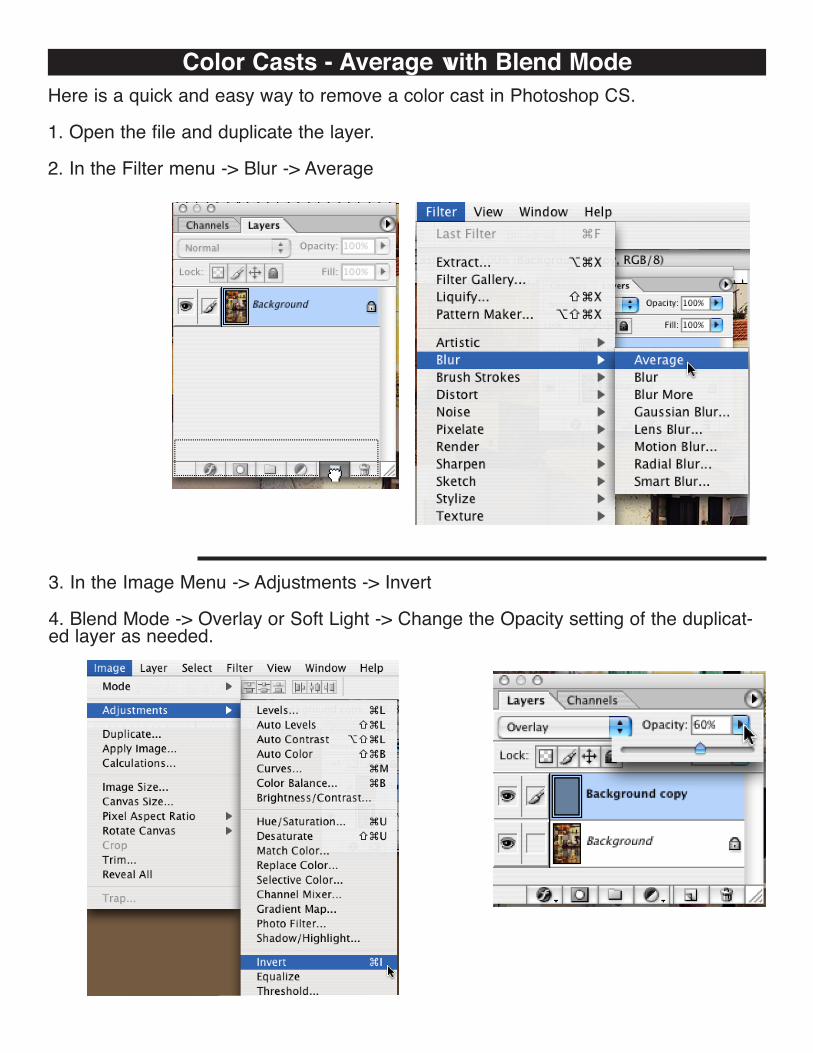
Color Casts - Average with Blend ModeHere is a quick and easy way to remove a color cast in Photoshop CS.
1. Open the file and duplicate the layer.
2. In the Filter menu -> Blur -> Average
3. In the Image Menu -> Adjustments -> Invert
4. Blend Mode -> Overlay or Soft Light -> Change the Opacity setting of the duplicat-ed layer as needed.