Embed Size (px)
Citation preview
1Version 1.2.3 1
Welcome to Common Goal Systems’ SchoolInsight Training Session.
Today we’ll be showing you how to set up and manage the ‘Lunch’ module within SchoolInsight. This is an introductory course designed for users new to the lunch module. Note: The "Lunch" module is used for all school meals; breakfast, lunch, snacks, etc.
Audience:This training is for your SchoolInsight Lunch Admin(s).
The Lunch Admin is the person who is responsible for determining the configuration and completing setup of the ‘Lunch’ module for your school.This training includes the daily use of lunch in your classrooms/lunchroom, ongoing account management and reporting. The lunch admin will be able to instruct additional personnel of their roles after this training.
Cafeteria personnel may also benefit from this training to learn how to enter lunch orders, however, a train-the-trainer approach could also be taken. The lunch admin can train the cafeteria staff at their school, after finishing lunch training.
SchoolInsight admins are school personnel, such as, school secretaries, counselors and technology coordinators. They may also be administrators like principals and superintendents.
We use the term ADMIN throughout SchoolInsight when referring to this person.

2
Today we’ll be covering the initial setup and use of the ‘Lunch’ module at your school. This is an introductory course designed to teach you how to set up and manage lunch with SchoolInsight. Note: All of your school’s basic setup; classes, instructors, students must be complete prior to using the SchoolInsight ‘Lunch’ module. Learning objective:Provide Lunch Admins with information and practical experience using SchoolInsight to make them self-sufficient in setup and use of automated lunch management.This course begins with an overview of the lunch process, configuration and setup, followed by details for tracking daily food orders, ongoing account management, and reporting.
Our training will follow the format of:• Slide presentation to familiarize you with initial concepts• Demo on the website to show more details and navigation• Lab exercise where you work hands on using the website and entering your school’s information
Note: Prior to taking this training Lunch Admins should have completed the ‘Introduction to Basic Setup’ course or be familiar with the ‘Basic Setup’ functions for SchoolInsight.
2
3
There are several things that need to be done as part of basic setup before using “Lunch”. Please complete the following items prior to your training session:
• Assign a lunch admin and give them ‘Lunch’ permissions
• Create an academic year
• Create grading periods for the academic year
• Update your instructors - create new instructors, mark departing teachers ‘inactive’
• Promote students to the academic year and update students - create new students,mark departing students ‘inactive’
• Copy existing classes to the academic year and/or create new classes, as needed
Below is a list of the data that you should bring to be most effective during the lab section of the training:
• General idea of how lunch will be managed at your school: Will orders be entered in the lunch room. Use scanner, touch screen, or manually enter lunch orders? Who will enter lunch orders. Will you take a lunch count for each student? How will you handle low balances. Will you allow cash and/or online payments.• Which classes will take lunch counts• Student lunch program information (free/reduced)• Types of meals offered• Food items and prices for students/employees (including reduced/standard price)

4
These are the lessons that will be covered for SchoolInsight Lunch.
5
The Lunch portion of SchoolInsight allows you to easily track daily lunch counts,food purchases and individual account balances.
Teachers gather student lunch counts in the morning and enter them online,giving cafeteria staff immediate access for daily meal planning.
Quickly process daily food orders using meal cards or sheets.
Generate reports, and send email/letters to help track and manage lunchaccount balances. SchoolInsight keeps a real-time account balance for eachstudent/employee.
Generate additional reports help ensure timely state reimbursements.
6
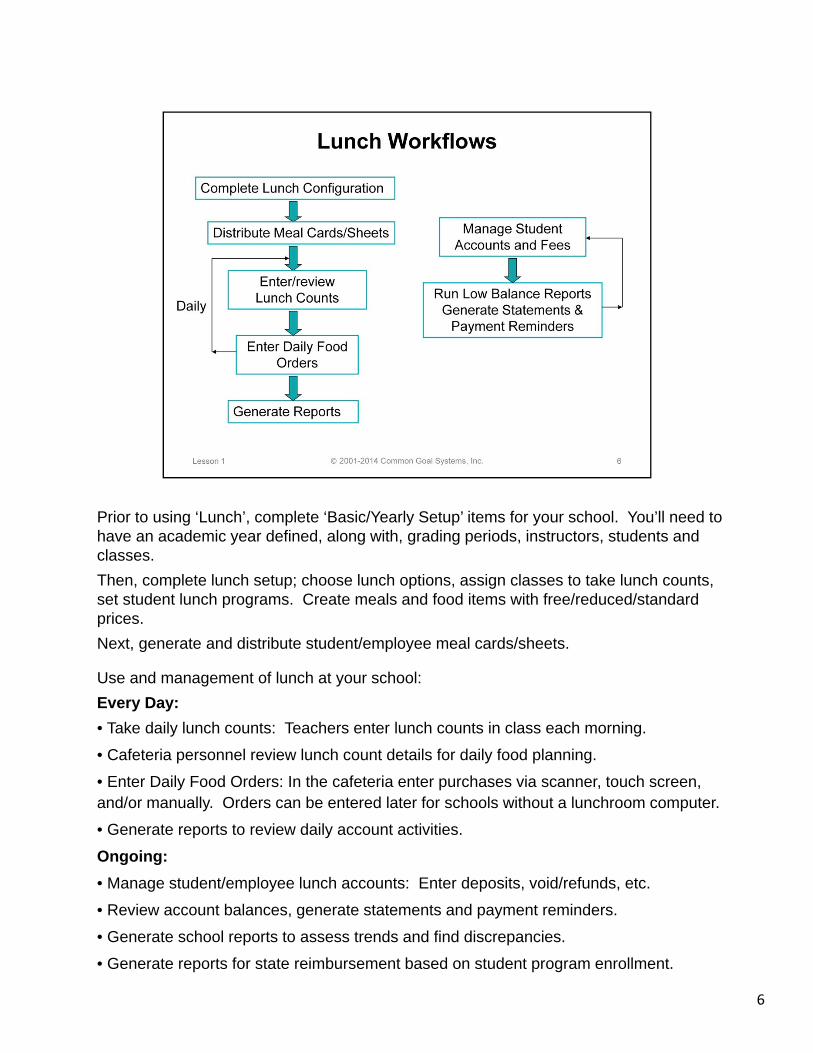
Prior to using ‘Lunch’, complete ‘Basic/Yearly Setup’ items for your school. You’ll need to have an academic year defined, along with, grading periods, instructors, students and classes.Then, complete lunch setup; choose lunch options, assign classes to take lunch counts, set student lunch programs. Create meals and food items with free/reduced/standard prices.Next, generate and distribute student/employee meal cards/sheets.
Use and management of lunch at your school:Every Day:• Take daily lunch counts: Teachers enter lunch counts in class each morning.
• Cafeteria personnel review lunch count details for daily food planning.
• Enter Daily Food Orders: In the cafeteria enter purchases via scanner, touch screen, and/or manually. Orders can be entered later for schools without a lunchroom computer.
• Generate reports to review daily account activities.
Ongoing:• Manage student/employee lunch accounts: Enter deposits, void/refunds, etc.
• Review account balances, generate statements and payment reminders.
• Generate school reports to assess trends and find discrepancies.
• Generate reports for state reimbursement based on student program enrollment.

7
School’s setup ‘Lunch’ options, meal served and food items that are sold in the cafeteria. Meal cards or sheets are generated for order entry as students go through the lunch line. Cards can be generated for individual students, by grade level, homeroom and for employees. Barcodes are used with a purchased scanner to quickly enter food orders.- Generate meal cards -
Each morning, teachers enter lunch counts for their students, when they take attendance.- Goto an instructor/class, enter attendance and take lunch counts -
Each day, students/employees buy food. Purchases are entered either in the cafeteria, or later in the office. The easiest way to enter purchases is to scan barcodes. - Scan some orders from a meal sheet -ID numbers can also be manually entered or found using ‘Student Search’.Large buttons are provided to also work with a touch screen.
Every transaction is tracked in individual accounts. - Review the Fees page using the date that corresponds to orders entered above -Accounts are managed on a regular basis, checking current balances and depositing payments into accounts. - Show the ‘Create Deposit’ page -Parents can also see their student’s accounts from the parent portal
Several reports are provided to help manage accounts, remind parents of payments and obtain state reimbursements.- Generate the ‘Account Balances’ report for balances below zero, show printable letter -- Generate the ‘Purchase Summary’ report -
8
SchoolInsight provides multiple ways to manage lunch at your school.Several details need to be decided upon and configured as part of your initial setup.
9
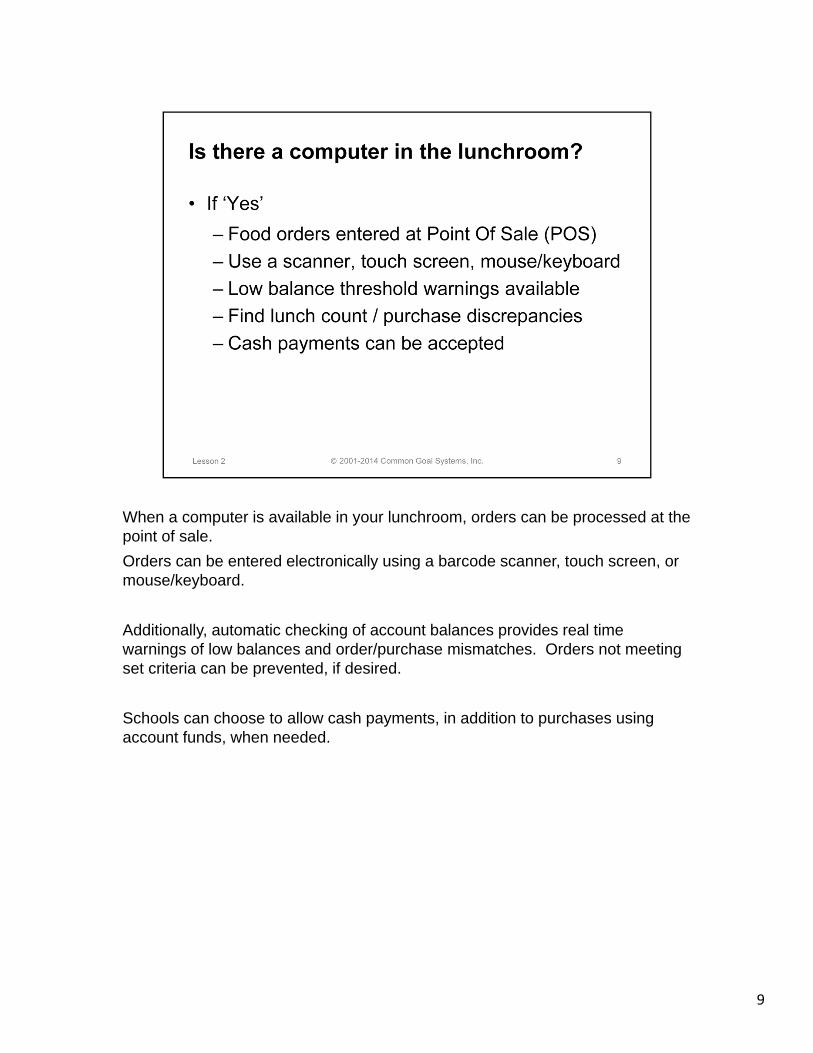
When a computer is available in your lunchroom, orders can be processed at the point of sale.Orders can be entered electronically using a barcode scanner, touch screen, or mouse/keyboard.
Additionally, automatic checking of account balances provides real time warnings of low balances and order/purchase mismatches. Orders not meeting set criteria can be prevented, if desired.
Schools can choose to allow cash payments, in addition to purchases using account funds, when needed.

10
When no computer is available for use in the lunchroom, orders can be tracked manually at POS and then recorded later. A paper checklist can be generated to track sales per student/employee, or lunch cards can be collected by teachers and dropped in a central location.Then, orders can be entered by your lunch admin at a later time.
Order entry can be done using a barcode scanner, touch screen or mouse/keyboard, the same as at POS.
Since order entry is post sale, orders cannot be prevented due to low balances or order/purchase mismatch.
11
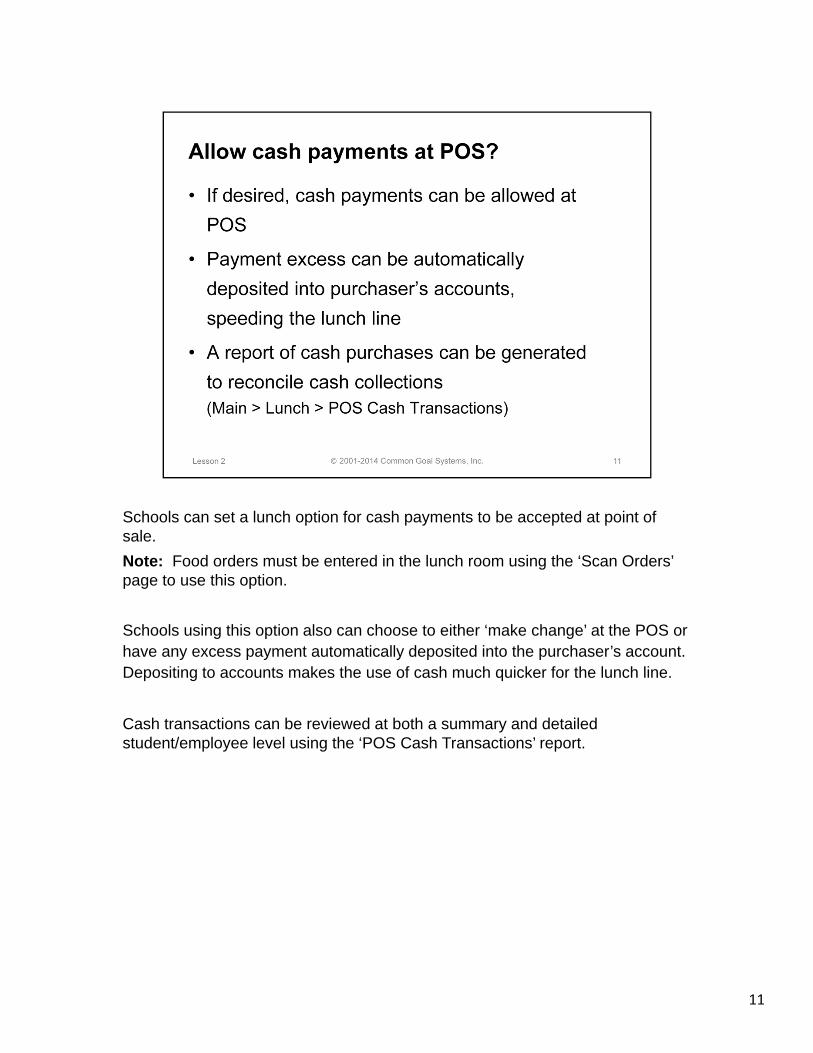
Schools can set a lunch option for cash payments to be accepted at point of sale.Note: Food orders must be entered in the lunch room using the ‘Scan Orders’ page to use this option.
Schools using this option also can choose to either ‘make change’ at the POS or have any excess payment automatically deposited into the purchaser’s account. Depositing to accounts makes the use of cash much quicker for the lunch line.
Cash transactions can be reviewed at both a summary and detailed student/employee level using the ‘POS Cash Transactions’ report.
12
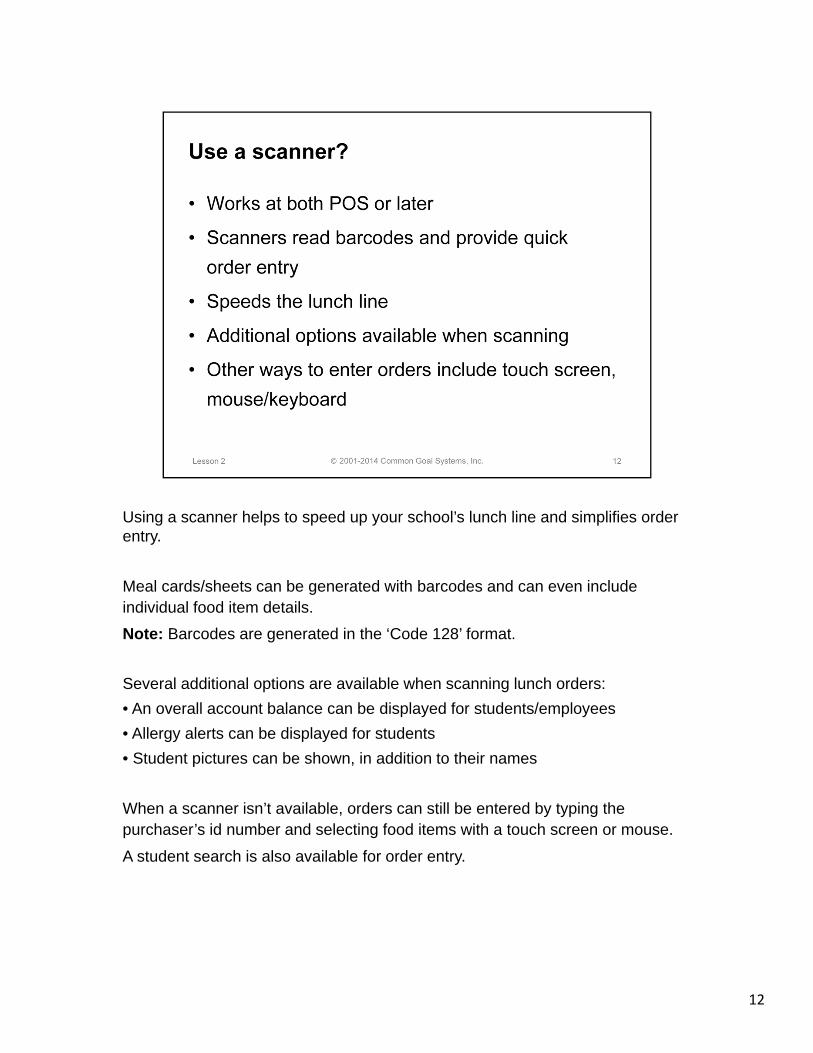
Using a scanner helps to speed up your school’s lunch line and simplifies order entry.
Meal cards/sheets can be generated with barcodes and can even include individual food item details.Note: Barcodes are generated in the ‘Code 128’ format.
Several additional options are available when scanning lunch orders:• An overall account balance can be displayed for students/employees• Allergy alerts can be displayed for students• Student pictures can be shown, in addition to their names
When a scanner isn’t available, orders can still be entered by typing the purchaser’s id number and selecting food items with a touch screen or mouse.
A student search is also available for order entry.

13
When using a scanner to enter food orders you’ll want to generate either meal cards or meal sheets with barcodes.Meal cards are printed and distributed to students and employees for use at time of purchase. Food items can be included in the barcode for even quicker order entry.Some schools have teachers collect cards from the students and drop them in a central location to be entered later.Meal cards can even include pictures and be used as ID cards.
If individual cards aren’t desired, instead generate a meal sheet with student/employee barcodes. Meal sheets can also include food items in the barcodes for quick order entry.
If your food order will be entered post sale, a meal sheet can be generated without barcodes to be used as a paper checklist in the lunchroom to track orders.

14
SchoolInsight provides two methods of taking student lunch counts.If your school has only a few choices for lunch you may want to take lunch counts by class only. This provides an overall count of what’s ordered that can be reviewed by cafeteria staff for daily meal planning.
However, if you have many food items and want to require students to purchase only what they order, then you’ll want to take lunch counts per student. Individual order details are tracked so cafeteria staff can plan more accurately, reducing wasted food.
Students can be prevented from purchasing food items not ordered ahead of time.
If students are allowed to purchase additional food items, the ‘Lunch Count Discrepancies’ report can be run to see students that purchased more and/or less than what they ordered.
15
Audible and visual alerts can be enabled to warn lunch staff of low account balances at POS.
Schools set thresholds for when warnings are enabled.Display a warning to alert staff of a low balance.Prevent food orders entirely if as account balance gets too low.
16
Districts/schools can offer parents the convenience of making online payments.Payments can be made using credit cards and/or E-Checks.Convenience fees can be charged to cover school costs.Online payments helps make managing student accounts less time consuming and paperwork intensive for both parents and schools.Online transactions are automatically recorded for each account, both schools and parents see all transaction details.
Note: During initiation of Online Payment for your school, SchoolInsight support will work with you to assure proper setup.

17
You must have completed basic and yearly setup for SchoolInsight prior to beginning ‘Lunch’.
Then, setup lunch admins/permissions, student lunch programs, meals and food items.

18
Before setting up ‘Lunch’, complete the required basic/yearly setup.
Create an ‘active’ academic year for the year. Create grading periods for the academic year.Create/update admin(s), instructors, students and classes for the year.

19
Admins are authorized to set up school information in SchoolInsight. Permission templates allow/restrict information that can be viewed/modified by admins.
You many need to set ‘Lunch’ permissions for your lunch admin allowing them to view, modify and enter lunch related data.
Note: If the person administering lunch is already a SchoolInsight admin with "Super User" permissions, this will not be necessary.
You may also want to create a separate template for cafeteria personnel to allow them to only view lunch counts and/or enter purchases. Create a ‘Lunch’ permission template at Main > Admins > Permission Templates.

20
Assign student lunch programs to initialize a dollar amount charged during lunch purchases. Assign "effective dates" to track movement between lunch programs throughout the academic year. Note: Corresponding prices are set when creating food items at Main > Lunch > Food Items > Create Food Item.
Mass Edit many students to set or clear lunch programs for a selected start date.Edit to modify a single student’s lunch program details.
Available program types include: Free, Reduced, and None.For students in the free lunch program, schools can mark if students are also "Direct Certified". The State of IL provides a direct certification file to the BoE that schools can import to initialize student’s ‘direct certified’ status.
Note: The lunch program default type is ‘None’ or blank, meaning the student will be charged the standard price for lunch.Note: If no effective date is entered, the first day of the school year is assumed.
You can also view/modify lunch program assignments when creating/editing students, in the demographics section at Main > Students > Create/Edit/Mass Edit.
21
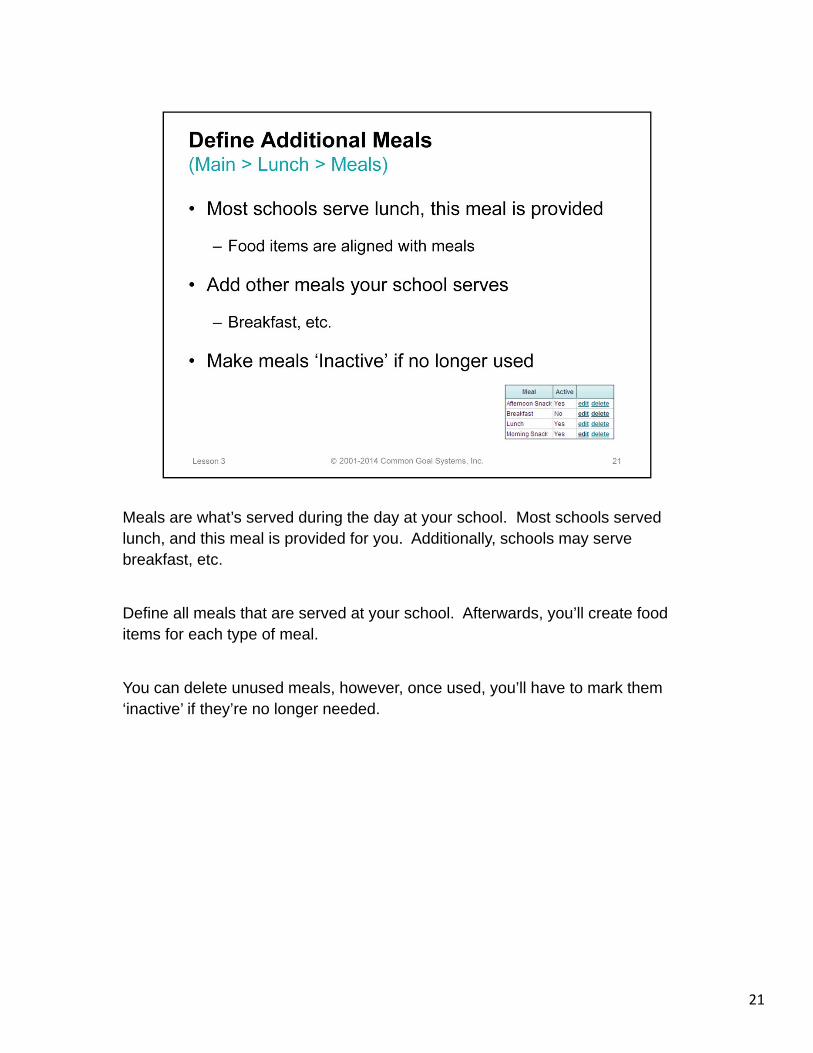
Meals are what’s served during the day at your school. Most schools served lunch, and this meal is provided for you. Additionally, schools may serve breakfast, etc.
Define all meals that are served at your school. Afterwards, you’ll create food items for each type of meal.
You can delete unused meals, however, once used, you’ll have to mark them ‘inactive’ if they’re no longer needed.

22
Define food items for each meal to match what students/employees are allowed to order and purchase. For example, if they only have a choice of a hot or cold lunch, only those two food items need to be entered. If, however, items are offered a la carte, with unique prices, each individual item needs to be entered.
Use descriptive names for each food item to help with tracking and reporting. Each food item ‘Title’ must be unique.
Align each food item with a ‘Food Type’. Food types are provided for you and cannot be changed.Assign ‘A la Carte’ to individual items offered for sale. Assign milk if it can be purchased separately. Everything else should be assigned ‘Meal’.
Each food item has a free, reduced and standard price associated with it. You can also set a different price for employees. These prices will be automatically charged when entering food orders based on the student’s assigned lunch program.Note: Once a food item has been sold, it cannot be deleted or edited (except to mark ‘inactive’). If you need to make a price change, make the existing food item inactive and then create a new one with a similar name.

23
There may be school employees that regularly purchase a school lunch, but otherwise, are not in the SchoolInsight system.
Add these employees to your lunch program to allow them to purchase meals and schools to manage their lunch accounts individually.
A ‘Guest Employee’ is already provided for those times when a visitor may need to purchase a meal.

24
25
Practice Lab, Lesson 3: (Estimated time of lab, 10 minutes)1. Assign lunch admin/permissionsA. Goto Main > AdminsB. Edit existing admins and assign lunch permissionsC. Create new admin(s), if needed, and assign lunch permissions
2. Assign lunch programs to studentsA. Goto Main > Students - Multi View > Mass EditB. Select ‘Reduced’ from the dropdown list under ‘Lunch Program’C. Scroll to the bottom of the page and select student(s) to assignD. ‘Save’ entries if you want to keep them, otherwise, click ‘Back’
3. Create a mealA. Goto Main > Lunch > Meals > Create MealB. Enter a meal name and ‘Save’ to keep, or click ‘Back’
4. Create a food itemA. Goto Main > Lunch > Food Items > Create Food ItemB. Enter all required fields with either ‘real’ or ‘pretend’ data and ‘Save’C. Create at least two food items for use later in the labs
5. Create a lunch only employeeA. Goto Main > Lunch > Lunch Only Employee > Create EmployeeB. Enter an employee name and ‘Save’ to keep or click ‘Back’
26
SchoolInsight provides multiple methods for order entry using the lunch program.
Generate meal cards/sheets with barcodes to quickly enter food orders using a scanner.

27
Generate meal cards, with barcodes, then print, cut, and distribute them to students and employees for use at time of purchase. Barcodes can be quickly scanned to record food orders.Include food items with the student/employee ID number on the barcode for even faster purchase scanning.Note: Barcodes are generated in the "Code 128" format. The scanner must support code 128 barcodes (one of the most popular barcode formats).
Details such as school name, grade level, homeroom teacher and even a student picture can be included on meal cards. If you have a CR80 Card compatible printer you can generate individual ID cards.
28
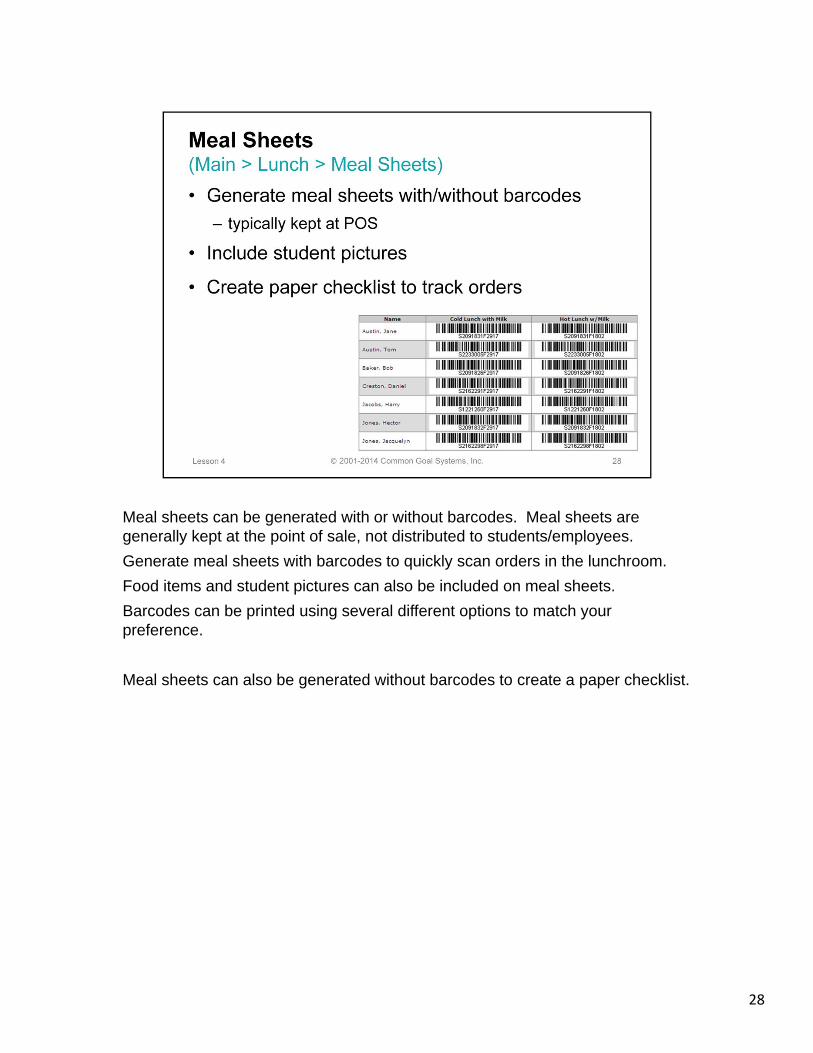
Meal sheets can be generated with or without barcodes. Meal sheets are generally kept at the point of sale, not distributed to students/employees.Generate meal sheets with barcodes to quickly scan orders in the lunchroom.Food items and student pictures can also be included on meal sheets.Barcodes can be printed using several different options to match your preference.
Meal sheets can also be generated without barcodes to create a paper checklist.

29
Print meal sheets without barcodes to generate a manual checklist.Use the list in the lunchroom to track individual food orders.Later, office staff can enter orders into SchoolInsight.
We recommend keeping a copy of a paper checklist on hand. In case of total internet failure, food orders can still be tracked.
30
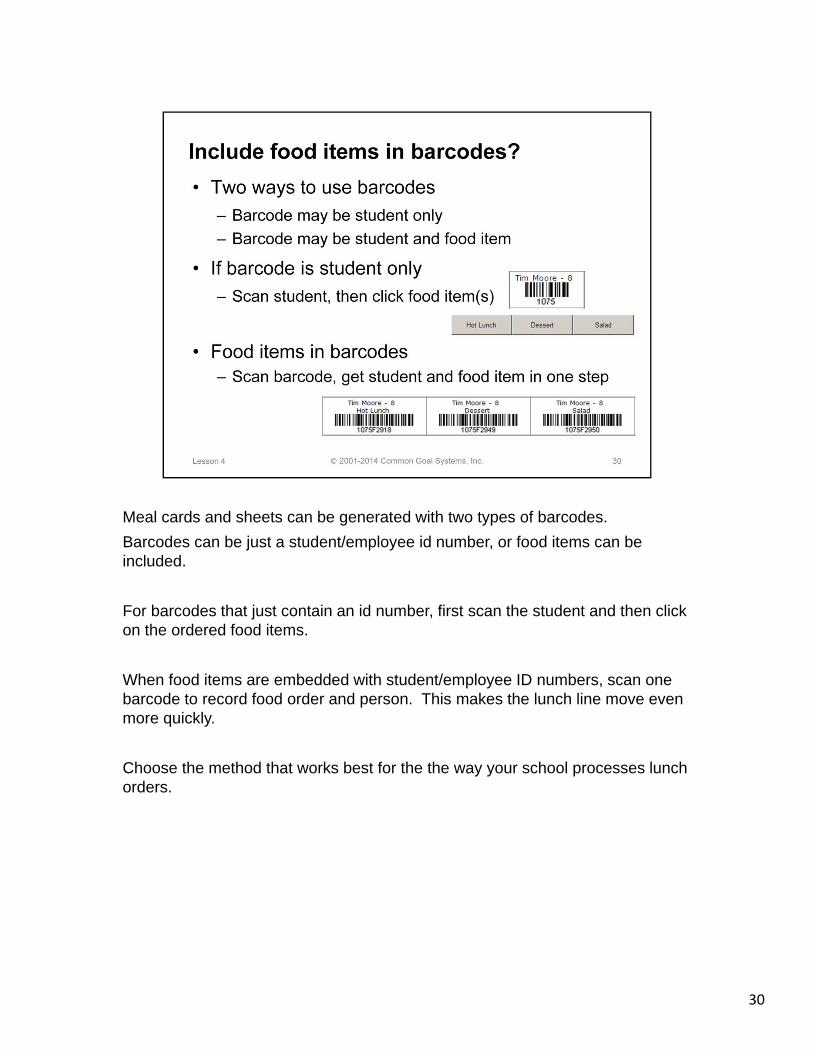
Meal cards and sheets can be generated with two types of barcodes.Barcodes can be just a student/employee id number, or food items can be included.
For barcodes that just contain an id number, first scan the student and then click on the ordered food items.
When food items are embedded with student/employee ID numbers, scan one barcode to record food order and person. This makes the lunch line move even more quickly.
Choose the method that works best for the the way your school processes lunch orders.

31
The default for student/employee numbers is their internal id. Your district can choose to generate ‘Unique student/employee numbers’. The generated numbers are usually shorter than internal id’s making them easier to read/enter.
Schools can choose which number they want to use when generating barcodes at Main > Lunch > Options. Note: The same number will also be used when generating ID Cards.
Note: Unique numbers are generated at the district level at School District Admin Main > Options. Contact SchoolInsight support if you need assistance generating unique student/employee numbers.
32
33
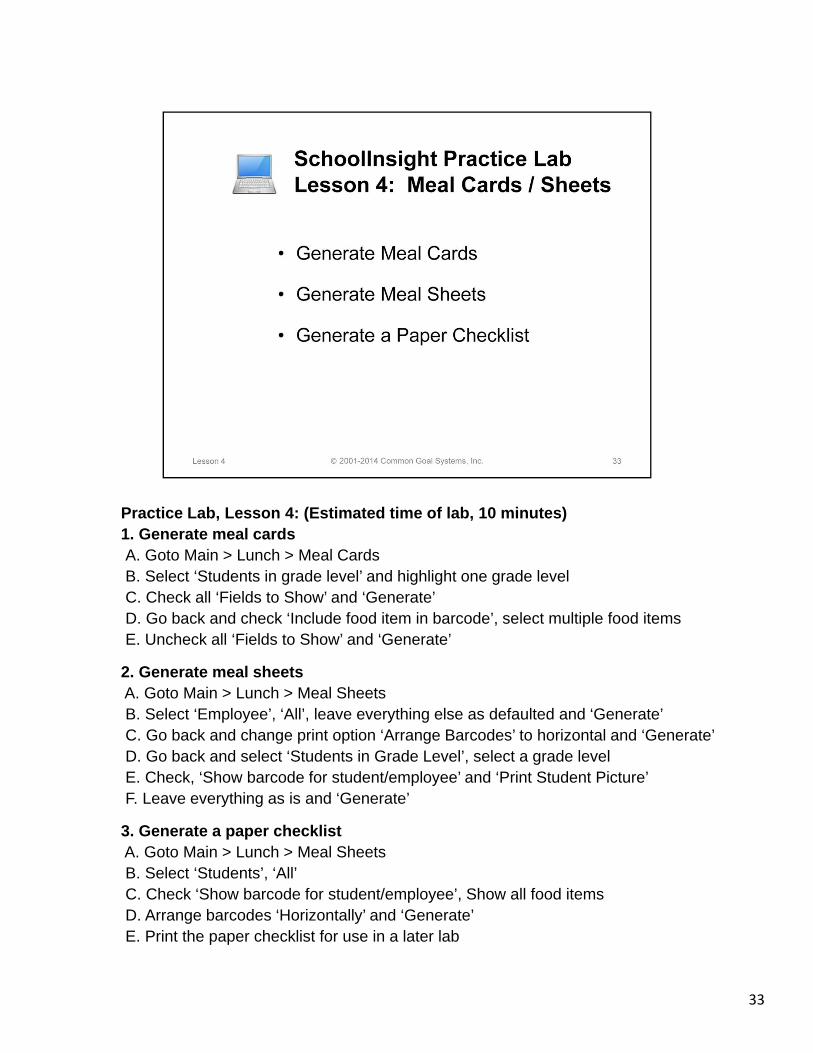
Practice Lab, Lesson 4: (Estimated time of lab, 10 minutes)1. Generate meal cardsA. Goto Main > Lunch > Meal CardsB. Select ‘Students in grade level’ and highlight one grade levelC. Check all ‘Fields to Show’ and ‘Generate’D. Go back and check ‘Include food item in barcode’, select multiple food itemsE. Uncheck all ‘Fields to Show’ and ‘Generate’
2. Generate meal sheetsA. Goto Main > Lunch > Meal SheetsB. Select ‘Employee’, ‘All’, leave everything else as defaulted and ‘Generate’C. Go back and change print option ‘Arrange Barcodes’ to horizontal and ‘Generate’D. Go back and select ‘Students in Grade Level’, select a grade levelE. Check, ‘Show barcode for student/employee’ and ‘Print Student Picture’F. Leave everything as is and ‘Generate’
3. Generate a paper checklistA. Goto Main > Lunch > Meal SheetsB. Select ‘Students’, ‘All’C. Check ‘Show barcode for student/employee’, Show all food itemsD. Arrange barcodes ‘Horizontally’ and ‘Generate’E. Print the paper checklist for use in a later lab
34
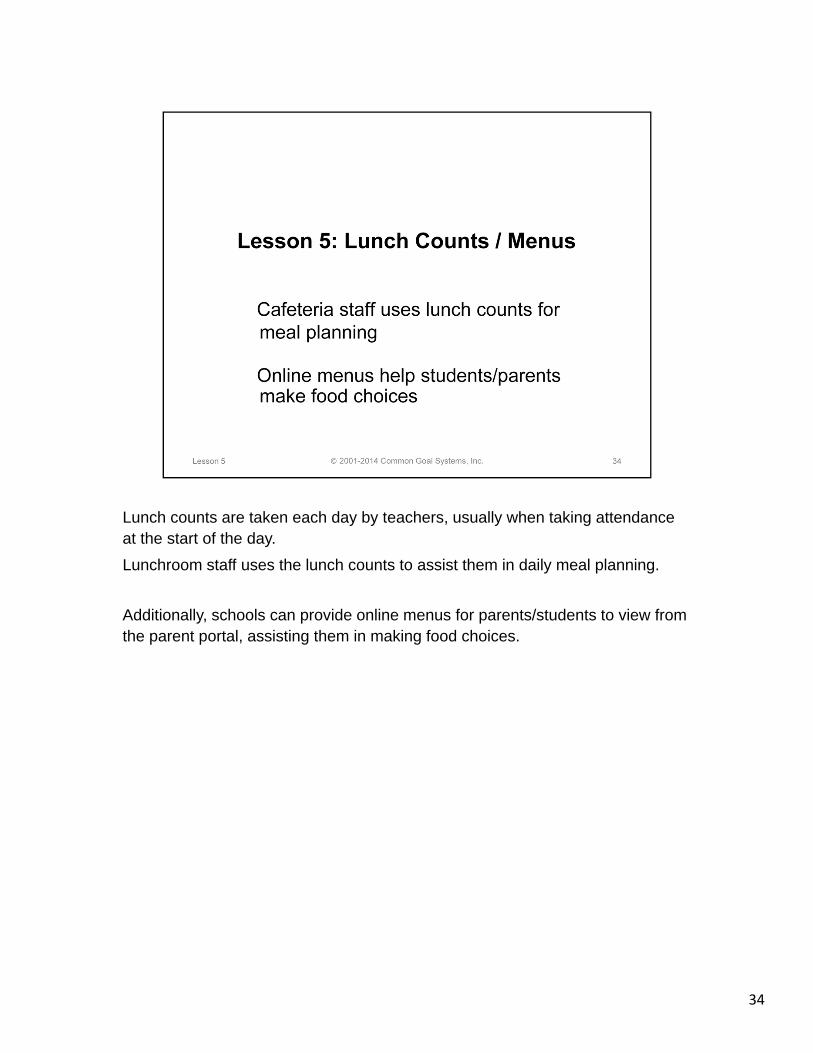
Lunch counts are taken each day by teachers, usually when taking attendance at the start of the day.Lunchroom staff uses the lunch counts to assist them in daily meal planning.
Additionally, schools can provide online menus for parents/students to view from the parent portal, assisting them in making food choices.

35
Schools can choose to take lunch counts per student or per class.
Taking counts per class provides overall totals used for meal planning/ordering.
Taking counts per student provides more detail on what each student has specifically ordered. Students can be prevented from taking food items that weren’t previously ordered. This can cut down on wasted food and streamline the lunch line.
Real time warnings can be generated alerting lunch staff that a student has taken an item they didn’t order.

36
Teachers can only take lunch counts in the classes designated by the SchoolInsight Admin.Classes must be marked to take lunch count.This can be quickly added to existing classes using the ‘Mass Edit’ at Admin Main > Classes.Individual classes can also be updated at Main > Classes > Edit.Set lunch count for new classes when they’re being created.

37
Teachers enter lunch counts when they take attendance. Generally, this will be done the first period of the day.
Counts are reviewed by cafeteria personnel to plan meals for the day. If the cafeteria has access to a computer counts can be viewed online, otherwise a printed report can be generated and supplied.
Students marked ‘Absent’ cannot have a lunch count entered.
Teachers enter their own lunch count if they are also purchasing lunch from the cafeteria.
Note: Admins can enter lunch counts, if necessary, from Main > Attendance > Period Attendance > Enter Attendance.

38
View the lunch count for a given day. This can be viewed online or printed and supplied to cafeteria personnel for daily meal planning.
View the details for student lunch orders for the chosen class and date. Note: This only applies if a lunch count is taken for each student individually.
Click the ‘Total’ number link in a ‘Students’ column to view a list of students/orders for the corresponding meal.
39
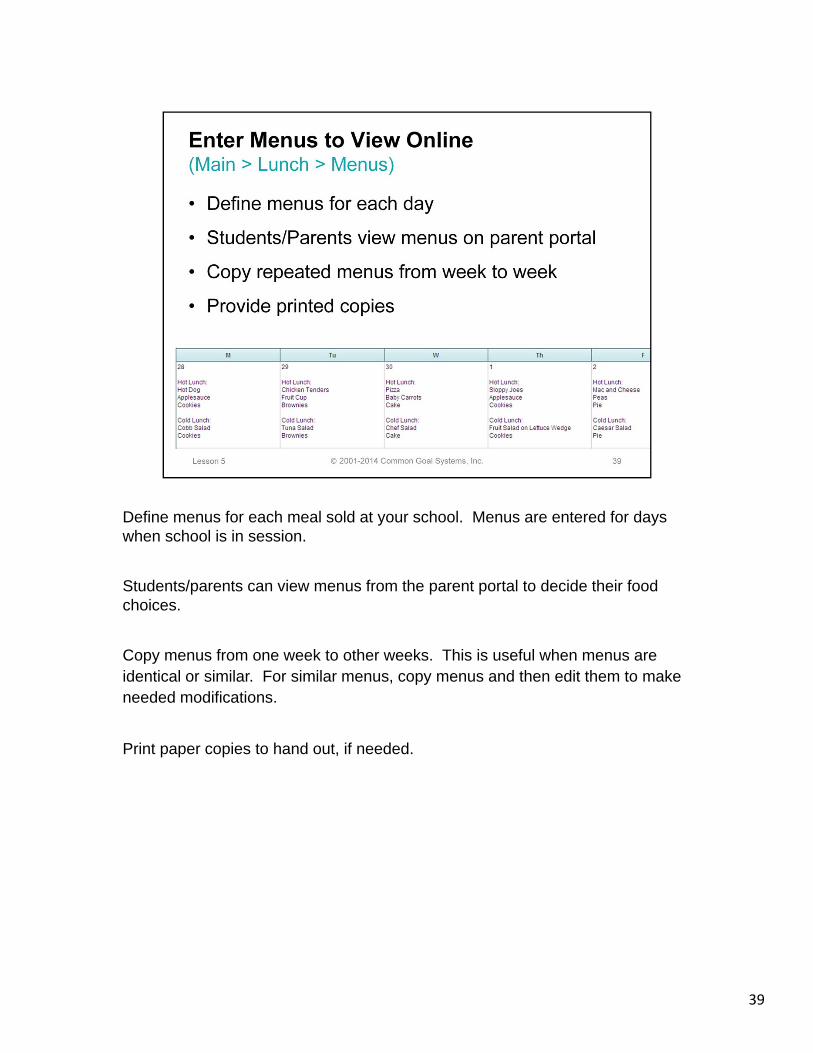
Define menus for each meal sold at your school. Menus are entered for days when school is in session.
Students/parents can view menus from the parent portal to decide their food choices.
Copy menus from one week to other weeks. This is useful when menus are identical or similar. For similar menus, copy menus and then edit them to make needed modifications.
Print paper copies to hand out, if needed.

40

41
Practice Lab, Lesson 5: (Estimated time of lab, 15 minutes)Note: We recommend that you write down the data you’ve entered in case you
need to go back and remove/modify it after this training session.
1. Mark classes to take ‘lunch count’A. Goto Main > Classes/Sections > Mass EditB. Set ‘Take Lunch Count’ to ‘Yes’C. Scroll down to classes and check at least one and ‘Save’
2. Set the ‘lunch count’ optionA. Goto Main > Lunch > Options > EditB. Set ‘Take a lunch count for each student?’ to either yes or no, based on how
your school wants to take counts, and ‘Save’
3. Enter lunch countsA. Goto Main > Instructors > Goto an instructor with classes that take lunch countsB. Click ‘Attendance’, select a class that takes lunch counts from the dropdownC. Enter attendance, set students to ‘Present’ and enter values for ‘Student Count’
for food items, near the bottom of the page, and ‘Save’
4. Review lunch counts and detailsA. Goto Main > Lunch > Lunch Counts, select attendance date from above
exercise, review lunch counts, click ‘Details’ to see what each student ordered
5. Create a menuA. Goto Main > Lunch > Menus, select a meal and month, click ‘Edit’B. Enter meal details into a few days in the same week, and ‘Save’C. Click ‘Copy Week’ and select that week to ‘copy from’D. Check ‘copy to’ for another week in the same month and click ‘Copy’
42
Enter food purchases each day for students, employees and guests.Several different methods are provided for tracking food orders to support the way your lunch room works.
Note: Enter starting balances for students and employees prior to entering food orders. This will avoid starting the year with negative account balances.Details on managing accounts is covered in Lesson 8.
43
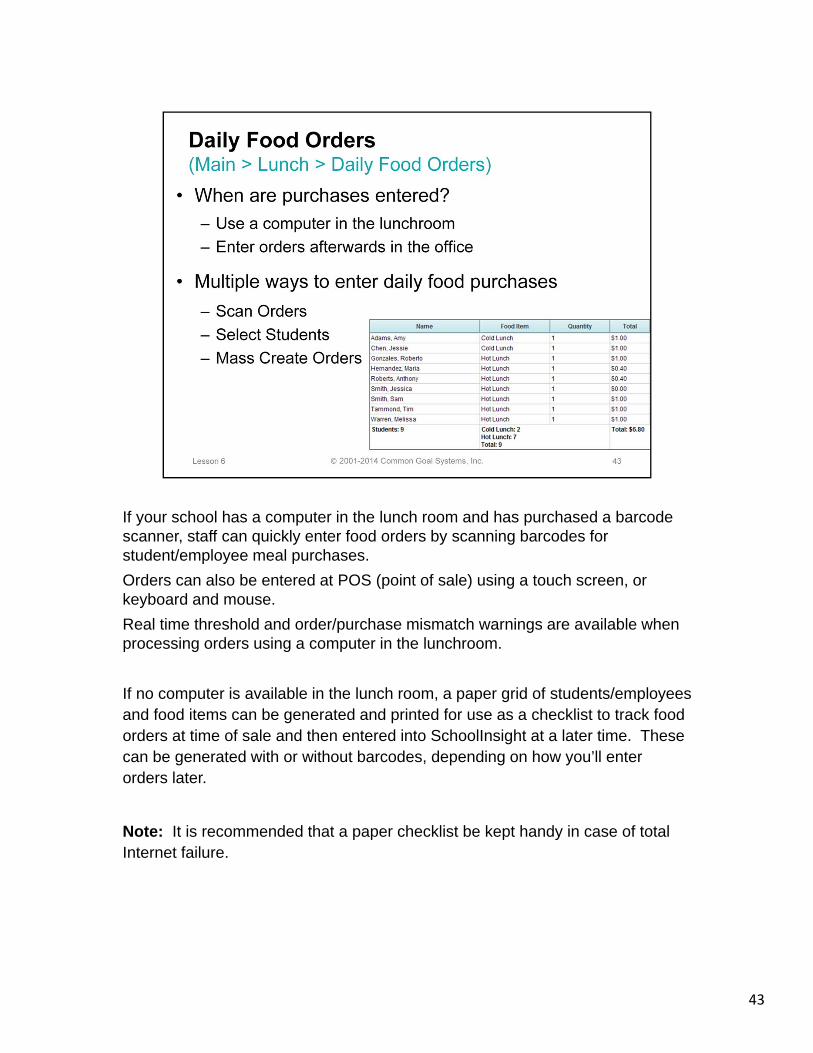
If your school has a computer in the lunch room and has purchased a barcode scanner, staff can quickly enter food orders by scanning barcodes for student/employee meal purchases. Orders can also be entered at POS (point of sale) using a touch screen, or keyboard and mouse.Real time threshold and order/purchase mismatch warnings are available when processing orders using a computer in the lunchroom.
If no computer is available in the lunch room, a paper grid of students/employees and food items can be generated and printed for use as a checklist to track food orders at time of sale and then entered into SchoolInsight at a later time. These can be generated with or without barcodes, depending on how you’ll enter orders later.
Note: It is recommended that a paper checklist be kept handy in case of total Internet failure.

44
Use the ‘Scan Orders’ page to enter student/employee food purchases at POS.
Enter orders by scanning ID barcodes from meal cards/sheets and then select food items using a touch screen or mouse.If entering orders without a scanner:• Use ‘Student/Employee Search’ to find a student/employee name and corresponding ID number • Manually type student/employee ID numbers
If food items are embedded in the student ID, simply scan the barcode for the appropriate item(s) and both the student/employee and food order data will be automatically entered.
Several additional options are available when using ‘Scan Orders’ at POS:• An overall account balance can be displayed for all students/employees• Enable low balance warnings and purchase prevention• Set warnings for duplicate orders, meals, absent students• Display student allergy alerts (school must uses the ‘Health Records’ module)• Show student picturesNote: Set these additional options at Main > Lunch > Options > Edit.
The ‘Scan Orders’ page can also be used later, in the office, to enter orders recorded on a paper checklist. Real time checks, of course, will not apply.

45
When using auto submit, food orders are submitted as soon as scanned, touched, typed onto screen. There’s no need to click the ‘Submit’ button, so order entry is even faster.
Choose which food item to auto submit. Either submit a food item included in the barcode or select a default food item.

46
The ‘Order History’ shows a running history of orders entered during a single session of transactions. Individual orders can be deleted to remove an erroneous entry. Use the "Clear Order History" button to remove the entire history from the screen.
‘Show/Hide Prices’ toggles to show/hide food prices in the order history. Hide prices to protect student’s privacy.
This is available both when scanning or selecting student orders.

47
If your school chooses to not use barcodes, you can enter student food orders using a touch screen or mouse.
If you have access to SchoolInsight in the cafeteria, the data can be entered at POS. Otherwise, use a paper checklist in the lunch room and enter the purchases into SchoolInsight later.
Note: Students orders can be entered by grade level and/or homeroom, if assigned.
This method provides the same real time threshold and order/purchase mismatch warnings and order history functions as available when scanning orders with barcodes.
You can also choose to display students’ pictures with their names on the order entry buttons.
Available options are set at Main > Lunch > Options > Edit.

48
Assign thresholds to warn of low balances when food is purchased. This helps manage low/negative balances.
Note: These options apply when scanning/entering food orders at POS on the ‘Scan Orders’ and ‘Select Student Orders’ pages. Warning messages will be displayed on the screen when the food order is chosen, prior to being submitted. These options are not applicable when mass creating food orders.
Display Warning: Display a warning message when a lunch is purchased by anyone with a balance below the set threshold. Lunch staff can choose to allow/disallow the purchase.
Disallow Lunch Orders: Prevent a lunch purchase by anyone with a balance below the set threshold. Lunch cannot be purchased when balance is less than the set threshold. This cannot be overridden to allow a purchase anyway.
A warning can also be set to display when two exact same orders are scanned twice in a row to help prevent accidental duplicate entries. Note: ‘Auto Submit’ must be in use when scanning orders for this option.

49
Enter lunch order purchases for many students at once. This is useful for schools that don't have a computer in their lunchroom, use a paper checklist for food orders and enter orders after time of sale. Order totals are shown at the bottom of the page.
Note: When lunch counts are taken per student, the table is initialized with lunch orders from the teacher’s lunch counts. To enter additional lunch orders/purchases, you must set the option ‘Allow students that didn't order a lunch item to still purchase that item?’ to ‘Yes’ at Main > Lunch > Options > Edit.

50
51
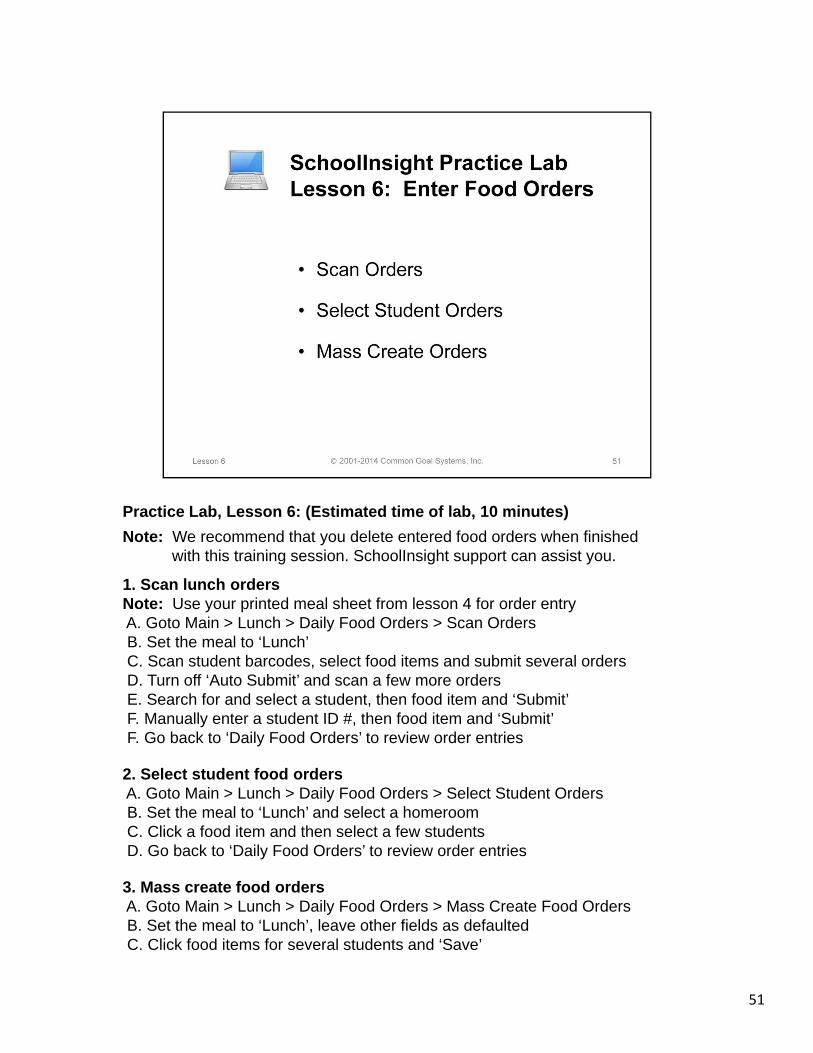
Practice Lab, Lesson 6: (Estimated time of lab, 10 minutes)Note: We recommend that you delete entered food orders when finished
with this training session. SchoolInsight support can assist you.
1. Scan lunch ordersNote: Use your printed meal sheet from lesson 4 for order entryA. Goto Main > Lunch > Daily Food Orders > Scan OrdersB. Set the meal to ‘Lunch’C. Scan student barcodes, select food items and submit several ordersD. Turn off ‘Auto Submit’ and scan a few more ordersE. Search for and select a student, then food item and ‘Submit’F. Manually enter a student ID #, then food item and ‘Submit’F. Go back to ‘Daily Food Orders’ to review order entries
2. Select student food ordersA. Goto Main > Lunch > Daily Food Orders > Select Student OrdersB. Set the meal to ‘Lunch’ and select a homeroomC. Click a food item and then select a few studentsD. Go back to ‘Daily Food Orders’ to review order entries
3. Mass create food ordersA. Goto Main > Lunch > Daily Food Orders > Mass Create Food OrdersB. Set the meal to ‘Lunch’, leave other fields as defaultedC. Click food items for several students and ‘Save’

52
SchoolInsight provides many reports to meet school/state reporting needs.Two basic types of reports are provided, detailed and summary.Detailed reports provide a powerful way to access student information stored in SchoolInsight. Summary reports provide the ability to review overall numbers and are used to spot trends and for state reporting.

53
Generate a report to use for state reimbursement of free/reduced lunches.Review meal purchases and counts for a chosen timeframe.Generate the report for a grade level, homeroom, group or for all students/employees.Report can be generated for one or all meals.Totals can be generated by meal type or food item.Note: All purchases will be included on the report, including those for ‘inactive’ food items.

54
Analyze food purchases by day to see how well food items are selling.Review daily food purchases for various timeframes and groups of students/employees. Total by food items or meal type to see which food items are most popular.

55
Analyze food purchases by week.Review free/reduced/paid food orders, per day, for a chosen week.Include one or all meals and/or food items to analyze purchasing patterns.
56
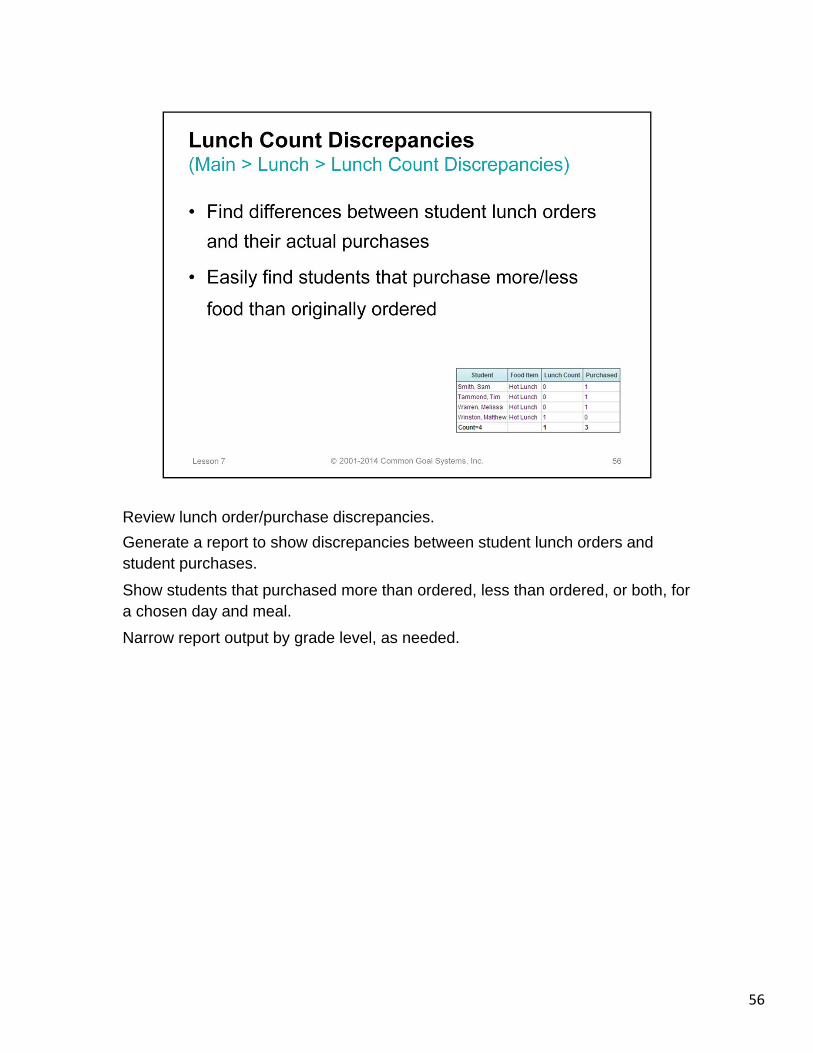
Review lunch order/purchase discrepancies.Generate a report to show discrepancies between student lunch orders and student purchases.
Show students that purchased more than ordered, less than ordered, or both, for a chosen day and meal. Narrow report output by grade level, as needed.

57
Find students in free/reduced lunch programs.Generate a report showing the number of students enrolled in free, reduced and paid (regular) lunch programs. Filter report by grade level, as needed. Note: Lunch program enrollment is set in student demographics at Main > Students > Create/Edit.
Review program enrollment for chosen date ranges. Include home/serving schools, as needed.
Use links to view student details, including student number, name and program effective date.
Note: Summary data shows the minimum and maximum enrollments for any day within the date range.
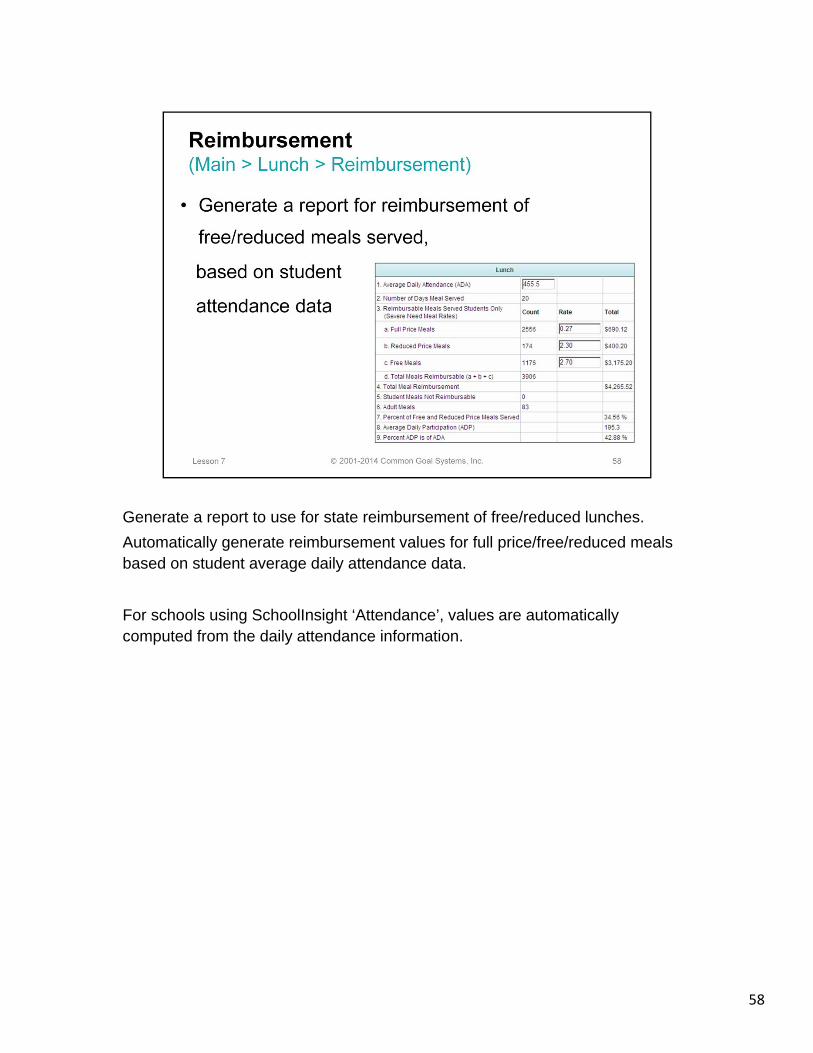
58
Generate a report to use for state reimbursement of free/reduced lunches. Automatically generate reimbursement values for full price/free/reduced meals based on student average daily attendance data.
For schools using SchoolInsight ‘Attendance’, values are automatically computed from the daily attendance information.

59
60
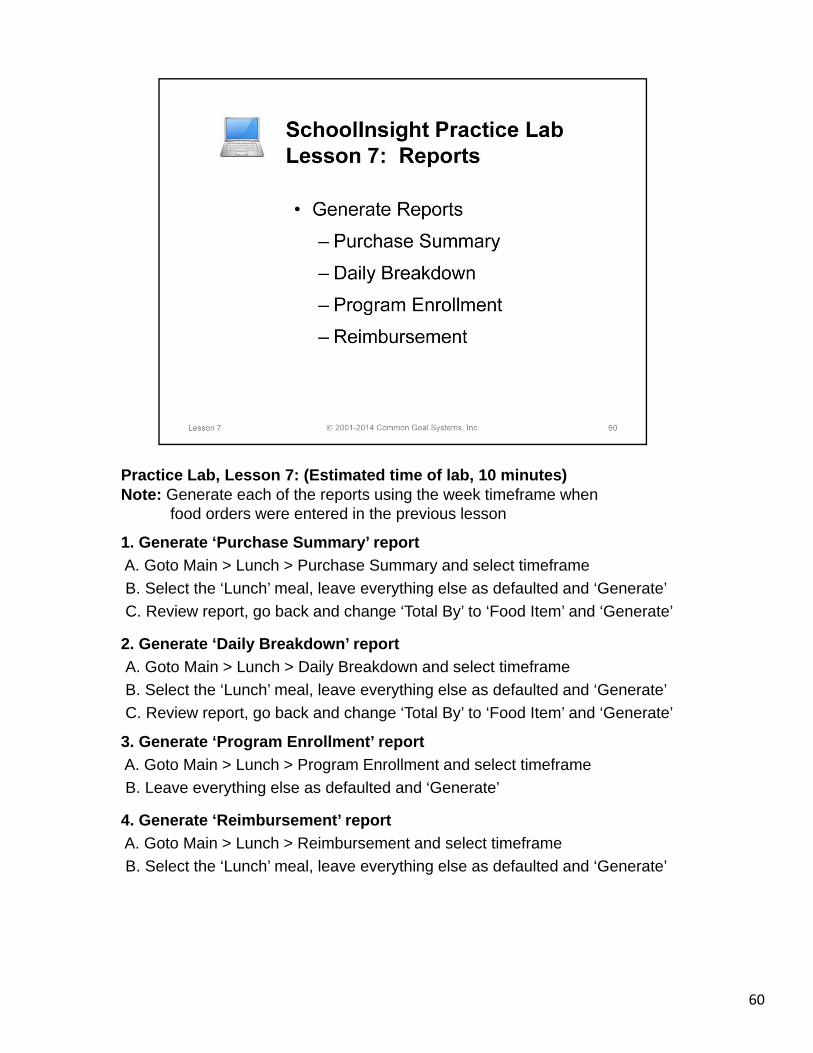
Practice Lab, Lesson 7: (Estimated time of lab, 10 minutes)Note: Generate each of the reports using the week timeframe when
food orders were entered in the previous lesson
1. Generate ‘Purchase Summary’ reportA. Goto Main > Lunch > Purchase Summary and select timeframeB. Select the ‘Lunch’ meal, leave everything else as defaulted and ‘Generate’C. Review report, go back and change ‘Total By’ to ‘Food Item’ and ‘Generate’
2. Generate ‘Daily Breakdown’ reportA. Goto Main > Lunch > Daily Breakdown and select timeframeB. Select the ‘Lunch’ meal, leave everything else as defaulted and ‘Generate’C. Review report, go back and change ‘Total By’ to ‘Food Item’ and ‘Generate’
3. Generate ‘Program Enrollment’ reportA. Goto Main > Lunch > Program Enrollment and select timeframeB. Leave everything else as defaulted and ‘Generate’
4. Generate ‘Reimbursement’ reportA. Goto Main > Lunch > Reimbursement and select timeframeB. Select the ‘Lunch’ meal, leave everything else as defaulted and ‘Generate’
61
Manage student/employee lunch accounts. View running balances, record payments, refund/void fees/payments, as needed.
Note: There are a few differences in managing accounts when online payment is used. An overview of online payment is covered in Lesson 10.
62
Each student and employee has a separate lunch account where every transaction is recorded.
Purchases and payments are automatically applied to accounts, providing real time balance tracking.Parents view student accounts from the parent portal.Teachers can view their own account activity from Instructor Main > Reports.

63
Admins can view account details by student, employee, or date.
Food purchases, payments, starting and current balances are all recorded.Admins manage student/employee accounts from the ‘Fees’ page.• Review current running balances• Manually add new fees, when necessary• Create deposits to record payments, apply discounts/waivers or initialize a
starting balance• Void fees and payments to remove them from account balance• Refund payments, in full, to remove amount from account balance
Note: Some of the functions for managing accounts/fees works differently when using ‘Online Payment’. An overview of ‘Online Payment’ is provided in Lesson 10.

64
Create one or more deposits to record payments made by students/employees.Entries are immediately reflected on the corresponding account ‘Fees’ page.
At the beginning of the school year, enter starting balances for students/employees to avoid negative account balances when food purchases are made. Create deposits with the ‘Category’ of ‘Starting Balance’.
Enter a payment, discount/waiver, and/or starting balance for a single student/employee. The ‘fee category’ is defaulted to ‘Payment’. Enter the category, payment type and amount for each deposit. Add notes, as needed.
Apply the same deposit to many students or employees.Student deposits can be applied by grade level, homeroom, or group.Employee deposits can be applied to school or district employees.
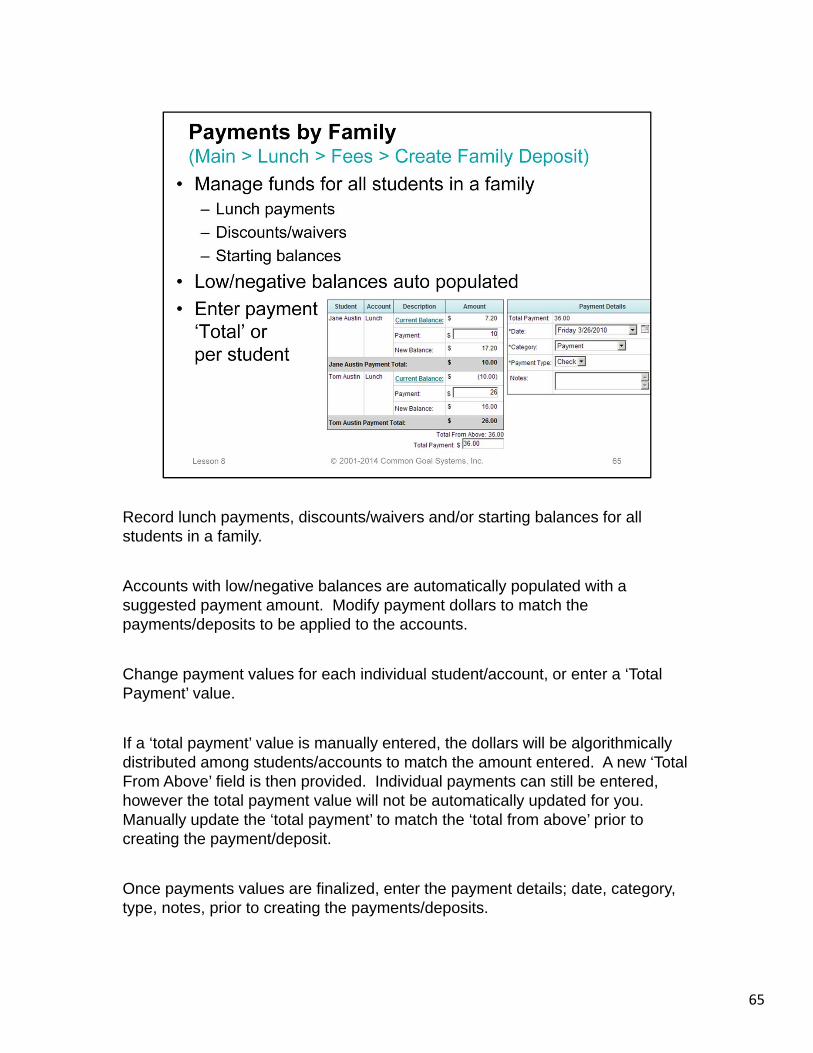
Record lunch payments, discounts/waivers and/or starting balances for all students in a family.
Accounts with low/negative balances are automatically populated with a suggested payment amount. Modify payment dollars to match the payments/deposits to be applied to the accounts.
Change payment values for each individual student/account, or enter a ‘Total Payment’ value.
If a ‘total payment’ value is manually entered, the dollars will be algorithmically distributed among students/accounts to match the amount entered. A new ‘Total From Above’ field is then provided. Individual payments can still be entered, however the total payment value will not be automatically updated for you. Manually update the ‘total payment’ to match the ‘total from above’ prior to creating the payment/deposit.
Once payments values are finalized, enter the payment details; date, category, type, notes, prior to creating the payments/deposits.
65
66
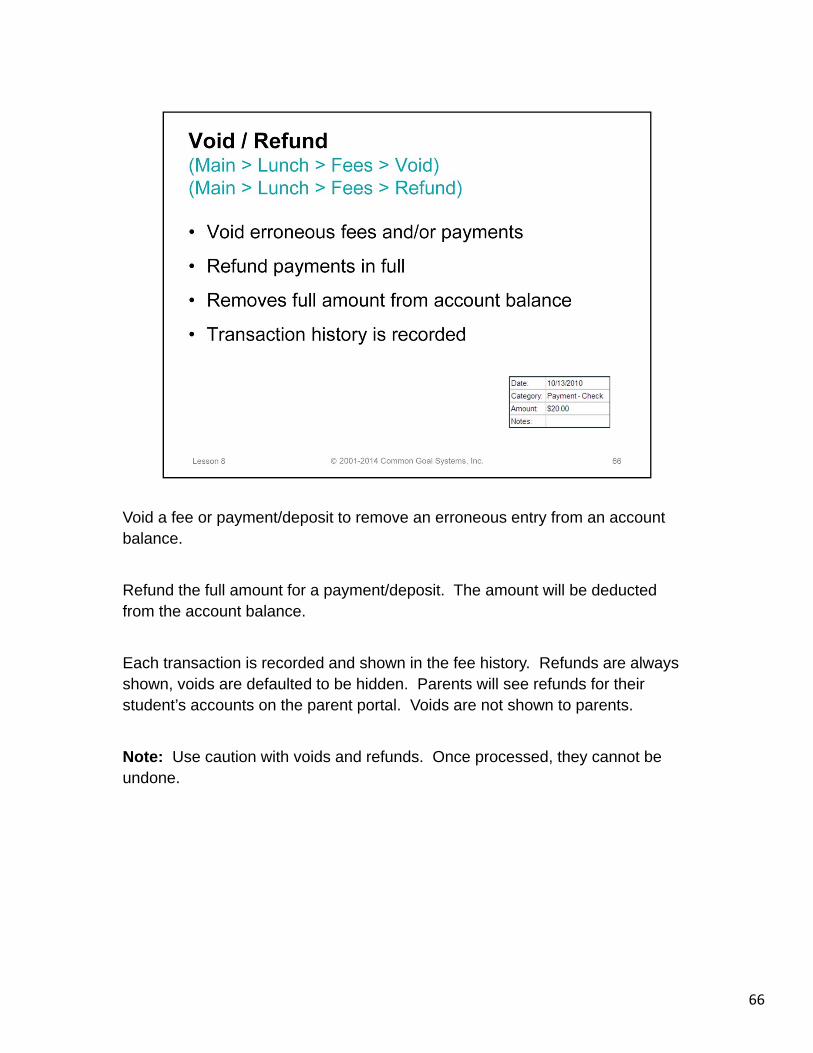
Void a fee or payment/deposit to remove an erroneous entry from an account balance.
Refund the full amount for a payment/deposit. The amount will be deducted from the account balance.
Each transaction is recorded and shown in the fee history. Refunds are always shown, voids are defaulted to be hidden. Parents will see refunds for their student’s accounts on the parent portal. Voids are not shown to parents.
Note: Use caution with voids and refunds. Once processed, they cannot be undone.

67
If a payment check bounces, you’ll need to make modifications to assure the accuracy of the account balance. Update the account using a refund or new fee to reflect the bounced check.
Either -Refund the payment, as outlined in the previous slide, adding a note indicating a bounced check.OR -Add a new fee, for the same amount as the bounced check, with a descriptive note.
Either option will update the person’s account to show that they still owe the corresponding amount. Parents will be able to view the transaction on the parent portal.Employees will be able to see the transaction on their own ‘Fees’ page.
68
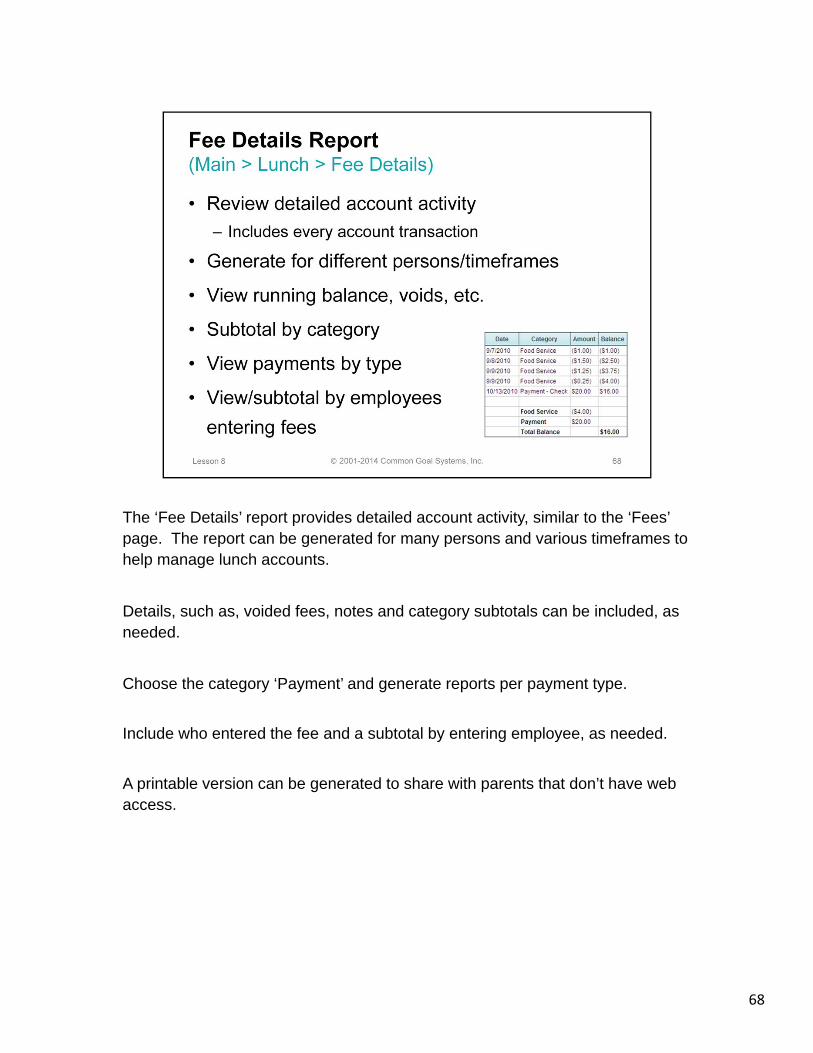
The ‘Fee Details’ report provides detailed account activity, similar to the ‘Fees’ page. The report can be generated for many persons and various timeframes to help manage lunch accounts.
Details, such as, voided fees, notes and category subtotals can be included, as needed.
Choose the category ‘Payment’ and generate reports per payment type.
Include who entered the fee and a subtotal by entering employee, as needed.
A printable version can be generated to share with parents that don’t have web access.

69
The ‘Daily Deposit’ report provides overall payment values per payment type. The report can be generated for many persons and various timeframes to assist schools in preparing daily bank deposits.
The report includes payment amounts for all allowed payment types. Hide zeros to eliminate those payment subtotals from the generated report. Choose to include a breakdown of persons that entered the deposits.
If your school allows for cash payments at POS, those payments will be shown separately from other cash payments on the report.
A printable version can be generated to keep for your records, as needed.
70
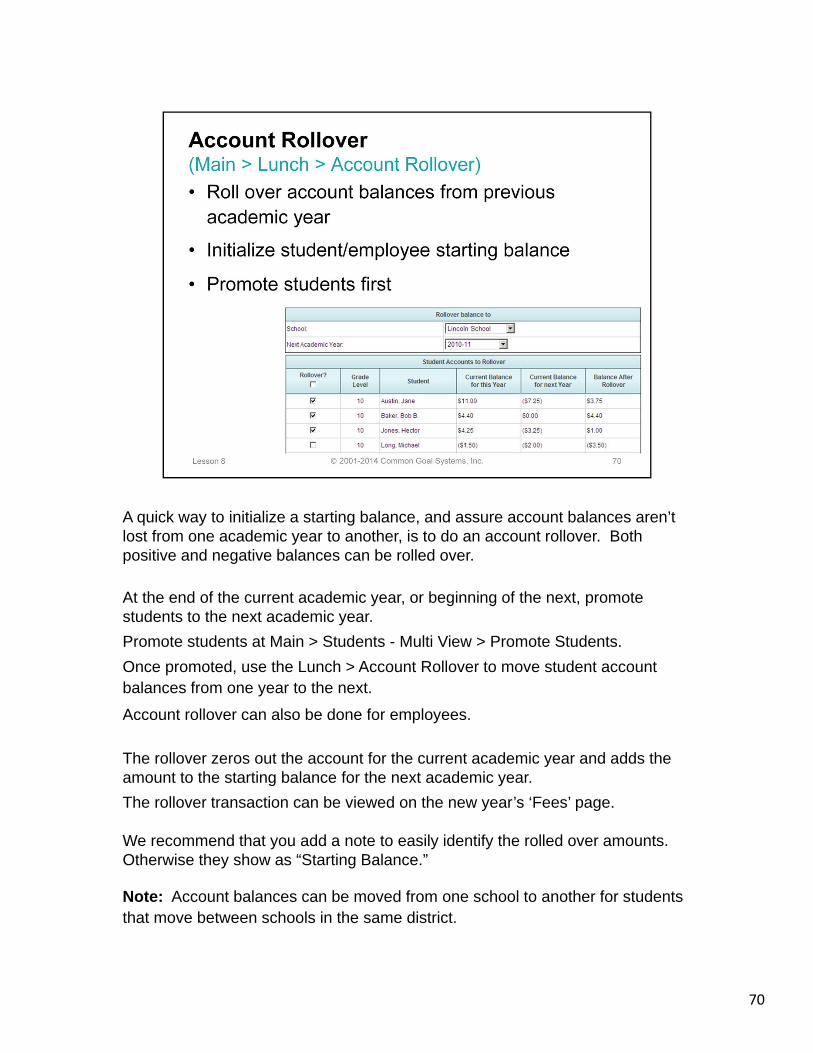
A quick way to initialize a starting balance, and assure account balances aren’t lost from one academic year to another, is to do an account rollover. Both positive and negative balances can be rolled over.
At the end of the current academic year, or beginning of the next, promote students to the next academic year. Promote students at Main > Students - Multi View > Promote Students.Once promoted, use the Lunch > Account Rollover to move student account balances from one year to the next.
Account rollover can also be done for employees.
The rollover zeros out the account for the current academic year and adds the amount to the starting balance for the next academic year.The rollover transaction can be viewed on the new year’s ‘Fees’ page.
We recommend that you add a note to easily identify the rolled over amounts. Otherwise they show as “Starting Balance.”
Note: Account balances can be moved from one school to another for students that move between schools in the same district.

71
Parents can view their student’s lunch account details from the parent portal. This provides an easy way for parents to see when account balances are getting low and a payment is needed. This is essentially the same as what admins see on the ‘Fees’ page, with the exception of ‘Voids’.
Parents can generate their own receipts for recorded payments, as needed.
Teachers can view their own account activity from Instructor Main > Reports.

72

73
Practice Lab, Lesson 8: (Estimated time of lab, 10 minutes)1. Create an account depositA. Goto Main > Lunch > Fees > Create DepositB. Search for a studentC. Leave the date as defaulted, notice the fee type is initialized to ‘Payment’D. Choose a payment type, enter an amount, add a note and ‘Save’
2. Generate a ‘Daily Deposit’ reportA. Goto Main > Lunch > Daily DepositB. Leave default ‘Time Frame’ with ‘Date Range’ of current dateC. Show ‘All students’, uncheck ‘Hide zero totals’ and ‘Generate’
3. Void the payment entered aboveA. Goto Main > Lunch > Fees > Void > Void
(select the same student/payment as created in exercise 1, above)B. Uncheck ‘Hide voided fees’ to view results
4. Generate a ‘Fee Details’ reportA. Goto Main > Lunch > Fee DetailsB. Search for the student used in the exercises aboveC. Check the options ‘Show voided fees’, ‘Show notes’, ‘Show category subtotals’
and ‘Generate’
74
Utilize the SchoolInsight account reports and letter templates to inform parents when their balances are getting low and payments are needed.

75
Quickly find students with zero/negative balances. Generate letter/email reminders to notify parents.
Review balances for single or groups of students. Set balance parameters; thresholds, date.Select student parameters; free, reduced, paid.
Automatically generate email to parents and/or students, using letter templates, reminding them to make a payment. Generate printable letters to send to those without email.
Encourage parents to manage their student’s accounts from the parent portal.
76
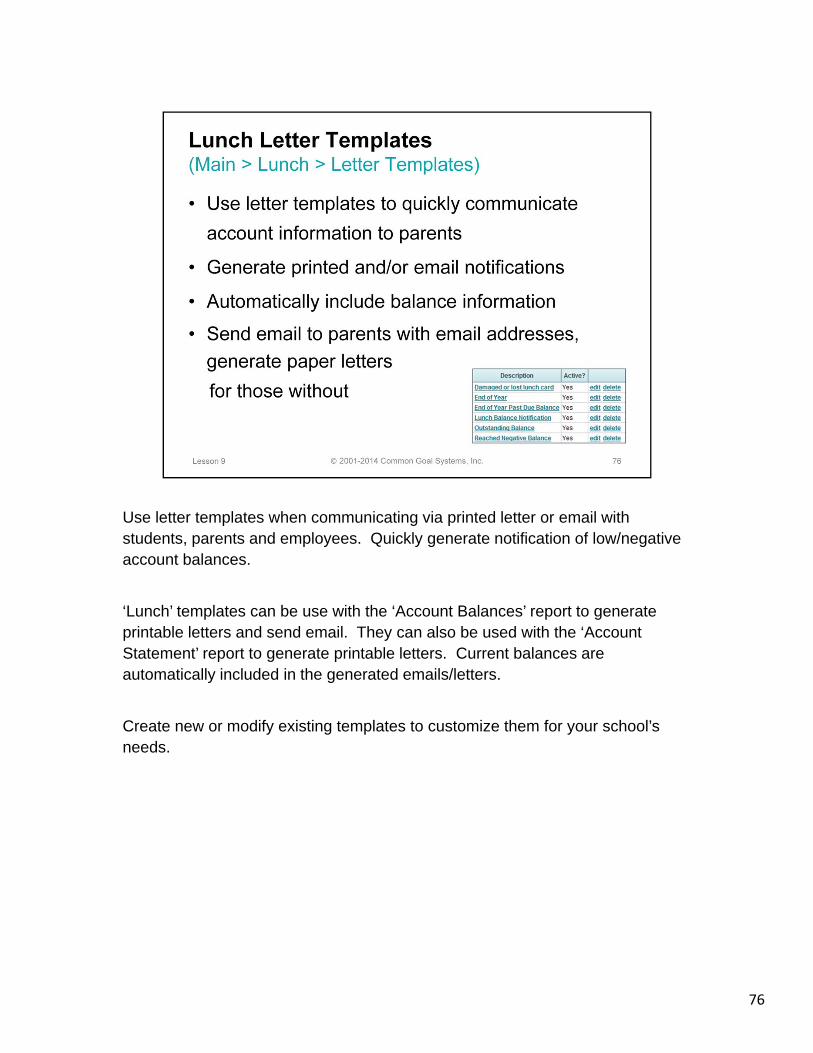
Use letter templates when communicating via printed letter or email with students, parents and employees. Quickly generate notification of low/negative account balances.
‘Lunch’ templates can be use with the ‘Account Balances’ report to generate printable letters and send email. They can also be used with the ‘Account Statement’ report to generate printable letters. Current balances are automatically included in the generated emails/letters.
Create new or modify existing templates to customize them for your school’s needs.
77
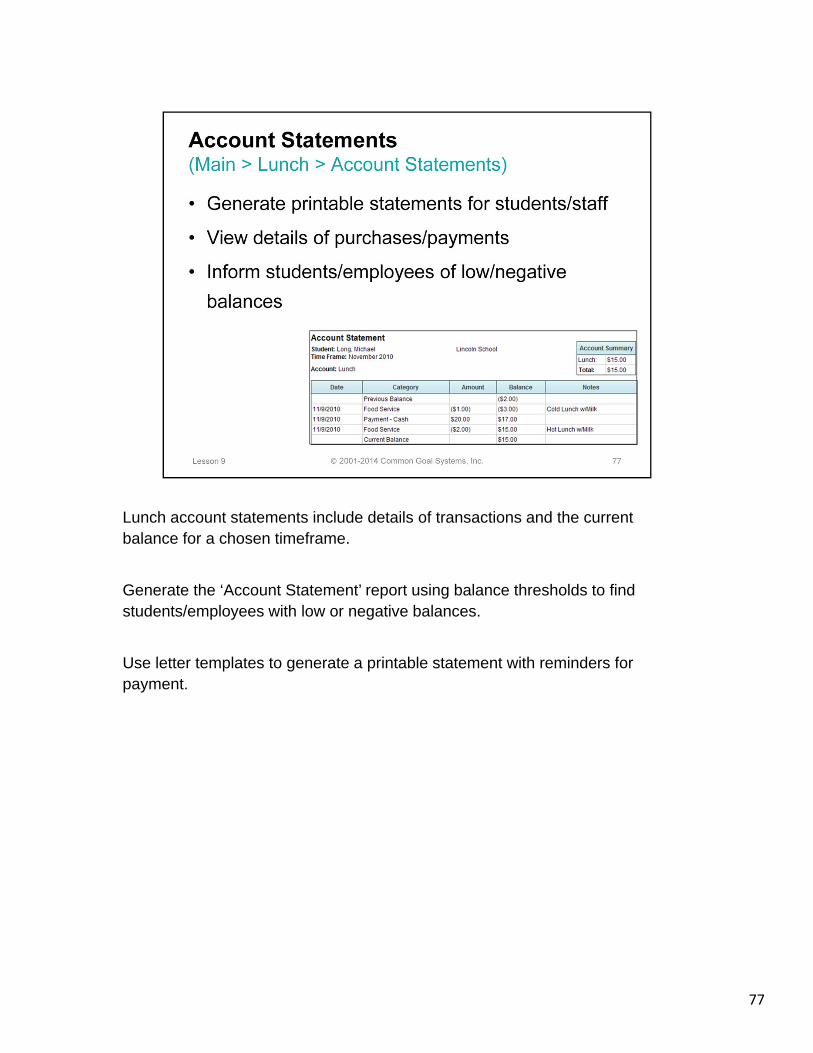
Lunch account statements include details of transactions and the current balance for a chosen timeframe.
Generate the ‘Account Statement’ report using balance thresholds to find students/employees with low or negative balances.
Use letter templates to generate a printable statement with reminders for payment.

78
79
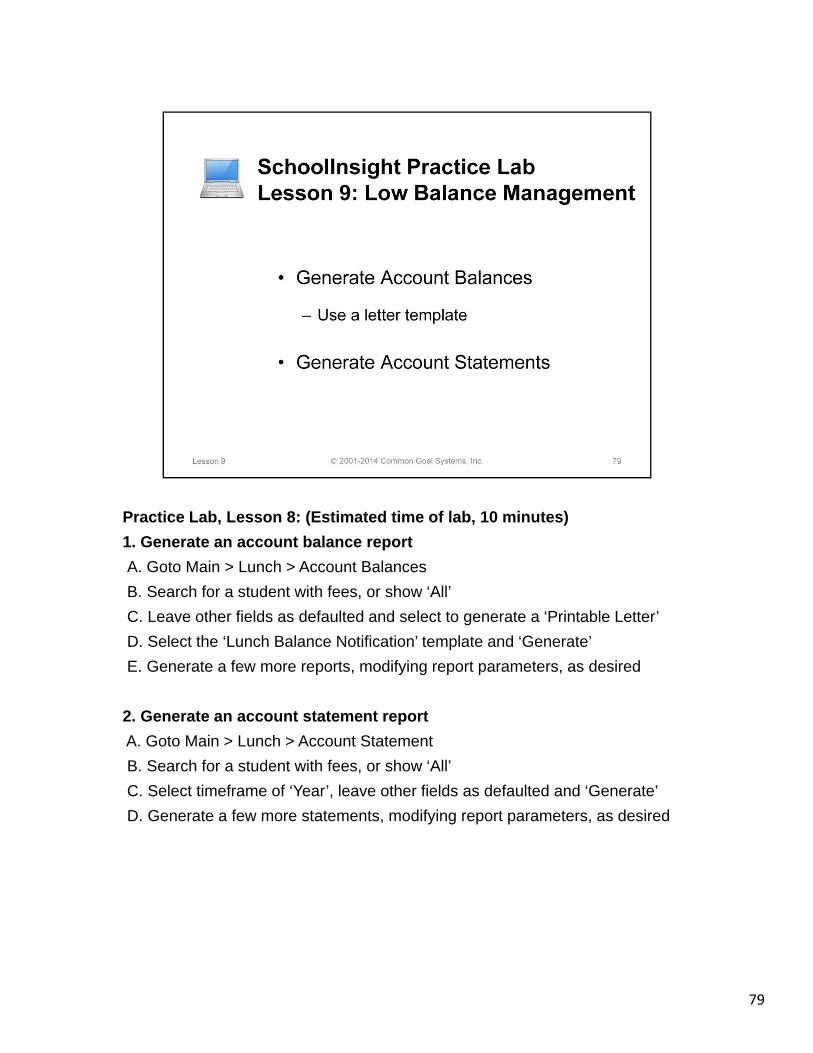
Practice Lab, Lesson 8: (Estimated time of lab, 10 minutes)1. Generate an account balance reportA. Goto Main > Lunch > Account BalancesB. Search for a student with fees, or show ‘All’C. Leave other fields as defaulted and select to generate a ‘Printable Letter’D. Select the ‘Lunch Balance Notification’ template and ‘Generate’E. Generate a few more reports, modifying report parameters, as desired
2. Generate an account statement reportA. Goto Main > Lunch > Account StatementB. Search for a student with fees, or show ‘All’C. Select timeframe of ‘Year’, leave other fields as defaulted and ‘Generate’D. Generate a few more statements, modifying report parameters, as desired

80
Enabling ‘Online Payment’ allows parents to pay balances online from the parent portal.
Using online payment helps speed payments, eliminate paperwork and save processing time.
Your district/school must obtain an online payment account prior to setup.
Note: During initialization of Online Payment for your school, SchoolInsight support will work with you to assure proper setup.

81
Once ‘Online Payment’ is enabled, parents can quickly pay account balances for their student’s accounts from the parent portal.
Online payment is a convenient way to manage student accounts for both parents and schools. Parents can self-manage payments saving schools the effort of processing extra balance notifications and letters asking for payment.Schools can charge a convenience fee to cover their banking costs.
Online payment is especially great for medium and larger school districts.
82
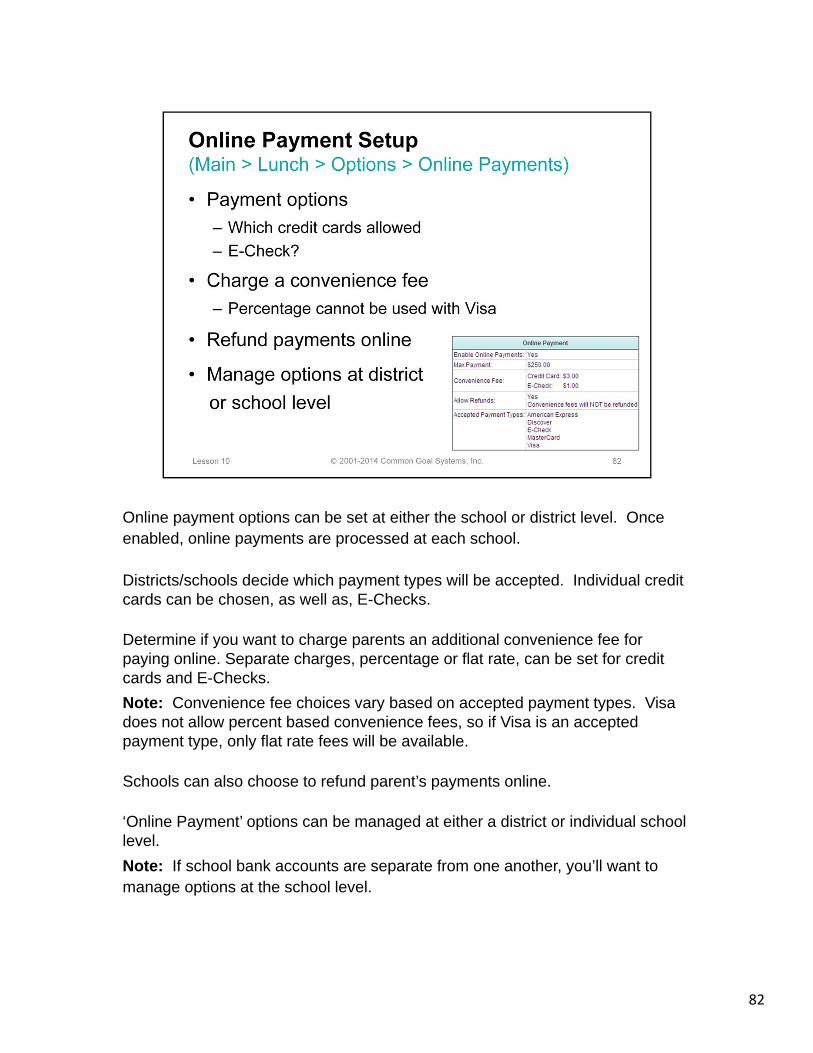
Online payment options can be set at either the school or district level. Once enabled, online payments are processed at each school.
Districts/schools decide which payment types will be accepted. Individual credit cards can be chosen, as well as, E-Checks.
Determine if you want to charge parents an additional convenience fee for paying online. Separate charges, percentage or flat rate, can be set for credit cards and E-Checks.Note: Convenience fee choices vary based on accepted payment types. Visa does not allow percent based convenience fees, so if Visa is an accepted payment type, only flat rate fees will be available.
Schools can also choose to refund parent’s payments online.
‘Online Payment’ options can be managed at either a district or individual school level. Note: If school bank accounts are separate from one another, you’ll want to manage options at the school level.

83

84
8585
If you need assistance after you’ve completed training,don’t hesitate to contact us by email or phone for support.
86