Embed Size (px)
Citation preview
1
ScreenBeam
Configurator for
Windows 8.1
User Manual
V1.2
2
Using the Utility with Windows 8.1
This guide describes installing and using the ScreenBeam Configurator for devices using Windows 8.1.
Installing the Utility on a Windows 8.1 Device
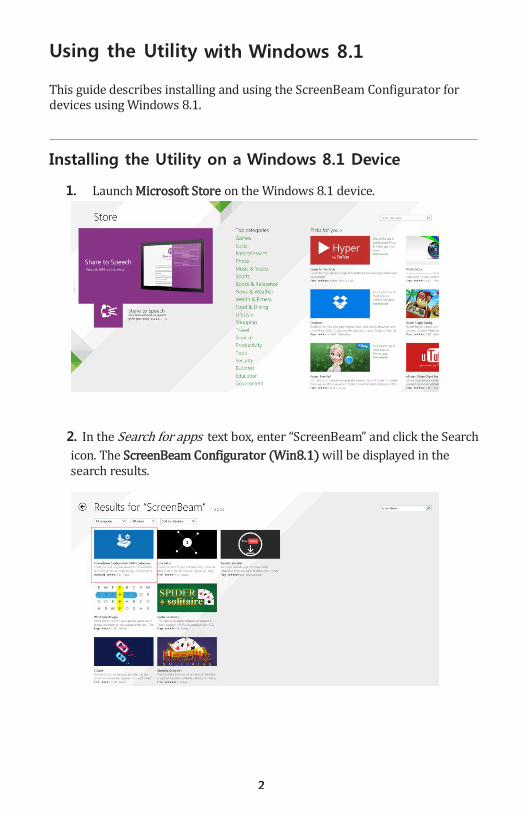
1. Launch Microsoft Store on the Windows 8.1 device.
2. In the Search for apps text box, enter “ScreenBeam” and click the Search
icon. The ScreenBeam Configurator (Win8.1) will be displayed in the search results.
3
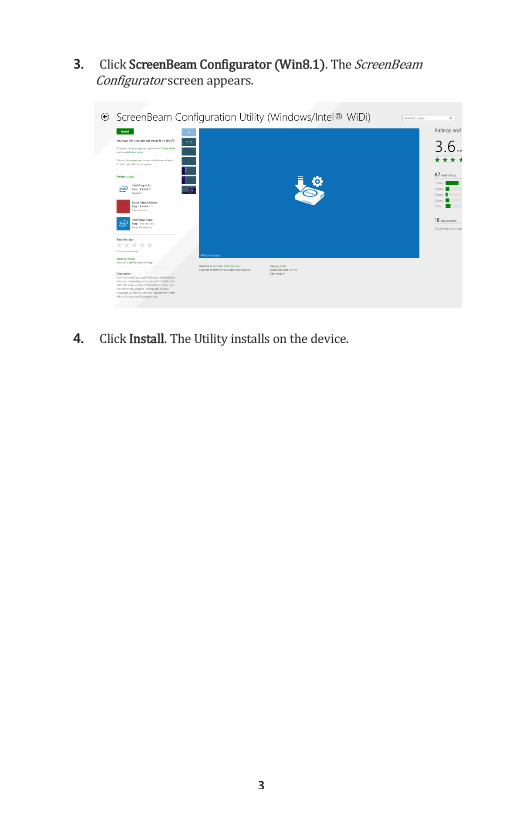
3. Click ScreenBeam Configurator (Win8.1). The ScreenBeam Configurator screen appears.
4. Click Install. The Utility installs on the device.
4
Using the Utility
The following sections explain how to configure ScreenBeam Receivers using the Utility.
Wireless Mode
To configure a Receiver wirelessly:
1. Verify the Receiver is powered on, with the Ready To Connect screen displayed on the connected monitor.
2. Connect the Windows 8.1 device to the Receiver.
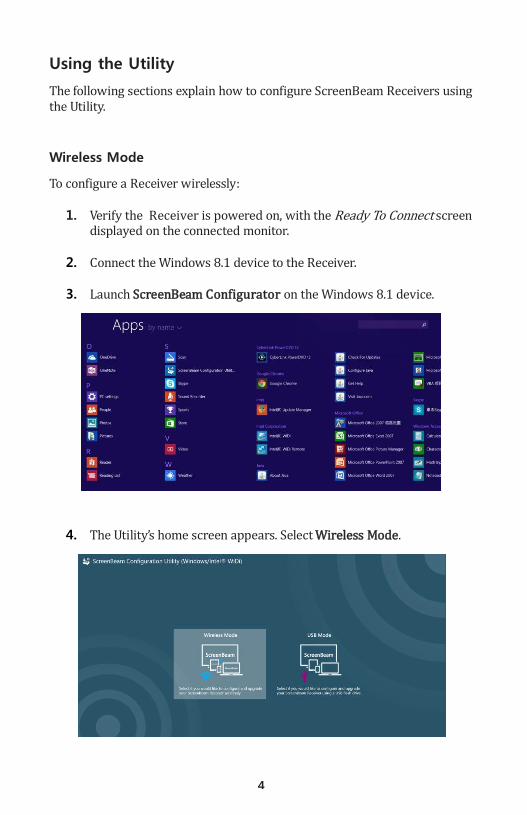
3. Launch ScreenBeam Configurator on the Windows 8.1 device.
4. The Utility’s home screen appears. Select Wireless Mode.
5
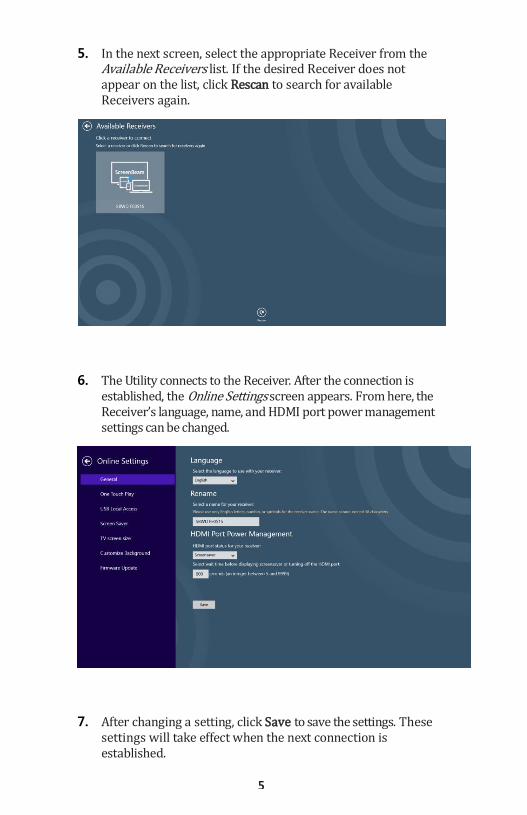
5. In the next screen, select the appropriate Receiver from the Available Receivers list. If the desired Receiver does not appear on the list, click Rescan to search for available Receivers again.
6. The Utility connects to the Receiver. After the connection is established, the Online Settings screen appears. From here, the Receiver’s language, name, and HDMI port power management settings can be changed.
7. After changing a setting, click Save to save the settings. These settings will take effect when the next connection is established.
6
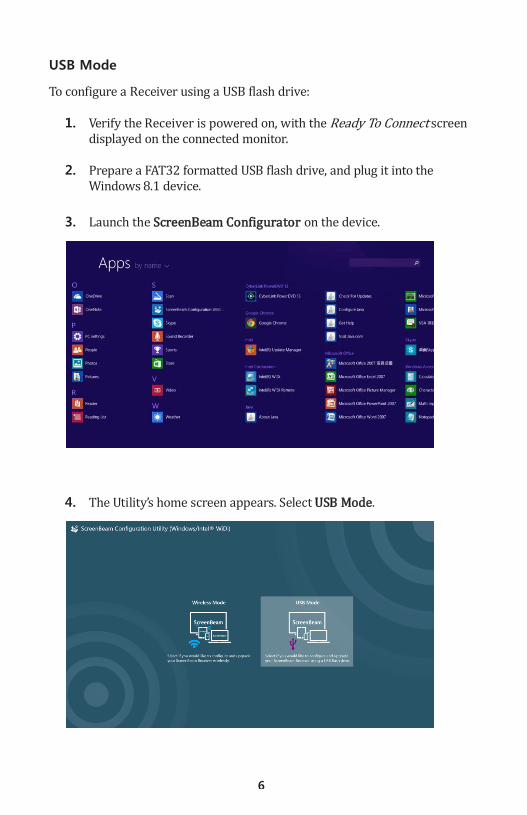
USB Mode
To configure a Receiver using a USB flash drive:
1. Verify the Receiver is powered on, with the Ready To Connect screen displayed on the connected monitor.
2. Prepare a FAT32 formatted USB flash drive, and plug it into the Windows 8.1 device.
3. Launch the ScreenBeam Configurator on the device.
4. The Utility’s home screen appears. Select USB Mode.
7
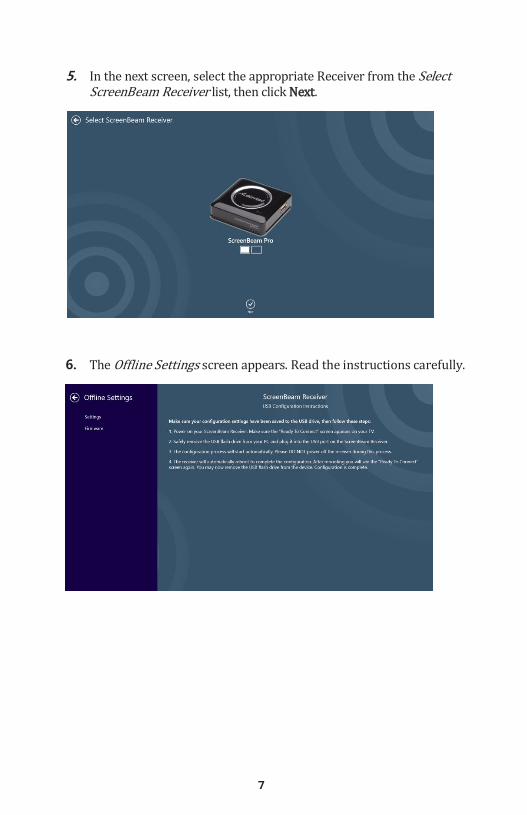
5. In the next screen, select the appropriate Receiver from the Select ScreenBeam Receiver list, then click Next.
6. The Offline Settings screen appears. Read the instructions carefully.
8
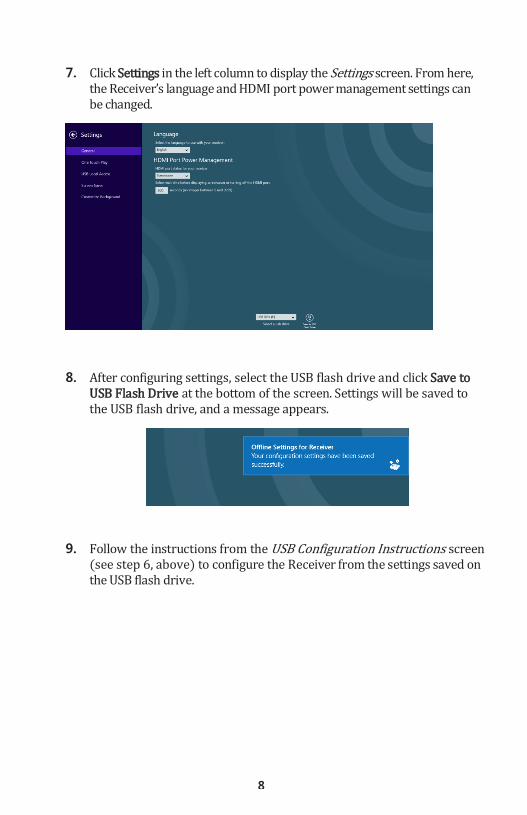
7. Click Settings in the left column to display the Settings screen. From here, the Receiver’s language and HDMI port power management settings can be changed.
8. After configuring settings, select the USB flash drive and click Save to USB Flash Drive at the bottom of the screen. Settings will be saved to the USB flash drive, and a message appears.
9. Follow the instructions from the USB Configuration Instructions screen (see step 6, above) to configure the Receiver from the settings saved on the USB flash drive.
9
Updating a Receiver’s Firmware
Using the Utility, the user can upgrade a ScreenBeam Receiver’s firmware. This can be done wirelessly, or by using a USB flash drive.
Wireless Mode
To upgrade a Receiver’s firmware wirelessly:
1. Verify that the Windows 8.1 device has access to the Internet.
2. Launch the Utility’s Wireless Mode (see page 4, “Wireless Mode,” for details).
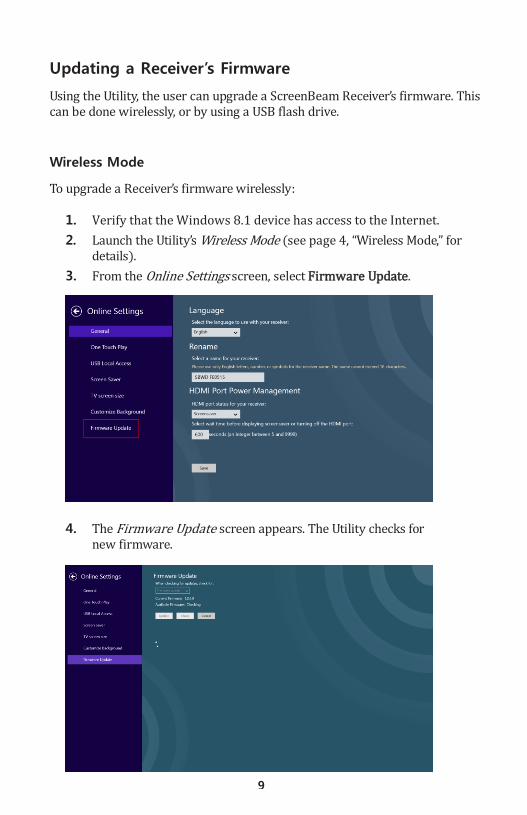
3. From the Online Settings screen, select Firmware Update.
4. The Firmware Update screen appears. The Utility checks for new firmware.

10
Two firmware options are available:
The latest update: This type of firmware is released officially, and is recommended for installation.
Beta: The beta firmware is for test purposes only. If installing beta firmware on a Receiver, the user must accept the software disclaimer.
5. The version number of the new firmware appears in the Available Firmware field. Click Update.
6. The Utility downloads the new firmware.
7. The firmware upgrades after the download is complete. Status is displayed on the monitor screen. When the Receiver returns to the Ready to Connect screen, the Receiver’s firmware has been upgraded.
Note: Do not power off the Receiver during the firmware update process. The update process may take several minutes.
11
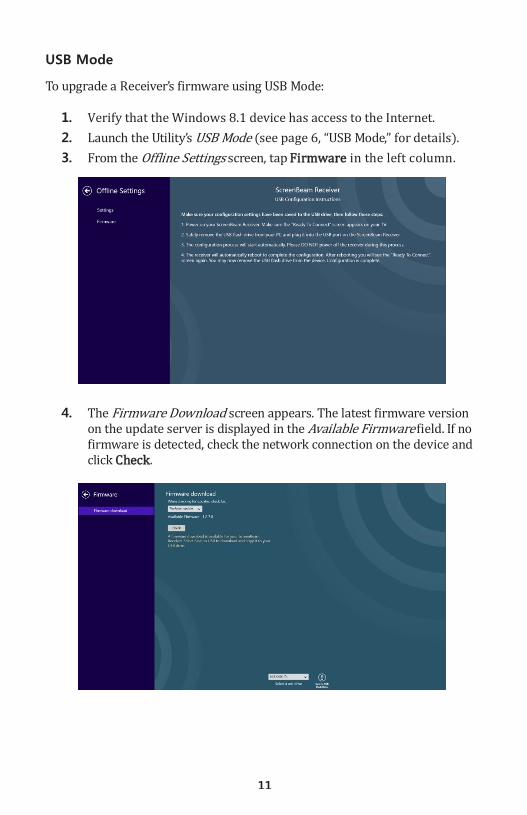
USB Mode
To upgrade a Receiver’s firmware using USB Mode:
1. Verify that the Windows 8.1 device has access to the Internet.
2. Launch the Utility’s USB Mode (see page 6, “USB Mode,” for details).
3. From the Offline Settings screen, tap Firmware in the left column.
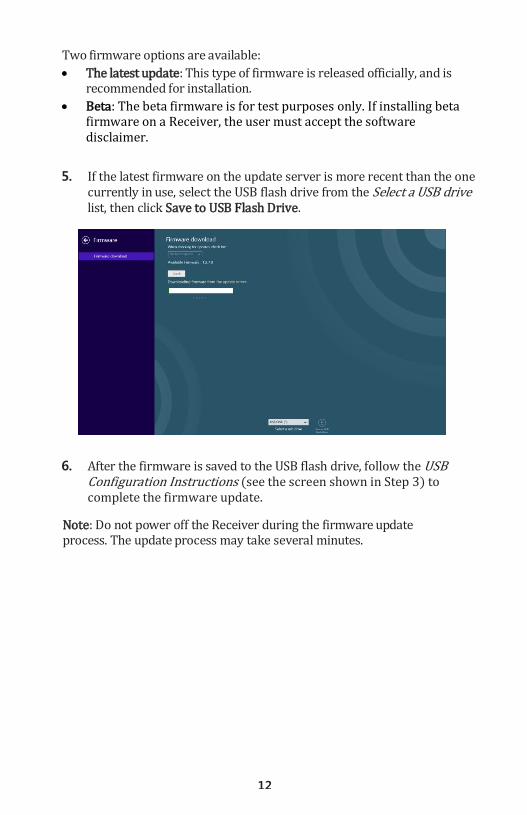
4. The Firmware Download screen appears. The latest firmware version on the update server is displayed in the Available Firmware field. If no firmware is detected, check the network connection on the device and click Check.
12
Two firmware options are available:
The latest update: This type of firmware is released officially, and is recommended for installation.
Beta: The beta firmware is for test purposes only. If installing beta firmware on a Receiver, the user must accept the software disclaimer.
5. If the latest firmware on the update server is more recent than the one currently in use, select the USB flash drive from the Select a USB drive list, then click Save to USB Flash Drive.
6. After the firmware is saved to the USB flash drive, follow the USB Configuration Instructions (see the screen shown in Step 3) to complete the firmware update.
Note: Do not power off the Receiver during the firmware update process. The update process may take several minutes.