Embed Size (px)
Citation preview
Public Health Services
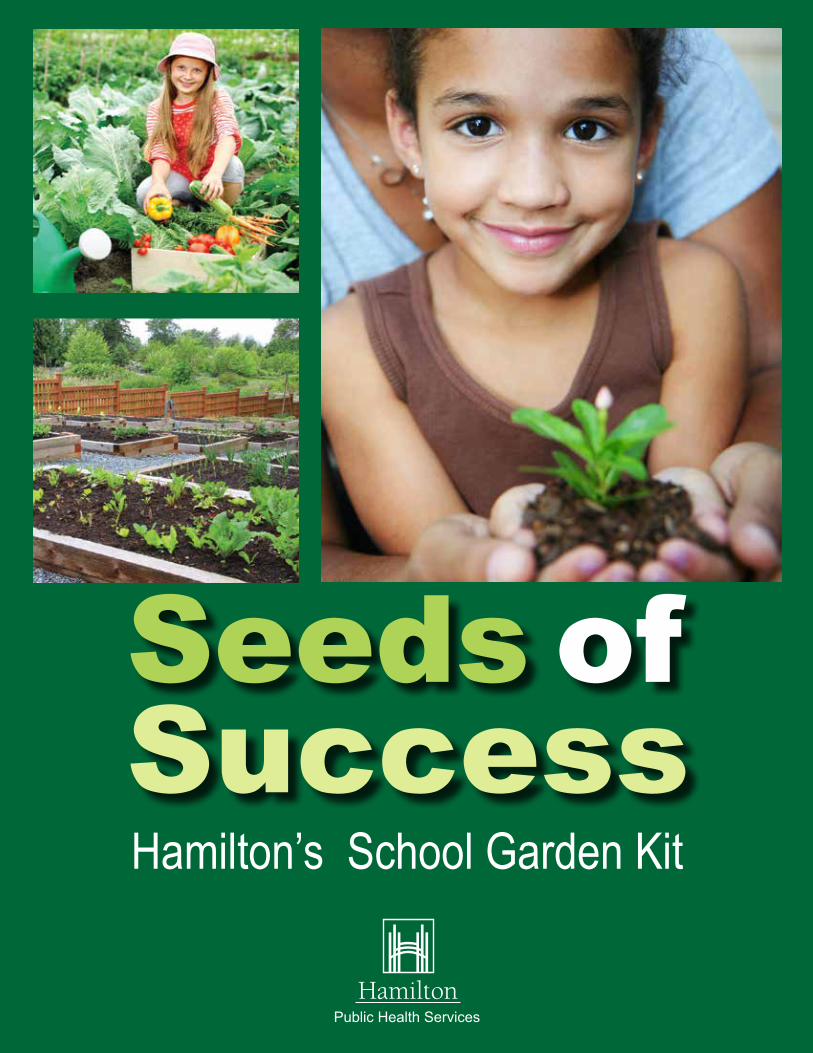
Hamilton’s School Garden Kit
Seeds of Success

Table of Contents
1
Table of Contents
1
Table of Contents
1
Table of Contents
1
Step 1: Make the Case ............................................................................................ page 3 Step 2: The Garden Committee ............................................................................... page 5Step 3: Create a Vision ............................................................................................ page 8 Step 4: Garden Site Planning .................................................................................. page 9 Step 5: Choose Your Plants..................................................................................... page 12 Step 6: Dig In! .......................................................................................................... page 16 Summertime! ........................................................................................................... page 19Celebrate! ................................................................................................................ page 19Come the Harvest.................................................................................................... page 21 Appendices .............................................................................................................. page 22 A1: Benefits of a School Garden ............................................................................. page 23 A2: Letter to Recruit New Committee ..................................................................... page 25 A3: The School Garden Committee ......................................................................... page 26 A4: Create a Vision .................................................................................................. page 27 A5: Types of Garden Beds ...................................................................................... page 30 A6: Site Planning Checklist ..................................................................................... page 32 A7: Vegetables and Their Companions ................................................................... page 33 A8: Garden Resources Checklist ............................................................................ page 35 A9: Sample Letter to Ask for Tools .......................................................................... page 36 A10: Sample Garden Plan ....................................................................................... page 37 A11 Sample Budget Sheet ...................................................................................... page 38 A12: List of Potential Grants .................................................................................... page 39 A13: Sample Letter to Business for Support ........................................................... page 41A14: Raised Beds .................................................................................................... page 42 A15: Keeping Students Safe in the Garden ............................................................ page 43 A16: Adopt-a-Garden............................................................................................... page 44 A17a: Chores for the School Garden Volunteers .................................................... page 45A17b: Watering Tips ................................................................................................ page 46A18: Garden tracking Sheet .................................................................................... page 47
Caldo Verde - Portuguese Collard Soup Recipe ..................................................... page 48
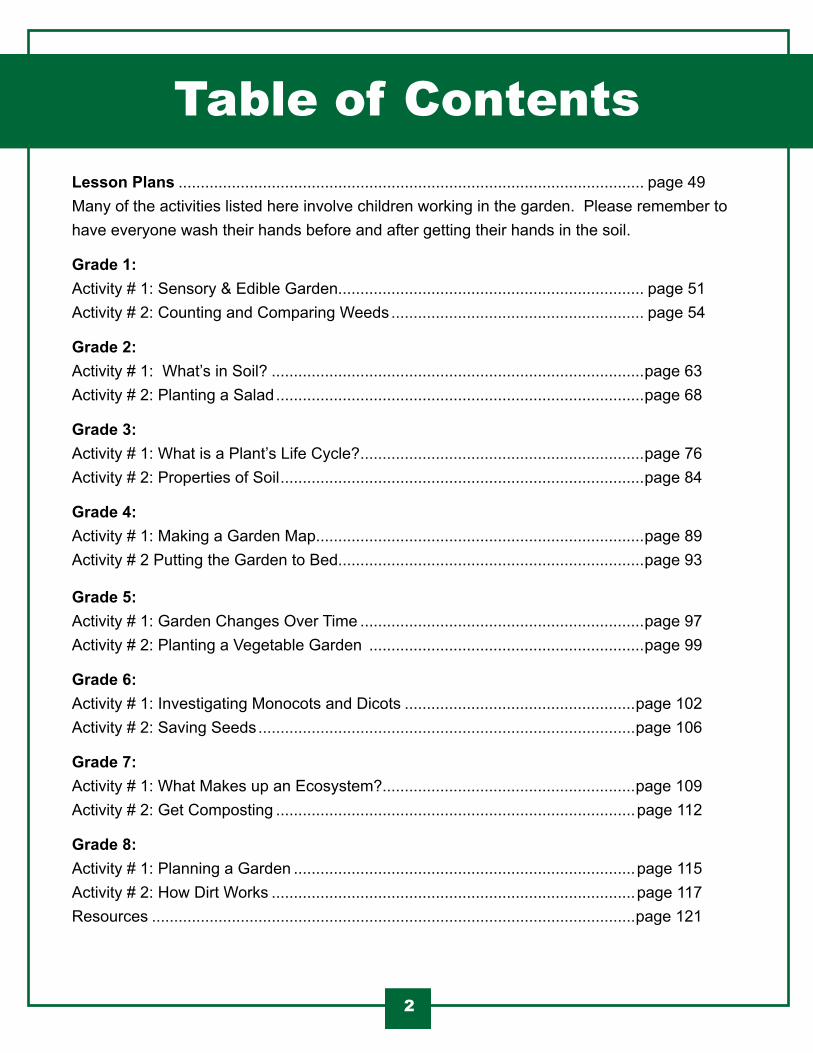
Table of Contents
1
Table of Contents
1
Table of Contents
1
Table of Contents
2
Lesson Plans ......................................................................................................... page 49Many of the activities listed here involve children working in the garden. Please remember to have everyone wash their hands before and after getting their hands in the soil. Grade 1: Activity # 1: Sensory & Edible Garden..................................................................... page 51 Activity # 2: Counting and Comparing Weeds ......................................................... page 54
Grade 2: Activity # 1: What’s in Soil? ....................................................................................page 63 Activity # 2: Planting a Salad ...................................................................................page 68
Grade 3: Activity # 1: What is a Plant’s Life Cycle? ................................................................page 76Activity # 2: Properties of Soil ..................................................................................page 84
Grade 4: Activity # 1: Making a Garden Map..........................................................................page 89Activity # 2 Putting the Garden to Bed.....................................................................page 93
Grade 5: Activity # 1: Garden Changes Over Time ................................................................page 97Activity # 2: Planting a Vegetable Garden ..............................................................page 99
Grade 6: Activity # 1: Investigating Monocots and Dicots ....................................................page 102Activity # 2: Saving Seeds .....................................................................................page 106
Grade 7: Activity # 1: What Makes up an Ecosystem?.........................................................page 109 Activity # 2: Get Composting .................................................................................page 112
Grade 8: Activity # 1: Planning a Garden .............................................................................page 115Activity # 2: How Dirt Works ..................................................................................page 117Resources .............................................................................................................page 121
Table of Contents
1
Table of Contents
1
Table of Contents
1
Step 1 - Make the Case
3
Making the CaseWhether you are a teacher, parent or student, you may have an interest in starting a school garden in your community. This kit is meant to provide direction to make that happen. It provides clear step-by step plans to get you on your way. If you have an interest and are willing to do the work, that is all you need to get things growing.
The first thing you may need to do is to convince those around you that having a garden is a good idea. Start by putting together a short proposal that you can share with the principal.
Why Create a Proposal? A school garden is a major commitment of time and resources for all involved. Often principals and other administrators will require you to develop a proposal before they will approve developing a garden. A proposal can be helpful as it creates a “word picture” of what the garden will be and how it will be used, so that everyone understands what it will be.
A Proposal might include: • Where you would like to build the garden (if you already know). If you don’t know, then tell the
principal that the Garden Committee will work this out.• When you’ll start (the sooner the better). • Who you’ll involve (don’t forget to involve your whole school community - teachers, students,
parents, EAs, etc.).• Use another school’s garden as an example. If you have enlisted any teachers to help you
with your project, bring them along. • Don’t worry if things change once your committee starts to take shape. Your principal just
needs to know that you have put some thought into it. • Review the Benefits of a School Garden, (Appendix A1), and use those that fit as you develop
your ‘case’ for your school garden.
Table of Contents
1
Table of Contents
1
Table of Contents
1
Step 1 - Make the Case
4
Brief History of School Gardens In some municipalities, particularly in the US, the development of school gardens is well established. Their popularity began in Europe and arrived in the US in the 1890’s. They flourished as Victory Gardens as a means of increasing the food supply during World War I and II. During the 1950’s school gardens fell out of fashion as the focus on technology in schools took on more importance. However, the interest in all things environmental during the 1970’s, brought gardens back into fashion in the US, and in recent years, the movement has grown in leaps and bounds (Gardens for Learning Manual, 2006).
In its report in 2006, Evergreen noted that there was a shortage of school gardens in Canada. The report states that in 2006, 0.5 percent of schools in Canada’s 16,000 schools had a garden, compared to 5 -10 percent in the UK, and 30 percent of schools in California. However, as with the food movement in general, the idea is gaining ground in Canada
A world without tomatoes is like a string quartet without violins. - Laurie Colwin
Table of Contents
1
Table of Contents
1
Table of Contents
1
Step 2 - The Garden Committee
5
Sowing Seeds of Interest The best time to start the discussion of a school garden is in the fall. However, any time is better than no time! Once everyone is settled into the school year, start to approach people around your school and see who may be interested in getting involved in a school garden.
With a supportive administrator on your side, you will be more successful in making the garden a reality. The principal can help by approving teacher time for the project, and may even be able to help find funds for the garden. He or she may be a real advocate in rallying support from others.
Before you go, and to help build your case, devise a rough plan of how you envision the garden. Include ideas from Benefits of a School Garden (Appendix A1), and have a list of possible partners. Most principals are happy to see events going on around the school, particularly if they involve the whole school.
Establish a Garden CommitteeBehind every successful school garden is a team of dedicated people. Look in all corners of your school community for those people who would like to participate in your school garden. They will become your “Garden Champions”, and bring with them a diverse skills and talents to your committee. Think about the future and who the community members will be that can support the garden for seasons to come.
Build Interest • Send out letters to parents and others in your school community see Letter to Recruit New
Members (Appendix A2).
• Talk it up in classes! Find enthusiastic students who can energize their classmates.
• Look to other school clubs such as the Eco or Green Teams.
• Hold an assembly and invite a garden expert to talk about school gardens.
• Profile gardening books in your library.
• Generate interest in teachers at all grade levels by pointing out how to use the garden for curriculum and experiential learning (See Lesson Plans).
• Think about special events you might be able to hold in the garden that parents and students can attend.
• Get your administrators to support the garden by approving the use of school space, supplies, and funds.
Table of Contents
1
Table of Contents
1
Table of Contents
1
Step 2 - The Garden Committee
6
• Invite the school custodian to be part of your committee. They are invaluable for ensuring water access is available (especially over the summer).
• Community partners can provide technical expertise, funding or may be able to donate supplies.
The Garden Committee should play a central role in establishing the garden, organizing events, fundraising, and planning for the garden’s future. Get committee members invested and in agreement with the vision by having discussions early on about the Mission and Goals for the garden, and keep them engaged with a regular meeting schedule and fun events. Build a structure to support your committee members in their work - remember that they’re volunteering their time!
In the early stages of your garden, the Garden Committee’s responsibilities will include:
• Design and implementation
• Communication about the garden
• Event planning
• Volunteer recruitment
• Visitor tours, and
• Building a 3 - 5 year plan
Table of Contents
1
Table of Contents
1
Table of Contents
1
Step 2 - The Garden Committee
7
Skills Needed For Your Committee As you consider those who should be on the committee, realize that you need a diverse group of people with various skill sets to help make this a success. Here are some important skills for your Garden Committee:
Leadership skills
Administrative skills e.g. minute taking
Building skills (to build garden plots)
Communication skills (to keep everyone in touch)
Fundraising ability (yes you will need money!)
Gardening skills
Planning skills
Worker Bees - those who will jump in and do!
Use the sheet, The School Garden Committee (Appendix A3), to record the skills of your garden group. If you find you are lacking some key skills in your group, brainstorm to identify someone who might have those skills, and ask them to job the committee.
Table of Contents
1
Table of Contents
1
Table of Contents
1
Step 3 - Create a Vision
8
Create a Vision of Your Garden
Why a Garden? School gardens are very trendy and work well with the popular concept of urban agriculture. We, in public health, believe gardens are a good idea, and hope you do too. There are so many reasons why gardens should become a permanent part of a school. If you get everyone to come to agreement on why this garden is important, it is much more likely to succeed in your school. Creating a common vision will help you to get there.
By year two of our promotion of school gardens, we began to realize that creating the vision was perhaps the most important step to do! And yet, it is the step that is so often forgotten.
As you assemble your Garden Committee, make creating the vision the first agenda item. If everyone comes to agreement about what you want the garden to do, there is a far greater chance that people will be committed to working in the garden and keeping it going year after year. As well, if you state your intentions at the start, you will have something to use to determine if the garden has met its goals and is a success.
Use the Create a Vision worksheet (Appendix A4), to create the school garden that you want.
A group of people truly committed to a common vision is an awesome force. They can accomplish the seemingly impossible. - Peter M. Senge
Table of Contents
1
Table of Contents
1
Table of Contents
1
Step 4 - Garden Site Planning
9
Dream Big! Plan Small! Now the fun begins! Know that you can grow a garden no matter how tight you are for space. If you have a school that has been paved over, you may want to start with a container garden. Below you will see the factors you need to consider wherever you decide to put your garden.
The first year is the one to try out your ideas. Start with a garden that is small and manageable. Consider the number of volunteers you have and their commitment to maintaining the garden over the summer.
Look around your schoolyard and take stock. Use your results from the visioning exercise to help answer these important questions.
• Do you have lots of space or just a small area?
• Is your school yard mostly green grass or concrete? If it is mostly concrete, could you grow plants in your classroom or in the front lobby?
• If you do plant outside, would you have an in ground garden? Raised beds? Or container gardens? Review the guidelines for Types of Garden Beds (Appendix A5), to help in your decision making, and record the findings of your school yard on the sheet provided in Planning Checklist (Appendix A6).
Table of Contents
1
Table of Contents
1
Table of Contents
1
Step 4 - Garden Site Planning
10
Garden Site Planning Considerations
Size Look around the school yard. Do you have plenty of green space on which to build a garden or just a small area that lends itself to greening? Many schools have been paved over with concrete, making a garden hard to do. You do have the option of Depaving”. At St. Augustine School in Dundas, 93 m of pavement was pulled up, and replaced with native plants and shrubs to catch rainwater and divert it from storm sewers. As well, benches were installed as a place to sit and enjoy the natural scenery.
SunlightVegetables need a minimum of six hours of sunlight per day. Check around the school and note where the sun is at different times of the day and over different seasons if possible. If there is an area that seems shadier, consider using it for an outdoor classroom.
Water Plan your garden so it is close to your water source.
• If your school has eaves troughs to catch rain water, then you can collect the water in a rain barrel. These are available from several distributors. The City of Hamilton Public Works Department sells rain barrels every spring, but check with local organizations too. Some of them sell the barrels as a fundraiser.
• It is far more likely that you do not have eaves troughs, and the rain that falls on the roof is drained through an internal drainage system. If this is true for your school, there is likely a tap for water on an outside wall. You will need to connect with your facilities to ensure that they can turn it on or provide you with a key to open it.
• If your garden ends up being a distance from the school building you will require a very long hose to keep it watered. If that is not feasible, can you develop a partnership with a neighbour who is close to the garden? If there is someone who is willing, you could get them to track the extra water usage over the garden season, and pay for the extra water used in the fall. Or your school might be able to provide a charitable donation tax receipt for the water used. Check with your administrator for information specific to your school.
• If you can find the money through a grant, you may want to consider the deluxe watering model - an underground irrigation system.
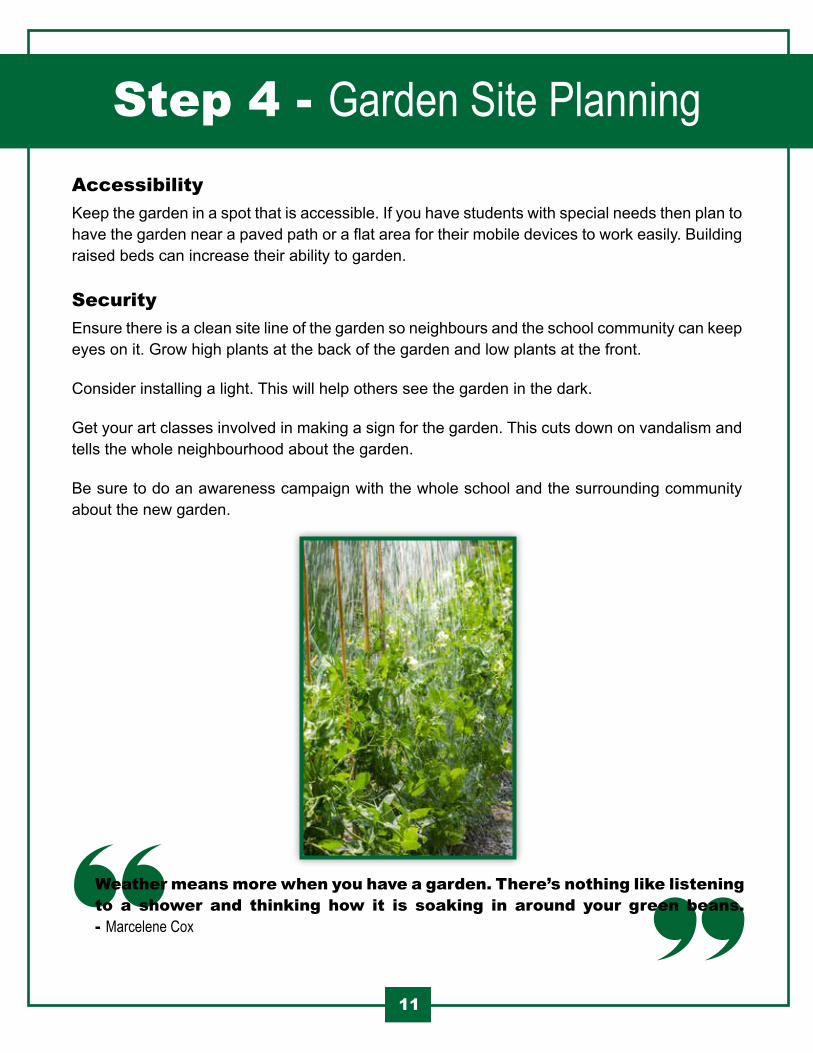
Table of Contents
1
Table of Contents
1
Table of Contents
1
Step 4 - Garden Site Planning
11
AccessibilityKeep the garden in a spot that is accessible. If you have students with special needs then plan to have the garden near a paved path or a flat area for their mobile devices to work easily. Building raised beds can increase their ability to garden.
Security
Ensure there is a clean site line of the garden so neighbours and the school community can keep eyes on it. Grow high plants at the back of the garden and low plants at the front.
Consider installing a light. This will help others see the garden in the dark.
Get your art classes involved in making a sign for the garden. This cuts down on vandalism and tells the whole neighbourhood about the garden.
Be sure to do an awareness campaign with the whole school and the surrounding community about the new garden.
Weather means more when you have a garden. There’s nothing like listening to a shower and thinking how it is soaking in around your green beans. - Marcelene Cox
Table of Contents
1
Table of Contents
1
Table of Contents
1
Step 5 - Choose Your Plants
12
What’s In Your Garden?What to plant and how to plant is often a challenge for first time gardeners. To decide what to plant, go to the students first. What would they like to see in their garden? Keep asking the question – of teachers, of the Garden Committee or if you have an end user in mind (e.g. the cafeteria), find out what they need.
Several schools in Hamilton wanted to plant the Three Sisters, the three main agricultural crops of various Native American groups in North America: squash, maize (corn), and climbing beans. Here are a few more suggestions:
• Heirloom varieties of vegetables yield tasty and often different coloured plants. It will be a treat for children to discover purple carrots!
• Be sure to include tomatoes (all sizes). Cherry and grape tomatoes offer small bites for more children, while adults like to harvest large beefsteak tomatoes.
• Add some root vegetables like carrots and radishes or tubers, like sweet potatoes. To see a child’s face as they pull out a huge, red radish ready to eat is sheer delight (be sure to wash first). While radishes are a short season crop and will be ready before school ends, carrots and sweet potatoes can be mulched over summer to conserve water, and harvested in the fall.
• Zucchini is always a hit especially if you like zucchini bread. Make sure you leave them lots of room to grow. They are large and hungry plants, and will take over the garden given the chance.
• Plant vegetables that will grow fast so that classes have a chance to go out, pick vegetables and prepare the food (e.g. radishes, lettuce, arugula).
• Seeds or seedlings? If you want to start early you can seed plants like tomatoes, green peppers etc. in the classroom in early March. Or buy small seedlings in May to plant directly in the garden.
• Consider perennial crops that come back every year and are tasty for children, such as Red Currant shrubs, or Garden Sorrel. These sour treats encourage healthy nibbles. Red Currant is ready to eat in June, and Garden Sorrel is edible from spring to fall. Allow it to self-seed. If you have lots of room, consider planting strawberries. Imagine the delight for children to have a strawberry social with fruit from their own garden!
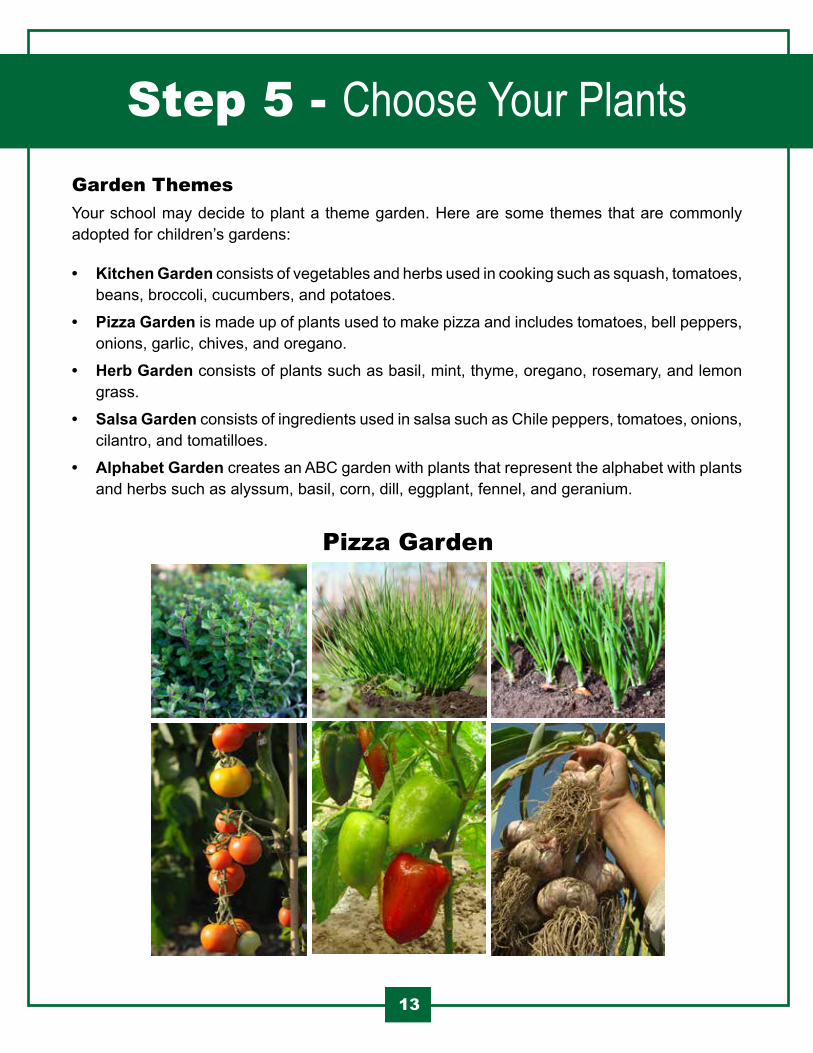
Table of Contents
1
Table of Contents
1
Table of Contents
1
Step 5 - Choose Your Plants
13
Garden ThemesYour school may decide to plant a theme garden. Here are some themes that are commonly adopted for children’s gardens:
• Kitchen Garden consists of vegetables and herbs used in cooking such as squash, tomatoes, beans, broccoli, cucumbers, and potatoes.
• Pizza Garden is made up of plants used to make pizza and includes tomatoes, bell peppers, onions, garlic, chives, and oregano.
• Herb Garden consists of plants such as basil, mint, thyme, oregano, rosemary, and lemon grass.
• Salsa Garden consists of ingredients used in salsa such as Chile peppers, tomatoes, onions, cilantro, and tomatilloes.
• Alphabet Garden creates an ABC garden with plants that represent the alphabet with plants and herbs such as alyssum, basil, corn, dill, eggplant, fennel, and geranium.
Pizza Garden
Table of Contents
1
Table of Contents
1
Table of Contents
1
Step 5 - Choose Your Plants
14
Take these and any other suggestions, and decide as a committee what you have room for and what meets the needs of your school. Have fun! Use the Vegetables and their Companions (Appendix A7), to plan out what will go where.
As you get ready for Build Day, keep in mind that you need to have all of your resources beforehand. Use the Garden Tools Checklist (Appendix A8), to ensure you have all the proper tools.
Using a copy of Sample Letter to Ask for Tools (Appendix A9), change it to be appropriate for your school. Send out copies to each teacher who can then photocopy and distribute in students’ backpacks. Place an ad in the monthly newsletter asking parents for these items.
Use the Sample Garden Plan (Appendix A10), to assist in designing the layout of your garden.
At this point you have decided where your garden should go and what type of garden you will plant. Now it is time to create a budget to determine how much your garden will cost. How many tools and other resources you will need to buy will depend on how successful your tool drive is.
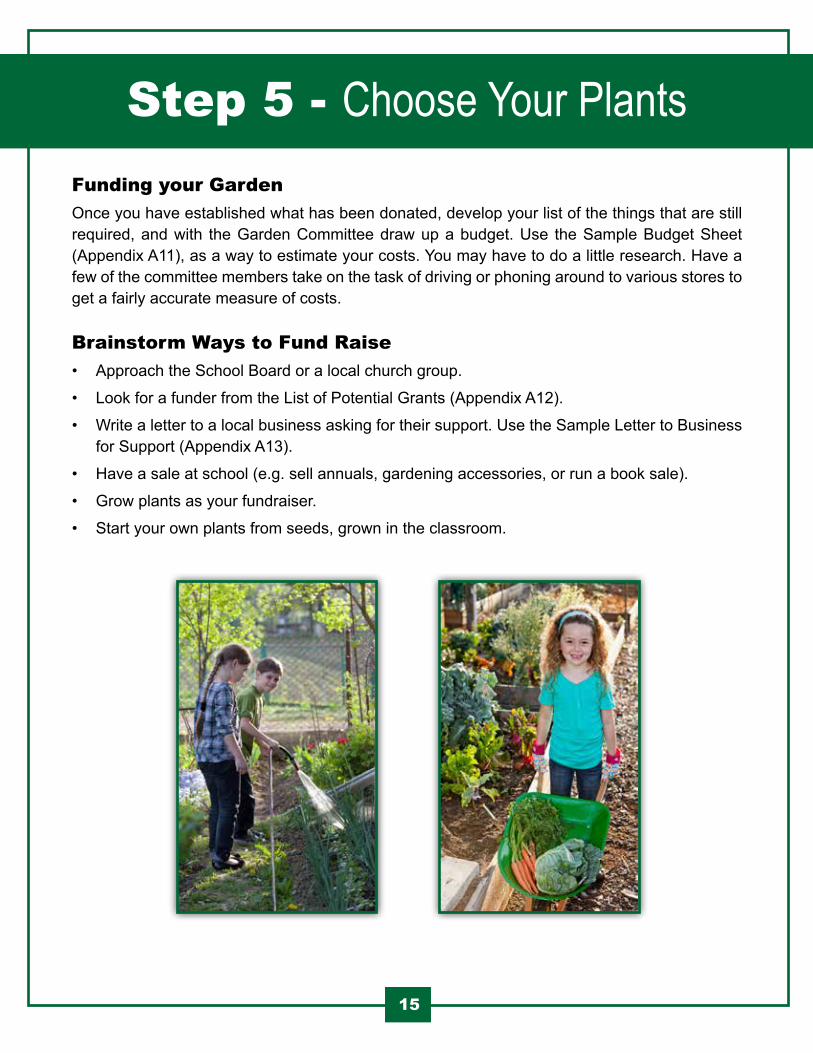
Table of Contents
1
Table of Contents
1
Table of Contents
1
Step 5 - Choose Your Plants
15
Funding your GardenOnce you have established what has been donated, develop your list of the things that are still required, and with the Garden Committee draw up a budget. Use the Sample Budget Sheet (Appendix A11), as a way to estimate your costs. You may have to do a little research. Have a few of the committee members take on the task of driving or phoning around to various stores to get a fairly accurate measure of costs.
Brainstorm Ways to Fund Raise• Approach the School Board or a local church group.
• Look for a funder from the List of Potential Grants (Appendix A12).
• Write a letter to a local business asking for their support. Use the Sample Letter to Business for Support (Appendix A13).
• Have a sale at school (e.g. sell annuals, gardening accessories, or run a book sale).
• Grow plants as your fundraiser.
• Start your own plants from seeds, grown in the classroom.
Table of Contents
1
Table of Contents
1
Table of Contents
1
Step 6 - Dig In!
16
Build DayIt is Build Day. Finally. The day when all that hard work and planning will take root. Be sure that you have booked this day far in advance. Advertise often and everywhere to get all the help you need. Here are some ways to promote Build Day:
• Send notices home
• Run an ad in the school newsletter
• Place an ad on the school website
• Get students to design posters for the day, and put them up around the school
• Make announcements on the week leading up to the event
• Plan a rain date!
If you are building raised beds, you might plan to have a few handy people build these in advance. To determine what materials you will need and the cost of constructing raised beds, see Raised Beds (Appendix A14).
If this work ends up being done on Build Day, then that is step one for the day. Keep the children away from the work crew for safety’s sake.
After the raised bed boxes are installed, line them with pizza boxes (saved by the custodian many weeks in advance) or pads of newspaper. This will help to kill everything under the bed, so that what grows is what you plant.
On the day of the big event, you will want to fill the beds with good quality soil. (This should be ordered and delivered ahead of time from a company such as Hamilton Sod). Children can help here by filling a wheelbarrow with soil and dumping it into the raised beds. When the beds are full, it is time to plant.
Distribute your master plan for the garden (several copies in plastic covers) and assign a few adults to each bed. They can each have several children with them who can be the main planters.
Do a quick lesson on planting seeds and/or seedlings for everyone and then hand out gloves, trowels, seeds or plants as per your garden design.
Once everything is planted, make sure that everything is watered well. Now stand back and watch your garden grow!
Table of Contents
1
Table of Contents
1
Table of Contents
1
Step 6 - Dig In!
17
Keeping Children Safe in the Garden• Wear gloves to lower the risk of skin irritations, cuts, and certain contaminants. This is quite
important. If raccoons or cats make the garden their outside litter box, there is a real risk of transmission of disease.
• Lower the risk of sunburn and skin cancer by practicing sun safety. When the UV Index is 3 or higher, wear long sleeves, wide-brimmed hats, sun shades and sunscreen with sun protective factor (SPF) 15 or higher.
• Do not allow anyone to work in the garden while sick, or until 24 hours after symptoms, such as vomiting or diarrhea, have subsided.
• Before they start to garden AND after, ensure that all gardeners wash hands thoroughly in warm, soapy water for at least 10 to 15 seconds, and then rinse with clean water. Ensure that all open cuts or wounds on hands, arms, or legs are properly covered prior to participating in the planting or the harvest.
• Require all gardeners to wear closed-toed shoes to prevent cuts, stings, or other injuries.
• Teach students about tool safety, for example
• Finally, when food is harvested from the garden, remind the children that everything MUST be washed before eaten.
These Guidelines for keeping children safe are also outlined in Keeping Students Safe in the Garden (Appendix A15). Photocopy them and hang in the garden shed so that they are available to anyone working in the garden.
The hard work is done. End the event with some healthy snacks* for everyone. Talk about the importance of everyone coming out to garden, to share the harvest or simply to be in the garden for a meeting. It should be the “go-to” place for children and adults.
• Keep the working part of the tool low, below their knee level.
• When using trowels, do not fly the soil up, but rather work it by twisting the trowel and keeping soil removed close to the hole. Plastic trowels are safer than metal for young children.
• Never lay a rake or hoe down with the tines pointing upwards.
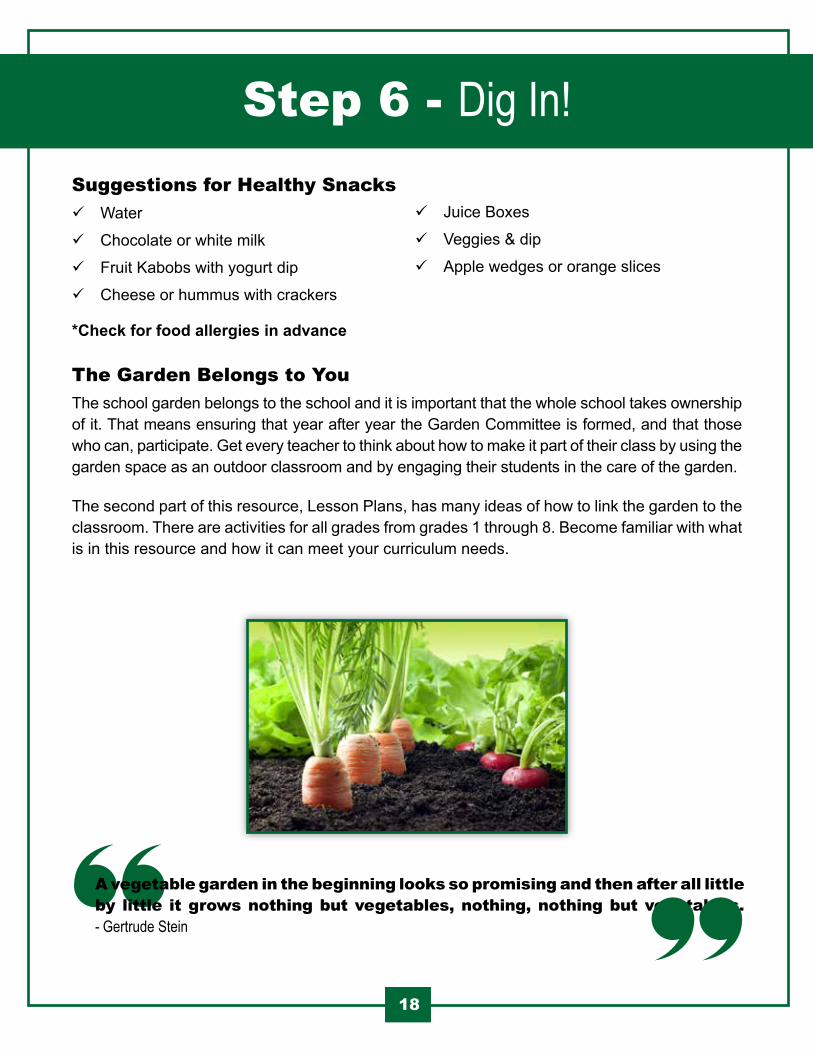
Table of Contents
1
Table of Contents
1
Table of Contents
1
Step 6 - Dig In!
18
Suggestions for Healthy Snacks Water
Chocolate or white milk
Fruit Kabobs with yogurt dip
Cheese or hummus with crackers
Juice Boxes
Veggies & dip
Apple wedges or orange slices
*Check for food allergies in advance
The Garden Belongs to YouThe school garden belongs to the school and it is important that the whole school takes ownership of it. That means ensuring that year after year the Garden Committee is formed, and that those who can, participate. Get every teacher to think about how to make it part of their class by using the garden space as an outdoor classroom and by engaging their students in the care of the garden.
The second part of this resource, Lesson Plans, has many ideas of how to link the garden to the classroom. There are activities for all grades from grades 1 through 8. Become familiar with what is in this resource and how it can meet your curriculum needs.
A vegetable garden in the beginning looks so promising and then after all little by little it grows nothing but vegetables, nothing, nothing but vegetables. - Gertrude Stein
Table of Contents
1
Table of Contents
1
Table of Contents
1
Summertime!
19
Do you remember the excitement when you see those first tender shoots come up in the garden in early spring? Does it make you want to get out and get your fingers in the soil and plant a garden? The smell of fresh earth in the spring is a call many find hard to resist.
Now remember how you feel about the garden at the end of a hot sunny July day. Are you yearning to get out and garden? Likely, not so much! That seems to be the norm. When it comes to a food garden you need to keep up that motivation. It is a shame when food goes to waste for a lack of garden hands.
Schools are closed during July and August which means school gardens can get neglected. The best way to ensure that your garden does not go to weeds and rot, is to schedule volunteers from the school community. Use Adopt-a-Garden (Appendix A16), and fill it in with parents, teachers or even neighbours who are willing to put in a few hours a week. Make sure this is done before summer vacation starts. Chores for the School Volunteers (Appendix A17), will help each of the people on your list know what they need to do.
It is important to keep everyone involved in the garden informed about what is going on in the garden. It gets confusing if you don’t know what has been done and what needs to be done. The Garden Tracking Sheet (Appendix A18), can be a good tool to maintain communication about the garden from week to week.
ResourcesFrom time to time schools may have questions about gardening. Know that there are community resources who can answer your questions:
Clare Wagner, Manager of Community Food Neighbour to Neighbour Centre Phone: 905-574-1334, ext. 205 Email: [email protected]
Table of Contents
1
Table of Contents
1
Table of Contents
1
Celebrate!
20
It is important that those who are involved in making the garden a success have an opportunity to celebrate. Have a potluck dinner and invite all the volunteers. Share the bounty from the garden with them and if the budget allows, give them a little gift for all their commitment.
Here are some gift ideas that shouldn’t be too costly:
Gardening gloves
A recipe from the potluck with all of the ingredients
A watering can
A small book on vegetable gardening
A basket with different seed packets for the next year’s garden
A garden trowel
The Garden JournalAll the wonderful work that goes on in the garden should be noted in a journal so that when the garden is reopened next year you have a sense of what went on.
Keep track of:
• What was grown?
• What grew well and what did not?
• Any issues with bugs, weeds, etc?
• Issues related to water
• What happened to the vegetables that were harvested?
• Any problems with keys, access to the tools?
• Was there a problem with volunteers over the summer? How did you manage it? What would you do differently next year?
• Did all the classes in the school use the garden? If not, how could you generate more interest in the garden?
All of this information and anything else worth noting will be valuable to you when the next garden season arrives.
Table of Contents
1
Table of Contents
1
Table of Contents
1
Come the Harvest
21
The Great Big Pull
Fall is the end of most garden growth in our climate, but there is still work to be done. It is time to put the garden to bed. Bring students out to do the final harvesting of the garden. If there are still vegetables that can be used, bring them into the school, wash them off and share them with students and staff.
Once all the food is removed, get rid of the remaining plant material. Pull all vegetable plant material and put it into the composter. Try to deal with weeds separately. Remove them and put them in a yard waste bag to be picked up by the City (do NOT put weeds into your green bin).
Turn the soil over and pile raked leaves on top. This will help to prevent soil erosion, and will act as good compost that can be dug back into the garden in the spring.
ToolsNext you must deal with the garden tools.
• Have students collect each type of tool in separate piles – shovels, hoes, rakes, trowels, gloves and wheelbarrows. Have them count how many you have of each and record the numbers in the garden journal.
• Examine each to see if there are repairs that must be done or whether some must be replaced.
• Wash them all off with the hose, and dry them. The best way to keep them over the winter is to spray the metal with a WD-40 spray to help prevent rust.
• Store them in a secure area for next year.
• Be sure that all hoses are emptied and stored away.
Have a wonderful fall and winter and we will see you in the garden in the spring!
11122
Appendices
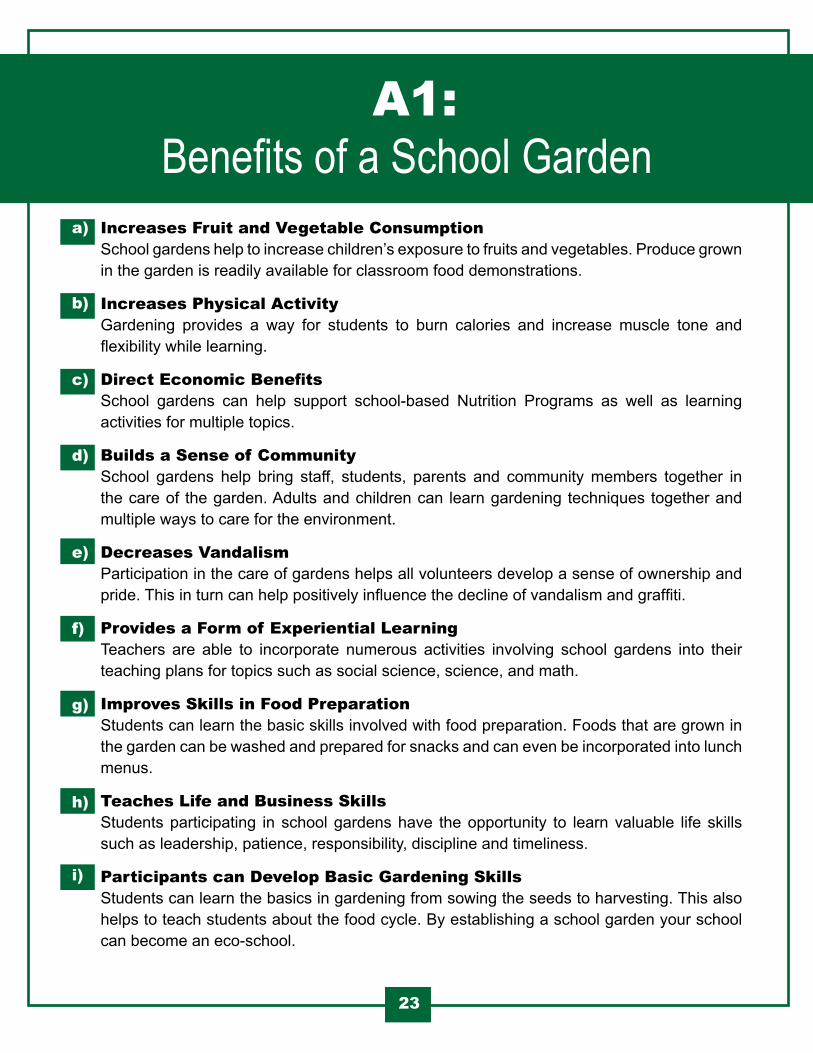
Table of ContentsTable of ContentsTable of Contents A1: Benefits of a School Garden
Increases Fruit and Vegetable ConsumptionSchool gardens help to increase children’s exposure to fruits and vegetables. Produce grown in the garden is readily available for classroom food demonstrations.
Increases Physical ActivityGardening provides a way for students to burn calories and increase muscle tone and flexibility while learning.
Direct Economic BenefitsSchool gardens can help support school-based Nutrition Programs as well as learning activities for multiple topics.
Builds a Sense of CommunitySchool gardens help bring staff, students, parents and community members together in the care of the garden. Adults and children can learn gardening techniques together and multiple ways to care for the environment.
Decreases VandalismParticipation in the care of gardens helps all volunteers develop a sense of ownership and pride. This in turn can help positively influence the decline of vandalism and graffiti.
Provides a Form of Experiential LearningTeachers are able to incorporate numerous activities involving school gardens into their teaching plans for topics such as social science, science, and math.
Improves Skills in Food PreparationStudents can learn the basic skills involved with food preparation. Foods that are grown in the garden can be washed and prepared for snacks and can even be incorporated into lunch menus.
Teaches Life and Business SkillsStudents participating in school gardens have the opportunity to learn valuable life skills such as leadership, patience, responsibility, discipline and timeliness.
Participants can Develop Basic Gardening SkillsStudents can learn the basics in gardening from sowing the seeds to harvesting. This also helps to teach students about the food cycle. By establishing a school garden your school can become an eco-school.
23
a)
b)
c)
d)
e)
f)
g)
h)
i)
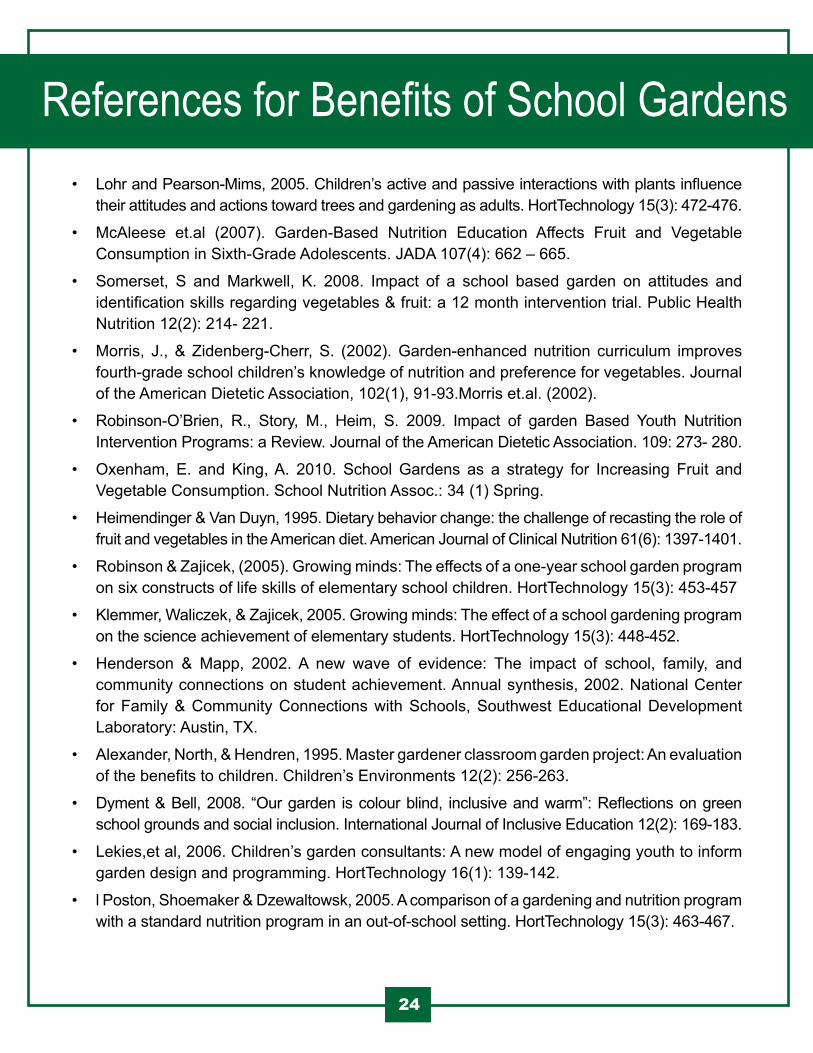
Table of Contents
1
Table of Contents
1
Table of Contents
1
References for Benefits of School Gardens
24
• Lohr and Pearson-Mims, 2005. Children’s active and passive interactions with plants influence their attitudes and actions toward trees and gardening as adults. HortTechnology 15(3): 472-476.
• McAleese et.al (2007). Garden-Based Nutrition Education Affects Fruit and Vegetable Consumption in Sixth-Grade Adolescents. JADA 107(4): 662 – 665.
• Somerset, S and Markwell, K. 2008. Impact of a school based garden on attitudes and identification skills regarding vegetables & fruit: a 12 month intervention trial. Public Health Nutrition 12(2): 214- 221.
• Morris, J., & Zidenberg-Cherr, S. (2002). Garden-enhanced nutrition curriculum improves fourth-grade school children’s knowledge of nutrition and preference for vegetables. Journal of the American Dietetic Association, 102(1), 91-93.Morris et.al. (2002).
• Robinson-O’Brien, R., Story, M., Heim, S. 2009. Impact of garden Based Youth Nutrition Intervention Programs: a Review. Journal of the American Dietetic Association. 109: 273- 280.
• Oxenham, E. and King, A. 2010. School Gardens as a strategy for Increasing Fruit and Vegetable Consumption. School Nutrition Assoc.: 34 (1) Spring.
• Heimendinger & Van Duyn, 1995. Dietary behavior change: the challenge of recasting the role of fruit and vegetables in the American diet. American Journal of Clinical Nutrition 61(6): 1397-1401.
• Robinson & Zajicek, (2005). Growing minds: The effects of a one-year school garden program on six constructs of life skills of elementary school children. HortTechnology 15(3): 453-457
• Klemmer, Waliczek, & Zajicek, 2005. Growing minds: The effect of a school gardening program on the science achievement of elementary students. HortTechnology 15(3): 448-452.
• Henderson & Mapp, 2002. A new wave of evidence: The impact of school, family, and community connections on student achievement. Annual synthesis, 2002. National Center for Family & Community Connections with Schools, Southwest Educational Development Laboratory: Austin, TX.
• Alexander, North, & Hendren, 1995. Master gardener classroom garden project: An evaluation of the benefits to children. Children’s Environments 12(2): 256-263.
• Dyment & Bell, 2008. “Our garden is colour blind, inclusive and warm”: Reflections on green school grounds and social inclusion. International Journal of Inclusive Education 12(2): 169-183.
• Lekies,et al, 2006. Children’s garden consultants: A new model of engaging youth to inform garden design and programming. HortTechnology 16(1): 139-142.
• l Poston, Shoemaker & Dzewaltowsk, 2005. A comparison of a gardening and nutrition program with a standard nutrition program in an out-of-school setting. HortTechnology 15(3): 463-467.
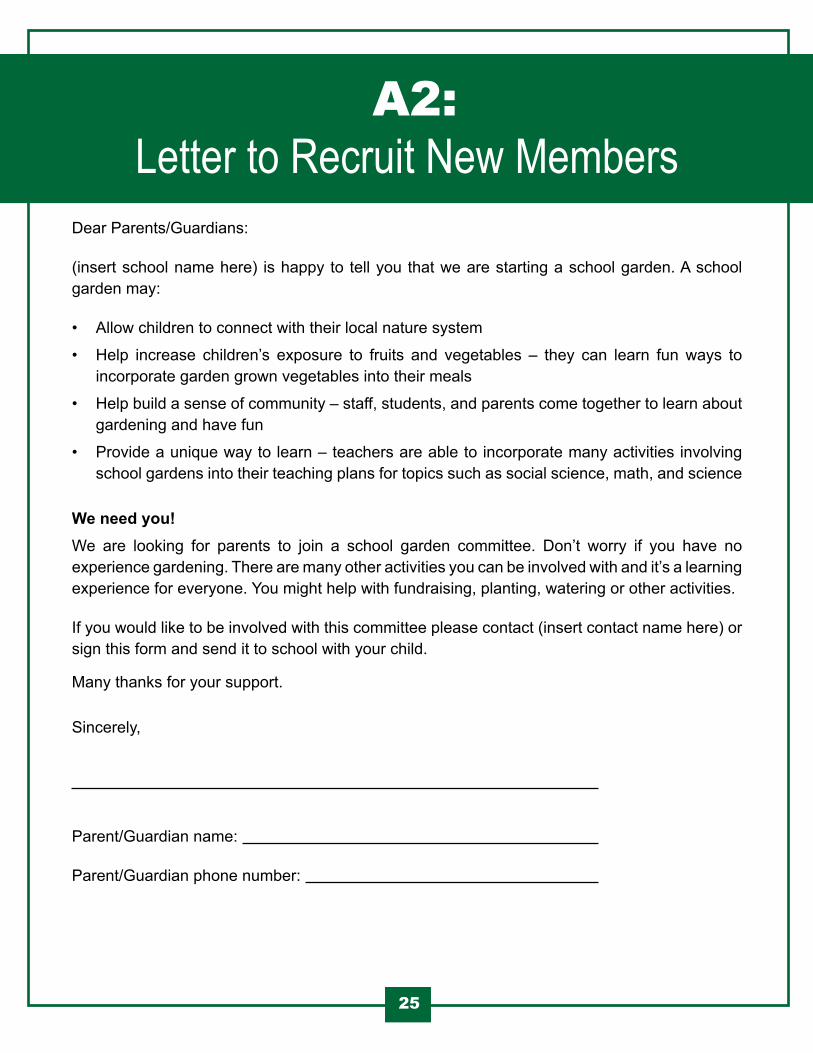
Table of ContentsTable of ContentsTable of Contents A2: Letter to Recruit New Members
Dear Parents/Guardians:
(insert school name here) is happy to tell you that we are starting a school garden. A school garden may:
• Allow children to connect with their local nature system
• Help increase children’s exposure to fruits and vegetables – they can learn fun ways to incorporate garden grown vegetables into their meals
• Help build a sense of community – staff, students, and parents come together to learn about gardening and have fun
• Provide a unique way to learn – teachers are able to incorporate many activities involving school gardens into their teaching plans for topics such as social science, math, and science
We need you!We are looking for parents to join a school garden committee. Don’t worry if you have no experience gardening. There are many other activities you can be involved with and it’s a learning experience for everyone. You might help with fundraising, planting, watering or other activities.
If you would like to be involved with this committee please contact (insert contact name here) or sign this form and send it to school with your child.
Many thanks for your support.
Sincerely,
Parent/Guardian name:
Parent/Guardian phone number:
25
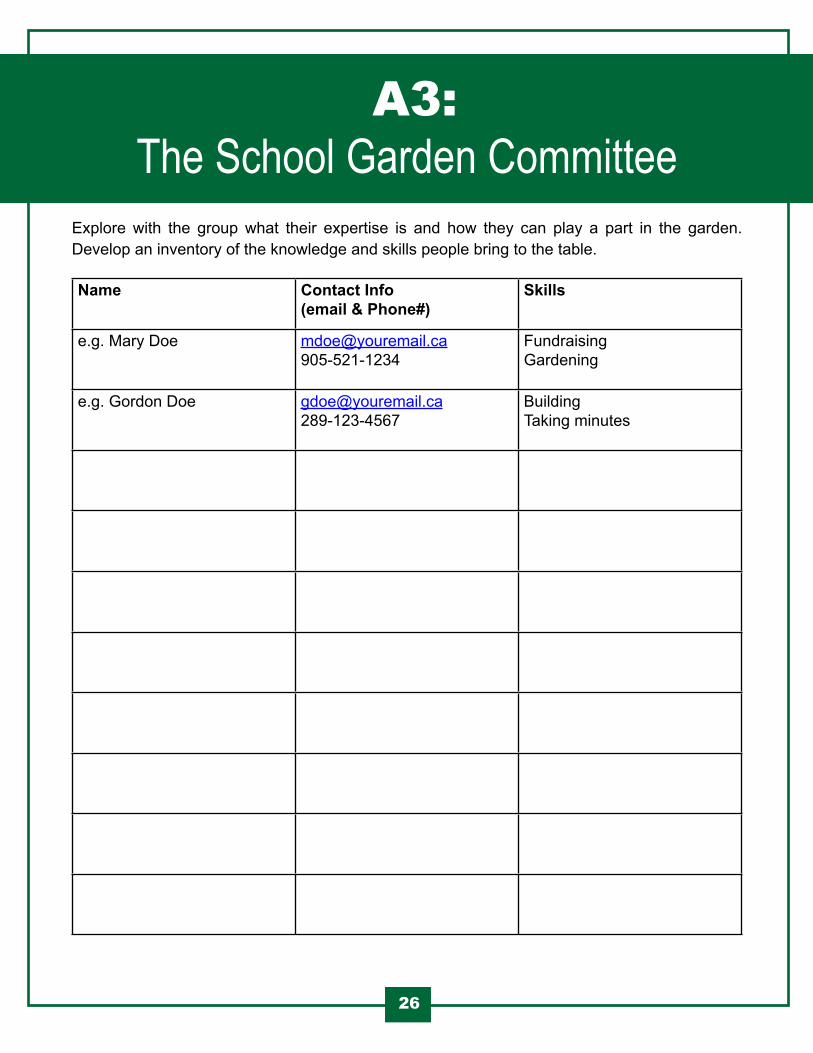
Table of ContentsTable of ContentsTable of Contents A3: The School Garden Committee
Explore with the group what their expertise is and how they can play a part in the garden. Develop an inventory of the knowledge and skills people bring to the table.
Name Contact Info (email & Phone#)
Skills
e.g. Mary Doe [email protected]
FundraisingGardening
e.g. Gordon Doe [email protected]
BuildingTaking minutes
26
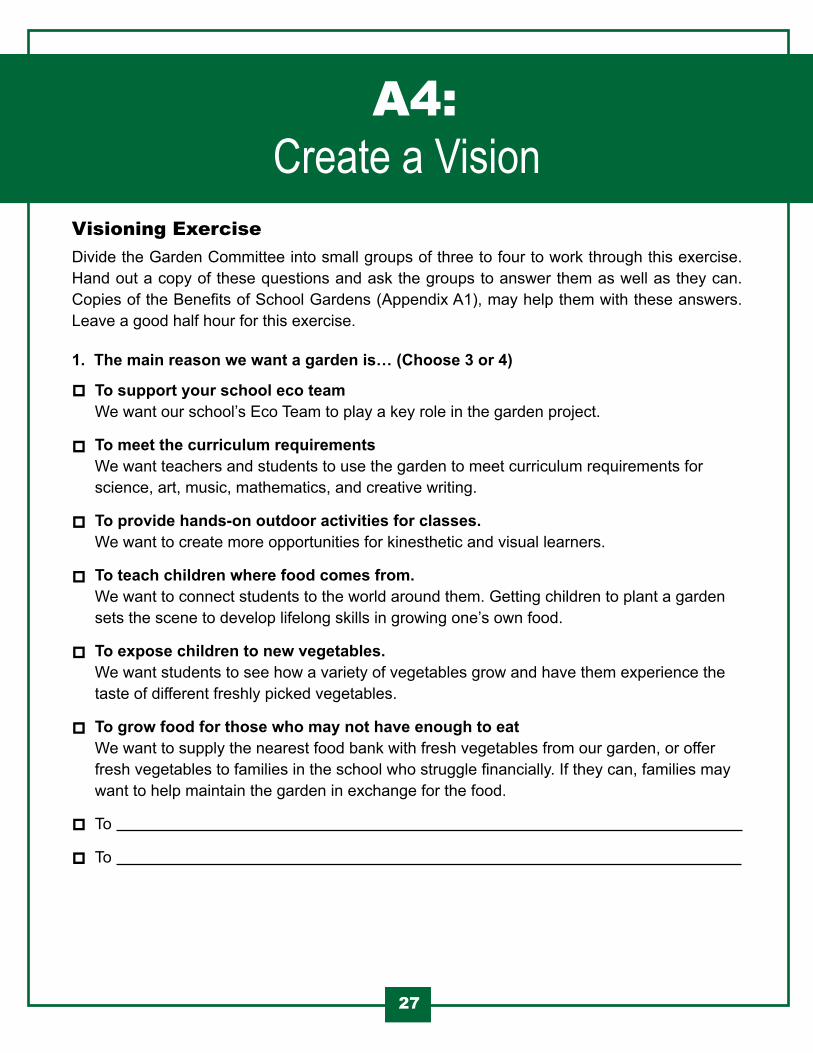
Table of ContentsTable of ContentsTable of Contents A4: Create a Vision
Visioning Exercise Divide the Garden Committee into small groups of three to four to work through this exercise. Hand out a copy of these questions and ask the groups to answer them as well as they can. Copies of the Benefits of School Gardens (Appendix A1), may help them with these answers. Leave a good half hour for this exercise.
1. The main reason we want a garden is… (Choose 3 or 4)
To support your school eco team We want our school’s Eco Team to play a key role in the garden project.
To meet the curriculum requirements We want teachers and students to use the garden to meet curriculum requirements for science, art, music, mathematics, and creative writing.
To provide hands-on outdoor activities for classes. We want to create more opportunities for kinesthetic and visual learners.
To teach children where food comes from. We want to connect students to the world around them. Getting children to plant a garden sets the scene to develop lifelong skills in growing one’s own food.
To expose children to new vegetables. We want students to see how a variety of vegetables grow and have them experience the taste of different freshly picked vegetables.
To grow food for those who may not have enough to eat We want to supply the nearest food bank with fresh vegetables from our garden, or offer fresh vegetables to families in the school who struggle financially. If they can, families may want to help maintain the garden in exchange for the food.
To
To
27
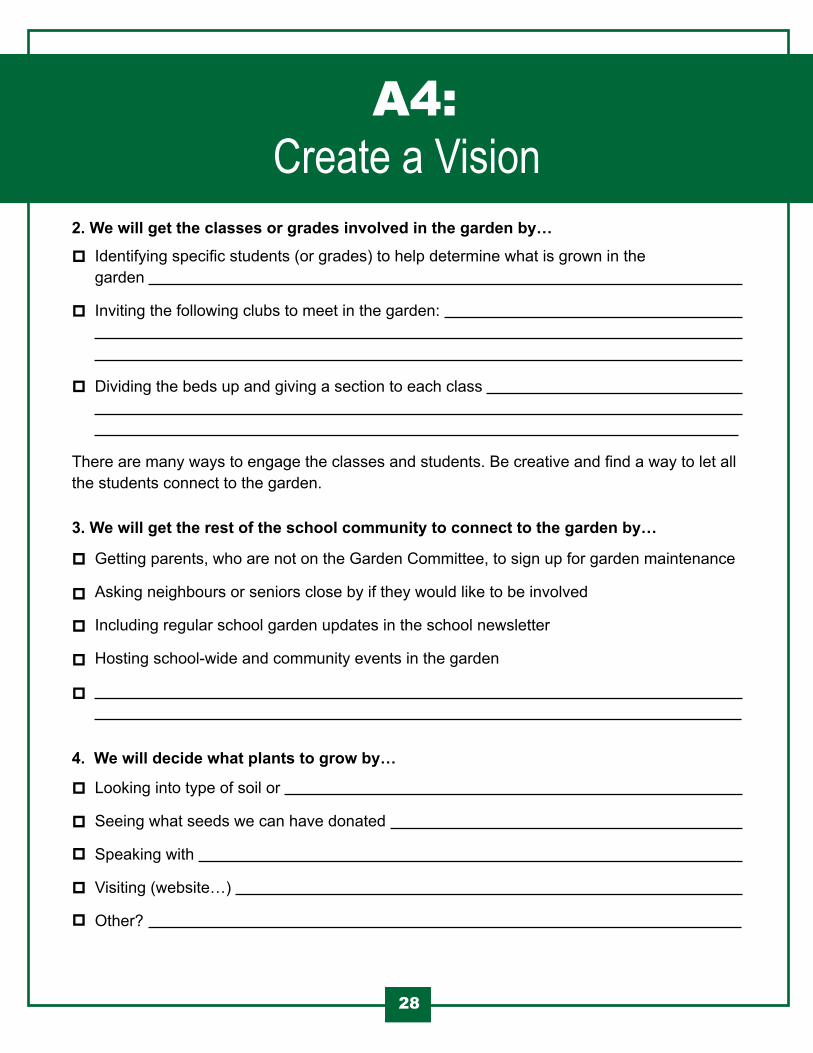
Table of ContentsTable of ContentsTable of Contents A4: Create a Vision
2. We will get the classes or grades involved in the garden by…
3. We will get the rest of the school community to connect to the garden by…
There are many ways to engage the classes and students. Be creative and find a way to let all the students connect to the garden.
4. We will decide what plants to grow by…
Identifying specific students (or grades) to help determine what is grown in the garden
Inviting the following clubs to meet in the garden:
Dividing the beds up and giving a section to each class
Getting parents, who are not on the Garden Committee, to sign up for garden maintenance
Asking neighbours or seniors close by if they would like to be involved
Including regular school garden updates in the school newsletter
Hosting school-wide and community events in the garden
Looking into type of soil or
Seeing what seeds we can have donated
Speaking with
Visiting (website…)
Other?
28
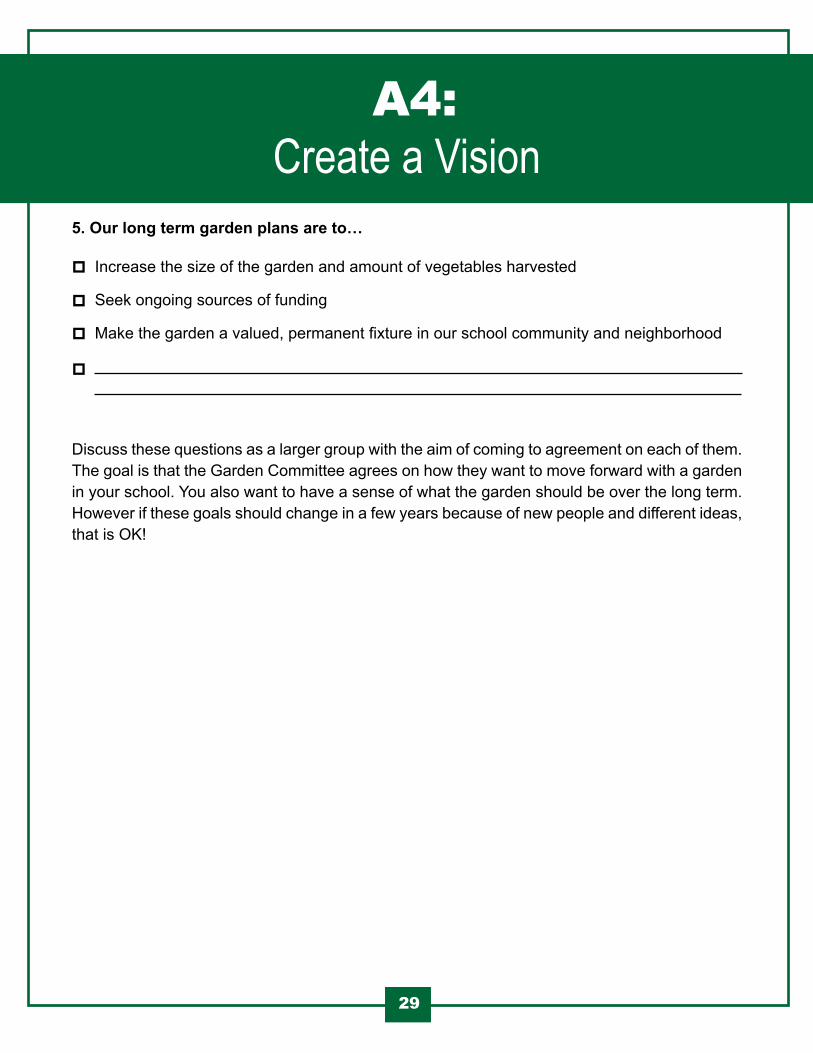
Table of ContentsTable of ContentsTable of Contents A4: Create a Vision
5. Our long term garden plans are to…
Increase the size of the garden and amount of vegetables harvested
Seek ongoing sources of funding
Make the garden a valued, permanent fixture in our school community and neighborhood
29
Discuss these questions as a larger group with the aim of coming to agreement on each of them. The goal is that the Garden Committee agrees on how they want to move forward with a garden in your school. You also want to have a sense of what the garden should be over the long term. However if these goals should change in a few years because of new people and different ideas, that is OK!
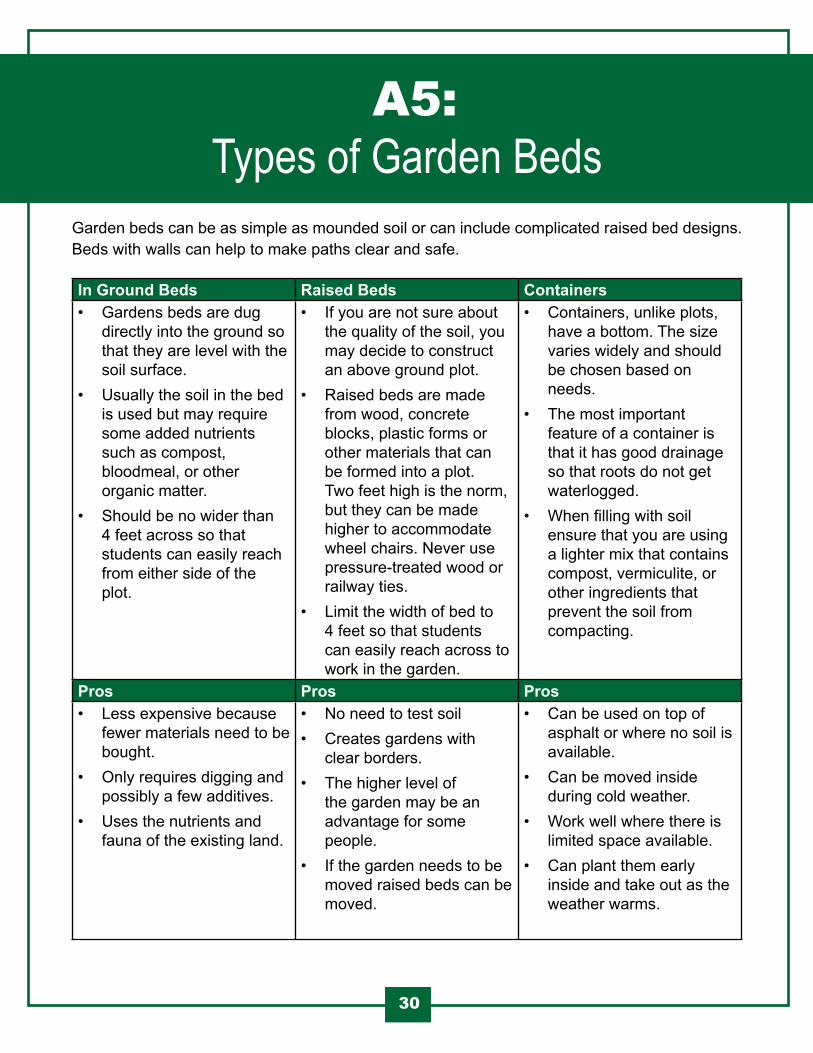
Table of ContentsTable of ContentsTable of Contents A5: Types of Garden Beds
Garden beds can be as simple as mounded soil or can include complicated raised bed designs. Beds with walls can help to make paths clear and safe.
In Ground Beds Raised Beds Containers• Gardens beds are dug
directly into the ground so that they are level with the soil surface.
• Usually the soil in the bed is used but may require some added nutrients such as compost, bloodmeal, or other organic matter.
• Should be no wider than 4 feet across so that students can easily reach from either side of the plot.
• If you are not sure about the quality of the soil, you may decide to construct an above ground plot.
• Raised beds are made from wood, concrete blocks, plastic forms or other materials that can be formed into a plot. Two feet high is the norm, but they can be made higher to accommodate wheel chairs. Never use pressure-treated wood or railway ties.
• Limit the width of bed to 4 feet so that students can easily reach across to work in the garden.
• Containers, unlike plots, have a bottom. The size varies widely and should be chosen based on needs.
• The most important feature of a container is that it has good drainage so that roots do not get waterlogged.
• When filling with soil ensure that you are using a lighter mix that contains compost, vermiculite, or other ingredients that prevent the soil from compacting.
Pros Pros Pros• Less expensive because
fewer materials need to be bought.
• Only requires digging and possibly a few additives.
• Uses the nutrients and fauna of the existing land.
• No need to test soil• Creates gardens with
clear borders.• The higher level of
the garden may be an advantage for some people.
• If the garden needs to be moved raised beds can be moved.
• Can be used on top of asphalt or where no soil is available.
• Can be moved inside during cold weather.
• Work well where there is limited space available.
• Can plant them early inside and take out as the weather warms.
30
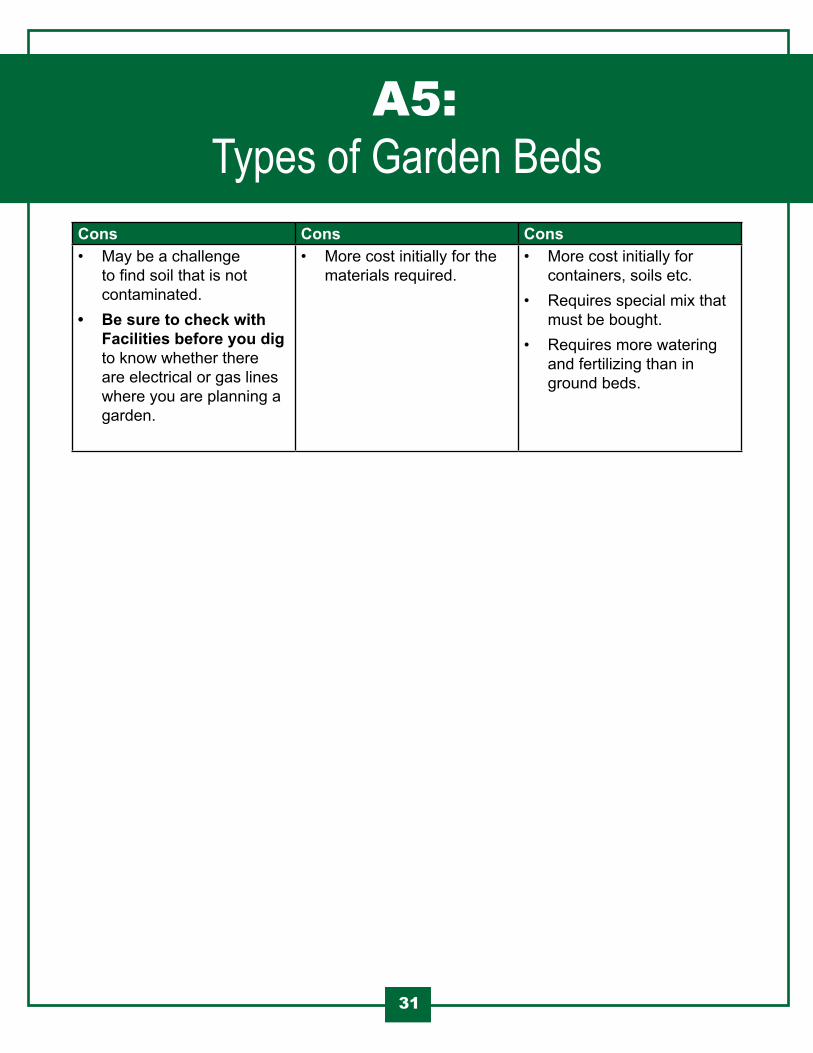
Table of ContentsTable of ContentsTable of Contents A5: Types of Garden Beds
Cons Cons Cons• May be a challenge
to find soil that is not contaminated.
• Be sure to check with Facilities before you dig to know whether there are electrical or gas lines where you are planning a garden.
• More cost initially for the materials required.
• More cost initially for containers, soils etc.
• Requires special mix that must be bought.
• Requires more watering and fertilizing than in ground beds.
31
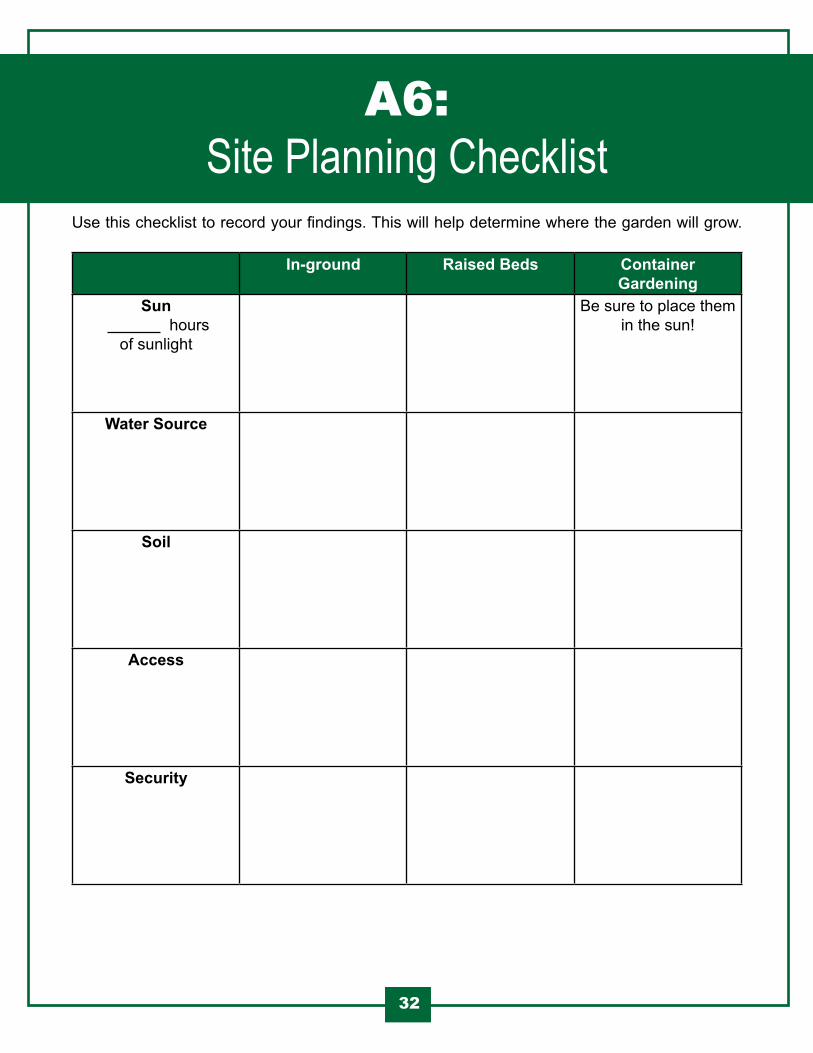
Table of ContentsTable of ContentsTable of ContentsA6: Site Planning Checklist
32
Use this checklist to record your findings. This will help determine where the garden will grow.
In-ground Raised Beds Container Gardening
Sun hours
of sunlight
Be sure to place them in the sun!
Water Source
Soil
Access
Security
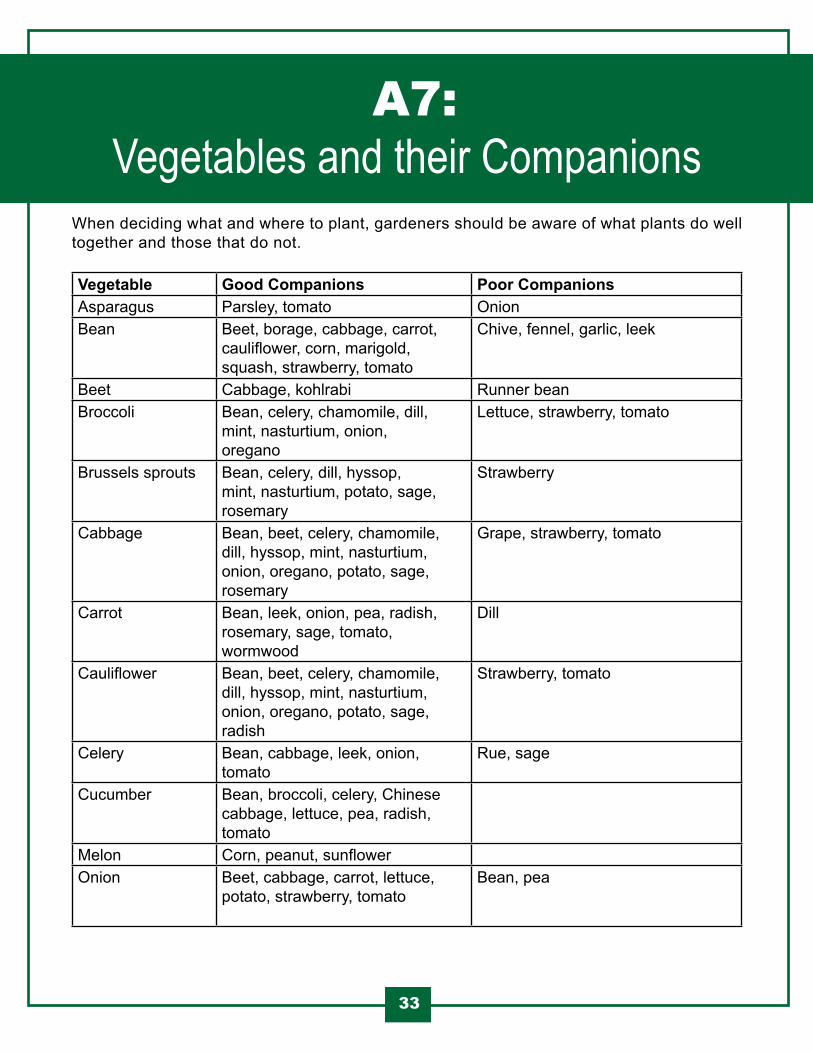
Table of ContentsTable of ContentsTable of Contents A7: Vegetables and their Companions
33
When deciding what and where to plant, gardeners should be aware of what plants do well together and those that do not.
Vegetable Good Companions Poor CompanionsAsparagus Parsley, tomato OnionBean Beet, borage, cabbage, carrot,
cauliflower, corn, marigold,squash, strawberry, tomato
Chive, fennel, garlic, leek
Beet Cabbage, kohlrabi Runner beanBroccoli Bean, celery, chamomile, dill,
mint, nasturtium, onion,oregano
Lettuce, strawberry, tomato
Brussels sprouts Bean, celery, dill, hyssop,mint, nasturtium, potato, sage,rosemary
Strawberry
Cabbage Bean, beet, celery, chamomile,dill, hyssop, mint, nasturtium,onion, oregano, potato, sage,rosemary
Grape, strawberry, tomato
Carrot Bean, leek, onion, pea, radish,rosemary, sage, tomato,wormwood
Dill
Cauliflower Bean, beet, celery, chamomile,dill, hyssop, mint, nasturtium,onion, oregano, potato, sage,radish
Strawberry, tomato
Celery Bean, cabbage, leek, onion,tomato
Rue, sage
Cucumber Bean, broccoli, celery, Chinesecabbage, lettuce, pea, radish,tomato
Melon Corn, peanut, sunflowerOnion Beet, cabbage, carrot, lettuce,
potato, strawberry, tomatoBean, pea
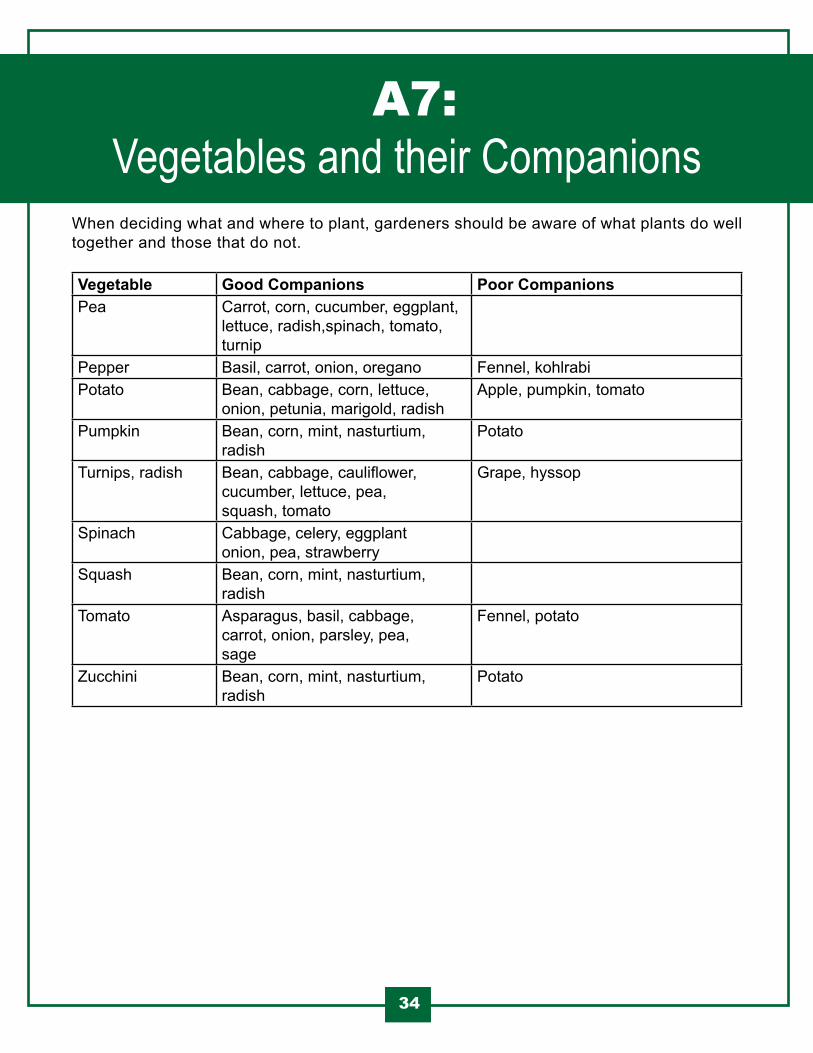
Table of ContentsTable of ContentsTable of Contents A7: Vegetables and their Companions
34
When deciding what and where to plant, gardeners should be aware of what plants do well together and those that do not.
Vegetable Good Companions Poor CompanionsPea Carrot, corn, cucumber, eggplant,
lettuce, radish,spinach, tomato, turnip
Pepper Basil, carrot, onion, oregano Fennel, kohlrabiPotato Bean, cabbage, corn, lettuce,
onion, petunia, marigold, radishApple, pumpkin, tomato
Pumpkin Bean, corn, mint, nasturtium,radish
Potato
Turnips, radish Bean, cabbage, cauliflower,cucumber, lettuce, pea,squash, tomato
Grape, hyssop
Spinach Cabbage, celery, eggplantonion, pea, strawberry
Squash Bean, corn, mint, nasturtium,radish
Tomato Asparagus, basil, cabbage,carrot, onion, parsley, pea,sage
Fennel, potato
Zucchini Bean, corn, mint, nasturtium,radish
Potato

Table of ContentsTable of ContentsTable of Contents A8: Garden Resources Checklist
35
Make sure you have these materials as you get ready for ‘dig day’.
Shovels
Trowels
Rake
Gardening gloves
Watering hose and/or cans
Wheelbarrow
Garden shed or storage in a nearby building
Seedlings and seeds in a container to keep them dry
Stakes and/or bamboo
Baskets or containers for harvesting
String
Labels for plants and rows
A prepared garden site
Good soil for adding to the planting (well-composted manure is usually needed, or a good quality “triple-mix” – topsoil, peat and composted manure)
Composter
Garden fork
Organic fertilizer
People
Healthy snacks
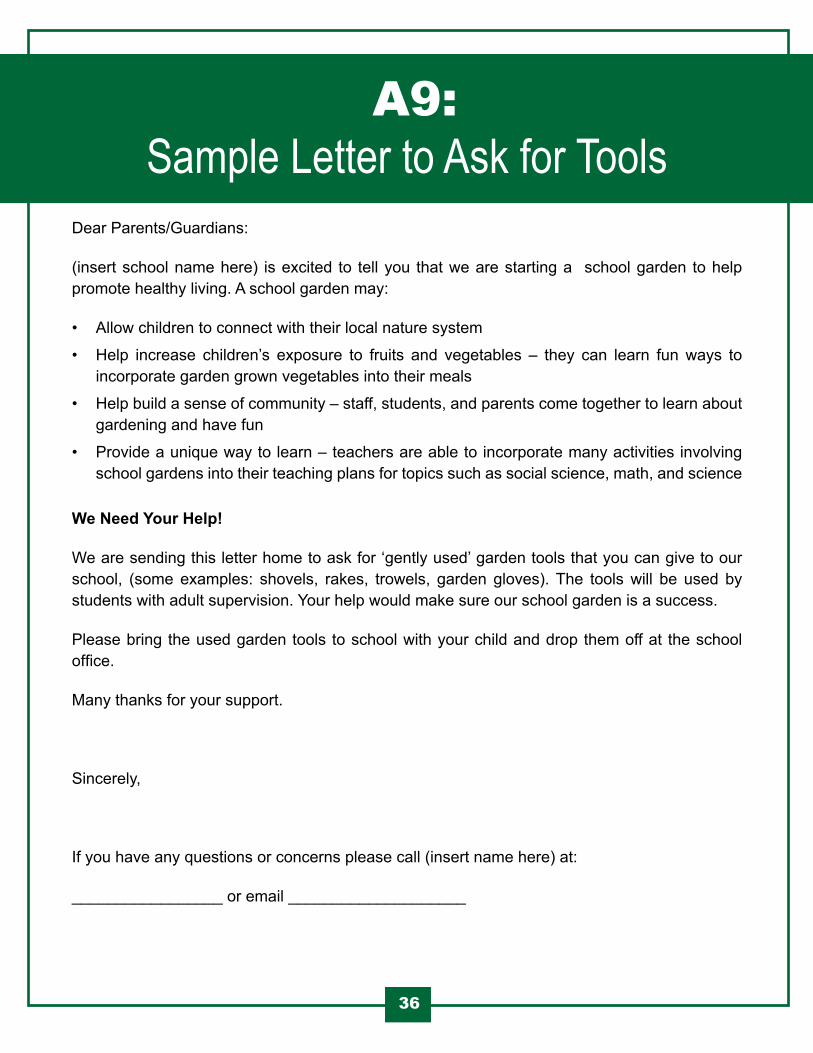
Dear Parents/Guardians:
(insert school name here) is excited to tell you that we are starting a school garden to help promote healthy living. A school garden may:
• Allow children to connect with their local nature system
• Help increase children’s exposure to fruits and vegetables – they can learn fun ways to incorporate garden grown vegetables into their meals
• Help build a sense of community – staff, students, and parents come together to learn about gardening and have fun
• Provide a unique way to learn – teachers are able to incorporate many activities involving school gardens into their teaching plans for topics such as social science, math, and science
We Need Your Help!
We are sending this letter home to ask for ‘gently used’ garden tools that you can give to our school, (some examples: shovels, rakes, trowels, garden gloves). The tools will be used by students with adult supervision. Your help would make sure our school garden is a success.
Please bring the used garden tools to school with your child and drop them off at the school office.
Many thanks for your support.
Sincerely,
If you have any questions or concerns please call (insert name here) at:
_________________ or email ____________________
Table of ContentsTable of ContentsTable of Contents A9: Sample Letter to Ask for Tools
36
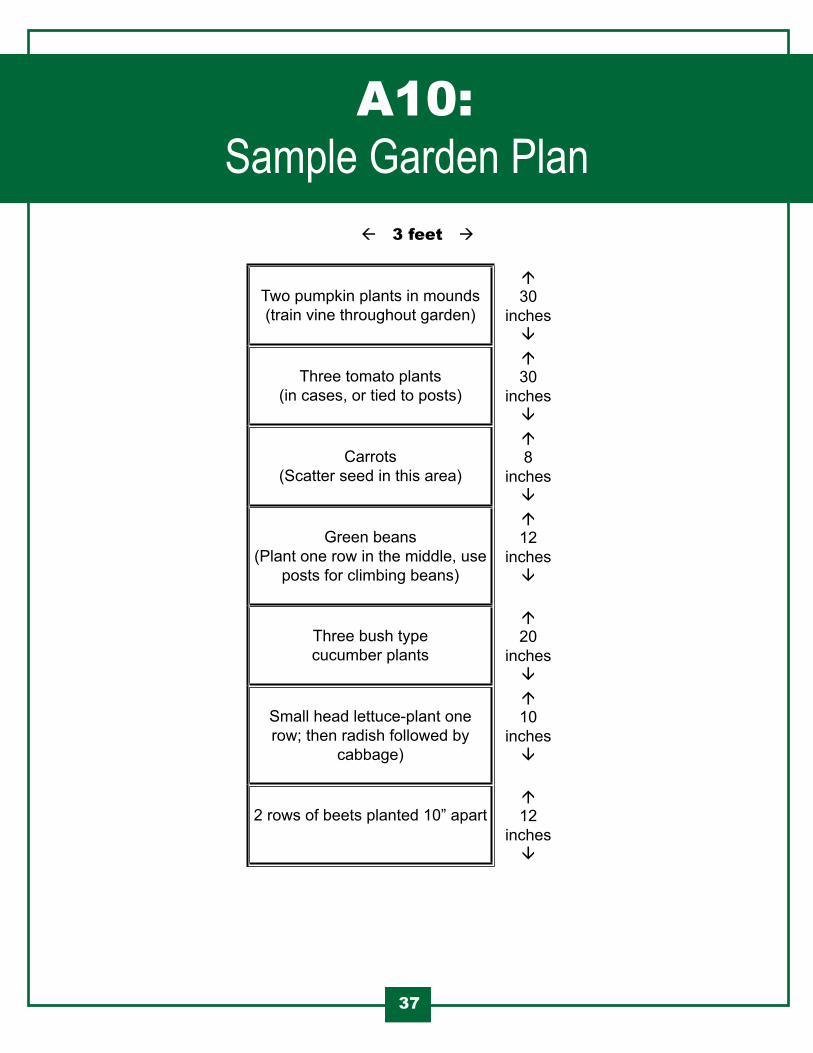
3 feet
Two pumpkin plants in mounds (train vine throughout garden)
30
inches
Three tomato plants(in cases, or tied to posts)
30
inches
Carrots(Scatter seed in this area)
8
inches
Green beans(Plant one row in the middle, use
posts for climbing beans)
12
inches
Three bush type cucumber plants
20
inches
Small head lettuce-plant one row; then radish followed by
cabbage)
10
inches
2 rows of beets planted 10” apart12
inches
Table of ContentsTable of ContentsTable of Contents A10: Sample Garden Plan
37
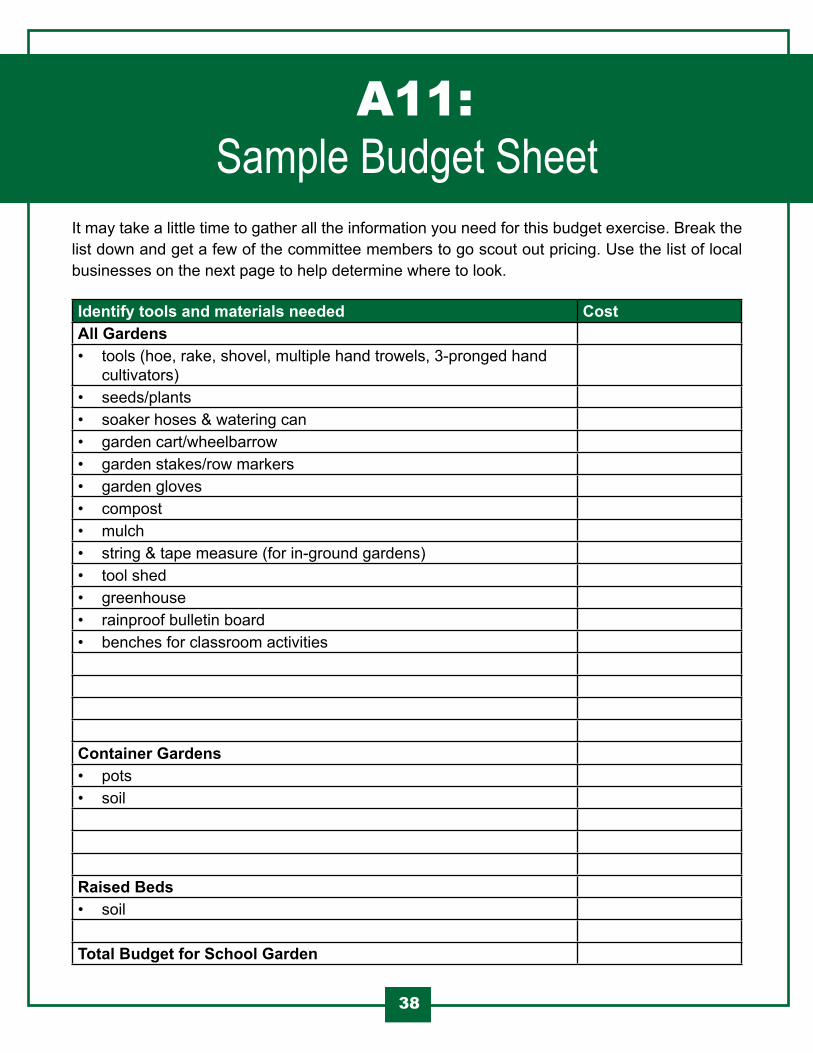
Table of ContentsTable of ContentsTable of Contents A11: Sample Budget Sheet
38
It may take a little time to gather all the information you need for this budget exercise. Break the list down and get a few of the committee members to go scout out pricing. Use the list of local businesses on the next page to help determine where to look.
Identify tools and materials needed CostAll Gardens• tools (hoe, rake, shovel, multiple hand trowels, 3-pronged hand
cultivators)• seeds/plants• soaker hoses & watering can• garden cart/wheelbarrow• garden stakes/row markers• garden gloves• compost• mulch• string & tape measure (for in-ground gardens)• tool shed• greenhouse• rainproof bulletin board• benches for classroom activities
Container Gardens• pots• soil
Raised Beds• soil
Total Budget for School Garden

Table of ContentsTable of ContentsTable of Contents A12: List of Potential Grants
39
Grants are a possible way to raise funds for your garden. Many grants are only applicable to non-profits or registered charities and have specific guidelines for what projects or groups they will fund. Consider working with a non-profit or charity group when applying for grants. Contact the Hamilton Community Garden Network (HCGN)* for a list of upcoming grant opportunities. * http://hcgn.ca/
Tips on applying for grants and writing a proposal:Research Research the grant fully
Know the priorities of the organization, deadlines and if a letter of intent is required
Follow the Guidelines
Answer questions in the order they are asked and address all points of each question
Do not exceed page or word count limits
Submit your application on time
Be Ready
Have someone read it over before sending
Customize your proposal to each grant
Be sure your proposal is concise, to the point, and easy to read
The following list of grants is not a complete list, but just a few of the opportunities available for schools looking for funds to start a garden. Go to the websites for details.
• Metro Green Apple School Program http://www.croquesante.metro.ca/home.en.html
• Scott’s Canada http://www.grogood.com/GiveBackToGro/GRO1000/Canada

Table of ContentsTable of ContentsTable of Contents A12: List of Potential Grants
40
• Toyota Evergreen Learning Grounds School Ground Greening Grants www.evergreen.ca/en/get-involved/funding-opportunities/school-ground-grants/
• Whole Kids Foundation School Garden Grant Program https://www.wholekidsfoundation.org
• WWF Green Community School Grants Program http://www.wwf.ca/?8941/WWFs-Green-CommUnity-School-Grants-Program
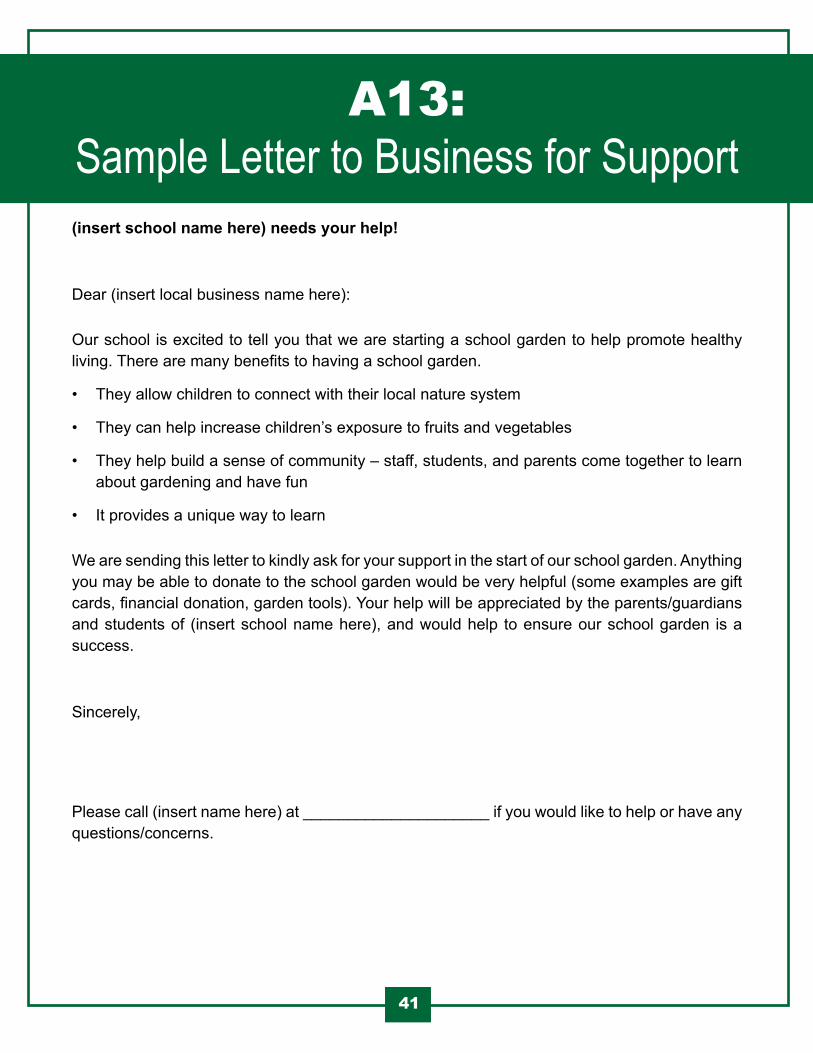
Table of ContentsTable of ContentsTable of ContentsA13: Sample Letter to Business for Support
41
(insert school name here) needs your help!
Dear (insert local business name here):
Our school is excited to tell you that we are starting a school garden to help promote healthy living. There are many benefits to having a school garden.
• They allow children to connect with their local nature system
• They can help increase children’s exposure to fruits and vegetables
• They help build a sense of community – staff, students, and parents come together to learn about gardening and have fun
• It provides a unique way to learn
We are sending this letter to kindly ask for your support in the start of our school garden. Anything you may be able to donate to the school garden would be very helpful (some examples are gift cards, financial donation, garden tools). Your help will be appreciated by the parents/guardians and students of (insert school name here), and would help to ensure our school garden is a success.
Sincerely,
Please call (insert name here) at _____________________ if you would like to help or have any questions/concerns.
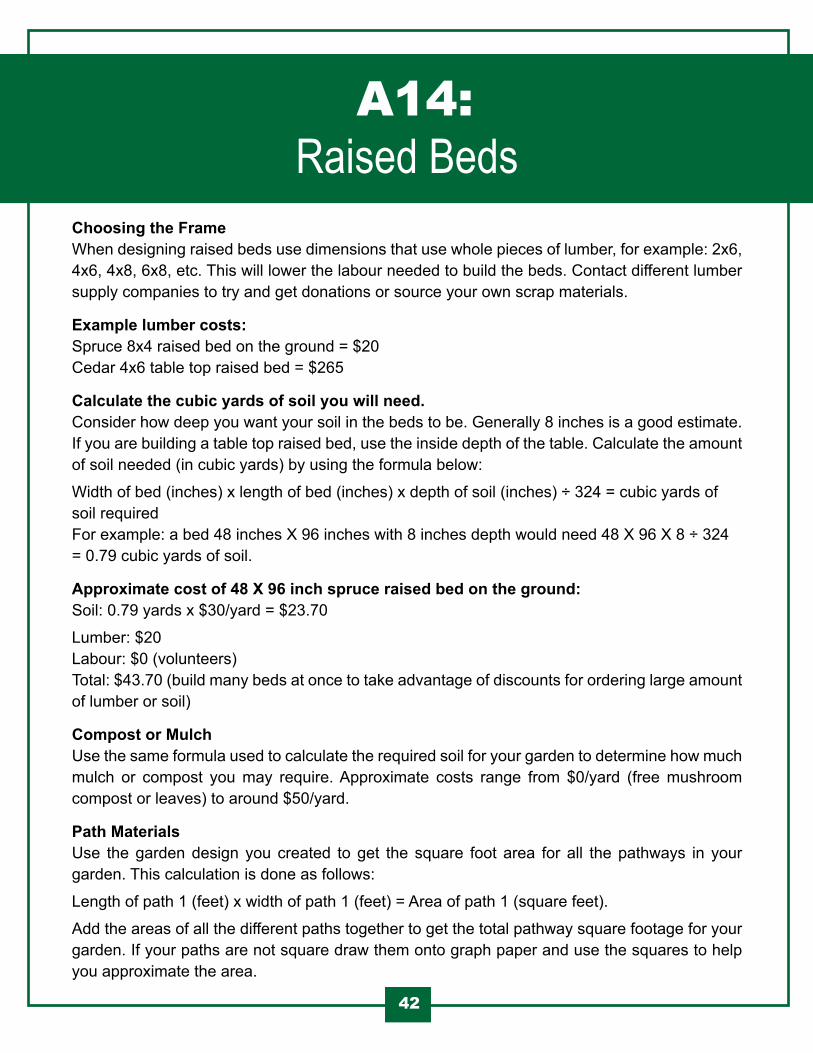
Table of ContentsTable of ContentsTable of Contents A14: Raised Beds
42
Choosing the FrameWhen designing raised beds use dimensions that use whole pieces of lumber, for example: 2x6, 4x6, 4x8, 6x8, etc. This will lower the labour needed to build the beds. Contact different lumber supply companies to try and get donations or source your own scrap materials.
Example lumber costs:Spruce 8x4 raised bed on the ground = $20Cedar 4x6 table top raised bed = $265
Calculate the cubic yards of soil you will need.Consider how deep you want your soil in the beds to be. Generally 8 inches is a good estimate. If you are building a table top raised bed, use the inside depth of the table. Calculate the amount of soil needed (in cubic yards) by using the formula below:
Width of bed (inches) x length of bed (inches) x depth of soil (inches) ÷ 324 = cubic yards of soil requiredFor example: a bed 48 inches X 96 inches with 8 inches depth would need 48 X 96 X 8 ÷ 324 = 0.79 cubic yards of soil.
Approximate cost of 48 X 96 inch spruce raised bed on the ground:Soil: 0.79 yards x $30/yard = $23.70
Lumber: $20Labour: $0 (volunteers)Total: $43.70 (build many beds at once to take advantage of discounts for ordering large amount of lumber or soil)
Compost or MulchUse the same formula used to calculate the required soil for your garden to determine how much mulch or compost you may require. Approximate costs range from $0/yard (free mushroom compost or leaves) to around $50/yard.
Path MaterialsUse the garden design you created to get the square foot area for all the pathways in your garden. This calculation is done as follows:
Length of path 1 (feet) x width of path 1 (feet) = Area of path 1 (square feet).
Add the areas of all the different paths together to get the total pathway square footage for your garden. If your paths are not square draw them onto graph paper and use the squares to help you approximate the area.
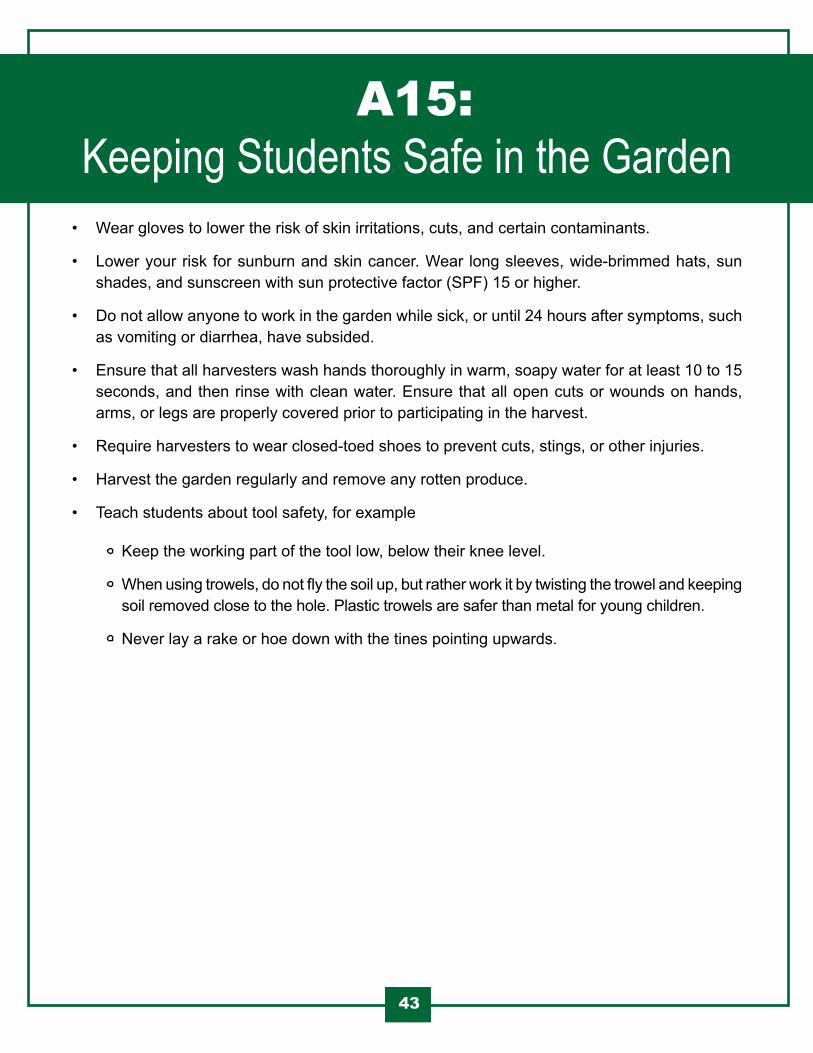
Table of ContentsTable of ContentsTable of Contents A15: Keeping Students Safe in the Garden
43
• Wear gloves to lower the risk of skin irritations, cuts, and certain contaminants.
• Lower your risk for sunburn and skin cancer. Wear long sleeves, wide-brimmed hats, sun shades, and sunscreen with sun protective factor (SPF) 15 or higher.
• Do not allow anyone to work in the garden while sick, or until 24 hours after symptoms, such as vomiting or diarrhea, have subsided.
• Ensure that all harvesters wash hands thoroughly in warm, soapy water for at least 10 to 15 seconds, and then rinse with clean water. Ensure that all open cuts or wounds on hands, arms, or legs are properly covered prior to participating in the harvest.
• Require harvesters to wear closed-toed shoes to prevent cuts, stings, or other injuries.
• Harvest the garden regularly and remove any rotten produce.
• Teach students about tool safety, for example
Keep the working part of the tool low, below their knee level.
When using trowels, do not fly the soil up, but rather work it by twisting the trowel and keeping soil removed close to the hole. Plastic trowels are safer than metal for young children.
Never lay a rake or hoe down with the tines pointing upwards.
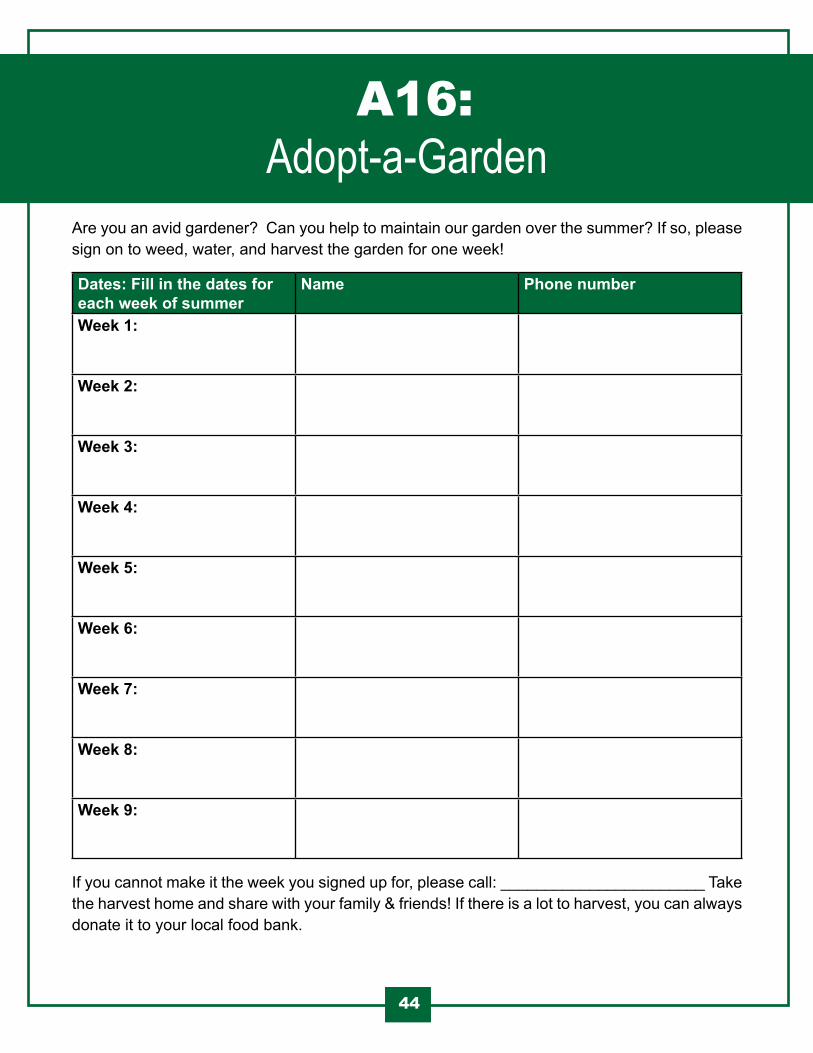
Table of ContentsTable of ContentsTable of Contents A16: Adopt-a-Garden
44
Are you an avid gardener? Can you help to maintain our garden over the summer? If so, please sign on to weed, water, and harvest the garden for one week!
Dates: Fill in the dates for each week of summer
Name Phone number
Week 1:
Week 2:
Week 3:
Week 4:
Week 5:
Week 6:
Week 7:
Week 8:
Week 9:
If you cannot make it the week you signed up for, please call: _______________________ Take the harvest home and share with your family & friends! If there is a lot to harvest, you can always donate it to your local food bank.
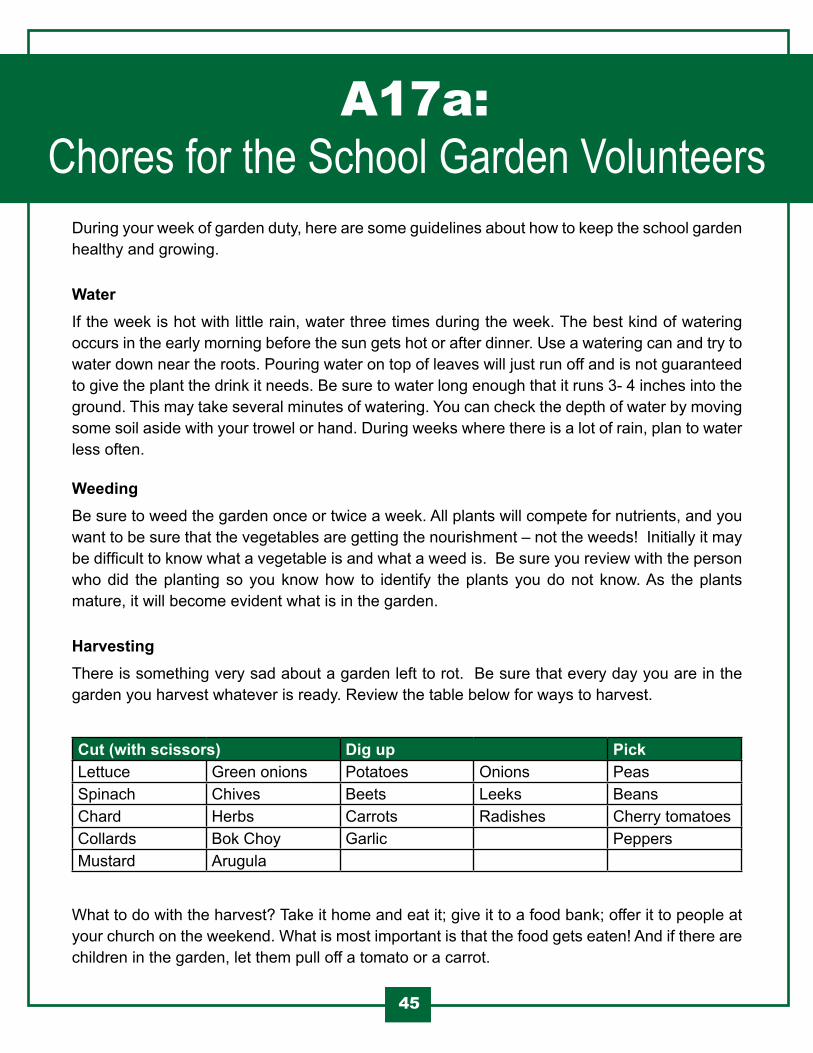
Table of ContentsTable of ContentsTable of Contents A17a: Chores for the School Garden Volunteers
45
During your week of garden duty, here are some guidelines about how to keep the school garden healthy and growing.
WaterIf the week is hot with little rain, water three times during the week. The best kind of watering occurs in the early morning before the sun gets hot or after dinner. Use a watering can and try to water down near the roots. Pouring water on top of leaves will just run off and is not guaranteed to give the plant the drink it needs. Be sure to water long enough that it runs 3- 4 inches into the ground. This may take several minutes of watering. You can check the depth of water by moving some soil aside with your trowel or hand. During weeks where there is a lot of rain, plan to water less often.
WeedingBe sure to weed the garden once or twice a week. All plants will compete for nutrients, and you want to be sure that the vegetables are getting the nourishment – not the weeds! Initially it may be difficult to know what a vegetable is and what a weed is. Be sure you review with the person who did the planting so you know how to identify the plants you do not know. As the plants mature, it will become evident what is in the garden.
HarvestingThere is something very sad about a garden left to rot. Be sure that every day you are in the garden you harvest whatever is ready. Review the table below for ways to harvest.
Cut (with scissors) Dig up PickLettuce Green onions Potatoes Onions PeasSpinach Chives Beets Leeks BeansChard Herbs Carrots Radishes Cherry tomatoesCollards Bok Choy Garlic PeppersMustard Arugula
What to do with the harvest? Take it home and eat it; give it to a food bank; offer it to people at your church on the weekend. What is most important is that the food gets eaten! And if there are children in the garden, let them pull off a tomato or a carrot.
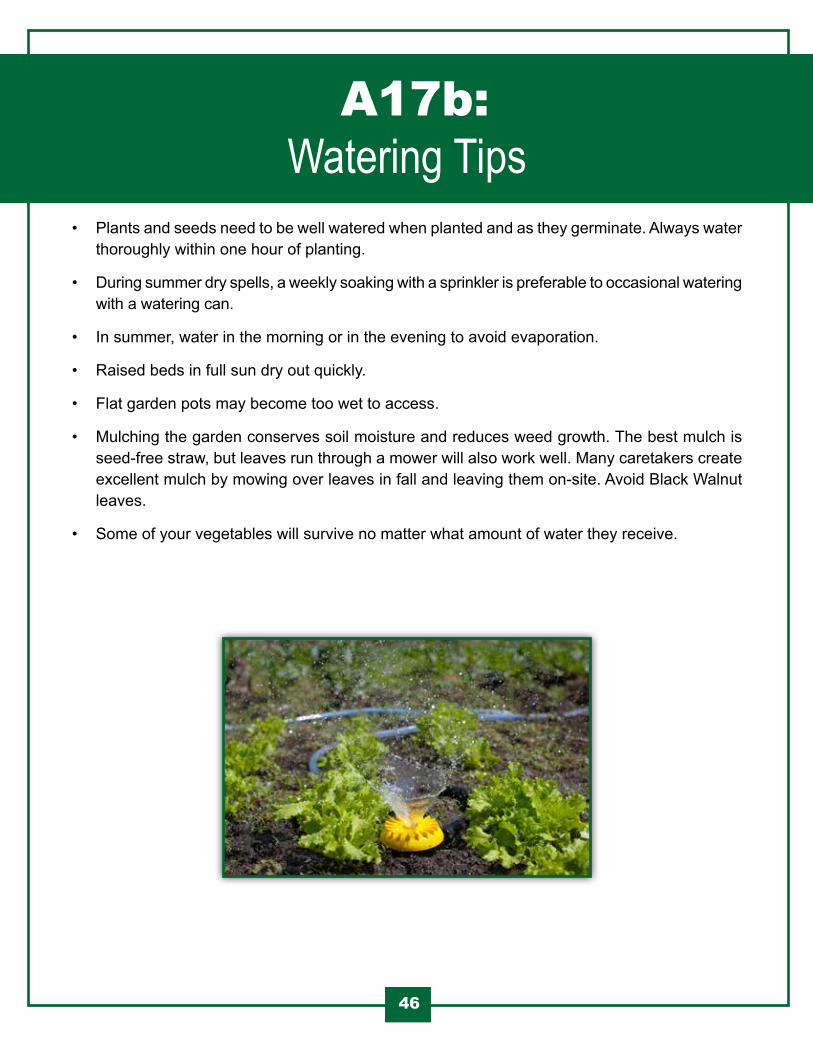
Table of ContentsTable of ContentsTable of Contents A17b: Watering Tips
46
• Plants and seeds need to be well watered when planted and as they germinate. Always water thoroughly within one hour of planting.
• During summer dry spells, a weekly soaking with a sprinkler is preferable to occasional watering with a watering can.
• In summer, water in the morning or in the evening to avoid evaporation.
• Raised beds in full sun dry out quickly.
• Flat garden pots may become too wet to access.
• Mulching the garden conserves soil moisture and reduces weed growth. The best mulch is seed-free straw, but leaves run through a mower will also work well. Many caretakers create excellent mulch by mowing over leaves in fall and leaving them on-site. Avoid Black Walnut leaves.
• Some of your vegetables will survive no matter what amount of water they receive.
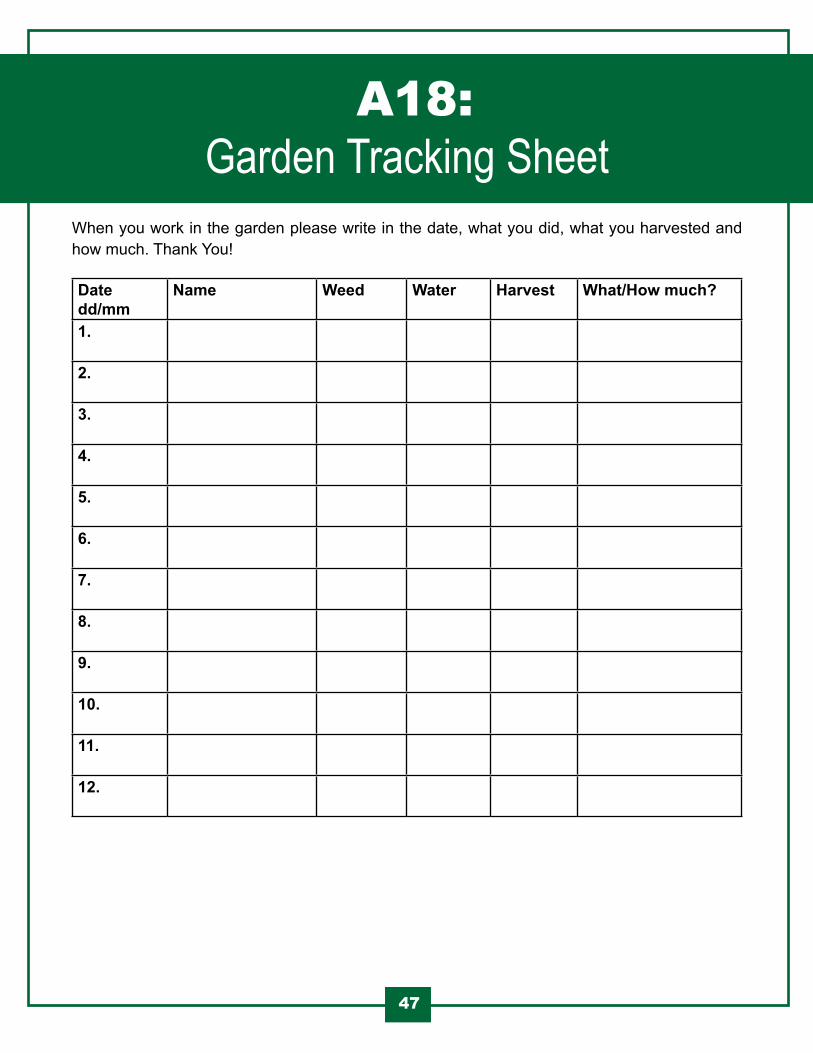
Table of ContentsTable of ContentsTable of Contents A18: Garden Tracking Sheet
47
When you work in the garden please write in the date, what you did, what you harvested and how much. Thank You!
Datedd/mm
Name Weed Water Harvest What/How much?
1.
2.
3.
4.
5.
6.
7.
8.
9.
10.
11.
12.
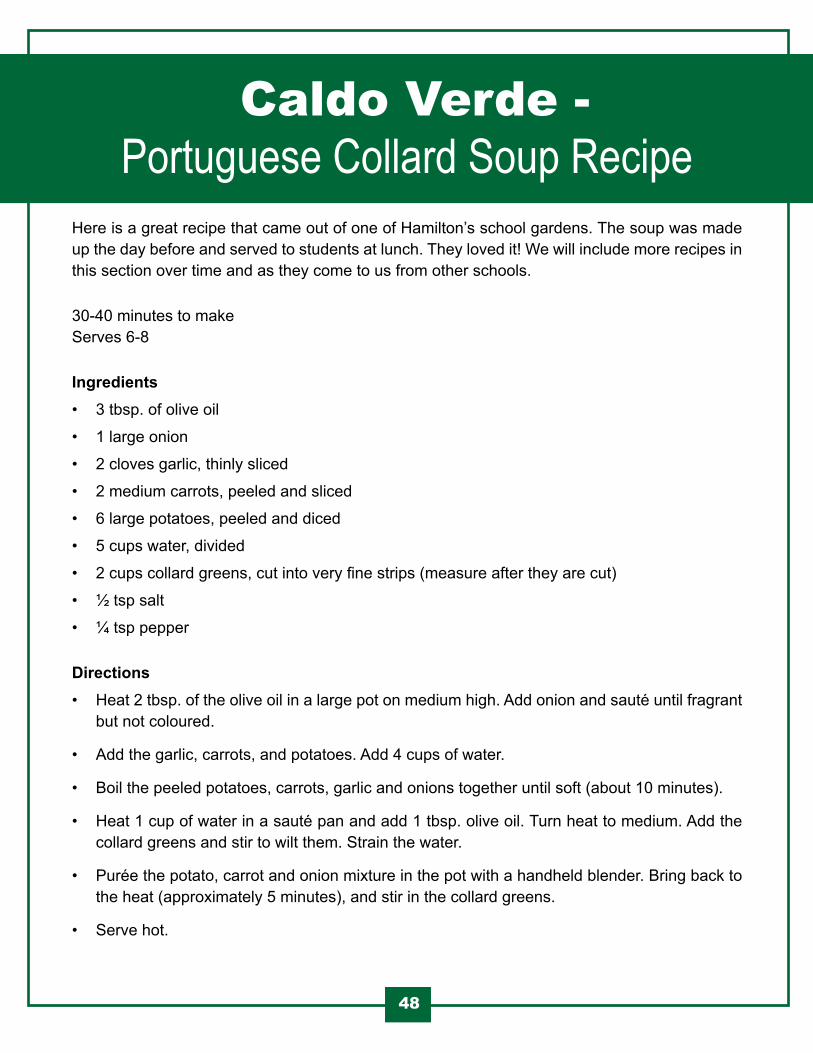
Table of ContentsTable of ContentsTable of Contents Caldo Verde - Portuguese Collard Soup Recipe
48
Here is a great recipe that came out of one of Hamilton’s school gardens. The soup was made up the day before and served to students at lunch. They loved it! We will include more recipes in this section over time and as they come to us from other schools.
30-40 minutes to make Serves 6-8
Ingredients • 3 tbsp. of olive oil
• 1 large onion
• 2 cloves garlic, thinly sliced
• 2 medium carrots, peeled and sliced
• 6 large potatoes, peeled and diced
• 5 cups water, divided
• 2 cups collard greens, cut into very fine strips (measure after they are cut)
• ½ tsp salt
• ¼ tsp pepper
Directions• Heat 2 tbsp. of the olive oil in a large pot on medium high. Add onion and sauté until fragrant
but not coloured.
• Add the garlic, carrots, and potatoes. Add 4 cups of water.
• Boil the peeled potatoes, carrots, garlic and onions together until soft (about 10 minutes).
• Heat 1 cup of water in a sauté pan and add 1 tbsp. olive oil. Turn heat to medium. Add the collard greens and stir to wilt them. Strain the water.
• Purée the potato, carrot and onion mixture in the pot with a handheld blender. Bring back to the heat (approximately 5 minutes), and stir in the collard greens.
• Serve hot.
11149
Lesson Plans
Table of ContentsTable of ContentsTable of ContentsLesson Plans
11150
Dear Teachers:
Thank you for your interest in Seeds of Success. The following supplemental lesson plans have been developed by educators and offer fun and engaging ways to teach problem-solving and critical thinking skills in connection with gardening and agriculture.
The lessons are designed to enhance what is being taught in the classroom, including curriculum areas such as reading, writing, mathematics, science and social studies.
These lesson plans contain ideas and opportunities for extending the current content presented in class. The school garden examples and activities found in this appendix are designed to motivate and inspire your students, connecting classroom lessons to real-life experiences and circumstances. This is accomplished by intertwining agriculture into teaching so that students can better relate to the food they eat, homes they live in and open spaces they enjoy.
It is important to remember when working with children in the garden that hand washing takes place before and after every activity.
Happy Gardening!
Hamilton Public Health Services
2015
Activity #1Title: Sensory & Edible Garden
Time: Approx. 30-40 minutes
Materials: (Ensure there are no food allergies.)
• Large crackers, (e.g., Ryvita) – one for each student
• Hummus or low-fat cream cheese
• A variety of herbs from the garden or a store (e.g., basil, rosemary, cilantro)
• A variety of vegetables (e.g., broccoli, cucumber, carrot, beans, lettuce)
• Sunflower seeds
• Butter knife for spreading
• Sharp knife for chopping vegetables
• Cutting board
• Plates
• Paper towels
Suggested Month: Use this lesson in late May or early June.
Objectives: Students use their imaginations to create miniature “Gardens” of vegetables and herbs on a cracker. on
Curriculum Expectations:
Science and Technology
Understanding Life Systems 2. Investigate the needs and characteristics of plants and animals, including humans;
2.5 Investigate characteristics of parts of the human body, including the five sense organs, and explain how those characteristics help humans meet their needs and explore the world around them
Table of ContentsTable of ContentsTable of Contents Grade 1
11151
3. Demonstrate an understanding of basic needs and characteristics of plants and animals, including humans;
3.4 Describe the characteristics of a healthy environment, including clean air and water and nutritious food, and explain why it is important for all living things to have a healthy environment
3.5 Describe how showing care and respect for all living things helps to maintain a healthy environment (e.g., leaving all living things in their natural environment; feeding birds during cold winter months; helping to plant and care for plants in the gardens that attract birds and butterflies; caring for the school and the school - yard).
Healthy Eating
C1.1 Explain why people need food to have healthy bodies (e.g., food provides energy for the healthy growth of teeth, skin, bones, muscles, and other body components)
C2.1 Describe how the food groups in Canada’s Food Guide (i.e., vegetables and fruit, grain products, milk and alternatives, meat and alternatives) can be used to make healthy food choices.
Background InformationChildren are far more likely to try new things, and like new things, if they have a hand in the growing, harvest, or preparation of the food. They are especially likely to try and like new things if they are presented in a spirit of fun and adventure. This activity fosters creativity while encouraging children to try new vegetables and herbs.
PreparationIf you are using any herbs and vegetables from your school garden, ask some or all of the children to help you harvest ahead of time. Have children wash their hands first and when they return from the garden. Wash all of the vegetables harvested to remove dirt, then slice them into small pieces and arrange on plates, perhaps at several stations so all children can reach them. Set out bowls of seeds. Spread hummus or cream cheese on each cracker.
Table of ContentsTable of ContentsTable of Contents Grade 1
11152
ActivityTake a walk to the garden together and ask the children to describe what they see there.
• What are the parts of a garden? (Plants, rocks, pathways, trees, soil…)
• We’re going to use our imaginations to create our own miniature “gardens” today – and then we get to eat them!
Back in the classroom, make sure everyone washes their hands. Show the children a cracker with spread and demonstrate how to stick bits of vegetables and herbs into it to create a pretend garden. Show them all the vegetables, herbs, and seeds available to use and then give each child a cracker (on a paper towel if desired). Have extras ready for children who drop their crackers.
As the children are creating their “gardens”, stop by and ask questions. Encourage them to describe their “garden” and what is growing in it.
Tying it TogetherIn a circle, ask for volunteers who will show and describe their “garden” to the class.
Since the eating will be messy, you may what to invite the children outside to eat their “gardens” over the grass or even in their real garden.
Table of ContentsTable of ContentsTable of Contents Grade 1
11153
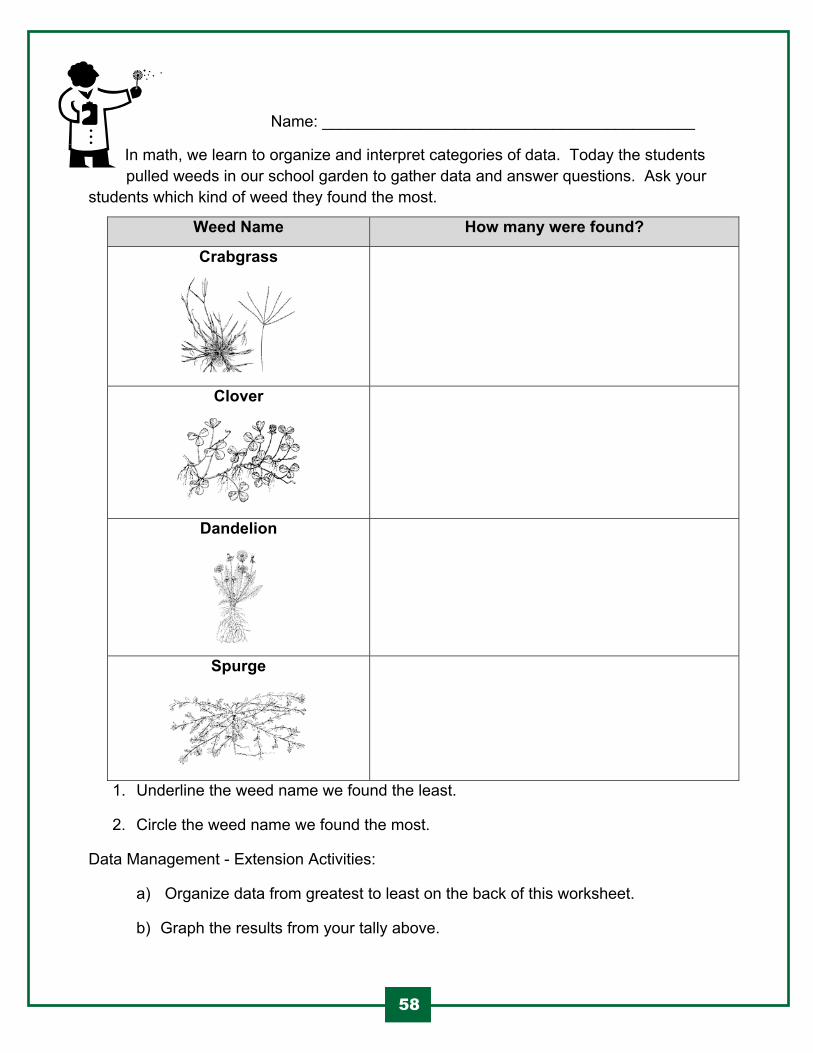
Activity #2Title: Counting and Comparing Weeds
Time: Approx. 30 minutes
Materials:
• Examples of various weeds the students will collect
• Worksheet for each student
• A clipboard for each student
• A pencil for each student
• A bucket for each team of students
• Individual weed pictures (at the end of this lesson)
Suggested Month: Use this activity when weeding is required in your garden (e.g. June or September).
Objectives: Students collect weeds to count and compare data using “most” and “least”.
Curriculum Expectations:
Science and Technology
Understanding Life Systems
2. Investigate the needs and characteristics of plants and animals, including humans;
3. Demonstrate an understanding of the basic needs and characteristics of plants;
3.2 - Identify the physical characteristics (e.g., size, shape, colour, common parts) of plants.
3.6 - Identify what living things provide for other living things.
Understanding Matter and Energy
3.2 Demonstrate an understanding that the sun, as the earth’s principal source of energy, warms the air, land and water; is a source of light for the earth; and makes it possible to grow food.
Table of ContentsTable of ContentsTable of Contents Grade 1
11154
Mathematics
Measurement
Overall expectation – Estimate, measure, and describe length, area, mass, capacity, time and temperature, using non-standard units of the same size (e.g., straws, index cards);
In Advance• Any open garden area can be used for this activity. Check your garden beds to see if weeding
is needed and use your beds and the area around them for the activity. Check the area that will be weeded to be sure the photos of weeds are represented. Decide which weeds the students will collect. Place a photo of the weed in the bucket for each team. Collect a sample of each weed and place it in the bucket.
About Weeds• Explain that the class will remove weeds from garden areas.
• What is a weed? A weed is a plant that is growing where we do not want it.
• What does a weed need to grow? Weeds are plants so they need air, water, and the right temperature to grow. Some weeds only grow in the spring and summer. Others start to grow in the fall and winter. Temperature changes signal the weeds to grow at the right time for their life cycle.
• Are weeds needed in nature? The flowers of some weeds are nectar sources. Many weeds are edible for people and contain vitamins and minerals (dandelion, purslane, wood sorrel). Some weeds are used for medicine. Some weeds have been developed by man into a new, more useful or acceptable plant – like a kind of wild grass into the corn plant we know today.
• Why do we remove weeds? We want to prevent them from spreading, to remove them before seeds form, and to give the plants we want to grow the space, food, and water they need without weeds crowding them and competing for resources.
• Explain the activity to the students. Students act like scientists to gather, record, and communicate information. Students work in teams to locate and pull the weed type assigned to the team. Each team has its own bucket to collect the pulled weeds and a picture and sample of their weed. After the allotted weeding time, the students gather in their teams to count the number of weeds they collected. Be sure that children wash their hands first. You may want them to use garden gloves if they are available.
Table of ContentsTable of ContentsTable of Contents Grade 1
11155
• Students may only count the weed if the roots are attached, so students should pull weeds with their fingers as close to the soil as possible. Their fingers should touch the soil when they pull. Can they guess why? We want to get as much of the roots as possible so the weed can’t regrow. Many weeds have long roots and spreading roots, which all need to be removed as completely as possible to help prevent them from growing again from the roots.
• Back in the classroom, make sure everyone washes their hands.
Recording and Interpreting Data• Discuss the worksheet. Students will record information for one weed only. Other groups will
record information for the other weed names. Note: If you did not find a weed or decide not to use all of the types of weeds, have students make an “X” over the weed name before they start.
• Divide the students into teams. Show the example of a weed, name it, and assign it to a team. Have the team members make a “√” by the name of the weed they are assigned.
• Give the team the example, a picture of their weed, and a bucket to collect weeds.
• Allow time to collect weeds, and then gather the teams to count and record the number of their weeds on the worksheet.
• Each group shows a sample of the weed they collected and reports the total number of weeds collected. All groups record the count reported by the other groups. Tip: Record information on your own worksheet as the group does the same. Use your finger to point to the name and number of the weed on the worksheet.
• Option: If you don’t have a lot of variety of weeds and are assigning more than one group to a particular weed, collect all of the buckets after weeding and count the grand total together as a group. You hold up one weed at a time and students count aloud. Record the number together on the worksheet. Do the same for each different weed.
• Answer the questions at the bottom of the worksheet as a group. Ask students to find the difference between the number of the most weeds and the number of the least weeds. Can students describe a strategy to help them? Try counting up from the low number with students. Have a student stand next to you and use his or her fingers to count up from the low number by showing one finger for each number in the count. Stop when the number (and finger) match the high number of weeds. Add students if the first student runs out of fingers. Find the difference by counting the fingers, which will be grouped by 5.
Table of ContentsTable of ContentsTable of Contents Grade 1
11156
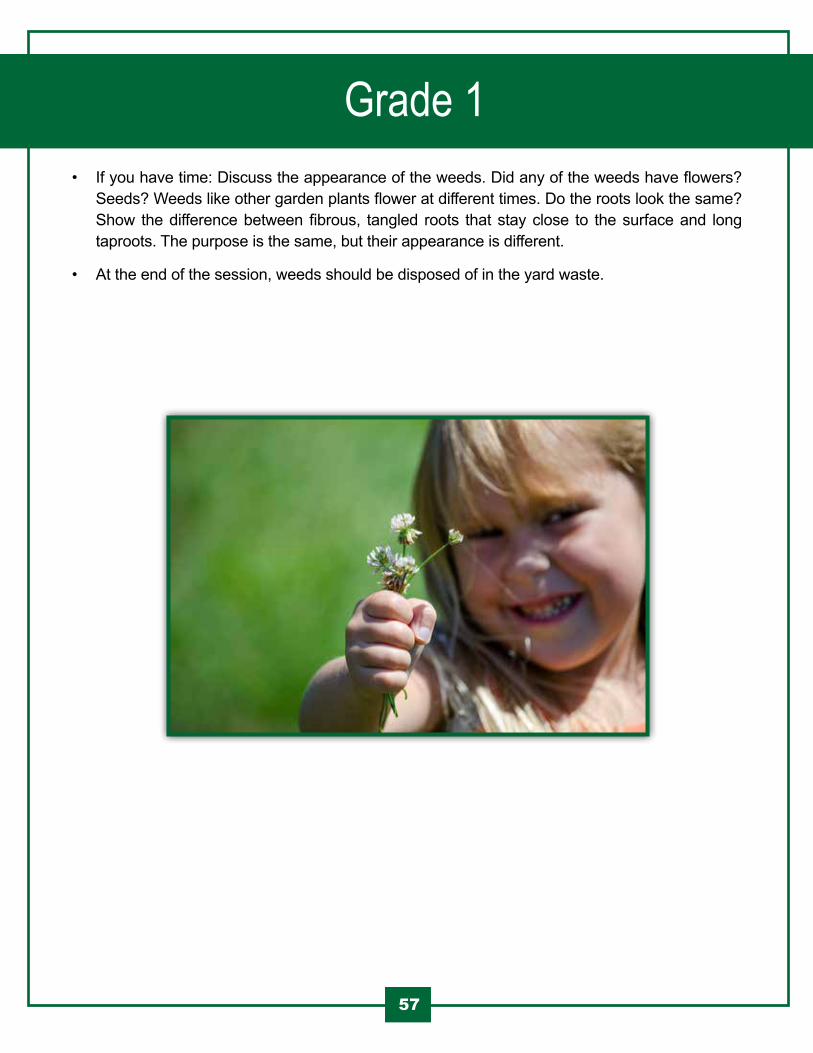
• If you have time: Discuss the appearance of the weeds. Did any of the weeds have flowers? Seeds? Weeds like other garden plants flower at different times. Do the roots look the same? Show the difference between fibrous, tangled roots that stay close to the surface and long taproots. The purpose is the same, but their appearance is different.
• At the end of the session, weeds should be disposed of in the yard waste.
Table of ContentsTable of ContentsTable of Contents Grade 1
11157
11158
9
Source: Granny's Garden School www.GrannysGardenSchool.org
Name: __________________________________________
In math, we learn to organize and interpret categories of data. Today the students pulled weeds in our school garden to gather data and answer questions. Ask your
students which kind of weed they found the most.
Weed Name How many were found?
Crabgrass
Clover
Dandelion
Spurge
1. Underline the weed name we found the least.
2. Circle the weed name we found the most.
Data Management - Extension Activities:
a) Organize data from greatest to least on the back of this worksheet.
b) Graph the results from your tally above.
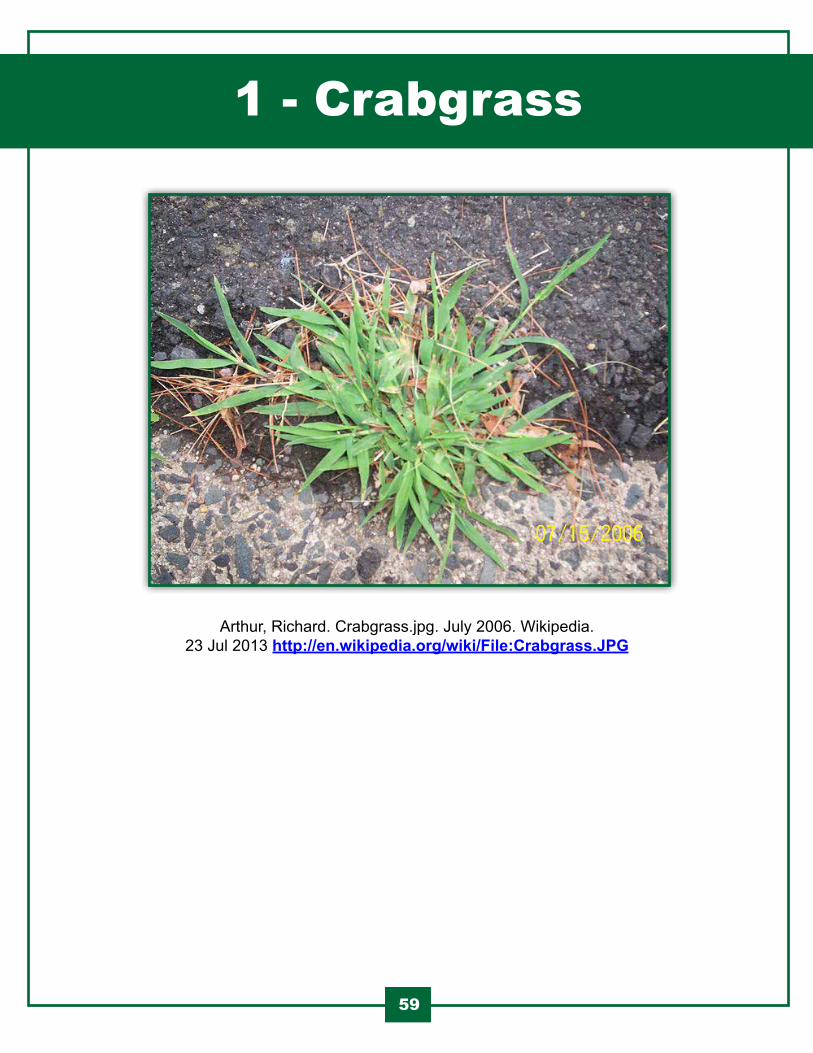
Table of ContentsTable of ContentsTable of Contents1 - Crabgrass
11159
Arthur, Richard. Crabgrass.jpg. July 2006. Wikipedia. 23 Jul 2013 http://en.wikipedia.org/wiki/File:Crabgrass.JPG
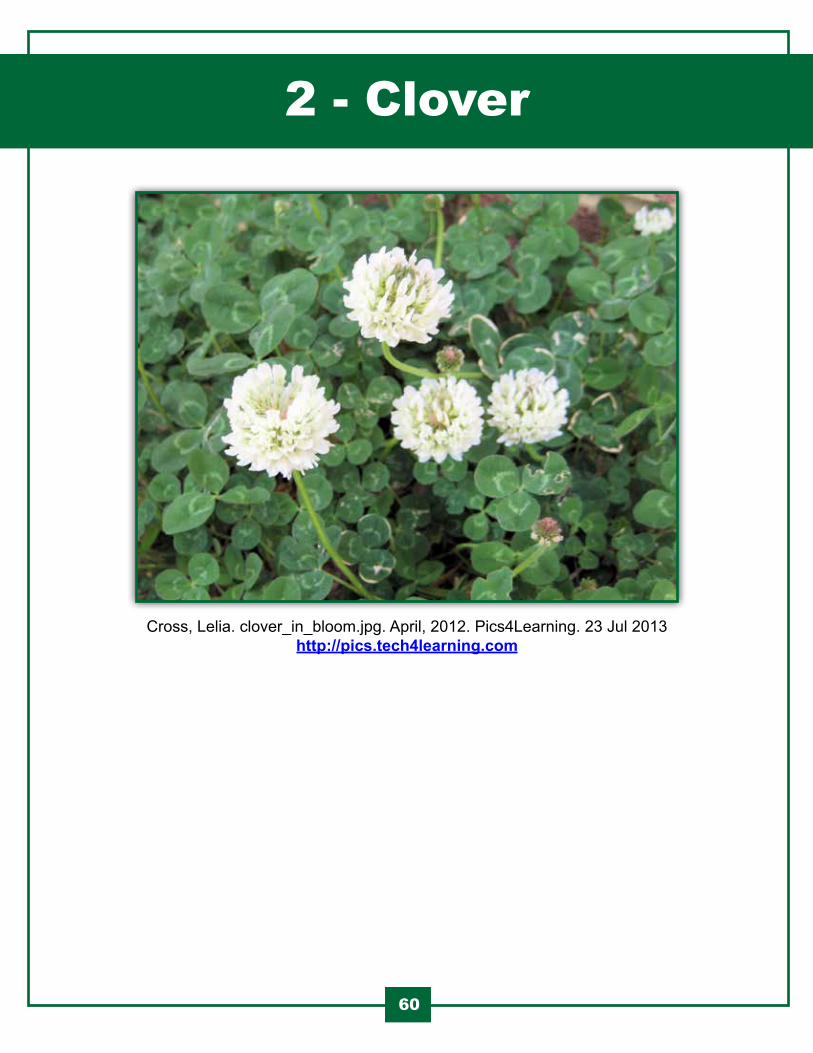
Table of ContentsTable of ContentsTable of Contents2 - Clover
11160
Cross, Lelia. clover_in_bloom.jpg. April, 2012. Pics4Learning. 23 Jul 2013 http://pics.tech4learning.com
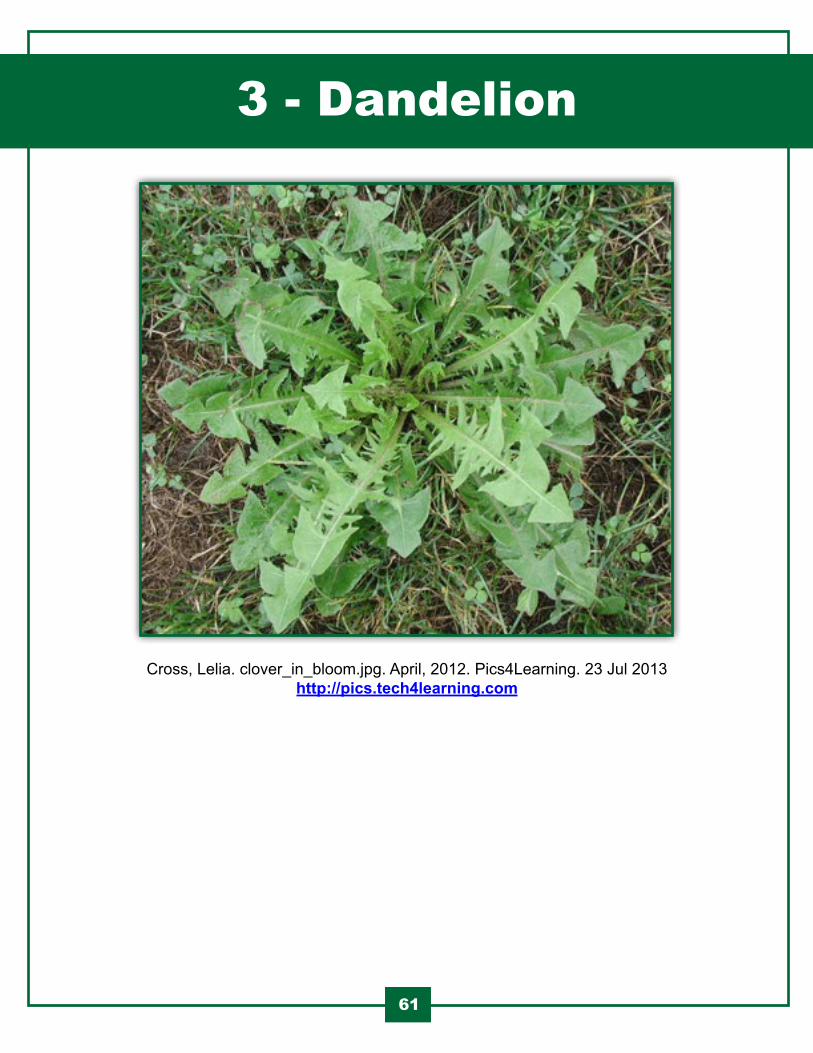
Table of ContentsTable of ContentsTable of Contents3 - Dandelion
11161
Cross, Lelia. clover_in_bloom.jpg. April, 2012. Pics4Learning. 23 Jul 2013 http://pics.tech4learning.com
Table of ContentsTable of ContentsTable of Contents4 - Spurge
11162
Hardyplants. Chamaesyce.jpg. February 2009. 23Jul 2013 http://en.wikipedia.org/wiki/File:Chamaesyce.jpg
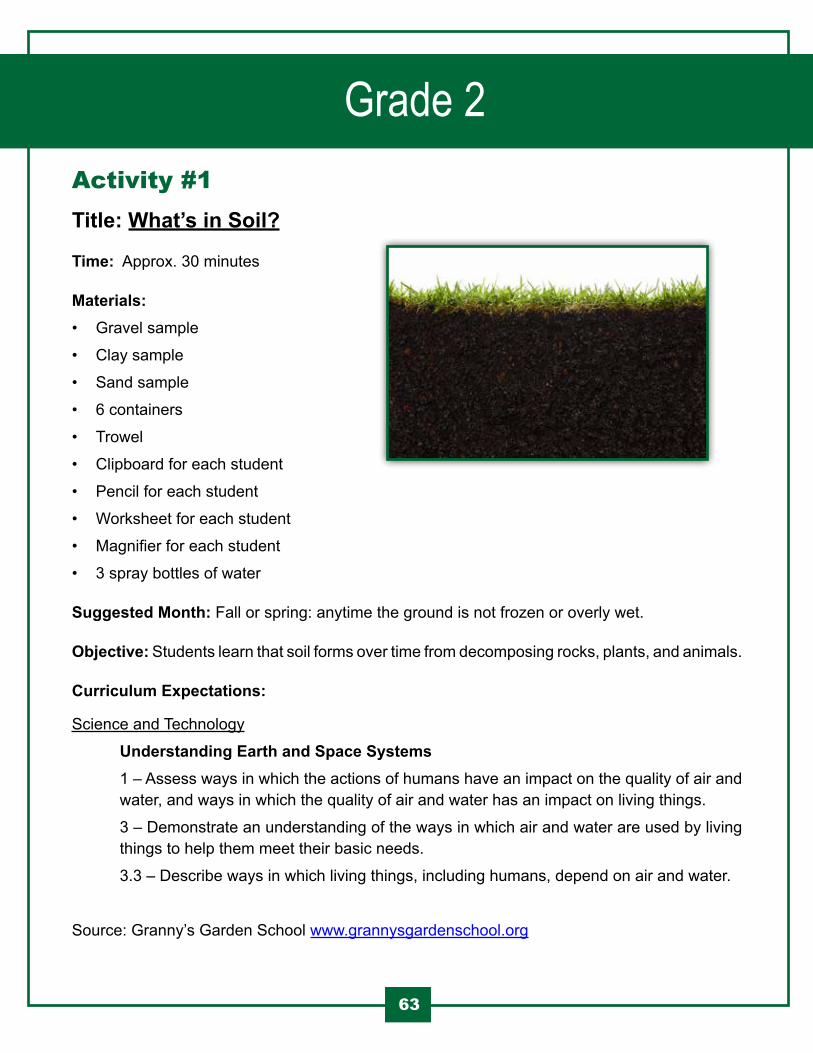
Table of ContentsTable of ContentsTable of Contents Grade 2Activity #1Title: What’s in Soil?
Time: Approx. 30 minutes
Materials: • Gravel sample
• Clay sample
• Sand sample
• 6 containers
• Trowel
• Clipboard for each student
• Pencil for each student
• Worksheet for each student
• Magnifier for each student
• 3 spray bottles of water
Suggested Month: Fall or spring: anytime the ground is not frozen or overly wet..
Objective: Students learn that soil forms over time from decomposing rocks, plants, and animals.
Curriculum Expectations:
Science and Technology
Understanding Earth and Space Systems 1 – Assess ways in which the actions of humans have an impact on the quality of air and water, and ways in which the quality of air and water has an impact on living things.
3 – Demonstrate an understanding of the ways in which air and water are used by living things to help them meet their basic needs.
3.3 – Describe ways in which living things, including humans, depend on air and water.
Source: Granny’s Garden School www.grannysgardenschool.org
11163
Table of ContentsTable of ContentsTable of Contents Grade 2Mathmatics
Measurement 1 – Estimate, measure and record length, perimeter, area, mass, capacity, time and temperature using non-standard units and standard units.
Geometry and Spatial Sense 1 – Collect and organize categorical or discrete primary data and display the data, using tally charts, concrete graphs, pictographs, line plots, simple bar graphs, and other graphic organizers, with labels ordered appropriately along horizontal axes as needed.
2 – Collect and organize primary data.
About Soil• We’re examining soil today to identify the traits of different kinds of soil.
• What is the purpose of soil? Soil is capable of supporting plant and animal life. Soil anchors plant roots, holds water and air, rots dead plants and animals, and contains minerals and nutrients that plants need.
• What is in soil? Soil has living and non-living parts. The non-living part consists of minerals from rocks and nutrients from dead plants and animals. The living part of soil has microscopic organisms. One teaspoon of soil can have billions of microscopic organisms. Air and water are in small spaces called pore spaces. Animals need air pockets. Soil animals need some water to keep them moist. Roots take in air and water.
• How is soil made? It takes from 100 to 20,000 years to make an inch of topsoil. That’s because the processes that make soil are usually slow. Living and non-living things are needed to make soil.
• Rocks break down into smaller and smaller particles from things like wind and water wearing away at the surface, water that freezes to ice in cracks and causes rock to break, and strong roots from living plants that break into rock. Show your samples as you discuss the following.
• Gravel is the largest particle of soil and can be seen easily. Gravel looks like small, smooth rocks.
• Sand particles are next in size and feel gritty when rubbed between the fingers. Sand particles can be easily seen.
• Clay particles are the smallest soil particles and cannot be seen individually. Clay feels sticky when it is wet.
11164

Table of ContentsTable of ContentsTable of Contents Grade 2• Dead plants and animals break down, or decompose over time and create soil. The dead
material rots from water and is eaten by living things in the soil, like animals, fungus, and bacteria until it looks nothing like it did when it was living.
• An average soil sample is about half pore space to hold water and air, almost half tiny particles of rock, and the rest broken down (decomposed) plants and animals. The smaller the size of the rock particle, the less pore spaces there are, making it hard for plants and animals to live.
Examining Soil• Pre-collect 2 buckets of each soil that represents the three types on the worksheet. You need
enough soil in each container for about 4 students to hold a handful.
• Set up three stations for students to observe and feel the soil. There will be two buckets of the same soil type at each station. Place one spray bottle at each station.
• Keep track of the soil type for each bucket, but do not share with the students.
• Assign an adult volunteer or older student to the spray bottles.
• Students gather in their groups to complete the worksheet as they examine their sample. Go through the worksheet together and show students how to test and record soil observations. Students make a choice in the observations section and circle the words that best describe their sample. The spray bottle is used to dampen the soil samples, if needed, for students to try to form a small 1-inch ball from their sample. Is it easy or difficult to make the ball? Is it easy or difficult to break the ball (over the bucket)
• Students use the circled words to find the best fit from the descriptions in the soil type column. Circle the soil type. Loam means that the sample has a lot of decomposed dead plants and animals.
• The groups rotate until each group has recorded and selected a soil type for each sample. Be sure that students wash their hands after this activity is completed.
• Tell students what the soil types are.
• Did you notice a color difference in the samples? Loam should be dark brown; soil with more clay or sand look lighter in color and often a bit gray.
11165

Table of ContentsTable of ContentsTable of Contents Grade 2
Sources• “The Nature of Soil”, Federation of Ontario Naturalists Soil and Water Conservation Society.
• Grow Lab: Activities for Growing Minds by National Gardening Association. Burlington, Vermont: National Gardening Association, 1990.
• Testing Soil, Soil-net.com, http://www.soil-net.com/dev/page.cfm?pageid=activities_sheets, 8-10-12.
• What soil type would be best for growing garden plants? Loam is the best mixture of sand, clay, and decomposed dead plants and animals. Refer to the following to discuss what would happen with too much clay, sand, or decomposed material.
Clay particles hold water the easiest, but drain poorly. Clay soil can hold onto nutrients. Clay helps support plant roots and the plant. Too much clay provides little pore space for water, air, plant roots, or organisms, and produces sticky soil when wet and very hard soil when dry.
Too much sand does not hold water. Think of waves on a beach. Sandy soils are lightweight and cannot hold onto nutrients.
In loam, compost contains the decomposed plant and animal bits that are the major source of nutrients for plants and organisms. It is dark and crumbly, retains moisture, provides good drainage, and has pore spaces. Without clay particles, there may not be enough firmness to the soil to hold plant roots in place. Without some sand, the clay particles may stick and clump together.
What kind of soil mix would be best for a sports field? Why?
Be sure that children wash their hands at the end of this activity.
11166
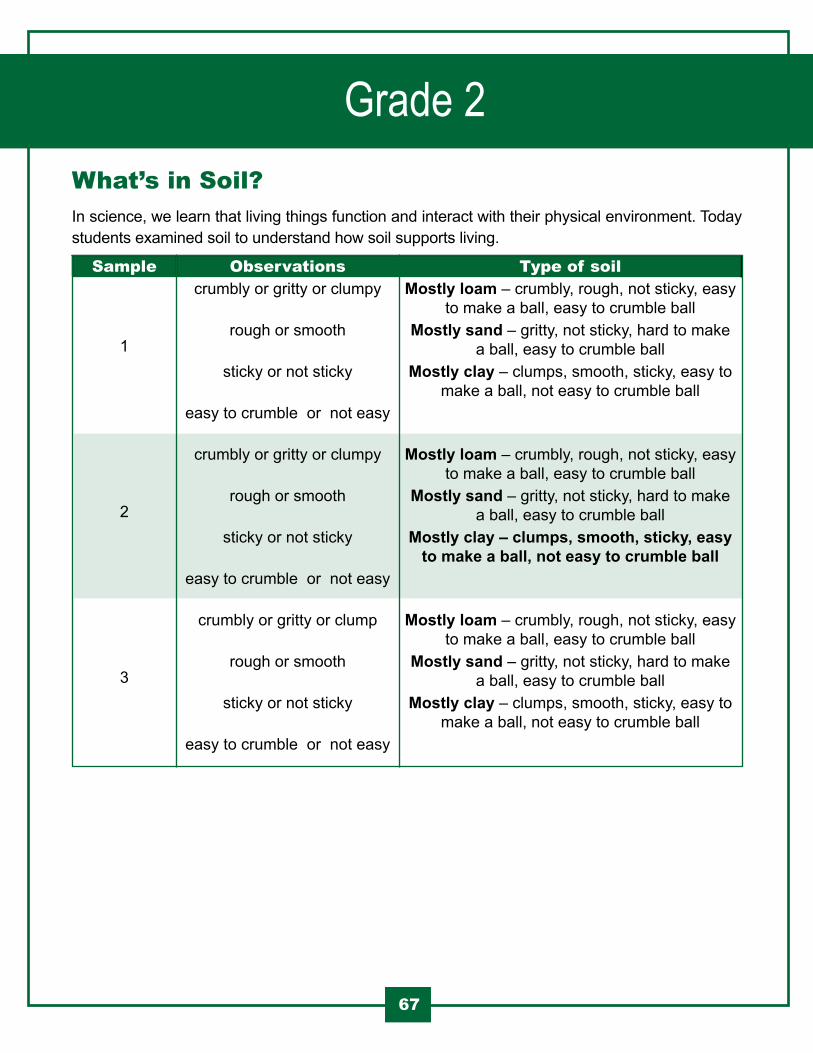
Table of ContentsTable of ContentsTable of Contents Grade 2What’s in Soil? In science, we learn that living things function and interact with their physical environment. Today students examined soil to understand how soil supports living.
Sample Observations Type of soil
1
crumbly or gritty or clumpy Mostly loam – crumbly, rough, not sticky, easy to make a ball, easy to crumble ball
rough or smooth Mostly sand – gritty, not sticky, hard to make a ball, easy to crumble ball
sticky or not sticky Mostly clay – clumps, smooth, sticky, easy to make a ball, not easy to crumble ball
easy to crumble or not easy
2
crumbly or gritty or clumpy Mostly loam – crumbly, rough, not sticky, easy to make a ball, easy to crumble ball
rough or smooth Mostly sand – gritty, not sticky, hard to make a ball, easy to crumble ball
sticky or not sticky Mostly clay – clumps, smooth, sticky, easy to make a ball, not easy to crumble ball
easy to crumble or not easy
3
crumbly or gritty or clump Mostly loam – crumbly, rough, not sticky, easy to make a ball, easy to crumble ball
rough or smooth Mostly sand – gritty, not sticky, hard to make a ball, easy to crumble ball
sticky or not sticky Mostly clay – clumps, smooth, sticky, easy to make a ball, not easy to crumble ball
easy to crumble or not easy
67
Table of ContentsTable of ContentsTable of Contents Grade 2Activity #2Title: Planting a Salad
Time: Approx. 30 minutes
Materials: • Flour in Zip Bag
• Seeds
• Pre-labeled plant marker for every seed type
• 3 buckets
• Bucket of cut water bottles
• Compost thermometer (any outdoor thermometer can work)
• Worksheet to track temperature
Suggested Month: Plant in April, to give the plants time to develop for a June harvest.
Objective: Students understand that seed germination is dependent on conditions in the seed’s habitat.
Curriculum Expectations:
Science and Technology
Understanding Earth and Space Systems 3 – Demonstrate an understanding of the ways in which air and water are used by living things to help them meet their basic needs.
3.3 – Describe ways in which living things, including humans, depend on air and water.
Mathematics
Measurement 1 – Estimate, measure and record length, perimeter, area, mass, capacity, time and temperature using non-standard units and standard units.
68
Table of ContentsTable of ContentsTable of Contents Grade 2 Geometry and Spatial Sense 1 – Collect and organize categorical or discrete primary data and display the data, using tally charts, concrete graphs, pictographs, line plots, simple bar graphs, and other graphic organizers, with labels ordered appropriately along horizontal axes as needed.
2 – Collect and organize primary data.
Planting Tips• Pick up and organize your seeds several days in advance.
• Ahead of time, review the seed planting instructions and map (following this lesson plan). You may need to adjust the maps a bit to fit your class size. The position of the seed placement on the maps takes into account companion planting when possible.
• Make a copy of the planting map for volunteers. Put the seeds in the order that they appear on the planting map. You, the teacher can work one bed and the volunteer the second bed. Or, place a seed packet in the spot you want a student to plant.
• In advance, prepare your outdoor beds to visually show planting areas. Use flour to line the sections. If your flour is in a zip top bag, cut a very small hole in one corner for pouring flour.
Activity• In advance, fill three buckets with water for students to use to water their plantings. Collect
some empty water bottles for students to share.
• In the classroom, discuss background information about seeds.
Today students are planting ingredients to harvest a salad in June.
Seeds have a protective outer layer called the seed coat. Inside every seed there is food and a plant with a root and the plant’s first leaves. The food source inside the seed provides energy for the plant to grow until the plant grows through the top of the soil. Then the leaves make food for the plant. If you pre-soaked seeds, show examples of seed parts.
What is the name of the process for the start of seed growth? Germination.
Seeds are dormant, meaning they are at rest, until they are exposed to proper growing conditions for that seed. Seeds need proper amounts of water, oxygen, and sometimes light, and the right soil temperature (not air temperature) to germinate.
69
Table of ContentsTable of ContentsTable of Contents Grade 2
70
The seeds we are planting today were selected because they germinate in cool soils. Moreover, the plants of several of the seeds today, like lettuce, kohlrabi, peas, and spinach grow better in cooler air temperatures.
Other seeds and plants require warmer soil and air to grow and produce. Some of these are tomatoes, cucumbers, beans, and squash. You can plant these later in spring.
Explain that students will take the soil and air temperature each week to observe how temperature affects plants and animals.
How do these conditions affect planting?
Wood chips can be used to make a small hole or shallow furrows for seed planting. Furrows are an easy way to plant small seeds that are planted 1cm. Furrows also give students a better visual for spacing between seeds. Encourage students to use multiple furrows.
Fingers are excellent tools to estimate length, generally, 1 cm is the width of a child’s finger.
Explain that the seed packets will have planting depth and spacing on the envelope. In the early spring garden, all but pea seeds and onion sets are planted not more than 2 cm deep (up to the students’ first knuckle) and 4cm apart (4 finger widths). Peas are planted 2cm deep and 10cm apart and onion sets 2cm deep and 6cm apart.
Instruct students to open their envelope and to pour all of the seeds into the hand they do not use to write. They pick up the seeds with the hand they use to write.
Remind students to pat the soil gently after covering the planted seeds to be sure the seeds and soil make contact.
Have everyone wash their hands before they go out.
Planted too deep? Small seeds are planted closer to the surface because there is not enough food inside for the embryo to make it to the surface if it is planted too deep, and they may require more light.
Planted too close? Seeds need to be properly spaced apart to provide room for the roots and plant to grow. You can demonstrate overcrowding of seeds with students by gathering several students together to show that improper spacing of seeds leads to competition for resources and poor development of plant parts.
• Discuss how to plant while you are in the classroom.
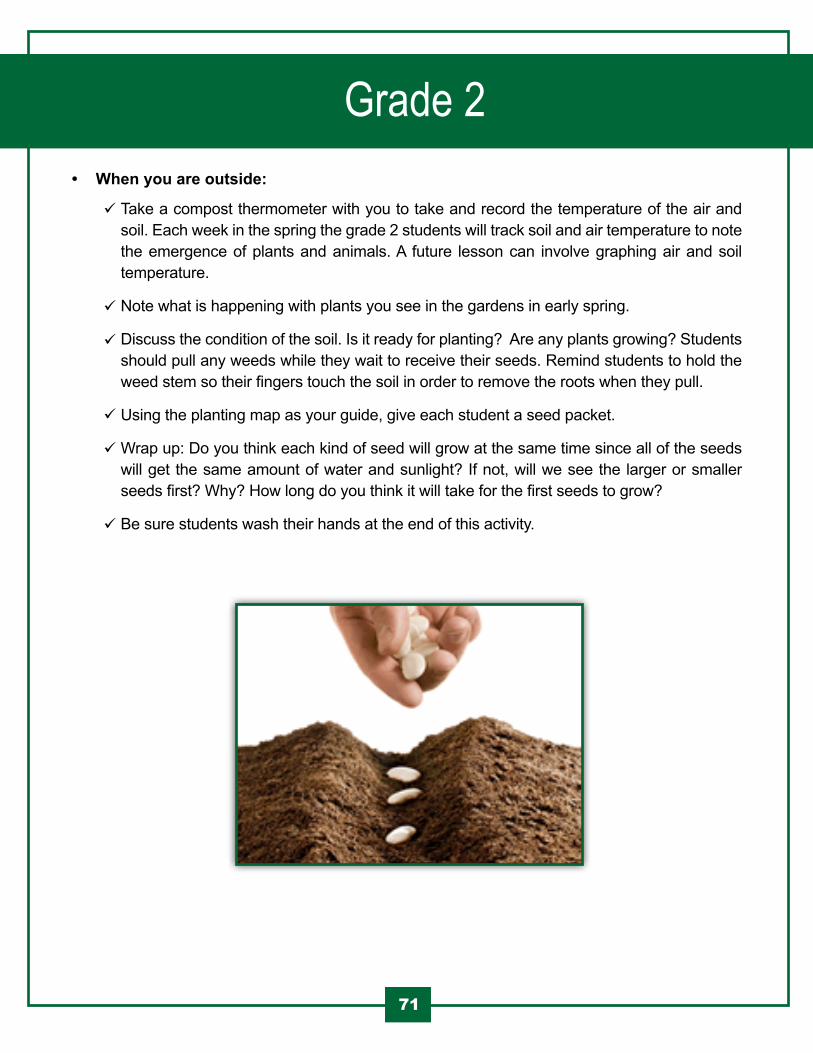
Table of ContentsTable of ContentsTable of Contents Grade 2
71
Take a compost thermometer with you to take and record the temperature of the air and soil. Each week in the spring the grade 2 students will track soil and air temperature to note the emergence of plants and animals. A future lesson can involve graphing air and soil temperature.
Note what is happening with plants you see in the gardens in early spring.
Discuss the condition of the soil. Is it ready for planting? Are any plants growing? Students should pull any weeds while they wait to receive their seeds. Remind students to hold the weed stem so their fingers touch the soil in order to remove the roots when they pull.
Using the planting map as your guide, give each student a seed packet.
Wrap up: Do you think each kind of seed will grow at the same time since all of the seeds will get the same amount of water and sunlight? If not, will we see the larger or smaller seeds first? Why? How long do you think it will take for the first seeds to grow?
Be sure students wash their hands at the end of this activity.
• When you are outside:
Table of ContentsTable of ContentsTable of Contents Grade 2
72
A note to parents...
Planting a Salad
Today we started our spring garden season by planting seeds that will grow food for a spring garden salad.
In science, we learn that plants have life cycles that are linked to conditions in their environment. Today, we learned that seeds are also specialized with their own adaptations for germination that depend on soil temperature. We only planted seeds that will germinate in cool soil temperatures.
In the spring, classes discuss weather and use tools to measure weather. Today, we started our study by measuring the temperature of the air and soil.
We’ll make observations of plants and animals in the garden to learn more about the effect of air and soil temperature on plant and animal life cycles.
Ask your child what we planted in our gardens and what we noticed about plants and animals today.
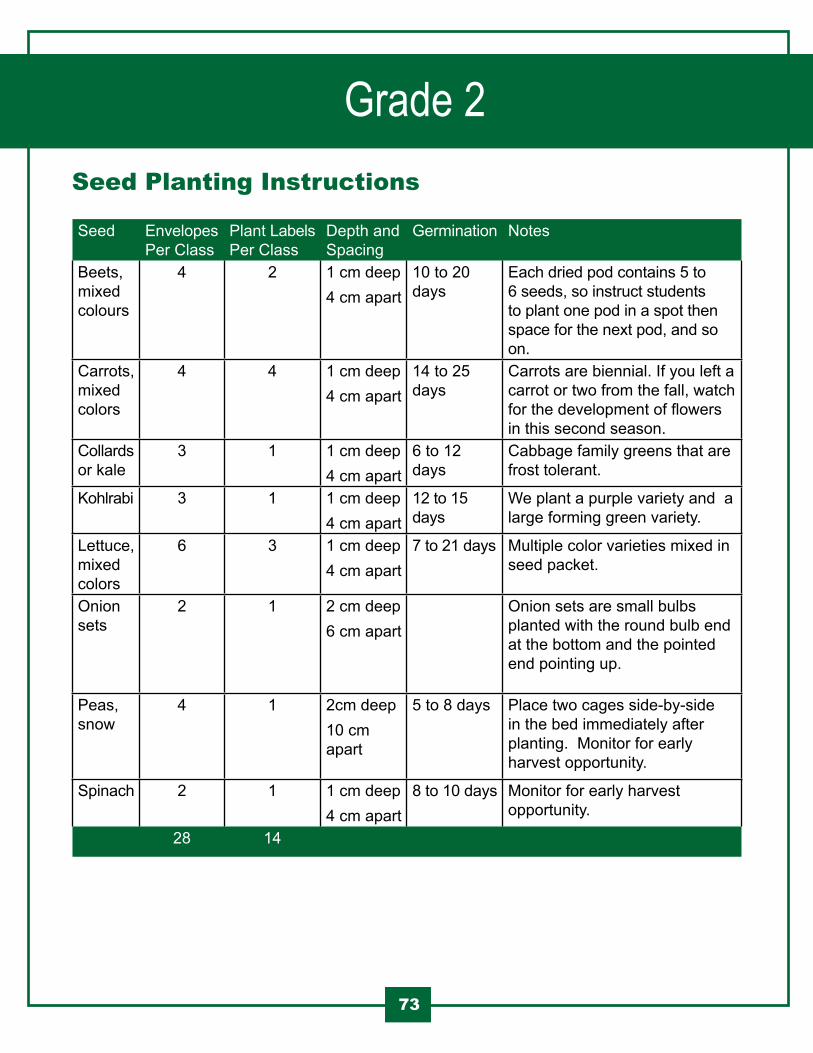
Table of ContentsTable of ContentsTable of Contents Grade 2
73
Seed Planting Instructions
Seed Envelopes Per Class
Plant Labels Per Class
Depth and Spacing
Germination Notes
Beets, mixed colours
4 2 1 cm deep4 cm apart
10 to 20 days
Each dried pod contains 5 to 6 seeds, so instruct students to plant one pod in a spot then space for the next pod, and so on.
Carrots, mixed colors
4 4 1 cm deep 4 cm apart
14 to 25 days
Carrots are biennial. If you left a carrot or two from the fall, watch for the development of flowers in this second season.
Collards or kale
3 1 1 cm deep 4 cm apart
6 to 12 days
Cabbage family greens that are frost tolerant.
Kohlrabi 3 1 1 cm deep4 cm apart
12 to 15 days
We plant a purple variety and a large forming green variety.
Lettuce, mixed colors
6 3 1 cm deep4 cm apart
7 to 21 days Multiple color varieties mixed in seed packet.
Onion sets
2 1 2 cm deep 6 cm apart
Onion sets are small bulbs planted with the round bulb end at the bottom and the pointed end pointing up.
Peas, snow
4 1 2cm deep10 cm apart
5 to 8 days Place two cages side-by-side in the bed immediately after planting. Monitor for early harvest opportunity.
Spinach 2 1 1 cm deep4 cm apart
8 to 10 days Monitor for early harvest opportunity.
28 14
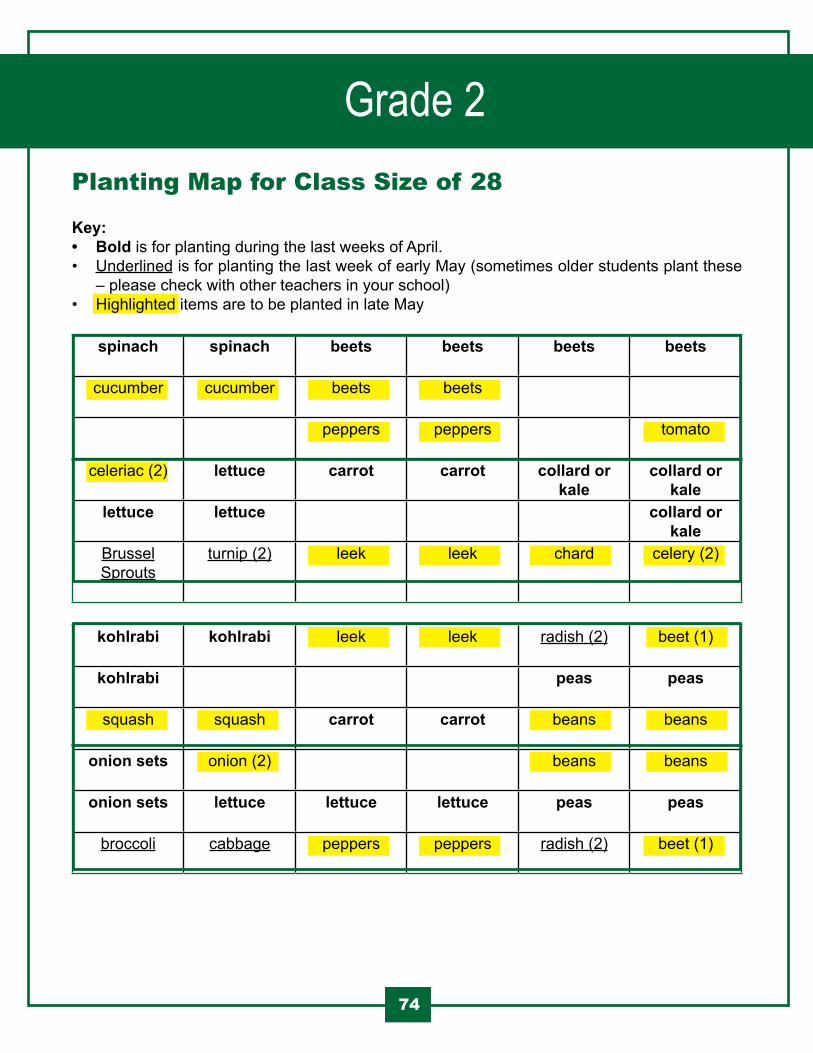
Table of ContentsTable of ContentsTable of Contents Grade 2
74
Planting Map for Class Size of 28
Key: • Bold is for planting during the last weeks of April.• Underlined is for planting the last week of early May (sometimes older students plant these
– please check with other teachers in your school)• Highlighted items are to be planted in late May
spinach spinach beets beets beets beets
cucumber cucumber beets beets
peppers peppers tomato
celeriac (2) lettuce carrot carrot collard or kale
collard or kale
lettuce lettuce collard or kale
Brussel Sprouts
turnip (2) leek leek chard celery (2)
kohlrabi kohlrabi leek leek radish (2) beet (1)
kohlrabi peas peas
squash squash carrot carrot beans beans
onion sets onion (2) beans beans
onion sets lettuce lettuce lettuce peas peas
broccoli cabbage peppers peppers radish (2) beet (1)
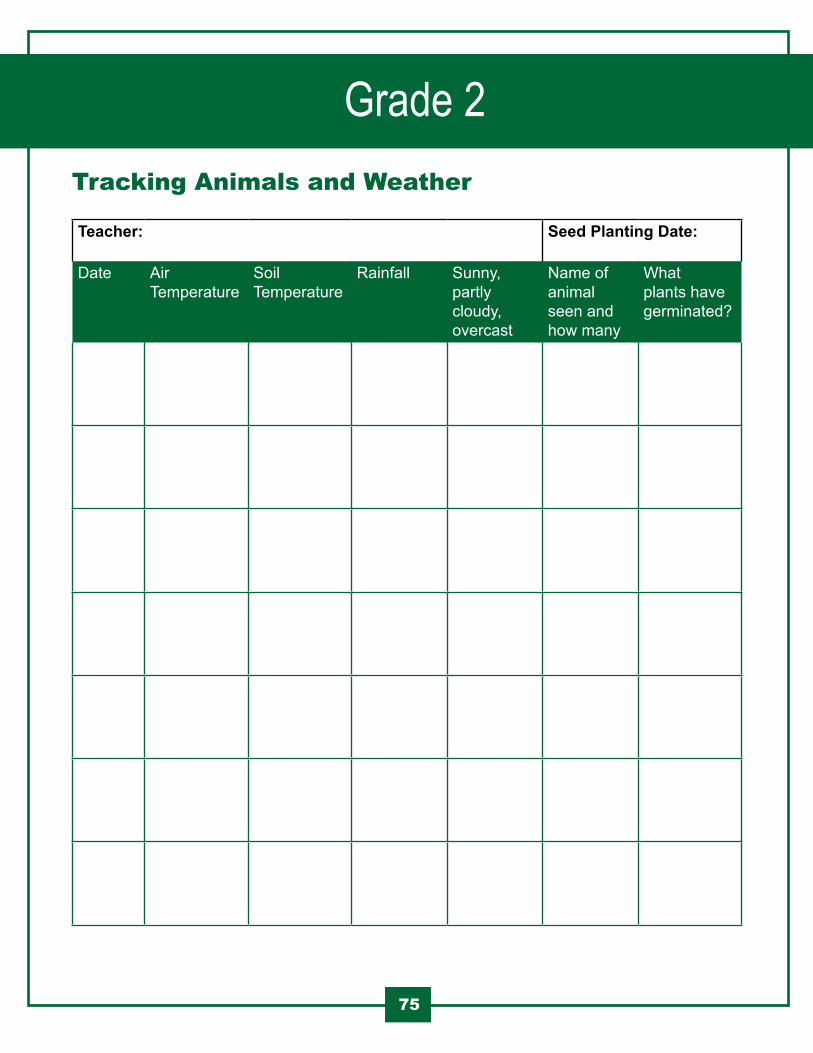
Tracking Animals and Weather
Teacher: Seed Planting Date:
Date Air Temperature
Soil Temperature
Rainfall Sunny, partly cloudy, overcast
Name of animal seen and how many
What plants have germinated?
Table of ContentsTable of ContentsTable of Contents Grade 2
75
Table of ContentsTable of ContentsTable of Contents Grade 3Activity #1Title: What is a Plant’s Life Cycle?
Time: Approx. 30 minutes
Materials: • Students bring their scissors
• Pencils for the students to write the name of the seeds on the envelopes
• One envelope for each student to take a seeds
• Bag or container to collect seed pods
• Laminated pictures of the flower, seed pod, and seeds to collect
• Sunflower seed head
• Pre-soaked lima beans to show the class
The best seeds to find:• Sunflower
• Calendula
• Cleome
• Marigold
• Orange cosmos
• Zinnia
• Beans
• Tomatoes
Suggested Month: Use this lesson in the fall when plants have developed seeds for the class to collect.
Objective: Students understand the stages in a plant’s life cycle.
76
Table of ContentsTable of ContentsTable of Contents Grade 3Curriculum Expectations:
Science and Technology
Understanding Life Systems 1 - Assess ways in which plants have an impact on society and the environment, and ways in which human activity has an impact on plants and plant habitats.
2 - Investigate similarities and differences in the characteristics of various plants, and ways in which the characteristics of plants relate to the environment in which they grow.
3 - Demonstrate an understanding that plants grow and change and have distinct characteristics.
In Advance• In advance, show students photos of the seeds they should collect (there are some photos at
the end of this lesson). Prepare cards you/students can use to label examples of the plants from which to collect.
• In the area you plan to have the students collect seeds, mark some examples of the plants that will be used by using a flag or pinwheel. Use a plant marker to label the name of the plant.
Classroom Discussion• What is the life cycle of a flowering plant? The life cycle describes how long it takes to germinate,
grow, flower, set seed, and die.
• Are all plant life cycles the same length? Different plants can have different life cycle lengths and start and end times. Plant type and weather/growing conditions influence a plant’s life cycle. Plants have different life cycles and so form seeds at different times – just like plants make flowers and develop ripe foods at different times. Some seeds take longer to develop than others. Depending on the plant species, germination of a seed can take weeks, months, or years.
• Plants can be categorized by their life cycle.
• Students may want to collect seeds from other plants. The plants we have selected have the greatest chance for growth next spring.
77
Collect samples of the bud, flower, and seedpod from plants the students will harvest.
Some plants can survive only one growing season in our climate. These plants cannot survive our winter. The life cycle is one growing season long and are called annuals. Examples are marigolds, tomatoes, most vegetables, and petunias.

Table of ContentsTable of ContentsTable of Contents Grade 3
78
Some plants have two growing seasons before they flower and make seeds. These plants can survive our winters, but only one. The life cycle is two growing seasons long. A biennial is a plant that takes two growing seasons to complete its life cycle. In the first year, it germinates and grows leaves. The stems and leaves die in the winter, but the roots are alive and storing foods underground. The plant is dormant or at rest. In the second year, the plant grows from the roots, flowers, makes seeds, and dies. Examples are parsley, carrots, beets, chard, foxglove, and hollyhock.
Some plants survive for many years. Their leaves, sometimes stems, and flowers die in the winter, and the roots are dormant underground until the soil warms to the right temperature after winter. These plants come back every year after being dormant and grow, flower, and make seeds for many years. We’re most familiar with winter dormancy, but many perennials that flower in the spring and summer start their dormancy in the summer and fall. Examples are grasses, trees, shrubs, daisies, and roses. How do perennials grow each year? These plants regrow from various underground plant structures like roots and bulbs to grow new plants, or from buds on existing stems.
Some seeds are found inside fruits that are eaten by animals. The fruit is a plant adaptation to protect the seed. After the fruit is eaten, the seed is spread in the scat of an animal. Some examples – deer eating crab apples, birds eating berries.
Some seeds stick to animals and are spread when they fall off the animal. Some examples – burs, other fuzzy seeds.
Some seeds are light and feathery and are spread by wind. Some examples – maple tree “helicopters”, dandelion, milkweed.
• What is the reason for a seed in the life cycle? A seed ensures the continuation of the plant species. Seeds pass on the traits from the parent plant.
• What special features do seeds have to help them survive? Seeds are usually brown, black, grey, or other pale colors to blend in with the ground so they are hard to find by the animals that eat them. A seed has a hard seed coat to protect it until the conditions are right for the seed to germinate. Air, temperature, moisture, and sometimes light need to be in the right amounts based on plant species. Seeds have a food source inside to help the new plant (also inside) grow.
• Seeds also have special features that help to disperse or spread them. Seeds that spread out have a better chance of survival than seeds that just accumulate in one spot. Use your collected samples to discuss how they are dispersed. Note that one pod or seed head produces many seeds to increase the chance that some will grow.

Table of ContentsTable of ContentsTable of Contents Grade 3
79
Some seeds are spread by water. Example – coconut.
Other seeds just drop to the ground from gravity when the seedpod opens or when an animal tries to pick out a seed and other seeds fall. What is the problem with this method? If too many seeds fall in one spot, they will be too crowded to grow into a healthy plant. Some examples - seedpods/pinecones opening and dropping seeds.
During your discussion, show examples of some seedpods and seeds to discuss similarities and differences and how seeds are dispersed.
Some plants produce seeds but do not have obvious flowers, like conifers. Coniferous trees and shrubs have needles and usually do not drop them during the winter. Conifers make cones that have seeds inside. If you have a pinecone, discuss its adaptation for protecting seeds inside the scales. Conifers don’t have flowers, but do have male parts (pollen) and female parts that are pollinated by wind.
What if a plant doesn’t have flowers or cones? Some plants don’t have flowers or cones, so they don’t produce seeds. They make tiny cells called spores in cases that release them to the air. Ask students if they can think of plants that produce spores. Examples are ferns, mosses. They may say fungus, but reinforce that fungus is not a plant. Fungus is a separate kingdom in the living world. Spores from moss grow by living on something else. Air contains spores, but we can’t see or smell them. Spores travel through the air until they find the right conditions to grow.
• If you have time, discuss cones and spores.
Collecting Seeds• Explain to students that they will be collecting seeds to take home and/or use in the spring. The
seeds they take home should not be planted until next spring. Alternatively, the students could collect the seeds for the teacher to plant in the spring.
• Explain to students that you have marked certain types of plants from which to collect seedpods. These are the seeds that will grow the best when they are planted next spring.
• Show some examples. The best pods are dry and brown with no petals or dried petals. Share the photos from the folder and the examples you collected.
• Each student receives an envelope. Before students start, have them print their name on the envelope. Student may collect two pods. To remember the name of the plant, students should print the name or description (like the flower color) of the plant on the envelop
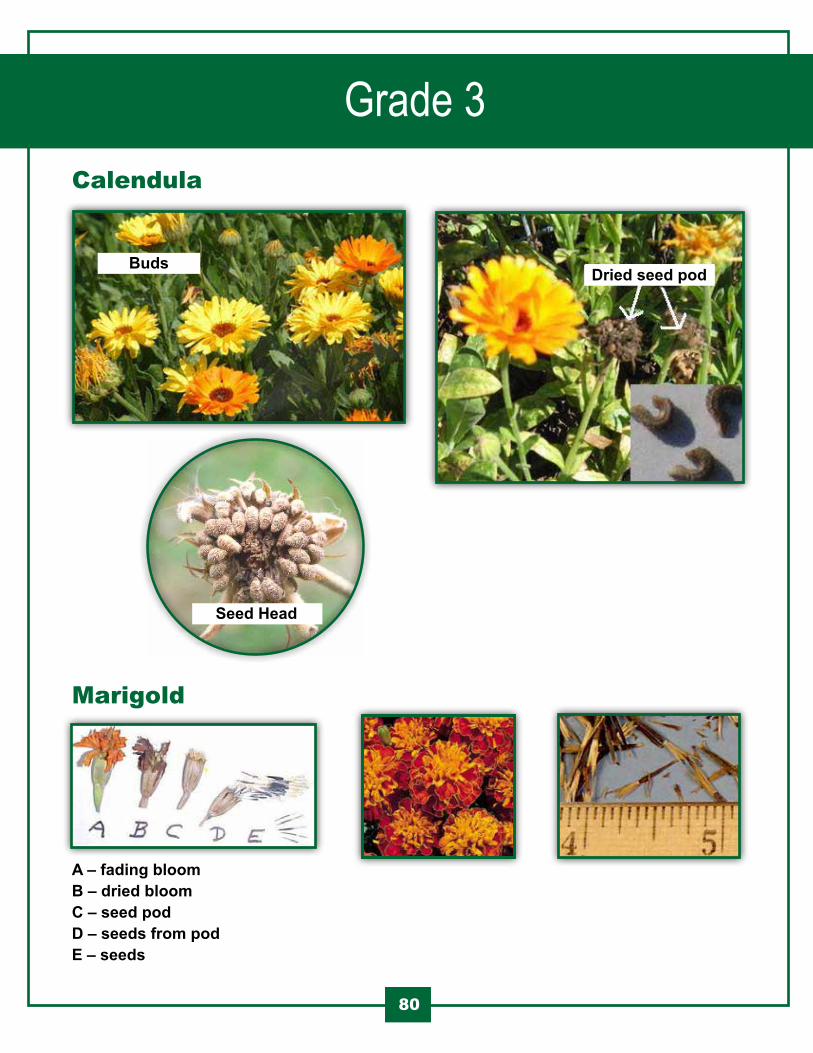
Table of ContentsTable of ContentsTable of Contents Grade 3
80
Calendula
Marigold
Buds
Seed Head
Dried seed pod
A – fading bloomB – dried bloomC – seed podD – seeds from pod E – seeds
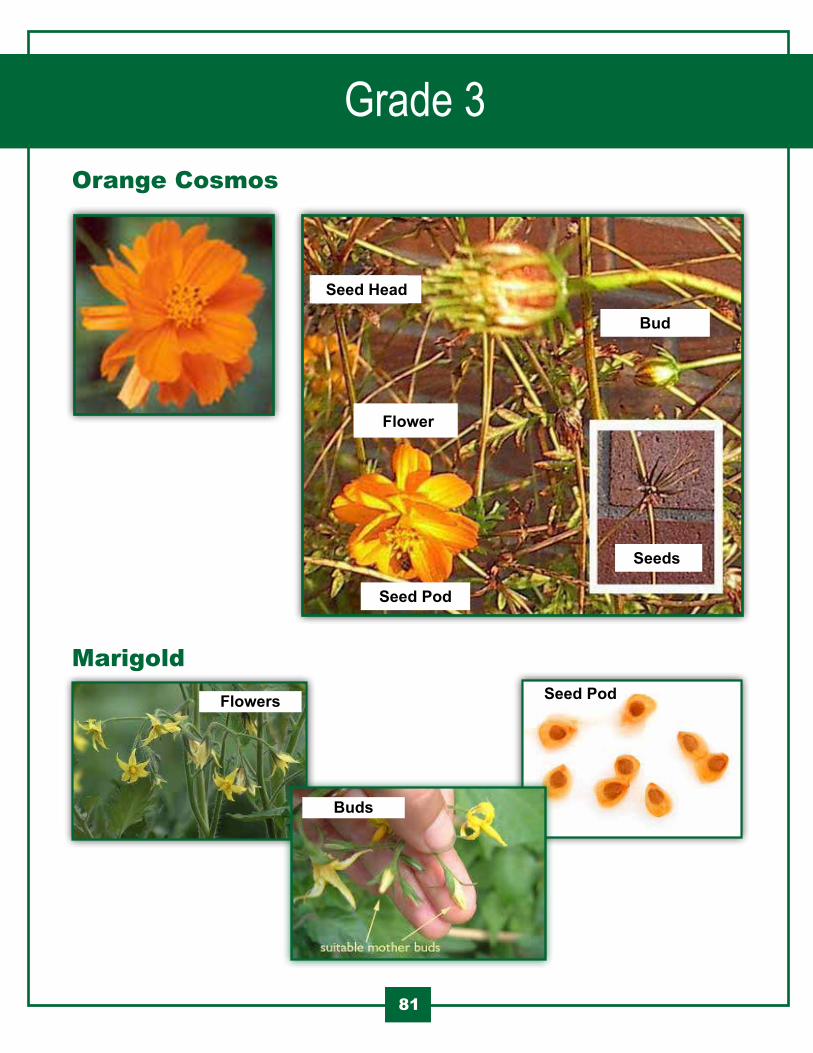
Table of ContentsTable of ContentsTable of Contents Grade 3
81
Orange Cosmos
Marigold
Seed Head
Seed Pod
Flower
Bud
Seeds
Buds
Flowers Seed Pod
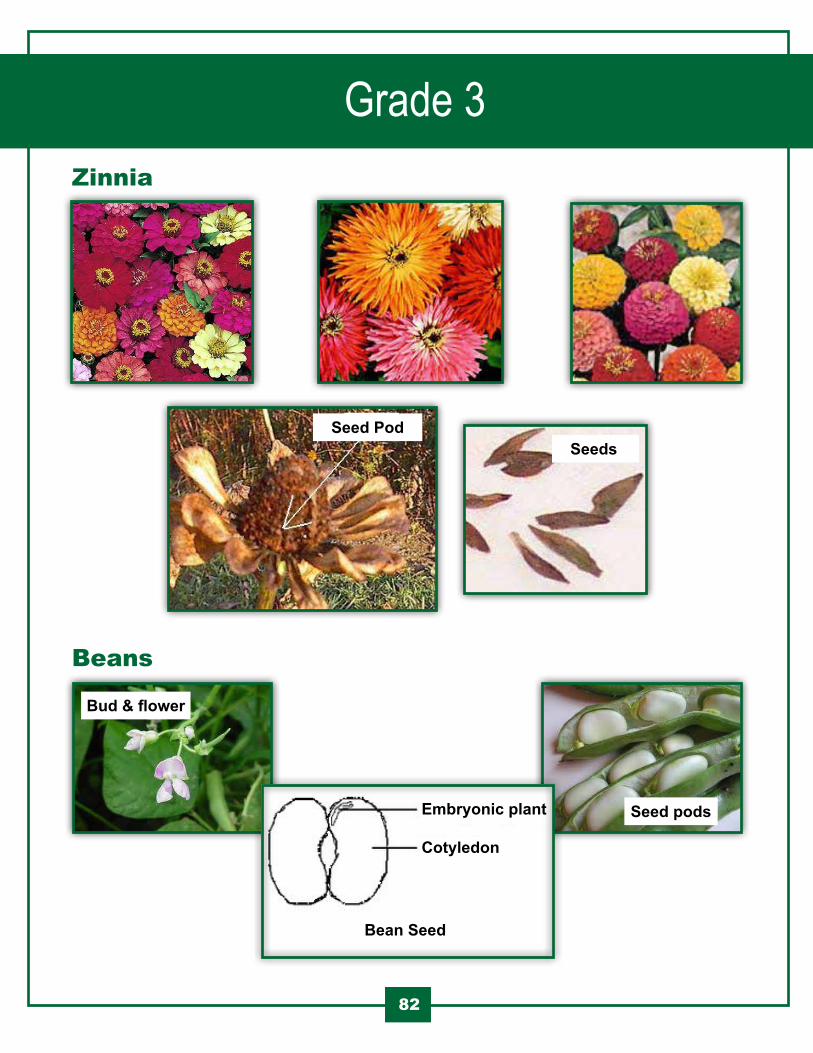
Table of ContentsTable of ContentsTable of Contents Grade 3
82
Zinnia
Beans
Bud
Seed PodSeeds
Seed pods
Bud & flower
Embryonic plant
Cotyledon
Bean Seed
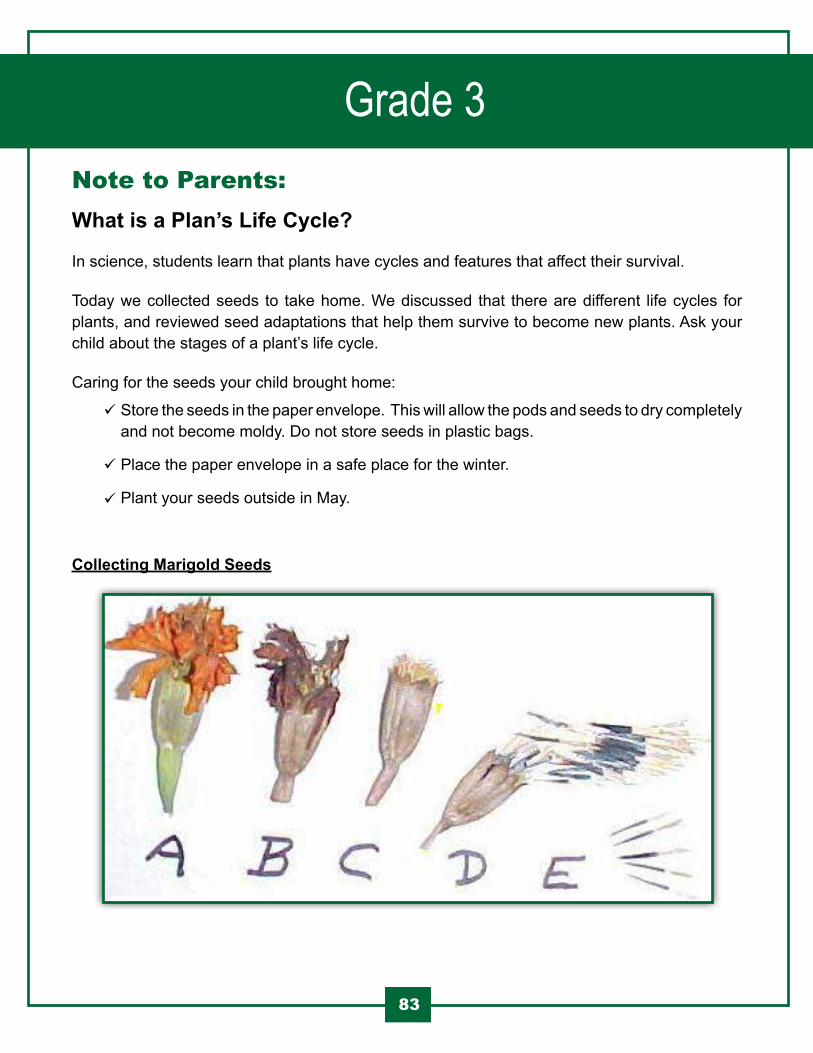
Table of ContentsTable of ContentsTable of Contents Grade 3Note to Parents:What is a Plan’s Life Cycle?
In science, students learn that plants have cycles and features that affect their survival.
Today we collected seeds to take home. We discussed that there are different life cycles for plants, and reviewed seed adaptations that help them survive to become new plants. Ask your child about the stages of a plant’s life cycle.
Caring for the seeds your child brought home:
Collecting Marigold Seeds
83
Store the seeds in the paper envelope. This will allow the pods and seeds to dry completely and not become moldy. Do not store seeds in plastic bags.
Place the paper envelope in a safe place for the winter.
Plant your seeds outside in May.
Table of ContentsTable of ContentsTable of Contents Grade 3Activity #2Title: Properties of Soil
Time: 30 minutes on the first day, 30 for a second session to discuss and observe the samples
Materials: • Samples of gravel, sand, silt (use flour), clay (use moistened flour or baking mix), and compost
• 5 mason jars with lids (or any glass or see through jar)
• Trowels
• 5 flat-bottom, paper coffee filters (not the cone-shaped variety which tends to rip along the bottom seam)
• 5 dry measuring cups like ¼ cup, 1/3 cup, ½ cup
• 5 liquid measuring cups
• 5 small buckets to collect soil samples, each from a different location (e.g., path, garden, trail, bare area in grass, playground)
• 5 funnels (can be cut from top of 2 liter plastic bottle)
• 2 large buckets filled with water
• 5 permanent markers
For follow up class:• Rulers for follow up analysis
• Worksheet for each student
• Pencil for each student
Suggested Month: Use this lesson when the class is learning about soil in the classroom. Usually the fall and spring are good times as the students are able to access soil from the garden.
Objective: Students learn that soil has properties that are based on the amount of mineral and organic material in the soil.
84
Table of ContentsTable of ContentsTable of Contents Grade 3Curriculum Expectations:
Science and Technology
Understanding Earth and Space Systems: Soils in the Environment 1 - Assess the impact of soils on society and the environment, and of society and the environment on soils.
2 - Investigate the composition and characteristics of different soils.
3 - Demonstrate an understanding of the composition of soils, the types of soils, and the relationship between soil and other living things.
About Soil• We’re examining soil today to examine the traits of different kinds of soil.
• What is the purpose of soil? Soil is capable of supporting plant and animal life. Soil anchors plant roots, holds water and air, rots dead plants and animals, and contains minerals and nutrients that plants and soil animals need.
• What is in soil? Soil has living and non-living parts. The non-living part consists of minerals from rocks and nutrients from dead plants and animals. The living part of soil has microscopic organisms. One teaspoon of soil can have billions of microscopic organisms. Air and water are in small spaces called pore spaces. Animals need air pockets. Soil animals need some water to keep them moist. Roots take in air and water.
• How is soil made? It takes from 100 to 20,000 years to make an inch of topsoil. That’s because the processes that make soil are usually slow. Living and non-living things are needed to make soil.
• Rocks break down into smaller and smaller particles from things like wind and water wearing away at the surface, water that freezes to ice in cracks and causes rock to break, and strong roots from living plants that break into rock. Show your samples as you discuss the following.
85
Gravel is the largest particle of soil and can be seen easily. Gravel looks like small, smooth rocks.
Sand particles are next in size and feel gritty when rubbed between the fingers. Sand particles can be easily seen.
Clay particles are the smallest soil particles and cannot be seen individually. Clay feels sticky when it is wet.
Table of ContentsTable of ContentsTable of Contents Grade 3• Dead plants and animals break down, or decompose, over time and create soil. The dead
material rots from water and is eaten by living things in the soil, like animals, fungus, and bacteria until it looks nothing like it did when it was living.
• An average soil sample is about half pore space to hold water and air, almost half tiny particles of rock, and the rest broken down (decomposed) plants and animals. The smaller the size of the rock particle, the less pore spaces there are, making it hard for plants and animals to live.
Examining Soil• Divide the class into 5 different teams.
• Have each group collect soil samples if your total class time is over 40 minutes or more. Each member of the group may add one scoop to their bucket. Each group will collect from a different location (e.g., path, garden, trail edge, bare grassy area). If you have a 30 minute class, pre-collecting soil samples is recommended.
• Discuss the soil samples and how to detect mixes by using touch, sight, and smell. Do mixes that are more organic have stronger odors? What might you predict lighter colored soil samples to have more of – sand or organic material? How do the samples feel – dry, wet, crumbly, spongy?
• Assign one student to label the lid of the jar to indicate the location of their soil sample. This student places a funnel with a coffee filter inside the funnel in the mouth of the jar.
• Assign another student the task of adding soil to the filter using the dry measure. Have them try to add one cup to the filter. How often will the dry measuring cup need to be filled to reach one cup? Tamp the one cup of soil gently.
• Assign one student the task of pouring one cup of water from the liquid measuring cup slowly into the filled filter. The rest of the group should watch to see how quickly the water drips through the sample. Take turns by having one group do this at a time so the entire class can watch the drainage of each sample.
• ASK: Why do you think some soils drain faster than others do? Discuss items that drain fast to help the students find the answer – sand, colander, closed hand vs. spread fingers. Spaces allow for faster drainage. Can you make any predictions about the soil components based on the drainage speed? Do you think any have more sand or clay than others do? For example, soils with a high content of gravel (the largest soil particle) will drain faster than those with a high mineral content of clay (the smallest particles.)
86
Table of ContentsTable of ContentsTable of Contents Grade 3• Let the water drain out completely. Have a student pour the water in the jar into the empty liquid
measuring cup. What is the level? What is the difference between the amount in the measuring cup and the one cup that was poured? Where is the difference? It is being retained in the soil. Compare the water retention of the different soil samples.
• Have a student add soil to the jar so the soil level is a little over half of the jar.
• Have a student fill the Mason jar nearly to the top with water. Twist on the lid and make sure it’s on tight.
• Have students take turns to shake each jar, and then place the jars upright to let the following week have students observe, measure, and sketch the layers that settled out.
• Have students wash their hands.
One Week Later• What to expect: Soil from different locations has different mixes of mineral content. The layering
will differ by location. Sand will settle quickly to the bottom. Silt will take longer to settle on top of the sand layer. Clay will take the longest to settle and some clay particles will not settle. Cloudy water indicates suspended clay particles. Samples with a lot of organic material will have stained looking water – like tea from tea leaves.
• Possible discussion questions
• Some notes to help your discussion
87
Are all soils made of the same things? How are they the same or different? What is in the layers?
How do the samples from different locations compare? Would you have learned as much about soil if all groups collected samples from one location? Why?
What kind of soil mix would be best for a sports field? Why?
What would happen if our gardens had a lot of clay or a lot of sand?
How does the mix affect plants and animals?
Since the pieces are heavy, gravel is sometimes used to cover soil in order to keep out weeds.
Water and nutrients drain quickly through sand and gravel.
Clay helps support plant roots and the plant. Too much clay provides little pore space for water, air, plant roots, or organisms, and produces sticky soil when wet and very hard soil when dry. The result is poor drainage, poor germination, and poor plant growth. Heavy clay soil is slow to warm in the spring.
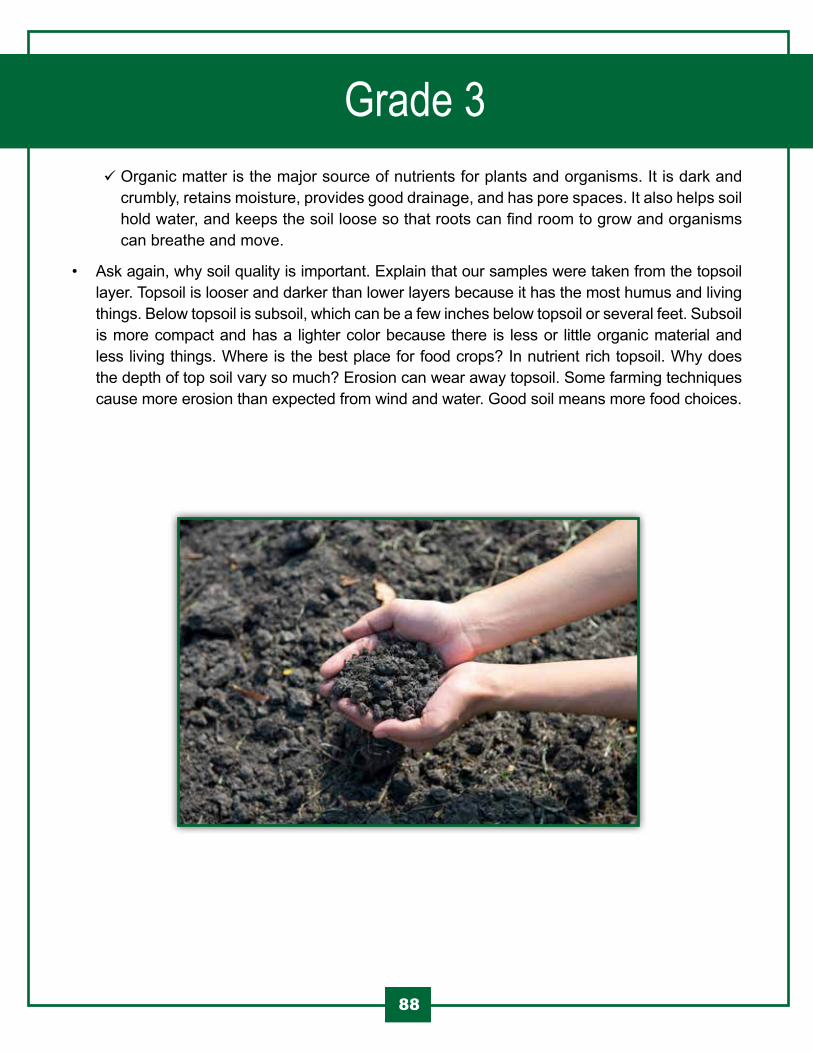
Table of ContentsTable of ContentsTable of Contents Grade 3
88
Organic matter is the major source of nutrients for plants and organisms. It is dark and crumbly, retains moisture, provides good drainage, and has pore spaces. It also helps soil hold water, and keeps the soil loose so that roots can find room to grow and organisms can breathe and move.
• Ask again, why soil quality is important. Explain that our samples were taken from the topsoil layer. Topsoil is looser and darker than lower layers because it has the most humus and living things. Below topsoil is subsoil, which can be a few inches below topsoil or several feet. Subsoil is more compact and has a lighter color because there is less or little organic material and less living things. Where is the best place for food crops? In nutrient rich topsoil. Why does the depth of top soil vary so much? Erosion can wear away topsoil. Some farming techniques cause more erosion than expected from wind and water. Good soil means more food choices.

Table of ContentsTable of ContentsTable of Contents Grade 4Activity #1Title: Making a Garden Map
Time: Approx. 30 minutes
Materials: • A pencil for each student
• A clipboard for each student
• A sharpie for you
• A blank map template of the garden area you will use, one copy for each student
• Compasses for your students to share
Suggested Month: Use this in the fall when students are learning about maps in the classroom.
Objective: Students design and label a simple map and answer questions to reinforce their understanding of cardinal directions.
Curriculum Expectations:
Social Studies
• B3.4 Demonstrate an understanding of cardinal and intermediate directions (i.e., NW, SW, NE, and SE), and use these to locate selected areas.
• B2.3 Analyse and construct print or digital maps.
About Maps• What is a map? A map is a visual representation of an area.
• Why are maps important? Different map types emphasize certain types of information. Some examples are: maps help you locate where countries and oceans are; maps help you get from one place to another; maps help you locate where places and landmarks are; maps help you learn about the geography, goods and services, and populations of an area.
89
Table of ContentsTable of ContentsTable of Contents Grade 4• What are some examples of types of maps? Some types of maps are climate maps to give
information about climate and precipitation; economic or resource maps to show economic activity and types of natural resources; physical maps to show physical features like rivers, lakes, and mountains; political maps to show boundaries of states and countries, capitals, and cities; road maps to show mileage, highways, roads, airports, railroad tracks, cities, parks, rivers, lakes, and other points of interest; and topographic maps to show the elevation and shape of an area. In addition to these maps, other types of maps are atlases and globes.
• What is the name for a mapmaker? A mapmaker is a cartographer. Students will be cartographers today to make a map of certain features in a garden area.
Making a Map• In advance sketch out the school location and parking lot on the Student – Worksheet template
(at the end of this lesson). Photocopy one worksheet per student.
• Give each student a clipboard and worksheet. Keep a clipboard and worksheet for yourself.
• What do we need on our map? The major components of a map are a title, compass rose, legend, and scale. Complete these parts of a map together.
90
What is needed to identify the map? Students add a title to the map.
The legend is the key on a map to explain symbols on the map. As a group, go over the items in the key that they will label. Decide on a symbol for each item in the key and draw the symbol in the key. You will use the symbols to label the location of the item on the map.
The scale is used to read measurement on a map. A line of a certain length, like an inch, is used to represent a fixed measurement, like a number of miles. We are not adding a scale to our map.
The compass rose is the symbol on a map that shows directions. Ask the students if they know what cardinal and ordinal/intermediate directions are. Cardinal directions are north, south, east, and west. Ordinal/intermediate directions are northeast, northwest, southeast, and southwest.
Label the compass rose. If you are in the classroom, can you label the compass rose? Probably not. You must label the directions by orienting the map in the garden area. This means your map needs to be positioned to match the appearance of the garden area.
Table of ContentsTable of ContentsTable of Contents Grade 4• Outside, split the students into groups to share a compass. As a group, guide the students
through the labeling of the compass rose. Give the compass to one student in the group. The compass is placed flat on the clipboard the student is holding. The clipboard is parallel to the ground. The “N” of the compass is at the top. To find north, the student with the compass turns until the point of the needle matches up with “N”. Find the point on the compass rose that matches up with the location of north on the map. Mark the direction on your compass rose and hold up for the students to see. Finish labeling the compass rose with the students by asking where the other directions would be located on the compass rose, e.g., where is east? East is the cardinal direction to the right of north on the compass rose.
• Have the students mark the location of the items in the key on their map. Discuss and show the prelabeled areas on the map (school and parking lot). Add the outline of the school garden. Provide assistance as needed. Students do not need to walk to the item. What is growing where? What’s in the garden and where? If nothing is growing yet, ask the students to map out what types of plants they think should grow in the school garden. Label the map. Ask the students to continue to add items to their map (e.g., roads, sidewalk, soccer field, jungle gym). As the students complete their maps, complete your map.
• Conclude the activity by reviewing the completed map. Show your completed map. Ask the students questions to test their understanding of using the compass rose to find items, e.g., what is located east of the parking lot (or some other item). What direction will you travel to get to your garden bed (or some other item)?
• Optional, if you have extra time. Ask the students if they can think of a way to figure out where east and west are if they are outside and do not have a compass. To guide them through the process, ask the students in which direction does the sun rise? The sun rises in the east. And, in which direction does the sun set? The sun sets in the west. If they are outside in the morning, they will look for the position of the sun in the sky to find east. If they are outside in the afternoon, they will look for the position of the sun in the sky to find west.
91
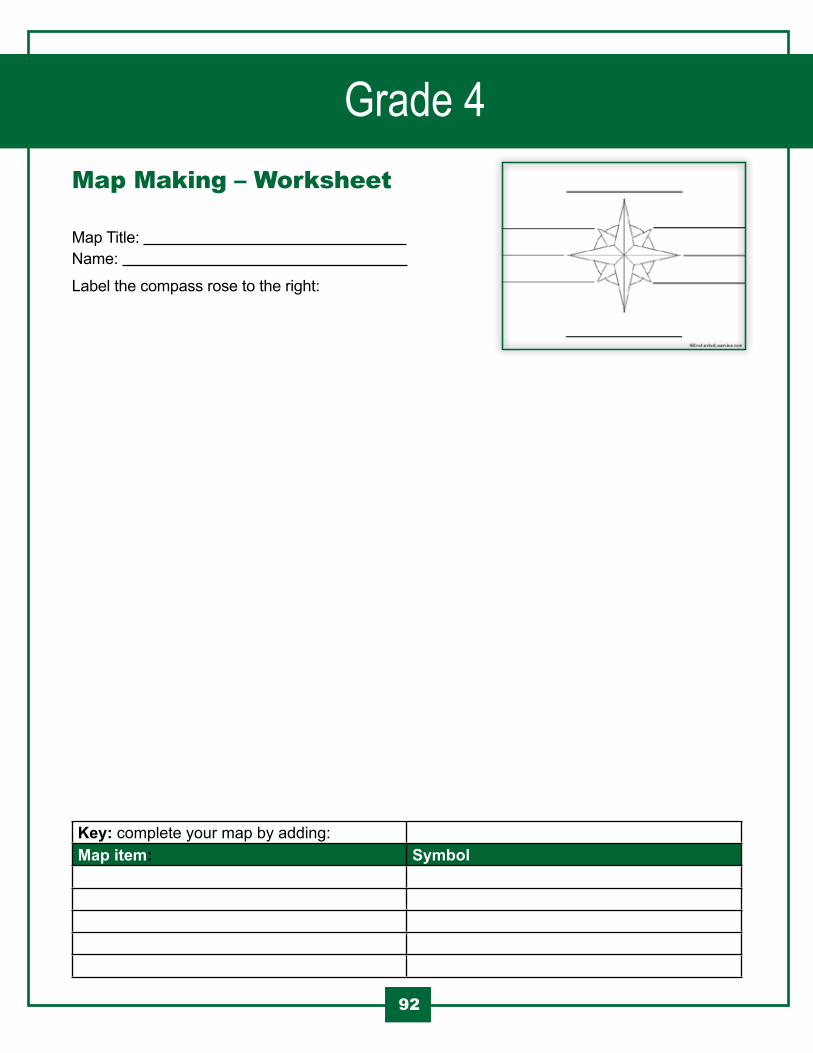
Table of ContentsTable of ContentsTable of Contents Grade 4Map Making – Worksheet
Map Title: Name:
Label the compass rose to the right:
Key: complete your map by adding:Map item: Symbol
92
Table of ContentsTable of ContentsTable of Contents Grade 4
93
Activity #2Title: Putting the Gardens to Bed
Time: Approx. 30 minutes
Materials:
• Shovels
• Compost /fertilizer
• Trowels and Frisbees to examine compost or a wheelbarrow filled with compost
• Buckets for weeds
• Compost thermometer
Suggested Month: Use this lesson in the fall when the garden beds are being composted (fertilized).
Objective: Students understand how compost is made by living things and why it’s important.
Curriculum Expectations:
Science and Technology
Understanding Life Systems 3 - Demonstrate an understanding of habitats and communities and the relationship among the plants and animals that live in them.
2.1 – Follow established safety procedures for working with soils and natural materials.
3.5 – Classify organisms, including humans, according to their role in a food chain (e.g., producer, consumer and decomposer).
Table of ContentsTable of ContentsTable of Contents Grade 4
94
ActivityThe Big Pull (Putting the gardens to bed)
• The students will work in sections of the garden to prepare beds for winter.
• Each class will be divided in half. The class coordinators will teach 2 lessons per class.
• While one half of the students are receiving their lesson, the other half will be working with other staff. The students working with the gardeners will remove all vegetation and weeds from the beds, putting all vegetable debris in the compost, and weeds in a separate bag to be picked up as yard waste by the City.
• If the garden area has paths with decomposed wood chips, students dig in the paths 10 to 12 inches deep and put the decomposed wood chips from the paths in the center of the cleared beds.
• If the garden area does not have decomposed wood chips, students will add compost to the beds from the compost pile or from pre-filled buckets of compost.
• Some students will be assigned to adding wood chips to the path areas that were dug (if you have laid down wood chips).
About the compost:
• What is decomposition? Decomposition is a process in nature that breaks down dead plants and animals and returns their nutrients to soil. Is the process fast? No, decomposition is a slow process. The leaves need about 2 years to decompose into compost. Breaking up a leaf just makes a smaller leaf. Decomposing a leaf releases nutrients inside the leaf into air, water, and soil.
• What organisms help decomposition? Decomposition happens when fungus, bacteria, and invertebrates (FBI), like insects, worms, snails, slugs, millipedes, mites, and centipedes eat plants and animals in the compost pile.
• Many animals found in soil are found in compost. Earthworms, pill bugs, sow bugs, millipedes, slugs, and snails are attracted to the compost pile to feed on dead and decaying plants and animals. Then, more animals come to the compost pile to eat the animals that are eating the dead plants and animals. These predators include centipedes, ground beetles, ants, and rove beetles.
• For us, the compost pile results in nutrient-rich compost for our gardens. For the animals of the compost pile, it’s a habitat for them to find shelter and food.

Table of ContentsTable of ContentsTable of Contents Grade 4
95
• Examine some compost during your discussion using trowels and Frisbees or a wheelbarrow filled with compost. Examine the wood chips that are used in paths. Compare textures of both and discuss how the compost and wood chips are suited to the jobs we have given them. Discuss how their texture benefits their purpose – why wood chips go in the path and compost in the beds.
• If you are by the composter and wood chips, take the temperature of the air, compost, and wood chips. Decomposition results in heat energy being released. If the piles are actively decomposing, the temperature should read in the range of 32 to 37 degrees Celsius.
• How do you know decomposition is at work in nature/forests? You don’t see increasing piles of dead trees, plants, and leaves. You don’t see a lot of dead animals and their waste.
• Review with students why we compost. We compost to:
• Be sure to have children wash their hands at the end of this activity
Compost – crumbly, spongy, holds water, nutrients and minerals released as it breaks down, porous for seeds, plant roots, animals and to hold air and water.
Wood chips – chunky, heavy, bigger pore spaces for faster drainage, takes longer to break down, chokes plant growth when a thick layer is used.
improve soil
increase water retention
control weeds
add nutrients for plants and animals
provide pore spaces for air, animals, and roots
attract organisms that help decomposition
add more nutrients to the soil
reduce soil compaction from having too much of the mineral part (sand, silt, and clay) of soil.
Reduce waste (decrease stuff to throw away)
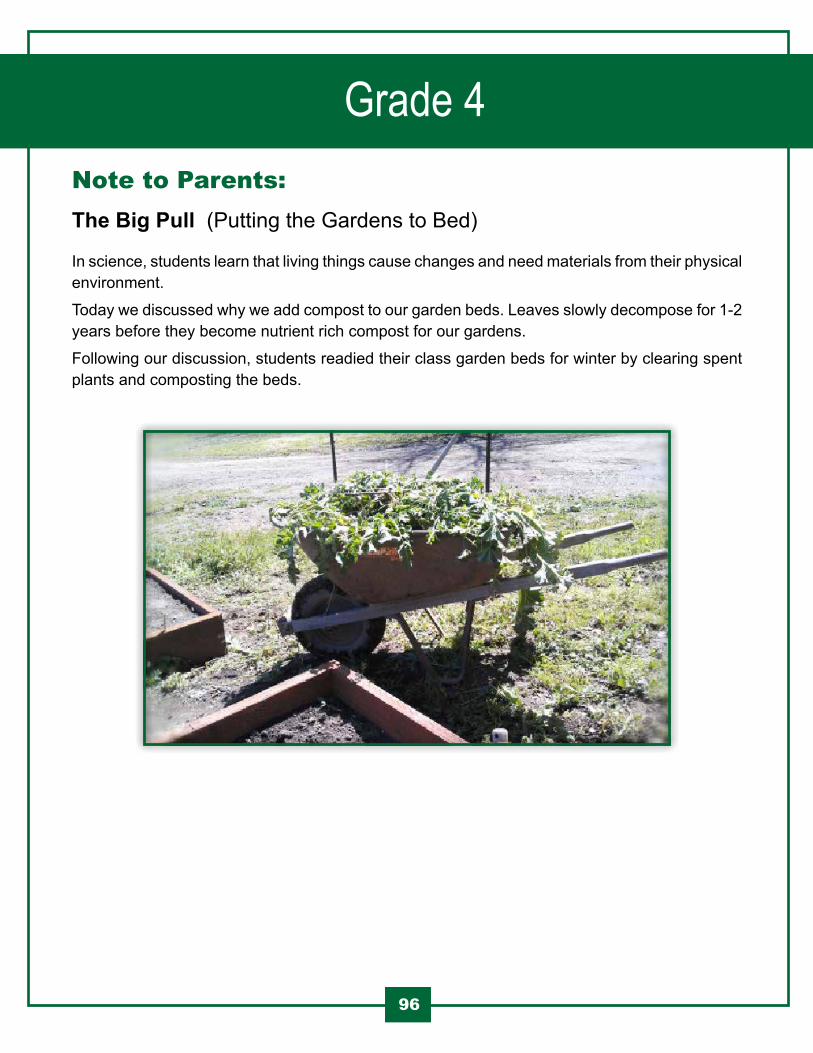
Table of ContentsTable of ContentsTable of Contents Grade 4
96
Note to Parents:The Big Pull (Putting the Gardens to Bed)
In science, students learn that living things cause changes and need materials from their physical environment.
Today we discussed why we add compost to our garden beds. Leaves slowly decompose for 1-2 years before they become nutrient rich compost for our gardens.
Following our discussion, students readied their class garden beds for winter by clearing spent plants and composting the beds.
Table of ContentsTable of ContentsTable of Contents Grade 5Activity #1Title: Garden Changes Over Time
Time: Approx. 1 hour
Materials: • Rulers
• Clip boards
• Pencils
• Garden map
• Graph paper (one per student)
• Master garden map/grid
Suggested Month: September
Objective: To introduce the students to the garden and set the routine for looking at changes in the garden for the rest of the school year.
Teacher Note: Briefly review the concepts of perimeter and area.
Curriculum Expectations:
Mathematics
Measurement
• Estimate, measure, and record perimeter, area, temperature change and elapsed time, using a variety of strategies.
• Determine the relationships among units and measurable attributes, including the area of a rectangle and the volume of a rectangular prism.
Data Management and Probability
• Collect and organize discrete or continuous primary data and secondary data and display the data using charts and graphs, including broken-line graph.
97

Table of ContentsTable of ContentsTable of Contents Grade 5Data Management and Probability1. Begin by taking a tour of the garden using the map to identify various areas (e.g., where
different plants are growing).
2. Have the students work in pairs to measure the length and width of the garden. Use this information to determine the area of the garden (L x W = A).
3. Discuss the grid that can be made by this information. Use this information to make one-meter squares of the garden (e.g., one square on the graph paper). Assign each student to a square. If there are not enough squares, two students may have the same square (it depends on the size of the school garden).
4. Each student should mark his/her square on the garden map they have drawn. As the teacher you should keep a master copy of where each student is investigating.
5. Explain to the student that they will be observing and sketching their patches of the garden twice a month for the next two months.
6. On the back of the map students should write some notes explaining their observations, along with the date. Encourage them to use their rulers to measure some of the plants found in their patches, as part of their observations.
7. Be sure that children wash their hands when they come inside.
Extension Activity:The student may choose one of the plants in their area to research more in depth.
98
Table of ContentsTable of ContentsTable of Contents Grade 5
99
Activity #2Title: Planting a Vegetable Garden
Time: Approx. 1 hour
Materials: For the Teacher:
• Seeds (onions, carrots, zucchinis, tomato seedlings and seed potatoes
• String
• Wooden stakes
• Tacks
• Scissors
• Water key
For the Students:
• Notebooks
• Pencils
Suggested Month: Plant in May/June – Harvest in September/October
Objective: Determine that foods are made up of a variety of components. The students will plant seeds for vegetables that they will later harvest.
Teacher Note: Briefly review the concepts of perimeter and area.
Curriculum Expectations:
Health and Physical Education
Healthy Living
C1 – Demonstrate an understanding of factors that contribute to healthy development (e.g., healthy food choices).
C3 – Demonstrate the ability to make connections that relates to health and well-being – how their choices and behaviours affect both themselves and others, and how factors in the world around them affect their own and other’s health and well-being.
Table of ContentsTable of ContentsTable of Contents Grade 5
100
Mathematics
Data Management and Probability
• Read, interpret and draw conclusions from primary data (e.g., survey results, measurements, observations) and from secondary data (e.g., precipitation or temperature data in the newspaper, data from the Internet), presented in charts, tables and graphs.
Background InformationRemind the students about how food goes from the farm to the grocery store. Ask students to give examples of what types of foods go from the farm to the store?
There is a specific growing season for various plants. The growing season is the period during the year in which plants grow. This is true for flowers as well as crops. Crops are plants that are grown for food.
The growing season is determined by the climate of a region. Farmers look at the amount of daylight, the temperature, and the amount of rainfall for an area to determine what crops to plant.
In Canada, the growing season for most plants occurs between the last frost and the first frost of the year. Frost is frozen dew, so it occurs when the temperature is 0 degrees Celsius or colder.
Some plants in Ontario have a limited growing season. For example, the strawberries in the garden only produce one harvest, usually sometime in late May or early June. People used to get fresh strawberries only once a year. Students’ great-grandparents probably saw fresh strawberries in the grocery store for only a short period each year. The strawberries could be preserved, usually as jelly or jam to last throughout the year. This would have been done with the June crop.
Now, with refrigeration and air/ground transportation, the students can buy fresh strawberries from the grocery store anytime. These strawberries usually come from California or South America, where the growing season is longer.
Some plants are hardier than others. A hardy plant is one that can survive colder temperatures. Some plants have a longer growing season than others.
In this lesson students will plant hardy seeds with a relatively short growing season. It will take roughly two to three months for them to go from seed to harvest. Because these crops grow quickly, farmers can plant them more than once per growing season.
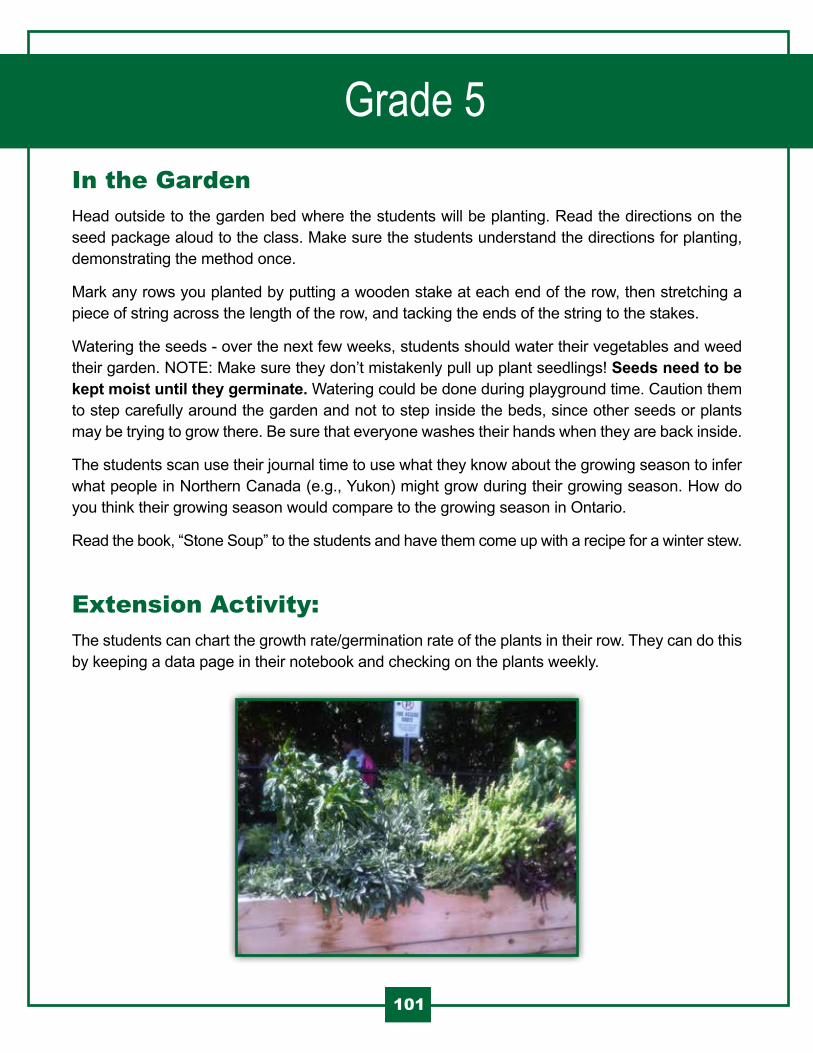
Table of ContentsTable of ContentsTable of Contents Grade 5
101
In the GardenHead outside to the garden bed where the students will be planting. Read the directions on the seed package aloud to the class. Make sure the students understand the directions for planting, demonstrating the method once.
Mark any rows you planted by putting a wooden stake at each end of the row, then stretching a piece of string across the length of the row, and tacking the ends of the string to the stakes.
Watering the seeds - over the next few weeks, students should water their vegetables and weed their garden. NOTE: Make sure they don’t mistakenly pull up plant seedlings! Seeds need to be kept moist until they germinate. Watering could be done during playground time. Caution them to step carefully around the garden and not to step inside the beds, since other seeds or plants may be trying to grow there. Be sure that everyone washes their hands when they are back inside.
The students scan use their journal time to use what they know about the growing season to infer what people in Northern Canada (e.g., Yukon) might grow during their growing season. How do you think their growing season would compare to the growing season in Ontario.
Read the book, “Stone Soup” to the students and have them come up with a recipe for a winter stew.
Extension Activity:The students can chart the growth rate/germination rate of the plants in their row. They can do this by keeping a data page in their notebook and checking on the plants weekly.
Table of ContentsTable of ContentsTable of Contents Grade 6Activity #1Title: Investigating Monocots and Dicots
Time:
Prep-time:
• Seed preparation: Overnight
• Growing period: 3-4 days
Duration:
• Seed investigation and ‘planting’: 30 minutes
• Final investigation and clean-up: 30 minutes
Materials: • Clear glass/plastic jars or cups – each student/group will need two jars
• Water
• Two small mixing bowls
• Paper towels
• Corn seeds and mung beans – for Part One of this investigation, you will need one of each seed per student; for Part Two, you will need 5-10 of each seed per group/student.
• Magnifying glasses (optional)
• Toothpicks (one per student – optional)
Suggested Month: Early spring so that students can plant their grown seedlings in the school garden.
Objective: During this investigation, students learn about monocotyledons and dicotyledons. In Part One, students explore the difference between the seed structure of monocots and dicots by examining bean and corn seeds. In Part Two, students sprout seeds of both types and observe the difference in their growth.
102
Table of ContentsTable of ContentsTable of Contents Grade 6Curriculum Expectations:
Science and Technology
Understanding Life Systems
2 - Investigate the characteristics of living things, and classify diverse organisms according to specific characteristics.
2.2 - Investigate the organisms found in a specific habitat and classify them according to a classification system.
2.3 - Use scientific inquiry/research skills to compare the characteristics of organisms within the plant or animal kingdoms.
3.1 - Identify and describe the distinguishing characteristics of different groups of plants and use these characteristics to further classify various kinds of plants.
Preparation:1. Fill the mixing bowls with water. Place the beans in one bowl and the corn seeds in the other
bowl and soak them overnight to speed up germination.
2. Before beginning the lesson, drain the beans and corn seeds in a colander or strainer.
Procedure:Part 1 – Inside Seeds1. As you work through this activity, stop along the way to talk about the different parts of a seed
and their basic functions.
2. Introduce or review the terms cotyledons, monocotyledons and dicotyledons.
3. Provide each student with one corn seed and one bean seed.
4. Instruct your students to examine each seed. How are they similar? How are they different? Point out the scar on the side of the seed that shows where it was attached to the parent plant.
5. Have the students carefully remove the seed coat from the beans. Ask them why they think a seed needs a “coat”.
103
Table of ContentsTable of ContentsTable of Contents Grade 66. Demonstrate to the students how to pry the two parts of the bean apart with their fingers (a
toothpick may make it easier).
7. Using the magnifying glasses (or just good, careful looking), have the students observe the inside of the bean. What do they see? Point out the embryo and the food supply and discuss the basic function of both.
8. Compare the bean seed to the corn seed. Instruct the students to remove the seed coat from the corn seed. Can the corn seed be easily split in half? What is inside the corn seed? Can you locate the embryo and the food supply within a corn seed?
9. Which seed do you think is the monocot and which is the dicot? Why?
Procedure:Part 2 – Seed Germination1. You may wish to have students work individually or in small groups for this activity.
2. Instruct the students to line their jar with paper towels that have been folded in half. Have them place wet, crumpled paper towels into the centre of the jar to hold the other paper towels against the side of the jar.
3. The students should now add a few centimeters of water to the bottom of each jar.
4. Provide each group/student with 5-10 bean seeds and instruct them to place the beans in one jar between the paper towel and the glass (so that they can see them).
5. Provide each group/student with 5-10 corn seeds and instruct them to place the corn seeds in the other jar in the same manner.
6. Over the next few days, provide time for your students to monitor their seeds, adding water as required, ensuring that the paper towels are kept damp.
7. Instruct your students to observe the jars each day, watching for changes in the seeds. What happens to the seeds? Which plant part appears first?
8. Compare the seeds when the roots and shoots appear. How are they different? How many seed leaves does the corn have? How many do the beans have? Which seeds are monocots and which are dicots? Was your original guess (from Part one) correct?
104
Table of ContentsTable of ContentsTable of Contents Grade 6Follow up and Discussion:1. Create diagrams of the corn seed (monocot) and bean seed (dicot). On the diagrams, label
the seed coat, embryo, food supply and cotyledons.
2. Create diagrams of the corn sprout and the bean sprout. On the diagrams, label the roots, stem, and cotyledons.
3. Discuss the characteristics of monocots and dicots. How do the structures of these plants differ? How can we identify monocots and dicots by simply looking at the plants? Identify some common monocots and dicots.
105
Table of ContentsTable of ContentsTable of Contents Grade 6
106
Activity #2Title: Saving Seeds
Time: Approx. 1 hour
Materials: • 1 pair of scissors• 1 knife• Small baggies• Brown paper lunch bags • Notebooks• Pencils
Suggested Month: In the fall, check the garden before starting this lesson to be sure there are seeds ready to collect.
Objective: Students will be gathering seeds from various plants in the garden in an effort to replant for next year. You can choose to harvest any or all the plants suggested.
Curriculum Expectations:
Science and Technology
Understanding Life Systems
2 - Investigate the characteristics of living things, and classify diverse organisms according to specific characteristics.
3 - Demonstrate an understanding of biodiversity, its contributions to the stability of natural systems, and its benefits to humans.
2.1 - Follow established safety procedures for outdoor activities and field work.
3.2 - Demonstrate an understanding of biodiversity as the variety of life on earth, including variety within each species of plant and animal, among species of plants and animals in communities and among communities and the physical landscapes that support them.
Table of ContentsTable of ContentsTable of Contents Grade 6
107
Teacher Note: Many of the seeds collected, especially from the vegetables, will need to dry before you store them in a cool, dry place for next spring. Use cookie sheets to spread the seeds out and let them dry. To speed the process, you can lay a piece of screen over the lip of the trays, so that air can circulate all around.
Background InformationA seed is produced when a plant has been successfully pollinated. In simplest terms, it is a plant embryo. The outer covering is the seed coat. It protects the tiny plant and its food source until germination. To illustrate this you can show an image of a peanut in half. The small pointed piece at one end of the peanut is actually the stem and if you look carefully you can see the small leaves. The majority of the peanut is food supply for the young plant until it can break through the ground and grow leaves and then through photosynthesis produce its own food.
Throughout history, people needed to save and replant their seeds in order to survive. The early settlers brought seeds with them so that they could grow their favorite crops. Today, even though seeds can be bought, many farmers save their seeds to cut down on costs. One tomato or pepper could yield hundreds of seeds, each one capable of producing a plant that could have many tomatoes or peppers.
Most garden seeds mature dry in pods, capsules, flowers, or fleshy fruits. The ideal time for gathering seeds varies from crop to crop. Some are ready when the fruit or vegetable is ripe. Others should be left on the plant until weeks after you’d normally eat them. Generally, let vegetable garden seeds dry on the plant as long as possible.
When a flower starts to droop then turn brown, it is usually a sign that it no longer needs to attract pollinators, and the seeds are beginning to form. The seeds are not ready for harvesting until the stalks have dried out and turned brown or the seedpod has turned to a dark colour. If you can lightly tap the stalk or pod and hear rattling, the seeds are mature.
Table of ContentsTable of ContentsTable of Contents Grade 6
108
Introduction: Explain that the growing season for many of the plants is over. Some of the vegetables and flowers have been left in the garden, so students can harvest the seed for next season. Let students help determine which seeds the classroom will gather. Some of the seeds can be collected as they are, while other will have to be dried.
Investigation:1. To harvest flower seeds, students should look for brown flowers. Carefully bend the flower
stalk, and then shake the flower head into a paper bag. The seeds will fall off into the bag. If the seeds are encased in a pod on top, student can carefully cut off the pod and open it over the bag. If there is a fluff or chaff mixed with the seeds, discard it before saving the seeds. If there is any moisture on the seeds, they must be spread out to dry before storing.
2. To harvest seeds from vegetables still in the garden, follow directions below for each type:
Students then can compare and contrast the benefits/drawbacks of harvesting their own seeds instead of buying new ones each year.
Extension: Encourage the students to study different plants in their neighbourhood on the playground to discover different kinds of seeds and their containers.
For beans or peas, the pod should be left on the plant until it rattles. Remove the seeds from the pods and spread them out to dry.
Peppers should be left on the plant until they are red. Cut open and scrape out the seeds. Spread them out to dry. They are fully dry when the seeds break in two instead of bending.
Tomatoes should also be left on the plant until they are fully ripe. The seeds have a coating that needs to be removed. To do this, squeeze the seeds into a bowl. Add water and let it stand at room temperature three to four days. Have the students stir the mixture a few times each day to prevent mold. The good seeds will sink to the bottom of the bowl. These can be spread out to dry.
The summer squash seeds probably will not be ready to harvest during the start of school year (Sept.). It is only when the squash is hard and cannot be dented with a fingernail that the seeds are mature enough to harvest. Cut open and scrape the seeds into a bowl. Wash and rinse them before spreading them out to dry.
a.
b.
c.
d.

Table of ContentsTable of ContentsTable of Contents Grade 7
109
Activity #1Title: What Makes Up an Ecosystem?
Time: Approx. 1 hour
Materials: • National Geographic Magazines, Hunter and Insect Magazines
• Pictures
• Glue
• Notebooks
• Pencils
• Construction paper
• Colouring utensil – markers, pencil crayons
Suggested Month: Any month.
Objective: The students will be able to develop a model of an ecosystem in a cooperative learning group.
Curriculum Expectations:
Science and Technology
Understanding Life Systems
2 - Investigate interactions within the environment, and identify factors that affect the balance between different components of an ecosystem.
2.2 - Design and construct a model ecosystem (e.g., composter).
Introduction:For this lesson, the teacher and students need to bring magazines with various pictures of animals, insects, and vegetation. Students also need to know the differences between predators and prey, and have knowledge about the basic requirements of an ecosystem. This lesson will aid in future lessons having to do with food webs, primary and secondary producers, and consumers.
Table of ContentsTable of ContentsTable of Contents Grade 7
110
Discussion:Ask students to imagine what would happen if the insects had no predators.
Would the garden and/or park change in any way?
Do you think that there would be any type of major damage done to the vegetation in the garden/park?
After this series of questions, tell the students that today it is their task to create the perfect ecosystem. They will have to create an ecosystem with a working food chain.
Activity:Students will be given the task of creating their own ecosystem. They can include water, trees, animals, insects and whatever else they decide to incorporate into their system. They will be working in groups of three and everyone must agree on what makes the ecosystem work. They must label the items that can be labeled as either autotrophic, heterotrophic, or saprotrophic energy sources.
Autotrophic: Self-sustaining or self-nourishing organisms (e.g. green plants, algae, and certain bacteria) that have the ability to synthesize their own food from inorganic materials, e.g., carbon dioxide and nitrogen.
Heterotrophic: Pertaining to the utilization of organic compounds as a source of carbon. For instance, a heterotrophic organism is one utilizing an organic compound to obtain carbon that is essential for growth and development. Examples of such organisms are animals, which are not capable of manufacturing food by inorganic sources, hence, must consume organic substrates for sustenance.
Saprotrophic: any organism, especially a fungus or bacterium, that lives and feeds on dead organic matter.
All members of the groups must agree on the labels assigned to the different organisms. In addition to the labels, they must draw in pencil, arrows between organisms that feed on other organisms.
Direct students to also point out the energy lost between each exchange by a different shaped arrow. When they complete this task, have each group share with the class and explain why they chose and set up their ecosystem in that particular manner.
When completed, use the students’ ecosystems as a visual for the teacher explanation. As a group, discuss what makes up an ecosystem, the organisms that feed upon each other, and review the concepts of autotrophs, heterotrophs, and saprotrophs. During this session, encourage students to take notes. Throughout the discussion, continue to make references to predators and their prey within the systems.
Table of ContentsTable of ContentsTable of Contents Grade 7
111
Critical Thinking:What would happen if all of the prey were to die off?
How do abiotic factors affect the success of predators?
What would happen if all predators were removed?
What would occur if all insects were taken out of the ecosystems that were created? Allow students to correct any errors made in labeling.
Closure:To close this lesson, show a real life example of an ecosystem at work. This would be done through a short video showing progression from primary producers all the way up the chain. Ask the students to point out similarities between the one they viewed and the ones we discussed in class.
Video link: What is an Ecosystem? - http://www.youtube.com/watch?v=JPHqUxxyLsY
Extension:Pose questions or problems to the class such as if all the heterotrophs could magically make their own food, what would happen to the system? Describe in words what you think the earth would be like if no organism depended on another for food/energy. Propose a solution to the problem that would arise.
Table of ContentsTable of ContentsTable of Contents Grade 7
112
Activity #2Title: Get CompostingTime: Approx. 1 hour
Materials: • Notebooks
• Pencils
• Construction paper
• Colouring utensil – markers, pencil crayon
Suggested Month: Early fall so students can use this information throughout the school year.
Objective: Students will learn about what you can compost and what you cannot. Lastly, students will learn how to maintain your compost bin so that students can use the compost for the school lawn and/or garden.
Curriculum Expectations:Science and Technology
Understanding Life Systems 2 - Investigate interactions within the environment, and identify factors that affect the balance between different components of an ecosystem.
2.2 - Design and construct a model ecosystem (e.g., composter)
Introduction:Ask the class the following questions:
Question: “What are 3 ways that composting lawn and kitchen waste can improve water quality?”
Answers:
1. Compost replaces synthetic fertilizers in people’s lawns that pollute storm water run- off with nitrogen and phosphorus.
2. Compost improves soil so that water penetrates more easily and stays in the soil longer. This reduces the watering needs of your lawn and garden.
3. Compost helps protect soil from erosion, which means less sediment in run-off waters.
Table of ContentsTable of ContentsTable of Contents Grade 7
113
Question: “What are some other benefits of composting?”
Answers:
1. Composting keeps lawn and kitchen waste from filling landfills.
2. If your lawn waste is collected by your city, you are preventing nitrogen-rich run-off from leaves and grass left sitting on the curb from polluting the storm water. You also prevent the leaves and clippings from clogging storm drains. You also conserve energy by decreasing the stops that city vehicles must make to collect the waste.
Discussion:1. Ask students what compost bins look like.
• Provide the student images (on smart board, overhead, handouts).
• Note: Compost bins should be no smaller than 1 meter by 1 meter and no larger than 1.5 meters by 1.5 meters. They should be around 1 meter tall.
2. What to compost:
To promote the breakdown of organic materials, you need 3 things:
a) A good carbon/nitrogen ratio (4 parts carbon to 1 part nitrogen)
a. Sources of carbon (“browns” or dry, hard materials) are dry leaves, sawdust, shredded newspaper, hay, straw, and eggshells.
b. Sources of nitrogen (“greens” or wet, soft materials) are manure, green plants, grass clippings, vegetable and fruit scraps, coffee grounds, and tea bags.
b) Water, which you add whenever you add new dry materials to the pile.
c) Microorganisms, which are introduced by adding a few shovelfuls of dirt to the pile.
What not to compost:
• Leftover cooked food (it attracts animals, contains fats and oils that are slow to break down, and contains salt that is harmful to plants);
• Meats (raw or cooked) and cheeses (they attract animals, contain fats and oils that are slow to break down, and contain salt that is harmful to plants);
• Inorganic material like plastic or metal (it won’t break down);
• Cloth and glossy paper (they take too long to break down and contain chemicals that are harmful to plants);
• Pet waste (it makes it smell bad and can introduce disease);
• Living weeds with roots (may grow in the bin).
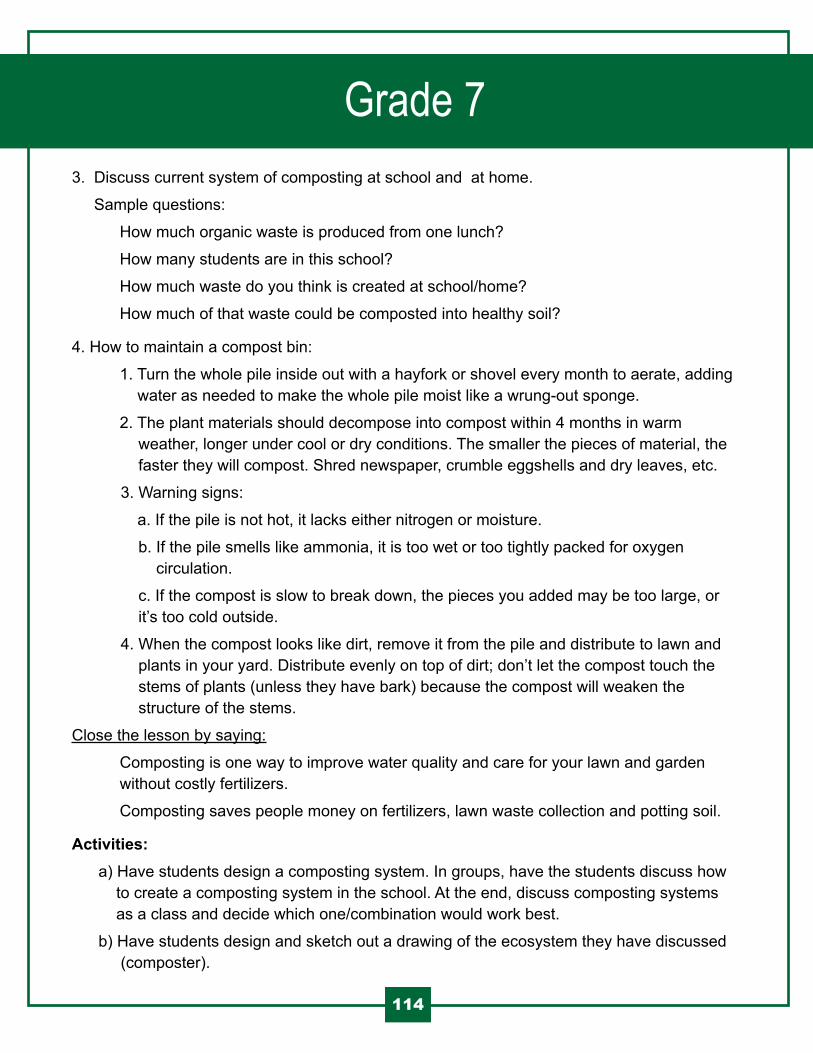
Table of ContentsTable of ContentsTable of Contents Grade 7
114
3. Discuss current system of composting at school and at home.
Sample questions:
How much organic waste is produced from one lunch?
How many students are in this school?
How much waste do you think is created at school/home?
How much of that waste could be composted into healthy soil?
4. How to maintain a compost bin:
1. Turn the whole pile inside out with a hayfork or shovel every month to aerate, adding water as needed to make the whole pile moist like a wrung-out sponge.
2. The plant materials should decompose into compost within 4 months in warm weather, longer under cool or dry conditions. The smaller the pieces of material, the faster they will compost. Shred newspaper, crumble eggshells and dry leaves, etc.
3. Warning signs:
a. If the pile is not hot, it lacks either nitrogen or moisture.
b. If the pile smells like ammonia, it is too wet or too tightly packed for oxygen circulation.
c. If the compost is slow to break down, the pieces you added may be too large, or it’s too cold outside.
4. When the compost looks like dirt, remove it from the pile and distribute to lawn and plants in your yard. Distribute evenly on top of dirt; don’t let the compost touch the stems of plants (unless they have bark) because the compost will weaken the structure of the stems.
Close the lesson by saying:
Composting is one way to improve water quality and care for your lawn and garden without costly fertilizers.
Composting saves people money on fertilizers, lawn waste collection and potting soil.
Activities: a) Have students design a composting system. In groups, have the students discuss how to create a composting system in the school. At the end, discuss composting systems as a class and decide which one/combination would work best.
b) Have students design and sketch out a drawing of the ecosystem they have discussed (composter).
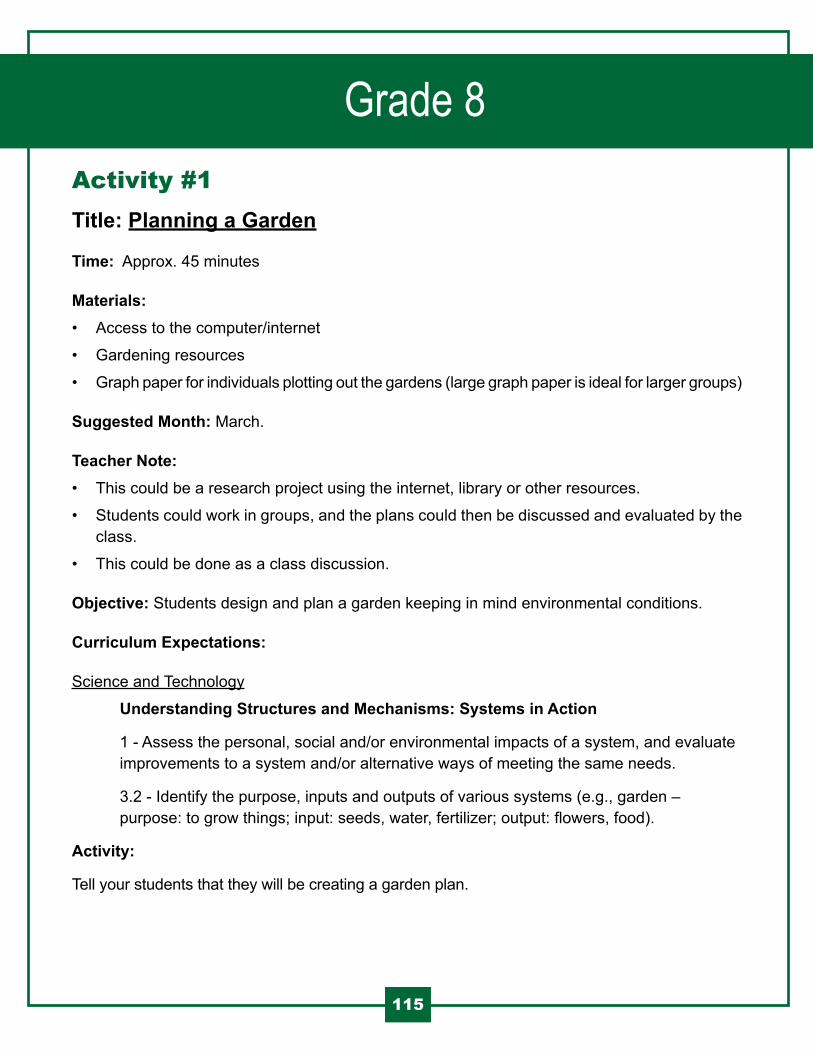
Table of ContentsTable of ContentsTable of Contents Grade 8
115
Activity #1Title: Planning a Garden
Time: Approx. 45 minutes
Materials: • Access to the computer/internet
• Gardening resources
• Graph paper for individuals plotting out the gardens (large graph paper is ideal for larger groups)
Suggested Month: March.
Teacher Note:• This could be a research project using the internet, library or other resources.
• Students could work in groups, and the plans could then be discussed and evaluated by the class.
• This could be done as a class discussion.
Objective: Students design and plan a garden keeping in mind environmental conditions.
Curriculum Expectations:
Science and Technology
Understanding Structures and Mechanisms: Systems in Action
1 - Assess the personal, social and/or environmental impacts of a system, and evaluate improvements to a system and/or alternative ways of meeting the same needs.
3.2 - Identify the purpose, inputs and outputs of various systems (e.g., garden – purpose: to grow things; input: seeds, water, fertilizer; output: flowers, food).
Activity:
Tell your students that they will be creating a garden plan.
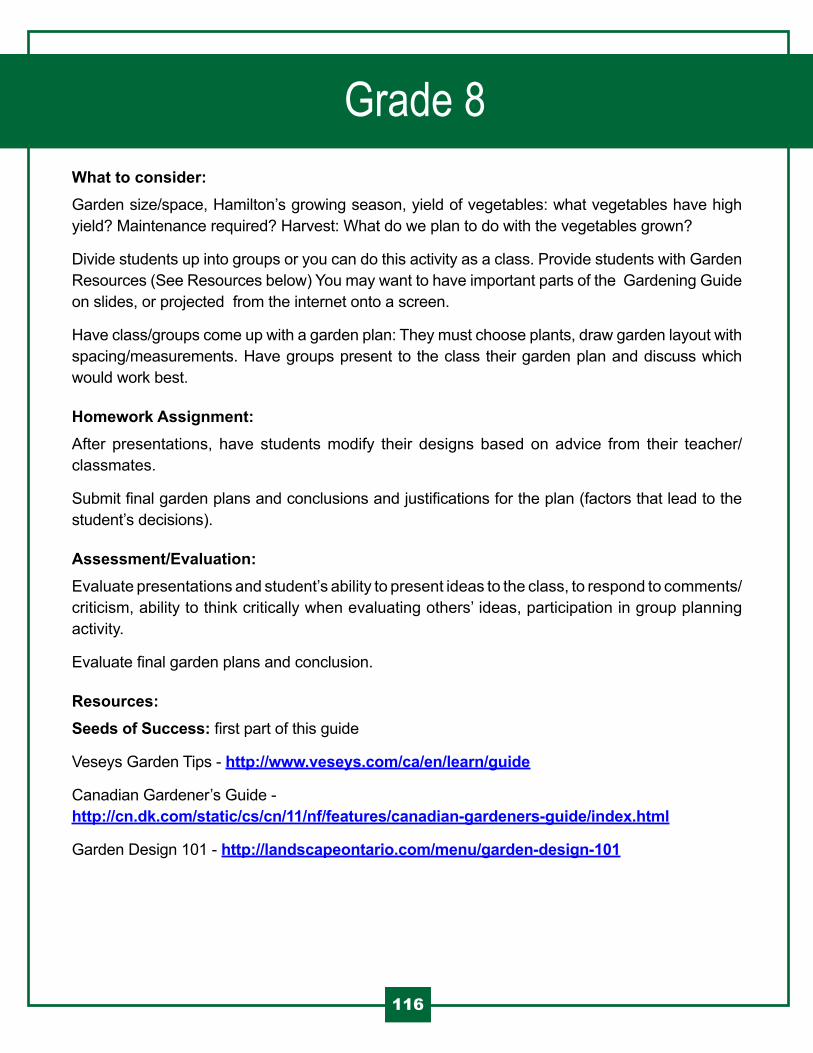
Table of ContentsTable of ContentsTable of Contents Grade 8
116
What to consider:Garden size/space, Hamilton’s growing season, yield of vegetables: what vegetables have high yield? Maintenance required? Harvest: What do we plan to do with the vegetables grown?
Divide students up into groups or you can do this activity as a class. Provide students with Garden Resources (See Resources below) You may want to have important parts of the Gardening Guide on slides, or projected from the internet onto a screen.
Have class/groups come up with a garden plan: They must choose plants, draw garden layout with spacing/measurements. Have groups present to the class their garden plan and discuss which would work best.
Homework Assignment:After presentations, have students modify their designs based on advice from their teacher/classmates.
Submit final garden plans and conclusions and justifications for the plan (factors that lead to the student’s decisions).
Assessment/Evaluation:Evaluate presentations and student’s ability to present ideas to the class, to respond to comments/criticism, ability to think critically when evaluating others’ ideas, participation in group planning activity.
Evaluate final garden plans and conclusion.
Resources:Seeds of Success: first part of this guide
Veseys Garden Tips - http://www.veseys.com/ca/en/learn/guide
Canadian Gardener’s Guide - http://cn.dk.com/static/cs/cn/11/nf/features/canadian-gardeners-guide/index.html
Garden Design 101 - http://landscapeontario.com/menu/garden-design-101
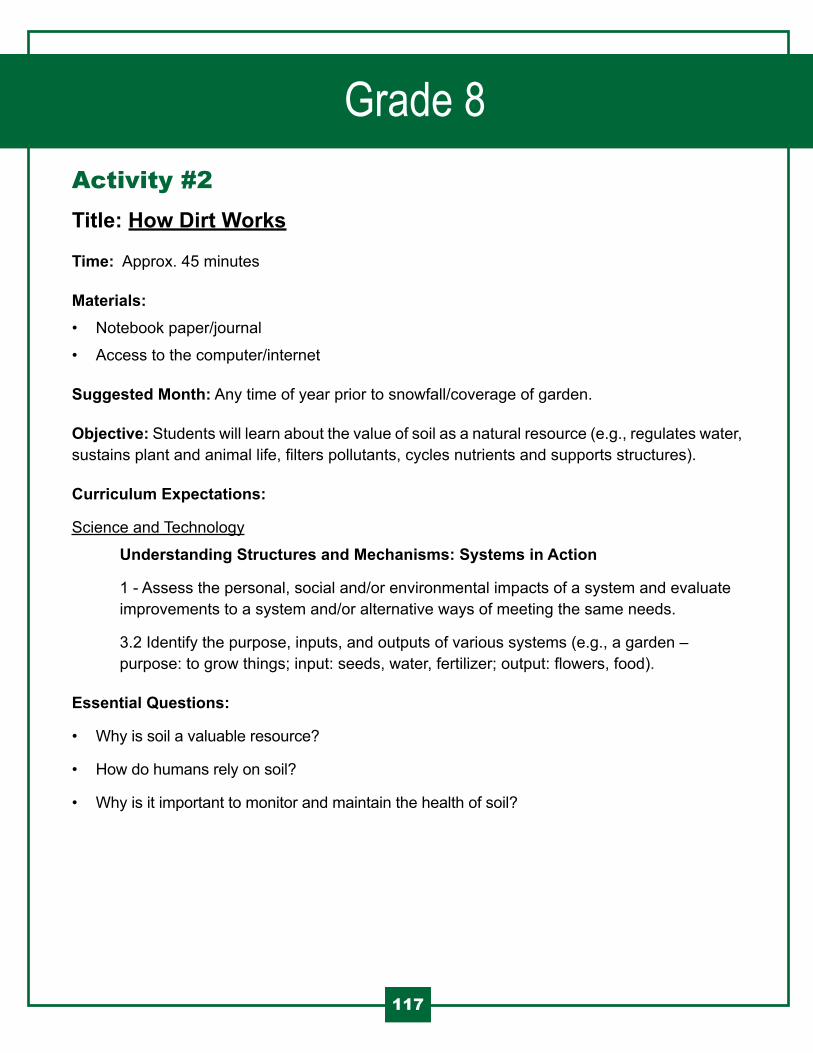
Table of ContentsTable of ContentsTable of Contents Grade 8
117
Activity #2Title: How Dirt Works
Time: Approx. 45 minutes
Materials: • Notebook paper/journal
• Access to the computer/internet
Suggested Month: Any time of year prior to snowfall/coverage of garden.
Objective: Students will learn about the value of soil as a natural resource (e.g., regulates water, sustains plant and animal life, filters pollutants, cycles nutrients and supports structures).
Curriculum Expectations:
Science and Technology
Understanding Structures and Mechanisms: Systems in Action
1 - Assess the personal, social and/or environmental impacts of a system and evaluate improvements to a system and/or alternative ways of meeting the same needs.
3.2 Identify the purpose, inputs, and outputs of various systems (e.g., a garden – purpose: to grow things; input: seeds, water, fertilizer; output: flowers, food).
Essential Questions:
• Why is soil a valuable resource?
• How do humans rely on soil?
• Why is it important to monitor and maintain the health of soil?
Table of ContentsTable of ContentsTable of Contents Grade 8
118
Background for the Teacher:In this lesson, students learn the value of soil and its role as a valuable natural resource. Students will investigate how humans and many other organisms rely on soil. They will also explore why it is important to monitor and maintain the health of soil.
Soil is the solid material on Earth’s surface that results from the interaction of weather and biological activities with the underlying geologic formation. Soil is created from rocks that have been broken down, organic matter, water and air. All soil types are made of varying amounts of silt, sand, and clay. Many different colors can be present in soil depending on the minerals and chemical and biological reactions within the soil.
Soil is typically found in layers that are distinguished by different colors, textures, and structures. Soil layers also have different amounts of organic matter and gravel. When humans work the land, for agriculture, home building, and road construction, they change the landscape to fit different purposes. Land use involves changing the landscape, including the soil, rocks, and vegetation. Humans change the land differently than how nature changes the land. Many animals depend on soil. Some we can see but there are also billions of microscopic organisms, such as bacteria, protozoa, fungi, and algae, which inhabit and enrich the soil.
Activity:
1. Ask students to think about where their food comes from. Do they think most of it is grown or raised locally? Explain to students that most food is grown or raised in other parts of the country or the world, transported, and then purchased at local grocery stores.
2. Ask students, “What comes to mind when you hear the word soil?” Some anticipated responses might include worms, plants, food, water, roots and landscaping. Then, ask students to rank how soil is important to them.
Soil is important to me…_____ to filter out pollutants that may contaminate drinking water._____ to provide income for farmers, food companies, clothing companies and grocers._____ to grow plants for food, oxygen, paper and other products._____ to provide wildlife and insects with a habitat._____ as a surface for building roads, sidewalks and the places where we live._____ to provide food for livestock._____ to walk on.
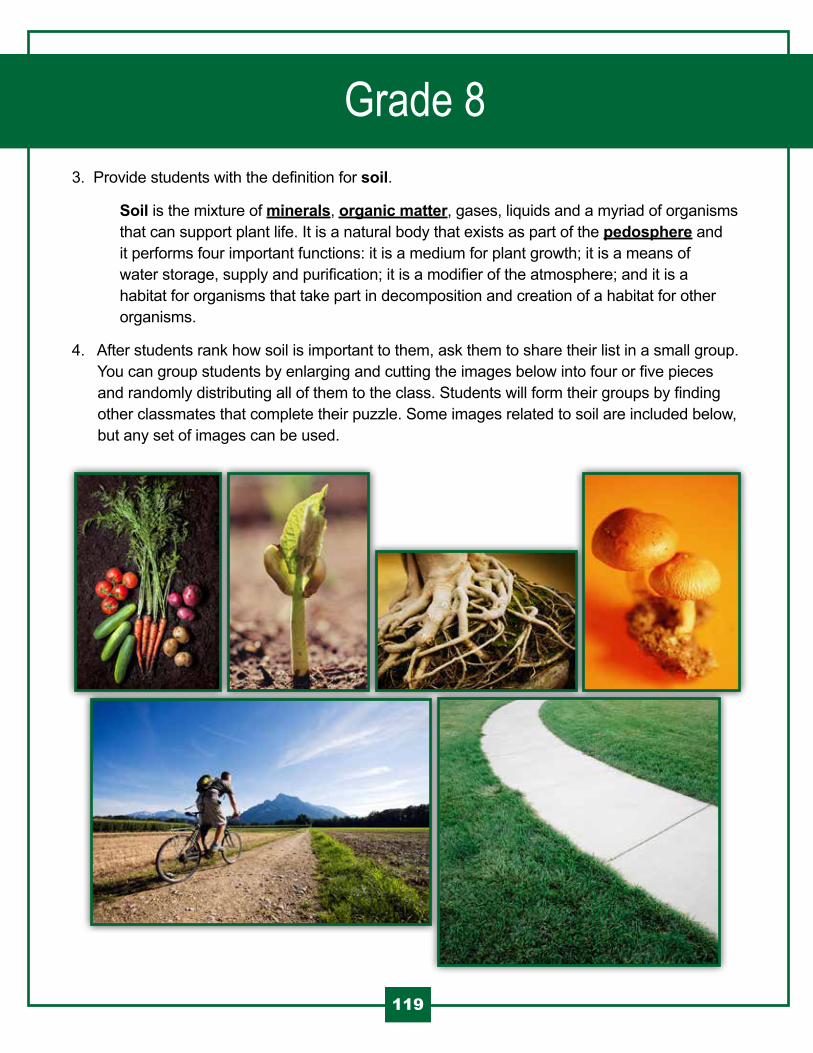
Table of ContentsTable of ContentsTable of Contents Grade 8
119
3. Provide students with the definition for soil.
Soil is the mixture of minerals, organic matter, gases, liquids and a myriad of organisms that can support plant life. It is a natural body that exists as part of the pedosphere and it performs four important functions: it is a medium for plant growth; it is a means of water storage, supply and purification; it is a modifier of the atmosphere; and it is a habitat for organisms that take part in decomposition and creation of a habitat for other organisms.
4. After students rank how soil is important to them, ask them to share their list in a small group. You can group students by enlarging and cutting the images below into four or five pieces and randomly distributing all of them to the class. Students will form their groups by finding other classmates that complete their puzzle. Some images related to soil are included below, but any set of images can be used.
Table of ContentsTable of ContentsTable of Contents Grade 8
120
5. Share with students “How Dirt Works” overview video and review the guided questions.
Video: How Dirt Works – Link:
• http://vimeo.com/61914542
Guided Questions:
a. Why is soil a valuable resource?
b. How do humans rely on soil?
c. Why is it important to monitor and maintain the health of soil?
Table of ContentsTable of ContentsTable of Contents Resources
121
The lesson plans listed in Seeds of Success were informed by, and adapted (with permission), from the following sites.
• The George Watts Edible Garden was accessed on July 23th, 2014 at http://schoolgardenweekly.com/ and lesson plans for Grade 5, Activities 1 and 2 and Grade 6, Activity 2 were adapted from it.
• Life Labs was accessed on August 8, 2014 at www.lifelabs.org and the lesson plan for Grade 1, Activity 1was adapted from it.
• Nature’s Work was accessed on August 29, 2014 at www.NatureWorksEverywhere.org and lesson plans for Grade 6, Activity # 1, and Grade 8, Activity 2 were adapted from it.
• Granny’s Garden School was accessed on July 30th, 2014 at http://www.grannysgardenschool.org/ and the remainder of the lessons were adapted from it.