Embed Size (px)
Citation preview
set aggressive-mode client-endpoint
SEC-2123April 2011
set aggressive-mode client-endpointTo specify the Tunnel-Client-Endpoint attribute within an Internet Security Association Key Management Protocol (ISAKMP) peer configuration, use the set aggressive-mode client-endpoint command in ISAKMP policy configuration mode. To remove this attribute from your configuration, use the no form of this command.
set aggressive-mode client-endpoint client-endpoint
no set aggressive-mode client-endpoint client-endpoint
Syntax Description
Command Default The Tunnel-Client-Endpoint attribute is not defined.
Command Modes ISAKMP policy configuration
Command History
Usage Guidelines Before you can use this command, you must enable the crypto isakmp peer command.
To initiate an IKE aggressive mode negotiation and specify the RADIUS Tunnel-Client-Endpoint attribute, the set aggressive-mode client-endpoint command, along with the set aggressive-mode password command, must be configured in the ISAKMP peer policy. The Tunnel-Client-Endpoint attribute will be communicated to the server by encoding it in the appropriate IKE identity payload.
Examples The following example shows how to initiate aggressive mode using RADIUS tunnel attributes:
crypto isakmp peer address 10.4.4.1set aggressive-mode client-endpoint user-fqdn [email protected] aggressive-mode password cisco123
client-endpoint One of the following identification types of the initiator end of the tunnel:
• ID_IPV4 (IPV4 address)
• ID_FQDN (fully qualified domain name, for example “green.cisco.com”)
• ID_USER_FQDN (e-mail address)
The ID type is translated to the corresponding ID type in Internet Key Exchange (IKE).
Release Modification
12.2(8)T This command was introduced.
12.2(18)SXD This command was integrated into Cisco IOS Release 12.2(18)SXD.
12.4(4)T Support for IPv6 was added.
12.2(33)SRA This command was integrated into Cisco IOS Release 12.2(33)SRA.

set aggressive-mode client-endpoint
SEC-2124April 2011
Related Commands Command Description
crypto isakmp peer Enables an IPSec peer for IKE querying of AAA for tunnel attributes in aggressive mode.
set aggressive-mode password Specifies the Tunnel-Password attribute within an ISAKMP peer configuration.
set aggressive-mode password
SEC-2125April 2011
set aggressive-mode passwordTo specify the Tunnel-Password attribute within an Internet Security Association Key Management Protocol (ISAKMP) peer configuration, use the set aggressive-mode password command in ISAKMP policy configuration mode. To remove this attribute from your configuration, use the no form of this command.
set aggressive-mode password password
no set aggressive-mode password password
Syntax Description
Defaults The Tunnel-Password attribute is not defined.
Command Modes ISAKMP policy configuration
Command History
Usage Guidelines Before you can use this command, you must enable the crypto isakmp peer command.
To initiate an IKE aggressive mode negotiation, the set aggressive-mode password command, along with the set aggressive-mode client-endpoint command, must be configured in the ISAKMP peer policy. The Tunnel-Password attribute will be used as the IKE preshared key for the aggressive mode negotiation.
Output for the set aggressive-mode password command will show that the preshared key is either unencrypted or encrypted. An output example for an unencrypted preshared key would be as follows:
set aggressive-mode password test123
An output example for a type 6 encrypted preshared key would be as follows:
set aggressive-mode password 6 DV’P[aTVWWbcgKU]T\T\QhZAAB
Examples The following example shows how to initiate aggressive mode using RADIUS tunnel attributes:
Router (config)# crypto isakmp peer address 10.4.4.1Router (config-isakmp-peer)# set aggressive-mode client-endpoint user-fqdn [email protected] (config-isakmp-peer)# set aggressive-mode password cisco123
password Password that is used to authenticate the peer to a remote server. The tunnel password is used as the Internet Key Exchange (IKE) preshared key.
Release Modification
12.2(8)T This command was introduced.
12.2(18)SXD This command was integrated into Cisco IOS Release 12.2(18)SXD.
12.3(2)T This command was modified so that output shows that the preshared key is either encrypted or unencrypted.
12.2(33)SRA This command was integrated into Cisco IOS Release 12.2(33)SRA.

set aggressive-mode password
SEC-2126April 2011
Related Commands Command Description
crypto isakmp peer Enables an IPSec peer for IKE querying of AAA for tunnel attributes in aggressive mode.
set aggressive-mode client-endpoint
Specifies the Tunnel-Client-Endpoint attribute within an ISAKMP peer configuration.
set group
SEC-2127April 2011
set groupTo set the Group Domain of Interpretation (GDOI) crypto map to the GDOI group that has already been defined, use the set group command in crypto map configuration mode. To remove the GDOI crypto map, use the no form of this command.
set group {group-name}
no set group {group-name}
Syntax Description
Command Default None
Command Modes crypto map configuration
Command History
Usage Guidelines This command must be configured for the GDOI crypto map to be complete.
Note This crypto map is specifically a GDOI crypto map, that is, the crypto map must be named as a GDOI crypto map, as in this example: crypto map test 10 gdoi
Examples The following example shows that the group name is “hsrp-group”:
set group hsrp-group
Related Commands
group-name Name of the GDOI group.
Release Modification
12.4(6)T This command was introduced.
Command Description
crypto map Enters crypto map configuration mode and creates or modifies a crypto map entry, creates a crypto profile that provides a template for configuration of dynamically created crypto maps, indicates that the key management mechanism is GDOI, or configures a client accounting list.
set identity
SEC-2128April 2011
set identityTo set the identity to the crypto map, use the set identity command in crypto map configuration mode.
set identity name
Syntax Description
Defaults If this command is not enabled, the encrypted connection does not have any restrictions other than the IP address of the encrypting peer.
Command Modes Crypto map configuration
Command History
Usage Guidelines Use the set identity command to set the identity to the configured crypto maps. When this command is applied, only the hosts that match a configuration listed within the name argument can use that crypto map.
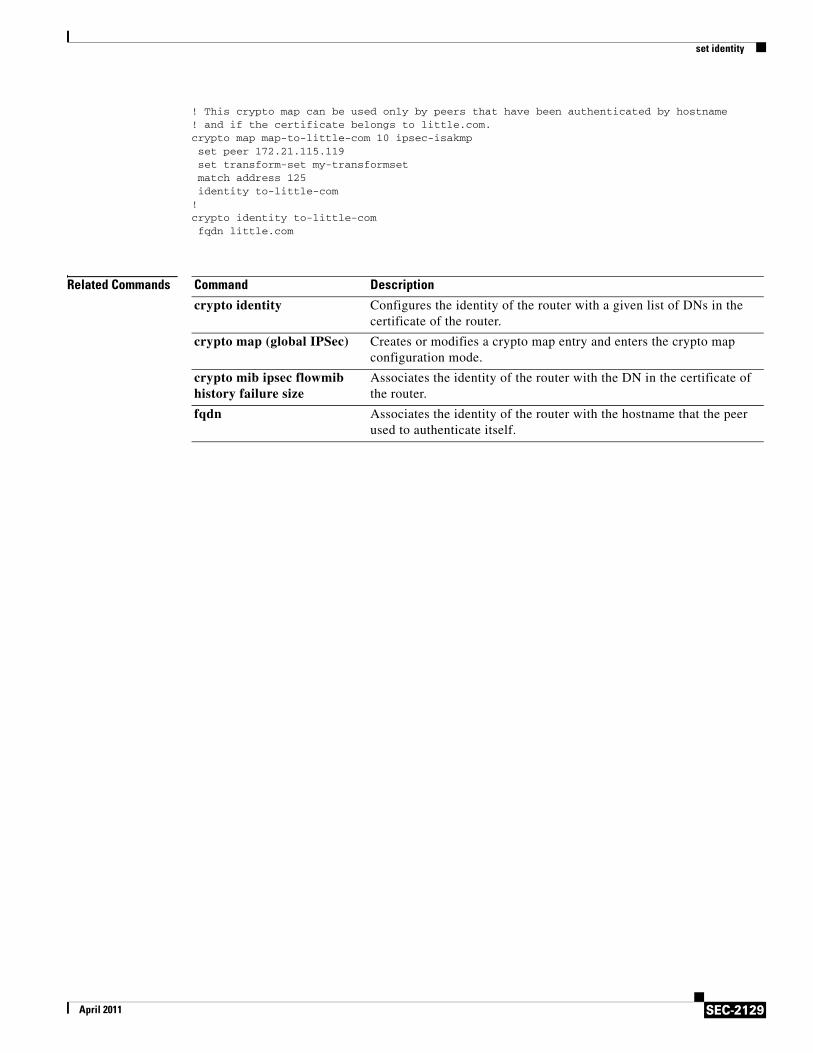
Examples The following example shows how to configure two IP Security (IPSec) crypto maps and apply the identity to each crypto map. That is, the identity is set to “to-bigbiz” for the first crypto map and “to-little-com” for the second crypto map.
! The following is an IPSec crypto map (part of IPSec configuration). It can be used only ! by peers that have been authenticated by DN and if the certificate belongs to BigBiz.crypto map map-to-bigbiz 10 ipsec-isakmp set peer 172.21.114.196 set transform-set my-transformset match address 124set identity to-bigbiz
!crypto identity to-bigbiz dn ou=BigBiz!!
name Identity used to permit or restrict access for a host to a crypto map.
Release Modification
12.2(4)T This command was introduced.
12.2(18)SXD This command was integrated into Cisco IOS Release 12.2(18)SXD.
12.2(33)SRA This command was integrated into Cisco IOS release 12.(33)SRA.
set identity
SEC-2129April 2011
! This crypto map can be used only by peers that have been authenticated by hostname! and if the certificate belongs to little.com.crypto map map-to-little-com 10 ipsec-isakmp set peer 172.21.115.119 set transform-set my-transformset match address 125identity to-little-com
!crypto identity to-little-com fqdn little.com
Related Commands Command Description
crypto identity Configures the identity of the router with a given list of DNs in the certificate of the router.
crypto map (global IPSec) Creates or modifies a crypto map entry and enters the crypto map configuration mode.
crypto mib ipsec flowmib history failure size
Associates the identity of the router with the DN in the certificate of the router.
fqdn Associates the identity of the router with the hostname that the peer used to authenticate itself.
set ip access-group
SEC-2130April 2011
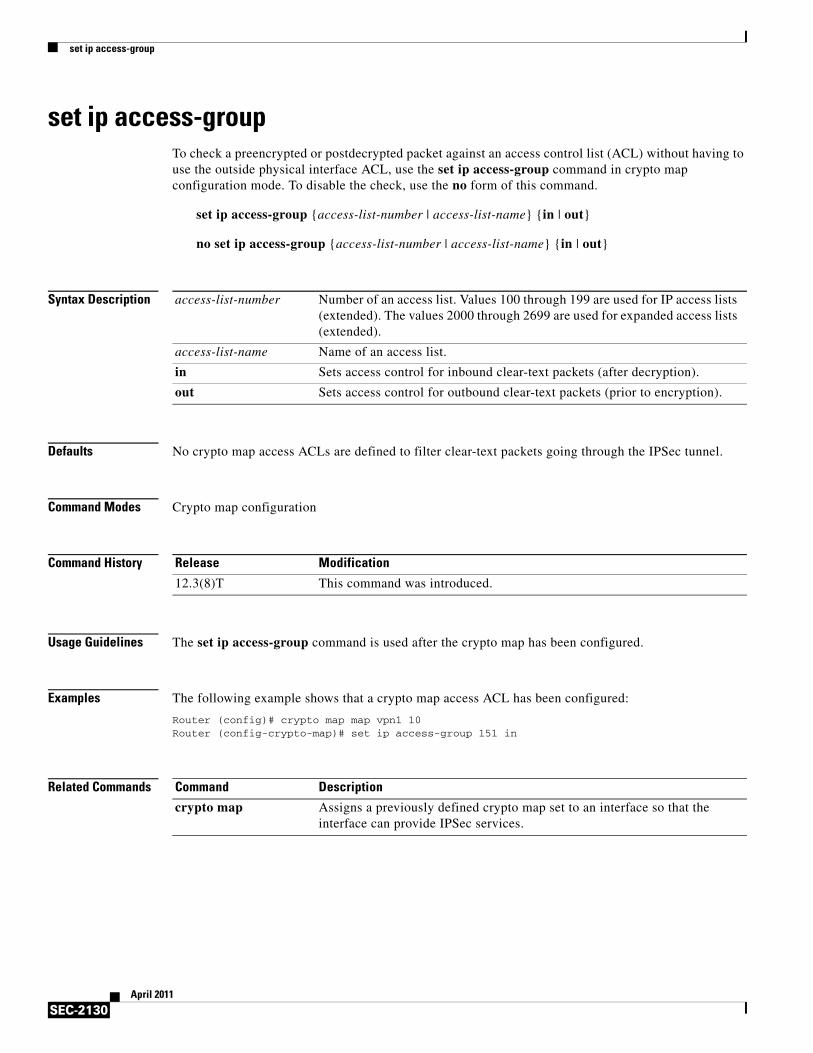
set ip access-groupTo check a preencrypted or postdecrypted packet against an access control list (ACL) without having to use the outside physical interface ACL, use the set ip access-group command in crypto map configuration mode. To disable the check, use the no form of this command.
set ip access-group {access-list-number | access-list-name} {in | out}
no set ip access-group {access-list-number | access-list-name} {in | out}
Syntax Description
Defaults No crypto map access ACLs are defined to filter clear-text packets going through the IPSec tunnel.
Command Modes Crypto map configuration
Command History
Usage Guidelines The set ip access-group command is used after the crypto map has been configured.
Examples The following example shows that a crypto map access ACL has been configured:
Router (config)# crypto map map vpn1 10Router (config-crypto-map)# set ip access-group 151 in
Related Commands
access-list-number Number of an access list. Values 100 through 199 are used for IP access lists (extended). The values 2000 through 2699 are used for expanded access lists (extended).
access-list-name Name of an access list.
in Sets access control for inbound clear-text packets (after decryption).
out Sets access control for outbound clear-text packets (prior to encryption).
Release Modification
12.3(8)T This command was introduced.
Command Description
crypto map Assigns a previously defined crypto map set to an interface so that the interface can provide IPSec services.
set isakmp-profile
SEC-2131April 2011
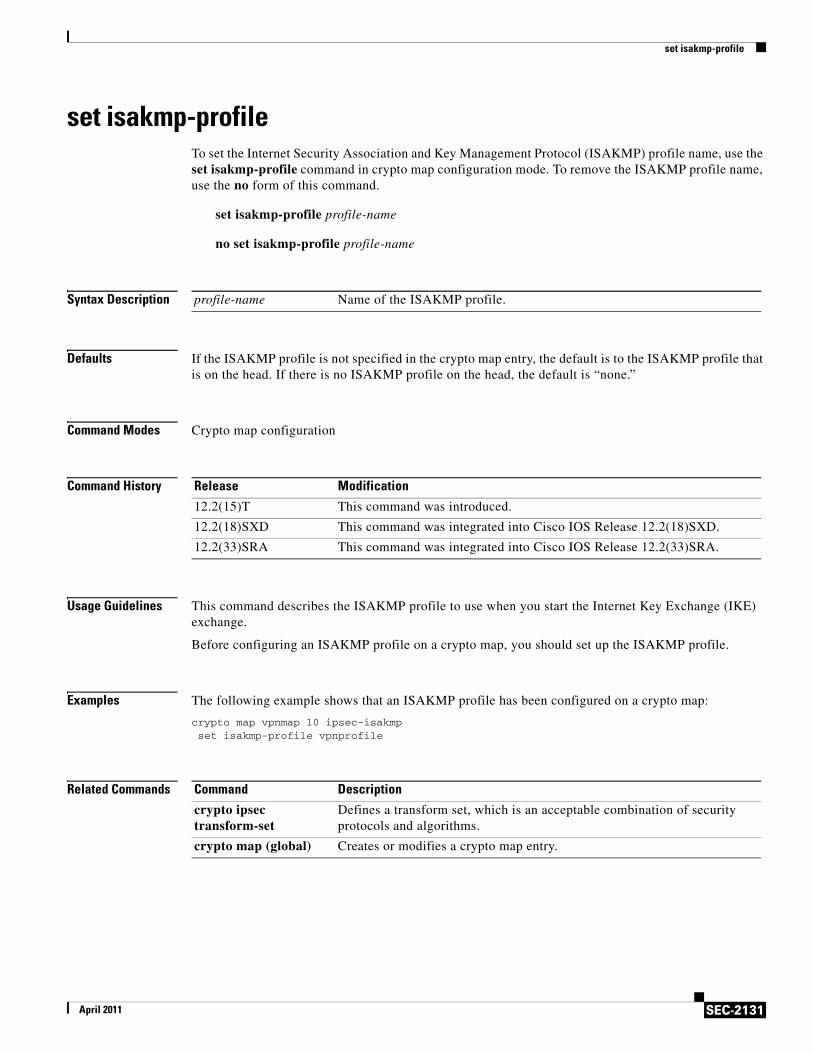
set isakmp-profileTo set the Internet Security Association and Key Management Protocol (ISAKMP) profile name, use the set isakmp-profile command in crypto map configuration mode. To remove the ISAKMP profile name, use the no form of this command.
set isakmp-profile profile-name
no set isakmp-profile profile-name
Syntax Description
Defaults If the ISAKMP profile is not specified in the crypto map entry, the default is to the ISAKMP profile that is on the head. If there is no ISAKMP profile on the head, the default is “none.”
Command Modes Crypto map configuration
Command History
Usage Guidelines This command describes the ISAKMP profile to use when you start the Internet Key Exchange (IKE) exchange.
Before configuring an ISAKMP profile on a crypto map, you should set up the ISAKMP profile.
Examples The following example shows that an ISAKMP profile has been configured on a crypto map:
crypto map vpnmap 10 ipsec-isakmp set isakmp-profile vpnprofile
Related Commands
profile-name Name of the ISAKMP profile.
Release Modification
12.2(15)T This command was introduced.
12.2(18)SXD This command was integrated into Cisco IOS Release 12.2(18)SXD.
12.2(33)SRA This command was integrated into Cisco IOS Release 12.2(33)SRA.
Command Description
crypto ipsec transform-set
Defines a transform set, which is an acceptable combination of security protocols and algorithms.
crypto map (global) Creates or modifies a crypto map entry.
set nat demux
SEC-2132April 2011
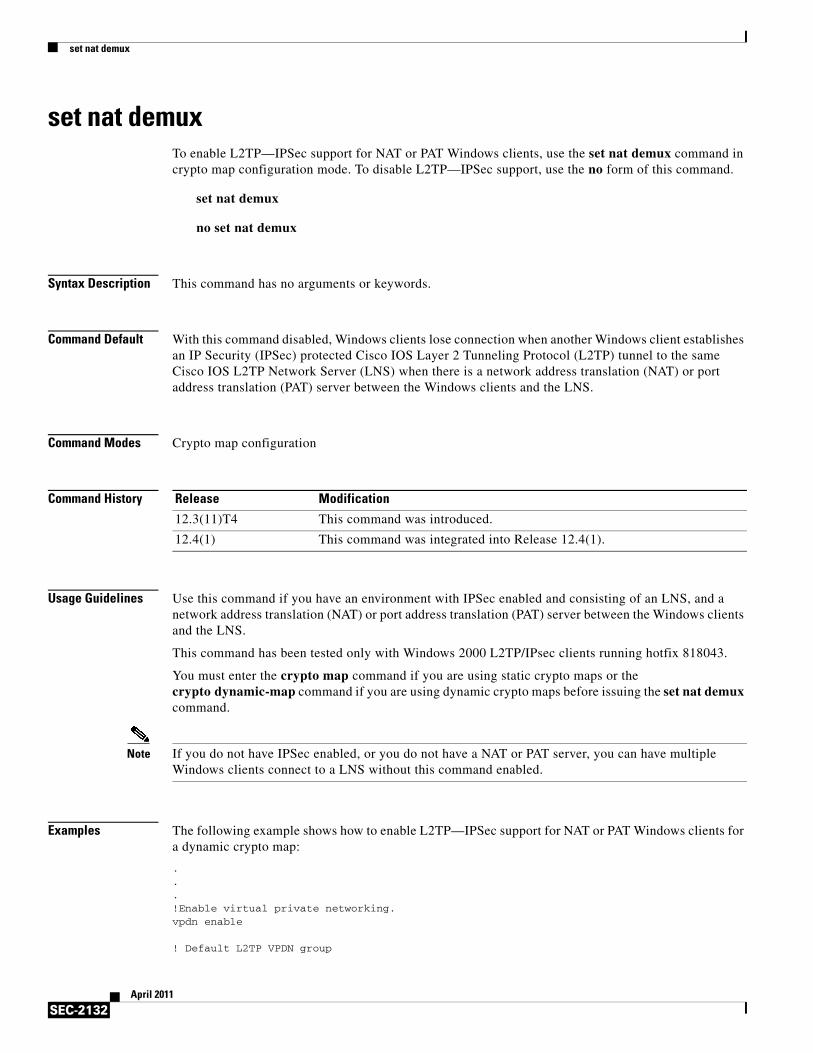
set nat demuxTo enable L2TP—IPSec support for NAT or PAT Windows clients, use the set nat demux command in crypto map configuration mode. To disable L2TP—IPSec support, use the no form of this command.
set nat demux
no set nat demux
Syntax Description This command has no arguments or keywords.
Command Default With this command disabled, Windows clients lose connection when another Windows client establishes an IP Security (IPSec) protected Cisco IOS Layer 2 Tunneling Protocol (L2TP) tunnel to the same Cisco IOS L2TP Network Server (LNS) when there is a network address translation (NAT) or port address translation (PAT) server between the Windows clients and the LNS.
Command Modes Crypto map configuration
Command History
Usage Guidelines Use this command if you have an environment with IPSec enabled and consisting of an LNS, and a network address translation (NAT) or port address translation (PAT) server between the Windows clients and the LNS.
This command has been tested only with Windows 2000 L2TP/IPsec clients running hotfix 818043.
You must enter the crypto map command if you are using static crypto maps or the crypto dynamic-map command if you are using dynamic crypto maps before issuing the set nat demux command.
Note If you do not have IPSec enabled, or you do not have a NAT or PAT server, you can have multiple Windows clients connect to a LNS without this command enabled.
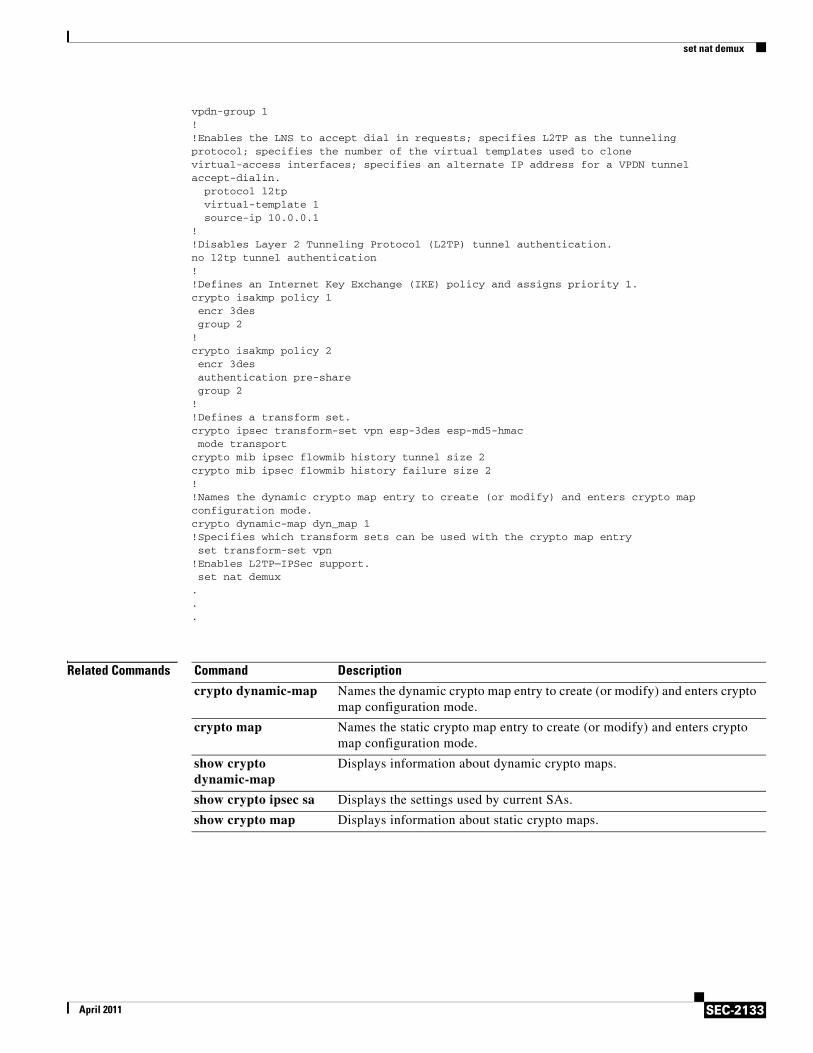
Examples The following example shows how to enable L2TP—IPSec support for NAT or PAT Windows clients for a dynamic crypto map:
.
.
.!Enable virtual private networking. vpdn enable
! Default L2TP VPDN group
Release Modification
12.3(11)T4 This command was introduced.
12.4(1) This command was integrated into Release 12.4(1).
set nat demux
SEC-2133April 2011
vpdn-group 1!!Enables the LNS to accept dial in requests; specifies L2TP as the tunnelingprotocol; specifies the number of the virtual templates used to clonevirtual-access interfaces; specifies an alternate IP address for a VPDN tunnelaccept-dialin. protocol l2tp virtual-template 1 source-ip 10.0.0.1!!Disables Layer 2 Tunneling Protocol (L2TP) tunnel authentication.no l2tp tunnel authentication!!Defines an Internet Key Exchange (IKE) policy and assigns priority 1.crypto isakmp policy 1 encr 3des group 2!crypto isakmp policy 2 encr 3des authentication pre-share group 2!!Defines a transform set.crypto ipsec transform-set vpn esp-3des esp-md5-hmac mode transportcrypto mib ipsec flowmib history tunnel size 2crypto mib ipsec flowmib history failure size 2!!Names the dynamic crypto map entry to create (or modify) and enters crypto map configuration mode.crypto dynamic-map dyn_map 1!Specifies which transform sets can be used with the crypto map entry set transform-set vpn!Enables L2TP—IPSec support. set nat demux...
Related Commands Command Description
crypto dynamic-map Names the dynamic crypto map entry to create (or modify) and enters crypto map configuration mode.
crypto map Names the static crypto map entry to create (or modify) and enters crypto map configuration mode.
show crypto dynamic-map
Displays information about dynamic crypto maps.
show crypto ipsec sa Displays the settings used by current SAs.
show crypto map Displays information about static crypto maps.
set peer (IPsec)
SEC-2134April 2011
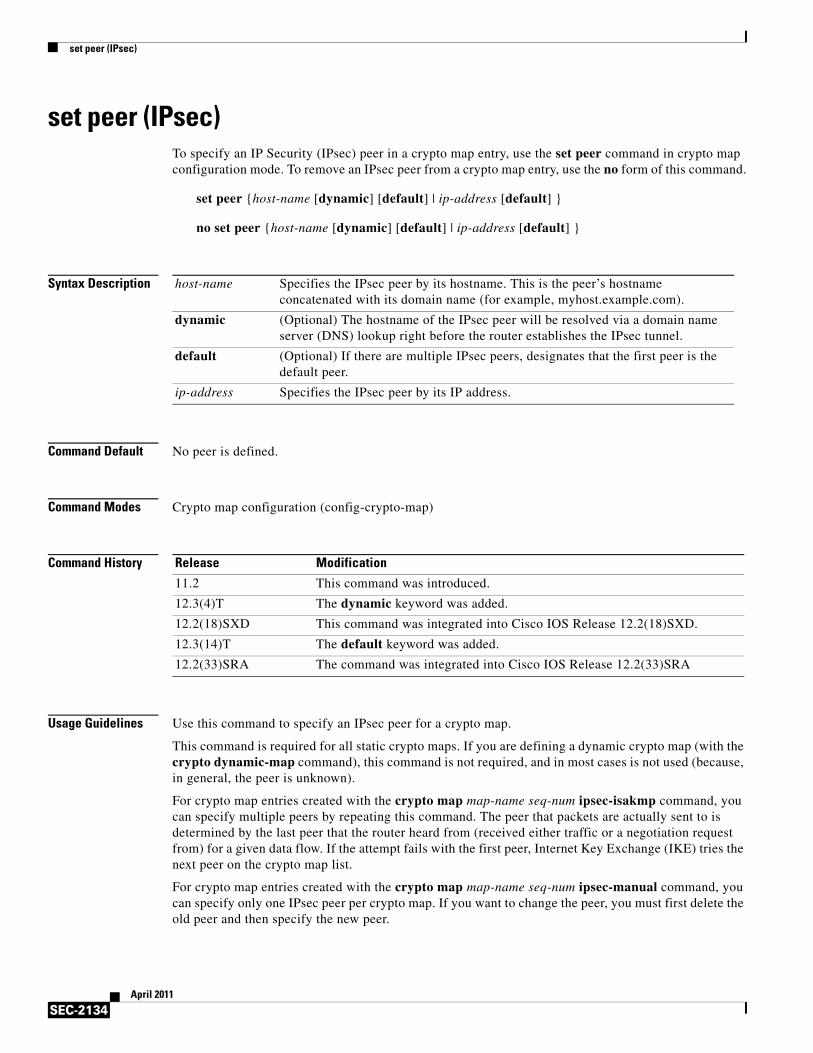
set peer (IPsec)To specify an IP Security (IPsec) peer in a crypto map entry, use the set peer command in crypto map configuration mode. To remove an IPsec peer from a crypto map entry, use the no form of this command.
set peer {host-name [dynamic] [default] | ip-address [default] }
no set peer {host-name [dynamic] [default] | ip-address [default] }
Syntax Description
Command Default No peer is defined.
Command Modes Crypto map configuration (config-crypto-map)
Command History
Usage Guidelines Use this command to specify an IPsec peer for a crypto map.
This command is required for all static crypto maps. If you are defining a dynamic crypto map (with the crypto dynamic-map command), this command is not required, and in most cases is not used (because, in general, the peer is unknown).
For crypto map entries created with the crypto map map-name seq-num ipsec-isakmp command, you can specify multiple peers by repeating this command. The peer that packets are actually sent to is determined by the last peer that the router heard from (received either traffic or a negotiation request from) for a given data flow. If the attempt fails with the first peer, Internet Key Exchange (IKE) tries the next peer on the crypto map list.
For crypto map entries created with the crypto map map-name seq-num ipsec-manual command, you can specify only one IPsec peer per crypto map. If you want to change the peer, you must first delete the old peer and then specify the new peer.
host-name Specifies the IPsec peer by its hostname. This is the peer’s hostname concatenated with its domain name (for example, myhost.example.com).
dynamic (Optional) The hostname of the IPsec peer will be resolved via a domain name server (DNS) lookup right before the router establishes the IPsec tunnel.
default (Optional) If there are multiple IPsec peers, designates that the first peer is the default peer.
ip-address Specifies the IPsec peer by its IP address.
Release Modification
11.2 This command was introduced.
12.3(4)T The dynamic keyword was added.
12.2(18)SXD This command was integrated into Cisco IOS Release 12.2(18)SXD.
12.3(14)T The default keyword was added.
12.2(33)SRA The command was integrated into Cisco IOS Release 12.2(33)SRA
set peer (IPsec)
SEC-2135April 2011
You can specify the remote IPsec peer by its hostname only if the hostname is mapped to the peer’s IP address in a DNS or if you manually map the hostname to the IP address with the ip host command.
The dynamic Keyword
When specifying the hostname of a remote IPsec peer via the set peer command, you can also issue the dynamic keyword, which defers DNS resolution of the hostname until right before the IPsec tunnel has been established. Deferring resolution enables the Cisco IOS software to detect whether the IP address of the remote IPsec peer has changed. Thus, the software can contact the peer at the new IP address.
If the dynamic keyword is not issued, the hostname is resolved immediately after it is specified. So, the Cisco IOS software cannot detect an IP address change and, therefore, attempts to connect to the IP address that it previously resolved.
The default Keyword
If there are multiple peers and you specify the default keyword, the first peer is designated as the default peer.
If dead peer detection (DPD) detects a failure, the default peer is retried before there is an attempt to connect to the next peer in the peer list.
If the default peer is unresponsive, the next peer in the peer list becomes the new current peer. Future connections through the crypto map will try that peer.
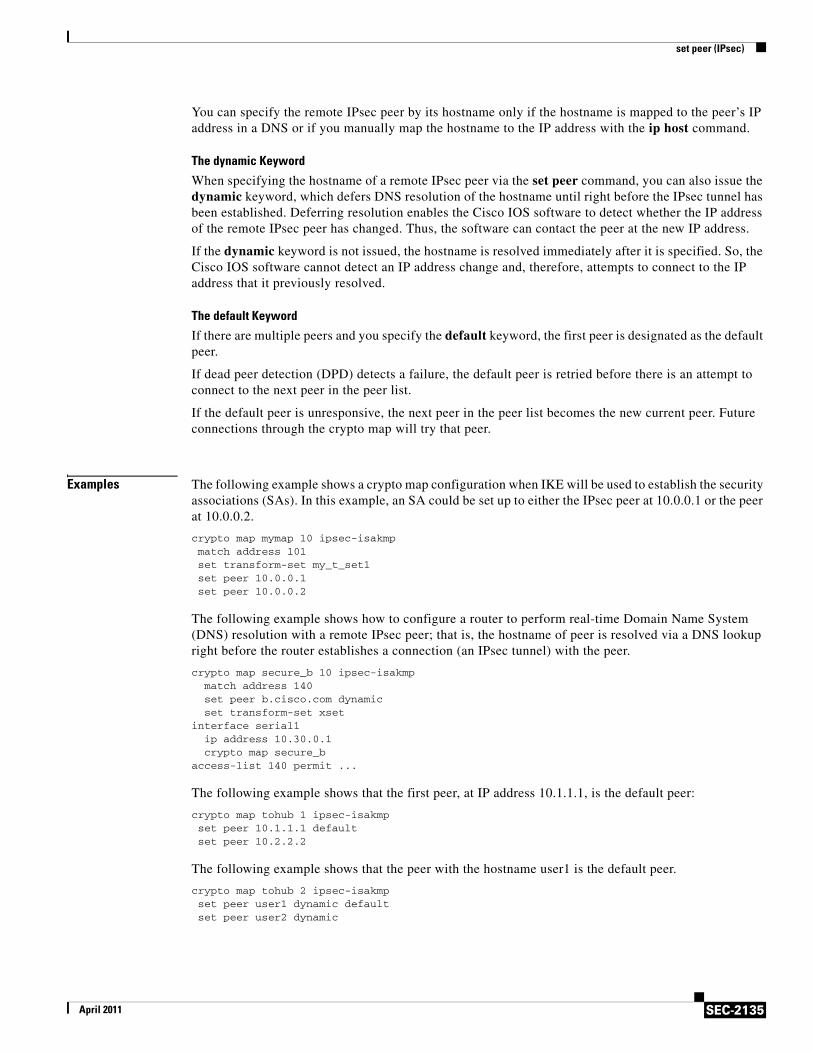
Examples The following example shows a crypto map configuration when IKE will be used to establish the security associations (SAs). In this example, an SA could be set up to either the IPsec peer at 10.0.0.1 or the peer at 10.0.0.2.
crypto map mymap 10 ipsec-isakmpmatch address 101set transform-set my_t_set1set peer 10.0.0.1set peer 10.0.0.2
The following example shows how to configure a router to perform real-time Domain Name System (DNS) resolution with a remote IPsec peer; that is, the hostname of peer is resolved via a DNS lookup right before the router establishes a connection (an IPsec tunnel) with the peer.
crypto map secure_b 10 ipsec-isakmp match address 140 set peer b.cisco.com dynamic set transform-set xsetinterface serial1 ip address 10.30.0.1 crypto map secure_baccess-list 140 permit ...
The following example shows that the first peer, at IP address 10.1.1.1, is the default peer:
crypto map tohub 1 ipsec-isakmp set peer 10.1.1.1 default set peer 10.2.2.2
The following example shows that the peer with the hostname user1 is the default peer.
crypto map tohub 2 ipsec-isakmp set peer user1 dynamic default set peer user2 dynamic
set peer (IPsec)
SEC-2136April 2011
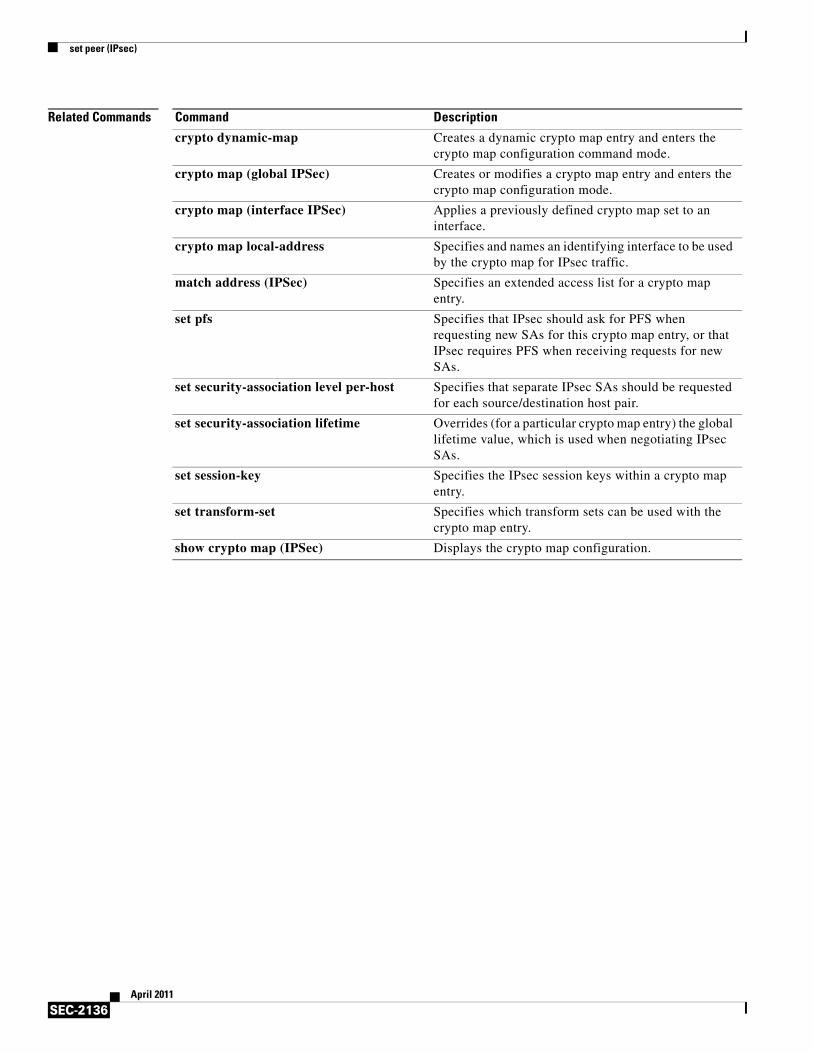
Related Commands Command Description
crypto dynamic-map Creates a dynamic crypto map entry and enters the crypto map configuration command mode.
crypto map (global IPSec) Creates or modifies a crypto map entry and enters the crypto map configuration mode.
crypto map (interface IPSec) Applies a previously defined crypto map set to an interface.
crypto map local-address Specifies and names an identifying interface to be used by the crypto map for IPsec traffic.
match address (IPSec) Specifies an extended access list for a crypto map entry.
set pfs Specifies that IPsec should ask for PFS when requesting new SAs for this crypto map entry, or that IPsec requires PFS when receiving requests for new SAs.
set security-association level per-host Specifies that separate IPsec SAs should be requested for each source/destination host pair.
set security-association lifetime Overrides (for a particular crypto map entry) the global lifetime value, which is used when negotiating IPsec SAs.
set session-key Specifies the IPsec session keys within a crypto map entry.
set transform-set Specifies which transform sets can be used with the crypto map entry.
show crypto map (IPSec) Displays the crypto map configuration.
set pfs
SEC-2137April 2011
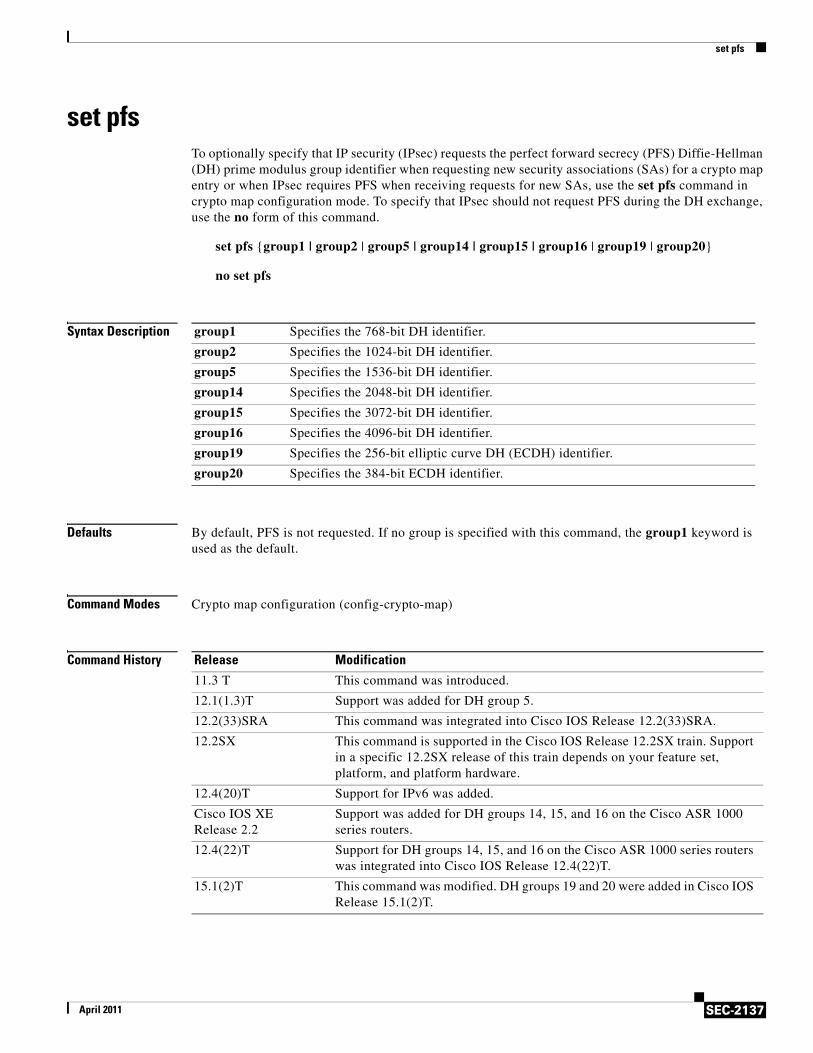
set pfsTo optionally specify that IP security (IPsec) requests the perfect forward secrecy (PFS) Diffie-Hellman (DH) prime modulus group identifier when requesting new security associations (SAs) for a crypto map entry or when IPsec requires PFS when receiving requests for new SAs, use the set pfs command in crypto map configuration mode. To specify that IPsec should not request PFS during the DH exchange, use the no form of this command.
set pfs {group1 | group2 | group5 | group14 | group15 | group16 | group19 | group20}
no set pfs
Syntax Description
Defaults By default, PFS is not requested. If no group is specified with this command, the group1 keyword is used as the default.
Command Modes Crypto map configuration (config-crypto-map)
Command History
group1 Specifies the 768-bit DH identifier.
group2 Specifies the 1024-bit DH identifier.
group5 Specifies the 1536-bit DH identifier.
group14 Specifies the 2048-bit DH identifier.
group15 Specifies the 3072-bit DH identifier.
group16 Specifies the 4096-bit DH identifier.
group19 Specifies the 256-bit elliptic curve DH (ECDH) identifier.
group20 Specifies the 384-bit ECDH identifier.
Release Modification
11.3 T This command was introduced.
12.1(1.3)T Support was added for DH group 5.
12.2(33)SRA This command was integrated into Cisco IOS Release 12.2(33)SRA.
12.2SX This command is supported in the Cisco IOS Release 12.2SX train. Support in a specific 12.2SX release of this train depends on your feature set, platform, and platform hardware.
12.4(20)T Support for IPv6 was added.
Cisco IOS XE Release 2.2
Support was added for DH groups 14, 15, and 16 on the Cisco ASR 1000 series routers.
12.4(22)T Support for DH groups 14, 15, and 16 on the Cisco ASR 1000 series routers was integrated into Cisco IOS Release 12.4(22)T.
15.1(2)T This command was modified. DH groups 19 and 20 were added in Cisco IOS Release 15.1(2)T.
set pfs
SEC-2138April 2011
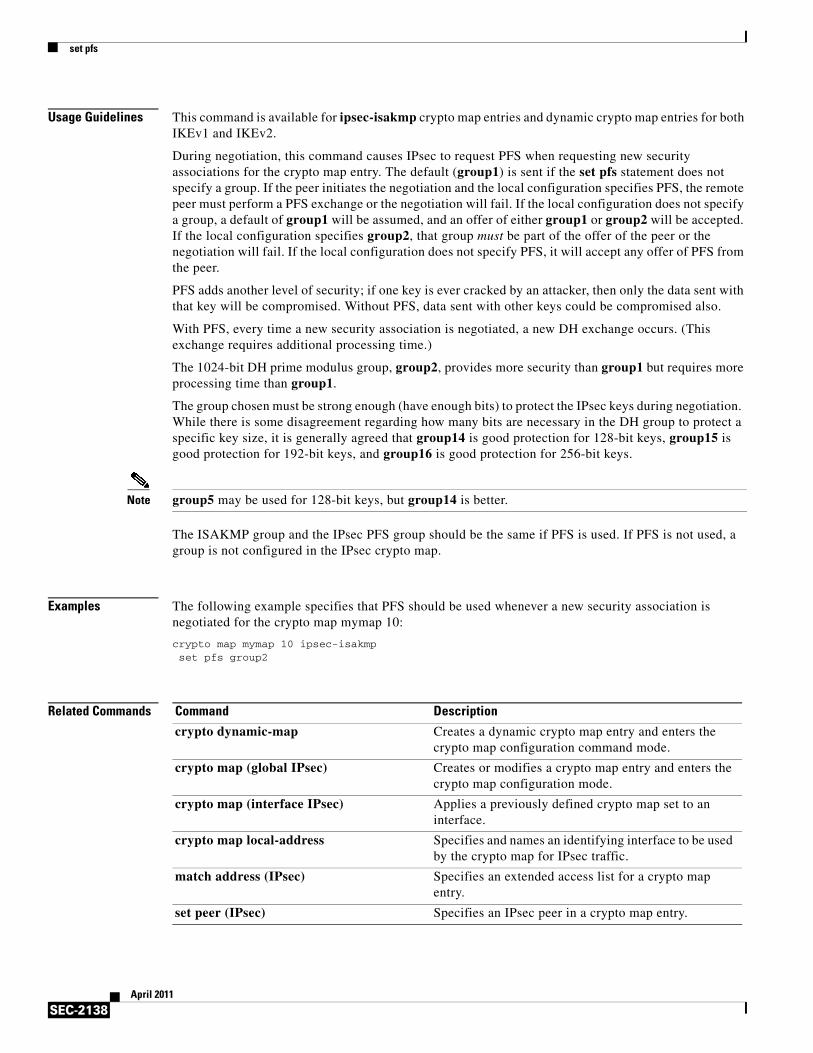
Usage Guidelines This command is available for ipsec-isakmp crypto map entries and dynamic crypto map entries for both IKEv1 and IKEv2.
During negotiation, this command causes IPsec to request PFS when requesting new security associations for the crypto map entry. The default (group1) is sent if the set pfs statement does not specify a group. If the peer initiates the negotiation and the local configuration specifies PFS, the remote peer must perform a PFS exchange or the negotiation will fail. If the local configuration does not specify a group, a default of group1 will be assumed, and an offer of either group1 or group2 will be accepted. If the local configuration specifies group2, that group must be part of the offer of the peer or the negotiation will fail. If the local configuration does not specify PFS, it will accept any offer of PFS from the peer.
PFS adds another level of security; if one key is ever cracked by an attacker, then only the data sent with that key will be compromised. Without PFS, data sent with other keys could be compromised also.
With PFS, every time a new security association is negotiated, a new DH exchange occurs. (This exchange requires additional processing time.)
The 1024-bit DH prime modulus group, group2, provides more security than group1 but requires more processing time than group1.
The group chosen must be strong enough (have enough bits) to protect the IPsec keys during negotiation. While there is some disagreement regarding how many bits are necessary in the DH group to protect a specific key size, it is generally agreed that group14 is good protection for 128-bit keys, group15 is good protection for 192-bit keys, and group16 is good protection for 256-bit keys.
Note group5 may be used for 128-bit keys, but group14 is better.
The ISAKMP group and the IPsec PFS group should be the same if PFS is used. If PFS is not used, a group is not configured in the IPsec crypto map.
Examples The following example specifies that PFS should be used whenever a new security association is negotiated for the crypto map mymap 10:
crypto map mymap 10 ipsec-isakmpset pfs group2
Related Commands Command Description
crypto dynamic-map Creates a dynamic crypto map entry and enters the crypto map configuration command mode.
crypto map (global IPsec) Creates or modifies a crypto map entry and enters the crypto map configuration mode.
crypto map (interface IPsec) Applies a previously defined crypto map set to an interface.
crypto map local-address Specifies and names an identifying interface to be used by the crypto map for IPsec traffic.
match address (IPsec) Specifies an extended access list for a crypto map entry.
set peer (IPsec) Specifies an IPsec peer in a crypto map entry.
set pfs
SEC-2139April 2011
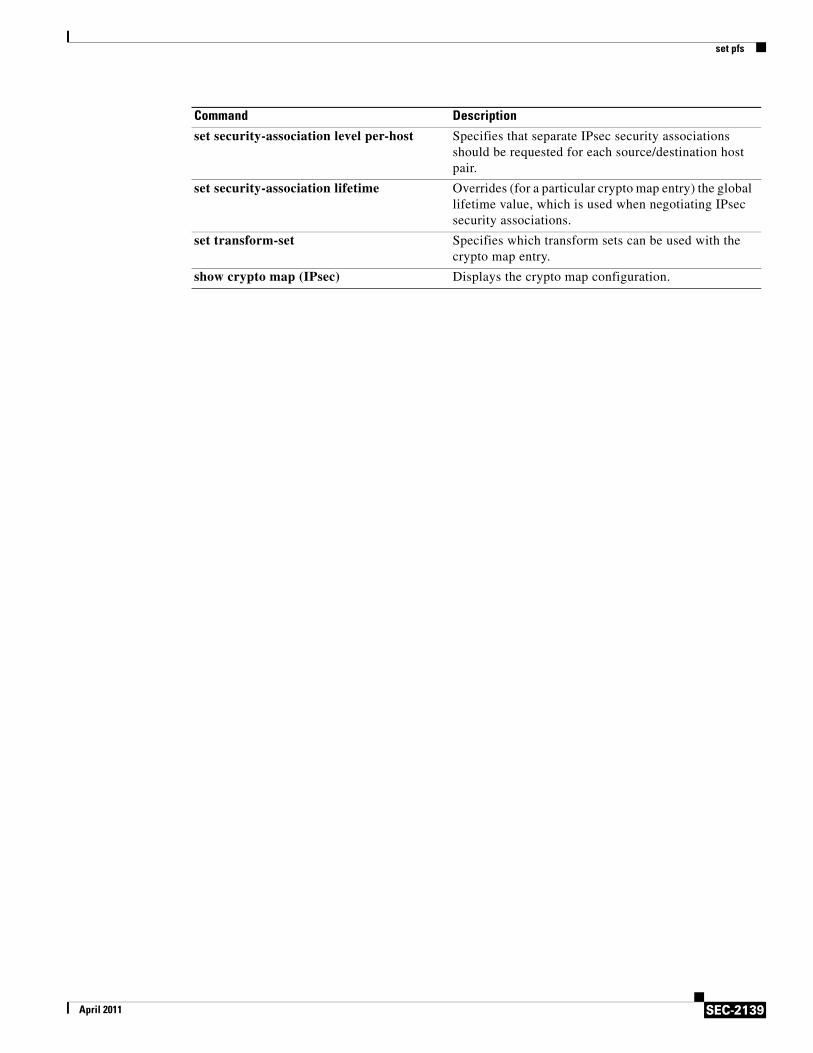
set security-association level per-host Specifies that separate IPsec security associations should be requested for each source/destination host pair.
set security-association lifetime Overrides (for a particular crypto map entry) the global lifetime value, which is used when negotiating IPsec security associations.
set transform-set Specifies which transform sets can be used with the crypto map entry.
show crypto map (IPsec) Displays the crypto map configuration.
Command Description
set reverse-route
SEC-2140April 2011
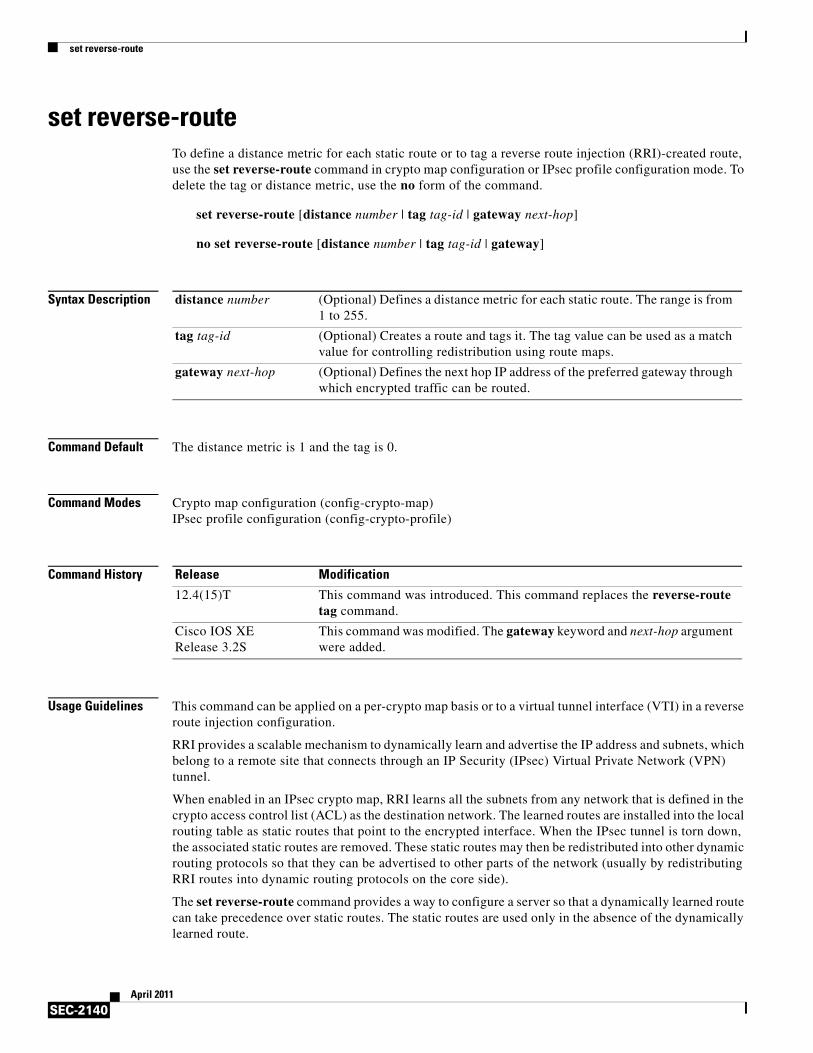
set reverse-routeTo define a distance metric for each static route or to tag a reverse route injection (RRI)-created route, use the set reverse-route command in crypto map configuration or IPsec profile configuration mode. To delete the tag or distance metric, use the no form of the command.
set reverse-route [distance number | tag tag-id | gateway next-hop]
no set reverse-route [distance number | tag tag-id | gateway]
Syntax Description
Command Default The distance metric is 1 and the tag is 0.
Command Modes Crypto map configuration (config-crypto-map)IPsec profile configuration (config-crypto-profile)
Command History
Usage Guidelines This command can be applied on a per-crypto map basis or to a virtual tunnel interface (VTI) in a reverse route injection configuration.
RRI provides a scalable mechanism to dynamically learn and advertise the IP address and subnets, which belong to a remote site that connects through an IP Security (IPsec) Virtual Private Network (VPN) tunnel.
When enabled in an IPsec crypto map, RRI learns all the subnets from any network that is defined in the crypto access control list (ACL) as the destination network. The learned routes are installed into the local routing table as static routes that point to the encrypted interface. When the IPsec tunnel is torn down, the associated static routes are removed. These static routes may then be redistributed into other dynamic routing protocols so that they can be advertised to other parts of the network (usually by redistributing RRI routes into dynamic routing protocols on the core side).
The set reverse-route command provides a way to configure a server so that a dynamically learned route can take precedence over static routes. The static routes are used only in the absence of the dynamically learned route.
distance number (Optional) Defines a distance metric for each static route. The range is from 1 to 255.
tag tag-id (Optional) Creates a route and tags it. The tag value can be used as a match value for controlling redistribution using route maps.
gateway next-hop (Optional) Defines the next hop IP address of the preferred gateway through which encrypted traffic can be routed.
Release Modification
12.4(15)T This command was introduced. This command replaces the reverse-route tag command.
Cisco IOS XE Release 3.2S
This command was modified. The gateway keyword and next-hop argument were added.
set reverse-route
SEC-2141April 2011
Inserting an RRI in the remote peer through a gateway that is configured in the crypto IPsec profile ensures that the traffic to the remote peer is always routed through the configured gateway.
If you configure the RRI gateway when there are no sessions, then no changes occur. A route to the remote peer is added only when a new security association (SA) becomes active.
To change to a new gateway when there are active sessions, you must delete the active sessions. You cannot add, delete, or change a gateway configuration when there are active sessions.
The gateway configuration scenarios with respect to sessions are exhibited irrespective of whether Front Virtual Routing and Forwarding (FVRF) has been configured or not.
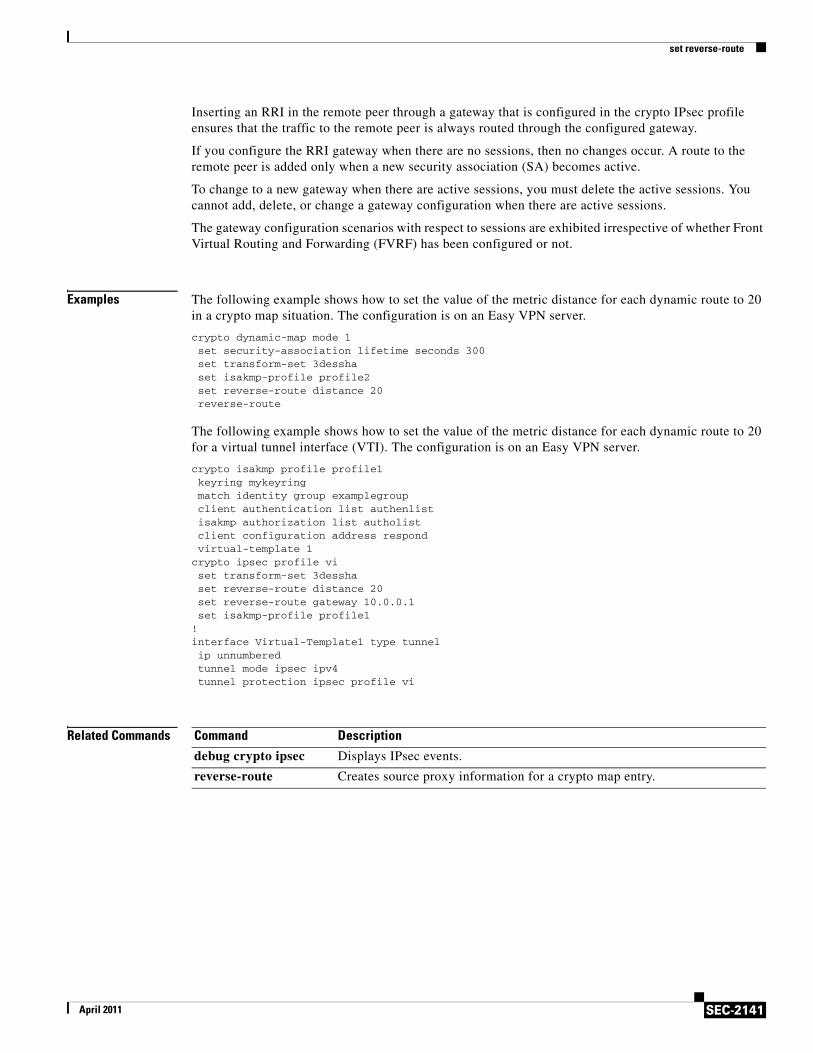
Examples The following example shows how to set the value of the metric distance for each dynamic route to 20 in a crypto map situation. The configuration is on an Easy VPN server.
crypto dynamic-map mode 1 set security-association lifetime seconds 300 set transform-set 3dessha set isakmp-profile profile2 set reverse-route distance 20 reverse-route
The following example shows how to set the value of the metric distance for each dynamic route to 20 for a virtual tunnel interface (VTI). The configuration is on an Easy VPN server.
crypto isakmp profile profile1keyring mykeyringmatch identity group examplegroupclient authentication list authenlistisakmp authorization list autholistclient configuration address respondvirtual-template 1
crypto ipsec profile viset transform-set 3dessha set reverse-route distance 20set reverse-route gateway 10.0.0.1set isakmp-profile profile1
!interface Virtual-Template1 type tunnelip unnumberedtunnel mode ipsec ipv4tunnel protection ipsec profile vi
Related Commands Command Description
debug crypto ipsec Displays IPsec events.
reverse-route Creates source proxy information for a crypto map entry.
set security-association idle-time
SEC-2142April 2011
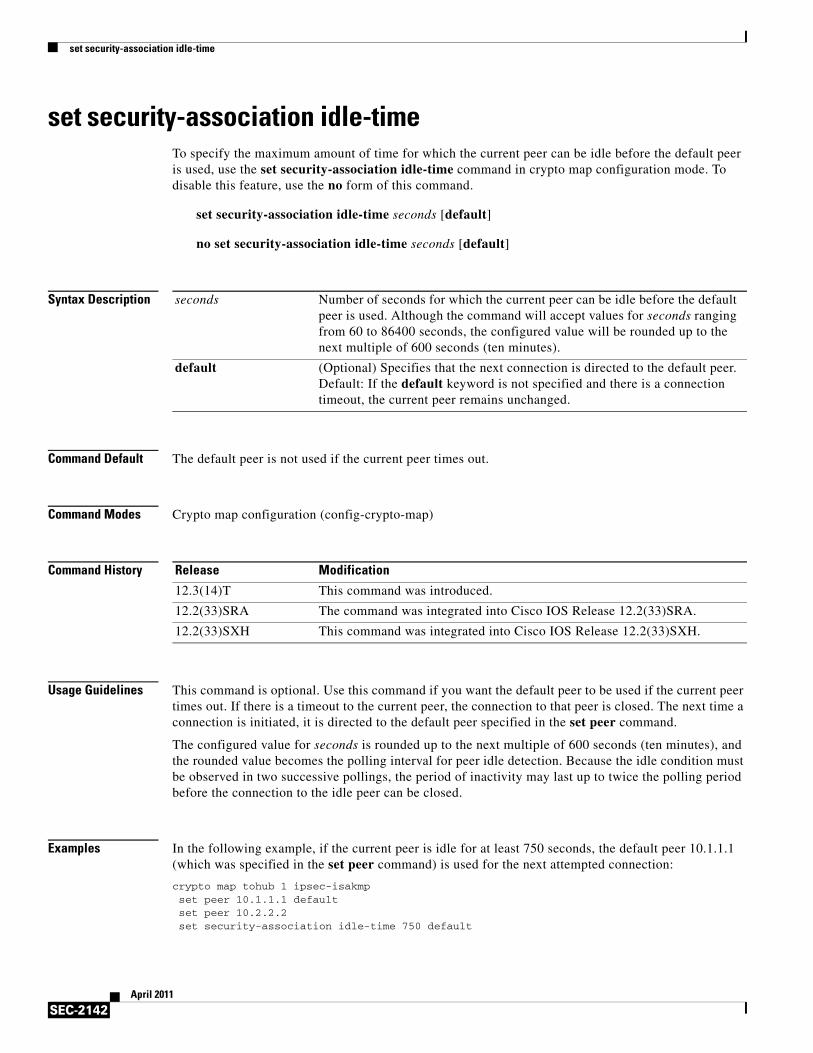
set security-association idle-timeTo specify the maximum amount of time for which the current peer can be idle before the default peer is used, use the set security-association idle-time command in crypto map configuration mode. To disable this feature, use the no form of this command.
set security-association idle-time seconds [default]
no set security-association idle-time seconds [default]
Syntax Description
Command Default The default peer is not used if the current peer times out.
Command Modes Crypto map configuration (config-crypto-map)
Command History
Usage Guidelines This command is optional. Use this command if you want the default peer to be used if the current peer times out. If there is a timeout to the current peer, the connection to that peer is closed. The next time a connection is initiated, it is directed to the default peer specified in the set peer command.
The configured value for seconds is rounded up to the next multiple of 600 seconds (ten minutes), and the rounded value becomes the polling interval for peer idle detection. Because the idle condition must be observed in two successive pollings, the period of inactivity may last up to twice the polling period before the connection to the idle peer can be closed.
Examples In the following example, if the current peer is idle for at least 750 seconds, the default peer 10.1.1.1 (which was specified in the set peer command) is used for the next attempted connection:
crypto map tohub 1 ipsec-isakmp set peer 10.1.1.1 default set peer 10.2.2.2 set security-association idle-time 750 default
seconds Number of seconds for which the current peer can be idle before the default peer is used. Although the command will accept values for seconds ranging from 60 to 86400 seconds, the configured value will be rounded up to the next multiple of 600 seconds (ten minutes).
default (Optional) Specifies that the next connection is directed to the default peer. Default: If the default keyword is not specified and there is a connection timeout, the current peer remains unchanged.
Release Modification
12.3(14)T This command was introduced.
12.2(33)SRA The command was integrated into Cisco IOS Release 12.2(33)SRA.
12.2(33)SXH This command was integrated into Cisco IOS Release 12.2(33)SXH.
set security-association idle-time
SEC-2143April 2011
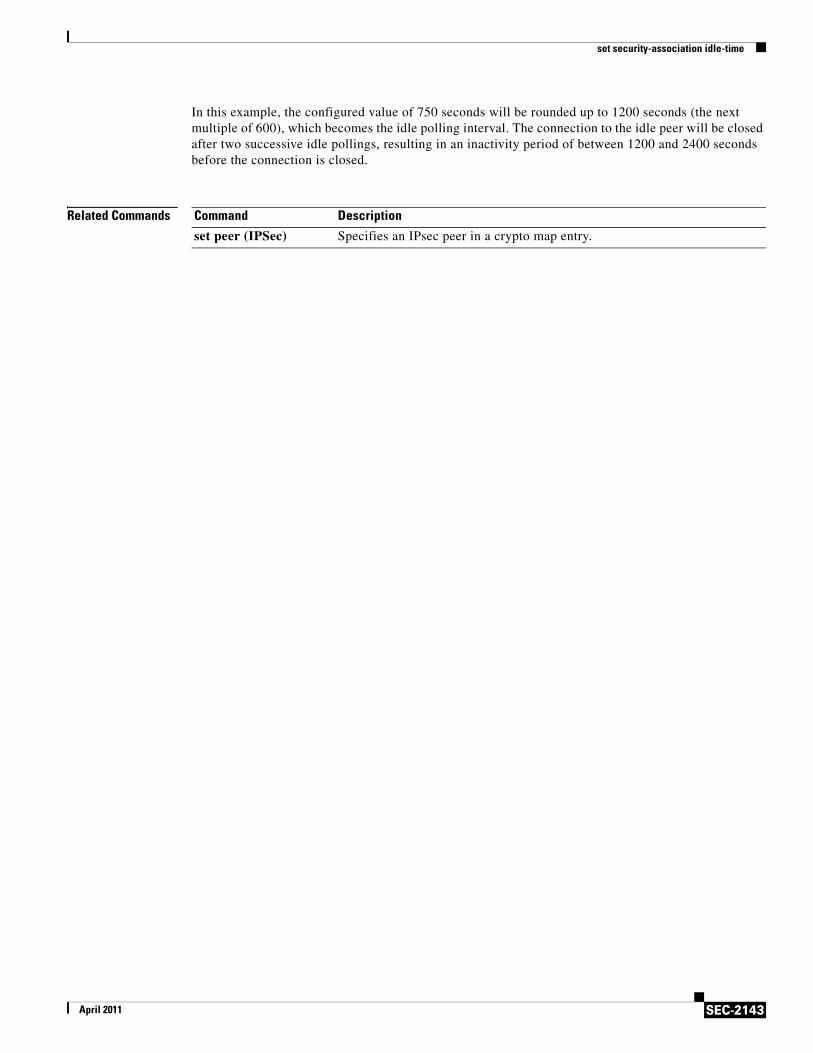
In this example, the configured value of 750 seconds will be rounded up to 1200 seconds (the next multiple of 600), which becomes the idle polling interval. The connection to the idle peer will be closed after two successive idle pollings, resulting in an inactivity period of between 1200 and 2400 seconds before the connection is closed.
Related Commands Command Description
set peer (IPSec) Specifies an IPsec peer in a crypto map entry.
set security-association level per-host
SEC-2144April 2011
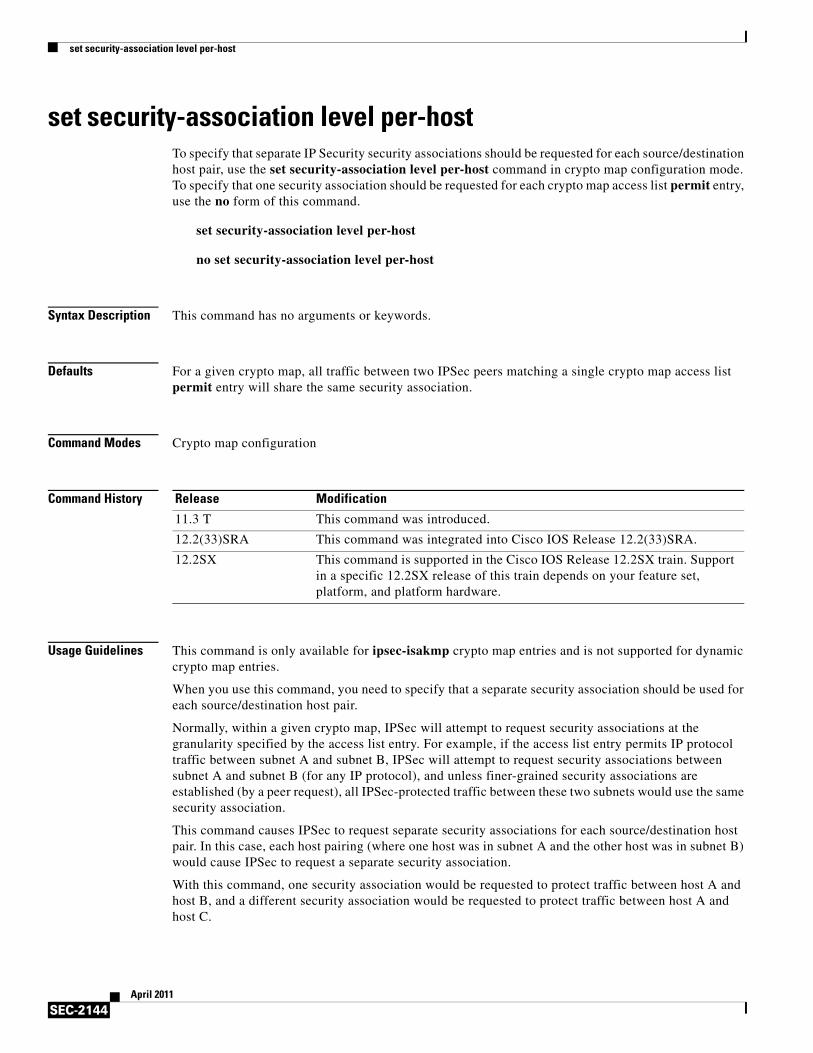
set security-association level per-hostTo specify that separate IP Security security associations should be requested for each source/destination host pair, use the set security-association level per-host command in crypto map configuration mode. To specify that one security association should be requested for each crypto map access list permit entry, use the no form of this command.
set security-association level per-host
no set security-association level per-host
Syntax Description This command has no arguments or keywords.
Defaults For a given crypto map, all traffic between two IPSec peers matching a single crypto map access list permit entry will share the same security association.
Command Modes Crypto map configuration
Command History
Usage Guidelines This command is only available for ipsec-isakmp crypto map entries and is not supported for dynamic crypto map entries.
When you use this command, you need to specify that a separate security association should be used for each source/destination host pair.
Normally, within a given crypto map, IPSec will attempt to request security associations at the granularity specified by the access list entry. For example, if the access list entry permits IP protocol traffic between subnet A and subnet B, IPSec will attempt to request security associations between subnet A and subnet B (for any IP protocol), and unless finer-grained security associations are established (by a peer request), all IPSec-protected traffic between these two subnets would use the same security association.
This command causes IPSec to request separate security associations for each source/destination host pair. In this case, each host pairing (where one host was in subnet A and the other host was in subnet B) would cause IPSec to request a separate security association.
With this command, one security association would be requested to protect traffic between host A and host B, and a different security association would be requested to protect traffic between host A and host C.
Release Modification
11.3 T This command was introduced.
12.2(33)SRA This command was integrated into Cisco IOS Release 12.2(33)SRA.
12.2SX This command is supported in the Cisco IOS Release 12.2SX train. Support in a specific 12.2SX release of this train depends on your feature set, platform, and platform hardware.
set security-association level per-host
SEC-2145April 2011
The access list entry can specify local and remote subnets, or it can specify a host-and-subnet combination. If the access list entry specifies protocols and ports, these values are applied when establishing the unique security associations.
Use this command with care, as multiple streams between given subnets can rapidly consume system resources.
Examples The following example shows what happens with an access list entry of permit ip 10.1.1.0 0.0.0.255 10.2.2.0 0.0.0.255 and a per-host level:
• A packet from 10.1.1.1 to 10.2.2.1 will initiate a security association request, which would look like it originated via permit ip host 10.1.1.1 host 10.2.2.1.
• A packet from 10.1.1.1 to 10.2.2.2 will initiate a security association request, which would look like it originated via permit ip host 10.1.1.1 host 10.2.2.2.
• A packet from 10.1.1.2 to 10.2.2.1 will initiate a security association request, which would look like it originated via permit ip host 10.1.1.2 host 10.2.2.1.
Without the per-host level, any of the above packets will initiate a single security association request originated via permit ip 10.1.1.0 0.0.0.255 10.2.2.0 0.0.0.255.
Related Commands Command Description
crypto dynamic-map Creates a dynamic crypto map entry and enters the crypto map configuration command mode.
crypto map (global IPSec) Creates or modifies a crypto map entry and enters the crypto map configuration mode.
crypto map (interface IPSec) Applies a previously defined crypto map set to an interface.
crypto map local-address Specifies and names an identifying interface to be used by the crypto map for IPSec traffic.
match address (IPSec) Specifies an extended access list for a crypto map entry.
set peer (IPSec) Specifies an IPSec peer in a crypto map entry.
set pfs Specifies that IPSec should ask for PFS when requesting new security associations for this crypto map entry, or that IPSec requires PFS when receiving requests for new security associations.
set security-association lifetime Overrides (for a particular crypto map entry) the global lifetime value, which is used when negotiating IPSec security associations.
set transform-set Specifies which transform sets can be used with the crypto map entry.
show crypto map (IPSec) Displays the crypto map configuration.
set security-association lifetime
SEC-2146April 2011
set security-association lifetimeTo override (for a particular crypto map entry) the global lifetime value, which is used when negotiating IP Security security associations, use the set security-association lifetime command in crypto map configuration mode. To reset a crypto map entry’s lifetime value to the global value, use the no form of this command.
set security-association lifetime {seconds seconds | kilobytes kilobytes | kilobytes disable}
no set security-association lifetime {seconds | kilobytes | kilobytes disable}
Syntax Description
Defaults The crypto map’s security associations are negotiated according to the global lifetimes.
Command Modes Crypto map configuration (config-crypto-map)
Command History
Usage Guidelines This command is available only for ipsec-isakmp crypto map entries and dynamic crypto map entries.
IPsec security associations use shared secret keys. These keys and their security associations time out together.
Assuming that the particular crypto map entry has lifetime values configured, when the router requests new security associations during security association negotiation, it will specify its crypto map lifetime value in the request to the peer; it will use this value as the lifetime of the new security associations.
seconds seconds Specifies the number of seconds a security association will live before expiring.
kilobytes kilobytes Specifies the volume of traffic (in kilobytes) that can pass between IPsec peers using a given security association before that security association expires.
kilobytes disable Disables the IPsec security association (SA) rekey based on the traffic-volume lifetime (in kilobytes).
If the no form is used with these keywords, lifetime settings return to the default settings.
Release Modification
11.3 T This command was introduced.
12.2(33)SRA This command was integrated into Cisco IOS Release 12.2(33)SRA.
12.2SX This command is supported in the Cisco IOS Release 12.2SX train. Support in a specific 12.2SX release of this train depends on your feature set, platform, and platform hardware.
12.4(20)T Support for IPv6 was added.
12.2(33)SXI The disable keyword was added.
Note This keyword addition is for only Cisco IOS Release 12.2(33)SXI.
15.0(1)M The disable keyword was added.
set security-association lifetime
SEC-2147April 2011
When the router receives a negotiation request from the peer, it will use the smaller of the lifetime value proposed by the peer or the locally configured lifetime value as the lifetime of the new security associations.
There are two lifetimes: a “timed” lifetime and a “traffic-volume” lifetime. The session keys or security association expires after the first of these lifetimes is reached.
Note IPsec SA rekey can be triggered either by a timed lifetime or by a traffic-volume lifetime. To control rekey, it is recommended that you use the timed lifetime rather than the traffic-volume lifetime. When a small traffic-volume lifetime is used for IPsec SA, it causes frequent IPsec SA rekeys. High throughput of encryption or decryption traffic can cause intermittent packet drops. The minimum traffic-volume lifetime threshold of 2560 kilobytes is not recommended on IPsec SAs that protect a medium-to-high throughput data link because this setting can cause packet drops during rekey.
If you change a lifetime, the change will not be applied to existing security associations, but will be used in subsequent negotiations to establish security associations for data flows supported by this crypto map entry. If you want the new settings to take effect sooner, you can clear all or part of the security association database by using the clear crypto sa command. Refer to the clear crypto sa command for more detail.
To change the timed lifetime, use the set security-association lifetime seconds form of the command. The timed lifetime causes the keys and security association to time out after the specified number of seconds have passed.
To change the traffic-volume lifetime, use the set security-association lifetime kilobytes form of the command. The traffic-volume lifetime causes the key and security association to time out after the specified amount of traffic (in kilobytes) has been protected by the security association’s key.
Shorter lifetimes can make it harder to mount a successful key recovery attack, because the attacker has less data encrypted under the same key to work with. However, shorter lifetimes need more CPU processing time.
The lifetime values are ignored for manually established security associations (security associations installed via an ipsec-manual crypto map entry).
How The Lifetimes Work
Assuming that the particular crypto map entry does not have lifetime values configured, when the router requests new security associations it will specify its global lifetime values in the request to the peer; it will use this value as the lifetime of the new security associations. When the router receives a negotiation request from the peer, it will use the smaller of either the lifetime value proposed by the peer or the locally configured lifetime value as the lifetime of the new security associations.
The security association (and corresponding keys) will expire according to whichever occurs sooner, either after the seconds time out or after the kilobytes amount of traffic is passed.
A new security association is negotiated before the lifetime threshold of the existing security association is reached, to ensure that a new security association is ready for use when the old one expires. The seconds lifetime and the kilobytes lifetime each have a jitter mechanism to avoid security association rekey collisions. The new security association is negotiated either (30 plus a random number of) seconds before the seconds lifetime expires or when the traffic volume reaches (90 minus a random number of) percent of the kilobytes lifetime (whichever occurs first).
If no traffic has passed through the tunnel during the entire life of the security association, a new security association is not negotiated when the lifetime expires. Instead, a new security association will be negotiated only when IPsec sees another packet that should be protected.
set security-association lifetime
SEC-2148April 2011
Disabling the Traffic-Volume Lifetime
The set security-association lifetime kilobytes disable form of the command disables the traffic-volume lifetime. Disabling the traffic-volume lifetime affects only the router on which IPsec SA rekey based on traffic-volume lifetime is configured. It does not affect the peer router’s behavior or the current router’s IPsec SA time-based (seconds) rekey. The set security-association lifetime kilobytes disable form of the command is useful when the IPsec SAs are protecting a high bandwidth data link (10-gigabit Ethernet). This option can be used to reduce packet loss in high traffic environments and to prevent frequent rekeys that are triggered by reaching the volume lifetimes.
Note The traffic-volume lifetime can also be disabled by entering the crypto ipsec security-association lifetime kilobytes disable command.
Examples The following example shortens the timed lifetime for a particular crypto map entry, because there is a higher risk that the keys could be compromised for security associations belonging to the crypto map entry. The traffic-volume lifetime is not changed because there is not a high volume of traffic anticipated for these security associations. The timed lifetime is shortened to 2700 seconds (45 minutes).
crypto map mymap 10 ipsec-isakmpset security-association lifetime seconds 2700
The following example shows that the kilobytes disable keyword has been used to disable the volume lifetime.
set security-association lifetime kilobytes disable
Related Commands Command Description
crypto dynamic-map Creates a dynamic crypto map entry and enters the crypto map configuration command mode.
crypto ipsec security-association lifetime Changes global lifetime values used when negotiating IPsec security associations.
crypto map (global IPsec) Creates or modifies a crypto map entry and enters the crypto map configuration mode.
crypto map (interface IPsec) Applies a previously defined crypto map set to an interface.
crypto map local-address Specifies and names an identifying interface to be used by the crypto map for IPsec traffic.
match address (IPsec) Specifies an extended access list for a crypto map entry.
set peer (IPsec) Specifies an IPsec peer in a crypto map entry.
set pfs Specifies that IPsec should ask for PFS when requesting new security associations for this crypto map entry, or that IPsec requires PFS when receiving requests for new security associations.
set security-association level per-host Specifies that separate IPsec security associations should be requested for each source/destination host pair.

set security-association lifetime
SEC-2149April 2011
set transform-set Specifies which transform sets can be used with the crypto map entry.
show crypto map (IPsec) Displays the crypto map configuration.
Command Description
set security-association replay disable
SEC-2150April 2011
set security-association replay disableTo disable anti-replay checking for a particular crypto map, dynamic crypto map, or crypto profile, use the set security-association replay disable command in crypto map configuration or crypto profile configuration mode. To enable anti-replay checking, use the no form of this command.
set security-association replay disable
no set security-association replay disable
Syntax Description This command has no arguments or keywords.
Defaults Anti-replay checking is enabled.
Command Modes Crypto map configurationCrypto profile configuration
Command History
Examples The following example shows that anti-replay checking has been disabled for the crypto map named “mymap.”
crypto map mymap 30set security-association replay disable
Related Commands
Release Modification
12.3(14)T This command was introduced.
12.2(33)SRA This command was integrated into Cisco IOS Release 12.2(33)SRA.
12.2(18)SXF6 This command was integrated into Cisco IOS Release 12.2(18)SXF6.
Command Description
set security-association replay window-size
Controls the SAs that are created using the policy specified by a particular crypto map, dynamic crypto map, or crypto profile.
set security-association replay window-size
SEC-2151April 2011
set security-association replay window-sizeTo control the security associations (SAs) that are created using the policy specified by a particular crypto map, dynamic crypto map, or crypto profile, use the set security-association replay window-size command in crypto map configuration or crypto profile configuration mode. To reset the crypto map to follow the global configuration that was specified by the crypto ipsec security-association replay window-size command, use the no form of this command.
set security-association replay window-size [N]
no set security-association replay window-size
Syntax Description
Defaults Window size is not set.
Command Modes Crypto map configurationCrypto profile configuration
Command History
Examples The following example shows that the SA window size has been set to 256 for the crypto map named “mymap”:
crypto map mymap 10set security-association replay window-size 256
Related Commands
N (Optional) Size of the window. The value can be 64, 128, 256, 512, or 1024. This value sets the window size for a particular crypto map, dynamic crypto map, or crypto profile.
Release Modification
12.3(14)T This command was introduced.
12.2(33)SRA This command was integrated into Cisco IOS Release 12.2(33)SRA.
12.2(18)SXF6 This command was integrated into Cisco IOS Release 12.2(18)SXF6.
Command Description
set security-association replay disable
Disables anti-replay checking for a particular crypto map, dynamic crypto map, or crypto profile.
set security-policy limit
SEC-2152April 2011
set security-policy limitTo define an upper limit to the number of flows that can be created for an individual virtual access interface, use the set security-policy limit command in IPsec profile configuration mode. To remove the limitation, use the no form of the command.
set security-policy limit maximum-limit
no set security-policy limit
Syntax Description
Command Default The upper limit to the number of flows that can be created for an individual virtual access interface is not defined.
Command Modes IPsec profile configuration (config-crypto-profile)
Command History
Usage Guidelines The set security-policy limit command is disabled by default. If the maximum limit is changed, this change is applied to the existing session. If the maximum limit is set to 0, then no new IPsec security associations (SAs) are created.
Examples The following example shows how to limit the number of flows that can be created for an individual virtual access interface to 5.
crypto ipsec profile ipsec-profile-1set security-policy limit 5
Related Commands
maximum-limit The number of security policy entries that can be negotiated with the peer. The range is from 0 to 50000.
Release Modification
Cisco IOS XE Release 3.2S
This command was introduced.
Command Description
crypto ipsec profile Defines the IPsec parameters that are to be used for IPsec encryption between two IPsec routers and to enter IPsec profile configuration mode.
crypto isakmp profile Defines an ISAKMP profile and IPsec user sessions.
interface virtual-template
Creates a virtual template interface that can be configured and applied dynamically when virtual access interfaces are created.

set session-key
SEC-2153April 2011
set session-keyTo manually specify the IP Security session keys within a crypto map entry, use the set session-key command in crypto map configuration mode. This command is available only for ipsec-manual crypto map entries. To remove IPSec session keys from a crypto map entry, use the no form of this command.
Authentication Header (AH) Protocol Syntax
set session-key {inbound | outbound} ah spi hex-key-string
no set session-key {inbound | outbound} ah
Encapsulation Security Protocol (ESP) Syntax
set session-key {inbound | outbound} esp spi cipher hex-key-string [authenticator hex-key-string]
no set session-key {inbound | outbound} esp
Syntax Description inbound Sets the inbound IPSec session key. (You must set both inbound and outbound keys.)
outbound Sets the outbound IPSec session key. (You must set both inbound and outbound keys.)
ah Sets the IPSec session key for the AH protocol. Use when the crypto map entry’s transform set includes an AH transform.
esp Sets the IPSec session key for ESP. Use when the crypto map entry’s transform set includes an ESP transform.
spi Specifies the security parameter index (SPI), a number that is used to uniquely identify a security association. The SPI is an arbitrary number you assign in the range of 256 to 4,294,967,295 (FFFF FFFF).
You can assign the same SPI to both directions and both protocols. However, not all peers have the same flexibility in SPI assignment. For a given destination address/protocol combination, unique SPI values must be used. The destination address is that of the router if inbound, the peer if outbound.
hex-key-string Specifies the session key; enter in hexadecimal format.
This is an arbitrary hexadecimal string of 8, 16, or 20 bytes.
If the crypto map’s transform set includes a DES algorithm, specify at least 8 bytes per key.
If the crypto map’s transform set includes an MD5 algorithm, specify at least 16 bytes per key.
If the crypto map’s transform set includes an SHA algorithm, specify 20 bytes per key.
Keys longer than the above sizes are simply truncated.
cipher Indicates that the key string is to be used with the ESP encryption transform.
authenticator (Optional) Indicates that the key string is to be used with the ESP authentication transform. This argument is required only when the crypto map entry’s transform set includes an ESP authentication transform.
set session-key
SEC-2154April 2011
Defaults No session keys are defined by default.
Command Modes Crypto map configuration
Command History
Usage Guidelines Use this command to define IPSec keys for security associations via ipsec-manual crypto map entries. (In the case of ipsec-isakmp crypto map entries, the security associations with their corresponding keys are automatically established via the IKE negotiation.)
If the crypto map’s transform set includes an AH protocol, you must define IPSec keys for AH for both inbound and outbound traffic. If the crypto map’s transform set includes an ESP encryption protocol, you must define IPSec keys for ESP encryption for both inbound and outbound traffic. If your transform set includes an ESP authentication protocol, you must define IPSec keys for ESP authentication for inbound and outbound traffic.
When you define multiple IPSec session keys within a single crypto map, you can assign the same security parameter index (SPI) number to all the keys. The SPI is used to identify the security association used with the crypto map. However, not all peers have the same flexibility in SPI assignment. You should coordinate SPI assignment with your peer’s operator, making certain that the same SPI is not used more than once for the same destination address/protocol combination.
Security associations established via this command do not expire (unlike security associations established via IKE).
Session keys at one peer must match the session keys at the remote peer.
If you change a session key, the security association using the key will be deleted and reinitialized.
Examples The following example shows a crypto map entry for manually established security associations. The transform set “t_set” includes only an AH protocol.
crypto ipsec transform-set t_set ah-sha-hmac
crypto map mymap 20 ipsec-manualmatch address 102set transform-set t_setset peer 10.0.0.21set session-key inbound ah 300 1111111111111111111111111111111111111111set session-key outbound ah 300 2222222222222222222222222222222222222222
Release Modification
11.3 T This command was introduced.
12.2(33)SRA This command was integrated into Cisco IOS Release 12.2(33)SRA.
12.2SX This command is supported in the Cisco IOS Release 12.2SX train. Support in a specific 12.2SX release of this train depends on your feature set, platform, and platform hardware.
set session-key
SEC-2155April 2011
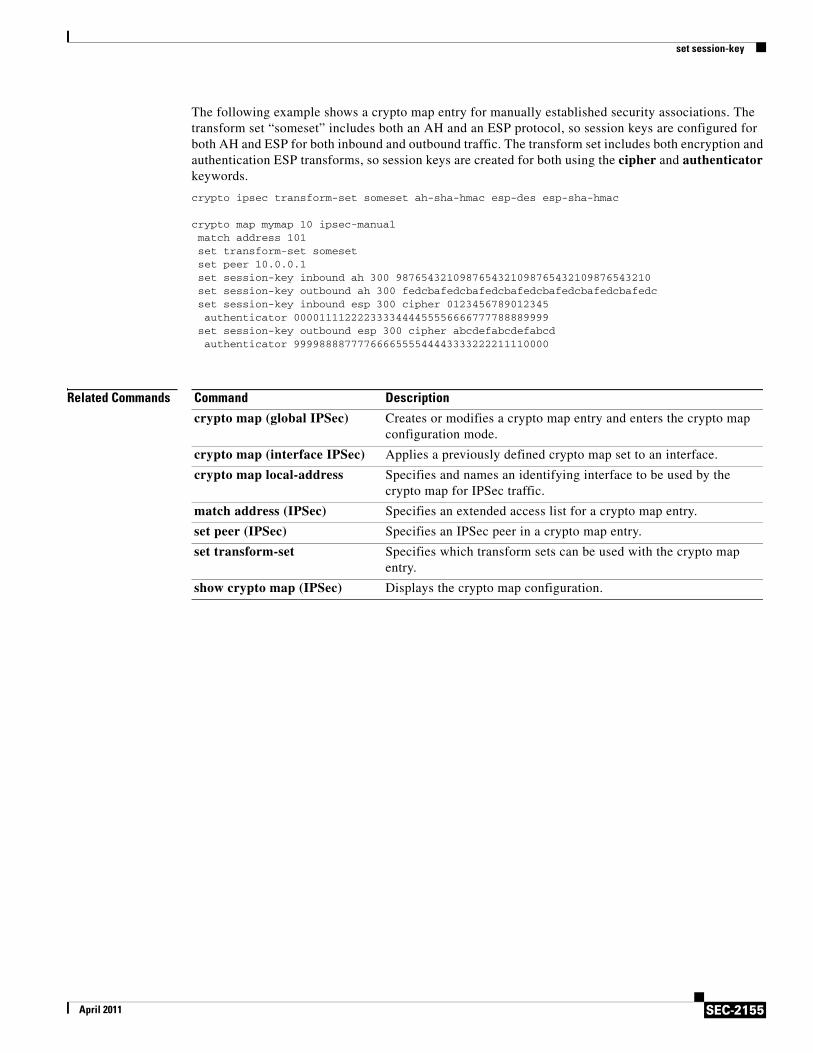
The following example shows a crypto map entry for manually established security associations. The transform set “someset” includes both an AH and an ESP protocol, so session keys are configured for both AH and ESP for both inbound and outbound traffic. The transform set includes both encryption and authentication ESP transforms, so session keys are created for both using the cipher and authenticator keywords.
crypto ipsec transform-set someset ah-sha-hmac esp-des esp-sha-hmac
crypto map mymap 10 ipsec-manualmatch address 101set transform-set somesetset peer 10.0.0.1set session-key inbound ah 300 9876543210987654321098765432109876543210set session-key outbound ah 300 fedcbafedcbafedcbafedcbafedcbafedcbafedcset session-key inbound esp 300 cipher 0123456789012345authenticator 0000111122223333444455556666777788889999
set session-key outbound esp 300 cipher abcdefabcdefabcdauthenticator 9999888877776666555544443333222211110000
Related Commands Command Description
crypto map (global IPSec) Creates or modifies a crypto map entry and enters the crypto map configuration mode.
crypto map (interface IPSec) Applies a previously defined crypto map set to an interface.
crypto map local-address Specifies and names an identifying interface to be used by the crypto map for IPSec traffic.
match address (IPSec) Specifies an extended access list for a crypto map entry.
set peer (IPSec) Specifies an IPSec peer in a crypto map entry.
set transform-set Specifies which transform sets can be used with the crypto map entry.
show crypto map (IPSec) Displays the crypto map configuration.
set transform-set
SEC-2156April 2011
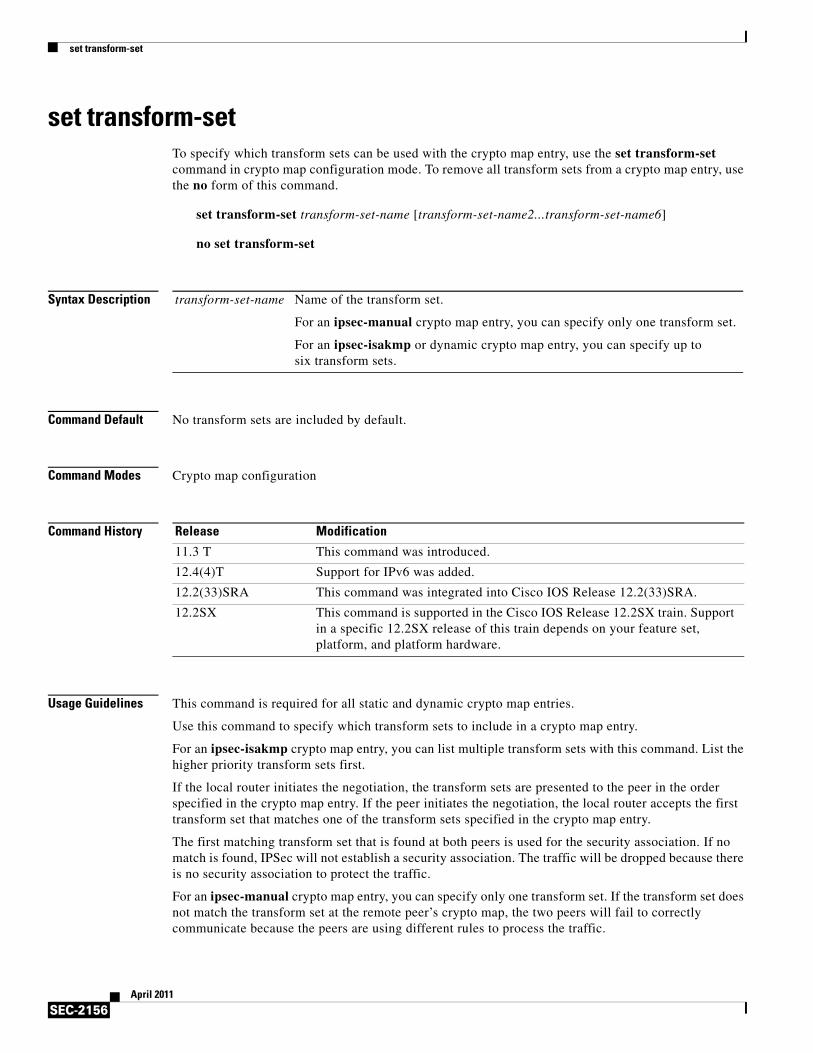
set transform-setTo specify which transform sets can be used with the crypto map entry, use the set transform-set command in crypto map configuration mode. To remove all transform sets from a crypto map entry, use the no form of this command.
set transform-set transform-set-name [transform-set-name2...transform-set-name6]
no set transform-set
Syntax Description
Command Default No transform sets are included by default.
Command Modes Crypto map configuration
Command History
Usage Guidelines This command is required for all static and dynamic crypto map entries.
Use this command to specify which transform sets to include in a crypto map entry.
For an ipsec-isakmp crypto map entry, you can list multiple transform sets with this command. List the higher priority transform sets first.
If the local router initiates the negotiation, the transform sets are presented to the peer in the order specified in the crypto map entry. If the peer initiates the negotiation, the local router accepts the first transform set that matches one of the transform sets specified in the crypto map entry.
The first matching transform set that is found at both peers is used for the security association. If no match is found, IPSec will not establish a security association. The traffic will be dropped because there is no security association to protect the traffic.
For an ipsec-manual crypto map entry, you can specify only one transform set. If the transform set does not match the transform set at the remote peer’s crypto map, the two peers will fail to correctly communicate because the peers are using different rules to process the traffic.
transform-set-name Name of the transform set.
For an ipsec-manual crypto map entry, you can specify only one transform set.
For an ipsec-isakmp or dynamic crypto map entry, you can specify up to six transform sets.
Release Modification
11.3 T This command was introduced.
12.4(4)T Support for IPv6 was added.
12.2(33)SRA This command was integrated into Cisco IOS Release 12.2(33)SRA.
12.2SX This command is supported in the Cisco IOS Release 12.2SX train. Support in a specific 12.2SX release of this train depends on your feature set, platform, and platform hardware.
set transform-set
SEC-2157April 2011
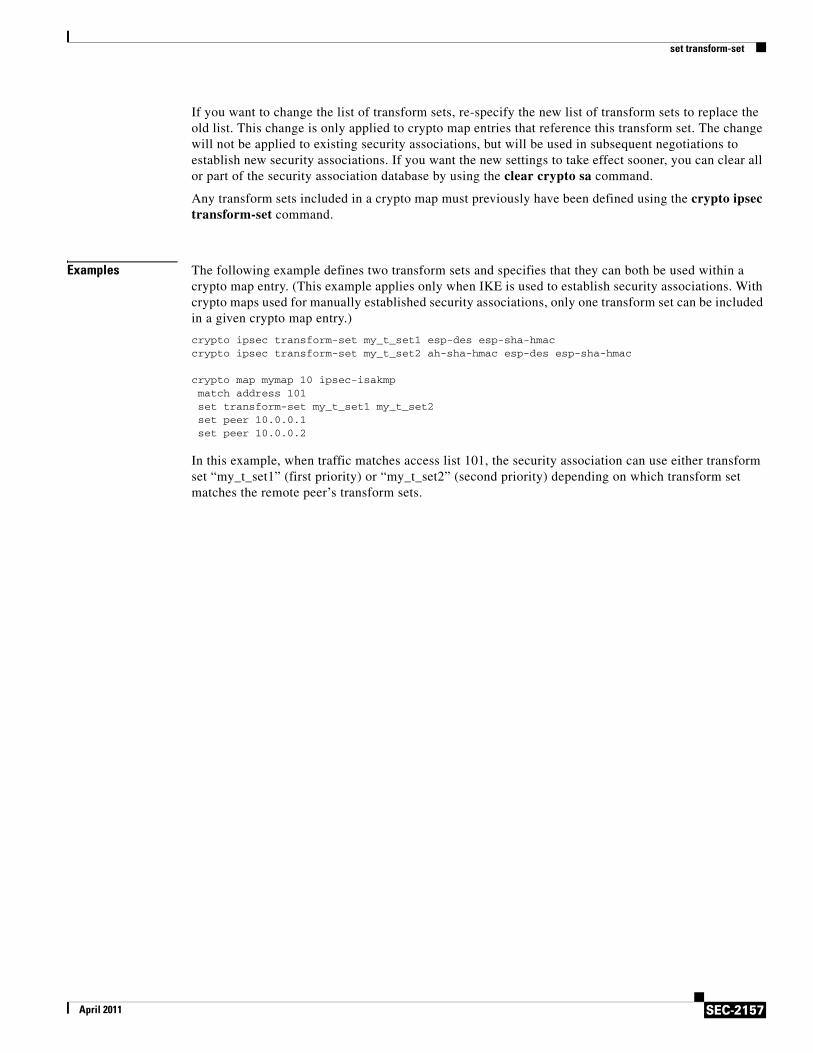
If you want to change the list of transform sets, re-specify the new list of transform sets to replace the old list. This change is only applied to crypto map entries that reference this transform set. The change will not be applied to existing security associations, but will be used in subsequent negotiations to establish new security associations. If you want the new settings to take effect sooner, you can clear all or part of the security association database by using the clear crypto sa command.
Any transform sets included in a crypto map must previously have been defined using the crypto ipsec transform-set command.
Examples The following example defines two transform sets and specifies that they can both be used within a crypto map entry. (This example applies only when IKE is used to establish security associations. With crypto maps used for manually established security associations, only one transform set can be included in a given crypto map entry.)
crypto ipsec transform-set my_t_set1 esp-des esp-sha-hmaccrypto ipsec transform-set my_t_set2 ah-sha-hmac esp-des esp-sha-hmac
crypto map mymap 10 ipsec-isakmpmatch address 101set transform-set my_t_set1 my_t_set2set peer 10.0.0.1set peer 10.0.0.2
In this example, when traffic matches access list 101, the security association can use either transform set “my_t_set1” (first priority) or “my_t_set2” (second priority) depending on which transform set matches the remote peer’s transform sets.
sgbp aaa authentication
SEC-2158April 2011
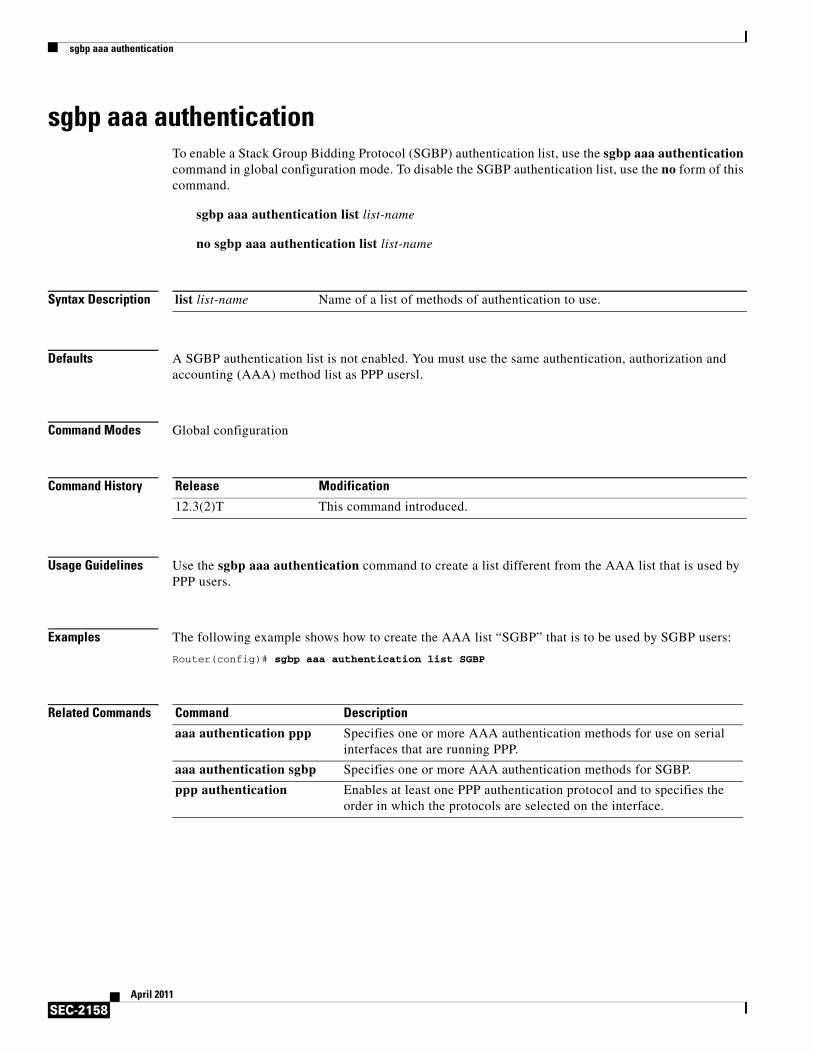
sgbp aaa authenticationTo enable a Stack Group Bidding Protocol (SGBP) authentication list, use the sgbp aaa authentication command in global configuration mode. To disable the SGBP authentication list, use the no form of this command.
sgbp aaa authentication list list-name
no sgbp aaa authentication list list-name
Syntax Description
Defaults A SGBP authentication list is not enabled. You must use the same authentication, authorization and accounting (AAA) method list as PPP usersl.
Command Modes Global configuration
Command History
Usage Guidelines Use the sgbp aaa authentication command to create a list different from the AAA list that is used by PPP users.
Examples The following example shows how to create the AAA list “SGBP” that is to be used by SGBP users:
Router(config)# sgbp aaa authentication list SGBP
Related Commands
list list-name Name of a list of methods of authentication to use.
Release Modification
12.3(2)T This command introduced.
Command Description
aaa authentication ppp Specifies one or more AAA authentication methods for use on serial interfaces that are running PPP.
aaa authentication sgbp Specifies one or more AAA authentication methods for SGBP.
ppp authentication Enables at least one PPP authentication protocol and to specifies the order in which the protocols are selected on the interface.

show aaa attributes
SEC-2159April 2011
show aaa attributesTo display the mapping between an authentication, authorization, and accounting (AAA) attribute number and the corresponding AAA attribute name, use the show aaa attributes command in EXEC configuration mode.
show aaa attributes [protocol radius]
Syntax Description
Command Modes EXEC
Command History
Examples The following example is sample output for the show aaa attributes command. In this example, all RADIUS attributes that have been enabled are displayed.
Router# show aaa attributes protocol radius
AAA ATTRIBUTE LIST: Type=1 Name=disc-cause-ext Format=Enum Protocol:RADIUS Non-Standard Type=195 Name=Ascend-Disconnect-Cau Format=Enum Cisco VSA Type=1 Name=Cisco AVpair Format=String Type=2 Name=Acct-Status-Type Format=Enum Protocol:RADIUS IETF Type=40 Name=Acct-Status-Type Format=Enum Type=3 Name=acl Format=Ulong Protocol:RADIUS IETF Type=11 Name=Filter-Id Format=Binary Type=4 Name=addr Format=IPv4 Address Protocol:RADIUS IETF Type=8 Name=Framed-IP-Address Format=IPv4 Addre Type=5 Name=addr-pool Format=String Protocol:RADIUS Non-Standard Type=218 Name=Ascend-IP-Pool Format=Ulong Type=6 Name=asyncmap Format=Ulong Protocol:RADIUS Non-Standard Type=212 Name=Ascend-Asyncmap Format=Ulong Type=7 Name=Authentic Format=Enum Protocol:RADIUS IETF Type=45 Name=Authentic Format=Enum Type=8 Name=autocmd Format=String
protocol radius (Optional) Displays the mapping between a RADIUS attribute and a AAA attribute name and number.
Release Modification
12.2(4)T This command was introduced.
12.2(11)T The protocol radius keyword was added.
12.3(14)T T.38 fax relay call statistics were made available to Call Detail Records (CDRs) through Vendor-Specific Attributes (VSAs) and added to the call log.
show aaa attributes
SEC-2160April 2011
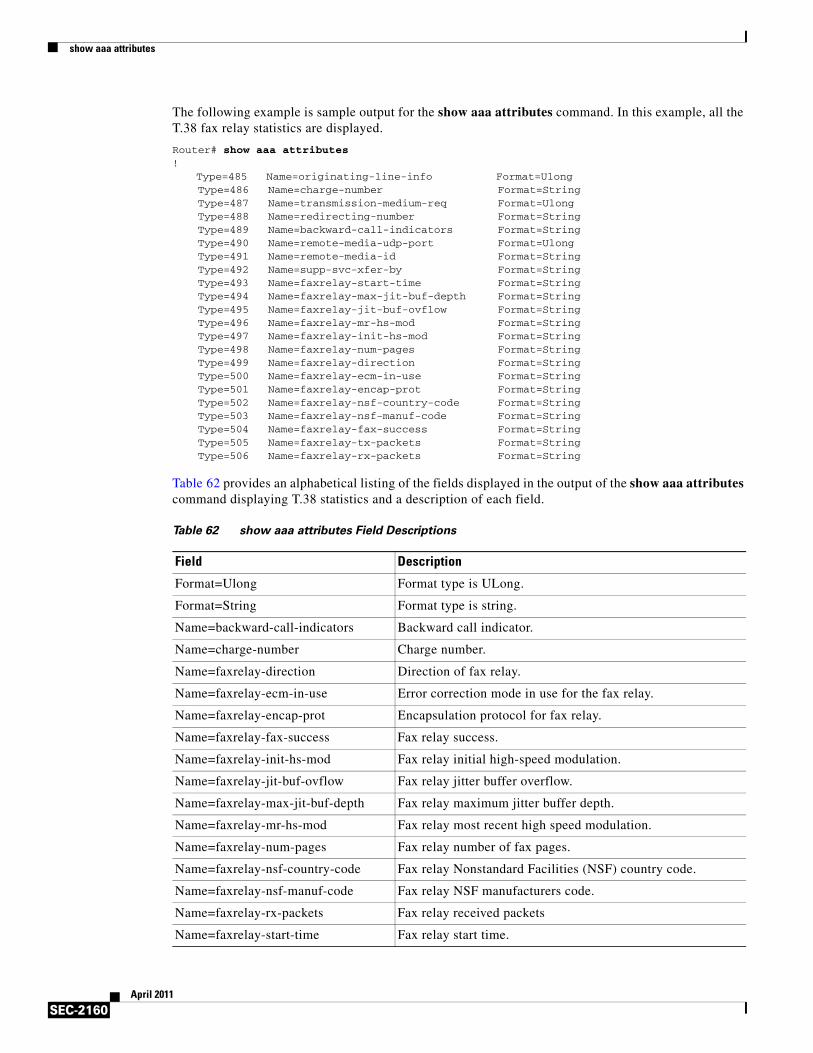
The following example is sample output for the show aaa attributes command. In this example, all the T.38 fax relay statistics are displayed.
Router# show aaa attributes!
Type=485 Name=originating-line-info Format=Ulong Type=486 Name=charge-number Format=String Type=487 Name=transmission-medium-req Format=Ulong Type=488 Name=redirecting-number Format=String Type=489 Name=backward-call-indicators Format=String Type=490 Name=remote-media-udp-port Format=Ulong Type=491 Name=remote-media-id Format=String Type=492 Name=supp-svc-xfer-by Format=String Type=493 Name=faxrelay-start-time Format=String Type=494 Name=faxrelay-max-jit-buf-depth Format=String Type=495 Name=faxrelay-jit-buf-ovflow Format=String Type=496 Name=faxrelay-mr-hs-mod Format=String Type=497 Name=faxrelay-init-hs-mod Format=String Type=498 Name=faxrelay-num-pages Format=String Type=499 Name=faxrelay-direction Format=String Type=500 Name=faxrelay-ecm-in-use Format=String Type=501 Name=faxrelay-encap-prot Format=String Type=502 Name=faxrelay-nsf-country-code Format=String Type=503 Name=faxrelay-nsf-manuf-code Format=String Type=504 Name=faxrelay-fax-success Format=String Type=505 Name=faxrelay-tx-packets Format=String Type=506 Name=faxrelay-rx-packets Format=String
Table 62 provides an alphabetical listing of the fields displayed in the output of the show aaa attributes command displaying T.38 statistics and a description of each field.
Table 62 show aaa attributes Field Descriptions
Field Description
Format=Ulong Format type is ULong.
Format=String Format type is string.
Name=backward-call-indicators Backward call indicator.
Name=charge-number Charge number.
Name=faxrelay-direction Direction of fax relay.
Name=faxrelay-ecm-in-use Error correction mode in use for the fax relay.
Name=faxrelay-encap-prot Encapsulation protocol for fax relay.
Name=faxrelay-fax-success Fax relay success.
Name=faxrelay-init-hs-mod Fax relay initial high-speed modulation.
Name=faxrelay-jit-buf-ovflow Fax relay jitter buffer overflow.
Name=faxrelay-max-jit-buf-depth Fax relay maximum jitter buffer depth.
Name=faxrelay-mr-hs-mod Fax relay most recent high speed modulation.
Name=faxrelay-num-pages Fax relay number of fax pages.
Name=faxrelay-nsf-country-code Fax relay Nonstandard Facilities (NSF) country code.
Name=faxrelay-nsf-manuf-code Fax relay NSF manufacturers code.
Name=faxrelay-rx-packets Fax relay received packets
Name=faxrelay-start-time Fax relay start time.
show aaa attributes
SEC-2161April 2011
Related Commands
Name=faxrelay-tx-packets Fax relay transmitted packets.
Name=originating-line-info Originating line information.
Name=redirecting-number Redirecting number.
Name=remote-media-id Remote media ID.
Name=remote-media-udp-port Remote media UDP port.
Name=supp-svc-xfer-by Supplementary service transfer.
Name=transmission-medium-req Transmission medium requirement.
Type= Type of fax relay string.
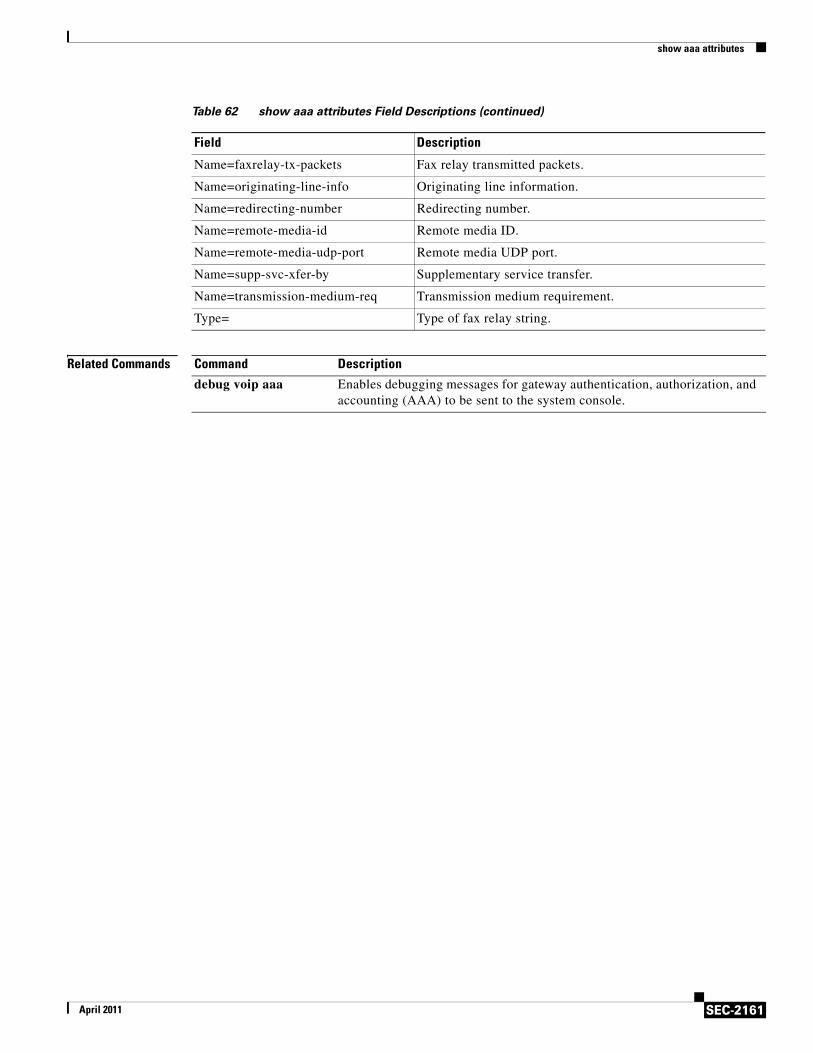
Table 62 show aaa attributes Field Descriptions (continued)
Field Description
Command Description
debug voip aaa Enables debugging messages for gateway authentication, authorization, and accounting (AAA) to be sent to the system console.

show aaa cache filterserver
SEC-2162April 2011
show aaa cache filterserverTo display the cache status, use the show aaa cache filterserver command in user EXEC or privileged EXEC mode.
show aaa cache filterserver {acl | pending}
Syntax Description
Command Modes User EXEC (>)Privileged EXEC (#)
Command History
Usage Guidelines The show aaa cache filterserver command shows how many times a particular filter has been referenced or refreshed. This function may be used in administration to determine which filters are actually being used.
Examples The following is sample output for the show aaa cache filterserver command using the acl and pending keywords:
Router# show aaa cache filterserver acl
Filter Server Age Expires Refresh Access-Control-Lists--------------------------------------------------------------------------------aol 10.2.3.4 0 1440 100 ip in icmp drop ip out icmp drop ip out forward tcp dstip 10.2.3.4msn 10.2.3.4 N/A Never 2 ip in tcp dropmsn2 10.2.3.4 N/A Never 2 ip in tcp dropvone 10.2.3.4 N/A Never 0 ip in tcp drop
The following is sample output for the show aaa cache filterserver command using the pending keyword:
Router# show aaa cache filterserver pending
AAA pending cache:Filter Age Expires Refresh--------------------------------------------------------------------------------myfilter N/A Never N/A call 0x501802D8 (00000085)
acl Shows the contents of the access control cache at the last refresh.
pending Shows the contents of the pending call cache, which references filters that have not received a response from the RADIUS server.
Release Modification
12.2(13)T This command was introduced.
12.2(28)SB This command was integrated into Cisco IOS Release 12.2(28)SB.
12.4T The acl and pending keywords were added.
12.2(33)SRC This command was integrated into Cisco IOS Release 12.2(33)SRC.
show aaa cache filterserver
SEC-2163April 2011
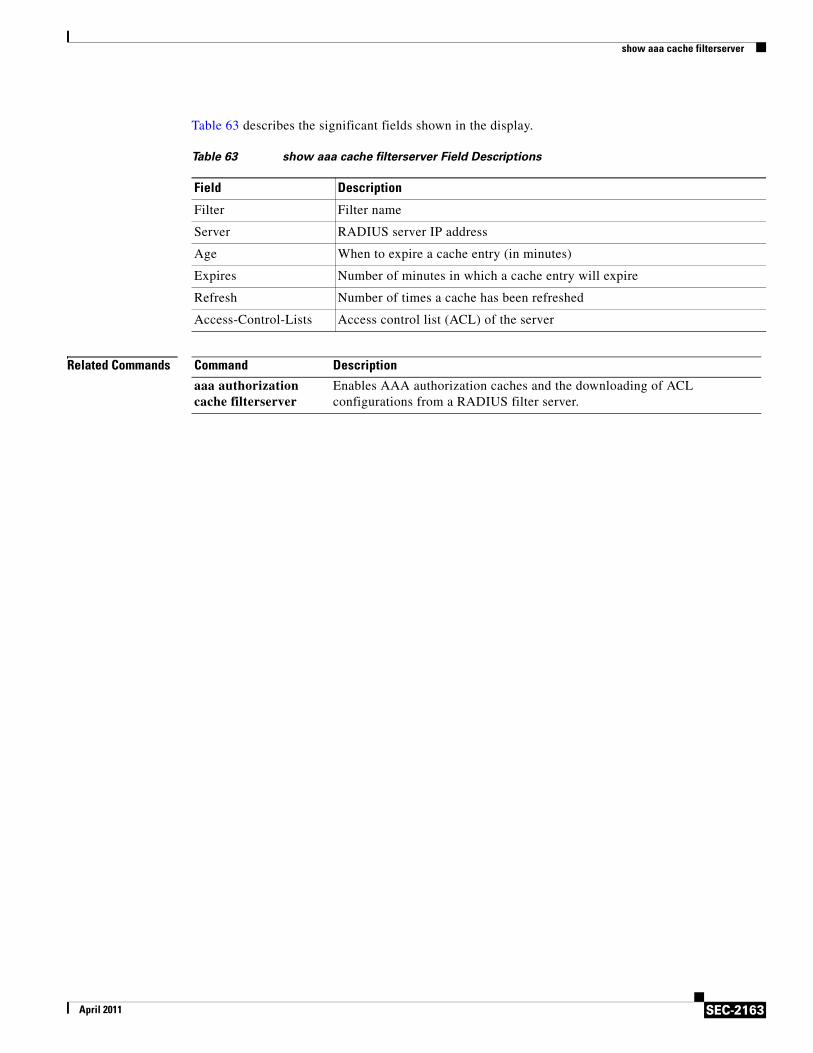
Table 63 describes the significant fields shown in the display.
Related Commands
Table 63 show aaa cache filterserver Field Descriptions
Field Description
Filter Filter name
Server RADIUS server IP address
Age When to expire a cache entry (in minutes)
Expires Number of minutes in which a cache entry will expire
Refresh Number of times a cache has been refreshed
Access-Control-Lists Access control list (ACL) of the server
Command Description
aaa authorization cache filterserver
Enables AAA authorization caches and the downloading of ACL configurations from a RADIUS filter server.
show aaa cache group
SEC-2164April 2011
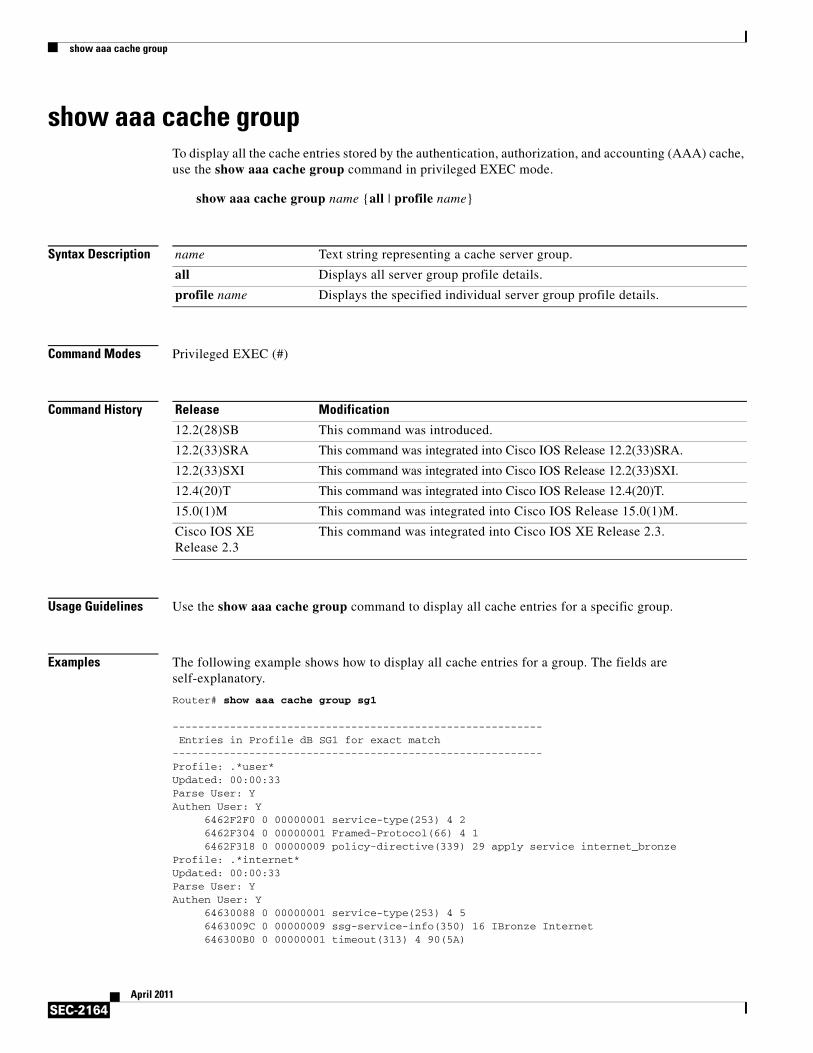
show aaa cache groupTo display all the cache entries stored by the authentication, authorization, and accounting (AAA) cache, use the show aaa cache group command in privileged EXEC mode.
show aaa cache group name {all | profile name}
Syntax Description
Command Modes Privileged EXEC (#)
Command History
Usage Guidelines Use the show aaa cache group command to display all cache entries for a specific group.
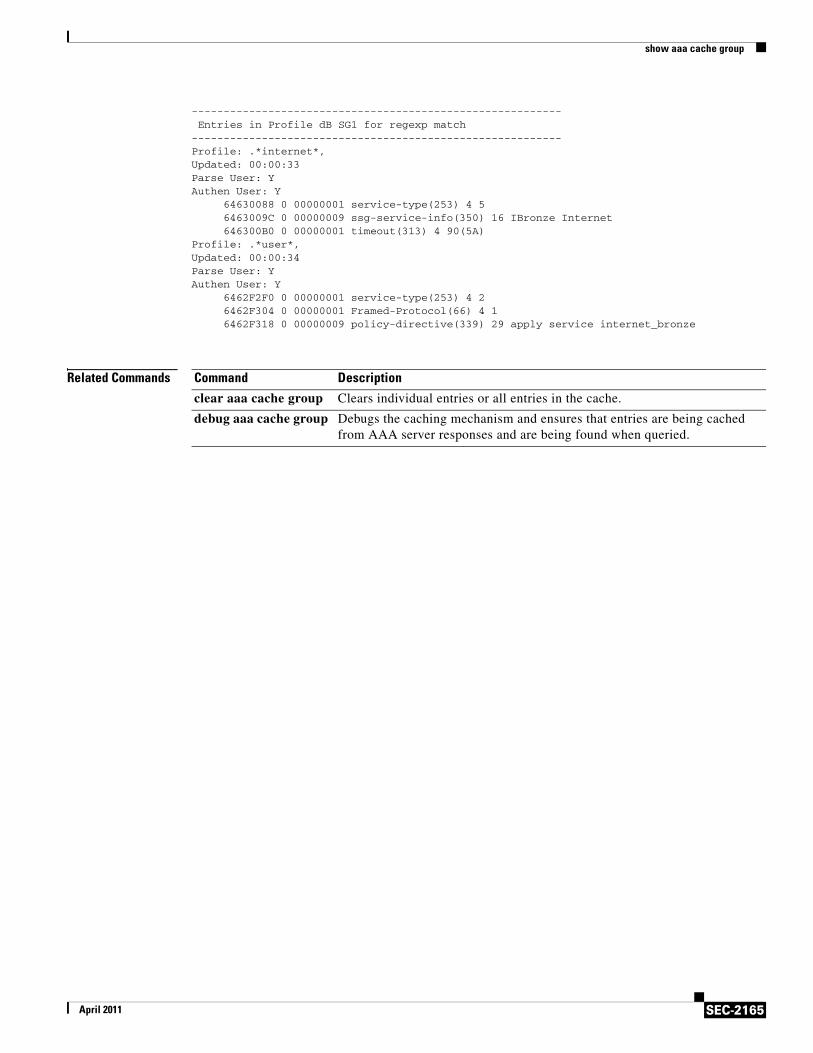
Examples The following example shows how to display all cache entries for a group. The fields are self-explanatory.
Router# show aaa cache group sg1
---------------------------------------------------------- Entries in Profile dB SG1 for exact match ----------------------------------------------------------Profile: .*user*Updated: 00:00:33Parse User: YAuthen User: Y 6462F2F0 0 00000001 service-type(253) 4 2 6462F304 0 00000001 Framed-Protocol(66) 4 1 6462F318 0 00000009 policy-directive(339) 29 apply service internet_bronzeProfile: .*internet*Updated: 00:00:33Parse User: YAuthen User: Y 64630088 0 00000001 service-type(253) 4 5 6463009C 0 00000009 ssg-service-info(350) 16 IBronze Internet 646300B0 0 00000001 timeout(313) 4 90(5A)
name Text string representing a cache server group.
all Displays all server group profile details.
profile name Displays the specified individual server group profile details.
Release Modification
12.2(28)SB This command was introduced.
12.2(33)SRA This command was integrated into Cisco IOS Release 12.2(33)SRA.
12.2(33)SXI This command was integrated into Cisco IOS Release 12.2(33)SXI.
12.4(20)T This command was integrated into Cisco IOS Release 12.4(20)T.
15.0(1)M This command was integrated into Cisco IOS Release 15.0(1)M.
Cisco IOS XE Release 2.3
This command was integrated into Cisco IOS XE Release 2.3.
show aaa cache group
SEC-2165April 2011
---------------------------------------------------------- Entries in Profile dB SG1 for regexp match ----------------------------------------------------------Profile: .*internet*, Updated: 00:00:33Parse User: YAuthen User: Y 64630088 0 00000001 service-type(253) 4 5 6463009C 0 00000009 ssg-service-info(350) 16 IBronze Internet 646300B0 0 00000001 timeout(313) 4 90(5A)Profile: .*user*, Updated: 00:00:34Parse User: YAuthen User: Y 6462F2F0 0 00000001 service-type(253) 4 2 6462F304 0 00000001 Framed-Protocol(66) 4 1 6462F318 0 00000009 policy-directive(339) 29 apply service internet_bronze
Related Commands Command Description
clear aaa cache group Clears individual entries or all entries in the cache.
debug aaa cache group Debugs the caching mechanism and ensures that entries are being cached from AAA server responses and are being found when queried.
show aaa dead-criteria
SEC-2166April 2011
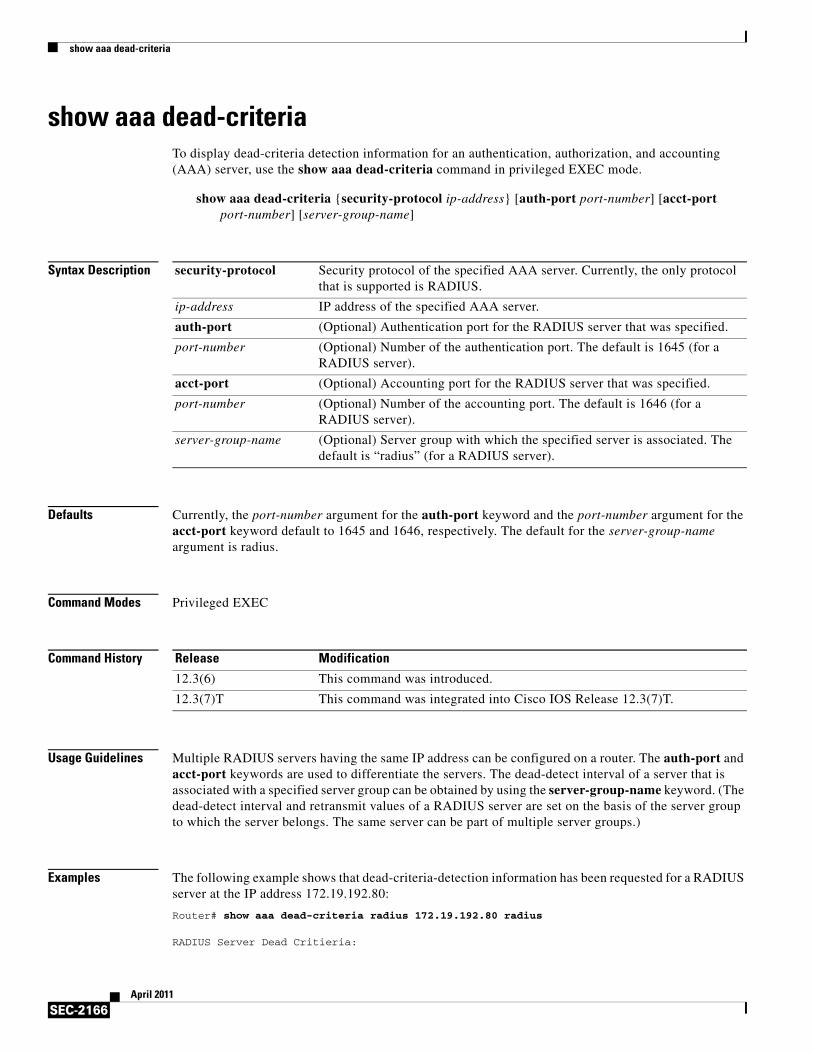
show aaa dead-criteriaTo display dead-criteria detection information for an authentication, authorization, and accounting (AAA) server, use the show aaa dead-criteria command in privileged EXEC mode.
show aaa dead-criteria {security-protocol ip-address} [auth-port port-number] [acct-port port-number] [server-group-name]
Syntax Description
Defaults Currently, the port-number argument for the auth-port keyword and the port-number argument for the acct-port keyword default to 1645 and 1646, respectively. The default for the server-group-name argument is radius.
Command Modes Privileged EXEC
Command History
Usage Guidelines Multiple RADIUS servers having the same IP address can be configured on a router. The auth-port and acct-port keywords are used to differentiate the servers. The dead-detect interval of a server that is associated with a specified server group can be obtained by using the server-group-name keyword. (The dead-detect interval and retransmit values of a RADIUS server are set on the basis of the server group to which the server belongs. The same server can be part of multiple server groups.)
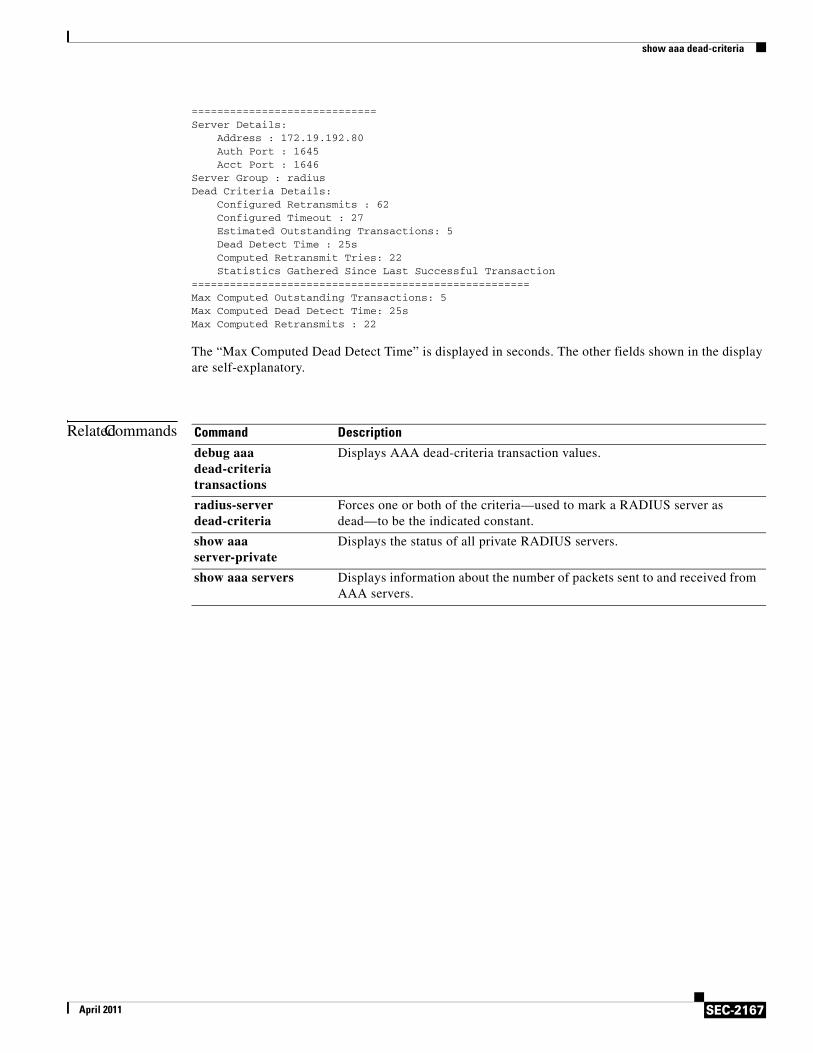
Examples The following example shows that dead-criteria-detection information has been requested for a RADIUS server at the IP address 172.19.192.80:
Router# show aaa dead-criteria radius 172.19.192.80 radius
RADIUS Server Dead Critieria:
security-protocol Security protocol of the specified AAA server. Currently, the only protocol that is supported is RADIUS.
ip-address IP address of the specified AAA server.
auth-port (Optional) Authentication port for the RADIUS server that was specified.
port-number (Optional) Number of the authentication port. The default is 1645 (for a RADIUS server).
acct-port (Optional) Accounting port for the RADIUS server that was specified.
port-number (Optional) Number of the accounting port. The default is 1646 (for a RADIUS server).
server-group-name (Optional) Server group with which the specified server is associated. The default is “radius” (for a RADIUS server).
Release Modification
12.3(6) This command was introduced.
12.3(7)T This command was integrated into Cisco IOS Release 12.3(7)T.
show aaa dead-criteria
SEC-2167April 2011
=============================Server Details: Address : 172.19.192.80 Auth Port : 1645 Acct Port : 1646Server Group : radiusDead Criteria Details: Configured Retransmits : 62 Configured Timeout : 27 Estimated Outstanding Transactions: 5 Dead Detect Time : 25s Computed Retransmit Tries: 22 Statistics Gathered Since Last Successful Transaction=====================================================Max Computed Outstanding Transactions: 5Max Computed Dead Detect Time: 25sMax Computed Retransmits : 22
The “Max Computed Dead Detect Time” is displayed in seconds. The other fields shown in the display are self-explanatory.
Related Commands Command Description
debug aaa dead-criteria transactions
Displays AAA dead-criteria transaction values.
radius-server dead-criteria
Forces one or both of the criteria—used to mark a RADIUS server as dead—to be the indicated constant.
show aaa server-private
Displays the status of all private RADIUS servers.
show aaa servers Displays information about the number of packets sent to and received from AAA servers.

show aaa local user lockout
SEC-2168April 2011
show aaa local user lockoutTo display a list of all locked-out users, use the show aaa local user lockout command in privileged EXEC mode.
show aaa local user lockout
Syntax Description This command has no arguments or keywords.
Defaults Names of locked-out users are not displayed.
Command Modes Privileged EXEC
Command History
Usage Guidelines This command can be used only by users having root privilege.
Examples The following output of the show aaa local user lockout command illustrates that user1 is locked out:
Router# show aaa local user lockout
Local-user Lock timeuser1 04:28:49 UTC Sat Jun 19 2004
The fields in the output example are self-explanatory.
Related Commands
Release Modification
12.3(14)T This command was introduced.
Command Description
aaa local authentication attempts max-fail
Specifies the maximum number of unsuccessful authentication attempts before a user is locked out.
clear aaa local user fail-attempts
Clears the unsuccessful login attempts of a user.
clear aaa local user lockout
Unlocks the locked-out user.
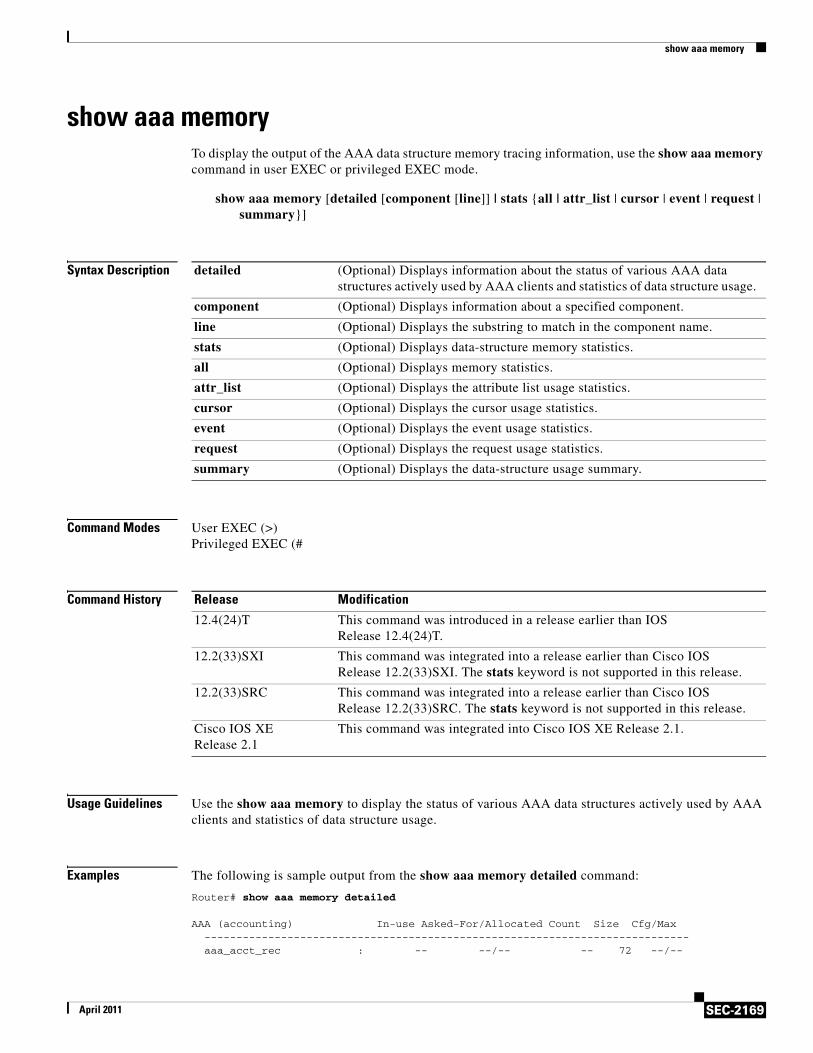
show aaa memory
SEC-2169April 2011
show aaa memory To display the output of the AAA data structure memory tracing information, use the show aaa memory command in user EXEC or privileged EXEC mode.
show aaa memory [detailed [component [line]] | stats {all | attr_list | cursor | event | request | summary}]
Syntax Description
Command Modes User EXEC (>)Privileged EXEC (#
Command History
Usage Guidelines Use the show aaa memory to display the status of various AAA data structures actively used by AAA clients and statistics of data structure usage.
Examples The following is sample output from the show aaa memory detailed command:
Router# show aaa memory detailed
AAA (accounting) In-use Asked-For/Allocated Count Size Cfg/Max ---------------------------------------------------------------------------- aaa_acct_rec : -- --/-- -- 72 --/--
detailed (Optional) Displays information about the status of various AAA data structures actively used by AAA clients and statistics of data structure usage.
component (Optional) Displays information about a specified component.
line (Optional) Displays the substring to match in the component name.
stats (Optional) Displays data-structure memory statistics.
all (Optional) Displays memory statistics.
attr_list (Optional) Displays the attribute list usage statistics.
cursor (Optional) Displays the cursor usage statistics.
event (Optional) Displays the event usage statistics.
request (Optional) Displays the request usage statistics.
summary (Optional) Displays the data-structure usage summary.
Release Modification
12.4(24)T This command was introduced in a release earlier than IOS Release 12.4(24)T.
12.2(33)SXI This command was integrated into a release earlier than Cisco IOS Release 12.2(33)SXI. The stats keyword is not supported in this release.
12.2(33)SRC This command was integrated into a release earlier than Cisco IOS Release 12.2(33)SRC. The stats keyword is not supported in this release.
Cisco IOS XE Release 2.1
This command was integrated into Cisco IOS XE Release 2.1.
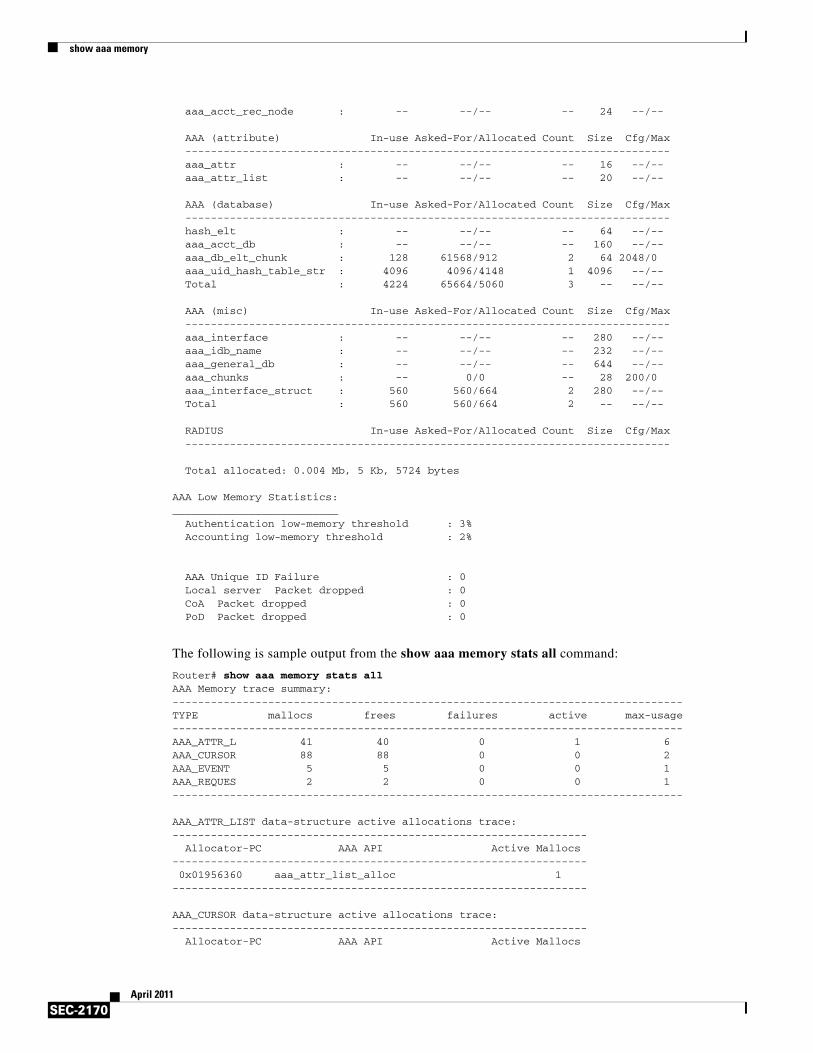
show aaa memory
SEC-2170April 2011
aaa_acct_rec_node : -- --/-- -- 24 --/--
AAA (attribute) In-use Asked-For/Allocated Count Size Cfg/Max ---------------------------------------------------------------------------- aaa_attr : -- --/-- -- 16 --/-- aaa_attr_list : -- --/-- -- 20 --/--
AAA (database) In-use Asked-For/Allocated Count Size Cfg/Max ---------------------------------------------------------------------------- hash_elt : -- --/-- -- 64 --/-- aaa_acct_db : -- --/-- -- 160 --/-- aaa_db_elt_chunk : 128 61568/912 2 64 2048/0 aaa_uid_hash_table_str : 4096 4096/4148 1 4096 --/-- Total : 4224 65664/5060 3 -- --/--
AAA (misc) In-use Asked-For/Allocated Count Size Cfg/Max ---------------------------------------------------------------------------- aaa_interface : -- --/-- -- 280 --/-- aaa_idb_name : -- --/-- -- 232 --/-- aaa_general_db : -- --/-- -- 644 --/-- aaa_chunks : -- 0/0 -- 28 200/0 aaa_interface_struct : 560 560/664 2 280 --/-- Total : 560 560/664 2 -- --/--
RADIUS In-use Asked-For/Allocated Count Size Cfg/Max ----------------------------------------------------------------------------
Total allocated: 0.004 Mb, 5 Kb, 5724 bytes
AAA Low Memory Statistics:__________________________ Authentication low-memory threshold : 3% Accounting low-memory threshold : 2%
AAA Unique ID Failure : 0 Local server Packet dropped : 0 CoA Packet dropped : 0 PoD Packet dropped : 0
The following is sample output from the show aaa memory stats all command:
Router# show aaa memory stats allAAA Memory trace summary:--------------------------------------------------------------------------------TYPE mallocs frees failures active max-usage--------------------------------------------------------------------------------AAA_ATTR_L 41 40 0 1 6AAA_CURSOR 88 88 0 0 2AAA_EVENT 5 5 0 0 1AAA_REQUES 2 2 0 0 1--------------------------------------------------------------------------------
AAA_ATTR_LIST data-structure active allocations trace:----------------------------------------------------------------- Allocator-PC AAA API Active Mallocs----------------------------------------------------------------- 0x01956360 aaa_attr_list_alloc 1-----------------------------------------------------------------
AAA_CURSOR data-structure active allocations trace:----------------------------------------------------------------- Allocator-PC AAA API Active Mallocs
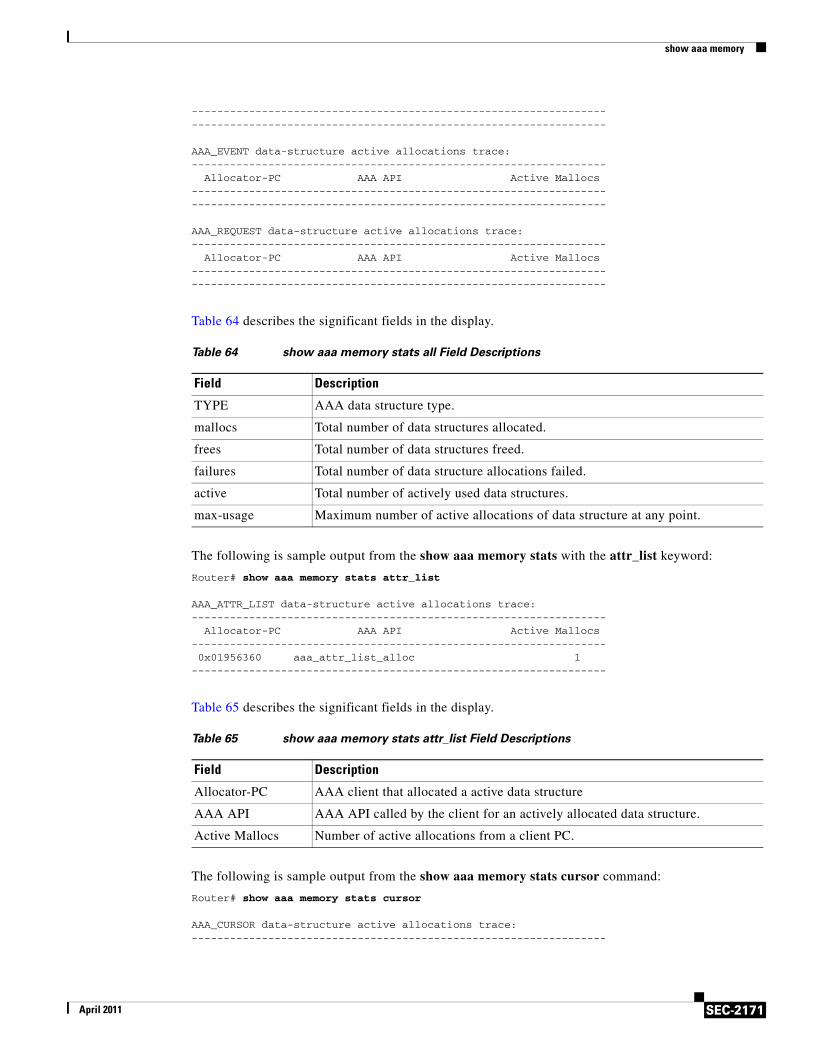
show aaa memory
SEC-2171April 2011
----------------------------------------------------------------------------------------------------------------------------------
AAA_EVENT data-structure active allocations trace:----------------------------------------------------------------- Allocator-PC AAA API Active Mallocs----------------------------------------------------------------------------------------------------------------------------------
AAA_REQUEST data-structure active allocations trace:----------------------------------------------------------------- Allocator-PC AAA API Active Mallocs----------------------------------------------------------------------------------------------------------------------------------
Table 64 describes the significant fields in the display.
The following is sample output from the show aaa memory stats with the attr_list keyword:
Router# show aaa memory stats attr_list
AAA_ATTR_LIST data-structure active allocations trace:----------------------------------------------------------------- Allocator-PC AAA API Active Mallocs----------------------------------------------------------------- 0x01956360 aaa_attr_list_alloc 1-----------------------------------------------------------------
Table 65 describes the significant fields in the display.
The following is sample output from the show aaa memory stats cursor command:
Router# show aaa memory stats cursor
AAA_CURSOR data-structure active allocations trace:-----------------------------------------------------------------
Table 64 show aaa memory stats all Field Descriptions
Field Description
TYPE AAA data structure type.
mallocs Total number of data structures allocated.
frees Total number of data structures freed.
failures Total number of data structure allocations failed.
active Total number of actively used data structures.
max-usage Maximum number of active allocations of data structure at any point.
Table 65 show aaa memory stats attr_list Field Descriptions
Field Description
Allocator-PC AAA client that allocated a active data structure
AAA API AAA API called by the client for an actively allocated data structure.
Active Mallocs Number of active allocations from a client PC.
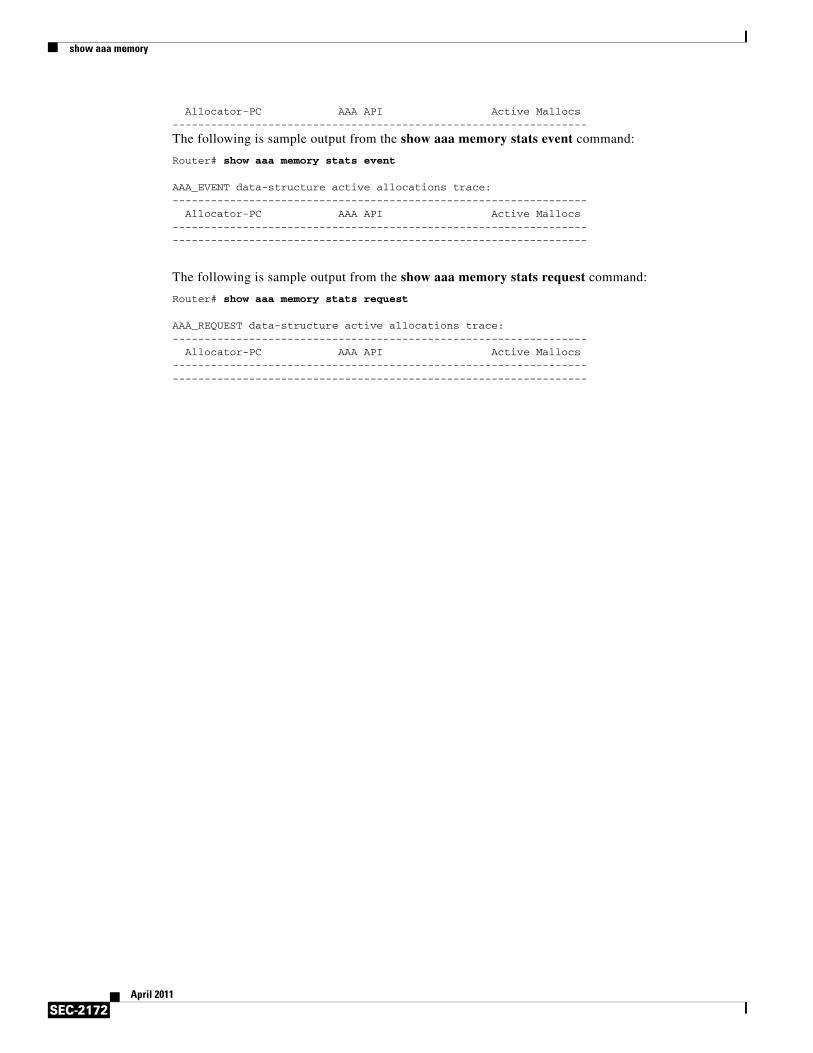
show aaa memory
SEC-2172April 2011
Allocator-PC AAA API Active Mallocs-----------------------------------------------------------------
The following is sample output from the show aaa memory stats event command:
Router# show aaa memory stats event
AAA_EVENT data-structure active allocations trace:----------------------------------------------------------------- Allocator-PC AAA API Active Mallocs----------------------------------------------------------------------------------------------------------------------------------
The following is sample output from the show aaa memory stats request command:
Router# show aaa memory stats request
AAA_REQUEST data-structure active allocations trace:----------------------------------------------------------------- Allocator-PC AAA API Active Mallocs----------------------------------------------------------------------------------------------------------------------------------
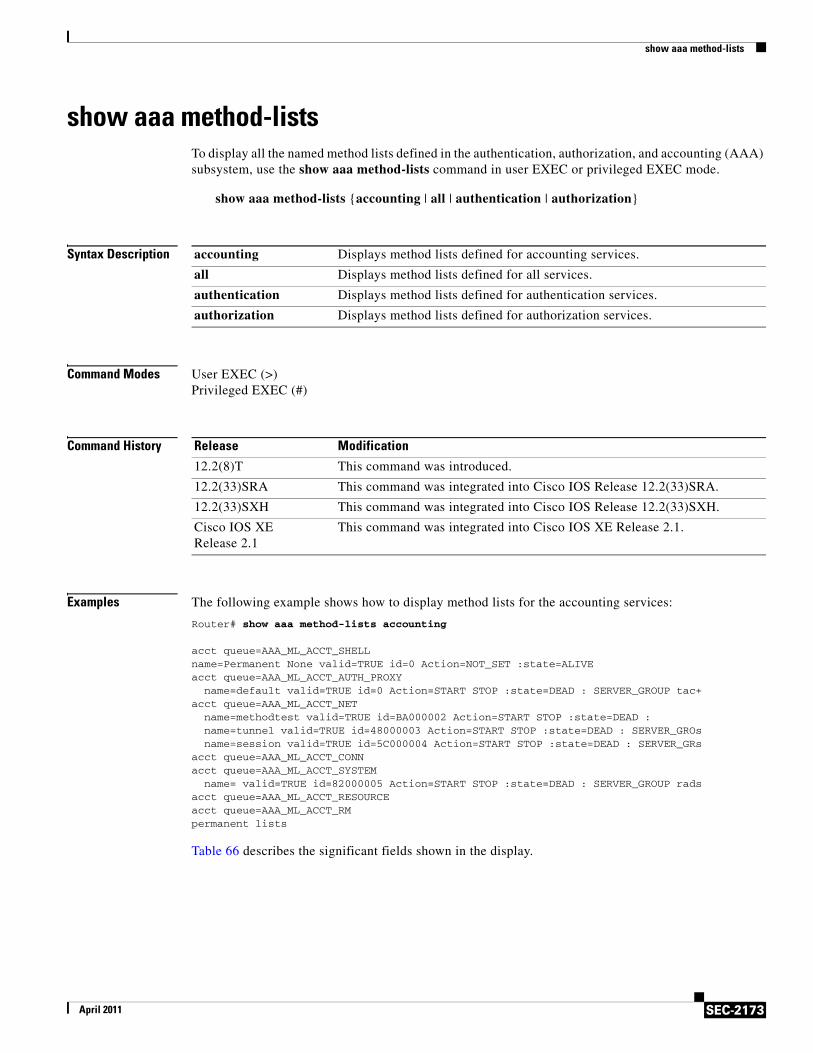
show aaa method-lists
SEC-2173April 2011
show aaa method-listsTo display all the named method lists defined in the authentication, authorization, and accounting (AAA) subsystem, use the show aaa method-lists command in user EXEC or privileged EXEC mode.
show aaa method-lists {accounting | all | authentication | authorization}
Syntax Description
Command Modes User EXEC (>)Privileged EXEC (#)
Command History
Examples The following example shows how to display method lists for the accounting services:
Router# show aaa method-lists accounting
acct queue=AAA_ML_ACCT_SHELLname=Permanent None valid=TRUE id=0 Action=NOT_SET :state=ALIVEacct queue=AAA_ML_ACCT_AUTH_PROXY name=default valid=TRUE id=0 Action=START STOP :state=DEAD : SERVER_GROUP tac+acct queue=AAA_ML_ACCT_NET name=methodtest valid=TRUE id=BA000002 Action=START STOP :state=DEAD : name=tunnel valid=TRUE id=48000003 Action=START STOP :state=DEAD : SERVER_GROs name=session valid=TRUE id=5C000004 Action=START STOP :state=DEAD : SERVER_GRsacct queue=AAA_ML_ACCT_CONNacct queue=AAA_ML_ACCT_SYSTEM name= valid=TRUE id=82000005 Action=START STOP :state=DEAD : SERVER_GROUP radsacct queue=AAA_ML_ACCT_RESOURCEacct queue=AAA_ML_ACCT_RMpermanent lists
Table 66 describes the significant fields shown in the display.
accounting Displays method lists defined for accounting services.
all Displays method lists defined for all services.
authentication Displays method lists defined for authentication services.
authorization Displays method lists defined for authorization services.
Release Modification
12.2(8)T This command was introduced.
12.2(33)SRA This command was integrated into Cisco IOS Release 12.2(33)SRA.
12.2(33)SXH This command was integrated into Cisco IOS Release 12.2(33)SXH.
Cisco IOS XE Release 2.1
This command was integrated into Cisco IOS XE Release 2.1.
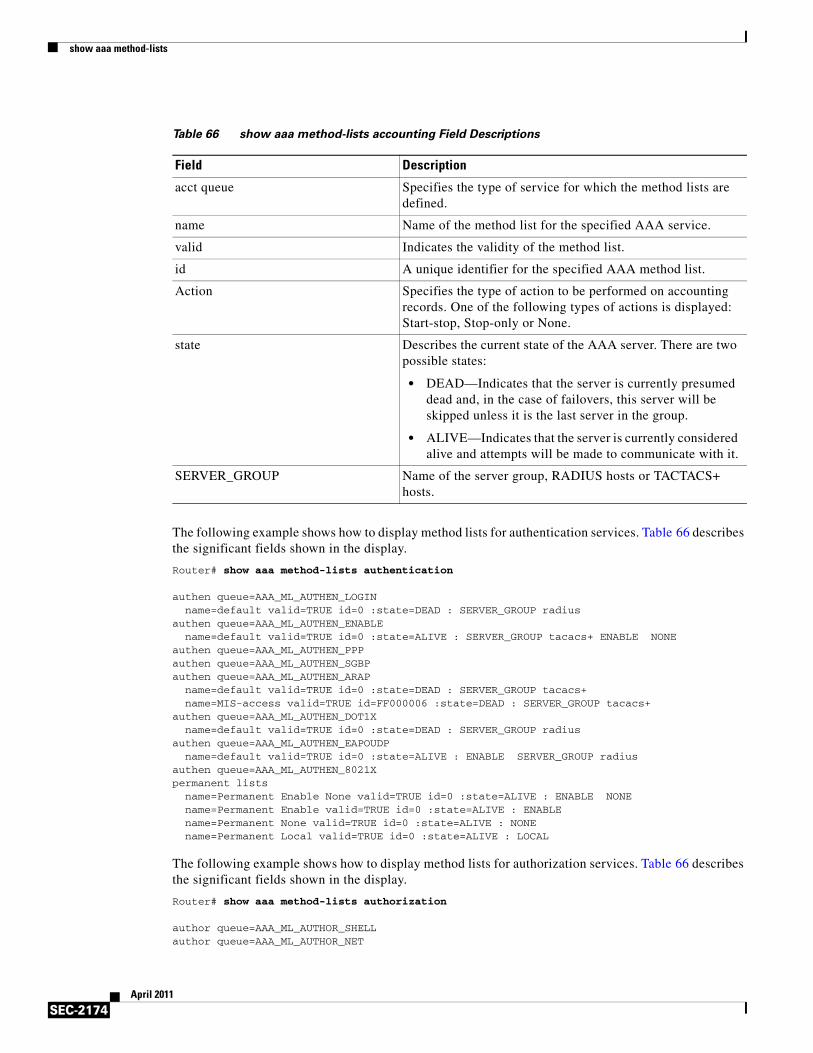
show aaa method-lists
SEC-2174April 2011
The following example shows how to display method lists for authentication services. Table 66 describes the significant fields shown in the display.
Router# show aaa method-lists authentication
authen queue=AAA_ML_AUTHEN_LOGIN name=default valid=TRUE id=0 :state=DEAD : SERVER_GROUP radiusauthen queue=AAA_ML_AUTHEN_ENABLE name=default valid=TRUE id=0 :state=ALIVE : SERVER_GROUP tacacs+ ENABLE NONE authen queue=AAA_ML_AUTHEN_PPPauthen queue=AAA_ML_AUTHEN_SGBPauthen queue=AAA_ML_AUTHEN_ARAP name=default valid=TRUE id=0 :state=DEAD : SERVER_GROUP tacacs+ name=MIS-access valid=TRUE id=FF000006 :state=DEAD : SERVER_GROUP tacacs+authen queue=AAA_ML_AUTHEN_DOT1X name=default valid=TRUE id=0 :state=DEAD : SERVER_GROUP radiusauthen queue=AAA_ML_AUTHEN_EAPOUDP name=default valid=TRUE id=0 :state=ALIVE : ENABLE SERVER_GROUP radiusauthen queue=AAA_ML_AUTHEN_8021Xpermanent lists name=Permanent Enable None valid=TRUE id=0 :state=ALIVE : ENABLE NONE name=Permanent Enable valid=TRUE id=0 :state=ALIVE : ENABLE name=Permanent None valid=TRUE id=0 :state=ALIVE : NONE name=Permanent Local valid=TRUE id=0 :state=ALIVE : LOCAL
The following example shows how to display method lists for authorization services. Table 66 describes the significant fields shown in the display.
Router# show aaa method-lists authorization
author queue=AAA_ML_AUTHOR_SHELLauthor queue=AAA_ML_AUTHOR_NET
Table 66 show aaa method-lists accounting Field Descriptions
Field Description
acct queue Specifies the type of service for which the method lists are defined.
name Name of the method list for the specified AAA service.
valid Indicates the validity of the method list.
id A unique identifier for the specified AAA method list.
Action Specifies the type of action to be performed on accounting records. One of the following types of actions is displayed: Start-stop, Stop-only or None.
state Describes the current state of the AAA server. There are two possible states:
• DEAD—Indicates that the server is currently presumed dead and, in the case of failovers, this server will be skipped unless it is the last server in the group.
• ALIVE—Indicates that the server is currently considered alive and attempts will be made to communicate with it.
SERVER_GROUP Name of the server group, RADIUS hosts or TACTACS+ hosts.
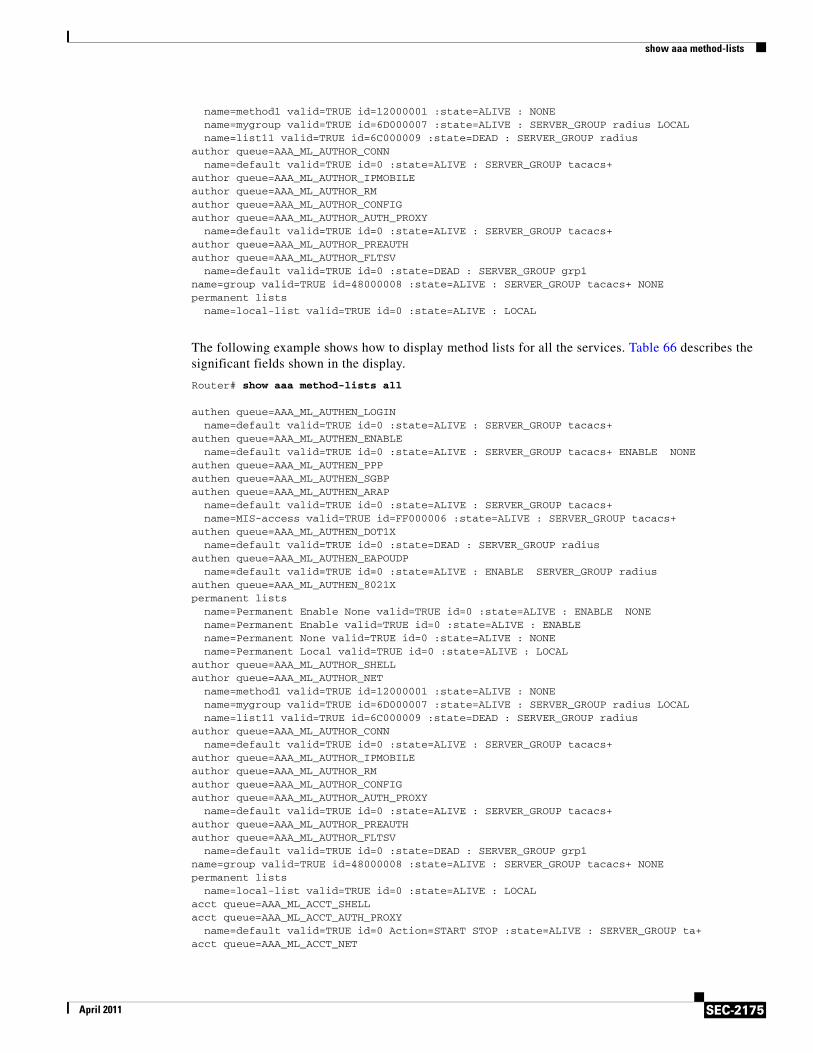
show aaa method-lists
SEC-2175April 2011
name=method1 valid=TRUE id=12000001 :state=ALIVE : NONE name=mygroup valid=TRUE id=6D000007 :state=ALIVE : SERVER_GROUP radius LOCAL name=list11 valid=TRUE id=6C000009 :state=DEAD : SERVER_GROUP radiusauthor queue=AAA_ML_AUTHOR_CONN name=default valid=TRUE id=0 :state=ALIVE : SERVER_GROUP tacacs+author queue=AAA_ML_AUTHOR_IPMOBILEauthor queue=AAA_ML_AUTHOR_RMauthor queue=AAA_ML_AUTHOR_CONFIGauthor queue=AAA_ML_AUTHOR_AUTH_PROXY name=default valid=TRUE id=0 :state=ALIVE : SERVER_GROUP tacacs+author queue=AAA_ML_AUTHOR_PREAUTHauthor queue=AAA_ML_AUTHOR_FLTSV name=default valid=TRUE id=0 :state=DEAD : SERVER_GROUP grp1name=group valid=TRUE id=48000008 :state=ALIVE : SERVER_GROUP tacacs+ NONE permanent lists name=local-list valid=TRUE id=0 :state=ALIVE : LOCAL
The following example shows how to display method lists for all the services. Table 66 describes the significant fields shown in the display.
Router# show aaa method-lists all
authen queue=AAA_ML_AUTHEN_LOGIN name=default valid=TRUE id=0 :state=ALIVE : SERVER_GROUP tacacs+authen queue=AAA_ML_AUTHEN_ENABLE name=default valid=TRUE id=0 :state=ALIVE : SERVER_GROUP tacacs+ ENABLE NONE authen queue=AAA_ML_AUTHEN_PPPauthen queue=AAA_ML_AUTHEN_SGBPauthen queue=AAA_ML_AUTHEN_ARAP name=default valid=TRUE id=0 :state=ALIVE : SERVER_GROUP tacacs+ name=MIS-access valid=TRUE id=FF000006 :state=ALIVE : SERVER_GROUP tacacs+authen queue=AAA_ML_AUTHEN_DOT1X name=default valid=TRUE id=0 :state=DEAD : SERVER_GROUP radiusauthen queue=AAA_ML_AUTHEN_EAPOUDP name=default valid=TRUE id=0 :state=ALIVE : ENABLE SERVER_GROUP radiusauthen queue=AAA_ML_AUTHEN_8021Xpermanent lists name=Permanent Enable None valid=TRUE id=0 :state=ALIVE : ENABLE NONE name=Permanent Enable valid=TRUE id=0 :state=ALIVE : ENABLE name=Permanent None valid=TRUE id=0 :state=ALIVE : NONE name=Permanent Local valid=TRUE id=0 :state=ALIVE : LOCAL author queue=AAA_ML_AUTHOR_SHELLauthor queue=AAA_ML_AUTHOR_NET name=method1 valid=TRUE id=12000001 :state=ALIVE : NONE name=mygroup valid=TRUE id=6D000007 :state=ALIVE : SERVER_GROUP radius LOCAL name=list11 valid=TRUE id=6C000009 :state=DEAD : SERVER_GROUP radiusauthor queue=AAA_ML_AUTHOR_CONN name=default valid=TRUE id=0 :state=ALIVE : SERVER_GROUP tacacs+author queue=AAA_ML_AUTHOR_IPMOBILEauthor queue=AAA_ML_AUTHOR_RMauthor queue=AAA_ML_AUTHOR_CONFIGauthor queue=AAA_ML_AUTHOR_AUTH_PROXY name=default valid=TRUE id=0 :state=ALIVE : SERVER_GROUP tacacs+author queue=AAA_ML_AUTHOR_PREAUTHauthor queue=AAA_ML_AUTHOR_FLTSV name=default valid=TRUE id=0 :state=DEAD : SERVER_GROUP grp1name=group valid=TRUE id=48000008 :state=ALIVE : SERVER_GROUP tacacs+ NONE permanent lists name=local-list valid=TRUE id=0 :state=ALIVE : LOCAL acct queue=AAA_ML_ACCT_SHELLacct queue=AAA_ML_ACCT_AUTH_PROXY name=default valid=TRUE id=0 Action=START STOP :state=ALIVE : SERVER_GROUP ta+acct queue=AAA_ML_ACCT_NET
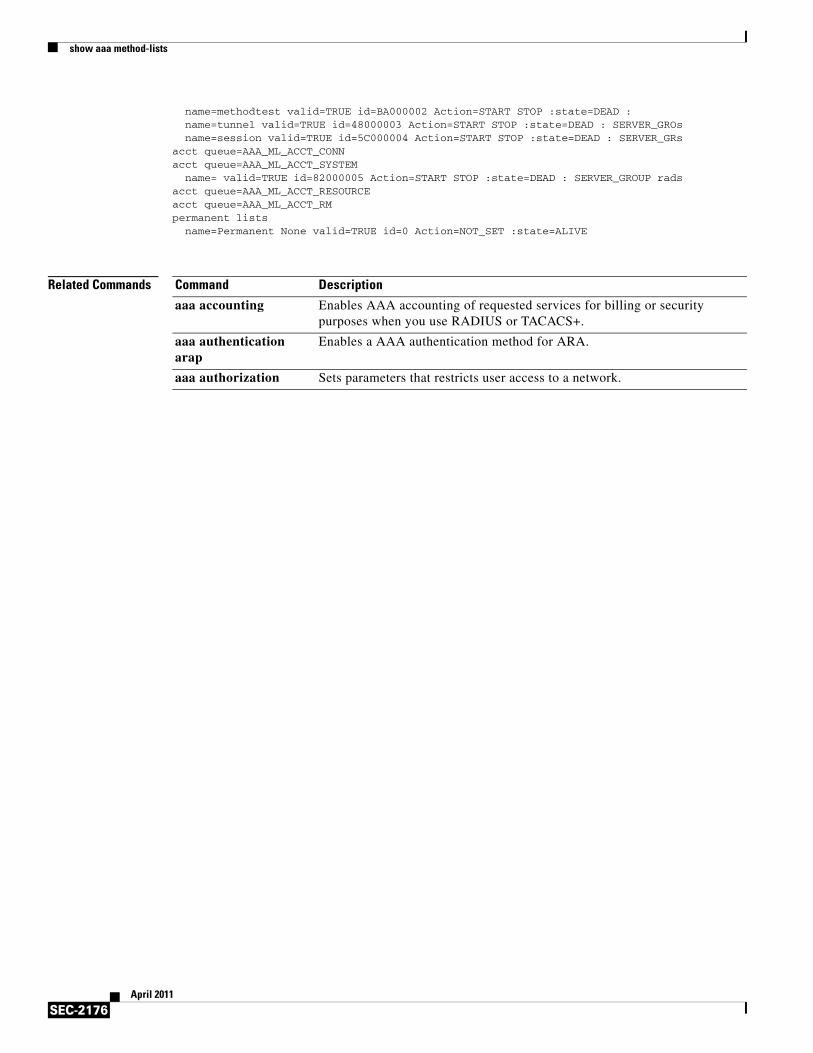
show aaa method-lists
SEC-2176April 2011
name=methodtest valid=TRUE id=BA000002 Action=START STOP :state=DEAD : name=tunnel valid=TRUE id=48000003 Action=START STOP :state=DEAD : SERVER_GROs name=session valid=TRUE id=5C000004 Action=START STOP :state=DEAD : SERVER_GRsacct queue=AAA_ML_ACCT_CONNacct queue=AAA_ML_ACCT_SYSTEM name= valid=TRUE id=82000005 Action=START STOP :state=DEAD : SERVER_GROUP radsacct queue=AAA_ML_ACCT_RESOURCEacct queue=AAA_ML_ACCT_RMpermanent lists name=Permanent None valid=TRUE id=0 Action=NOT_SET :state=ALIVE
Related Commands Command Description
aaa accounting Enables AAA accounting of requested services for billing or security purposes when you use RADIUS or TACACS+.
aaa authentication arap
Enables a AAA authentication method for ARA.
aaa authorization Sets parameters that restricts user access to a network.
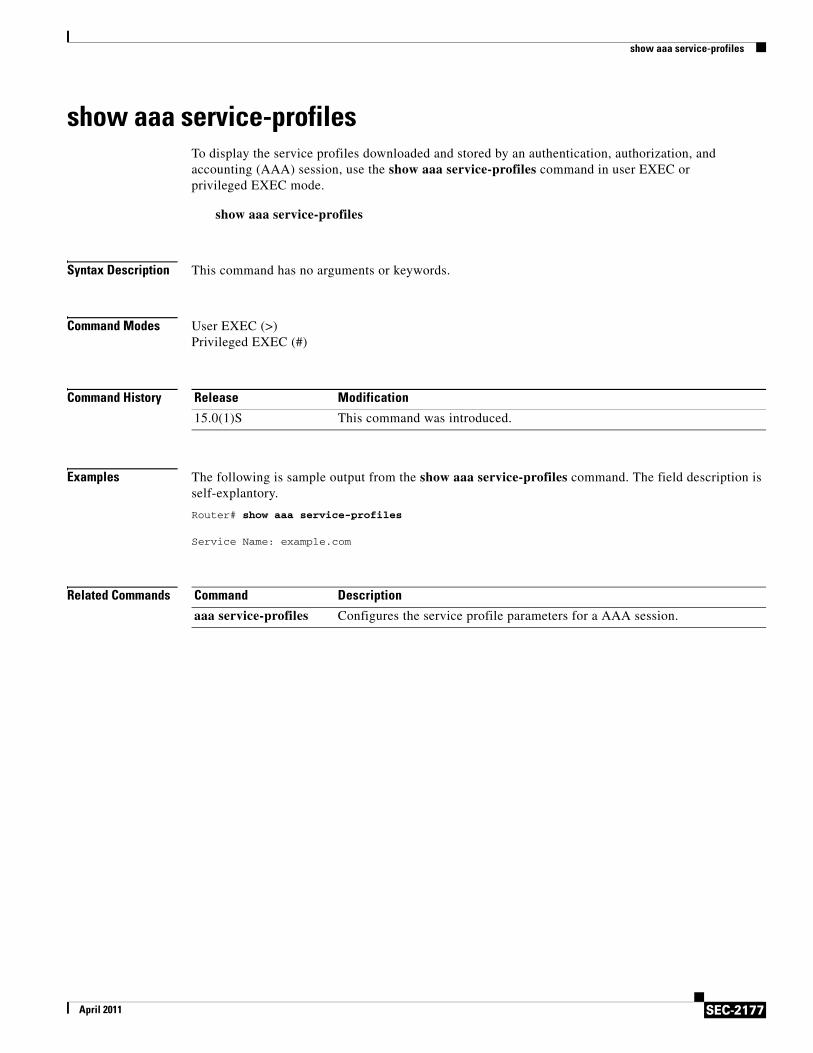
show aaa service-profiles
SEC-2177April 2011
show aaa service-profilesTo display the service profiles downloaded and stored by an authentication, authorization, and accounting (AAA) session, use the show aaa service-profiles command in user EXEC or privileged EXEC mode.
show aaa service-profiles
Syntax Description This command has no arguments or keywords.
Command Modes User EXEC (>)Privileged EXEC (#)
Command History
Examples The following is sample output from the show aaa service-profiles command. The field description is self-explantory.
Router# show aaa service-profiles
Service Name: example.com
Related Commands
Release Modification
15.0(1)S This command was introduced.
Command Description
aaa service-profiles Configures the service profile parameters for a AAA session.
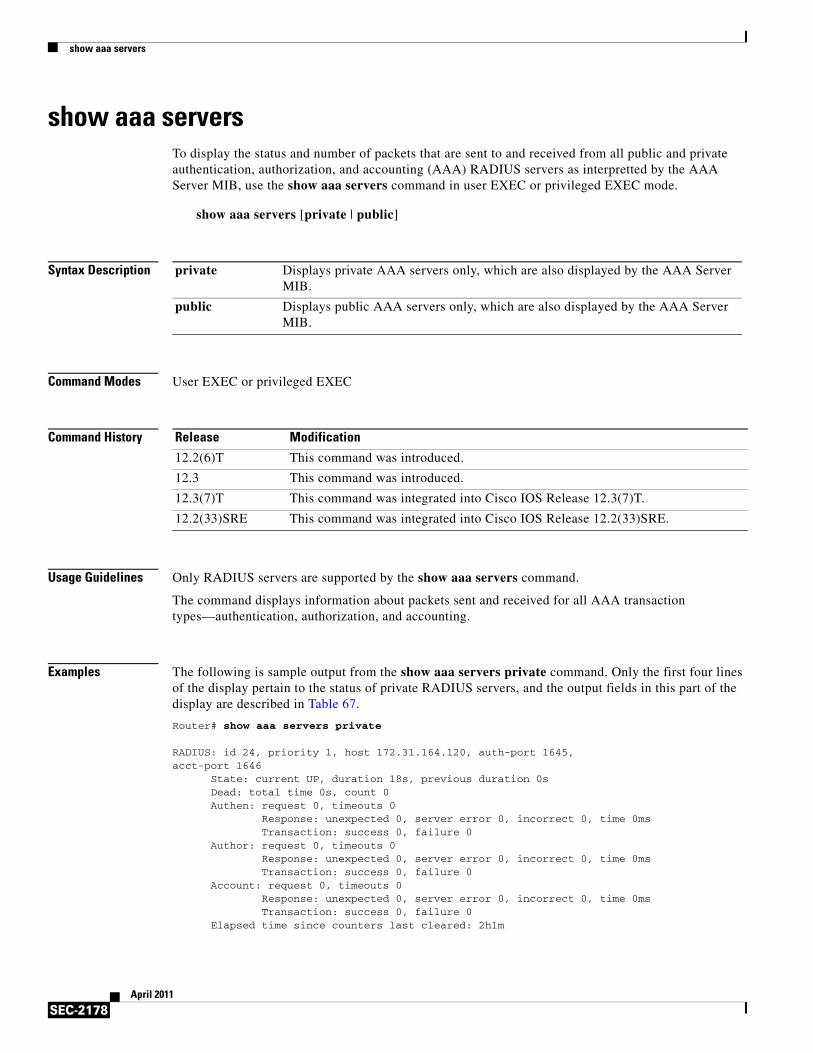
show aaa servers
SEC-2178April 2011
show aaa serversTo display the status and number of packets that are sent to and received from all public and private authentication, authorization, and accounting (AAA) RADIUS servers as interpretted by the AAA Server MIB, use the show aaa servers command in user EXEC or privileged EXEC mode.
show aaa servers [private | public]
Syntax Description
Command Modes User EXEC or privileged EXEC
Command History
Usage Guidelines Only RADIUS servers are supported by the show aaa servers command.
The command displays information about packets sent and received for all AAA transaction types—authentication, authorization, and accounting.
Examples The following is sample output from the show aaa servers private command. Only the first four lines of the display pertain to the status of private RADIUS servers, and the output fields in this part of the display are described in Table 67.
Router# show aaa servers private
RADIUS: id 24, priority 1, host 172.31.164.120, auth-port 1645,acct-port 1646 State: current UP, duration 18s, previous duration 0s Dead: total time 0s, count 0 Authen: request 0, timeouts 0 Response: unexpected 0, server error 0, incorrect 0, time 0ms Transaction: success 0, failure 0 Author: request 0, timeouts 0 Response: unexpected 0, server error 0, incorrect 0, time 0ms Transaction: success 0, failure 0 Account: request 0, timeouts 0 Response: unexpected 0, server error 0, incorrect 0, time 0ms Transaction: success 0, failure 0 Elapsed time since counters last cleared: 2h1m
private Displays private AAA servers only, which are also displayed by the AAA Server MIB.
public Displays public AAA servers only, which are also displayed by the AAA Server MIB.
Release Modification
12.2(6)T This command was introduced.
12.3 This command was introduced.
12.3(7)T This command was integrated into Cisco IOS Release 12.3(7)T.
12.2(33)SRE This command was integrated into Cisco IOS Release 12.2(33)SRE.
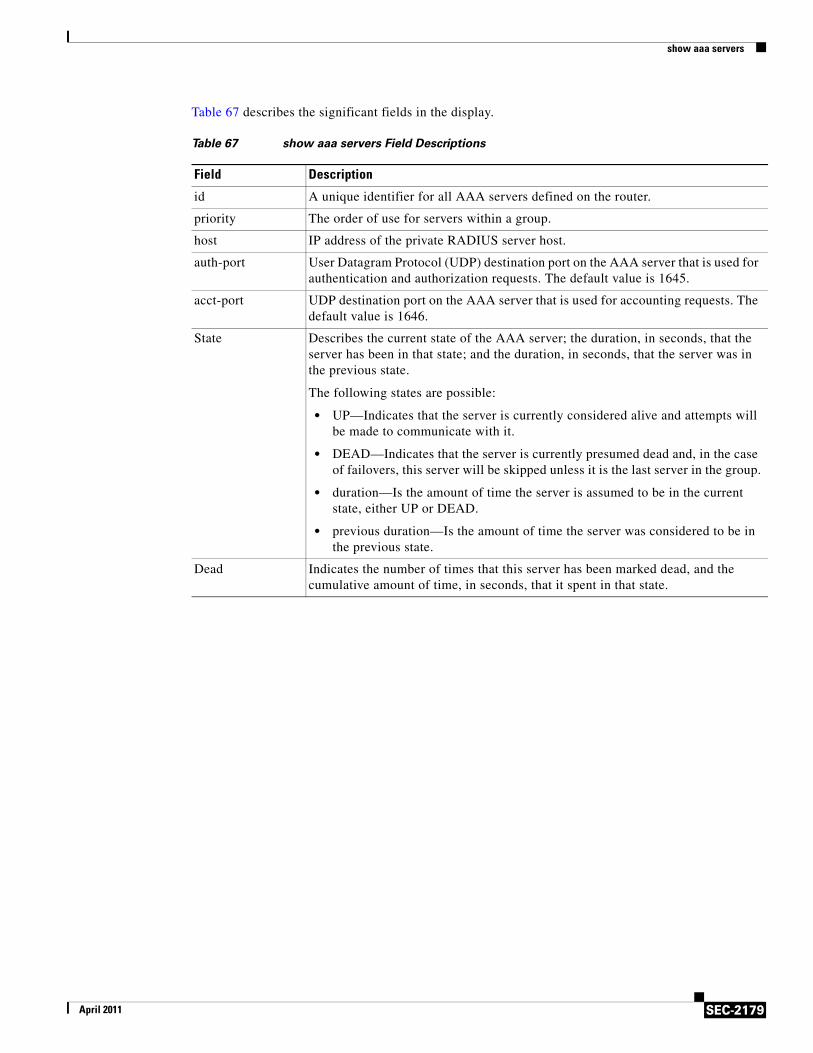
show aaa servers
SEC-2179April 2011
Table 67 describes the significant fields in the display.
Table 67 show aaa servers Field Descriptions
Field Description
id A unique identifier for all AAA servers defined on the router.
priority The order of use for servers within a group.
host IP address of the private RADIUS server host.
auth-port User Datagram Protocol (UDP) destination port on the AAA server that is used for authentication and authorization requests. The default value is 1645.
acct-port UDP destination port on the AAA server that is used for accounting requests. The default value is 1646.
State Describes the current state of the AAA server; the duration, in seconds, that the server has been in that state; and the duration, in seconds, that the server was in the previous state.
The following states are possible:
• UP—Indicates that the server is currently considered alive and attempts will be made to communicate with it.
• DEAD—Indicates that the server is currently presumed dead and, in the case of failovers, this server will be skipped unless it is the last server in the group.
• duration—Is the amount of time the server is assumed to be in the current state, either UP or DEAD.
• previous duration—Is the amount of time the server was considered to be in the previous state.
Dead Indicates the number of times that this server has been marked dead, and the cumulative amount of time, in seconds, that it spent in that state.
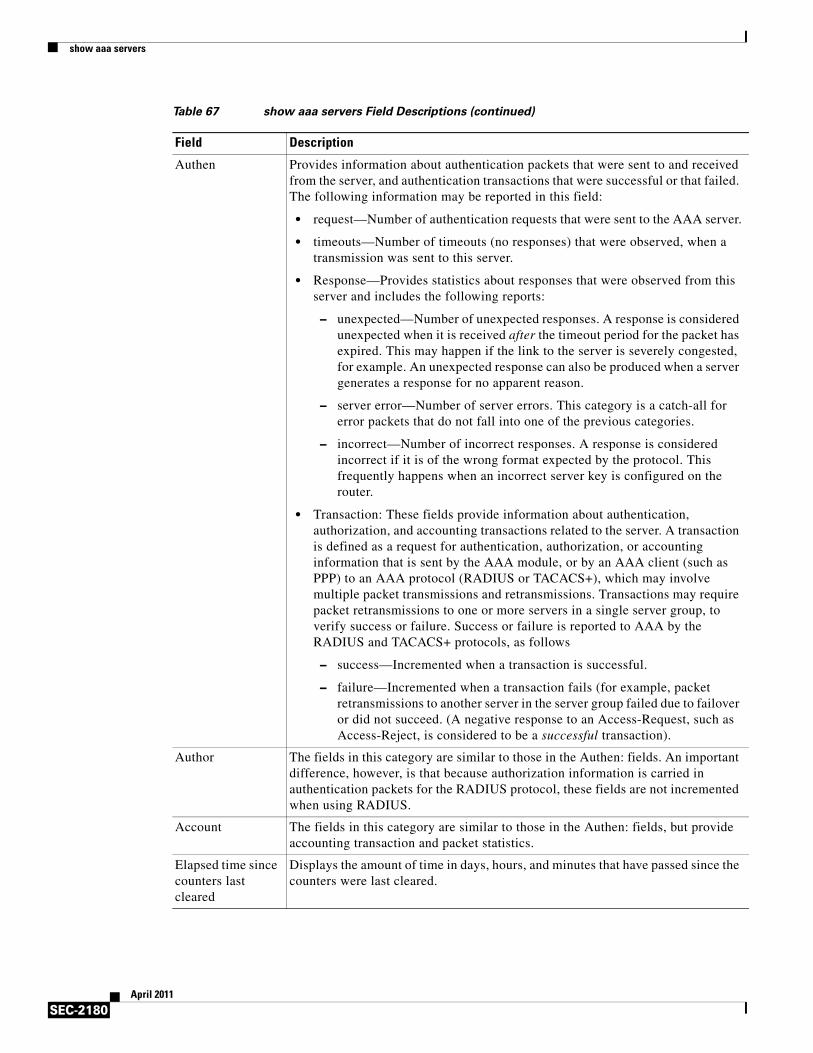
show aaa servers
SEC-2180April 2011
Authen Provides information about authentication packets that were sent to and received from the server, and authentication transactions that were successful or that failed. The following information may be reported in this field:
• request—Number of authentication requests that were sent to the AAA server.
• timeouts—Number of timeouts (no responses) that were observed, when a transmission was sent to this server.
• Response—Provides statistics about responses that were observed from this server and includes the following reports:
– unexpected—Number of unexpected responses. A response is considered unexpected when it is received after the timeout period for the packet has expired. This may happen if the link to the server is severely congested, for example. An unexpected response can also be produced when a server generates a response for no apparent reason.
– server error—Number of server errors. This category is a catch-all for error packets that do not fall into one of the previous categories.
– incorrect—Number of incorrect responses. A response is considered incorrect if it is of the wrong format expected by the protocol. This frequently happens when an incorrect server key is configured on the router.
• Transaction: These fields provide information about authentication, authorization, and accounting transactions related to the server. A transaction is defined as a request for authentication, authorization, or accounting information that is sent by the AAA module, or by an AAA client (such as PPP) to an AAA protocol (RADIUS or TACACS+), which may involve multiple packet transmissions and retransmissions. Transactions may require packet retransmissions to one or more servers in a single server group, to verify success or failure. Success or failure is reported to AAA by the RADIUS and TACACS+ protocols, as follows
– success—Incremented when a transaction is successful.
– failure—Incremented when a transaction fails (for example, packet retransmissions to another server in the server group failed due to failover or did not succeed. (A negative response to an Access-Request, such as Access-Reject, is considered to be a successful transaction).
Author The fields in this category are similar to those in the Authen: fields. An important difference, however, is that because authorization information is carried in authentication packets for the RADIUS protocol, these fields are not incremented when using RADIUS.
Account The fields in this category are similar to those in the Authen: fields, but provide accounting transaction and packet statistics.
Elapsed time since counters last cleared
Displays the amount of time in days, hours, and minutes that have passed since the counters were last cleared.
Table 67 show aaa servers Field Descriptions (continued)
Field Description
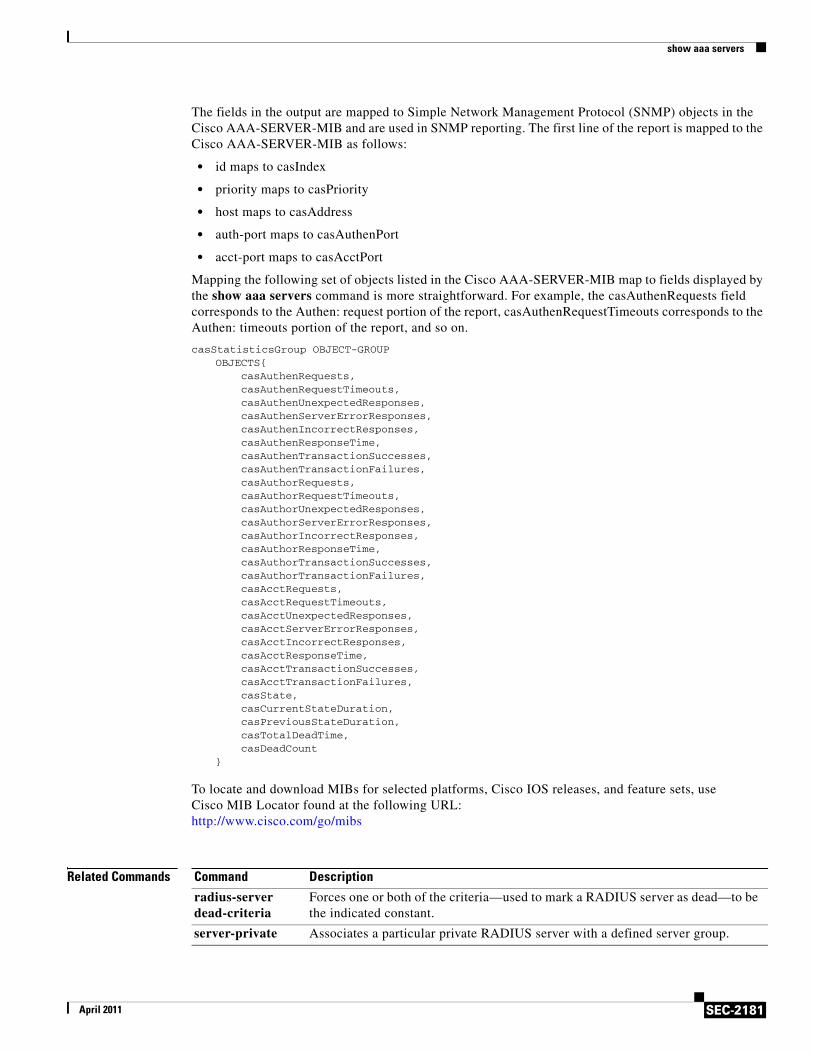
show aaa servers
SEC-2181April 2011
The fields in the output are mapped to Simple Network Management Protocol (SNMP) objects in the Cisco AAA-SERVER-MIB and are used in SNMP reporting. The first line of the report is mapped to the Cisco AAA-SERVER-MIB as follows:
• id maps to casIndex
• priority maps to casPriority
• host maps to casAddress
• auth-port maps to casAuthenPort
• acct-port maps to casAcctPort
Mapping the following set of objects listed in the Cisco AAA-SERVER-MIB map to fields displayed by the show aaa servers command is more straightforward. For example, the casAuthenRequests field corresponds to the Authen: request portion of the report, casAuthenRequestTimeouts corresponds to the Authen: timeouts portion of the report, and so on.
casStatisticsGroup OBJECT-GROUPOBJECTS{ casAuthenRequests, casAuthenRequestTimeouts, casAuthenUnexpectedResponses, casAuthenServerErrorResponses, casAuthenIncorrectResponses, casAuthenResponseTime, casAuthenTransactionSuccesses, casAuthenTransactionFailures, casAuthorRequests, casAuthorRequestTimeouts, casAuthorUnexpectedResponses, casAuthorServerErrorResponses, casAuthorIncorrectResponses, casAuthorResponseTime, casAuthorTransactionSuccesses, casAuthorTransactionFailures, casAcctRequests, casAcctRequestTimeouts, casAcctUnexpectedResponses, casAcctServerErrorResponses, casAcctIncorrectResponses, casAcctResponseTime, casAcctTransactionSuccesses, casAcctTransactionFailures, casState, casCurrentStateDuration, casPreviousStateDuration, casTotalDeadTime, casDeadCount}
To locate and download MIBs for selected platforms, Cisco IOS releases, and feature sets, use Cisco MIB Locator found at the following URL:http://www.cisco.com/go/mibs
Related Commands Command Description
radius-server dead-criteria
Forces one or both of the criteria—used to mark a RADIUS server as dead—to be the indicated constant.
server-private Associates a particular private RADIUS server with a defined server group.
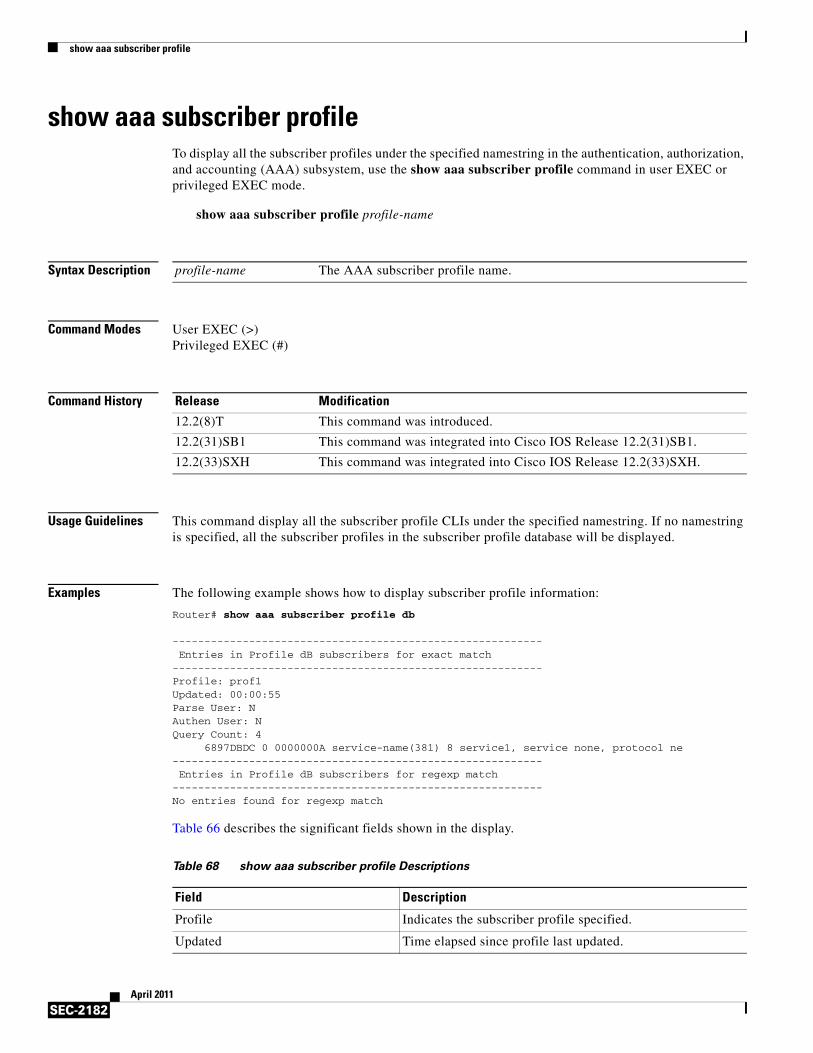
show aaa subscriber profile
SEC-2182April 2011
show aaa subscriber profileTo display all the subscriber profiles under the specified namestring in the authentication, authorization, and accounting (AAA) subsystem, use the show aaa subscriber profile command in user EXEC or privileged EXEC mode.
show aaa subscriber profile profile-name
Syntax Description
Command Modes User EXEC (>)Privileged EXEC (#)
Command History
Usage Guidelines This command display all the subscriber profile CLIs under the specified namestring. If no namestring is specified, all the subscriber profiles in the subscriber profile database will be displayed.
Examples The following example shows how to display subscriber profile information:
Router# show aaa subscriber profile db
---------------------------------------------------------- Entries in Profile dB subscribers for exact match----------------------------------------------------------Profile: prof1Updated: 00:00:55 Parse User: NAuthen User: NQuery Count: 4 6897DBDC 0 0000000A service-name(381) 8 service1, service none, protocol ne---------------------------------------------------------- Entries in Profile dB subscribers for regexp match----------------------------------------------------------No entries found for regexp match
Table 66 describes the significant fields shown in the display.
profile-name The AAA subscriber profile name.
Release Modification
12.2(8)T This command was introduced.
12.2(31)SB1 This command was integrated into Cisco IOS Release 12.2(31)SB1.
12.2(33)SXH This command was integrated into Cisco IOS Release 12.2(33)SXH.
Table 68 show aaa subscriber profile Descriptions
Field Description
Profile Indicates the subscriber profile specified.
Updated Time elapsed since profile last updated.
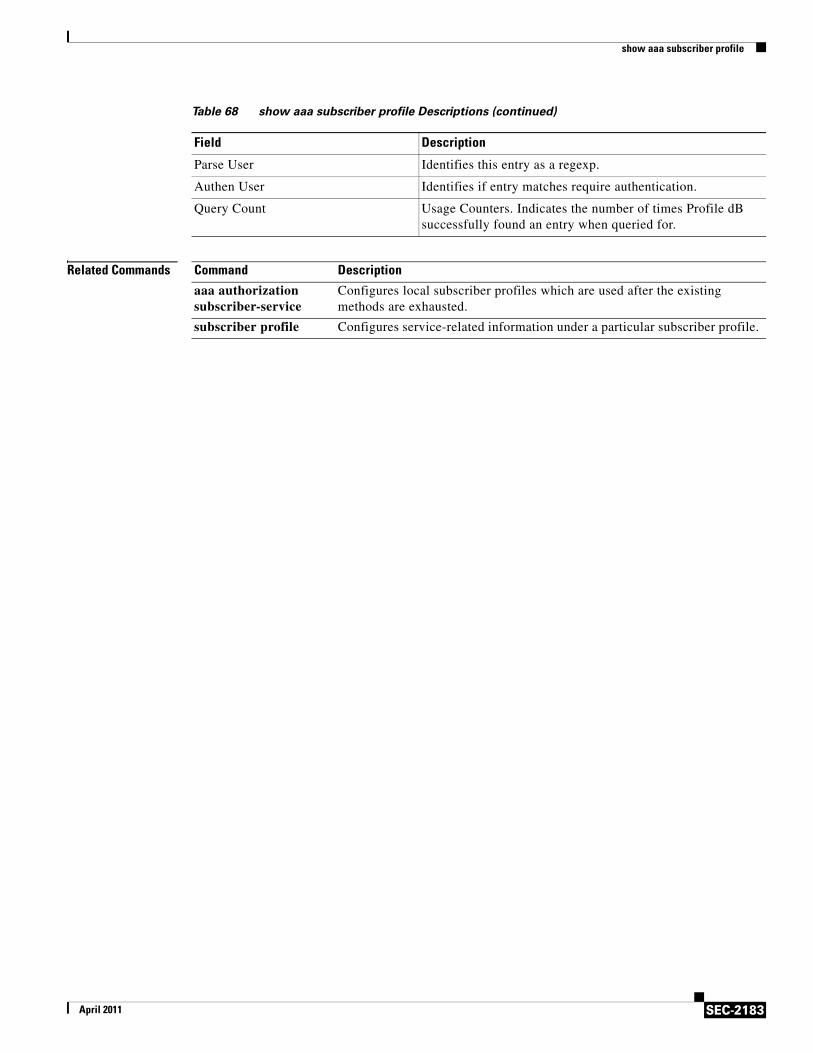
show aaa subscriber profile
SEC-2183April 2011
Related Commands
Parse User Identifies this entry as a regexp.
Authen User Identifies if entry matches require authentication.
Query Count Usage Counters. Indicates the number of times Profile dB successfully found an entry when queried for.
Table 68 show aaa subscriber profile Descriptions (continued)
Field Description
Command Description
aaa authorization subscriber-service
Configures local subscriber profiles which are used after the existing methods are exhausted.
subscriber profile Configures service-related information under a particular subscriber profile.
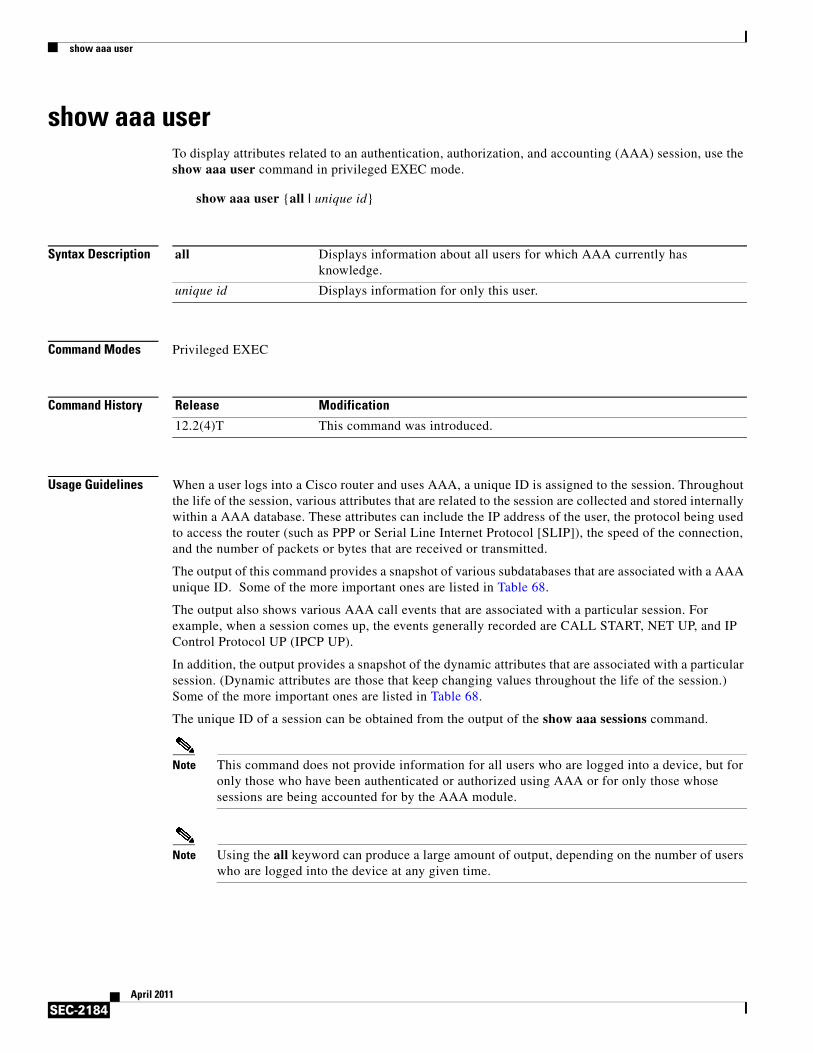
show aaa user
SEC-2184April 2011
show aaa userTo display attributes related to an authentication, authorization, and accounting (AAA) session, use the show aaa user command in privileged EXEC mode.
show aaa user {all | unique id}
Syntax Description
Command Modes Privileged EXEC
Command History
Usage Guidelines When a user logs into a Cisco router and uses AAA, a unique ID is assigned to the session. Throughout the life of the session, various attributes that are related to the session are collected and stored internally within a AAA database. These attributes can include the IP address of the user, the protocol being used to access the router (such as PPP or Serial Line Internet Protocol [SLIP]), the speed of the connection, and the number of packets or bytes that are received or transmitted.
The output of this command provides a snapshot of various subdatabases that are associated with a AAA unique ID. Some of the more important ones are listed in Table 68.
The output also shows various AAA call events that are associated with a particular session. For example, when a session comes up, the events generally recorded are CALL START, NET UP, and IP Control Protocol UP (IPCP UP).
In addition, the output provides a snapshot of the dynamic attributes that are associated with a particular session. (Dynamic attributes are those that keep changing values throughout the life of the session.) Some of the more important ones are listed in Table 68.
The unique ID of a session can be obtained from the output of the show aaa sessions command.
Note This command does not provide information for all users who are logged into a device, but for only those who have been authenticated or authorized using AAA or for only those whose sessions are being accounted for by the AAA module.
Note Using the all keyword can produce a large amount of output, depending on the number of users who are logged into the device at any given time.
all Displays information about all users for which AAA currently has knowledge.
unique id Displays information for only this user.
Release Modification
12.2(4)T This command was introduced.
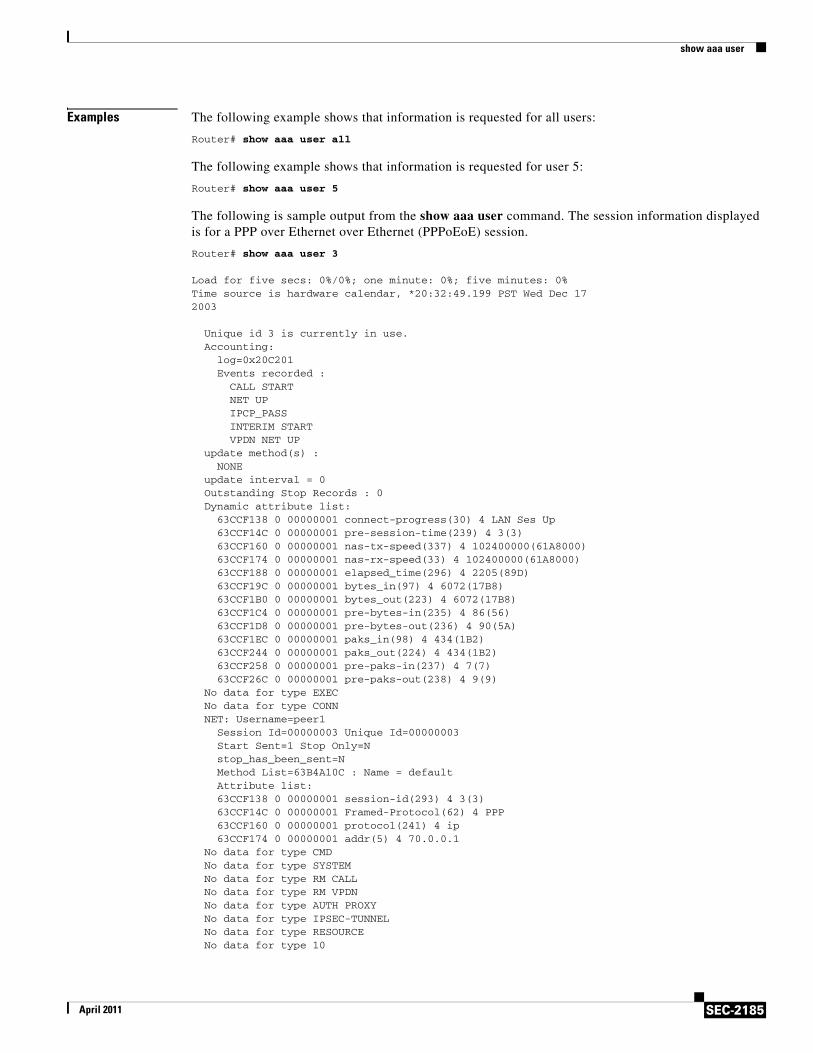
show aaa user
SEC-2185April 2011
Examples The following example shows that information is requested for all users:
Router# show aaa user all
The following example shows that information is requested for user 5:
Router# show aaa user 5
The following is sample output from the show aaa user command. The session information displayed is for a PPP over Ethernet over Ethernet (PPPoEoE) session.
Router# show aaa user 3
Load for five secs: 0%/0%; one minute: 0%; five minutes: 0%Time source is hardware calendar, *20:32:49.199 PST Wed Dec 17 2003
Unique id 3 is currently in use.Accounting:
log=0x20C201Events recorded :
CALL STARTNET UPIPCP_PASSINTERIM STARTVPDN NET UP
update method(s) :NONE
update interval = 0Outstanding Stop Records : 0Dynamic attribute list:
63CCF138 0 00000001 connect-progress(30) 4 LAN Ses Up63CCF14C 0 00000001 pre-session-time(239) 4 3(3)63CCF160 0 00000001 nas-tx-speed(337) 4 102400000(61A8000)63CCF174 0 00000001 nas-rx-speed(33) 4 102400000(61A8000)63CCF188 0 00000001 elapsed_time(296) 4 2205(89D)63CCF19C 0 00000001 bytes_in(97) 4 6072(17B8)63CCF1B0 0 00000001 bytes_out(223) 4 6072(17B8)63CCF1C4 0 00000001 pre-bytes-in(235) 4 86(56)63CCF1D8 0 00000001 pre-bytes-out(236) 4 90(5A)63CCF1EC 0 00000001 paks_in(98) 4 434(1B2)63CCF244 0 00000001 paks_out(224) 4 434(1B2)63CCF258 0 00000001 pre-paks-in(237) 4 7(7)63CCF26C 0 00000001 pre-paks-out(238) 4 9(9)
No data for type EXECNo data for type CONNNET: Username=peer1
Session Id=00000003 Unique Id=00000003Start Sent=1 Stop Only=Nstop_has_been_sent=NMethod List=63B4A10C : Name = defaultAttribute list:63CCF138 0 00000001 session-id(293) 4 3(3)63CCF14C 0 00000001 Framed-Protocol(62) 4 PPP63CCF160 0 00000001 protocol(241) 4 ip63CCF174 0 00000001 addr(5) 4 70.0.0.1
No data for type CMDNo data for type SYSTEMNo data for type RM CALLNo data for type RM VPDNNo data for type AUTH PROXYNo data for type IPSEC-TUNNELNo data for type RESOURCENo data for type 10
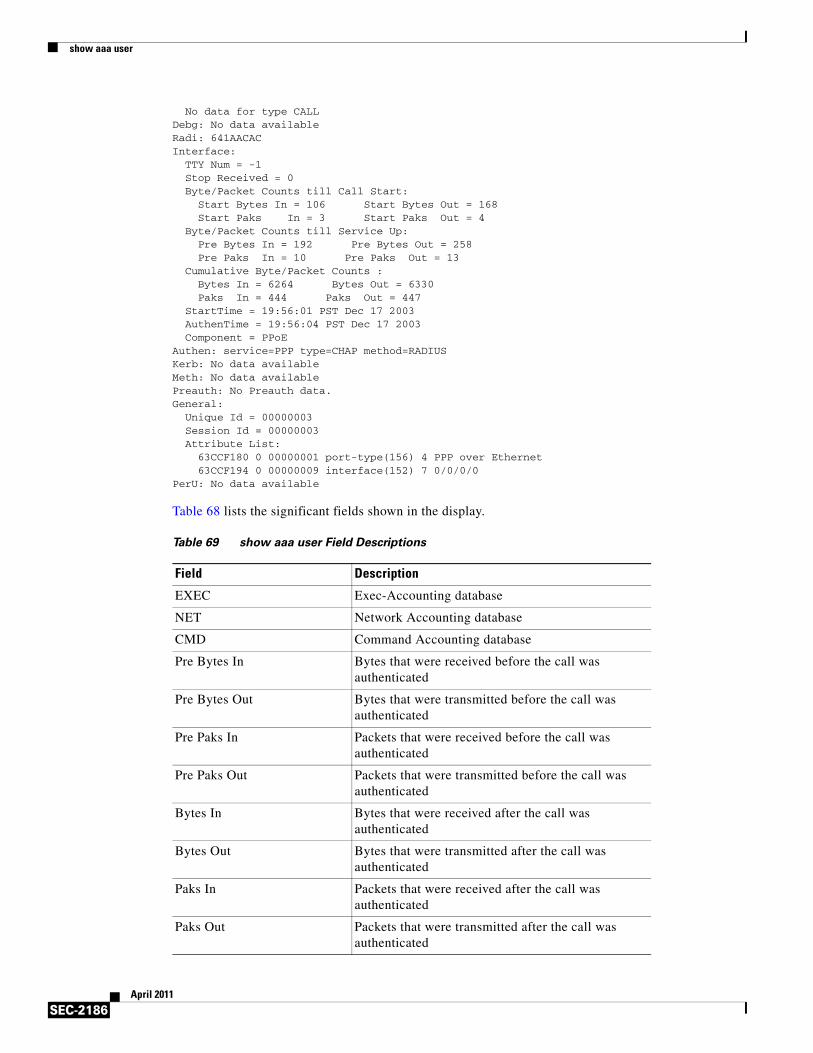
show aaa user
SEC-2186April 2011
No data for type CALLDebg: No data availableRadi: 641AACACInterface:
TTY Num = -1Stop Received = 0Byte/Packet Counts till Call Start:
Start Bytes In = 106 Start Bytes Out = 168 Start Paks In = 3 Start Paks Out = 4
Byte/Packet Counts till Service Up:Pre Bytes In = 192 Pre Bytes Out = 258 Pre Paks In = 10 Pre Paks Out = 13
Cumulative Byte/Packet Counts :Bytes In = 6264 Bytes Out = 6330 Paks In = 444 Paks Out = 447
StartTime = 19:56:01 PST Dec 17 2003AuthenTime = 19:56:04 PST Dec 17 2003Component = PPoE
Authen: service=PPP type=CHAP method=RADIUSKerb: No data availableMeth: No data availablePreauth: No Preauth data.General:
Unique Id = 00000003Session Id = 00000003Attribute List:
63CCF180 0 00000001 port-type(156) 4 PPP over Ethernet63CCF194 0 00000009 interface(152) 7 0/0/0/0
PerU: No data available
Table 68 lists the significant fields shown in the display.
Table 69 show aaa user Field Descriptions
Field Description
EXEC Exec-Accounting database
NET Network Accounting database
CMD Command Accounting database
Pre Bytes In Bytes that were received before the call was authenticated
Pre Bytes Out Bytes that were transmitted before the call was authenticated
Pre Paks In Packets that were received before the call was authenticated
Pre Paks Out Packets that were transmitted before the call was authenticated
Bytes In Bytes that were received after the call was authenticated
Bytes Out Bytes that were transmitted after the call was authenticated
Paks In Packets that were received after the call was authenticated
Paks Out Packets that were transmitted after the call was authenticated
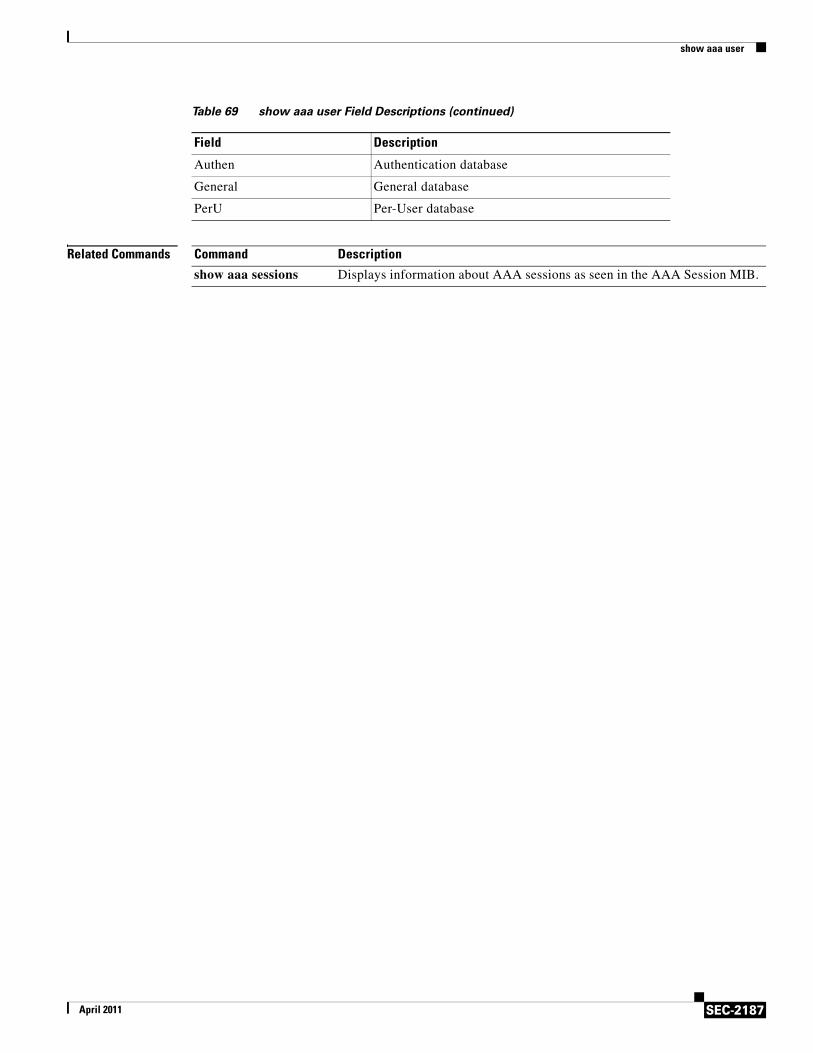
show aaa user
SEC-2187April 2011
Related Commands
Authen Authentication database
General General database
PerU Per-User database
Table 69 show aaa user Field Descriptions (continued)
Field Description
Command Description
show aaa sessions Displays information about AAA sessions as seen in the AAA Session MIB.
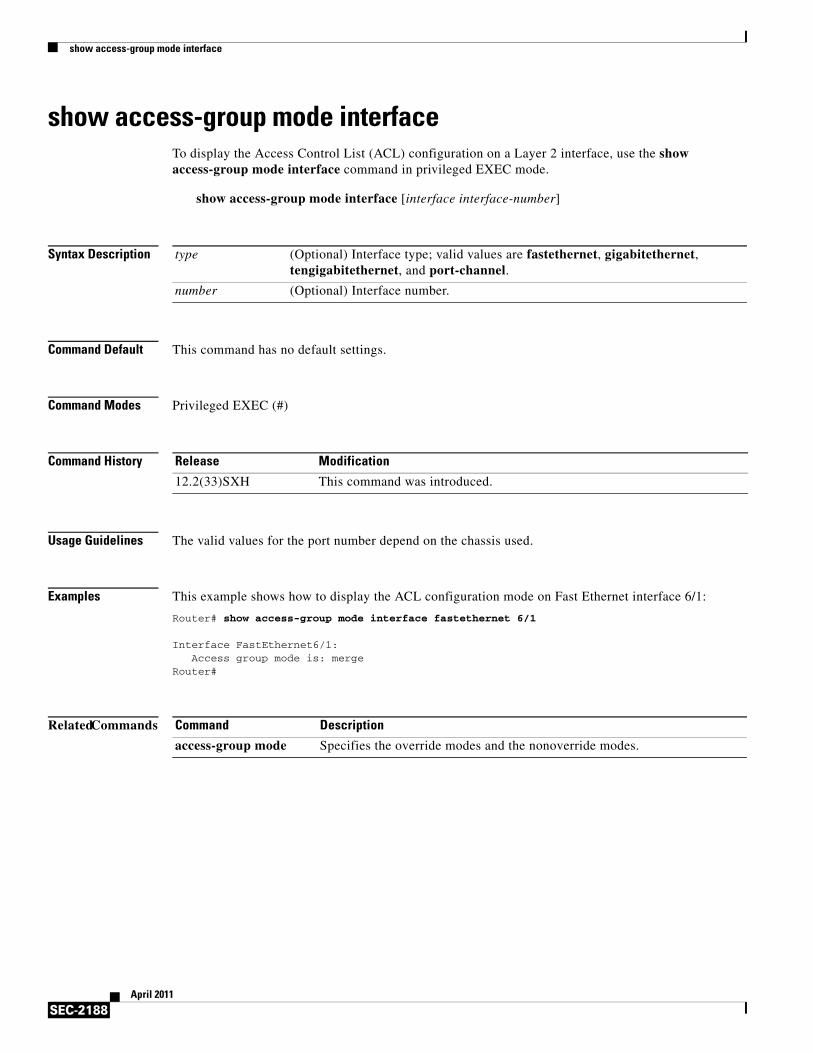
show access-group mode interface
SEC-2188April 2011
show access-group mode interfaceTo display the Access Control List (ACL) configuration on a Layer 2 interface, use the show access-group mode interface command in privileged EXEC mode.
show access-group mode interface [interface interface-number]
Syntax Description
Command Default This command has no default settings.
Command Modes Privileged EXEC (#)
Command History
Usage Guidelines The valid values for the port number depend on the chassis used.
Examples This example shows how to display the ACL configuration mode on Fast Ethernet interface 6/1:
Router# show access-group mode interface fastethernet 6/1
Interface FastEthernet6/1: Access group mode is: mergeRouter#
Related Commands
type (Optional) Interface type; valid values are fastethernet, gigabitethernet, tengigabitethernet, and port-channel.
number (Optional) Interface number.
Release Modification
12.2(33)SXH This command was introduced.
Command Description
access-group mode Specifies the override modes and the nonoverride modes.
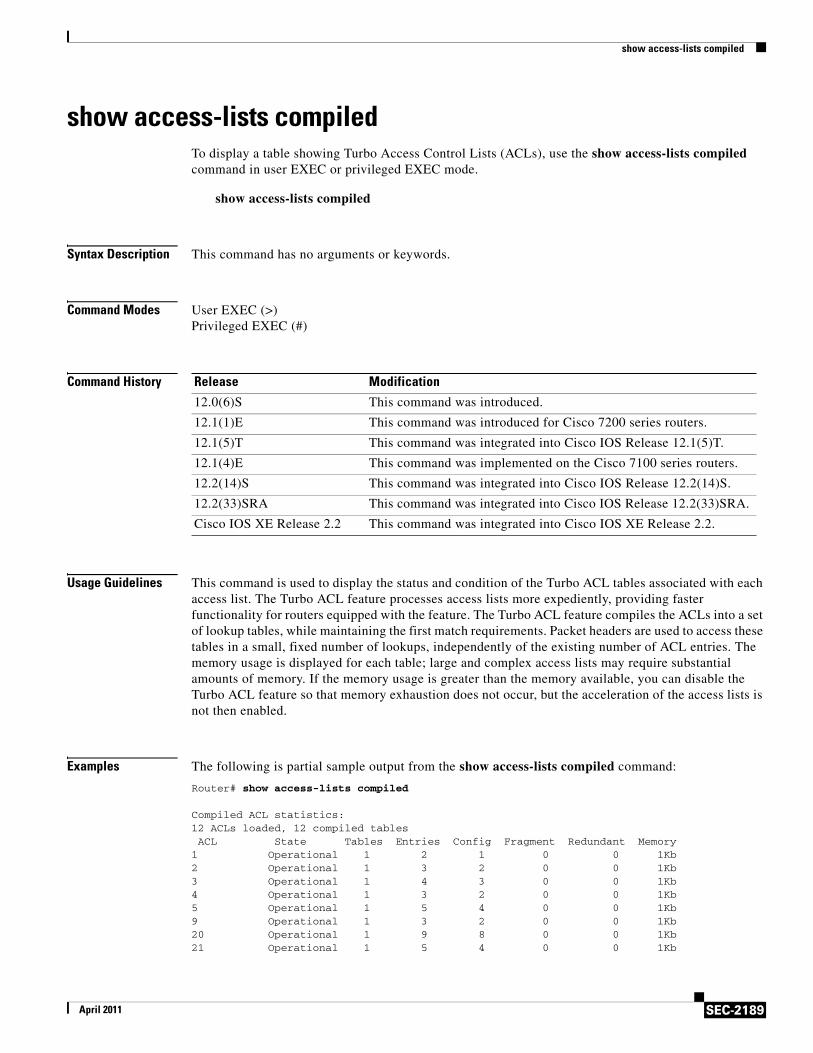
show access-lists compiled
SEC-2189April 2011
show access-lists compiledTo display a table showing Turbo Access Control Lists (ACLs), use the show access-lists compiled command in user EXEC or privileged EXEC mode.
show access-lists compiled
Syntax Description This command has no arguments or keywords.
Command Modes User EXEC (>)Privileged EXEC (#)
Command History
Usage Guidelines This command is used to display the status and condition of the Turbo ACL tables associated with each access list. The Turbo ACL feature processes access lists more expediently, providing faster functionality for routers equipped with the feature. The Turbo ACL feature compiles the ACLs into a set of lookup tables, while maintaining the first match requirements. Packet headers are used to access these tables in a small, fixed number of lookups, independently of the existing number of ACL entries. The memory usage is displayed for each table; large and complex access lists may require substantial amounts of memory. If the memory usage is greater than the memory available, you can disable the Turbo ACL feature so that memory exhaustion does not occur, but the acceleration of the access lists is not then enabled.
Examples The following is partial sample output from the show access-lists compiled command:
Router# show access-lists compiled
Compiled ACL statistics:12 ACLs loaded, 12 compiled tables ACL State Tables Entries Config Fragment Redundant Memory1 Operational 1 2 1 0 0 1Kb2 Operational 1 3 2 0 0 1Kb3 Operational 1 4 3 0 0 1Kb4 Operational 1 3 2 0 0 1Kb5 Operational 1 5 4 0 0 1Kb9 Operational 1 3 2 0 0 1Kb20 Operational 1 9 8 0 0 1Kb21 Operational 1 5 4 0 0 1Kb
Release Modification
12.0(6)S This command was introduced.
12.1(1)E This command was introduced for Cisco 7200 series routers.
12.1(5)T This command was integrated into Cisco IOS Release 12.1(5)T.
12.1(4)E This command was implemented on the Cisco 7100 series routers.
12.2(14)S This command was integrated into Cisco IOS Release 12.2(14)S.
12.2(33)SRA This command was integrated into Cisco IOS Release 12.2(33)SRA.
Cisco IOS XE Release 2.2 This command was integrated into Cisco IOS XE Release 2.2.
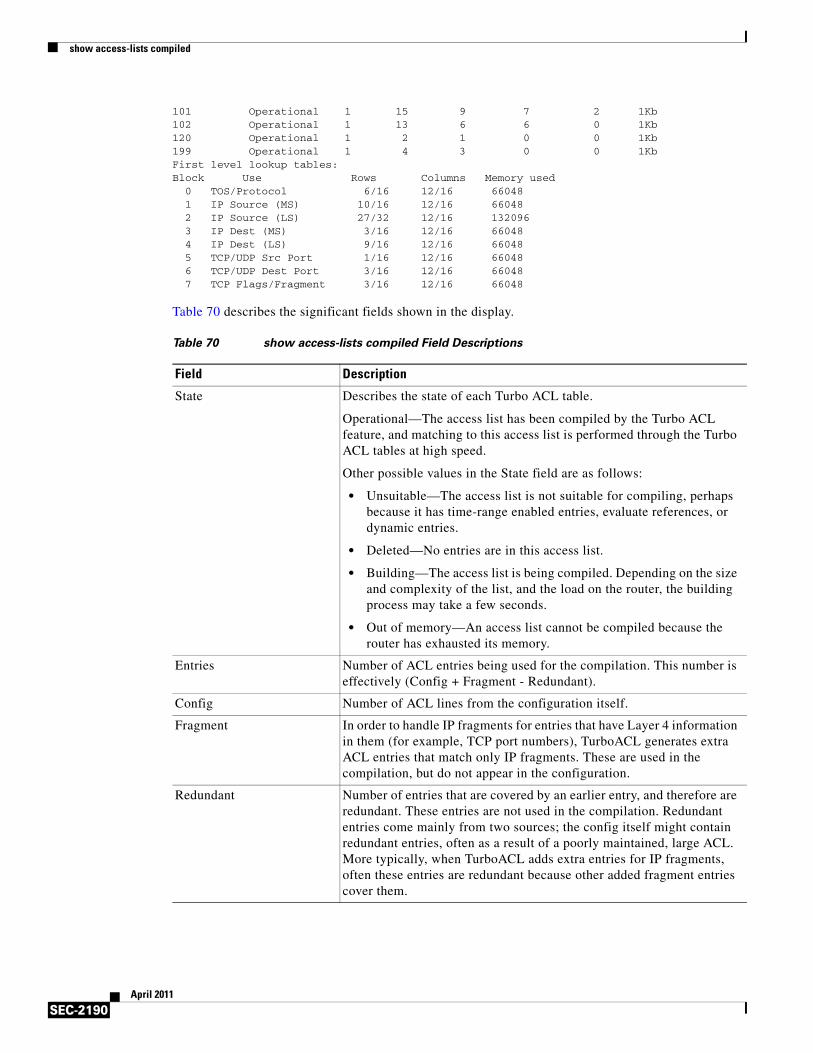
show access-lists compiled
SEC-2190April 2011
101 Operational 1 15 9 7 2 1Kb102 Operational 1 13 6 6 0 1Kb120 Operational 1 2 1 0 0 1Kb199 Operational 1 4 3 0 0 1KbFirst level lookup tables:Block Use Rows Columns Memory used 0 TOS/Protocol 6/16 12/16 66048 1 IP Source (MS) 10/16 12/16 66048 2 IP Source (LS) 27/32 12/16 132096 3 IP Dest (MS) 3/16 12/16 66048 4 IP Dest (LS) 9/16 12/16 66048 5 TCP/UDP Src Port 1/16 12/16 66048 6 TCP/UDP Dest Port 3/16 12/16 66048 7 TCP Flags/Fragment 3/16 12/16 66048
Table 70 describes the significant fields shown in the display.
Table 70 show access-lists compiled Field Descriptions
Field Description
State Describes the state of each Turbo ACL table.
Operational—The access list has been compiled by the Turbo ACL feature, and matching to this access list is performed through the Turbo ACL tables at high speed.
Other possible values in the State field are as follows:
• Unsuitable—The access list is not suitable for compiling, perhaps because it has time-range enabled entries, evaluate references, or dynamic entries.
• Deleted—No entries are in this access list.
• Building—The access list is being compiled. Depending on the size and complexity of the list, and the load on the router, the building process may take a few seconds.
• Out of memory—An access list cannot be compiled because the router has exhausted its memory.
Entries Number of ACL entries being used for the compilation. This number is effectively (Config + Fragment - Redundant).
Config Number of ACL lines from the configuration itself.
Fragment In order to handle IP fragments for entries that have Layer 4 information in them (for example, TCP port numbers), TurboACL generates extra ACL entries that match only IP fragments. These are used in the compilation, but do not appear in the configuration.
Redundant Number of entries that are covered by an earlier entry, and therefore are redundant. These entries are not used in the compilation. Redundant entries come mainly from two sources; the config itself might contain redundant entries, often as a result of a poorly maintained, large ACL. More typically, when TurboACL adds extra entries for IP fragments, often these entries are redundant because other added fragment entries cover them.
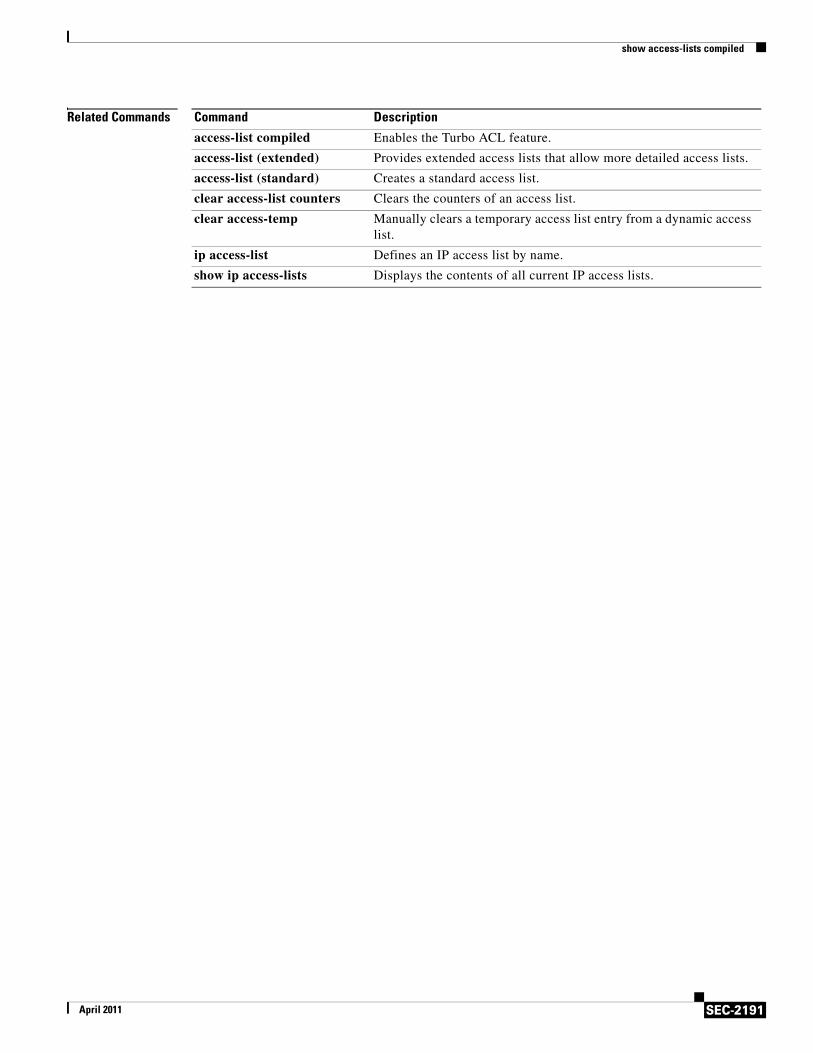
show access-lists compiled
SEC-2191April 2011
Related Commands Command Description
access-list compiled Enables the Turbo ACL feature.
access-list (extended) Provides extended access lists that allow more detailed access lists.
access-list (standard) Creates a standard access list.
clear access-list counters Clears the counters of an access list.
clear access-temp Manually clears a temporary access list entry from a dynamic access list.
ip access-list Defines an IP access list by name.
show ip access-lists Displays the contents of all current IP access lists.
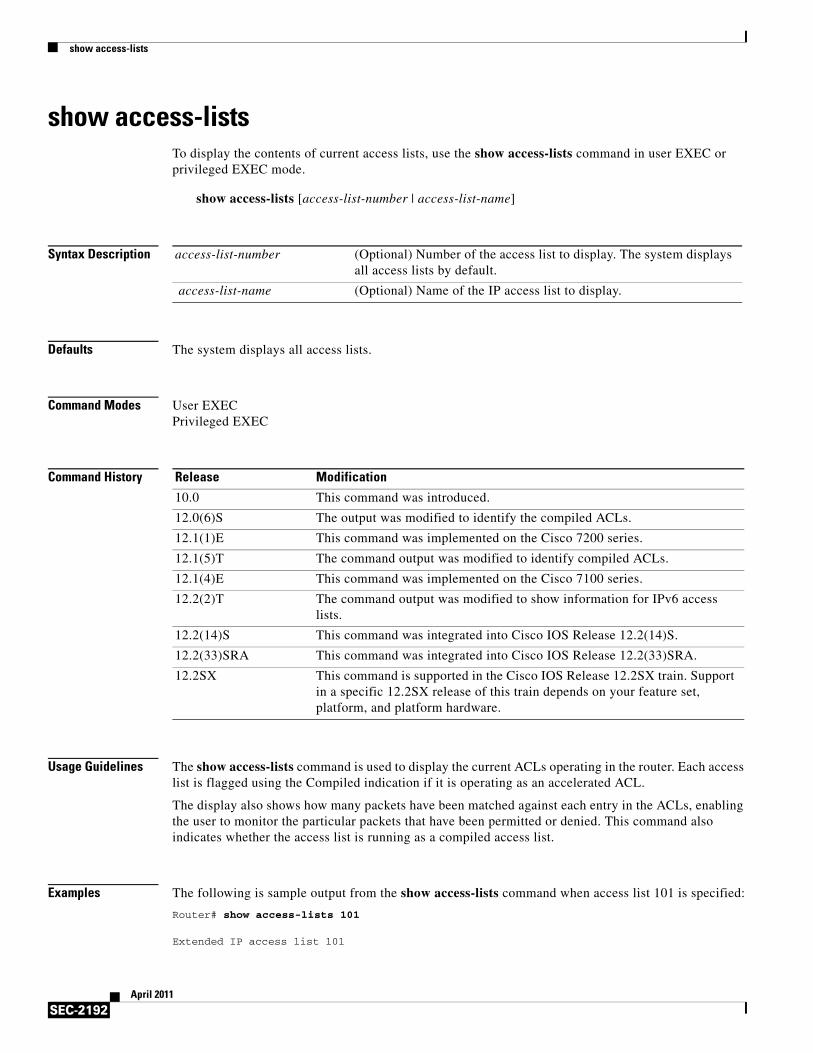
show access-lists
SEC-2192April 2011
show access-listsTo display the contents of current access lists, use the show access-lists command in user EXEC or privileged EXEC mode.
show access-lists [access-list-number | access-list-name]
Syntax Description
Defaults The system displays all access lists.
Command Modes User EXECPrivileged EXEC
Command History
Usage Guidelines The show access-lists command is used to display the current ACLs operating in the router. Each access list is flagged using the Compiled indication if it is operating as an accelerated ACL.
The display also shows how many packets have been matched against each entry in the ACLs, enabling the user to monitor the particular packets that have been permitted or denied. This command also indicates whether the access list is running as a compiled access list.
Examples The following is sample output from the show access-lists command when access list 101 is specified:
Router# show access-lists 101
Extended IP access list 101
access-list-number (Optional) Number of the access list to display. The system displays all access lists by default.
access-list-name (Optional) Name of the IP access list to display.
Release Modification
10.0 This command was introduced.
12.0(6)S The output was modified to identify the compiled ACLs.
12.1(1)E This command was implemented on the Cisco 7200 series.
12.1(5)T The command output was modified to identify compiled ACLs.
12.1(4)E This command was implemented on the Cisco 7100 series.
12.2(2)T The command output was modified to show information for IPv6 access lists.
12.2(14)S This command was integrated into Cisco IOS Release 12.2(14)S.
12.2(33)SRA This command was integrated into Cisco IOS Release 12.2(33)SRA.
12.2SX This command is supported in the Cisco IOS Release 12.2SX train. Support in a specific 12.2SX release of this train depends on your feature set, platform, and platform hardware.
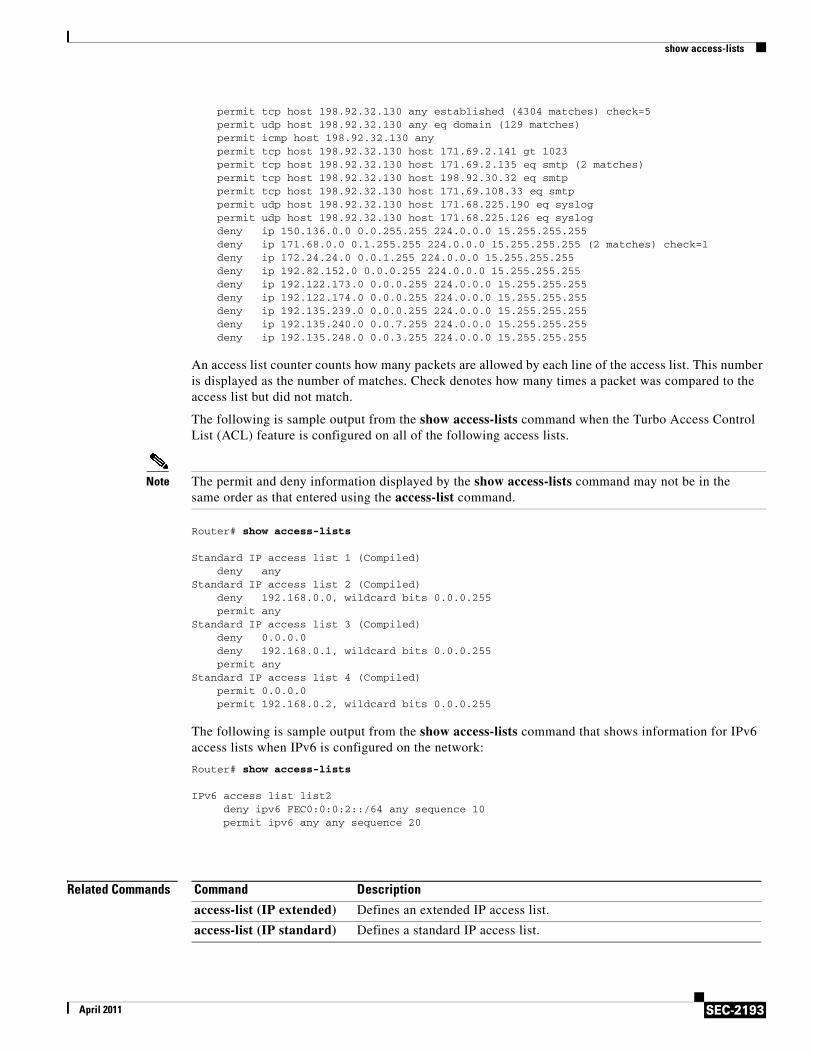
show access-lists
SEC-2193April 2011
permit tcp host 198.92.32.130 any established (4304 matches) check=5permit udp host 198.92.32.130 any eq domain (129 matches)
permit icmp host 198.92.32.130 any permit tcp host 198.92.32.130 host 171.69.2.141 gt 1023 permit tcp host 198.92.32.130 host 171.69.2.135 eq smtp (2 matches) permit tcp host 198.92.32.130 host 198.92.30.32 eq smtp permit tcp host 198.92.32.130 host 171.69.108.33 eq smtp permit udp host 198.92.32.130 host 171.68.225.190 eq syslog permit udp host 198.92.32.130 host 171.68.225.126 eq syslog deny ip 150.136.0.0 0.0.255.255 224.0.0.0 15.255.255.255 deny ip 171.68.0.0 0.1.255.255 224.0.0.0 15.255.255.255 (2 matches) check=1 deny ip 172.24.24.0 0.0.1.255 224.0.0.0 15.255.255.255 deny ip 192.82.152.0 0.0.0.255 224.0.0.0 15.255.255.255 deny ip 192.122.173.0 0.0.0.255 224.0.0.0 15.255.255.255 deny ip 192.122.174.0 0.0.0.255 224.0.0.0 15.255.255.255 deny ip 192.135.239.0 0.0.0.255 224.0.0.0 15.255.255.255 deny ip 192.135.240.0 0.0.7.255 224.0.0.0 15.255.255.255 deny ip 192.135.248.0 0.0.3.255 224.0.0.0 15.255.255.255
An access list counter counts how many packets are allowed by each line of the access list. This number is displayed as the number of matches. Check denotes how many times a packet was compared to the access list but did not match.
The following is sample output from the show access-lists command when the Turbo Access Control List (ACL) feature is configured on all of the following access lists.
Note The permit and deny information displayed by the show access-lists command may not be in the same order as that entered using the access-list command.
Router# show access-lists
Standard IP access list 1 (Compiled) deny anyStandard IP access list 2 (Compiled) deny 192.168.0.0, wildcard bits 0.0.0.255 permit anyStandard IP access list 3 (Compiled) deny 0.0.0.0 deny 192.168.0.1, wildcard bits 0.0.0.255 permit anyStandard IP access list 4 (Compiled) permit 0.0.0.0 permit 192.168.0.2, wildcard bits 0.0.0.255
The following is sample output from the show access-lists command that shows information for IPv6 access lists when IPv6 is configured on the network:
Router# show access-lists
IPv6 access list list2deny ipv6 FEC0:0:0:2::/64 any sequence 10permit ipv6 any any sequence 20
Related Commands Command Description
access-list (IP extended) Defines an extended IP access list.
access-list (IP standard) Defines a standard IP access list.

show access-lists
SEC-2194April 2011
clear access-list counters Clears the counters of an access list.
clear access-template Clears a temporary access list entry from a dynamic access list manually.
ip access-list Defines an IP access list by name.
show ip access-lists Displays the contents of all current IP access lists.
show ipv6 access-list Displays the contents of all current IPv6 access lists.
Command Description

show accounting
SEC-2195April 2011
show accountingThe show accounting command is replaced by the show aaa user command. See the show aaa user command for more information.
show appfw
SEC-2196April 2011
show appfwTo display application firewall policy information, use the show appfw command in user EXEC or privileged EXEC mode.
show appfw {configuration | dns [cache [policy policy-name]] | name appfw-name}
Syntax Description
Command Default If no policies are specified, information for all policies is displayed.
Command Modes User EXEC (>)Privileged EXEC (#)
Command History
Usage Guidelines Use this command to display information regarding the application firewall policy configuration or the IP addresses of the DNS cache.
Use the show appfw command in conjunction with the show ip inspect config command to display the complete firewall configuration.
If you do not specify a policy using the policy policy-name option, the IP addresses gathered for all DNS names and policies are displayed.
Examples This following output for the show appfw configuration command displays the configuration for the inspection rule “mypolicy,” which is applied to all incoming HTTP traffic on FastEthernet interface 0/0. In this example, all available HTTP inspection parameters have been defined.
Router# show appfw configuration
configuration Displays configuration information for configured policies.
dns Displays IP addresses resolved by the Domain Name System (DNS) server of the applicable instant messenger application.
cache (Optional) Displays IP addresses related to the DNS server.
policy (Optional) Displays information for the specified policy.
policy-name Name of the policy.
name Displays information about the specified application firewall.
appfw-name Name of an application firewall.
Release Modification
12.3(14)T This command was introduced.
12.4(4)T This command was modified. The dns and cache keywords were added to support instant messenger traffic inspection.
12.4(24)T This command was modified in a release earlier than Cisco IOS Release 12.4(24)T. The name keyword and appfw-name argument were added.
show appfw
SEC-2197April 2011
Application Firewall Rule configuration Application Policy name mypolicy Application http strict-http action allow alarm content-length minimum 0 maximum 1 action allow alarm content-type-verification match-req-rsp action allow alarm max-header-length request length 1 response length 1 action allow alarm max-uri-length 1 action allow alarm port-misuse default action allow alarm request-method rfc default action allow alarm request-method extension default action allow alarm transfer-encoding default action allow alarm
Table 71 describes the significant fields shown in the display.
Related Commands
Table 71 show appfw configuration Field Descriptions
Field Description
Application Policy name Name of the application policy.
strict-http action allow alarm Allows HTTP messages to pass through the firewall.
content-length minimum 0 maximum 1 action allow alarm
Allows HTTP traffic having the maximum message size of 1 to pass through the firewall.
content-type-verification match-req-rsp action allow alarm
Allows HTTP traffic after verifying the content type of the HTTP response against the accept field of the HTTP request.
max-header-length request length 1 response length 1 action allow alarm
Allows the alarm to pass through the firewall if both the maximum header length request and the response is 1.
max-uri-length 1 action allow alarm Allows HTTP traffic if the uniform resource identifier (URI) length in the request message is 1.
port-misuse default action allow alarm Allows HTTP traffic through the firewall for all the default applications in the HTTP message.
request-method rfc default action allow alarm
Allows HTTP traffic for RFC 2616 supported methods.
request-method extension default action allow alarm
Allows HTTP traffic for all the extension methods.
transfer-encoding default action allow alarm
Allows HTTP traffic for all types of transfer encoded messages.
Command Description
show ip inspect config Displays firewall configuration and session information.
show ase
SEC-2198April 2011
show ase
Note Effective with Cisco IOS Release 12.4(24), the show ase command is not available in Cisco IOS software.
To display the Automatic Signature Extraction (ASE) run-time status or detected signatures, use the show ase command in privileged EXEC mode.
show ase [dispersion-table num-entries-to-display | prevalence-table num-entries-to-display | signatures | special-case-table num-entries-to-display | statistics]
Syntax Description
Command Modes Privileged EXEC (#)
Command History
Usage Guidelines Use the show ase command without any keywords to display the run-time status. Use the show ase command with the signatures keyword to display the detected ASE signatures.
This command is used on the Cisco 1800, 2800, and 7200 series routers, Cisco 7301 router, and Integrated Services Routers (ISRs) as ASE sensors.
Examples The following example output displays the ASE run-time status:
Note The ASE collector must be started in order for the ASE run-time status information to be displayed.
Router# show ase
ASE Information:
Collector IP: 10.10.10.3TIDP Group : 10Status : Online
dispersion-table (Optional) Displays the dispersion table.
num-entries-to-display (Optional) The number of table entries to be displayed. The range is from 0 to 4294967295.
prevalence-table (Optional) Displays the prevalence table.
signatures (Optional) Displays the detected ASE signatures.
special-case-table (Optional) Displays the special case table.
statistics (Optional) Displays the address description table staistics.
Release Modification
12.4(15)T This command was introduced.
12.4(24) This command was removed.
show ase
SEC-2199April 2011
Packets inspected: 1105071Address Dispersion Threshold: 20Prevalence Threshold: 10Sampling set to: 1 in 64Address Dispersion Inactivity Timer: 3600sPrevalence Table Refresh Time: 60s
Table 72 describes the significant fields shown in the display.
The following example output displays the detected ASE signatures:
Router# show ase signature
Table 72 show ase Field Descriptions
Field Description
Collector IP The IP address of the ASE collector.
TIDP Group Threat Information Distribution Protocol (TIDP) group used for exchange between the ASE sensor and ASE collector.
Status The four states are:
• Connected—The ASE sensor has connected with the ASE collector, but it has not completed initialization.
• Enabled—The ASE feature is enabled in global configuration mode, but the ASE sensor has not connected with the ASE collector.
• Not Enabled—The ASE feature is not enabled in global configuration mode.
• Online—The ASE is ready for inspecting traffic.
Packets inspected Total number of packets inspected on this ASE collector.
Address Dispersion Threshold Number of IP address occurrences that are permitted by the ASE sensor before this signature is considered an anomaly.
Note The Address Dispersion Threshold is configured on the ASE collector. This information is shown on the ASE sensor (this router) for informational purposes.
Prevalence Threshold The number of signature occurrences that are permitted before this signature is considered an anomaly. The default threshold is 10 seconds.
Sampling set to A sampling value that sets the chance for which a signature is being inspected. For example, 1 in 64 is less than 1 in 32 chances.
Address Dispersion Inactivity Timer Number of seconds that a signature does not occur. After this interval elapses, the signature is purged from the Address Dispersion table.
Prevalence Table Refresh Time Number of seconds that the ASE sensor has before it clears the occurrence table. If a signature does not occur for the Prevalence Threshold during a refresh, then the Prevalence Threshold is not considered.
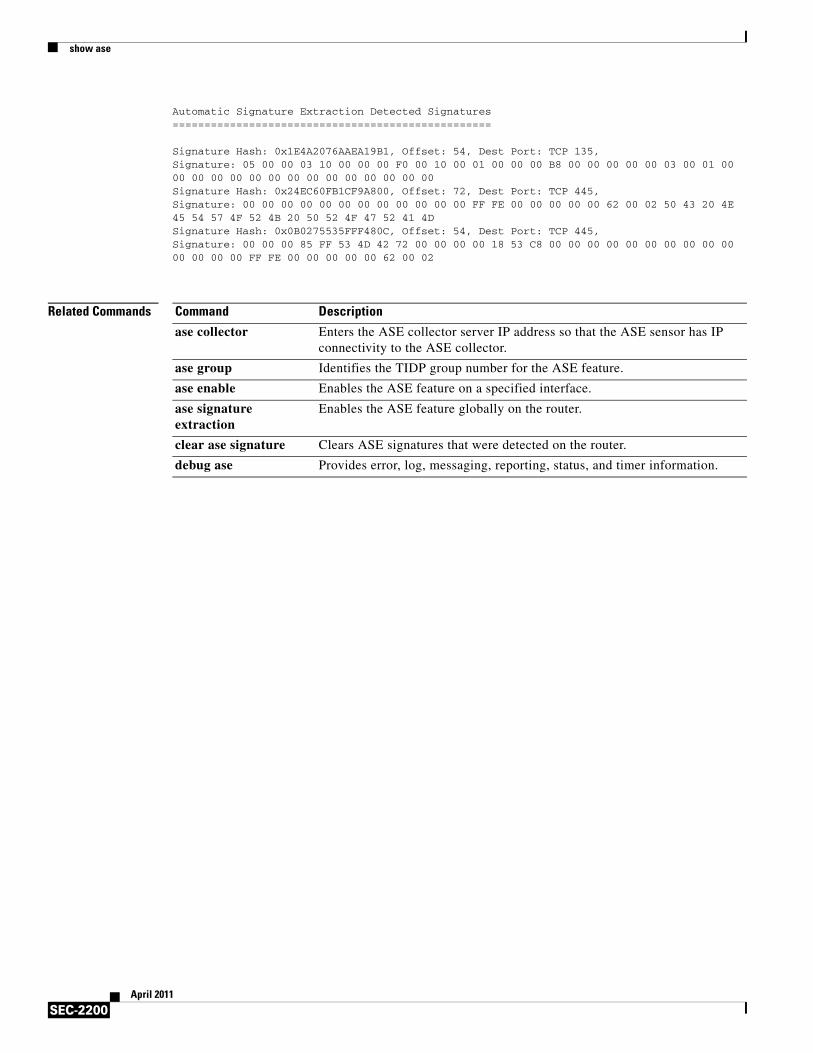
show ase
SEC-2200April 2011
Automatic Signature Extraction Detected Signatures==================================================
Signature Hash: 0x1E4A2076AAEA19B1, Offset: 54, Dest Port: TCP 135,Signature: 05 00 00 03 10 00 00 00 F0 00 10 00 01 00 00 00 B8 00 00 00 00 00 03 00 01 00 00 00 00 00 00 00 00 00 00 00 00 00 00 00 Signature Hash: 0x24EC60FB1CF9A800, Offset: 72, Dest Port: TCP 445,Signature: 00 00 00 00 00 00 00 00 00 00 00 00 FF FE 00 00 00 00 00 62 00 02 50 43 20 4E 45 54 57 4F 52 4B 20 50 52 4F 47 52 41 4D Signature Hash: 0x0B0275535FFF480C, Offset: 54, Dest Port: TCP 445,Signature: 00 00 00 85 FF 53 4D 42 72 00 00 00 00 18 53 C8 00 00 00 00 00 00 00 00 00 00 00 00 00 00 FF FE 00 00 00 00 00 62 00 02
Related Commands Command Description
ase collector Enters the ASE collector server IP address so that the ASE sensor has IP connectivity to the ASE collector.
ase group Identifies the TIDP group number for the ASE feature.
ase enable Enables the ASE feature on a specified interface.
ase signature extraction
Enables the ASE feature globally on the router.
clear ase signature Clears ASE signatures that were detected on the router.
debug ase Provides error, log, messaging, reporting, status, and timer information.
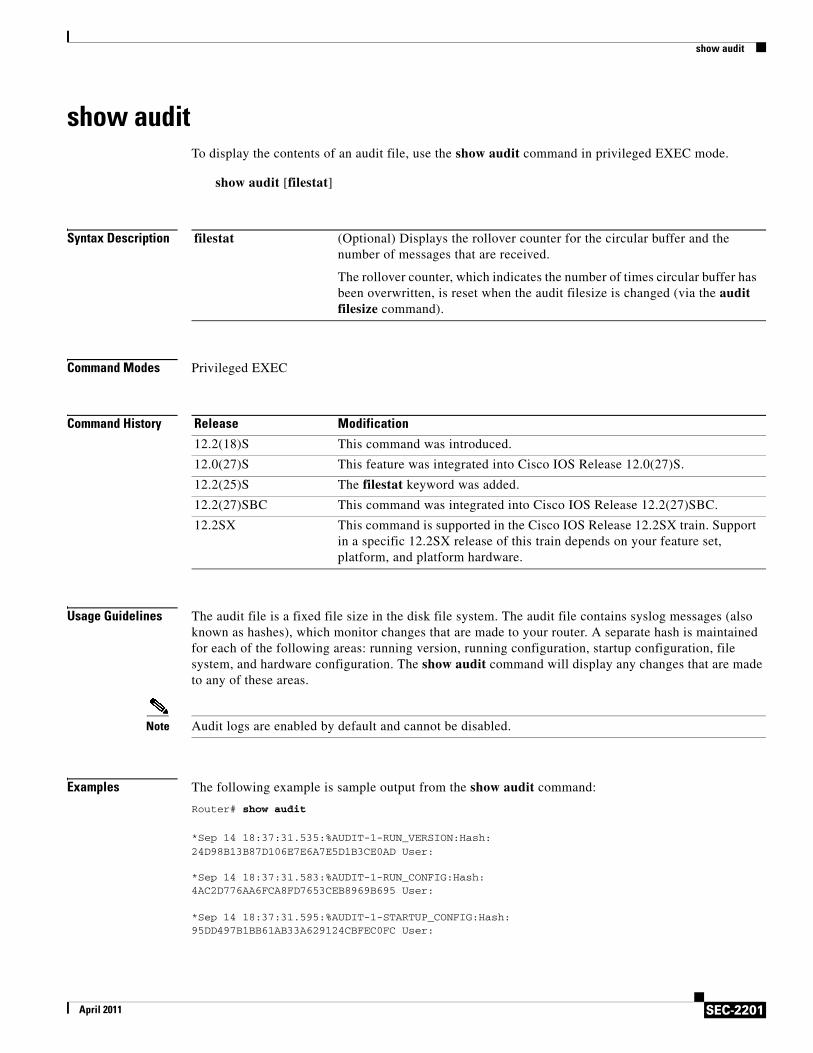
show audit
SEC-2201April 2011
show audit To display the contents of an audit file, use the show audit command in privileged EXEC mode.
show audit [filestat]
Syntax Description
Command Modes Privileged EXEC
Command History
Usage Guidelines The audit file is a fixed file size in the disk file system. The audit file contains syslog messages (also known as hashes), which monitor changes that are made to your router. A separate hash is maintained for each of the following areas: running version, running configuration, startup configuration, file system, and hardware configuration. The show audit command will display any changes that are made to any of these areas.
Note Audit logs are enabled by default and cannot be disabled.
Examples The following example is sample output from the show audit command:
Router# show audit
*Sep 14 18:37:31.535:%AUDIT-1-RUN_VERSION:Hash:24D98B13B87D106E7E6A7E5D1B3CE0AD User:
*Sep 14 18:37:31.583:%AUDIT-1-RUN_CONFIG:Hash:4AC2D776AA6FCA8FD7653CEB8969B695 User:
*Sep 14 18:37:31.595:%AUDIT-1-STARTUP_CONFIG:Hash:95DD497B1BB61AB33A629124CBFEC0FC User:
filestat (Optional) Displays the rollover counter for the circular buffer and the number of messages that are received.
The rollover counter, which indicates the number of times circular buffer has been overwritten, is reset when the audit filesize is changed (via the audit filesize command).
Release Modification
12.2(18)S This command was introduced.
12.0(27)S This feature was integrated into Cisco IOS Release 12.0(27)S.
12.2(25)S The filestat keyword was added.
12.2(27)SBC This command was integrated into Cisco IOS Release 12.2(27)SBC.
12.2SX This command is supported in the Cisco IOS Release 12.2SX train. Support in a specific 12.2SX release of this train depends on your feature set, platform, and platform hardware.
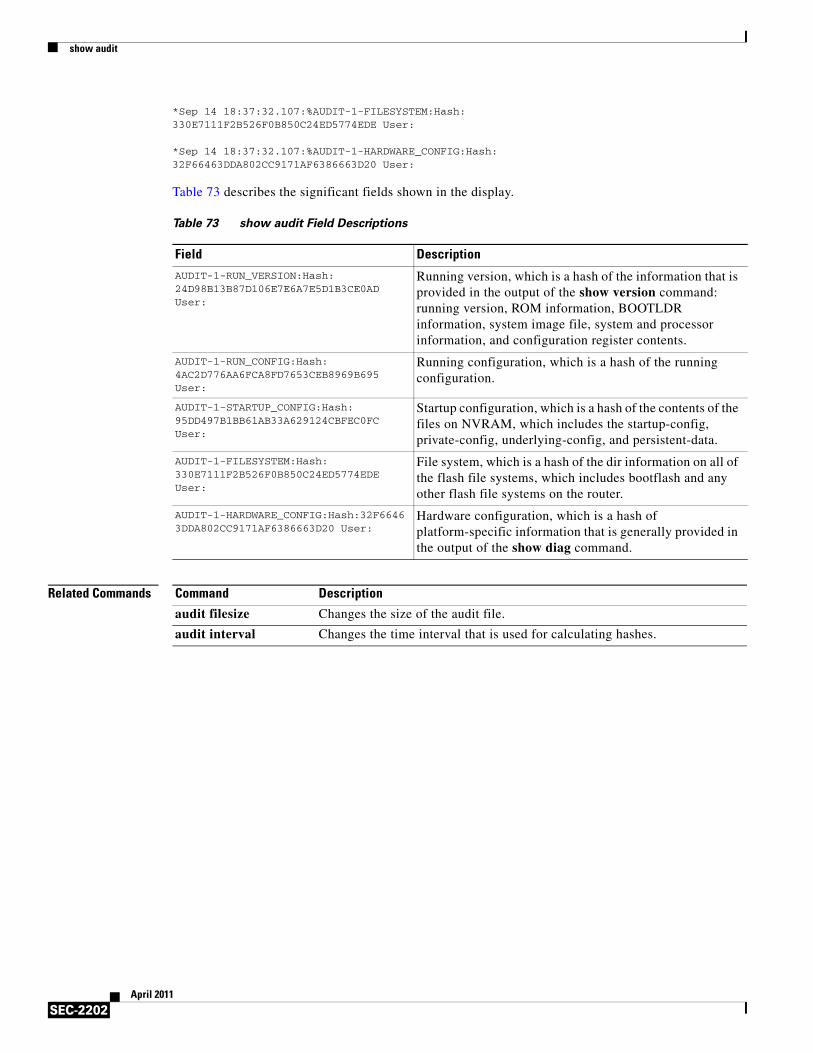
show audit
SEC-2202April 2011
*Sep 14 18:37:32.107:%AUDIT-1-FILESYSTEM:Hash:330E7111F2B526F0B850C24ED5774EDE User:
*Sep 14 18:37:32.107:%AUDIT-1-HARDWARE_CONFIG:Hash:32F66463DDA802CC9171AF6386663D20 User:
Table 73 describes the significant fields shown in the display.
Related Commands
Table 73 show audit Field Descriptions
Field Description
AUDIT-1-RUN_VERSION:Hash:24D98B13B87D106E7E6A7E5D1B3CE0AD User:
Running version, which is a hash of the information that is provided in the output of the show version command: running version, ROM information, BOOTLDR information, system image file, system and processor information, and configuration register contents.
AUDIT-1-RUN_CONFIG:Hash:4AC2D776AA6FCA8FD7653CEB8969B695 User:
Running configuration, which is a hash of the running configuration.
AUDIT-1-STARTUP_CONFIG:Hash:95DD497B1BB61AB33A629124CBFEC0FC User:
Startup configuration, which is a hash of the contents of the files on NVRAM, which includes the startup-config, private-config, underlying-config, and persistent-data.
AUDIT-1-FILESYSTEM:Hash:330E7111F2B526F0B850C24ED5774EDE User:
File system, which is a hash of the dir information on all of the flash file systems, which includes bootflash and any other flash file systems on the router.
AUDIT-1-HARDWARE_CONFIG:Hash:32F66463DDA802CC9171AF6386663D20 User:
Hardware configuration, which is a hash of platform-specific information that is generally provided in the output of the show diag command.
Command Description
audit filesize Changes the size of the audit file.
audit interval Changes the time interval that is used for calculating hashes.
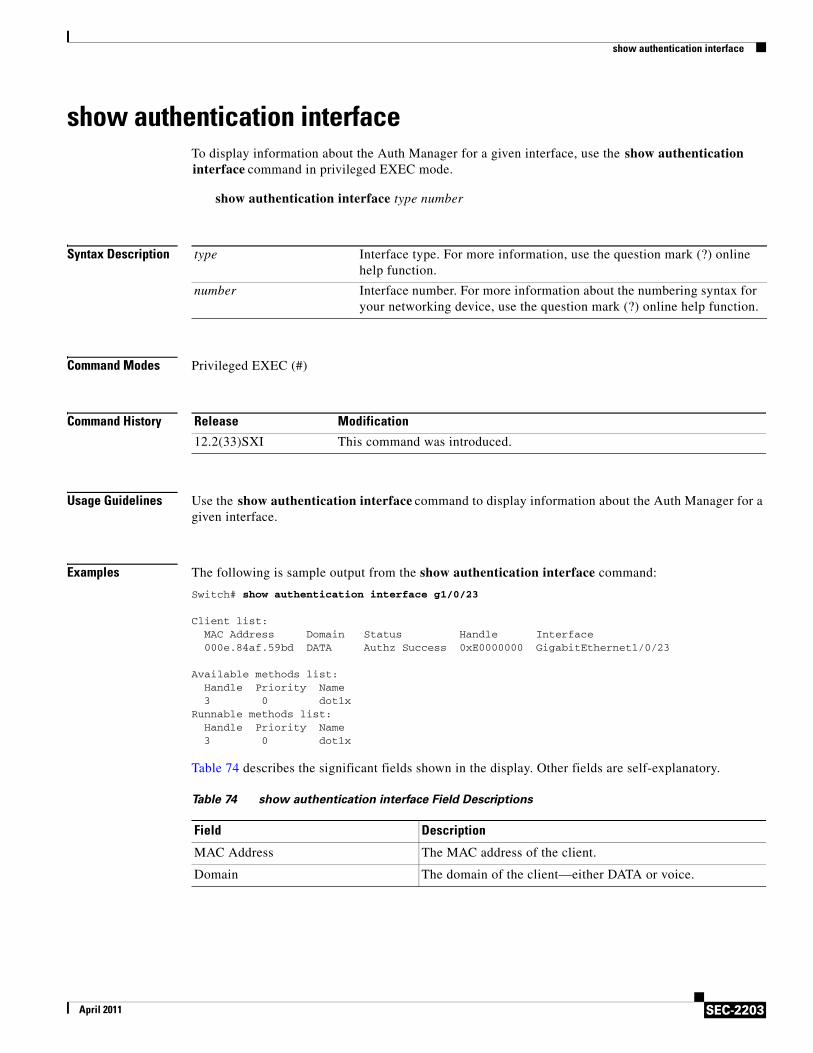
show authentication interface
SEC-2203April 2011
show authentication interfaceTo display information about the Auth Manager for a given interface, use the show authentication interface command in privileged EXEC mode.
show authentication interface type number
Syntax Description
Command Modes Privileged EXEC (#)
Command History
Usage Guidelines Use the show authentication interface command to display information about the Auth Manager for a given interface.
Examples The following is sample output from the show authentication interface command:
Switch# show authentication interface g1/0/23
Client list:MAC Address Domain Status Handle Interface000e.84af.59bd DATA Authz Success 0xE0000000 GigabitEthernet1/0/23
Available methods list:Handle Priority Name3 0 dot1x
Runnable methods list:Handle Priority Name3 0 dot1x
Table 74 describes the significant fields shown in the display. Other fields are self-explanatory.
type Interface type. For more information, use the question mark (?) online help function.
number Interface number. For more information about the numbering syntax for your networking device, use the question mark (?) online help function.
Release Modification
12.2(33)SXI This command was introduced.
Table 74 show authentication interface Field Descriptions
Field Description
MAC Address The MAC address of the client.
Domain The domain of the client—either DATA or voice.
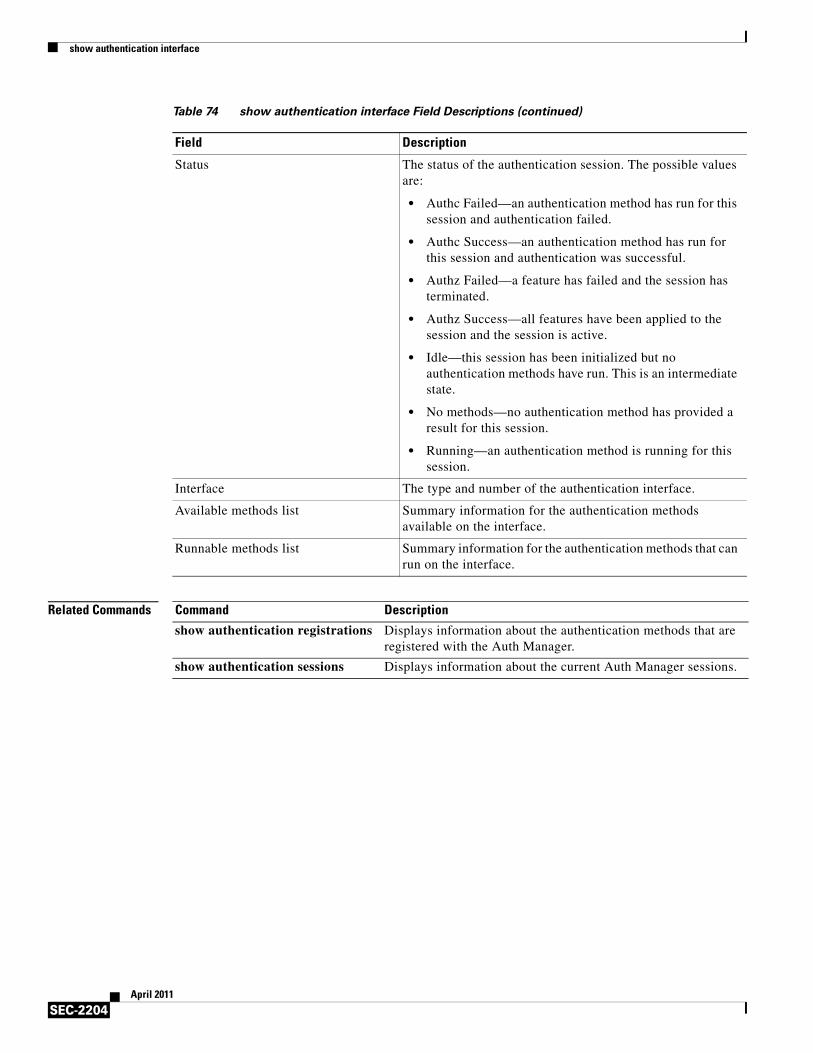
show authentication interface
SEC-2204April 2011
Related Commands
Status The status of the authentication session. The possible values are:
• Authc Failed—an authentication method has run for this session and authentication failed.
• Authc Success—an authentication method has run for this session and authentication was successful.
• Authz Failed—a feature has failed and the session has terminated.
• Authz Success—all features have been applied to the session and the session is active.
• Idle—this session has been initialized but no authentication methods have run. This is an intermediate state.
• No methods—no authentication method has provided a result for this session.
• Running—an authentication method is running for this session.
Interface The type and number of the authentication interface.
Available methods list Summary information for the authentication methods available on the interface.
Runnable methods list Summary information for the authentication methods that can run on the interface.
Table 74 show authentication interface Field Descriptions (continued)
Field Description
Command Description
show authentication registrations Displays information about the authentication methods that are registered with the Auth Manager.
show authentication sessions Displays information about the current Auth Manager sessions.
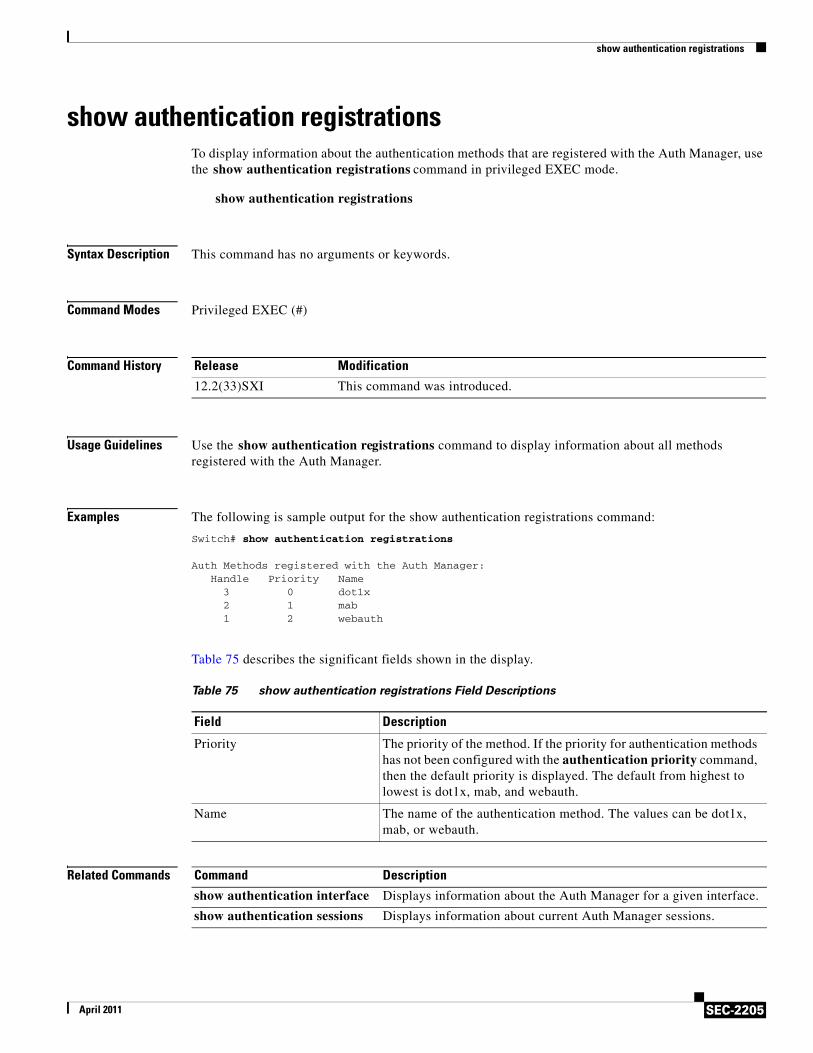
show authentication registrations
SEC-2205April 2011
show authentication registrations To display information about the authentication methods that are registered with the Auth Manager, use the show authentication registrations command in privileged EXEC mode.
show authentication registrations
Syntax Description This command has no arguments or keywords.
Command Modes Privileged EXEC (#)
Command History
Usage Guidelines Use the show authentication registrations command to display information about all methods registered with the Auth Manager.
Examples The following is sample output for the show authentication registrations command:
Switch# show authentication registrations
Auth Methods registered with the Auth Manager:Handle Priority Name
3 0 dot1x2 1 mab1 2 webauth
Table 75 describes the significant fields shown in the display.
Related Commands
Release Modification
12.2(33)SXI This command was introduced.
Table 75 show authentication registrations Field Descriptions
Field Description
Priority The priority of the method. If the priority for authentication methods has not been configured with the authentication priority command, then the default priority is displayed. The default from highest to lowest is dot1x, mab, and webauth.
Name The name of the authentication method. The values can be dot1x, mab, or webauth.
Command Description
show authentication interface Displays information about the Auth Manager for a given interface.
show authentication sessions Displays information about current Auth Manager sessions.
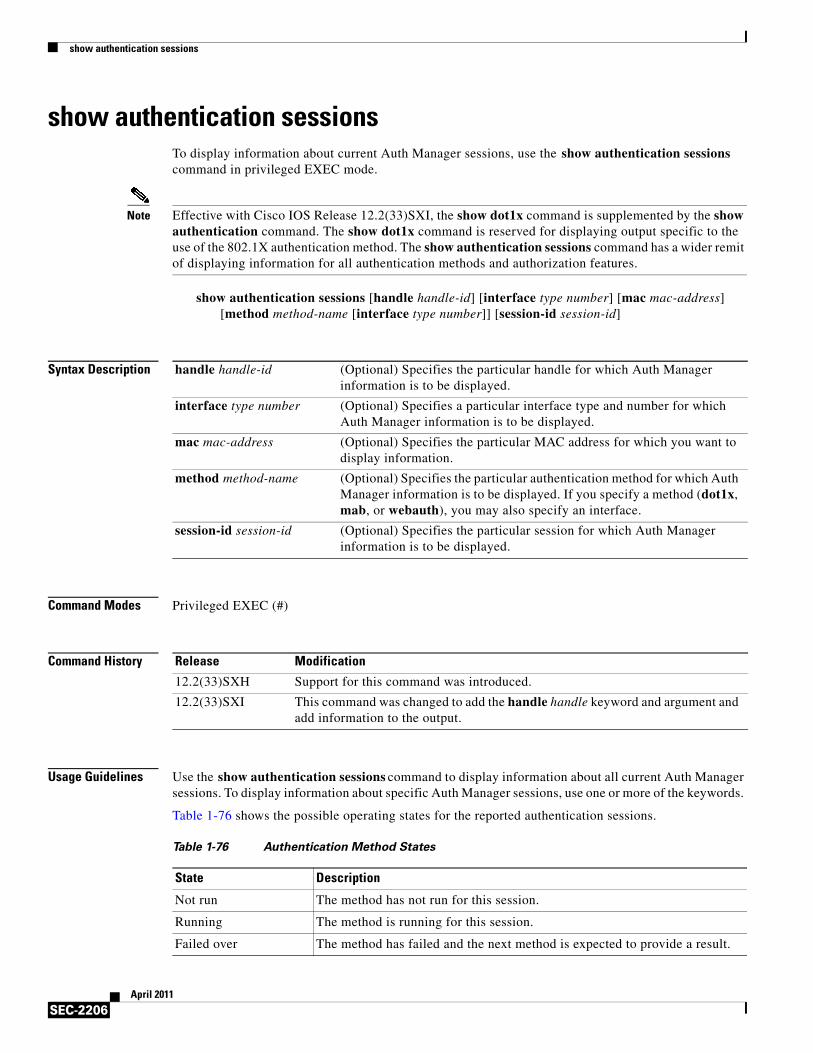
show authentication sessions
SEC-2206April 2011
show authentication sessionsTo display information about current Auth Manager sessions, use the show authentication sessions command in privileged EXEC mode.
Note Effective with Cisco IOS Release 12.2(33)SXI, the show dot1x command is supplemented by the show authentication command. The show dot1x command is reserved for displaying output specific to the use of the 802.1X authentication method. The show authentication sessions command has a wider remit of displaying information for all authentication methods and authorization features.
show authentication sessions [handle handle-id] [interface type number] [mac mac-address] [method method-name [interface type number]] [session-id session-id]
Syntax Description
Command Modes Privileged EXEC (#)
Command History
Usage Guidelines Use the show authentication sessions command to display information about all current Auth Manager sessions. To display information about specific Auth Manager sessions, use one or more of the keywords.
Table 1-76 shows the possible operating states for the reported authentication sessions.
handle handle-id (Optional) Specifies the particular handle for which Auth Manager information is to be displayed.
interface type number (Optional) Specifies a particular interface type and number for which Auth Manager information is to be displayed.
mac mac-address (Optional) Specifies the particular MAC address for which you want to display information.
method method-name (Optional) Specifies the particular authentication method for which Auth Manager information is to be displayed. If you specify a method (dot1x, mab, or webauth), you may also specify an interface.
session-id session-id (Optional) Specifies the particular session for which Auth Manager information is to be displayed.
Release Modification
12.2(33)SXH Support for this command was introduced.
12.2(33)SXI This command was changed to add the handle handle keyword and argument and add information to the output.
Table 1-76 Authentication Method States
State Description
Not run The method has not run for this session.
Running The method is running for this session.
Failed over The method has failed and the next method is expected to provide a result.
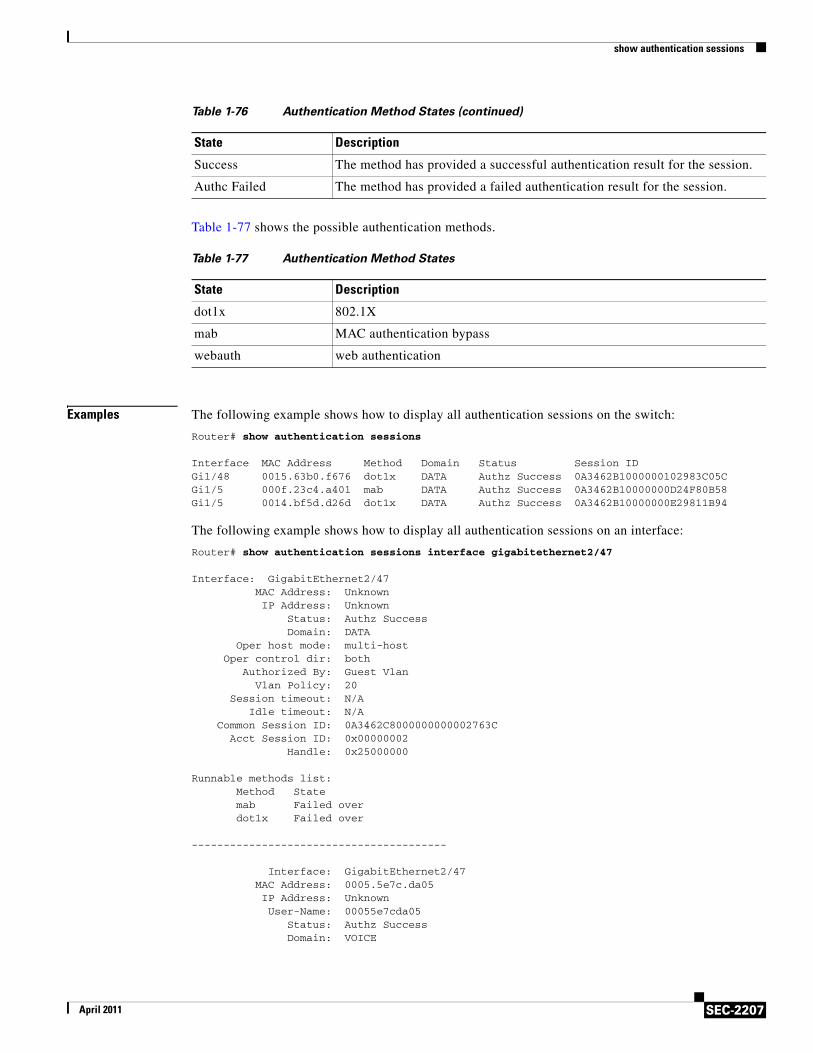
show authentication sessions
SEC-2207April 2011
Table 1-77 shows the possible authentication methods.
Examples The following example shows how to display all authentication sessions on the switch:
Router# show authentication sessions
Interface MAC Address Method Domain Status Session IDGi1/48 0015.63b0.f676 dot1x DATA Authz Success 0A3462B1000000102983C05CGi1/5 000f.23c4.a401 mab DATA Authz Success 0A3462B10000000D24F80B58Gi1/5 0014.bf5d.d26d dot1x DATA Authz Success 0A3462B10000000E29811B94
The following example shows how to display all authentication sessions on an interface:
Router# show authentication sessions interface gigabitethernet2/47
Interface: GigabitEthernet2/47 MAC Address: Unknown IP Address: Unknown Status: Authz Success Domain: DATA Oper host mode: multi-host Oper control dir: both Authorized By: Guest Vlan Vlan Policy: 20 Session timeout: N/A Idle timeout: N/A Common Session ID: 0A3462C8000000000002763C Acct Session ID: 0x00000002 Handle: 0x25000000
Runnable methods list: Method State mab Failed over dot1x Failed over
----------------------------------------
Interface: GigabitEthernet2/47 MAC Address: 0005.5e7c.da05 IP Address: Unknown User-Name: 00055e7cda05 Status: Authz Success Domain: VOICE
Success The method has provided a successful authentication result for the session.
Authc Failed The method has provided a failed authentication result for the session.
Table 1-76 Authentication Method States (continued)
State Description
Table 1-77 Authentication Method States
State Description
dot1x 802.1X
mab MAC authentication bypass
webauth web authentication
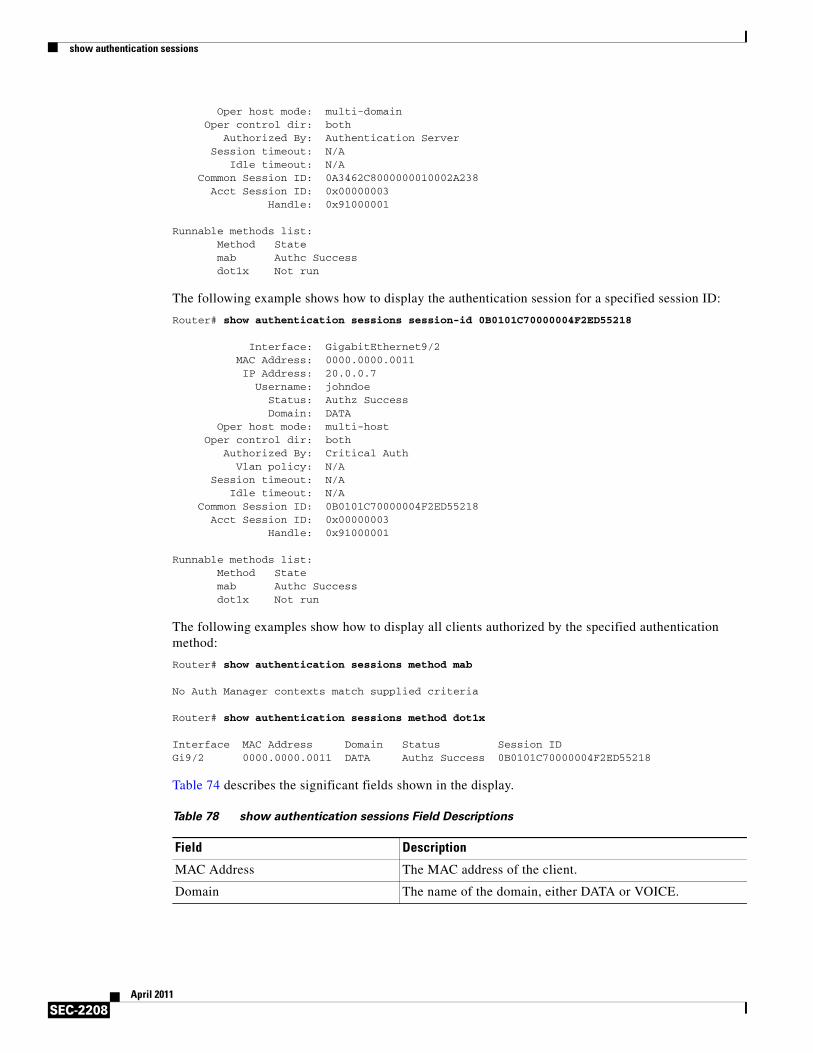
show authentication sessions
SEC-2208April 2011
Oper host mode: multi-domain Oper control dir: both Authorized By: Authentication Server Session timeout: N/A Idle timeout: N/A Common Session ID: 0A3462C8000000010002A238 Acct Session ID: 0x00000003 Handle: 0x91000001
Runnable methods list: Method State mab Authc Success dot1x Not run
The following example shows how to display the authentication session for a specified session ID:
Router# show authentication sessions session-id 0B0101C70000004F2ED55218
Interface: GigabitEthernet9/2 MAC Address: 0000.0000.0011 IP Address: 20.0.0.7 Username: johndoe Status: Authz Success Domain: DATA Oper host mode: multi-host Oper control dir: both Authorized By: Critical Auth
Vlan policy: N/ASession timeout: N/A
Idle timeout: N/A Common Session ID: 0B0101C70000004F2ED55218
Acct Session ID: 0x00000003 Handle: 0x91000001
Runnable methods list: Method State mab Authc Success dot1x Not run
The following examples show how to display all clients authorized by the specified authentication method:
Router# show authentication sessions method mab
No Auth Manager contexts match supplied criteria
Router# show authentication sessions method dot1x
Interface MAC Address Domain Status Session IDGi9/2 0000.0000.0011 DATA Authz Success 0B0101C70000004F2ED55218
Table 74 describes the significant fields shown in the display.
Table 78 show authentication sessions Field Descriptions
Field Description
MAC Address The MAC address of the client.
Domain The name of the domain, either DATA or VOICE.
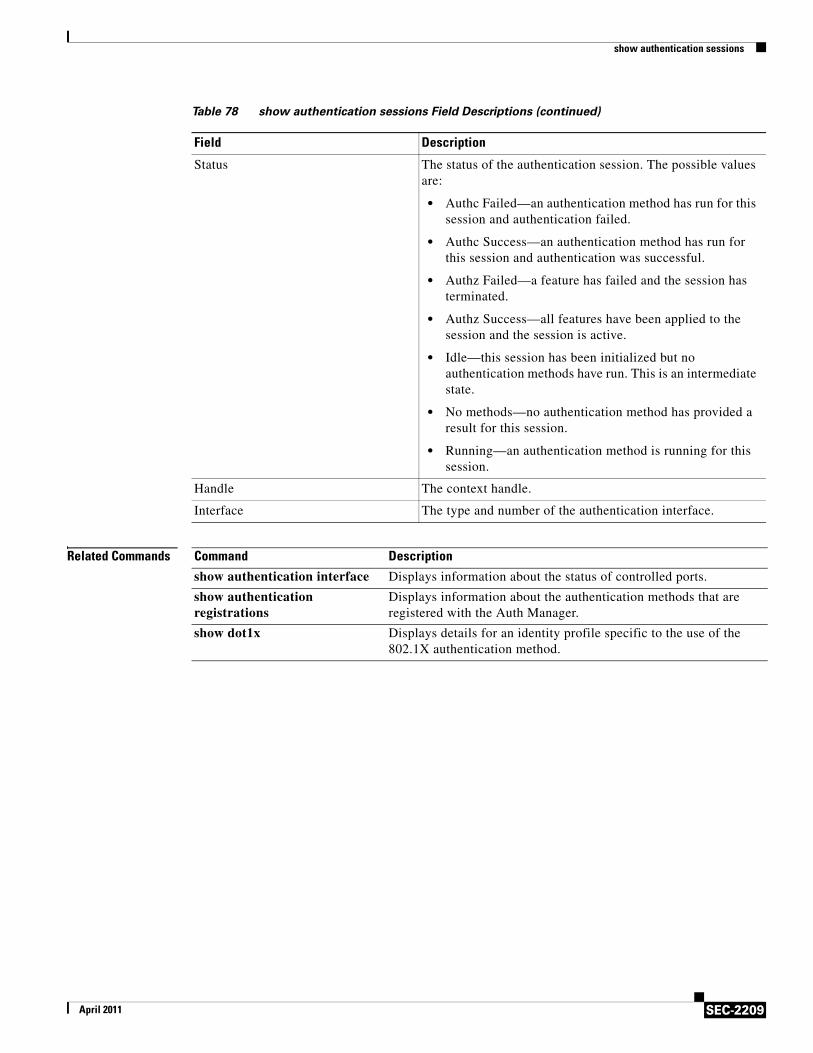
show authentication sessions
SEC-2209April 2011
Related Commands
Status The status of the authentication session. The possible values are:
• Authc Failed—an authentication method has run for this session and authentication failed.
• Authc Success—an authentication method has run for this session and authentication was successful.
• Authz Failed—a feature has failed and the session has terminated.
• Authz Success—all features have been applied to the session and the session is active.
• Idle—this session has been initialized but no authentication methods have run. This is an intermediate state.
• No methods—no authentication method has provided a result for this session.
• Running—an authentication method is running for this session.
Handle The context handle.
Interface The type and number of the authentication interface.
Table 78 show authentication sessions Field Descriptions (continued)
Field Description
Command Description
show authentication interface Displays information about the status of controlled ports.
show authentication registrations
Displays information about the authentication methods that are registered with the Auth Manager.
show dot1x Displays details for an identity profile specific to the use of the 802.1X authentication method.
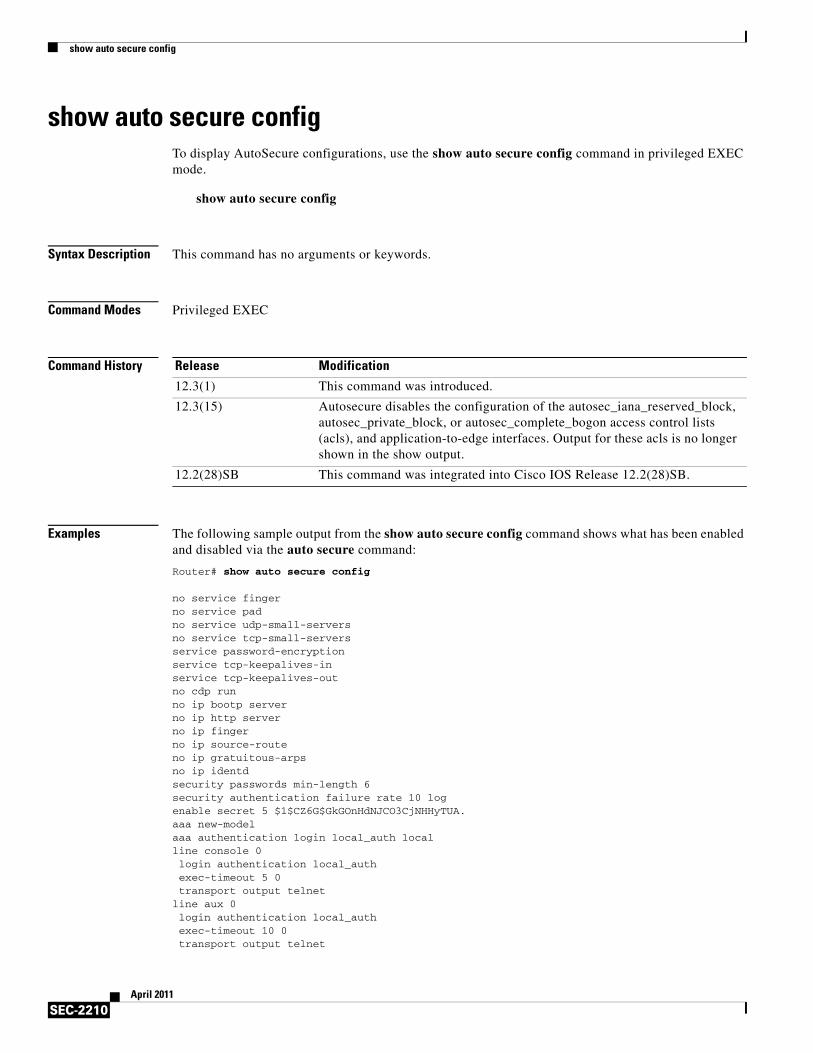
show auto secure config
SEC-2210April 2011
show auto secure configTo display AutoSecure configurations, use the show auto secure config command in privileged EXEC mode.
show auto secure config
Syntax Description This command has no arguments or keywords.
Command Modes Privileged EXEC
Command History
Examples The following sample output from the show auto secure config command shows what has been enabled and disabled via the auto secure command:
Router# show auto secure config
no service fingerno service padno service udp-small-serversno service tcp-small-serversservice password-encryptionservice tcp-keepalives-inservice tcp-keepalives-outno cdp runno ip bootp serverno ip http serverno ip fingerno ip source-routeno ip gratuitous-arpsno ip identdsecurity passwords min-length 6security authentication failure rate 10 logenable secret 5 $1$CZ6G$GkGOnHdNJCO3CjNHHyTUA.aaa new-modelaaa authentication login local_auth localline console 0 login authentication local_auth exec-timeout 5 0 transport output telnetline aux 0 login authentication local_auth exec-timeout 10 0 transport output telnet
Release Modification
12.3(1) This command was introduced.
12.3(15) Autosecure disables the configuration of the autosec_iana_reserved_block, autosec_private_block, or autosec_complete_bogon access control lists (acls), and application-to-edge interfaces. Output for these acls is no longer shown in the show output.
12.2(28)SB This command was integrated into Cisco IOS Release 12.2(28)SB.
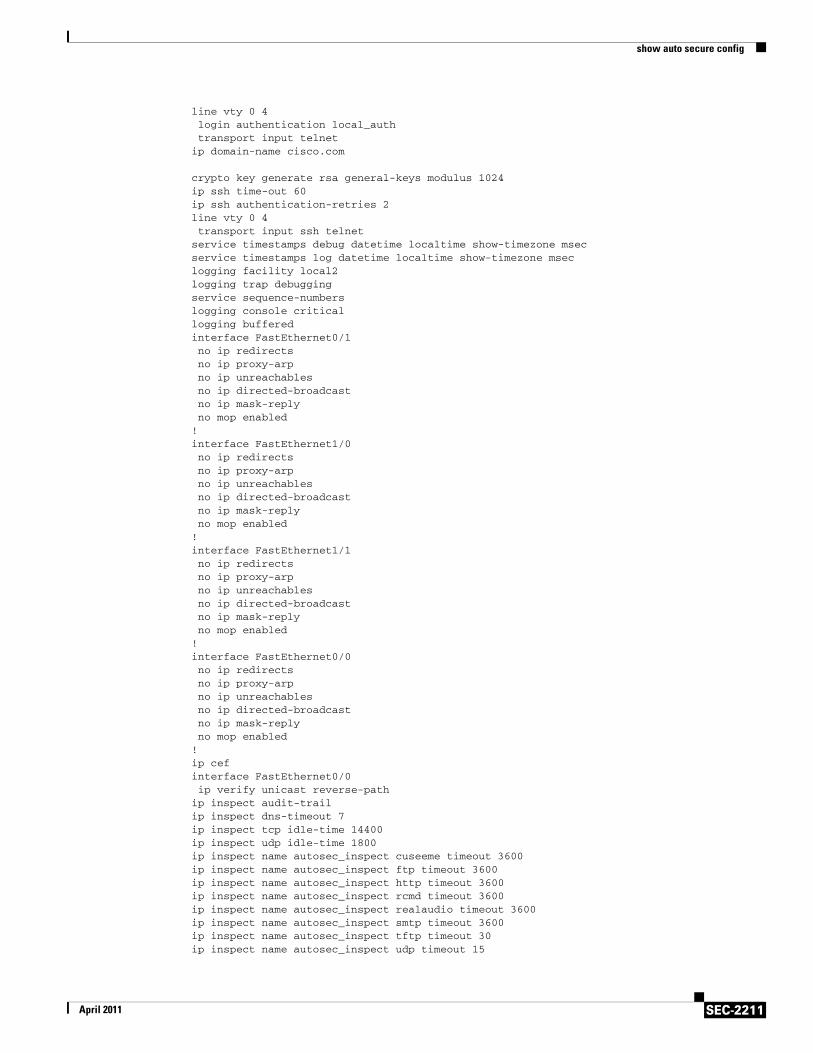
show auto secure config
SEC-2211April 2011
line vty 0 4 login authentication local_auth transport input telnetip domain-name cisco.com
crypto key generate rsa general-keys modulus 1024ip ssh time-out 60ip ssh authentication-retries 2line vty 0 4 transport input ssh telnetservice timestamps debug datetime localtime show-timezone msecservice timestamps log datetime localtime show-timezone mseclogging facility local2logging trap debuggingservice sequence-numberslogging console criticallogging bufferedinterface FastEthernet0/1 no ip redirects no ip proxy-arp no ip unreachables no ip directed-broadcast no ip mask-reply no mop enabled!interface FastEthernet1/0 no ip redirects no ip proxy-arp no ip unreachables no ip directed-broadcast no ip mask-reply no mop enabled!interface FastEthernet1/1 no ip redirects no ip proxy-arp no ip unreachables no ip directed-broadcast no ip mask-reply no mop enabled!interface FastEthernet0/0 no ip redirects no ip proxy-arp no ip unreachables no ip directed-broadcast no ip mask-reply no mop enabled!ip cefinterface FastEthernet0/0 ip verify unicast reverse-pathip inspect audit-trailip inspect dns-timeout 7ip inspect tcp idle-time 14400ip inspect udp idle-time 1800ip inspect name autosec_inspect cuseeme timeout 3600ip inspect name autosec_inspect ftp timeout 3600ip inspect name autosec_inspect http timeout 3600ip inspect name autosec_inspect rcmd timeout 3600ip inspect name autosec_inspect realaudio timeout 3600ip inspect name autosec_inspect smtp timeout 3600ip inspect name autosec_inspect tftp timeout 30ip inspect name autosec_inspect udp timeout 15

show auto secure config
SEC-2212April 2011
ip inspect name autosec_inspect tcp timeout 3600access-list 100 deny ip any anyinterface FastEthernet0/0 ip inspect autosec_inspect out ip access-group 100 in
Related Commands Command Description
auto secure Secures the management and forwarding planes of the router.

show call admission statistics
SEC-2213April 2011
show call admission statisticsTo monitor the global Call Admission Control (CAC) configuration parameters and the behavior of CAC, use the show call admission statistics command in user EXEC or privileged EXEC mode.
show call admission statistics
Syntax Description This command has no arguments or keywords.
Command Modes User EXECPrivileged EXEC
Command History
Examples The following is sample output from the show call admission statistics command:
Router# show call admission statistics
Total Call admission charges: 0, limit 25 Total calls rejected 12, accepted 51 Load metric: charge 0, unscaled 0
Table 79 describes the significant fields shown in the display.
Release Modification
12.3(8)T This command was introduced.
12.2(18)SXD1 This command was integrated into Cisco IOS Release 12.2(18)SXD1.
12.2(33)SRA This command was integrated into Cisco IOS Release 12.2(33)SRA.
12.2(33)SXH This command was integrated into Cisco IOS Release 12.2(33)SXH.
Table 79 show call admission statistics Field Descriptions
Field Description
Total call admission charges Percentage of system resources being charged to the system. If you configured a resource limit, SA requests are dropped when this field is equal to that limit.
limit Maximum allowed number of total call admission charges. Valid values are 0 to 100000.
Total calls rejected Number of SA requests that were not accepted.
accepted Number of SA requests that were accepted.
unscaled Not related to IKE. This value always is 0.

show call admission statistics
SEC-2214April 2011
Related Commands Command Description
call admission limit Instructs IKE to drop calls when a specified percentage of system resources are being consumed.
crypto call admission limit Specifies the maximum number of IKE SA requests allowed before IKE begins rejecting new IKE SA requests.
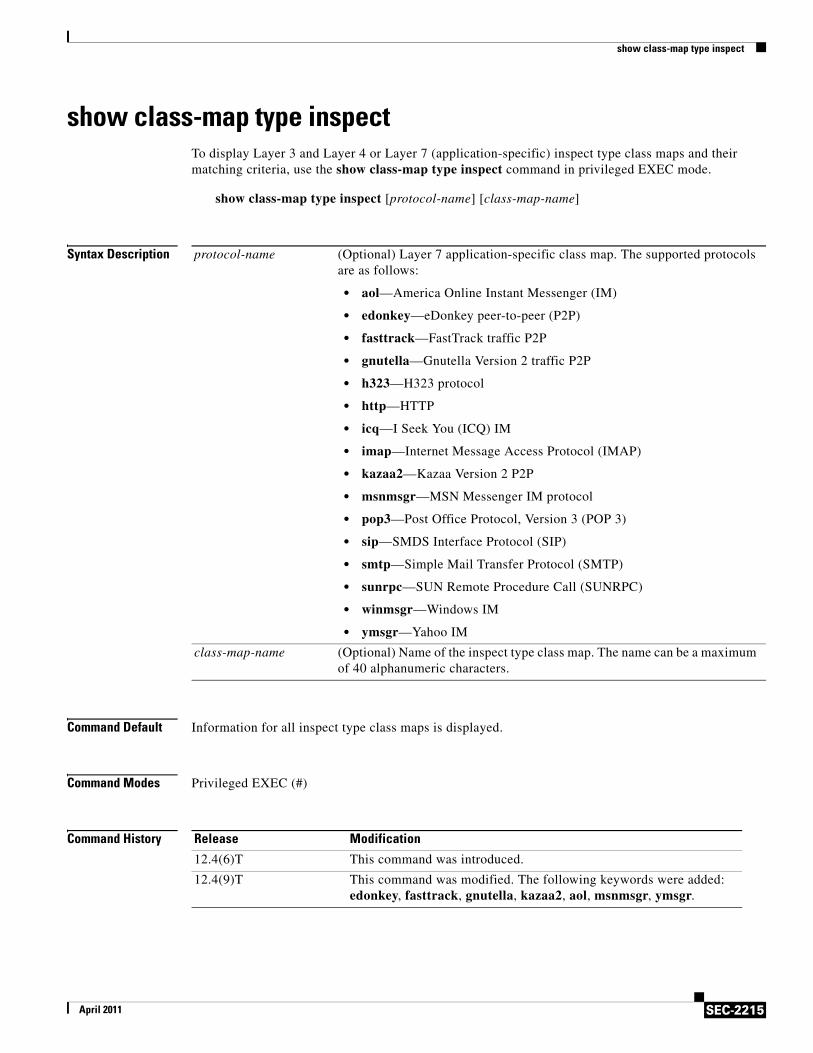
show class-map type inspect
SEC-2215April 2011
show class-map type inspectTo display Layer 3 and Layer 4 or Layer 7 (application-specific) inspect type class maps and their matching criteria, use the show class-map type inspect command in privileged EXEC mode.
show class-map type inspect [protocol-name] [class-map-name]
Syntax Description
Command Default Information for all inspect type class maps is displayed.
Command Modes Privileged EXEC (#)
Command History
protocol-name (Optional) Layer 7 application-specific class map. The supported protocols are as follows:
• aol—America Online Instant Messenger (IM)
• edonkey—eDonkey peer-to-peer (P2P)
• fasttrack—FastTrack traffic P2P
• gnutella—Gnutella Version 2 traffic P2P
• h323—H323 protocol
• http—HTTP
• icq—I Seek You (ICQ) IM
• imap—Internet Message Access Protocol (IMAP)
• kazaa2—Kazaa Version 2 P2P
• msnmsgr—MSN Messenger IM protocol
• pop3—Post Office Protocol, Version 3 (POP 3)
• sip—SMDS Interface Protocol (SIP)
• smtp—Simple Mail Transfer Protocol (SMTP)
• sunrpc—SUN Remote Procedure Call (SUNRPC)
• winmsgr—Windows IM
• ymsgr—Yahoo IM
class-map-name (Optional) Name of the inspect type class map. The name can be a maximum of 40 alphanumeric characters.
Release Modification
12.4(6)T This command was introduced.
12.4(9)T This command was modified. The following keywords were added: edonkey, fasttrack, gnutella, kazaa2, aol, msnmsgr, ymsgr.
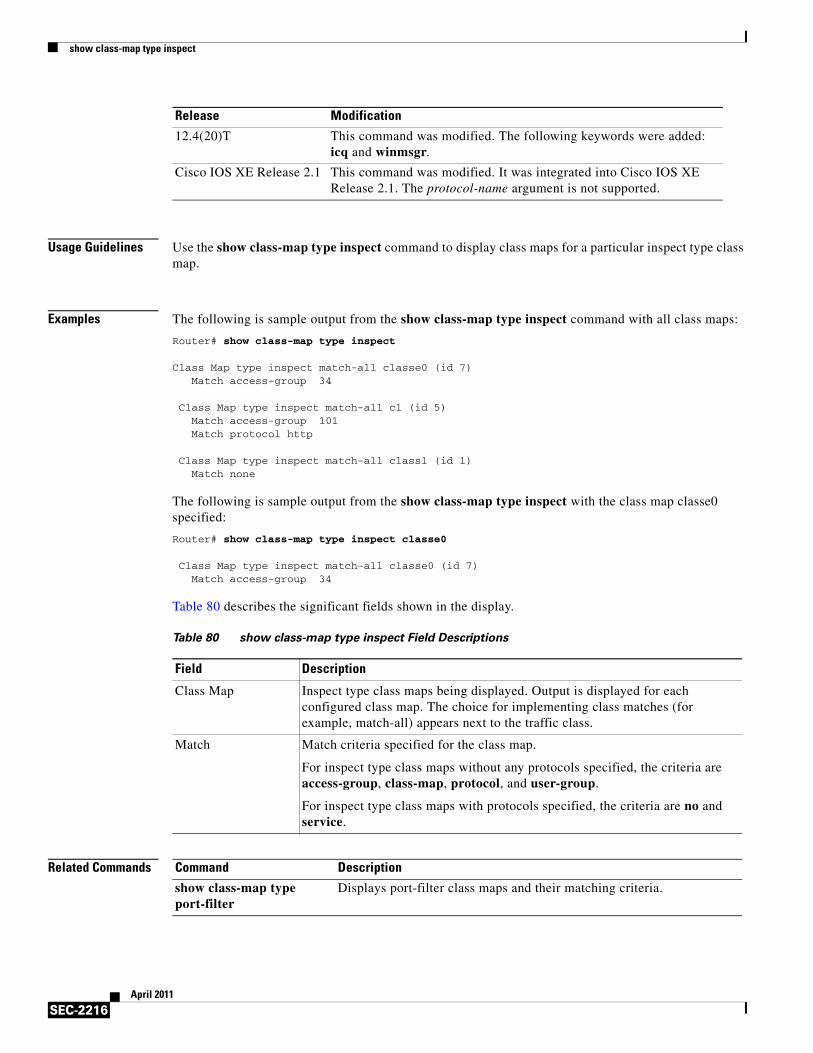
show class-map type inspect
SEC-2216April 2011
Usage Guidelines Use the show class-map type inspect command to display class maps for a particular inspect type class map.
Examples The following is sample output from the show class-map type inspect command with all class maps:
Router# show class-map type inspect
Class Map type inspect match-all classe0 (id 7) Match access-group 34
Class Map type inspect match-all c1 (id 5) Match access-group 101 Match protocol http
Class Map type inspect match-all class1 (id 1) Match none
The following is sample output from the show class-map type inspect with the class map classe0 specified:
Router# show class-map type inspect classe0
Class Map type inspect match-all classe0 (id 7) Match access-group 34
Table 80 describes the significant fields shown in the display.
Related Commands
12.4(20)T This command was modified. The following keywords were added: icq and winmsgr.
Cisco IOS XE Release 2.1 This command was modified. It was integrated into Cisco IOS XE Release 2.1. The protocol-name argument is not supported.
Release Modification
Table 80 show class-map type inspect Field Descriptions
Field Description
Class Map Inspect type class maps being displayed. Output is displayed for each configured class map. The choice for implementing class matches (for example, match-all) appears next to the traffic class.
Match Match criteria specified for the class map.
For inspect type class maps without any protocols specified, the criteria are access-group, class-map, protocol, and user-group.
For inspect type class maps with protocols specified, the criteria are no and service.
Command Description
show class-map type port-filter
Displays port-filter class maps and their matching criteria.
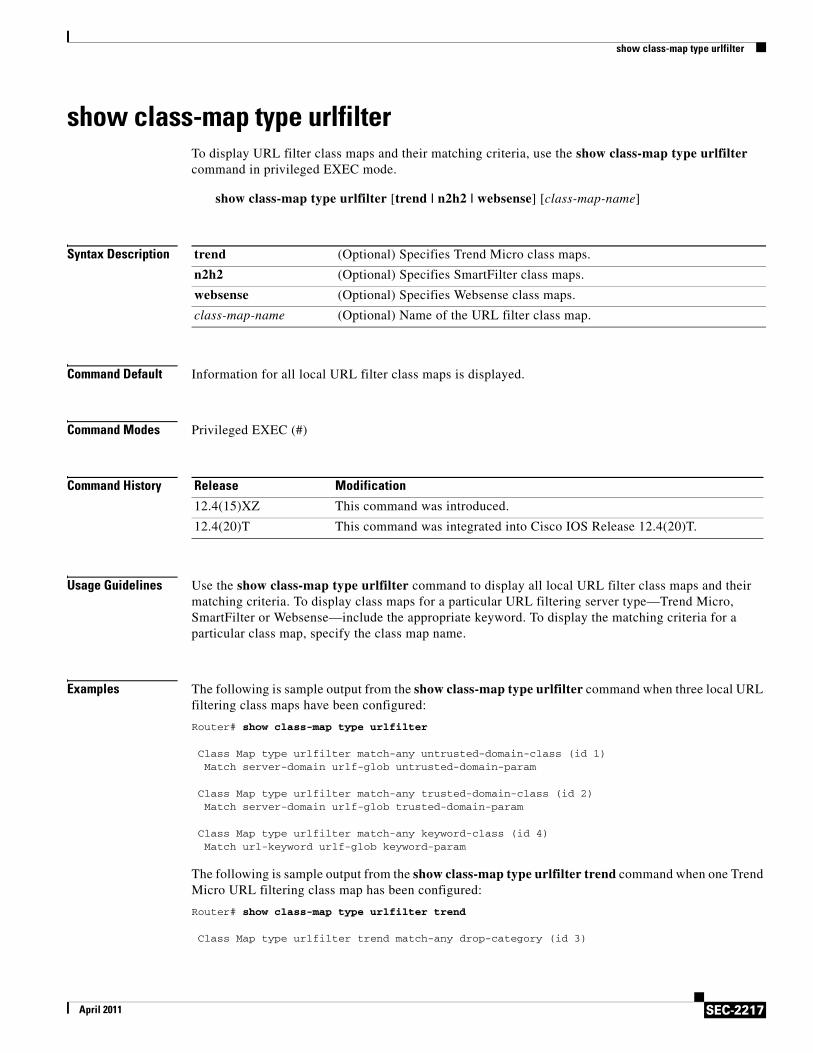
show class-map type urlfilter
SEC-2217April 2011
show class-map type urlfilter To display URL filter class maps and their matching criteria, use the show class-map type urlfilter command in privileged EXEC mode.
show class-map type urlfilter [trend | n2h2 | websense] [class-map-name]
Syntax Description
Command Default Information for all local URL filter class maps is displayed.
Command Modes Privileged EXEC (#)
Command History
Usage Guidelines Use the show class-map type urlfilter command to display all local URL filter class maps and their matching criteria. To display class maps for a particular URL filtering server type—Trend Micro, SmartFilter or Websense—include the appropriate keyword. To display the matching criteria for a particular class map, specify the class map name.
Examples The following is sample output from the show class-map type urlfilter command when three local URL filtering class maps have been configured:
Router# show class-map type urlfilter
Class Map type urlfilter match-any untrusted-domain-class (id 1)Match server-domain urlf-glob untrusted-domain-param
Class Map type urlfilter match-any trusted-domain-class (id 2)Match server-domain urlf-glob trusted-domain-param
Class Map type urlfilter match-any keyword-class (id 4)Match url-keyword urlf-glob keyword-param
The following is sample output from the show class-map type urlfilter trend command when one Trend Micro URL filtering class map has been configured:
Router# show class-map type urlfilter trend
Class Map type urlfilter trend match-any drop-category (id 3)
trend (Optional) Specifies Trend Micro class maps.
n2h2 (Optional) Specifies SmartFilter class maps.
websense (Optional) Specifies Websense class maps.
class-map-name (Optional) Name of the URL filter class map.
Release Modification
12.4(15)XZ This command was introduced.
12.4(20)T This command was integrated into Cisco IOS Release 12.4(20)T.
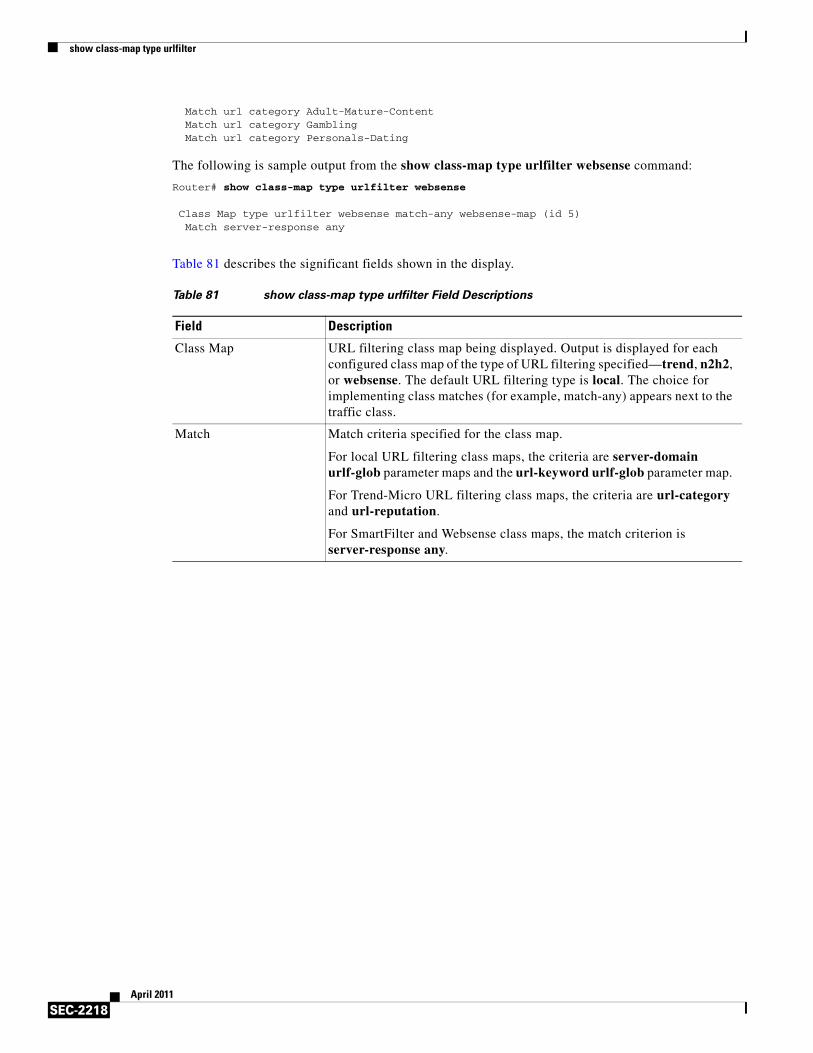
show class-map type urlfilter
SEC-2218April 2011
Match url category Adult-Mature-ContentMatch url category GamblingMatch url category Personals-Dating
The following is sample output from the show class-map type urlfilter websense command:
Router# show class-map type urlfilter websense
Class Map type urlfilter websense match-any websense-map (id 5)Match server-response any
Table 81 describes the significant fields shown in the display.
Table 81 show class-map type urlfilter Field Descriptions
Field Description
Class Map URL filtering class map being displayed. Output is displayed for each configured class map of the type of URL filtering specified—trend, n2h2, or websense. The default URL filtering type is local. The choice for implementing class matches (for example, match-any) appears next to the traffic class.
Match Match criteria specified for the class map.
For local URL filtering class maps, the criteria are server-domain urlf-glob parameter maps and the url-keyword urlf-glob parameter map.
For Trend-Micro URL filtering class maps, the criteria are url-category and url-reputation.
For SmartFilter and Websense class maps, the match criterion is server-response any.