Embed Size (px)
Citation preview
SPLINTING & BRACING CHOICES SPLINTING & BRACING CHOICES IN VETERINARY MEDICINEIN VETERINARY MEDICINE
INCLUDINGINCLUDINGAN INTRODUCTION TO CUSTOM AN INTRODUCTION TO CUSTOM
SPLINTING WITH THERMOPLASTICSSPLINTING WITH THERMOPLASTICS
COMBINED SECTIONS MEETING 2006COMBINED SECTIONS MEETING 2006San Diego, CASan Diego, CA
February 1February 1--5, 20065, 2006
Ilaria F. Borghese, MS, MA, OTR/LIlaria F. Borghese, MS, MA, OTR/LTheraThera--Paw, Inc.Paw, Inc.

Course DescriptionCourse DescriptionThis course offers attendees a review of currently This course offers attendees a review of currently available splinting and bracing options for available splinting and bracing options for immobilization, support, protection, and immobilization, support, protection, and assistance with function for small animals.assistance with function for small animals.This course offers attendees an introduction to This course offers attendees an introduction to custom splinting with lowcustom splinting with low--temperature temperature thermoplastics, and discusses commonly used thermoplastics, and discusses commonly used materials and tools for custom splinting.materials and tools for custom splinting.This course introduces basic mechanical and This course introduces basic mechanical and design principles for custom splinting, and ways design principles for custom splinting, and ways to splint for various conditions.to splint for various conditions.This course discusses the features and uses of This course discusses the features and uses of various static and dynamic splints and braces.various static and dynamic splints and braces.
Course ObjectivesCourse ObjectivesThe attendee will:The attendee will:
Identify a variety of preIdentify a variety of pre--fabricated, customfabricated, custom--fitted, and customfitted, and custom--made made orthoticorthotic, splinting, and , splinting, and bracing devices.bracing devices.
Identify materials and tools used in custom Identify materials and tools used in custom splinting with lowsplinting with low--temperature thermoplastics.temperature thermoplastics.
Acquire knowledge of the steps for custom splint Acquire knowledge of the steps for custom splint fabrication. fabrication.
Gain a basic understanding of the mechanical Gain a basic understanding of the mechanical and design principles used in custom splinting, and design principles used in custom splinting, that will optimize splint fit and patient that will optimize splint fit and patient compliance.compliance.
ContentsContentsIntroduction Introduction -- Splinting and bracing choices Splinting and bracing choices in human medicinein human medicineSplinting and bracing choices in veterinary Splinting and bracing choices in veterinary medicinemedicineIntroduction to custom splinting with Introduction to custom splinting with thermoplasticsthermoplasticsCustom splinting materials and toolsCustom splinting materials and toolsProcedure for fabricating a custom Procedure for fabricating a custom thermoplastic splintthermoplastic splintOptimizing patient and owner complianceOptimizing patient and owner complianceSplint examples and associated conditionsSplint examples and associated conditions
EXAMPLES OFEXAMPLES OF
SPLINTS SPLINTS && BRACESBRACES
ININ
HUMAN MEDICINEHUMAN MEDICINE
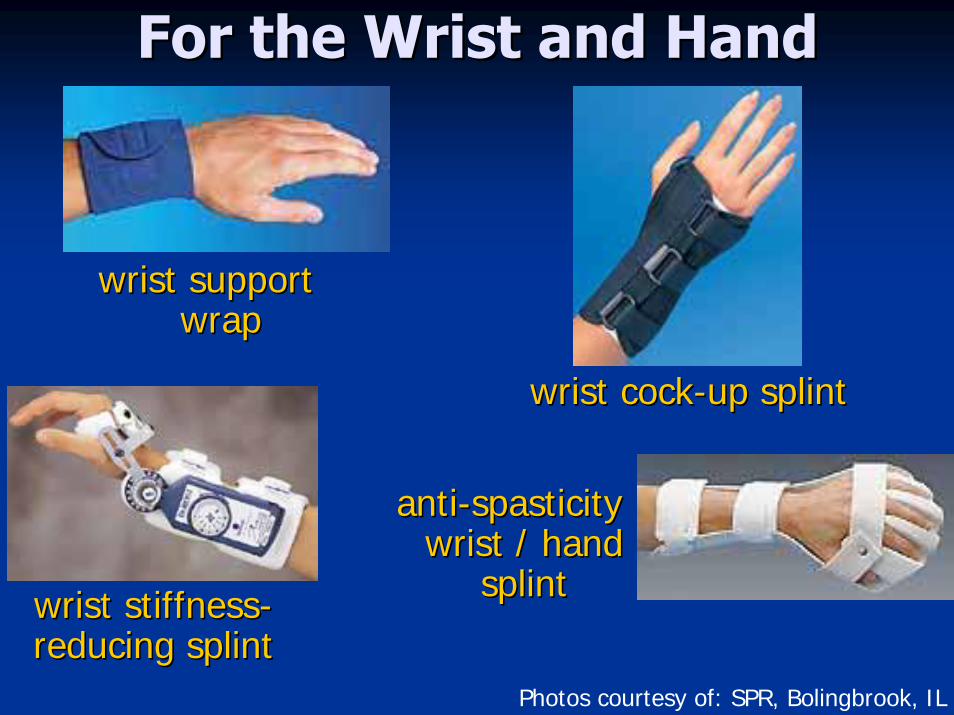
For the Wrist and HandFor the Wrist and Hand
wrist cockwrist cock--up splintup splint
wrist support wrist support wrapwrap
wrist stiffnesswrist stiffness--reducing splintreducing splint
antianti--spasticityspasticitywrist / hand wrist / hand
splintsplint
Photos courtesy of: SPR, Bolingbrook, IL
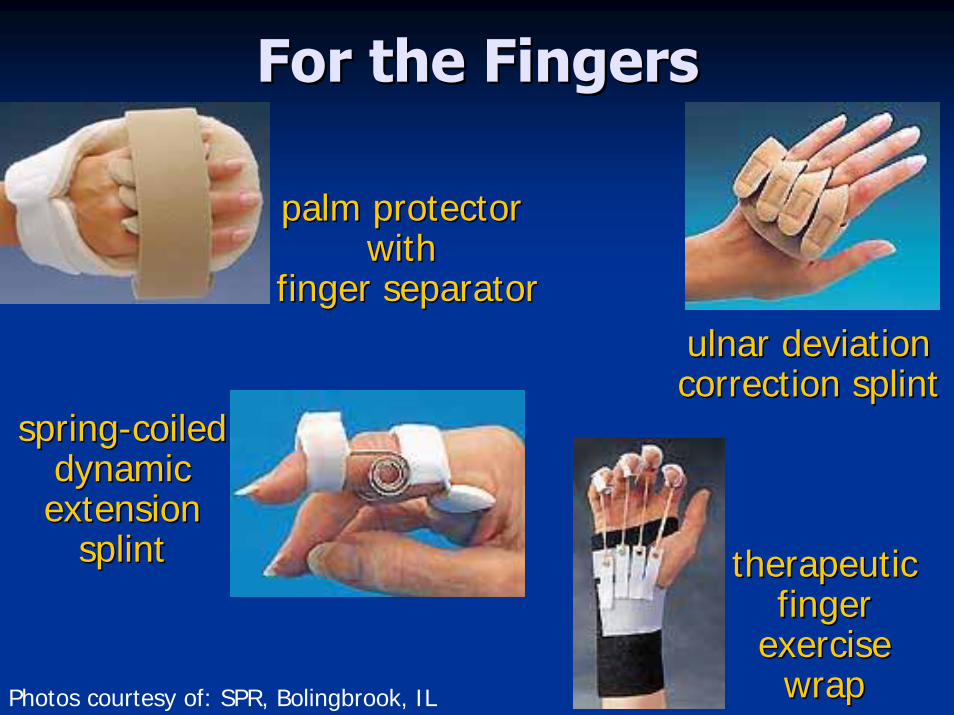
For the FingersFor the Fingers
palm protector palm protector withwith
finger separatorfinger separatorulnarulnar deviation deviation correction splintcorrection splint
springspring--coiled coiled dynamic dynamic extension extension
splintsplint therapeutic therapeutic finger finger
exercise exercise wrapwrapPhotos courtesy of: SPR, Bolingbrook, IL
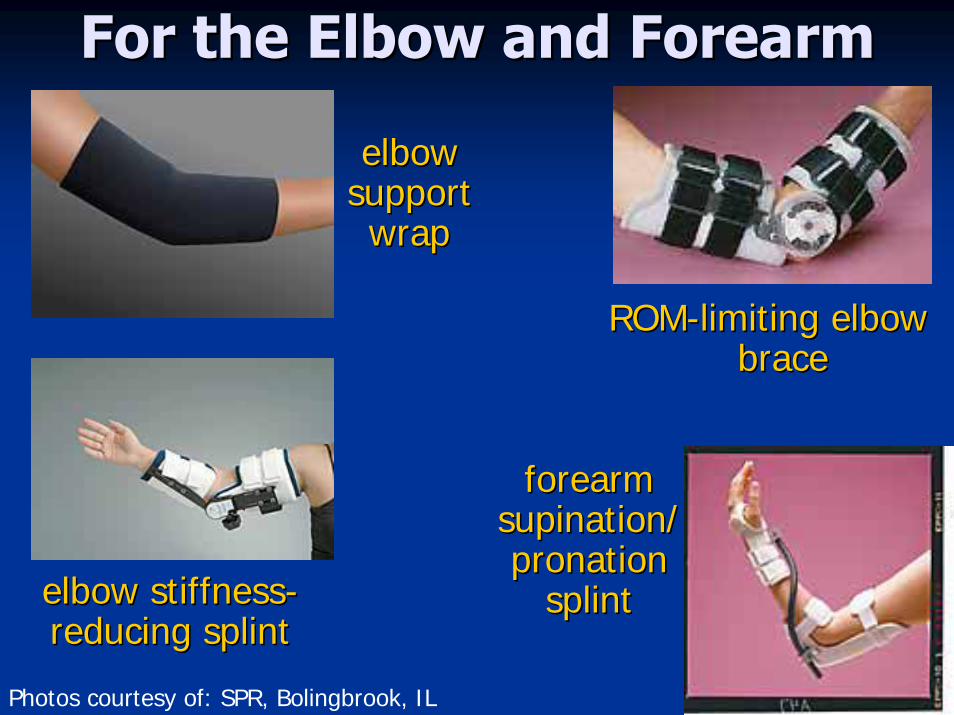
For the Elbow and ForearmFor the Elbow and Forearm
ROMROM--limiting elbow limiting elbow bracebrace
elbow elbow support support wrapwrap
elbow stiffnesselbow stiffness--reducing splintreducing splint
forearm forearm supinationsupination//pronationpronation
splintsplint
Photos courtesy of: SPR, Bolingbrook, IL
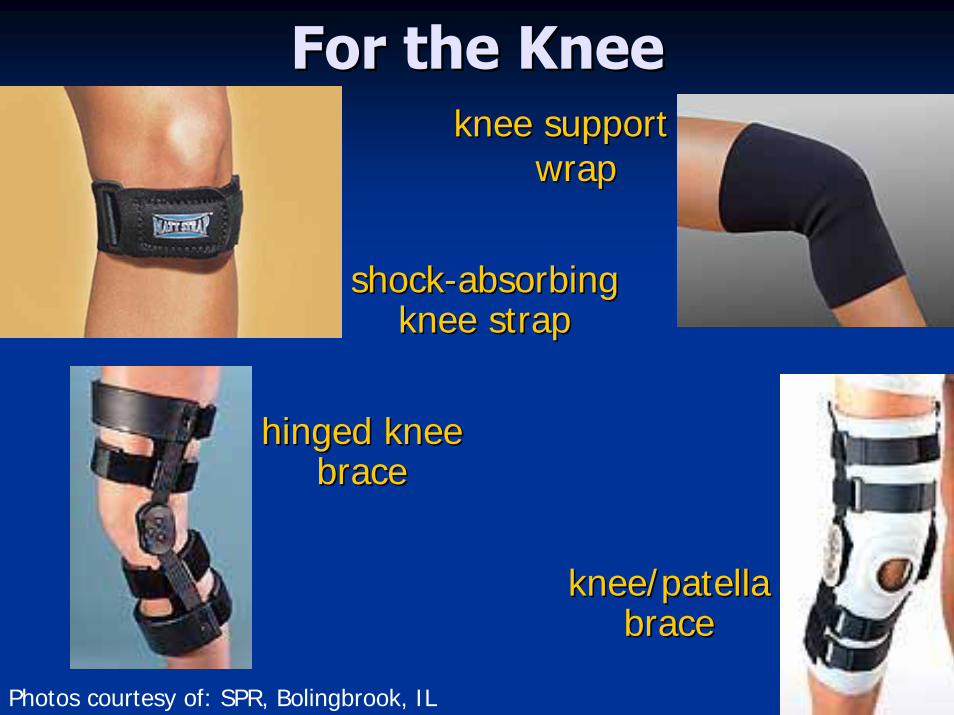
For the KneeFor the Kneeknee support knee support
wrapwrap
shockshock--absorbing absorbing knee strapknee strap
hinged knee hinged knee bracebrace
knee/patella knee/patella bracebrace
Photos courtesy of: SPR, Bolingbrook, IL

For the Leg, Ankle, FootFor the Leg, Ankle, Foot
ankle ankle orthosisorthosis
ankle support ankle support wrapwrap
ankle ankle and and footfootsplintsplint
inflatable air splintinflatable air splintPhotos courtesy of: SPR, Bolingbrook, IL
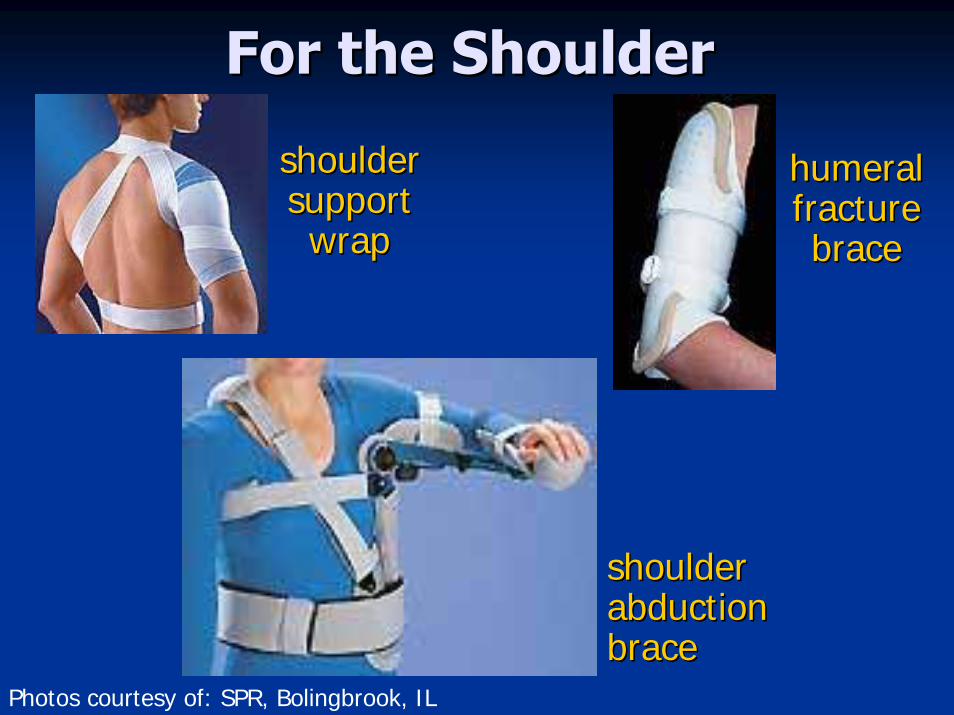
For the ShoulderFor the Shoulder
humeral humeral fracture fracture bracebrace
shouldershoulderabductionabductionbracebrace
shoulder shoulder supportsupportwrapwrap
Photos courtesy of: SPR, Bolingbrook, IL
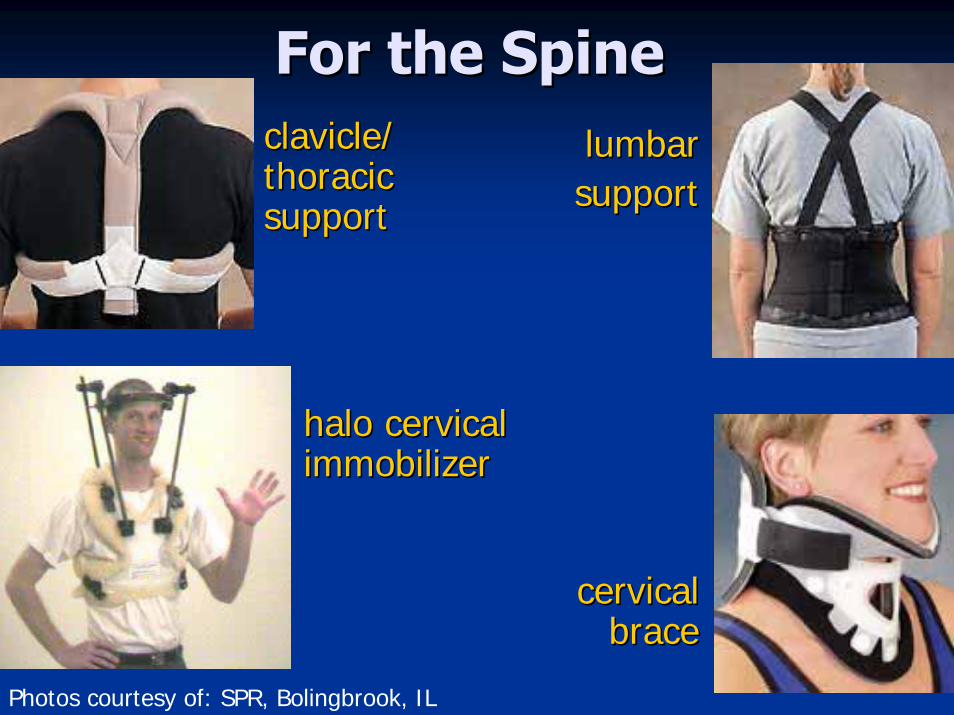
For the SpineFor the Spineclavicle/clavicle/thoracicthoracicsupportsupport
lumbarlumbarsupportsupport
cervicalcervicalbracebrace
halo cervicalhalo cervicalimmobilizerimmobilizer
Photos courtesy of: SPR, Bolingbrook, IL
SPLINTING SPLINTING && BRACINGBRACING
CHOICESCHOICES
ININ
VETERINARY VETERINARY MEDICINEMEDICINE
TRADITIONALTRADITIONAL
SPLINTING/BRACINGSPLINTING/BRACING
OPTIONSOPTIONS
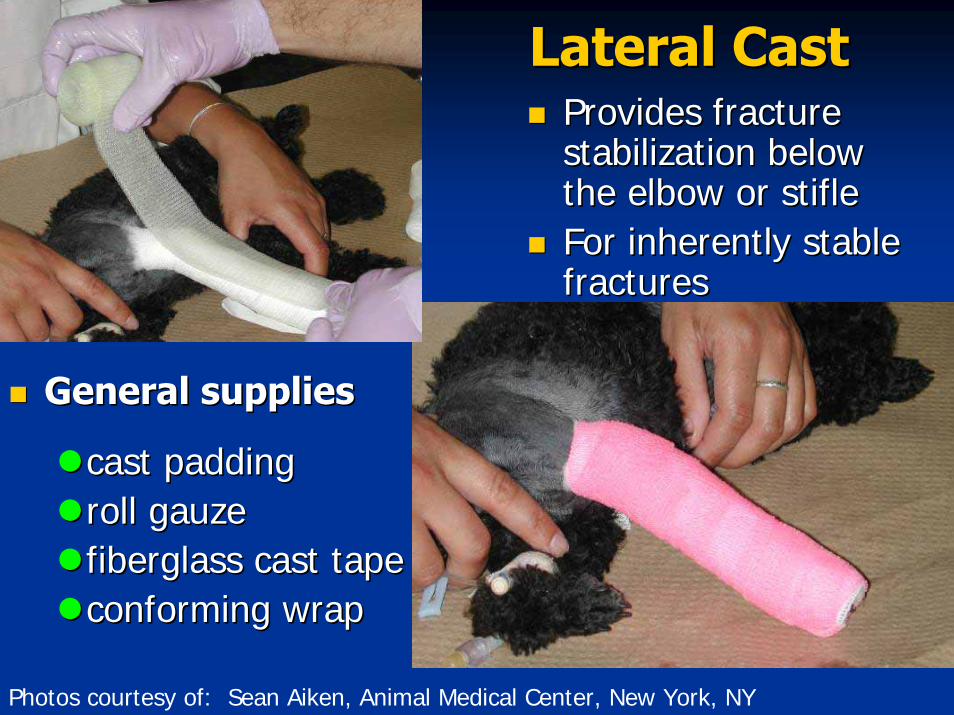
Provides fracture Provides fracture stabilization below stabilization below the elbow or stifle the elbow or stifle For inherently stable For inherently stable fracturesfractures
General suppliesGeneral supplies
cast paddingcast paddingroll gauzeroll gauzefiberglass cast tapefiberglass cast tapeconforming wrapconforming wrap
Lateral CastLateral Cast
Photos courtesy of: Sean Aiken, Animal Medical Center, New York, NY
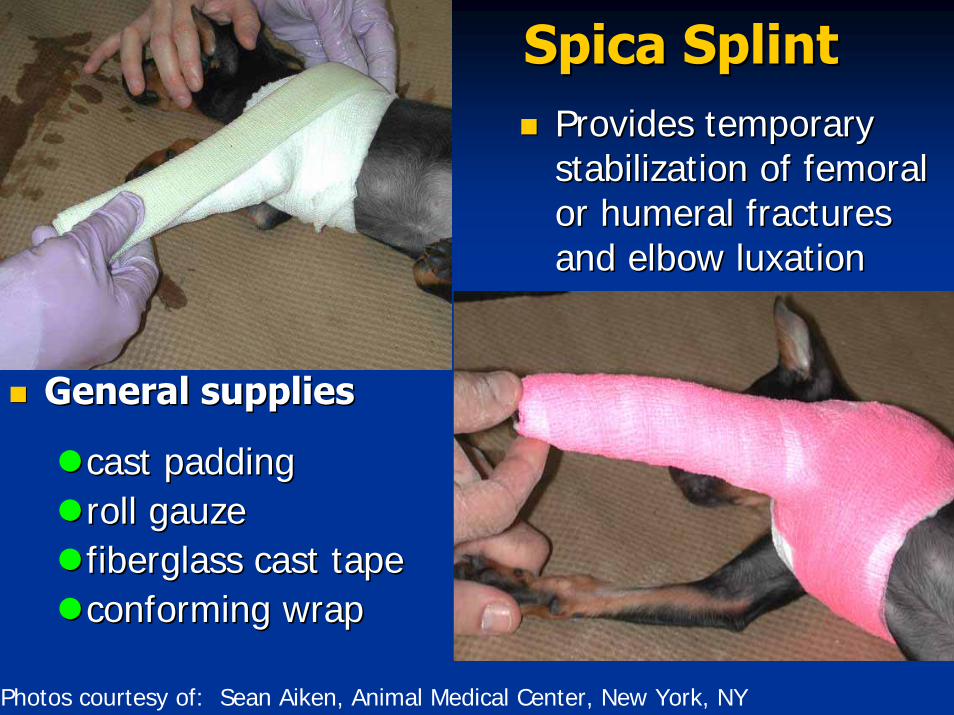
SpicaSpica SplintSplintProvides temporary Provides temporary stabilization of femoral stabilization of femoral or humeral fractures or humeral fractures and elbow and elbow luxationluxation
General suppliesGeneral supplies
cast paddingcast paddingroll gauzeroll gauzefiberglass cast tapefiberglass cast tapeconforming wrapconforming wrap
Photos courtesy of: Sean Aiken, Animal Medical Center, New York, NY
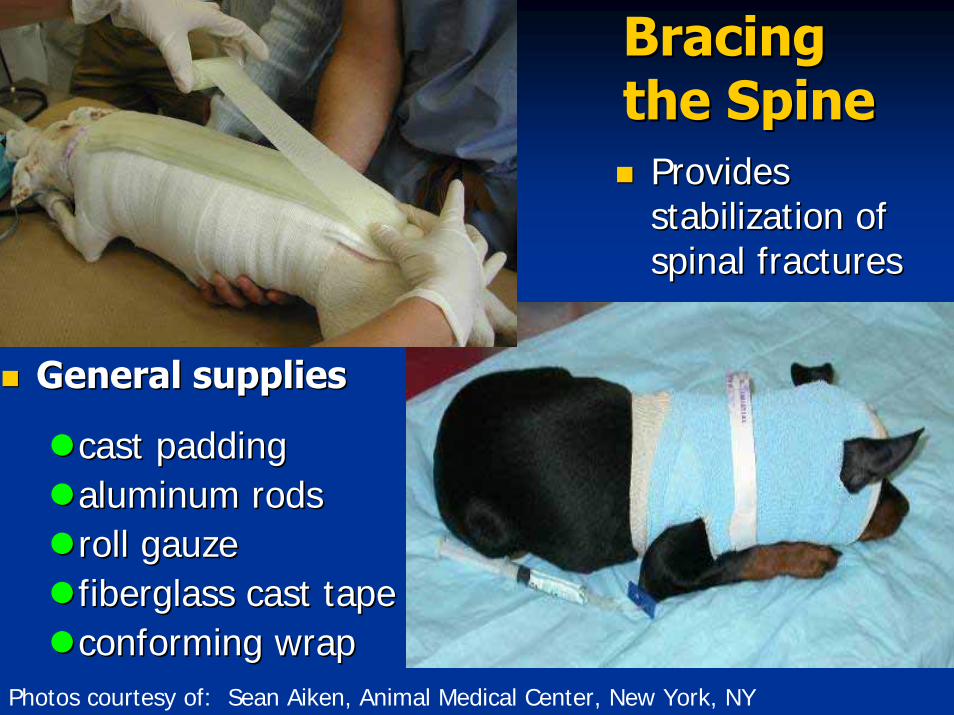
Bracing Bracing the Spinethe Spine
Provides Provides stabilization of stabilization of spinal fracturesspinal fractures
General suppliesGeneral supplies
cast paddingcast paddingaluminum rodsaluminum rodsroll gauzeroll gauzefiberglass cast tapefiberglass cast tapeconforming wrapconforming wrap
Photos courtesy of: Sean Aiken, Animal Medical Center, New York, NY
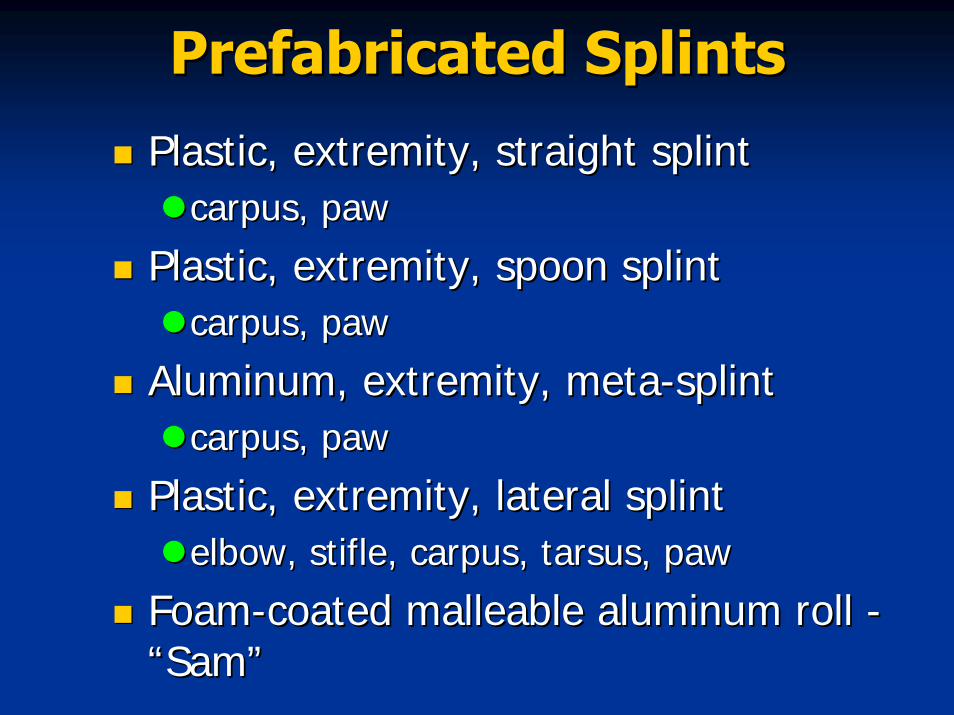
Prefabricated SplintsPrefabricated Splints
Plastic, extremity, straight splintPlastic, extremity, straight splintcarpuscarpus, paw, paw
Plastic, extremity, spoon splintPlastic, extremity, spoon splintcarpuscarpus, paw, paw
Aluminum, extremity, metaAluminum, extremity, meta--splintsplintcarpuscarpus, paw, paw
Plastic, extremity, lateral splint Plastic, extremity, lateral splint elbow, stifle, elbow, stifle, carpuscarpus, tarsus, paw, tarsus, paw
FoamFoam--coated malleable aluminum roll coated malleable aluminum roll --““SamSam””
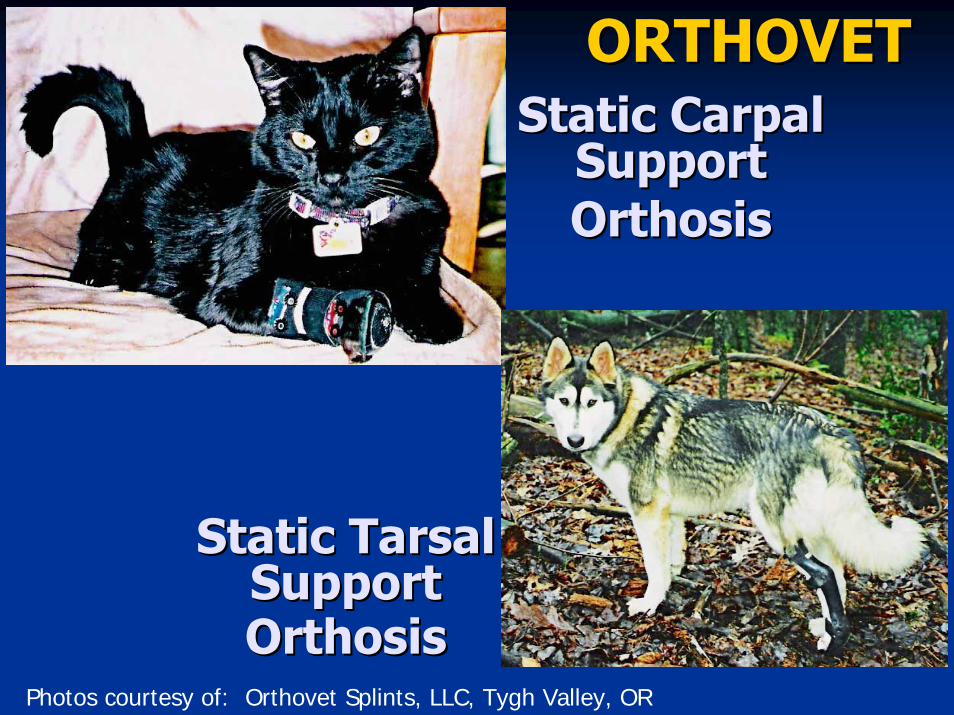
Static Carpal Static Carpal Support Support OrthosisOrthosis
Photos courtesy of: Orthovet Splints, LLC, Tygh Valley, OR
Static Tarsal Static Tarsal Support Support OrthosisOrthosis
ORTHOVETORTHOVET
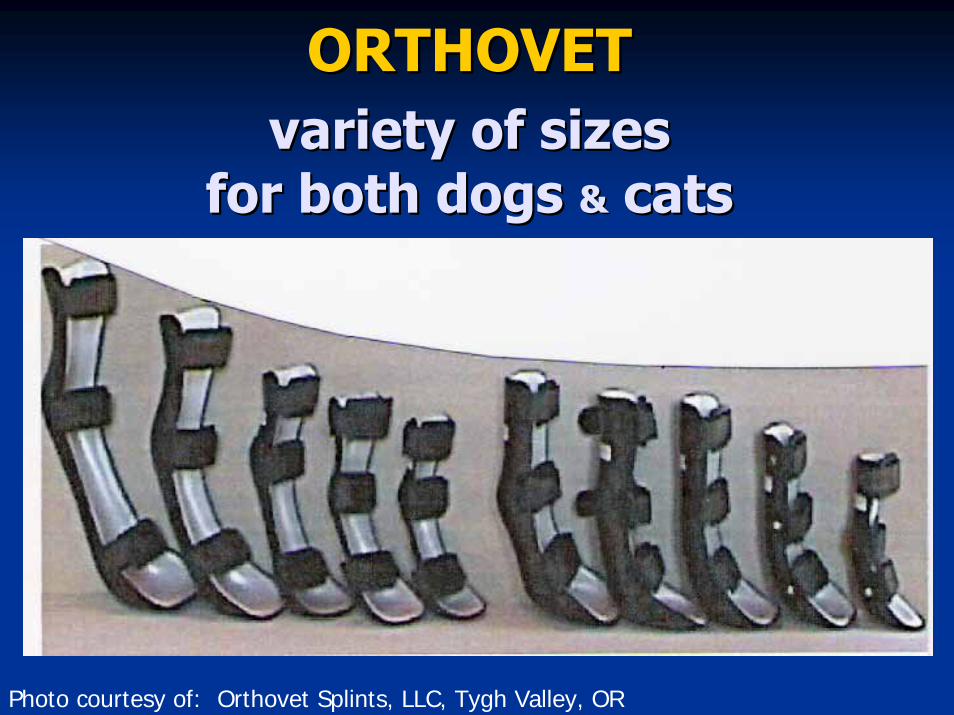
ORTHOVET ORTHOVET variety of sizes variety of sizes
for both dogs for both dogs && cats cats
Photo courtesy of: Orthovet Splints, LLC, Tygh Valley, OR
SPLINTS, BRACES, SPLINTS, BRACES, SUPPORTSSUPPORTS
FORFOR
SPECIFIC CONDITIONSSPECIFIC CONDITIONS
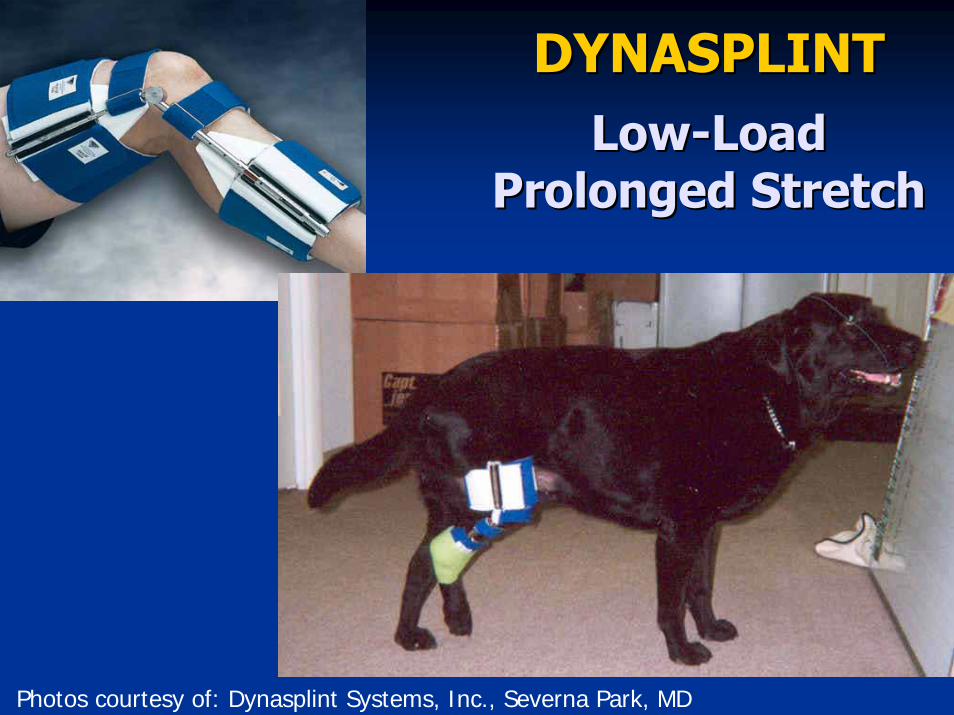
DYNASPLINTDYNASPLINTLowLow--Load Load
Prolonged Stretch Prolonged Stretch
Photos courtesy of: Dynasplint Systems, Inc., Severna Park, MD
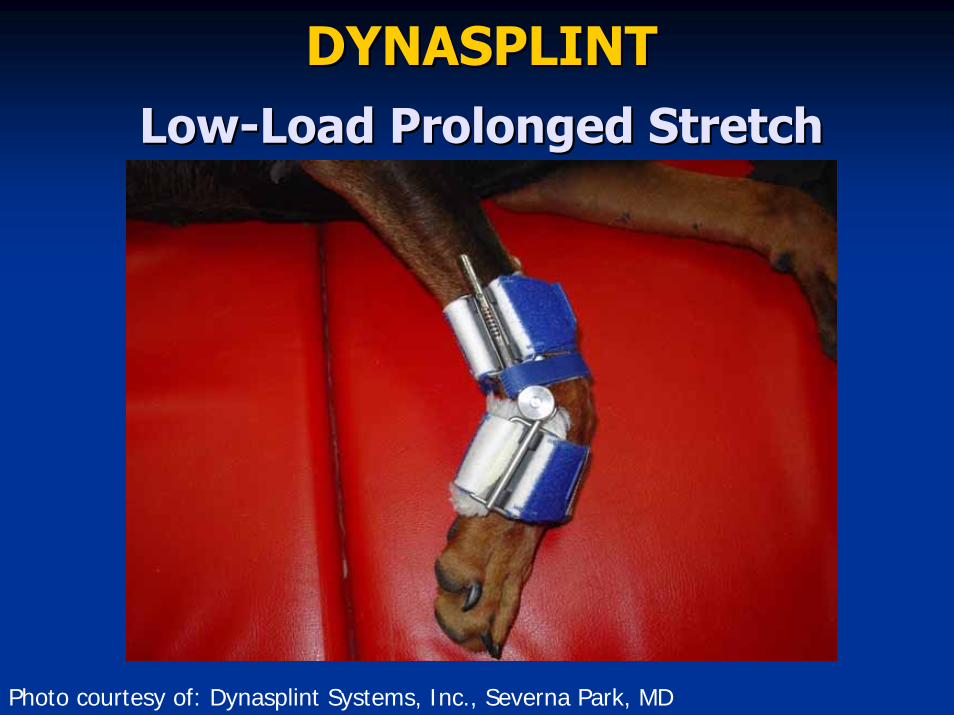
DYNASPLINTDYNASPLINTLowLow--Load Prolonged StretchLoad Prolonged Stretch
Photo courtesy of: Dynasplint Systems, Inc., Severna Park, MD
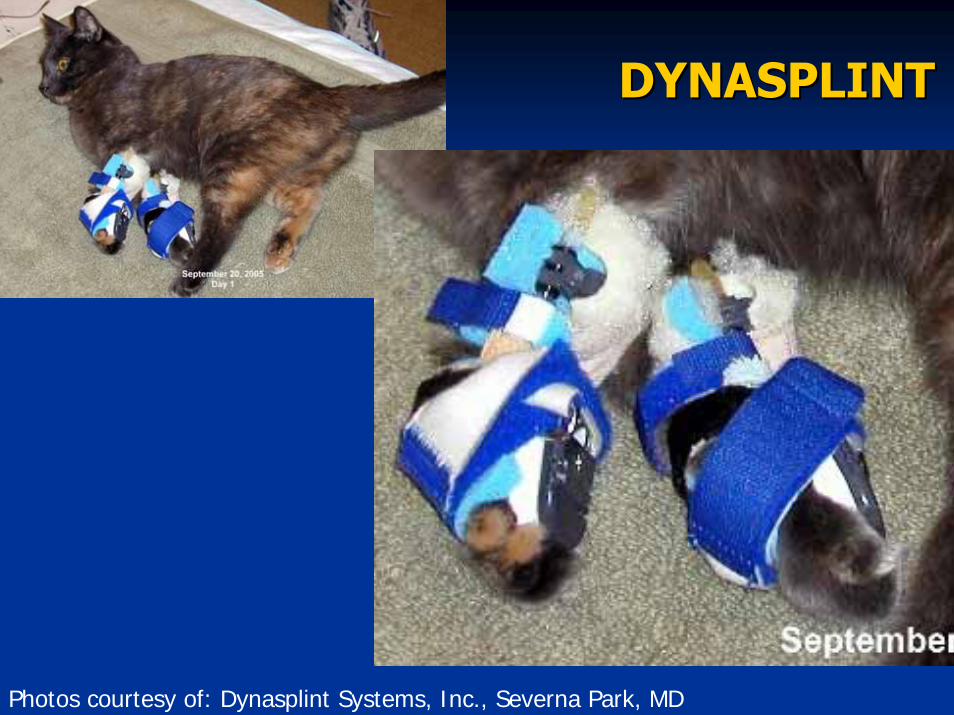
DYNASPLINTDYNASPLINT
Photos courtesy of: Dynasplint Systems, Inc., Severna Park, MD
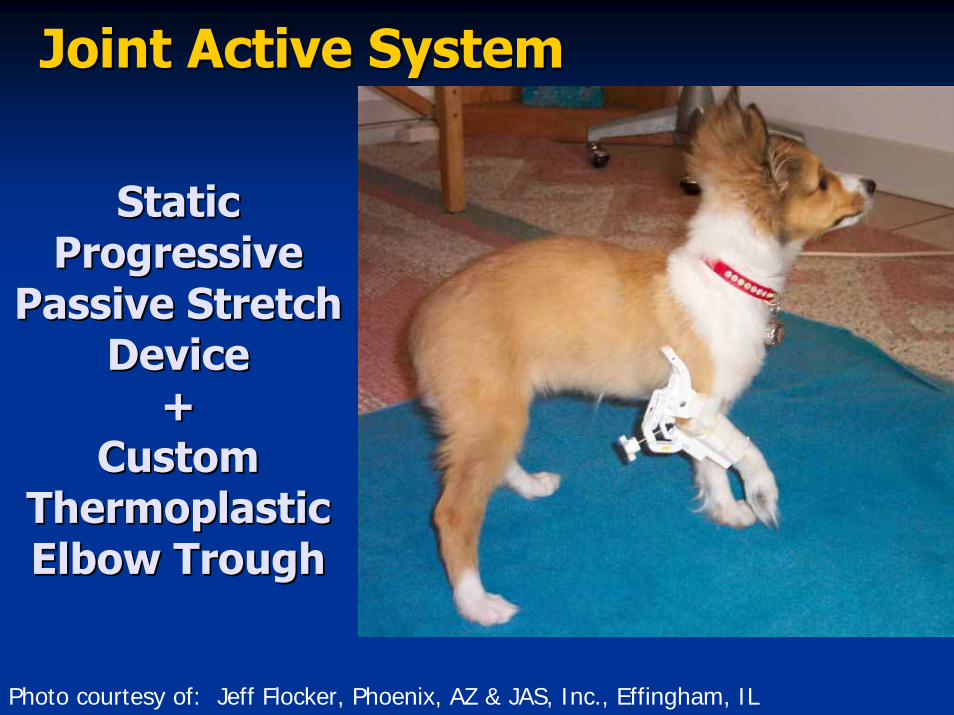
Joint Active SystemJoint Active System
Static Static Progressive Progressive
Passive Stretch Passive Stretch Device Device
++Custom Custom
Thermoplastic Thermoplastic Elbow TroughElbow Trough
Photo courtesy of: Jeff Flocker, Phoenix, AZ & JAS, Inc., Effingham, IL
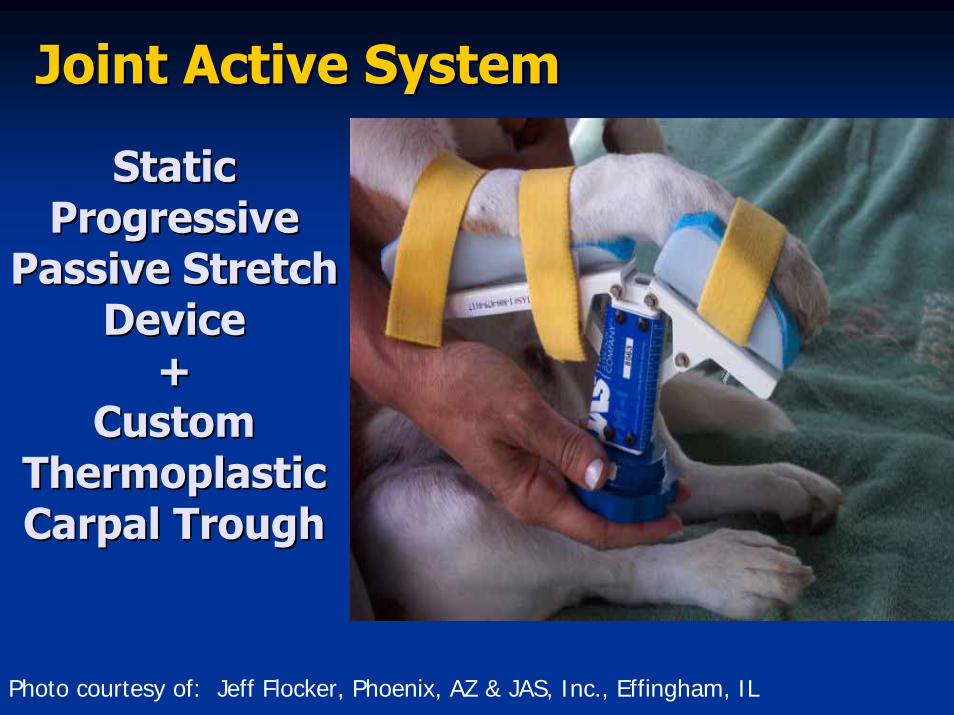
Static Static Progressive Progressive
Passive Stretch Passive Stretch DeviceDevice
++Custom Custom
Thermoplastic Thermoplastic Carpal Trough Carpal Trough
Joint Active SystemJoint Active System
Photo courtesy of: Jeff Flocker, Phoenix, AZ & JAS, Inc., Effingham, IL
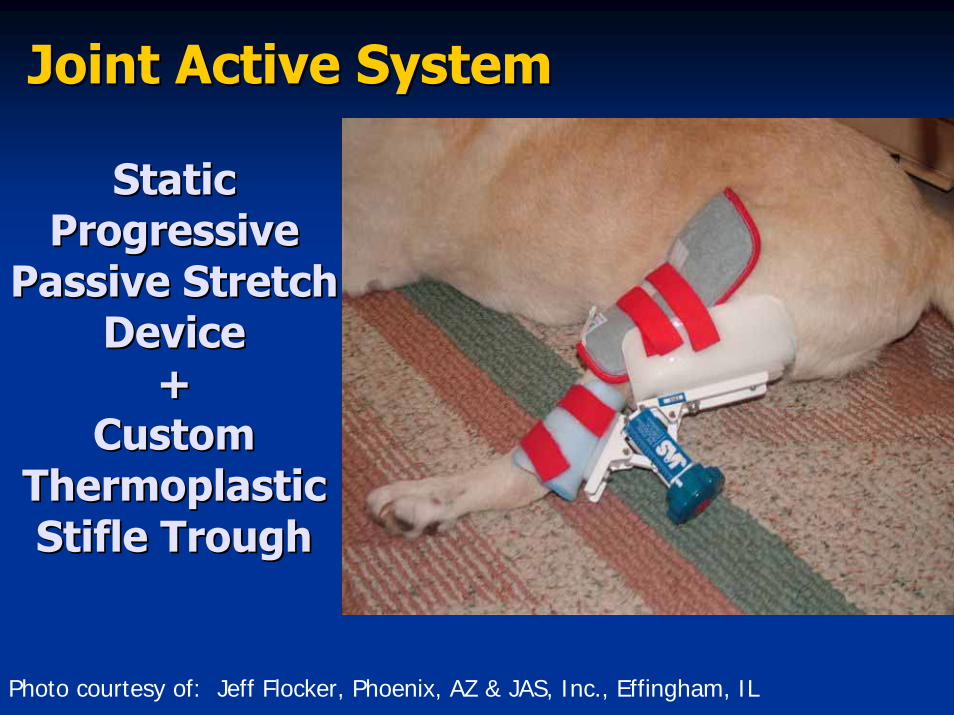
Static Static Progressive Progressive
Passive Stretch Passive Stretch Device Device
++Custom Custom
Thermoplastic Thermoplastic Stifle Trough Stifle Trough
Joint Active SystemJoint Active System
Photo courtesy of: Jeff Flocker, Phoenix, AZ & JAS, Inc., Effingham, IL

AA--TraCTraC Dynamic BraceDynamic Braceantianti--translational translational cruciatecruciate bracebrace
lateral and medial adjustable tension rodslateral and medial adjustable tension rods
Diagram courtesy of: WoundWear, Inc. Buffalo Grove, IL
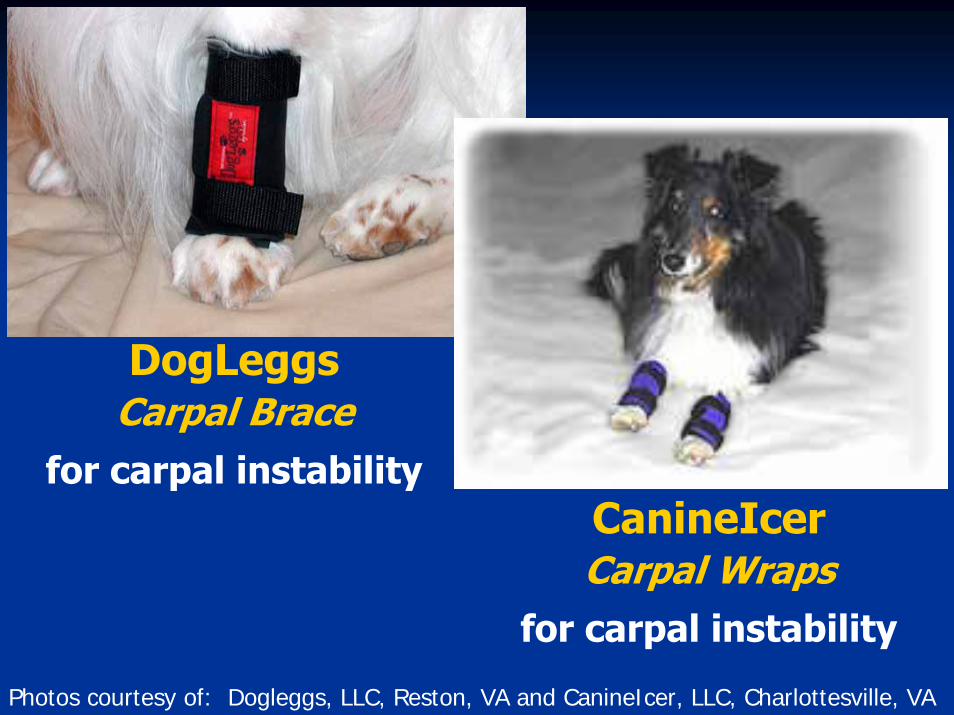
DogLeggsCarpal Brace
for carpal instabilityCanineIcerCarpal Wraps
for carpal instability
Photos courtesy of: Dogleggs, LLC, Reston, VA and CanineIcer, LLC, Charlottesville, VA
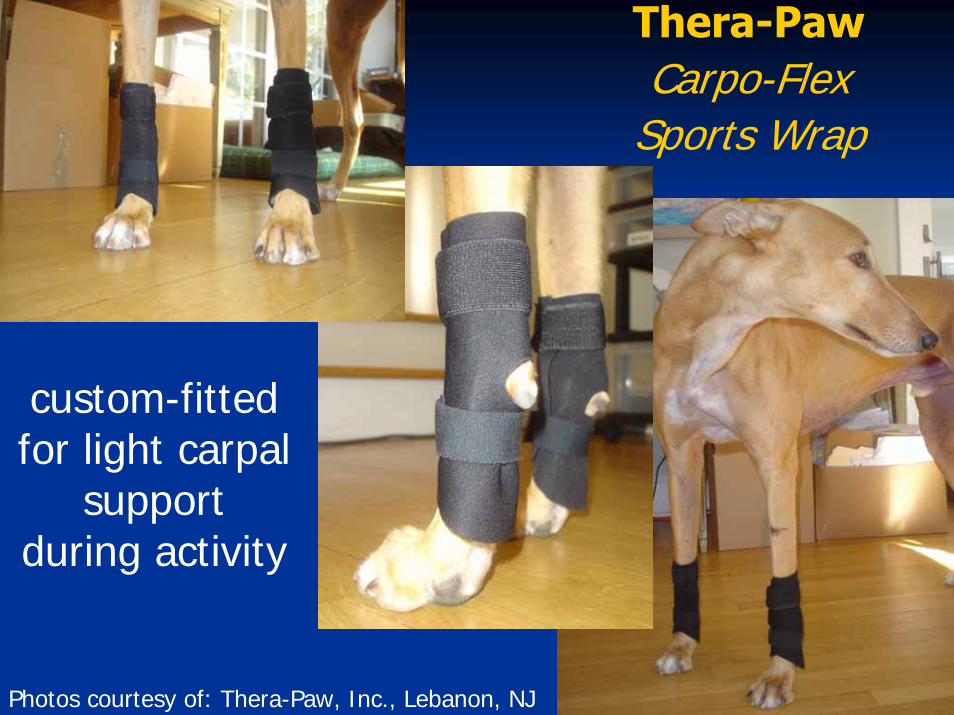
Thera-PawCarpo-Flex
Sports Wrap
custom-fitted for light carpal
support during activity
Photos courtesy of: Thera-Paw, Inc., Lebanon, NJ
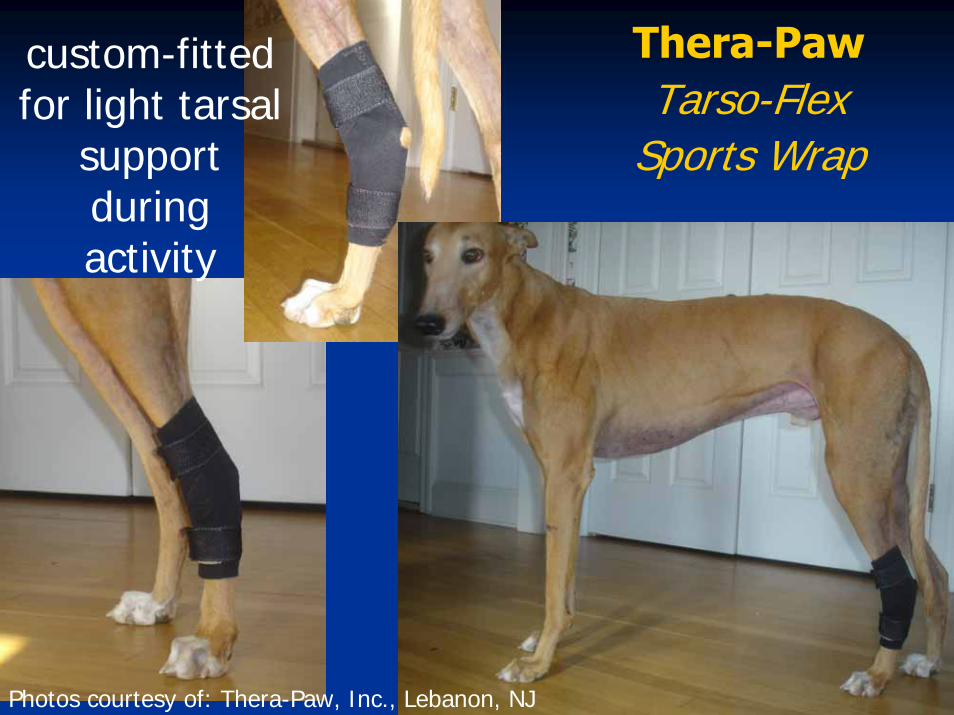
Thera-PawTarso-Flex
Sports Wrap
custom-fitted for light tarsal
support during activity
Photos courtesy of: Thera-Paw, Inc., Lebanon, NJ
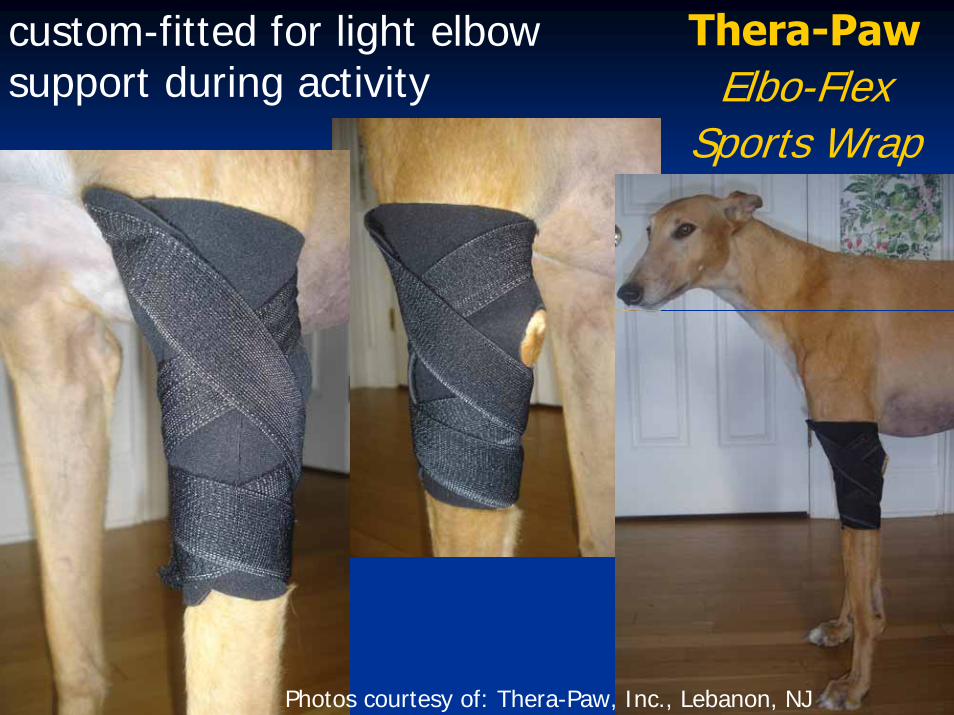
Thera-PawElbo-Flex
Sports Wrap
custom-fitted for light elbow support during activity
Photos courtesy of: Thera-Paw, Inc., Lebanon, NJ
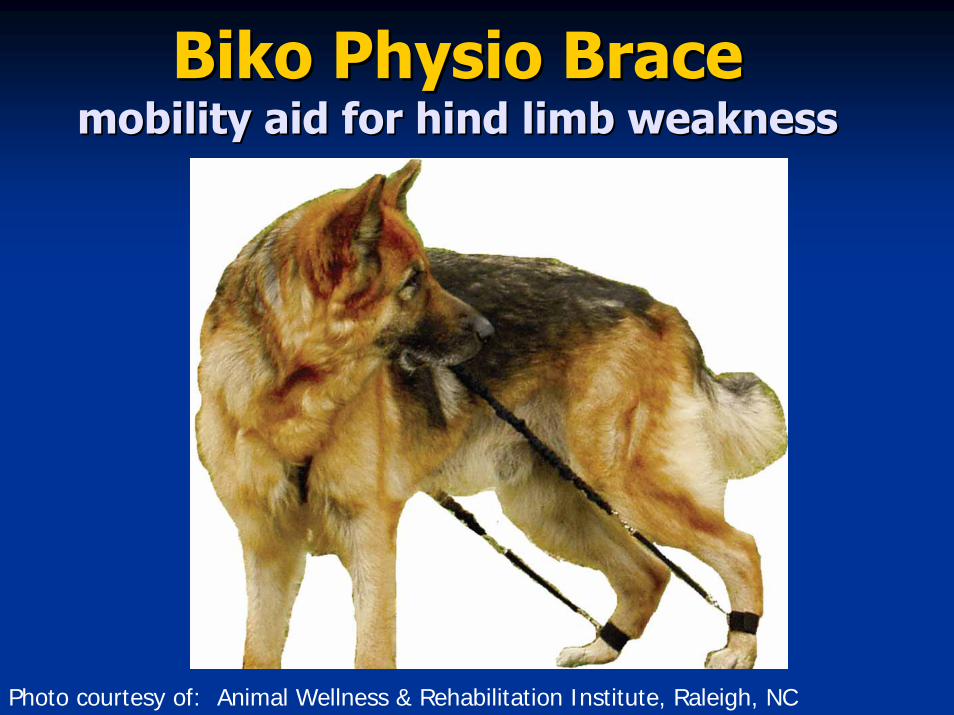
BikoBiko PhysioPhysio BraceBracemobility aid for hind limb weaknessmobility aid for hind limb weakness
Photo courtesy of: Animal Wellness & Rehabilitation Institute, Raleigh, NC
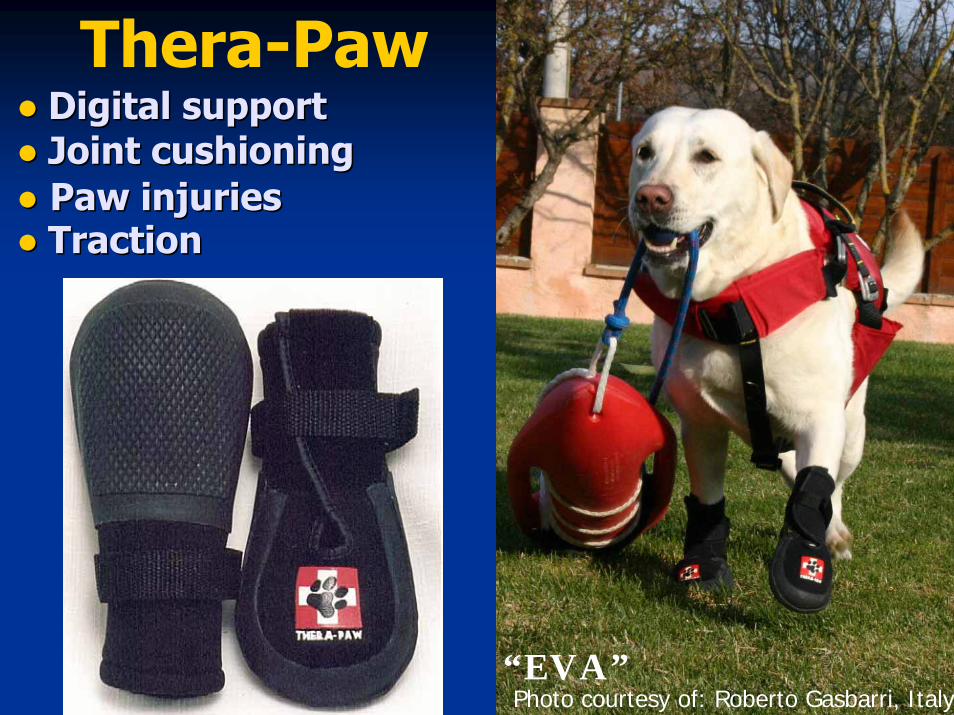
Thera-Paw●● Digital supportDigital support●● Joint cushioningJoint cushioning●● Paw injuriesPaw injuries●● TractionTraction
“EVA”Photo courtesy of: Roberto Gasbarri, Italy
EXAMPLESEXAMPLES
OFOF
CUSTOMCUSTOM--MADEMADEORTHOSESORTHOSES
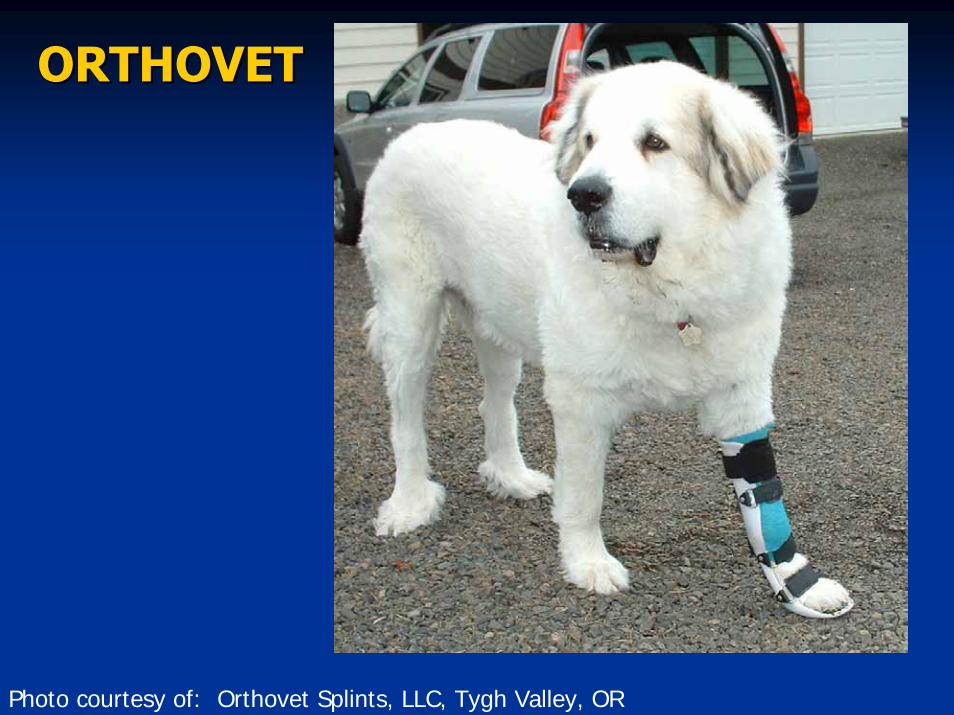
ORTHOVETORTHOVET
Photo courtesy of: Orthovet Splints, LLC, Tygh Valley, OR
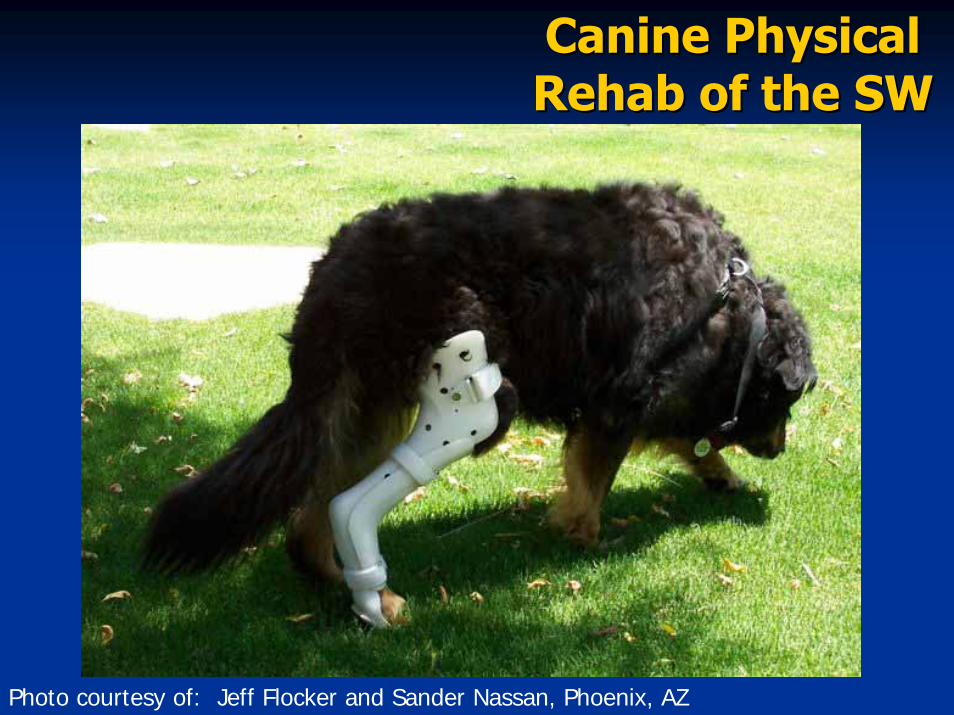
Canine Physical Canine Physical Rehab of the SW Rehab of the SW
Photo courtesy of: Jeff Flocker and Sander Nassan, Phoenix, AZ
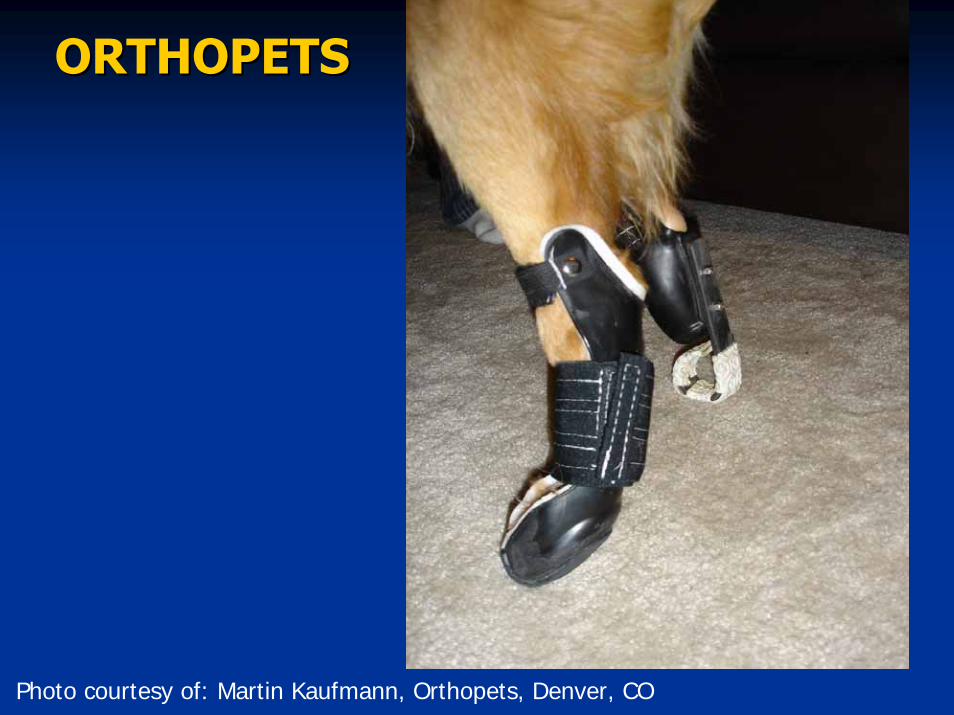
ORTHOPETSORTHOPETS
Photo courtesy of: Martin Kaufmann, Orthopets, Denver, CO
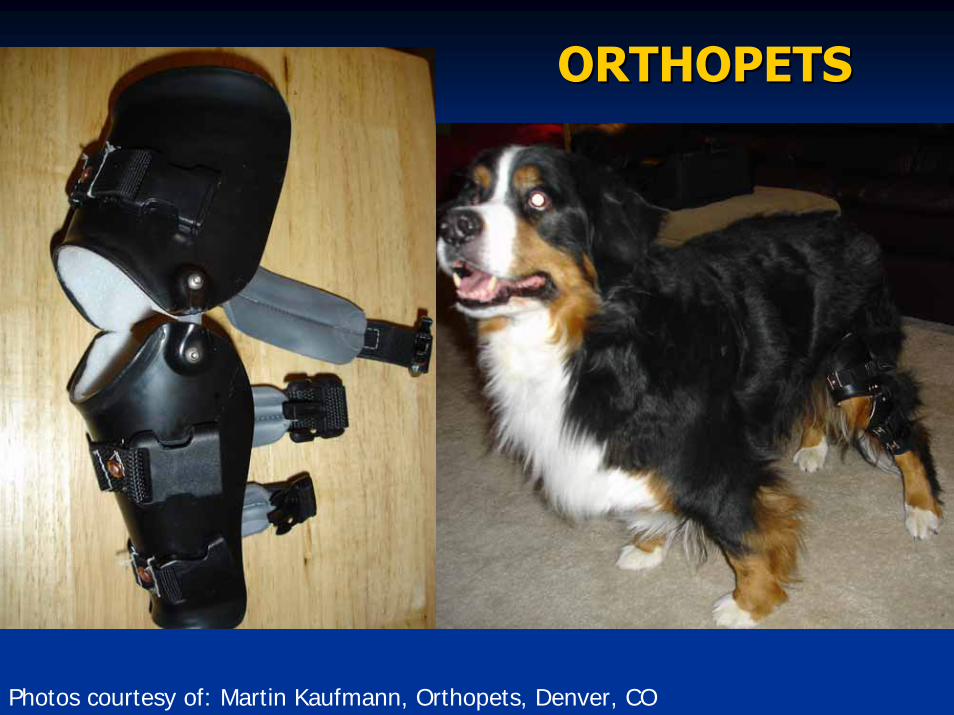
ORTHOPETSORTHOPETS
Photos courtesy of: Martin Kaufmann, Orthopets, Denver, CO
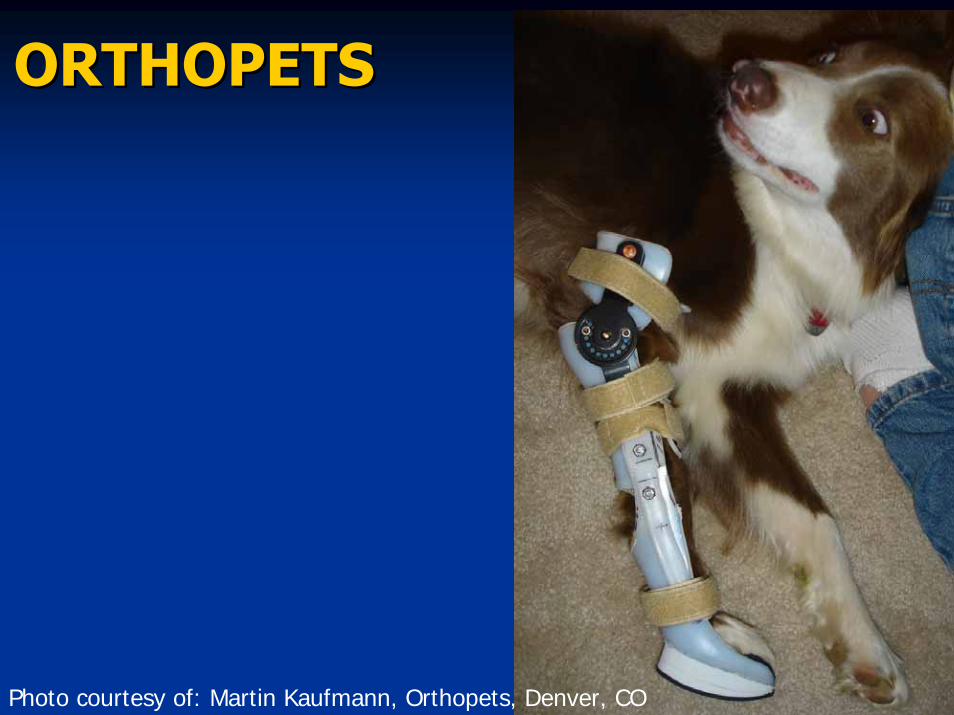
ORTHOPETSORTHOPETS
Photo courtesy of: Martin Kaufmann, Orthopets, Denver, CO
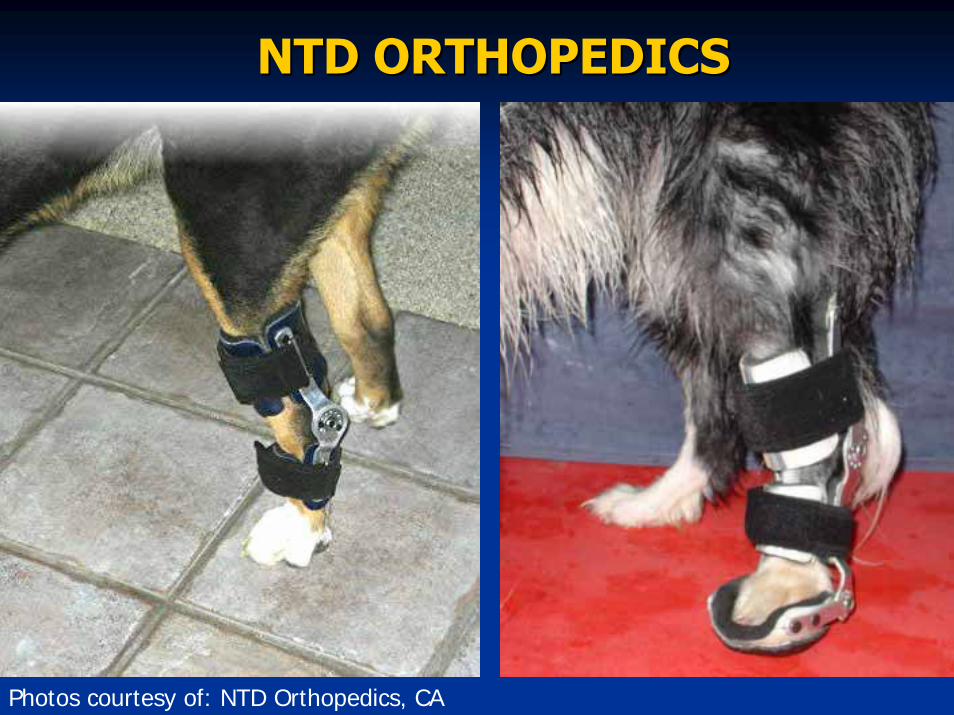
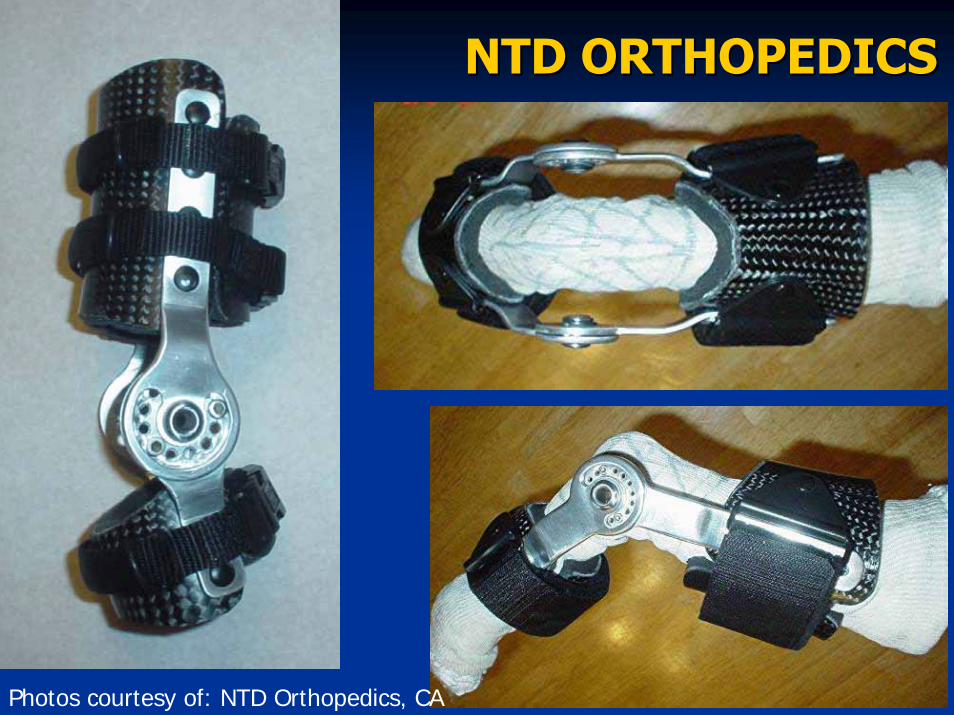
NTD ORTHOPEDICSNTD ORTHOPEDICS
Photos courtesy of: NTD Orthopedics, CA

NTD ORTHOPEDICSNTD ORTHOPEDICS
Photo courtesy of: NTD Orthopedics, CA
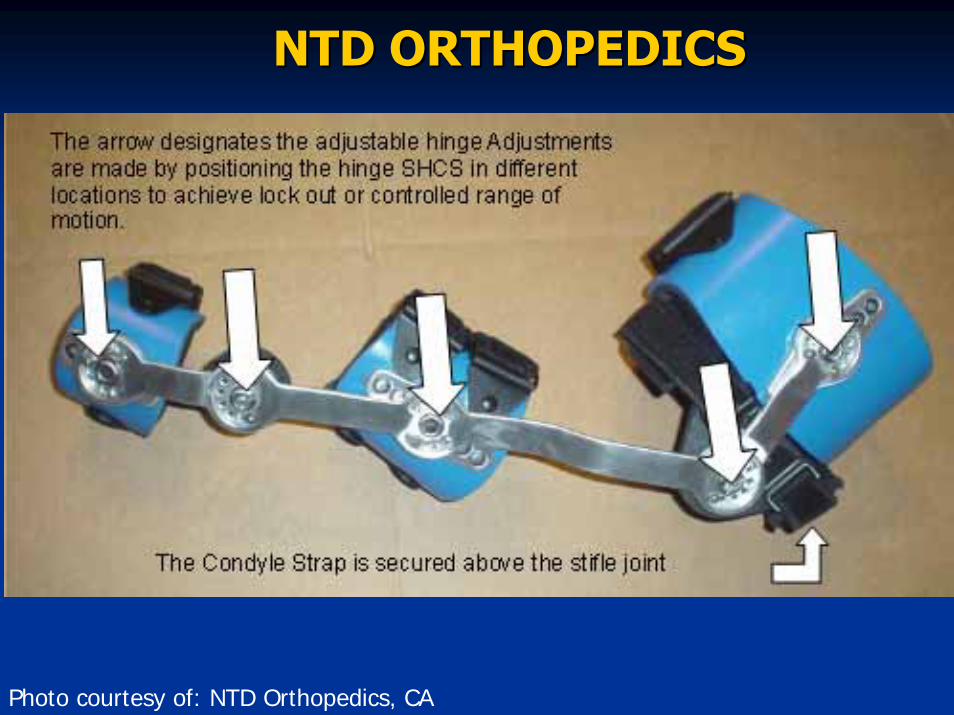
NTD ORTHOPEDICSNTD ORTHOPEDICS
Photos courtesy of: NTD Orthopedics, CA
NTD ORTHOPEDICSNTD ORTHOPEDICS
Photo courtesy of: NTD Orthopedics, CA
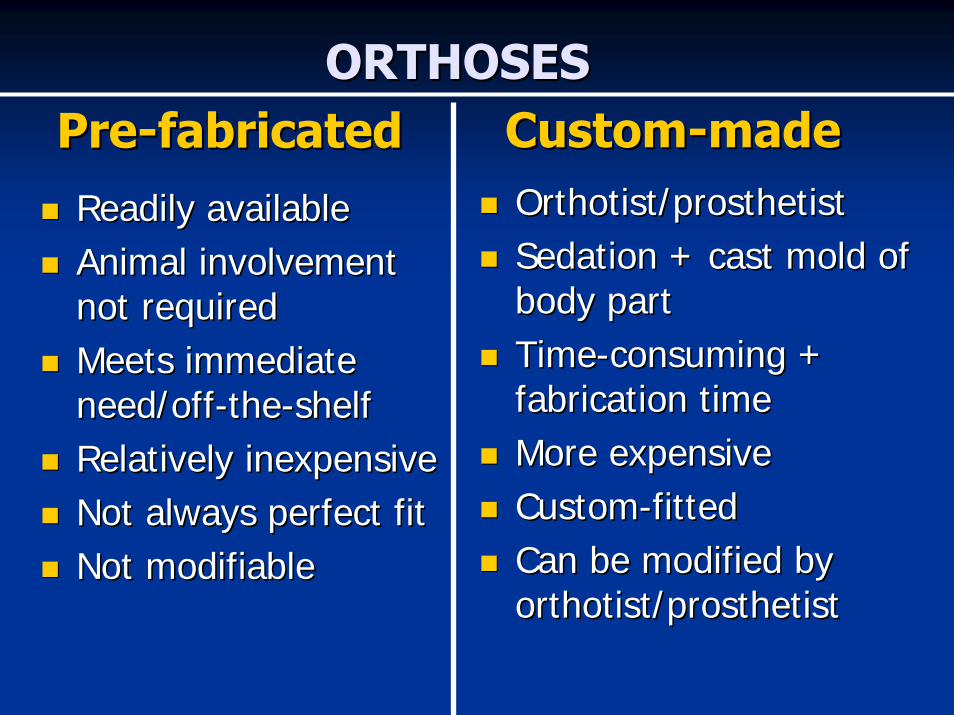
PrePre--fabricatedfabricatedReadily availableReadily availableAnimal involvement Animal involvement not required not required Meets immediate Meets immediate need/offneed/off--thethe--shelfshelfRelatively inexpensiveRelatively inexpensiveNot always perfect fitNot always perfect fitNot modifiableNot modifiable
CustomCustom--mademadeOrthotist/prosthetistOrthotist/prosthetistSedation + cast mold of Sedation + cast mold of body partbody partTimeTime--consuming + consuming + fabrication timefabrication timeMore expensiveMore expensiveCustomCustom--fittedfittedCan be modified by Can be modified by orthotist/prosthetistorthotist/prosthetist
ORTHOSESORTHOSES
INTRODUCTIONINTRODUCTION
TOTO
CUSTOM SPLINTINGCUSTOM SPLINTINGWITHWITH
THERMOPLASTICSTHERMOPLASTICS

2 main categories of thermoplastic
high-temperature thermoplastic (HTT)low-temperature thermoplastic (LTT)
THERMOPLASTICS
plastic- or rubber-based material that becomes malleable when heated
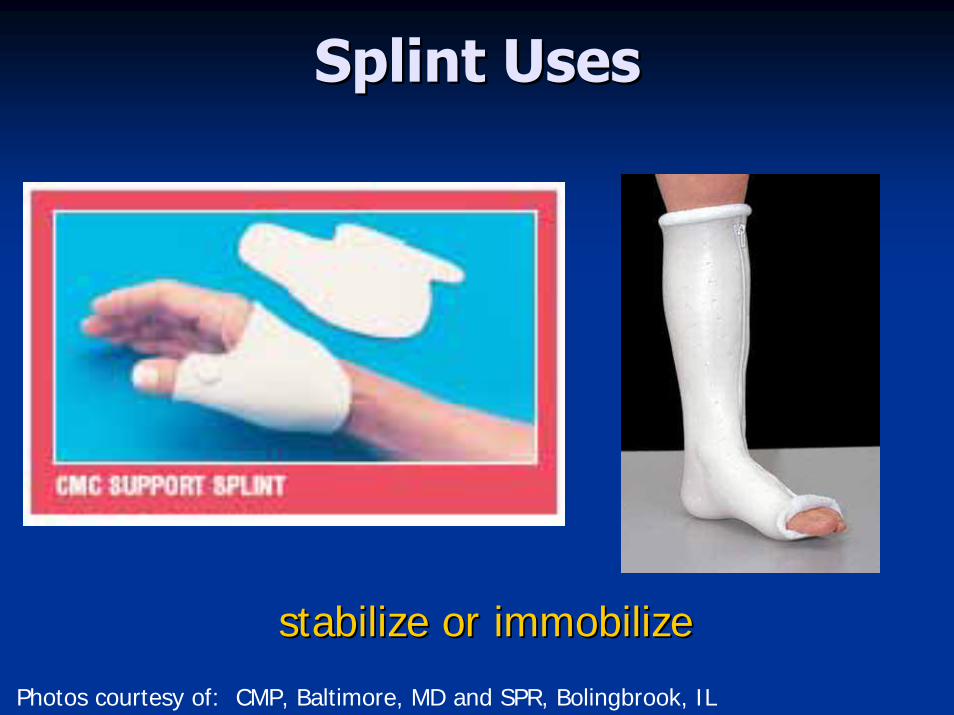
Splint UsesSplint Uses
stabilize or immobilizestabilize or immobilize
Photos courtesy of: CMP, Baltimore, MD and SPR, Bolingbrook, IL
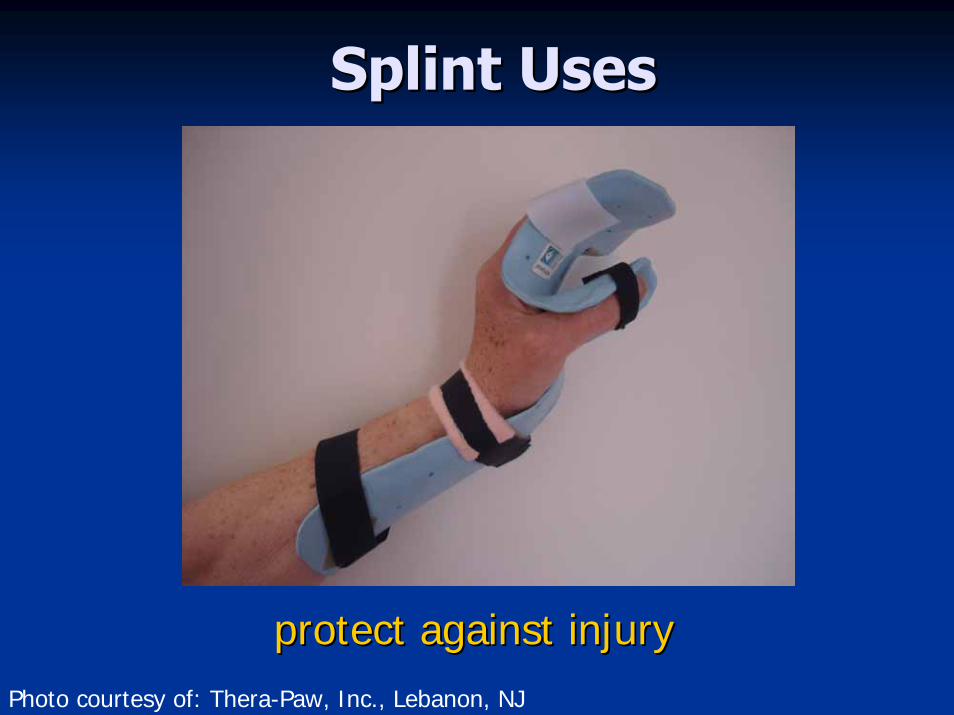
Splint UsesSplint Uses
protect against injuryprotect against injuryPhoto courtesy of: Thera-Paw, Inc., Lebanon, NJ
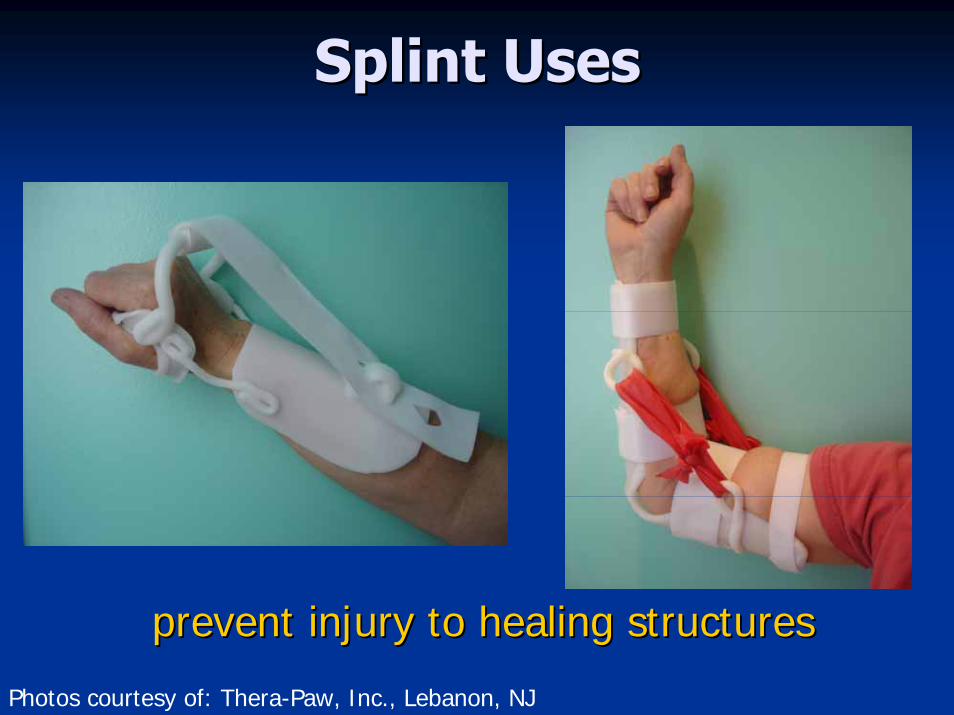
Splint UsesSplint Uses
prevent injury to healing structuresprevent injury to healing structures
Photos courtesy of: Thera-Paw, Inc., Lebanon, NJ
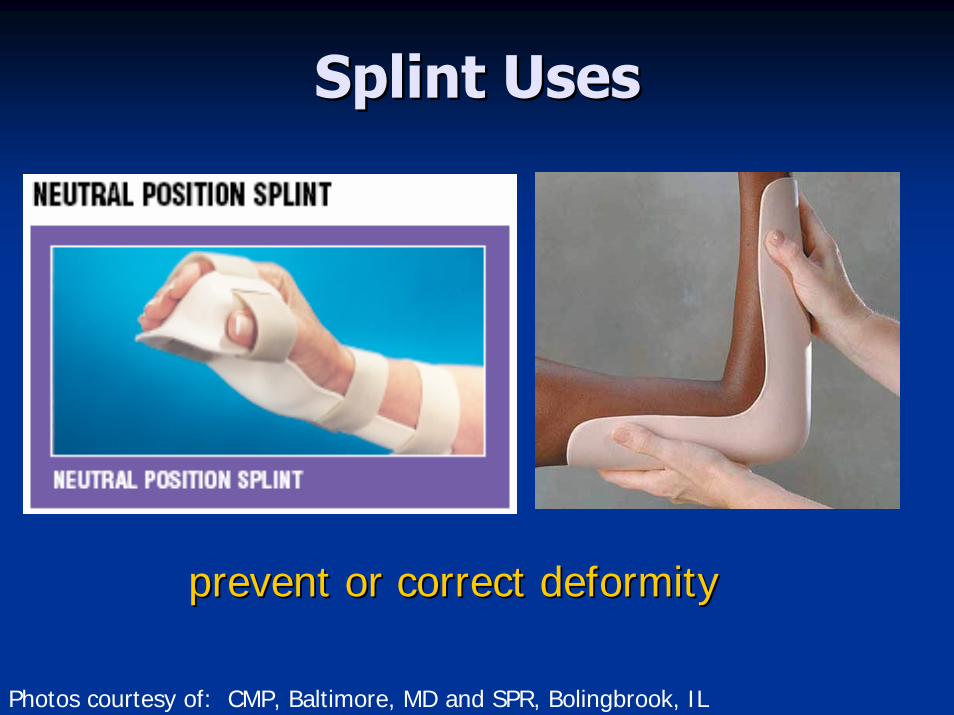
Splint UsesSplint Uses
prevent or correct deformityprevent or correct deformity
Photos courtesy of: CMP, Baltimore, MD and SPR, Bolingbrook, IL
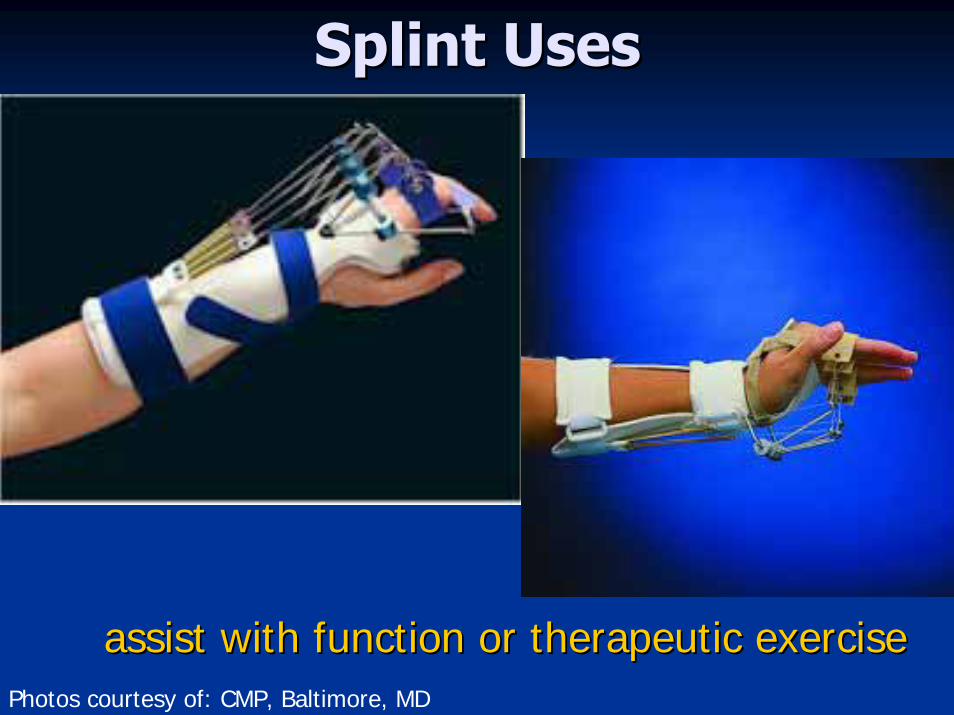
Splint UsesSplint Uses
assist with function or therapeutic exerciseassist with function or therapeutic exercisePhotos courtesy of: CMP, Baltimore, MD
CUSTOM SPLINTINGCUSTOM SPLINTING
MATERIALSMATERIALS&&
TOOLSTOOLS
Basic ComponentsBasic ComponentsLowLow--temperature thermoplastic (LTT) temperature thermoplastic (LTT) (e.g., Marq(e.g., Marq--Easy)Easy)
Pad / Liner Pad / Liner (e.g., closed(e.g., closed--cell cell polycushionpolycushion / / stockinettestockinette))
Fixation / Strapping material Fixation / Strapping material (e.g., Velcro hook & loop) (e.g., Velcro hook & loop)
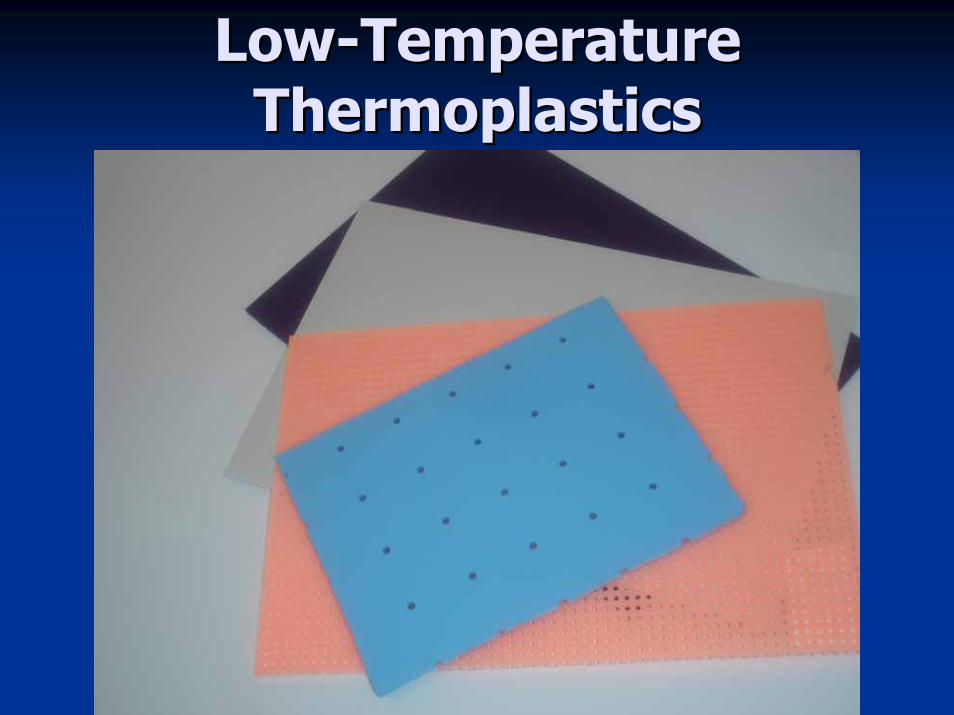
LowLow--Temperature Temperature ThermoplasticsThermoplastics
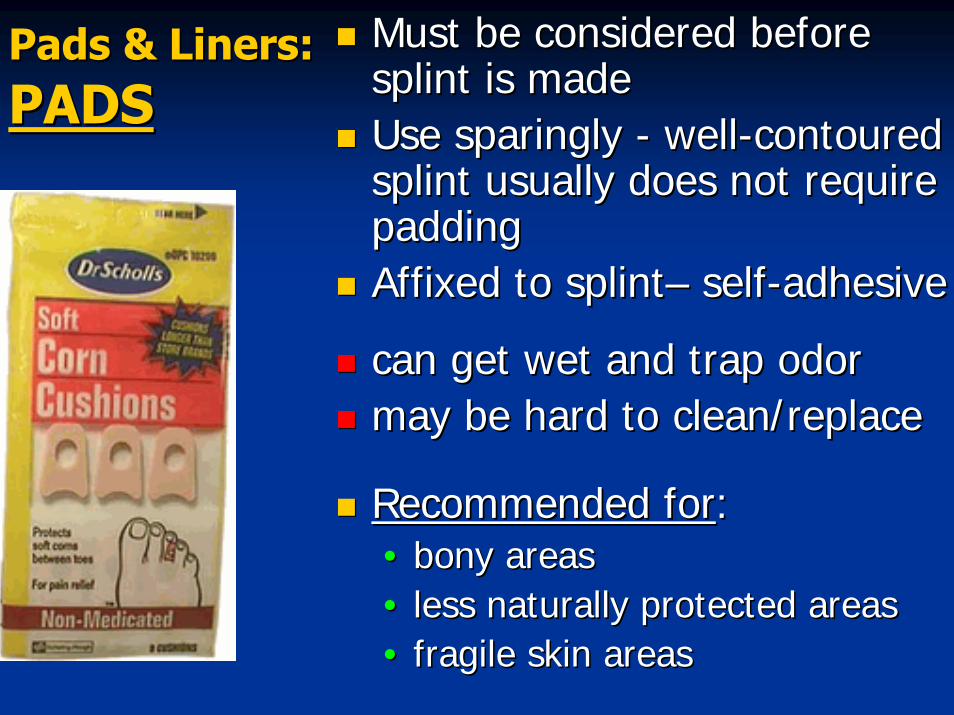
Pads & Liners:Pads & Liners:PADSPADS
Must be considered before Must be considered before splint is madesplint is madeUse sparingly Use sparingly -- wellwell--contoured contoured splint usually does not require splint usually does not require paddingpaddingAffixed to splintAffixed to splint–– selfself--adhesiveadhesive
can get wet and trap odorcan get wet and trap odormay be hard to clean/replacemay be hard to clean/replace
Recommended forRecommended for::•• bony areas bony areas •• less naturally protected areas less naturally protected areas •• fragile skin areasfragile skin areas

WhatWhat’’s wrong s wrong with this with this picture??picture??
Photo courtesy of: Thera-Paw, Inc., Lebanon, NJ
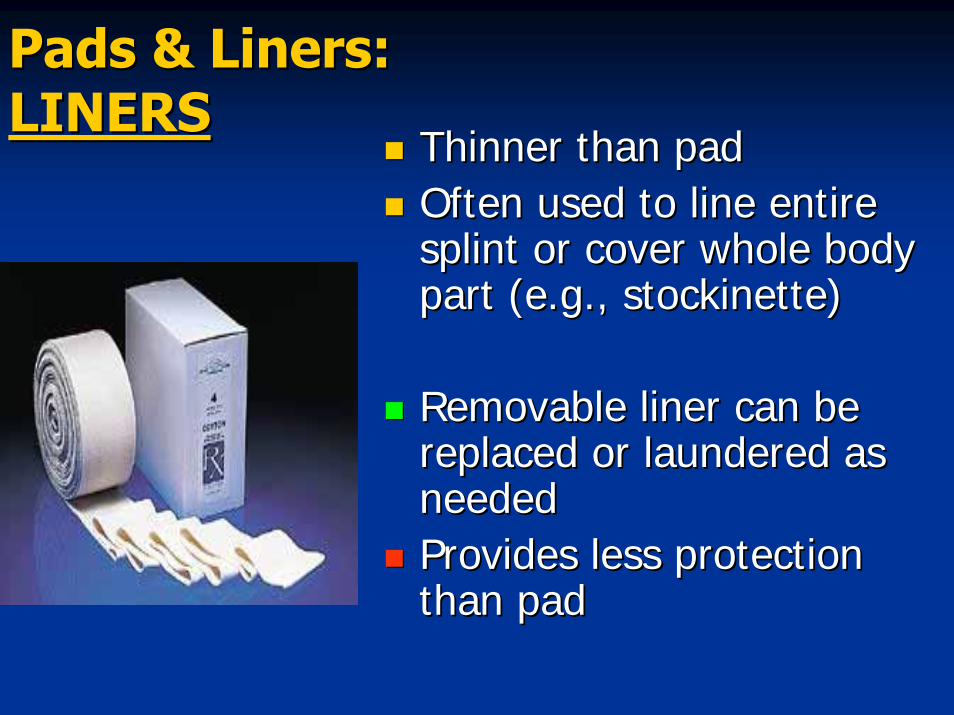
Thinner than pad Thinner than pad Often used to line entire Often used to line entire splint or cover whole body splint or cover whole body part (e.g., part (e.g., stockinettestockinette))
Removable liner can be Removable liner can be replaced or laundered as replaced or laundered as neededneededProvides less protection Provides less protection than padthan pad
Pads & Liners: Pads & Liners: LINERSLINERS
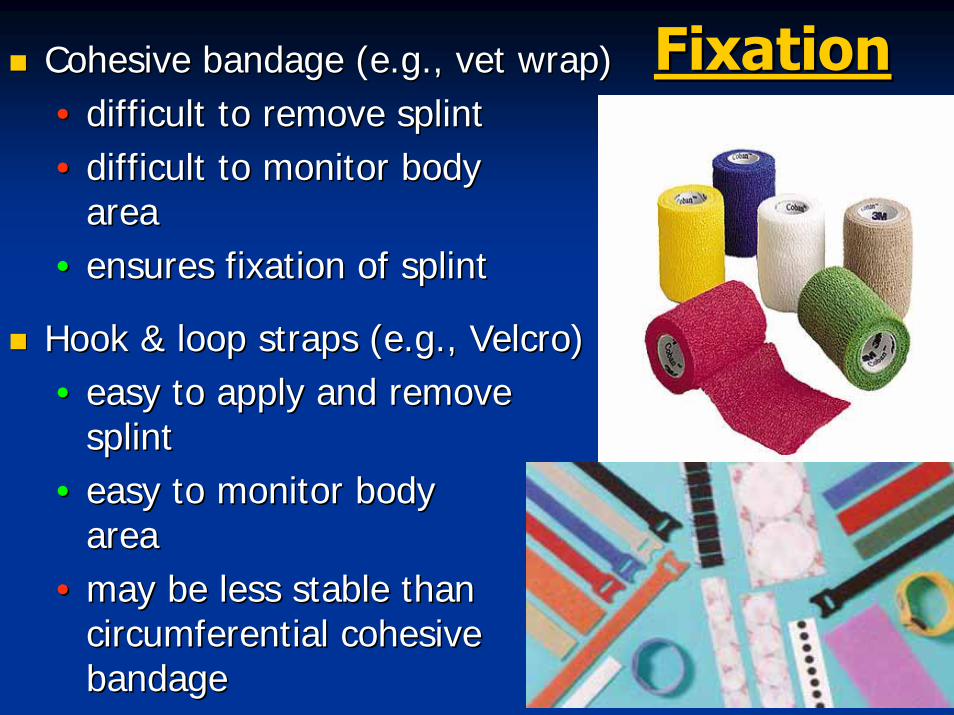
FixationFixationCohesive bandage (e.g., vet wrap)Cohesive bandage (e.g., vet wrap)•• difficult to remove splintdifficult to remove splint•• difficult to monitor body difficult to monitor body
areaarea•• ensures fixation of splintensures fixation of splint
Hook & loop straps (e.g., Velcro)Hook & loop straps (e.g., Velcro)•• easy to apply and remove easy to apply and remove
splintsplint•• easy to monitor body easy to monitor body
areaarea•• maymay be less stable than be less stable than
circumferential cohesive circumferential cohesive bandagebandage
Other Materials Other Materials && ToolsToolsSource of heat (e.g., electric heating pan, Source of heat (e.g., electric heating pan, microwave, oven)microwave, oven)Other materials Other materials
paper towelspaper towelsclean, dry, cotton towelclean, dry, cotton towelspatula spatula scissorsscissorswaterwater--resistant marker (e.g., grease pencil)resistant marker (e.g., grease pencil)elastic wrap (e.g., Ace)elastic wrap (e.g., Ace)heat gunheat gun
PROCEDURE FOR PROCEDURE FOR FABRICATING FABRICATING
AALOWLOW--TEMPERATURETEMPERATURE
THERMOPLASTICTHERMOPLASTICSPLINTSPLINT
(example: carpal splint)(example: carpal splint)
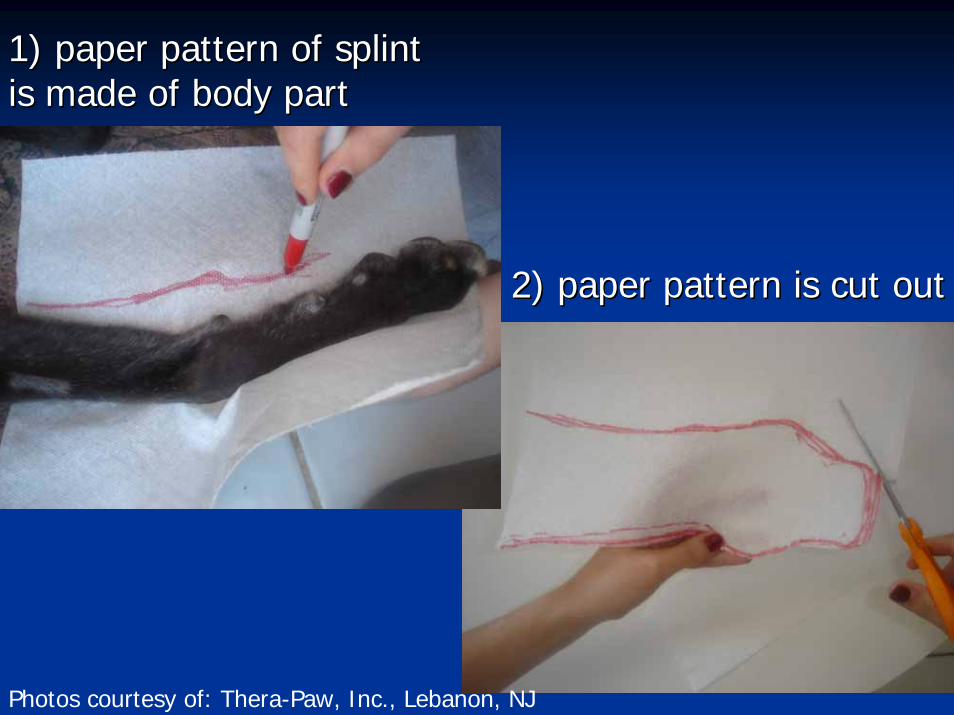
1) paper pattern of splint 1) paper pattern of splint is made of body partis made of body part
2) paper pattern is cut out2) paper pattern is cut out
Photos courtesy of: Thera-Paw, Inc., Lebanon, NJ

3) paper pattern traced 3) paper pattern traced onto LTT sheetonto LTT sheet
4) LTT sheet heated 4) LTT sheet heated in hot waterin hot water
Photos courtesy of: Thera-Paw, Inc., Lebanon, NJ
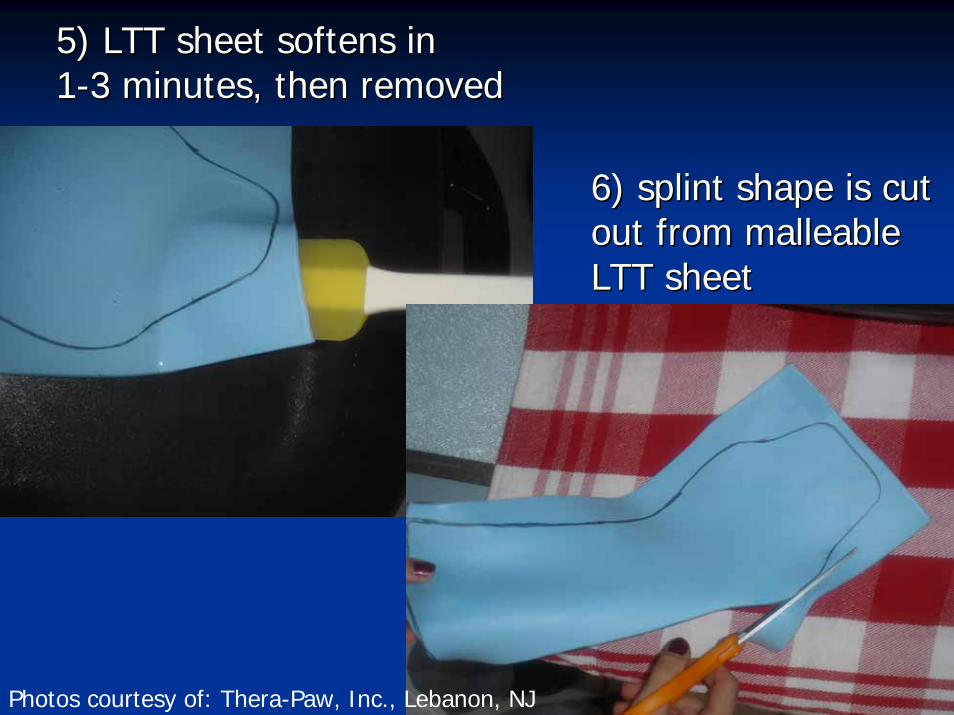
5) LTT sheet softens in 5) LTT sheet softens in 11--3 minutes, then removed3 minutes, then removed
6) splint shape is cut 6) splint shape is cut out from malleable out from malleable LTT sheetLTT sheet
Photos courtesy of: Thera-Paw, Inc., Lebanon, NJ
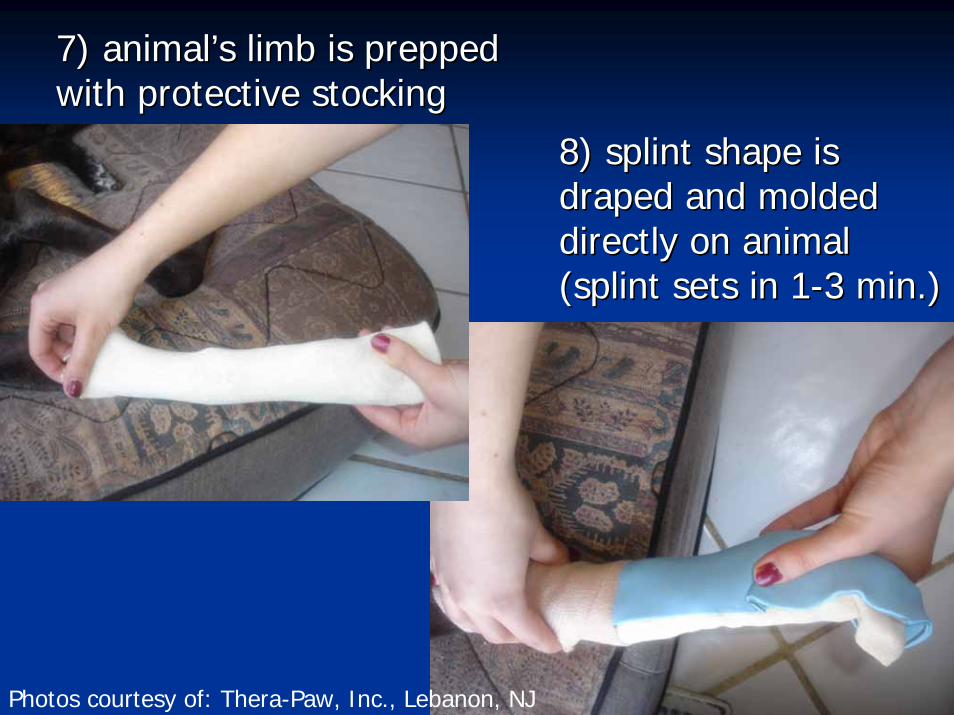
8) splint shape is 8) splint shape is draped and molded draped and molded directly on animal directly on animal (splint sets in 1(splint sets in 1--3 min.)3 min.)
7) animal7) animal’’s limb is prepped s limb is prepped with protective stockingwith protective stocking
Photos courtesy of: Thera-Paw, Inc., Lebanon, NJ
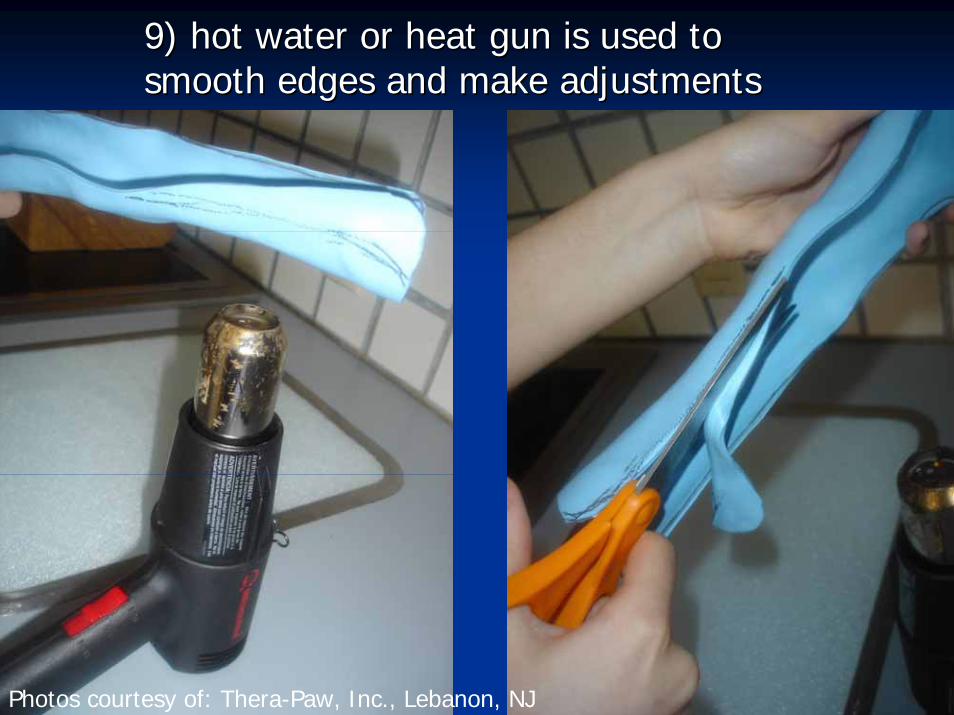
9) hot water or heat gun is used to 9) hot water or heat gun is used to smooth edges and make adjustmentssmooth edges and make adjustments
Photos courtesy of: Thera-Paw, Inc., Lebanon, NJ
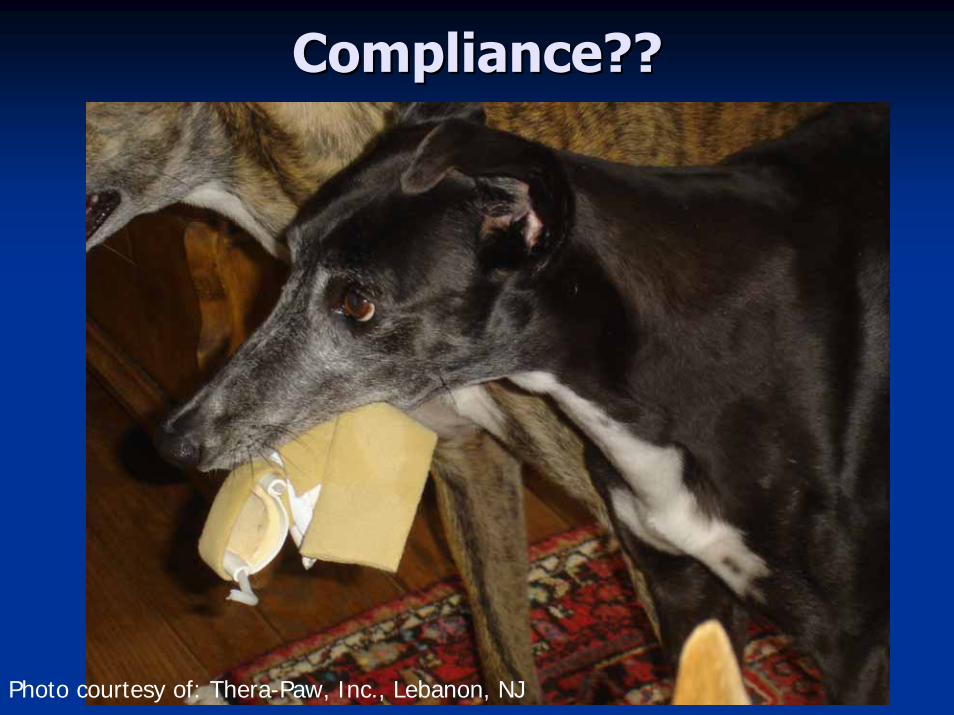
Compliance??Compliance??
Photo courtesy of: Thera-Paw, Inc., Lebanon, NJ
Patient / Owner CompliancePatient / Owner Compliance
No unnecessary restriction of functionNo unnecessary restriction of functionSimple in design / easy to adjustSimple in design / easy to adjustEasy to apply and removeEasy to apply and removeLightweightLightweightDurableDurableEasy to clean / soil resistantEasy to clean / soil resistantOptimize Optimize cosmesiscosmesis
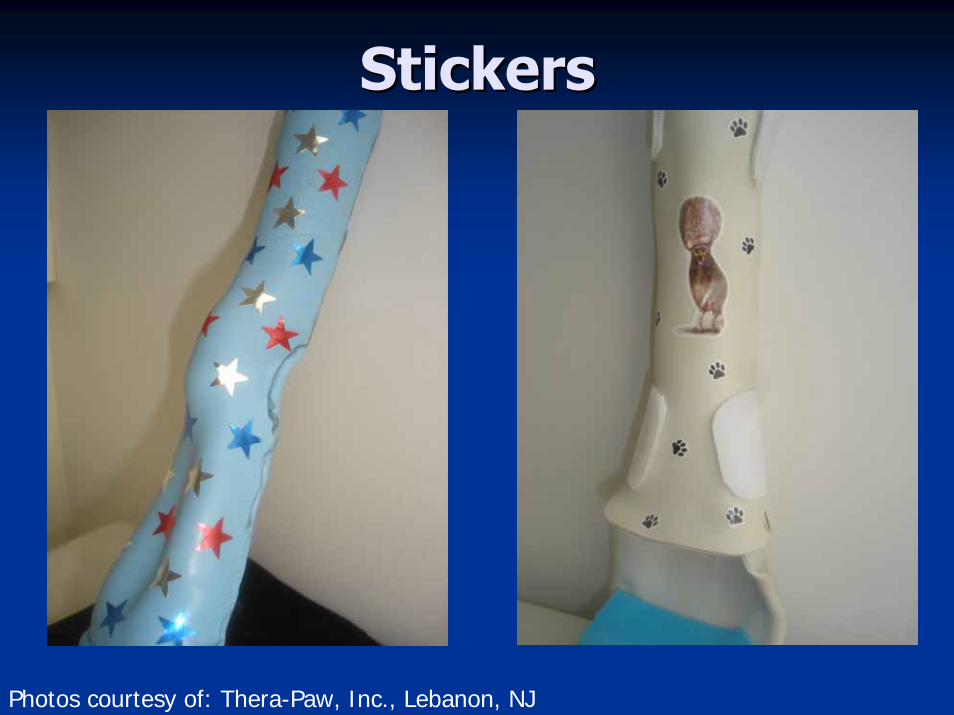
StickersStickers
Photos courtesy of: Thera-Paw, Inc., Lebanon, NJ
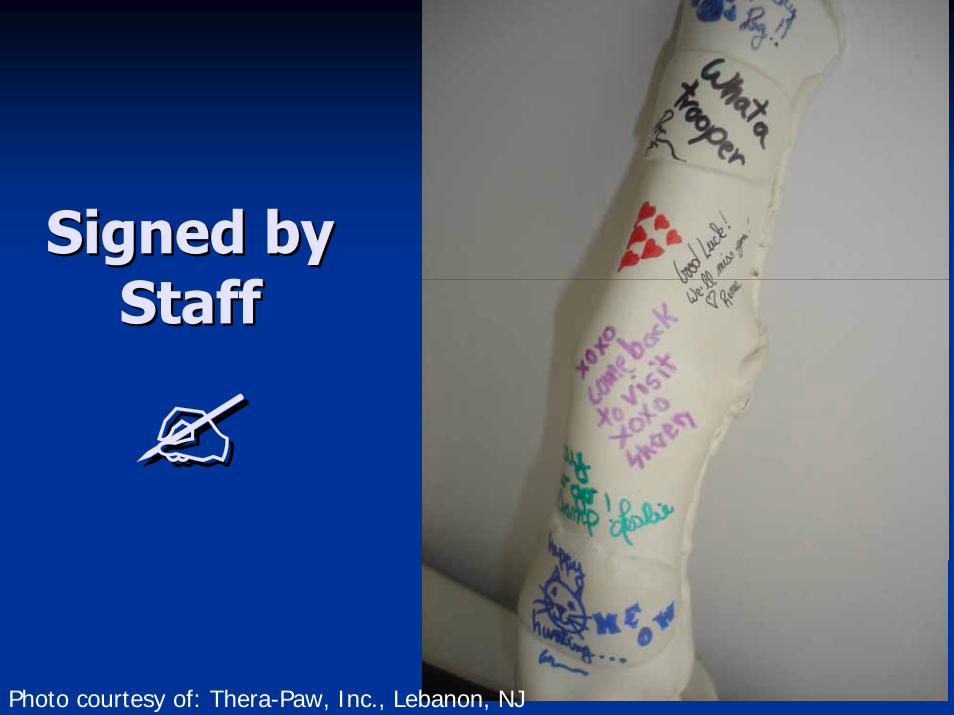
Signed by Signed by StaffStaff
Photo courtesy of: Thera-Paw, Inc., Lebanon, NJ
EXAMPLES EXAMPLES OF OF
CUSTOM CUSTOM THERMOPLASTICTHERMOPLASTIC
SPLINTSSPLINTS
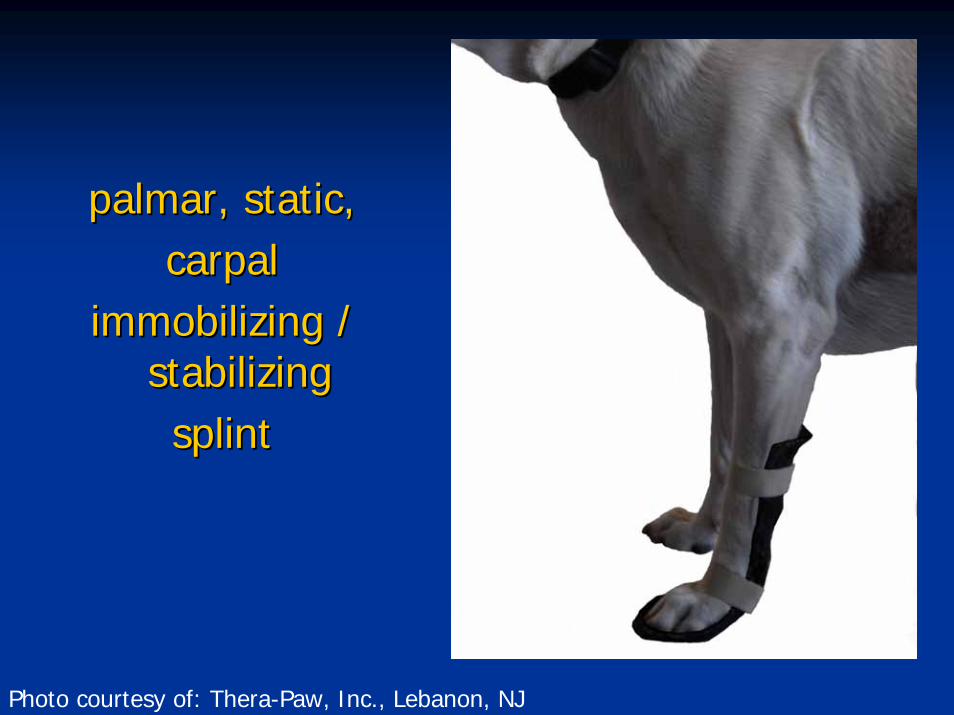
palmarpalmar, static, , static, carpal carpal
immobilizing / immobilizing / stabilizing stabilizing splintsplint
Photo courtesy of: Thera-Paw, Inc., Lebanon, NJ
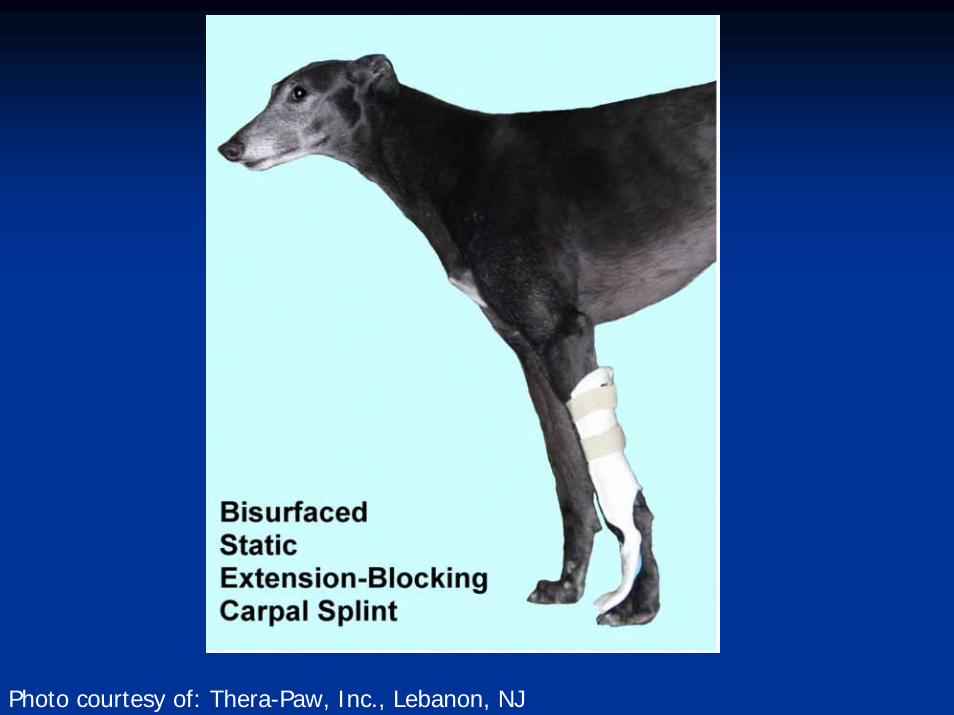
Photo courtesy of: Thera-Paw, Inc., Lebanon, NJ
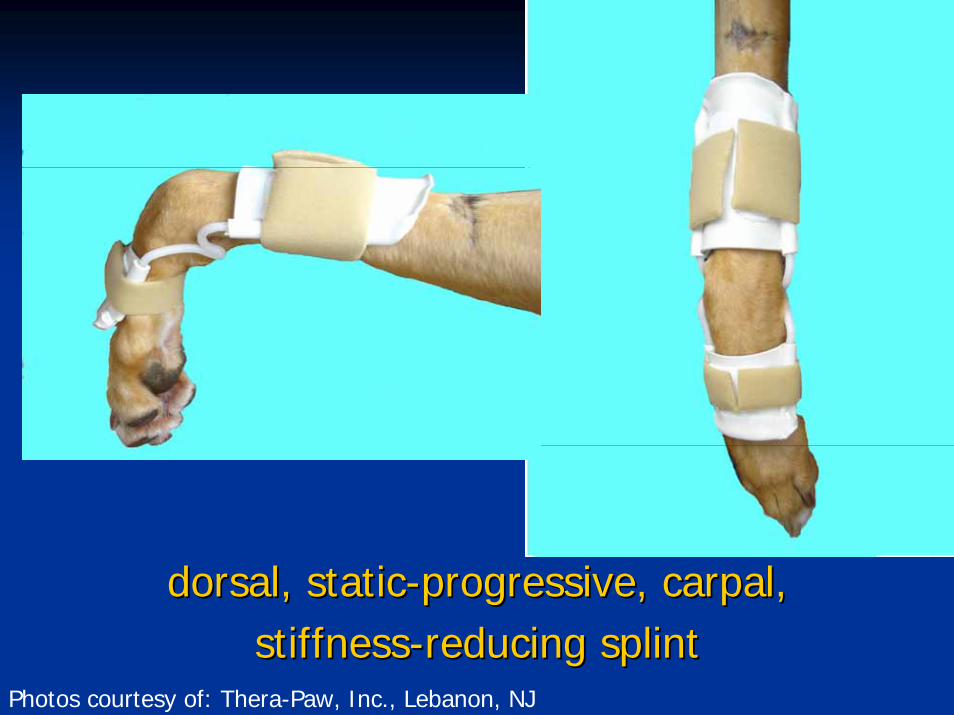
dorsal, staticdorsal, static--progressive, carpal, progressive, carpal, stiffnessstiffness--reducing splintreducing splint
Photos courtesy of: Thera-Paw, Inc., Lebanon, NJ
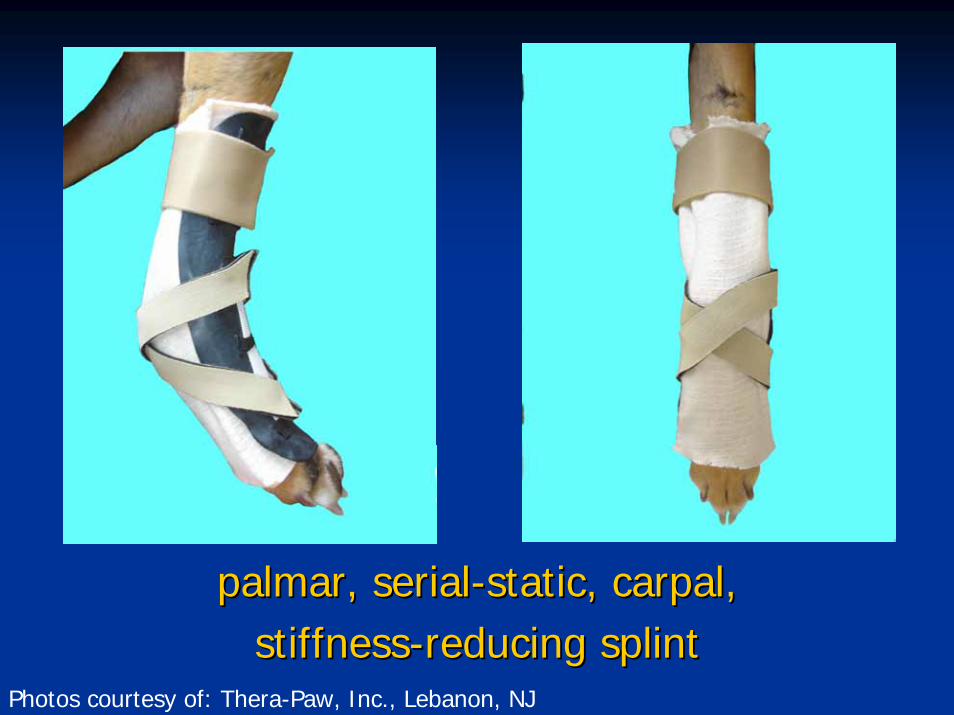
palmarpalmar, serial, serial--static, carpal, static, carpal, stiffnessstiffness--reducing splintreducing splint
Photos courtesy of: Thera-Paw, Inc., Lebanon, NJ
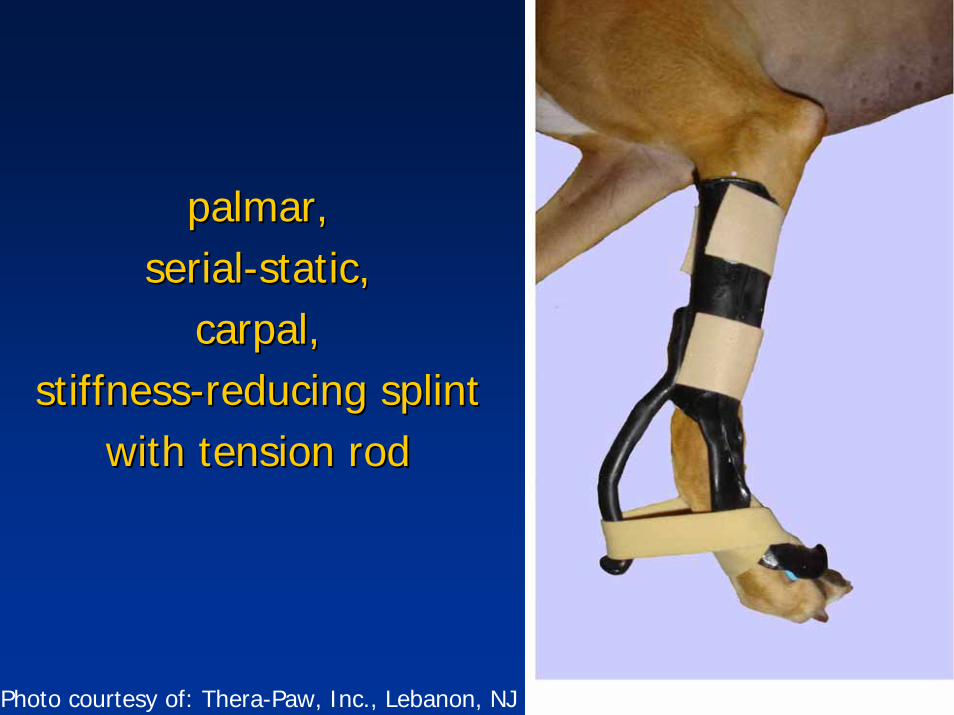
palmarpalmar, , serialserial--static, static,
carpal, carpal, stiffnessstiffness--reducing splintreducing splint
with tension rodwith tension rod
Photo courtesy of: Thera-Paw, Inc., Lebanon, NJ

Photo courtesy of: Thera-Paw, Inc., Lebanon, NJ
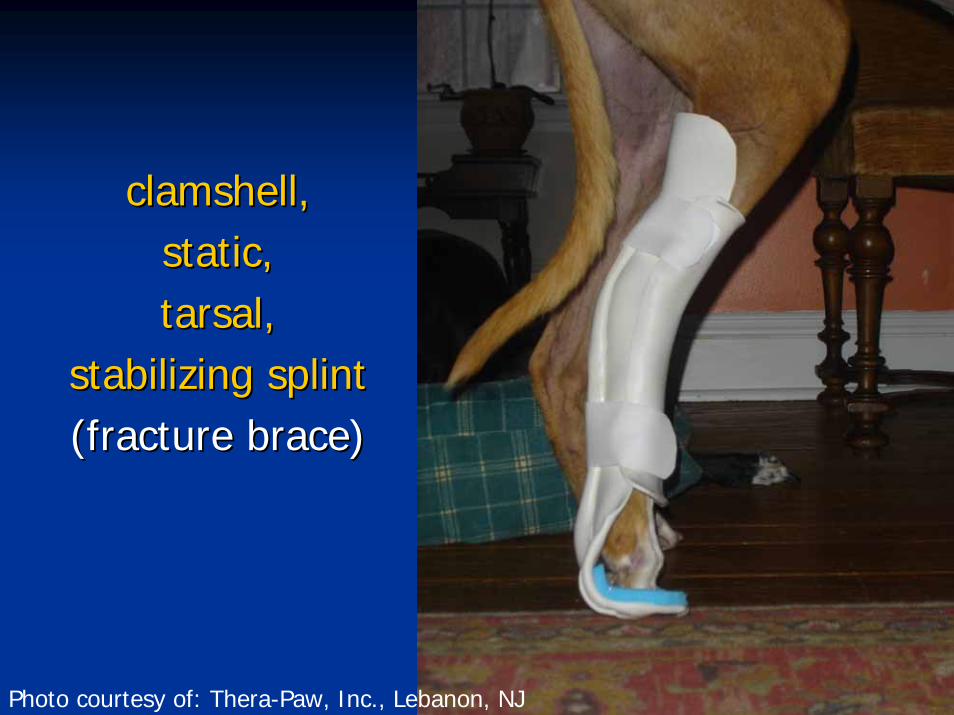
clamshell, clamshell, static, static, tarsal, tarsal,
stabilizing splintstabilizing splint(fracture brace) (fracture brace)
Photo courtesy of: Thera-Paw, Inc., Lebanon, NJ
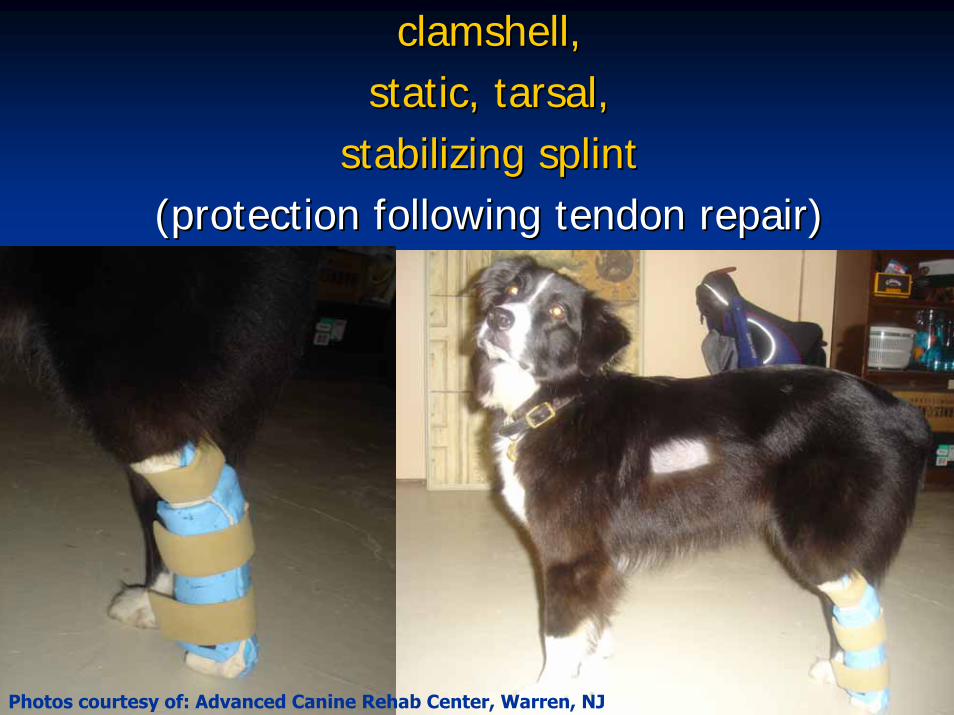
clamshell, clamshell, static, tarsal, static, tarsal,
stabilizing splintstabilizing splint(protection following tendon repair) (protection following tendon repair)
Photos courtesy of: Advanced Canine Rehab Center, Warren, NJ
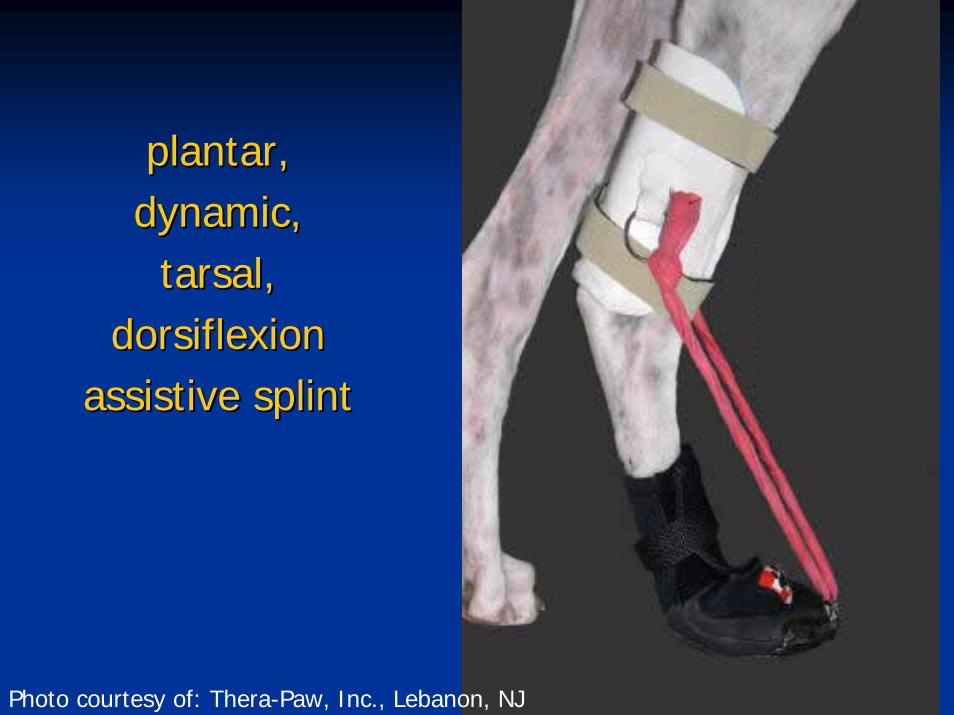
plantar, plantar, dynamic, dynamic, tarsal, tarsal,
dorsiflexiondorsiflexionassistive splintassistive splint
Photo courtesy of: Thera-Paw, Inc., Lebanon, NJ
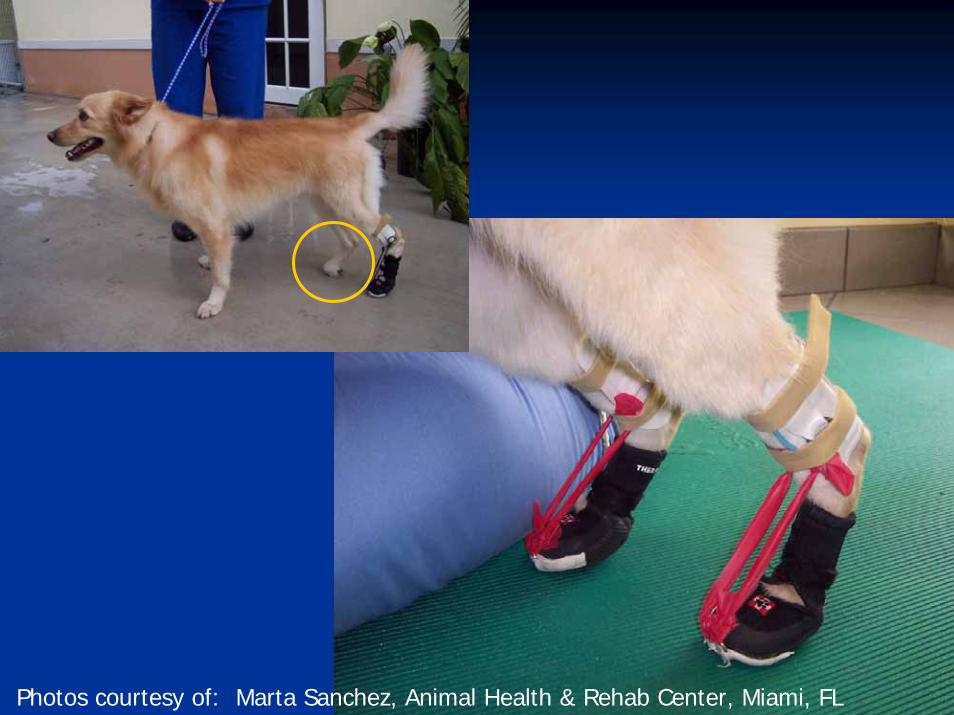
Photos courtesy of: Marta Sanchez, Animal Health & Rehab Center, Miami, FL
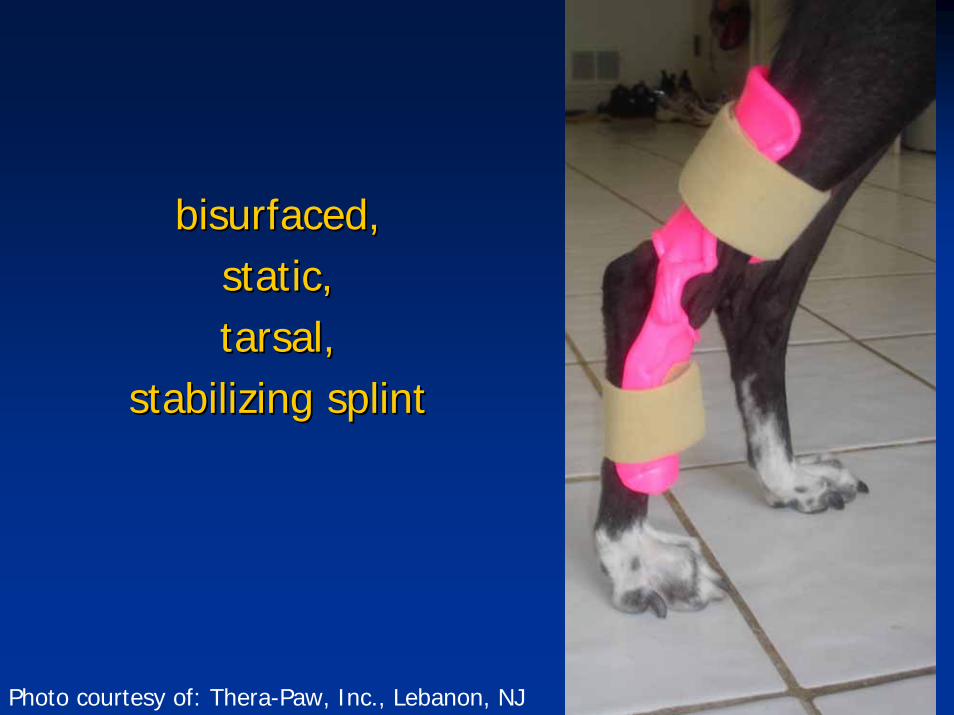
bisurfacedbisurfaced, , static, static, tarsal, tarsal,
stabilizing splintstabilizing splint
Photo courtesy of: Thera-Paw, Inc., Lebanon, NJ
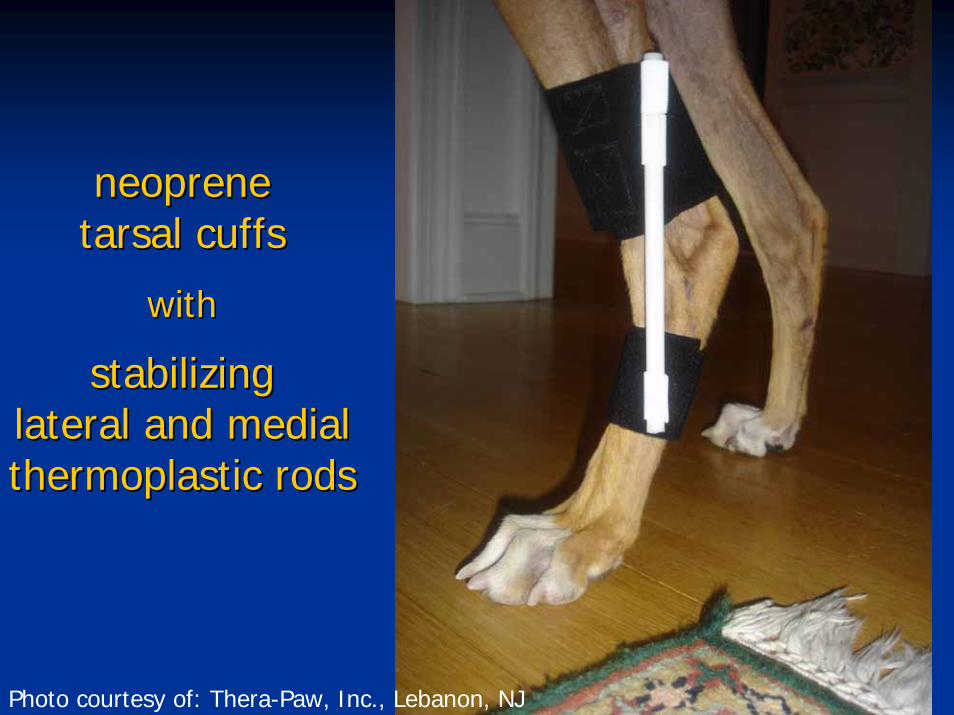
neoprene neoprene tarsal cuffstarsal cuffs
withwith
stabilizing stabilizing lateral and mediallateral and medialthermoplastic rodsthermoplastic rods
Photo courtesy of: Thera-Paw, Inc., Lebanon, NJ
Photo courtesy of: Thera-Paw, Inc., Lebanon, NJ
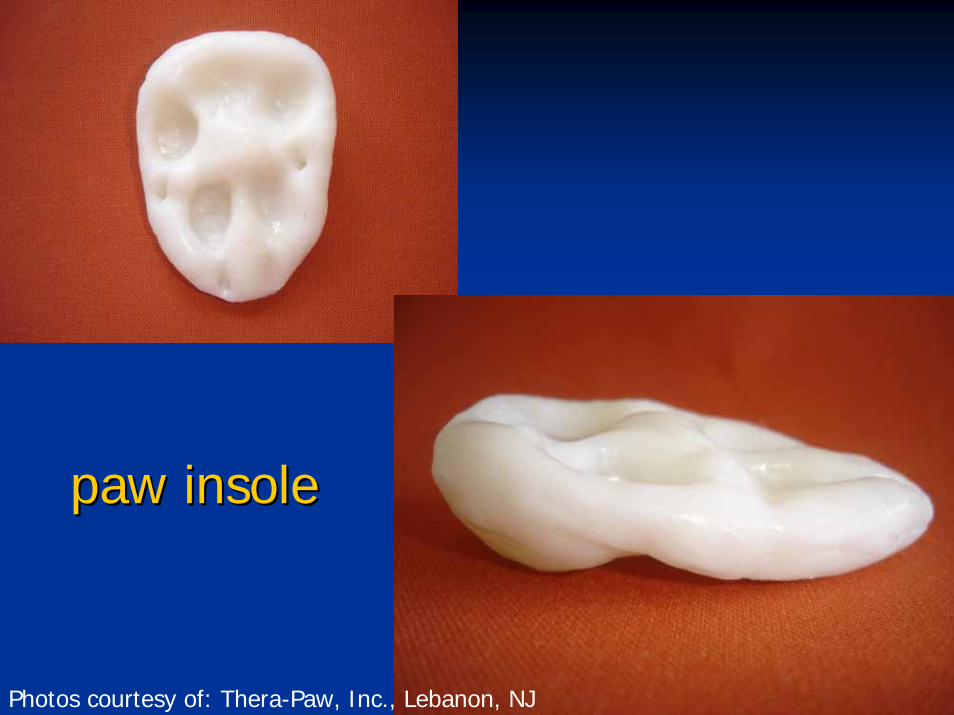
paw insolepaw insole
Photos courtesy of: Thera-Paw, Inc., Lebanon, NJ

Thank You!Thank You!Jorgensen Laboratories, Inc. (Loveland, CO)Jorgensen Laboratories, Inc. (Loveland, CO)My hounds for their cooperationMy hounds for their cooperationFor photos and case studies:For photos and case studies:•• Sean Aiken, DVM, MS, DACVS (Animal Medical Center, NYC, NY)Sean Aiken, DVM, MS, DACVS (Animal Medical Center, NYC, NY)•• Chesapeake Medical Products, Inc. (Baltimore, MD)Chesapeake Medical Products, Inc. (Baltimore, MD)•• DynasplintDynasplint Systems, Inc. (Severna Park, MD)Systems, Inc. (Severna Park, MD)•• Jeff Jeff FlockerFlocker, MPT, CMT, CCRP (Canine Physical Rehab of SW, , MPT, CMT, CCRP (Canine Physical Rehab of SW,
Gilbert, AZ)Gilbert, AZ)•• SchonSchon Gross (Gross (DogLeggsDogLeggs, Reston, VA), Reston, VA)•• Stacy Sties (Stacy Sties (CanineIcerCanineIcer, Charlottesville, VA), Charlottesville, VA)•• Martin Kaufmann (Martin Kaufmann (OrthopetsOrthopets, Denver, CO), Denver, CO)•• Sander Sander NassanNassan, CPO, FAAOP (Phoenix, AZ), CPO, FAAOP (Phoenix, AZ)•• Coral Anne Roeder (Coral Anne Roeder (OrthovetOrthovet Splints, Splints, TyghTygh Valley, OR)Valley, OR)•• NTD Orthopedics (CA)NTD Orthopedics (CA)•• Sammons Preston Sammons Preston RolyanRolyan (Bolingbrook, IL)(Bolingbrook, IL)•• Marta Sanchez, DVM, CVA, CCRP (Animal Health & Rehab C., Marta Sanchez, DVM, CVA, CCRP (Animal Health & Rehab C.,
Miami, FL)Miami, FL)•• Advanced Canine Rehabilitation Center (Warren, NJ)Advanced Canine Rehabilitation Center (Warren, NJ)•• TheraThera--Paw, Inc. (Lebanon, NJ)Paw, Inc. (Lebanon, NJ)
Hippotherapy: An Introduction and Overview Diana Carman, PT CSM San Diego, 2006
I . Terminology and history. a. History and Research b. Hippotherapy vs. Therapeutic Riding
c. NARHA, AHA, EFMHA d. Therapist registration: PT, PTA, OT, COTA, SLP
II. The Horse a. Global benefits of incorporating the horse into physical
therapy intervention. b. Equine gait kinematics compared to human gait c. special considerations
size gait temperment, attitude movement fitness potential problems with horses involved in hippotherapy
III. Hippotherapy as a physical therapy Intervention a. goals
b. appropriate patients c. precautions and contraindications
d. special equipment IV. Conclusion and Questions
POST-OPERATIVE INSTRUCTIONS: FEMORAL HEAD AND NECK OSTECTOMY
1.) It is not uncommon for your pet to have a decreased appetite upon
returning home from a major surgery. If you notice that he or she has not urinated or defecated within 24 hours of their return home, please give our hospital a call. It is common that these functions be decreased along with the decreased appetite and activity level. You should allow your dog to do no more activity than what is discussed upon discharge.
2.) MODERATE ACTIVITY: It is important that your pet’s activities be
moderately restricted during the first 5 days post-operative. It is fine for your pet to get up on their own and to follow you around the house, as long as they are able to get up without a great deal of effort. If they are having difficulty getting up or should slip and fall, we encourage you to assist them up with a sling. An isolated slip and fall will not do any damage; however, if they are allowed to repeatedly slip and fall they can cause additional soft tissue damage.
3.) REHABILITATION EXERCISES: It is common for muscles to atrophy or
weaken dramatically if they are not used normally post operatively. The following exercises are to be your tasks at home following your dog’s return home. A dog should be relaxed and comfortable at the start of each session, so select an area which is quiet with a low level of activity around your pet. Begin by gently performing a whole body massage as demonstrated at discharge. Then gently focus in on the muscles of the shoulders, chest and the surgical limb. Continue this for 5 minutes or so, or until you perceive your pet to be relaxed.
A.)Icing: You should ice for the first 72 hours post-operatively. This should be performed at least 3 times daily for 10-15 minutes at a time. By cooling the surgery site, you provide essential anti-inflammatory effects and as a result decrease pain associated with surgery. It is good to use a small ice pack that is somewhat flexible to gently drape over the surgical area. If you are using a commercial ice pack, place a pillowcase over it to protect your pet’s skin. You can also use direct ice in the form of ice massage. You can do this by filling small paper cups to the brim with water and placing them in the freezer. When you need to ice you can tear off the top inch of the paper cup and use that surface to ice. If your dog is small, short Popsicle sticks in an ice tray are sufficient. Gently rub the surgical area with the ice for around 10 minutes. Ice massage is the preferred method of icing because it is quicker and provides a better
cooling effect. It may take two people to accomplish the icing as sometimes a dog can get squirmy. Be aware that your dog will be experiencing the same sensations that we would when being iced. At first they will feel cold, then a burning sensation, then an aching sensation and then numbness. Once the icing has achieved the numbing stage they usually do not squirm any longer.
B.)Hot packs: Heat should not be applied for the first 72 hours because this may increase inflammation, swelling and edema. Moist heat can begin to be applied on day 4 or 5 after the surgery. You should begin using hot packs before performing passive range of motion and immediately after a bathroom break. The walking done on the bathroom break will begin to warm up the muscles of the hip. The moist hot pack will serve to reduce tissue tightness, increase blood flow and warm the joint. This can be done by immersing a hand towel in very warm water and gently wrapping it around the surgical area. Pre-test the towel on you first to make sure it is not too hot. Keep immersing the towel into the hot water as it cools off. Hot packing should last for 15 minutes. You may also purchase microwavable hot packs. You can find these at any pharmacy and they are inexpensive. The microwavable packs should be wrapped in a moist warm towel before being applied to the surgical area. Place the pack on the surgical area for 15 minutes. Never use an electric heating pad for warming a joint.
C.)Passive range of motion: Once the joint has been warmed with the hot pack, you can begin gentle passive range of motion. This helps to maintain the joint’s mobility and provides nutrition to the joint and cartilage. While continuing with the hot packing start by gently flexing (bending) and extending (straightening) the hip. When bending the hip you should be bringing your dog’s foot forward to about the elbow of the front leg. When extending the hip you will be bringing your dog’s leg back so that it is almost parallel with his or her back. Hold the joint flexed (bent) for 10-15 seconds, and then slowly move through the range of motion until the hip is in the extended position (straight). Hold the hip in extension for 10-15 seconds. Repeat these motions 10 times per session. Your dog may not enjoy this. Pay attention to how your dog reacts to the 10-15 second holds. If he or she whimpers or vocalizes more than usual or quickly turns his or her head toward you, you may be bending or straightening the hip too much. If that is the case do not flex of extend the hip joint as much the next time.
Depending upon what your schedule allow you to do, these sessions should take place 2-3 times daily. Non-steroidal oral anti-inflammatories will also be provided throughout the recovery period to help with the pain. You may notice swelling along the incision site. Please call if this should occur, it is not uncommon. Increasing the time spent hot packing and additional passive range of motion exercises should help with this.
4.) ACCEPTABLE ACTIVITIES: Please follow these guidelines for exercise. Days 5-7: It is time to begin more formalized exercise on a regular basis. Begin at day 5 by instituting 3, 5 minute walks daily. Be sure to follow-up each walk with hot packing, passive range of motion and sustained stretching. To perform sustained stretching you will bring your dog’s hip into full flexion (bending) and full extension (straight out behind), while hot packing, and hold that position for a count of 30 seconds. Be aware of the same restrictions as with passive range of motion. If you can see that your dog is uncomfortable or painful at either full flexion or extension, back off the stretch just a little and hold that position. Sustained stretching will stretch the hip joint capsule and muscles which may have tightened up as a result of changing their biomechanics due to the pain of hip dysplasia. Weeks 1-3: As your dog tolerates the walks, begin to increase the walks by 3-5 minutes every other day. The goal will be, eventually, to take 3, 20 minute walks daily. If your dog is not showing any swelling, pain or lameness at the hip you can discontinue the passive range of motion, but continue with the hot packing and sustained stretching. Keep in mind that your dog’s balance and strength may be decreased due to the surgery and the hip problems that caused the surgery, so avoid activities that may put them in danger such as climbing flights of stairs, playing with other dogs or jumping on/off furniture or into/out of the car. You can purchase a therapeutic ball of a size that will allow you dog to straddle the ball without any of his or her feet touching the floor. While your dog is on the ball, with you supporting her or him, you will roll the ball slightly forward and backward and side to side. These exercises will strengthen the abdominal and paraspinal muscles which will help with your dog’s core stabilization. You can also roll your dog forward onto his or her front legs for weight bearing, or backward onto her or his rear legs for weight bearing. Rolling the ball side to side while weight bearing on the ball is good for strengthening and improving proprioception (the sense of where your limb is in space). Weeks 4-6: Once your dog is comfortable with the 3, 20 minute walks, decrease the number of walks to 2 daily and slowly increase the time of the walks to 30 minutes. During your walks you can have you dog walk in a zigzag pattern, in circles in both directions and figure eights. You can also begin proprioceptive exercises with short periods of dancing with your dog (lifting the front legs off the floor about 6-10 inches, and having them stand on their hind limbs at first and then, as they grow stronger walk them forward and backward and side to side). You can also lift the front and hind leg of the non-surgical side off the floor and have your dog hop to the side using the legs on the surgical side for support. Both of these exercises should begin
statically (standing still) and progress into movement once your dog can tolerate the exercise. Week 7 and on: You can now shift your dog’s walks slowly up to 45 minutes once daily. When you have reached that time you can start walking your dog for 60 minutes 3-4 times a week. You can also start walking your dog up and down stairs. The stair walking should be performed slowly allowing the dog to use all four legs independently, not allowing your dog to bunny hop or tripod up the stairs. Once again if your dog becomes sore or lame after walking, hot pack the surgical area for 15 minutes, give her/him a day or two of rest and resume activities at a shorter distance than when the lameness occurred and slowly return him or her to the previous level of activity. 5.) RECHECK APPOINTMENTS: You should schedule two recheck
appointments post operatively. We will tell you when you pick up your pet when the first recheck should be scheduled. We will take this recheck time to assess your pet’s recovery and adjust your rehabilitation program accordingly. Every patient is individual in her or his progress.
6.) MEDICATIONS PRESCRIBED:
7.) OTHER COMMENTS: If you have any questions at all regarding your pet’s progress throughout the recovery please do not hesitate to call our office at any time! (603) 742-6438
POST-SURGICAL INSTRUCTIONS: OSTEOCHONDRITIS DESSICANS (OCD)
1.) It is not uncommon for your pet to have a decreased appetite upon
retuning home from a major surgery. If you notice that he or she has not urinated or defecated within 24 hours of their return home, please give our hospital a call. It is common that these functions be decreased along with the decreased appetite and activity level. You should allow your dog to do no more activity than what is discussed upon discharge.
2.) REHABILITATION EXERCISES: It is common for muscles to atrophy or
weaken dramatically if they are not used in any way post operatively. The following exercises are to be your tasks at home following your dog’s return home. A dog should be relaxed and comfortable at the start of each session, so select an area, which is quiet with a low level of activity around your pet. Begin by gently performing a whole body massage as demonstrated at discharge. Then gently focus in on the muscles of the shoulders, chest and the surgical forelimb. Continue this for 5 minutes or so, until you perceive your pet to be relaxed.
A.) Icing: Icing should be done for the first 72 hours posts operatively. This
should be performed at least three times daily for 10-15 minutes at a time. By cooling the surgery site, you provide essential anti-inflammatory effects and as a result decrease pain associated with surgery. It is good to use a small ice pack that is somewhat flexible to gently drape over the surgical area. If you are using a commercial ice pack, place a pillowcase over it to protect your pet’s skin. You can use direct ice in the form of ice massage. You can do this by freezing small Dixie filled to the brim with water. If you dog is small Popsicle sticks in an ice tray is sufficient. After the water is frozen tear the top 1 inch of the Dixie cup off and gently rub the surgical area with the ice for around 10 minutes. Ice massage is the preferred method of icing because it is quicker and provides a better cooling effect. It may take two people to accomplish the icing, as sometimes a dog can get squirmy. Be aware that your dog will be experiencing the same sensations that we would with icing. At first they will feel cold, than a burning sensation, then an aching sensation and then numbness. Once the icing has achieved the numbing stage they usually don’t squirm any longer.
B.)Hot packing: Heat should not be applied for the first 72 hours after surgery because this may increase inflammation and swelling. Moist heat can be applied starting on day 4 or 5 following surgery. You should begin using hot packs before performing passive range of motion. This will serve to reduce tissue tightness, increase blood flow and warm the joint. This can be done by immersing a hand towel in very warm water and gently wrapping it around the surgical area. Pre-test the towel on yourself fist to make sure it is not too hot. Keep immersing the towel into the hot water as it cools off. Hot packing should last for 15 minutes. You may also purchase microwavable hot packs. You can find these at any pharmacy and they are inexpensive. The microwavable packs should be wrapped in a moist warm towel before being applied to the surgical area. Place the pack on the surgical area for 15 minutes. NEVER USE AN ELECTRIC HEATING PAD FOR WARMING A JOINT. C.)Passive range of motion: Once the joint has been warmed with the hot pack, you can begin gentle passive range of motion. This helps to maintain the joint’s mobility and provides nutrition to the joint and cartilage. Start by gently flexing (bending) and extending (straightening) the elbow as shown to you at the first recheck. Hold the joint flexed (bent) for 10-15 seconds, and then slowly move through the range of motion until the elbow is in the extended position (straight). Hold this position for 10-15 seconds. Repeat these motions 10-15 times. Your dog may not enjoy this. Pay attention to how your dog reacts to the 10-15 second holds. If he or she whimpers or vocalizes more than usual or quickly turns his or her head toward you, you may be bending or straightening the elbow too much. If that is the case don’t flex or extend the elbow joint as much the next time. Depending upon what your schedule allows you to do, these sessions should take place 2-3 times daily. Non steroidal oral anti-inflammatories will also be provided throughout the recovery period to help with the pain. You may notice swelling along the incision site. Please call if this should occur, it is not uncommon. Increasing the time spent hot packing and additional passive range of motion exercises should help with this. 3.) ACCEPTABLE ACTIVITIES: Please follow these guidelines for exercise. Week one: Hot packing, passive range of motion and bathroom outings 2-3 times daily. Week two-three: Walk your dog outside on a leash for 5-15 minutes three times a day. This walking can be accomplished while your dog is outside doing his or her bathroom duties. Your dog should be confined to a crate when you are not outside for these small walks, or doing your hot packing and passive range of motion exercises.
Week four: Swimming may begin now, however your dog should not be running in and out of the water. Start with your dog standing in the water with the water level at about the shoulder and hip. Allow your dog to either walk in the water at this depth or to swim from that position. Start with limiting the time spent in the water to 5 minutes and progress slowly by 2 minutes every other session. (We realize that many people do not have access to water, that there are seasonal restrictions, and that your dog may not like water. These are all good reasons to not swim your dog.) Dover Veterinary Hospital has an underwater treadmill for those owners who might want to provide access to water rehabilitation year round. Week five-eight: Continue passive range of motion and add stretching after walks. Hold the stretch for 15-30 seconds (at the end of the range of motion either flexion or extension), repeated 4 times after each walk. Continue with controlled walks. You may begin to increase the length of walks by 5 minutes per week added on to the end of the bathroom breaks. By the time your dog is 8 weeks post surgery you should be walking him or her about 20-25 minutes 2-3 times daily. These walks should be very calm and controlled. Week eight-nine: Staying within the time limit of 20-25 minutes 2-3 times daily, start during the walks to move your dog in a zigzag pattern, in circles in both directions, and in figure eights. These walks will begin to strengthen the muscles on the inside and outside of the leg as well as improve balance and your dog’s sense of where her or his leg is in space. Week ten-twelve: You may begin gentle incline work. Walk your dog slowly up a small hill or other incline. The hill should be about 50 feet long. Repeat the ascent and descent 3-4 times and repeat the exercise 2 times daily. This will help to strengthen the hind and fore limbs. You can also begin at this time to wheelbarrow your dog. Holding the hind limbs in your hands raise the rear legs about 10-12 inches off the floor. Begin by just standing statically for 5 minutes and as your dog grows stronger walk your dog forward, backward and sideways for about 5 minutes. Continue with the previously recommended exercises for strengthening only increase the speed of the zigzags, circles and figure eights to a trot. Week twelve-sixteen: You may begin stairs at this time. Keep your dog on a leash and walk him or her slowly up and down 8-10 stairs 3-4 times in a row. Repeat this exercise 2 times daily. You may need to accompany your dog on these exercises to either give them confidence or to slow them down. Your dog should go up the stairs slowly allowing them to use all four legs and not to substitute by lifting the surgical leg up and tripoding. This will continue to strengthen the leg muscles and help your dog improve his or her balance and sense of leg position or proprioception.

Week 16 and on: Do not allow crazed activity such as leaping off of retaining walls, decks, etc., or jumping after Frisbees until 6 to 8 months post-operatively. Your dog will not regain full muscle mass until 6 to 8 months post surgery. During this time any new activity or extended activity will possibly cause some muscle strain and lameness. If this occurs, take a break for a day or two, return to moist hot packing and passive range of motion for those days and then over a 2-3 day period work back to the previous level of activity. Please call our office immediately if you should notice that your dog is suddenly not weight bearing at all, and do not hesitate to call our office as often as you like for advice or updates. 742-6438. 4.) RECHECK APPOINTMENTS: You should schedule two recheck
appointments post operatively. We will tell you when you pick up your pet when the first recheck should be scheduled. We will take this time to assess your pet’s recovery and adjust your rehab program as needed, as every patient is individual in her or his progress. Charles Evans, Director of Rehabilitation will be calling you every two weeks for these same reasons after the 1 month recheck appointment. If you have any questions at all regarding your dog’s recovery throughout this period, please don’t hesitate to call our office and ask for Charlie or Cindy.
5.) MEDICATIONS PRESCRIBED:
POST-OPERATIVE INSTRUCTIONS: TIBIAL PLATEAU LEVELING OSTEOTOMY
1.) It is not uncommon for your pet to have a decreased appetite upon retuning home from a major surgery. If you notice that he or she has not urinated or defecated within 24 hours of their return home, please give our hospital a call. It is common that these functions be decreased along with the decreased appetite and activity level. You should allow your dog to do no more activity than what is discussed upon discharge.
2.) REHABILITATION EXERCISES: It is common for muscles to atrophy or
weaken dramatically if they are not used in any way post operatively. The following exercises are to be your tasks at home following your dog’s return home. A dog should be relaxed and comfortable at the start of each session, so select an area, which is quiet with a low level of activity around your pet. Begin by gently performing a whole body massage as demonstrated at discharge. Then gently focus in on the muscles of the shoulders, chest and the surgical forelimb. Continue this for 5 minutes or so, until you perceive your pet to be relaxed.
A.) Icing: Icing should be done for the first 72 hours posts operatively. This
should be performed at least three times daily for 10-15 minutes at a time. By cooling the surgery site, you provide essential anti-inflammatory effects and as a result decrease pain associated with surgery. It is good to use a small ice pack that is somewhat flexible to gently drape over the surgical area. If you are using a commercial ice pack, place a pillowcase over it to protect your pet’s skin. You can use direct ice in the form of ice massage. You can do this by freezing small Dixie filled to the brim with water. If you dog is small Popsicle sticks in an ice tray is sufficient. After the water is frozen tear the top 1 inch of the Dixie cup off and gently rub the surgical area with the ice for around 10 minutes. Ice massage is the preferred method of icing because it is quicker and provides a better cooling effect. It may take two people to accomplish the icing, as sometimes a dog can get squirmy. Be aware that your dog will be experiencing the same sensations that we would with icing. At first they will feel cold, than a burning sensation, then an aching sensation and then numbness. Once the icing has achieved the numbing stage they usually don’t squirm any longer.

B.)Hot packing: Heat should not be applied for the first 72 hours after surgery because this may increase inflammation and swelling. Moist heat can be applied starting on day 4 or 5 following surgery. You should begin using hot packs before performing passive range of motion. This will serve to reduce tissue tightness, increase blood flow and warm the joint. This can be done by immersing a hand towel in very warm water and gently wrapping it around the surgical area. Pre-test the towel on yourself fist to make sure it is not too hot. Keep immersing the towel into the hot water as it cools off. Hot packing should last for 15 minutes. You may also purchase microwavable hot packs. You can find these at any pharmacy and they are inexpensive. The microwavable packs should be wrapped in a moist warm towel before being applied to the surgical area. Place the pack on the surgical area for 15 minutes. NEVER USE AN ELECTRIC HEATING PAD FOR WARMING A JOINT. C.)Passive range of motion: Once the joint has been warmed with the hot pack, you can begin gentle passive range of motion. This helps to maintain the joint’s mobility and provides nutrition to the joint and cartilage. Start by gently flexing (bending) and extending (straightening) the elbow as shown to you at the first recheck. Hold the joint flexed (bent) for 10-15 seconds, and then slowly move through the range of motion until the elbow is in the extended position (straight). Hold this position for 10-15 seconds. Repeat these motions 10-15 times. Your dog may not enjoy this. Pay attention to how your dog reacts to the 10-15 second holds. If he or she whimpers or vocalizes more than usual or quickly turns his or her head toward you, you may be bending or straightening the elbow too much. If that is the case don’t flex or extend the elbow joint as much the next time. Depending upon what your schedule allows you to do, these sessions should take place 2-3 times daily. Non steroidal oral anti-inflammatories will also be provided throughout the recovery period to help with the pain. You may notice swelling along the incision site. Please call if this should occur, it is not uncommon. Increasing the time spent hot packing and additional passive range of motion exercises should help with this. 3.) ACCEPTABLE ACTIVITIES: Please follow these guidelines for exercise. Week one: Hot packing, passive range of motion and bathroom outings 2-3 times daily. Week two-three: Walk your dog outside on a leash for 5-15 minutes three times a day. This walking can be accomplished while your dog is outside doing his or her bathroom duties. Your dog should be confined to a crate when you are not outside for these small walks, or doing your hot packing and passive range of motion exercises.

Week four: Swimming may begin now, however your dog should not be running in and out of the water. Start with your dog standing in the water with the water level at about the shoulder and hip. Allow your dog to either walk in the water at this depth or to swim from that position. Start with limiting the time spent in the water to 5 minutes and progress slowly by 2 minutes every other session. (We realize that many people do not have access to water, that there are seasonal restrictions, and that your dog may not like water. These are all good reasons to not swim your dog.) Dover Veterinary Hospital has an underwater treadmill for those owners who might want to provide access to water rehabilitation year round. Week five-eight: Continue passive range of motion and add stretching after walks. Hold the stretch for 15-30 seconds (at the end of the range of motion either flexion or extension), repeated 4 times after each walk. Continue with controlled walks. You may begin to increase the length of walks by 5 minutes per week added on to the end of the bathroom breaks. By the time your dog is 8 weeks post surgery you should be walking him or her about 20-25 minutes 2-3 times daily. These walks should be very calm and controlled. Week eight-nine: Staying within the time limit of 20-25 minutes 2-3 times daily, start during the walks to move your dog in a zigzag pattern, in circles in both directions, and in figure eights. These walks will begin to strengthen the muscles on the inside and outside of the leg as well as improve balance and your dog’s sense of where her or his leg is in space. Week ten-twelve: You may begin gentle incline work. Walk your dog slowly up a small hill or other incline. The hill should be about 50 feet long. Repeat the ascent and descent 3-4 times and repeat the exercise 2 times daily. This will help to strengthen the hindquarters. You can also begin at this time to dance with your dog. Holding the forelimbs in your hands raise the front legs about 10-12 inches off the floor. Begin by just standing statically for 5 minutes and as your dog grows stronger walk your dog forward, backward and sideways for about 5 minutes. Continue with the previously recommended exercises for strengthening only increase the speed of the zigzags, circles and figure eights to a trot. Week twelve-sixteen: You may begin stairs at this time. Keep your dog on a leash and walk him or her slowly up and down 8-10 stairs 3-4 times in a row. Repeat this exercise 2 times daily. You may need to accompany your dog on these exercises to either give them confidence or to slow them down. Your dog should go up the stairs slowly allowing them to use all four legs and not to substitute by lifting the surgical leg up and tripoding. This will continue to strengthen the leg muscles and help your dog improve his or her balance and sense of leg position or proprioception.

Week 16 and on: Do not allow crazed activity such as leaping off of retaining walls, decks, etc., or jumping after Frisbees until 6 to 8 months post-operatively. Your dog will not regain full muscle mass until 6 to 8 months post surgery. During this time any new activity or extended activity will possibly cause some muscle strain and lameness. If this occurs, take a break for a day or two, return to moist hot packing and passive range of motion for those days and then over a 2-3 day period work back to the previous level of activity. Please call our office immediately if you should notice that your dog is suddenly not weight bearing at all, and do not hesitate to call our office as often as you like for advice or updates. 742-6438. 4.) RECHECK APPOINTMENTS: You should schedule two recheck
appointments post operatively. We will tell you when you pick up your pet when the first recheck should be scheduled. We will take this time to assess your pet’s recovery and adjust your rehab program as needed, as every patient is individual in her or his progress. Charles Evans, Director of Rehabilitation will be calling you every two weeks for these same reasons after the 1 month recheck appointment. If you have any questions at all regarding your dog’s recovery throughout this period, please don’t hesitate to call our office and ask for Charlie or Cindy.
5.) MEDICATIONS PRESCRIBED:
POST-OPERATIVE INSTRUCTIONS: TRIPLE PELVIC OSTEOTOMY
1.) It is not uncommon for your pet to have a decreased appetite upon
retuning home from a major surgery. If you notice that he or she has not urinated or defecated within 24 hours of their return home, please give our hospital a call. It is common that these functions be decreased along with the decreased appetite and activity level. You should allow your dog to do no more activity than what is discussed upon discharge.
2.) REHABILITATION EXERCISES: It is common for muscles to atrophy or
weaken dramatically if they are not used in any way post operatively. The following exercises are to be your tasks at home following your dog’s return home. A dog should be relaxed and comfortable at the start of each session, so select an area, which is quiet with a low level of activity around your pet. Begin by gently performing a whole body massage as demonstrated at discharge. Then gently focus in on the muscles of the shoulders, chest and the surgical forelimb. Continue this for 5 minutes or so, until you perceive your pet to be relaxed.
A.) Icing: Icing should be done for the first 72 hours posts operatively. This
should be performed at least three times daily for 10-15 minutes at a time. By cooling the surgery site, you provide essential anti-inflammatory effects and as a result decrease pain associated with surgery. It is good to use a small ice pack that is somewhat flexible to gently drape over the surgical area. If you are using a commercial ice pack, place a pillowcase over it to protect your pet’s skin. You can use direct ice in the form of ice massage. You can do this by freezing small Dixie filled to the brim with water. If you dog is small Popsicle sticks in an ice tray is sufficient. After the water is frozen tear the top 1 inch of the Dixie cup off and gently rub the surgical area with the ice for around 10 minutes. Ice massage is the preferred method of icing because it is quicker and provides a better cooling effect. It may take two people to accomplish the icing, as sometimes a dog can get squirmy. Be aware that your dog will be experiencing the same sensations that we would with icing. At first they will feel cold, than a burning sensation, then an aching sensation and then numbness. Once the icing has achieved the numbing stage they usually don’t squirm any longer.
B.)Hot packing: Heat should not be applied for the first 72 hours after surgery because this may increase inflammation and swelling. Moist heat can be applied starting on day 4 or 5 following surgery. You should begin using hot packs before performing passive range of motion. This will serve to reduce tissue tightness, increase blood flow and warm the joint. This can be done by immersing a hand towel in very warm water and gently wrapping it around the surgical area. Pre-test the towel on yourself fist to make sure it is not too hot. Keep immersing the towel into the hot water as it cools off. Hot packing should last for 15 minutes. You may also purchase microwavable hot packs. You can find these at any pharmacy and they are inexpensive. The microwavable packs should be wrapped in a moist warm towel before being applied to the surgical area. Place the pack on the surgical area for 15 minutes. NEVER USE AN ELECTRIC HEATING PAD FOR WARMING A JOINT. C.)Passive range of motion: Once the joint has been warmed with the hot pack, you can begin gentle passive range of motion. This helps to maintain the joint’s mobility and provides nutrition to the joint and cartilage. Start by gently flexing (bending) and extending (straightening) the elbow as shown to you at the first recheck. Hold the joint flexed (bent) for 10-15 seconds, and then slowly move through the range of motion until the elbow is in the extended position (straight). Hold this position for 10-15 seconds. Repeat these motions 10-15 times. Your dog may not enjoy this. Pay attention to how your dog reacts to the 10-15 second holds. If he or she whimpers or vocalizes more than usual or quickly turns his or her head toward you, you may be bending or straightening the elbow too much. If that is the case don’t flex or extend the elbow joint as much the next time. Depending upon what your schedule allows you to do, these sessions should take place 2-3 times daily. Non steroidal oral anti-inflammatories will also be provided throughout the recovery period to help with the pain. You may notice swelling along the incision site. Please call if this should occur, it is not uncommon. Increasing the time spent hot packing and additional passive range of motion exercises should help with this. 3.) ACCEPTABLE ACTIVITIES: Please follow these guidelines for exercise. Week one: Hot packing, passive range of motion and bathroom outings 2-3 times daily. Week two-three: Walk your dog outside on a leash for 5-15 minutes three times a day. This walking can be accomplished while your dog is outside doing his or her bathroom duties. Your dog should be confined to a crate when you are not outside for these small walks, or doing your hot packing and passive range of motion exercises.
Week four: Swimming may begin now, however your dog should not be running in and out of the water. Start with your dog standing in the water with the water level at about the shoulder and hip. Allow your dog to either walk in the water at this depth or to swim from that position. Start with limiting the time spent in the water to 5 minutes and progress slowly by 2 minutes every other session. (We realize that many people do not have access to water, that there are seasonal restrictions, and that your dog may not like water. These are all good reasons to not swim your dog.) Dover Veterinary Hospital has an underwater treadmill for those owners who might want to provide access to water rehabilitation year round. Week five-eight: Continue passive range of motion and add stretching after walks. Hold the stretch for 15-30 seconds (at the end of the range of motion either flexion or extension), repeated 4 times after each walk. Continue with controlled walks. You may begin to increase the length of walks by 5 minutes per week added on to the end of the bathroom breaks. By the time your dog is 8 weeks post surgery you should be walking him or her about 20-25 minutes 2-3 times daily. These walks should be very calm and controlled. Week eight-nine: Staying within the time limit of 20-25 minutes 2-3 times daily, start during the walks to move your dog in a zigzag pattern, in circles in both directions, and in figure eights. These walks will begin to strengthen the muscles on the inside and outside of the leg as well as improve balance and your dog’s sense of where her or his leg is in space. Week ten-twelve: You may begin gentle incline work. Walk your dog slowly up a small hill or other incline. The hill should be about 50 feet long. Repeat the ascent and descent 3-4 times and repeat the exercise 2 times daily. This will help to strengthen the hindquarters. You can also begin at this time to dance with your dog. Holding the forelimbs in your hands raise the front legs about 10-12 inches off the floor. Begin by just standing statically for 5 minutes and as your dog grows stronger walk your dog forward, backward and sideways for about 5 minutes. Continue with the previously recommended exercises for strengthening only increase the speed of the zigzags, circles and figure eights to a trot. Week twelve-sixteen: You may begin stairs at this time. Keep your dog on a leash and walk him or her slowly up and down 8-10 stairs 3-4 times in a row. Repeat this exercise 2 times daily. You may need to accompany your dog on these exercises to either give them confidence or to slow them down. Your dog should go up the stairs slowly allowing them to use all four legs and not to substitute by lifting the surgical leg up and tripoding. This will continue to strengthen the leg muscles and help your dog improve his or her balance and sense of leg position or proprioception.
Week 16 and on: Do not allow crazed activity such as leaping off of retaining walls, decks, etc., or jumping after Frisbees until 6 to 8 months post-operatively. Your dog will not regain full muscle mass until 6 to 8 months post surgery. During this time any new activity or extended activity will possibly cause some muscle strain and lameness. If this occurs, take a break for a day or two, return to moist hot packing and passive range of motion for those days and then over a 2-3 day period work back to the previous level of activity. Please call our office immediately if you should notice that your dog is suddenly not weight bearing at all, and do not hesitate to call our office as often as you like for advice or updates. 742-6438. 4.) RECHECK APPOINTMENTS: You should schedule two recheck
appointments post operatively. We will tell you when you pick up your pet when the first recheck should be scheduled. We will take this time to assess your pet’s recovery and adjust your rehab program as needed, as every patient is individual in her or his progress. Charles Evans, Director of Rehabilitation will be calling you every two weeks for these same reasons after the 1 month recheck appointment. If you have any questions at all regarding your dog’s recovery throughout this period, please don’t hesitate to call our office and ask for Charlie or Cindy.
5.) MEDICATIONS PRESCRIBED:
POST-OPERATIVE INSTRUCTIONS: UNUNITED ANCONEAL PROCESS OR FRAGMENTED CORONOID
PROCESS
1.) It is not uncommon for your pet to have a decreased appetite upon retuning home from a major surgery. If you notice that he or she has not urinated or defecated within 24 hours of their return home, please give our hospital a call. It is common that these functions be decreased along with the decreased appetite and activity level. You should allow your dog to do no more activity than what is discussed upon discharge.
2.) REHABILITATION EXERCISES: It is common for muscles to atrophy or
weaken dramatically if they are not used in any way post operatively. The following exercises are to be your tasks at home following your dog’s return home. A dog should be relaxed and comfortable at the start of each session, so select an area, which is quiet with a low level of activity around your pet. Begin by gently performing a whole body massage as demonstrated at discharge. Then gently focus in on the muscles of the shoulders, chest and the surgical forelimb. Continue this for 5 minutes or so, until you perceive your pet to be relaxed.
A.) Icing: Icing should be done for the first 72 hours posts operatively. This
should be performed at least three times daily for 10-15 minutes at a time. By cooling the surgery site, you provide essential anti-inflammatory effects and as a result decrease pain associated with surgery. It is good to use a small ice pack that is somewhat flexible to gently drape over the surgical area. If you are using a commercial ice pack, place a pillowcase over it to protect your pet’s skin. You can use direct ice in the form of ice massage. You can do this by freezing small Dixie filled to the brim with water. If you dog is small Popsicle sticks in an ice tray is sufficient. After the water is frozen tear the top 1 inch of the Dixie cup off and gently rub the surgical area with the ice for around 10 minutes. Ice massage is the preferred method of icing because it is quicker and provides a better cooling effect. It may take two people to accomplish the icing, as sometimes a dog can get squirmy. Be aware that your dog will be experiencing the same sensations that we would with icing. At first they will feel cold, than a burning sensation, then an aching sensation and then numbness. Once the icing has achieved the numbing stage they usually don’t squirm any longer.

B.)Hot packing: Heat should not be applied for the first 72 hours after surgery because this may increase inflammation and swelling. Moist heat can be applied starting on day 4 or 5 following surgery. You should begin using hot packs before performing passive range of motion. This will serve to reduce tissue tightness, increase blood flow and warm the joint. This can be done by immersing a hand towel in very warm water and gently wrapping it around the surgical area. Pre-test the towel on yourself fist to make sure it is not too hot. Keep immersing the towel into the hot water as it cools off. Hot packing should last for 15 minutes. You may also purchase microwavable hot packs. You can find these at any pharmacy and they are inexpensive. The microwavable packs should be wrapped in a moist warm towel before being applied to the surgical area. Place the pack on the surgical area for 15 minutes. NEVER USE AN ELECTRIC HEATING PAD FOR WARMING A JOINT. C.)Passive range of motion: Once the joint has been warmed with the hot pack, you can begin gentle passive range of motion. This helps to maintain the joint’s mobility and provides nutrition to the joint and cartilage. Start by gently flexing (bending) and extending (straightening) the elbow as shown to you at the first recheck. Hold the joint flexed (bent) for 10-15 seconds, and then slowly move through the range of motion until the elbow is in the extended position (straight). Hold this position for 10-15 seconds. Repeat these motions 10-15 times. Your dog may not enjoy this. Pay attention to how your dog reacts to the 10-15 second holds. If he or she whimpers or vocalizes more than usual or quickly turns his or her head toward you, you may be bending or straightening the elbow too much. If that is the case don’t flex or extend the elbow joint as much the next time. Depending upon what your schedule allows you to do, these sessions should take place 2-3 times daily. Non steroidal oral anti-inflammatories will also be provided throughout the recovery period to help with the pain. You may notice swelling along the incision site. Please call if this should occur, it is not uncommon. Increasing the time spent hot packing and additional passive range of motion exercises should help with this. 3.) ACCEPTABLE ACTIVITIES: Please follow these guidelines for exercise.
Week one: Hot packing, passive range of motion and bathroom outings 2-3 times daily. Week two-three: Walk your dog outside on a leash for 5-15 minutes three times a day. This walking can be accomplished while your dog is outside doing his or her bathroom duties. Your dog should be confined to a crate when you are not outside for these small walks, or doing your hot packing and passive range of motion exercises.

Week four: Swimming may begin now, however your dog should not be running in and out of the water. Start with your dog standing in the water with the water level at about the shoulder and hip. Allow your dog to either walk in the water at this depth or to swim from that position. Start with limiting the time spent in the water to 5 minutes and progress slowly by 2 minutes every other session. (We realize that many people do not have access to water, that there are seasonal restrictions, and that your dog may not like water. These are all good reasons to not swim your dog.) Dover Veterinary Hospital has an underwater treadmill for those owners who might want to provide access to water rehabilitation year round. Week five-eight: Continue passive range of motion and add stretching after walks. Hold the stretch for 15-30 seconds (at the end of the range of motion either flexion or extension), repeated 4 times after each walk. Continue with controlled walks. You may begin to increase the length of walks by 5 minutes per week added on to the end of the bathroom breaks. By the time your dog is 8 weeks post surgery you should be walking him or her about 20-25 minutes 2-3 times daily. These walks should be very calm and controlled. Week eight-nine: Staying within the time limit of 20-25 minutes 2-3 times daily, start during the walks to move your dog in a zigzag pattern, in circles in both directions, and in figure eights. These walks will begin to strengthen the muscles on the inside and outside of the leg as well as improve balance and your dog’s sense of where her or his leg is in space. Week ten-twelve: You may begin gentle incline work. Walk your dog slowly up a small hill or other incline. The hill should be about 50 feet long. Repeat the ascent and descent 3-4 times and repeat the exercise 2 times daily. This will help to strengthen the hind and fore limbs. You can also begin at this time to wheelbarrow your dog. Holding the hind limbs in your hands raise the rear legs about 10-12 inches off the floor. Begin by just standing statically for 5 minutes and as your dog grows stronger walk your dog forward, backward and sideways for about 5 minutes. Continue with the previously recommended exercises for strengthening only increase the speed of the zigzags, circles and figure eights to a trot. Week twelve-sixteen: You may begin stairs at this time. Keep your dog on a leash and walk him or her slowly up and down 8-10 stairs 3-4 times in a row. Repeat this exercise 2 times daily. You may need to accompany your dog on these exercises to either give them confidence or to slow them down. Your dog should go up the stairs slowly allowing them to use all four legs and not to substitute by lifting the surgical leg up and tripoding. This will continue to strengthen the leg muscles and help your dog improve his or her balance and sense of leg position or proprioception.

Week 16 and on: Do not allow crazed activity such as leaping off of retaining walls, decks, etc., or jumping after Frisbees until 6 to 8 months post-operatively. Your dog will not regain full muscle mass until 6 to 8 months post surgery. During this time any new activity or extended activity will possibly cause some muscle strain and lameness. If this occurs, take a break for a day or two, return to moist hot packing and passive range of motion for those days and then over a 2-3 day period work back to the previous level of activity. Please call our office immediately if you should notice that your dog is suddenly not weight bearing at all, and do not hesitate to call our office as often as you like for advice or updates. 742-6438. 4.) RECHECK APPOINTMENTS: You should schedule two recheck
appointments post operatively. We will tell you when you pick up your pet when the first recheck should be scheduled. We will take this time to assess your pet’s recovery and adjust your rehab program as needed, as every patient is individual in her or his progress. Charles Evans, Director of Rehabilitation will be calling you every two weeks for these same reasons after the 1 month recheck appointment. If you have any questions at all regarding your dog’s recovery throughout this period, please don’t hesitate to call our office and ask for Charlie or Cindy.
5.) MEDICATIONS PRESCRIBED:
Discussion of Recent Advances in Veterinary Orthopedic Surgery and Follow-Up Rehabilitation
Protocols: Surgical Interventions
COMBINED SECTIONS MEETING 2006 San Diego, CA
February 4, 2006
Brett C. Wood, DVM, MS Diplomate, American College of Veterinary Surgeons
Staff Surgeon, Dover Veterinary Hospital Dover, New Hampshire
Course Description/Objectives: • To introduce participants to some common orthopedic injuries afflicting veterinary
patients and surgical interventions used to treat these conditions • To inform participants of new advances in surgical techniques available in veterinary
orthopedic surgery
Course Topics: • Arthroscopy • Shoulder advances • Elbow advances • Stifle advances • Coxofemoral joint advances
Veterinary Arthroscopy
• Diagnostic and therapeutic uses • Decreased pain (?) • Quicker recovery (?) • Indications • Steep learning curve • Increased equipment needs
Canine Shoulder • Normal anatomy • Weight bearing joint
Shoulder Pathology
• Ostechondritis Dessicans (OCD) • Bicipital Tendon Injuries • Medial/lateral capsule Injuries
Ostechondritis Dessicans • Pathophysiology • Diagnosis • Treatment options
– Arthroscopic removal/debridement – Arthrotomy
Bicipital Tendon Injuries
• Bicipital “tenosynovitis” vs. “tendinosis” • Chronic, overuse injury • Diagnosis
Bicipital Tendon Treatment Options • Conservative treatment • Bicipital tenodesis (open) • Biceps tendon arthroscopic tenotomy • Bicipital tenodesis (arthroscopic assisted)
Capsular injuries • Medial or lateral capsule injuries – glenohumeral ligaments • Diagnosis (PE/Arthroscopy) • Treatments
– Conservative – Surgical
• Open • Arthroscopic
Canine Elbow • Normal anatomy • Weight bearing joint • Differences compared with human elbow
Elbow Pathology • Elbow Dysplasia
– OCD – Fragmented coronoid process (FCP) – Ununited Anconeal Process
• End-Stage Osteoarthritis
Elbow Dysplasia • Pathophysiology
– Radius/ulna growth incongruity – Differing forms of OCD
• Diagnosis – Radiographs – Advanced Imaging – Arthroscopy
OCD/Fragmented Coronoid Process
• Diagnosis • Treatment
– Arthroscopic removal – Abrasion Chrondroplasty
• Prognosis
Ununited Anconeal Process • Pathophysiology • Breeds (GSD) • Diagnosis • Treatment:
– Ulna osteotomy/ostectomy – +/- Lag screw fixation – Fragment Removal
• Prognosis
Canine Elbow Replacement • Biomedtrix Total Elbow Replacement System© • Semi-constrained system • Clinically available
Canine Stifle
• Normal anatomy • Differences between canine/human stifles
Stifle Pathology • Cranial cruciate ligament tears • Medial Patella Luxation • Meniscal injuries • Osteoarthritis
Cranial Cruciate Ligament Tears • Pathophysiology
– Canine = chronic injury – Human = acute injury
• Partial vs. complete tears • Diagnosis • Problem with 2nd side (35-40%)
Surgical Management of CCL Injury • Conventional intra-articular or extra-articular repairs • Tibial Plateau Leveling Osteotomy (TPLO) • Tibial Tuberosity Advancement (TTA)
Tibial Plateau Leveling Osteotomy • Surgical Procedure • Biomechanics • Expected outcome • Potential complications
TPLO Biomechanics The stifle joint can be divided into two components: a compressive force parallel to the loading axis of the tibia and perpendicular force dependent on the slope of the tibial plateau. The difference between these create a cranially oriented shear force called the cranial tibial thrust (CrTT). In normal stifle joints the cranial tibial thrust is apposed by the intact cranial cruciate ligament. The magnitude of this cranial tibia thrust is a function of both the slope of the tibial plateau (TPS) and the magnitude of the compressive force along the loading axis of the tibia. Because the magnitude of the cranial tibial thrust is proportional to the slope of the tibial plateau the cranial tibial thrust can be theoretically eliminated by leveling the tibial plateau. Biomechanically, this stability results from the bringing the tibia plateau surface perpendicular to the functional axis of the tibia. As the joint reaction force and the compressive force become aligned, the joint force becomes solely represented by its compressive component and there is no shear stress created. With weight bearing the stifle joint now becomes functionally stable under load conditions regardless of status of CCL.
TPLO Expectations/Complications • Quick return to function • Minimal progression of OA/DJD • Better outcome than conventional repair ?? • Complications
– Incisional/Infection – Tibial crest avulsions – Patella tendinopathy – Plate removal?
Tibial Tuberosity Advancement (TTA)
• Surgical Procedure • Biomechanics • Expected Outcome • Potential Complications
TTA Biomechanics External and internal forces acting around the weight-bearing stifle joint result in a total joint force approximately parallel to the patella ligament. If the tibial plateau is not perpendicular to the patellar ligament than a shear force (similar to Slocum’s cranial tibial thrust) is created (seen as the difference between the functional joint stress (FJS), the patellofemoral joint reaction force (FP) and the FS which is the force vector created as a perpendicular force to the slope of the tibial plateau).

After completion of the TTA the cranialization of the tibial crest has resulted in the patellar ligament positioned perpendicular to the tibial plateau which eliminates the tibiofemoral shear force (FS), and relieves the tensile load placed on the deficient cranial cruciate ligament.
TTA Expectations/Complications • Similar expectations to TPLO • No long term data looking at OA/DJD available • Complications
– Implant failure – Inadequate advancement
Patellar Luxation
• Usually medial • Pathophysiology • Grading (I-IV) • Surgical Treatment options
MPL Surgical Management • Femoral trochlear groove deepening procedure
– Trochlear wedge recession – Abrasion trochleoplasty
• Tibial tuberosity transposition • Anti-rotation suture • Soft tissue imbrication of joint capsule • Femoral osteotomy in severe cases
Meniscal Injuries • Associated with complete CrCL injury • Caudal-medial meniscus usually • Secondary injury after initial repair – 10-15% • Prevention with medial meniscal release ?
Meniscal Injuries • Diagnosis
– Ultrasound – MRI – Arthroscopic explore – Arthrotomy
• Treatment – Partial meniscectomy – Complete meniscectomy
Canine Coxofemoral Joint
• Normal anatomy • Difference from human joint
Coxofemoral Joint Pathology • Canine Hip Dysplasia • Legg-Calve-Perthe’s Disease • Coxofemoral luxation • Acetabular/Femoral head or neck fractures
Canine Hip Dysplasia •• MMoosstt iimmppoorrttaanntt ccaauussee oo ff oosstteeooaarrtthhrr iitt iiss iinn ccaanniinnee hhiippss •• AAbbnnoorrmmaa ll ddeevvee llooppmmeenntt oorr ggrroowwtthh oo ff tthhee ccooxxooffeemmoorraa ll jjoo iinntt •• CCoommmmoonnllyy iinnvvoo llvveess llaaxxiittyy oo ff ssuurrrroouunndd iinngg ssoo fftt tt iissssuueess,, jjoo iinntt iinnss ttaabb iilliittyy,, mmaa llffoorrmmaa tt iioonn
ooff tthhee ffeemmoorraa ll hheeaadd aanndd aacceettaabbuulluumm,, aanndd oosstteeooaarr tthhrr iitt iiss
Surgical Options for Hip Dysplasia •• MMoosstt ccoommmmoonn oopptt iioonnss ::
–– JJuuvveenniillee PP uubb iicc SSyymmpphhyyss iiooddeess iiss –– TTrr iipp llee PPee llvviicc OOsstteeoottoommyy ((TTPPOO)) –– FFeemmoorraa ll HHeeaadd aanndd NNeecckk OOsstteeccttoommyy ((FFHHOO)) –– TToottaa ll HHiipp RReepp llaacceemmeenntt ((TTHHRR))
Juvenile Pubic Symphysiodesis (JPS)
• Novel surgical technique • Electrocautery → growth plate of pubis → induces thermal necrosis • Premature closure of plate allows dorsolateral growth of pelvis (underdeveloped
ventromedial aspect) – Inc. femoral head coverage is result • Results of JPS related primarily to age at surgical intervention (~<16 weeks preferred)
Triple Pelvic Osteotomy •• PPaattiieenntt SSee lleecc tt iioonn:: 44--1122 mmoonntthhss oo ff aaggee wwiitthh mmiinniimmaa ll//nnoo ddaammaaggee oo ff jjoo iinntt ((****PPrree--oopp
aarrtthhrroossccooppyy****)) •• SSuurrggiiccaa ll PPrroocceedduurree •• AAddvvaannttaaggeess :: iimmpprroovveess ccoonnggrruueennccyy bbeettwweeeenn ffeemmoorraa ll hheeaadd aanndd aacceettaabbuulluumm eeaarr llyy bbee ffoorree
mmaajjoo rr ddaammaaggee iiss ddoonnee •• DDiissaaddvvaannttaaggeess ::
–– iinnvvaass iivvee //ppootteenntt iiaa ll ccoommpp lliiccaatt iioonnss –– 33 sseeppaarraattee aapppprrooaacchheess –– vvaarr iiaabb llee rreessuullttss – PPrree--oopp ppaatthhoo llooggyy oo ff aarr tt iiccuullaarr ccaarr tt iillaaggee ffoorr ppaatt iieenntt ssee lleecctt iioonn
Femoral Head and Neck Osteotomy (FHO)
••PPaattiieenntt ssee lleecc tt iioonn:: SSeevveerree DDJJDD,, nnoonn--rreeccoonnss ttrruuccttaabb llee aarr tt iiccuullaarr ffrraaccttuurreess,, cchhrroonniicc lluuxxaatt iioonnss ••AAddvvaannttaaggeess :: rreemmoovveess ssoouurrccee ooff ppaa iinn;; mmoorree iinneexxppeennss iivvee tthhaann ootthheerr ssuurrggiiccaa ll oopptt iioonnss -- wwee llll kknnoowwnn pprroocceedduurree ••DDiissaaddvvaannttaaggeess :: ““ssaa llvvaaggee”” pprroocceedduurree,, ppoossss iibb llee sshhoorr tteenneedd lliimmbb;; aabbnnoorrmmaa ll ggaa iitt lliikkee llyy;; rreessuullttss vvaarr iiaabb llee ;; lloossss oo ff TTHHRR oopptt iioonn
Total Hip Replacement •• PPaattiieenntt ssee lleecctt iioonn:: mmaa ttuurree llaarrggee bbrreeeedd ddooggss wwiitthh cc lliinniiccaa ll ss iiggnnss oo ff CCHHDD oorr aaccuuttee ffeemmoorraa ll
hheeaadd//nneecckk ffrraaccttuurree •• AAddvvaannttaaggeess :: rreepp llaacceess ddee ffeecc tt iivvee aannaa ttoommyy;; ppaa iinn rree lliiee ff •• DDiissaaddvvaannttaaggeess :: eexxppeennss iivvee ;; rreeqquuiirreess ssppeecc iiaa lliisstt;; ppootteenntt iiaa ll ccoommpp lliiccaa tt iioonnss •• BBootthh cceemmeenntteedd aanndd uunncceemmeenntteedd vveerrss iioonnss aavvaa iillaabb llee
Cemented Total Hip Replacement •• CCeemmeenntt aanncchhoorrss pprrooss tthheess iiss •• RRiicchhaarrddss IIII,, BBiioommeeddttrriixx CCFFXX •• AAddvvaannttaaggeess ::
–– lloonngg tteerrmm uussee –– CCoommppoonneenntt ssyysstteemm
•• DDiissaaddvvaannttaaggeess :: –– cceemmeenntt //bboonnee iinnffeecc tt iioonn –– aasseepptt iicc lloooosseenniinngg –– iinnaaddeeqquuaattee cceemmeenntt oorr aa iirr bbuubbbb lleess ssuurrrroouunndd iinngg iimmpp llaanntt
Zurich Cementless THR System • Component system – cup, femoral implant, femoral head/neck • Screw fixation of femoral stem • Press fit acetabular component • No cement – less concern regarding infection problems with cement
Biomedtrix BFX System • Press-fit system • Relies on bone ingrowth for long term stability • Similar three component system to CFX • ** Need to have both CFX and BFX systems if there are intraop complications**
Conclusions • Rapid advances in diagnostic and treatment options for veterinary patients • Knowledge of these treatment options:
– Assist in physical therapy care post-op – Identification of patients in need of surgical evaluation/referral