Embed Size (px)
Citation preview
STUDORSTUDOR®®
AUSTRALIAPresents
TThehe I Introductionntroduction & I & Installationnstallation C Courseourse for thefor the
STUDORSTUDOR®® M Miniini-V-Ventent
AAirir A Admittancedmittance V Valvealve (AAV)(AAV)
The Course:
should at its’ completion enable the participants to:
1. correctly identify the components of the Mini-Vent Air Admittance Valve (AAV); and
2. correctly install a Mini-Vent AAV
The Assessment:
will be via a written Question & Answer Sheet at the end of the course
(Participants are advised to make note of items marked with a ‘*’)
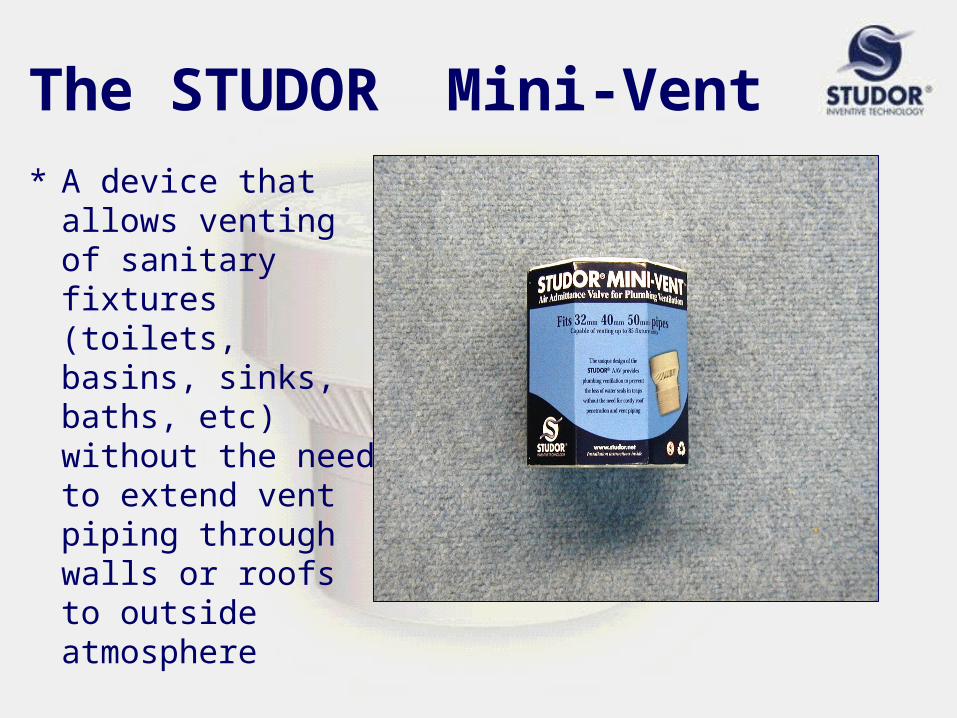
The STUDOR Mini-Vent
* A device that allows venting of sanitary fixtures (toilets, basins, sinks, baths, etc) without the need to extend vent piping through walls or roofs to outside atmosphere
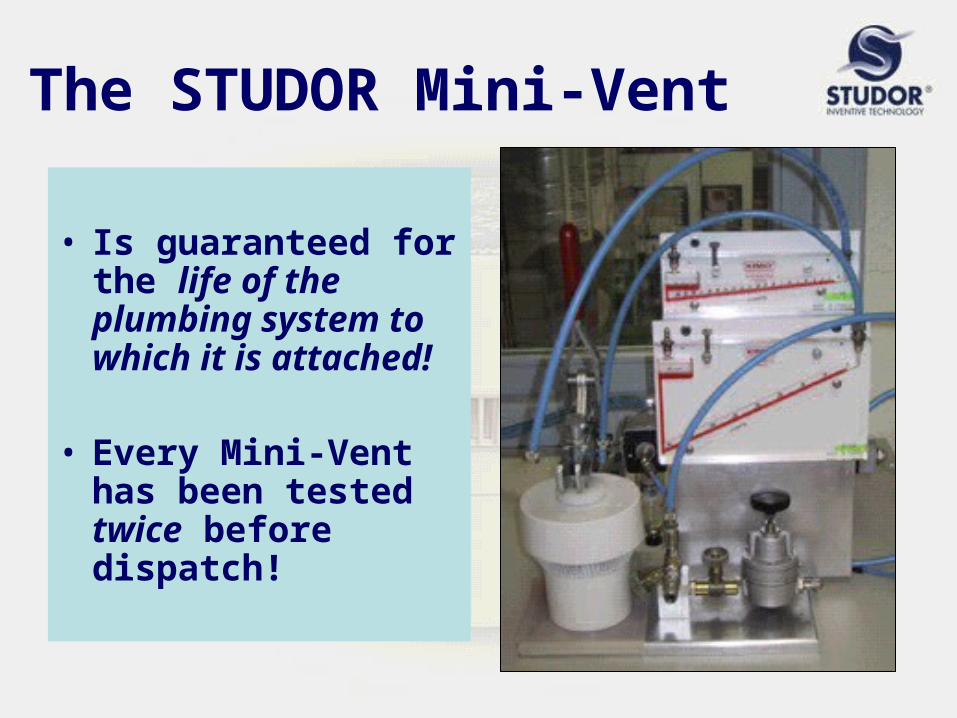
The STUDOR Mini-Vent
• Is guaranteed for the life of the plumbing system to which it is attached!
• Every Mini-Vent has been tested twice before dispatch!
The STUDOR Mini-Vent
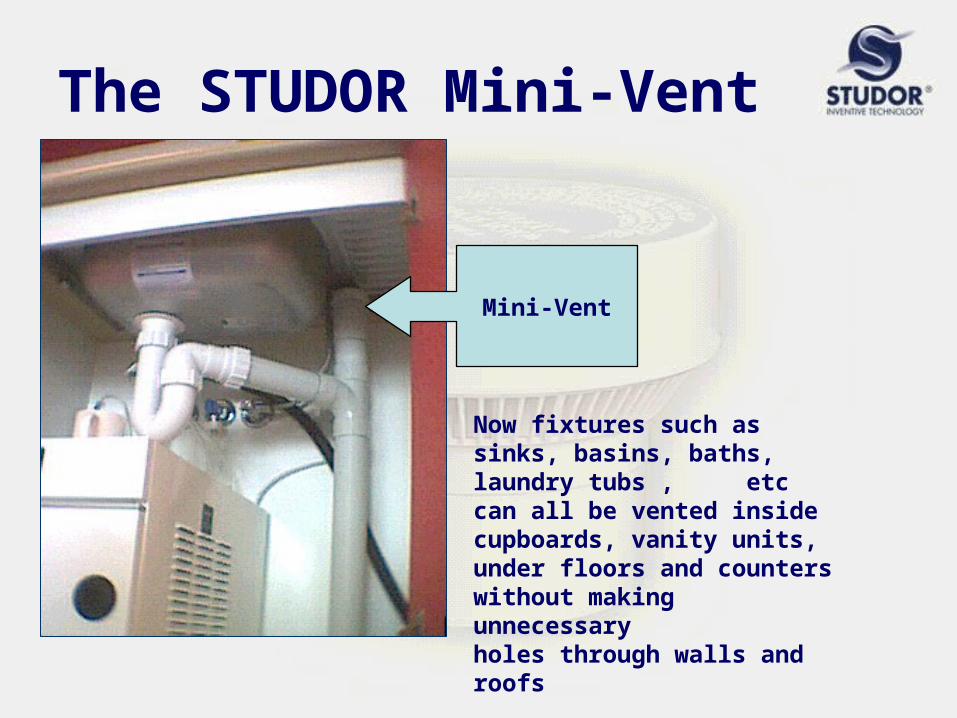
Now fixtures such as sinks, basins, baths, laundry tubs , etc can all be vented inside cupboards, vanity units, under floors and counters without making unnecessary holes through walls and roofs
Mini-Vent
Important Notes
*2. Do not remove the Mini-Vent from its packaging until ready to install
This way, the chance of dirt , dust or grit getting into the Mini-Vent is kept to a minimum
*1. Always make sure there is at least one open vent on the plumbing line or
system that the vent is to be attached to
*3. Never install a Mini-Vent where the air is contaminated with solvents, e.g. a spray booth
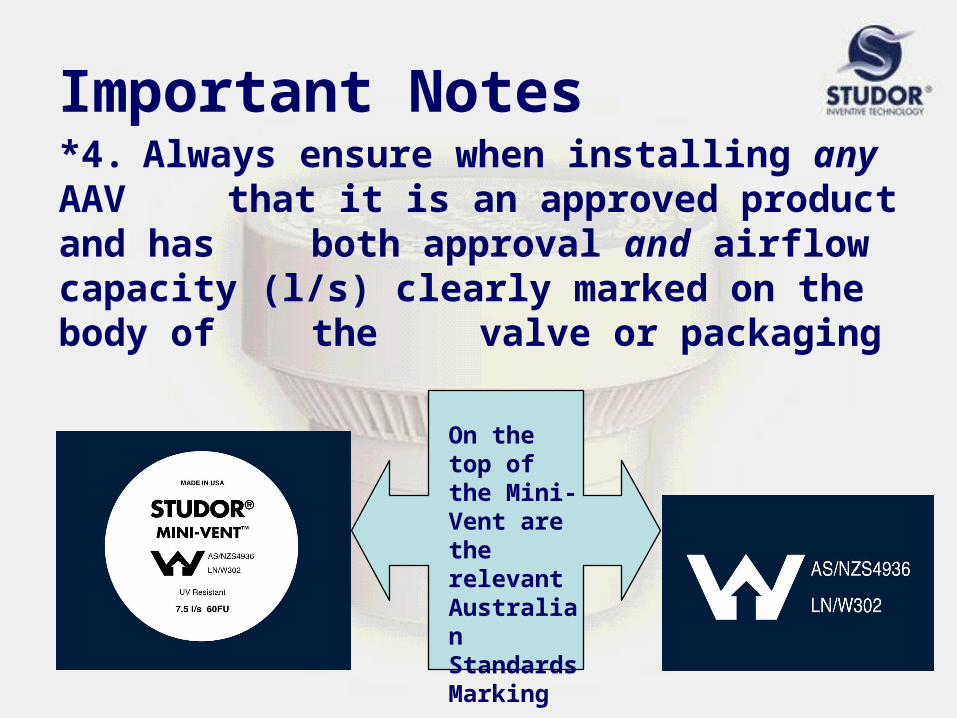
Important Notes*4. Always ensure when installing any AAV that it is an approved product and has both approval and airflow capacity (l/s) clearly marked on the body of the valve or packaging
On the top of the Mini-Vent are the relevant Australian Standards Marking
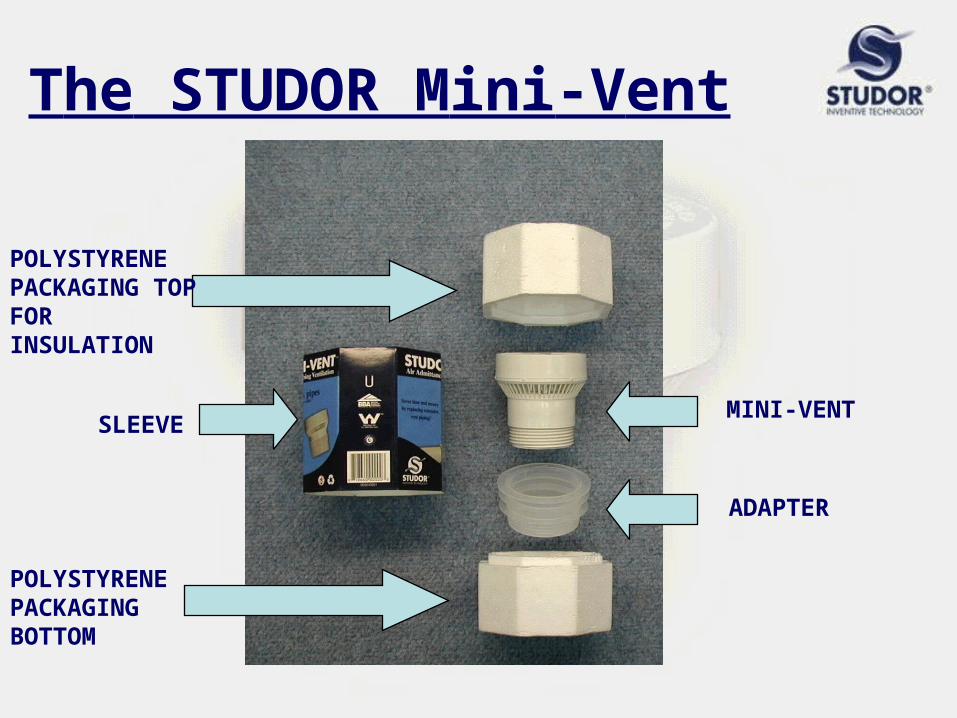
The STUDOR Mini-Vent
POLYSTYRENE PACKAGING TOP FOR INSULATION
SLEEVE
POLYSTYRENE PACKAGINGBOTTOM
MINI-VENT
ADAPTER
Installation
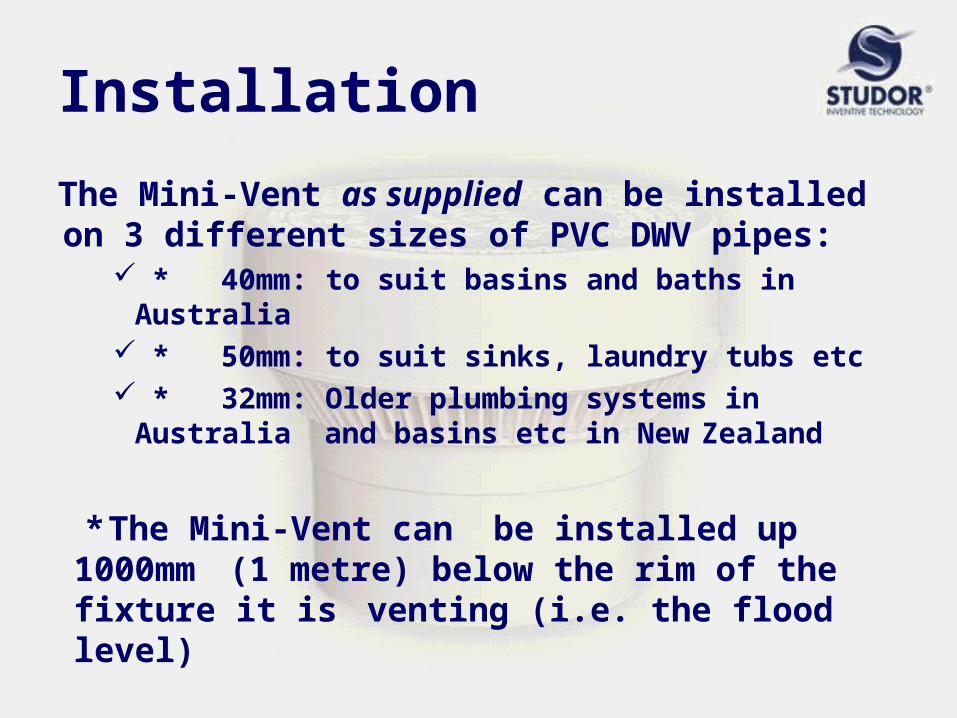
The Mini-Vent as supplied can be installed on 3 different sizes of PVC DWV pipes:
* 40mm: to suit basins and baths in Australia
* 50mm: to suit sinks, laundry tubs etc * 32mm: Older plumbing systems in
Australia and basins etc in New Zealand
* The Mini-Vent can be installed up 1000mm (1 metre) below the rim of the fixture it is
venting (i.e. the flood level)
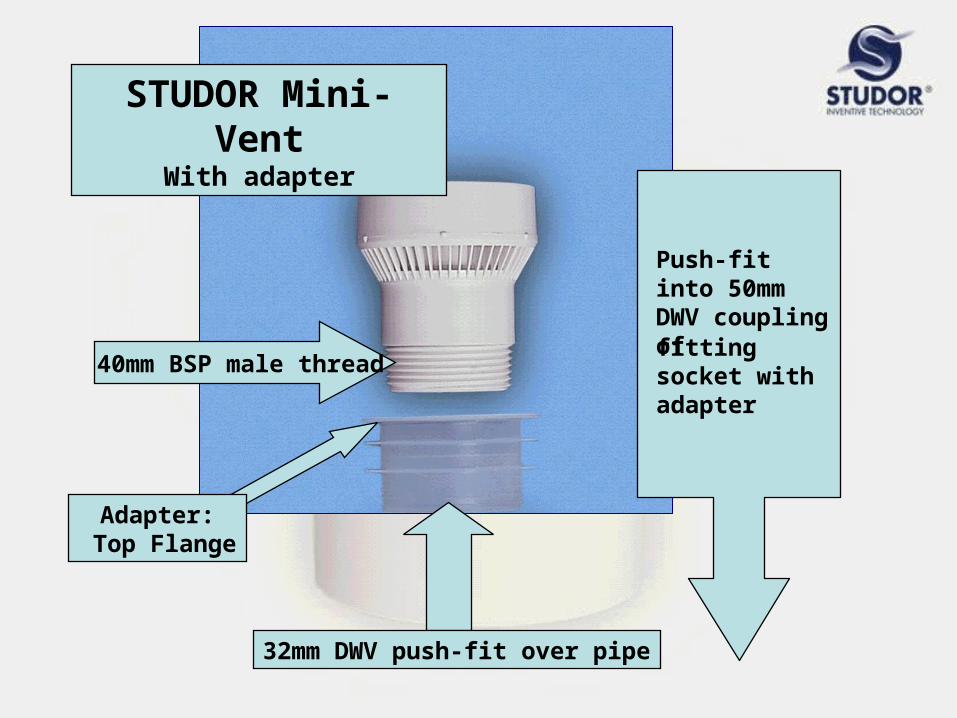
32mm DWV push-fit over pipe
STUDOR Mini-VentWith adapter
40mm BSP male thread
Push-fit into 50mm DWV coupling offitting socket with adapter
Adapter: Top Flange
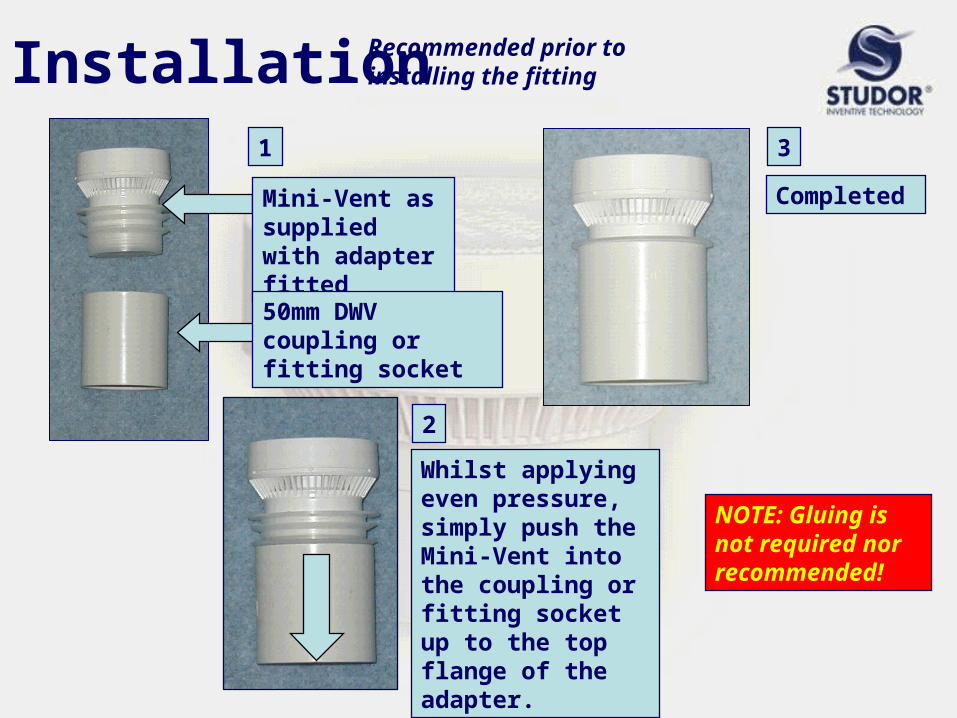
Installation
Mini-Vent as supplied with adapter fitted50mm DWV coupling or fitting socket
Whilst applying even pressure, simply push the Mini-Vent into the coupling or fitting socket up to the top flange of the adapter.
Completed
1
2
3
NOTE: Gluing is not required nor recommended!
Recommended prior to installing the fitting
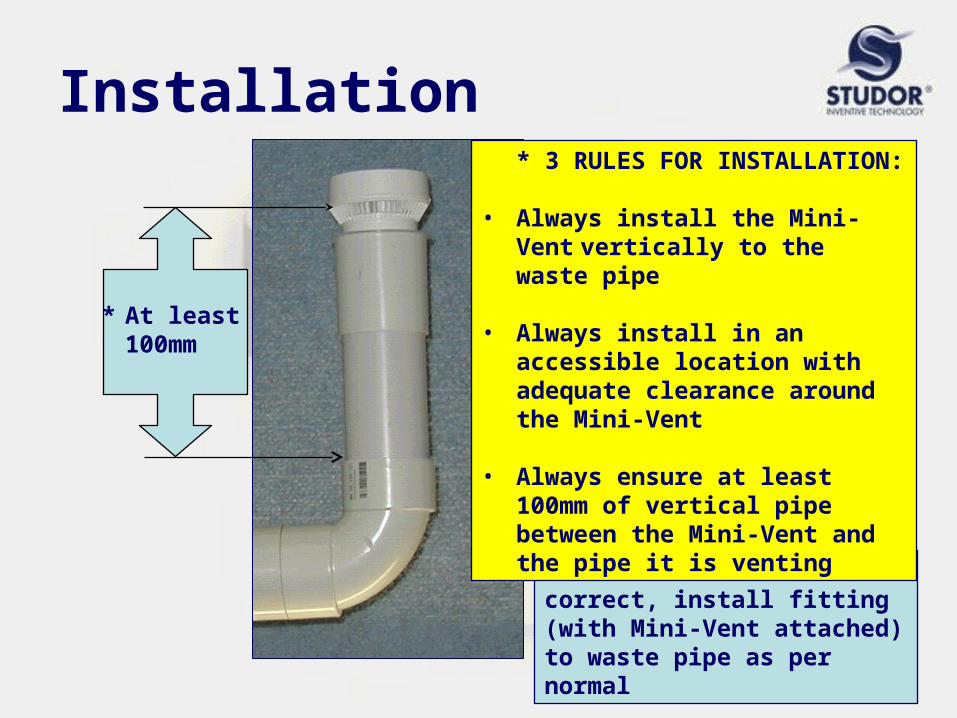
Installation
If all the above is correct, install fitting (with Mini-Vent attached) to waste pipe as per normal
* 3 RULES FOR INSTALLATION:
• Always install the Mini-Vent
vertically to the waste pipe
• Always install in an accessible location with adequate clearance around the Mini-Vent
• Always ensure at least 100mm of vertical pipe between the Mini-Vent and the pipe it is venting
* At least 100mm
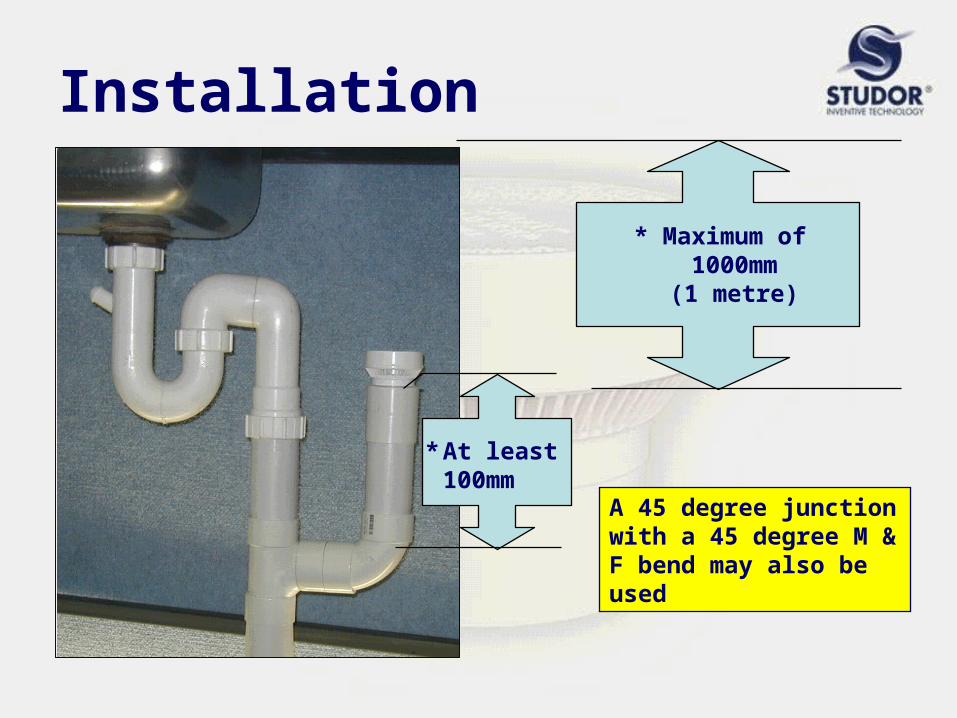
Installation
* At least 100mm
* Maximum of 1000mm (1 metre)
A 45 degree junction with a 45 degree M & F bend may also be used
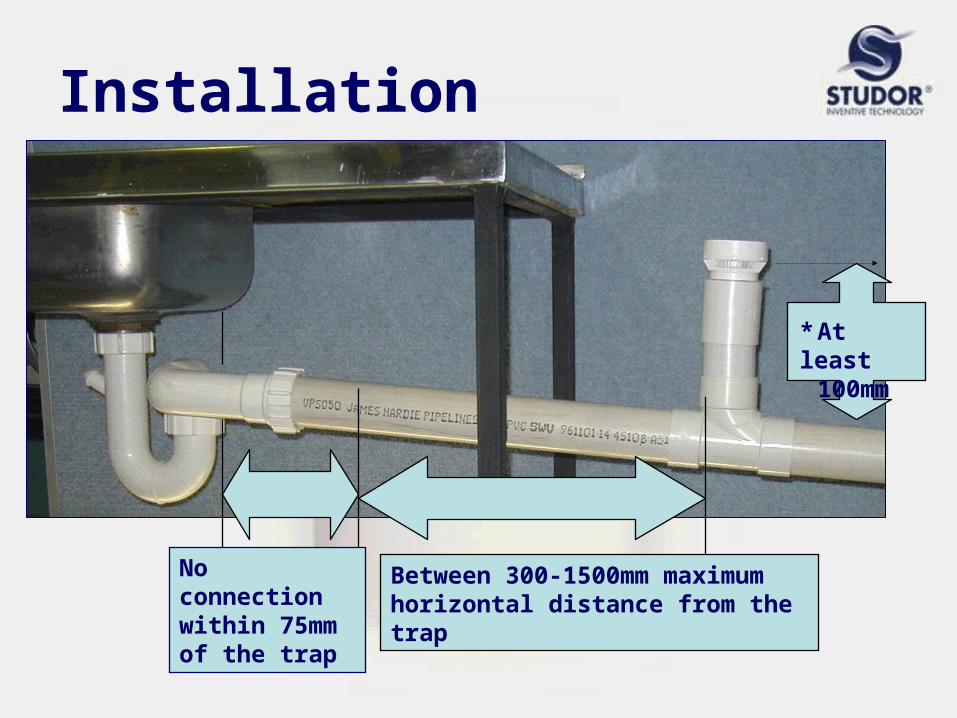
Installation
* At least 100mm
No connectionwithin 75mmof the trap
Between 300-1500mm maximumhorizontal distance from the trap
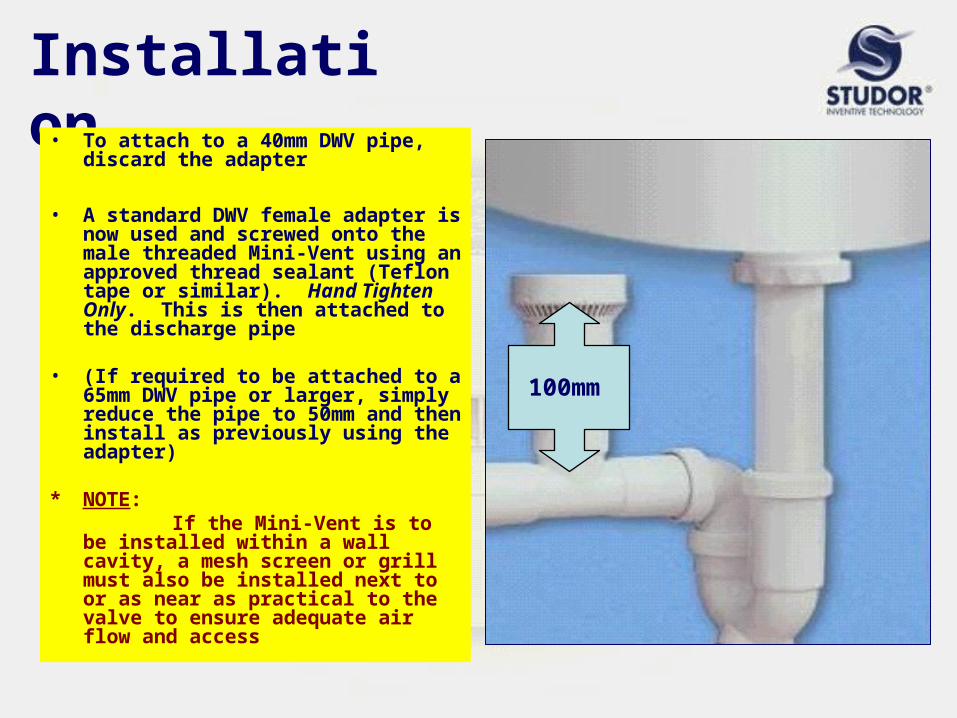
Installation• To attach to a 40mm DWV pipe,
discard the adapter
• A standard DWV female adapter is now used and screwed onto the male threaded Mini-Vent using an approved thread sealant (Teflon tape or similar). Hand Tighten Only. This is then attached to the discharge pipe
• (If required to be attached to a 65mm DWV pipe or larger, simply reduce the pipe to 50mm and then install as previously using the adapter)
* NOTE: If the Mini-Vent is to be
installed within a wall cavity, a mesh screen or grill must also be installed next to or as near as practical to the valve to ensure adequate air flow and access
100mm
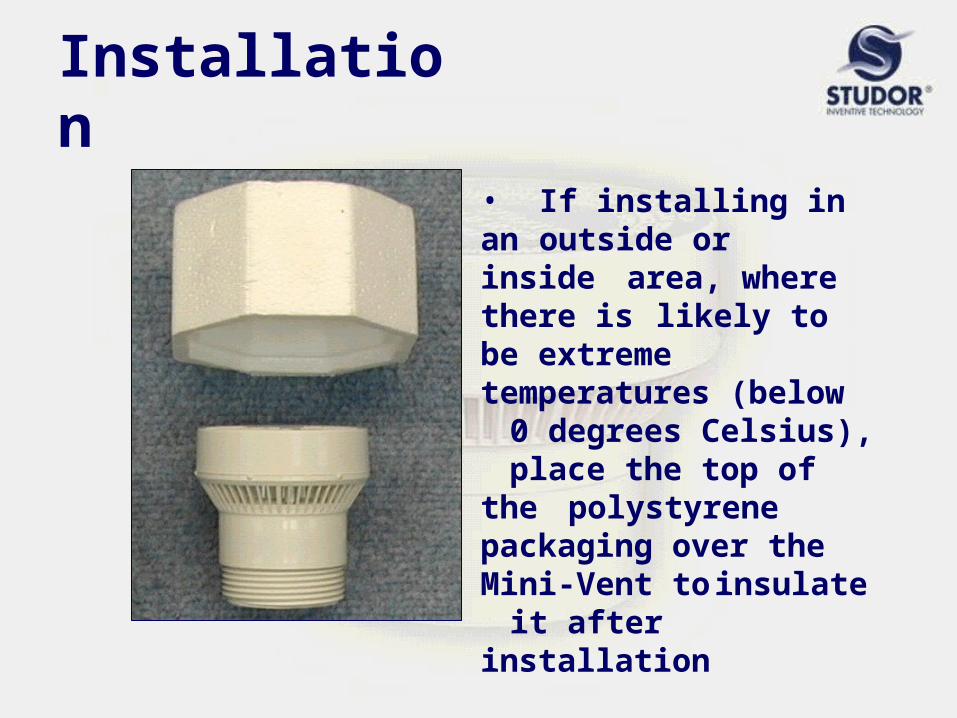
Installation
• If installing in an outside or inside area, where there is likely to be extremetemperatures (below
0 degrees Celsius), place the top of the polystyrene
packaging over the Mini-Vent to insulate
it after installation
Installation
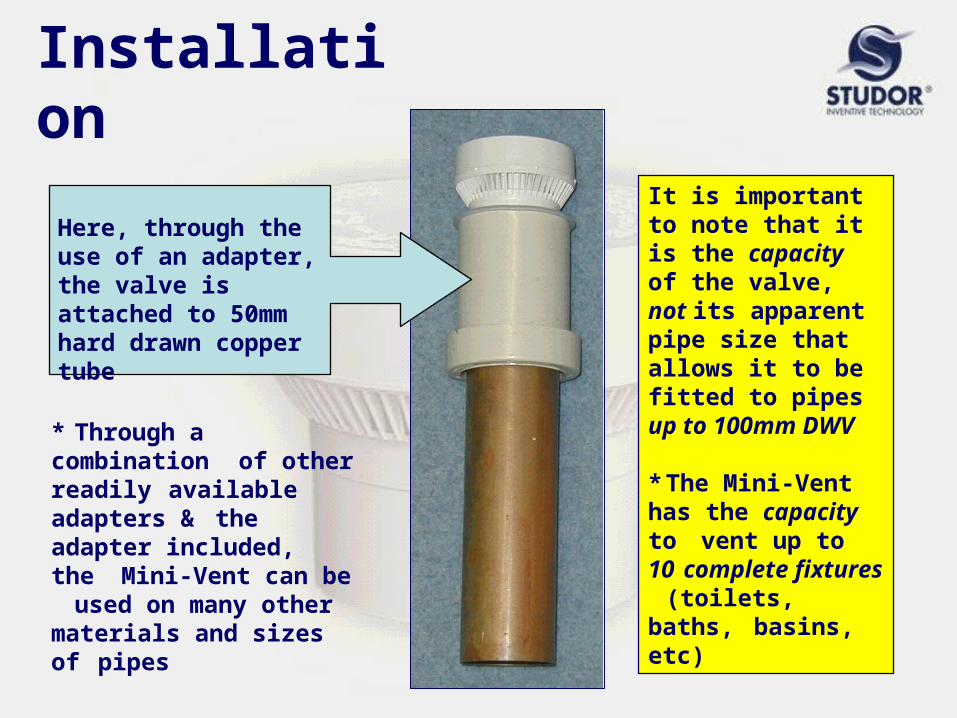
* Through a combination of other readily available adapters & the adapter included, the
Mini-Vent can be used on many other materials and sizes of pipes
It is important to note that it is the capacity of the valve, not its apparent pipe size that allows it to be fitted to pipes up to 100mm DWV
* The Mini-Vent has the capacity
to vent up to 10 complete fixtures
(toilets, baths, basins, etc)
Here, through the use of an adapter, the valve is attached to 50mm hard drawn copper tube
Installation
• Mini-Vents can also be used for venting groups of fixtures such as washrooms, toilet blocks etc
This is called: “Group Venting”
• * The Mini-Vent has the capacity to vent:
10 complete fixtures or 60 Fixture Units
- 1 WC (toilet pan & cistern) = 4 Fixture Units
- 1 Basin = 1 Fixture Unit
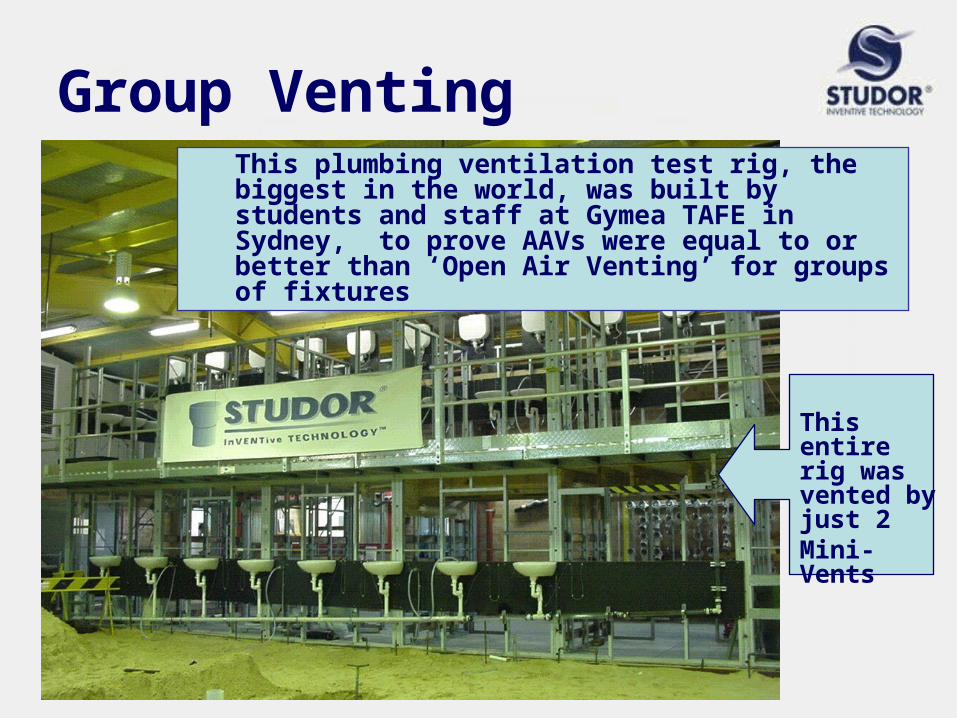
Group VentingThis plumbing ventilation test rig, the biggest in the world, was built by students and staff at Gymea TAFE in Sydney, to prove AAVs were equal to or better than ‘Open Air Venting’ for groups of fixtures
This entire rig was vented by just 2 Mini-Vents
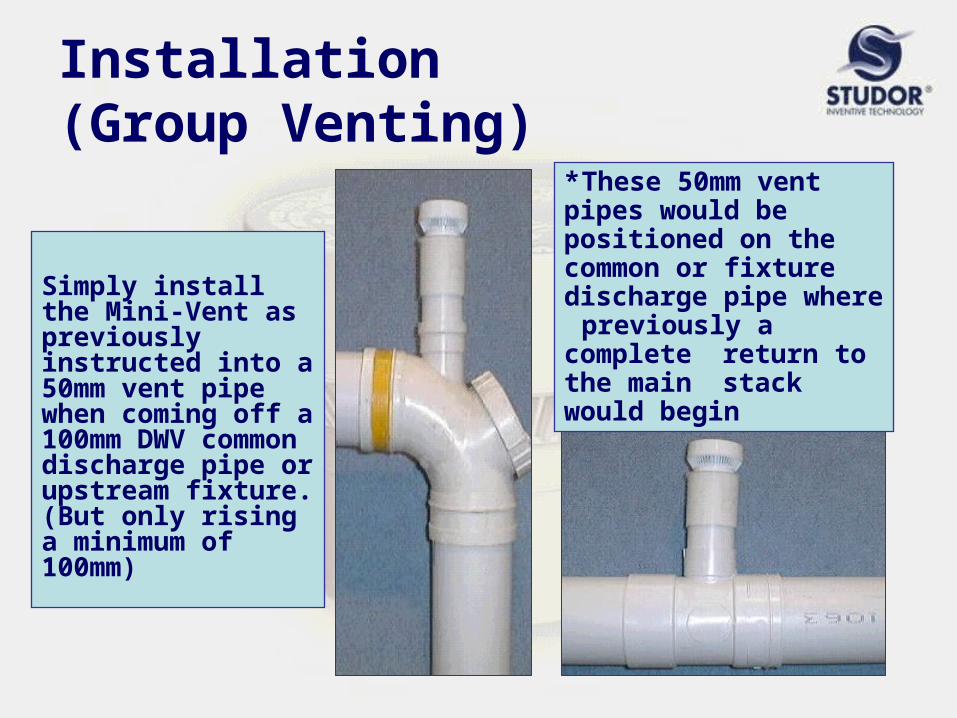
Installation(Group Venting)
Simply install the Mini-Vent as previously instructed into a 50mm vent pipe when coming off a 100mm DWV common discharge pipe or upstream fixture. (But only rising a minimum of 100mm)
* These 50mm vent pipes would be positioned on the common or fixture discharge pipe where previously a complete return to the main stack would begin
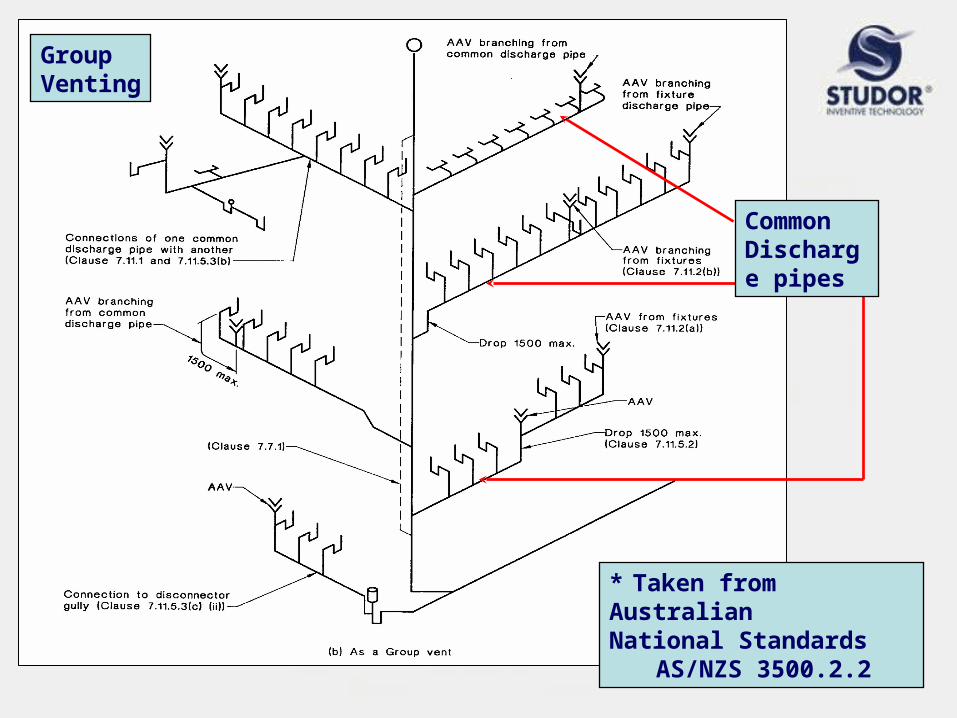
GroupVenting
* Taken from Australian National Standards AS/NZS 3500.2.2
Common Discharge pipes
Summary
• We’ve learned that approved AAVs can be used to vent both single and groups of fixtures as well as how to install them in those situations
• Your Instructor will now hand out a Q & A sheet for you to complete.
GOOD LUCK!

Acknowledgements STUDOR Australia would like to thank:
- the Teaching and Stores Staff under the guidance of Raymond Jones, Senior Head Teacher of Plumbing,
TAFE NSW;- Southern Sydney Institute, Sutherland College (Gymea Campus) for their support and contribution to this module; and - all TAFE teachers nationally
STUDOR would also like to acknowledge the continued support offered by Plumbers Supplies Co-operative who provided the materials for this project