Embed Size (px)
Citation preview
2
Table of Contents
Features…………………………………………………….……..…. p. 3
Specifications…………………………………………………………p. 4
General Use……………………………………………………...……p. 5
Operating Instructions………………………………………….……p. 5
Part Replacement Instructions………………….……………...……p. 6
3
Overview
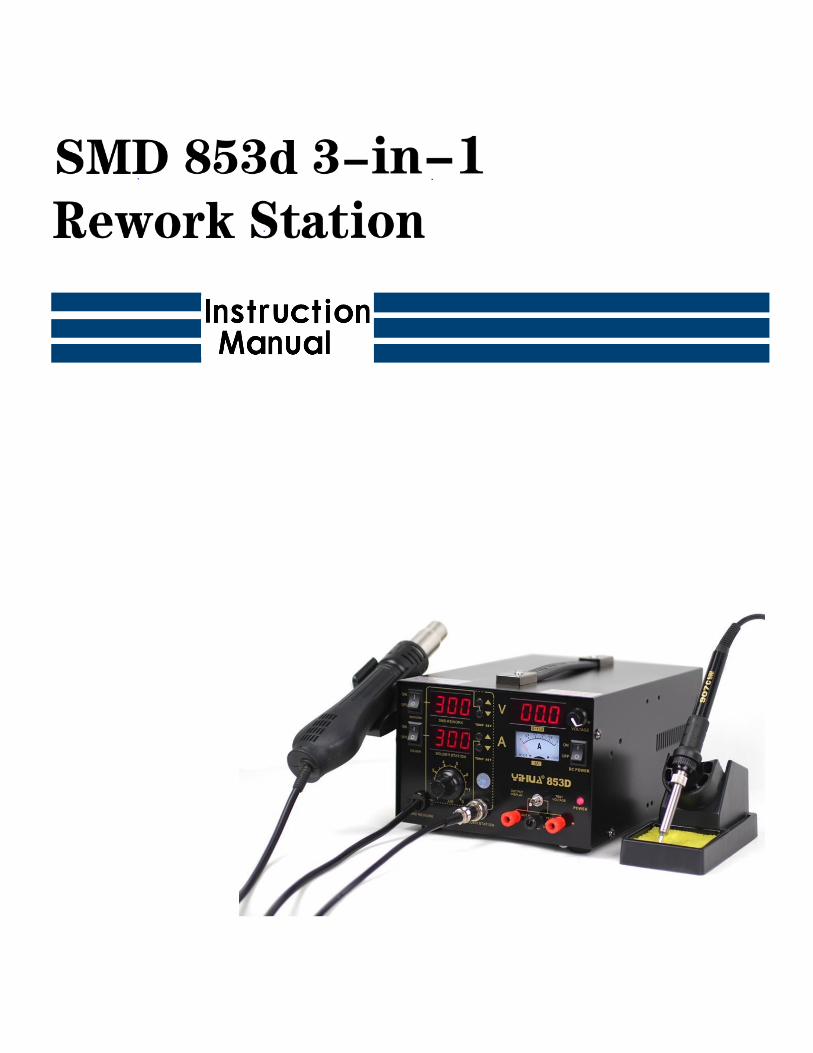
This product’s design is based on the need for a 3 in 1 work station. It combines a soldering station, a hot
air rework, and a DC power supply. These functions can be used independently or simultaneously. This
design occupies less area and is energy efficient.
The product uses a double-sided fiberglass circuit board. The components are installed in a particular or-
der to eliminate noise from the DC voltage signal.
There are components in the work station that can detect a fault (short circuit, open circuit, overload, etc.)
and prevent damage to the work station.
Soldering Iron and Hot Air Rework Station
The soldering iron, hot air rework station and DC power supply use independent dual-core microcontrol-
lers to allow for each function to work independently. A dual-core CPU is used to avoid failure on one fea-
ture when another feature is not functioning properly.
An Intelligent Fuzzy logic PID controller monitors the temperature of the soldering iron and the hot air re-
work station. This temperature is displayed on the LED digital display. There are components to the de-
vice that help maintain temperature stability.
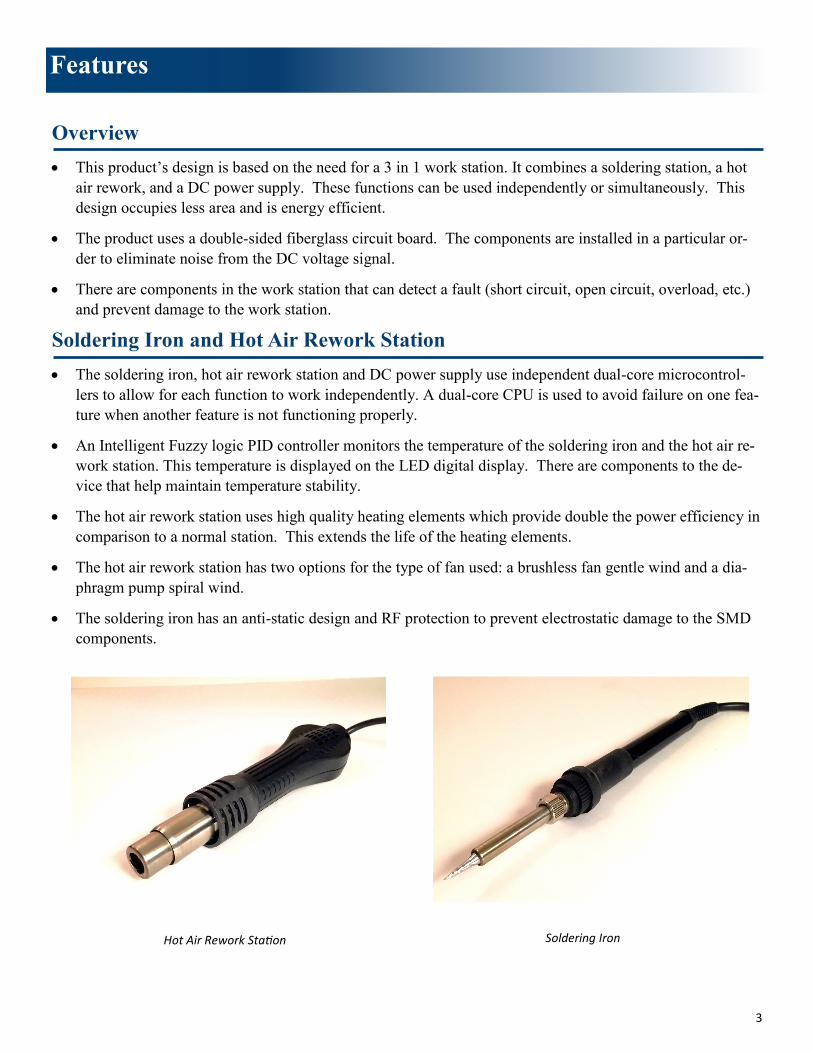
The hot air rework station uses high quality heating elements which provide double the power efficiency in
comparison to a normal station. This extends the life of the heating elements.
The hot air rework station has two options for the type of fan used: a brushless fan gentle wind and a dia-
phragm pump spiral wind.
The soldering iron has an anti-static design and RF protection to prevent electrostatic damage to the SMD
components.
Hot Air Rework Station Soldering Iron
Features
4
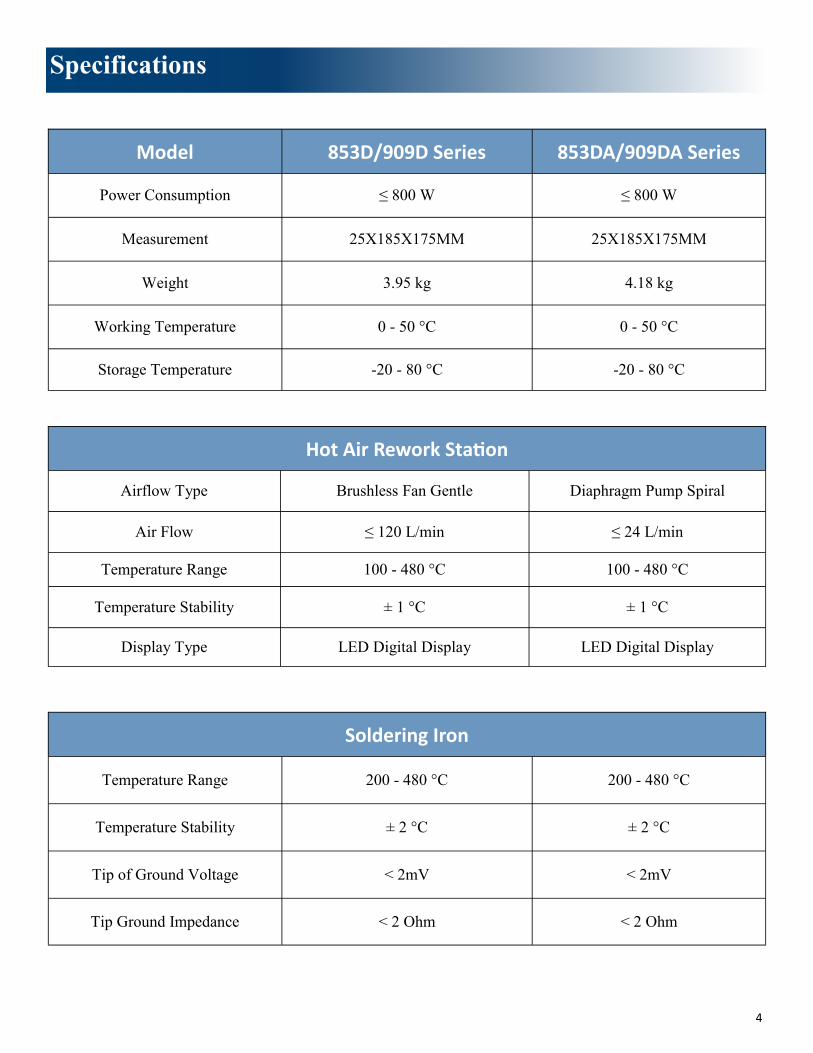
Model 853D/909D Series 853DA/909DA Series
Power Consumption ≤ 800 W ≤ 800 W
Measurement 25X185X175MM 25X185X175MM
Weight 3.95 kg 4.18 kg
Working Temperature 0 - 50 °C 0 - 50 °C
Storage Temperature -20 - 80 °C -20 - 80 °C
Hot Air Rework Station
Airflow Type Brushless Fan Gentle Diaphragm Pump Spiral
Air Flow ≤ 120 L/min ≤ 24 L/min
Temperature Range 100 - 480 °C 100 - 480 °C
Temperature Stability ± 1 °C ± 1 °C
Display Type LED Digital Display LED Digital Display
Soldering Iron
Temperature Range 200 - 480 °C 200 - 480 °C
Temperature Stability ± 2 °C ± 2 °C
Tip of Ground Voltage < 2mV < 2mV
Tip Ground Impedance < 2 Ohm < 2 Ohm
Specifications
5
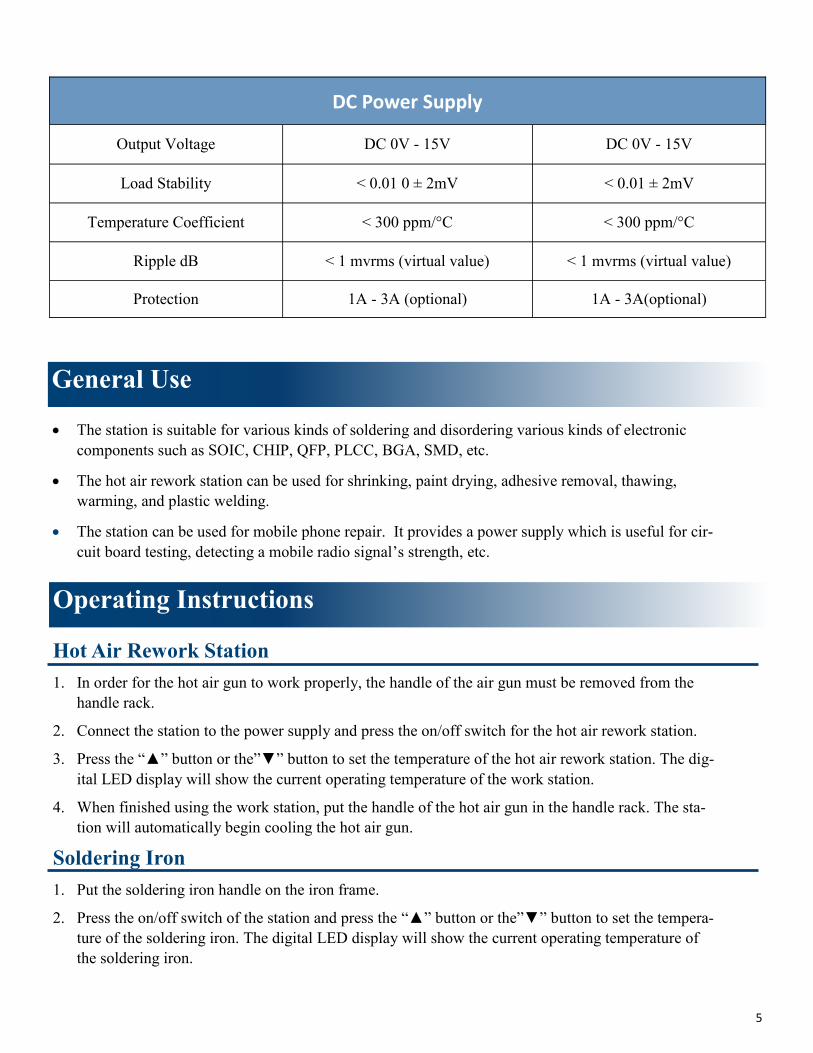
DC Power Supply
Output Voltage DC 0V - 15V DC 0V - 15V
Load Stability < 0.01 0 ± 2mV < 0.01 ± 2mV
Temperature Coefficient < 300 ppm/°C < 300 ppm/°C
Ripple dB < 1 mvrms (virtual value) < 1 mvrms (virtual value)
Protection 1A - 3A (optional) 1A - 3A(optional)
The station is suitable for various kinds of soldering and disordering various kinds of electronic
components such as SOIC, CHIP, QFP, PLCC, BGA, SMD, etc.
The hot air rework station can be used for shrinking, paint drying, adhesive removal, thawing,
warming, and plastic welding.
The station can be used for mobile phone repair. It provides a power supply which is useful for cir-
cuit board testing, detecting a mobile radio signal’s strength, etc.
Hot Air Rework Station
1. In order for the hot air gun to work properly, the handle of the air gun must be removed from the
handle rack.
2. Connect the station to the power supply and press the on/off switch for the hot air rework station.
3. Press the “▲” button or the”▼” button to set the temperature of the hot air rework station. The dig-
ital LED display will show the current operating temperature of the work station.
4. When finished using the work station, put the handle of the hot air gun in the handle rack. The sta-
tion will automatically begin cooling the hot air gun.
Soldering Iron
1. Put the soldering iron handle on the iron frame.
2. Press the on/off switch of the station and press the “▲” button or the”▼” button to set the tempera-
ture of the soldering iron. The digital LED display will show the current operating temperature of
the soldering iron.
General Use
Operating Instructions

6
DC Power Supply Operation
1. Press the on/off switch of the DC power supply.
2. Turn the knob until the digital LED display reads the desired voltage value. If the load current exceeds the
rated current, the station will automatically disable the DC power supply.
Replacement of the Hot Air Rework Heating Element
Once the hot rework station is fully cooled, loosen the screws on the handle.
Turn the handle counterclockwise until it comes off and then remove the cover of the handle.
Gently remove the fan and loosen the three screws to remove the fixed wiring board.
Separate the wiring board from the heater wiring board connection cable. Pay attention to the connection
locations.
Remove the heat pipe body wrap with mica paper. Be careful not to break the steel ground wire.
Wrap the heater well with new mica paper. Insert the heater in the tube and install in back into place.
Put all other parts back into place.
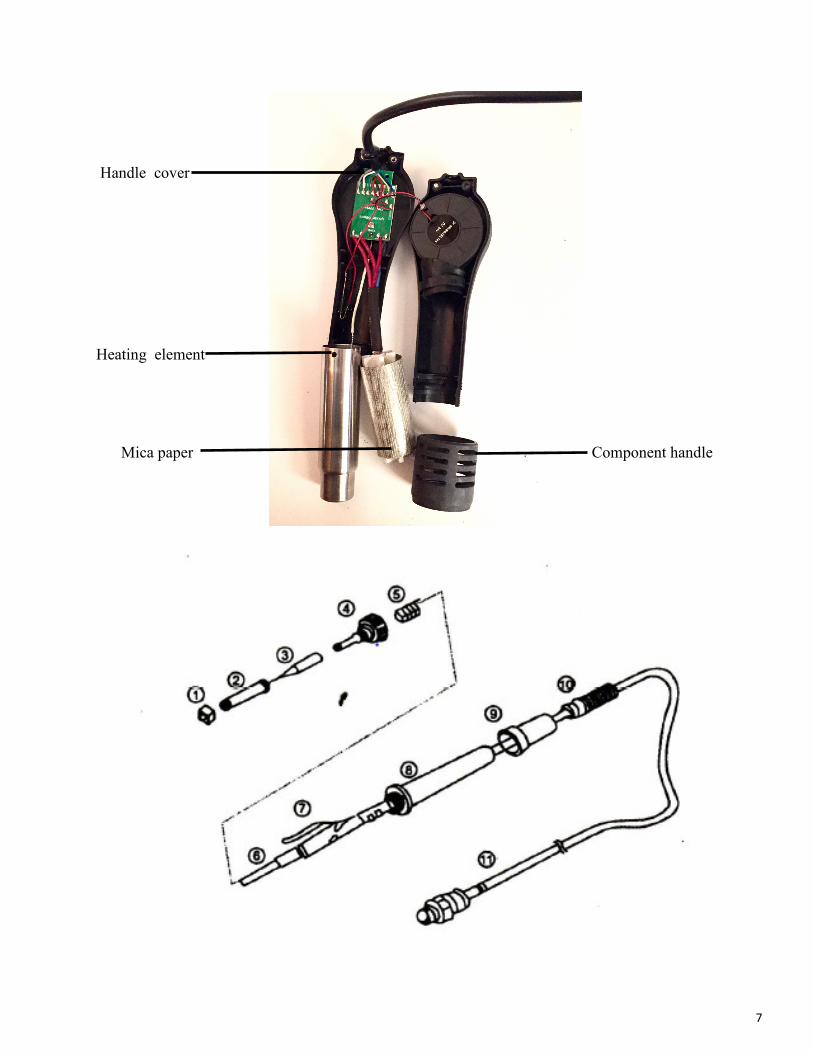
Replacement of the Soldering Iron’s Tips and Soldering Iron’s Heating Core
Element
Unscrew nut No.1 and then remove the steel tube No. 2. Remove the tip.
To replace the heating core element NO. 6 and the plastic cap NO 4, gently pull out the heating core ele-
ment NO. 6 and the circuit board NO. 7. Remember the connection of spring NO. 5.
The iron core from the circuit board welding allows the heating core to fit well. Note the order of the iron
core wire connection.
WARNING
To avoid serious injury and fire accidents, strictly adhere to the following:
When repairing or installing parts, the power supply must be off.
When the work station is on, DO NOT touch the metal parts of the hot air rework station or the soldering
iron. To replace the nozzles or tips, the power supply should be off and the metal parts should be cooled to
room temperature.
DO NOT use the machine near flammable things.
Parts Replacement Instructions
7
Heating element
Component handle
Handle cover
Mica paper