Embed Size (px)
Citation preview
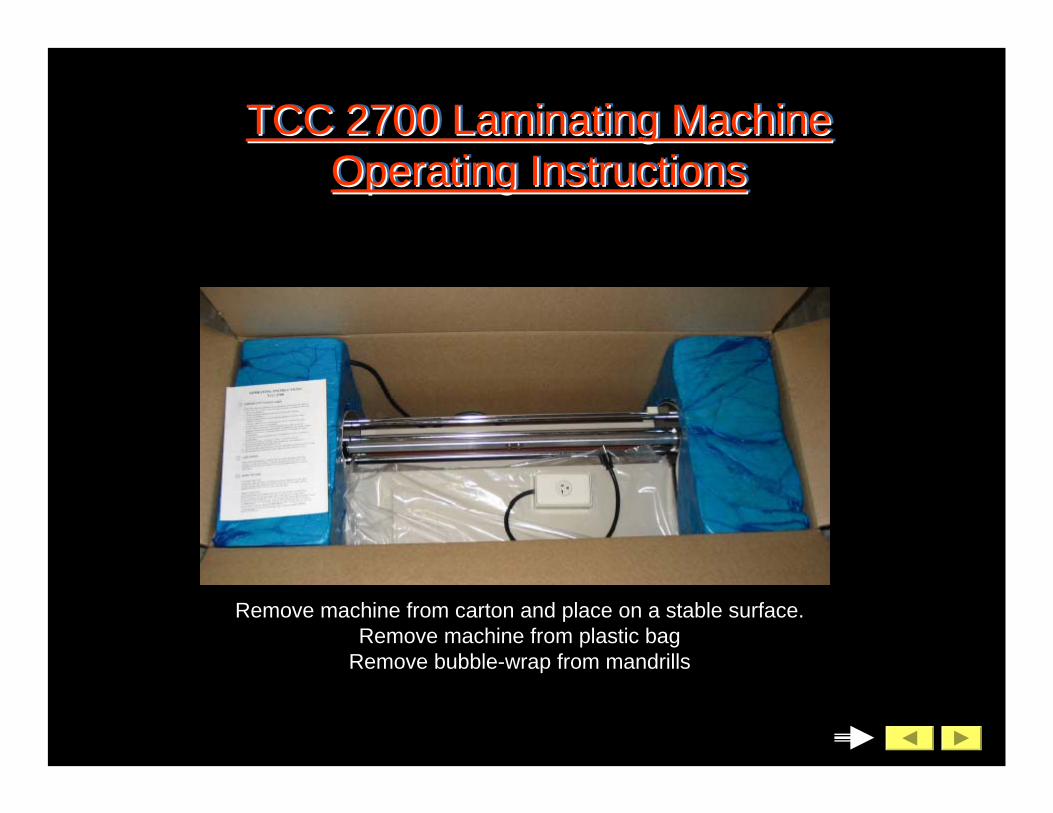
Remove machine from carton and place on a stable surface.Remove machine from plastic bag
Remove bubble-wrap from mandrills
TCC 2700 Laminating MachineOperating Instructions
TCC 2700 Laminating MachineTCC 2700 Laminating MachineOperating InstructionsOperating Instructions
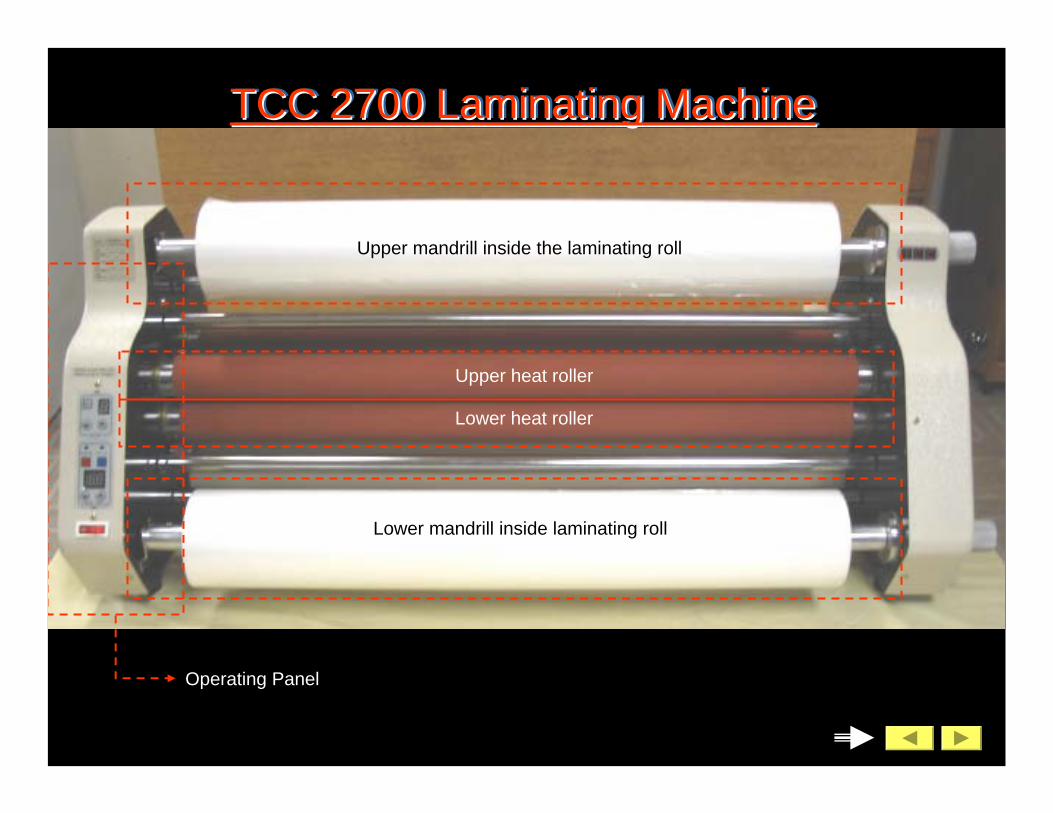
Lower mandrill inside laminating roll
Upper mandrill inside the laminating roll
Lower heat roller
Upper heat roller
Operating Panel
TCC 2700 Laminating MachineTCC 2700 Laminating MachineTCC 2700 Laminating Machine
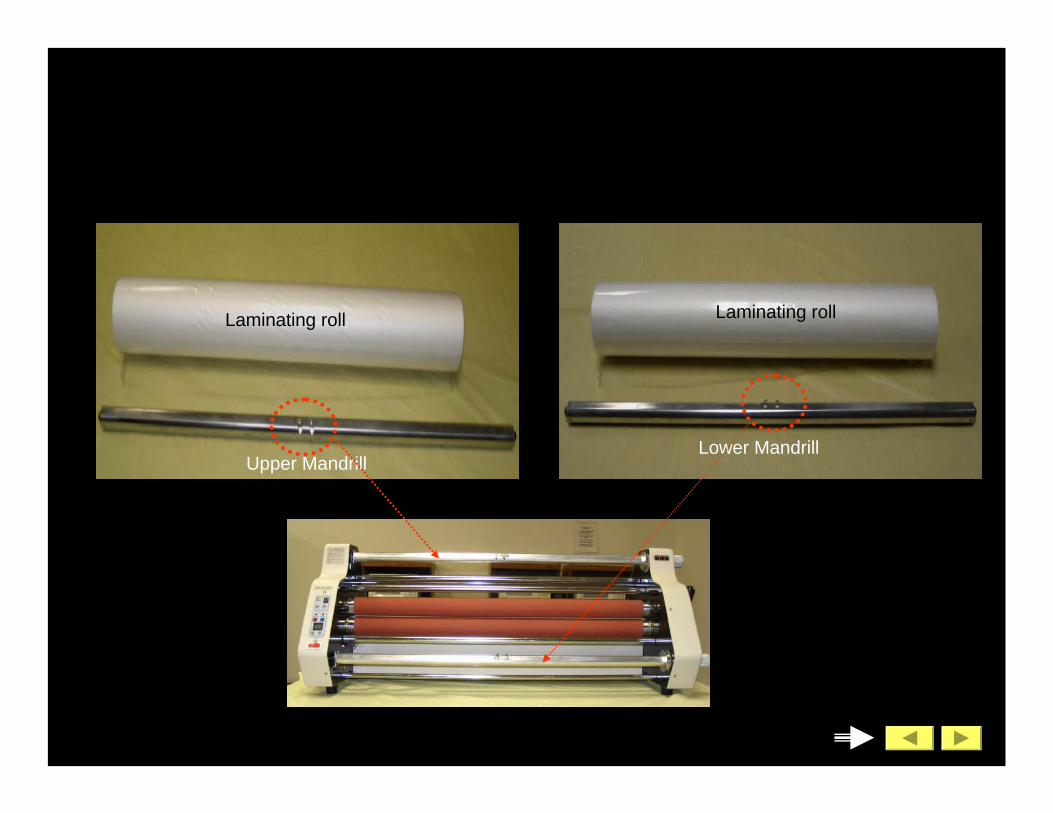
Upper MandrillLower Mandrill
Laminating roll Laminating roll

Insert upper and lower mandrills into core of the film
Line up film with appropriate notches on mandrill (25” film lines
up with notch that reads “25”” and so forth)
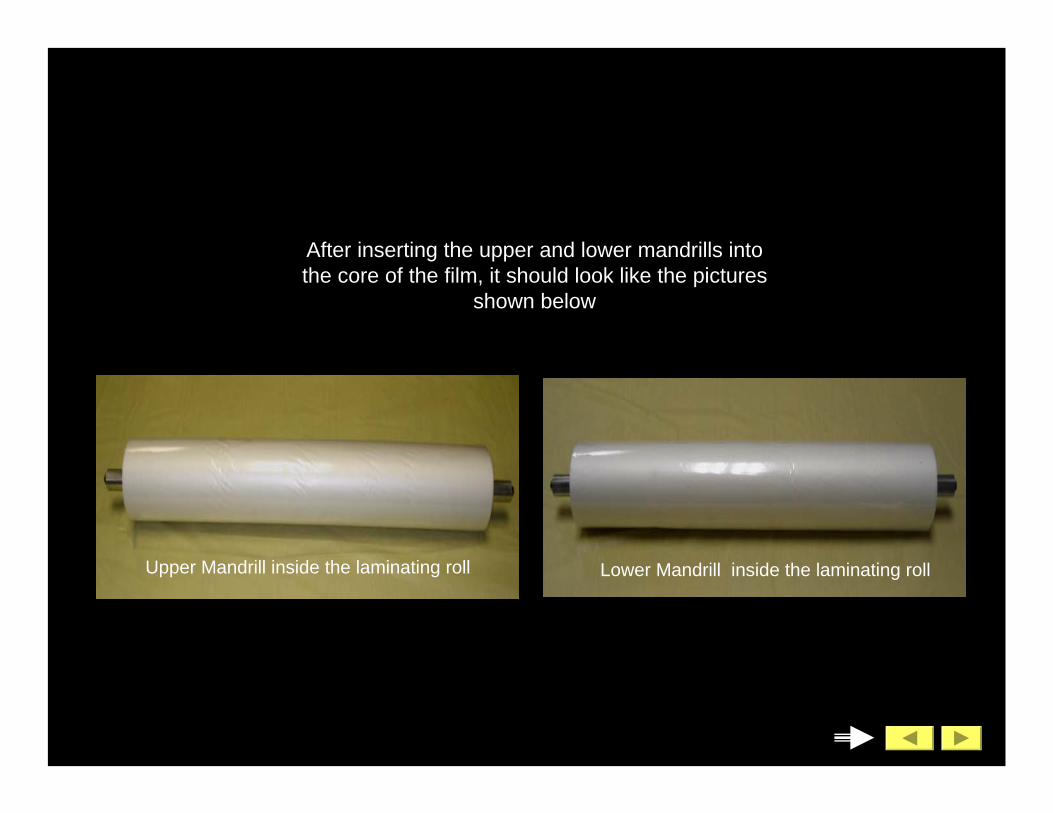
Upper Mandrill inside the laminating roll Lower Mandrill inside the laminating roll
After inserting the upper and lower mandrills into the core of the film, it should look like the pictures
shown below
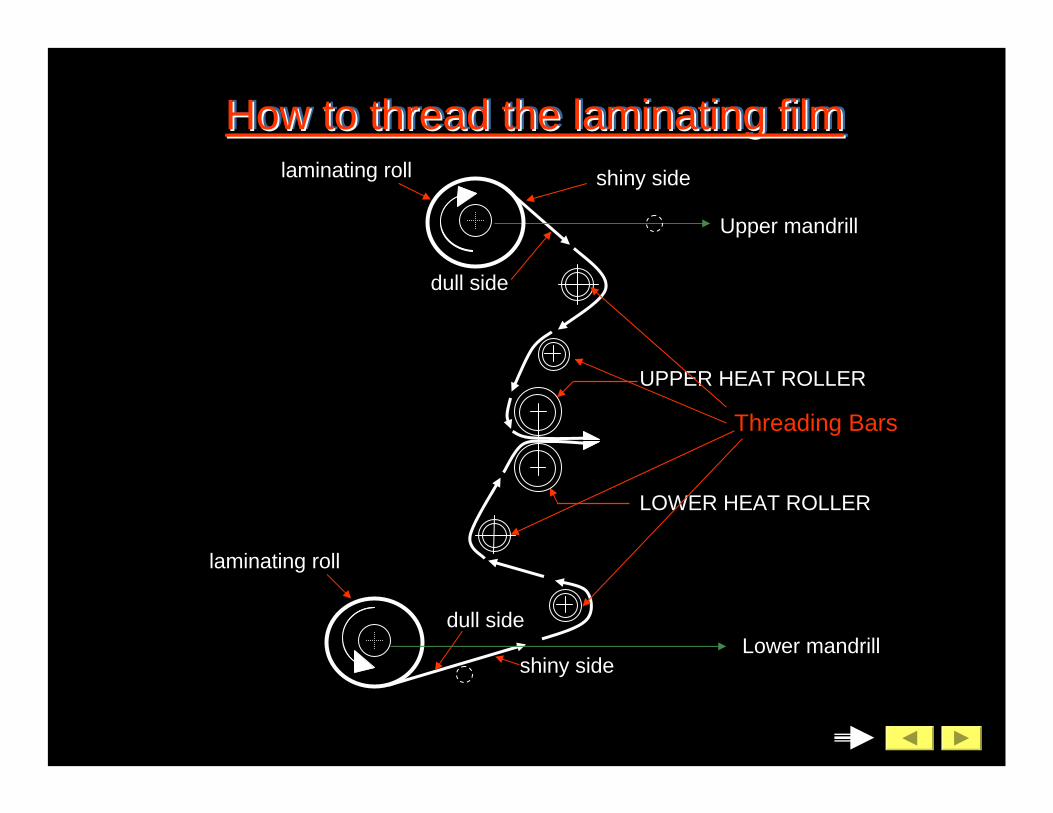
How to thread the laminating filmHow to thread the laminating filmHow to thread the laminating filmshiny side
dull side
UPPER HEAT ROLLER
LOWER HEAT ROLLER
dull side
shiny side
laminating roll
laminating roll
Upper mandrill
Lower mandrill
Threading Bars
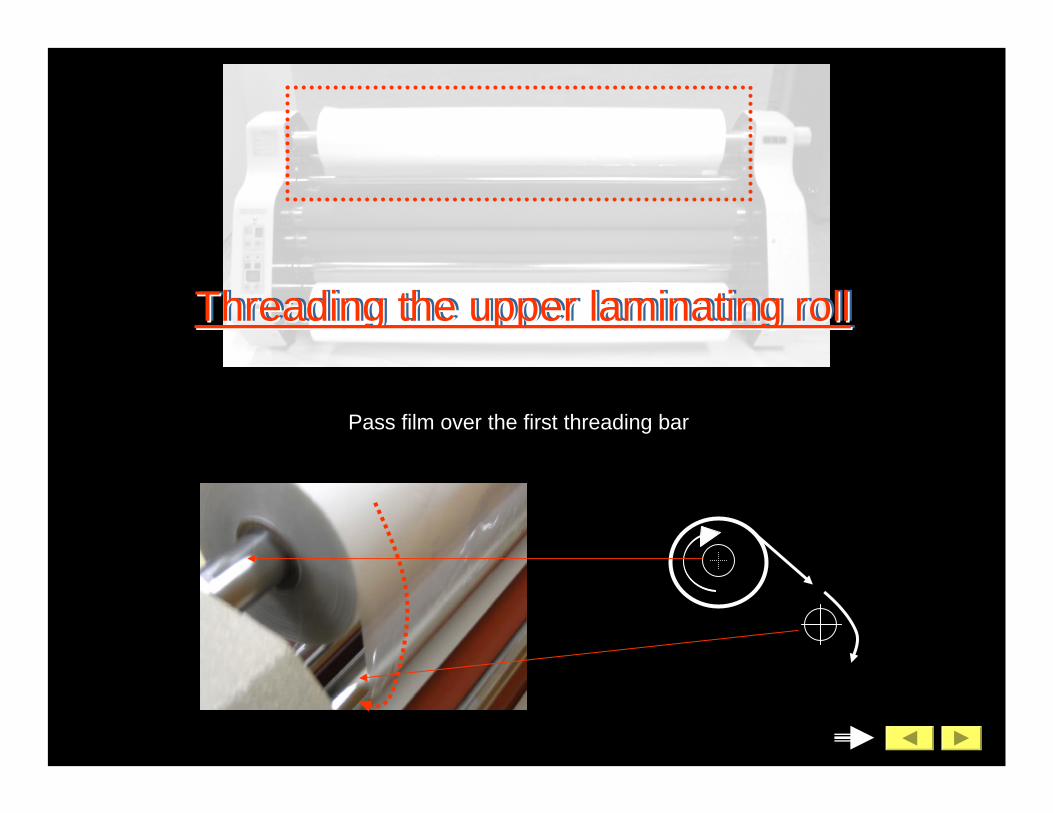
Pass film over the first threading bar
Threading the upper laminating rollThreading the upper laminating rollThreading the upper laminating roll
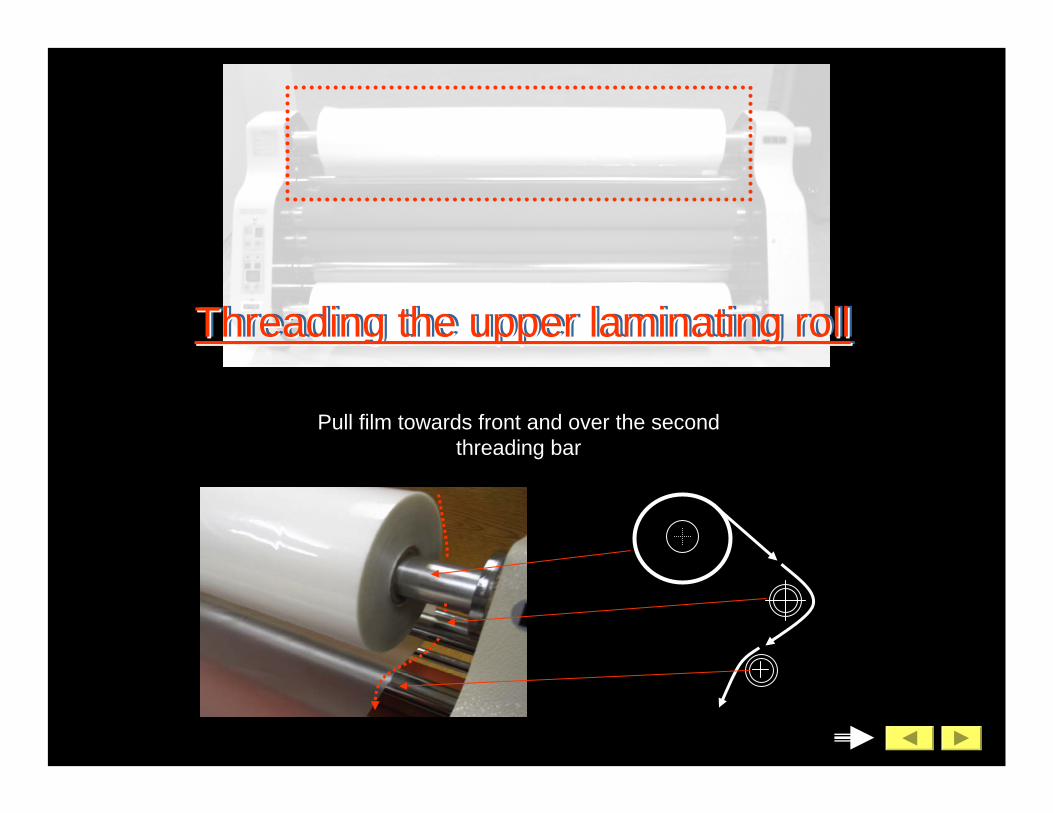
Pull film towards front and over the second threading bar
Threading the upper laminating rollThreading the upper laminating rollThreading the upper laminating roll
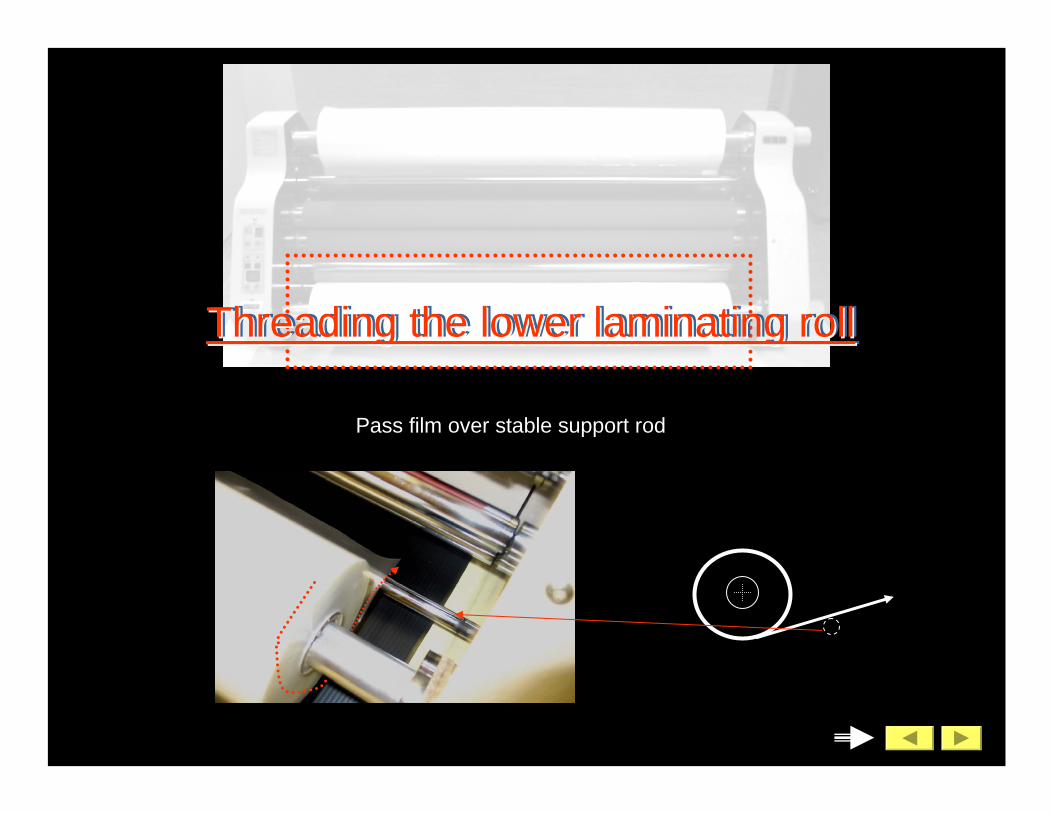
Pass film over stable support rod
Threading the lower laminating rollThreading the lower laminating rollThreading the lower laminating roll
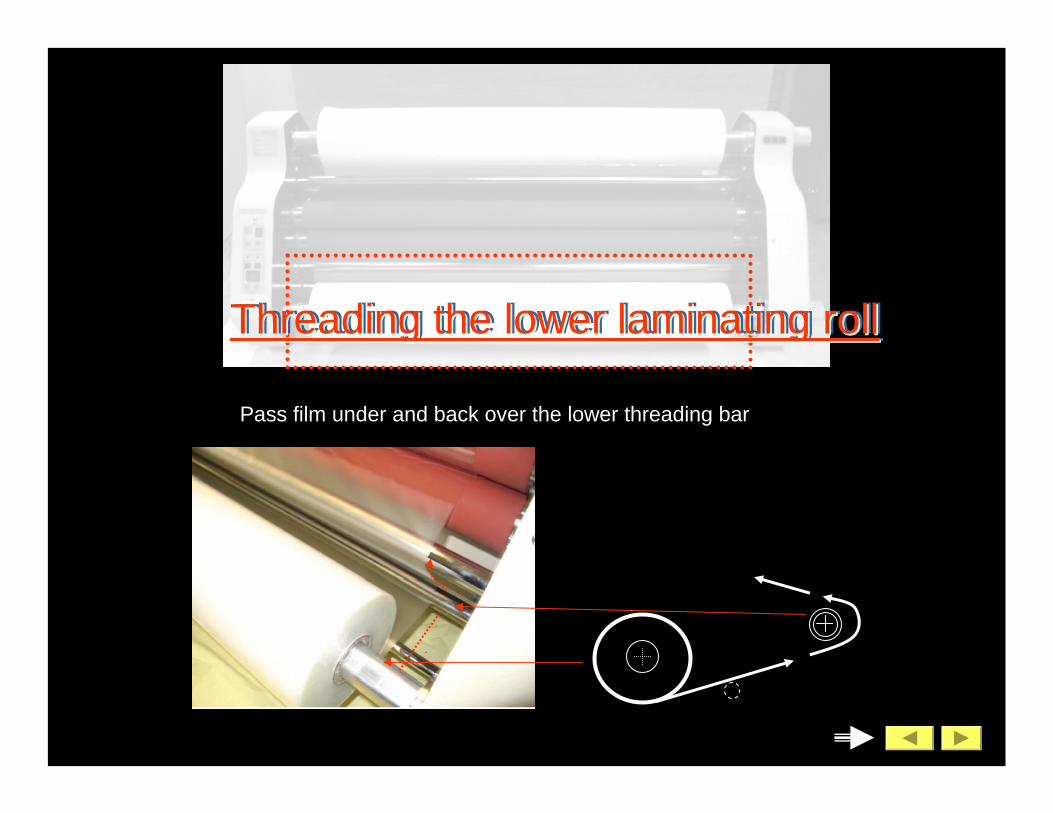
Pass film under and back over the lower threading bar
Threading the lower laminating rollThreading the lower laminating rollThreading the lower laminating roll

Threading the lower laminating rollThreading the lower laminating rollThreading the lower laminating roll
Pull through and over the upper threading bar
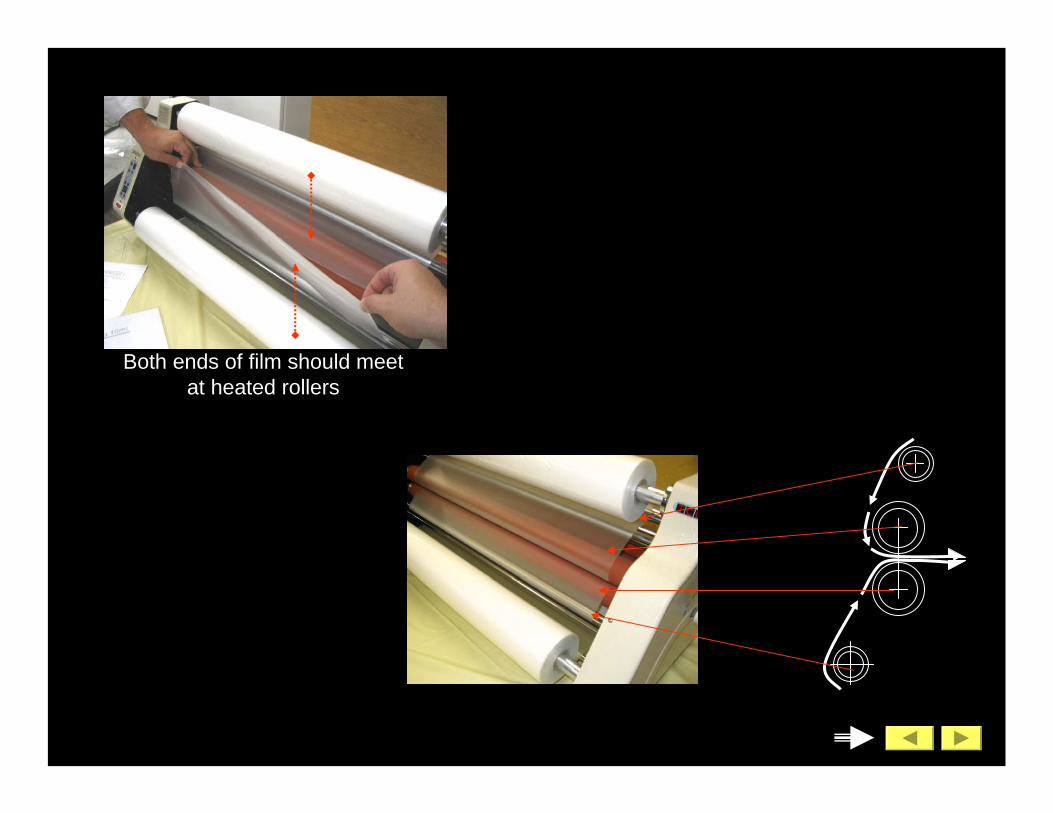
Both ends of film should meet at heated rollers
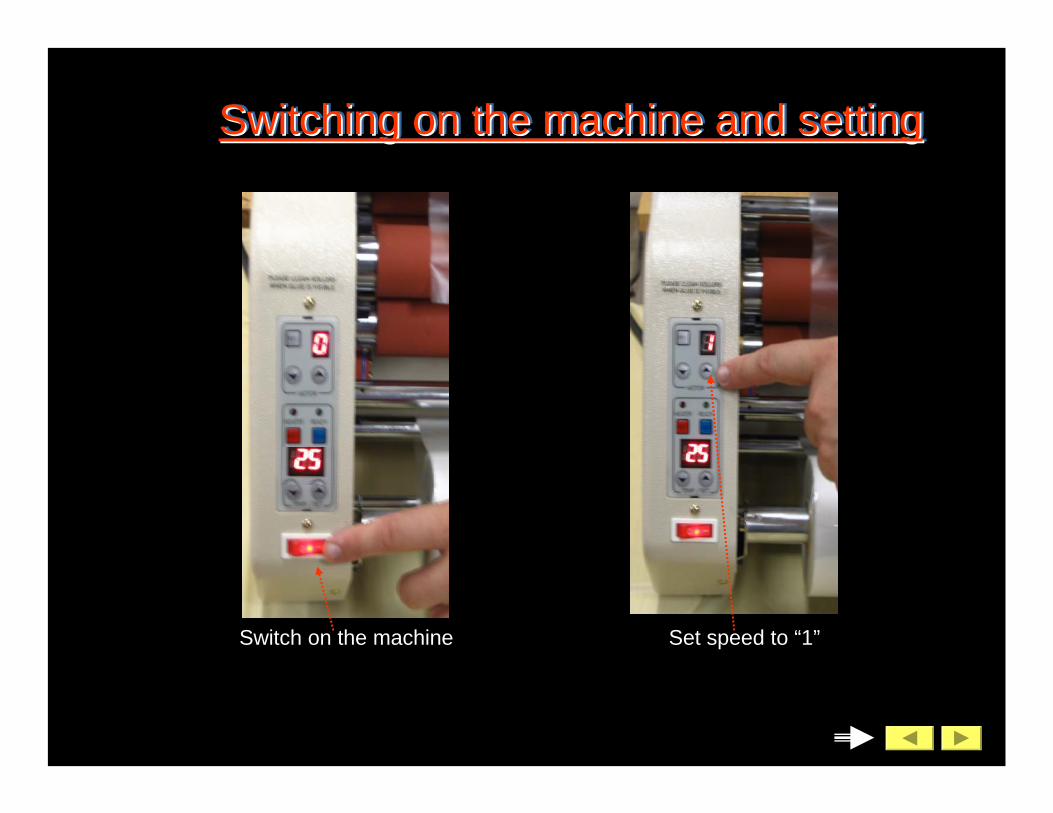
Switch on the machine Set speed to “1”
Switching on the machine and settingSwitching on the machine and settingSwitching on the machine and setting
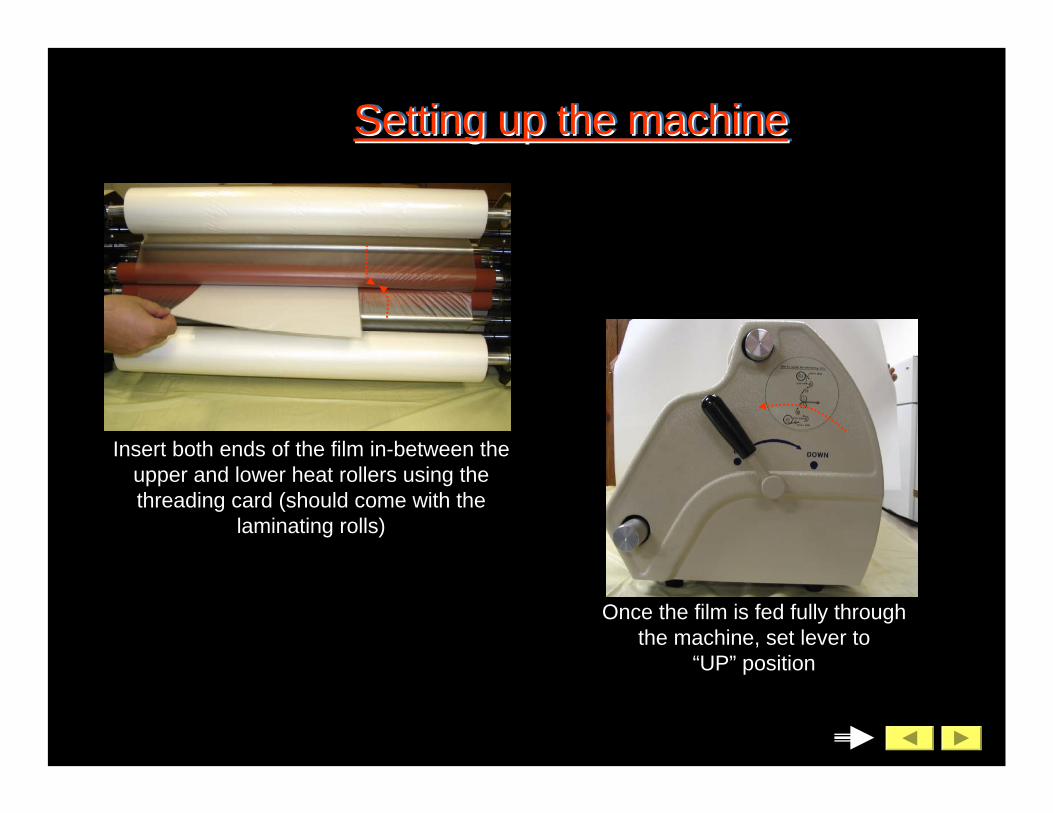
Insert both ends of the film in-between the upper and lower heat rollers using the threading card (should come with the
laminating rolls)
Once the film is fed fully through the machine, set lever to
“UP” position
Setting up the machineSetting up the machineSetting up the machine

Set temperature to desired heat level and press the
heat button
At this time, the machine will take a few minutes to heat up
At 80 degrees Celsius, you will hear a beep from the machine. This is to let you know that when the temperature reaches 90 degrees, the rollers will start to turn. Press heat button again to silence beeping.
At 90 degrees Celsius, the roller will start turning. If the lever is in the “UP” position, the rollers are therefore separated, the machine should not pull any film through.
The chart at the top left hand side of the machine will give you our recommended setting for different thicknesses of film (settings may vary depending upon material)
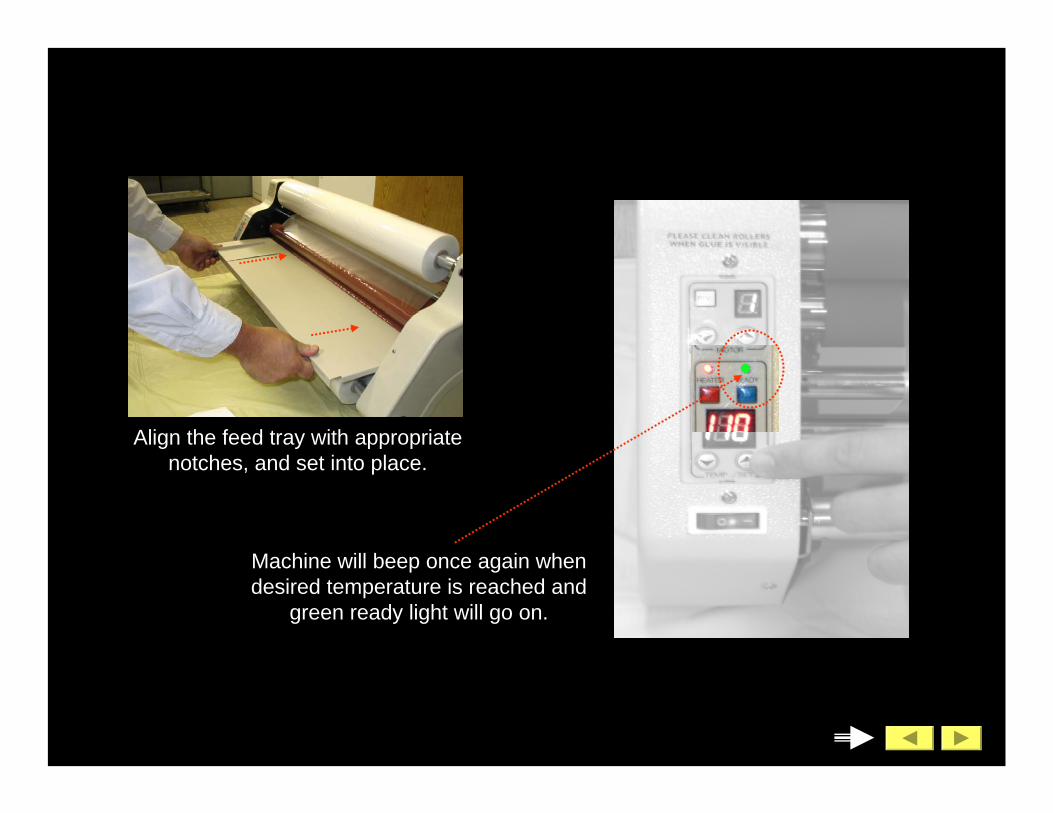
Align the feed tray with appropriate notches, and set into place.
Machine will beep once again when desired temperature is reached and
green ready light will go on.
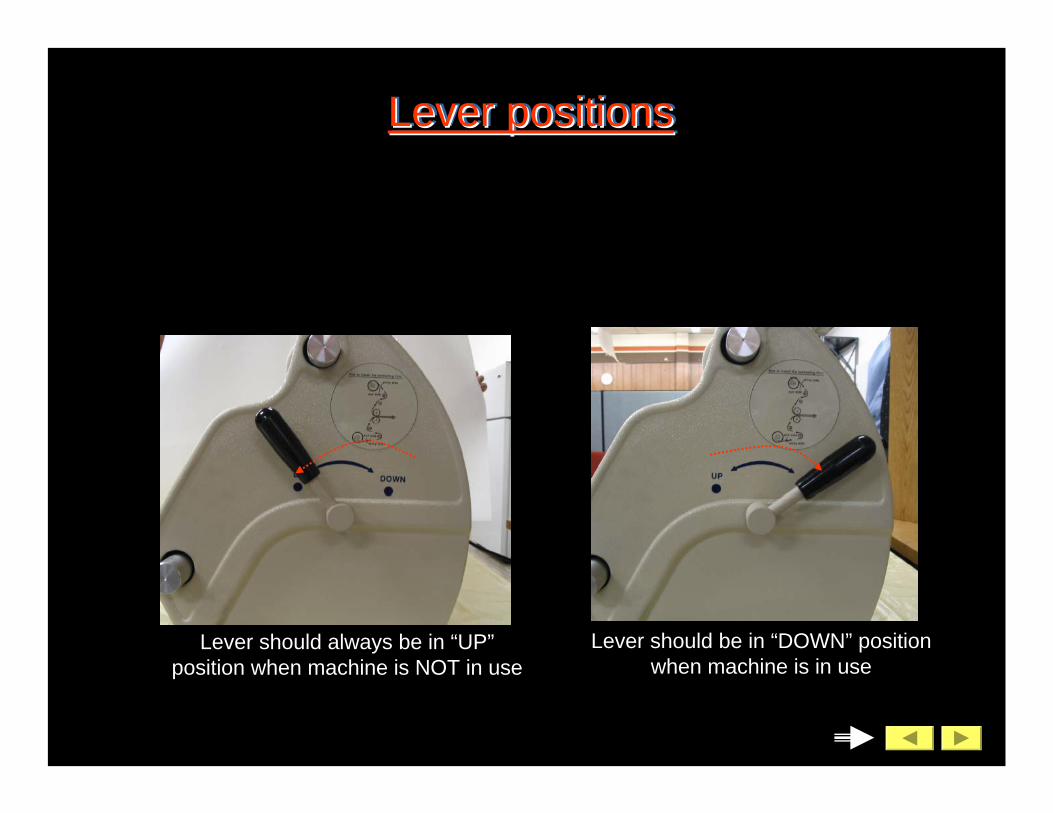
Lever should always be in “UP”position when machine is NOT in use
Lever should be in “DOWN” positionwhen machine is in use
Lever positionsLever positionsLever positions
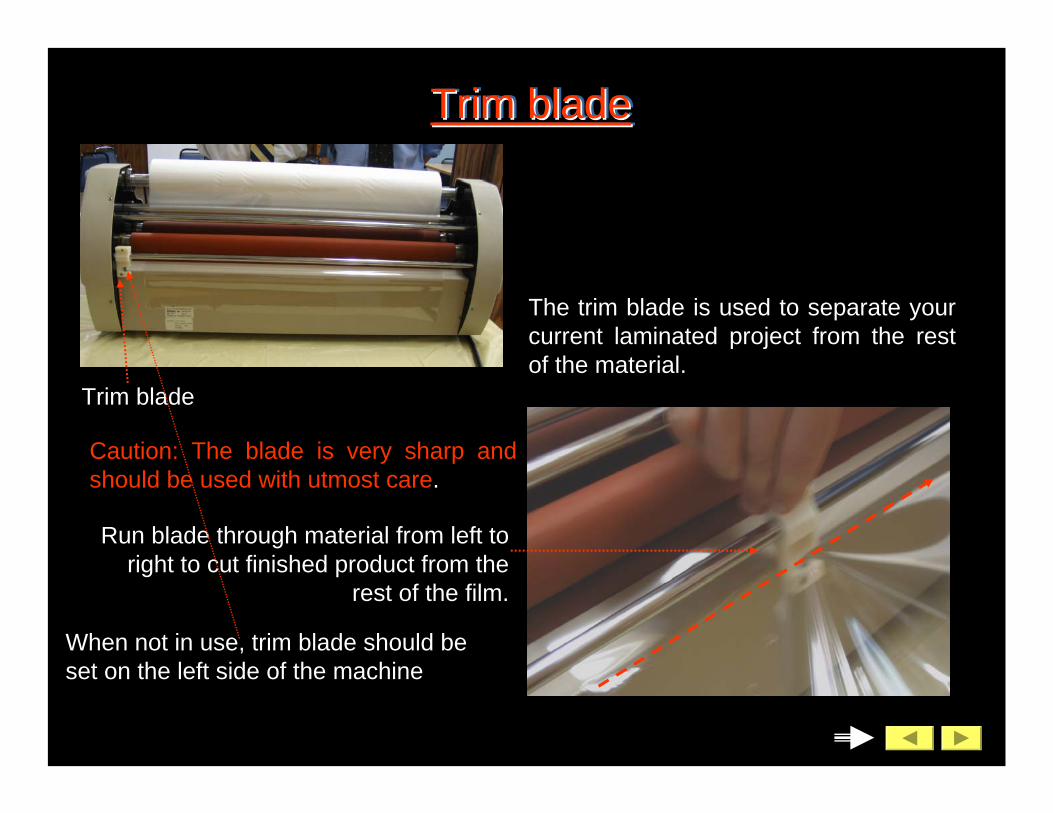
Trim blade
The trim blade is used to separate your current laminated project from the rest of the material.
Caution: The blade is very sharp and should be used with utmost care.
Run blade through material from left to right to cut finished product from the
rest of the film.
When not in use, trim blade should be set on the left side of the machine
Trim bladeTrim bladeTrim blade
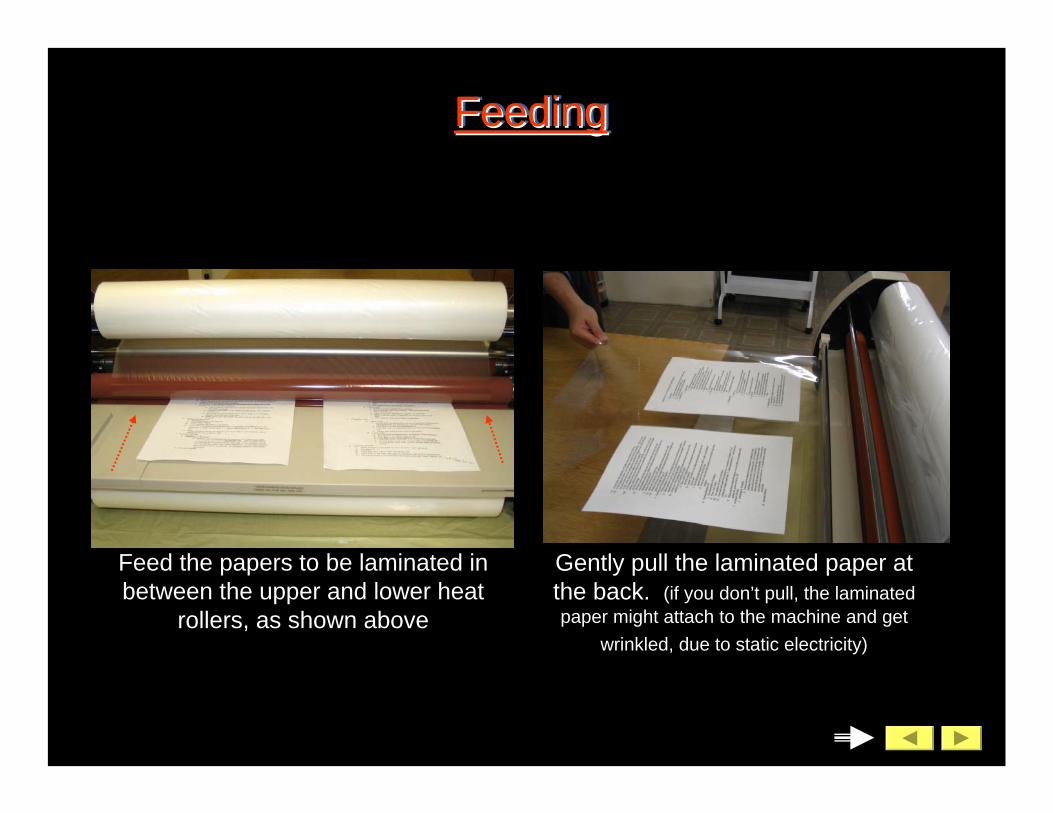
Feed the papers to be laminated in between the upper and lower heat
rollers, as shown above
Gently pull the laminated paper at the back. (if you don’t pull, the laminated paper might attach to the machine and get
wrinkled, due to static electricity)
FeedingFeedingFeeding
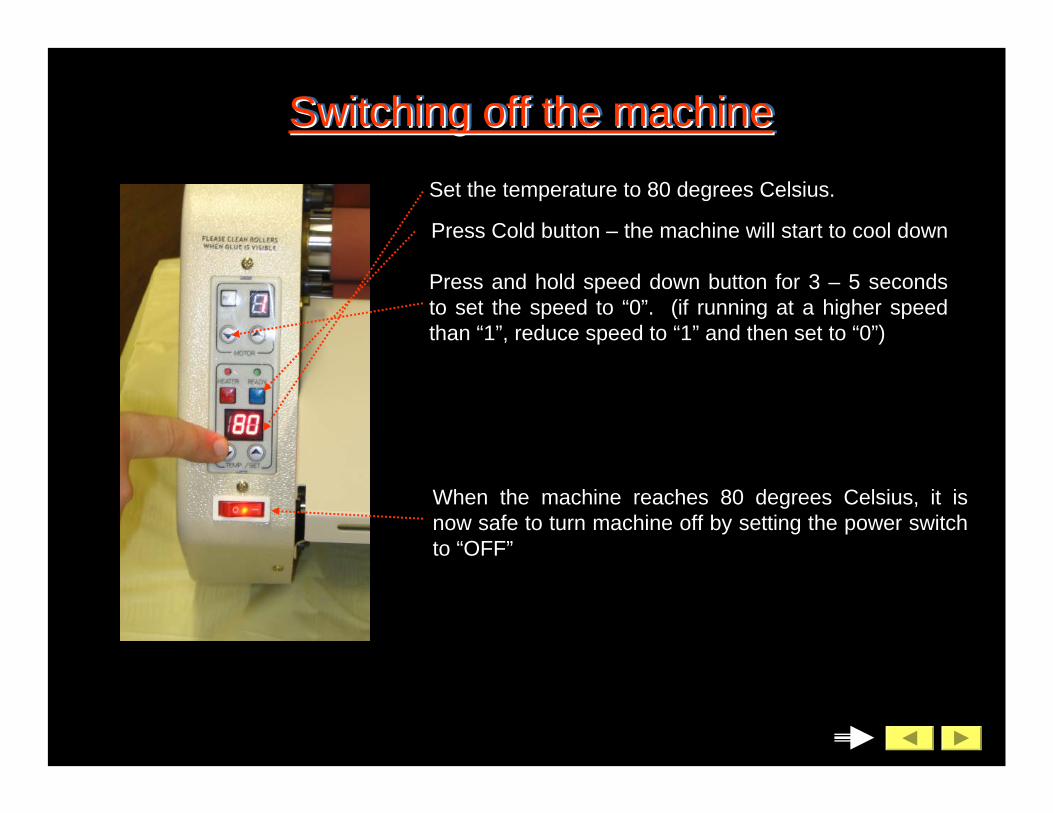
Set the temperature to 80 degrees Celsius.
Press Cold button – the machine will start to cool down
Press and hold speed down button for 3 – 5 seconds to set the speed to “0”. (if running at a higher speed than “1”, reduce speed to “1” and then set to “0”)
When the machine reaches 80 degrees Celsius, it is now safe to turn machine off by setting the power switch to “OFF”
Switching off the machineSwitching off the machineSwitching off the machine
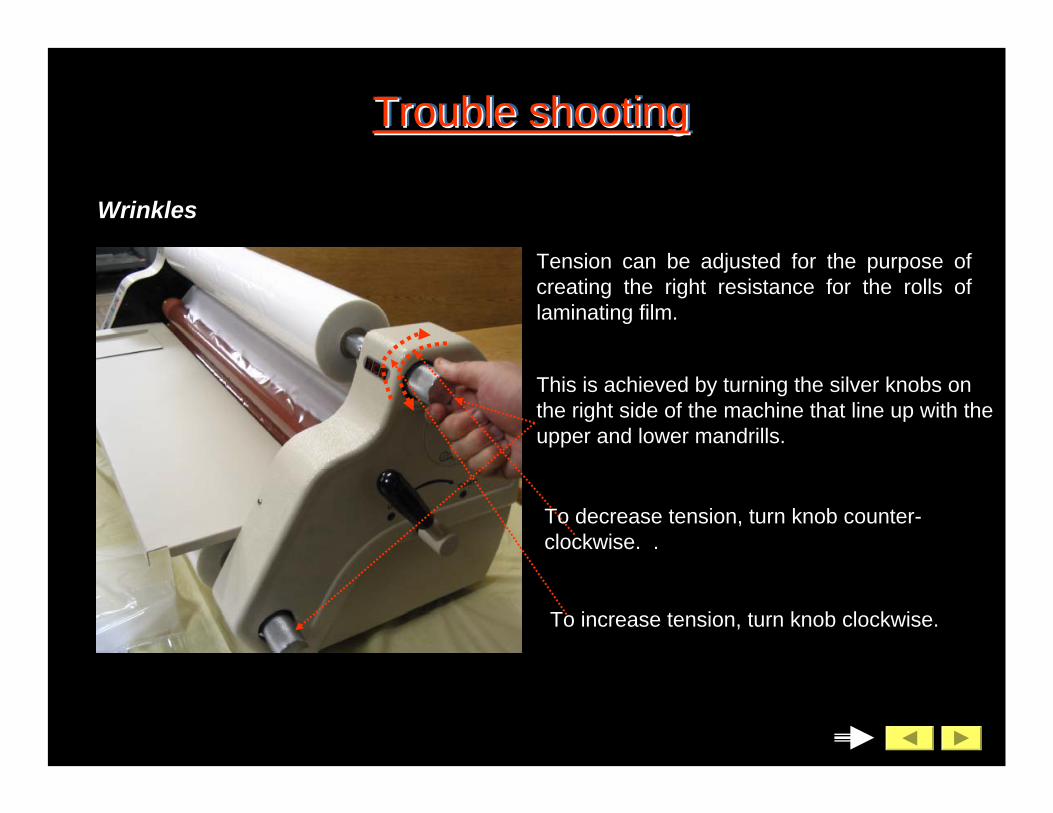
Tension can be adjusted for the purpose of creating the right resistance for the rolls of laminating film.
This is achieved by turning the silver knobs on the right side of the machine that line up with the upper and lower mandrills.
To decrease tension, turn knob counter-clockwise. .
To increase tension, turn knob clockwise.
Wrinkles
Trouble shootingTrouble shootingTrouble shooting
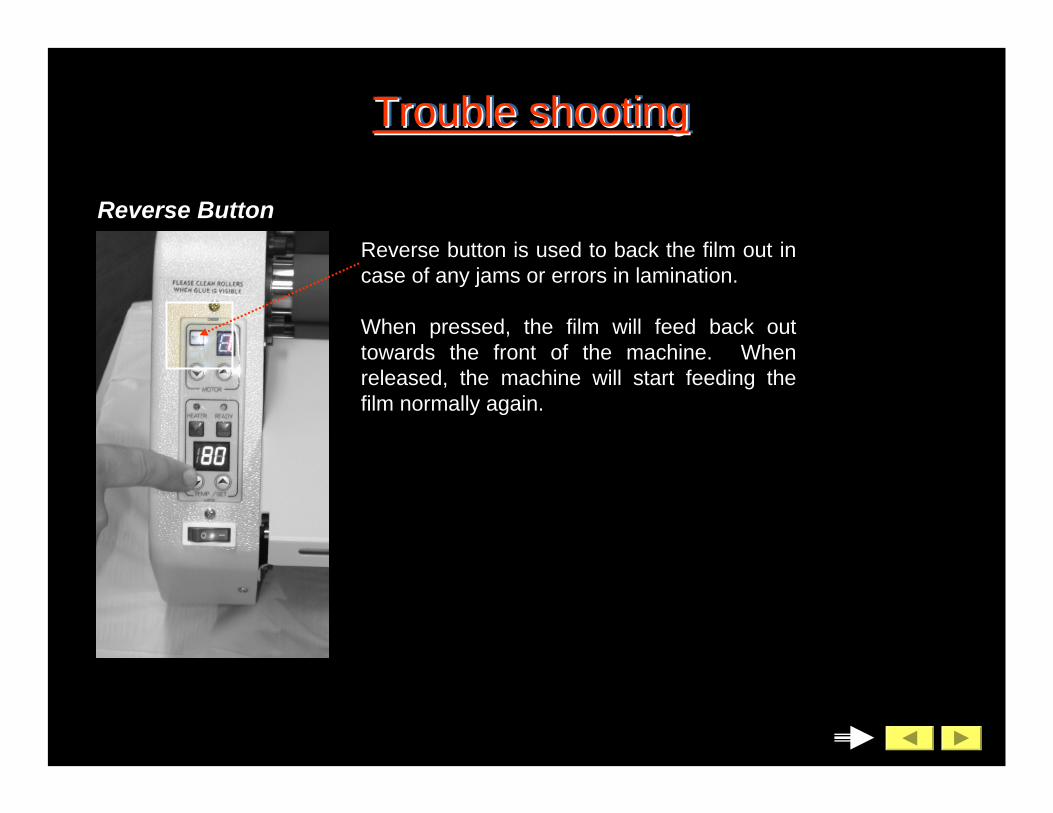
Reverse ButtonReverse button is used to back the film out in case of any jams or errors in lamination.
When pressed, the film will feed back out towards the front of the machine. When released, the machine will start feeding the film normally again.
Trouble shootingTrouble shootingTrouble shooting

ue Buildup
When machine is improperly heated to too high temperature or film is improperly aligned, you may notice markings along the side of the film where excess glue is building up on the rollers.
To properly remove the glue, please use a non-abrasive cleaning solution (such as GooGone) that will not damage the rollers themselves.
Do not use sharp or abrasive tool to scratch glue from rollers. Use a clean cloth and a cleaning solution to scrub away build up.
Trouble shootingTrouble shootingTrouble shooting
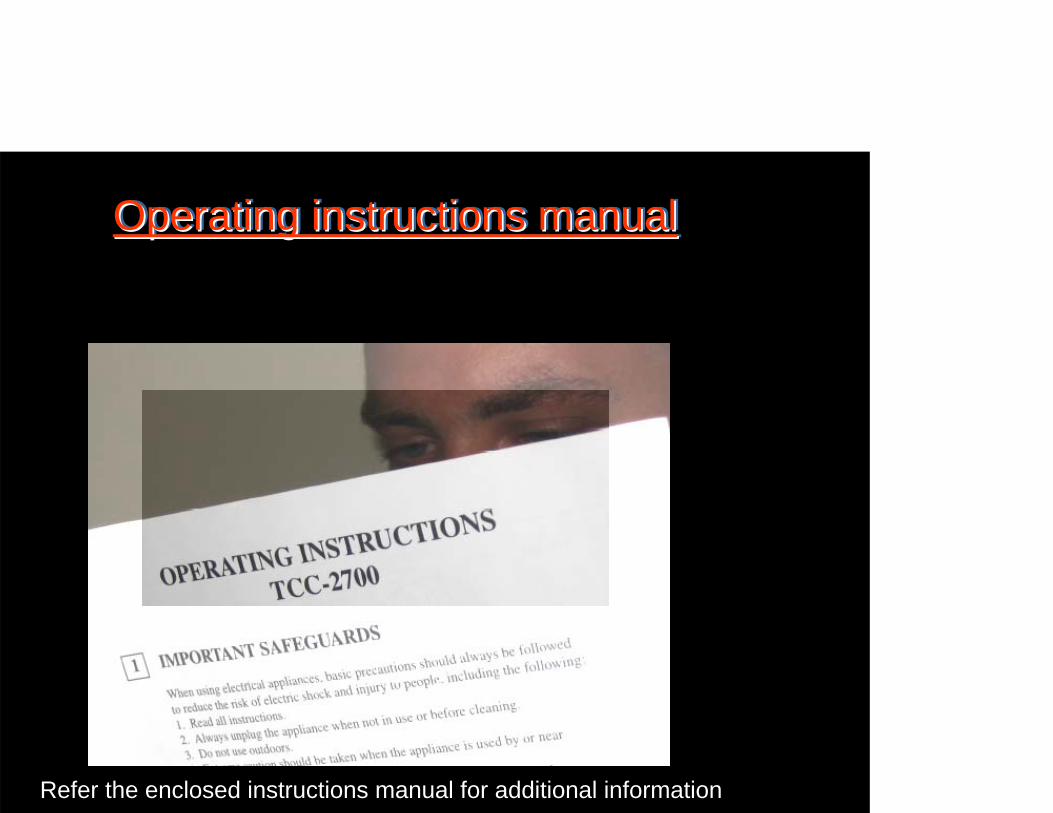
Operating instructions manualOperating instructions manualOperating instructions manual
Refer the enclosed instructions manual for additional information