Embed Size (px)
Citation preview

Level 3 WGHS VISUAL ARTS 2011
ART DESIGN Achievement Standard 90516 Version 2 - Credits: 6 - Internal Assessment - 9 Weeks
3.2: Investigate and use ideas and methods in the context of a drawing study in design.
This Achievement Standard involves investigating ideas and methods relating to art and artwork in the context of the drawing study in design. It also involves using established drawing processes, procedures, materials and techniques appropriate to ideas and methods studied, and using drawing to generate, analyse and clarify ideas.
Design 101
This assessment will take place during teaching and homework time of approximately 9 weeks. There are 3 tasks within this assessment. Task 1: Investigating ideas and subject matter 1 week
Task 2: Drawing and image-making 3 weeks
Task 3: Generating, analysing and clarifying ideas 5 weeks
All work for this achievement standard should be documented in your visual diary with
supporting notes that explain your decisions. It is critical that you include ‘failures’ - not just
your best work (this goes on your board!). The notes you make about what worked, what didn’t
and why, are important and provide solid evidence of your process, analysis and decision-
making. Note: this is about drawing, not writing, so make sure notes are brief and to the point,
supported by sketches.
TASK 1: (1 week)
Investigating ideas and selecting subject matter
Writing the situation: investigation of subject matter
a) Using the supplied worksheets, write a brief or situation which will enable you to generate,
analyse and clarify ideas for a poster design , then continue with a range of briefs for your
external folio. Consider how you will generate original imagery for the topic. (Photo shoot,
illustration, model making...)
Key ingredients for a successful folio include:
- The brief/ situation is challenging
- Brief/ situation is achievable and accessible
- Provides a variety of design activities
- Relevant to contemporary design
Following are some examples of interesting and achievable topics. SOCIAL / ENVIRONMENTAL ISSUE:
Eco/ Sustainability/ Litter / Recycle / Pollution / Promote hybrid cars
Poverty / Third world debt / Famine / War / Reuse and repair instead of throwing away
Global warming / Carbon footprints / Protection of sand dunes / Extreme weather
Disability / Genetic modification / Robotics / Privacy in 20th century
Drink driving / Raise the speed limit / Raise the driving age
Human rights / Political prisoners / Amnesty International / Literacy / Communication
Whaling / Drift net fishing / Travel
Cruelty to animals / Animal testing / Violence / Genetic modification / Robots
PROMOTION OF AN EVENT:
Concert / Music festival / Fundraiser
Sports tournament
Exhibition / Theatre
Film festival / New film
b) Complete a brainstorm in your book around a number of possible options to research.
Fill a page in your visual diary with notes, clippings and inspirational research around your
topics. Complete this in the form of a visual and written mind map on one page.
c) Writing your situation / brief A design brief is the outline and specifications of what you will be required to design.
In industry designers are given a brief and work to a client’s requirements and budget.
Fortunately you are able to write your own brief for the year and set your own parameters.
You will need to select a name for your organisation/ issue/ campaign and determine exactly
how and where your chosen organisation operates and what their aims and objectives are.
Type up your brief and paste into your diary.
You must identify:
Who is the client?
Who is the target audience – who is the design aimed at? Who are you talking to?
The exact type of person who will be the consumer, customer or supporter. If your
designs do not reach this target market then you have failed in your mission to
communicate a message. Every element in your design solution gives a message to
the viewer and appeals on different levels to the viewer. Define your target market:
age, ethnicity, income bracket, tastes and attitude. The look and feel of a design
appealing to young children would be very different to one aimed at petrol head
men in their 40s.
What style or look is appealing and appropriate to the topic? Consider a colour
palette of up to 6 colours and show the teacher.
What is the desired purpose or intention of the design? Is it to raise awareness of a
business, to inform, or to sell a product?
Outcome - what exactly are you required to design? A poster, brochure,
advertisement, web page?
TASK 2: (3 weeks)
Drawing and image-making
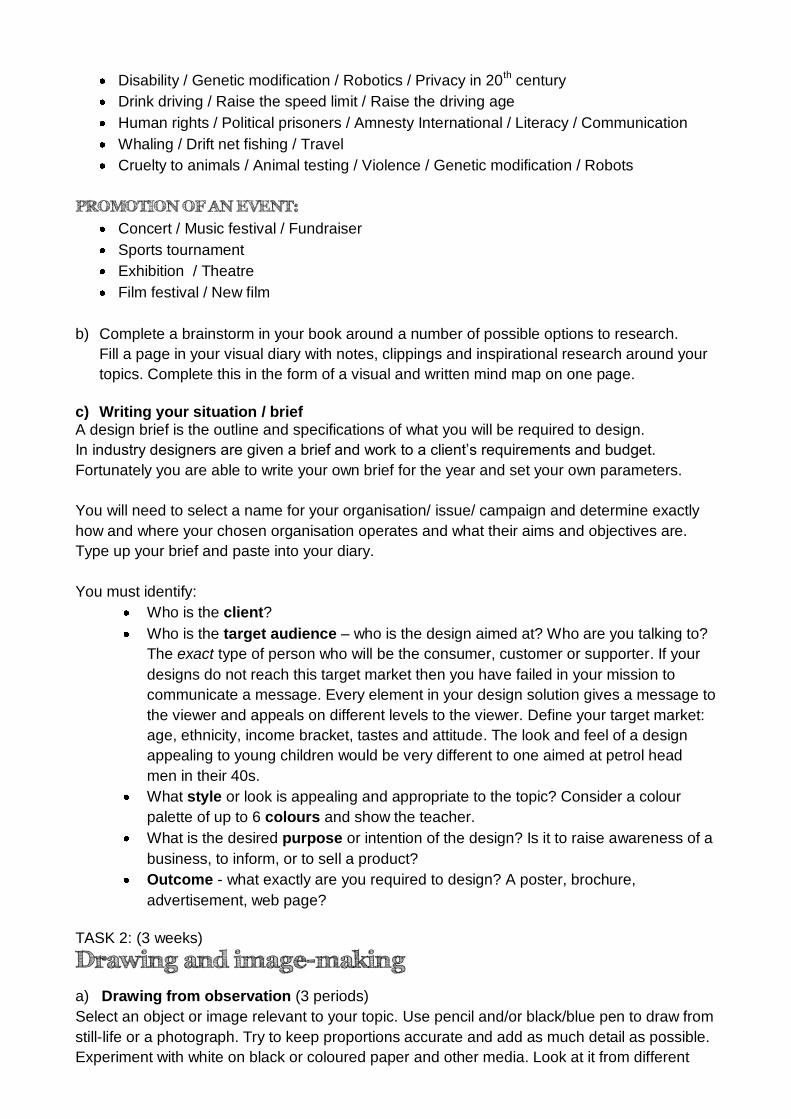
a) Drawing from observation (3 periods)
Select an object or image relevant to your topic. Use pencil and/or black/blue pen to draw from
still-life or a photograph. Try to keep proportions accurate and add as much detail as possible.
Experiment with white on black or coloured paper and other media. Look at it from different
angles and scale. You should end up with at least 3 drawings. These could be mounted with
other image-making at the top of board 1.
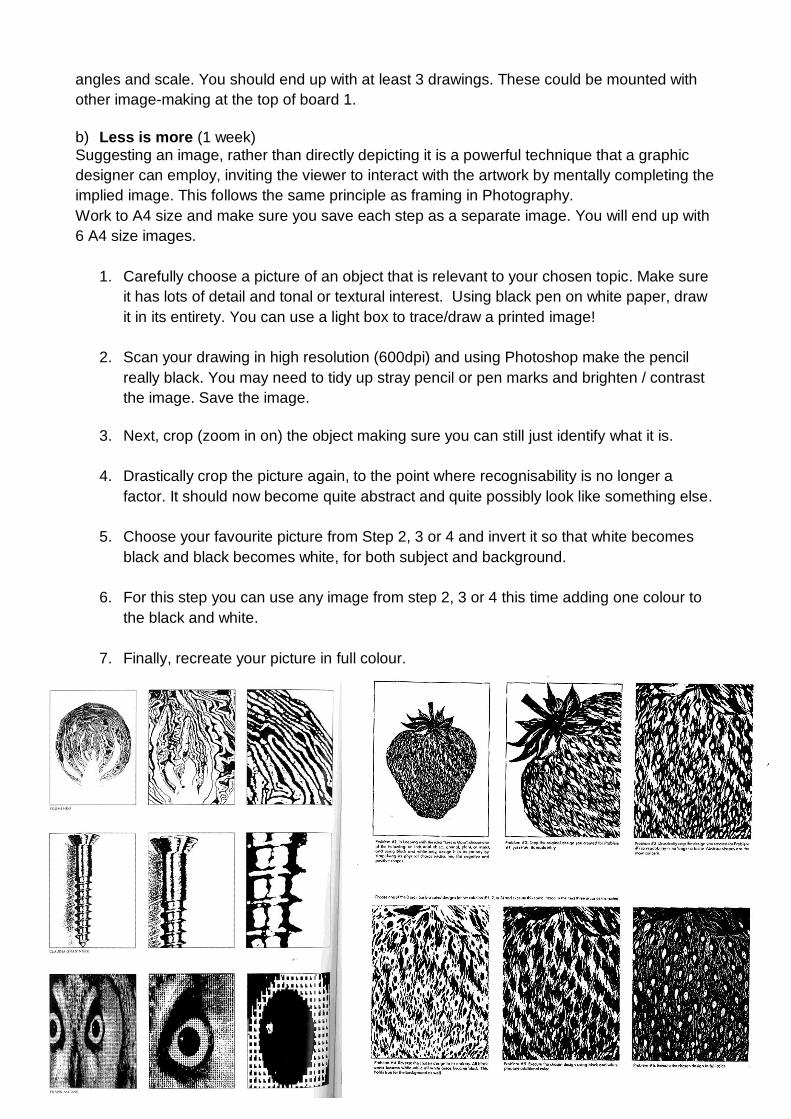
b) Less is more (1 week) Suggesting an image, rather than directly depicting it is a powerful technique that a graphic
designer can employ, inviting the viewer to interact with the artwork by mentally completing the
implied image. This follows the same principle as framing in Photography.
Work to A4 size and make sure you save each step as a separate image. You will end up with
6 A4 size images.
1. Carefully choose a picture of an object that is relevant to your chosen topic. Make sure
it has lots of detail and tonal or textural interest. Using black pen on white paper, draw
it in its entirety. You can use a light box to trace/draw a printed image!
2. Scan your drawing in high resolution (600dpi) and using Photoshop make the pencil
really black. You may need to tidy up stray pencil or pen marks and brighten / contrast
the image. Save the image.
3. Next, crop (zoom in on) the object making sure you can still just identify what it is.
4. Drastically crop the picture again, to the point where recognisability is no longer a
factor. It should now become quite abstract and quite possibly look like something else.
5. Choose your favourite picture from Step 2, 3 or 4 and invert it so that white becomes
black and black becomes white, for both subject and background.
6. For this step you can use any image from step 2, 3 or 4 this time adding one colour to
the black and white.
7. Finally, recreate your picture in full colour.
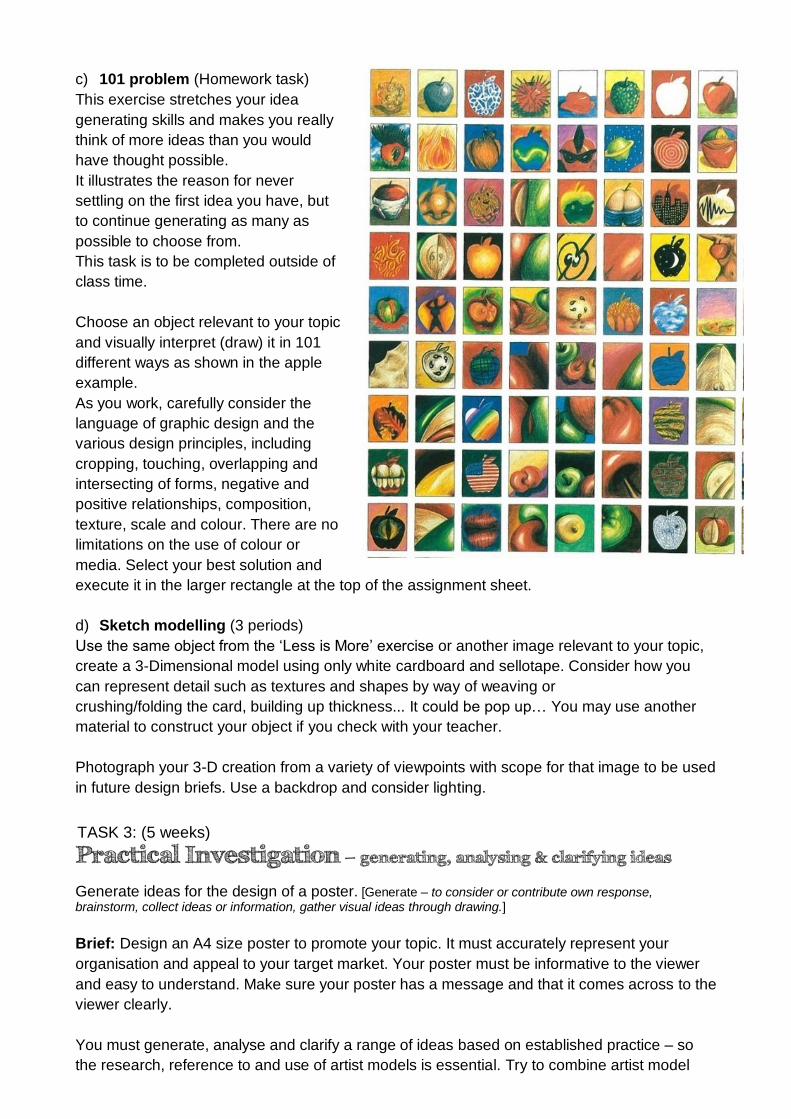
c) 101 problem (Homework task)
This exercise stretches your idea
generating skills and makes you really
think of more ideas than you would
have thought possible.
It illustrates the reason for never
settling on the first idea you have, but
to continue generating as many as
possible to choose from.
This task is to be completed outside of
class time.
Choose an object relevant to your topic
and visually interpret (draw) it in 101
different ways as shown in the apple
example.
As you work, carefully consider the
language of graphic design and the
various design principles, including
cropping, touching, overlapping and
intersecting of forms, negative and
positive relationships, composition,
texture, scale and colour. There are no
limitations on the use of colour or
media. Select your best solution and
execute it in the larger rectangle at the top of the assignment sheet.
d) Sketch modelling (3 periods)
Use the same object from the ‘Less is More’ exercise or another image relevant to your topic,
create a 3-Dimensional model using only white cardboard and sellotape. Consider how you
can represent detail such as textures and shapes by way of weaving or
crushing/folding the card, building up thickness... It could be pop up… You may use another
material to construct your object if you check with your teacher.
Photograph your 3-D creation from a variety of viewpoints with scope for that image to be used
in future design briefs. Use a backdrop and consider lighting.
TASK 3: (5 weeks)
Practical Investigation – generating, analysing & clarifying ideas
Generate ideas for the design of a poster. [Generate – to consider or contribute own response, brainstorm, collect ideas or information, gather visual ideas through drawing.]
Brief: Design an A4 size poster to promote your topic. It must accurately represent your
organisation and appeal to your target market. Your poster must be informative to the viewer
and easy to understand. Make sure your poster has a message and that it comes across to the
viewer clearly.
You must generate, analyse and clarify a range of ideas based on established practice – so
the research, reference to and use of artist models is essential. Try to combine artist model
ideas and make your own new style. You must consider the characteristics and function of a
poster: it communicates a message to the viewer. This could be information about an event or
a call to action like a competition. Posters must be easily read from a distance, be memorable,
have hierarchy of type and image etc.
RESEARCH
Select at least 4 artist models from the list below and paste poster examples into your
workbook examples making notes about the style characteristics unique to each artist model.
Look at type, colour palette, decorative or minimalist styles…
Notes (not long paragraphs) should include:
Who the poster is by
What is it about? What is the message?
Techniques used to construct the poster (painted, photographed, digitally drawn,
screen printed…)
Design principles and elements used (see list at back)
Identify the strengths and weaknesses of each example studied and what you can
learn/ gain from that to inform your subsequent work.
Make small thumbnail sketches of ideas you can take from the artist models for your
own design.
Artist models: Paul Rand, Saul Bass, International Typographic style, Art Nouveau, Art Deco,
Constructivism, El Lissitzky, Marian Bantjes, Milton Glaser, Jasper Johns, Derek Birdsall,
David Carson…
There must be obvious links between the artist models work and your own work.
IMAGERY CREATION
Try to utilise as much of the imagery you have created in your poster concepts as possible.
You can use Photoshop to modify images and experiment with other colours and effects.
Complete at least 2 x A3 pages of drawing to show the visual investigation of your topic.
At least two different media must be used. It is strongly recommended that you include
photographs of your subject matter.
Use the drawing techniques practiced in Task 2 as a starting point for generating more
imagery. Your page could contain: marks and/ or textures, photographs (print, digital
manipulations, photocopies), drawing in wet and dry media, tracing, outlining, collage type
experiments.
Concepts:
Produce 6-10 concepts in the style of your artist models. I should be able to look at
your work and immediately see which artist model has influenced each poster. You can
combine artist model ideas/styles to create your own interpretation.
See how many more ideas you can generate yourself taking inspiration from other
designs in books. (The more ideas you start with, the better the final outcome.)
It is imperative for Merit and Excellence level that you generate at least two or more
‘lines of inquiry’, or major alternative options to explore. Work in a systematic way in
your diary, documenting research, ideas, sketches, concepts, rejected ideas, refined
ideas and developments. This may include side investigations and even back-tracking
at times.
Analysing your ideas
Consider the range of ideas you have generated. Which ideas are most effective? Which ideas
have potential? Fill 1 x A3 page trying out some ideas, using a range of media and techniques
that are appropriate to your design models. Make sure to highlight ideas that you have
rejected, and briefly explain why.
Select your best 4 concepts and try to improve them. Move around elements testing
composition and trying different typefaces. Annotate every sketch justifying your
decisions. You can try combining elements from different concepts and even introduce
new elements from another artist model.
Create digital versions of these sketches.
Clarifying specific options
Select concepts you wish to progress. You should be developing at least 3 ideas, each on an
A3 page. Combine different methods and ideas (imagery, technique, composition, form, colour
etc) from different sources.
Ideas must be synthesised:
- Combining visual elements from previous work
- Combining technical devices from different artist models
- Rearranging previous compositions and including/ removing visual elements
- Integrating new visual elements, techniques or materials
- Regenerating or revisiting ideas abandoned previously
At this point you should be identifying which ideas are the best to develop to a final.
Your work should have a strong sense of purpose and refer periodically back to the brief.
Resources
Typography and design websites to check out: thedesignencyclopedia.org aiga.com designmuseum.org/design dafont.com
International designers/ firms: seadesign.co.uk bantjes.com sagmeister.com collider.com.au dannyyount.com debaser.com.au pidgeon.com.au jessicahische.com pokelondon.com vault49.com eduardorecife.com whynotassociates.com idnworld.com New Zealand design firms: designworks.co.nz dashwood.co.nz dna.co.nz saltdesign.co.nz
Books to reference at school* or from the public library: Process; A tomato project – Thames and Hudson Pen and Mouse – Commercial Art and Digital Illustration Letterwork: Creative Letterforms in Graphic Design by Neuenschwander & Brody Type in Motion: Innovations in digital graphics by Bellantoni & Woolman Twentieth Century Type: Remix by Lewis Blackwell *Graphic Language of Neville Brody by Neville Brody *End of Print by David Carson Trek: david carson.recent work by David Carson Buro Destruct – Die Gestalten Verlag *Designing Type – Karen Cheng *Graphic Design School – David Dabner *1000 Graphic Elements – Rockport *Tres Logos – 00/00 *The Big Book of Logos 4 – David E. Carter *Type and Typography – Phil Baines and Andrew Haslam No More Rules – Graphic Design and Post Modernism – Rick Poynor Typo Graphics – the art and science of type design in context – Ivan Vartanian How to Design Trademarks and Logos – Graphic Library Press 130 Alphabets and Other Signs – Thames and Hudson International Corporate Identity – Wally Olins Cross Cultural Design – Thames and Hudson Designers Handbook of Logos and Symbols – RC Publications Fresh ideas in Letterhead and Business Card Design – Diana Martin Letterwork – Phaidon Logo Design 5 by Graphis Inc