Embed Size (px)
Citation preview

My Testbench Used to Break! Now it Bends: Adapting to Changing Design Configurations
Jeff Vance, Jeff Montesano, Kevin Vasconcellos, Kevin Johnston
Verilab Inc. 609 Castle Ridge Road Suite 210,
Austin, TX 78746
Abstract - This paper demonstrates a technique that allows a single UVM testbench to adapt to design configuration changes that would otherwise require significant manual effort. The solution accommodates multiple design versions, changes in design hierarchy, and testbench migrations to future project iterations. It also allows us to simulate any subsystem in isolation without maintaining a separate testbench. To achieve this, we show several enhancements to the UVM harness technique along with a run-time generated environment topology that mirrors the design hierarchy. Examples show how this results in a testbench that automatically adapts and works with any design configuration.
I. INTRODUCTION
UVM testbenches can require significant upkeep when faced with (1) the need to verify multiple design versions with different numbers of CPU cores or interfaces, (2) the need to accommodate a design with frequent hierarchy changes, or (3) the need to migrate a testbench to future project iterations. Additional challenges are introduced with the need to stub-out RTL blocks for better simulation performance or to verify select blocks or subsystems of the design in isolation. These problems are often solved either by maintaining separate testbenches, or with extensive maintenance over time to a single testbench. This requires updating many interface connections to the design under test (DUT), changing testbench environment configurations to have the correct number of bus functional models (BFMs) connected to the correct interfaces, and having the ability to stimulate and monitor design signals at various hierarchies with or without stubbed RTL. This adds significant bottlenecks to project schedules as teams are required to make these changes while avoiding the introduction of testbench bugs.
In this paper, we demonstrate a technique that solves all of these challenges using a single testbench that adapts to changes that would otherwise require significant manual effort. We show how a single UVM testbench can adapt to multiple design versions, changes in design hierarchy, and interface with both stubbed and active RTL blocks. This solution also allows us to simulate any subsystem or blocks in isolation without maintaining a separate testbench. The technique relies on the UVM Harness ([1], [2]), which is a way of binding interface connections to a DUT, a technique that has proven to be more flexible than traditional connections. This application of the harness gives us the ability to automatically instantiate and connect the correct number of interfaces to any design hierarchy and universally support different parameterized signal widths. We also rely on the SystemVerilog feature of port coercion ([1], [3]) to ensure all interfaces universally support master and slave BFMs in both active and passive contexts. Using a single testbench can have additional benefits such as the ability to reuse test cases between different levels of design integration, to isolate bugs more easily by regenerating constrained-random stimulus on isolated portions of the design, and to automatically merge coverage between block-level and full-system regressions.
To achieve an adaptable testbench, we introduce a methodology for constructing an environment topology that mirrors the design module hierarchy. We demonstrate how this approach provides better encapsulation of testbench components and naturally scales to any design at all integration levels. This architecture is also more intuitively understood by designers and future users of the testbench. Most importantly, this approach allows us to dynamically generate environment topologies at runtime that match the topology of the DUT. We also enhance the UVM harness with several features that take advantage of this testbench structure. First, we introduce self-publication of virtual interfaces to the configuration database, which ensures all testbench components are connected to the correct interface. Second, we apply the well-established technique of polymorphic interfaces ([1], [4]) to the harness. A polymorphic harness allows us to embed functionality in the harness, provide an API to testbench components, and allow it to accommodate changes in the DUT such as stubbed modules. Finally, we add harness methods that extract RTL parameters from design modules and make them accessible to testbench code [5].
II. MIRRORING DESIGN AND TESTBENCH HIERARCHY
In UVM, the encapsulation of agents and interfaces is well established and agreed upon: an agent encapsulates a given protocol, and an interface encapsulates a bundle of wires used by that protocol. While the UVM environment
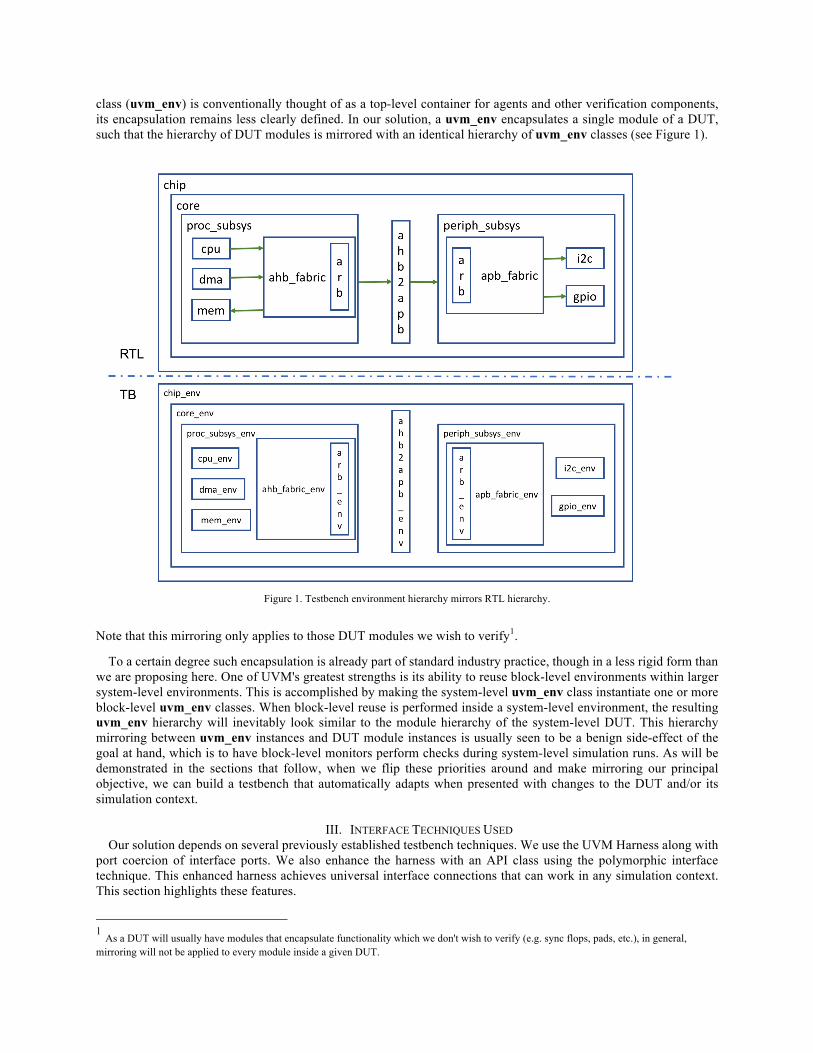
class (uvm_env) is conventionally thought of as a top-level container for agents and other verification components, its encapsulation remains less clearly defined. In our solution, a uvm_env encapsulates a single module of a DUT, such that the hierarchy of DUT modules is mirrored with an identical hierarchy of uvm_env classes (see Figure 1).
Figure 1. Testbench environment hierarchy mirrors RTL hierarchy.
Note that this mirroring only applies to those DUT modules we wish to verify1.
To a certain degree such encapsulation is already part of standard industry practice, though in a less rigid form than we are proposing here. One of UVM's greatest strengths is its ability to reuse block-level environments within larger system-level environments. This is accomplished by making the system-level uvm_env class instantiate one or more block-level uvm_env classes. When block-level reuse is performed inside a system-level environment, the resulting uvm_env hierarchy will inevitably look similar to the module hierarchy of the system-level DUT. This hierarchy mirroring between uvm_env instances and DUT module instances is usually seen to be a benign side-effect of the goal at hand, which is to have block-level monitors perform checks during system-level simulation runs. As will be demonstrated in the sections that follow, when we flip these priorities around and make mirroring our principal objective, we can build a testbench that automatically adapts when presented with changes to the DUT and/or its simulation context.
III. INTERFACE TECHNIQUES USED
Our solution depends on several previously established testbench techniques. We use the UVM Harness along with port coercion of interface ports. We also enhance the harness with an API class using the polymorphic interface technique. This enhanced harness achieves universal interface connections that can work in any simulation context. This section highlights these features.
1 As a DUT will usually have modules that encapsulate functionality which we don't wish to verify (e.g. sync flops, pads, etc.), in general, mirroring will not be applied to every module inside a given DUT.

A. The UVM Harness
The basic harness [2] is a wrapper interface that instantiates all the interfaces to be connected to a target module. We bind the harness to a module type, ensuring all instances of that module contain a harness instance. The harness also contains the connection assignments between the interface ports and the target module ports using upward referencing [3] to the module type name (see [1] for a full explanation of these features). This basic harness gives the following benefits:
• Interface connections are independent of module hierarchy. • Interface assignments are encapsulated and organized by the target scope. • All instances of a given module type are connected with a single bind statement. • Interface connections are reusable between testbench environments.
In order to make the harness even more flexible, we ensure all interfaces can support any signal width and any
signal direction. As described in [1], we define all interface signals as input ports and use the SystemVerilog feature of port coercion [3] to support driving signals in any direction. This approach avoids the use of inout ports, as they cannot tolerate changes in signal widths [1]. Input ports allow us to use max-width interfaces that support connections of smaller width while allowing the simulator to coerce the port directions during elaboration. This enhanced harness configuration gives the following additional benefits:
• We can bind interface connections to module instances that are parameterized with different signal widths. • We can tolerate changes in signal widths (below the maximum) without breaking the testbench. • We can easily replace RTL with stub modules, changing the driving of signals by RTL with testbench
stimulus. We can do this without impact to connection assignments or the need to resolve multiple drivers of nets.
• Agents can change between active and passive roles or between master and slave roles without changing connection assignments or recompiling.
• We can extract RTL parameters for use by testbench code. See [5] for detailed examples. See [1] for detailed examples and use-cases of the enhanced harness with port coercion.
B. Self-Publication of Virtual Interfaces
It is standard practice to publish virtual interfaces to the UVM configuration database. This allows any targeted agent to retrieve a reference to the physical interface that the agent is intended to drive and monitor. Publication requires establishing a string name for lookup and a testbench hierarchical path string that targets the appropriate UVM component(s). It is most common to pass virtual interfaces from a top testbench module since that is where interfaces are often instantiated. However, the UVM harness allows for better ways of managing virtual interface assignments.
Since the harness encapsulates the interface instances, it's natural to publish virtual interfaces directly from within the harness. A common way of doing this is to use “set_vif” (set virtual interface) functions to pass the scope hierarchy as a string to each harness ([1], [2]). The disadvantage of this is that a testbench environment must make hierarchical references to all harness instances and manage all the agent assignments with appropriate strings. This makes the environment dependent on both harness hierarchy and testbench component hierarchy. Changes to either of these will break the testbench and require maintenance of the environment class.
Our solution for an adaptable testbench is for each harness to self-publish virtual interfaces to the configuration database. Rather than relying on external string assignments, a harness can retrieve the hierarchical path unique to its instance using the string format specifier %m [3]. Figure 2 shows an example of self-publishing a virtual interface with the unique path of the harness instance2.
2 Using %m inside an initial block creates an additional hierarchical layer within the harness. We show this as a simplified example for the sake of brevity. We use an alternate approach in the released code that avoids this by using %m directly from the harness scope.

Figure 2. Virtual interfaces are self-published using %m string format specifier.
This also ensures that if a harness is bound to multiple instances of a given module type, it will publish interfaces
with a unique string and avoid conflicting entries in the database. However, the main advantage of this is we can automate virtual interface assignments to testbench agents so they work with any design configuration. This works since we construct a testbench environment topology that mirrors the design hierarchy, as described in Section II. If we ensure each environment name matches the corresponding module instance name, the string generated from %m will naturally match the UVM component hierarchy used in configuration database assignments. The only difference is the UVM hierarchy has uvm_test_top as a root while the module hierarchy has the top testbench module as the root.
C. The Polymorphic Harness
We often need to define methods inside an interface and make these available to other testbench components. These methods can be used to access signals or to perform special operations. While it is sometimes possible to directly pass a virtual interface to the harness itself and call these methods, there are limitations with this approach. The primary problem is the SystemVerilog LRM [3] says it is illegal to pass a virtual interface if that interfaces makes a reference outside of itself. Polymorphic interfaces were introduced in [4] as another way to provide an API to an interface. As shown in [1], we can combine the polymorphic interface technique with the harness, which results in what we’ll call a polymorphic harness.
The API is a class that is defined inside the harness, providing wrapper methods to the harness methods. The embedded class has scope to access harness methods. In order to pass a handle to the API object, it must extend a base class that is defined in a SystemVerilog package. Such a package can be imported into any scope. Since testbench code doesn't have scope of the extended API class inside the harness, we must use the base type to pass the API through the configuration database. Polymorphism ensures that invoking the API methods executes the extended implementations defined inside the harness. This provides several benefits:
• Harness methods can make references into the design and we can make these methods available without
violating the LRM. The methods make upward references to the bound module type and can continue to make downward references to modules and signals.
• The implementation of methods can be extended and customized.

• This helps with compilation issues that are commonly encountered when using stub modules3 (See Section IV).
See Section 5 of [1] for full details of this technique4.
IV. UVM ENVIRONMENT TOPOLOGY GENERATION
To achieve a reconfigurable testbench, we need the ability to create an environment topology during the UVM build phase that matches the design hierarchy. The topology must be configurable for each test. This allows each test to target verification of different modules, subsystems, or the entire design. Design modules not targeted by the test can be replaced by stub modules. Note that we are using the term test in the standard UVM sense: a test class just defines a particular testbench configuration (scenarios are defined in sequences). Since UVM handles the creation of all environments during the build phase, we demonstrate how to define the topology for a given test and control which environments to build at runtime.
We define the testbench topology using configuration objects for each environment class. Since it is common to use configuration objects to encapsulate environment configuration settings, it is natural to include topology settings in a configuration class. The topology configuration specifies which sub-environments to build inside a given environment. As described in Section II, we want the testbench environment hierarchy to mirror the design module hierarchy. When simulating the full design hierarchy, the environment topology specifies that all environments are built. When simulating a subsystem of the design, the topology specifies that only the environments for those modules are built5. This section describes the configuration object implementation and how tests can use this to control which environments exist.
A. Core Environment Example
The following block diagram describes a sample System-on-a-Chip (SoC) that will serve as the DUT for subsequent sections. In this DUT, high-speed data producers/consumers using the Advanced High-Performance Bus (AHB) protocol are inside the processor subsystem (proc_subsys); low-speed data consumers using the Advanced Peripheral Bus (APB) protocol are inside the peripheral subsystem (periph_subsys); and an AHB-to-APB bridge allows for communication between the two subsystems. Arbitration between masters is performed by an arbiter (arb), with the same arbiter being reused in each subsystem.
Figure 3. Sample SoC used for subsequent examples.
3 Stubbing out a module will remove the sub-module target of the bind statement and will break compile. 4 The code samples for this paper use the naming convention “pharness” (polymorphic harness) to refer to the API class and instances for any harness. 5 Environments are not built for modules that are removed from a design due to a parent module being stubbed-out.

B. Environments and Configuration Objects
It is common UVM practice to have a hierarchical relationship between environment instances. However, for our solution, we must only create sub-environments when needed for a given test. The ultimate goal is for tests to choose how much of the design to simulate and build only the environments needed for those modules. We accomplish this by using an associative array of sub-environments. The array is indexed by the module instance name that is being mirrored by each sub-environment. Since we want the entire environment hierarchy to mirror the design hierarchy, each module type will have a corresponding environment class definition (as in Figure 1)6.
Figure 4 shows an example environment class for the verilab_core (shown as core in Figure 3) design. The environment can instantiate up to three sub-environment types: the proc_subsys_env, periph_subsys_env, and the ahb2apb_env. This hierarchy mirrors the design hierarchy shown in Figure 3. There is also a reference to the harness API object that is bound to the verilab_core module.
Figure 4. The verilab_core environment contains a configuration object and associative arrays for sub-environment.
A configuration object is created for each environment7 to control how it is built. The configuration object specifies
which types of sub-environments to create. Figure 5 shows the configuration object for verilab_core_env. Similar to the environment class, the configuration object contains associative arrays of configuration objects for each of the sub-environments. Again, these associative arrays are indexed by instance name of the design module being mirrored by each environment. It is the responsibility of each test to populate the entries of the configuration object arrays. If an entry exists, the environment will be built.
Note that although using arrays for environments and configuration objects allows us the option to create multiple
sub-environment instances of the same environment class, this is not the primary motivation for using them. We use associative arrays for the benefit of having a data structure that ties a string index name to an object instance. This allows each environment to build its sub-environments and assign the correct instance name (from the array index) that corresponds to the mirrored design module (see next section).
C. Building the Environment Topology
The following steps illustrate how the testbench is built during the UVM build phase (top-down) using the configuration objects:
6 When we are mirroring just one instance of a sub-module type, the environment array will only have a single entry. We will leave the array empty for tests that require no sub-environments. For example, this situation applies to running block-level tests within the larger design (see Section V). 7 In this example, every environment class has a unique configuration object class definition. However, it is also possible to use a shared configuration object definition for all environments (or even use a combination of unique and shared objects).
class verilab_core_env extends uvm_env; proc_subsys_env proc_subsys_envs[string]; periph_subsys_env periph_subsys_envs[string]; ahb2apb_env ahb2apb_envs[string]; verilab_core_env_cfg cfg; verilab_core_pharness_base harness; verilab_core_vseqr vseqr; …
class verilab_core_env_cfg extends uvm_object; proc_subsys_env_cfg proc_subsys_env_cfgs[string]; periph_subsys_env_cfg periph_subsys_env_cfgs[string]; ahb2apb_env_cfg ahb2apb_env_cfgs[string]; ... endclass
Figure 5. The environment configuration object contains configuration objects for all sub-environments.
1) Base Test: See example in Figure 6.
• Step 1: In the base test’s build phase, create the configuration object for the top environment only (verilab_chip_env_cfg).
• Step 2: Create the top environment (verilab_chip_env). • Step 3: Assign the configuration object to the top environment instance. • No run phase is defined for the base test. • Extended tests are responsible for defining the rest of the testbench hierarchy.
Figure 6. The base test configures the top environment only.
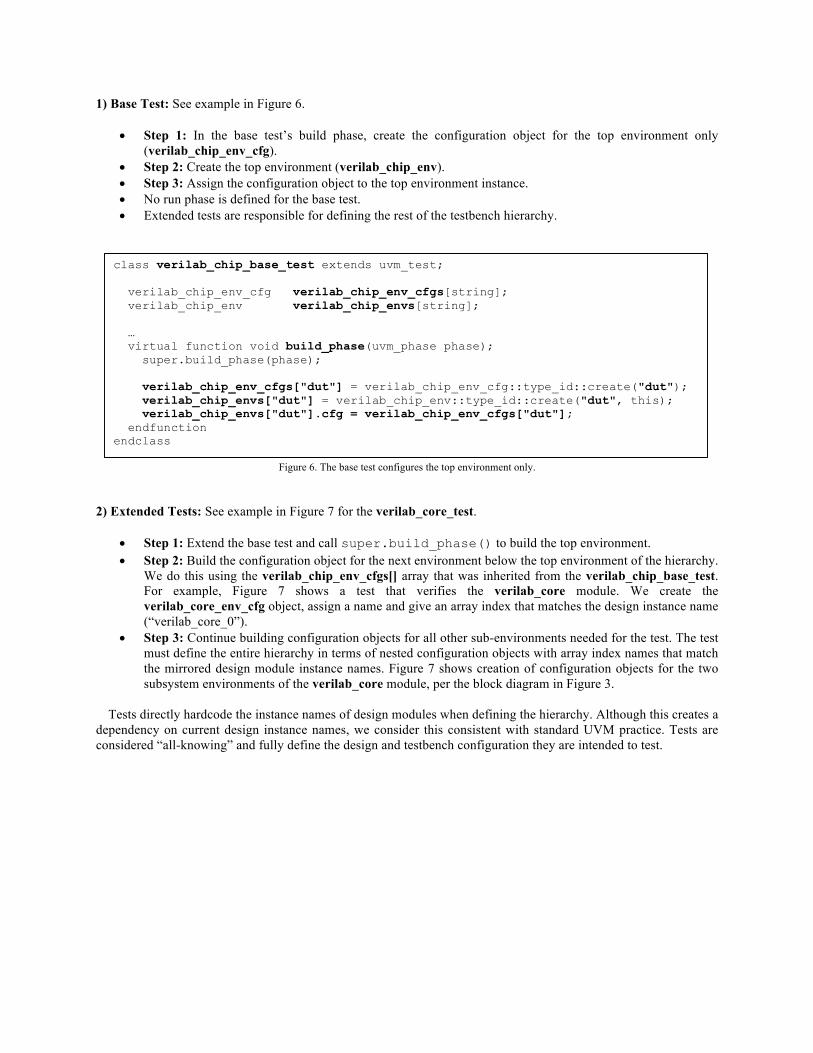
2) Extended Tests: See example in Figure 7 for the verilab_core_test.
• Step 1: Extend the base test and call super.build_phase() to build the top environment. • Step 2: Build the configuration object for the next environment below the top environment of the hierarchy.
We do this using the verilab_chip_env_cfgs[] array that was inherited from the verilab_chip_base_test. For example, Figure 7 shows a test that verifies the verilab_core module. We create the verilab_core_env_cfg object, assign a name and give an array index that matches the design instance name (“verilab_core_0”).
• Step 3: Continue building configuration objects for all other sub-environments needed for the test. The test must define the entire hierarchy in terms of nested configuration objects with array index names that match the mirrored design module instance names. Figure 7 shows creation of configuration objects for the two subsystem environments of the verilab_core module, per the block diagram in Figure 3.
Tests directly hardcode the instance names of design modules when defining the hierarchy. Although this creates a
dependency on current design instance names, we consider this consistent with standard UVM practice. Tests are considered “all-knowing” and fully define the design and testbench configuration they are intended to test.
class verilab_chip_base_test extends uvm_test; verilab_chip_env_cfg verilab_chip_env_cfgs[string]; verilab_chip_env verilab_chip_envs[string]; … virtual function void build_phase(uvm_phase phase); super.build_phase(phase); verilab_chip_env_cfgs["dut"] = verilab_chip_env_cfg::type_id::create("dut"); verilab_chip_envs["dut"] = verilab_chip_env::type_id::create("dut", this); verilab_chip_envs["dut"].cfg = verilab_chip_env_cfgs["dut"]; endfunction endclass

Figure 7. Extended tests define the sub-environment hierarchy needed below the top environment.
3) Environments: See Figure 8 for example verilab_core_env.
• Step 1: Create the agents for this environment. These agents use virtual interfaces published by the harness of the design module this environment mirrors.
• Step 2: Create all sub-environment instances according to the configuration object settings. As shown in Figure 5, there is an array for each environment type that specifies which instances to create. The array index specifies the instance name that mirrors the corresponding design module. We use a foreach loop on each array to build the instances needed. Note that some tests will not need the entire environment hierarchy and will deliberately leave these arrays empty (See Section V).
• Note that we don’t have to get the configuration object since it was already created by the test class. • This process is repeated for all sub-environments according to the standard top-down execution of the UVM
build phase. • The process stops when an environment has an empty topology object array.
Figure 8. The environment creates sub-environments based on its configuration object contents.
class verilab_core_test extends verilab_chip_base_test; verilab_core_env_cfg verilab_core_env_cfgs[string]; verilab_core_env verilab_core_envs[string]; virtual function void build_phase(uvm_phase phase); //STEP 1 super.build_phase(phase); //STEP 2 verilab_chip_env_cfgs["dut"].verilab_core_env_cfgs[“verilab_core_0”] = verilab_core_env_cfg::type_id::create("verilab_core_0"); //STEP 3: verilab_chip_env_cfgs["dut"].verilab_core_env_cfgs[“verilab_core_0”].proc_subsys_0 = proc_subsys_env_cfg::type_id::create(“proc_subsys_0”); verilab_chip_env_cfgs["dut"].verilab_core_env_cfgs[“verilab_core_0”].periph_subsys_0 = periph_subsys_env_cfg::type_id::create(“periph_subsys_0”); …
class verilab_core_env extends uvm_env; … virtual function void build_phase(uvm_phase phase); super.build_phase(phase); //STEP 1 clk_rst_agents["clk_rst_if"] = clk_rst_agent::type_id::create("clk_rst_if", this); gpio_agents["gpio_if"] = gpio_agent::type_id::create("gpio_if", this); i2c_agents["i2c_if"] = i2c_agent::type_id::create("i2c_if", this); //STEP 2 foreach (cfg.proc_subsys_env_cfgs[s]) begin proc_subsys_envs[s] = proc_subsys_env::type_id::create(s, this); proc_subsys_envs[s].cfg = cfg.proc_subsys_env_cfgs[s]; end // ... (foreach loops for other sub-environments)

The benefit of this solution is that tests can fully control the entire testbench topology while ensuring the environment hierarchy matches the module hierarchy. This also ensures that for every possible topology, all agents correctly get virtual interfaces from the configuration database (published using a string hierarchical path)8.
D. Variable Numbers of Agents
Each environment in the hierarchy contains agents for the interfaces of the corresponding design module. Since interfaces exist for all modules in the hierarchy, many environments must create the agents needed at that level in addition to creating the sub-environments. Figure 3 shows the ahb_fabric module, and though not shown, it supports multiple master and slave ports. Therefore, the ahb_fabric_env will need the correct number of agents for those ports. We use associative arrays for all agents in the same way that we used arrays of environments. Each agent is indexed by a string name to be used for that agent.
Figure 9. An environment instantiates the correct number of agents based on design parameters.
Our solution fully automates agent creation and interface connections for parameterized blocks using the UVM
harness technique. We use the technique from [5] to extract the RTL parameters of the ahb_fabric block at runtime. The ahb_fabric_env can therefore get the number of master and slave ports via the harness and create the correct number of agents.
E. Resolving Compilation Issues When Using Stubs
Two major problems arise when we use stub modules with a testbench that uses bind statements. The first problem is that it is common for a stub module to be defined with a different type name than the design module it is replacing. However, we bind the harness to the original design module type. If we compile the stub module instead of the design module, we can’t compile the bind statement of the harness. In this situation, the bind target type no longer exists and results in a compile error. Our solution avoids this problem by ensuring that all stub modules have identical type names as the design modules they replace. We manage include guards (`ifndef statements) in a way that ensures there is no conflict between module definitions declared with the same type name.
The second problem occurs when we bind a harness to a module which has a parent module we wish to stub. For example, consider what happens in Figure 3 when the periph_subsys module is replaced with a stub. Since the stub is an empty module, the apb_fabric, i2c, and gpio blocks no longer exist in the design. However, if we compile an apb_fabric harness, we must also compile the apb_fabric module since it makes upward-scope references to the module. If we compile this module and all instances are removed from the design, it results in an undesirable implicit top-level instance of apb_fabric9. Our solution is to skip compilation of the harness (and its bind statement) if neither the target module nor its stub is compiled. This doesn’t impact testbench code since we use the polymorphic interface technique for the harness (Section III). Each environment class only contains a base class reference to the harness API object. Therefore, we can safely compile any environment class, even if the harness (and its extended API definition) is never compiled. 8 An environment would also normally get a handle to the polymorphic harness (pharness) for the harness bound to the mirrored module (see Appendix A). 9 Implicit top-level instances of design modules are highly undesirable. If we compile with a “top” compiler switch, it suppresses all implicit top modules except the testbench top. This will break compilation of the harness.
class ahb_fabric_env extends uvm_env; … ahb_agent mst_ahb_agents[string]; ahb_agent slv_ahb_agents[string]; ahb_fabric_pharness_base harness; … virtual function void build_phase(uvm_phase phase); super.build_phase(phase); for (int s = 0; s < harness.SLV; ++s) begin string name = $sformatf("slv_ahb_if[%0d]", s); slv_ahb_agents[name] = ahb_agent::type_id::create(name, this); end …

V. EXAMPLES AND APPLICATIONS
A. Block-level Verification
As already mentioned, using a system-level testbench to achieve block-level verification has the following benefits: • Test case reuse between different levels of design integration. • Improved bug isolation through the regeneration of constrained-random stimulus. • The ability to automatically merge coverage between block-level and system-level regressions.
Combining the techniques of environment mirroring, self-publishing interfaces, and a topology object, a system-
level testbench can easily be configured to serve as a block-level testbench for any design module in the DUT. We will say that the lowest-level environment is acting on10 the DUT module it aims to verify. All modules in the system are replaced with stub modules except for the block that is to be verified. Figure 10 shows a test class for making the system-level testbench behave as a block-level testbench to verify the ahb_fabric design.
Figure 10. Test class for doing block-level verification of the ahb_fabric module.
The test class extends from the highest-level base class (verilab_chip_base_test) and has a handle to the sequence
it will eventually run. The build phase makes use of field verilab_chip_env_cfgs (inherited from parent class verilab_chip_base_test) to build configuration objects of the sub-environments, defining the topology to be built down to the level of the targeted block (ahb_fabric). In the run phase, the sequence to be run is received from the
10 In [1] acting on was referred to as stub-out/outside looking in
class ahb_fabric_test extends verilab_chip_base_test; ahb_fabric_test_base_vseq vseq; … function void build_phase(uvm_phase phase); verilab_chip_env_cfgs["dut"].verilab_core_env_cfgs["verilab_core_0"] = verilab_core_env_cfg::type_id::create("verilab_core_0"); … verilab_chip_env_cfgs["dut"].verilab_core_env_cfgs["verilab_core_0"].proc_subsys_env_cfgs["proc_subsys_0"] = proc_subsys_env_cfg::type_id::create("proc_subsys_0"); … verilab_chip_env_cfgs["dut"].verilab_core_env_cfgs["verilab_core_0"].proc_subsys_env_cfgs["proc_subsys_0"].ahb_fabric_env_cfgs["ahb_fabric_0"] = ahb_fabric_env_cfg::type_id::create("ahb_fabric_0"); … endfunction task run_phase(uvm_phase phase); string VSEQ; phase.raise_objection(this); void'($value$plusargs("VSEQ=%s", VSEQ)); set_type_override(ahb_fabric_test_base_vseq::type_name, VSEQ); vseq = ahb_fabric_test_base_vseq::type_id::create(VSEQ); `uvm_info("run_phase", $sformatf("Starting VSEQ=%s",VSEQ),UVM_NONE) vseq.start(verilab_chip_envs["dut"].verilab_core_envs["verilab_core_0"].proc_subsys_envs["proc_subsys_0"].ahb_fabric_envs["ahb_fabric_0"].vseqr, null); `uvm_info("run_phase", $sformatf("Finished VSEQ=%s",VSEQ),UVM_NONE) phase.drop_objection(this); …

command-line, making this test topology capable of running any number of scenarios written for it. The sequence is run on the virtual sequencer of the target environment (ahb_fabric_env).
There is nothing specific to our solution about the block-level environment that this sequence will run on, nor the sequence itself. Both the environment and sequence are standard UVM, and they are shown in appendix A.
B. System-level Verification
When doing system-level verification, replacing RTL blocks with stubs driven by UVM agents can achieve the following benefits:
• Increased simulation performance. • Ability to stimulate difficult-to-reach scenarios inside the system.
We will say that the environment providing the agent(s) is acting as11 the RTL module being stubbed, as it is taking on the role of that RTL module. Using the techniques presented in the previous sections, we can create a test topology that achieves this (Figure 11).
Figure 11. Test class for verifying the proc_subsys_0 module using active stubs for modules cpu_0 and dma_0
As was the case with the block-level sequence to be run on this topology, there is nothing solution-specific about
it. It is presented in Appendix B. Because there are multiple levels of environments involved when doing system-level verification (as opposed to block-level, in which only the lowest-level environment does the work), in the interest of space, they have not been added to the Appendix. Full code examples of these environments are available for download (see section VI).
11 In [1] acting as was referred to as stub-in/inside looking out
class proc_subsys_xcpu_xdma_test extends verilab_chip_base_test; proc_subsys_xcpu_xdma_test_base_vseq vseq; … virtual function void build_phase(uvm_phase phase); super.build_phase(phase); verilab_chip_env_cfgs["dut"].verilab_core_env_cfgs["verilab_core_0"] = verilab_core_env_cfg::type_id::create("verilab_core_0"); … verilab_chip_env_cfgs["dut"].verilab_core_env_cfgs["verilab_core_0"].proc_subsys_env_cfgs["proc_subsys_0"] = proc_subsys_env_cfg::type_id::create("proc_subsys_0"); verilab_chip_env_cfgs["dut"].verilab_core_env_cfgs["verilab_core_0"].proc_subsys_env_cfgs["proc_subsys_0"].role = proc_subsys_pkg::ACTING_ON; … verilab_chip_env_cfgs["dut"].verilab_core_env_cfgs["verilab_core_0"].proc_subsys_env_cfgs["proc_subsys_0"].cpu_env_cfgs["cpu_0"] = cpu_env_cfg::type_id::create("cpu_0"); verilab_chip_env_cfgs["dut"].verilab_core_env_cfgs["verilab_core_0"].proc_subsys_env_cfgs["proc_subsys_0"].cpu_env_cfgs["cpu_0"].role = cpu_pkg::ACTING_AS; verilab_chip_env_cfgs["dut"].verilab_core_env_cfgs["verilab_core_0"].proc_subsys_env_cfgs["proc_subsys_0"].dma_env_cfgs["dma_0"] = dma_env_cfg::type_id::create("dma_0"); verilab_chip_env_cfgs["dut"].verilab_core_env_cfgs["verilab_core_0"].proc_subsys_env_cfgs["proc_subsys_0"].dma_env_cfgs["dma_0"].role = dma_pkg::ACTING_AS; …

VI. CONCLUSION By combining the techniques of the UVM Harness, hierarchy mirroring, self-publishing, topology objects and
polymorphic interfaces, we have demonstrated that it is possible to build a testbench that bends rather than breaks: one that adapts to multiple design versions and changes in hierarchy, can simulate subsystems in isolation, supports parameterized signal widths, supports parameterization of the number of module instances, and achieves error-proof connectivity to the DUT. All of the concepts presented in this paper have been used in a real-world project. In addition, full example code is available for download at the following URL:
http://www.verilab.com/resources/source-code/
While the solution presented here is consistent with standard UVM, it does require more specific architecture guidelines than what are commonly applied. Therefore, applying this technique is limited to those projects where the verification engineer has the opportunity to work with a clean sheet (i.e. building the testbench from scratch). It is our belief and experience that projects that employ these techniques will be rewarded with a flexible verification environment that adapts to the design changes, enables rapid migration to future design iterations, and frees up verification resources to focus on more value-added tasks.
REFERENCES [1] J. Vance, J. Montesano, K. Johnston, “Verification Prowess with the UVM Harness”, SNUG Austin, October 2017 [2] D. Larson, “UVM Harness Whitepaper: The Missing Link in Connectivity”, Synapse Design Automation 2011 [3] IEEE Std 1800-2012, “Standard for SystemVerilog – Unified Hardware Design, Specification, and Verification Language” [4] S. Bhutada, “Polymorphic Interfaces: An Alternative for SystemVerilog Interfaces”, Verification Horizons, November 2011 [5] A. Melikian, P. Marriott, “Perplexing Parameter Permutation Problems? Immunize Your Testbench”, SNUG Canada, April 2017

APPENDIX A: BLOCK-LEVEL SEQUENCE AND BLOCK-LEVEL ENVIRONMENT
class ahb_fabric_vseq extends ahb_fabric_test_base_vseq; `uvm_object_utils_begin(ahb_fabric_vseq) `uvm_object_utils_end function new(string name = "ahb_fabric_vseq"); super.new(name); endfunction virtual task body(); ahb_seq_pkg::ahb_master_rand_seq ahb_master_rand_seqs[string]; ahb_seq_pkg::ahb_slave_mem_seq ahb_slave_mem_seqs[string]; int enough = 0; fork // RESPONDER sequences: Run forever. Set as auto_seq on respective seqrs and forget about them. foreach (p_sequencer.p_env.slv_ahb_agents[a]) begin fork automatic string b = a; begin ahb_slave_mem_seqs[b] = ahb_test_pkg::ahb_slv_mem_seq::type_id::create(b); uvm_config_db#(uvm_sequence#(ahb_seq_item))::set(p_sequencer.p_env.slv_ahb_agents[b].sequencer, "", "auto_seq", ahb_slave_mem_seqs[b]); end join_none end // REQUESTER sequences: Run forever unless commanded to stop. begin foreach (p_sequencer.p_env.mst_ahb_agents[a]) begin fork automatic string b = a; do begin ahb_master_rand_seqs[b] = ahb_test_pkg::ahb_master_rand_seq::type_id::create(b); ahb_master_rand_seqs[b].item_limit = enough; ahb_master_rand_seqs[b].start(p_sequencer.p_env.mst_ahb_agents[b].sequencer, this); end while (p_sequencer.p_env.mst_ahb_agents[b].sequencer.get_reset() == 1); // If a seq stops on enough, we're done, but if it was stopped by reset, start another. join_none end wait fork; // If commanded to stop, we will wait for them to finish txns in progress. end // Test termination thread. begin #100us; enough = 1; // Just in case a reset kills the currently running seq just as we try to wind it down; we don't want to shut down the dead one and let a new infinite one start up. foreach (ahb_master_rand_seqs[b]) begin ahb_master_rand_seqs[b].item_limit = 1; // If it's done at least 1 item, don't send any more. end end join endtask endclass

class ahb_fabric_env extends uvm_env; arb_env arb_envs[string]; clk_rst_agent clk_rst_agents[string]; ahb_agent mst_ahb_agents[string]; ahb_agent slv_ahb_agents[string]; ahb_fabric_env_cfg cfg; ahb_fabric_pharness_base harness; ahb_fabric_vseqr vseqr; `uvm_component_utils_begin(ahb_fabric_env) `uvm_component_utils_end function new(string name = "ahb_fabric_env", uvm_component parent = null); super.new(name, parent); endfunction virtual function void build_phase(uvm_phase phase); super.build_phase(phase); if (cfg.role != BLIND) begin if (! uvm_config_db#(ahb_fabric_pharness_base)::get(this, "", "harness", harness)) begin `uvm_fatal("build_phase", "No ahb_fabric_pharness_base 'harness' in uvm_config_db") end vseqr = ahb_fabric_vseqr::type_id::create("vseqr", this); clk_rst_agents["clk_rst_if"] = clk_rst_agent::type_id::create("clk_rst_if", this); if (! uvm_config_db#(virtual clk_rst_interface)::get(this, "", "clk_rst_if", clk_rst_agents["clk_rst_if"].vif)) begin `uvm_fatal("build_phase", "No virtual clk_rst_interface 'clk_rst_if' in uvm_config_db") end clk_rst_agents["clk_rst_if"].cfg = clk_rst_vip_cfg::type_id::create("clk_rst_if_cfg"); for (int a = 0; a < harness.MST; ++a) begin string name = $sformatf("mst_ahb_if[%0d]", a); mst_ahb_agents[name] = ahb_agent::type_id::create(name, this); if (! uvm_config_db#(virtual ahb_interface)::get(this, "", name, mst_ahb_agents[name].vif)) begin `uvm_fatal("build_phase", $sformatf("No virtual ahb_interface '%s' in uvm_config_db", name)) end mst_ahb_agents[name].cfg = ahb_vip_cfg::type_id::create($sformatf("mst_ahb_if_cfg[%0d]", a)); mst_ahb_agents[name].cfg.actual_addr_bus_bits = harness.MST_ADDR; mst_ahb_agents[name].cfg.actual_data_bus_bits = harness.DATA; end for (int a = 0; a < harness.SLV; ++a) begin string name = $sformatf("slv_ahb_if[%0d]", a); slv_ahb_agents[name] = ahb_agent::type_id::create(name, this); if (! uvm_config_db#(virtual ahb_interface)::get(this, "", name, slv_ahb_agents[name].vif)) begin `uvm_fatal("build_phase", $sformatf("No virtual ahb_interface '%s' in uvm_config_db", name)) end slv_ahb_agents[name].cfg = ahb_vip_cfg::type_id::create($sformatf("slv_ahb_if_cfg[%0d]", a)); slv_ahb_agents[name].cfg.actual_addr_bus_bits = harness.SLV_ADDR; slv_ahb_agents[name].cfg.actual_data_bus_bits = harness.DATA; end
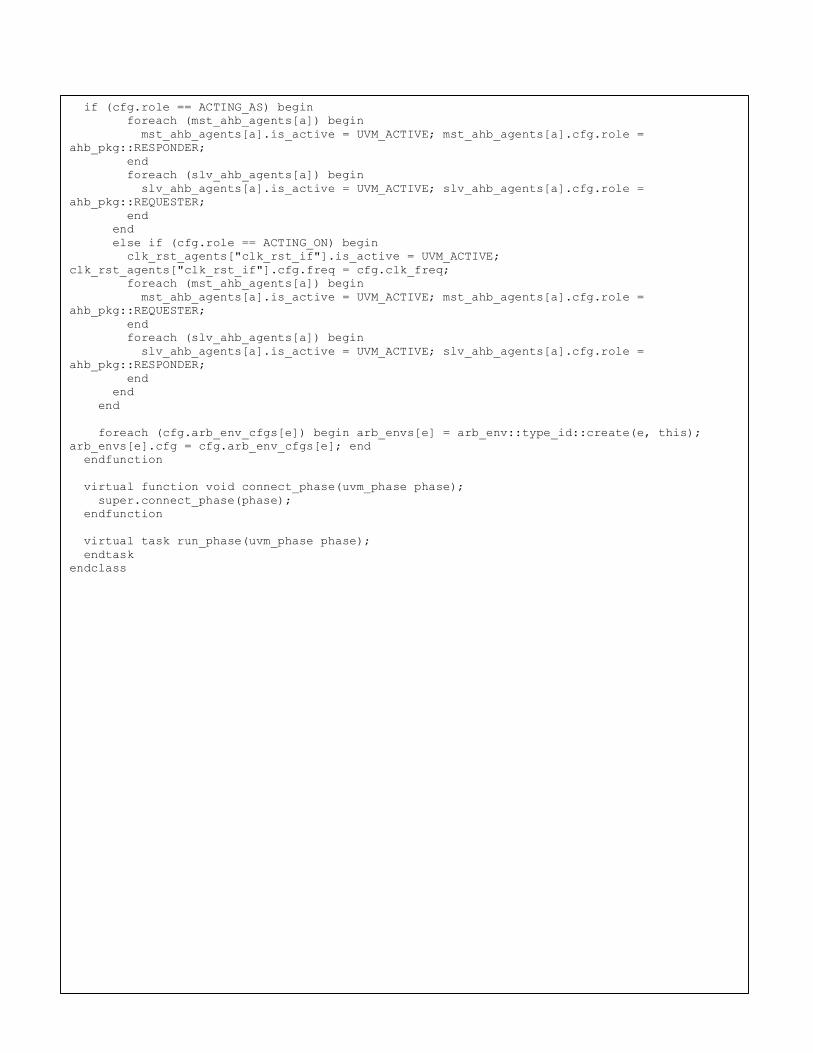
if (cfg.role == ACTING_AS) begin foreach (mst_ahb_agents[a]) begin mst_ahb_agents[a].is_active = UVM_ACTIVE; mst_ahb_agents[a].cfg.role = ahb_pkg::RESPONDER; end foreach (slv_ahb_agents[a]) begin slv_ahb_agents[a].is_active = UVM_ACTIVE; slv_ahb_agents[a].cfg.role = ahb_pkg::REQUESTER; end end else if (cfg.role == ACTING_ON) begin clk_rst_agents["clk_rst_if"].is_active = UVM_ACTIVE; clk_rst_agents["clk_rst_if"].cfg.freq = cfg.clk_freq; foreach (mst_ahb_agents[a]) begin mst_ahb_agents[a].is_active = UVM_ACTIVE; mst_ahb_agents[a].cfg.role = ahb_pkg::REQUESTER; end foreach (slv_ahb_agents[a]) begin slv_ahb_agents[a].is_active = UVM_ACTIVE; slv_ahb_agents[a].cfg.role = ahb_pkg::RESPONDER; end end end foreach (cfg.arb_env_cfgs[e]) begin arb_envs[e] = arb_env::type_id::create(e, this); arb_envs[e].cfg = cfg.arb_env_cfgs[e]; end endfunction virtual function void connect_phase(uvm_phase phase); super.connect_phase(phase); endfunction virtual task run_phase(uvm_phase phase); endtask endclass

APPENDIX B: SYSTEM-LEVEL SEQUENCE
class proc_subsys_xcpu_xdma_vseq extends proc_subsys_xcpu_xdma_test_base_vseq; `uvm_object_utils_begin(proc_subsys_xcpu_xdma_vseq) `uvm_object_utils_end function new(string name = "proc_subsys_xcpu_xdma_vseq"); super.new(name); endfunction virtual task body(); ahb_pkg::ahb_master_rand_seq ahb_master_rand_seqs[string]; ahb_pkg::ahb_slave_mem_seq ahb_slave_mem_seqs[string]; apb_pkg::apb_master_rand_seq apb_master_rand_seqs[string]; apb_pkg::apb_slave_mem_seq apb_slave_mem_seqs[string]; int enough = 0; fork // RESPONDER sequences: Run forever. Set as auto_seq on respective seqrs and forget about them. begin ahb_slave_mem_seqs["periph_ahb_if"] = ahb_pkg::ahb_slv_mem_seq::type_id::create("periph_ahb_if"); uvm_config_db#(uvm_sequence#(ahb_seq_item))::set(p_sequencer.p_env.ahb_agents["periph_ahb_if"].sequencer, "", "auto_seq", ahb_slave_mem_seqs["periph_ahb_if"]); apb_slave_mem_seqs["dma_apb_if"] = apb_pkg::apb_slv_mem_seq::type_id::create("dma_apb_if"); uvm_config_db#(uvm_sequence#(apb_seq_item))::set(p_sequencer.p_env.dma_envs["dma_0"].apb_agents["apb_if"].sequencer, "", "auto_seq", apb_slave_mem_seqs["dma_apb_if"]); end // REQUESTER sequences: Run forever unless commanded to stop. do begin ahb_master_rand_seqs["cpu_ahb_if"] = ahb_pkg::ahb_master_rand_seq::type_id::create("cpu_ahb_if"); ahb_master_rand_seqs["cpu_ahb_if"].item_limit = enough; ahb_master_rand_seqs["cpu_ahb_if"].start(p_sequencer.p_env.cpu_envs["cpu_0"].ahb_agents["ahb_if"].sequencer, this); end while (p_sequencer.p_env.cpu_envs["cpu_0"].ahb_agents["ahb_if"].sequencer.get_reset() == 1); // If a seq stops on enough, we're done, but if it was stopped by reset, start another. do begin ahb_master_rand_seqs["dma_ahb_if"] = ahb_pkg::ahb_master_rand_seq::type_id::create("dma_ahb_if"); ahb_master_rand_seqs["dma_ahb_if"].item_limit = enough; ahb_master_rand_seqs["dma_ahb_if"].start(p_sequencer.p_env.dma_envs["dma_0"].ahb_agents["ahb_if"].sequencer, this); end while

(p_sequencer.p_env.dma_envs["dma_0"].ahb_agents["ahb_if"].sequencer.get_reset() == 1); // If a seq stops on enough, we're done, but if it was stopped by reset, start another. do begin apb_master_rand_seqs["dma_apb_if"] = apb_pkg::apb_master_rand_seq::type_id::create("dma_apb_if"); apb_master_rand_seqs["dma_apb_if"].item_limit = enough; apb_master_rand_seqs["dma_apb_if"].start(p_sequencer.p_env.apb_agents["dma_apb_if"].sequencer, this); end while (p_sequencer.p_env.apb_agents["dma_apb_if"].sequencer.get_reset() == 1); // If a seq stops on enough, we're done, but if it was stopped by reset, start another. // Test termination thread. begin #100us; enough = 1; // Just in case a reset kills the currently running seq just as we try to wind it down; we don't want to shut down the dead one and let a new infinite one start up. foreach (ahb_master_rand_seqs[b]) begin ahb_master_rand_seqs[b].item_limit = 1; // If it's done at least 1 item, don't send any more. end foreach (apb_master_rand_seqs[b]) begin apb_master_rand_seqs[b].item_limit = 1; // If it's done at least 1 item, don't send any more. end end join endtask endclass