Embed Size (px)
Citation preview
1
The Lackner Group
Addendum to the Administrator’s Guide forFileMaker Server 5.5
(February 14, 2003)
This document will step you through the most common configuration setup for FileMakerServer 5.5 when hosting Lackner 6-in-1 for Windows data files. Please disable virus monitoringsoftware before installing then renable when finished.
The FileMaker Server 5.5 Installation routine can be found on the FileMaker Installation CDfrom The Lackner Group. The CD will automatically bring up the Installation Options Screen.
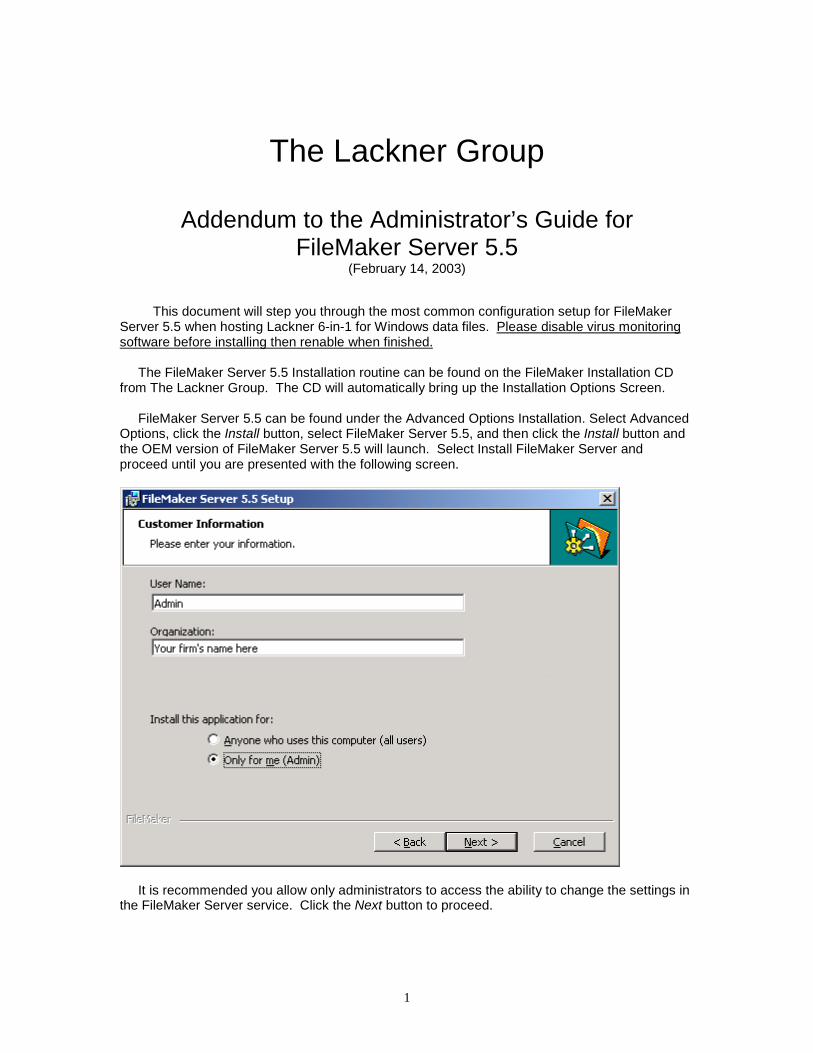
FileMaker Server 5.5 can be found under the Advanced Options Installation. Select AdvancedOptions, click the Install button, select FileMaker Server 5.5, and then click the Install button andthe OEM version of FileMaker Server 5.5 will launch. Select Install FileMaker Server andproceed until you are presented with the following screen.
It is recommended you allow only administrators to access the ability to change the settings inthe FileMaker Server service. Click the Next button to proceed.
2
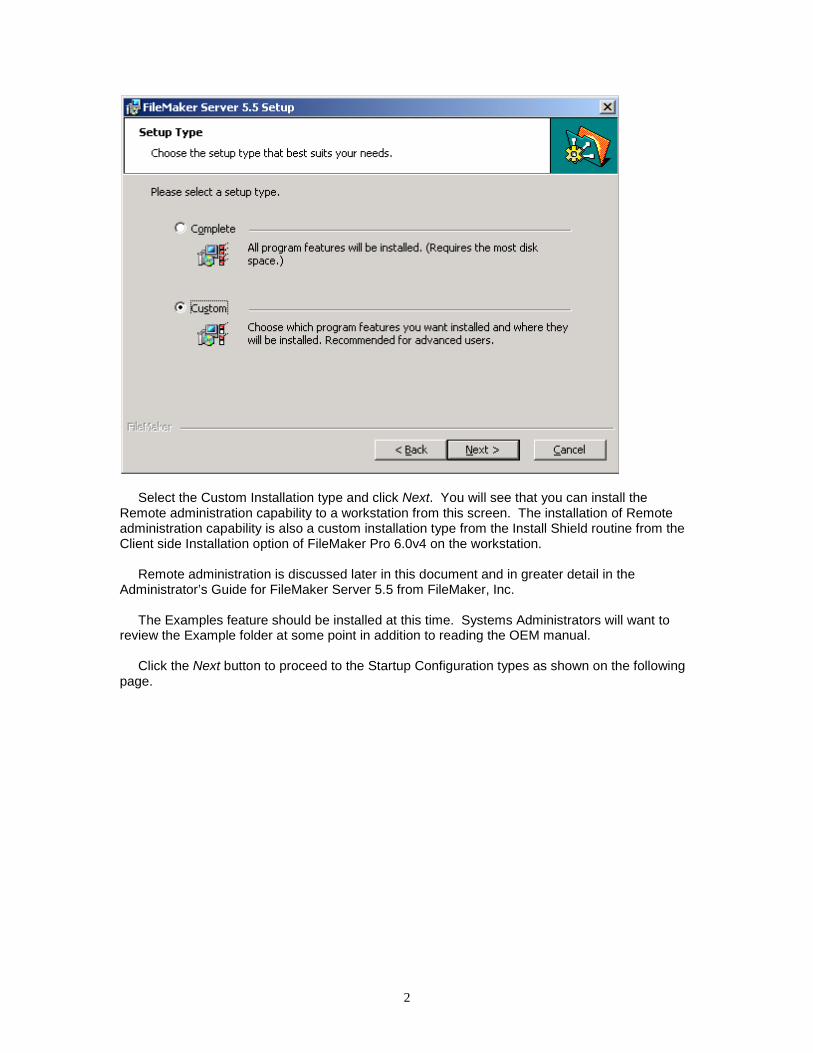
Select the Custom Installation type and click Next. You will see that you can install theRemote administration capability to a workstation from this screen. The installation of Remoteadministration capability is also a custom installation type from the Install Shield routine from theClient side Installation option of FileMaker Pro 6.0v4 on the workstation.
Remote administration is discussed later in this document and in greater detail in theAdministrator’s Guide for FileMaker Server 5.5 from FileMaker, Inc.
The Examples feature should be installed at this time. Systems Administrators will want toreview the Example folder at some point in addition to reading the OEM manual.
Click the Next button to proceed to the Startup Configuration types as shown on the followingpage.
3
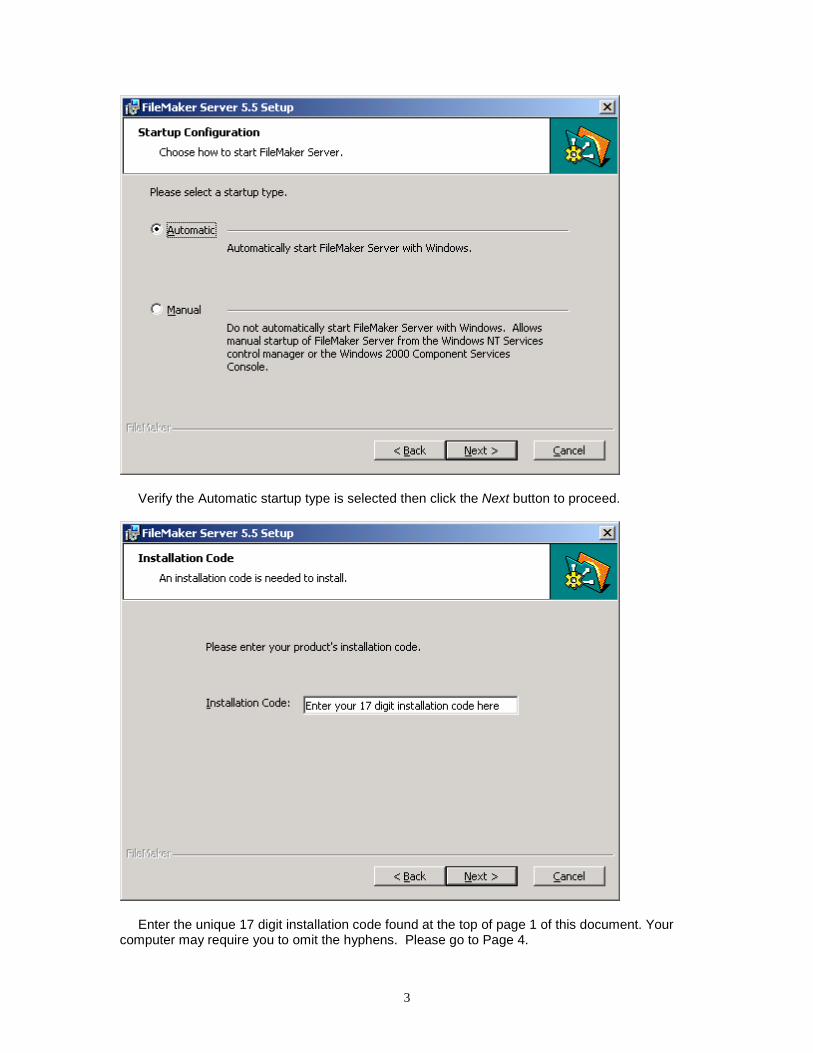
Verify the Automatic startup type is selected then click the Next button to proceed.
Enter the unique 17 digit installation code found at the top of page 1 of this document. Yourcomputer may require you to omit the hyphens. Please go to Page 4.
4
Continue until installation is complete.
Please Note: Any error code received at this time relating to the failure of a file calledIRAVCOBJ.DLL to register usually implies that you did not disable your virus monitoring softwareas previously instructed. Click the Ignore button to proceed. This error message in no wayaffects the functionality of the FileMaker Server 5.5 service.
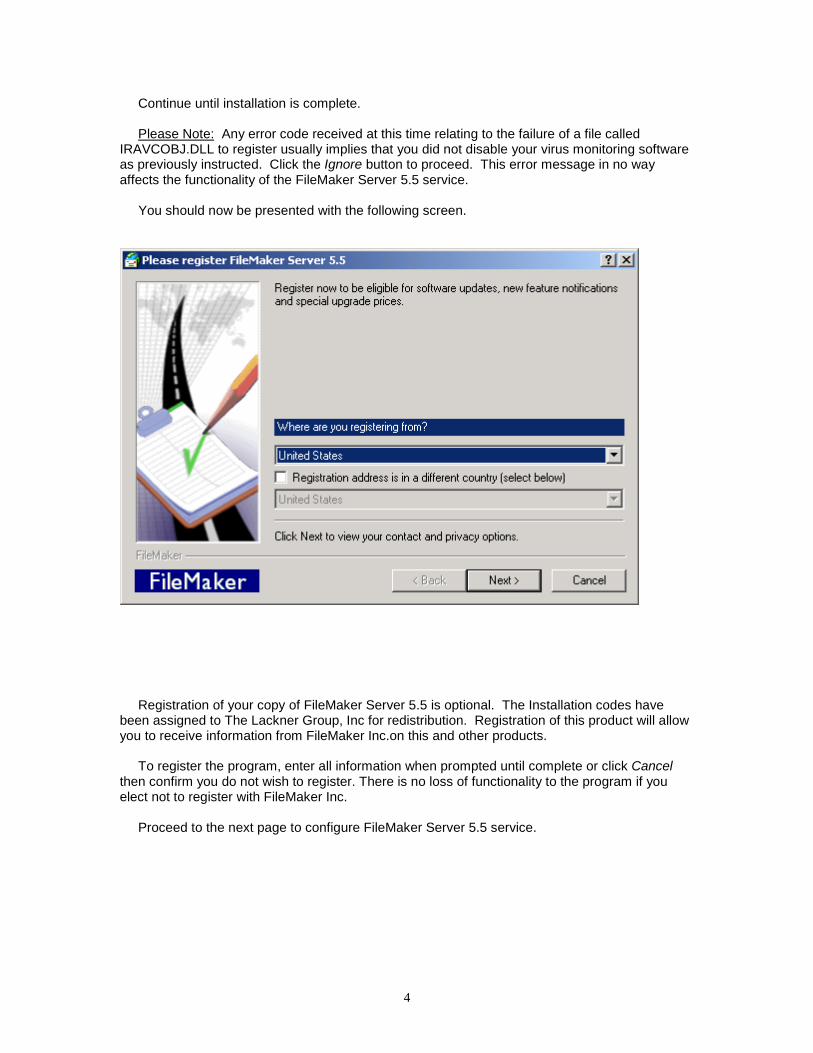
You should now be presented with the following screen.
Registration of your copy of FileMaker Server 5.5 is optional. The Installation codes havebeen assigned to The Lackner Group, Inc for redistribution. Registration of this product will allowyou to receive information from FileMaker Inc.on this and other products.
To register the program, enter all information when prompted until complete or click Cancelthen confirm you do not wish to register. There is no loss of functionality to the program if youelect not to register with FileMaker Inc.
Proceed to the next page to configure FileMaker Server 5.5 service.
5
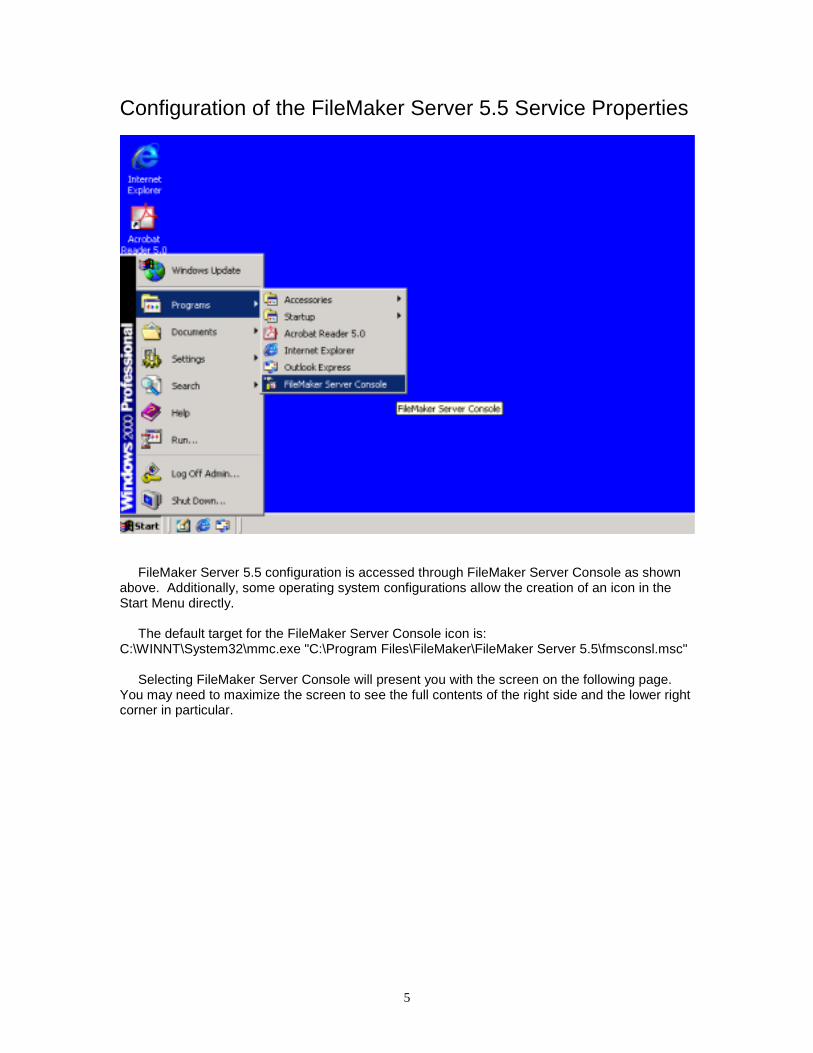
Configuration of the FileMaker Server 5.5 Service Properties
FileMaker Server 5.5 configuration is accessed through FileMaker Server Console as shownabove. Additionally, some operating system configurations allow the creation of an icon in theStart Menu directly.
The default target for the FileMaker Server Console icon is:C:\WINNT\System32\mmc.exe "C:\Program Files\FileMaker\FileMaker Server 5.5\fmsconsl.msc"
Selecting FileMaker Server Console will present you with the screen on the following page.You may need to maximize the screen to see the full contents of the right side and the lower rightcorner in particular.
6
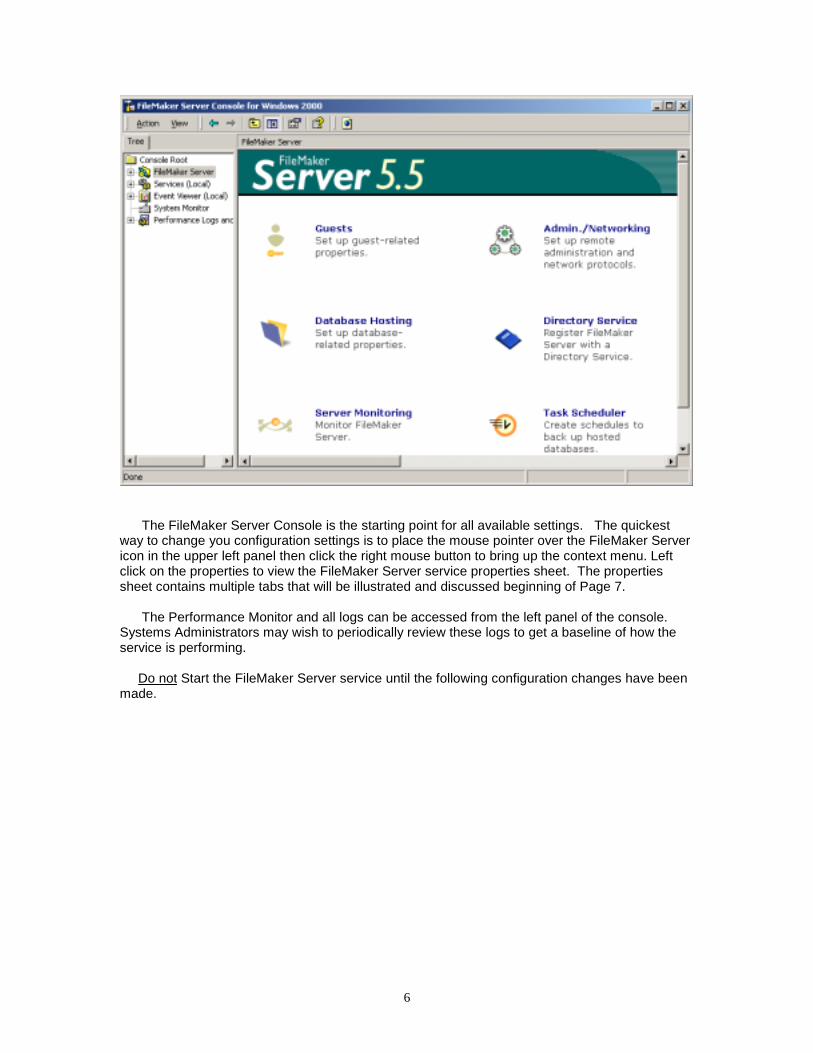
The FileMaker Server Console is the starting point for all available settings. The quickestway to change you configuration settings is to place the mouse pointer over the FileMaker Servericon in the upper left panel then click the right mouse button to bring up the context menu. Leftclick on the properties to view the FileMaker Server service properties sheet. The propertiessheet contains multiple tabs that will be illustrated and discussed beginning of Page 7.
The Performance Monitor and all logs can be accessed from the left panel of the console.Systems Administrators may wish to periodically review these logs to get a baseline of how theservice is performing.
Do not Start the FileMaker Server service until the following configuration changes have beenmade.
7
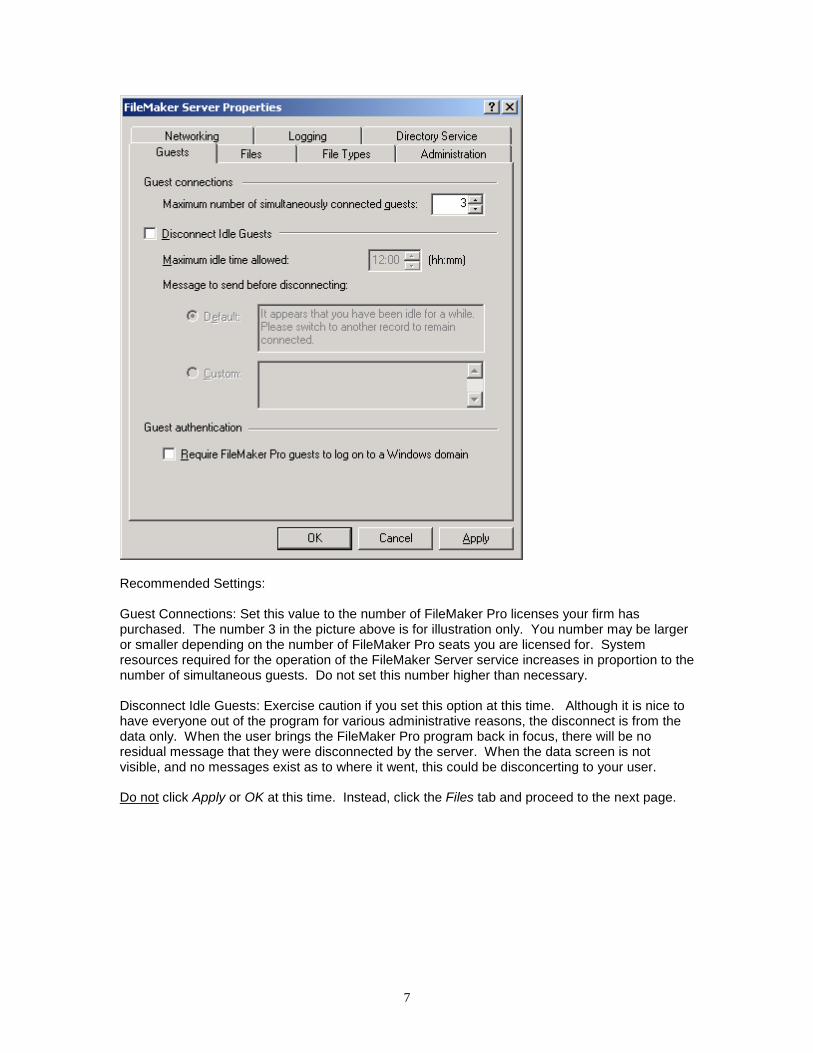
Recommended Settings:
Guest Connections: Set this value to the number of FileMaker Pro licenses your firm haspurchased. The number 3 in the picture above is for illustration only. You number may be largeror smaller depending on the number of FileMaker Pro seats you are licensed for. Systemresources required for the operation of the FileMaker Server service increases in proportion to thenumber of simultaneous guests. Do not set this number higher than necessary.
Disconnect Idle Guests: Exercise caution if you set this option at this time. Although it is nice tohave everyone out of the program for various administrative reasons, the disconnect is from thedata only. When the user brings the FileMaker Pro program back in focus, there will be noresidual message that they were disconnected by the server. When the data screen is notvisible, and no messages exist as to where it went, this could be disconcerting to your user.
Do not click Apply or OK at this time. Instead, click the Files tab and proceed to the next page.
8
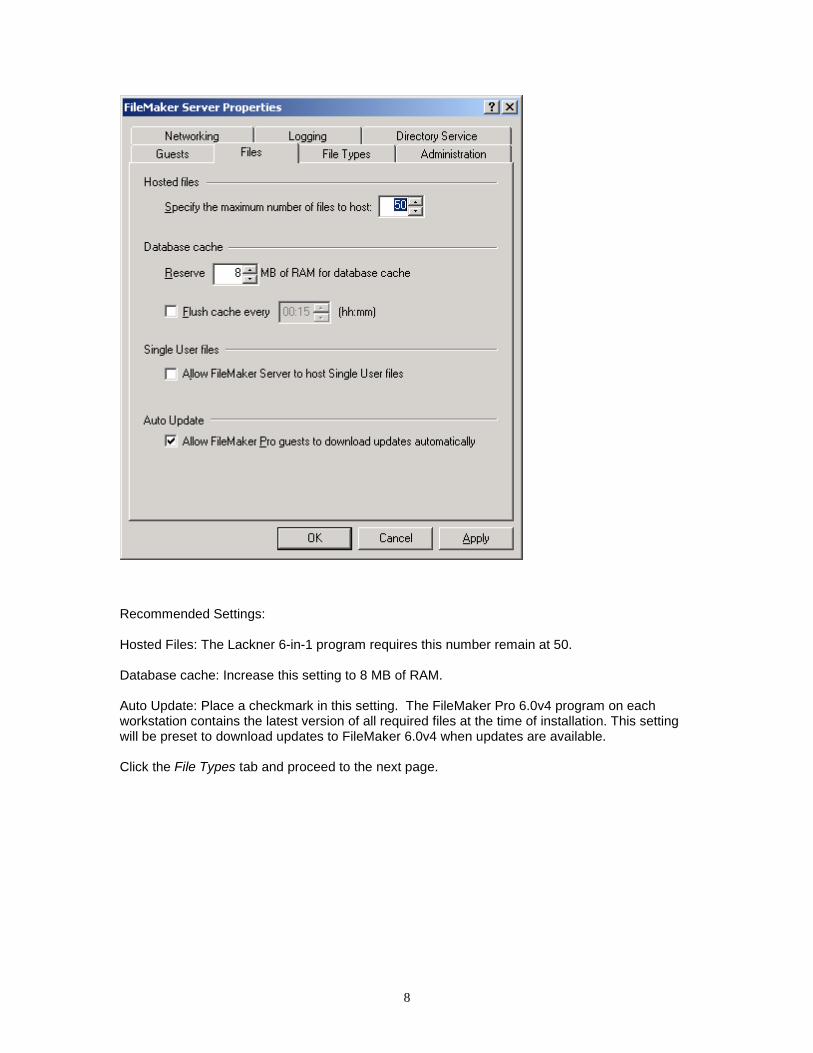
Recommended Settings:
Hosted Files: The Lackner 6-in-1 program requires this number remain at 50.
Database cache: Increase this setting to 8 MB of RAM.
Auto Update: Place a checkmark in this setting. The FileMaker Pro 6.0v4 program on eachworkstation contains the latest version of all required files at the time of installation. This settingwill be preset to download updates to FileMaker 6.0v4 when updates are available.
Click the File Types tab and proceed to the next page.
9
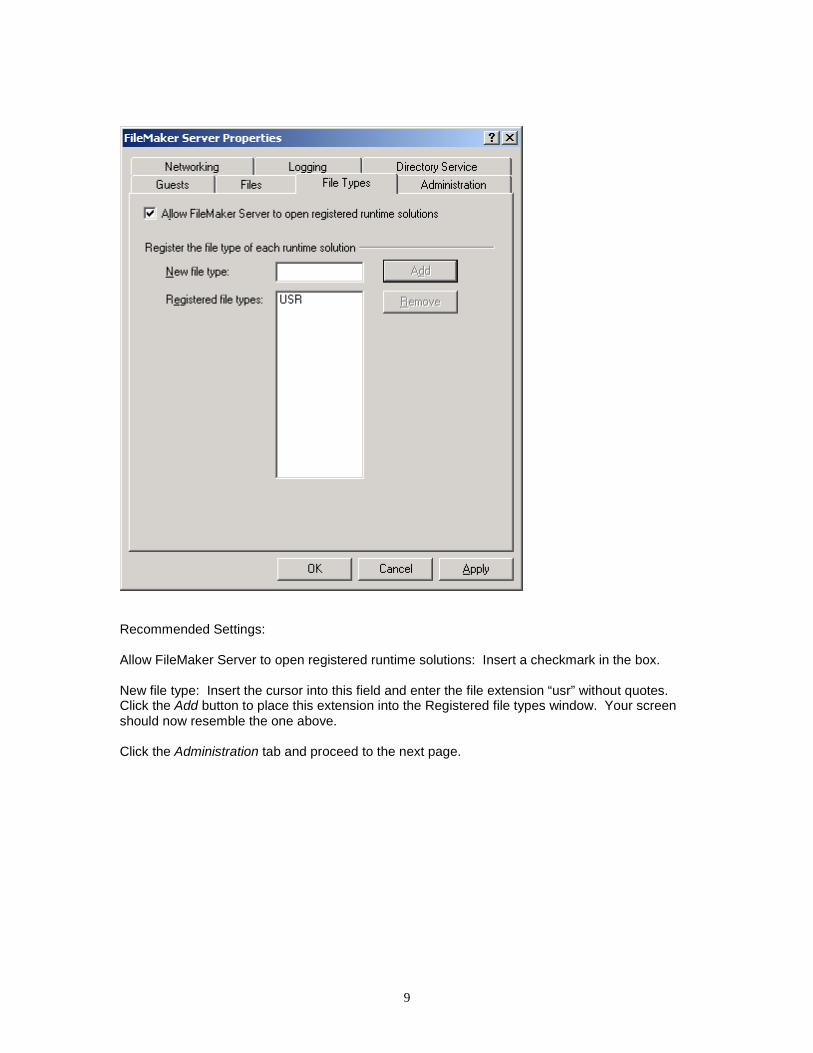
Recommended Settings:
Allow FileMaker Server to open registered runtime solutions: Insert a checkmark in the box.
New file type: Insert the cursor into this field and enter the file extension “usr” without quotes.Click the Add button to place this extension into the Registered file types window. Your screenshould now resemble the one above.
Click the Administration tab and proceed to the next page.
10
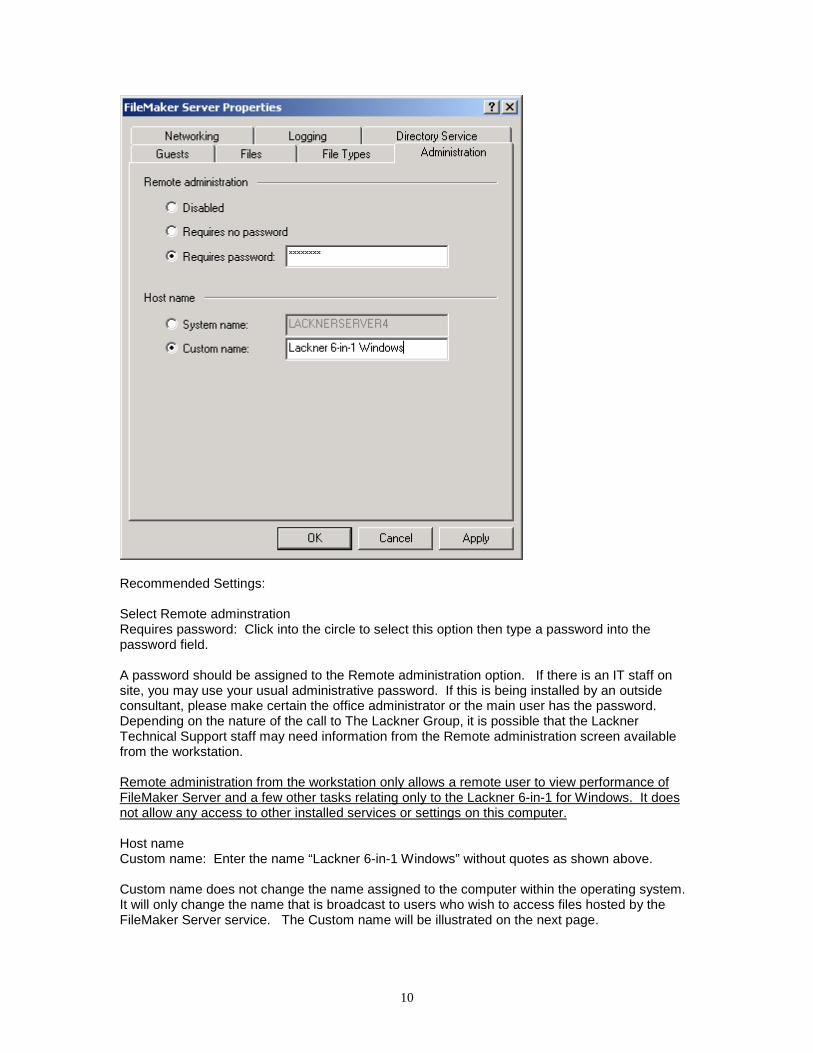
Recommended Settings:
Select Remote adminstrationRequires password: Click into the circle to select this option then type a password into thepassword field.
A password should be assigned to the Remote administration option. If there is an IT staff onsite, you may use your usual administrative password. If this is being installed by an outsideconsultant, please make certain the office administrator or the main user has the password.Depending on the nature of the call to The Lackner Group, it is possible that the LacknerTechnical Support staff may need information from the Remote administration screen availablefrom the workstation.
Remote administration from the workstation only allows a remote user to view performance ofFileMaker Server and a few other tasks relating only to the Lackner 6-in-1 for Windows. It doesnot allow any access to other installed services or settings on this computer.
Host nameCustom name: Enter the name “Lackner 6-in-1 Windows” without quotes as shown above.
Custom name does not change the name assigned to the computer within the operating system.It will only change the name that is broadcast to users who wish to access files hosted by theFileMaker Server service. The Custom name will be illustrated on the next page.
11
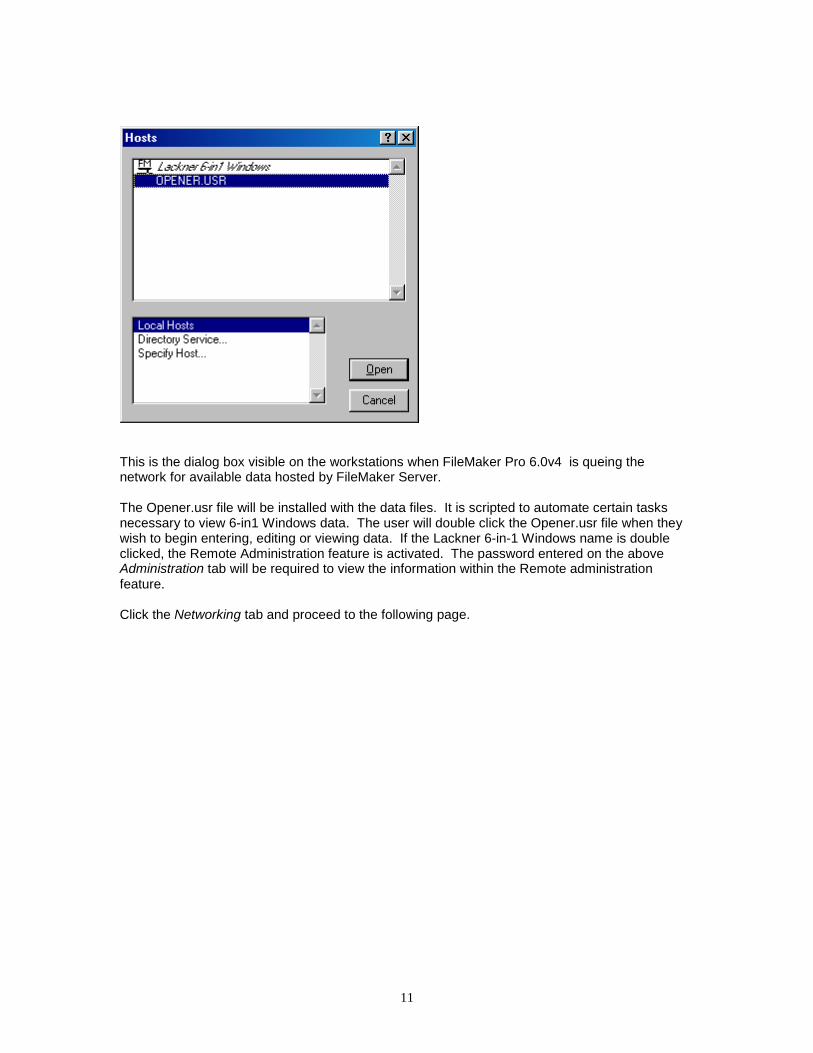
This is the dialog box visible on the workstations when FileMaker Pro 6.0v4 is queing thenetwork for available data hosted by FileMaker Server.
The Opener.usr file will be installed with the data files. It is scripted to automate certain tasksnecessary to view 6-in1 Windows data. The user will double click the Opener.usr file when theywish to begin entering, editing or viewing data. If the Lackner 6-in-1 Windows name is doubleclicked, the Remote Administration feature is activated. The password entered on the aboveAdministration tab will be required to view the information within the Remote administrationfeature.
Click the Networking tab and proceed to the following page.
12
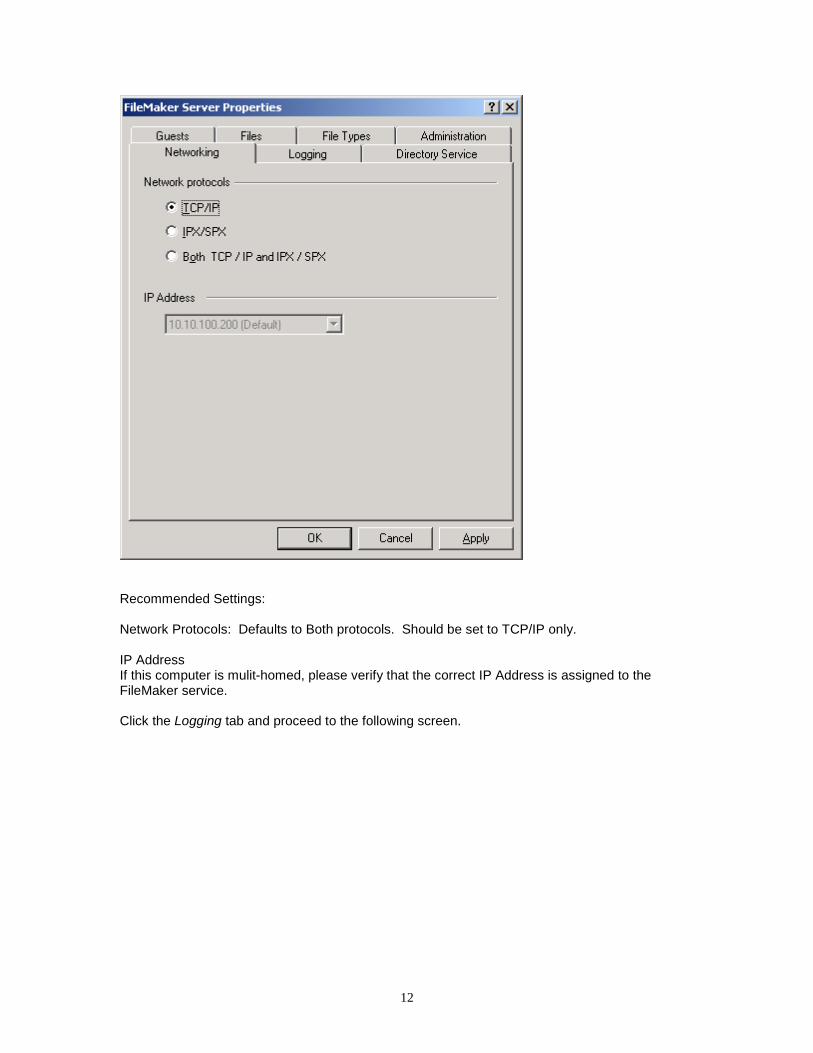
Recommended Settings:
Network Protocols: Defaults to Both protocols. Should be set to TCP/IP only.
IP AddressIf this computer is mulit-homed, please verify that the correct IP Address is assigned to theFileMaker service.
Click the Logging tab and proceed to the following screen.
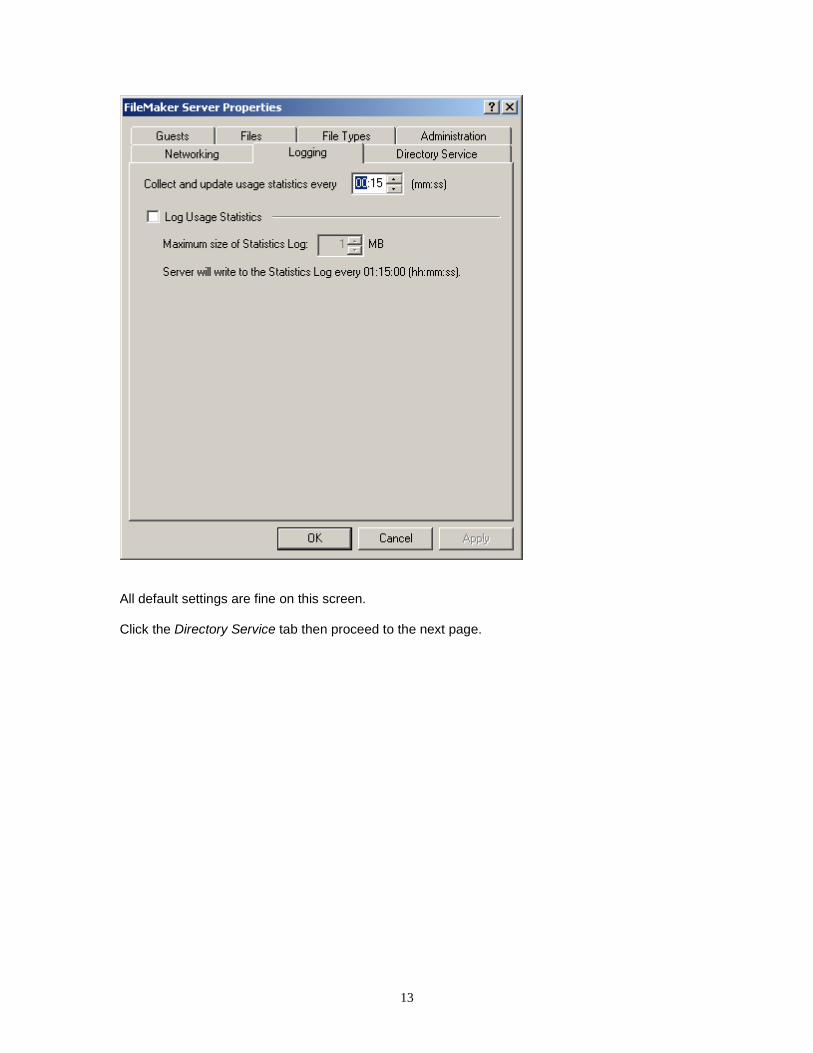
13
All default settings are fine on this screen.
Click the Directory Service tab then proceed to the next page.
14
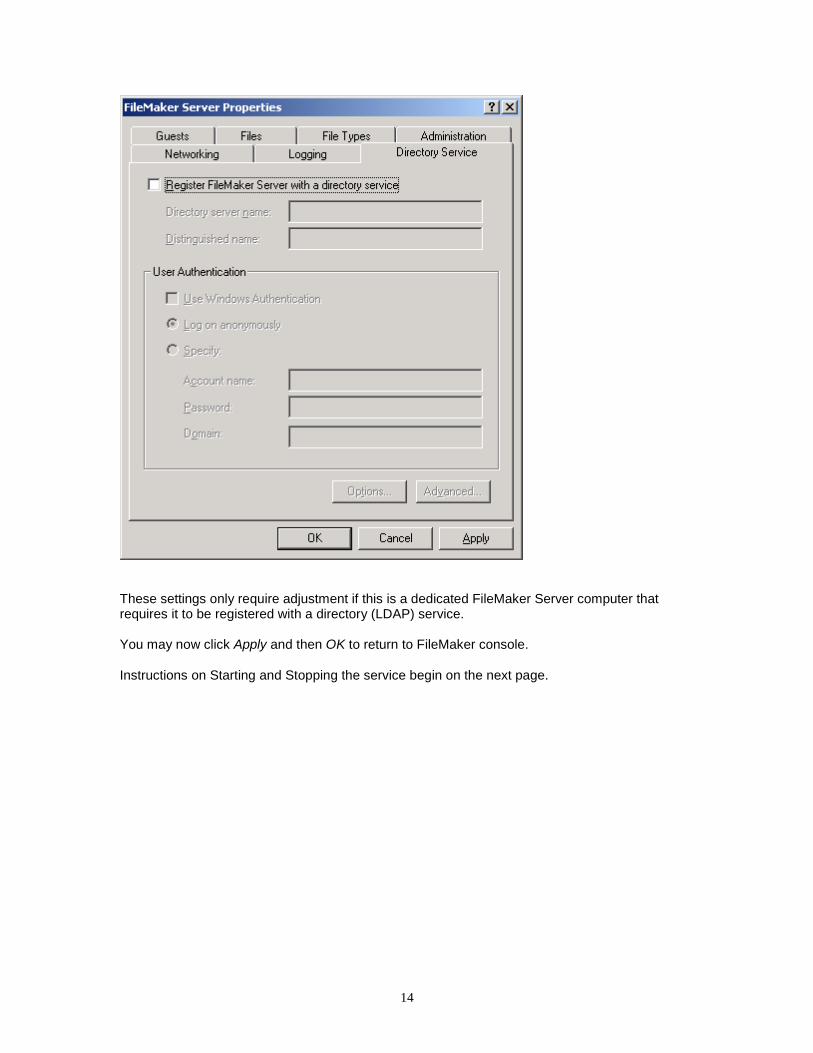
These settings only require adjustment if this is a dedicated FileMaker Server computer thatrequires it to be registered with a directory (LDAP) service.
You may now click Apply and then OK to return to FileMaker console.
Instructions on Starting and Stopping the service begin on the next page.
15
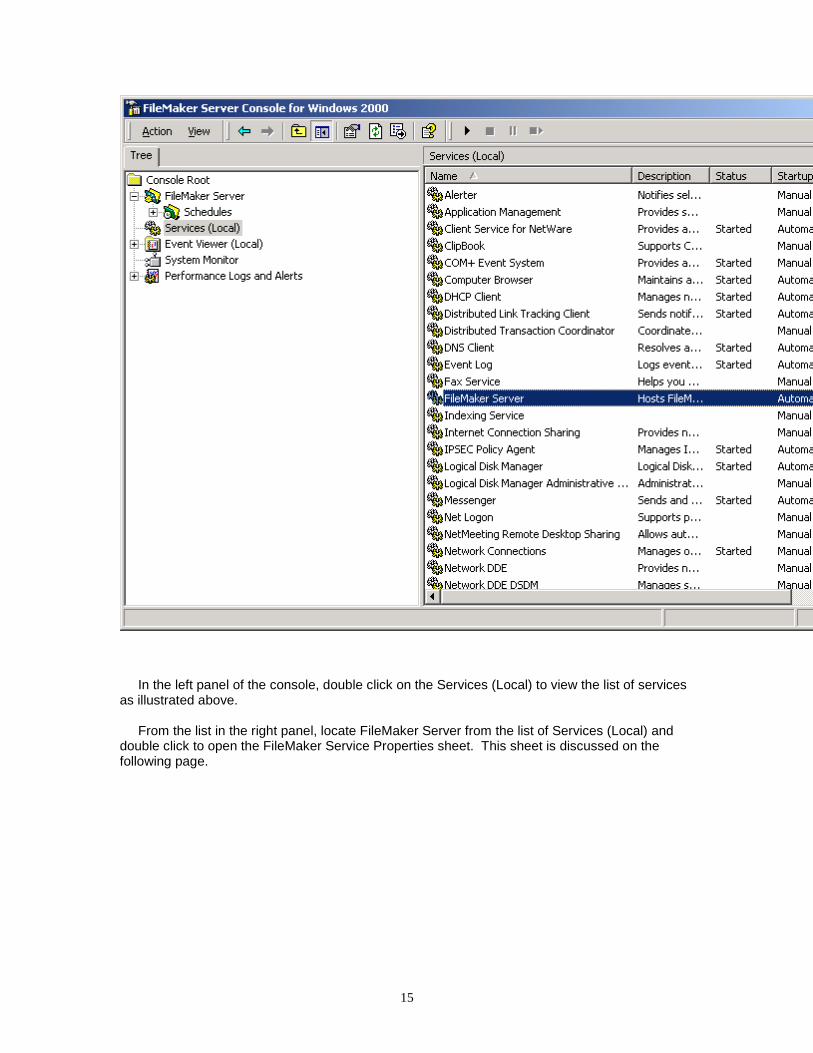
In the left panel of the console, double click on the Services (Local) to view the list of servicesas illustrated above.
From the list in the right panel, locate FileMaker Server from the list of Services (Local) anddouble click to open the FileMaker Service Properties sheet. This sheet is discussed on thefollowing page.
16
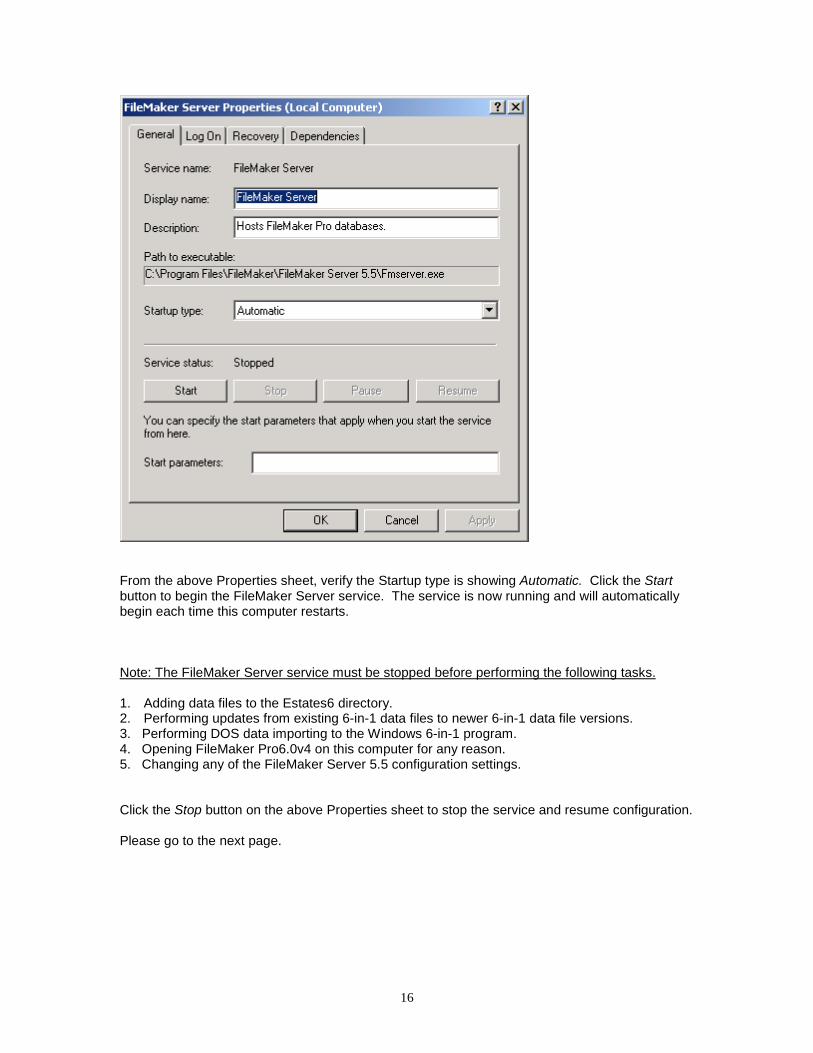
From the above Properties sheet, verify the Startup type is showing Automatic. Click the Startbutton to begin the FileMaker Server service. The service is now running and will automaticallybegin each time this computer restarts.
Note: The FileMaker Server service must be stopped before performing the following tasks.
1. Adding data files to the Estates6 directory.2. Performing updates from existing 6-in-1 data files to newer 6-in-1 data file versions.3. Performing DOS data importing to the Windows 6-in-1 program.4. Opening FileMaker Pro6.0v4 on this computer for any reason.5. Changing any of the FileMaker Server 5.5 configuration settings.
Click the Stop button on the above Properties sheet to stop the service and resume configuration.
Please go to the next page.
17
Creating a Backup procedure for the Lackner 6-in-1 Windows files.
FileMaker Server 5.5 allows the creation of a scheduled backup of the data files using theTask Scheduler. This procedure should be sufficient for most installations.
At this time, there is no Estates6 data directory to point the backup procedure to. To createthe FileMaker Server backup procedure, you need to manually create a folder titled Estates6.Open the Windows Explorer or navigate through My Computer and create this directory under theC:\Program Files\FileMaker\FileMaker Server 5.5 directory.
It is advisable to keep the Lackner 6-in-1 data in the default location. When the FileMakerServer service is started, it will automatically open any database files in the root directory and onelevel down. For ease of administration, never put your Lackner 6-in-1 data files directly in theFileMaker Server 5.5 root directory.
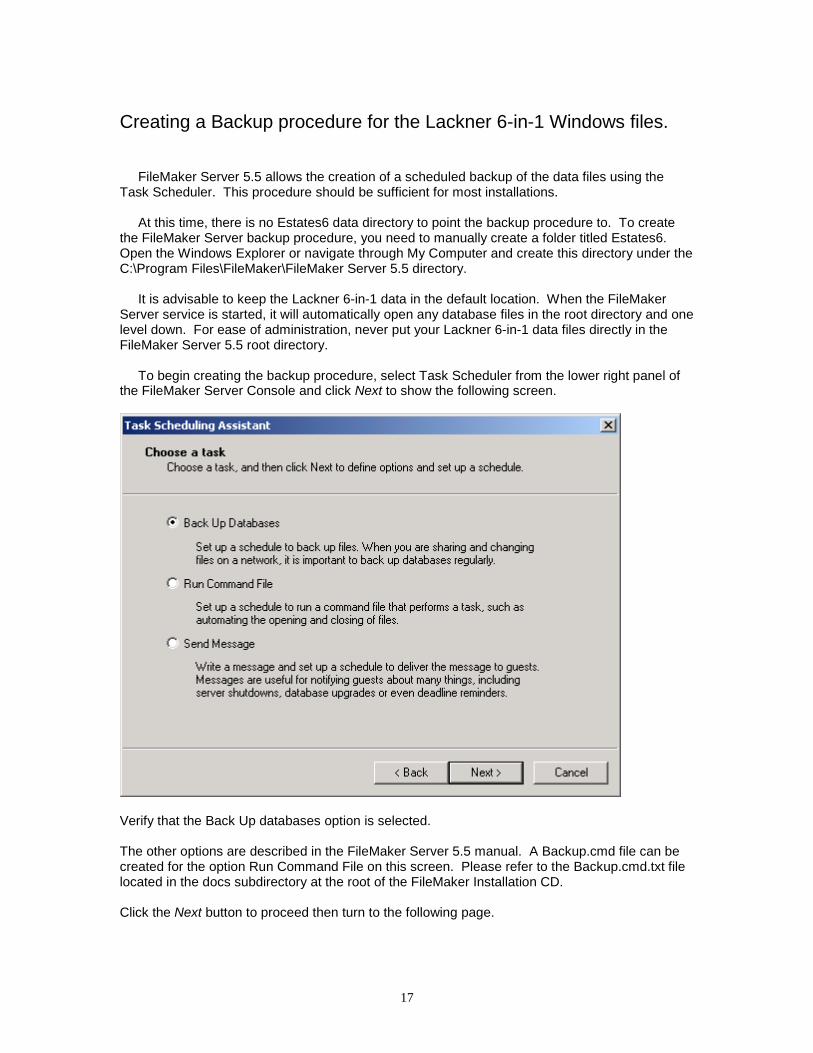
To begin creating the backup procedure, select Task Scheduler from the lower right panel ofthe FileMaker Server Console and click Next to show the following screen.
Verify that the Back Up databases option is selected.
The other options are described in the FileMaker Server 5.5 manual. A Backup.cmd file can becreated for the option Run Command File on this screen. Please refer to the Backup.cmd.txt filelocated in the docs subdirectory at the root of the FileMaker Installation CD.
Click the Next button to proceed then turn to the following page.
18
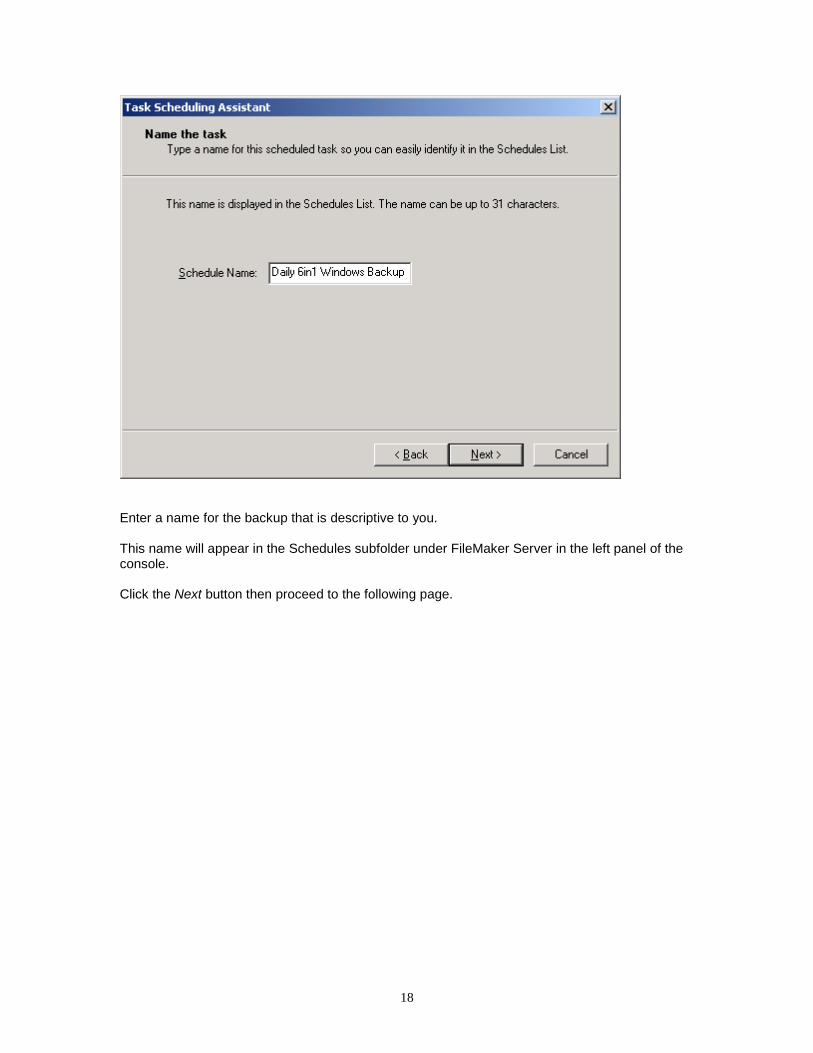
Enter a name for the backup that is descriptive to you.
This name will appear in the Schedules subfolder under FileMaker Server in the left panel of theconsole.
Click the Next button then proceed to the following page.
19
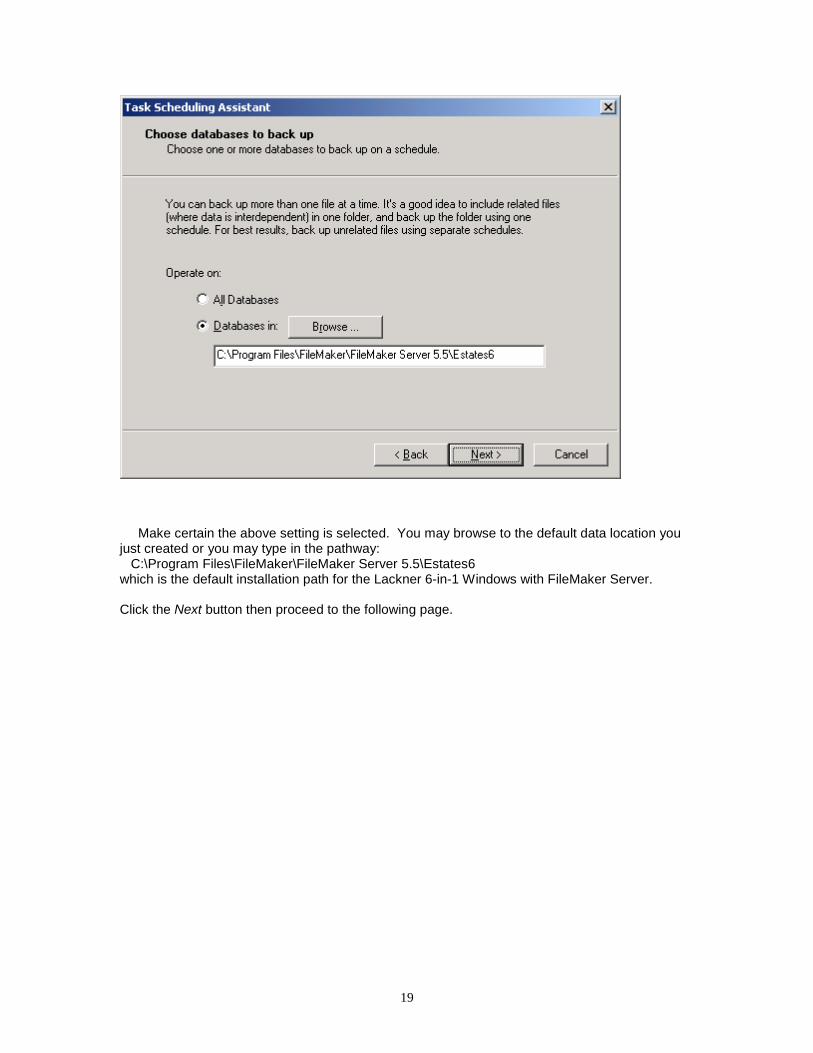
Make certain the above setting is selected. You may browse to the default data location youjust created or you may type in the pathway: C:\Program Files\FileMaker\FileMaker Server 5.5\Estates6which is the default installation path for the Lackner 6-in-1 Windows with FileMaker Server.
Click the Next button then proceed to the following page.
20
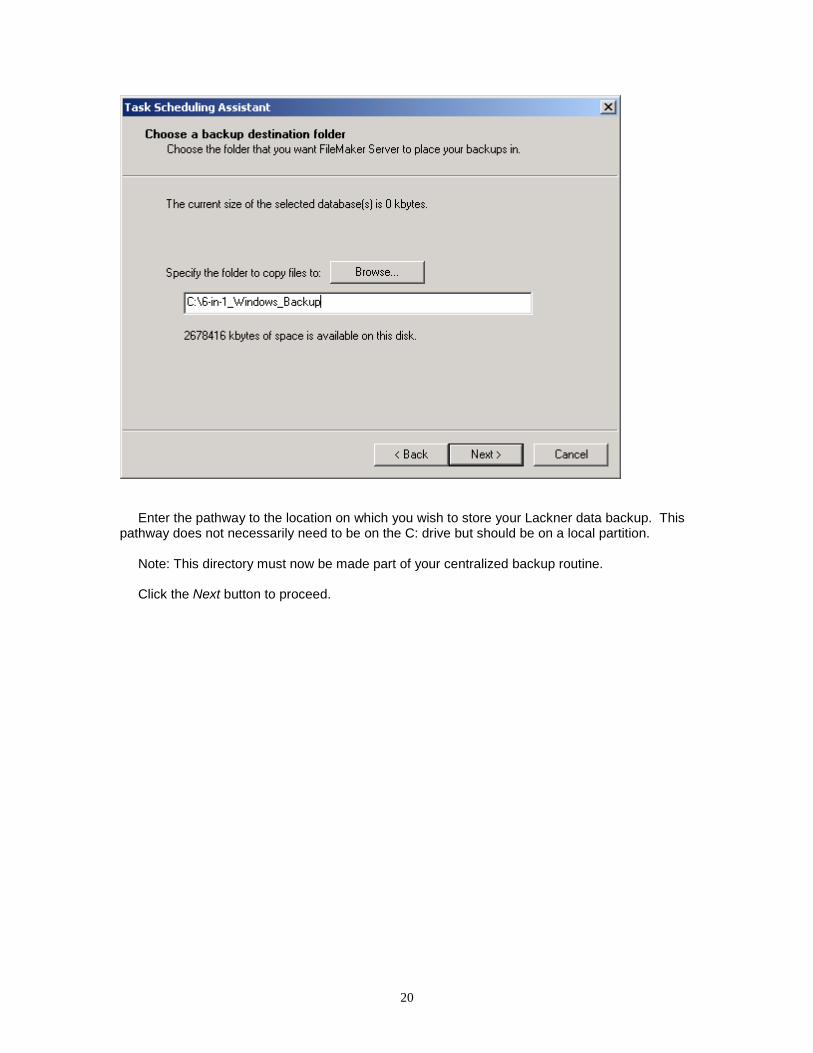
Enter the pathway to the location on which you wish to store your Lackner data backup. Thispathway does not necessarily need to be on the C: drive but should be on a local partition.
Note: This directory must now be made part of your centralized backup routine.
Click the Next button to proceed.
21
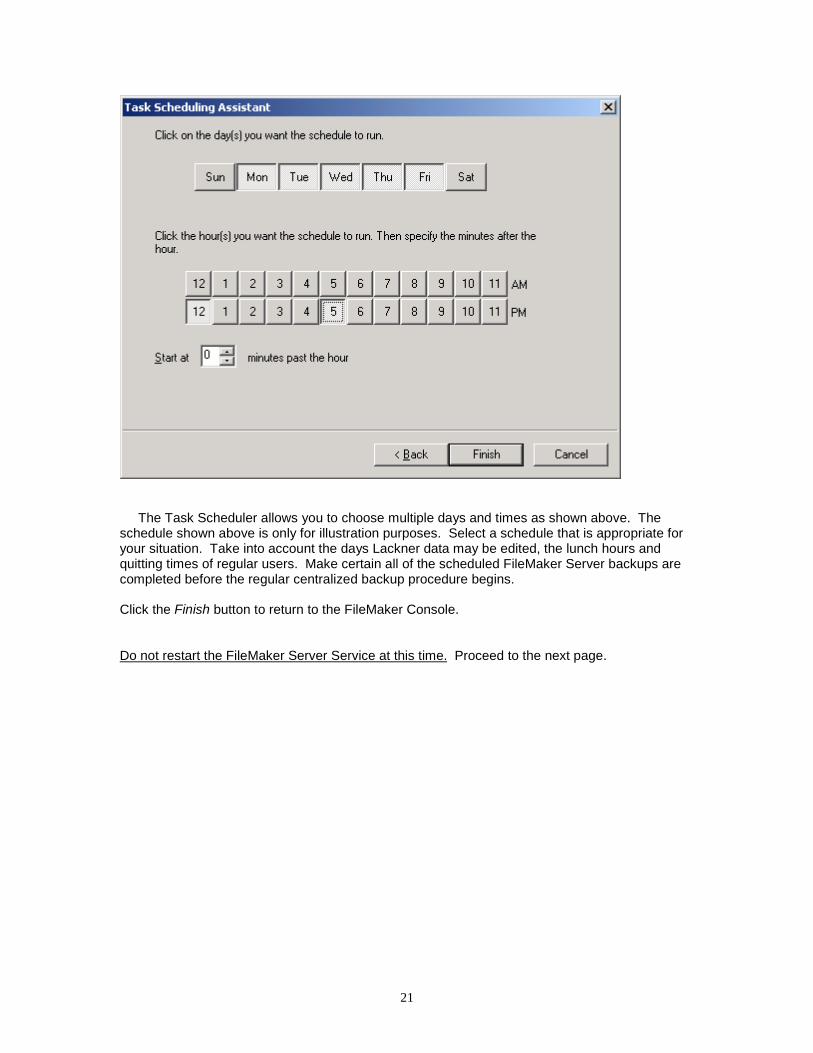
The Task Scheduler allows you to choose multiple days and times as shown above. Theschedule shown above is only for illustration purposes. Select a schedule that is appropriate foryour situation. Take into account the days Lackner data may be edited, the lunch hours andquitting times of regular users. Make certain all of the scheduled FileMaker Server backups arecompleted before the regular centralized backup procedure begins.
Click the Finish button to return to the FileMaker Console.
Do not restart the FileMaker Server Service at this time. Proceed to the next page.
22
Installing FileMaker Pro 6.0v4 on this computer to managedata file updates and DOS data conversions.
The FileMaker Installation CD is again required.
It is strongly recommended that DOS conversions and Windows file version updates areperformed from a local disk. To this end, a FileMaker Pro 6.0v4 installation routine was createdfor this purpose only.
The FileMaker 6.0v4 installation for data file updates and DOS data conversion is not found onthe Configuration Options screen that automatically appears when the FileMaker Installation CDis inserted. Insert the FileMaker Installation CD and when this screen appears, click the “X” in theupper right hand corner of this screen to close.
From the Windows Explorer, open the CD contents. Locate and open the Admin directory atthe CD root. From here, double click the Setup.exe file to begin the InstallShield routine. You willknow this is the correct routine if the product name is “FileMaker Pro 6.0v4 to manage 6-in-1 dataunder FM Server”. If you have not launched the correct setup routine, simple click the Cancelbutton at any time to roll back changes.
This installation differs from the workstations in both the default installation location and iconsetup. This server side installation will keep both applications in a FileMaker root folder with theicon pointing directly to the executable file. The icon will not launch a data file with scriptedinformation to assist the user to locate 6-in-1 data as it does on a workstation.
Step through the InstallShield Wizard. Please keep the default installation path. Select Finishto exit the CD installation routine.
From the Start | Programs | FMPro for 6-in-1 Data, launch the program to verify it has beeninstalled correctly. The specific use of this installation will be detailed with any documentationthat requires it. Exit the FileMaker Pro application.
Restart the FileMaker Server service.
At this time, go back to the FileMaker Server Console, double click on Services from the leftpanel and then double click on FileMaker Server from the right panel. Click the Start button tobegin the FileMaker Server Service. Click OK to exit the service properties sheet.
You have just completed the server side installation. Before installing your data, complete theworkstation installations per instructions that accompanied the FileMaker Installation CD.
Please note: The number of workstations that will have FileMaker Pro 6.0v4 installed toadd, edit or review Lackner 6-in1 data, must equal the number of seat licenses obtainedfrom the The Lackner Group. No support is available for any unlicensed workstation or forany user accessing any portion of the Lackner 6-in-1 for Windows from a shared directory.
Proceed to the next page.

23
At this time, please refer to the document:
FileMaker Installation CD(Release Date February 14, 2003)
forThe Lackner 6-in-1 for Windows
Estate and Trust Administration System
This is the documentation to install the workstation configurations of FileMaker Pro 6.0v4.
After completing the workstation installation and configuration, exit FileMaker Pro 6.0v4 on theworkstation then relaunch the program. Although the Installation notes do not refer you back tothis sheet, please go to the next paragraph after relaunching the Lackner 6-in-1 Windows on theworkstation.
From the main splash screen, press the key sequence Control+Shift+O to bring up the"Hosts" screen as illustrated on page 11 of this document. If the TCP/IP protocol is correctlyconfigured, you should see the Lackner 6-in-1 Windows name in the Hosts window correspondingto the Custom name selected for the FileMaker Server service to be broadcast. If there are nodata files resident in the Estates6 directory, no files will be listed beneath the Custom name.
To preview the Remote administration screen, double click on the Custom name listed in theHosts window and if you selected Password Required for Remote administration, you should beprompted for that password at this time. Enter the password and click OK. Explore the optionsavailable from this screen. To close the Remote administration files, go to File | Close and youwill be back at the blue splash screen. If you do not see the computer listed, verify that theFileMaker Server service has been started. If you are still having problems and you believe thatall of your computers are on the same IP subnet, call Lackner Technical Support at 412.279.2121for assistance.
Be certain to read all applicable sections of the Administrator’s Guide for FileMaker Server 5.5for additional information and the docs directory on the CD root. There is also adequatereference material at www.FileMaker.com relating to FileMaker Server 5.5 and FileMaker Pro6.0v4.