Embed Size (px)
Citation preview
Two-Second Adv
tibbr®, tibbr Service, tibbr Community, and tibbr Community Service
How-To GuideSoftware Release 5.0November 2013
antage®

Important Information
SOME TIBCO SOFTWARE EMBEDS OR BUNDLES OTHER TIBCO SOFTWARE. USE OF SUCH EMBEDDED OR BUNDLED TIBCO SOFTWARE IS SOLELY TO ENABLE THE FUNCTIONALITY (OR PROVIDE LIMITED ADD-ON FUNCTIONALITY) OF THE LICENSED TIBCO SOFTWARE. THE EMBEDDED OR BUNDLED SOFTWARE IS NOT LICENSED TO BE USED OR ACCESSED BY ANY OTHER TIBCO SOFTWARE OR FOR ANY OTHER PURPOSE.USE OF TIBCO SOFTWARE AND THIS DOCUMENT IS SUBJECT TO THE TERMS AND CONDITIONS OF A LICENSE AGREEMENT FOUND IN EITHER A SEPARATELY EXECUTED SOFTWARE LICENSE AGREEMENT, OR, IF THERE IS NO SUCH SEPARATE AGREEMENT, THE CLICKWRAP END USER LICENSE AGREEMENT WHICH IS DISPLAYED DURING DOWNLOAD OR INSTALLATION OF THE SOFTWARE (AND WHICH IS DUPLICATED IN THE LICENSE FILE) OR IF THERE IS NO SUCH SOFTWARE LICENSE AGREEMENT OR CLICKWRAP END USER LICENSE AGREEMENT, THE LICENSE(S) LOCATED IN THE “LICENSE” FILE(S) OF THE SOFTWARE. USE OF THIS DOCUMENT IS SUBJECT TO THOSE TERMS AND CONDITIONS, AND YOUR USE HEREOF SHALL CONSTITUTE ACCEPTANCE OF AND AN AGREEMENT TO BE BOUND BY THE SAME.This document contains confidential information that is subject to U.S. and international copyright laws and treaties. No part of this document may be reproduced in any form without the written authorization of TIBCO Software Inc.TIBCO, Two-Second Advantage, TIBCO ActiveMatrix BusinessWorks, tibbr, TIBCO Silver are either registered trademarks or trademarks of TIBCO Software Inc. in the United States and/or other countries.All other product and company names and marks mentioned in this document are the property of their respective owners and are mentioned for identification purposes only.THIS SOFTWARE MAY BE AVAILABLE ON MULTIPLE OPERATING SYSTEMS. HOWEVER, NOT ALL OPERATING SYSTEM PLATFORMS FOR A SPECIFIC SOFTWARE VERSION ARE RELEASED AT THE SAME TIME. SEE THE README FILE FOR THE AVAILABILITY OF THIS SOFTWARE VERSION ON A SPECIFIC OPERATING SYSTEM PLATFORM.THIS DOCUMENT IS PROVIDED “AS IS” WITHOUT WARRANTY OF ANY KIND, EITHER EXPRESS OR IMPLIED, INCLUDING, BUT NOT LIMITED TO, THE IMPLIED WARRANTIES OF MERCHANTABILITY, FITNESS FOR A PARTICULAR PURPOSE, OR NON-INFRINGEMENT.THIS DOCUMENT COULD INCLUDE TECHNICAL INACCURACIES OR TYPOGRAPHICAL ERRORS. CHANGES ARE PERIODICALLY ADDED TO THE INFORMATION HEREIN; THESE CHANGES WILL BE INCORPORATED IN NEW EDITIONS OF THIS DOCUMENT. TIBCO SOFTWARE INC. MAY MAKE IMPROVEMENTS AND/OR CHANGES IN THE PRODUCT(S) AND/OR THE PROGRAM(S) DESCRIBED IN THIS DOCUMENT AT ANY TIME.THE CONTENTS OF THIS DOCUMENT MAY BE MODIFIED AND/OR QUALIFIED, DIRECTLY OR INDIRECTLY, BY OTHER DOCUMENTATION WHICH ACCOMPANIES THIS SOFTWARE, INCLUDING BUT NOT LIMITED TO ANY RELEASE NOTES AND READ ME FILES.Copyright © 2010-2013 TIBCO Software Inc. ALL RIGHTS RESERVED.TIBCO Software Inc. Confidential Information
| iii
Contents
Preface . . . . . . . . . . . . . . . . . . . . . . . . . . . . . . . . . . . . . . . . . . . . . . . . . . . . . . . . . . . . . . . . . . . . . . . . ix
Related Documentation . . . . . . . . . . . . . . . . . . . . . . . . . . . . . . . . . . . . . . . . . . . . . . . . . . . . . . . . . . . . . . . . . . . . . . xtibbr Documentation . . . . . . . . . . . . . . . . . . . . . . . . . . . . . . . . . . . . . . . . . . . . . . . . . . . . . . . . . . . . . . . . . . . . . xThird-Party Documentation. . . . . . . . . . . . . . . . . . . . . . . . . . . . . . . . . . . . . . . . . . . . . . . . . . . . . . . . . . . . . . . . x
Typographical Conventions . . . . . . . . . . . . . . . . . . . . . . . . . . . . . . . . . . . . . . . . . . . . . . . . . . . . . . . . . . . . . . . . . . xi
TIBCO Resources . . . . . . . . . . . . . . . . . . . . . . . . . . . . . . . . . . . . . . . . . . . . . . . . . . . . . . . . . . . . . . . . . . . . . . . . .xivHow to Join TIBCOmmunity . . . . . . . . . . . . . . . . . . . . . . . . . . . . . . . . . . . . . . . . . . . . . . . . . . . . . . . . . . . . . .xivHow to Access TIBCO Documentation. . . . . . . . . . . . . . . . . . . . . . . . . . . . . . . . . . . . . . . . . . . . . . . . . . . . . .xivHow to Contact TIBCO Support . . . . . . . . . . . . . . . . . . . . . . . . . . . . . . . . . . . . . . . . . . . . . . . . . . . . . . . . . . .xiv
Chapter 1 Navigation in tibbr . . . . . . . . . . . . . . . . . . . . . . . . . . . . . . . . . . . . . . . . . . . . . . . . . . . . . .1
Access tibbr . . . . . . . . . . . . . . . . . . . . . . . . . . . . . . . . . . . . . . . . . . . . . . . . . . . . . . . . . . . . . . . . . . . . . . . . . . . . . . . 2On the Web. . . . . . . . . . . . . . . . . . . . . . . . . . . . . . . . . . . . . . . . . . . . . . . . . . . . . . . . . . . . . . . . . . . . . . . . . . . . 2On Your Desktop. . . . . . . . . . . . . . . . . . . . . . . . . . . . . . . . . . . . . . . . . . . . . . . . . . . . . . . . . . . . . . . . . . . . . . . . 2On Your Mobile Device . . . . . . . . . . . . . . . . . . . . . . . . . . . . . . . . . . . . . . . . . . . . . . . . . . . . . . . . . . . . . . . . . . . 2
Create an Account . . . . . . . . . . . . . . . . . . . . . . . . . . . . . . . . . . . . . . . . . . . . . . . . . . . . . . . . . . . . . . . . . . . . . . . . . . 5
Sign In . . . . . . . . . . . . . . . . . . . . . . . . . . . . . . . . . . . . . . . . . . . . . . . . . . . . . . . . . . . . . . . . . . . . . . . . . . . . . . . . . . . 6
Sign Out . . . . . . . . . . . . . . . . . . . . . . . . . . . . . . . . . . . . . . . . . . . . . . . . . . . . . . . . . . . . . . . . . . . . . . . . . . . . . . . . . . 7
View Your Profile . . . . . . . . . . . . . . . . . . . . . . . . . . . . . . . . . . . . . . . . . . . . . . . . . . . . . . . . . . . . . . . . . . . . . . . . . . . 8View the Basic Information . . . . . . . . . . . . . . . . . . . . . . . . . . . . . . . . . . . . . . . . . . . . . . . . . . . . . . . . . . . . . . . . 8View Your Posts . . . . . . . . . . . . . . . . . . . . . . . . . . . . . . . . . . . . . . . . . . . . . . . . . . . . . . . . . . . . . . . . . . . . . . . . 8View the Posts You Liked . . . . . . . . . . . . . . . . . . . . . . . . . . . . . . . . . . . . . . . . . . . . . . . . . . . . . . . . . . . . . . . . . 8Find Out Whom and Which Subjects You Are Following and Your Followers . . . . . . . . . . . . . . . . . . . . . . . . . . 8Access Your Influence Score and Related People and Subjects . . . . . . . . . . . . . . . . . . . . . . . . . . . . . . . . . . . 8List Your Company Apps . . . . . . . . . . . . . . . . . . . . . . . . . . . . . . . . . . . . . . . . . . . . . . . . . . . . . . . . . . . . . . . . . 9
Specify Your Availability Status . . . . . . . . . . . . . . . . . . . . . . . . . . . . . . . . . . . . . . . . . . . . . . . . . . . . . . . . . . . . . . . 10
Update Your Profile . . . . . . . . . . . . . . . . . . . . . . . . . . . . . . . . . . . . . . . . . . . . . . . . . . . . . . . . . . . . . . . . . . . . . . . . 11Public Or Private Profile? . . . . . . . . . . . . . . . . . . . . . . . . . . . . . . . . . . . . . . . . . . . . . . . . . . . . . . . . . . . . . . . . 11Customization of Right Panel . . . . . . . . . . . . . . . . . . . . . . . . . . . . . . . . . . . . . . . . . . . . . . . . . . . . . . . . . . . . . 12Basic Information . . . . . . . . . . . . . . . . . . . . . . . . . . . . . . . . . . . . . . . . . . . . . . . . . . . . . . . . . . . . . . . . . . . . . . 12Customization. . . . . . . . . . . . . . . . . . . . . . . . . . . . . . . . . . . . . . . . . . . . . . . . . . . . . . . . . . . . . . . . . . . . . . . . . 13Showcase . . . . . . . . . . . . . . . . . . . . . . . . . . . . . . . . . . . . . . . . . . . . . . . . . . . . . . . . . . . . . . . . . . . . . . . . . . . . 14Password Change. . . . . . . . . . . . . . . . . . . . . . . . . . . . . . . . . . . . . . . . . . . . . . . . . . . . . . . . . . . . . . . . . . . . . . 15
View a Person’s Basic Profile or Follow or Unfollow That Person . . . . . . . . . . . . . . . . . . . . . . . . . . . . . . . . . . . . . 16
View tibbr . . . . . . . . . . . . . . . . . . . . . . . . . . . . . . . . . . . . . . . . . . . . . . . . . . . . . . . . . . . . . . . . . . . . . . . . . . . . . . . . 17
tibbr, tibbr Service, tibbr Community, and tibbr Community Service How-To Guide

iv | Contents
Top . . . . . . . . . . . . . . . . . . . . . . . . . . . . . . . . . . . . . . . . . . . . . . . . . . . . . . . . . . . . . . . . . . . . . . . . . . . . . . . . . 17Left Panel. . . . . . . . . . . . . . . . . . . . . . . . . . . . . . . . . . . . . . . . . . . . . . . . . . . . . . . . . . . . . . . . . . . . . . . . . . . . 18My Wall . . . . . . . . . . . . . . . . . . . . . . . . . . . . . . . . . . . . . . . . . . . . . . . . . . . . . . . . . . . . . . . . . . . . . . . . . . . . . 20Right Panel . . . . . . . . . . . . . . . . . . . . . . . . . . . . . . . . . . . . . . . . . . . . . . . . . . . . . . . . . . . . . . . . . . . . . . . . . . 20
Search for Subjects, People, and Posts . . . . . . . . . . . . . . . . . . . . . . . . . . . . . . . . . . . . . . . . . . . . . . . . . . . . . . . . 22
Chapter 2 Posts . . . . . . . . . . . . . . . . . . . . . . . . . . . . . . . . . . . . . . . . . . . . . . . . . . . . . . . . . . . . . . . 23
Post on tibbr . . . . . . . . . . . . . . . . . . . . . . . . . . . . . . . . . . . . . . . . . . . . . . . . . . . . . . . . . . . . . . . . . . . . . . . . . . . . . 24Understand the Scenarios for Public and Private Posts . . . . . . . . . . . . . . . . . . . . . . . . . . . . . . . . . . . . . . . . 25Post With Your Location . . . . . . . . . . . . . . . . . . . . . . . . . . . . . . . . . . . . . . . . . . . . . . . . . . . . . . . . . . . . . . . . . 26Attach Files or Add Links . . . . . . . . . . . . . . . . . . . . . . . . . . . . . . . . . . . . . . . . . . . . . . . . . . . . . . . . . . . . . . . . 27
Reply to a Post Or to a Reply . . . . . . . . . . . . . . . . . . . . . . . . . . . . . . . . . . . . . . . . . . . . . . . . . . . . . . . . . . . . . . . . 29
Like Or Unlike a Post. . . . . . . . . . . . . . . . . . . . . . . . . . . . . . . . . . . . . . . . . . . . . . . . . . . . . . . . . . . . . . . . . . . . . . . 30
Mark a Post With a Star . . . . . . . . . . . . . . . . . . . . . . . . . . . . . . . . . . . . . . . . . . . . . . . . . . . . . . . . . . . . . . . . . . . . 31
Perform Other Post-Related Tasks . . . . . . . . . . . . . . . . . . . . . . . . . . . . . . . . . . . . . . . . . . . . . . . . . . . . . . . . . . . . 32Copy Link . . . . . . . . . . . . . . . . . . . . . . . . . . . . . . . . . . . . . . . . . . . . . . . . . . . . . . . . . . . . . . . . . . . . . . . . . . . . 32Email Link . . . . . . . . . . . . . . . . . . . . . . . . . . . . . . . . . . . . . . . . . . . . . . . . . . . . . . . . . . . . . . . . . . . . . . . . . . . 32Add Recipients. . . . . . . . . . . . . . . . . . . . . . . . . . . . . . . . . . . . . . . . . . . . . . . . . . . . . . . . . . . . . . . . . . . . . . . . 33Hide or Show a Post . . . . . . . . . . . . . . . . . . . . . . . . . . . . . . . . . . . . . . . . . . . . . . . . . . . . . . . . . . . . . . . . . . . 33
Share a Web Page as a tibbr Post . . . . . . . . . . . . . . . . . . . . . . . . . . . . . . . . . . . . . . . . . . . . . . . . . . . . . . . . . . . . 34
Publish a Post as a Subject Announcement . . . . . . . . . . . . . . . . . . . . . . . . . . . . . . . . . . . . . . . . . . . . . . . . . . . . . 35
Delete a Post Or Reply . . . . . . . . . . . . . . . . . . . . . . . . . . . . . . . . . . . . . . . . . . . . . . . . . . . . . . . . . . . . . . . . . . . . . 36
Delete a Subject From a Post . . . . . . . . . . . . . . . . . . . . . . . . . . . . . . . . . . . . . . . . . . . . . . . . . . . . . . . . . . . . . . . . 37
Understand Message Streams and Manage Custom Filters . . . . . . . . . . . . . . . . . . . . . . . . . . . . . . . . . . . . . . . . 38Understand Default Message Streams . . . . . . . . . . . . . . . . . . . . . . . . . . . . . . . . . . . . . . . . . . . . . . . . . . . . . 38Create Custom Filters . . . . . . . . . . . . . . . . . . . . . . . . . . . . . . . . . . . . . . . . . . . . . . . . . . . . . . . . . . . . . . . . . . 38
Create a Poll . . . . . . . . . . . . . . . . . . . . . . . . . . . . . . . . . . . . . . . . . . . . . . . . . . . . . . . . . . . . . . . . . . . . . . . . . . . . . 43
Work With Communities . . . . . . . . . . . . . . . . . . . . . . . . . . . . . . . . . . . . . . . . . . . . . . . . . . . . . . . . . . . . . . . . . . . . 45Sign In to a Community . . . . . . . . . . . . . . . . . . . . . . . . . . . . . . . . . . . . . . . . . . . . . . . . . . . . . . . . . . . . . . . . . 45Forward a Post from Your Wall to a Community. . . . . . . . . . . . . . . . . . . . . . . . . . . . . . . . . . . . . . . . . . . . . . . 46Forward a Post from a Community Wall to Your Wall. . . . . . . . . . . . . . . . . . . . . . . . . . . . . . . . . . . . . . . . . . . 46
Chapter 3 Subjects . . . . . . . . . . . . . . . . . . . . . . . . . . . . . . . . . . . . . . . . . . . . . . . . . . . . . . . . . . . . . 47
Explore Subjects . . . . . . . . . . . . . . . . . . . . . . . . . . . . . . . . . . . . . . . . . . . . . . . . . . . . . . . . . . . . . . . . . . . . . . . . . . 48Subject Names . . . . . . . . . . . . . . . . . . . . . . . . . . . . . . . . . . . . . . . . . . . . . . . . . . . . . . . . . . . . . . . . . . . . . . . 48Subject Hierarchy and Rules . . . . . . . . . . . . . . . . . . . . . . . . . . . . . . . . . . . . . . . . . . . . . . . . . . . . . . . . . . . . . 49Subject Search . . . . . . . . . . . . . . . . . . . . . . . . . . . . . . . . . . . . . . . . . . . . . . . . . . . . . . . . . . . . . . . . . . . . . . . 49Broadcast Subjects . . . . . . . . . . . . . . . . . . . . . . . . . . . . . . . . . . . . . . . . . . . . . . . . . . . . . . . . . . . . . . . . . . . . 50
Create, Edit, Move, or Delete Subjects . . . . . . . . . . . . . . . . . . . . . . . . . . . . . . . . . . . . . . . . . . . . . . . . . . . . . . . . . 51Create a Subject . . . . . . . . . . . . . . . . . . . . . . . . . . . . . . . . . . . . . . . . . . . . . . . . . . . . . . . . . . . . . . . . . . . . . . 51
tibbr, tibbr Service, tibbr Community, and tibbr Community Service How-To Guide
Contents | v
Create a Subsubject . . . . . . . . . . . . . . . . . . . . . . . . . . . . . . . . . . . . . . . . . . . . . . . . . . . . . . . . . . . . . . . . . . . . 52Edit a Subject . . . . . . . . . . . . . . . . . . . . . . . . . . . . . . . . . . . . . . . . . . . . . . . . . . . . . . . . . . . . . . . . . . . . . . . . . 53Move a Subject . . . . . . . . . . . . . . . . . . . . . . . . . . . . . . . . . . . . . . . . . . . . . . . . . . . . . . . . . . . . . . . . . . . . . . . . 53Delete a Subject . . . . . . . . . . . . . . . . . . . . . . . . . . . . . . . . . . . . . . . . . . . . . . . . . . . . . . . . . . . . . . . . . . . . . . . 53
Control Access to Subjects . . . . . . . . . . . . . . . . . . . . . . . . . . . . . . . . . . . . . . . . . . . . . . . . . . . . . . . . . . . . . . . . . . 55Manage Followers . . . . . . . . . . . . . . . . . . . . . . . . . . . . . . . . . . . . . . . . . . . . . . . . . . . . . . . . . . . . . . . . . . . . . 55Remove Followers . . . . . . . . . . . . . . . . . . . . . . . . . . . . . . . . . . . . . . . . . . . . . . . . . . . . . . . . . . . . . . . . . . . . . 56
Manage Subject Visibility . . . . . . . . . . . . . . . . . . . . . . . . . . . . . . . . . . . . . . . . . . . . . . . . . . . . . . . . . . . . . . . . . . . . 57
Follow Subjects . . . . . . . . . . . . . . . . . . . . . . . . . . . . . . . . . . . . . . . . . . . . . . . . . . . . . . . . . . . . . . . . . . . . . . . . . . . 58Suggest a Subject to People . . . . . . . . . . . . . . . . . . . . . . . . . . . . . . . . . . . . . . . . . . . . . . . . . . . . . . . . . . . . . 58Pause or Restart a Subscription. . . . . . . . . . . . . . . . . . . . . . . . . . . . . . . . . . . . . . . . . . . . . . . . . . . . . . . . . . . 59Unfollow a Subject . . . . . . . . . . . . . . . . . . . . . . . . . . . . . . . . . . . . . . . . . . . . . . . . . . . . . . . . . . . . . . . . . . . . . 59
Manage Subject Owners . . . . . . . . . . . . . . . . . . . . . . . . . . . . . . . . . . . . . . . . . . . . . . . . . . . . . . . . . . . . . . . . . . . . 60
Post to Subjects by Email . . . . . . . . . . . . . . . . . . . . . . . . . . . . . . . . . . . . . . . . . . . . . . . . . . . . . . . . . . . . . . . . . . . 61
Make Announcements on Subjects . . . . . . . . . . . . . . . . . . . . . . . . . . . . . . . . . . . . . . . . . . . . . . . . . . . . . . . . . . . . 62
Manage Groups for Subjects . . . . . . . . . . . . . . . . . . . . . . . . . . . . . . . . . . . . . . . . . . . . . . . . . . . . . . . . . . . . . . . . . 63
Set Up Alerts for Subject Posts . . . . . . . . . . . . . . . . . . . . . . . . . . . . . . . . . . . . . . . . . . . . . . . . . . . . . . . . . . . . . . . 64
View Details by Subject Timeline. . . . . . . . . . . . . . . . . . . . . . . . . . . . . . . . . . . . . . . . . . . . . . . . . . . . . . . . . . . . . . 65
Incorporate External Content into Subjects . . . . . . . . . . . . . . . . . . . . . . . . . . . . . . . . . . . . . . . . . . . . . . . . . . . . . . 66Incorporate Content and Add Language . . . . . . . . . . . . . . . . . . . . . . . . . . . . . . . . . . . . . . . . . . . . . . . . . . . . 66Update Page Names and URLs . . . . . . . . . . . . . . . . . . . . . . . . . . . . . . . . . . . . . . . . . . . . . . . . . . . . . . . . . . . 67
Chapter 4 People . . . . . . . . . . . . . . . . . . . . . . . . . . . . . . . . . . . . . . . . . . . . . . . . . . . . . . . . . . . . . . .69
Explore People. . . . . . . . . . . . . . . . . . . . . . . . . . . . . . . . . . . . . . . . . . . . . . . . . . . . . . . . . . . . . . . . . . . . . . . . . . . . 70All People . . . . . . . . . . . . . . . . . . . . . . . . . . . . . . . . . . . . . . . . . . . . . . . . . . . . . . . . . . . . . . . . . . . . . . . . . . . . 70My Connections . . . . . . . . . . . . . . . . . . . . . . . . . . . . . . . . . . . . . . . . . . . . . . . . . . . . . . . . . . . . . . . . . . . . . . . 70
Follow a Person . . . . . . . . . . . . . . . . . . . . . . . . . . . . . . . . . . . . . . . . . . . . . . . . . . . . . . . . . . . . . . . . . . . . . . . . . . . 71
Stop Following a Person . . . . . . . . . . . . . . . . . . . . . . . . . . . . . . . . . . . . . . . . . . . . . . . . . . . . . . . . . . . . . . . . . . . . 72
Chapter 5 People Groups . . . . . . . . . . . . . . . . . . . . . . . . . . . . . . . . . . . . . . . . . . . . . . . . . . . . . . . .73
Create a People Group . . . . . . . . . . . . . . . . . . . . . . . . . . . . . . . . . . . . . . . . . . . . . . . . . . . . . . . . . . . . . . . . . . . . . 74
Specify the Members of a People Group . . . . . . . . . . . . . . . . . . . . . . . . . . . . . . . . . . . . . . . . . . . . . . . . . . . . . . . . 75
Edit a People Group. . . . . . . . . . . . . . . . . . . . . . . . . . . . . . . . . . . . . . . . . . . . . . . . . . . . . . . . . . . . . . . . . . . . . . . . 76
Add Owners to a People Group . . . . . . . . . . . . . . . . . . . . . . . . . . . . . . . . . . . . . . . . . . . . . . . . . . . . . . . . . . . . . . . 77
Delete a People Group . . . . . . . . . . . . . . . . . . . . . . . . . . . . . . . . . . . . . . . . . . . . . . . . . . . . . . . . . . . . . . . . . . . . . 78
Access, Learn About, Or View the Members of a People Group. . . . . . . . . . . . . . . . . . . . . . . . . . . . . . . . . . . . . . 79
Chapter 6 Alerts on New Posts. . . . . . . . . . . . . . . . . . . . . . . . . . . . . . . . . . . . . . . . . . . . . . . . . . . .81
Register Your Email Address . . . . . . . . . . . . . . . . . . . . . . . . . . . . . . . . . . . . . . . . . . . . . . . . . . . . . . . . . . . . . . . . . 82
tibbr, tibbr Service, tibbr Community, and tibbr Community Service How-To Guide
vi | Contents
Schedule Delivery . . . . . . . . . . . . . . . . . . . . . . . . . . . . . . . . . . . . . . . . . . . . . . . . . . . . . . . . . . . . . . . . . . . . . . . . . 83
Respond to Posts by Email . . . . . . . . . . . . . . . . . . . . . . . . . . . . . . . . . . . . . . . . . . . . . . . . . . . . . . . . . . . . . . . . . . 85
Delete a Message-Delivery Channel. . . . . . . . . . . . . . . . . . . . . . . . . . . . . . . . . . . . . . . . . . . . . . . . . . . . . . . . . . . 86
Pause or Resume a Channel . . . . . . . . . . . . . . . . . . . . . . . . . . . . . . . . . . . . . . . . . . . . . . . . . . . . . . . . . . . . . . . . 87
Chapter 7 tibbr Events . . . . . . . . . . . . . . . . . . . . . . . . . . . . . . . . . . . . . . . . . . . . . . . . . . . . . . . . . . 89
Post an Event . . . . . . . . . . . . . . . . . . . . . . . . . . . . . . . . . . . . . . . . . . . . . . . . . . . . . . . . . . . . . . . . . . . . . . . . . . . . 90
Reply to an Event . . . . . . . . . . . . . . . . . . . . . . . . . . . . . . . . . . . . . . . . . . . . . . . . . . . . . . . . . . . . . . . . . . . . . . . . . 91
Chapter 8 Apps . . . . . . . . . . . . . . . . . . . . . . . . . . . . . . . . . . . . . . . . . . . . . . . . . . . . . . . . . . . . . . . . 93
Understand Apps . . . . . . . . . . . . . . . . . . . . . . . . . . . . . . . . . . . . . . . . . . . . . . . . . . . . . . . . . . . . . . . . . . . . . . . . . 94
Work With tibbr Files . . . . . . . . . . . . . . . . . . . . . . . . . . . . . . . . . . . . . . . . . . . . . . . . . . . . . . . . . . . . . . . . . . . . . . . 95Enable File-Service Providers . . . . . . . . . . . . . . . . . . . . . . . . . . . . . . . . . . . . . . . . . . . . . . . . . . . . . . . . . . . . 95View Files. . . . . . . . . . . . . . . . . . . . . . . . . . . . . . . . . . . . . . . . . . . . . . . . . . . . . . . . . . . . . . . . . . . . . . . . . . . . 95Search for Files . . . . . . . . . . . . . . . . . . . . . . . . . . . . . . . . . . . . . . . . . . . . . . . . . . . . . . . . . . . . . . . . . . . . . . . 96Upload Files . . . . . . . . . . . . . . . . . . . . . . . . . . . . . . . . . . . . . . . . . . . . . . . . . . . . . . . . . . . . . . . . . . . . . . . . . . 96Preview Files . . . . . . . . . . . . . . . . . . . . . . . . . . . . . . . . . . . . . . . . . . . . . . . . . . . . . . . . . . . . . . . . . . . . . . . . . 97Download Files . . . . . . . . . . . . . . . . . . . . . . . . . . . . . . . . . . . . . . . . . . . . . . . . . . . . . . . . . . . . . . . . . . . . . . . 97Share Files. . . . . . . . . . . . . . . . . . . . . . . . . . . . . . . . . . . . . . . . . . . . . . . . . . . . . . . . . . . . . . . . . . . . . . . . . . . 97Copy File Links . . . . . . . . . . . . . . . . . . . . . . . . . . . . . . . . . . . . . . . . . . . . . . . . . . . . . . . . . . . . . . . . . . . . . . . 98View Properties . . . . . . . . . . . . . . . . . . . . . . . . . . . . . . . . . . . . . . . . . . . . . . . . . . . . . . . . . . . . . . . . . . . . . . . 98Comment on Files . . . . . . . . . . . . . . . . . . . . . . . . . . . . . . . . . . . . . . . . . . . . . . . . . . . . . . . . . . . . . . . . . . . . . 98Filter Shared Files . . . . . . . . . . . . . . . . . . . . . . . . . . . . . . . . . . . . . . . . . . . . . . . . . . . . . . . . . . . . . . . . . . . . . 98
Work With the tibbr Ideas App . . . . . . . . . . . . . . . . . . . . . . . . . . . . . . . . . . . . . . . . . . . . . . . . . . . . . . . . . . . . . . 100Understand the Roles . . . . . . . . . . . . . . . . . . . . . . . . . . . . . . . . . . . . . . . . . . . . . . . . . . . . . . . . . . . . . . . . . 100Access the App . . . . . . . . . . . . . . . . . . . . . . . . . . . . . . . . . . . . . . . . . . . . . . . . . . . . . . . . . . . . . . . . . . . . . . 101Search for Ideas. . . . . . . . . . . . . . . . . . . . . . . . . . . . . . . . . . . . . . . . . . . . . . . . . . . . . . . . . . . . . . . . . . . . . . 101Sort or Filter Ideas . . . . . . . . . . . . . . . . . . . . . . . . . . . . . . . . . . . . . . . . . . . . . . . . . . . . . . . . . . . . . . . . . . . . 101Create and Manage Ideas . . . . . . . . . . . . . . . . . . . . . . . . . . . . . . . . . . . . . . . . . . . . . . . . . . . . . . . . . . . . . . 102Vote For, Comment On, Like, or Share Ideas . . . . . . . . . . . . . . . . . . . . . . . . . . . . . . . . . . . . . . . . . . . . . . . 104Perform Administrator Tasks . . . . . . . . . . . . . . . . . . . . . . . . . . . . . . . . . . . . . . . . . . . . . . . . . . . . . . . . . . . . 105
Work With tibbr Tasks . . . . . . . . . . . . . . . . . . . . . . . . . . . . . . . . . . . . . . . . . . . . . . . . . . . . . . . . . . . . . . . . . . . . . 111Enable and Launch the App. . . . . . . . . . . . . . . . . . . . . . . . . . . . . . . . . . . . . . . . . . . . . . . . . . . . . . . . . . . . . 111View Projects . . . . . . . . . . . . . . . . . . . . . . . . . . . . . . . . . . . . . . . . . . . . . . . . . . . . . . . . . . . . . . . . . . . . . . . . 111Manage Projects . . . . . . . . . . . . . . . . . . . . . . . . . . . . . . . . . . . . . . . . . . . . . . . . . . . . . . . . . . . . . . . . . . . . . 113Invite Colleagues . . . . . . . . . . . . . . . . . . . . . . . . . . . . . . . . . . . . . . . . . . . . . . . . . . . . . . . . . . . . . . . . . . . . . 114Manage Task Lists . . . . . . . . . . . . . . . . . . . . . . . . . . . . . . . . . . . . . . . . . . . . . . . . . . . . . . . . . . . . . . . . . . . . 114
Work With Apps Developed by Your Company . . . . . . . . . . . . . . . . . . . . . . . . . . . . . . . . . . . . . . . . . . . . . . . . . . 118
Work With Event Streams . . . . . . . . . . . . . . . . . . . . . . . . . . . . . . . . . . . . . . . . . . . . . . . . . . . . . . . . . . . . . . . . . . 119Configure an RSS App . . . . . . . . . . . . . . . . . . . . . . . . . . . . . . . . . . . . . . . . . . . . . . . . . . . . . . . . . . . . . . . . 123Configure a Salesforce App . . . . . . . . . . . . . . . . . . . . . . . . . . . . . . . . . . . . . . . . . . . . . . . . . . . . . . . . . . . . . 125
tibbr, tibbr Service, tibbr Community, and tibbr Community Service How-To Guide
Contents | vii
Configure an SAP App . . . . . . . . . . . . . . . . . . . . . . . . . . . . . . . . . . . . . . . . . . . . . . . . . . . . . . . . . . . . . . . . . 130Configure the Oracle Expenses App . . . . . . . . . . . . . . . . . . . . . . . . . . . . . . . . . . . . . . . . . . . . . . . . . . . . . . 134Set Up and Work With the Voice Memo App . . . . . . . . . . . . . . . . . . . . . . . . . . . . . . . . . . . . . . . . . . . . . . . . 135
Work With Social Apps . . . . . . . . . . . . . . . . . . . . . . . . . . . . . . . . . . . . . . . . . . . . . . . . . . . . . . . . . . . . . . . . . . . . 138Create a Social App . . . . . . . . . . . . . . . . . . . . . . . . . . . . . . . . . . . . . . . . . . . . . . . . . . . . . . . . . . . . . . . . . . . 139Disable a Social App. . . . . . . . . . . . . . . . . . . . . . . . . . . . . . . . . . . . . . . . . . . . . . . . . . . . . . . . . . . . . . . . . . . 141
Chapter 9 tibbr Meetings. . . . . . . . . . . . . . . . . . . . . . . . . . . . . . . . . . . . . . . . . . . . . . . . . . . . . . . .143
Enable Google+ Hangouts. . . . . . . . . . . . . . . . . . . . . . . . . . . . . . . . . . . . . . . . . . . . . . . . . . . . . . . . . . . . . . . . . . 144
Set Up a Future Meeting . . . . . . . . . . . . . . . . . . . . . . . . . . . . . . . . . . . . . . . . . . . . . . . . . . . . . . . . . . . . . . . . . . . 145On WebEx . . . . . . . . . . . . . . . . . . . . . . . . . . . . . . . . . . . . . . . . . . . . . . . . . . . . . . . . . . . . . . . . . . . . . . . . . . 145On Google+ Hangouts . . . . . . . . . . . . . . . . . . . . . . . . . . . . . . . . . . . . . . . . . . . . . . . . . . . . . . . . . . . . . . . . . 148On Skype . . . . . . . . . . . . . . . . . . . . . . . . . . . . . . . . . . . . . . . . . . . . . . . . . . . . . . . . . . . . . . . . . . . . . . . . . . . 150
Set Up an Instantaneous Meeting . . . . . . . . . . . . . . . . . . . . . . . . . . . . . . . . . . . . . . . . . . . . . . . . . . . . . . . . . . . . 153On WebEx . . . . . . . . . . . . . . . . . . . . . . . . . . . . . . . . . . . . . . . . . . . . . . . . . . . . . . . . . . . . . . . . . . . . . . . . . . 153On Google+ Hangouts . . . . . . . . . . . . . . . . . . . . . . . . . . . . . . . . . . . . . . . . . . . . . . . . . . . . . . . . . . . . . . . . . 155On Skype . . . . . . . . . . . . . . . . . . . . . . . . . . . . . . . . . . . . . . . . . . . . . . . . . . . . . . . . . . . . . . . . . . . . . . . . . . . 157
Chapter 10 tibbr Chat . . . . . . . . . . . . . . . . . . . . . . . . . . . . . . . . . . . . . . . . . . . . . . . . . . . . . . . . . .161
Explore the Chat Window . . . . . . . . . . . . . . . . . . . . . . . . . . . . . . . . . . . . . . . . . . . . . . . . . . . . . . . . . . . . . . . . . . 162Go Offline . . . . . . . . . . . . . . . . . . . . . . . . . . . . . . . . . . . . . . . . . . . . . . . . . . . . . . . . . . . . . . . . . . . . . . . . . . . 162Go Online . . . . . . . . . . . . . . . . . . . . . . . . . . . . . . . . . . . . . . . . . . . . . . . . . . . . . . . . . . . . . . . . . . . . . . . . . . . 162Play or Mute Sounds . . . . . . . . . . . . . . . . . . . . . . . . . . . . . . . . . . . . . . . . . . . . . . . . . . . . . . . . . . . . . . . . . . 162
Start a Chat . . . . . . . . . . . . . . . . . . . . . . . . . . . . . . . . . . . . . . . . . . . . . . . . . . . . . . . . . . . . . . . . . . . . . . . . . . . . . 163
Review Chat Archives . . . . . . . . . . . . . . . . . . . . . . . . . . . . . . . . . . . . . . . . . . . . . . . . . . . . . . . . . . . . . . . . . . . . . 164
Chapter 11 SharePoint Content in tibbr. . . . . . . . . . . . . . . . . . . . . . . . . . . . . . . . . . . . . . . . . . . .165
Upload Files to SharePoint from tibbr . . . . . . . . . . . . . . . . . . . . . . . . . . . . . . . . . . . . . . . . . . . . . . . . . . . . . . . . . 166
Browse SharePoint Content in tibbr . . . . . . . . . . . . . . . . . . . . . . . . . . . . . . . . . . . . . . . . . . . . . . . . . . . . . . . . . . . 168
Search for SharePoint Documents in tibbr. . . . . . . . . . . . . . . . . . . . . . . . . . . . . . . . . . . . . . . . . . . . . . . . . . . . . . 169
Chapter 12 Analytics . . . . . . . . . . . . . . . . . . . . . . . . . . . . . . . . . . . . . . . . . . . . . . . . . . . . . . . . . . .171
What’s Happening . . . . . . . . . . . . . . . . . . . . . . . . . . . . . . . . . . . . . . . . . . . . . . . . . . . . . . . . . . . . . . . . . . . . . . . . 172
Leaderboards. . . . . . . . . . . . . . . . . . . . . . . . . . . . . . . . . . . . . . . . . . . . . . . . . . . . . . . . . . . . . . . . . . . . . . . . . . . . 175
Index . . . . . . . . . . . . . . . . . . . . . . . . . . . . . . . . . . . . . . . . . . . . . . . . . . . . . . . . . . . . . . . . . . . . . . . . .177
tibbr, tibbr Service, tibbr Community, and tibbr Community Service How-To Guide

viii | Contents
tibbr, tibbr Service, tibbr Community, and tibbr Community Service How-To Guide

| ix
Preface
tibbr® is the first workplace communication tool with which you can follow subjects that relate to your work and interests besides following people as you do in typical social networking applications. That way, you have much more flexibility in obtaining the right information at the right time in the right context. In fact, the information will find you.
Topics
• Related Documentation, page x
• Typographical Conventions, page xi
• TIBCO Resources, page xiv
tibbr, tibbr Service, tibbr Community, and tibbr Community Service How-To Guide
x | Related Documentation
Related Documentation
This section lists documentation resources you might find useful.
tibbr DocumentationThe following documents form the tibbr documentation set:
• tibbr, tibbr Service, tibbr Community, tibbr Community Service Installation and Configuration This manual, also available in both PDF and HTML, is targeted for administrators of tibbr deployments. It describes the procedures for installing and configuring tibbr.
• tibbr, tibbr Service, tibbr Community, and tibbr Community Service How-To Guide This task-oriented guide tells you how to use tibbr. The topics include following and posting to people and subjects, setting up event streams, and creating subjects. This guide, available in both PDF and HTML, is also accessible through the tibbr Web interface at http://tibbr-host/doc, where tibbr-host is the address of your tibbr installation.
• tibbr Salesforce App: Administration and User Guide This manual, available in both PDF and HTML, describes how to enable, configure, and use the tibbr Salesforce app. Note: This app requires a separate license.
• tibbr, tibbr Service, tibbr Community, and tibbr Community Service Release Notes This document, available in PDF, describes the new and changed features and known and closed issues for the current release.
In addition, the tibbr API Reference manual, previously available as part of the documentation set, now resides in the Developer Center tab in the left panel of the tibbr home page.
Third-Party DocumentationRead about the YAML data serialization standard at http://www.yaml.org/ and http://en.wikipedia.org/wiki/YAML.
tibbr, tibbr Service, tibbr Community, and tibbr Community Service How-To Guide
Preface | xi
Typographical Conventions
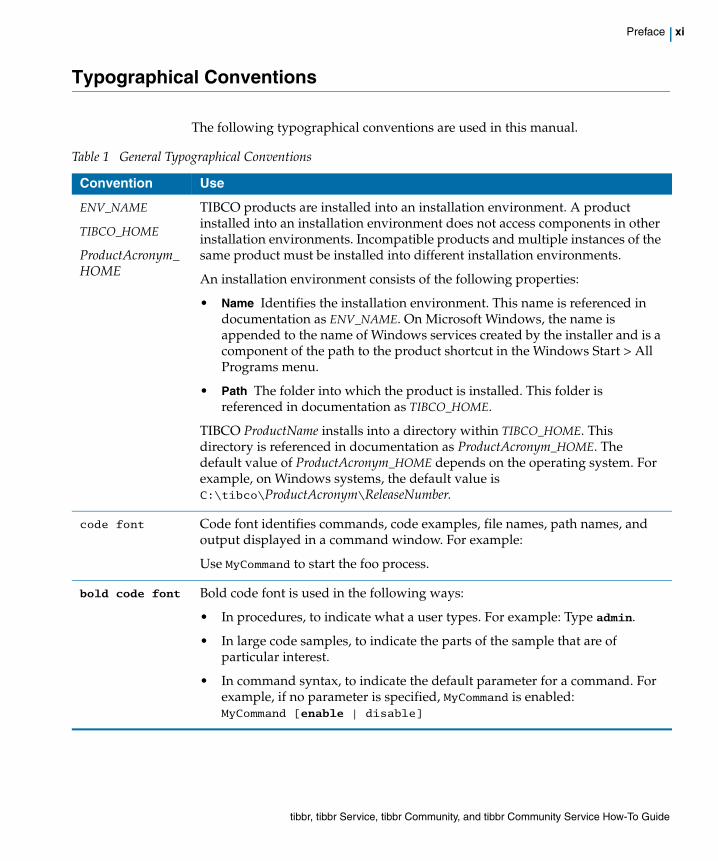
The following typographical conventions are used in this manual.
Table 1 General Typographical Conventions
Convention Use
ENV_NAME
TIBCO_HOME
ProductAcronym_HOME
TIBCO products are installed into an installation environment. A product installed into an installation environment does not access components in other installation environments. Incompatible products and multiple instances of the same product must be installed into different installation environments.
An installation environment consists of the following properties:
• Name Identifies the installation environment. This name is referenced in documentation as ENV_NAME. On Microsoft Windows, the name is appended to the name of Windows services created by the installer and is a component of the path to the product shortcut in the Windows Start > All Programs menu.
• Path The folder into which the product is installed. This folder is referenced in documentation as TIBCO_HOME.
TIBCO ProductName installs into a directory within TIBCO_HOME. This directory is referenced in documentation as ProductAcronym_HOME. The default value of ProductAcronym_HOME depends on the operating system. For example, on Windows systems, the default value is C:\tibco\ProductAcronym\ReleaseNumber.
code font Code font identifies commands, code examples, file names, path names, and output displayed in a command window. For example:
Use MyCommand to start the foo process.
bold code font Bold code font is used in the following ways:
• In procedures, to indicate what a user types. For example: Type admin.
• In large code samples, to indicate the parts of the sample that are of particular interest.
• In command syntax, to indicate the default parameter for a command. For example, if no parameter is specified, MyCommand is enabled: MyCommand [enable | disable]
tibbr, tibbr Service, tibbr Community, and tibbr Community Service How-To Guide
xii | Typographical Conventions
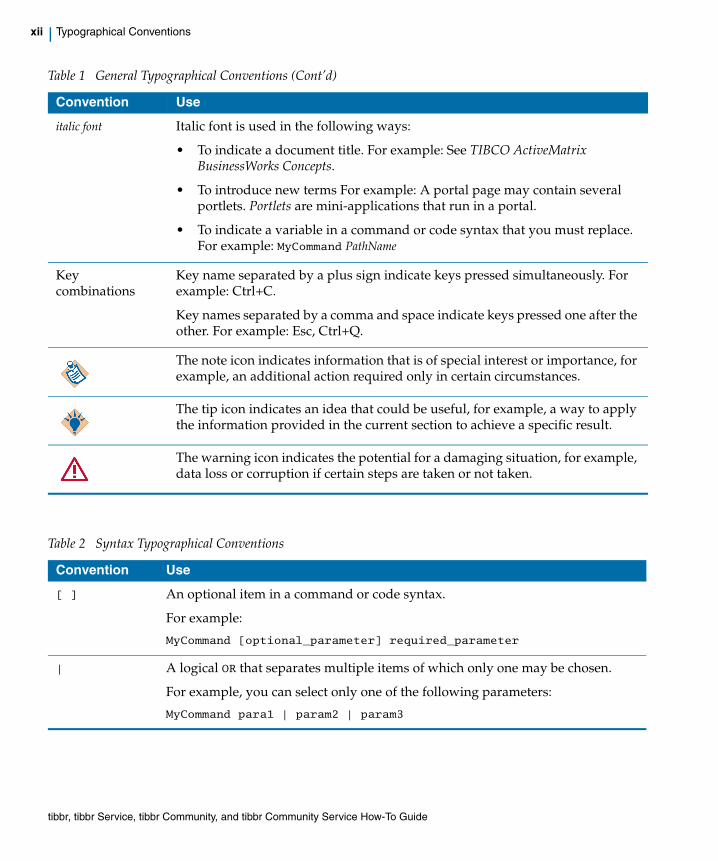
italic font Italic font is used in the following ways:
• To indicate a document title. For example: See TIBCO ActiveMatrix BusinessWorks Concepts.
• To introduce new terms For example: A portal page may contain several portlets. Portlets are mini-applications that run in a portal.
• To indicate a variable in a command or code syntax that you must replace. For example: MyCommand PathName
Key combinations
Key name separated by a plus sign indicate keys pressed simultaneously. For example: Ctrl+C.
Key names separated by a comma and space indicate keys pressed one after the other. For example: Esc, Ctrl+Q.
The note icon indicates information that is of special interest or importance, for example, an additional action required only in certain circumstances.
The tip icon indicates an idea that could be useful, for example, a way to apply the information provided in the current section to achieve a specific result.
The warning icon indicates the potential for a damaging situation, for example, data loss or corruption if certain steps are taken or not taken.
Table 1 General Typographical Conventions (Cont’d)
Convention Use
Table 2 Syntax Typographical Conventions
Convention Use
[ ] An optional item in a command or code syntax.
For example:
MyCommand [optional_parameter] required_parameter
| A logical OR that separates multiple items of which only one may be chosen.
For example, you can select only one of the following parameters:
MyCommand para1 | param2 | param3
tibbr, tibbr Service, tibbr Community, and tibbr Community Service How-To Guide
Preface | xiii
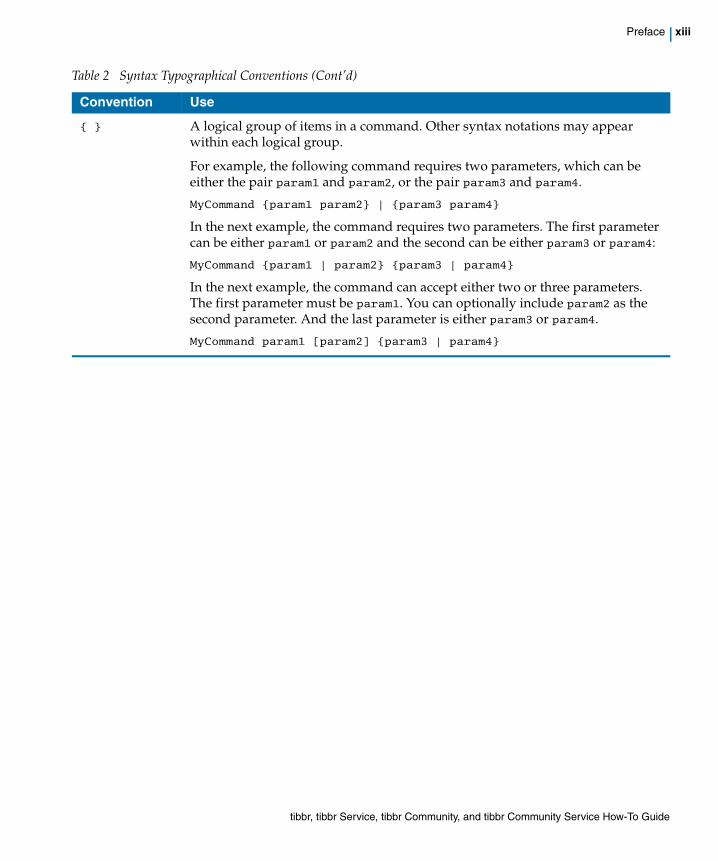
{ } A logical group of items in a command. Other syntax notations may appear within each logical group.
For example, the following command requires two parameters, which can be either the pair param1 and param2, or the pair param3 and param4.
MyCommand {param1 param2} | {param3 param4}
In the next example, the command requires two parameters. The first parameter can be either param1 or param2 and the second can be either param3 or param4:
MyCommand {param1 | param2} {param3 | param4}
In the next example, the command can accept either two or three parameters. The first parameter must be param1. You can optionally include param2 as the second parameter. And the last parameter is either param3 or param4.
MyCommand param1 [param2] {param3 | param4}
Table 2 Syntax Typographical Conventions (Cont’d)
Convention Use
tibbr, tibbr Service, tibbr Community, and tibbr Community Service How-To Guide
xiv | TIBCO Resources
TIBCO Resources
You have three ways in which to connect with TIBCO’s resources.
How to Join TIBCOmmunityTIBCOmmunity is an online destination for TIBCO customers, partners, and resident experts. It is a place to share and access the collective experience of the TIBCO community. TIBCOmmunity offers forums, blogs, and access to a variety of resources. To register, go to http://www.tibcommunity.com.
How to Access TIBCO DocumentationYou can access the documentation for many supported product versions here:
http://docs.tibco.com
How to Contact TIBCO SupportFor comments or problems with this document or the software it addresses, contact TIBCO Support as follows:
• For an overview of TIBCO Support and information about getting started with TIBCO Support, visit this site:
http://www.tibco.com/services/support
• If you already have a valid maintenance or support contract, visit this site:
https://support.tibco.com
Entry to this site requires a user name and password. If you do not have a user name, click Register with Support.
tibbr, tibbr Service, tibbr Community, and tibbr Community Service How-To Guide
| 1
Chapter 1 Navigation in tibbr
This chapter describes the tibbr® layout and shows you how to perform the basic tasks.
Topics
• Access tibbr, page 2
• Create an Account, page 5
• Sign In, page 6
• Sign Out, page 7
• View Your Profile, page 8
• Update Your Profile, page 11
• View a Person’s Basic Profile or Follow or Unfollow That Person, page 16
• View tibbr, page 17
• Search for Subjects, People, and Posts, page 22
tibbr, tibbr Service, tibbr Community, and tibbr Community Service How-To Guide
2 | Chapter 1 Navigation in tibbr
Access tibbr
This section describes how to access tibbr: on the Web, on your desktop, or on your mobile device.
On the WebYou can access the tibbr Web interface from a supported browser: Mozilla Firefox, Windows Internet Explorer, Google Chrome, or Apple Safari.
On Your Desktoptibbr Desktop, a stand-alone native application, enables you to perform the following tibbr tasks:
• Following people or subjects
• Making posts
• Conducting polls
• Setting up calendar events
• Replying to posts
• Chatting
• Adding @ mentions of people names to posts to make those names hyperlinks
• Clicking a notification icon for alerts of noteworthy events, such as replies to your posts
To download tibbr Desktop:
1. Click the tibbr Desktop link under New to tibbr? in the right panel of your home page.
2. In the screen that is displayed, click the leftmost image labeled desktop.
On Your Mobile DeviceYou can access tibbr on a number of mobile devices, on which you can perform the following tibbr tasks:
• Following people or subjects
• Making posts
• Conducting polls
tibbr, tibbr Service, tibbr Community, and tibbr Community Service How-To Guide
Access tibbr | 3
• Setting up calendar events
• Replying to posts
• Chatting
• Displaying the location from which you made a post in the form of a map
• Scrolling posts to view the latest activities
• Viewing the time the posts were created
• Viewing who most recently replied to posts
• Adding @ mentions of people names to posts to make those names hyperlinks
• Adding attachments from any other mobile app to posts
• Sharing links from other apps in posts
iPhone and iPad
Access tibbr on the iPhone, iPod Touch, or iPad with the tibbr app, available through the iTunes store at http://itunes.apple.com/us/app/tibbr/id365376956.
tibbr on the iPhone, iPad Touch, or iPad runs on iOS 4.0 or later versions.
Android
Access tibbr on your Android device with the tibbr app for Android, available through Google play at https://play.google.com/store/apps/details?id=com.tibco.tibbr.android. Depending on your environment, your administrator might have set up a local download for you. Otherwise, to download:
1. Click the link Android under New to tibbr? in the right panel of your home page.
2. Follow the instructions on the page that is displayed.
tibbr on Android runs on Android 2.3 or later versions.
You can respond to polls on mobile devices but cannot create polls there. Similarly, you can respond to events on mobile devices but cannot create events there.
tibbr, tibbr Service, tibbr Community, and tibbr Community Service How-To Guide
4 | Chapter 1 Navigation in tibbr
BlackBerry
Access tibbr on a BlackBerry device with the tibbr app for BlackBerry. Depending on your environment, your administrator might have set up a local download for you. Otherwise, to download:
1. Click the link BlackBerry under New to tibbr? in the right panel of your home page.
2. Follow the instructions on the page that is displayed.
Alternatively, download tibbr on BlackBerry from BlackBerry App World at https://appworld.blackberry.com/webstore/content/20057/?lang=EN.
tibbr on BlackBerry runs on BlackBerry OS 4.5, 5.0, or later versions.
HTML5
tibbr in HTML5 is a Web application for mobile browsers. You can access this application from a browser in your mobile device.
tibbr, tibbr Service, tibbr Community, and tibbr Community Service How-To Guide
Create an Account | 5
Create an Account
To create a tibbr account:
1. Go to the tibbr home page.
2. Click the Sign up now link for the related dialog box.
3. Fill in the fields:
— Email — Type your email address. tibbr then sends an activation message to this address to confirm your registration.
— User Name — Type a name to uniquely identify you in the tibbr community and as part of the login credentials.
— Password — Type the password you would like to use as part of the login credentials.
— Confirm Password — Type the password again.
— First Name — Type your first name.
— Last Name — Type your last name.
tibbr displays your first and last names when you post and reply to posts.
4. Click Sign up.
tibbr displays an error message in case of problems. For example, if the user name you typed is already in use or if the typed text in the Password and Confirm Password fields do not match. You must then type a different user name or password.
Afterwards, tibbr sends you an activation message to your email address to confirm your registration. Click the link in the message to activate your account.
You are now ready to sign in to your new tibbr account.
If your tibbr instance is configured to use LDAP credentials, you do not need to create an account. Just follow the steps in the Sign In section to access tibbr with your LDAP user name and password.
tibbr, tibbr Service, tibbr Community, and tibbr Community Service How-To Guide
6 | Chapter 1 Navigation in tibbr
Sign In
To sign in to tibbr with an existing account:
1. Go to the tibbr home page.
For information on signing in with the iPhone, Android, or BlackBerry applications, see On Your Mobile Device on page 2.
2. Type your user name and password in the related fields.
— If you do not yet have a tibbr account, see Create an Account on page 5.
— If you do not have your account password, click Click here next to Forgot your password?
tibbr then prompts you for the email address associated with your account and sends you the password-reset instructions at that address.
3. Optional. Select Keep me signed in so that you are always signed in until you expressly sign out. Deselecting Keep me signed in means that you must sign in again next time you access your tibbr account.
4. Click Sign In.
tibbr, tibbr Service, tibbr Community, and tibbr Community Service How-To Guide
Sign Out | 7
Sign Out
To sign out of tibbr, choose Log Out from the drop-down menu of your name at the top.
tibbr, tibbr Service, tibbr Community, and tibbr Community Service How-To Guide
8 | Chapter 1 Navigation in tibbr
View Your Profile
Your profile contains six components. To access them, click View My Profile below your picture in the left panel for the My Profile page. Six tabs are displayed at the top: About, Posts, Likes, Influence, Following, and Apps.
View the Basic InformationClicking About displays the following information about you:
• Your profile’s basic information: First Name, Last Name, Email, and so forth.
• Your specialties along with an Edit link (next to the My Profile title near the top) to the Edit Profile page.
• Your reporting structure (you, your manager, and the ranks above, if applicable) along with a link, Go to Hierarchy Page, clicking which enables you to view the reporting hierarchy.
For details on editing your profile, see Update Your Profile on page 11.
View Your PostsTo see all your posts, click Posts.
View the Posts You LikedTo see all the posts whose Like links you have clicked, click Likes.
Find Out Whom and Which Subjects You Are Following and Your FollowersTo see the people and subjects you are following and your followers along with a total count, click Following. Click a picture or an icon to go to the page in question.
Access Your Influence Score and Related People and SubjectsThe tibbr influence score measures how influential you are within a tibbr network. Behind the scenes is a proprietary algorithm that aggregates your contribution to the network and a subsequent calculation of the effect your actions have on conversations, subjects, and other users.
tibbr, tibbr Service, tibbr Community, and tibbr Community Service How-To Guide
View Your Profile | 9
Clicking Influence displays your influence score, the change from last week, and your scores over the past three weeks in a graph. Also listed are the people and subjects you have influenced the most.
List Your Company AppsFor a list of your company’s apps you can access, click My Company Apps. To go to an app, click See Details in the app pane in question.
tibbr, tibbr Service, tibbr Community, and tibbr Community Service How-To Guide
10 | Chapter 1 Navigation in tibbr
Specify Your Availability Status
While on tibbr, you can specify your availability status. Follow these steps:
1. Mouse over your picture or the placeholder image in the left panel of your home page.
tibbr displays a pane that shows the number of your followers and those you are following, as well as your current status.
2. Mouse over Update Your Status in the pane.
The Update Your Status Message text field is displayed with your current status.
3. Type your new status in the text field, for example, “I’m in my office.” Click Update.
tibbr shows your entry in the pane. Also, if someone mouses over your profile image on his or her wall, tibbr displays a pane with your availability status and other details.
tibbr, tibbr Service, tibbr Community, and tibbr Community Service How-To Guide
Update Your Profile | 11
Update Your Profile
To edit your profile (name, company name, phone number, and other details), do either of the following:
• Choose Edit Profile from your name’s drop-down menu at the top.
• On your home page, click View My Profile below your picture in the left panel of your home page and then click Edit at the top of the My Profile page that is displayed.
The Edit Profile screen is displayed, at the top of which are three tabs: Basic Information, Customization, and Showcase. In addition, a drop-down menu called Customize Sidebar is in the top right corner.
For details on your profile, see Optional. Type the title of the page in the Title field. on page 28.
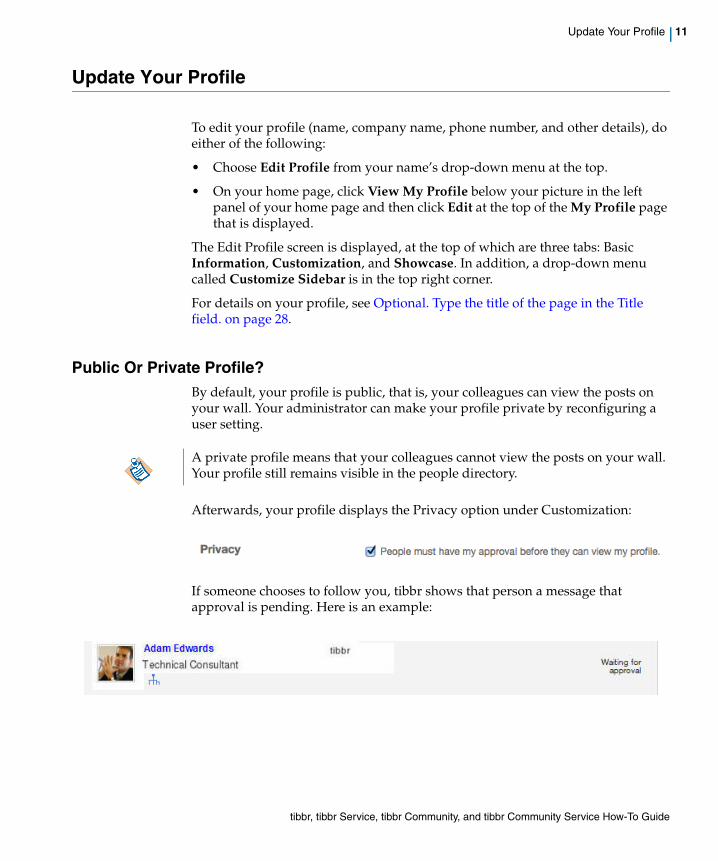
Public Or Private Profile?By default, your profile is public, that is, your colleagues can view the posts on your wall. Your administrator can make your profile private by reconfiguring a user setting.
Afterwards, your profile displays the Privacy option under Customization:
If someone chooses to follow you, tibbr shows that person a message that approval is pending. Here is an example:
A private profile means that your colleagues cannot view the posts on your wall. Your profile still remains visible in the people directory.
tibbr, tibbr Service, tibbr Community, and tibbr Community Service How-To Guide
12 | Chapter 1 Navigation in tibbr
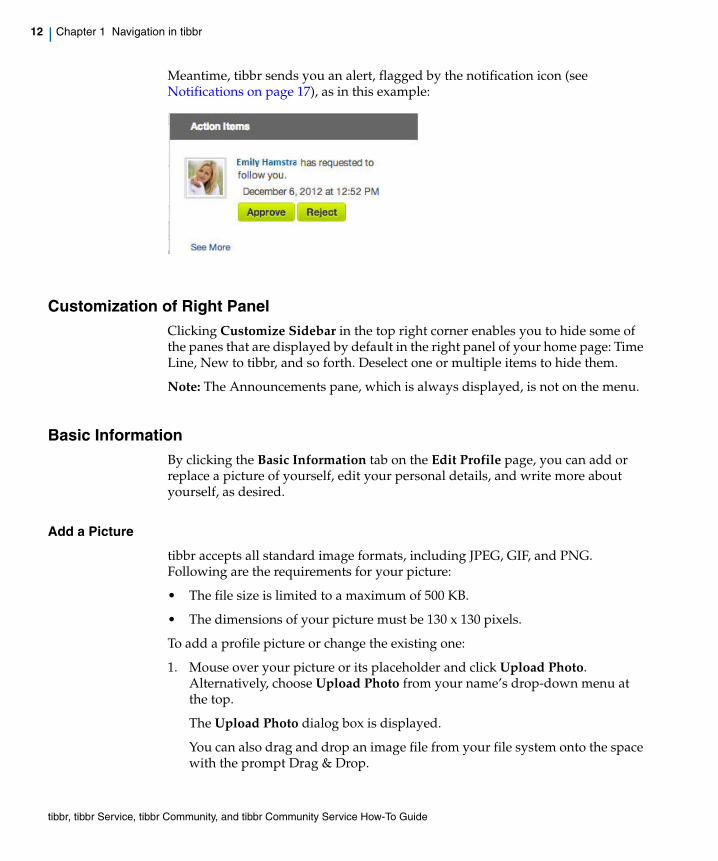
Meantime, tibbr sends you an alert, flagged by the notification icon (see Notifications on page 17), as in this example:
Customization of Right PanelClicking Customize Sidebar in the top right corner enables you to hide some of the panes that are displayed by default in the right panel of your home page: Time Line, New to tibbr, and so forth. Deselect one or multiple items to hide them.
Note: The Announcements pane, which is always displayed, is not on the menu.
Basic InformationBy clicking the Basic Information tab on the Edit Profile page, you can add or replace a picture of yourself, edit your personal details, and write more about yourself, as desired.
Add a Picture
tibbr accepts all standard image formats, including JPEG, GIF, and PNG. Following are the requirements for your picture:
• The file size is limited to a maximum of 500 KB.
• The dimensions of your picture must be 130 x 130 pixels.
To add a profile picture or change the existing one:
1. Mouse over your picture or its placeholder and click Upload Photo. Alternatively, choose Upload Photo from your name’s drop-down menu at the top.
The Upload Photo dialog box is displayed.
You can also drag and drop an image file from your file system onto the space with the prompt Drag & Drop.
tibbr, tibbr Service, tibbr Community, and tibbr Community Service How-To Guide
Update Your Profile | 13
2. Click Browse under Select an image from your computer and, in the file browser that is displayed, navigate to the directory in which the desired picture resides.
3. Select the picture file and click Open or double-click the file.
4. Move the square to crop the image.
Note: This cropping capability works on Internet Explorer 8 and later versions only.
5. Click Save.
Edit Personal Details
To edit your personal information:
1. Edit the information in the fields under Personal Details: First Name, Last Name, and so forth, as appropriate.
2. Optional. Add more details about yourself by typing them in the My Background text field.
3. Click Save.
CustomizationTo further personalize your profile, click Customization at the top of the Edit Profile page and edit the fields that are displayed, as desired:
1. Specify the language of your choice by choosing the appropriate item from the Language drop-down menu.
2. Specify your time zone by choosing the appropriate item from the Time Zone drop-down menu.
3. Type your areas of expertise in the Specialties text field.
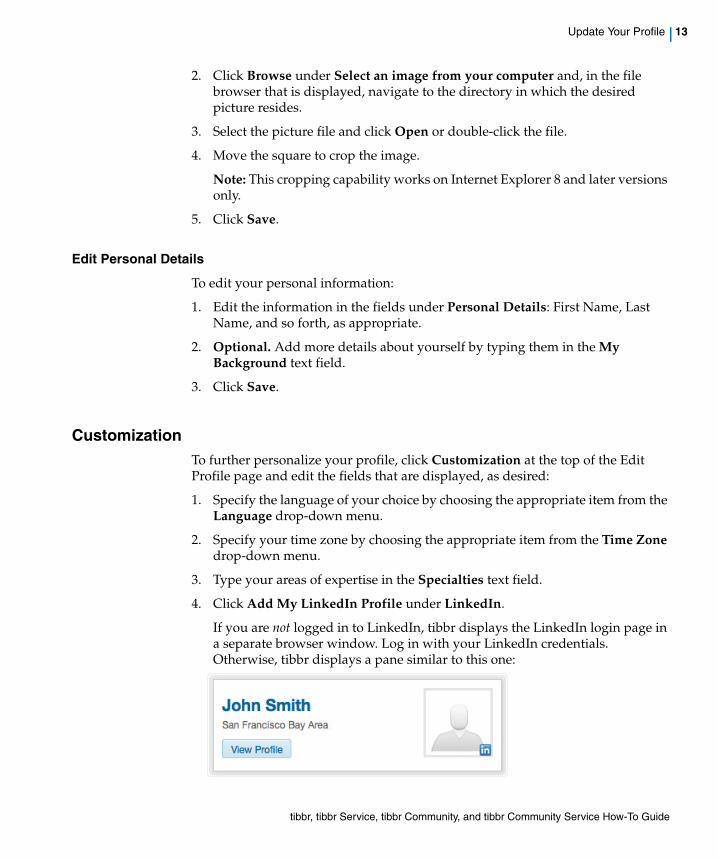
4. Click Add My LinkedIn Profile under LinkedIn.
If you are not logged in to LinkedIn, tibbr displays the LinkedIn login page in a separate browser window. Log in with your LinkedIn credentials. Otherwise, tibbr displays a pane similar to this one:
tibbr, tibbr Service, tibbr Community, and tibbr Community Service How-To Guide
14 | Chapter 1 Navigation in tibbr
Note: For the above pane to become available, your tibbr administrator must configure the LinkedIn app.
5. Under Filter Streams on Wall, select or deselect the options (RSS, Email, Salesforce, and so forth) to show or hide the related posts, as applicable, on your wall.
6. Click Save.
ShowcaseClicking Showcase at the top of the Edit Profile page displays a page to which you can add files or links to highlight your projects, accomplishments, and such.
• To upload a file:
a. Click Add a File under Upload to Your Showcase.
A pane is displayed below.
b. Click Choose File and navigate to the file in the file browser that is displayed. Double-click the file or click Open.
Alternatively, drag and drop your file to the pane with the notation Drag and drop your file here for your showcase.
c. Type a description or name in the Caption text field.
Afterwards tibbr displays the file in icon format under Preview Panel. You can preview the file or delete it by mousing over its icon and then clicking Preview or Delete in the floating menu that is displayed, respectively.
d. Click Add to Showcase.
• To add a link:
a. Click Add a Link under Upload to Your Showcase.
A pane is displayed below.
b. Type the related URL in the URL text field.
c. Type a title in the Title text field.
d. Click Add to Showcase.
Finally, click Save.
tibbr, tibbr Service, tibbr Community, and tibbr Community Service How-To Guide
Update Your Profile | 15
Password Change
To change the password for your tibbr account:
1. Click Change Password below your picture in the left panel or from your name’s drop-down menu at the top.
The Change Password dialog box is displayed.
2. Type your current password in the Current Password field.
3. Type your new password in the New Password and Verify New Password fields.
4. Click Change Password.
Once the password change succeeds, tibbr returns you to your wall.
If your tibbr instance is authenticated through the corporate LDAP directory, you cannot change your password in tibbr.
tibbr, tibbr Service, tibbr Community, and tibbr Community Service How-To Guide
16 | Chapter 1 Navigation in tibbr
View a Person’s Basic Profile or Follow or Unfollow That Person
On mouse-over of a user’s picture on your wall, tibbr displays some of that person’s basic profile information, including the picture (if uploaded), in a pane.
In the same pane, you can follow (or unfollow) that person, post to him or her, or view his or her basic profile in hierarchy view in the company directory.
tibbr, tibbr Service, tibbr Community, and tibbr Community Service How-To Guide
View tibbr | 17
View tibbr
You can access tibbr through a Web browser or on smart devices, such as Android, iPhone, and BlackBerry.
When you first log in, you see the tibbr home page with the current look and feel. By setting certain configuration parameters, your tibbr administrator can switch the interface to the previous version, which features a top navigation bar.
The following sections describe the home page of the Web-based version of tibbr.
TopIn the top right corner are the following:
Search Field
The Search field on the right enables you to find information. Enter keywords in this field and press Enter to find related posts, subjects, or people. tibbr displays a screen below that shows matches to your keywords: people, subjects, or posts.
Alternatively, you can obtain search results by typing keywords in the Quick Search field that is displayed when you mouse over the Subjects, People, or Groups tab in the left panel.
Notifications
The notification icon to the left of the Search field at the top alerts you to noteworthy events, such as the following:
• Requests that are pending your approval, that is, someone asking to follow one or more subjects that you own and that you set up as requiring prior approval for following; or, if your profile is private, someone asking to follow you.
• Posts that are addressed to you
• Replies to your posts
• Replies to the posts that you liked
• Replies to the posts to which you replied
• Replies to the posts you have marked with a star
• Private posts addressed to you
• Likes for your posts and replies
tibbr, tibbr Service, tibbr Community, and tibbr Community Service How-To Guide
18 | Chapter 1 Navigation in tibbr
• New followers of yours
• Suggestions of subjects from one or more people for you to follow
• Addition of your name as a follower of a subject
• Addition of groups as followers of subjects that you own
• Addition of groups—of which you are a member-—as subject followers
Left PanelIn the left panel are the following:
Main Wall
From the Main Wall drop-down menu, you can access the following:
• My Wall — A post feed with the most recent posts made to the people and subjects you follow since you began following them. To view all tibbr posts, keep scrolling or click See More at the bottom. You can further refine which posts are displayed with filters. For details, see Understand Message Streams and Manage Custom Filters on page 38.
• My Posts — The posts you have created.
• Company Stream — All the public posts to which you have access.
• Private Posts — Your private posts.
• Starred Posts — The posts you have marked with a star.
• Chat History — The conversations you have held through chats within tibbr.
• your-name — The posts that mention your name.
Subjects
Mousing over Subjects enables you to search for subjects, explore them, and access those that you follow. For details, see Chapter 3, Subjects.
People
Mousing over People enables you to search for people and explore the walls of the people whom you follow or who are following you. For details, see Chapter 4, People.
tibbr, tibbr Service, tibbr Community, and tibbr Community Service How-To Guide
View tibbr | 19
Apps
Mousing over Apps shows the default applications and any applications you have enabled, also a button called Explore Apps. Clicking that button takes you to the configuration controls for apps. For details, see Chapter 8, Apps.
Meetings
Mousing over Meetings starts the process of setting up meetings through WebEx, Google+ Hangouts, or Skype. For details, see Chapter 9, tibbr Meetings.
Files
Clicking Files starts the process of sharing files from external file-service providers, such as SharePoint, Box, and Google Drive. You can also sort, filter, upload, or download the files. For details, see Work With tibbr Files.
My Filters
Mousing over My Filters shows the custom filters you have created and a button called Manage Filters. Clicking that button takes you to the interface for adding, editing, or deleting filters. For details, see Understand Message Streams and Manage Custom Filters on page 38.
Insight
From the Insight drop-down menu, you can access tibbr’s analytics under the What’s Happening and Leaderboards sections. For details, see Chapter 12, Analytics.
My Communities
Mousing over My Communities lists the communities in other tibbr instances that are available to you.
Developer Center
The tibbr Developer Center contains the reference resources on building apps for tibbr. The resources include documentation on core app concepts, the tibbr APIs, JavaScript APIs, and tutorials. Below each of the API descriptions is a console for testing the API.
This section is visible only after your tibbr administrator has added you to one or more communities.
tibbr, tibbr Service, tibbr Community, and tibbr Community Service How-To Guide
20 | Chapter 1 Navigation in tibbr
My WallDisplayed under My Wall in the center panel are the posts made by the people or on the subjects that you follow. At the top are three tabs: Post, Poll, and Event, which enable you to make posts, set up polls, and post calendar events. Below the Post text field on the right is a Filter Posts drop-down menu with three choices:
• My Wall — All the posts made by the people or on the subjects that you follow.
• Polls — The surveys created by you or your followers, or those that are posted to the subjects that you follow, and the related votes.
• Events — Your calendar events.
Right PanelIn the right panel are the following panes:
New to tibbr?
Your tibbr administrator can make available this pane through a configuration setting. The pane contains links to the download sites for the mobile versions of tibbr (iPhone, BlackBerry, and so forth) and to this manual.
What’s Happening
This section shows the current analytics for tibbr: the number of new subjects, the number of total users, the number of new documents, and so forth. Click See More in the bottom right corner for details.
Announcements
These are announcements published by your tibbr administrator. Click the Previous or Next link at the top to go to the previous announcement or to the next one, respectively. Click the See Details link at the bottom to view the specifics.
Popular Conversations
Shown in this section are the posts with the most replies or likes in the last 24 hours. tibbr updates this section every hour.
A link called Remove from Right Panel on some of the panes enables you to hide them. To redisplay a pane, click View My Profile below your picture in the left panel and then click Edit Profile near the top or from your name’s drop-down menu at the top. On the Edit Profile page that is displayed, select the pane from the Customize Sidebar drop-down menu in the top right corner.
tibbr, tibbr Service, tibbr Community, and tibbr Community Service How-To Guide
View tibbr | 21
Upcoming Events
This section contains links to event invitations you or your colleagues have created in tibbr. Clicking one of those links takes you to a page on which you can reply to the invitation, add it to your iCal or Outlook Calendar, or perform other related tasks.
Share on tibbr
The Share on tibbr button in this section enables you to share an external Web page on tibbr along with a comment, if desired. For details, see Share a Web Page as a tibbr Post on page 34.
Recently Created Subjects
This section lists the latest subjects created in tibbr along with the owner names, date, and time. Click a subject name to navigate to its page. Click See More to view a longer list of new subjects.
Popular Subjects
This panel lists the current popular tibbr subjects according to the number of posts. Click a subject name to navigate to its page. Click See More to view a longer list of popular subjects.
Invite Your Colleagues
Clicking Invite Colleagues to join tibbr in this panel displays a screen in which you can specify the email addresses of the people in your network whom you would like to invite.
tibbr, tibbr Service, tibbr Community, and tibbr Community Service How-To Guide
22 | Chapter 1 Navigation in tibbr
Search for Subjects, People, and Posts
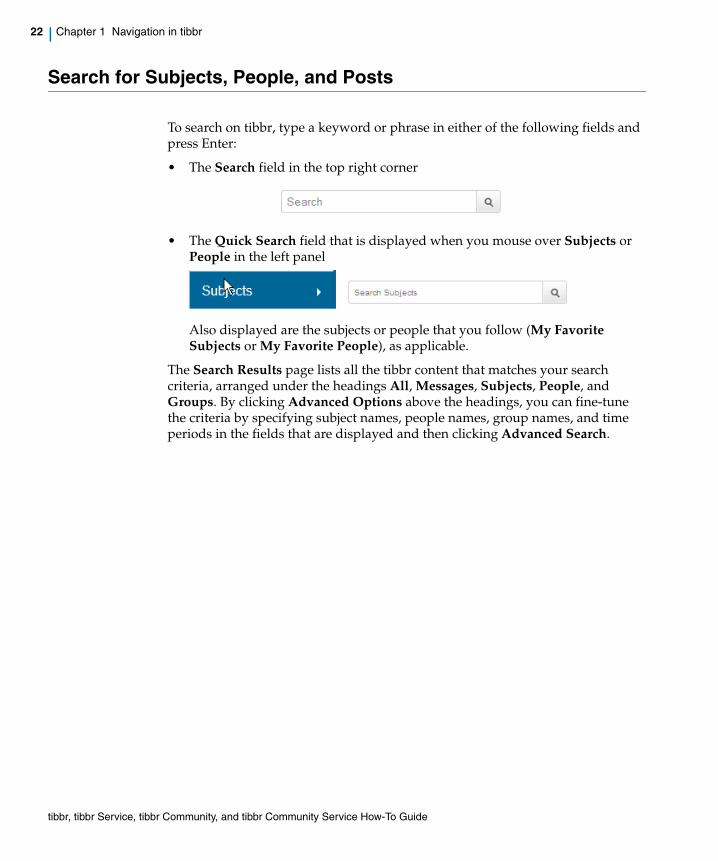
To search on tibbr, type a keyword or phrase in either of the following fields and press Enter:
• The Search field in the top right corner
• The Quick Search field that is displayed when you mouse over Subjects or People in the left panel
Also displayed are the subjects or people that you follow (My Favorite Subjects or My Favorite People), as applicable.
The Search Results page lists all the tibbr content that matches your search criteria, arranged under the headings All, Messages, Subjects, People, and Groups. By clicking Advanced Options above the headings, you can fine-tune the criteria by specifying subject names, people names, group names, and time periods in the fields that are displayed and then clicking Advanced Search.
tibbr, tibbr Service, tibbr Community, and tibbr Community Service How-To Guide
| 23
Chapter 2 Posts
This chapter describes the following:
• How to post and reply to posts or replies in tibbr and perform other related tasks
• How to create polls in tibbr
• How to work with communities in tibbr
Topics
• Post on tibbr, page 24
• Reply to a Post Or to a Reply, page 29
• Like Or Unlike a Post, page 30
• Mark a Post With a Star, page 31
• Perform Other Post-Related Tasks, page 32
• Share a Web Page as a tibbr Post, page 34
• Publish a Post as a Subject Announcement, page 35
• Delete a Post Or Reply, page 36
• Delete a Subject From a Post, page 37
• Understand Message Streams and Manage Custom Filters, page 38
• Create a Poll, page 43
• Work With Communities, page 45
tibbr, tibbr Service, tibbr Community, and tibbr Community Service How-To Guide
24 | Chapter 2 Posts
Post on tibbr
To post on tibbr:
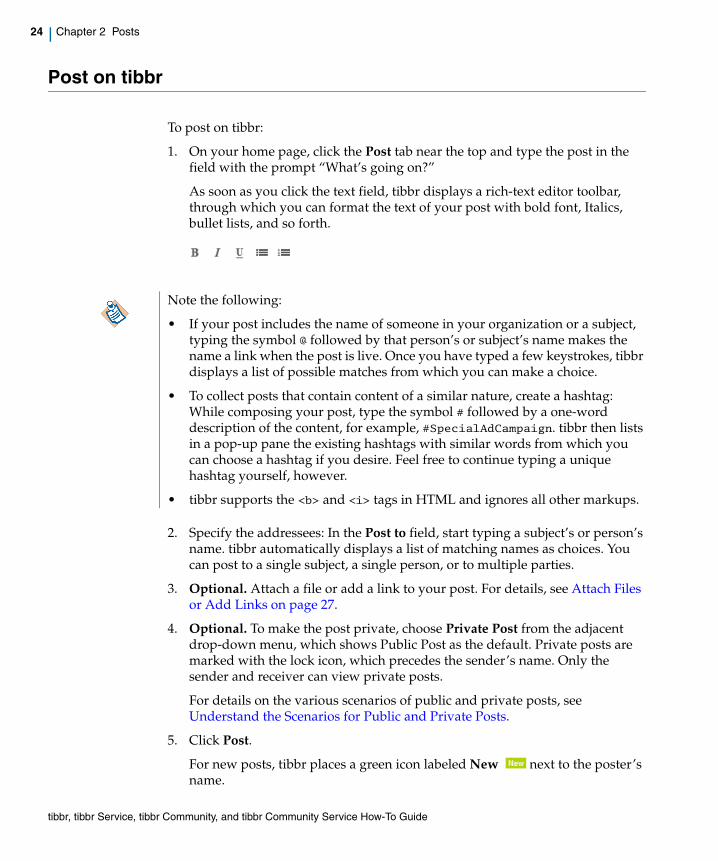
1. On your home page, click the Post tab near the top and type the post in the field with the prompt “What’s going on?”
As soon as you click the text field, tibbr displays a rich-text editor toolbar, through which you can format the text of your post with bold font, Italics, bullet lists, and so forth.
2. Specify the addressees: In the Post to field, start typing a subject’s or person’s name. tibbr automatically displays a list of matching names as choices. You can post to a single subject, a single person, or to multiple parties.
3. Optional. Attach a file or add a link to your post. For details, see Attach Files or Add Links on page 27.
4. Optional. To make the post private, choose Private Post from the adjacent drop-down menu, which shows Public Post as the default. Private posts are marked with the lock icon, which precedes the sender’s name. Only the sender and receiver can view private posts.
For details on the various scenarios of public and private posts, see Understand the Scenarios for Public and Private Posts.
5. Click Post.
For new posts, tibbr places a green icon labeled New next to the poster’s name.
Note the following:
• If your post includes the name of someone in your organization or a subject, typing the symbol @ followed by that person’s or subject’s name makes the name a link when the post is live. Once you have typed a few keystrokes, tibbr displays a list of possible matches from which you can make a choice.
• To collect posts that contain content of a similar nature, create a hashtag: While composing your post, type the symbol # followed by a one-word description of the content, for example, #SpecialAdCampaign. tibbr then lists in a pop-up pane the existing hashtags with similar words from which you can choose a hashtag if you desire. Feel free to continue typing a unique hashtag yourself, however.
• tibbr supports the <b> and <i> tags in HTML and ignores all other markups.
tibbr, tibbr Service, tibbr Community, and tibbr Community Service How-To Guide
Post on tibbr | 25
Understand the Scenarios for Public and Private PostsPublic posts are viewable by your followers, those who follow the public subjects to which you post, and those who access your wall. Private posts are viewable by only the people or the followers of the subjects to which you post.
Various scenarios apply, as follows:
• If you post to your name only from My Wall, your post is by default public.
• If you post to one or more people, your post is by default public.
• If you post to a subject on My Wall or on the subject page, your post is by default the same as the subject’s privacy. However, if you post to one or more private subjects from My Wall and leave your name in the Post to field, your post is public.
• If you post to both private and public subjects, your post is public.
As a distinction, tibbr places an orange line above private-subject names.
• If you post to a private subject and to other people, regardless of whether those people follow that subject, your post is public.
• If you add people to a post in a private subject by choosing More > Manage > Add Recipients at the bottom of the post, the post remains private. However, if you add one or more public subjects in that manner, the post becomes public.
• If you add people to a private post to another person, your post stays private.
• If you post from the Private Posts stream under Main Wall, your post is private.
tibbr, tibbr Service, tibbr Community, and tibbr Community Service How-To Guide
26 | Chapter 2 Posts
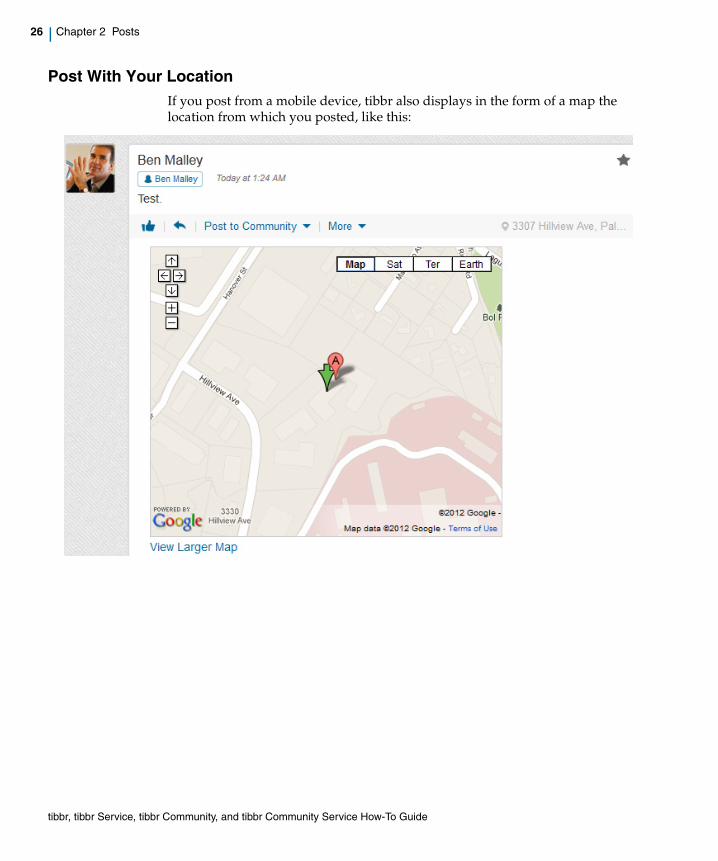
Post With Your LocationIf you post from a mobile device, tibbr also displays in the form of a map the location from which you posted, like this:
tibbr, tibbr Service, tibbr Community, and tibbr Community Service How-To Guide
Post on tibbr | 27
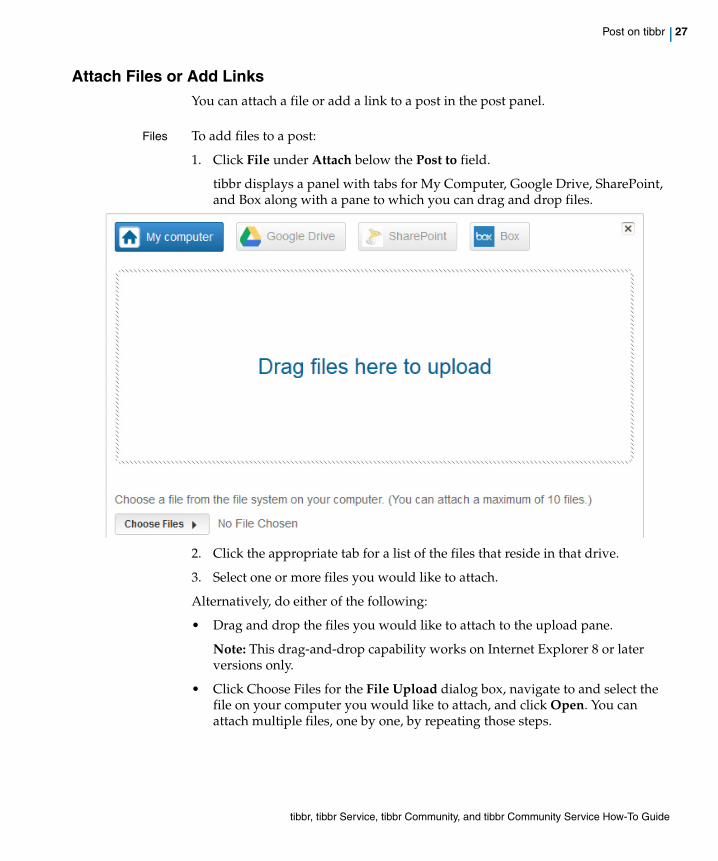
Attach Files or Add LinksYou can attach a file or add a link to a post in the post panel.
Files To add files to a post:
1. Click File under Attach below the Post to field.
tibbr displays a panel with tabs for My Computer, Google Drive, SharePoint, and Box along with a pane to which you can drag and drop files.
2. Click the appropriate tab for a list of the files that reside in that drive.
3. Select one or more files you would like to attach.
Alternatively, do either of the following:
• Drag and drop the files you would like to attach to the upload pane.
Note: This drag-and-drop capability works on Internet Explorer 8 or later versions only.
• Click Choose Files for the File Upload dialog box, navigate to and select the file on your computer you would like to attach, and click Open. You can attach multiple files, one by one, by repeating those steps.
tibbr, tibbr Service, tibbr Community, and tibbr Community Service How-To Guide
28 | Chapter 2 Posts
Links To add a link to a post:
1. Click Link in the Attach field.
The Attach a Link pane is displayed.
2. Type the Web address (URL) you would like to attach to your post in the URL field. Be sure to start the URL with http://.
3. Optional. Click the Preview link to the right of the URL field for a summary of the page with the Web address you entered.
4. Optional. Type the title of the page in the Title field.
tibbr separates the new posts on your wall from the old ones with a double-line divider, labeled End of New Activity.
tibbr, tibbr Service, tibbr Community, and tibbr Community Service How-To Guide
Reply to a Post Or to a Reply | 29
Reply to a Post Or to a Reply
To reply to a post:
1. Click the reply icon at the bottom of the post.
A text field with your picture is displayed.
2. Type your reply in the text field.
3. Optional. Attach a file or post a link to your reply. The steps are the same as those described in Attach Files or Add Links.
4. Click Reply.
To reply to a reply, click the reply icon at the bottom of the post to which you would like to reply and then repeat steps 2 through 4 above. tibbr precedes your reply with an arrow icon followed by the name of the person to whom you replied. See this example:
Do not delete the incoming post or email header information; tibbr recognizes and ignores this content when posting your reply.
If you have set up email alerts for incoming posts (see Register Your Email Address and Schedule Delivery), tibbr notifies you of the posts by email. You can then reply to them by email from your email application, such as Microsoft Outlook. Respond to Posts by Email on page 85 describes the procedure.
tibbr, tibbr Service, tibbr Community, and tibbr Community Service How-To Guide

30 | Chapter 2 Posts
Like Or Unlike a Post
With the tibbr Like feature, you show appreciation for a post. Just click the blue thumbs-up icon at the bottom of the post. Your name is then listed with any other colleagues who also like the post.
On posts that you like, tibbr changes the color of the icon to gray. If you accidentally clicked the blue icon or you did that and then changed your mind, click the icon again.
To see all the posts that you like, first click either your picture or View My Profile below the picture. tibbr then shows My Likes as a tab at the top of your wall. Clicking that tab displays all the posts that you like.
tibbr, tibbr Service, tibbr Community, and tibbr Community Service How-To Guide
Mark a Post With a Star | 31
Mark a Post With a Star
You might like to mark important posts and collect them in a special archive for ease of reference. Do that in tibbr by hovering your mouse device over a post and clicking the star symbol to the right.
Clicking Starred Posts under Main Wall in the left panel displays on your wall all the posts you have marked with a star.
tibbr, tibbr Service, tibbr Community, and tibbr Community Service How-To Guide
32 | Chapter 2 Posts
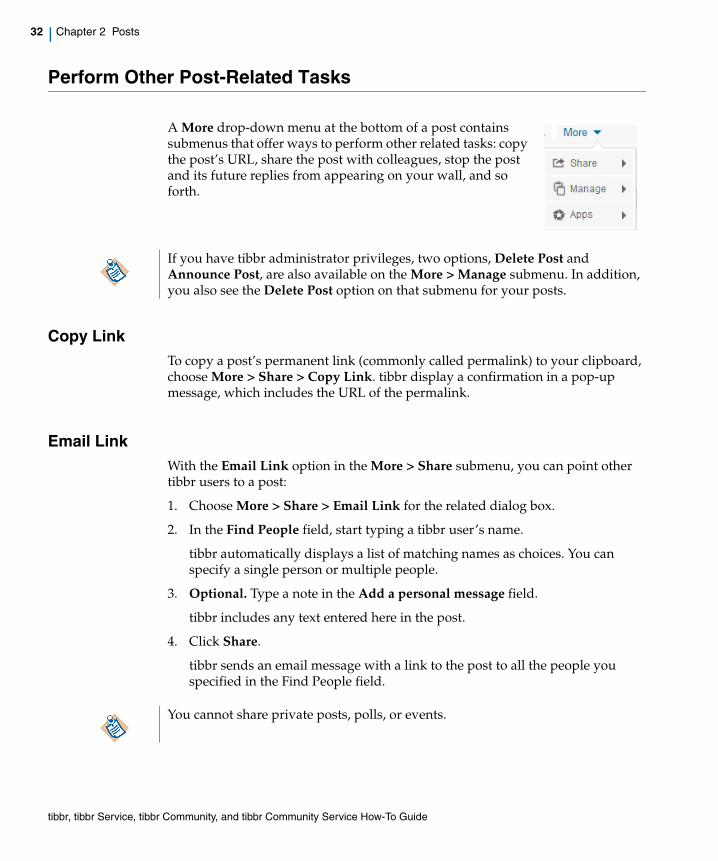
Perform Other Post-Related Tasks
A More drop-down menu at the bottom of a post contains submenus that offer ways to perform other related tasks: copy the post’s URL, share the post with colleagues, stop the post and its future replies from appearing on your wall, and so forth.
Copy LinkTo copy a post’s permanent link (commonly called permalink) to your clipboard, choose More > Share > Copy Link. tibbr display a confirmation in a pop-up message, which includes the URL of the permalink.
Email LinkWith the Email Link option in the More > Share submenu, you can point other tibbr users to a post:
1. Choose More > Share > Email Link for the related dialog box.
2. In the Find People field, start typing a tibbr user’s name.
tibbr automatically displays a list of matching names as choices. You can specify a single person or multiple people.
3. Optional. Type a note in the Add a personal message field.
tibbr includes any text entered here in the post.
4. Click Share.
tibbr sends an email message with a link to the post to all the people you specified in the Find People field.
If you have tibbr administrator privileges, two options, Delete Post and Announce Post, are also available on the More > Manage submenu. In addition, you also see the Delete Post option on that submenu for your posts.
You cannot share private posts, polls, or events.
tibbr, tibbr Service, tibbr Community, and tibbr Community Service How-To Guide
Perform Other Post-Related Tasks | 33
Add RecipientsAn Add Recipients option in the More > Manage submenu enables you to add people or subjects to a post:
1. Choose More > Manage > Add Recipients for the related dialog box.
2. In the Add field, start typing the name of a tibbr user or subject.
tibbr automatically displays a list of matching names as choices. You can specify a single person or subject; or multiple people or subjects. Note that the list for people contains registered tibbr users only.
3. Click Add to Post.
Hide or Show a PostIn case a post is of no interest to you, you can hide it, that is, stop the post and future replies to it from being displayed on your wall.
To hide a post:
1. Choose Hide Post from the More > Manage submenu at the bottom of the post.
A confirmation dialog box is displayed.
2. Click OK.
Once you have hidden a post, the Hide Post item in the More menu changes to Show Post.
To redisplay a hidden post and the related replies:
1. Click Company Stream under Main Wall in the left panel and locate the post on the Company Stream wall.
2. Choose More > Manage > Show Post at the bottom.
Note that only the following people can delete a subject from a post:
• The subject owner
• Someone with message-management privilege, which is granted by the tibbr administrator
For more details, see Delete a Subject From a Post.
tibbr, tibbr Service, tibbr Community, and tibbr Community Service How-To Guide
34 | Chapter 2 Posts
Share a Web Page as a tibbr Post
To share a Web page as a tibbr post:
1. On your tibbr home page, drag the Share on tibbr button in the right panel to the bookmarks bar on your Web browser.
2. While displaying the Web page you would like to share with your colleagues, click Share on tibbr in the bookmarks bar.
3. In the dialog box that is displayed, which shows at the bottom the link of the page you would like to share, do the following:
a. Specify whether this is a public or private post by choosing Public Post or Private Post from the drop-down menu at the top.
b. Specify the addresses: In the adjacent text field, type one or more names of the people or subjects to which to address the post.
c. Optional. In the text field with the prompt “Say something about this,” type a note to accompany the post.
d. Click Post.
Afterwards, tibbr displays the post on your wall. Here is an example:
Clicking link displays a pane at the top of your wall called Details of the link with the title and URL of the Web page you just shared. Click the title or URL to go to the shared page.
tibbr, tibbr Service, tibbr Community, and tibbr Community Service How-To Guide
Publish a Post as a Subject Announcement | 35
Publish a Post as a Subject Announcement
You can publish as an announcement a tibbr post in a subject that you own. tibbr administrators can publish any post as an announcement. The announcement is placed in the right panel in a pane entitled Announcements.
Follow these steps:
1. On the subject page or on your wall, locate the post you would like to publish as an announcement.
2. Choose Announce Post from the More > Manage submenu at the bottom of the post.
The Make This Message an Announcement dialog box appears.
3. Select Global Announcement under Type of Announcement.
4. Under Announcement Duration, select Manually remove it or, if you would like tibbr to delete the announcement after a certain number of days, select Days to keep and type that number in the text field next to it. The default for x is 1.
5. Click Save.
To manually remove the announcement, locate it on the subject wall and click the Remove link next to the date and time at the bottom.
tibbr, tibbr Service, tibbr Community, and tibbr Community Service How-To Guide
36 | Chapter 2 Posts
Delete a Post Or Reply
The following people can delete a post:
• The person who created the post
• The subject owner, assuming that the post was made to one subject only
• Someone with the message-management privilege, which is granted by the tibbr administrator
To delete a post:
1. Choose Delete Post from the More > Manage submenu at the bottom of the post.
tibbr prompts for your confirmation.
2. Click Yes to delete the post or Cancel to retain it.
The Delete option is also available for replies. To delete a reply, click the Delete link at the bottom of the reply.
tibbr, tibbr Service, tibbr Community, and tibbr Community Service How-To Guide
Delete a Subject From a Post | 37
Delete a Subject From a Post
You can delete a subject from a post if you are the subject owner or if your tibbr administrator has granted you the message-management privilege.
To delete a subject from a post:
1. Choose Remove Recipients from the More > Manage submenu at the bottom of the post.
The related dialog box is displayed.
2. Click the X symbol next to the subject name you would like to delete.
3. Click Save Changes.
tibbr, tibbr Service, tibbr Community, and tibbr Community Service How-To Guide
38 | Chapter 2 Posts
Understand Message Streams and Manage Custom Filters
Use tibbr message streams to filter posts. Several default streams are available in tibbr. You can also create your own filters.
Understand Default Message StreamsUnder Main Wall in the left panel of the home page are the default view options for posts:
• My Wall displays the broadcast posts, if any, and all the posts made by the people or to the subjects that you follow.
• Company Stream displays all the posts that are accessible to you.
• Private Posts displays the private posts that you have sent and those that other people have sent you. These posts are not visible to others.
• Starred Posts displays the posts, if any, that you have marked by clicking the star symbol next to them.
• Chat History displays the archives of the conversations you’ve had with other tibbr users in chat, assuming that your tibbr administrator has enabled chat for tibbr.
• your-name displays all the posts that mention your name.
In addition, you can view the polls you have created and the related votes by choosing Polls from the Filter Posts drop-down menu on your wall. To view your calendar events, choose Events from Filter Posts.
Create Custom FiltersYou can create custom filters to manage which posts to display, for example:
• A filter called QA to display only the posts related to testing.
• A filter called IT Service to display only the posts made by your IT team.
tibbr, tibbr Service, tibbr Community, and tibbr Community Service How-To Guide
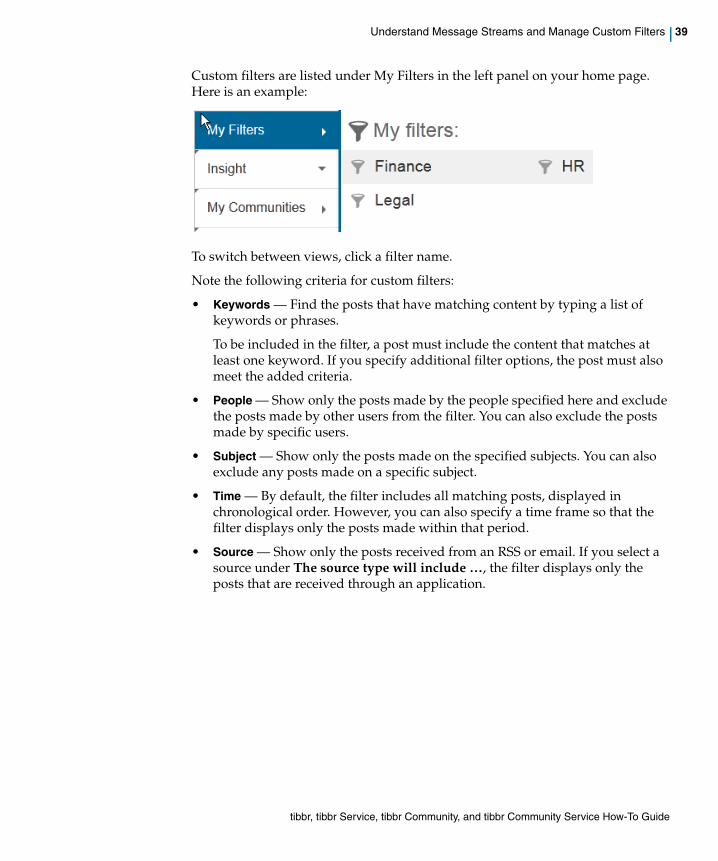
Understand Message Streams and Manage Custom Filters | 39
Custom filters are listed under My Filters in the left panel on your home page. Here is an example:
To switch between views, click a filter name.
Note the following criteria for custom filters:
• Keywords — Find the posts that have matching content by typing a list of keywords or phrases.
To be included in the filter, a post must include the content that matches at least one keyword. If you specify additional filter options, the post must also meet the added criteria.
• People — Show only the posts made by the people specified here and exclude the posts made by other users from the filter. You can also exclude the posts made by specific users.
• Subject — Show only the posts made on the specified subjects. You can also exclude any posts made on a specific subject.
• Time — By default, the filter includes all matching posts, displayed in chronological order. However, you can also specify a time frame so that the filter displays only the posts made within that period.
• Source — Show only the posts received from an RSS or email. If you select a source under The source type will include …, the filter displays only the posts that are received through an application.
tibbr, tibbr Service, tibbr Community, and tibbr Community Service How-To Guide
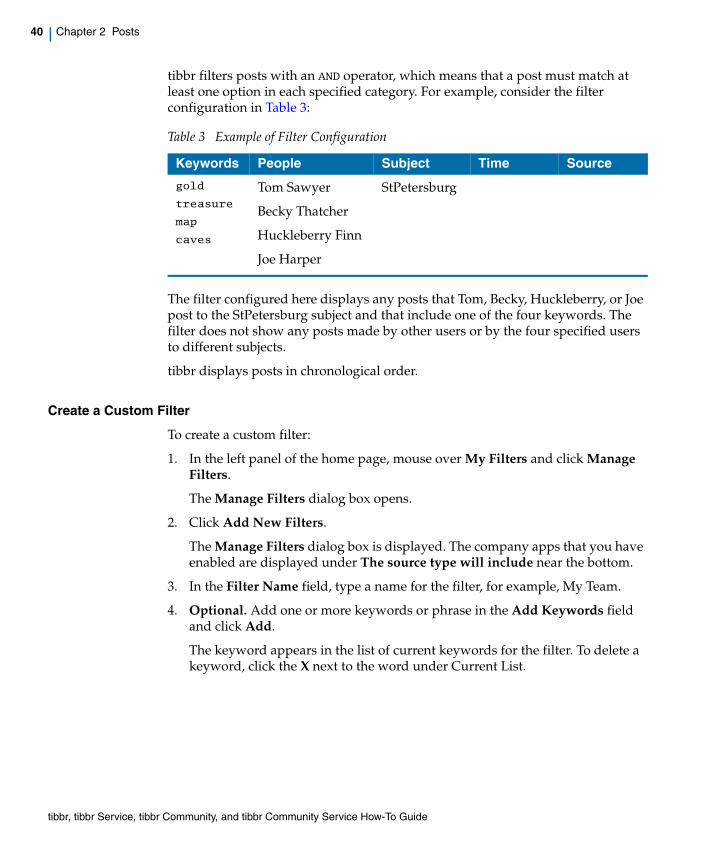
40 | Chapter 2 Posts
tibbr filters posts with an AND operator, which means that a post must match at least one option in each specified category. For example, consider the filter configuration in Table 3:
The filter configured here displays any posts that Tom, Becky, Huckleberry, or Joe post to the StPetersburg subject and that include one of the four keywords. The filter does not show any posts made by other users or by the four specified users to different subjects.
tibbr displays posts in chronological order.
Create a Custom Filter
To create a custom filter:
1. In the left panel of the home page, mouse over My Filters and click Manage Filters.
The Manage Filters dialog box opens.
2. Click Add New Filters.
The Manage Filters dialog box is displayed. The company apps that you have enabled are displayed under The source type will include near the bottom.
3. In the Filter Name field, type a name for the filter, for example, My Team.
4. Optional. Add one or more keywords or phrase in the Add Keywords field and click Add.
The keyword appears in the list of current keywords for the filter. To delete a keyword, click the X next to the word under Current List.
Table 3 Example of Filter Configuration
Keywords People Subject Time Source
gold
treasure
map
caves
Tom Sawyer
Becky Thatcher
Huckleberry Finn
Joe Harper
StPetersburg
tibbr, tibbr Service, tibbr Community, and tibbr Community Service How-To Guide
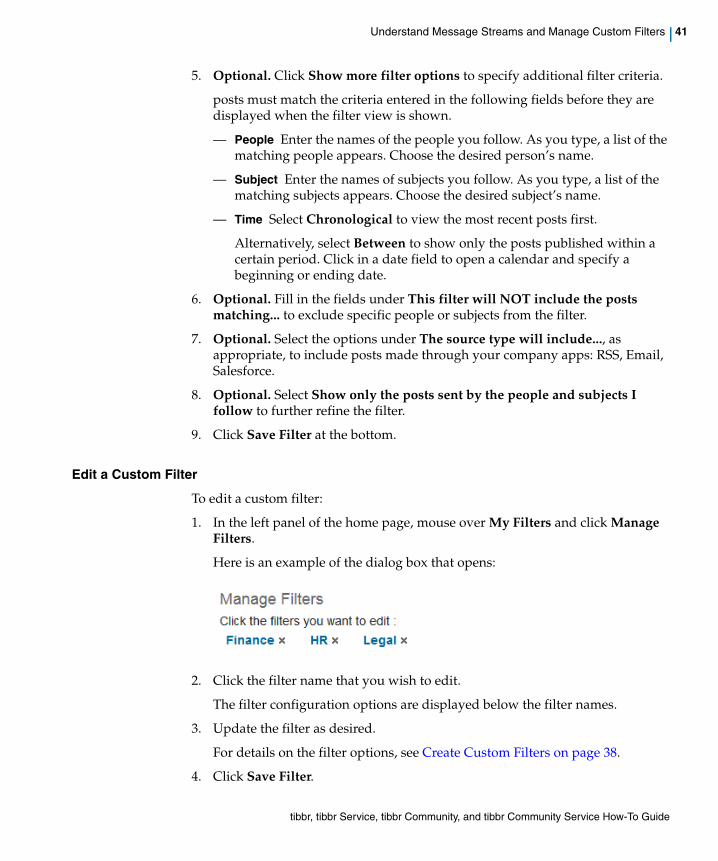
Understand Message Streams and Manage Custom Filters | 41
5. Optional. Click Show more filter options to specify additional filter criteria.
posts must match the criteria entered in the following fields before they are displayed when the filter view is shown.
— People Enter the names of the people you follow. As you type, a list of the matching people appears. Choose the desired person’s name.
— Subject Enter the names of subjects you follow. As you type, a list of the matching subjects appears. Choose the desired subject’s name.
— Time Select Chronological to view the most recent posts first.
Alternatively, select Between to show only the posts published within a certain period. Click in a date field to open a calendar and specify a beginning or ending date.
6. Optional. Fill in the fields under This filter will NOT include the posts matching... to exclude specific people or subjects from the filter.
7. Optional. Select the options under The source type will include..., as appropriate, to include posts made through your company apps: RSS, Email, Salesforce.
8. Optional. Select Show only the posts sent by the people and subjects I follow to further refine the filter.
9. Click Save Filter at the bottom.
Edit a Custom Filter
To edit a custom filter:
1. In the left panel of the home page, mouse over My Filters and click Manage Filters.
Here is an example of the dialog box that opens:
2. Click the filter name that you wish to edit.
The filter configuration options are displayed below the filter names.
3. Update the filter as desired.
For details on the filter options, see Create Custom Filters on page 38.
4. Click Save Filter.
tibbr, tibbr Service, tibbr Community, and tibbr Community Service How-To Guide
42 | Chapter 2 Posts
Delete a Custom Filter
To delete a custom filter:
1. In the left panel of the home page, mouse over My Filters and click Manage Filters.
The Manage Filters dialog box opens.
2. Click the X next to the name of the filter you want to delete.
3. Click Yes in the post that is displayed, prompting for your confirmation.
tibbr, tibbr Service, tibbr Community, and tibbr Community Service How-To Guide
Create a Poll | 43
Create a Poll
You can survey your colleagues with a poll and have them vote on the options that you specify.
To create a poll:
1. On the home page, click the Poll tab at the top.
2. Type the question that pertains to the poll in the text field with the prompt, “What would you like to know?”, for example, What’s your favorite Web browser?
3. Add two or more options, up to a maximum of 11, by typing them in the text fields below. By default, two text fields are displayed.
For the browser example, you might want to specify Internet Explorer, Mozilla Firefox, and Google Chrome as the options. Once you have filled out two fields and placed your cursor in the bottom field, tibbr adds another field.
4. Optional. Select one or both of these two options:
— Allow anyone to add options. Selecting this option enables your poll-takers to add more choices to your poll.
— Allow people to select multiple options. Selecting this option enables your poll-takers to vote for two or more choices.
5. Optional. Specify the end date for the poll by specifying the date in the calendar that is displayed when you click the field next to This poll will end on. Set the time by selecting the time you desire by clicking the adjacent field for a list of the times.
By default, the poll ends three hours from the start time.
6. Type the names of the people you would like to poll in the Post to text field.
As you start typing, tibbr automatically displays a list of matching names as choices.
7. Optional. Click File or Link under Attach to attach a file or specify the URL for a link that pertains to your poll.
8. Optional. To post a private poll, choose Private Post from the adjacent drop-down menu, which shows Public Post as the default. Private polls, viewable by only you and the people to whom you post, are marked with the lock icon.
tibbr, tibbr Service, tibbr Community, and tibbr Community Service How-To Guide
44 | Chapter 2 Posts
9. Click Ask.
tibbr displays the poll on your wall as a post. As your poll-takers cast their votes, their profile pictures (if uploaded) are displayed next to their choices. Clicking the ellipsis symbol (…) next to an option displays a list of the poll-takers who have voted for that option.
Once a poll is in place, to change the end date and time, choose Extend Poll from the More menu at the bottom of the poll. A dialog box is then displayed, in which you can specify the end date and time that you desire. Click Save afterwards.
tibbr, tibbr Service, tibbr Community, and tibbr Community Service How-To Guide
Work With Communities | 45
Work With Communities
Communities are those that are run by your organization’s partners, customers, suppliers, or resellers in other tibbr instances that are made available by your tibbr administrator. Once you have logged in to a community, you can do the following:
• Perform various tasks on the posts: view, reply to, email.
• Forward posts from your tibbr home site to those communities—with comments, if desired.
• Forward posts from those communities to your tibbr home site—again, with comments, if desired.
Sign In to a CommunityTo sign in to a community:
1. Click the community name under My Communities in the left panel of the home page.
tibbr displays the login page.
The name of the community, for example, Partners, is displayed as a link in the top left hand corner next to a home icon, like this:
Clicking the home icon returns you to your tibbr home site.
2. Type in the text fields your user name and password associated with the community and click Log in.
The end-user license agreement is displayed.
3. Scroll to the bottom and select the box next to the acceptance statement. Click I Agree.
As a prerequisite, you must have an account on at least one other tibbr instance.
tibbr, tibbr Service, tibbr Community, and tibbr Community Service How-To Guide
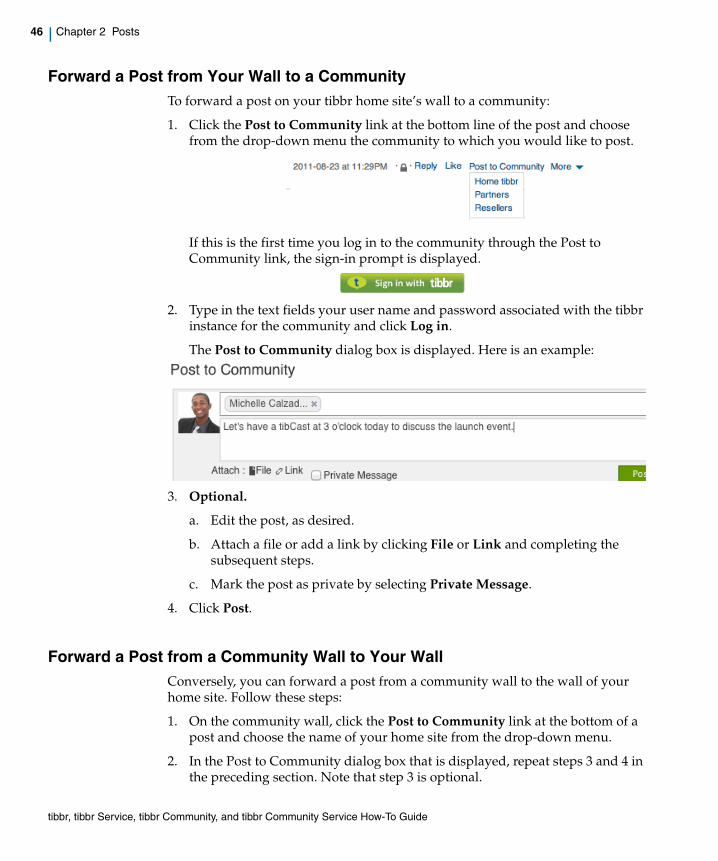
46 | Chapter 2 Posts
Forward a Post from Your Wall to a CommunityTo forward a post on your tibbr home site’s wall to a community:
1. Click the Post to Community link at the bottom line of the post and choose from the drop-down menu the community to which you would like to post.
If this is the first time you log in to the community through the Post to Community link, the sign-in prompt is displayed.
2. Type in the text fields your user name and password associated with the tibbr instance for the community and click Log in.
The Post to Community dialog box is displayed. Here is an example:
3. Optional.
a. Edit the post, as desired.
b. Attach a file or add a link by clicking File or Link and completing the subsequent steps.
c. Mark the post as private by selecting Private Message.
4. Click Post.
Forward a Post from a Community Wall to Your WallConversely, you can forward a post from a community wall to the wall of your home site. Follow these steps:
1. On the community wall, click the Post to Community link at the bottom of a post and choose the name of your home site from the drop-down menu.
2. In the Post to Community dialog box that is displayed, repeat steps 3 and 4 in the preceding section. Note that step 3 is optional.
tibbr, tibbr Service, tibbr Community, and tibbr Community Service How-To Guide
| 47
Chapter 3 Subjects
This chapter steps you through the procedures of working with subjects in tibbr.
Topics
• Explore Subjects, page 48
• Create, Edit, Move, or Delete Subjects, page 51
• Control Access to Subjects, page 55
• Manage Subject Visibility, page 57
• Follow Subjects, page 58
• Manage Subject Owners, page 60
• Post to Subjects by Email, page 61
• Make Announcements on Subjects, page 62
• Manage Groups for Subjects, page 63
• Set Up Alerts for Subject Posts, page 64
• View Details by Subject Timeline, page 65
• Incorporate External Content into Subjects, page 66
tibbr, tibbr Service, tibbr Community, and tibbr Community Service How-To Guide
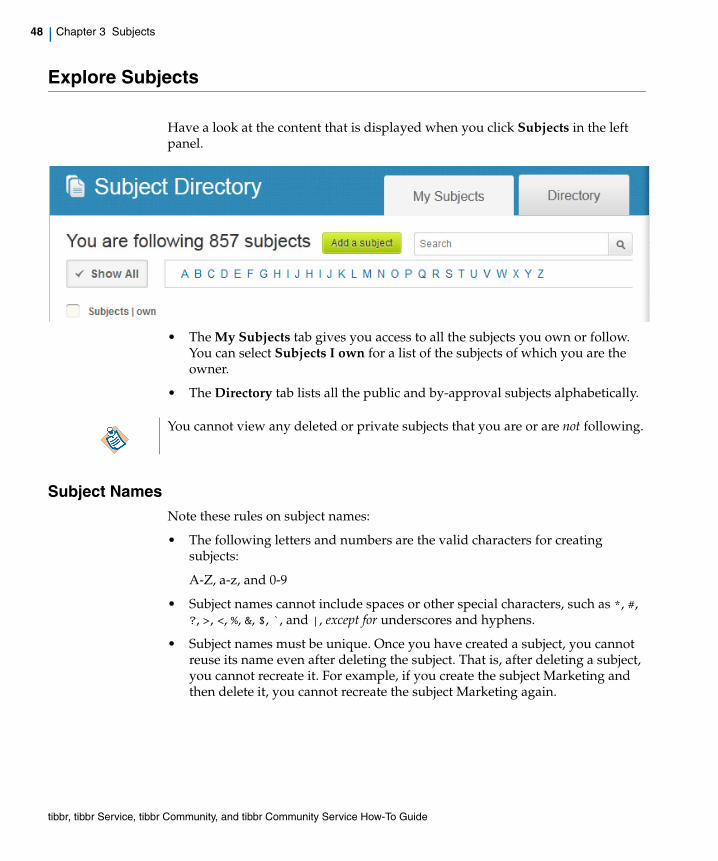
48 | Chapter 3 Subjects
Explore Subjects
Have a look at the content that is displayed when you click Subjects in the left panel.
• The My Subjects tab gives you access to all the subjects you own or follow. You can select Subjects I own for a list of the subjects of which you are the owner.
• The Directory tab lists all the public and by-approval subjects alphabetically.
Subject NamesNote these rules on subject names:
• The following letters and numbers are the valid characters for creating subjects:
A-Z, a-z, and 0-9
• Subject names cannot include spaces or other special characters, such as *, #, ?, >, <, %, &, $, `, and |, except for underscores and hyphens.
• Subject names must be unique. Once you have created a subject, you cannot reuse its name even after deleting the subject. That is, after deleting a subject, you cannot recreate it. For example, if you create the subject Marketing and then delete it, you cannot recreate the subject Marketing again.
You cannot view any deleted or private subjects that you are or are not following.
tibbr, tibbr Service, tibbr Community, and tibbr Community Service How-To Guide
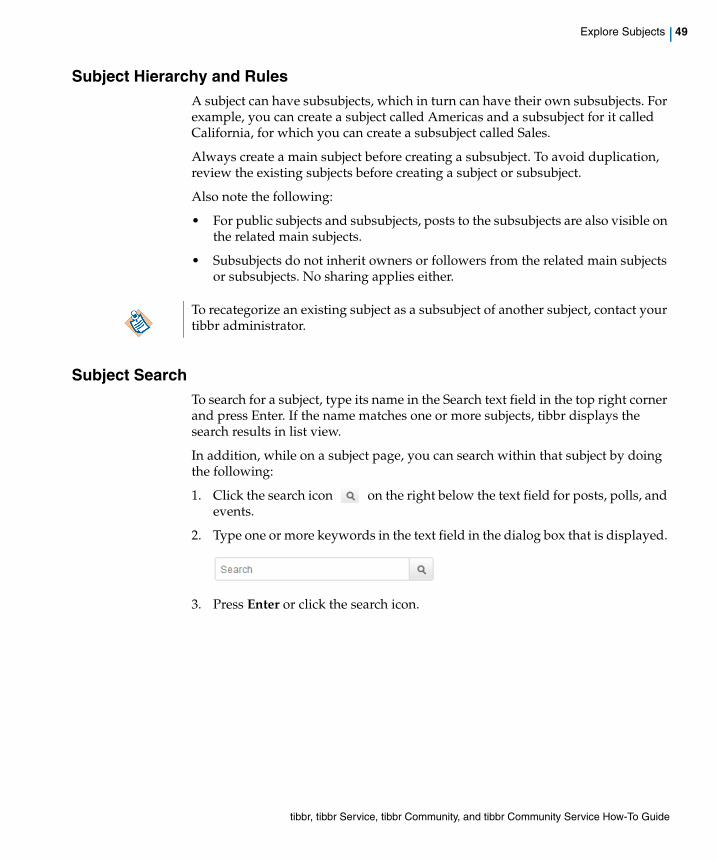
Explore Subjects | 49
Subject Hierarchy and RulesA subject can have subsubjects, which in turn can have their own subsubjects. For example, you can create a subject called Americas and a subsubject for it called California, for which you can create a subsubject called Sales.
Always create a main subject before creating a subsubject. To avoid duplication, review the existing subjects before creating a subject or subsubject.
Also note the following:
• For public subjects and subsubjects, posts to the subsubjects are also visible on the related main subjects.
• Subsubjects do not inherit owners or followers from the related main subjects or subsubjects. No sharing applies either.
Subject SearchTo search for a subject, type its name in the Search text field in the top right corner and press Enter. If the name matches one or more subjects, tibbr displays the search results in list view.
In addition, while on a subject page, you can search within that subject by doing the following:
1. Click the search icon on the right below the text field for posts, polls, and events.
2. Type one or more keywords in the text field in the dialog box that is displayed.
3. Press Enter or click the search icon.
To recategorize an existing subject as a subsubject of another subject, contact your tibbr administrator.
tibbr, tibbr Service, tibbr Community, and tibbr Community Service How-To Guide
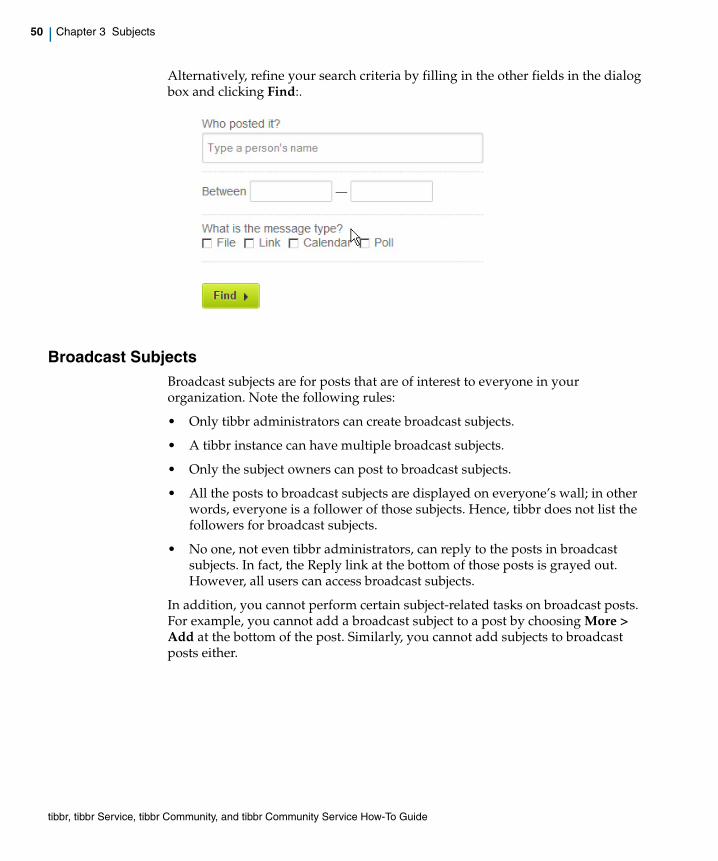
50 | Chapter 3 Subjects
Alternatively, refine your search criteria by filling in the other fields in the dialog box and clicking Find:.
Broadcast SubjectsBroadcast subjects are for posts that are of interest to everyone in your organization. Note the following rules:
• Only tibbr administrators can create broadcast subjects.
• A tibbr instance can have multiple broadcast subjects.
• Only the subject owners can post to broadcast subjects.
• All the posts to broadcast subjects are displayed on everyone’s wall; in other words, everyone is a follower of those subjects. Hence, tibbr does not list the followers for broadcast subjects.
• No one, not even tibbr administrators, can reply to the posts in broadcast subjects. In fact, the Reply link at the bottom of those posts is grayed out. However, all users can access broadcast subjects.
In addition, you cannot perform certain subject-related tasks on broadcast posts. For example, you cannot add a broadcast subject to a post by choosing More > Add at the bottom of the post. Similarly, you cannot add subjects to broadcast posts either.
tibbr, tibbr Service, tibbr Community, and tibbr Community Service How-To Guide
Create, Edit, Move, or Delete Subjects | 51
Create, Edit, Move, or Delete Subjects
This section describes how to create a subject or subsubject, also how to edit or delete subjects.
Create a SubjectTo create a subject:
1. Mouse over the Subjects tab in the left panel and then click Explore Subjects.
The All Subjects page is displayed.
2. Click Add a Subject either at the top or at the bottom.
The Create a New Subject screen is displayed.
3. Create a profile for the new subject by filling in the following fields:
— Name is the name of the new subject in the subject directory.
To convenience you and alleviate typographical errors, as you type a subject name, tibbr displays the existing subjects that begin with that name.
— Optional. Display Name is the name of the new subject that is displayed, which can be different from Name. Spaces and certain special characters are allowed.
This is an optional field. However, we strongly recommend that you fill in this field for two reasons: First, in case of a name with multiple words, the subject name in the Name field does not allow spaces whereas the one under Display Name does. Second, if you do not specify a display name, any subsubject name would show the full hierarchy of subjects, resulting in clunkiness and even confusion.
— Subject Description is a description of the new subject. This is an optional field.
— Picture is an optional graphic for the subject. To assign a picture to the subject, click Upload a Photo. In the file browser that appears, navigate to the desired image file and click Open.
— The Use default image option is selected by default.
— Subject Permission specifies whether the subject is public, private, by approval, or, for administrators only, broadcast.
Note: The capability to broadcast to all users is available to the tibbr administrator only. The default permission setting is Public, which allows all tibbr users to subscribe.
tibbr, tibbr Service, tibbr Community, and tibbr Community Service How-To Guide
52 | Chapter 3 Subjects
For more details on restricting access to subjects, see Control Access to Subjects on page 55.
— Subject Hierarchy specifies whether another user can create a subsubject for this subject. Subsubjects are enabled by default. To disallow their creation, deselect Allow subsubjects to be created under this subject.
— Subject Location specifies the place with which the subject is associated. If you select the option Specify a geolocation for this subject, you can either edit the address of your present location in the text field at the top of the Geo Map below to reflect the location you desire or drag the pin in the map to the appropriate location.
Note: Your tibbr administrator must activate this capability before it becomes available to you.
— Subject Pages activates the item Manage Pages in the Actions menu for subject owners.
— SharePoint Files lists the files and folders from which you can specify the default location for uploading the files for the subject you are creating.
Note: For this section to be displayed, your tibbr administrator must enable SharePoint.
By default, the option Set SharePoint files as the default file-attachment source is deselected. Selecting that option displays the Select a Site drop-down menu, from which you can then choose the default site from the list of the related folders that are displayed.
4. Click Create a Subject.
Create a SubsubjectTo create a subsubject for a subject:
1. On the subject page, choose Actions > Create Subsubject near the top.
Alternatively, under the Subjects tab, click the Directory tab. Scroll through the list to locate the subject. Click the expand button that precedes the subject name to expand it and then click Add a subject.
The Create a New Subject screen is displayed with the subject name already specified under Name.
2. Create a profile for the new subsubject by filling in the fields, which are identical to those in the Create a New Subject screen, except that the field titles refer to subsubjects, where appropriate.
3. Click Create a Subject.
tibbr, tibbr Service, tibbr Community, and tibbr Community Service How-To Guide
Create, Edit, Move, or Delete Subjects | 53
Edit a SubjectTo edit a subject that you own:
1. Mouse over the Subjects tab in the left panel, click Explore Subjects, and then click My Subjects at the top.
2. Locate the subject you would like to edit from the list and click the subject name to open the subject page.
3. Choose Actions > Edit below the subject name near the top.
The Edit Subject page is displayed.
4. Edit the fields, as appropriate, and click Save.
Move a SubjectTo move a subject that you own:
1. Click the Subjects tab.
2. Click My Subjects.
3. Locate your subject in the My Subjects panel.
4. Choose Move from the Action drop-down menu to the right of the subject.
A dialog box that lists all the main subjects that you own is displayed.
5. Navigate to the location to which you would like to move the subject by clicking the orange + symbol that precedes a subject.
6. Click Move Here at the bottom of the subject tree.
Delete a SubjectTo delete an existing subject that you own:
1. Click the Subjects tab.
2. Click My Subjects.
3. Locate your subject in the My Subjects panel.
4. Choose Delete from the Action drop-down menu to the right of the subject.
5. Click Yes in the confirmation dialog box that is displayed.
tibbr, tibbr Service, tibbr Community, and tibbr Community Service How-To Guide
54 | Chapter 3 Subjects
To delete a subject, you must be its owner. Otherwise, you cannot access the edit or delete-subject interface. If you cannot delete a subsubject because you are not the subject owner, the delete operation for the subject fails.
Deleting a subject does not delete its subsubjects. Instead, tibbr elevates the subsubjects by one level.
tibbr, tibbr Service, tibbr Community, and tibbr Community Service How-To Guide
Control Access to Subjects | 55
Control Access to Subjects
You can make a subject public, private, by approval, or, if you are a tibbr administrator, broadcast. Toward that end, the Subject Permission section of the Create a New Subject screen contains these settings:
• Public — The subject is visible to all tibbr users, who can follow it any time.
• Private — The subject is hidden to all users except for those whom the subject owner has invited.
• By Approval — The subject is visible to all users. However, when a user clicks Follow, tibbr alerts the subject owner of the request through the left notification icon at the top of the owner’s home page. (See Notifications on page 17 for details.) As soon as the owner clicks the icon and then the approval request, a dialog box is displayed, prompting him or her to approve or reject the request. Once the owner has clicked Approve, the requestor’s name and picture (if uploaded) appear on the Followers list on the subject page. The requestor can then access the subject.
• Broadcast — Available to administrators only. The subject posts are displayed on the walls of all users, regardless of whether they are following the subject.
Manage FollowersTo give other users access to a subject that you own:
1. Click the subject name or icon to display the page of the subject.
2. Choose Actions > Manage Followers near the top.
Note: This menu choice is available to subject owners only.
The Follower List dialog box is displayed, at the bottom of which is a list of the current followers.
3. Click Add More Followers at the top.
4. In the Find People field, type a person’s name.
As you type a name, tibbr displays in the field the existing people names that begin with the first few keystrokes. Choose the desired name. You can input multiple names in that fashion.
tibbr, tibbr Service, tibbr Community, and tibbr Community Service How-To Guide
56 | Chapter 3 Subjects
5. Optional. Type a note in the Add a Personal Message field.
tibbr includes the text entered here in the email message sent to the people you specified.
6. Click Submit.
Remove FollowersTo remove a follower from a subject that you own:
1. Repeat steps 1 and 2 in the preceding section.
2. Click the Remove link next to the name of the follower you wish to remove from the subject.
tibbr, tibbr Service, tibbr Community, and tibbr Community Service How-To Guide
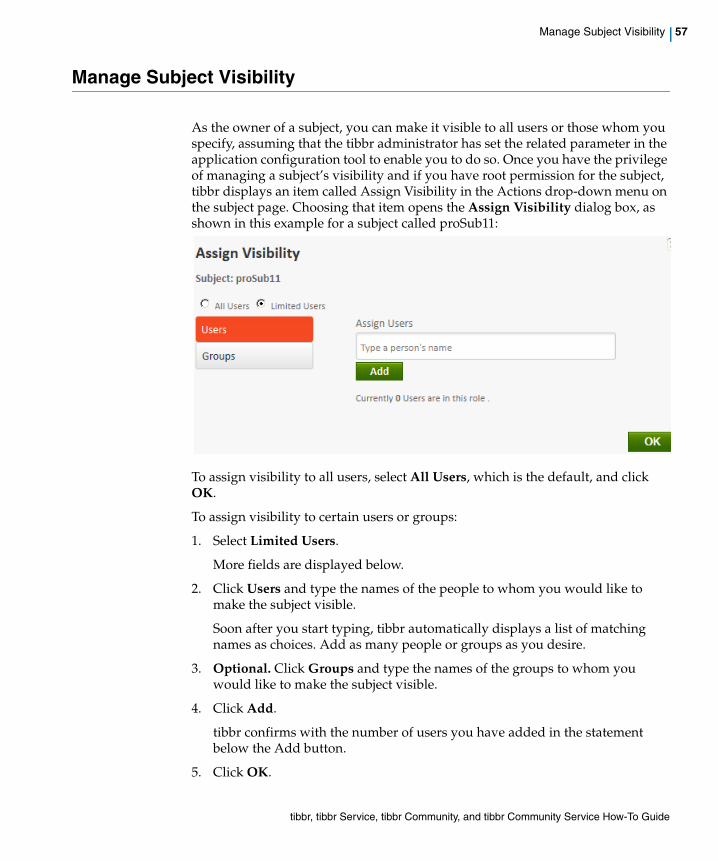
Manage Subject Visibility | 57
Manage Subject Visibility
As the owner of a subject, you can make it visible to all users or those whom you specify, assuming that the tibbr administrator has set the related parameter in the application configuration tool to enable you to do so. Once you have the privilege of managing a subject’s visibility and if you have root permission for the subject, tibbr displays an item called Assign Visibility in the Actions drop-down menu on the subject page. Choosing that item opens the Assign Visibility dialog box, as shown in this example for a subject called proSub11:
To assign visibility to all users, select All Users, which is the default, and click OK.
To assign visibility to certain users or groups:
1. Select Limited Users.
More fields are displayed below.
2. Click Users and type the names of the people to whom you would like to make the subject visible.
Soon after you start typing, tibbr automatically displays a list of matching names as choices. Add as many people or groups as you desire.
3. Optional. Click Groups and type the names of the groups to whom you would like to make the subject visible.
4. Click Add.
tibbr confirms with the number of users you have added in the statement below the Add button.
5. Click OK.
tibbr, tibbr Service, tibbr Community, and tibbr Community Service How-To Guide

58 | Chapter 3 Subjects
Follow Subjects
Following a subject means to subscribe to it from the subject page. Do either of the following:
• Click Subjects in the left panel and then Directory at the top. Click the subject name on the Directory page. To subscribe, click the Follow button below the subject name near the top.
• Mouse over the subject name in the hierarchy tree under Directory and click Follow in the subject profile pane that is displayed.
Once you’ve begun following a subject, all the new posts that are posted on it appear on your wall.
Suggest a Subject to PeopleTo suggest a subject to other tibbr users:
1. Navigate to the subject’s page by clicking the subject name.
2. Choose Actions > Invite People below the subject name near the top.
The Share This Subject with Your Colleagues dialog box is displayed.
3. In the Find People field, type a person’s name.
As you type a name, tibbr displays the existing people names that begin with the first few keystrokes in the field. Choose the desired name. You can enter multiple names in that fashion.
4. In the Find Group field, type a group’s name.
As you type a name, tibbr displays the existing group names that begin with the first few keystrokes in the field. Choose the desired name. You can enter multiple names in that fashion.
5. Optional. Under Email Address, type the email addresses of the people you would like to invite in each of the fields.
By default, four fields are displayed. To add more fields, click Add More.
6. Optional. Type a note in the Add a Personal Message field.
tibbr includes the text entered here in the email message sent to the specified people.
7. Click Share.
tibbr sends each specified user an email message with a link to the subject page.
tibbr, tibbr Service, tibbr Community, and tibbr Community Service How-To Guide

Follow Subjects | 59
Pause or Restart a SubscriptionTo temporarily stop receiving posts on a subject, pause your subscription:
1. Navigate to the subject’s page.
2. Choose Alerts > Pause below the subject name near the top.
To restart your subscription, choose Play, which replaces Pause Alerts as soon as you have chosen the latter.
Unfollow a SubjectTo permanently stop receiving posts on a subject you are following:
1. Click Subjects in the left panel and then My Subjects at the top of the page that is displayed.
2. Locate the subject from the list and click its name for the subject page.
Alternatively, mouse over Subjects and click the subject name under My Favorite Subjects in the pane that is displayed.
3. Click the Followers link near the top and mouse over your picture.
4. Click Unfollow in the pane that is displayed.
Also, an Unfollow button is available below the description at the top of the subject page. Click that button to stop receiving the related posts.
tibbr, tibbr Service, tibbr Community, and tibbr Community Service How-To Guide
60 | Chapter 3 Subjects
Manage Subject Owners
As a subject owner, you can assign more owners to the subject. Do the following:
1. Navigate to the subject’s page.
2. Choose Actions > Manage Owners below the subject name near the top.
The Assign Owners for the Subject dialog box is displayed.
3. In the Assign Owner field, type the name of the person you would like to assign as another owner of this subject.
Soon after you start typing, tibbr automatically displays a list of matching names as choices. Add as many people as you desire.
4. Click Add.
tibbr displays the total number of owners and their names along with job titles below.
5. Click OK.
tibbr, tibbr Service, tibbr Community, and tibbr Community Service How-To Guide
Post to Subjects by Email | 61
Post to Subjects by Email
You can post to a subject by email instead of from tibbr. Do the following:
1. Compose your post in your email client and specify @tibbr main-subject-or-subsubject under Subject.
For example:
— To post to a main subject called HR, type @tibbr HR under Subject.
— To post to an HR subsubject called Benefits, type @tibbr HR.Benefits under Subject.
tibbr then displays your post in the main subject HR and the subsubject HR.Benefits. If the main subject HR does not exist, the post appears on your wall.
2. Send the post by email addressed to [email protected], for example, [email protected].
tibbr, tibbr Service, tibbr Community, and tibbr Community Service How-To Guide
62 | Chapter 3 Subjects
Make Announcements on Subjects
You can make an announcement on a subject that you own. Do the following:
1. On the subject page, choose Actions > Make an Announcement below the subject name near the top.
The dialog box entitled I want to make an announcement on this subject subject-name is displayed.
2. In the text field, type the announcement.
3. Optional. Attach a file or add a link. For details, see Attach Files or Add Links on page 27.
4. Select Subject Announcement under Type of Announcement.
5. Under Announcement Duration, select Manually remove it or, if you would like tibbr to delete the announcement after a certain number of days, type that number in the text field of the option Days to keep. The default for x is 1.
6. Click Save.
tibbr, tibbr Service, tibbr Community, and tibbr Community Service How-To Guide
Manage Groups for Subjects | 63
Manage Groups for Subjects
To add existing groups of people as followers of a subject that you own:
\
1. Click the subject name or icon to display the page of the subject.
2. Choose Actions > Manage Groups near the top.
The Group List dialog box is displayed, at the bottom of which is a list of the current followers.
3. Click Add More Groups at the top.
4. In the Find Group field, type a group’s name.
As you type a name, tibbr displays in the field the existing group names that begin with the first few keystrokes. Choose the desired name. You can input multiple names in that fashion.
5. Click Submit.
For details on people groups, see Chapter 5 on page 73.
This menu item is visible only if your tibbr administrator has enabled LDAP authentication and made the LDAP groups in your organization available for tibbr.
tibbr, tibbr Service, tibbr Community, and tibbr Community Service How-To Guide
64 | Chapter 3 Subjects
Set Up Alerts for Subject Posts
Once you have created or followed a subject, you can have tibbr notify you by email in case of new posts on that subject. Follow these steps:
1. On the subject page, choose Alerts > Set Up Alerts below the subject name near the top.
The Set Up Email Alerts dialog box is displayed along with your email addresses on record.
2. Choose from the Frequency of Alerts drop-down menu how often you would like to be notified of new posts for this subject: None, In Real-time, Hourly, or Daily.
Be sure to perform this step for each of your email addresses, if applicable.
3. Click Save.
tibbr, tibbr Service, tibbr Community, and tibbr Community Service How-To Guide
View Details by Subject Timeline | 65
View Details by Subject Timeline
In the right panel of a subject page is a pane with several timeline sections. The information displayed under each section starts from the date the subject was created (see Created on at the bottom) until the current date.
Clicking a section displays the number of posts on the subject and the number of likes and replies for that period. Also shown are clickable pictures of the followers of the subject, clicking one of which takes you to the follower’s profile.
Here are the sections:
• Now — Shows the details for the current month.
• Previous years by month — Shows the details for each of the months in the previous years.
• Current year by month — Shows the details for each of the months in the current year.
In addition, you can view the analytics that pertain to a subject by choosing Actions > View Insight near the top of the subject page.
tibbr, tibbr Service, tibbr Community, and tibbr Community Service How-To Guide
66 | Chapter 3 Subjects
Incorporate External Content into Subjects
As the owner of a subject, you can enhance its substance by integrating content from external sources, such as reference information, into the subject.
Incorporate Content and Add LanguageTo integrate external content into a subject page:
1. On the subject page. choose Actions > Manage Pages below the subject name near the top.
The Manage Pages dialog box is displayed.
2. Click Add Page.
The Add Page dialog box is displayed.
3. Type a name of your choice in the Page Name text field.
4. Type the page’s URL in the URL text field.
5. Click Save.
Afterwards, tibbr displays at the top of the subject page a tab labeled with the page name you specified. Clicking the tab displays the content of the new page.
If an external page you have added to a subject has one or more versions in other languages, you can also add them, one by one, to the subject. To add a page in another language:
1. In the lower left corner of the Manage Pages dialog box, click Add Language.
A new section, Add Language, is displayed at the bottom of the dialog box.
2. Choose the language you would like to add from the drop-down menu on the left.
The menu choices are configured by your tibbr administrator.
3. Type the new page name and URL in the Page Name and URL text fields, respectively.
4. Click Add.
Before you can take advantage of this capability, your tibbr administrator must specify that the Manage Pages item in the Actions drop-down menu on the subject page be made visible to you by selecting the related option in the Edit Subject Details screen for tibbr administrators.
tibbr, tibbr Service, tibbr Community, and tibbr Community Service How-To Guide
Incorporate External Content into Subjects | 67
Update Page Names and URLsTo change the URL, the name of a page within a subject, or both:
1. In the upper left corner of the Manage Pages dialog box, click the name of the page you want to edit.
2. Optional. Type a new name in the Page Name text field.
3. Optional. Type a new URL in the URL text field.
4. Click Save.
tibbr, tibbr Service, tibbr Community, and tibbr Community Service How-To Guide

68 | Chapter 3 Subjects
tibbr, tibbr Service, tibbr Community, and tibbr Community Service How-To Guide
| 69
Chapter 4 People
This chapter explains how to find and follow people.
Topics
• Explore People, page 70
• Follow a Person, page 71
• Stop Following a Person, page 72
tibbr, tibbr Service, tibbr Community, and tibbr Community Service How-To Guide
70 | Chapter 4 People
Explore People
Click Explore People in the People tab in the left panel takes you to a page with two tabs, All People and My Connections.
All PeopleClicking the All People tab displays a list of all tibbr users in your organization.
To find a user in the directory, type that person’s name in the Search field and either click the Search button or press Enter. tibbr then lists the users whose names match the typed name.
By default, people are shown in hierarchical view. Some tibbr instances have an alternate, hierarchical view, available. In those cases, to see the list by organization, click the Hierarchical View tab. Expand or collapse the groups in the hierarchical view by clicking the expand or collapse button in the tree display.
By default, clicking the List View tab alphabetically displays all the people in your organization by their first names. Choosing Last Name from the drop-down menu near the top displays the names alphabetically by last name.
Clicking a person’s name takes you to his or her profile page.
My ConnectionsClicking the My Connections tab displays a list of the people you are following (in the Following tab) and those who are following you (in the Followers tab).
tibbr, tibbr Service, tibbr Community, and tibbr Community Service How-To Guide
Follow a Person | 71
Follow a Person
To follow someone, that is, subscribe to his or her posts, trigger a request by clicking the Follow button to the right of that person’s name in the directory or near the top right corner of that person’s profile page. That button then changes to read Unfollow.
If following that person requires approval, tibbr alerts that person of your request through the notification icon at the top of his or her home page. (See Notifications on page 17 for details.) As soon as approval is granted, tibbr updates the Follow button to read Unfollow and displays the related posts on your wall.
tibbr grays out the pictures of the people who have left your organization.
tibbr, tibbr Service, tibbr Community, and tibbr Community Service How-To Guide
72 | Chapter 4 People
Stop Following a Person
To stop following a person, click the user’s Unfollow button in the directory or near the top right corner of the user’s profile page.
Afterwards, tibbr updates that button to read Follow and stops displaying the related posts on your wall.
tibbr, tibbr Service, tibbr Community, and tibbr Community Service How-To Guide
| 73
Chapter 5 People Groups
You can create a people group with the names of certain colleagues in your organization—similar to an email alias. Afterwards, you can invite the group members to follow subjects without having to specify the individuals one by one.
This chapter describes how to create a people group, assign members to it, edit the group attributes and members, assign additional owners to a group, or delete it.
Everyone in your organization can see all the groups that have been created and view their members, that is, all groups are public. This chapter shows you how.
Topics
• Create a People Group, page 74
• Specify the Members of a People Group, page 75
• Edit a People Group, page 76
• Add Owners to a People Group, page 77
• Delete a People Group, page 78
• Access, Learn About, Or View the Members of a People Group, page 79
Before you can create people groups, your tibbr administrator must grant you the privilege for performing that task.
tibbr, tibbr Service, tibbr Community, and tibbr Community Service How-To Guide
74 | Chapter 5 People Groups
Create a People Group
To create a people group:
1. Click the Groups tab in your home page’s left panel.
2. Click Create Group to the left of the Search field.
The related dialog box is displayed with the Details tab on the left selected by default.
3. In the Name text field, type a name that identifies the group, for example, My Staff.
4. Optional. Post an image for the group:
a. Under Upload a group picture, click Browse for a file browser.
b. Navigate to the image file and click Open.
5. Optional.
a. In the Location text field, type the area in which the group is situated.
b. In the Phone Number text field, type the telephone number of the group.
c. In the Fax text field, type the facsimile number of the group.
d. In the Address text field, type the street or postal address of the group.
e. In the Description text field, type a synopsis about the group.
6. Click Create Group.
tibbr, tibbr Service, tibbr Community, and tibbr Community Service How-To Guide
Specify the Members of a People Group | 75
Specify the Members of a People Group
To specify the members of a newly created people group:
1. Click the Groups tab in the left panel.
2. Click Create Group to the left of the Search field.
The related dialog box is displayed.
3. Click the Members tab on the right.
4. In the Add Users to the Group text field, type the names of the people you would like to add to the group.
Soon after you start typing, tibbr automatically displays a list of matching names as choices. Add as many people as you desire.
5. Click Add.
tibbr displays the details of the user you have added: name, department, and job title in a table below.
6. Click Create Group.
tibbr, tibbr Service, tibbr Community, and tibbr Community Service How-To Guide
76 | Chapter 5 People Groups
Edit a People Group
To edit a people group:
1. Click the Groups tab in the left panel.
2. Click My Groups.
tibbr displays two tabs near the top: Following (the groups you are following) and Member (the groups of which you are a member).
3. Click the Member tab and select the group you would like to edit.
4. Choose Edit Group from the drop-down menu to the right of the group name.
The related dialog box is displayed with the Details tab selected by default.
5. Revise the details, as appropriate:
a. Upload a new photo or replace the existing one by clicking Browse under Upload a group picture and following the appropriate steps.
b. Update any of the fields, as appropriate.
6. Click Update Group.
7. Click the Members tab on the right.
8. Edit the members, as appropriate:
a. In the Add Users to the Group text field, type the names of the people you would like to add to the group.
Soon after you start typing, tibbr automatically displays a list of matching names as choices. Add as many people as you desire.
b. Click Add.
c. Delete one or more member names from the group by locating them, one by one, on the list of people displayed and clicking Remove to the right.
9. Click Update Group.
tibbr, tibbr Service, tibbr Community, and tibbr Community Service How-To Guide
Add Owners to a People Group | 77
Add Owners to a People Group
By default, you are the owner of the people groups you create. To add owners to a group that you own:
1. Click the Groups tab in the left panel.
2. Click My Groups and then the Member tab.
3. Select the group and choose Assign Owner from the drop-down menu to the right of the group name.
The related dialog box is displayed.
4. In the Add Owners text field, type the names of the people you would like to be coowners of the group.
Soon after you start typing, tibbr automatically displays a list of matching names as choices. Add as many people as you desire.
5. Click Add.
tibbr displays the names, departments, and job titles of the new owners along with their pictures.
6. Optional. Delete any owners you have added by clicking Remove in the bottom right-hand corner of the section with their details.
7. Click OK.
tibbr, tibbr Service, tibbr Community, and tibbr Community Service How-To Guide
78 | Chapter 5 People Groups
Delete a People Group
To delete a people group:
1. Click the Groups tab in the left panel.
2. Click My Groups and then the Member tab.
3. Select the group and choose Delete from the drop-down menu to the right of the group name.
tibbr prompts you to confirm the deletion.
tibbr, tibbr Service, tibbr Community, and tibbr Community Service How-To Guide
Access, Learn About, Or View the Members of a People Group | 79
Access, Learn About, Or View the Members of a People Group
You can read about a group’s details by mousing over its picture in the Groups tab. In addition, for the groups that you own, you can view their members by selecting a group and choosing View Members from the drop-down menu. For the groups not owned by you, you can find out who are their members by clicking the group name to go to the Group Wall.
tibbr, tibbr Service, tibbr Community, and tibbr Community Service How-To Guide

80 | Chapter 5 People Groups
tibbr, tibbr Service, tibbr Community, and tibbr Community Service How-To Guide
| 81
Chapter 6 Alerts on New Posts
With a few steps, you can have tibbr alert you by email whenever new posts arrive. This chapter describe the setup procedure.
Topics
• Register Your Email Address, page 82
• Schedule Delivery, page 83
• Respond to Posts by Email, page 85
• Delete a Message-Delivery Channel, page 86
• Pause or Resume a Channel, page 87
tibbr, tibbr Service, tibbr Community, and tibbr Community Service How-To Guide
82 | Chapter 6 Alerts on New Posts
Register Your Email Address
First, register your email address at which you would like to receive notifications of new posts from tibbr:
1. Click View My Profile below your picture in the left panel of your home page.
The My Profile page is displayed.
2. Click Manage Email Alerts in the top right corner or from your name’s drop-down menu at the top.
The Manage Email Alerts screen is displayed.
3. Choose Add Another Email Address from the Choose an Email Address drop-down menu.
The Add Another Email Address dialog box is displayed.
4. Type your email address in the text field and then click Submit.
tibbr sends you an email message in which is an activation code.
5. Type the activation code in the Activation code field in the Set Up Alerts screen and click Submit.
tibbr, tibbr Service, tibbr Community, and tibbr Community Service How-To Guide
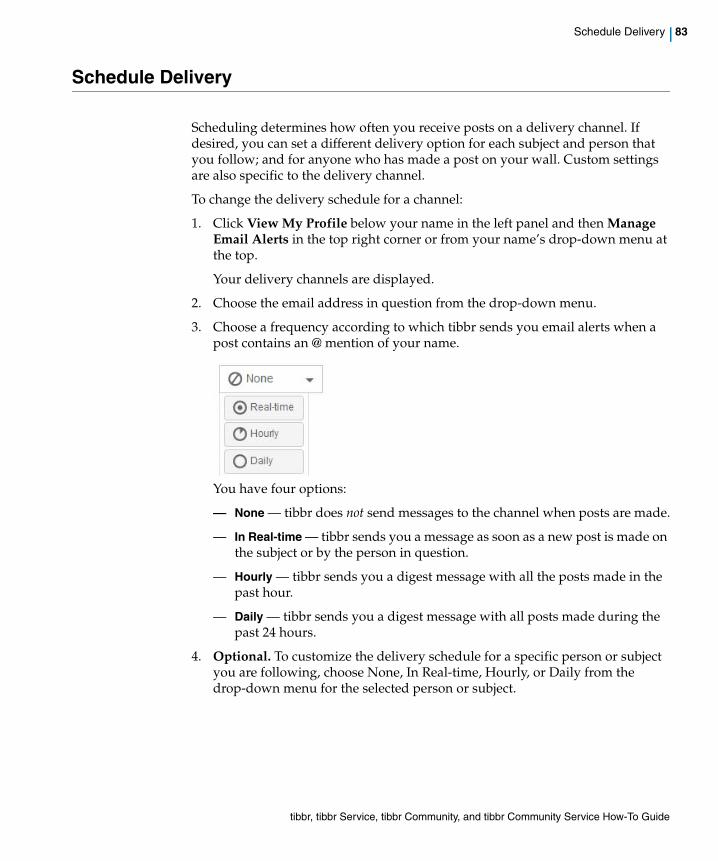
Schedule Delivery | 83
Schedule Delivery
Scheduling determines how often you receive posts on a delivery channel. If desired, you can set a different delivery option for each subject and person that you follow; and for anyone who has made a post on your wall. Custom settings are also specific to the delivery channel.
To change the delivery schedule for a channel:
1. Click View My Profile below your name in the left panel and then Manage Email Alerts in the top right corner or from your name’s drop-down menu at the top.
Your delivery channels are displayed.
2. Choose the email address in question from the drop-down menu.
3. Choose a frequency according to which tibbr sends you email alerts when a post contains an @ mention of your name.
You have four options:
— None — tibbr does not send messages to the channel when posts are made.
— In Real-time — tibbr sends you a message as soon as a new post is made on the subject or by the person in question.
— Hourly — tibbr sends you a digest message with all the posts made in the past hour.
— Daily — tibbr sends you a digest message with all posts made during the past 24 hours.
4. Optional. To customize the delivery schedule for a specific person or subject you are following, choose None, In Real-time, Hourly, or Daily from the drop-down menu for the selected person or subject.
tibbr, tibbr Service, tibbr Community, and tibbr Community Service How-To Guide
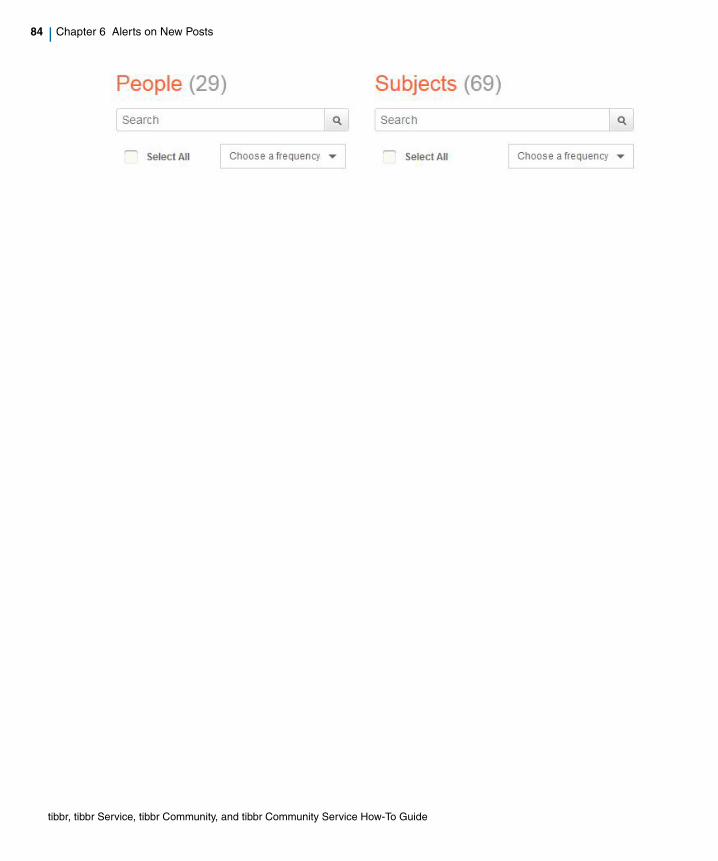
84 | Chapter 6 Alerts on New Posts
tibbr, tibbr Service, tibbr Community, and tibbr Community Service How-To Guide
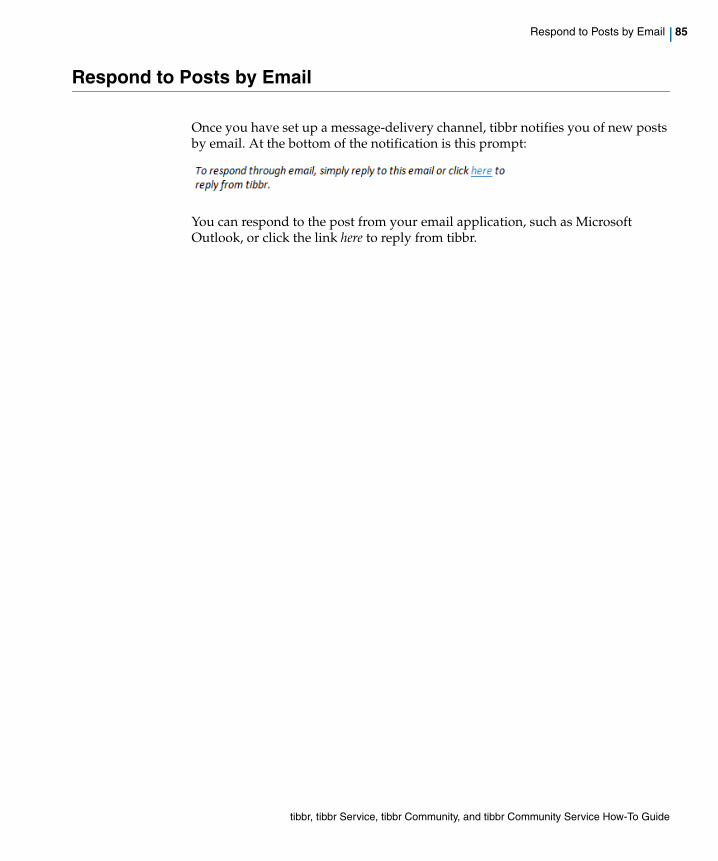
Respond to Posts by Email | 85
Respond to Posts by Email
Once you have set up a message-delivery channel, tibbr notifies you of new posts by email. At the bottom of the notification is this prompt:
You can respond to the post from your email application, such as Microsoft Outlook, or click the link here to reply from tibbr.
tibbr, tibbr Service, tibbr Community, and tibbr Community Service How-To Guide
86 | Chapter 6 Alerts on New Posts
Delete a Message-Delivery Channel
To delete a message-delivery channel:
1. Click View My Profile below your picture for the My Profile page and then Set Up Alerts in the top right corner or from your name’s drop-down menu at the top.
2. Click the Delete this email link on the right.
3. Click OK in the confirmation dialog box that is displayed.
tibbr, tibbr Service, tibbr Community, and tibbr Community Service How-To Guide
Pause or Resume a Channel | 87
Pause or Resume a Channel
You can temporarily stop receiving posts for a channel, such as when you are on vacation.
To pause a channel:
1. Click View My Profile below your picture for the My Profile page and then Set Up Alerts in the top right corner or from your name’s drop-down menu at the top.
2. Choose the email address in question from the drop-down menu.
3. Click the Pause all email alerts link on the right.
The link then reads Play all email alerts.
To receive posts again, click the Play all email alerts link.
tibbr, tibbr Service, tibbr Community, and tibbr Community Service How-To Guide

88 | Chapter 6 Alerts on New Posts
tibbr, tibbr Service, tibbr Community, and tibbr Community Service How-To Guide
| 89
Chapter 7 tibbr Events
With tibbr’s event capability, you can post calendar appointments to your colleagues or followers of a subject. As a recipient of an event, you can reply on tibbr and then add the event to your Microsoft Outlook or Apple iCal calendar.
Topics
• Post an Event, page 90
• Reply to an Event, page 91
tibbr, tibbr Service, tibbr Community, and tibbr Community Service How-To Guide
90 | Chapter 7 tibbr Events
Post an Event
To post an event to people or subjects:
1. On your home page, click Event at the top of your wall.
2. In the field with the prompt What are you planning?, type the title of the appointment, for example, Team Meeting.
3. Under Start Time, specify the date and time the event will start by clicking and then choosing the appropriate values for the two fields.
4. Under End Time, specify the date and time the event will end by clicking and then choosing the appropriate values for the two fields.
5. Optional. In the field with the prompt Where, type the location in which the appointment will take place.
6. Optional. In the field with the prompt More Details, type any other information that pertains to the appointment.
7. Select or deselect Show the guest list for this event to specify whether to list your invitees in the post.
8. In the Post to field, type the name of the person to which you would like to post the appointment. Add as many people as you desire.
Soon after you start typing, tibbr automatically displays a list of matching names as choices. Add as many people or subjects as you desire.
9. Optional. Attach a file or add a link to this post. For the procedure, see Attach Files or Add Links on page 27.
10. Optional. To post a private appointment, choose Private Post from the adjacent drop-down menu, which shows Public Post as the default. Private appointments are marked with the lock icon, which precedes the sender’s name. Only the sender and receivers can view those appointments.
11. Click Create Event.
tibbr, tibbr Service, tibbr Community, and tibbr Community Service How-To Guide
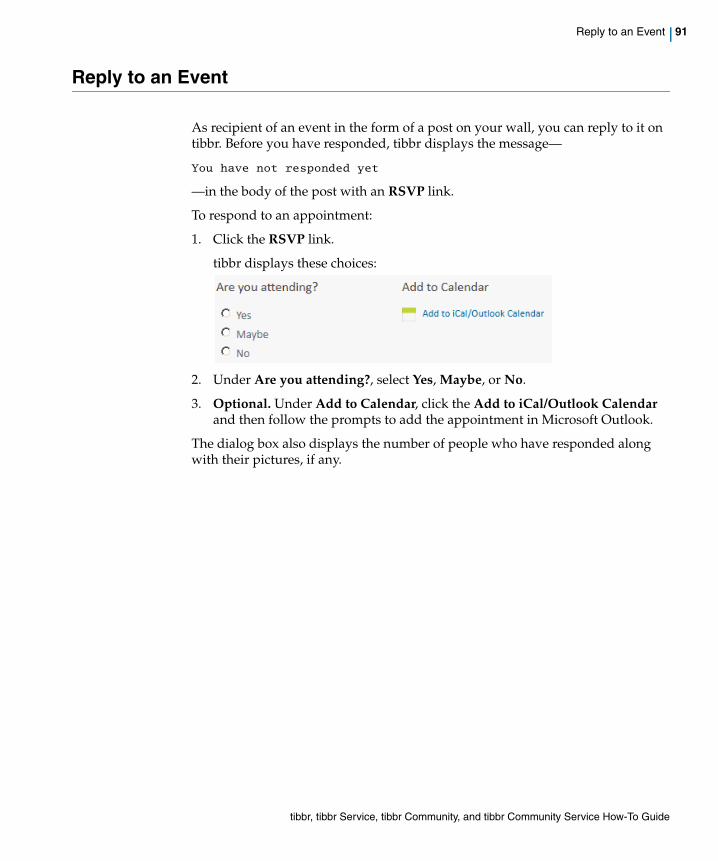
Reply to an Event | 91
Reply to an Event
As recipient of an event in the form of a post on your wall, you can reply to it on tibbr. Before you have responded, tibbr displays the message—
You have not responded yet
—in the body of the post with an RSVP link.
To respond to an appointment:
1. Click the RSVP link.
tibbr displays these choices:
2. Under Are you attending?, select Yes, Maybe, or No.
3. Optional. Under Add to Calendar, click the Add to iCal/Outlook Calendar and then follow the prompts to add the appointment in Microsoft Outlook.
The dialog box also displays the number of people who have responded along with their pictures, if any.
tibbr, tibbr Service, tibbr Community, and tibbr Community Service How-To Guide

92 | Chapter 7 tibbr Events
tibbr, tibbr Service, tibbr Community, and tibbr Community Service How-To Guide
| 93
Chapter 8 Apps
This chapter describes the tibbr applications, including event streams from previous versions. They are called tibbr apps for short, which might integrate with external systems or extend tibbr’s capabilities.
Topics
• Understand Apps, page 94
• Work With tibbr Files, page 95
• Work With the tibbr Ideas App, page 100
• Work With tibbr Tasks, page 111
• Work With Apps Developed by Your Company, page 118
• Work With Event Streams, page 119
• Work With Social Apps, page 138
Your tibbr administrator might need to enable some of the apps described in this chapter before they are available to you.
tibbr, tibbr Service, tibbr Community, and tibbr Community Service How-To Guide
94 | Chapter 8 Apps
Understand Apps
By mousing over Apps in the left panel of your home page and then clicking Explore Apps, you access three categories of apps, shown under three tabs:
• My Apps — These are the apps that you have enabled for your use.
• My Company Apps — Each of these apps, ready for use within your organization, falls within one of the following:
— The app is part of the tibbr installation.
— The app is developed by you. To learn how to register such an app for tibbr, see the page on registering applications in the Developer Center tab in the left panel of the tibbr home page.
— The app is an event stream from previous tibbr releases.
— The app has been added to this tab by your tibbr administrator from Marketplace Apps, for example, the Box app.
• Marketplace Apps — These apps, developed by TIBCO or its application partners on top of the tibbr application framework, extend the capabilities of tibbr. They can be imported into your tibbr environment by your tibbr administrator, after which they are displayed under My Company Apps.
tibbr, tibbr Service, tibbr Community, and tibbr Community Service How-To Guide
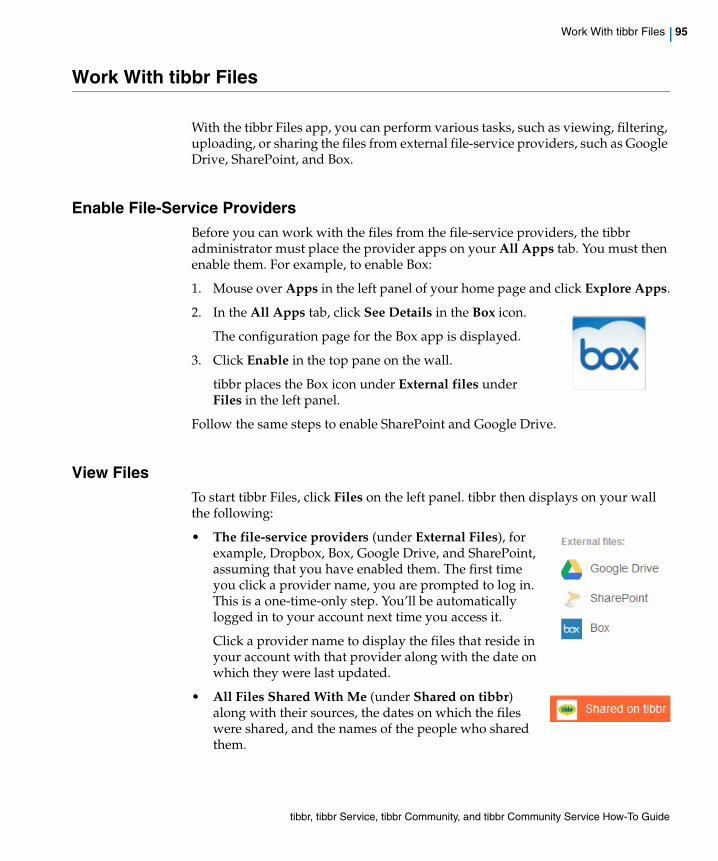
Work With tibbr Files | 95
Work With tibbr Files
With the tibbr Files app, you can perform various tasks, such as viewing, filtering, uploading, or sharing the files from external file-service providers, such as Google Drive, SharePoint, and Box.
Enable File-Service ProvidersBefore you can work with the files from the file-service providers, the tibbr administrator must place the provider apps on your All Apps tab. You must then enable them. For example, to enable Box:
1. Mouse over Apps in the left panel of your home page and click Explore Apps.
2. In the All Apps tab, click See Details in the Box icon.
The configuration page for the Box app is displayed.
3. Click Enable in the top pane on the wall.
tibbr places the Box icon under External files under Files in the left panel.
Follow the same steps to enable SharePoint and Google Drive.
View FilesTo start tibbr Files, click Files on the left panel. tibbr then displays on your wall the following:
• The file-service providers (under External Files), for example, Dropbox, Box, Google Drive, and SharePoint, assuming that you have enabled them. The first time you click a provider name, you are prompted to log in. This is a one-time-only step. You’ll be automatically logged in to your account next time you access it.
Click a provider name to display the files that reside in your account with that provider along with the date on which they were last updated.
• All Files Shared With Me (under Shared on tibbr) along with their sources, the dates on which the files were shared, and the names of the people who shared them.
tibbr, tibbr Service, tibbr Community, and tibbr Community Service How-To Guide
96 | Chapter 8 Apps
To display only the files that have been shared with you or with the subjects that you follow from one of the file-service providers:
1. Click Shared on tibbr.
2. Click the From drop-down menu near the top right corner and choose the provider name, for example, Box.
tibbr then displays the Box files that have been shared.
Search for FilesFor long file lists, you can easily locate a specific file by searching for it. Type a keyword of the file name in the Search for files text field in the top-right corner. tibbr then displays a list of the matching names from which you can choose the one you desire.
Upload FilesTo upload and share one or more files from your file system, Google Drive, SharePoint, or Box:
1. Click the Upload File button next to the search field in the top right-hand corner.
tibbr opens the dialog box for uploading files.
2. Type your post in the text field with the prompt What’s going on.
3. Type one or more names of the people or subjects with which you would like to share the file under Post to.
4. Click one of the tabs (My computer, Google Drive, SharePoint, or Box) to specify the location of the files you would like to upload and share.
5. Drag and drop one or more files to the area with the prompt Drag files here to upload.
6. Choose Public Post or Private Post from the drop-down menu at the bottom.
Click Post.
Mousing over a file name on the list highlights two buttons to the right of the file name:
• A comment button along with a count of the number of comments that have been made on the original post that accompanied the shared file.
• An Actions drop-down menu with five items: Preview, Download, Share, Copy Link, and View Properties.
tibbr, tibbr Service, tibbr Community, and tibbr Community Service How-To Guide
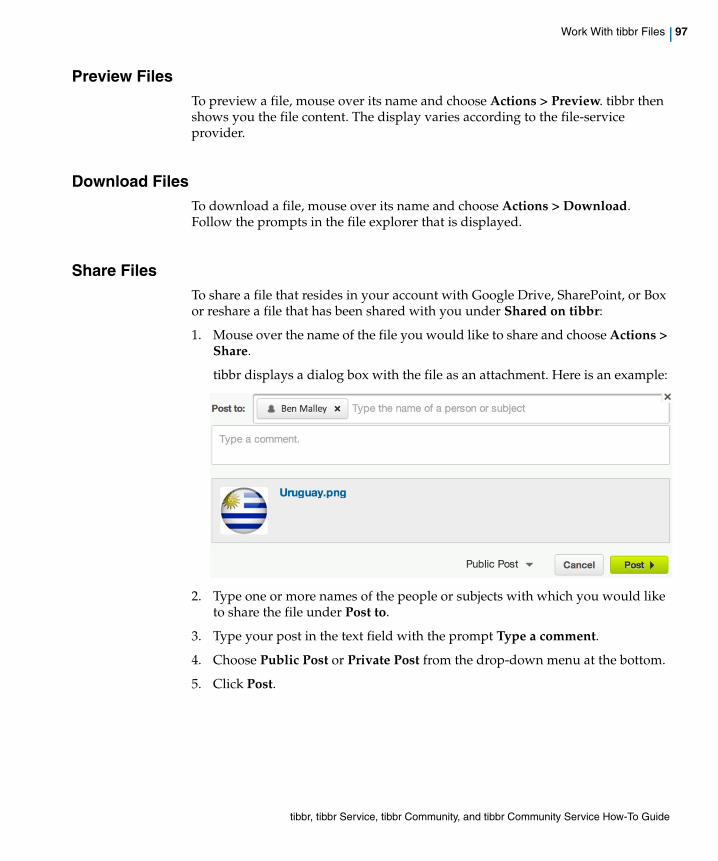
Work With tibbr Files | 97
Preview FilesTo preview a file, mouse over its name and choose Actions > Preview. tibbr then shows you the file content. The display varies according to the file-service provider.
Download FilesTo download a file, mouse over its name and choose Actions > Download. Follow the prompts in the file explorer that is displayed.
Share FilesTo share a file that resides in your account with Google Drive, SharePoint, or Box or reshare a file that has been shared with you under Shared on tibbr:
1. Mouse over the name of the file you would like to share and choose Actions > Share.
tibbr displays a dialog box with the file as an attachment. Here is an example:
2. Type one or more names of the people or subjects with which you would like to share the file under Post to.
3. Type your post in the text field with the prompt Type a comment.
4. Choose Public Post or Private Post from the drop-down menu at the bottom.
5. Click Post.
tibbr, tibbr Service, tibbr Community, and tibbr Community Service How-To Guide
98 | Chapter 8 Apps
Copy File LinksTo copy a file’s URL to your clipboard, mouse over the file name and choose Actions > Copy Link. tibbr then confirms in a pop-up pane. The copied link would be handy for pasting as, for example, a reference in a post.
View PropertiesTo find out a file’s attributes, such as its type, mouse over the file name and choose Actions > View Properties. tibbr then displays in a pop-up pane the related details. The fields vary according to the file-service provider.
Comment on FilesTo comment on a shared file:
1. Mouse over the name of the file on which you would like to comment and click the comment button .
tibbr displays a dialog box with a text field with the prompt Add a comment along with any other comments that have been posted.
2. Type your comment in the text field.
3. Click Post.
Filter Shared FilesYou can display the files shared by a person or subject by filtering them.
By Person
To display only the files shared by someone in your organization:
1. Click Shared on tibbr.
2. Click the people icon near the top.
tibbr opens a pane with a search field.
3. Type in the search field the name of the person whose shared files you would like to display. Press Enter.
tibbr displays a list of the matching names as choices.
4. Choose the appropriate name.
tibbr then displays the files shared by the person you specified.
tibbr, tibbr Service, tibbr Community, and tibbr Community Service How-To Guide
Work With tibbr Files | 99
By Subject
To display only the files shared for a certain subject:
1. Click Shared on tibbr .
2. Click the file icon near the top
tibbr opens a pane with a search field.
3. Type in the search field the name of the subject whose shared files you would like to display. Press Enter.
tibbr displays a list of matching names as choices.
4. Choose the appropriate name.
tibbr then displays only the files shared in the subject you specified.
tibbr, tibbr Service, tibbr Community, and tibbr Community Service How-To Guide
100 | Chapter 8 Apps
Work With the tibbr Ideas App
Ideas is a tibbr app that collects ideas created by you or your colleagues and that enables posting of feedback, sharing, and other related tasks.
Understand the RolesThe following roles are available for the Ideas app:
• tibbr administrators — Even though tibbr administrators do not have a specific role per se in Ideas, they can add Ideas administrators (see the next bullet), who can then manage the Ideas settings. If desired, tibbr administrators can delete their own names from the list of app administrators.
The Manage App Admins tab in the Administrator section of the Ideas app is available to tibbr administrators only. For more details, see Manage Administrators on page 106.
• App administrators — App administrators (in this case, Ideas administrators) can access all the Ideas settings. However, they cannot edit ideas and cannot add or delete app administrators.
• Category owners — Category owners manage the Ideas process for the ideas in their categories, that is, they can change the stage of an idea.
• Owners and contributors — While creating an idea, the owner can specify one or more contributors, who have the same privileges as the owner. They can edit or delete the ideas that they own.
• Participants — These are regular users who can view, vote for, comment on, share, and like ideas.
For details on which roles are notified of Ideas activities and which roles can perform the Ideas-related tasks, see Addendum: Understand Notifications and Privileges on page 109.
Your administrator must set up the tibbr Ideas app before it becomes available to you.
Category owners can access all ideas. In addition, they can assign categories to or modify the categories of an idea—regardless of whether they own those categories. They can, however, only edit the ideas that are assigned to the categories that they own.
tibbr, tibbr Service, tibbr Community, and tibbr Community Service How-To Guide

Work With the tibbr Ideas App | 101
Access the App
To access Ideas, mouse over Ideas in the left panel of your home page.
Search for IdeasDisplayed on the All Ideas wall are the ideas that you can access. At the top of the Ideas page is a Search field. Enter one or more keywords and click Search to search for the ideas that relate to them. tibbr displays the matches, highlighting the search string in the ideas that are shown.
In addition, you can search by people or by category:
• To search for ideas by people, click the people icon next to the All Ideas drop-down menu at the top. Type a person’s first or last name; tibbr displays a list of possible matches along with pictures, from which you can make a choice. Press Enter or click the Search icon .
• To search for ideas by category, click the category icon next to the people icon. A search field is displayed, in which you can type the category name and then press Enter or click the Search icon.
Sort or Filter IdeasNear the top of the Ideas wall is a pull-down menu with All Ideas as the default, that is, all the ideas are displayed. You can change the display by choosing from one of the items in the drop-down menu: Ideas I created, Ideas I voted, Ideas I starred, or All Ideas.
In the right panel are the option panes for sorting and filtering ideas:
• Sorting — Under Sort Ideas, select one of the following options:
— By Activity (default) — According to the chronological order of the related posts
— By Votes — In descending order of the number of votes for the ideas
— By Creation Date — In descending order of the dates on which the ideas were created
Your administrator must set up the Ideas app to make it available to you.
tibbr, tibbr Service, tibbr Community, and tibbr Community Service How-To Guide
102 | Chapter 8 Apps
• Filtering — In the pane below are four drop-down menus for filtering, as follows:
— Under Filter by Stage, choose All ideas, Active, Under Review, In Progress, Already Offered, For Future Consideration, or Delivered.
— Under Filter by Subject, select All Subjects or one of the popular subjects on the list.
— Under Filter by Contributor, select All Contributors or one of the popular contributors on the list.
— Under Filter by Category (available to administrators only), select a category from the list.
Create and Manage IdeasThis section describes how to create, edit, or delete ideas—tasks that only owners or contributors can perform.
Create Ideas
To create an idea, go to the Ideas app and then do the following:
1. In the panel below the banner, type a title for your idea in the text field with the prompt Idea title.
tibbr displays in a pane below the existing ideas with titles that are similar to the one you are typing.
2. In the text field below, describe your idea.
3. In the Post to text field, type the name of the related subject.
tibbr displays the possible matches from which you can make a choice.
• The Ideas administrator can change the stage criteria to meet the needs of your organization.
• Depending on the stage the ideas are in, some of the features or actions might not apply.
Alternatively, go to your wall and choose More > Apps > Create Idea at the bottom of a post.
tibbr, tibbr Service, tibbr Community, and tibbr Community Service How-To Guide
Work With the tibbr Ideas App | 103
4. Optional. In the Add Contributors field, type one or more names of the idea’s contributors.
Once you have typed a few keystrokes, tibbr displays a list of possible matches from which you can make a choice.
Note that in the right panel is a Top Contributors pane that shows the names and pictures of the people who have contributed the most along the number of ideas they have created and the number of votes for those ideas.
5. Optional. Under Attach, click File or Link to attach a file or add a link.
6. Optional. In the Add Contributors field, type one or more names of the idea’s contributors.
Once you have typed a few keystrokes, tibbr displays a list of possible matches from which you can make a choice.
7. Click Create Idea.
tibbr posts the idea to the subject that you specified.
Edit Ideas
To edit an idea created or contributed by you:
1. Locate the idea on the Ideas wall and choose More > Edit Idea at the bottom.
The Edit This Idea dialog box is displayed.
2. Edit the fields, including the title, attachments and links, as appropriate.
3. Click Save.
Delete Ideas
To delete an idea that you created or contributed to:
1. Locate the idea on the Ideas wall.
2. Choose More > Delete link at the bottom of the idea.
A confirmation dialog box is displayed.
3. Click Yes to delete the idea or Cancel to retain it.
To share an idea with more people or subjects, click Share at the bottom of the post. For details, see Share Ideas on page 104.
tibbr, tibbr Service, tibbr Community, and tibbr Community Service How-To Guide

104 | Chapter 8 Apps
Vote For, Comment On, Like, or Share IdeasAs an idea user, you can vote for or comment on ideas, mark those that you like, or share them.
Vote for Ideas
A vote for an idea shows support for it. tibbr displays the total number of votes for an idea below the picture of the idea’s creator.
To vote for an idea, click Vote below the idea’s vote count, after which tibbr updates the Vote button to read Unvote. To cancel your vote, click Unvote.
Comment on Ideas
To comment on an idea:
1. Find the idea on the Ideas wall.
2. Click Comment at the bottom.
3. Type your comment in the text field that is displayed.
4. Click Post.
Mark Ideas That You Like
To show appreciation for an idea, click the Like link at the bottom.
For the ideas that you like, tibbr updates the Like link to read Unlike. If you accidentally clicked Like or you did that and then changed your mind, click Unlike.
Share Ideas
To share an idea with colleagues or subjects:
1. Locate the idea on the Ideas wall and click Share at the bottom.
The Share This Idea dialog box is displayed.
2. In the Share with text field, type a person’s or subject’s name. You can type multiple names.
Once you have typed a few keystrokes, tibbr displays a list of possible matches from which you can make a choice.
3. In the text field with the prompt Write your comments here, type your comments.
4. Click Share.
tibbr, tibbr Service, tibbr Community, and tibbr Community Service How-To Guide
Work With the tibbr Ideas App | 105
Afterwards, tibbr makes a related post on the walls of the people or subjects you specified along with a link to the idea.
Perform Administrator TasksThis section describes the tasks you can perform as an Ideas administrator.
Update Stages
To change the stage of an idea of which you are a category owner:
1. Locate the idea on the Ideas wall and choose More > Update Stage at the bottom.
The Update Idea Stage dialog box is displayed.
2. Select the stage you desire.
3. Optional. Add a comment in the Comment field.
4. Optional. Select Only admins can see this comment, if desired.
5. Click Save.
Manage Stages
To edit an idea’s stage, first click the gear icon to the left of the pie-chart icon in the upper right corner to display the Ideas Administrator Settings page along with four tabs below the title. Click Manage Stages, which is the default.
To edit an idea’s stage:
1. Edit the stages, 1 to 6 (Active, Under Review, In Progress, Already Offered, For Future Consideration, Delivered, and Submission Completed), as desired: Select one or both of the options, Provide voting options and Do not allow users to comment or like at this stage.
2. Click Save.
To add a stage, click Add a stage below the list to display the Add Stage dialog box. Fill in the text field with the stage name, select one or both options, and click Save.
The links for these tasks are displayed only if you have idea administrator privilege.
Depending on the stage the idea is in, some of the capabilities might not apply. Also, note that the Submission Completed stage is not present by default.
tibbr, tibbr Service, tibbr Community, and tibbr Community Service How-To Guide
106 | Chapter 8 Apps
Manage Administrators
Only tibbr administrators can add or delete Ideas administrators.
To add an Ideas administrator:
1. Click the Manage Administrators tab.
The Manage App Administrators screen is displayed.
2. In the text field, type the name of the Ideas administrator you would like to add.
Once you have typed a few strokes, tibbr automatically displays a list of matching names as choices. You can add multiple names.
3. Click Add.
tibbr adds the name under App Administrators.
To delete an Ideas administrator, click the X next to the name in question.
Manage Category Owners
To add owners by category, click the Manage Category Owners tab for the related screen and then do the following:
1. For the category to which you would like to add idea administrators, type one or more names in the text field under Administrators.
Once you have typed a few keystrokes, tibbr displays the possible matches from which you can make a choice.
2. Click Save.
To delete an owner, click the X symbol next to the name of the administrator in question.
tibbr, tibbr Service, tibbr Community, and tibbr Community Service How-To Guide

Work With the tibbr Ideas App | 107
Manage Categories
To add Ideas categories, first click the Manage Categories tab for the related screen. The existing categories are displayed under Idea Categories.
Add a Category
To add a category:
1. Type the name of the new category in the text field with the prompt Add a new category.
2. Click Add.
tibbr displays the new category name under Idea categories.
3. Click Save.
Delete a Category
To delete a category:
1. Click the X symbol next to the name in question under Idea Categories.
2. Click Save.
Rename a Category
To rename a category:
1. Click Rename Categories.
tibbr displays the Rename Categories dialog box, listing the current categories in editable fields.
2. Edit the category names, as appropriate.
3. Click Save.
Specify Categories
To specify one or more categories for an idea, locate the idea and select the appropriate categories from the Select a Category pull-down menu to the right of the More menu.
Here is an example of the subsequent display:
tibbr, tibbr Service, tibbr Community, and tibbr Community Service How-To Guide
108 | Chapter 8 Apps
Configure Notifications
To choose whether to be notified—through the notification icon at the top—of the ideas’ stage changes and of newly created ideas, click the Configure Notifications tab. Afterwards, do the following in the screen that is displayed:
1. Select or deselect Notify me if any idea has changed its stage, Notify me if someone has created an idea, or both, as desired.
Both options are selected by default.
2. Click Save.
Browse Ideas Analytics
To browse the analytics of all the ideas, click the pie-chart icon below the Create Idea button on the right.
tibbr then displays the following two line graphs:
• Ideas created in:
— Choose One Week, One Month, Six Months, or One Year from the first pull-down menu. The default is One week.
— Choose All Categories or one of the categories on the list from the second pull-down menu. The default is All Categories.
• Participation in:
— Choose One Week, One Month, Six Months, or One Year from the pull-down menu. The default is One week.
— Choose All Categories or one of the categories on the list from the second pull-down menu. The default is All Categories.
Below the graphs are two horizontal bar graphs:
• Top Creators — The names of the people who have created the most ideas and the percentage of the ideas they have created.
• Top Categories — The category names and the percentages of ideas in those categories.
tibbr, tibbr Service, tibbr Community, and tibbr Community Service How-To Guide
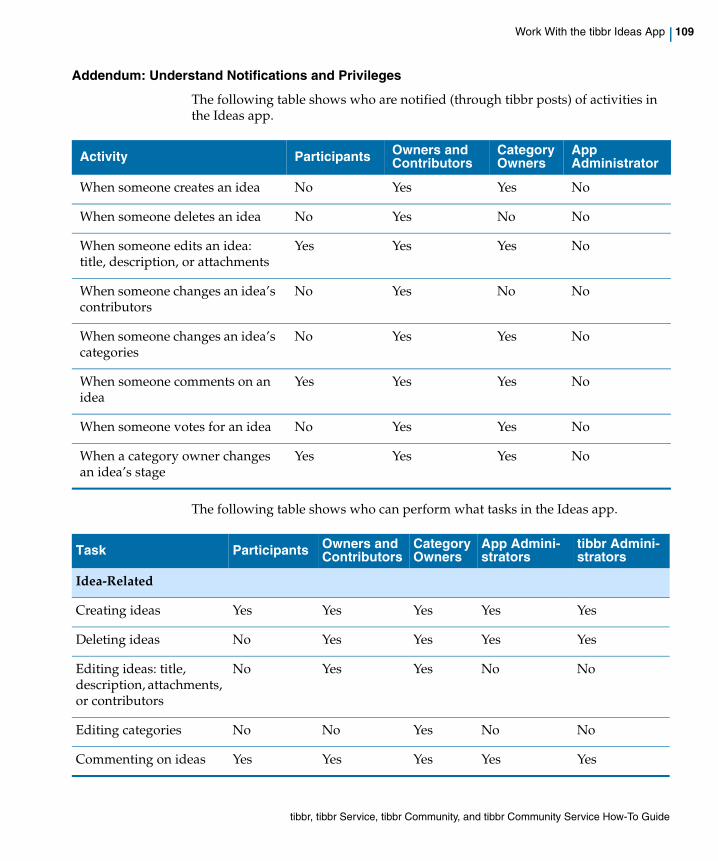
Work With the tibbr Ideas App | 109
Addendum: Understand Notifications and Privileges
The following table shows who are notified (through tibbr posts) of activities in the Ideas app.
The following table shows who can perform what tasks in the Ideas app.
Activity Participants Owners and Contributors
Category Owners
App Administrator
When someone creates an idea No Yes Yes No
When someone deletes an idea No Yes No No
When someone edits an idea: title, description, or attachments
Yes Yes Yes No
When someone changes an idea’s contributors
No Yes No No
When someone changes an idea’s categories
No Yes Yes No
When someone comments on an idea
Yes Yes Yes No
When someone votes for an idea No Yes Yes No
When a category owner changes an idea’s stage
Yes Yes Yes No
Task Participants Owners and Contributors
Category Owners
App Admini-strators
tibbr Admini-strators
Idea-Related
Creating ideas Yes Yes Yes Yes Yes
Deleting ideas No Yes Yes Yes Yes
Editing ideas: title, description, attachments, or contributors
No Yes Yes No No
Editing categories No No Yes No No
Commenting on ideas Yes Yes Yes Yes Yes
tibbr, tibbr Service, tibbr Community, and tibbr Community Service How-To Guide
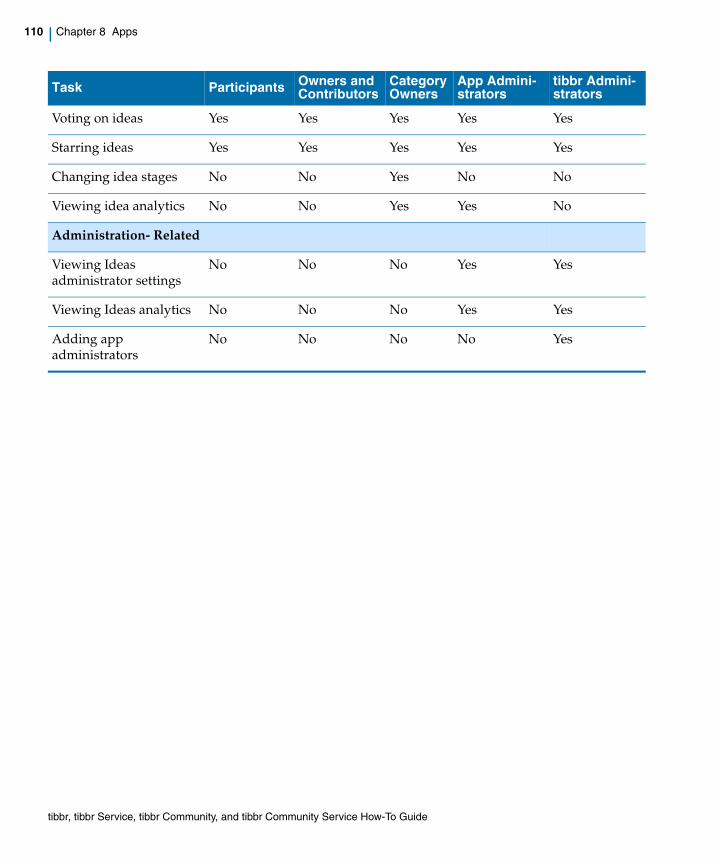
110 | Chapter 8 Apps
Voting on ideas Yes Yes Yes Yes Yes
Starring ideas Yes Yes Yes Yes Yes
Changing idea stages No No Yes No No
Viewing idea analytics No No Yes Yes No
Administration- Related
Viewing Ideas administrator settings
No No No Yes Yes
Viewing Ideas analytics No No No Yes Yes
Adding app administrators
No No No No Yes
Task Participants Owners and Contributors
Category Owners
App Admini-strators
tibbr Admini-strators
tibbr, tibbr Service, tibbr Community, and tibbr Community Service How-To Guide
Work With tibbr Tasks | 111
Work With tibbr Tasks
tibbr Tasks is a tibbr app that enables you to manage projects through organizational and collaborational activities, such as creating task lists and tasks for projects; assigning tasks to colleagues; inviting colleagues to become project members; and viewing task-specific posts.
Enable and Launch the App
Before running tibbr Tasks, enable it:
1. Mouse over Apps in the left panel of your home page and click Explore Apps.
2. In the My Company Apps tab, click See Details in the tibbr Tasks pane.
The configuration page for the tibbr Tasks app is displayed.
3. Click Enable on the wall.
tibbr places the tibbr Tasks pane in the My Apps tab.
To launch tibbr Tasks:
1. Mouse over Apps in the left panel and click Explore Apps.
2. In the My Apps tab, click Launch App at the bottom of the tibbr Tasks pane.
In the top right corner of the tibbr Tasks home page are two tabs:
• Projects: Click this tab for a summary of all the open projects.
• Me: Click this tab for a list of the tasks to which you have been assigned along with the related project names and due dates.
View ProjectsBy default, the tibbr Tasks wall is displayed in the Open Projects tab below the banner.
Your administrator must set up the tibbr Tasks app before it becomes available to you.
tibbr, tibbr Service, tibbr Community, and tibbr Community Service How-To Guide
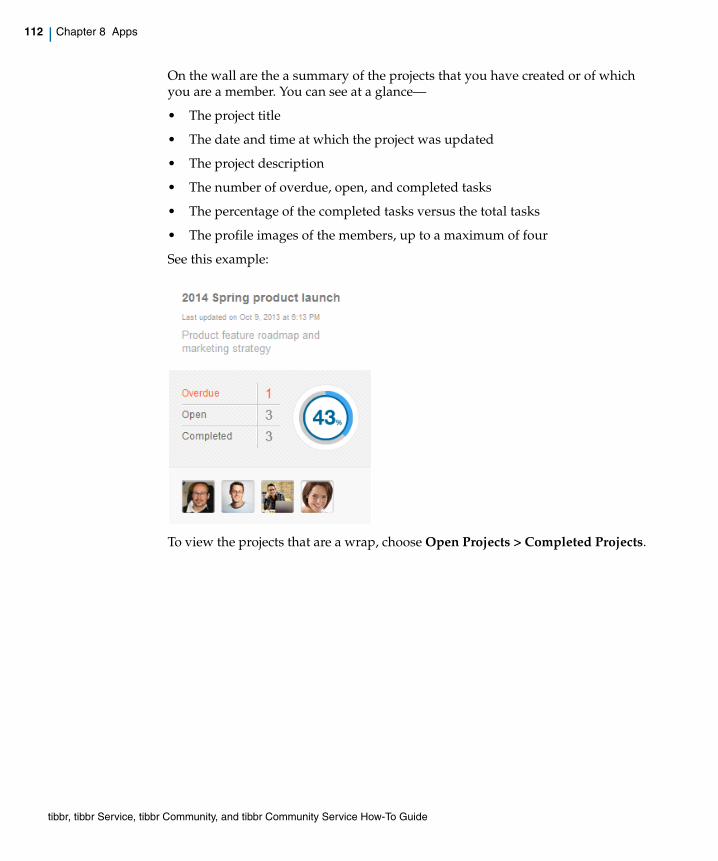
112 | Chapter 8 Apps
On the wall are the a summary of the projects that you have created or of which you are a member. You can see at a glance—
• The project title
• The date and time at which the project was updated
• The project description
• The number of overdue, open, and completed tasks
• The percentage of the completed tasks versus the total tasks
• The profile images of the members, up to a maximum of four
See this example:
To view the projects that are a wrap, choose Open Projects > Completed Projects.
tibbr, tibbr Service, tibbr Community, and tibbr Community Service How-To Guide
Work With tibbr Tasks | 113
Manage ProjectsProjects contains task lists, which in turn contain tasks. Create, edit, or delete projects as follows.
Create a Project
To create a project:
1. Click the +New Project button.
The Create New Project dialog box is displayed.
2. In the top text field, type the name of the project.
3. Optional. Type a description of the project in the text field below.
4. Optional. In the Invite People to This Project text field, type the names of the people you would like to invite as project members.
Once you have typed a few keystrokes, tibbr displays a list of possible matches from which you can make a choice.
5. Click Create.
You are then the owner of the newly created project.
Browse Project Details
Click a project name to go to its wall. Below the title are displayed the number of overdue, open, and completed tasks; the task lists; and the associated tasks. The wall contains two panes:
• In the left pane are the tasks lists.
• In the right pane are the activities that have taken place on the project or, if you click a task list, those that pertain to that list. Shown are such details as the due date, the creation date, the owner, and the names of the people who have been assigned to handle the task, along with these three tabs:
— Posts: Click this tab to show all the related posts.
— Files: Click this tab to show all the related files that have been attached to the posts or that have been uploaded. To download a file, click Download to the right of the file name.
To upload a file, click the Upload File button in the top right corner of the file list. tibbr then opens a file browser in which you can specify the file you would like to upload.
— Statistics (for projects only): Click to view the related data under Top Resolvers This Week, Thirty-Day Summary, and Open and Overdue Tasks By Assignee.
tibbr, tibbr Service, tibbr Community, and tibbr Community Service How-To Guide
114 | Chapter 8 Apps
Edit a Project
To edit a project that you own:
1. On the project page, choose Edit Project from the Settings pull-down menu near the top right corner.
The Edit Project dialog box is displayed, showing the project title and description in the top two text fields.
2. Update the project title or description, as desired.
3. Optional. In the Invite People to This Project, type the names of the people you would like to invite as project members.
4. Click Update.
Delete a Project
To delete a project that you own, choose Delete Project from the Settings pull-down menu. tibbr then prompts you to confirm in a dialog box.
Invite ColleaguesTo invite one or more colleagues to become members of the project, click Invite Colleagues near the top right corner on the project wall. The subsequent steps are similar to those that you follow in the section Suggest a Subject to People.
Manage Task ListsBefore generating tasks, create task lists for capturing them.
Create a Task List
To create a tasks list:
1. Click Create a Task List on the project wall.
tibbr displays a text field with the prompt Untitled Task List.
2. Type the name of the task list you would like to create.
3. Set the due date by clicking the calendar icon to the right and specifying the date in the calendar that is displayed.
tibbr, tibbr Service, tibbr Community, and tibbr Community Service How-To Guide
Work With tibbr Tasks | 115
Edit a Task List
To edit the title of a task list, click that title and edit it inline.
To edit the due date, click the calendar icon and specify the new date on the calendar that is displayed.
Delete a Task List
To edit a task list:
1. On the project wall, locate in the right pane the task list you would like to delete.
2. Click Delete at the right end of the title.
tibbr then prompts you to confirm in a dialog box.
Manage Tasks
You can create, edit, or delete tasks, as follows.
Create Tasks
You can create tasks in either of the following ways:
From the left pane of the project wall:\
1. Locate the related task list and click + Add Task below the bottom task.
A text field with the prompt Untitled Task is displayed at the top of the list.
2. Type the name of the new task in the text field.
3. Set a due date by clicking the calendar icon to the right and then specifying the date and month in the calendar that is displayed.
4. Place your cursor at the end of the new task name and press Enter.
From a post on your wall:
1. Choose More > Apps > Create Task at the bottom of the post.
The Create Task dialog box is displayed.
2. Specify the related project from the top pull-down menu with the prompt Choose an Existing Project.
3. Specify the related task list from the pull-down menu with the prompt Choose a Task List.
tibbr, tibbr Service, tibbr Community, and tibbr Community Service How-To Guide
116 | Chapter 8 Apps
4. Set a due date by clicking Set Due Date under Due Date.
tibbr displays a calendar from which you can specify the date.
5. Specify the people who will handle this task by typing their names in the Assign People to This Task text field.
6. Click Create.
Edit Tasks
To edit the title of a task, click that title and edit it inline.
Delete Tasks
To delete a task, go to its Task Activity view in the right pane and click Delete at the right end of the project name. tibbr then prompts you to confirm in a dialog box.
Sort Tasks
To change the view of the tasks in the left pane on the project wall, choose from the All pull-down menu All, Assigned To Me, Assigned By Me, or Completed.
You can also further sort the tasks by choosing Due Date or Task List in the Sorted By pull-down menu.
Assign Tasks
In the left pane on the project wall, a question mark precedes the names of the tasks that have not been assigned to anyone. To assign a task to a colleague:
1. Click the question mark.
tibbr displays a text field with the prompt Assign User.
2. Type the name of the colleague to whom you would like to assign this task.
Once you have typed a few keystrokes, tibbr displays a list of possible matches from which you can make a choice.
In the right pane on the project wall, the link Assign This Task is displayed next to the Assign To field for a task with no assignees. Click that link and follow step 2 above.
tibbr, tibbr Service, tibbr Community, and tibbr Community Service How-To Guide
Work With tibbr Tasks | 117
Specify Completed tasks
To mark a task as being complete, go to the left pane and click the checkbox to the left of the task. Afterwards, tibbr displays the up-to-date total under Completed below the project name near the top.
Deselecting that checkbox reverts the task status to Open.
Search for Tasks
To search for tasks, type one or more keywords of the task name in the text field with the prompt Search task name at the right end of the banner. tibbr returns the matches in a table with three columns (Task Name, Project Name, and Due Date). To the left of the Due Date column is the conversation icon along with the total number of the posts on that task.
View Task Conversations
To view all the posts on a task, locate the task, for example, by searching for it, and click the conversation icon. tibbr then displays a pop-up pane with the posts on that task.
View Notifications
Whenever activities that pertain to you occur in the tibbr Tasks app, for example, someone assigning a task to you or someone adding you as a project member, tibbr displays alerts in the notification icon to the left of the Search field at the top. Clicking the link in the alert takes you to the appropriate place in the tibbr Tasks app.
tibbr, tibbr Service, tibbr Community, and tibbr Community Service How-To Guide
118 | Chapter 8 Apps
Work With Apps Developed by Your Company
You can integrate apps developed by your company into tibbr by registering them. Afterwards, you can run them on tibbr.
Again, for the registration procedure, see the related page in the Developer Center tab in the left panel of the tibbr home page.
tibbr, tibbr Service, tibbr Community, and tibbr Community Service How-To Guide
Work With Event Streams | 119
Work With Event Streams
You can configure event streams to publish messages from an RSS feed or from an SAP or a Salesforce system.
In general, event streams contain two components:
• Instance An instance is like a category container. The instance contains settings that apply to all its streams. For example, a Salesforce instance holds the user name and password for logging in to Salesforce. You can enable or disable instances, controlling whether their streams are published. Once you have disabled an instance, tibbr does not read or publish messages from the streams it contains.
• Stream A stream is a specific feed of messages within an instance. For example, an RSS stream is a link to a specific RSS feed. Streams are associated with a specific subject. tibbr publishes messages from the stream to that subject.
By default, tibbr checks enabled instances for new messages every 10 minutes and then publishes them.
For details on creating the default event streams available in tibbr, see these sections:
• Configure an RSS App on page 123
• Configure a Salesforce App on page 125
• Configure an SAP App on page 130
• Configure the Oracle Expenses App on page 134
Enable or Disable Event Streams
If your tibbr administrator has added you to the user or subscriber list of an event stream, you can enable or disable that stream.
After an event stream is enabled, its icon is displayed under My Favorite Apps in the pane that is displayed when you mouse over Apps in the left panel of your home page.
tibbr, tibbr Service, tibbr Community, and tibbr Community Service How-To Guide
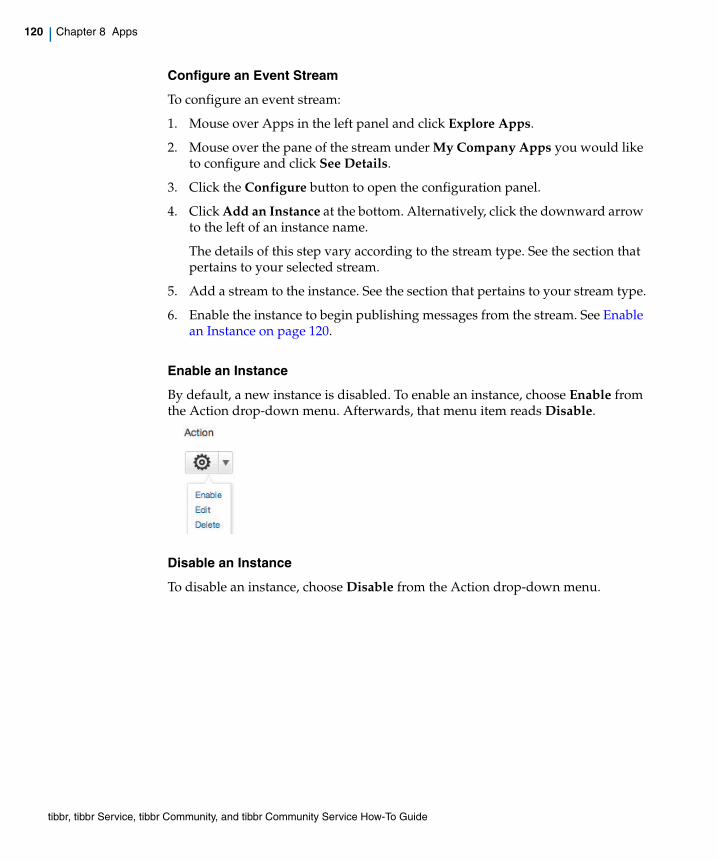
120 | Chapter 8 Apps
Configure an Event Stream
To configure an event stream:
1. Mouse over Apps in the left panel and click Explore Apps.
2. Mouse over the pane of the stream under My Company Apps you would like to configure and click See Details.
3. Click the Configure button to open the configuration panel.
4. Click Add an Instance at the bottom. Alternatively, click the downward arrow to the left of an instance name.
The details of this step vary according to the stream type. See the section that pertains to your selected stream.
5. Add a stream to the instance. See the section that pertains to your stream type.
6. Enable the instance to begin publishing messages from the stream. See Enable an Instance on page 120.
Enable an Instance
By default, a new instance is disabled. To enable an instance, choose Enable from the Action drop-down menu. Afterwards, that menu item reads Disable.
Disable an Instance
To disable an instance, choose Disable from the Action drop-down menu.
tibbr, tibbr Service, tibbr Community, and tibbr Community Service How-To Guide
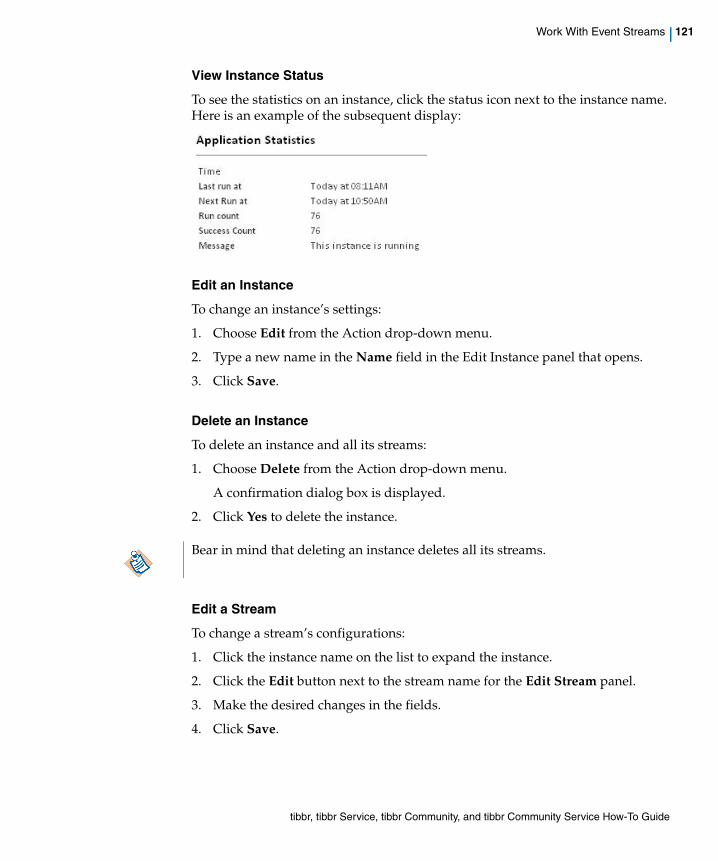
Work With Event Streams | 121
View Instance Status
To see the statistics on an instance, click the status icon next to the instance name. Here is an example of the subsequent display:
Edit an Instance
To change an instance’s settings:
1. Choose Edit from the Action drop-down menu.
2. Type a new name in the Name field in the Edit Instance panel that opens.
3. Click Save.
Delete an Instance
To delete an instance and all its streams:
1. Choose Delete from the Action drop-down menu.
A confirmation dialog box is displayed.
2. Click Yes to delete the instance.
Edit a Stream
To change a stream’s configurations:
1. Click the instance name on the list to expand the instance.
2. Click the Edit button next to the stream name for the Edit Stream panel.
3. Make the desired changes in the fields.
4. Click Save.
Bear in mind that deleting an instance deletes all its streams.
tibbr, tibbr Service, tibbr Community, and tibbr Community Service How-To Guide
122 | Chapter 8 Apps
Delete a Stream
To delete a stream:
1. Click the instance name on the list to expand the instance.
2. Click the Delete icon next to the Edit button of the stream you wish to delete.
A confirmation dialog box is displayed.
3. Click Yes to delete the stream.
tibbr, tibbr Service, tibbr Community, and tibbr Community Service How-To Guide
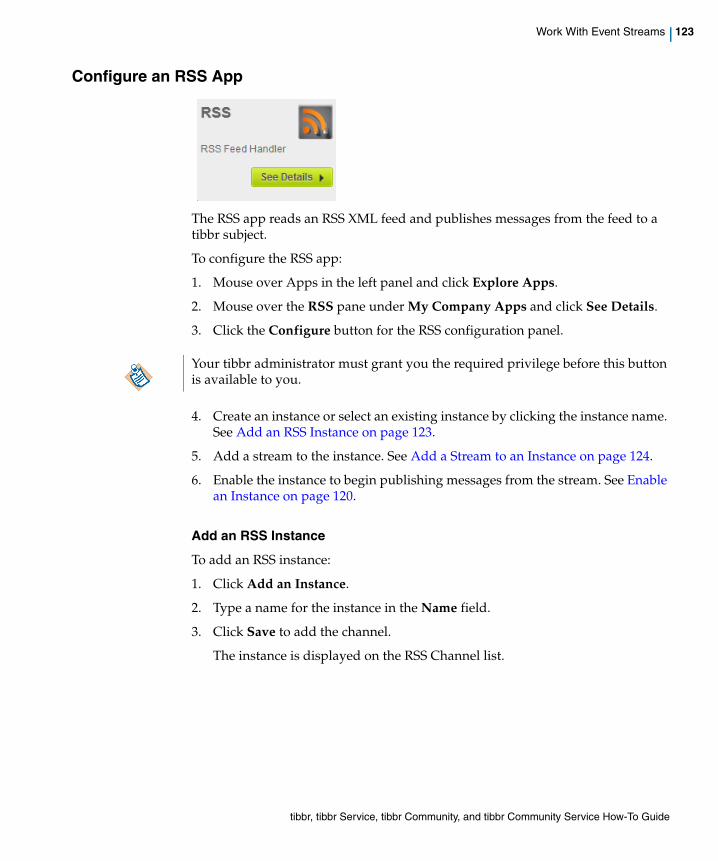
Work With Event Streams | 123
Configure an RSS App
The RSS app reads an RSS XML feed and publishes messages from the feed to a tibbr subject.
To configure the RSS app:
1. Mouse over Apps in the left panel and click Explore Apps.
2. Mouse over the RSS pane under My Company Apps and click See Details.
3. Click the Configure button for the RSS configuration panel.
4. Create an instance or select an existing instance by clicking the instance name. See Add an RSS Instance on page 123.
5. Add a stream to the instance. See Add a Stream to an Instance on page 124.
6. Enable the instance to begin publishing messages from the stream. See Enable an Instance on page 120.
Add an RSS Instance
To add an RSS instance:
1. Click Add an Instance.
2. Type a name for the instance in the Name field.
3. Click Save to add the channel.
The instance is displayed on the RSS Channel list.
Your tibbr administrator must grant you the required privilege before this button is available to you.
tibbr, tibbr Service, tibbr Community, and tibbr Community Service How-To Guide
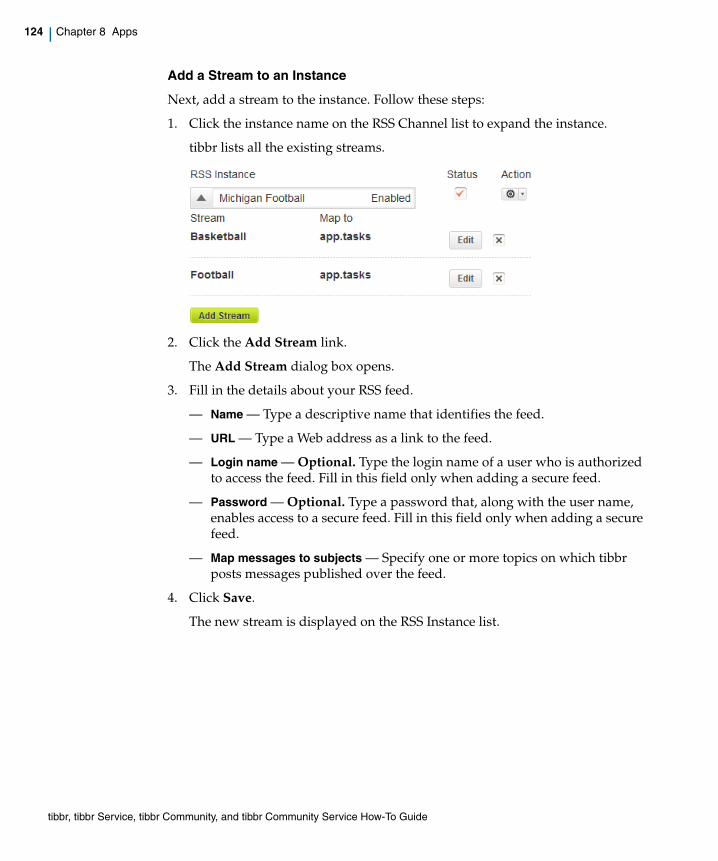
124 | Chapter 8 Apps
Add a Stream to an Instance
Next, add a stream to the instance. Follow these steps:
1. Click the instance name on the RSS Channel list to expand the instance.
tibbr lists all the existing streams.
2. Click the Add Stream link.
The Add Stream dialog box opens.
3. Fill in the details about your RSS feed.
— Name — Type a descriptive name that identifies the feed.
— URL — Type a Web address as a link to the feed.
— Login name — Optional. Type the login name of a user who is authorized to access the feed. Fill in this field only when adding a secure feed.
— Password — Optional. Type a password that, along with the user name, enables access to a secure feed. Fill in this field only when adding a secure feed.
— Map messages to subjects — Specify one or more topics on which tibbr posts messages published over the feed.
4. Click Save.
The new stream is displayed on the RSS Instance list.
tibbr, tibbr Service, tibbr Community, and tibbr Community Service How-To Guide
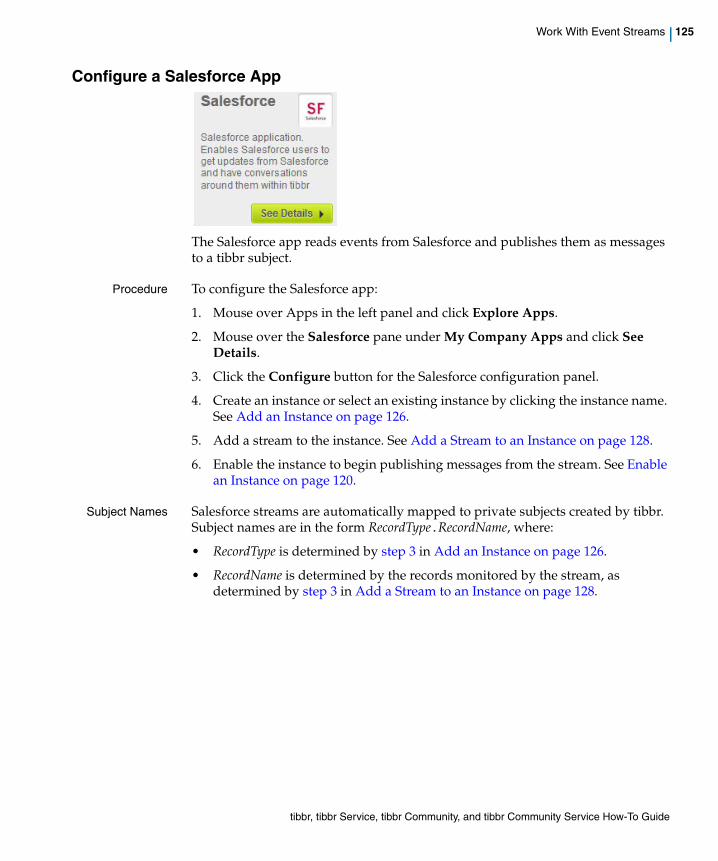
Work With Event Streams | 125
Configure a Salesforce App
The Salesforce app reads events from Salesforce and publishes them as messages to a tibbr subject.
Procedure To configure the Salesforce app:
1. Mouse over Apps in the left panel and click Explore Apps.
2. Mouse over the Salesforce pane under My Company Apps and click See Details.
3. Click the Configure button for the Salesforce configuration panel.
4. Create an instance or select an existing instance by clicking the instance name. See Add an Instance on page 126.
5. Add a stream to the instance. See Add a Stream to an Instance on page 128.
6. Enable the instance to begin publishing messages from the stream. See Enable an Instance on page 120.
Subject Names Salesforce streams are automatically mapped to private subjects created by tibbr. Subject names are in the form RecordType.RecordName, where:
• RecordType is determined by step 3 in Add an Instance on page 126.
• RecordName is determined by the records monitored by the stream, as determined by step 3 in Add a Stream to an Instance on page 128.
tibbr, tibbr Service, tibbr Community, and tibbr Community Service How-To Guide
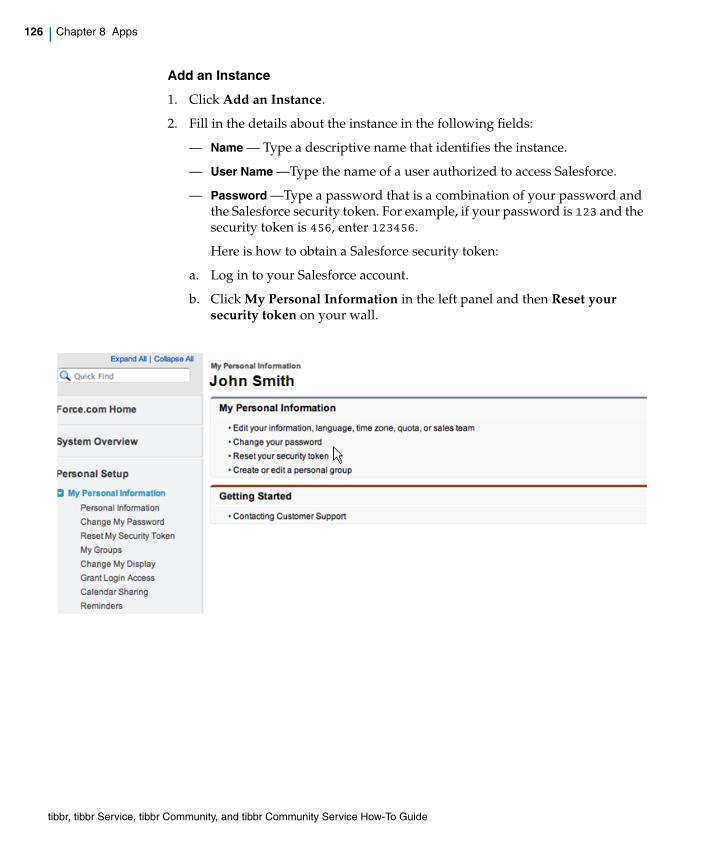
126 | Chapter 8 Apps
Add an Instance
1. Click Add an Instance.
2. Fill in the details about the instance in the following fields:
— Name — Type a descriptive name that identifies the instance.
— User Name —Type the name of a user authorized to access Salesforce.
— Password —Type a password that is a combination of your password and the Salesforce security token. For example, if your password is 123 and the security token is 456, enter 123456.
Here is how to obtain a Salesforce security token:
a. Log in to your Salesforce account.
b. Click My Personal Information in the left panel and then Reset your security token on your wall.
tibbr, tibbr Service, tibbr Community, and tibbr Community Service How-To Guide
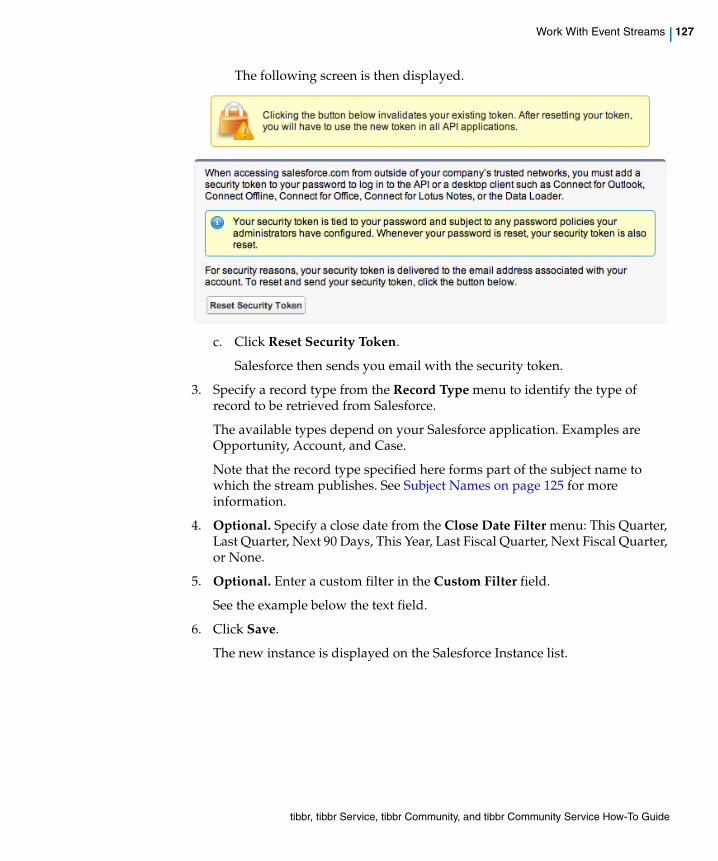
Work With Event Streams | 127
The following screen is then displayed.
c. Click Reset Security Token.
Salesforce then sends you email with the security token.
3. Specify a record type from the Record Type menu to identify the type of record to be retrieved from Salesforce.
The available types depend on your Salesforce application. Examples are Opportunity, Account, and Case.
Note that the record type specified here forms part of the subject name to which the stream publishes. See Subject Names on page 125 for more information.
4. Optional. Specify a close date from the Close Date Filter menu: This Quarter, Last Quarter, Next 90 Days, This Year, Last Fiscal Quarter, Next Fiscal Quarter, or None.
5. Optional. Enter a custom filter in the Custom Filter field.
See the example below the text field.
6. Click Save.
The new instance is displayed on the Salesforce Instance list.
tibbr, tibbr Service, tibbr Community, and tibbr Community Service How-To Guide
128 | Chapter 8 Apps
Add a Stream to an Instance
Next, add a stream to an instance. Follow these steps:
1. Click a name on the Salesforce Instance list to expand the instance.
tibbr lists all the existing streams.
2. Click the Add Stream link for the related panel.
3. Fill in the details on your Salesforce app in the following fields:
— Name — Type a descriptive name that identifies the stream.
— Monitor Records — Optional. Specify whether the stream monitors new or existing records.
— Existing Records — Specify the records monitored by the stream. This field is available only if you specified that the stream monitors existing records in the preceding field.
Note that the names of the records monitored by the stream form part of the subject name to which the stream publishes. See Subject Names on page 125 for more information.
— Post Messages To — Select one of the following:
Myself only — The updates are posted to you only.
Myself and others — The updates are posted to you and the users you specify. Once you have selected this option, the Map Messages to Users field is displayed. Start typing a user name. tibbr automatically displays a list of matching names as choices. Add as many users as you desire.
Subjects — The updates are posted to the subjects you specify. Start typing a subject name. tibbr automatically displays a list of matching names as choices. Add as many subjects as you desire.
4. Click Save.
The new stream is displayed on the Salesforce Instance list.
ExampleScenario
Here is an example of a typical user scenario:
1. Log in to Salesforce.
2. Click Opportunities at the top and, in the Recent Opportunities panel that is displayed, select an opportunity.
3. In the Opportunity Detail panel that is displayed, click Edit.
4. Change the value in the Amount field. Click Save.
tibbr, tibbr Service, tibbr Community, and tibbr Community Service How-To Guide
Work With Event Streams | 129
Next time tibbr runs and updates event streams (the default frequency is once every 10 minutes), it posts the details of the update to the subject in question.
To verify the post immediately, disable the instance on the Salesforce Instance list and enable it again.
If you have configured a Salesforce stream to monitor new records, tibbr monitors them for you. Here is an example:
1. In Salesforce, click New under the Opportunity tab.
2. Fill in the details in the New Opportunity panel that is displayed. The required fields are Opportunity Name, Close Date, and Stage. Click Save.
Next time tibbr runs and updates event streams, it posts on your home page a new ID for the opportunity you just created.
tibbr, tibbr Service, tibbr Community, and tibbr Community Service How-To Guide
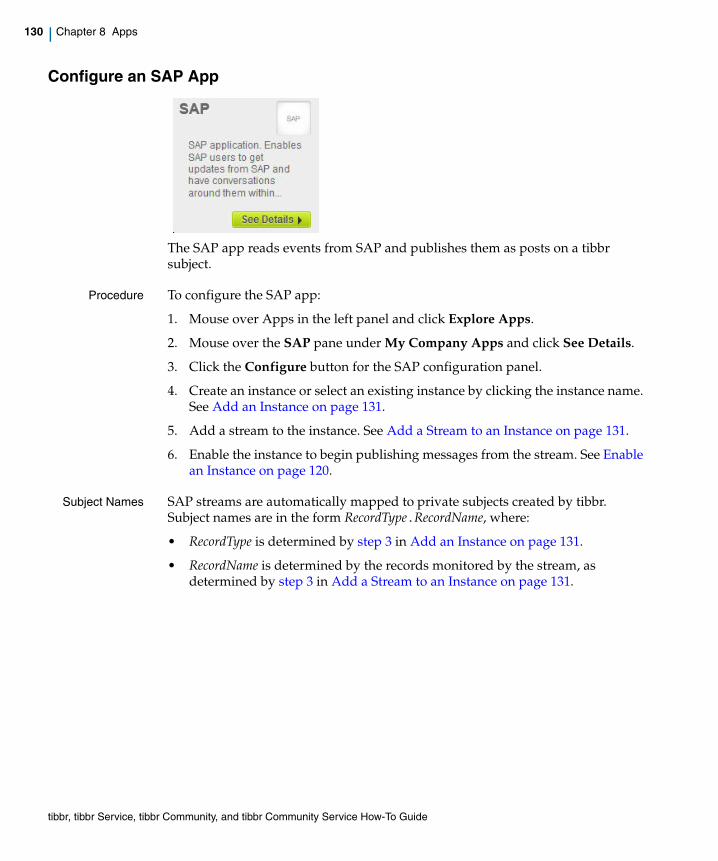
130 | Chapter 8 Apps
Configure an SAP App
The SAP app reads events from SAP and publishes them as posts on a tibbr subject.
Procedure To configure the SAP app:
1. Mouse over Apps in the left panel and click Explore Apps.
2. Mouse over the SAP pane under My Company Apps and click See Details.
3. Click the Configure button for the SAP configuration panel.
4. Create an instance or select an existing instance by clicking the instance name. See Add an Instance on page 131.
5. Add a stream to the instance. See Add a Stream to an Instance on page 131.
6. Enable the instance to begin publishing messages from the stream. See Enable an Instance on page 120.
Subject Names SAP streams are automatically mapped to private subjects created by tibbr. Subject names are in the form RecordType.RecordName, where:
• RecordType is determined by step 3 in Add an Instance on page 131.
• RecordName is determined by the records monitored by the stream, as determined by step 3 in Add a Stream to an Instance on page 131.
tibbr, tibbr Service, tibbr Community, and tibbr Community Service How-To Guide
Work With Event Streams | 131
Add an Instance
1. Click Add an Instance.
2. Fill in the details about the instance in the following fields:
— Name — Type a descriptive name that identifies the instance.
— User Name —Type the name of a user authorized to access SAP.
— Password — Type the password that, along with the user name, enables access to SAP.
— SAP Server Host — Type the name or IP address of the SAP server.
— SAP Server Port — Type the port number of the SAP server.
3. Select Opportunity from the Record Type menu.
Opportunity is the only record type currently available. This record type forms part of the subject name to which the stream publishes. See Subject Names for more information.
4. AS a filter, select the close date (Today, Last Quarter, Last Year, Last 3 Years, Last 5 Years, or None) from the Close Date Filter drop-down menu.
5. Click Save.
The new instance is displayed on the SAP Instance list.
Add a Stream to an Instance
Next, add a stream to an instance. Follow these steps:
1. Click a name on the SAP Instance list to expand the instance.
tibbr lists all the existing streams.
2. Click the Add Stream link for the related panel.
3. Fill in the details on your SAP stream in the following fields:
— Name — Type a descriptive name that identifies the stream.
— Existing Records — Select the records to be monitored by the stream.
tibbr, tibbr Service, tibbr Community, and tibbr Community Service How-To Guide

132 | Chapter 8 Apps
4. Select Monitor New Records, if desired.
For each SAP record, tibbr monitors three fields:
— Exp. Sales Volume (under Forecast)
— Closing Date (under Dates)
— Status (under Sales Cycle)
5. Select one of the following options under Post Messages to:
— Myself only — The updates are posted to you only.
— Myself and others — The updates are posted to you and the users you specify. Once you have selected this option, the Map Messages to Users field is displayed. Start typing a user name. tibbr automatically displays a list of matching names as choices. Add as many users as you desire.
— Subjects — The updates are posted to the subjects you specify. Start typing a subject name. tibbr automatically displays a list of matching names as choices. Add as many subjects as you desire
6. Click Save.
The new stream is displayed below the SAP instance.
ExampleScenario
Here is an example of a typical user scenario:
1. Log in to SAP CRM.
2. Click an Opportunity ID, for example, 1424, under Recent Items at the bottom of the left navigation panel.
3. Click Edit near the top. In the Opportunity Details panel that is displayed, change the values of the three fields monitored by tibbr: Exp. Sales Volume, Closing Date, and Status. Click Save.
Next time tibbr runs and updates event streams (the default frequency is once every 10 minutes), it posts three messages with the details of the updates to the subjects configured.
To verify the post immediately, disable the instance on the SAP Instance list and enable it again.
If you have configured Monitor New Records for SAP streams, tibbr also monitors the new records that you create. Here is an example:
1. In SAP CRM, click New near the top and select Opportunity in the list that is displayed.
2. Fill in the details in the Opportunity Details panel that is displayed: Description, Prospect, Partner Selection, Exp. Sales Volume, and so forth. Click Save.
tibbr, tibbr Service, tibbr Community, and tibbr Community Service How-To Guide

Work With Event Streams | 133
Next time tibbr runs and updates event streams, it posts on your home page a new ID for the opportunity you just created.
tibbr, tibbr Service, tibbr Community, and tibbr Community Service How-To Guide
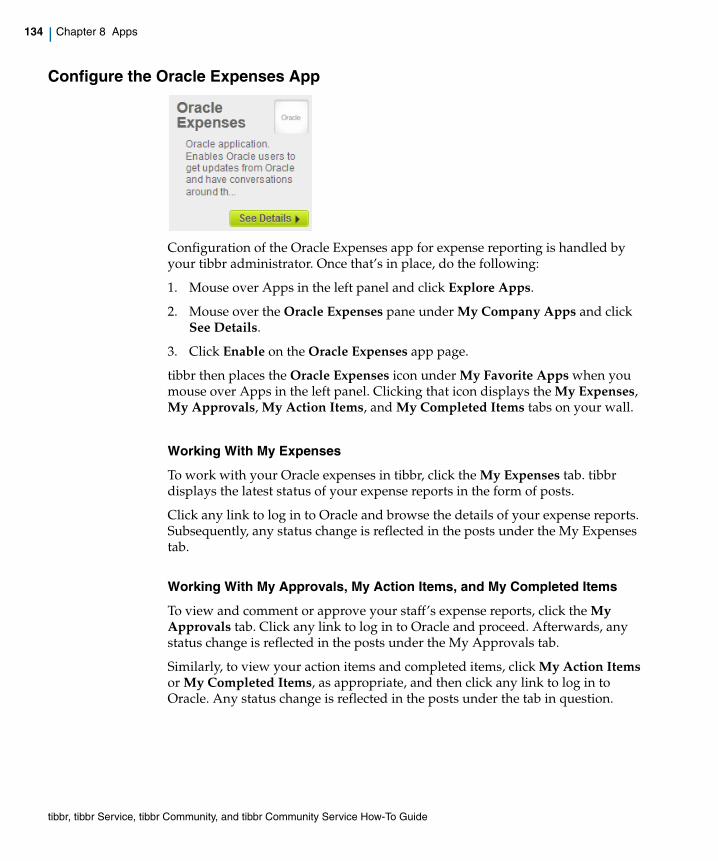
134 | Chapter 8 Apps
Configure the Oracle Expenses App
Configuration of the Oracle Expenses app for expense reporting is handled by your tibbr administrator. Once that’s in place, do the following:
1. Mouse over Apps in the left panel and click Explore Apps.
2. Mouse over the Oracle Expenses pane under My Company Apps and click See Details.
3. Click Enable on the Oracle Expenses app page.
tibbr then places the Oracle Expenses icon under My Favorite Apps when you mouse over Apps in the left panel. Clicking that icon displays the My Expenses, My Approvals, My Action Items, and My Completed Items tabs on your wall.
Working With My Expenses
To work with your Oracle expenses in tibbr, click the My Expenses tab. tibbr displays the latest status of your expense reports in the form of posts.
Click any link to log in to Oracle and browse the details of your expense reports. Subsequently, any status change is reflected in the posts under the My Expenses tab.
Working With My Approvals, My Action Items, and My Completed Items
To view and comment or approve your staff’s expense reports, click the My Approvals tab. Click any link to log in to Oracle and proceed. Afterwards, any status change is reflected in the posts under the My Approvals tab.
Similarly, to view your action items and completed items, click My Action Items or My Completed Items, as appropriate, and then click any link to log in to Oracle. Any status change is reflected in the posts under the tab in question.
tibbr, tibbr Service, tibbr Community, and tibbr Community Service How-To Guide
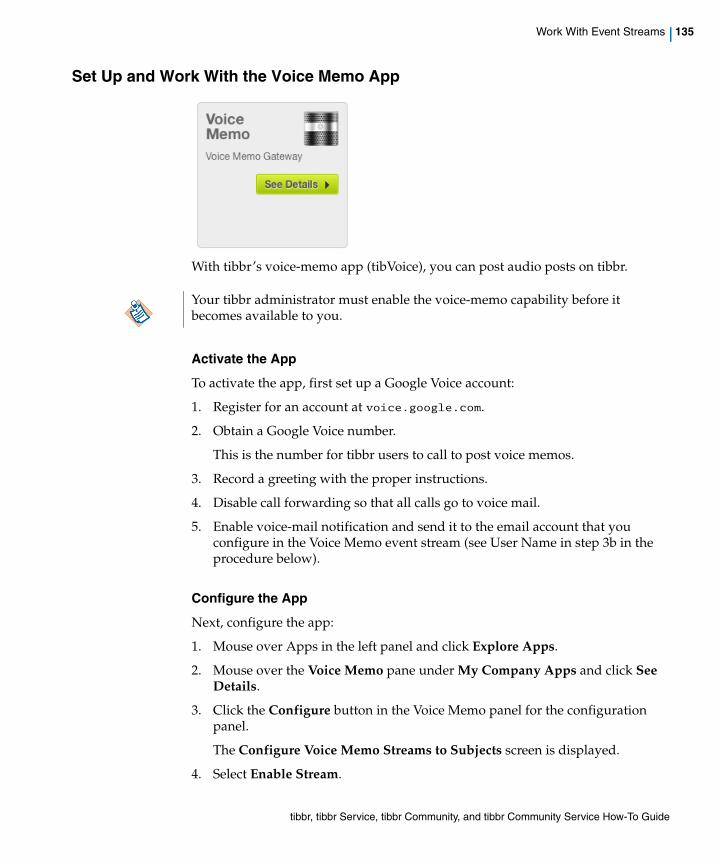
Work With Event Streams | 135
Set Up and Work With the Voice Memo App
With tibbr’s voice-memo app (tibVoice), you can post audio posts on tibbr.
Activate the App
To activate the app, first set up a Google Voice account:
1. Register for an account at voice.google.com.
2. Obtain a Google Voice number.
This is the number for tibbr users to call to post voice memos.
3. Record a greeting with the proper instructions.
4. Disable call forwarding so that all calls go to voice mail.
5. Enable voice-mail notification and send it to the email account that you configure in the Voice Memo event stream (see User Name in step 3b in the procedure below).
Configure the App
Next, configure the app:
1. Mouse over Apps in the left panel and click Explore Apps.
2. Mouse over the Voice Memo pane under My Company Apps and click See Details.
3. Click the Configure button in the Voice Memo panel for the configuration panel.
The Configure Voice Memo Streams to Subjects screen is displayed.
4. Select Enable Stream.
Your tibbr administrator must enable the voice-memo capability before it becomes available to you.
tibbr, tibbr Service, tibbr Community, and tibbr Community Service How-To Guide
136 | Chapter 8 Apps
5. Create a voice-memo instance by doing the following:
a. Click Add Instance for its panel.
b. Fill in the fields:
Name — Required. Type a descriptive name that identifies the instance.
Enable SSL — Specify whether tibbr uses Secure Sockets Layer (SSL) for voice memos by choosing Yes or No from the drop-down menu. The default is No.
POP Address — Required. Type the Internet host name of the POP mail server, for example, pop.tibbrmail.com.
POP Port — Required. Type the POP mail server’s port number, for example, 995.
User Name — Type the user name associated with the POP mail server. This is the email account that you set up to receive voice mail from a voice service provider, such as Google Voice.
Password — Type the password associated with the POP mail server.
Post Voice Memo To — Required. Select User’s Wall or Subjects to post voice memos to the user’s wall or to one or more subjects. If you select Subjects, the Map messages to subjects text field is displayed. Start typing a subject name. A list of the matching names appears, from which you can then choose the desired name.
6. Click Save.
7. Enable the instance to begin publishing messages from the stream. See Enable an Instance on page 120.
Be sure to enable your email account for POP access. For details, contact your email provider.
Optionally, to display voice memos on your wall:
1. Choose Edit Profile from your name’s drop-down menu at the top or click Edit next to the title on the My Profile page.
2. On the Edit Profile screen, deselect RSS under Exclude Wall Posts From.
3. Click Save.
tibbr, tibbr Service, tibbr Community, and tibbr Community Service How-To Guide

Work With Event Streams | 137
Enable the Setup
Finally, enable the app:
1. Choose Edit Profile from your name’s drop-down menu at the top.
The Edit Profile page is displayed.
2. Enter a phone number in one or more of these fields: Phone, Office Number, and Mobile. Click Save.
3. On the home page, mouse over Apps in the left panel and click Explore Apps.
4. Under My Company Apps, mouse over the Voice Memo pane and click See Details.
5. Click Enable on the Voice Memo app page.
Post or Listen to Voice Memos
Once you’ve set up voice memos, you can call a phone number specified by your tibbr administrator to make a voice post to tibbr.
To listen to a voice memo, click to play the audio file.
You must call from one of the phone numbers on your profile. The caller ID identifies you to tibbr.
tibbr, tibbr Service, tibbr Community, and tibbr Community Service How-To Guide
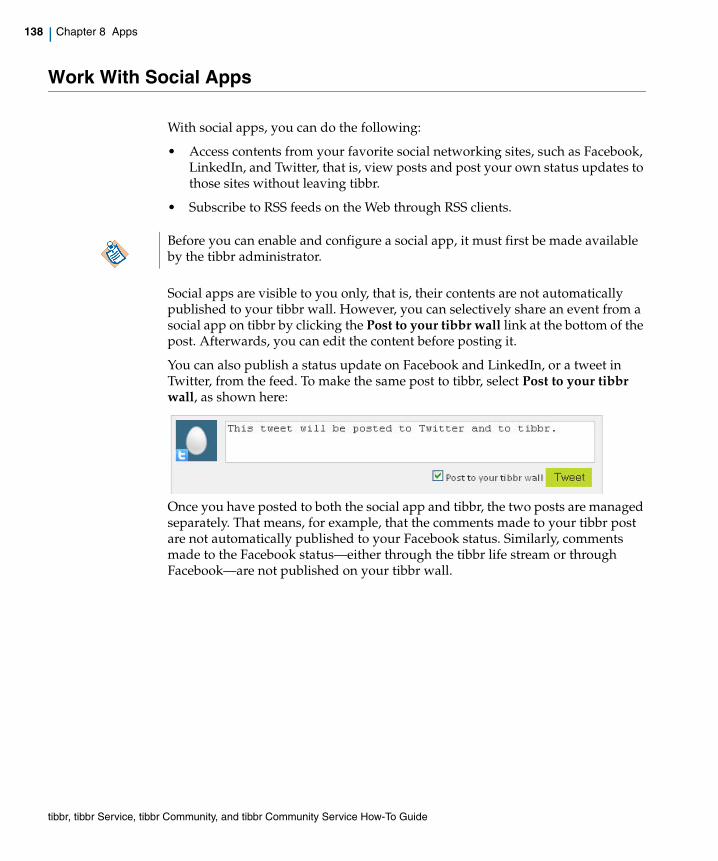
138 | Chapter 8 Apps
Work With Social Apps
With social apps, you can do the following:
• Access contents from your favorite social networking sites, such as Facebook, LinkedIn, and Twitter, that is, view posts and post your own status updates to those sites without leaving tibbr.
• Subscribe to RSS feeds on the Web through RSS clients.
Social apps are visible to you only, that is, their contents are not automatically published to your tibbr wall. However, you can selectively share an event from a social app on tibbr by clicking the Post to your tibbr wall link at the bottom of the post. Afterwards, you can edit the content before posting it.
You can also publish a status update on Facebook and LinkedIn, or a tweet in Twitter, from the feed. To make the same post to tibbr, select Post to your tibbr wall, as shown here:
Once you have posted to both the social app and tibbr, the two posts are managed separately. That means, for example, that the comments made to your tibbr post are not automatically published to your Facebook status. Similarly, comments made to the Facebook status—either through the tibbr life stream or through Facebook—are not published on your tibbr wall.
Before you can enable and configure a social app, it must first be made available by the tibbr administrator.
tibbr, tibbr Service, tibbr Community, and tibbr Community Service How-To Guide
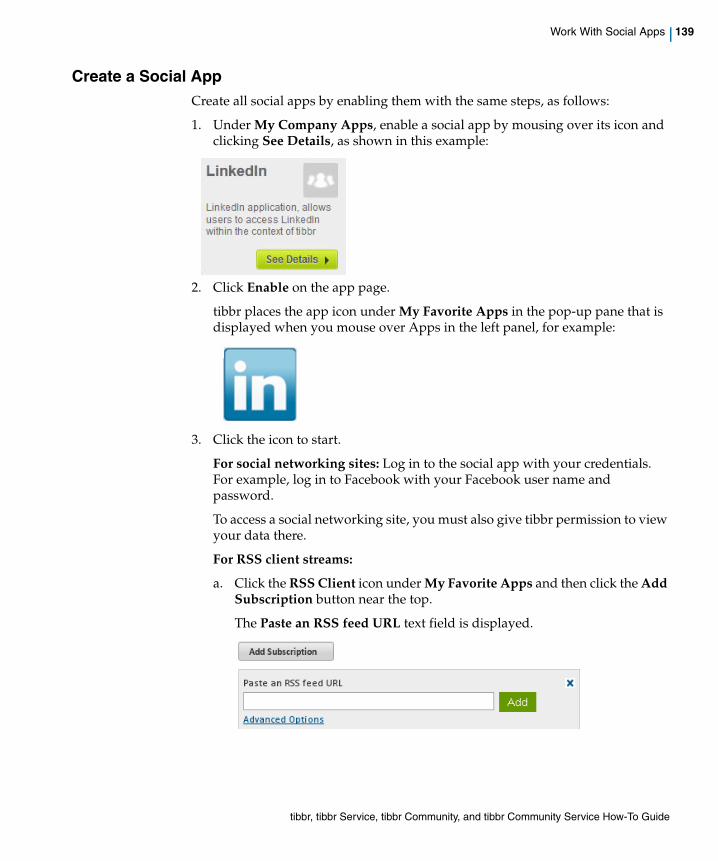
Work With Social Apps | 139
Create a Social AppCreate all social apps by enabling them with the same steps, as follows:
1. Under My Company Apps, enable a social app by mousing over its icon and clicking See Details, as shown in this example:
2. Click Enable on the app page.
tibbr places the app icon under My Favorite Apps in the pop-up pane that is displayed when you mouse over Apps in the left panel, for example:
3. Click the icon to start.
For social networking sites: Log in to the social app with your credentials. For example, log in to Facebook with your Facebook user name and password.
To access a social networking site, you must also give tibbr permission to view your data there.
For RSS client streams:
a. Click the RSS Client icon under My Favorite Apps and then click the Add Subscription button near the top.
The Paste an RSS feed URL text field is displayed.
tibbr, tibbr Service, tibbr Community, and tibbr Community Service How-To Guide
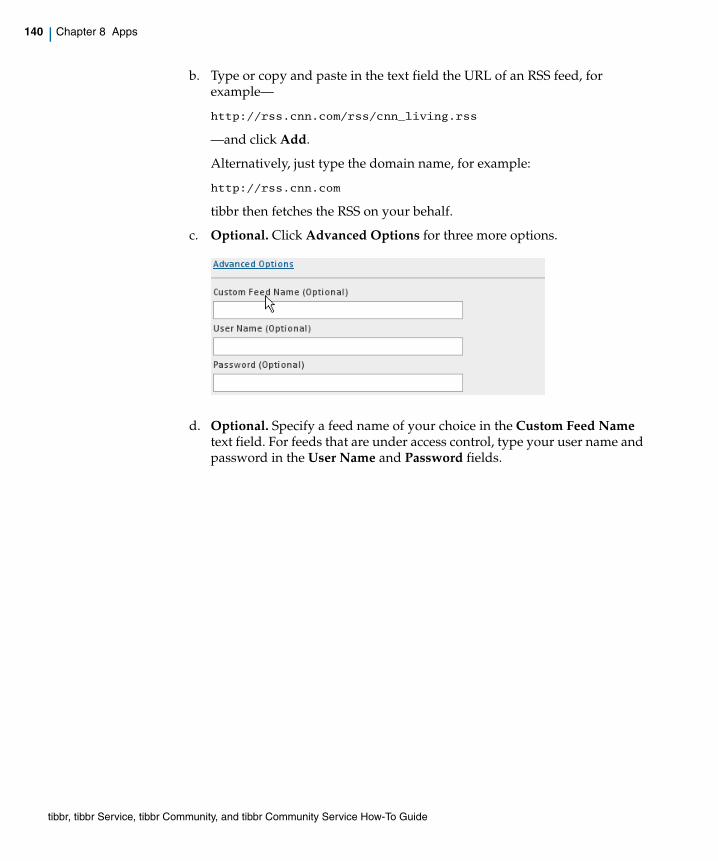
140 | Chapter 8 Apps
b. Type or copy and paste in the text field the URL of an RSS feed, for example—
http://rss.cnn.com/rss/cnn_living.rss
—and click Add.
Alternatively, just type the domain name, for example:
http://rss.cnn.com
tibbr then fetches the RSS on your behalf.
c. Optional. Click Advanced Options for three more options.
d. Optional. Specify a feed name of your choice in the Custom Feed Name text field. For feeds that are under access control, type your user name and password in the User Name and Password fields.
tibbr, tibbr Service, tibbr Community, and tibbr Community Service How-To Guide

Work With Social Apps | 141
Once you have added a subscription, you can edit its property fields or delete it by clicking Edit or Delete below its name, as shown here:
Disable a Social AppTo disable a social app in tibbr:
1. Mouse over Apps on the left panel of your home page and then click Explore Apps.
2. On the app page, mouse over the social app’s icon and click the Disable button in the app pane.
tibbr, tibbr Service, tibbr Community, and tibbr Community Service How-To Guide

142 | Chapter 8 Apps
tibbr, tibbr Service, tibbr Community, and tibbr Community Service How-To Guide
| 143
Chapter 9 tibbr Meetings
The tibbr Meetings app enables you to set up future or instantaneous meetings on WebEx, Google+ Hangouts, or Skype. This chapter shows you how to enable Google+ Hangouts and how to set up meetings.
Topics
• Enable Google+ Hangouts, page 144
• Set Up a Future Meeting, page 145
• Set Up an Instantaneous Meeting, page 153
tibbr, tibbr Service, tibbr Community, and tibbr Community Service How-To Guide
144 | Chapter 9 tibbr Meetings
Enable Google+ Hangouts
As a one-time prerequisite step, you must enable Google+ Hangouts before setting up Hangout meetings while on tibbr. Do the following:
1. Log in to your Google account.
2. Click the Calendar tab at the top.
Your Google calendar is displayed.
3. From the drop-down menu on the right near the top, choose Settings.
The Google Calendar Settings page is displayed.
4. Scroll down and, under Automatically add Google+ Hangouts to events I create, select Yes.
5. Click Save.
tibbr, tibbr Service, tibbr Community, and tibbr Community Service How-To Guide
Set Up a Future Meeting | 145
Set Up a Future Meeting
This section describes how to set up a future meeting on WebEx, Google+ Hangouts, or Skype.
On WebExTo set up a future meeting on WebEx:
1. On your home page, click Event at the top of your wall.
2. Type the subject of the meeting in the field with the prompt What are you planning?.
3. Under Start Time, specify the date and time the event will start by clicking and then choosing the appropriate values for the two fields.
4. Under End Time, specify the date and time the event will end by clicking and then choosing the appropriate values for the two fields.
5. Optional. In the field with the prompt Where, type the location in which the meeting will take place.
6. Optional. In the field with the prompt More Details, type any other information that pertains to the meeting.
7. Select or deselect Show the guest list for this event to specify whether to list your invitees in the post.
8. In the Post to field, type the name of the person whom you would like to invite to the meeting. Add as many people as you desire.
Soon after you start typing, tibbr automatically displays a list of matching names as choices. Add as many people or subjects as you desire.
9. Optional. Attach a file or add a link to this post. For the procedure, see Attach Files or Add Links on page 27.
10. Under Create meeting, click the logo of the platform on which you would like to hold the meeting, in this case WebEx.
tibbr, tibbr Service, tibbr Community, and tibbr Community Service How-To Guide

146 | Chapter 9 tibbr Meetings
tibbr displays a login dialog box for WebEx.
11. Enter your user name and password in the User Name and Password fields, respectively.
12. Select or deselect Remember me, which, depending on a configuration set by your administrator, might be selected or deselected by default.
Selecting this option means that once you have entered your WebEx password while creating a meeting, tibbr does not prompt you for that password again in future logins.
13. Click Log In.
Depending on another configuration setting, a Site Name pull-down menu might be displayed below Password. If so, choose from that menu the appropriate site name.
tibbr, tibbr Service, tibbr Community, and tibbr Community Service How-To Guide
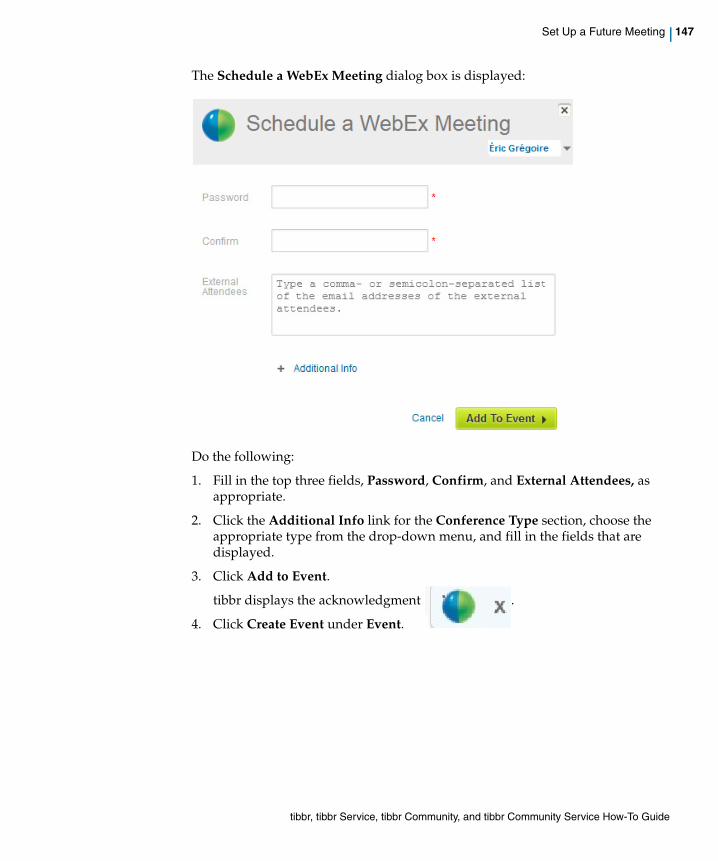
Set Up a Future Meeting | 147
The Schedule a WebEx Meeting dialog box is displayed:
Do the following:
1. Fill in the top three fields, Password, Confirm, and External Attendees, as appropriate.
2. Click the Additional Info link for the Conference Type section, choose the appropriate type from the drop-down menu, and fill in the fields that are displayed.
3. Click Add to Event.
tibbr displays the acknowledgment .
4. Click Create Event under Event.
tibbr, tibbr Service, tibbr Community, and tibbr Community Service How-To Guide
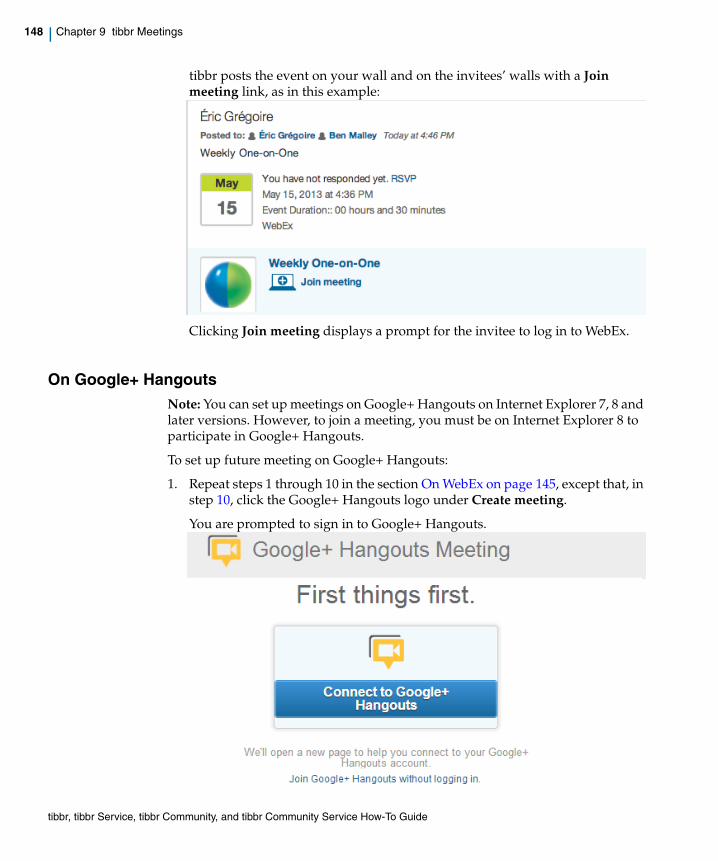
148 | Chapter 9 tibbr Meetings
tibbr posts the event on your wall and on the invitees’ walls with a Join meeting link, as in this example:
Clicking Join meeting displays a prompt for the invitee to log in to WebEx.
On Google+ HangoutsNote: You can set up meetings on Google+ Hangouts on Internet Explorer 7, 8 and later versions. However, to join a meeting, you must be on Internet Explorer 8 to participate in Google+ Hangouts.
To set up future meeting on Google+ Hangouts:
1. Repeat steps 1 through 10 in the section On WebEx on page 145, except that, in step 10, click the Google+ Hangouts logo under Create meeting.
You are prompted to sign in to Google+ Hangouts.
tibbr, tibbr Service, tibbr Community, and tibbr Community Service How-To Guide
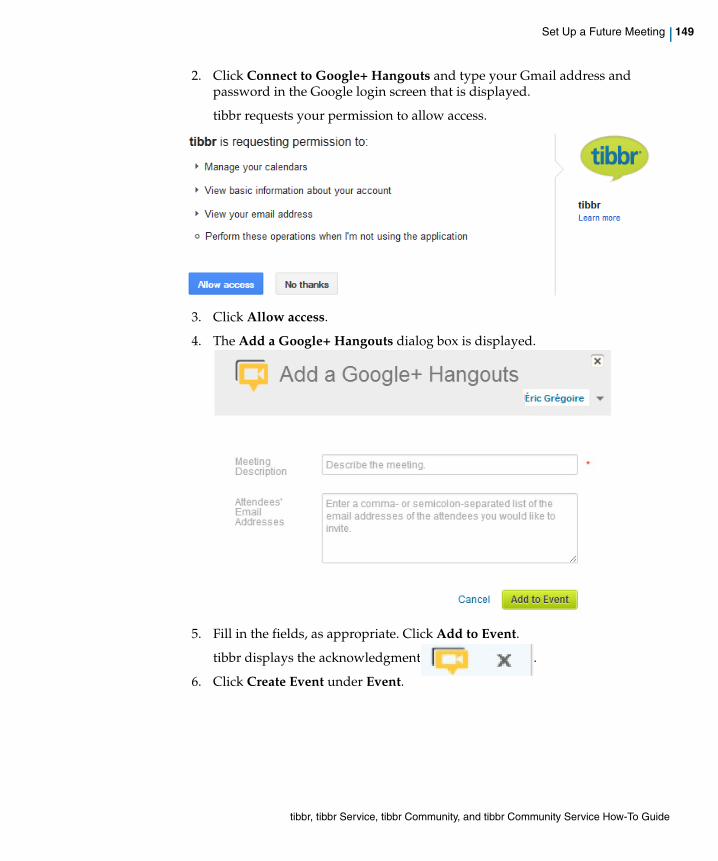
Set Up a Future Meeting | 149
2. Click Connect to Google+ Hangouts and type your Gmail address and password in the Google login screen that is displayed.
tibbr requests your permission to allow access.
3. Click Allow access.
4. The Add a Google+ Hangouts dialog box is displayed.
5. Fill in the fields, as appropriate. Click Add to Event.
tibbr displays the acknowledgment .
6. Click Create Event under Event.
tibbr, tibbr Service, tibbr Community, and tibbr Community Service How-To Guide
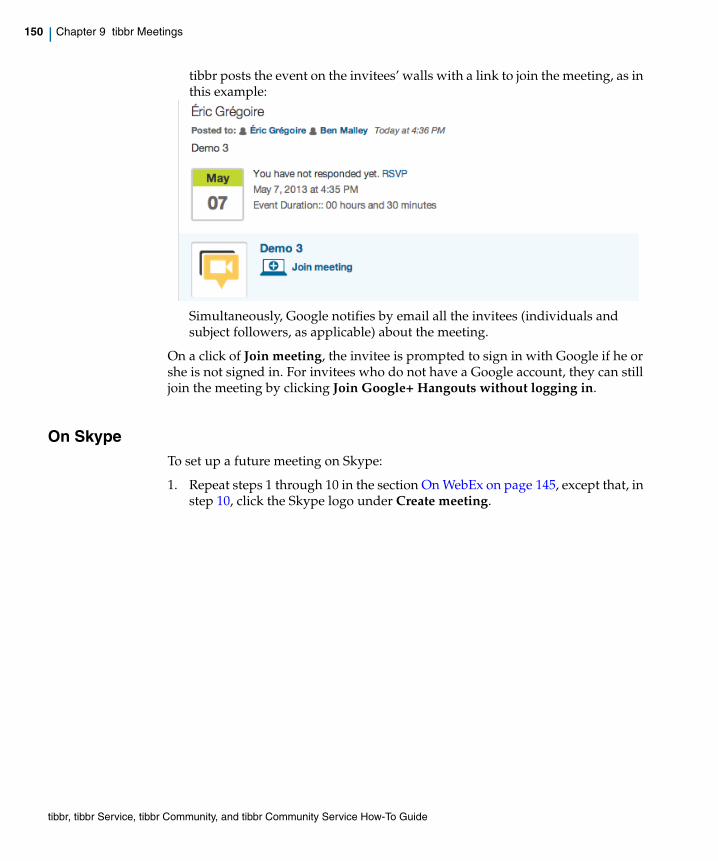
150 | Chapter 9 tibbr Meetings
tibbr posts the event on the invitees’ walls with a link to join the meeting, as in this example:
Simultaneously, Google notifies by email all the invitees (individuals and subject followers, as applicable) about the meeting.
On a click of Join meeting, the invitee is prompted to sign in with Google if he or she is not signed in. For invitees who do not have a Google account, they can still join the meeting by clicking Join Google+ Hangouts without logging in.
On SkypeTo set up a future meeting on Skype:
1. Repeat steps 1 through 10 in the section On WebEx on page 145, except that, in step 10, click the Skype logo under Create meeting.
tibbr, tibbr Service, tibbr Community, and tibbr Community Service How-To Guide
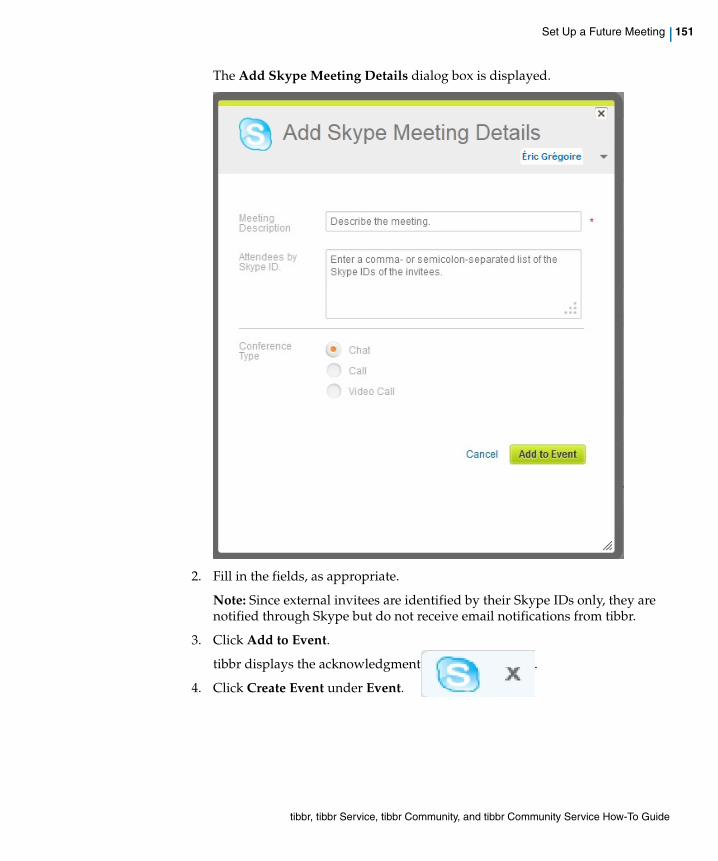
Set Up a Future Meeting | 151
The Add Skype Meeting Details dialog box is displayed.
2. Fill in the fields, as appropriate.
Note: Since external invitees are identified by their Skype IDs only, they are notified through Skype but do not receive email notifications from tibbr.
3. Click Add to Event.
tibbr displays the acknowledgment .
4. Click Create Event under Event.
tibbr, tibbr Service, tibbr Community, and tibbr Community Service How-To Guide
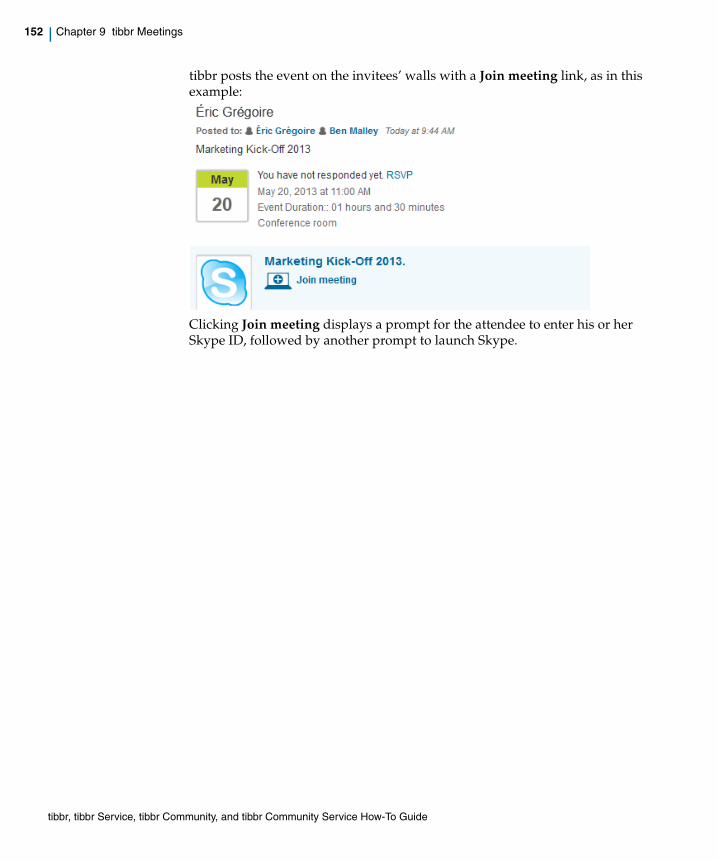
152 | Chapter 9 tibbr Meetings
tibbr posts the event on the invitees’ walls with a Join meeting link, as in this example:
Clicking Join meeting displays a prompt for the attendee to enter his or her Skype ID, followed by another prompt to launch Skype.
tibbr, tibbr Service, tibbr Community, and tibbr Community Service How-To Guide
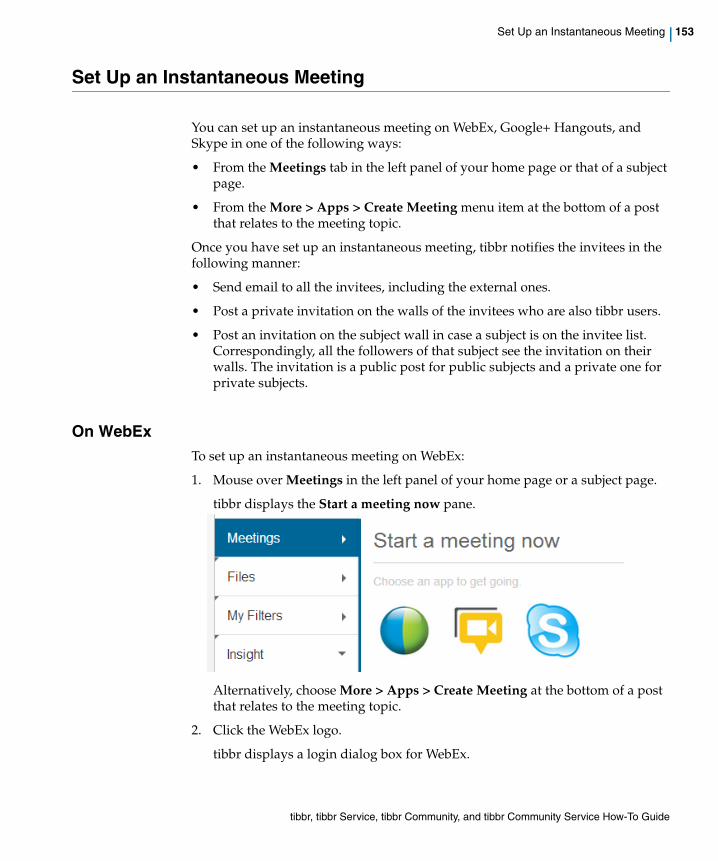
Set Up an Instantaneous Meeting | 153
Set Up an Instantaneous Meeting
You can set up an instantaneous meeting on WebEx, Google+ Hangouts, and Skype in one of the following ways:
• From the Meetings tab in the left panel of your home page or that of a subject page.
• From the More > Apps > Create Meeting menu item at the bottom of a post that relates to the meeting topic.
Once you have set up an instantaneous meeting, tibbr notifies the invitees in the following manner:
• Send email to all the invitees, including the external ones.
• Post a private invitation on the walls of the invitees who are also tibbr users.
• Post an invitation on the subject wall in case a subject is on the invitee list. Correspondingly, all the followers of that subject see the invitation on their walls. The invitation is a public post for public subjects and a private one for private subjects.
On WebExTo set up an instantaneous meeting on WebEx:
1. Mouse over Meetings in the left panel of your home page or a subject page.
tibbr displays the Start a meeting now pane.
Alternatively, choose More > Apps > Create Meeting at the bottom of a post that relates to the meeting topic.
2. Click the WebEx logo.
tibbr displays a login dialog box for WebEx.
tibbr, tibbr Service, tibbr Community, and tibbr Community Service How-To Guide
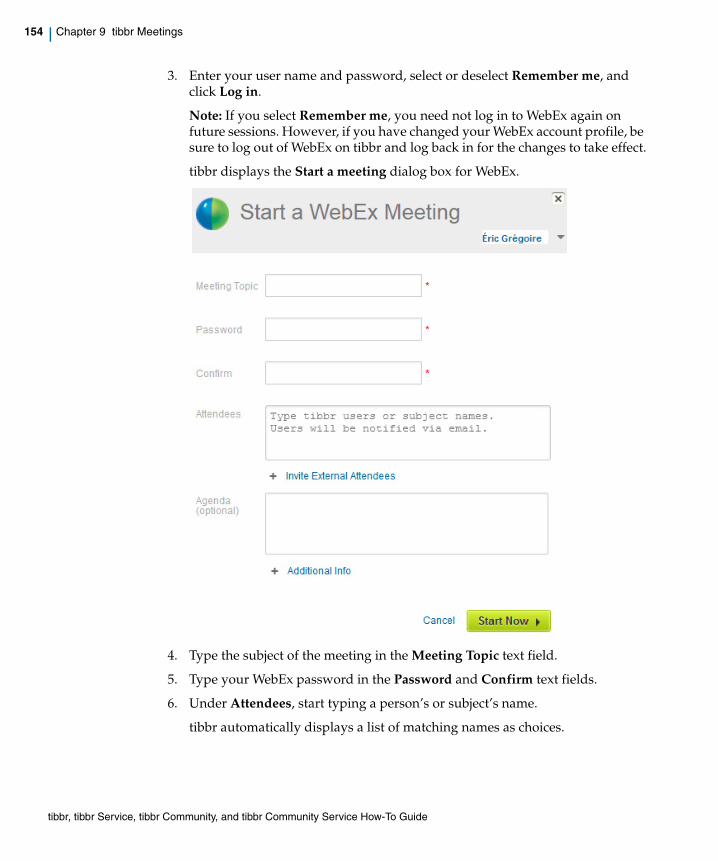
154 | Chapter 9 tibbr Meetings
3. Enter your user name and password, select or deselect Remember me, and click Log in.
Note: If you select Remember me, you need not log in to WebEx again on future sessions. However, if you have changed your WebEx account profile, be sure to log out of WebEx on tibbr and log back in for the changes to take effect.
tibbr displays the Start a meeting dialog box for WebEx.
4. Type the subject of the meeting in the Meeting Topic text field.
5. Type your WebEx password in the Password and Confirm text fields.
6. Under Attendees, start typing a person’s or subject’s name.
tibbr automatically displays a list of matching names as choices.
tibbr, tibbr Service, tibbr Community, and tibbr Community Service How-To Guide
Set Up an Instantaneous Meeting | 155
Note the following:
— If you are setting up this meeting from a subject page, tibbr prefills this field with the subject name.
— If you are setting up this meeting by choosing More > Apps > Create Meeting at the bottom of a post, tibbr prefills this field with the users or subjects to whom the post is addressed.
7. Optional. Click Invite external attendees and follow the prompts to specify the email addresses of those attendees.
8. Optional. Fill in the Agenda text field.
9. Under Conference Type, choose the appropriate type from the drop-down menu and fill in the fields that are displayed.
10. Click Start Now.
WebEx starts.
At the same time, tibbr posts the meeting invitation on the invitees’ walls with a Join meeting link. As soon as they click that link, WebEx displays a login screen in which they can log in and then join the meeting. For invitees who do not have a WebEx account, they can still join the meeting by clicking Join the WebEx meeting without logging in.
On Google+ HangoutsNote: You can set up meetings on Google+ Hangouts on Internet Explorer 7, 8 and later versions. However, to join the meeting, you must be on Internet Explorer 8 to participate in a Google+ Hangouts.
To set up an instantaneous meeting on Google+ Hangouts:
1. Repeats step 1 in On WebEx on page 153.
2. Click the Google+ Hangouts logo.
tibbr, tibbr Service, tibbr Community, and tibbr Community Service How-To Guide
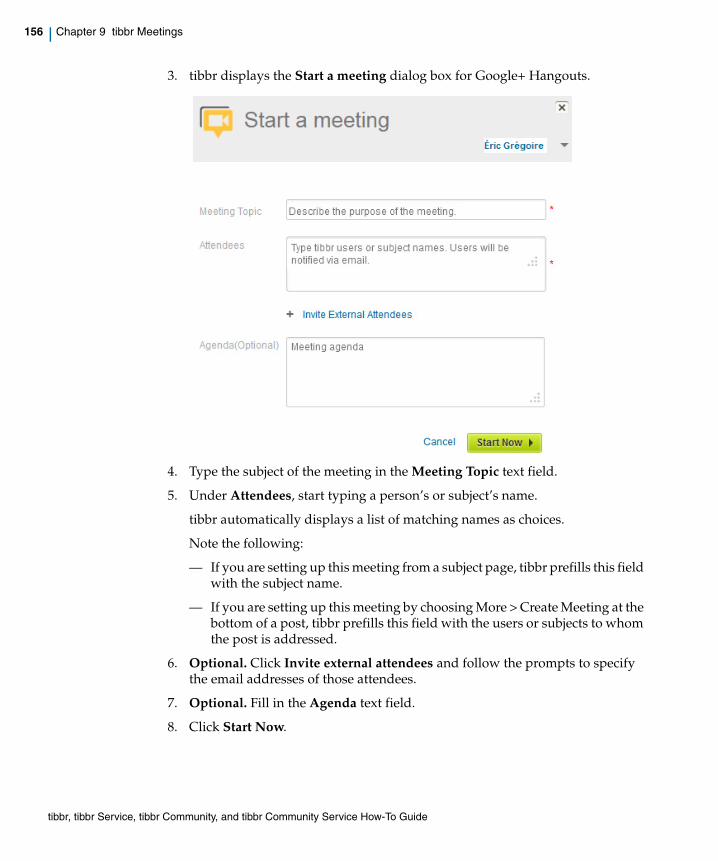
156 | Chapter 9 tibbr Meetings
3. tibbr displays the Start a meeting dialog box for Google+ Hangouts.
4. Type the subject of the meeting in the Meeting Topic text field.
5. Under Attendees, start typing a person’s or subject’s name.
tibbr automatically displays a list of matching names as choices.
Note the following:
— If you are setting up this meeting from a subject page, tibbr prefills this field with the subject name.
— If you are setting up this meeting by choosing More > Create Meeting at the bottom of a post, tibbr prefills this field with the users or subjects to whom the post is addressed.
6. Optional. Click Invite external attendees and follow the prompts to specify the email addresses of those attendees.
7. Optional. Fill in the Agenda text field.
8. Click Start Now.
tibbr, tibbr Service, tibbr Community, and tibbr Community Service How-To Guide

Set Up an Instantaneous Meeting | 157
tibbr posts an invitation on the walls of the invitees with a Join meeting link, as in this example:
Clicking Join meeting starts Google+ Hangouts.
On SkypeTo set up an instantaneous meeting on Skype:
1. Repeat step 1 in On WebEx on page 153.
2. Click the Skype logo.
tibbr, tibbr Service, tibbr Community, and tibbr Community Service How-To Guide
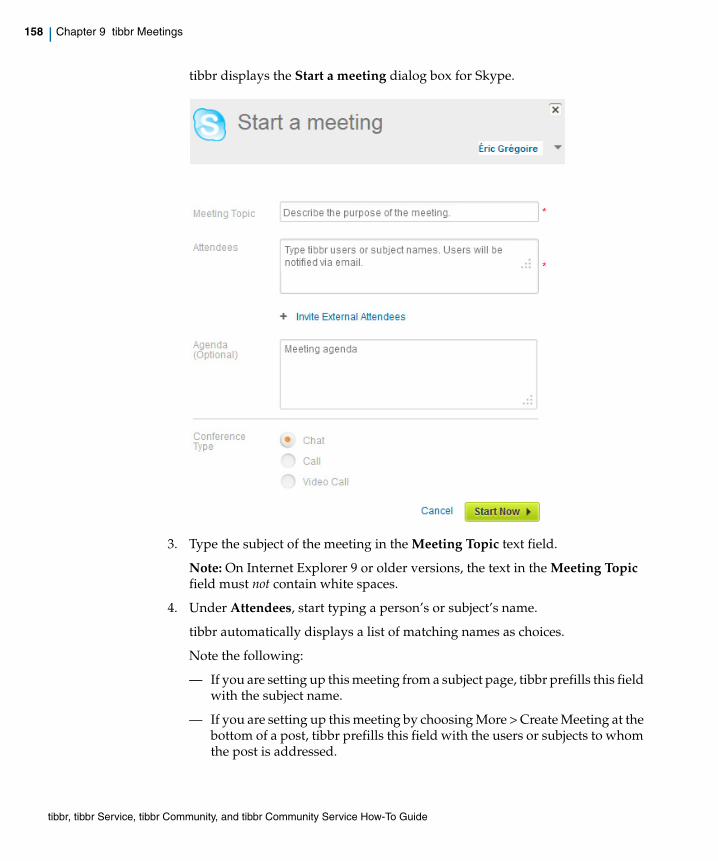
158 | Chapter 9 tibbr Meetings
tibbr displays the Start a meeting dialog box for Skype.
3. Type the subject of the meeting in the Meeting Topic text field.
Note: On Internet Explorer 9 or older versions, the text in the Meeting Topic field must not contain white spaces.
4. Under Attendees, start typing a person’s or subject’s name.
tibbr automatically displays a list of matching names as choices.
Note the following:
— If you are setting up this meeting from a subject page, tibbr prefills this field with the subject name.
— If you are setting up this meeting by choosing More > Create Meeting at the bottom of a post, tibbr prefills this field with the users or subjects to whom the post is addressed.
tibbr, tibbr Service, tibbr Community, and tibbr Community Service How-To Guide
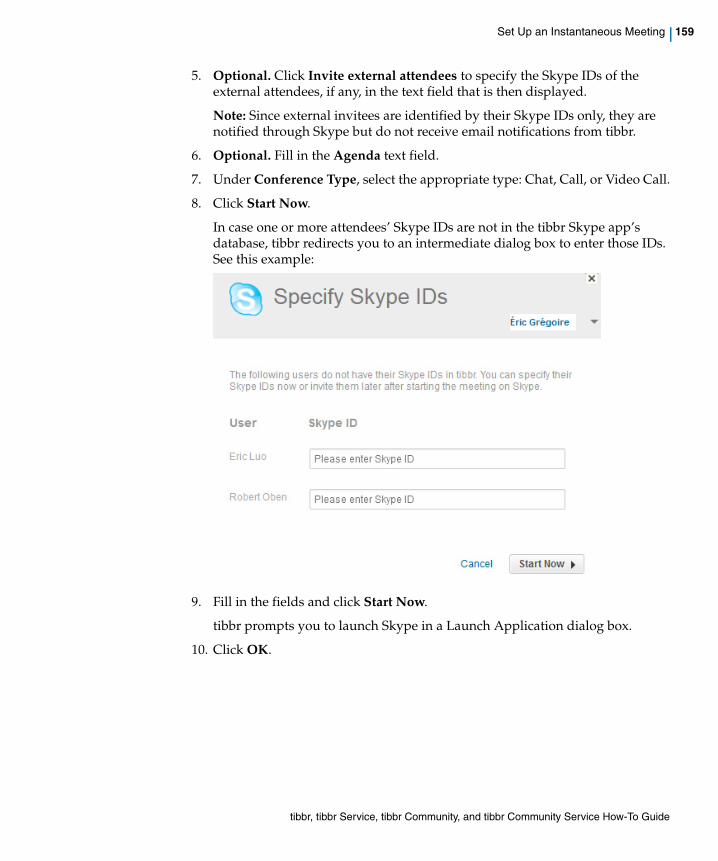
Set Up an Instantaneous Meeting | 159
5. Optional. Click Invite external attendees to specify the Skype IDs of the external attendees, if any, in the text field that is then displayed.
Note: Since external invitees are identified by their Skype IDs only, they are notified through Skype but do not receive email notifications from tibbr.
6. Optional. Fill in the Agenda text field.
7. Under Conference Type, select the appropriate type: Chat, Call, or Video Call.
8. Click Start Now.
In case one or more attendees’ Skype IDs are not in the tibbr Skype app’s database, tibbr redirects you to an intermediate dialog box to enter those IDs. See this example:
9. Fill in the fields and click Start Now.
tibbr prompts you to launch Skype in a Launch Application dialog box.
10. Click OK.
tibbr, tibbr Service, tibbr Community, and tibbr Community Service How-To Guide
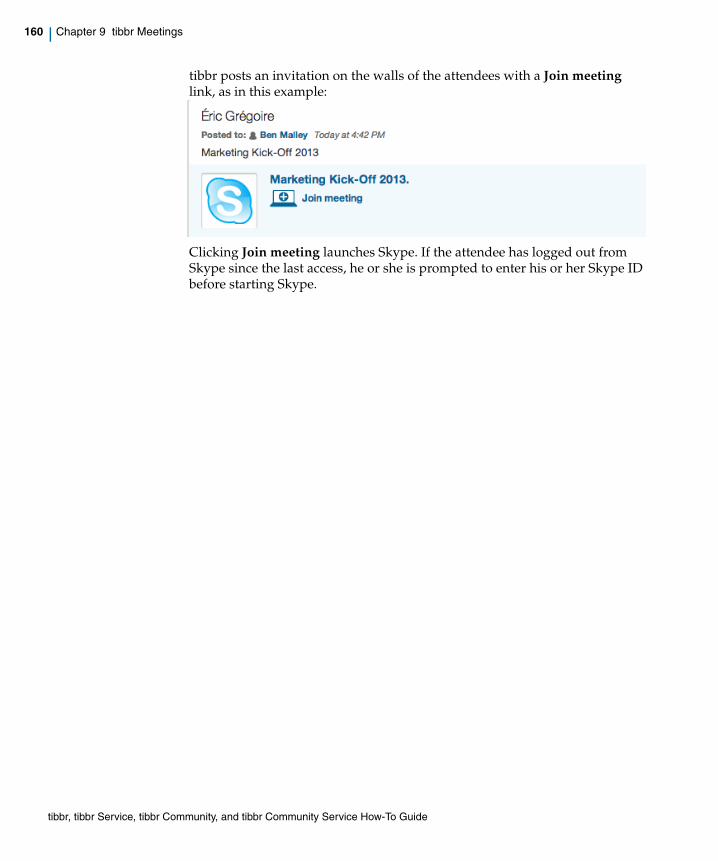
160 | Chapter 9 tibbr Meetings
tibbr posts an invitation on the walls of the attendees with a Join meeting link, as in this example:
Clicking Join meeting launches Skype. If the attendee has logged out from Skype since the last access, he or she is prompted to enter his or her Skype ID before starting Skype.
tibbr, tibbr Service, tibbr Community, and tibbr Community Service How-To Guide

| 161
Chapter 10 tibbr Chat
This chapter explains how to chat online in tibbr.
Topics
• Explore the Chat Window, page 162
• Start a Chat, page 163
• Review Chat Archives, page 164
tibbr, tibbr Service, tibbr Community, and tibbr Community Service How-To Guide
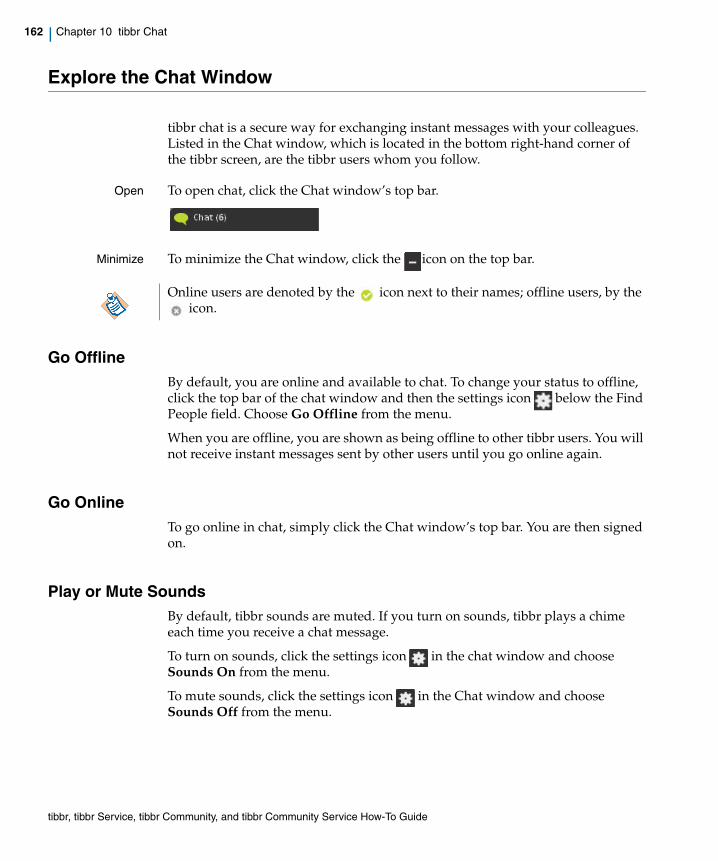
162 | Chapter 10 tibbr Chat
Explore the Chat Window
tibbr chat is a secure way for exchanging instant messages with your colleagues. Listed in the Chat window, which is located in the bottom right-hand corner of the tibbr screen, are the tibbr users whom you follow.
Open To open chat, click the Chat window’s top bar.
Minimize To minimize the Chat window, click the icon on the top bar.
Go OfflineBy default, you are online and available to chat. To change your status to offline, click the top bar of the chat window and then the settings icon below the Find People field. Choose Go Offline from the menu.
When you are offline, you are shown as being offline to other tibbr users. You will not receive instant messages sent by other users until you go online again.
Go OnlineTo go online in chat, simply click the Chat window’s top bar. You are then signed on.
Play or Mute SoundsBy default, tibbr sounds are muted. If you turn on sounds, tibbr plays a chime each time you receive a chat message.
To turn on sounds, click the settings icon in the chat window and choose Sounds On from the menu.
To mute sounds, click the settings icon in the Chat window and choose Sounds Off from the menu.
Online users are denoted by the icon next to their names; offline users, by the icon.
tibbr, tibbr Service, tibbr Community, and tibbr Community Service How-To Guide
Start a Chat | 163
Start a Chat
To start an online chat in tibbr:
1. Click to open the Chat window.
2. Locate your colleague in the list by doing either of the following:
— Scroll through the list to find the colleague’s name.
— In the Find People field, type part or all of the colleague’s name.
The Chat window displays those users whose names match the text you enter.
3. Click the appropriate name to open a Chat window.
4. Type your post in the text field and press Enter.
tibbr, tibbr Service, tibbr Community, and tibbr Community Service How-To Guide
164 | Chapter 10 tibbr Chat
Review Chat Archives
tibbr saves all chat sessions. To view your chat archive, click Chat History under Main Wall in the left panel of your home page.
tibbr, tibbr Service, tibbr Community, and tibbr Community Service How-To Guide
| 165
Chapter 11 SharePoint Content in tibbr
With Microsoft SharePoint, you can manage and provision Web sites and manage documents. Once your tibbr administrator has configured SharePoint for tibbr, you can do the following:
• Upload files to SharePoint and link to them through tibbr posts.
• Browse SharePoint content in tibbr and link to it through tibbr posts.
• Search for SharePoint documents in tibbr.
This chapter shows you the steps.
Topics
• Upload Files to SharePoint from tibbr, page 166
• Browse SharePoint Content in tibbr, page 168
• Search for SharePoint Documents in tibbr, page 169
tibbr, tibbr Service, tibbr Community, and tibbr Community Service How-To Guide
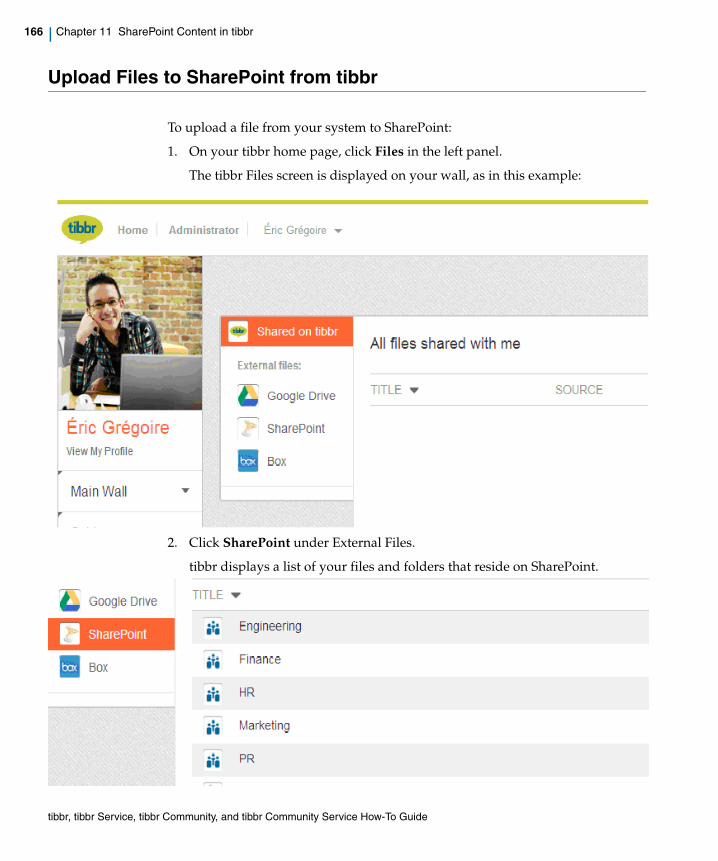
166 | Chapter 11 SharePoint Content in tibbr
Upload Files to SharePoint from tibbr
To upload a file from your system to SharePoint:
1. On your tibbr home page, click Files in the left panel.
The tibbr Files screen is displayed on your wall, as in this example:
2. Click SharePoint under External Files.
tibbr displays a list of your files and folders that reside on SharePoint.
tibbr, tibbr Service, tibbr Community, and tibbr Community Service How-To Guide
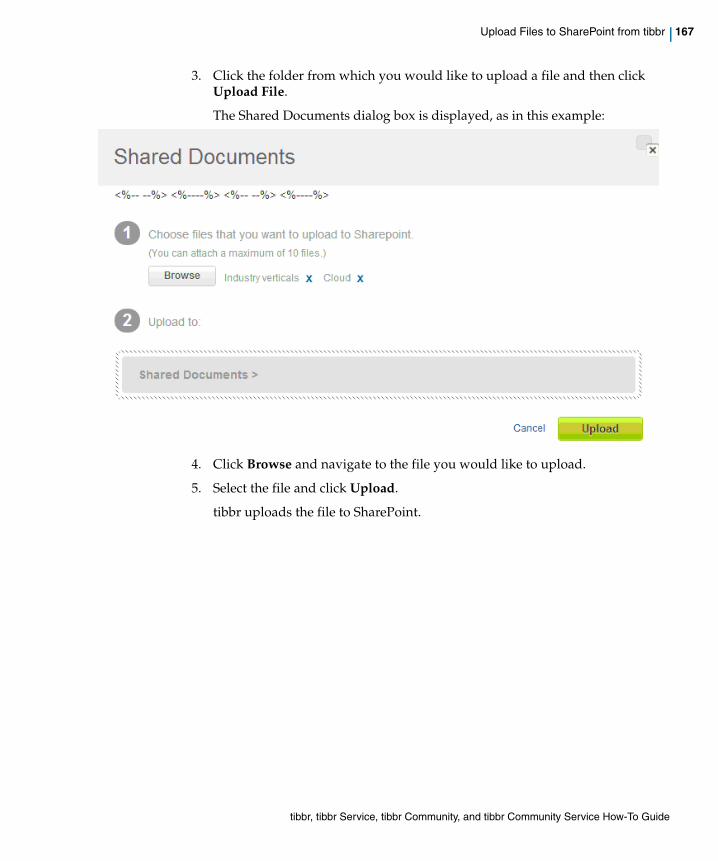
Upload Files to SharePoint from tibbr | 167
3. Click the folder from which you would like to upload a file and then click Upload File.
The Shared Documents dialog box is displayed, as in this example:
4. Click Browse and navigate to the file you would like to upload.
5. Select the file and click Upload.
tibbr uploads the file to SharePoint.
tibbr, tibbr Service, tibbr Community, and tibbr Community Service How-To Guide
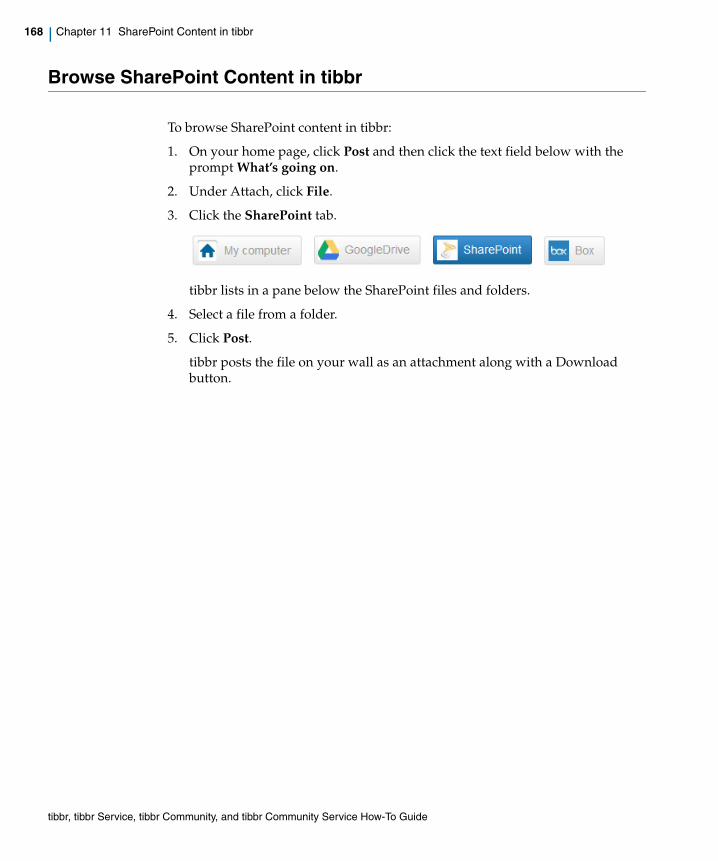
168 | Chapter 11 SharePoint Content in tibbr
Browse SharePoint Content in tibbr
To browse SharePoint content in tibbr:
1. On your home page, click Post and then click the text field below with the prompt What’s going on.
2. Under Attach, click File.
3. Click the SharePoint tab.
tibbr lists in a pane below the SharePoint files and folders.
4. Select a file from a folder.
5. Click Post.
tibbr posts the file on your wall as an attachment along with a Download button.
tibbr, tibbr Service, tibbr Community, and tibbr Community Service How-To Guide

Search for SharePoint Documents in tibbr | 169
Search for SharePoint Documents in tibbr
You can also search for SharePoint documents by typing one or more keywords in the Search field in the top right corner of your home page. tibbr then displays the matches under the SharePoint heading, which is also a link, in the Search Results page.
Click the SharePoint link for a list of the files whose names match your search criteria.
tibbr, tibbr Service, tibbr Community, and tibbr Community Service How-To Guide

170 | Chapter 11 SharePoint Content in tibbr
tibbr, tibbr Service, tibbr Community, and tibbr Community Service How-To Guide
| 171
Chapter 12 Analytics
This chapter shows you how to view and monitor tibbr analytics, which is available under the Insight tab in the left panel of your home page, and explains the data. tibbr displays all the data in real time.
Topics
• What’s Happening, page 172
• Leaderboards, page 175
tibbr, tibbr Service, tibbr Community, and tibbr Community Service How-To Guide
172 | Chapter 12 Analytics
What’s Happening
What’s Happening, the top section under Insight, shows you the analytics of interest for tibbr in the past seven days.
Clicking What’s Happening displays the following data in separate panes on the page. Except for those otherwise noted, you can click a panel for a pop-up pane with the related details.
• Number of users and new signups — The total number of users and the number of users who have signed up in the past seven days. These numbers also take into account users who have been deleted, for example, people who have left your company. Click the panel for a list of the top 10 new members.
• Number of new subjects — The total number of subjects that have been created in the past seven days. Click the panel for a list of the subjects, up to a maximum of 10. Click a subject name to access that subject or an owner name to access the related profile.
• Number of notifications — The number of notifications you have received in the past seven days. Click the panel for the details.
• Number of @ mentions — The number of mentions of people names in the posts in the past seven days. Click the panel for that statistic and the number of mentions that pertain to you.
• Most popular document — The icon of the document (attached to a post) that has been downloaded the most in the past seven days. Click the panel for the details.
• Number of documents — The number of attachments to posts in the past seven days. Click the panel for the details of the attachments, up to a maximum of 10, along with a Download button and a link, Go to the message, for each of the attachments.
When your tibbr instance is first installed, the following three panels show zero statistics:
• Number of users who have viewed your profile
• Most popular document
• Number of users who have updated their profiles
tibbr starts collecting data from then on, however, and displays the related statistics in due time.
tibbr, tibbr Service, tibbr Community, and tibbr Community Service How-To Guide
What’s Happening | 173
• Number of posts — The total number of posts that have been posted in the past seven days. Click the panel for a graph that shows on a 30-day basis the number of posts made over the past month.
• Most popular subject — The subject with the most posts and likes in the past seven days.
• User with the most mentions — The person, whose profile picture is displayed, with the most mentions in posts in the past seven days. Mouse over the panel for the number of mentions.
• User with the most new followers — The person, whose profile picture is displayed, with the most new followers in the past seven days. Mouse over the panel for the number of followers.
• User with the most liked posts — The person, whose profile picture is displayed, with the most liked posts in the past seven days. Mouse over the panel for the number of likes.
• User with the most posts — The person, whose profile picture is displayed, with the most posts in the past seven days. Mouse over the panel for the number of posts.
• User with the most commented-on posts — The person, whose profile picture is displayed, with the most commented-on posts in the past seven days. Mouse over the panel for the number of comments.
• Number of polls your followers and the people you are following have taken — The number of polls your followers and the people you are following have taken in the past seven days. Click the panel for the details of the polls.
• Number of users who have viewed your profile — The number of users who have visited your profile in the past seven days. Click the panel for the details of the users, up to a maximum of 10.
• Number of locations from which users have posted on tibbr through mobile and the number of posts — The number of locations from which users have posted on tibbr through mobile in the past seven days. Click the panel for the details of the top 10 locations, displayed in descending order of the number of posts.
Note the following:
• Clicking the panel of the most popular subject takes you to that subject page.
• For users with the most mentions, the most new followers, the most liked posts, the most posts, and the most commented posts, clicking each of those panels opens a pane with more details. For example, clicking the panel that shows users with the most posts opens a pane that lists the top 10 users with the most posts.
tibbr, tibbr Service, tibbr Community, and tibbr Community Service How-To Guide

174 | Chapter 12 Analytics
• Number of users who have updated their profiles — The number of users who have updated their profiles in the past seven days. Click the panel for the details of the users, up to a maximum of 10.
tibbr, tibbr Service, tibbr Community, and tibbr Community Service How-To Guide
Leaderboards | 175
Leaderboards
Leaderboards, the bottom section under Insight, shows the users and public subjects with the most posts, the most followers, and the most activities today, this week, this month, this year, or all time. Just click the appropriate links, as follows:
• In the first row, click User for user statistics and Subject for subject statistics.
• In the second row, click Most Posts, Most New Followers, or Most Activities.
• In the third and last row, click Today, This Week, This Month, This Year, or All Time.
For example, clicking Subject in the first row, Most Followers in the second row, and This Month in the third row shows the subjects with the most followers in the current month.
tibbr, tibbr Service, tibbr Community, and tibbr Community Service How-To Guide

176 | Chapter 12 Analytics
tibbr, tibbr Service, tibbr Community, and tibbr Community Service How-To Guide
| 177
Index
Symbols
@ mentions 24
A
accessingsubjects 55tibbr 2
account, creating 5adding
RSSinstances 123streams to instances 124
Salesforceinstances 126streams to instances 128
adding, replacing, or removing a profile picture 12alerts for subject posts, setting up 64analytics 171applications
Marketplace Apps 94My Company Apps 94social 138
assigning additional owners to people groups 77attaching files to posts 27availability status, specifying 10
B
browsers supported by tibbr 2browsing SharePoint content in tibbr 168
C
changing passwords 15chats
archives of 164using 162
comments, deleting 36community posts, performing tasks on 46company applications (My Company Apps) 94configuring
event streams 120voice memos 135
copying permanent links for posts 32creating
accounts 5custom filters 38, 40hashtags 24live link for a person’s or subject’s name in a post 24message-delivery channels 82people groups 74RSS streams 123Salesforce stream 125SAP app (by administrator) 130subjects 51subsubjects 52
customer support xivcustomizing right panel 12
tibbr, tibbr Service, tibbr Community, and tibbr Community Service How-To Guide
178 | Index
D
deletingcompany apps 122custom filters 42instances 121message-delivery channels 86people groups 78posts or comments 36subjects 53subjects from posts 37
displayingall your likes 8all your posts 8influence score 9My Company Apps 9people and subjects you are following and
followers 8
E
editingcompany apps 121custom filters 41people groups 76profiles 11subjects 53
enable Google+ Hangouts 144event streams, configuring 120events
posting 90replying to 91
F
Facebook, LinkedIn, and Twitter social apps 138file attachments to posts 27
filtersconfiguration of 40creating 38, 40deleting 42editing 41
followingpeople 71subjects 58
G
giving users access to private subjects 55
H
hashtags in posts 24hiding or showing posts 33home page panels 17
I
Ideas app, working with 100incorporating external content into subjects 66influence score 9instances
deleting 121editing 121enabling or disabling 120viewing status of 121
L
liking or unliking posts 30links to posts 27
tibbr, tibbr Service, tibbr Community, and tibbr Community Service How-To Guide
Index | 179
M
managingSAP app (by administrator) 130subject visibility 57
Marketplace Apps 94marking posts with a star 31meetings, setting up on WebEx, Skype, or Google+
Hangoutsin advance 145to start now 153
message streams 38message-delivery channels
creating of 82deletion of 86pausing or resuming message deliveries 87scheduling 83
messages, See postsmobile devices supported by tibbr 2moving subjects 53My Company Apps
deleting 122editing 121enabling or disabling 119Salesforce
adding instances 126adding streams to instances 128
My Profile, updating and making private 11My Subjects 48
N
notificationsby email for new posts 81from tibbr of noteworthy events 17
O
opening Chat window 162Oracle Expenses app, using 134
P
panels, home page 17password, changing 15pausing, restarting, or stopping subject
subscriptions 59people
directory of 70following 71groups
assigning additional owners to 77creating 74deleting 78editing 76Group Wall, Members Only, and About tabs 79specifying members of 75
unfollow 72performing tasks on community posts 46picture in profile, adding, replacing, or removing 12polls
creating 43extending 44
postingprivate posts 24to people groups 79to subjects by email 61
postscopying permanent links for 32deleting 36deleting subjects from 37divider of old and new 28hiding or showing 33liking or unliking 30marking with a star 31publishing as subject announcements 35replying to 29sharing by adding people or subjects 33sharing by email 32
privateposts 24profiles 11
publishing posts as subject announcements 35
tibbr, tibbr Service, tibbr Community, and tibbr Community Service How-To Guide
180 | Index
R
removing subject followers 56replying to posts 29, 85right panel, customizing 12RSS
instances, adding 123streams to instances, adding 124streams, creating 123
S
Salesforce security token, how to obtain 126SAP app, managing (by administrator) 130scheduling post deliveries 83searching for
people 70posts 22SharePoint documents in tibbr 169subjects 48, 49
setting up meetings on WebEx, Skype, or Google+ Hangouts
in advance 145to start now 153
SharePointbrowsing for content in tibbr 168searching for documents in tibbr 169uploading from tibbr to 166
sharingposts
by email 32posts by adding people or subjects 33Web pages as tibbr posts 34
signing in tocommunities 45tibbr 6
signing out of tibbr 7social apps 138specifying
availability status 10members in people groups 75
starred posts 31status, specifying 10
stopping following of people 72subjects
access types 55adding groups of people to 63announcements on 62broadcast 50changing the page names and URLs of 67creating 51deleting 53directory of 48editing 53following 58giving users access to 55hierarchy of 49incorporating external content into 66managing owners (by subject owners) 60moving 53pause, restart, or stop subscription to 59posting to, by email 61removing followers from 56rules for naming 48searching of 49setting up alerts for posts on 64suggesting 58unfollowing 59viewing related details of 65visibility of 57
subsubjects, creating 52suggesting subjects to people 58support, contacting xiv
T
technical support xivtibbr Files app
Enabling file-service providers 95Filtering shared files 98Searching 96Sharing files 95Starting 95Uploading files 96
tibbr Meetings app 143–155tibbr Tasks app 111–117
tibbr, tibbr Service, tibbr Community, and tibbr Community Service How-To Guide

Index | 181
TIBCO documentation xivTIBCO_HOME xiTIBCOmmunity xiv
U
unfollowing subjects 59updating My Profile 11uploading files to SharePoint from tibbr 166using Oracle Expenses app 134
V
viewing analytics 171voice memos (tibVoice)
configuring 135setting up 137work with 137
tibbr, tibbr Service, tibbr Community, and tibbr Community Service How-To Guide