Embed Size (px)
Citation preview

Tivoli® Management Solution forDominoInstallation and Setup GuideVersion 3.2.0 GC32-0755-00


Tivoli® Management Solution forDominoInstallation and Setup GuideVersion 3.2.0 GC32-0755-00
Tivoli Management Solution for Domino Installation and Setup Guide
Copyright Notice
© Copyright IBM Corporation 2001. All rights reserved. May only be used pursuant to a Tivoli Systems SoftwareLicense Agreement, an IBM Software License Agreement, or Addendum for Tivoli Products to IBM Customer orLicense Agreement. No part of this publication may be reproduced, transmitted, transcribed, stored in a retrievalsystem, or translated into any computer language, in any form or by any means, electronic, mechanical, magnetic,optical, chemical, manual, or otherwise, without prior written permission of IBM Corporation. IBM Corporation grantsyou limited permission to make hardcopy or other reproductions of any machine-readable documentation for your ownuse, provided that each such reproduction shall carry the IBM Corporation copyright notice. No other rights undercopyright are granted without prior written permission of IBM Corporation. The document is not intended forproduction and is furnished “as is” without warranty of any kind. All warranties on this document are herebydisclaimed, including the warranties of merchantability and fitness for a particular purpose.
U.S. Government Users Restricted Rights—Use, duplication or disclosure restricted by GSA ADP Schedule Contractwith IBM Corporation.
Trademarks
AIX, IBM, the IBM logo, Tivoli, the Tivoli logo, DB2, OS/400, Tivoli Enterprise Console, and Tivoli Manager forDomino are trademarks or registered trademarks of International Business Machines Corporation or Tivoli Systems Inc.in the United States, other countries, or both.
Lotus and Lotus Notes are registered trademarks of Lotus Development Corporation. Domino is a trademark of LotusDevelopment Corporation.
Microsoft, Windows, Windows NT, and the Windows logo are trademarks of Microsoft Corporation in the UnitedStates, other countries, or both.
UNIX is a registered trademark of The Open Group in the United States and other countries.
Solaris Operating Environment, Java, and all Java-based trademarks are trademarks of Sun Microsystems, Inc. in theUnited States, other countries, or both.
Other company, product, and service names may be trademarks or service marks of others.Notices
References in this publication to Tivoli Systems or IBM products, programs, or services do not imply that they will beavailable in all countries in which Tivoli Systems or IBM operates. Any reference to these products, programs, orservices is not intended to imply that only Tivoli Systems or IBM products, programs, or services can be used. Subjectto valid intellectual property or other legally protectable right of Tivoli Systems or IBM, any functionally equivalentproduct, program, or service can be used instead of the referenced product, program, or service. The evaluation andverification of operation in conjunction with other products, except those expressly designated by Tivoli Systems orIBM, are the responsibility of the user. Tivoli Systems or IBM may have patents or pending patent applicationscovering subject matter in this document. The furnishing of this document does not give you any license to thesepatents. You can send license inquiries, in writing, to the IBM Director of Licensing, IBM Corporation, North CastleDrive, Armonk, New York 10504-1785, U.S.A.
Contents
Preface . . . . . . . . . . . . . . . . . . . . . . . . . . . . . . . . . . . . . . . . . . . . . . . . . . . . . . . . . . . . . . . . . . . . . . . vWho Should Read This Guide . . . . . . . . . . . . . . . . . . . . . . . . . . . . . . . . . . . . . . . . . . . . . . . . . . . . . . v
What This Guide Contains. . . . . . . . . . . . . . . . . . . . . . . . . . . . . . . . . . . . . . . . . . . . . . . . . . . . . . . . . v
Publications . . . . . . . . . . . . . . . . . . . . . . . . . . . . . . . . . . . . . . . . . . . . . . . . . . . . . . . . . . . . . . . . . . . vi
Prerequisite and Related Documents . . . . . . . . . . . . . . . . . . . . . . . . . . . . . . . . . . . . . . . . . . . . . vi
Accessing Publications Online . . . . . . . . . . . . . . . . . . . . . . . . . . . . . . . . . . . . . . . . . . . . . . . . . vi
Ordering Publications . . . . . . . . . . . . . . . . . . . . . . . . . . . . . . . . . . . . . . . . . . . . . . . . . . . . . . . . vi
Providing Feedback about Publications . . . . . . . . . . . . . . . . . . . . . . . . . . . . . . . . . . . . . . . . . . vii
Contacting Customer Support . . . . . . . . . . . . . . . . . . . . . . . . . . . . . . . . . . . . . . . . . . . . . . . . . . . . . vii
Conventions Used in This Guide . . . . . . . . . . . . . . . . . . . . . . . . . . . . . . . . . . . . . . . . . . . . . . . . . . . vii
Using the Guide Online. . . . . . . . . . . . . . . . . . . . . . . . . . . . . . . . . . . . . . . . . . . . . . . . . . . . . . . . . . vii
Viewing Online Help . . . . . . . . . . . . . . . . . . . . . . . . . . . . . . . . . . . . . . . . . . . . . . . . . . . . . . . . . . . viii
Chapter 1. Overview . . . . . . . . . . . . . . . . . . . . . . . . . . . . . . . . . . . . . . . . . . . . . . . . . . . . . . . . . 1Key Tivoli Concepts . . . . . . . . . . . . . . . . . . . . . . . . . . . . . . . . . . . . . . . . . . . . . . . . . . . . . . . . . . . . . 1
Architecture . . . . . . . . . . . . . . . . . . . . . . . . . . . . . . . . . . . . . . . . . . . . . . . . . . . . . . . . . . . . . . . 1
Authorization Roles. . . . . . . . . . . . . . . . . . . . . . . . . . . . . . . . . . . . . . . . . . . . . . . . . . . . . . . . . . 2
User Interface Options. . . . . . . . . . . . . . . . . . . . . . . . . . . . . . . . . . . . . . . . . . . . . . . . . . . . . . . . . . . . 3
Chapter 2. Guidelines for Installation and Setup . . . . . . . . . . . . . . . . . . . . . . . . . . 5
Chapter 3. Installing the Product . . . . . . . . . . . . . . . . . . . . . . . . . . . . . . . . . . . . . . . . . . . 7System Requirements for Tivoli Management Solution for Domino . . . . . . . . . . . . . . . . . . . . . . . . . . 7
National Language Versions of the Product . . . . . . . . . . . . . . . . . . . . . . . . . . . . . . . . . . . . . . . . 9
Enabling a User to Install the Product . . . . . . . . . . . . . . . . . . . . . . . . . . . . . . . . . . . . . . . . . . . . . . . 10
Installing Tivoli Management Solution for Domino . . . . . . . . . . . . . . . . . . . . . . . . . . . . . . . . . . . . . 13
Installing the Management Console . . . . . . . . . . . . . . . . . . . . . . . . . . . . . . . . . . . . . . . . . . . . . . . . . 34
Starting the Management Console . . . . . . . . . . . . . . . . . . . . . . . . . . . . . . . . . . . . . . . . . . . . . . . . . . 36
Chapter 4. Setting Up Tivoli Endpoints . . . . . . . . . . . . . . . . . . . . . . . . . . . . . . . . . . . 39Installing the Tivoli Management Agent . . . . . . . . . . . . . . . . . . . . . . . . . . . . . . . . . . . . . . . . . . . . . . 39
Creating a Proxy Endpoint. . . . . . . . . . . . . . . . . . . . . . . . . . . . . . . . . . . . . . . . . . . . . . . . . . . . . . . . 51
Removing a Tivoli Management Agent . . . . . . . . . . . . . . . . . . . . . . . . . . . . . . . . . . . . . . . . . . . . . . 52
Verifying a Tivoli Management Agent Endpoint . . . . . . . . . . . . . . . . . . . . . . . . . . . . . . . . . . . . . . . . 54
Chapter 5. Managing Domino Server Administrators . . . . . . . . . . . . . . . . . . . . 59Creating a Tivoli Domino Administrator . . . . . . . . . . . . . . . . . . . . . . . . . . . . . . . . . . . . . . . . . . . . . 59
iiiTivoli® Management Solution for Domino Installation and Setup Guide

Viewing Administrators . . . . . . . . . . . . . . . . . . . . . . . . . . . . . . . . . . . . . . . . . . . . . . . . . . . . . . . . . . 62
Deleting an Administrator . . . . . . . . . . . . . . . . . . . . . . . . . . . . . . . . . . . . . . . . . . . . . . . . . . . . . . . . 64
Chapter 6. Backing Up and Uninstalling . . . . . . . . . . . . . . . . . . . . . . . . . . . . . . . . . . 67Backing Up Tivoli Databases. . . . . . . . . . . . . . . . . . . . . . . . . . . . . . . . . . . . . . . . . . . . . . . . . . . . . . 67
Restoring a Tivoli System Backup . . . . . . . . . . . . . . . . . . . . . . . . . . . . . . . . . . . . . . . . . . . . . . . . . . 68
Uninstalling Tivoli Management Solution for Domino . . . . . . . . . . . . . . . . . . . . . . . . . . . . . . . . . . . 69
Uninstalling the Management Console . . . . . . . . . . . . . . . . . . . . . . . . . . . . . . . . . . . . . . . . . . . . . . . 71
Appendix A. Problem Determination . . . . . . . . . . . . . . . . . . . . . . . . . . . . . . . . . . . . . . 73Common Problems . . . . . . . . . . . . . . . . . . . . . . . . . . . . . . . . . . . . . . . . . . . . . . . . . . . . . . . . . . . . . 73
About the Log File for Installation Errors . . . . . . . . . . . . . . . . . . . . . . . . . . . . . . . . . . . . . . . . 74
Testing Endpoint Connectivity . . . . . . . . . . . . . . . . . . . . . . . . . . . . . . . . . . . . . . . . . . . . . . . . . . . . . 74
Resolving Error Messages from the Tivoli Management Agent Wizard . . . . . . . . . . . . . . . . . . . . . . . 76
Cleaning Up and Removing the Tivoli Management Agent. . . . . . . . . . . . . . . . . . . . . . . . . . . . . . . . 77
Appendix B. Error Messages for Installation . . . . . . . . . . . . . . . . . . . . . . . . . . . . . 81
Index . . . . . . . . . . . . . . . . . . . . . . . . . . . . . . . . . . . . . . . . . . . . . . . . . . . . . . . . . . . . . . . . . . . . . . . . 83
iv Version 3.2.0
Preface
This guide describes how to install and set up Tivoli® Management Solution for Domino™
to manage Lotus® Domino resources with Tivoli software.
Who Should Read This GuideThe Tivoli administrator refers to this book to install and set up the four basic componentsof the Tivoli Management Solution for Domino environment:
¶ A Tivoli server
¶ Managed Domino servers, which are hosts for the Tivoli management agent
¶ Tivoli Domino administrators
¶ A management console for each Tivoli Domino administrator
After you set up the environment, Tivoli Domino administrators use the management consoleto monitor and control Domino server hosts. Procedures in the Tivoli Manager for DominoUser’s Guide give detailed, step-by-step instructions for probing, monitoring, controlling, andcreating reports about Domino server hosts. The Tivoli Manager for Domino User’s Guideand related documents are included on the installation CD labeled Tivoli ManagementSolution for Domino v3.2 (CD #5). Open the documentation.html file on that CD to see alist of hyperlinks to the documents.
Note: The term Tivoli Manager for Domino will become obsolete in future versions of thisproduct. All components of the product will be called Tivoli Management Solution forDomino.
What This Guide ContainsThis guide contains the following sections:
¶ Chapter 1, “Overview” on page 1
Provides an overview of installation and setup of Tivoli Management Solution forDomino.
¶ Chapter 2, “Guidelines for Installation and Setup” on page 5
Gives guidelines for installing and setting up Tivoli Management Solution for Domino.
¶ Chapter 3, “Installing the Product” on page 7
Describes how to install Tivoli Management Solution for Domino.
¶ Chapter 4, “Setting Up Tivoli Endpoints” on page 39
Describes how to set up Tivoli management agent endpoints so that Tivoli ManagementSolution for Domino can manage these endpoints.
¶ Chapter 5, “Managing Domino Server Administrators” on page 59
Describes how to set up administrators in Tivoli Management Solution for Domino.
¶ Chapter 6, “Backing Up and Uninstalling” on page 67
Describes how to backup, restore, and uninstall Tivoli Management Solution forDomino.
¶ Appendix A, “Problem Determination” on page 73
vTivoli® Management Solution for Domino Installation and Setup Guide
Describes how to determine the source of common problems and suggests solutions.
¶ Appendix B, “Error Messages for Installation” on page 81
Describes error messages that the procedures in this document can generate.
Publications
This section lists publications in the Tivoli Management Solution for Domino library and anyother related documents. It also describes how to access Tivoli publications online, how toorder Tivoli publications, and how to submit comments on Tivoli publications.
Prerequisite and Related DocumentsThe following lists mention documents that provide detailed information on the product.Read the Tivoli Management Solution for Domino, Version 3.2.0, Release Notes for updatedinformation that could not be included in the documents that come with the product. Thefollowing documents describe how to use Tivoli Management Solution for Domino and areincluded on the product installation CDs in Portable Document Format (PDF) format and inHTML format:
¶ The Tivoli Manager for Domino Reference Guide, GC32-0675-00, provides informationabout Tivoli Manager for Domino (now called Tivoli Management Solution for Domino)monitors, tasks, and commands.
¶ The Tivoli Manager for Domino User’s Guide, GC32-0673-00, describes the proceduresyou use to manage Domino server hosts using Tivoli Manager for Domino (now calledTivoli Management Solution for Domino).
The following documents describe how to install and configure the Tivoli environment andare included on the product installation CDs:
¶ The Tivoli Distributed Monitoring User’s Guide, GC31-8382-04, describes TivoliDistributed Monitoring.
¶ The Tivoli Distributed Monitoring Collection Reference, SC31-5118-03, describes eachmonitor that is part of Tivoli Distributed Monitoring.
¶ The Tivoli Management Framework User’s Guide, GC31-8433-04, describes the Tivolienvironment.
¶ The Tivoli Management Framework Reference Manual, SC31-8434-04, providesinformation about Tivoli commands.
The Tivoli Glossary gives definitions for all Tivoli terminology:http://www.tivoli.com/support/documents/glossary/termsm03.htm
Accessing Publications OnlineYou can access many Tivoli publications online at the Tivoli Customer Support Web site:http://www.tivoli.com/support/documents/
These publications are available in PDF or HTML format, or both. Translated documents arealso available for some products.
Ordering PublicationsYou can order many Tivoli publications online at the following Web site:http://www.ibm.com/shop/publications/order
Preface
vi Version 3.2.0
You can also order by telephone by calling one of these numbers:
¶ In the United States: 800-879-2755
¶ In Canada: 800-426-4968
¶ In other countries, for a list of telephone numbers, see the following Web site:http://www.tivoli.com/inside/store/lit_order.html
Providing Feedback about PublicationsWe are very interested in hearing about your experience with Tivoli products anddocumentation, and we welcome your suggestions for improvements. If you have commentsor suggestions about our products and documentation, contact us in one of the followingways:
¶ Send an e-mail to [email protected].
¶ Complete our customer feedback survey at the following Web site:http://www.tivoli.com/support/survey/
Contacting Customer SupportIf you have a problem with any Tivoli product, you can contact Tivoli Customer Support.See the Tivoli Customer Support Handbook at the following Web site:http://www.tivoli.com/support/handbook/
The handbook provides information about how to contact Tivoli Customer Support,depending on the severity of your problem, and the following information:
¶ Registration and eligibility
¶ Telephone numbers and e-mail addresses, depending on the country you are in
¶ What information you should gather before contacting support
Conventions Used in This GuideThe guide uses several typeface conventions for special terms and actions. Theseconventions have the following meaning:
Bold Commands, keywords, file names, authorization roles, Web addresses, orother information that you must use literally appear like this, in bold.Names of windows, dialog boxes, and other controls also appear like this, inbold.
Italics Variables and values that you must provide appear like this, in italics. Wordsand phrases that are emphasized also appear like this, in italics.
Monospace Code examples, output, and system messages appear like this, in amonospace font.
Using the Guide OnlineThis document is available in the following formats through the hyperlink in thedocuments.html file located in the of the fourth installation CD labeled Tivoli ManagementSolution for Domino v3.2 (CD #4):
¶ HTML (.htm)
Preface
viiTivoli® Management Solution for Domino Installation and Setup Guide
¶ Adobe Acrobat (.pdf)
Note: Use the Adobe Acrobat Reader, Version 3.0 or later, to view and print the manual.You can use the ar405eng.exe executable in the extras directory of the TivoliManagement Solution for Domino installation CD to install Version 4.05 of thereader.
Viewing Online HelpView online help as follows:
¶ In the Tivoli desktop, click the Help buttons in dialog boxes.
¶ In the command line interface, type the name of the command at a command promptand press Enter to display command syntax and parameter information for thecommand.
Preface
viii Version 3.2.0

Overview
Tivoli Management Solution for Domino is system management and analysis software forLotus Domino servers. This chapter introduces basic concepts of the Tivoli environment.
Note: When you install Tivoli Management Solution for Domino, you create a completeTivoli environment. You must use the Tivoli components that come with this product.You cannot use any previously installed Tivoli components.
The Tivoli administrator refers to this book to install and set up the four basic componentsof the Tivoli Management Solution for Domino environment:
¶ A Tivoli server
¶ Managed Domino servers, which are hosts for the Tivoli management agent
¶ Tivoli Domino administrators
¶ A management console for each Tivoli Domino administrator
After you set up the environment, Tivoli Domino administrators use the management consoleto monitor and control Domino server hosts. Procedures in the Tivoli Manager for DominoUser’s Guide give detailed, step-by-step instructions for probing, monitoring, controlling, andcreating reports about Domino server hosts. The Tivoli Manager for Domino User’s Guideand related documents are included on the installation CD labeled Tivoli ManagementSolution for Domino v3.2 (CD #5). Open the documentation.html file on that CD to see alist of hyperlinks to the documents.
Key Tivoli ConceptsThe Tivoli environment is a set of components that is installed at a specific customerlocation. The environment addresses network computing management issues across manyplatforms. The environment is based on Tivoli Management Framework. In a Tivolienvironment, a system administrator can distribute software, manage user configurations,change access privileges, automate operations, monitor resources, and schedule jobs.
This section describes concepts and terms that you encounter as you install, set up, andmanage a Tivoli environment. The key Tivoli concepts fall into two general categories,architecture of the system and authorization roles of the administrators. See the TivoliGlossary at the following Web address for definitions of all Tivoli terminology:http://www.tivoli.com/support/documents/glossary/termsm03.htm
ArchitectureThis section lists the basic components of the Tivoli environment.
1
1Tivoli® Management Solution for Domino Installation and Setup Guide
1.Overview

Tivoli management region server, also called Tivoli serverIn Tivoli Management Solution for Domino, the Tivoli management region server,also called the Tivoli server, is the host for all Tivoli management functions.
Tivoli management regionIn Tivoli Management Solution for Domino, the Tivoli management region is agroup of servers that consists of the Tivoli server and the Domino servers that itmanages. In a Tivoli system for a larger enterprise, the Tivoli management regionmight manage thousands of Domino servers and would have a more complexarchitecture.
Tivoli management agent
A Tivoli management agent is Tivoli software installed on a Domino server host toenable communication with the Tivoli server.
Tivoli serverSee Tivoli management region server.
GatewayA software entity on the Tivoli server that enables communication between theTivoli server and the other servers that it manages.
Managed resourceA hardware or software entity in the Tivoli environment. A Domino server is anexample of a hardware entity. The Tivoli management agent is an example of asoftware entity. The Tivoli graphical user interface employs icons, graphs, and tablesto display information about managed resources.
Management consoleThe Java-based user interface for Tivoli Management Solution for Domino. You usethe console to inspect, manage, and monitor Domino resources in a distributedenvironment.
Policy regionIn a Tivoli environment, a group of managed resources that share one or morepolicies. Tivoli administrators use policy regions to define access to and control theresources, and associate rules for governing the resources.
Server hostA Domino server that is host for the Tivoli management agent. The Tivolimanagement agent enables communications between the Domino server host and theTivoli server. You use the Tivoli management agent wizard (Tivoli ManagementAgent Wizard) to install and configure the Tivoli management agent on a Dominoserver host. This procedure is described in “Installing the Tivoli Management Agent”on page 39.
Server objectA software entity that enables Tivoli Management Solution for Domino to probe,monitor, control, and report on Domino server hosts. You use the managementconsole to create a Domino server object. This automated process is introduced inthe ″Create Domino server objects″ row of Chapter 2, “Guidelines for Installationand Setup” on page 5.
Authorization RolesAuthorization roles control the type and the scope of operations that Domino administratorscan perform in the Tivoli environment.
Overview
2 Version 3.2.0
Authorization roleIn a Tivoli environment, the role assigned to Tivoli administrators to enable them toperform their assigned system management tasks. Examples of authorization rolesfor the Tivoli environment include: admin, senior, super, and user.
Note: The Authorization Role section for each procedure states the minimum rolethat an administrator must have to perform the procedure.
Tivoli administratorIn a Tivoli environment, a system administrator who is authorized to perform systemmanagement tasks and manage policy regions in one or more networks.
Note: In Tivoli Management Solution for Domino, the installation routine also givesthe Tivoli administrator authorization to manage Domino servers.
The installation routine for Tivoli Management Solution for Domino automaticallycreates a Tivoli administrator. At installation, this administrator receives the seniorrole. This role gives that person authority to perform the following operations:
¶ Create Tivoli Domino administrators for the Tivoli environment
¶ Configure Domino servers as hosts for the Tivoli environment
The installation routine also gives the Tivoli administrator the Domino_Admin role.This role enables that person to perform the following operations:
¶ Configure Domino servers as objects to be managed by Tivoli ManagementSolution for Domino
¶ Manage Domino servers
Tivoli Domino administratorA system administrator who is authorized to manage servers in the Tivolienvironment. The Tivoli administrator creates Tivoli Domino administrators andauthorizes them to manage Domino servers.
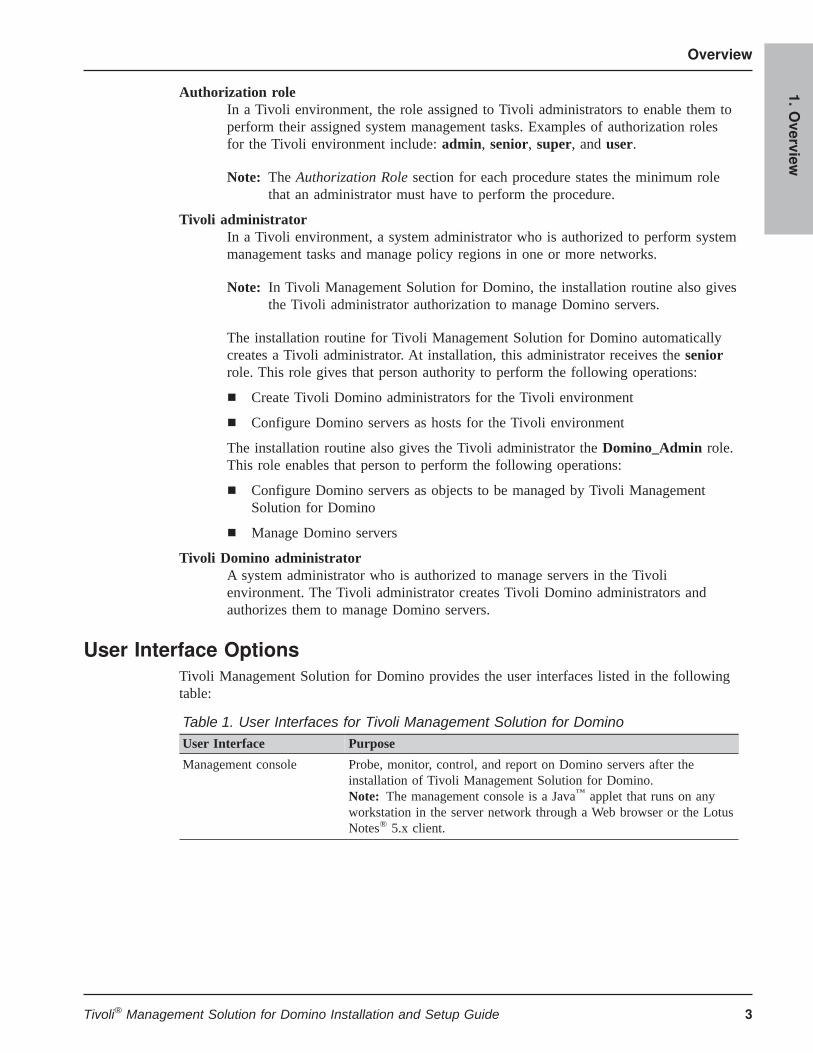
User Interface OptionsTivoli Management Solution for Domino provides the user interfaces listed in the followingtable:
Table 1. User Interfaces for Tivoli Management Solution for DominoUser Interface Purpose
Management console Probe, monitor, control, and report on Domino servers after theinstallation of Tivoli Management Solution for Domino.Note: The management console is a Java™ applet that runs on anyworkstation in the server network through a Web browser or the LotusNotes® 5.x client.
Overview
3Tivoli® Management Solution for Domino Installation and Setup Guide
1.Overview

Table 1. User Interfaces for Tivoli Management Solution for Domino (continued)User Interface Purpose
Wizards Separate wizards install and configure the following components:
¶ Tivoli Management Solution for Domino on the Tivoli server, asdescribed in “Installing Tivoli Management Solution for Domino”on page 13.
¶ The management console on the workstations of Tivoli Dominoadministrators, as described in “Installing the ManagementConsole” on page 34.
¶ The Tivoli management agent on Domino server hosts, asdescribed in “Installing the Tivoli Management Agent” on page39.
Tivoli desktop Create and manage Tivoli Domino administrators.
Command line interface Create and manage Tivoli Domino administrators and uninstallcomponents of the product.Note: For customers who must use a command line interface, TivoliManagement Solution for Domino provides command line interfacemethods to perform all required procedures.
Overview
4 Version 3.2.0

Guidelines for Installation and Setup
Table 2 summarizes the procedures for installing and setting up Tivoli Management Solutionfor Domino.
Table 2. Guidelines for Installation and SetupWhat you do Description Refer to
Before Installation
1. Prepare forinstallation.
Check the system for compliance with systemrequirements. Assign required privileges to the user whoinstalls the product.
“System Requirements for TivoliManagement Solution for Domino”on page 7
“Enabling a User to Install theProduct” on page 10
Installation
2. Install theproduct.
You can choose one of the following installationmethods:
¶ InstallShield wizard
¶ Silent installation
¶ InstallShield console (a command line interface)
“Installing Tivoli ManagementSolution for Domino” on page 13
3. Install themanagementconsole onotherworkstations.
Install management consoles on the local workstations ofeach Tivoli Domino administrator.
You can install the console on any workstation in thenetwork for the use of administrators.Note: Any administrator can remotely access the Tivoliserver and manage Domino server hosts through theTivoli server’s operating system. However, this approachmight cause unnecessary network traffic and causes theTivoli server to perform extra work. Tivoli recommendsdistributing management work to Web browsers or Notesclients on the individual workstations of Tivoli Dominoadministrator.
“Installing the ManagementConsole” on page 34
“Starting the Management Console”on page 36
After Installation
2
5Tivoli® Management Solution for Domino Installation and Setup Guide
2.Guidelin
esfor
Installatio
nandSetu
p
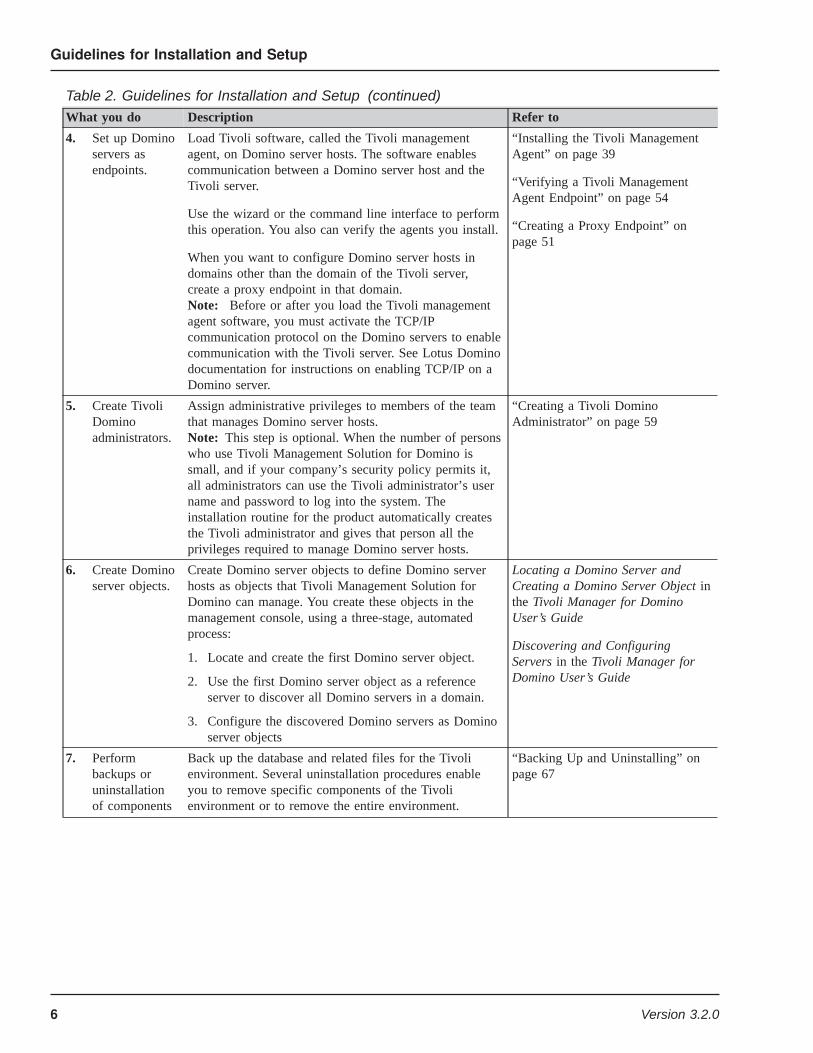
Table 2. Guidelines for Installation and Setup (continued)What you do Description Refer to
4. Set up Dominoservers asendpoints.
Load Tivoli software, called the Tivoli managementagent, on Domino server hosts. The software enablescommunication between a Domino server host and theTivoli server.
Use the wizard or the command line interface to performthis operation. You also can verify the agents you install.
When you want to configure Domino server hosts indomains other than the domain of the Tivoli server,create a proxy endpoint in that domain.Note: Before or after you load the Tivoli managementagent software, you must activate the TCP/IPcommunication protocol on the Domino servers to enablecommunication with the Tivoli server. See Lotus Dominodocumentation for instructions on enabling TCP/IP on aDomino server.
“Installing the Tivoli ManagementAgent” on page 39
“Verifying a Tivoli ManagementAgent Endpoint” on page 54
“Creating a Proxy Endpoint” onpage 51
5. Create TivoliDominoadministrators.
Assign administrative privileges to members of the teamthat manages Domino server hosts.Note: This step is optional. When the number of personswho use Tivoli Management Solution for Domino issmall, and if your company’s security policy permits it,all administrators can use the Tivoli administrator’s username and password to log into the system. Theinstallation routine for the product automatically createsthe Tivoli administrator and gives that person all theprivileges required to manage Domino server hosts.
“Creating a Tivoli DominoAdministrator” on page 59
6. Create Dominoserver objects.
Create Domino server objects to define Domino serverhosts as objects that Tivoli Management Solution forDomino can manage. You create these objects in themanagement console, using a three-stage, automatedprocess:
1. Locate and create the first Domino server object.
2. Use the first Domino server object as a referenceserver to discover all Domino servers in a domain.
3. Configure the discovered Domino servers as Dominoserver objects
Locating a Domino Server andCreating a Domino Server Object inthe Tivoli Manager for DominoUser’s Guide
Discovering and ConfiguringServers in the Tivoli Manager forDomino User’s Guide
7. Performbackups oruninstallationof components
Back up the database and related files for the Tivolienvironment. Several uninstallation procedures enableyou to remove specific components of the Tivolienvironment or to remove the entire environment.
“Backing Up and Uninstalling” onpage 67
Guidelines for Installation and Setup
6 Version 3.2.0
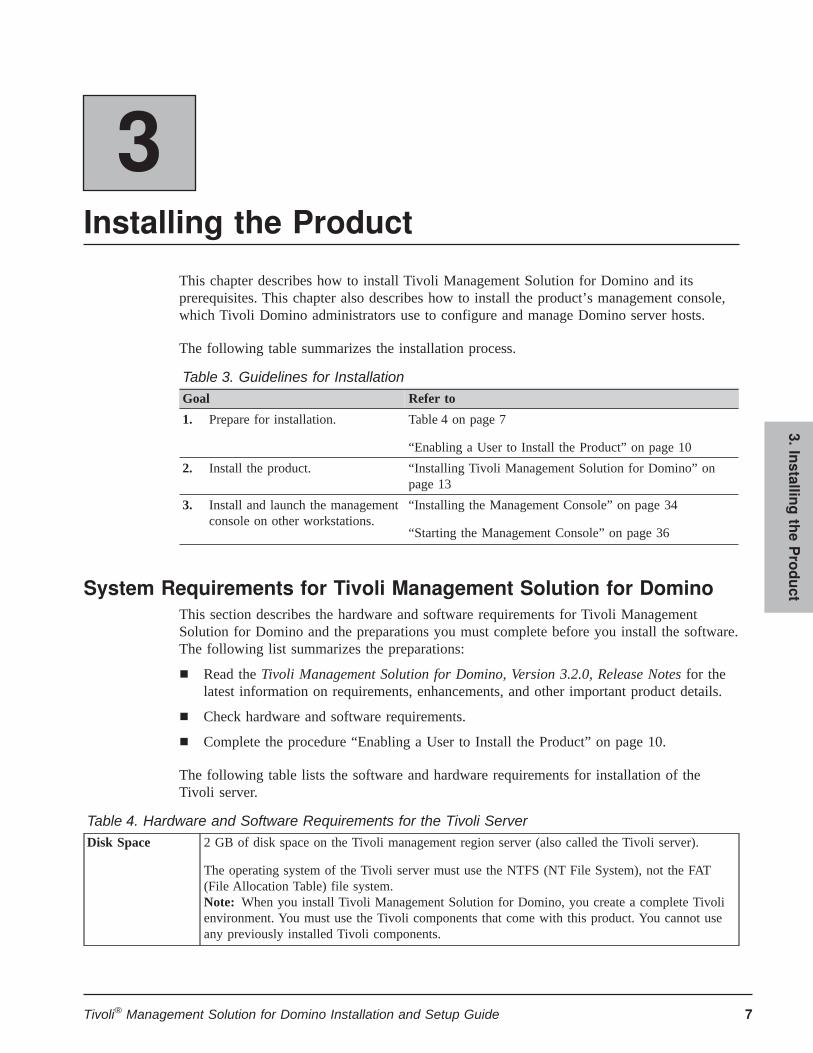
Installing the Product
This chapter describes how to install Tivoli Management Solution for Domino and itsprerequisites. This chapter also describes how to install the product’s management console,which Tivoli Domino administrators use to configure and manage Domino server hosts.
The following table summarizes the installation process.
Table 3. Guidelines for InstallationGoal Refer to
1. Prepare for installation. Table 4 on page 7
“Enabling a User to Install the Product” on page 10
2. Install the product. “Installing Tivoli Management Solution for Domino” onpage 13
3. Install and launch the managementconsole on other workstations.
“Installing the Management Console” on page 34
“Starting the Management Console” on page 36
System Requirements for Tivoli Management Solution for DominoThis section describes the hardware and software requirements for Tivoli ManagementSolution for Domino and the preparations you must complete before you install the software.The following list summarizes the preparations:
¶ Read the Tivoli Management Solution for Domino, Version 3.2.0, Release Notes for thelatest information on requirements, enhancements, and other important product details.
¶ Check hardware and software requirements.
¶ Complete the procedure “Enabling a User to Install the Product” on page 10.
The following table lists the software and hardware requirements for installation of theTivoli server.
Table 4. Hardware and Software Requirements for the Tivoli ServerDisk Space 2 GB of disk space on the Tivoli management region server (also called the Tivoli server).
The operating system of the Tivoli server must use the NTFS (NT File System), not the FAT(File Allocation Table) file system.Note: When you install Tivoli Management Solution for Domino, you create a complete Tivolienvironment. You must use the Tivoli components that come with this product. You cannot useany previously installed Tivoli components.
3
7Tivoli® Management Solution for Domino Installation and Setup Guide
3.Installin
gtheProduct
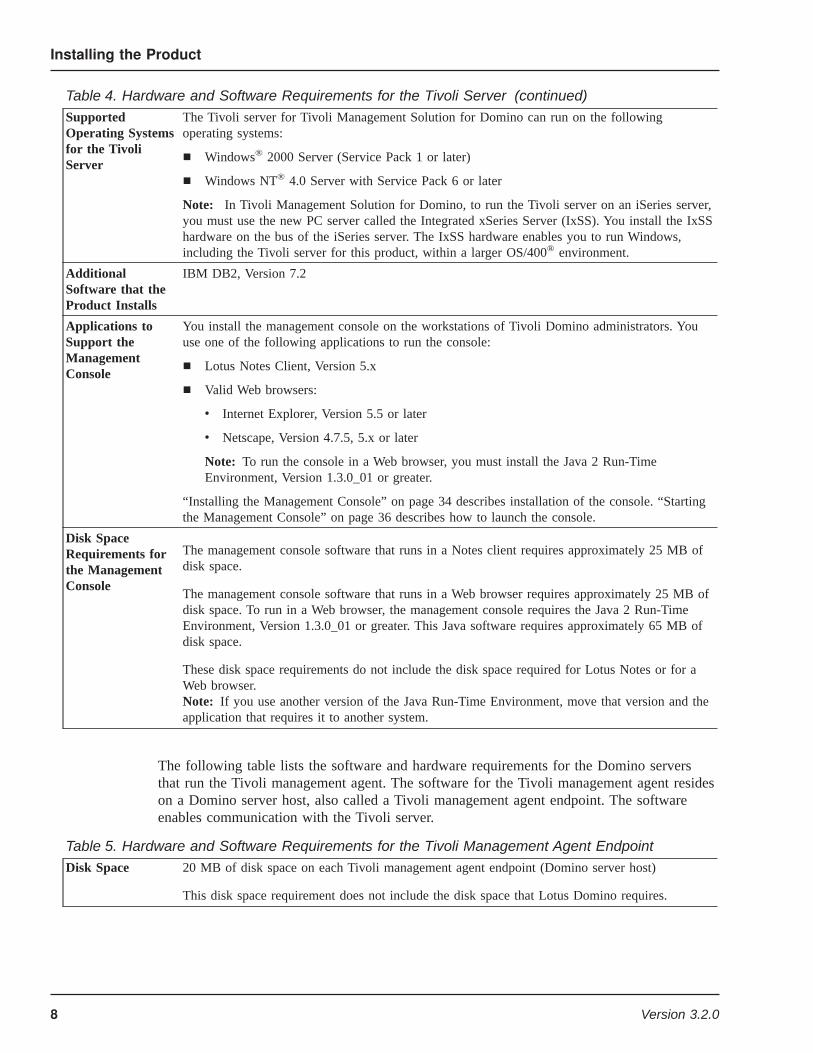
Table 4. Hardware and Software Requirements for the Tivoli Server (continued)SupportedOperating Systemsfor the TivoliServer
The Tivoli server for Tivoli Management Solution for Domino can run on the followingoperating systems:
¶ Windows® 2000 Server (Service Pack 1 or later)
¶ Windows NT® 4.0 Server with Service Pack 6 or later
Note: In Tivoli Management Solution for Domino, to run the Tivoli server on an iSeries server,you must use the new PC server called the Integrated xSeries Server (IxSS). You install the IxSShardware on the bus of the iSeries server. The IxSS hardware enables you to run Windows,including the Tivoli server for this product, within a larger OS/400® environment.
AdditionalSoftware that theProduct Installs
IBM DB2, Version 7.2
Applications toSupport theManagementConsole
You install the management console on the workstations of Tivoli Domino administrators. Youuse one of the following applications to run the console:
¶ Lotus Notes Client, Version 5.x
¶ Valid Web browsers:
v Internet Explorer, Version 5.5 or later
v Netscape, Version 4.7.5, 5.x or later
Note: To run the console in a Web browser, you must install the Java 2 Run-TimeEnvironment, Version 1.3.0_01 or greater.
“Installing the Management Console” on page 34 describes installation of the console. “Startingthe Management Console” on page 36 describes how to launch the console.
Disk SpaceRequirements forthe ManagementConsole
The management console software that runs in a Notes client requires approximately 25 MB ofdisk space.
The management console software that runs in a Web browser requires approximately 25 MB ofdisk space. To run in a Web browser, the management console requires the Java 2 Run-TimeEnvironment, Version 1.3.0_01 or greater. This Java software requires approximately 65 MB ofdisk space.
These disk space requirements do not include the disk space required for Lotus Notes or for aWeb browser.Note: If you use another version of the Java Run-Time Environment, move that version and theapplication that requires it to another system.
The following table lists the software and hardware requirements for the Domino serversthat run the Tivoli management agent. The software for the Tivoli management agent resideson a Domino server host, also called a Tivoli management agent endpoint. The softwareenables communication with the Tivoli server.
Table 5. Hardware and Software Requirements for the Tivoli Management Agent EndpointDisk Space 20 MB of disk space on each Tivoli management agent endpoint (Domino server host)
This disk space requirement does not include the disk space that Lotus Domino requires.
Installing the Product
8 Version 3.2.0
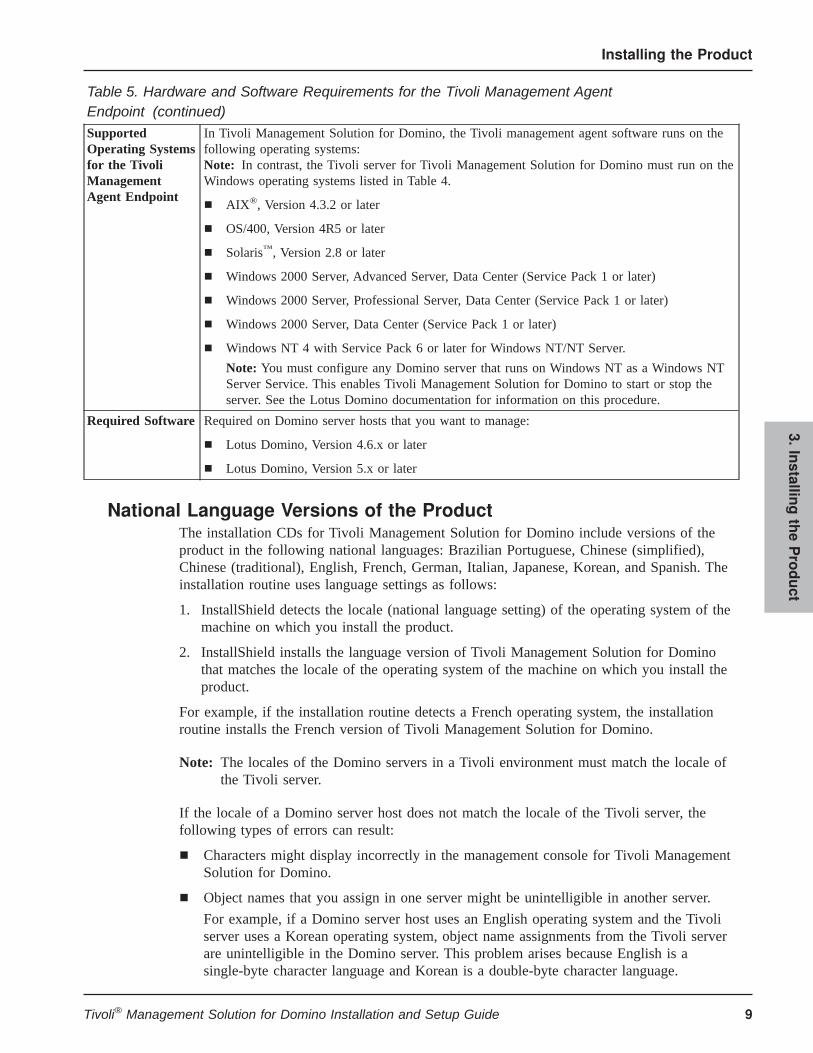
Table 5. Hardware and Software Requirements for the Tivoli Management AgentEndpoint (continued)SupportedOperating Systemsfor the TivoliManagementAgent Endpoint
In Tivoli Management Solution for Domino, the Tivoli management agent software runs on thefollowing operating systems:Note: In contrast, the Tivoli server for Tivoli Management Solution for Domino must run on theWindows operating systems listed in Table 4.
¶ AIX®, Version 4.3.2 or later
¶ OS/400, Version 4R5 or later
¶ Solaris™, Version 2.8 or later
¶ Windows 2000 Server, Advanced Server, Data Center (Service Pack 1 or later)
¶ Windows 2000 Server, Professional Server, Data Center (Service Pack 1 or later)
¶ Windows 2000 Server, Data Center (Service Pack 1 or later)
¶ Windows NT 4 with Service Pack 6 or later for Windows NT/NT Server.
Note: You must configure any Domino server that runs on Windows NT as a Windows NTServer Service. This enables Tivoli Management Solution for Domino to start or stop theserver. See the Lotus Domino documentation for information on this procedure.
Required Software Required on Domino server hosts that you want to manage:
¶ Lotus Domino, Version 4.6.x or later
¶ Lotus Domino, Version 5.x or later
National Language Versions of the ProductThe installation CDs for Tivoli Management Solution for Domino include versions of theproduct in the following national languages: Brazilian Portuguese, Chinese (simplified),Chinese (traditional), English, French, German, Italian, Japanese, Korean, and Spanish. Theinstallation routine uses language settings as follows:
1. InstallShield detects the locale (national language setting) of the operating system of themachine on which you install the product.
2. InstallShield installs the language version of Tivoli Management Solution for Dominothat matches the locale of the operating system of the machine on which you install theproduct.
For example, if the installation routine detects a French operating system, the installationroutine installs the French version of Tivoli Management Solution for Domino.
Note: The locales of the Domino servers in a Tivoli environment must match the locale ofthe Tivoli server.
If the locale of a Domino server host does not match the locale of the Tivoli server, thefollowing types of errors can result:
¶ Characters might display incorrectly in the management console for Tivoli ManagementSolution for Domino.
¶ Object names that you assign in one server might be unintelligible in another server.
For example, if a Domino server host uses an English operating system and the Tivoliserver uses a Korean operating system, object name assignments from the Tivoli serverare unintelligible in the Domino server. This problem arises because English is asingle-byte character language and Korean is a double-byte character language.
Installing the Product
9Tivoli® Management Solution for Domino Installation and Setup Guide
3.Installin
gtheProduct
For a non-English Tivoli environment, you must install the kbdus.dll file before installingTivoli Management Solution for Domino. This requirement applies to both the Tivoli serverand the Domino server hosts in the Tivoli environment. You can obtain this file fromMicrosoft or on the product CDs for Windows NT or Windows 2000 in all languageversions of these operating systems. The kbdus.dll file must reside in the%SystemRoot%\system32 directory.
Non-English characters in host names and host labels are not supported in this release. Forsome locales, using non-English characters for the following items can cause problems:
¶ User and group names
¶ Passwords
¶ File, directory, and object names
If you encounter problems, use only English characters for these items.
Setting the LANG VariableWhere possible, set the operating system of the machines in the Tivoli environment to run inthe desired language. Consult the documentation of the operating system to learn how to setthe language for your system. The following examples describe language setting options forspecific operating systems when the Tivoli server has a Japanese operating system.
Note: In Tivoli Management Solution for Domino, the Tivoli server always must run theWindows operating system.
¶ When the Domino server host runs on a Solaris operating system, all Tivoli processesmust be initiated with a LANG value of ja. If you are able to set all processes on thisserver to run in Japanese, you can access the /etc/default/init file and set the LANGvariable to Japanese (LANG=ja). That method ensures that Tivoli processes are initiatedwith a LANG value of ja.
¶ When Windows runs on the Domino server host, Japanese must be the system language.On Windows NT, you make this setting in the Regional Settings properties dialog boxthat you access in the Control Panel.
Enabling a User to Install the Product
ObjectiveTo give a user in the Windows operating system the advanced user rights required so he orshe can install Tivoli Management Solution for Domino.
Background Information
Note: The user logon account you use to install the product becomes the logon account of theTivoli administrator. The machine on which you install this product becomes the Tivoliserver.
The Windows user who installs Tivoli Management Solution for Domino must have thefollowing membership and privileges in the Windows operating system of the target machine:
¶ Be a member of the Administrators group
¶ Have the user right to Act as part of the operating system
Installing the Product
10 Version 3.2.0
¶ Have the user right to Replace a process level token
The network administrator for the domain in which the Tivoli server operates performs thisprocedure. The domain in which this user exists must be accessible to all the Domino serversthat you want to manage.
Required Authorization RoleAdministrator privileges for the Windows operating system.
Before You BeginNot applicable
When You FinishInstall the product using one of the methods described in “Installing Tivoli ManagementSolution for Domino” on page 13.
ProcedureYou can perform this procedure from the Windows desktop for Windows NT or Windows2000.
Windows NT Desktop
1. Log on to the network server on which you want to install Tivoli Management Solutionfor Domino.
2. Click Start in the Windows taskbar.
3. Select Programs → Administrative Tools (Common) → User Manager to access theUser Manager window.
4. Select the user you want to modify in the Username list.
5. Add the user to the Administrators group as follows:
a. Double-click the user name to access the Users Properties window.
b. Click the Groups button to access the Group Memberships dialog box.
c. Select Administrators in the Not member of list.
d. Click Add to move Administrators to the Member of list.
e. Click OK to return the Users Properties window.
f. Click OK to save your changes and to return to the User Manager window.
6. Select Policies → User Rights to access the User Rights Policy dialog box.
7. Click the Show Advanced User Rights option.
8. Assign the Act as part of the operating system user right to the user as follows:
a. Select Act as part of the operating system in the Right drop-down list.
b. Click Add to access the Add Users and Groups dialog box.
c. Click Show Users.
d. Select the user who will run the installation wizard for Tivoli Management Solutionfor Domino in the Names list.
e. Click Add.
Installing the Product
11Tivoli® Management Solution for Domino Installation and Setup Guide
3.Installin
gtheProduct
f. Click OK to return to the User Rights Policy dialog box.
9. Assign the Replace a process level token user right to the user as follows:
a. Select Replace a process level token in the Right drop-down list.
b. Click Add to access the Add Users and Groups dialog box.
c. Click Show Users.
d. Select the user who will run the installation wizard for Tivoli Management Solutionfor Domino in the Names list.
e. Click Add.
f. Click OK to return to the User Rights Policy dialog box.
10. Click OK to save the user rights assignments.
11. Close the User Manager window.
12. Log off your user account to apply these changes :
a. Click Start in the Windows taskbar and select Shut Down.
b. Select the Close all programs and log on as a different user? option.
c. Click Yes.
Additional Information: When you log in again, your user account has theauthorizations required for the installation of Tivoli Management Solution forDomino.
Windows 2000 Desktop
1. Log on to the Windows server on which you want to install Tivoli Management Solutionfor Domino.
2. Add the user to the Administrators group as follows:
a. Click Start in the Windows taskbar.
b. Select Settings → Control Panel.
c. Double-click Users and Passwords to access the Users and Passwords window.
d. Click Advanced → Advanced to display the Local Users and Groups window.
e. Select the Groups folder under Local Users and Groups (Local).
f. Click Administrators.
g. Click Actions → Add to Group.
h. Click Add to access the Select Users or Groups dialog box.
i. Select the user who will run the installation wizard for Tivoli Management Solutionfor Domino from the Name list.
j. Click Add.
k. Click OK to return to the Administrator Properties dialog box.
l. Click OK to save the administrator group assignments.
3. Click Start in the Windows taskbar.
Installing the Product
12 Version 3.2.0
4. Select Settings → Control Panel → Administrative Tools → Local Security Policy toaccess the Local Security Settings window.
5. Use the tree view to select User Rights Assignment folder within the Local Policiesfolder to display the Policy list.
6. Assign the Act as part of the operating system user right to the user as follows:
a. Double-click Act as part of the operating system in the Policy list.
b. Click Add to access the Select Users or Groups dialog box.
c. Select the user who will run the installation wizard for Tivoli Management Solutionfor Domino from the Name list.
d. Click Add.
e. Click OK to return to the Local Security Policy Setting dialog box.
f. Click OK to save the settings and return to the Local Security Settings dialog box.
7. Assign the Replace a process level token user right to the user as follows:
a. Double click Replace a process level token from the Policy list.
b. Click Add to access the Select Users or Groups dialog box.
c. Select the user who will run the installation wizard for Tivoli Management Solutionfor Domino from the Name list.
d. Click Add.
e. Click OK to return to the Local Security Policy Setting dialog box.
f. Click OK to save the settings and return to the Local Security Settings dialog box.
8. Close the Local Security Settings window.
9. Log off your user account to apply these changes :
a. Click Start in the Windows taskbar and select Shut Down.
b. Select the Log off <account_name> option in the pull-down menu.
c. Click OK.
Additional Information: When you log in again, your user account has theauthorizations required for the installation of Tivoli Management Solution forDomino.
Installing Tivoli Management Solution for Domino
ObjectiveTo install the Tivoli server and related components of the Tivoli environment so you can useTivoli Management Solution for Domino to manage Domino servers.
Note: This procedure requires approximately three hours, depending on the performance ofthe target machine.
Background InformationTivoli strongly recommends that you install the software for the Tivoli environment on adedicated Windows NT or Windows 2000 server. The server on which you install almost all
Installing the Product
13Tivoli® Management Solution for Domino Installation and Setup Guide
3.Installin
gtheProduct

of the software is the host for the Tivoli environment. When you use a dedicated server, allthe computation power and network connectivity of that machine is available to operate theTivoli environment.
Note: The user who installs the product becomes the Tivoli administrator for the product.See “Key Tivoli Concepts” on page 1 for more information on this and otherconcepts. By default, the Tivoli administrator has the following logon name:Root_<hostname>-region
where <hostname> is the name of the Tivoli server.
The installation routine of Tivoli Management Solution for Domino detects the languagesetting in your Tivoli server and installs the language version of the product that matches theoperating system. See “National Language Versions of the Product” on page 9 for moreinformation on this topic.
You must type single-byte characters (not double-byte characters) in the text boxes of theinstallation wizard. Even if you use an operating system based on a double-byte characterset, such as Korean, Chinese, and Japanese, the installation wizard requires single-bytecharacters in these text boxes.
Each of the components that this product installs can generate errors that prevent asuccessful installation. When errors occur, error messages are stored in a log file. The file islocated on the Tivoli server in the %TMP% directory, where %TMP% is the environmentvariable for the temporary directory of the operating system. To resolve the errors, contactTivoli Customer Support and provide the log file to support staff for analysis.
Installation OptionsUse one of the following procedures to install the product:
¶ The procedure for the “Installation Wizard” on page 17 prompts you for installationparameters in a graphical user interface. Wizard panels includes Back, Next, and Cancelbuttons to enable you to review settings, change settings, or cancel the installationprocess. A button might be absent or disabled when it is not valid in a specific panel ofthe wizard. For example, the Back button is not available in the first panel of the wizardbecause there is no previous panel to which you can return. Sometimes the Next buttonis not available until you provide a value that is required for installation.
Note: The wizard displays a panel that gives you the option to begin installing theTivoli management agent on the Domino server hosts. See “Installing the TivoliManagement Agent” on page 39 for more information on that procedure.
¶ The procedure for the “Silent Installation” on page 29 enables installation to take placewithout user intervention. You record installation parameters in a text file that theinstaller references during installation.
Note: You must first copy the contents of the installation CDs to the hard drive of yourcomputer to use silent installation.
¶ The procedure for the “Installation Console” on page 31 prompts you for installationparameters through a command line interface.
Installing the Product
14 Version 3.2.0

Mounting the CD Drive on OS/400 During Use of the Installation WizardOn an iSeries server running OS/400, you can install the Tivoli server on an IntegratedxSeries Server (IxSS) that runs the Windows operating system. The IxSS hardware ismounted on the PCI bus of the iSeries server.
During installation, the installation wizard restarts the system because the product installsmultiple components. If you want to use the installation wizard on OS/400, you must ensurethat the CD drive for the installation CD is remounted each time that the installation routinerestarts the system.
There is no mechanism for locking the drive that you use for the Tivoli ManagementSolution for Domino installation. In complex iSeries server environments, other operatingsystems might lock the drive while the installation routine for Tivoli Management Solutionfor Domino restarts the system. To ensure that the Windows system on which you areinstalling the product mounts the CD drive during a restart, use one of the methods outlinedin this section.
Note: The as400dev executable you use in these methods is located in the system32directory of the Windows operating system.
¶ Create a batch (.bat) file that runs the as400dev command to mount the CD drive andplace the batch file in the Startup folder. For example, if the ID of the CD drive isOPT01, the batch file should contain the following command:as400dev /Lock OPT01
—OR—
¶ Add a registry key to the Windows Registry:
1. Launch the regedit.exe executable located in the Windows system directory.
2. Access the following directory in the tree on the left side of the registry window:HKEY_LOCAL_MACHINE\SOFTWARE\Microsoft\Windows\CurrentVersion\Run
3. Right-click in the background of the right pane of this window.
4. Select New → String Value.
5. Name the new string value MountCD.
6. Right-click the new MountCD icon.
7. Select Modify.
8. Type the following string in the Value data field of the Edit String dialog box:WINNT\system32\as400dev.exe /lock OPT01
Additional Information: Instead of the literal path, you can use the environmentvariable %systemroot% to identify the location of the system32 directory. Forexample, you can replace the literal directory name in the preceding string to createthe following alternative string:%systemroot%\system32\as400dev.exe /lock OPT01
Installing the Product
15Tivoli® Management Solution for Domino Installation and Setup Guide
3.Installin
gtheProduct
Cancelling the InstallationInstallShield provides a Cancel button in all panels except the progress panels that displaypercentage completion for specific phases of installation. You can click Cancel at any time.The following conditions apply whenever you click Cancel after you begin installing theproduct:
¶ Clicking Cancel stops further installation of product components.
¶ The installer removes the set of components that are contained on the installation CDthat you are currently using to install the product.
¶ The components that you have installed from any previous Tivoli Management Solutionfor Domino installation CDs remain on your system. This condition means that you canresolve any problems that caused you to click Cancel and continue installation using thecomponent from previous installation CDs that you had successfully installed.
For example, stop and restart installation of Tivoli Management Solution for Dominov3.2 (CD #3) components as follows:
1. Click Cancel to stop product installation.
2. Exit from the InstallShield wizard.
3. Restart the machine to stop all installation processes.
4. Insert the first installation CD, Tivoli Management Solution for Domino v3.2 (CD#1).
5. Run setup.exe, which is located in the root directory of the CD.
Additional Information: InstallShield detects the installed components of the productand prompts you to insert Tivoli Management Solution for Domino v3.2 (CD #3).
6. Insert the specified installation CD.
7. Click Next to continue installation.
Regarding the Required DatabaseThe installation routine permits you to install the DB2 application for this product on aseparate hard disk on the machine where you install the Tivoli server. Do not attempt tooverwrite an existing installation of DB2 when you install the product. If another version ofDB2 exists on the drive where you want to install DB2 for this product, completely uninstallthe existing version before you install the version of DB2 that comes with TivoliManagement Solution for Domino.
In all cases, you must install and use the version of DB2 that comes with TivoliManagement Solution for Domino, Version 3.2. You cannot use a version of DB2 that mightalready be installed on your system.
The OS/400 operating system includes the DB2/400 database management application. Youcannot use this application with Tivoli Management Solution for Domino. You must installand use the DB2 application that comes with Tivoli Management Solution for Domino. Thisinstance of DB2 does not interact or interfere with DB2/400.
Required Authorization RoleThe user who installs Tivoli Management Solution for Domino must be a member of theWindows Administrators group. You assign this membership and other required rights asdescribed in “Enabling a User to Install the Product” on page 10.
Installing the Product
16 Version 3.2.0
Before You BeginYour system must meet the prerequisites described in “System Requirements for TivoliManagement Solution for Domino” on page 7.
Note: For a non-English Tivoli environment, you must install the kbdus.dll file beforeinstalling Tivoli Management Solution for Domino. This requirement applies to boththe Tivoli server and the Domino server hosts in the Tivoli environment. You canobtain this file from Microsoft or on the product CDs for Windows NT or Windows2000 in all language versions of these operating systems. The kbdus.dll file mustreside in the %SystemRoot%\system32 directory.
Confirm that no previously installed Tivoli software exists on the computer. TivoliManagement Solution for Domino is a complete Tivoli environment. You must create theTivoli environment using only the components of this product. If the installation routinedetects other previously installed Tivoli components, the installation routine terminates.
Perform the procedure described in “Enabling a User to Install the Product” on page 10.
Close other applications that are running on the computer.
When You FinishInstall the Tivoli management agent on Domino server hosts, as described in “Installing theTivoli Management Agent” on page 39.
Create Tivoli Domino administrators as described in “Creating a Tivoli DominoAdministrator” on page 59.
Install the management console on the workstations of each Tivoli Domino administrator, asdescribed in “Installing the Management Console” on page 34.
ProcedureYou can install the product using one of the following methods: “Installation Wizard” onpage 17, “Silent Installation” on page 29, or “Installation Console” on page 31. See theBackground Information section for information on each method.
Installation Wizard
Note: This installation routine creates a log file containing any error messages that thecomponents of the product generate during installation. This file specifies problemsand in some cases suggests possible solutions. You and the Tivoli Customer Supportstaff can review this log file to resolve installation problems. See “About the Log Filefor Installation Errors” on page 74 for more information on the log file for errormessages.
1. Log on to the computer on which you want to install the Tivoli management region.
Additional Information: This computer becomes the Tivoli server. The user logonaccount you use becomes the logon account of the Tivoli administrator.
2. Display the contents of the Tivoli Management Solution for Domino v3.2 (CD #1) CDusing one of the following methods:
¶ Access the CD drive that contains the installation CD.
—OR—
Installing the Product
17Tivoli® Management Solution for Domino Installation and Setup Guide
3.Installin
gtheProduct
¶ Copy the contents of all installation CDs to a temporary directory on the Tivoliserver and access that directory. This method can speed installation. In somecompanies, the network architecture or company policy require this method. TheCDs require a total of approximately 2 GB of disk space.
Note: Copy CD 3A or CD 3B. It is not necessary to copy both CDs. Copy CD 3Aif your operating system uses a single-byte character language such asEnglish. Copy CD 3B if you operating system uses a double-byte characterlanguage such as Chinese.
3. Run setup.exe located in the root directory of the installation software.
4. Respond to one of the following prompts:
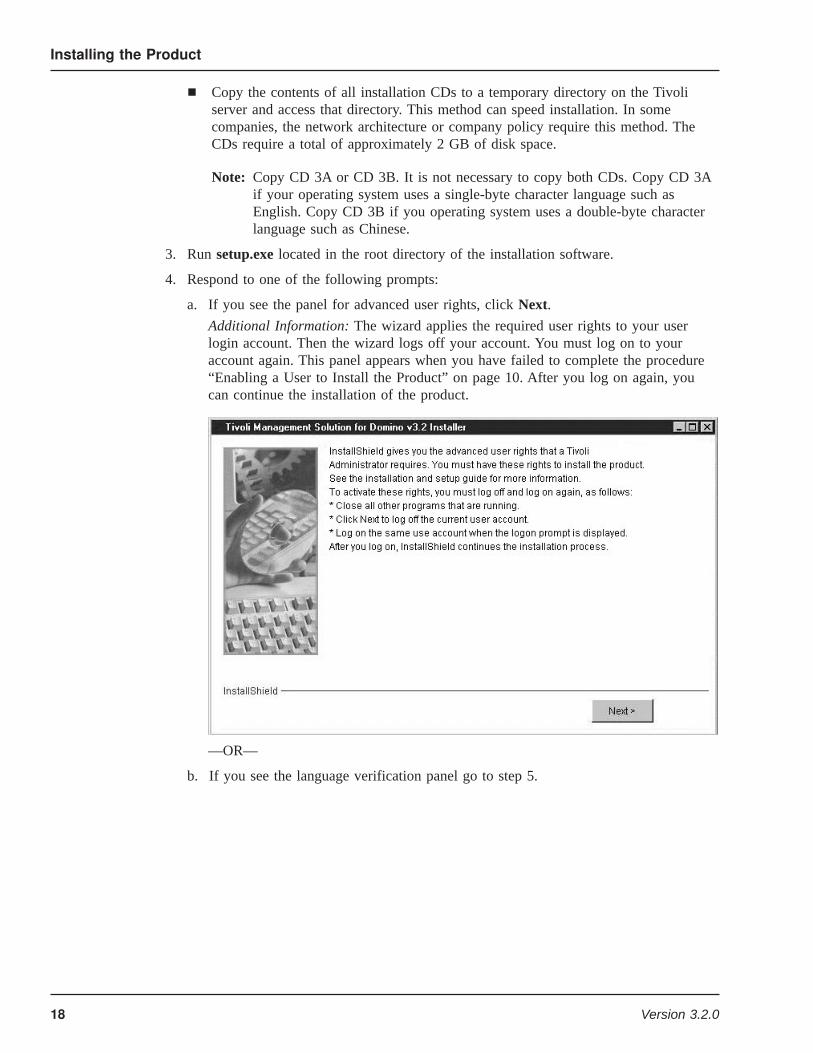
a. If you see the panel for advanced user rights, click Next.
Additional Information: The wizard applies the required user rights to your userlogin account. Then the wizard logs off your account. You must log on to youraccount again. This panel appears when you have failed to complete the procedure“Enabling a User to Install the Product” on page 10. After you log on again, youcan continue the installation of the product.
—OR—
b. If you see the language verification panel go to step 5.
Installing the Product
18 Version 3.2.0

5. Choose one of the following actions:
¶ Select Install using the current language to continue installation with thelanguage used in this panel. This action enables the Next button.
—OR—
¶ Cancel installation as follows:
a. Select Do not install using the current language.
b. Click Cancel.
c. Click Yes in the confirmation dialog box.
Installing the Product
19Tivoli® Management Solution for Domino Installation and Setup Guide
3.Installin
gtheProduct
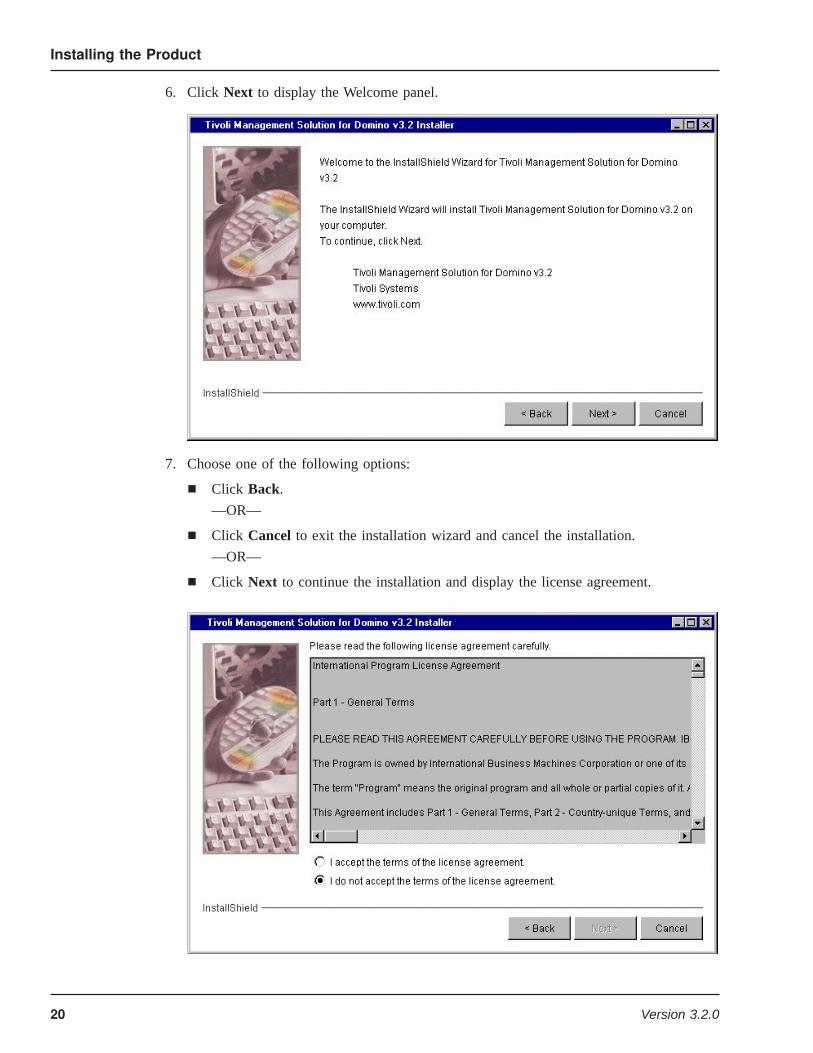
6. Click Next to display the Welcome panel.
7. Choose one of the following options:
¶ Click Back.
—OR—
¶ Click Cancel to exit the installation wizard and cancel the installation.
—OR—
¶ Click Next to continue the installation and display the license agreement.
Installing the Product
20 Version 3.2.0
8. Confirm the license agreement.
a. Use the scroll bar to read the agreement.
b. Click the appropriate option button:
¶ Click I accept the terms of the license agreement. to indicate acceptance.
—OR—
¶ Click I do not accept the terms of the license agreement. to indicate rejectionand click Cancel. When you take this action, you cancel the installation.
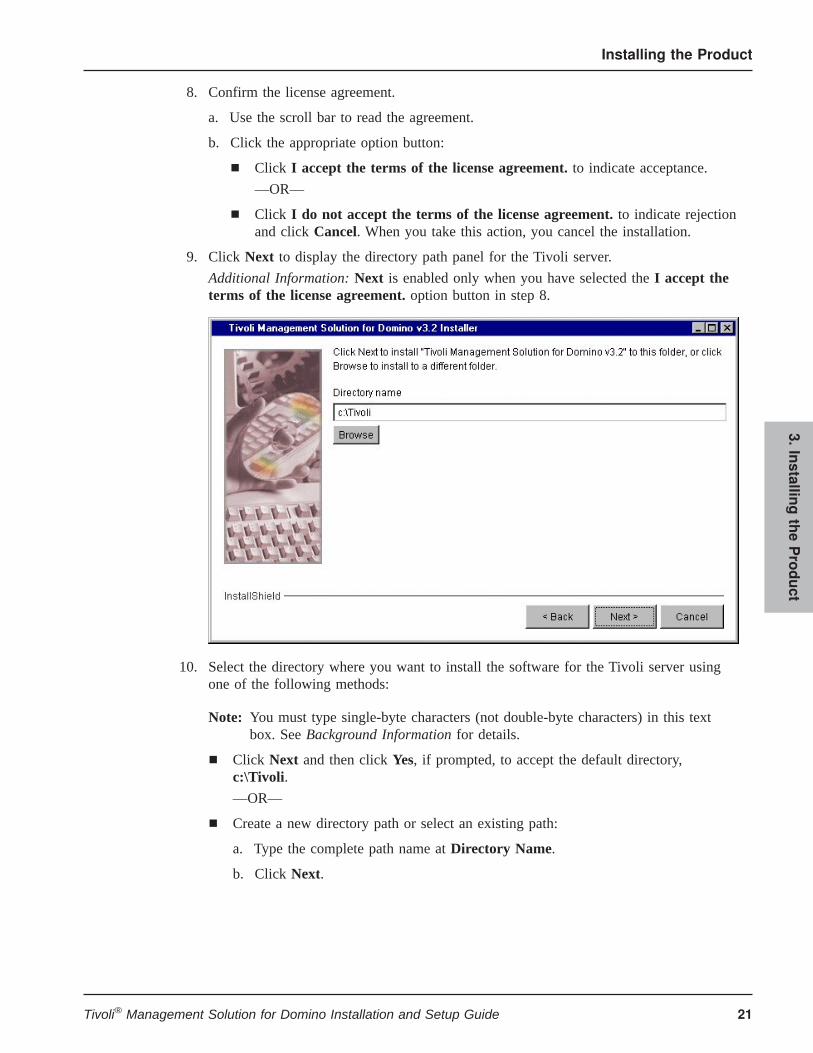
9. Click Next to display the directory path panel for the Tivoli server.
Additional Information: Next is enabled only when you have selected the I accept theterms of the license agreement. option button in step 8.
10. Select the directory where you want to install the software for the Tivoli server usingone of the following methods:
Note: You must type single-byte characters (not double-byte characters) in this textbox. See Background Information for details.
¶ Click Next and then click Yes, if prompted, to accept the default directory,c:\Tivoli.
—OR—
¶ Create a new directory path or select an existing path:
a. Type the complete path name at Directory Name.
b. Click Next.
Installing the Product
21Tivoli® Management Solution for Domino Installation and Setup Guide
3.Installin
gtheProduct

c. Click Yes to create the directory if it does not exist.
d. Click Next.
—OR—
¶ Select a different, existing directory:
a. Click Browse.
b. Select the directory.
c. Click Next.
InstallShield displays the panel in which you set the directory path for DB2.
11. Select the directory where you want to install the software for DB2 using one of thefollowing methods.
Note: You must type single-byte characters (not double-byte characters) in this textbox. See Background Information for details.
¶ Click Next and then click Yes, if prompted, to accept the default directory, c:\DB2.
—OR—
¶ Create a new directory path or select an existing path:
a. Type the complete path name at Directory Name.
b. Click Next.
c. Click Yes to create the directory if it does not exist.
Installing the Product
22 Version 3.2.0
d. Click Next.
—OR—
¶ Select a different, existing directory:
a. Click Browse.
b. Select the directory.
c. Click Next.
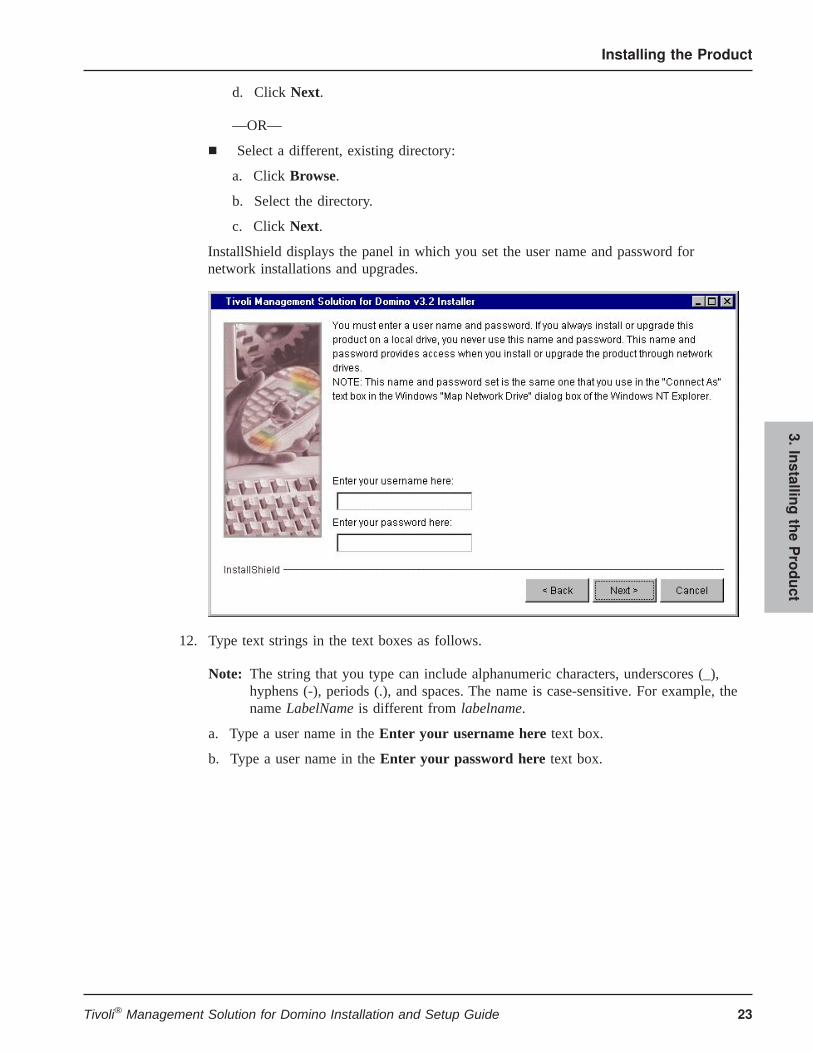
InstallShield displays the panel in which you set the user name and password fornetwork installations and upgrades.
12. Type text strings in the text boxes as follows.
Note: The string that you type can include alphanumeric characters, underscores (_),hyphens (-), periods (.), and spaces. The name is case-sensitive. For example, thename LabelName is different from labelname.
a. Type a user name in the Enter your username here text box.
b. Type a user name in the Enter your password here text box.
Installing the Product
23Tivoli® Management Solution for Domino Installation and Setup Guide
3.Installin
gtheProduct
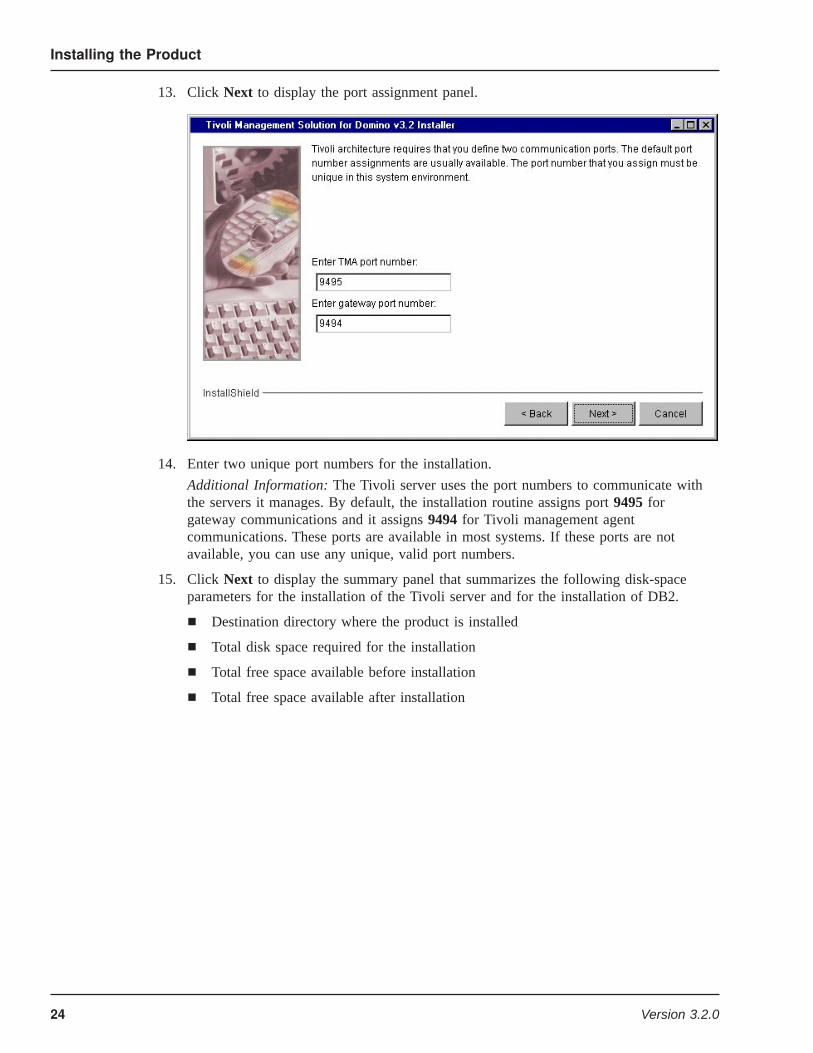
13. Click Next to display the port assignment panel.
14. Enter two unique port numbers for the installation.
Additional Information: The Tivoli server uses the port numbers to communicate withthe servers it manages. By default, the installation routine assigns port 9495 forgateway communications and it assigns 9494 for Tivoli management agentcommunications. These ports are available in most systems. If these ports are notavailable, you can use any unique, valid port numbers.
15. Click Next to display the summary panel that summarizes the following disk-spaceparameters for the installation of the Tivoli server and for the installation of DB2.
¶ Destination directory where the product is installed
¶ Total disk space required for the installation
¶ Total free space available before installation
¶ Total free space available after installation
Installing the Product
24 Version 3.2.0

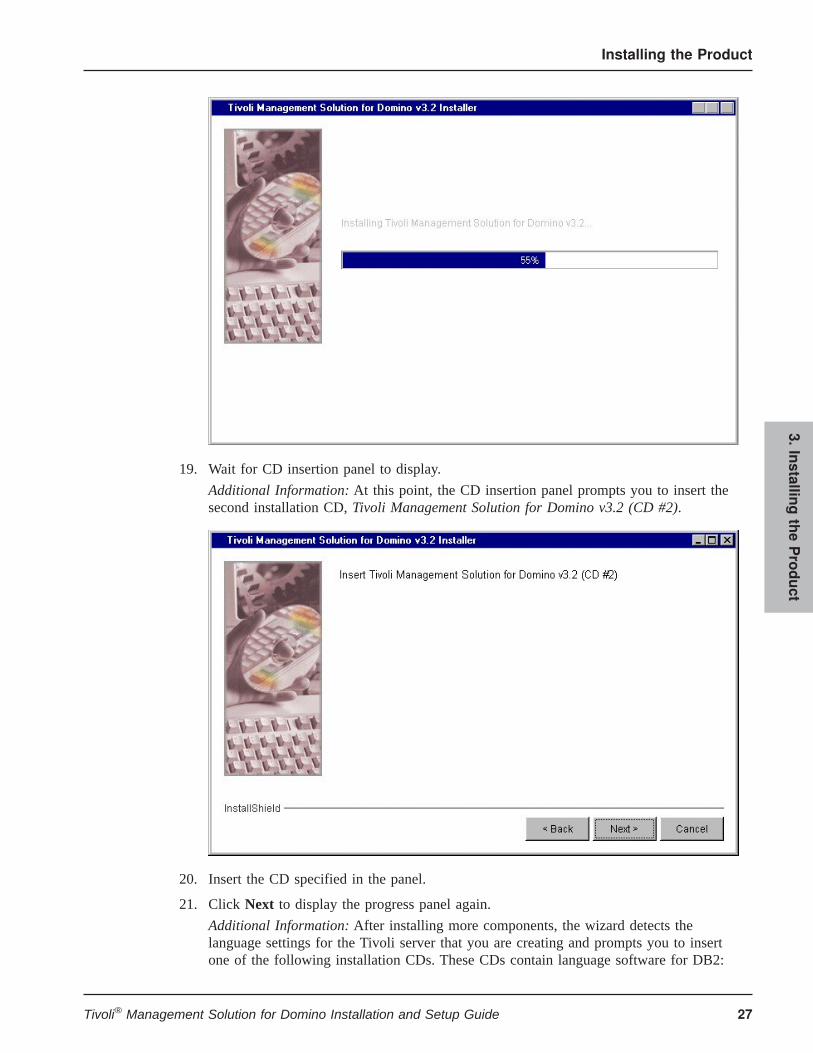
16. Click Next to display the progress panel.
Additional Information: The progress panel shows the progress of installation, includinga display of percentage complete.
Note: Unlike other panels in the wizard, the progress panel does not provide a Cancelbutton. If you want to cancel installation, you must wait for the progress panel toreach 100 percent completion. Then click Cancel in the panel that comes after
Installing the Product
25Tivoli® Management Solution for Domino Installation and Setup Guide
3.Installin
gtheProduct
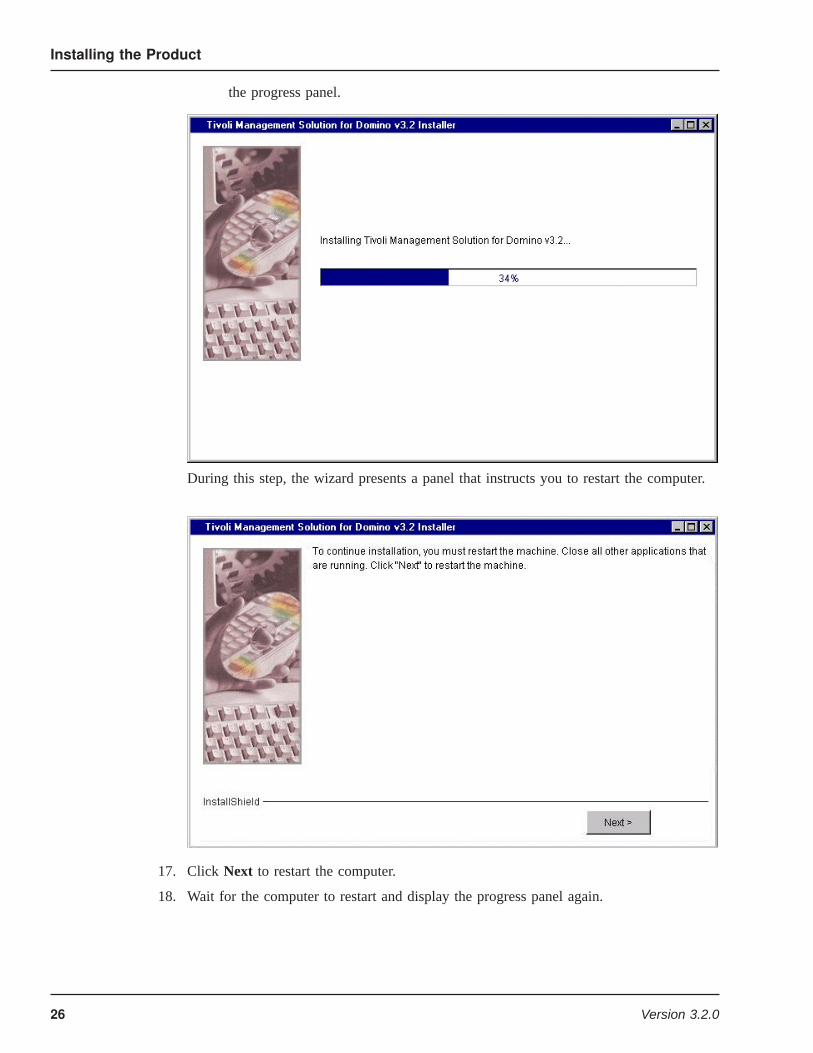
the progress panel.
During this step, the wizard presents a panel that instructs you to restart the computer.
17. Click Next to restart the computer.
18. Wait for the computer to restart and display the progress panel again.
Installing the Product
26 Version 3.2.0
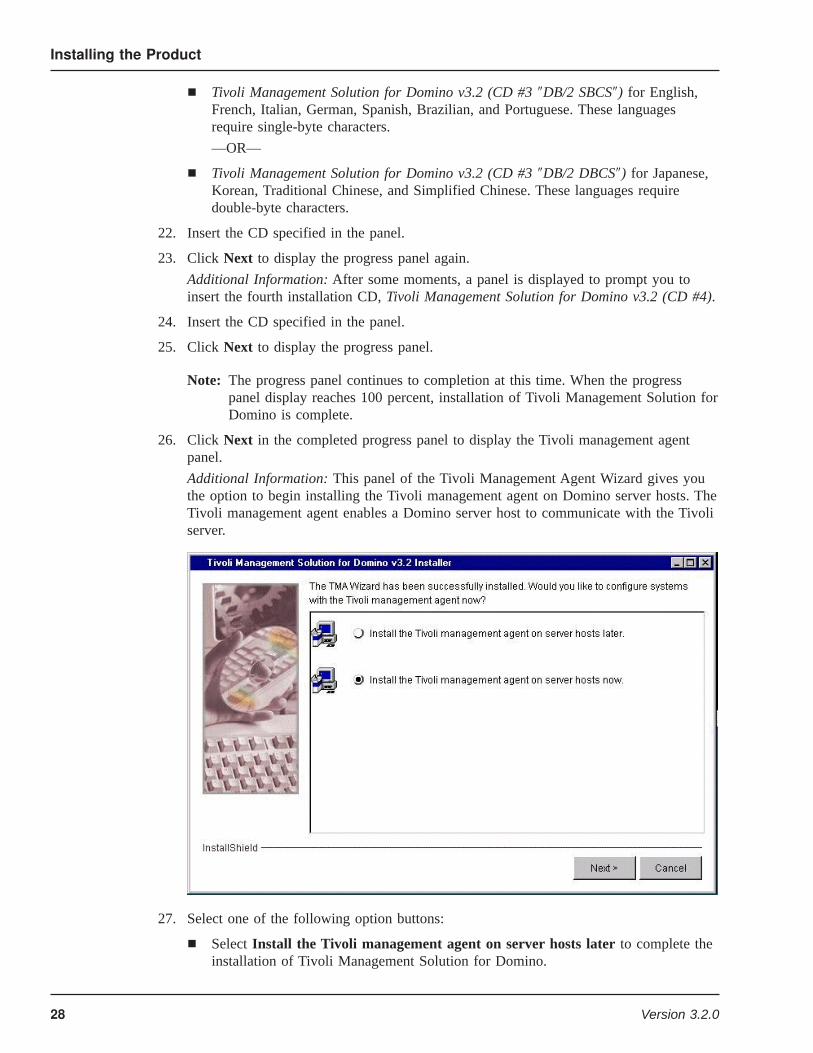
19. Wait for CD insertion panel to display.
Additional Information: At this point, the CD insertion panel prompts you to insert thesecond installation CD, Tivoli Management Solution for Domino v3.2 (CD #2).
20. Insert the CD specified in the panel.
21. Click Next to display the progress panel again.
Additional Information: After installing more components, the wizard detects thelanguage settings for the Tivoli server that you are creating and prompts you to insertone of the following installation CDs. These CDs contain language software for DB2:
Installing the Product
27Tivoli® Management Solution for Domino Installation and Setup Guide
3.Installin
gtheProduct
¶ Tivoli Management Solution for Domino v3.2 (CD #3 ″DB/2 SBCS″) for English,French, Italian, German, Spanish, Brazilian, and Portuguese. These languagesrequire single-byte characters.
—OR—
¶ Tivoli Management Solution for Domino v3.2 (CD #3 ″DB/2 DBCS″) for Japanese,Korean, Traditional Chinese, and Simplified Chinese. These languages requiredouble-byte characters.
22. Insert the CD specified in the panel.
23. Click Next to display the progress panel again.
Additional Information: After some moments, a panel is displayed to prompt you toinsert the fourth installation CD, Tivoli Management Solution for Domino v3.2 (CD #4).
24. Insert the CD specified in the panel.
25. Click Next to display the progress panel.
Note: The progress panel continues to completion at this time. When the progresspanel display reaches 100 percent, installation of Tivoli Management Solution forDomino is complete.
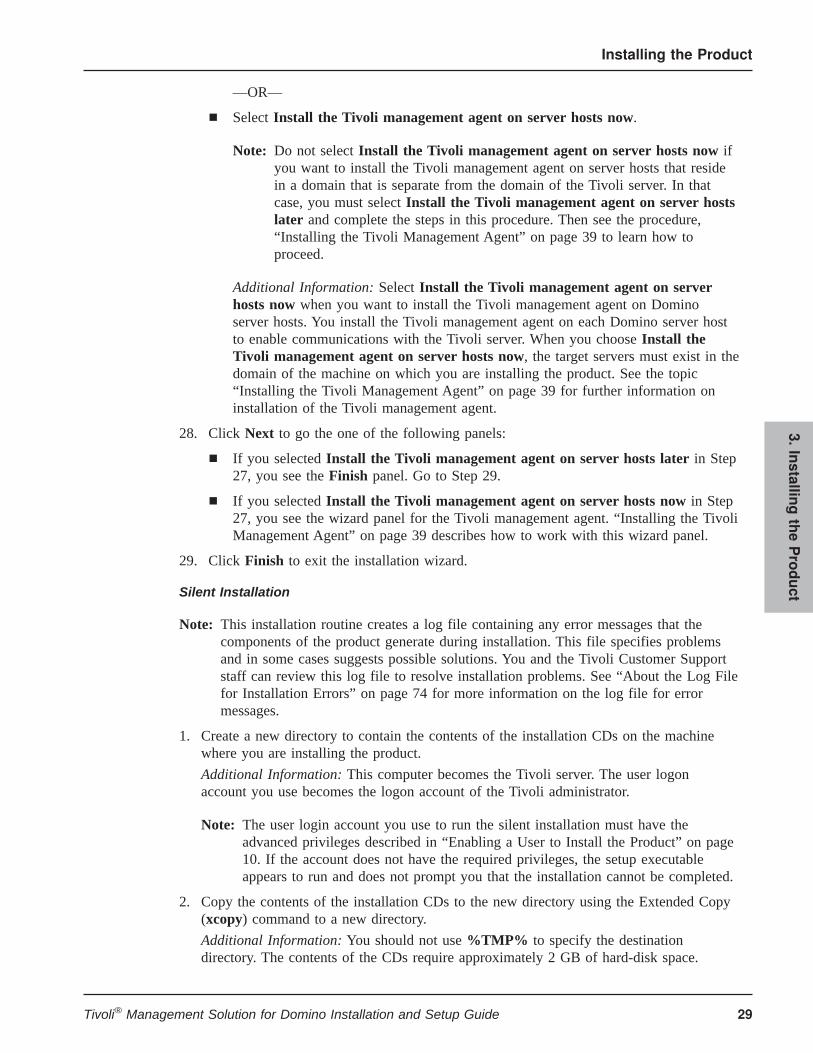
26. Click Next in the completed progress panel to display the Tivoli management agentpanel.
Additional Information: This panel of the Tivoli Management Agent Wizard gives youthe option to begin installing the Tivoli management agent on Domino server hosts. TheTivoli management agent enables a Domino server host to communicate with the Tivoliserver.
27. Select one of the following option buttons:
¶ Select Install the Tivoli management agent on server hosts later to complete theinstallation of Tivoli Management Solution for Domino.
Installing the Product
28 Version 3.2.0
—OR—
¶ Select Install the Tivoli management agent on server hosts now.
Note: Do not select Install the Tivoli management agent on server hosts now ifyou want to install the Tivoli management agent on server hosts that residein a domain that is separate from the domain of the Tivoli server. In thatcase, you must select Install the Tivoli management agent on server hostslater and complete the steps in this procedure. Then see the procedure,“Installing the Tivoli Management Agent” on page 39 to learn how toproceed.
Additional Information: Select Install the Tivoli management agent on serverhosts now when you want to install the Tivoli management agent on Dominoserver hosts. You install the Tivoli management agent on each Domino server hostto enable communications with the Tivoli server. When you choose Install theTivoli management agent on server hosts now, the target servers must exist in thedomain of the machine on which you are installing the product. See the topic“Installing the Tivoli Management Agent” on page 39 for further information oninstallation of the Tivoli management agent.
28. Click Next to go the one of the following panels:
¶ If you selected Install the Tivoli management agent on server hosts later in Step27, you see the Finish panel. Go to Step 29.
¶ If you selected Install the Tivoli management agent on server hosts now in Step27, you see the wizard panel for the Tivoli management agent. “Installing the TivoliManagement Agent” on page 39 describes how to work with this wizard panel.
29. Click Finish to exit the installation wizard.
Silent Installation
Note: This installation routine creates a log file containing any error messages that thecomponents of the product generate during installation. This file specifies problemsand in some cases suggests possible solutions. You and the Tivoli Customer Supportstaff can review this log file to resolve installation problems. See “About the Log Filefor Installation Errors” on page 74 for more information on the log file for errormessages.
1. Create a new directory to contain the contents of the installation CDs on the machinewhere you are installing the product.
Additional Information: This computer becomes the Tivoli server. The user logonaccount you use becomes the logon account of the Tivoli administrator.
Note: The user login account you use to run the silent installation must have theadvanced privileges described in “Enabling a User to Install the Product” on page10. If the account does not have the required privileges, the setup executableappears to run and does not prompt you that the installation cannot be completed.
2. Copy the contents of the installation CDs to the new directory using the Extended Copy(xcopy) command to a new directory.
Additional Information: You should not use %TMP% to specify the destinationdirectory. The contents of the CDs require approximately 2 GB of hard-disk space.
Installing the Product
29Tivoli® Management Solution for Domino Installation and Setup Guide
3.Installin
gtheProduct
Note: Copy CD 3A or CD 3B. It is not necessary to copy both of these CDs. Copy CD3A if your operating system uses a single-byte character language such as English.Copy CD 3B if you operating system uses a double-byte character language suchas Chinese.
3. Copy the sample response file for silent installation, silent.rsp, from CD1 to thesystem32 sub-directory in the directory for your operating system.
Additional Information: The environment variable %systemroot% identifies the locationof the correct system32 directory. The response file must reside in that specific system32directory. For example, if the %systemroot% environment variable points to c:\winnt,the silent.rsp file must be located in the following directory path:c:\winnt\system32
4. Edit the response file as needed.
Additional Information: The response file is located in the installation CD labeled TivoliManagement Solution for Domino v3.2 (CD #1). Also, this file is located in the rootlevel of the files that you copied to a new directory in Step 2. The file contains theresponse information that the installation routine requires for each step of installation.You can edit the following responses in the response file, as your system requires:
¶ The directory path for the Tivoli server. The default is c:\Tivoli.
¶ The directory path for DB2 software that the product requires. The default is c:\DB2.
¶ User name for future network installation.
¶ Password for future network installation.
¶ The port number for the Tivoli gateway. The default is 9495.
¶ The port number for transactions for the Tivoli management agent. The default is9494.
Note: Do not allow any blank lines to exist in the silent.rsp file. Some word processorsautomatically add a blank line to the end of files. Any blank line generates anerror in the installation. To avoid this problem, edit the silent.rsp file in a texteditor that does not add blank lines, such as the NotePad accessory in Windows.
The following example shows the contents of the sample response file, silent.rsp. Ifnecessary for your system requirements, you can change the six variables that appear inbold text:-silent# The first line in this file tells the InstallShield to run in silent mode.# Do not move or edit the first line.# Comment lines start with "#" sign and are allowed in this file.## set selection to Install using the current language-W LocaleApprovePanel.selection=1## set selection to I accept the terms of the license agreement-W suiteLicense.selection=1## set the Tivoli install directory - where Tivoli Management Solution for Domino v3.2# will be installed.-P suiteProductTree.installLocation=c:\tivoli## set DB/2 install directory - where IBM DB/2 will be installed.-W db2installdir.directoryName=c:\db2## set the user name and password
Installing the Product
30 Version 3.2.0
-W suiteUserPassword.defaultUserName=AUser-W suiteUserPassword.defaultPassword=APassword## set the TMA port and gateway port-W suiteTMPorts.defaultGatewayPort=9494-W suiteTMPorts.defaultTmaPort=9495## global wizard value assignment. Respond YES to all panels. Same as NEXT button.-G replaceNewerResponse="Yes to All"## disable the TMA configuration portion-W TMAApprove.active=false
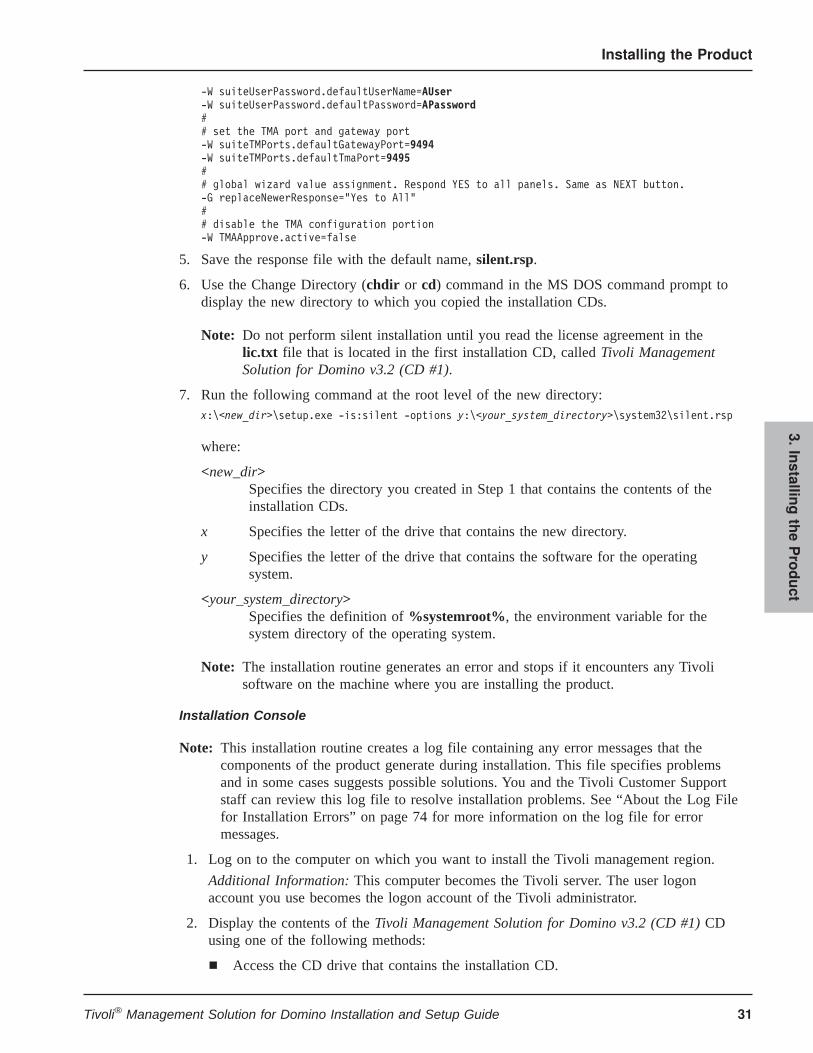
5. Save the response file with the default name, silent.rsp.
6. Use the Change Directory (chdir or cd) command in the MS DOS command prompt todisplay the new directory to which you copied the installation CDs.
Note: Do not perform silent installation until you read the license agreement in thelic.txt file that is located in the first installation CD, called Tivoli ManagementSolution for Domino v3.2 (CD #1).
7. Run the following command at the root level of the new directory:x:\<new_dir>\setup.exe -is:silent -options y:\<your_system_directory>\system32\silent.rsp
where:
<new_dir>Specifies the directory you created in Step 1 that contains the contents of theinstallation CDs.
x Specifies the letter of the drive that contains the new directory.
y Specifies the letter of the drive that contains the software for the operatingsystem.
<your_system_directory>Specifies the definition of %systemroot%, the environment variable for thesystem directory of the operating system.
Note: The installation routine generates an error and stops if it encounters any Tivolisoftware on the machine where you are installing the product.
Installation Console
Note: This installation routine creates a log file containing any error messages that thecomponents of the product generate during installation. This file specifies problemsand in some cases suggests possible solutions. You and the Tivoli Customer Supportstaff can review this log file to resolve installation problems. See “About the Log Filefor Installation Errors” on page 74 for more information on the log file for errormessages.
1. Log on to the computer on which you want to install the Tivoli management region.
Additional Information: This computer becomes the Tivoli server. The user logonaccount you use becomes the logon account of the Tivoli administrator.
2. Display the contents of the Tivoli Management Solution for Domino v3.2 (CD #1) CDusing one of the following methods:
¶ Access the CD drive that contains the installation CD.
Installing the Product
31Tivoli® Management Solution for Domino Installation and Setup Guide
3.Installin
gtheProduct

—OR—
¶ Copy the contents of all installation CDs to a temporary directory on the Tivoliserver and access that directory. This method can speed installation. In somecompanies, the network architecture or company policy require this method. TheCDs require a total of approximately 2 GB of disk space.
Note: Copy CD 3A or CD 3B. It is not necessary to copy both CDs. Copy CD 3Aif your operating system uses a single-byte character language such asEnglish. Copy CD 3B if you operating system uses a double-byte characterlanguage such as Chinese.
3. Use the Change Directory (chdir or cd) command in the MS DOS command prompt todisplay the root directory of the Tivoli Management Solution for Domino v3.2 (CD #1)CD.
4. Run the following command at the root level of the temporary directory:setup.exe -is:javaconsole -console
Note: The installation routine generates an error and stops if it encounters any Tivolisoftware on the machine where you are installing the product.
5. Press Enter to read the locale-specific information, until an installation option isdisplayed.
Note: The console displays text that refers to buttons and other graphical features forthe installation wizard. These features are not available in the installationconsole.
6. Select Install using the current language as follows:
a. Enter 1.
Additional Information: The letter X to the left of an option marks the method thatyou have selected.
b. Enter 0 to execute your selection.
7. Press Enter to display a welcome message.
8. Press Enter until a license acceptance option is displayed.
9. Read the license agreement in the lic.txt file that is located in the first installation CD,which is labeled Tivoli Management Solution for Domino v3.2 (CD #1).
10. Select I accept the terms of the license agreement to indicate acceptance.
a. Enter 1.
b. Enter 0 to execute your selection.
c. Press Enter to continue with the installation.
11. Select the directory where you want to install Tivoli Management Solution forDomino v3.2.
a. Specify a fully qualified path or press Enter to use the default setting c:\Tivoli.
b. Press Enter to continue with the installation.
c. Press Enter if the console prompts you to create a directory.
12. Select the directory where you want to install IBM DB/2 v7.2.
Installing the Product
32 Version 3.2.0
a. Specify a fully qualified path or press Enter to use the default setting c:\DB2.
b. Press Enter to continue with the installation.
c. Press Enter if the console prompts you to create a directory.
Additional Information: The console instructs you to set the user name andpassword for network installations and upgrades.
13. Set your user name and password.
Note: The string that you type can include alphanumeric characters, underscores (_),hyphens (-), periods (.), and spaces. The name is case-sensitive. For example, thename LabelName is different from labelname.
a. Type a user name next to the Enter your username here prompt.
b. Type a user name next to the Enter your password here prompt.
c. Press Enter to continue with the installation.
Additional Information: The console instructs you to define two communicationports.
14. Set two unique port numbers for the installation.
a. Specify a unique and valid port number or use the default.
Additional Information: The Tivoli server uses the port numbers to communicatewith the servers it manages. By default, the installation routine assigns port 9495 forgateway communications and it assigns 9494 for Tivoli management agentcommunications. These ports are available in most systems. If these ports are notavailable, you can use any unique, valid port numbers.
b. Press Enter until more installation instructions appear.
15. The console instructs you to restart the machine. Press Enter to restart the machine.
Additional Information: After you restart the machine and log in, installation continues.After some moments, you are prompted you to insert the second installation CD, TivoliManagement Solution for Domino v3.2 (CD #2).
16. Insert the CD specified by the console.
17. Press Enter to continue with the installation.
Additional Information: After installing more components, the wizard detects thelanguage settings for the Tivoli server that you are creating and prompts you to insertone of the following installation CDs. These CDs contain language software for DB2:
¶ Tivoli Management Solution for Domino v3.2 (CD #3) for English, French, Italian,German, Spanish, Brazilian, and Portuguese. These languages require single-bytecharacters.
—OR—
¶ Tivoli Management Solution for Domino v3.2 (CD #3) for Japanese, Korean,Traditional Chinese, and Simplified Chinese. These languages require double-bytecharacters.
18. Insert the CD specified by the console.
19. Press Enter to continue with the installation.
Additional Information: After some moments, you are prompted to insert the fourthinstallation CD, Tivoli Management Solution for Domino v3.2 (CD #4).
Installing the Product
33Tivoli® Management Solution for Domino Installation and Setup Guide
3.Installin
gtheProduct

20. Insert the CD specified by the console.
21. Press Enter to continue with the installation.
Note: Installation continues to completion at this time. When the progress displayreaches 100 percent, installation of Tivoli Management Solution for Domino iscomplete.
22. Press Enter.
23. Select Install the Tivoli management agent on server hosts later to complete theinstallation of Tivoli Management Solution for Domino.
24. Continue to press Enter to see ReadMe information.
25. Press Enter to exit the installation console.
Installing the Management Console
ObjectiveTo install the management console on the workstation of a Tivoli Domino administrator sothat administrator can manage Domino servers from her or his workstation.
Note: The installation routine for Tivoli Management Solution for Domino automaticallyinstalls the management console on the Tivoli server.
Background InformationThe management console is the graphical user interface on Windows NT that runs in a Webbrowser or in the Lotus Notes 5.x client.
The management console software that runs in a Notes client requires approximately 25 MBof disk space. To run in a Web browser, the management console requires the Java 2Run-Time Environment, Version 1.3.0_01 or greater. This Java software requiresapproximately 65 MB of disk space. The management console software that runs in a Webbrowser requires approximately 25 MB of disk space.
Note: This disk space requirement does not include the disk space required for Lotus Notesor for a Web browser.
To take full advantage of the flexibility and efficiency of Tivoli Management Solution forDomino, Tivoli recommends that you set up multiple workstations for the team of TivoliDomino administrators. You can install the console on any workstation in the network forthe use of administrators.
Required Authorization RoleAny user who can log on to the workstation can install the management console.
Before You BeginInstall the product as described in “Installing Tivoli Management Solution for Domino” onpage 13.
You must install the Java 2 Run-Time Environment if you want to run the managementconsole in a Web browser. Install the Java software as follows:
Installing the Product
34 Version 3.2.0

1. Run the j2_1301.exe executable located in the extras directory of the installation CDlabeled Tivoli Management Solution for Domino v3.2 (CD #4).
2. Follow the instructions of the installation routine.
Note: If you use another version of the Java Run-Time Environment, move that version andthe application that requires it to another system.
When You FinishStart the management console, as described in “Starting the Management Console” on page36.
ProcedureYou can perform this procedure from the Tivoli desktop only.
Tivoli Desktop
1. Open the TMD_31_Patch_x\portal directory of the installation CD labeled TivoliManagement Solution for Domino v3.2 (CD #4), where x is an integer that correspondsto the patch number.
Additional Information: This directory contains the newest version of the software forthe management console.
2. Run setup.exe.
3. Click Next.
4. Click Yes in the license agreement panel.
5. Type values for User name and Company name.
6. Click Next.
7. Choose one of the following options:
¶ Local Browser Client installs the console for use in the Web browser.
¶ Lotus Notes Client installs the console for use in the Lotus Notes.
¶ Notes and Browser Clients installs the console for use in the Web browser and inLotus Notes.
8. Click Next.
9. Select a location for installation as follows:
¶ Click Next to accept the default destination.
—OR—
¶ Select a different, existing destination:
a. Click Browse.
b. Select a directory.
c. Click Next.
10. Identify the location of the Lotus Notes executables:
¶ Click Next to accept the default location.
—OR—
¶ Select a different location:
Installing the Product
35Tivoli® Management Solution for Domino Installation and Setup Guide
3.Installin
gtheProduct

a. Click Browse.
b. Select a location.
c. Click Next.
11. Identify the location of the Lotus Notes data files:
¶ Click Next to accept the default location.
—OR—
¶ Select a different location:
a. Click Browse.
b. Select a location.
c. Click Next.
12. Type the location of the Lotus Notes initialization (notes.ini) file.
Note: The wizard attempts to choose the correct path for the notes.ini file.
13. Click Next to display the summary panel.
14. Click Next.
15. Select Let Setup modify the <drive_name>\lotus\notes\note.ini file, where<drive_name> is the name of the drive that contains the Lotus Notes software.
16. Click Ok in the message box that reminds you to restart Lotus Notes.
17. Click Finish to exit the wizard.
18. Restart Lotus Notes.
Starting the Management Console
ObjectiveTo start the management console so you can use it in a Web browser or in the Lotus Notesclient.
Background InformationThe Lotus Notes TMfD.nsf database file enables the management console in the NotesClient. The Java 2 Run-Time Environment enables the management console in a Webbrowser.
Required Authorization RoleThe installation routine for Tivoli Management Solution for Domino creates the Tivoliadministrator who is authorized to perform this procedure. Other users must have thefollowing authorization roles to start the management console and view managed resources:
¶ Domino_Admin (You also use this role to perform all operations in the managementconsole.)
¶ Domino_User
Before You BeginCreate Tivoli Domino administrator as described in “Creating a Tivoli DominoAdministrator” on page 59.
Installing the Product
36 Version 3.2.0
Install the management console as described in “Installing the Management Console” onpage 34.
When You FinishManage Domino server hosts as described in the Tivoli Manager for Domino User’s Guide.
ProcedureYou can perform this procedure in the Windows desktop or in the Lotus Notes client.
Windows Desktop
Double-click the Tivoli Manager for Domino shortcut on the desktop to start theconsole in your default Web browser. The installation routine for the managementconsole creates the Tivoli Manager for Domino shortcut. The shortcut icon for aWeb browser is shown here.
Lotus Notes Client
1. Launch Lotus Notes.
2. Select File → Database → Open to access the Choose a Notes database or template filedialog box.
3. Select the Tivoli Manager for Domino (TMfD.nsf) database in the Database area.
4. Click Open in the Open Database dialog box.
Note: This action automatically creates an icon in the Lotus Notes Workspace.Double-click this icon to launch the management console, instead of accessingTMfD.nsf.
Installing the Product
37Tivoli® Management Solution for Domino Installation and Setup Guide
3.Installin
gtheProduct

Installing the Product
38 Version 3.2.0
Setting Up Tivoli Endpoints
This chapter describes how to install, configure, and manage Tivoli management agentsoftware on Domino server hosts.
Note: This product is designed to manage 100 or fewer Domino server endpoints.
The following table provides an overview of the topics covered in this chapter.
Table 6. Guidelines for Installing and Configuring Tivoli EndpointsGoal Refer to
Install Tivoli management agent software on anendpoint.
“Installing the Tivoli Management Agent” onpage 39
Remove Tivoli management agent software froman endpoint.
“Removing a Tivoli Management Agent” onpage 52
Verify Tivoli management agent software on anendpoint.
“Verifying a Tivoli Management AgentEndpoint” on page 54
Installing the Tivoli Management Agent
ObjectiveTo install and configure the Tivoli management agent software on an endpoint so that youcan manage the endpoint.
Note: At the end of this procedure the Tivoli management agent is running on the Dominoserver host.
Background Information
Note: Before or after you load the Tivoli management agent, you must activate the TCP/IPcommunication protocol on the Domino servers to enable communication. See the LotusDomino documentation for information on this procedure.
You must install the Tivoli management agent software on a Domino server host to enablecommunication with the Tivoli server. You perform this procedure from the Tivoli server. Theuser account you use to log on to the Tivoli server must have membership in theAdministrators group for the Windows operating system. For example, Administrator, adefault user in the Windows operating system has membership in the Administrators group bydefault.
4
39Tivoli® Management Solution for Domino Installation and Setup Guide
4.Settin
gUpTivo
liEndpoints
You can perform this procedure in the Tivoli management agent wizard or in the command lineinterface. When you use the Tivoli management agent wizard, you specify the operating systemof the Domino server host. You make this setting in the Platform pull-down list in the Basic tabof Tivoli management agent wizard, as described in Step 6 of this procedure. You must provideconfiguration values that match the requirements of specific operating systems as follows:
¶ For Domino server hosts that reside on UNIX machines, you must provide the root user IDand password of the host machine to install the Tivoli management agent, as described inthis procedure.
¶ For Domino server hosts that reside on Windows machines, you must have at least oneproxy endpoint in each Windows domain that contains Domino servers that you want tomanage. The installation routine for Tivoli Management Solution for Domino creates aproxy endpoint for the domain of the Tivoli server. This proxy endpoint enables you toinstall the Tivoli management agent on Windows servers that reside in the domain of theTivoli server. You can create more proxy endpoints in other Windows domains as describedin “Creating a Proxy Endpoint” on page 51.
Required Authorization RoleThe installation routine for Tivoli Management Solution for Domino creates a Tivoliadministrator who is authorized to perform this procedure. Other administrators must haveadmin authority to perform these procedures.
Before You BeginInstall the product as described in “Installing Tivoli Management Solution for Domino” onpage 13.
Note: The installation procedure gives you the option to install the Tivoli management agenton Domino server hosts during the product installation process. Step 4 and subsequentsteps describe how to complete this optional process during installation.
If the Domino server on which you want to install the Tivoli management agent resides in adomain other than the Tivoli server’s domain, you must create a proxy endpoint for thatdomain. See “Creating a Proxy Endpoint” on page 51 to learn how to create a proxyendpoint.
(Optional) Use the planning sheet in Table 7 on page 41 to prepare to perform thisprocedure for multiple Domino server hosts.
Setting Up Tivoli Endpoints
40 Version 3.2.0

Tabl
e7.
End
poin
tP
lann
ing
She
etN
ame
Hos
tP
latf
orm
Use
rP
assw
ord
Por
tD
esti
nati
on
End
poin
tna
me
you
assi
gnto
the
targ
etm
achi
neon
whi
chth
eT
ivol
im
anag
emen
tag
ent
soft
war
eis
inst
alle
d
Hos
tnam
eor
IPad
dres
sO
pera
ting
syst
emof
the
endp
oint
Syst
emna
me
ofth
eus
eron
the
endp
oint
Pas
swor
dof
the
user
onth
een
dpoi
ntP
ort
num
ber
Pat
hon
the
targ
etm
achi
new
here
the
Tiv
oli
man
agem
ent
agen
tso
ftw
are
isin
stal
led
Setting Up Tivoli Endpoints
41Tivoli® Management Solution for Domino Installation and Setup Guide
4.Settin
gUpTivo
liEndpoints
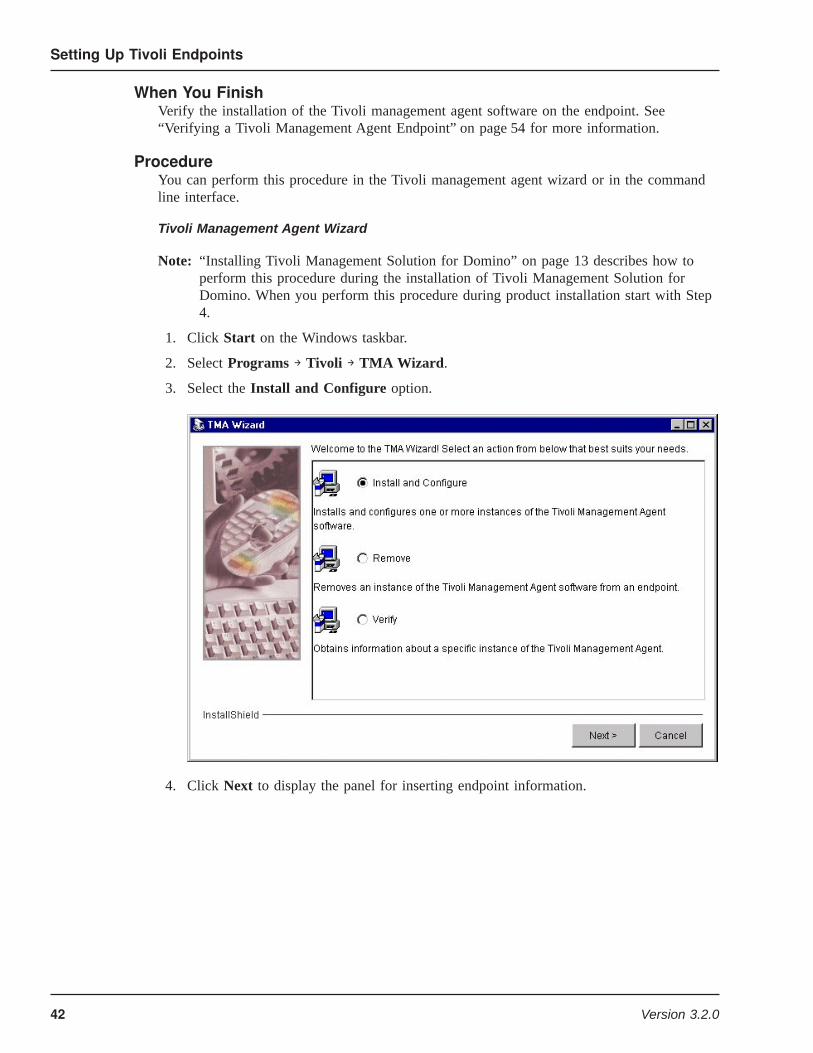
When You FinishVerify the installation of the Tivoli management agent software on the endpoint. See“Verifying a Tivoli Management Agent Endpoint” on page 54 for more information.
ProcedureYou can perform this procedure in the Tivoli management agent wizard or in the commandline interface.
Tivoli Management Agent Wizard
Note: “Installing Tivoli Management Solution for Domino” on page 13 describes how toperform this procedure during the installation of Tivoli Management Solution forDomino. When you perform this procedure during product installation start with Step4.
1. Click Start on the Windows taskbar.
2. Select Programs → Tivoli → TMA Wizard.
3. Select the Install and Configure option.
4. Click Next to display the panel for inserting endpoint information.
Setting Up Tivoli Endpoints
42 Version 3.2.0
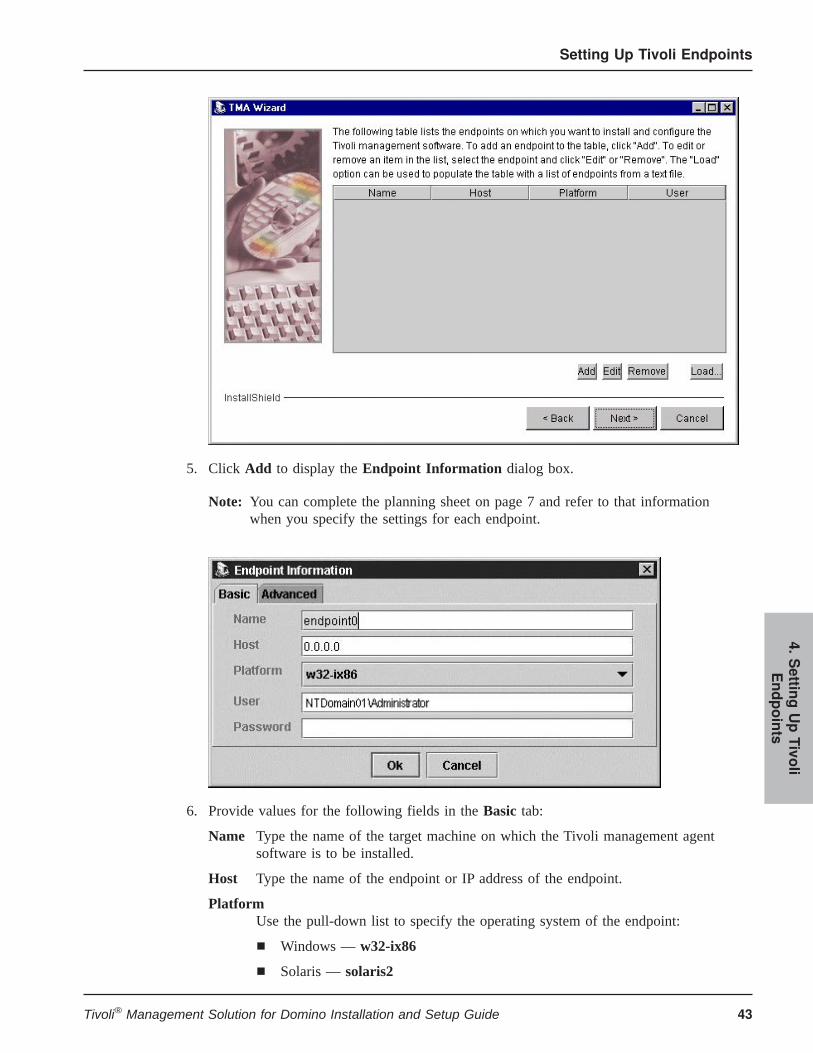
5. Click Add to display the Endpoint Information dialog box.
Note: You can complete the planning sheet on page 7 and refer to that informationwhen you specify the settings for each endpoint.
6. Provide values for the following fields in the Basic tab:
Name Type the name of the target machine on which the Tivoli management agentsoftware is to be installed.
Host Type the name of the endpoint or IP address of the endpoint.
PlatformUse the pull-down list to specify the operating system of the endpoint:
¶ Windows — w32-ix86
¶ Solaris — solaris2
Setting Up Tivoli Endpoints
43Tivoli® Management Solution for Domino Installation and Setup Guide
4.Settin
gUpTivo
liEndpoints

¶ AIX — aix4-r1
¶ OS400 — os400
User Type the system name of the user on the endpoint. For example, a valid systemuser name on Windows might be NTDomain01\Administrator, whereNTDomain01 is the name of the domain in which the endpoint resides andAdministrator is the user name. On UNIX, a valid system user name might beroot.
Note: In non-Windows operating systems, a domain name is not required inthis field.
PasswordPassword of the User.
7. (Optional) Click the Advanced tab.
8. Enter values for the following fields or accept the default values:
Port Port number that is unique.
DestinationPath on the target machine where you want to install the Tivoli managementagent software.
Proxy Endpoint
Note: This field is displayed only when you select Windows (w32–ix86) in thePlatform pull-down list of the Basic tab in Step 6.
(Windows Only) Name of the server to which the Tivoli environment referswhen it installs the Tivoli management agent on Domino server hosts. Bydefault, the Tivoli server is specified as the proxy endpoint. With this defaultname, you can install the Tivoli management agent on Windows servers indomain of the Tivoli server.
Sometimes the Domino servers you want to manage reside in a Windowsdomain other than the Windows domain of the Tivoli server. In this case, youmust create a proxy endpoint in that other domain, as described in “Creating aProxy Endpoint” on page 51. You enter the name of that proxy endpoint in theProxy Endpoint field.
Setting Up Tivoli Endpoints
44 Version 3.2.0

Reboot Now(Windows Only) Select this option when you want to enable the TivoliManagement Agent Wizard to restart the operating system on the endpoint, afterinstallation of the Tivoli management agent.
Note: Unlike UNIX, on Windows you must restart the operating system toactivate theTivoli management agent. By default, the automatic rebootingoption is not selected (off). When you accept the default setting (off),you must manually restart the system after you install the Tivolimanagement agent.
9. Click Ok to return to the panel of the wizard.
Additional Information: The panel displays the endpoint settings you made. If you wantto add other endpoints, click Add and repeat the procedures in Steps 6 to 9.
Note: You do not use the Load button in this procedure. “Resolving Error Messagesfrom the Tivoli Management Agent Wizard” on page 76 describes use of theLoad button.
10. Click Next to install and display the results panel.
Setting Up Tivoli Endpoints
45Tivoli® Management Solution for Domino Installation and Setup Guide
4.Settin
gUpTivo
liEndpoints
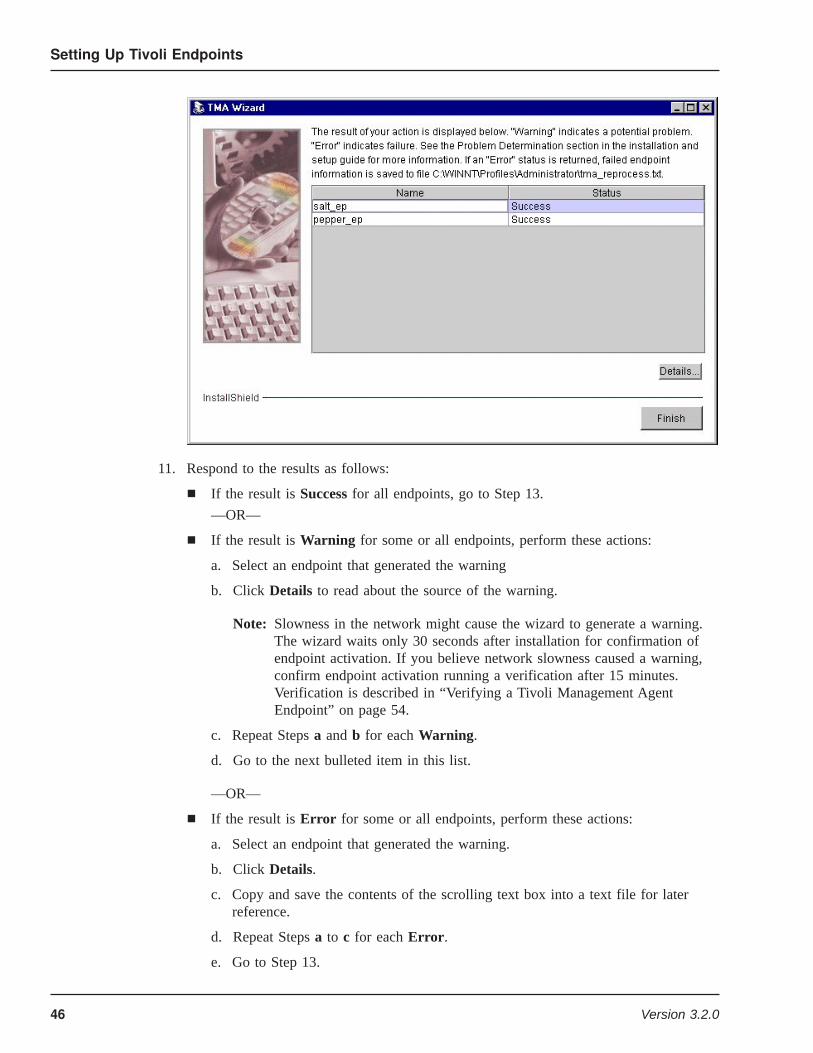
11. Respond to the results as follows:
¶ If the result is Success for all endpoints, go to Step 13.
—OR—
¶ If the result is Warning for some or all endpoints, perform these actions:
a. Select an endpoint that generated the warning
b. Click Details to read about the source of the warning.
Note: Slowness in the network might cause the wizard to generate a warning.The wizard waits only 30 seconds after installation for confirmation ofendpoint activation. If you believe network slowness caused a warning,confirm endpoint activation running a verification after 15 minutes.Verification is described in “Verifying a Tivoli Management AgentEndpoint” on page 54.
c. Repeat Steps a and b for each Warning.
d. Go to the next bulleted item in this list.
—OR—
¶ If the result is Error for some or all endpoints, perform these actions:
a. Select an endpoint that generated the warning.
b. Click Details.
c. Copy and save the contents of the scrolling text box into a text file for laterreference.
d. Repeat Steps a to c for each Error.
e. Go to Step 13.
Setting Up Tivoli Endpoints
46 Version 3.2.0
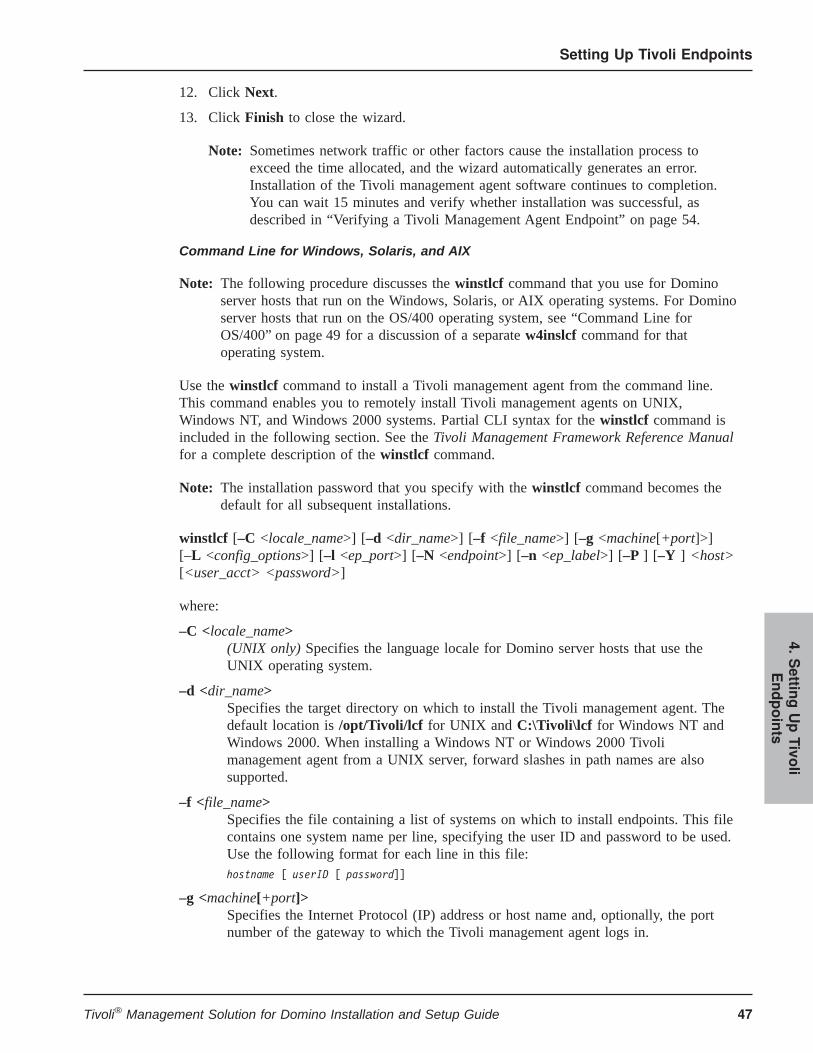
12. Click Next.
13. Click Finish to close the wizard.
Note: Sometimes network traffic or other factors cause the installation process toexceed the time allocated, and the wizard automatically generates an error.Installation of the Tivoli management agent software continues to completion.You can wait 15 minutes and verify whether installation was successful, asdescribed in “Verifying a Tivoli Management Agent Endpoint” on page 54.
Command Line for Windows, Solaris, and AIX
Note: The following procedure discusses the winstlcf command that you use for Dominoserver hosts that run on the Windows, Solaris, or AIX operating systems. For Dominoserver hosts that run on the OS/400 operating system, see “Command Line forOS/400” on page 49 for a discussion of a separate w4inslcf command for thatoperating system.
Use the winstlcf command to install a Tivoli management agent from the command line.This command enables you to remotely install Tivoli management agents on UNIX,Windows NT, and Windows 2000 systems. Partial CLI syntax for the winstlcf command isincluded in the following section. See the Tivoli Management Framework Reference Manualfor a complete description of the winstlcf command.
Note: The installation password that you specify with the winstlcf command becomes thedefault for all subsequent installations.
winstlcf [–C <locale_name>] [–d <dir_name>] [–f <file_name>] [–g <machine[+port]>][–L <config_options>] [–l <ep_port>] [–N <endpoint>] [–n <ep_label>] [–P ] [–Y ] <host>[<user_acct> <password>]
where:
–C <locale_name>(UNIX only) Specifies the language locale for Domino server hosts that use theUNIX operating system.
–d <dir_name>Specifies the target directory on which to install the Tivoli management agent. Thedefault location is /opt/Tivoli/lcf for UNIX and C:\Tivoli\lcf for Windows NT andWindows 2000. When installing a Windows NT or Windows 2000 Tivolimanagement agent from a UNIX server, forward slashes in path names are alsosupported.
–f <file_name>Specifies the file containing a list of systems on which to install endpoints. This filecontains one system name per line, specifying the user ID and password to be used.Use the following format for each line in this file:hostname [ userID [ password]]
–g <machine[+port]>Specifies the Internet Protocol (IP) address or host name and, optionally, the portnumber of the gateway to which the Tivoli management agent logs in.
Setting Up Tivoli Endpoints
47Tivoli® Management Solution for Domino Installation and Setup Guide
4.Settin
gUpTivo
liEndpoints
–L <config_options>Passes configuration options to the lcfd command for starting the endpoint. See thelcfd command in the Tivoli Management Framework Reference Manual for a list ofvalid options. The example in this section shows how to specify options. If youspecify multiple options or have spaces in a single option, you must enclose the textin double quotation marks (″).
–l <ep_port>Specifies the port number for the endpoint. The default port number is 9495.
–N <endpoint>Specifies the reference endpoint from which you install other endpoints in aWindows domain. In Tivoli Management Solution for Domino specify one of thefollowing values for the <endpoint> in the Windows domain where you areinstalling the Tivoli management agent:
¶ For Domino server endpoints in the domain of the Tivoli server, specify%HOST%_ep.
¶ For Domino server endpoints in a domain other than the domain of the Tivoliserver, specify the name of the reference endpoint that you manually create, asdescribed in “Creating a Proxy Endpoint” on page 51.
–n Specifies a Tivoli management agent label provided by a user. If you do not assign aname, the command generates a unique name automatically.
–P This option is useful only when installing on remote hosts with different passwords.If each machine has the same password or if you do not use the –P option, you areprompted for a global password to use for each machine.
Causes the winstlcf command to prompt for a password for each machine. Thisoption is useful only when you install Tivoli management agents on remote hoststhat have different passwords. If each machine has the same password or if you donot use the –P option, the winstlcf command prompts you for a global password touse for each machine.
–Y Specifies that the installation should proceed without confirmation. By default, thiscommand identifies the actions that must be taken to perform the installation andrequests confirmation before continuing. When you use this option, the winstlcfcommand identifies the actions and performs the installation without requestingconfirmation.
<host> [<user_acct> <password>]Specifies the name of the Domino server host on which to install the Tivolimanagement agent. When you specify only the host name, the winstlcf commanduses the root or Administrator account and prompts you for the password. If youwant to specify a different account and password on the host, enclose the host name,account name, and password in single quotation marks. For example, the followingcommand installs the Tivoli management agent on the host vernon, using theDOMAIN-NT\chris account with the password pa55word:winstlcf 'vernon DOMAIN-NT\chris pa55word'
where DOMAIN-NT is the domain in which chris is located. When the WindowsNT or Windows 2000 domain and the local computer use the same name foruser_acct, you must provide the fully qualified name for the account. For example,
Setting Up Tivoli Endpoints
48 Version 3.2.0
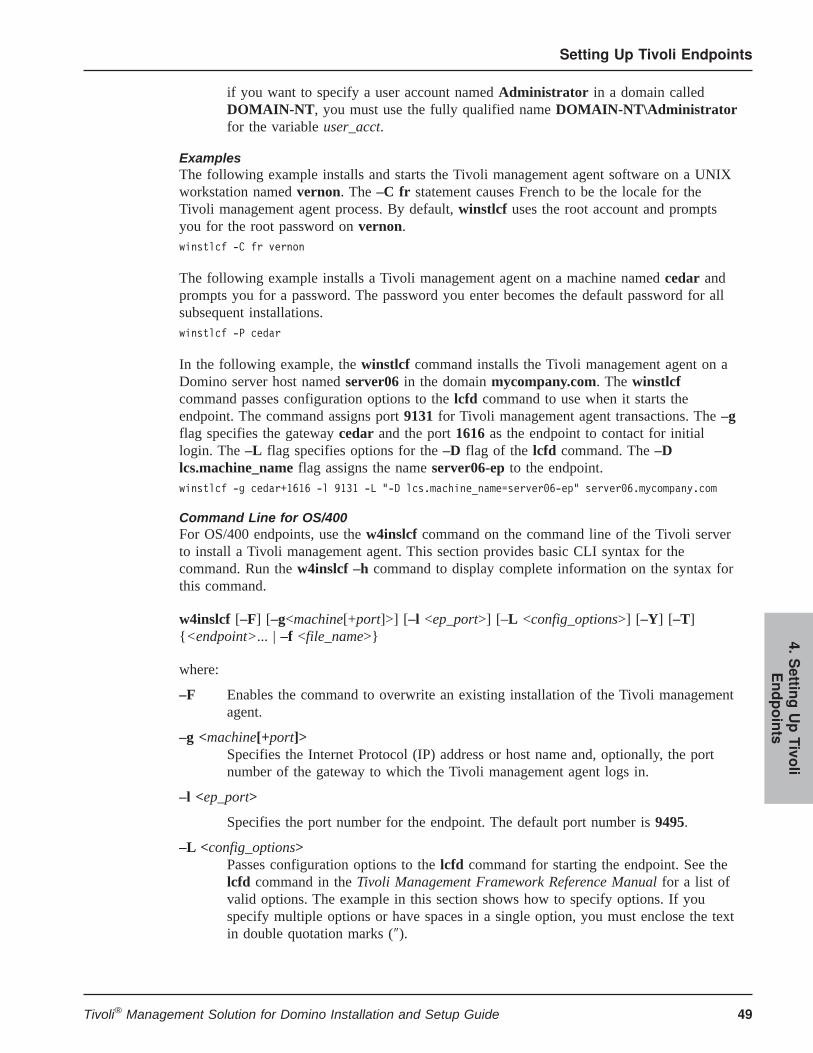
if you want to specify a user account named Administrator in a domain calledDOMAIN-NT, you must use the fully qualified name DOMAIN-NT\Administratorfor the variable user_acct.
ExamplesThe following example installs and starts the Tivoli management agent software on a UNIXworkstation named vernon. The –C fr statement causes French to be the locale for theTivoli management agent process. By default, winstlcf uses the root account and promptsyou for the root password on vernon.winstlcf -C fr vernon
The following example installs a Tivoli management agent on a machine named cedar andprompts you for a password. The password you enter becomes the default password for allsubsequent installations.winstlcf -P cedar
In the following example, the winstlcf command installs the Tivoli management agent on aDomino server host named server06 in the domain mycompany.com. The winstlcfcommand passes configuration options to the lcfd command to use when it starts theendpoint. The command assigns port 9131 for Tivoli management agent transactions. The –gflag specifies the gateway cedar and the port 1616 as the endpoint to contact for initiallogin. The –L flag specifies options for the –D flag of the lcfd command. The –Dlcs.machine_name flag assigns the name server06-ep to the endpoint.winstlcf -g cedar+1616 -l 9131 -L "-D lcs.machine_name=server06-ep" server06.mycompany.com
Command Line for OS/400For OS/400 endpoints, use the w4inslcf command on the command line of the Tivoli serverto install a Tivoli management agent. This section provides basic CLI syntax for thecommand. Run the w4inslcf –h command to display complete information on the syntax forthis command.
w4inslcf [–F] [–g<machine[+port]>] [–l <ep_port>] [–L <config_options>] [–Y] [–T]{<endpoint>... | –f <file_name>}
where:
–F Enables the command to overwrite an existing installation of the Tivoli managementagent.
–g <machine[+port]>Specifies the Internet Protocol (IP) address or host name and, optionally, the portnumber of the gateway to which the Tivoli management agent logs in.
–l <ep_port>
Specifies the port number for the endpoint. The default port number is 9495.
–L <config_options>Passes configuration options to the lcfd command for starting the endpoint. See thelcfd command in the Tivoli Management Framework Reference Manual for a list ofvalid options. The example in this section shows how to specify options. If youspecify multiple options or have spaces in a single option, you must enclose the textin double quotation marks (″).
Setting Up Tivoli Endpoints
49Tivoli® Management Solution for Domino Installation and Setup Guide
4.Settin
gUpTivo
liEndpoints

–P Specifies to prompt the user for a password. This option overrides existing entries ina $HOME/.netrc file used for automatic logins.
–Y Specifies that the installation should proceed without confirmation. The defaultbehavior is to request confirmation.
–T Specifies a IP address that the Tivoli server uses to connect to the machine on whichthe agent is to be installed. Use this flag to install from a Tivoli management regionthat has more than one Network Interface Card.
endpointSpecifies the names or IP addresses of the AS/400 systems on which the Tivolimanagement agent is installed.
–f <file_name>Specifies the file containing a list of systems on which to install endpoints. This filecontains one system name per line, specifying the user ID and password to be used.Each line in this file must be in the following format:hostname [ userID [ password]]
For each Domino server host that you configure, the w4inslcf command creates the/tmp/tivoli.<epname>.w4log log file in the temporary directory of the Tivoli server, where<epname> is the name of the Domino server host.
When an installation fails, the w4inslcf command creates the os4LcfH.err error file in thedirectory from which you run the command. The file lists the Domino server hosts wherefailure occurred. This error file uses name syntax that is valid for use with the –f flag in thew4inslcf command. After you eliminate the causes of an installation failure, you can run thew4inslcf command with the –f os4LcfH.err flag. This setting causes the w4inslcf commandto install the Tivoli management agent on the Domino server hosts that are listed in theos4LcfH.err file.
The w4inslcf command checks for the following prerequisites:
¶ Disk Space: Checks that at least 40 MB of free space exists for the installation andrunning of the Tivoli management agent.
¶ Authority: Checks for authority to the RSTOBJ and RSTLICPGM commands and to*SAVSYS.
¶ Allow object restore: Checks that the QALWOBJRST system value has *ALL or*ALWPGMADP rights. This value specifies whether objects with security-sensitiveattributes can be restored.
¶ Slip Installation: Checks whether the 1TMELCF product was already installed or not.
¶ Connection with the gateway: Checks whether it can open a socket to the Gateway andport specified.
In the following example, the w4inslcf command installs the Tivoli management agent onOS/400 on a Domino server host named tomato in a domain namedmyorg.mycompany.com.w4inslcf.pl tomato.myorg.mycompany.com
In the following example, the w4inslcf command installs the Tivoli management agent on aDomino server host named server06 in the domain mycompany.com. The w4inslcfcommand passes configuration options to the lcfd command to use when it starts the
Setting Up Tivoli Endpoints
50 Version 3.2.0

endpoint. The command assigns port 9131 for Tivoli management agent transactions. The –gflag specifies the gateway cedar and the port 1616 as the endpoint to contact for initiallogin. The –L flag specifies options for the –D flag of the lcfd command. The –Dlcs.machine_name flag assigns the name server06-ep to the endpoint.w4inslcf.pl -g cedar+1616 -l 9131 -L "-D lcs.machine_name=server06-ep" server06.mycompany.com
Creating a Proxy Endpoint
ObjectiveTo manually configure a proxy endpoint in a Windows domain that is separate from theTivoli server’s domain so you can manage Domino servers in that domain.
Background InformationFor Domino servers that reside on Windows machines, you must have at least one proxyendpoint in each Windows domain that contains Domino servers that you want to manage.The installation routine for Tivoli Management Solution for Domino creates a proxyendpoint for the domain of the Tivoli server. This proxy endpoint enables you to install theTivoli management agent on Windows servers that reside in the domain of the Tivoli server.You can create more proxy endpoints in other Windows domains as described in thisprocedure.
The Tivoli server uses the user ID and password for the proxy endpoint to obtain access tothe file system of the other Windows server hosts within the domain. With this access theTivoli server is able to install the Tivoli management agent on Windows systems in thatdomain.
By default, the hostname of the Tivoli server becomes the name of the proxy endpoint.When you want to install the Tivoli management agent on Windows servers that belong inanother, untrusted domain, use this procedure to install the required proxy endpoint.
Required Authorization RoleYou must be a member of the Windows Administrators group on the Tivoli server.
Before You BeginInstall the product, as described in “Installing Tivoli Management Solution for Domino” onpage 13.
When You FinishUse the Tivoli management agent wizard that comes with Tivoli Management Solution forDomino to automatically configure other Domino server hosts in the domain of the proxyendpoint. Use the procedure described in “Installing the Tivoli Management Agent” on page39.
ProcedureYou perform this procedure in a specialized wizard that works in any domain that you canaccess.
Wizard
1. Insert the CD labeled Tivoli Management Solution for Domino v3.2 (CD #2).
2. Access the DOS command prompt window on the Tivoli server.
Setting Up Tivoli Endpoints
51Tivoli® Management Solution for Domino Installation and Setup Guide
4.Settin
gUpTivo
liEndpoints
3. Use the Change Directory (chdir or cd) command to display the\371TMF05\pc\lcf\winnt directory of CD 2.
Additional Information: This wizard works on both Windows NT and Windows 2000machines.
4. Run the setup.exe executable to launch the specialized wizard for this procedure.
5. Respond to the prompts that the wizard presents.
Removing a Tivoli Management Agent
ObjectiveTo remove the Tivoli management agent software from an endpoint.
Background InformationThis procedure describes how to use the Tivoli Management Agent Wizard to remove Tivolimanagement agent software from an endpoint. The endpoint is no longer a managedresource when this process is completed. You might want to remove the endpoint for one ofthese reasons:
¶ You are completely uninstalling the product and unconfiguring all managed Dominoservers. “Uninstalling Tivoli Management Solution for Domino” on page 69 describesthe complete uninstallation procedure.
—OR—
¶ You want to remove a Domino server host from the Tivoli environment.
If the Tivoli Management Agent Wizard fails to remove the Tivoli management agent, see“Cleaning Up and Removing the Tivoli Management Agent” on page 77.
Required Authorization Rolesenior or super
Before You BeginNot applicable
When You FinishVerify that the Tivoli management agent has been removed by referring to “Verifying aTivoli Management Agent Endpoint” on page 54.
ProcedureYou perform this procedure using the Tivoli management agent wizard.
Tivoli Management Agent Wizard
1. Click Start on the Windows taskbar.
2. Select Programs → Tivoli → TMA Wizard.
3. Select the Remove option.
Setting Up Tivoli Endpoints
52 Version 3.2.0

4. Click Next to display the panel for selecting the endpoint that you want to remove.
5. Select an endpoint from which to remove the Tivoli management agent software.
6. Click Next to display the results panel.
Setting Up Tivoli Endpoints
53Tivoli® Management Solution for Domino Installation and Setup Guide
4.Settin
gUpTivo
liEndpoints
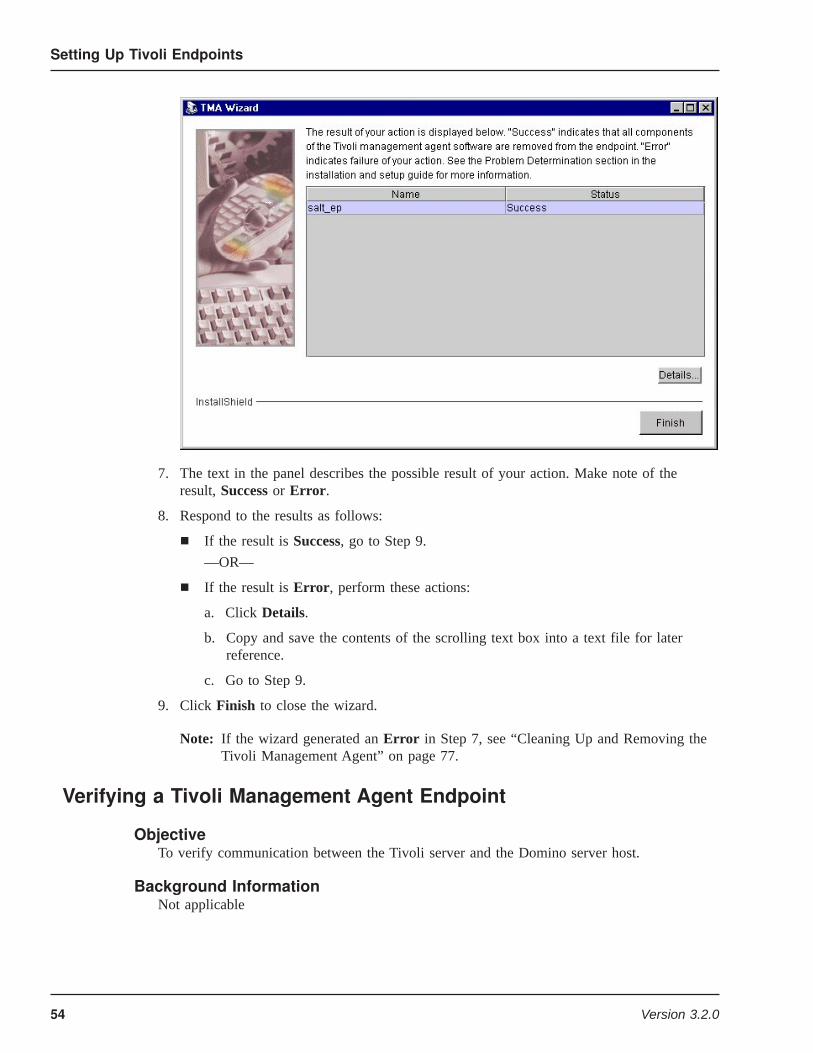
7. The text in the panel describes the possible result of your action. Make note of theresult, Success or Error.
8. Respond to the results as follows:
¶ If the result is Success, go to Step 9.
—OR—
¶ If the result is Error, perform these actions:
a. Click Details.
b. Copy and save the contents of the scrolling text box into a text file for laterreference.
c. Go to Step 9.
9. Click Finish to close the wizard.
Note: If the wizard generated an Error in Step 7, see “Cleaning Up and Removing theTivoli Management Agent” on page 77.
Verifying a Tivoli Management Agent Endpoint
ObjectiveTo verify communication between the Tivoli server and the Domino server host.
Background InformationNot applicable
Setting Up Tivoli Endpoints
54 Version 3.2.0
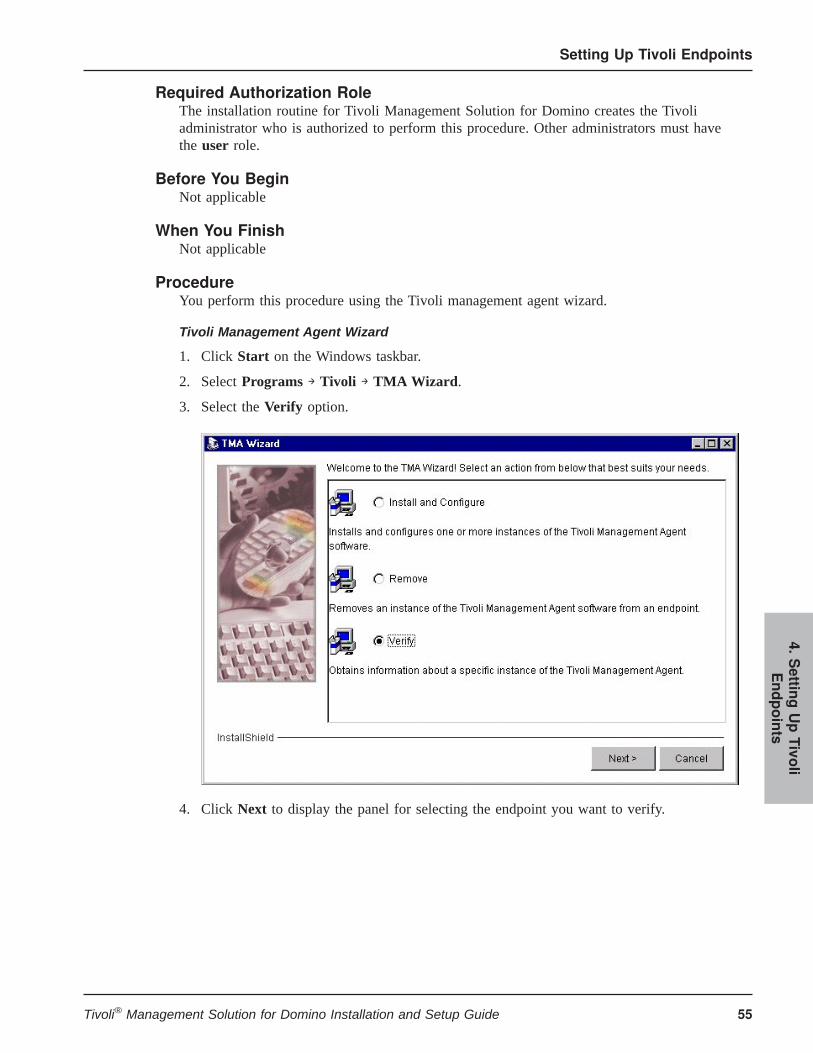
Required Authorization RoleThe installation routine for Tivoli Management Solution for Domino creates the Tivoliadministrator who is authorized to perform this procedure. Other administrators must havethe user role.
Before You BeginNot applicable
When You FinishNot applicable
ProcedureYou perform this procedure using the Tivoli management agent wizard.
Tivoli Management Agent Wizard
1. Click Start on the Windows taskbar.
2. Select Programs → Tivoli → TMA Wizard.
3. Select the Verify option.
4. Click Next to display the panel for selecting the endpoint you want to verify.
Setting Up Tivoli Endpoints
55Tivoli® Management Solution for Domino Installation and Setup Guide
4.Settin
gUpTivo
liEndpoints

5. Select the endpoint you want to verify.
6. Click Next to display the result panel.
7. Make note of the result, Success or Error. The text in the panel describes the possibleresult of your action.
8. Click Finish to close the wizard.
Setting Up Tivoli Endpoints
56 Version 3.2.0

9. If the result of your action was Error, see “Testing Endpoint Connectivity” on page 74.If the connectivity tests fail see “Resolving Error Messages from the Tivoli ManagementAgent Wizard” on page 76.
Setting Up Tivoli Endpoints
57Tivoli® Management Solution for Domino Installation and Setup Guide
4.Settin
gUpTivo
liEndpoints

Setting Up Tivoli Endpoints
58 Version 3.2.0
Managing Domino Server Administrators
This chapter describes how to create, configure, and view a Tivoli Domino administrator.The following table provides an overview of the topics covered in this chapter.
Table 8. Guidelines for Managing Domino Server AdministratorsGoal Refer to
Create a Tivoli Domino administrator and setproper roles for users.
“Creating a Tivoli Domino Administrator” onpage 59
View administrator privileges and information. “Viewing Administrators” on page 62
Delete administrators. “Deleting an Administrator” on page 64
Creating a Tivoli Domino Administrator
ObjectiveTo create Tivoli Domino administrators in Tivoli Management Solution for Domino so he orshe can manage Domino servers.
Background InformationThe installation routine for Tivoli Management Solution for Domino creates a Tivoliadministrator who is authorized to create Tivoli Domino administrators. By default, theTivoli administrator has the following logon name:Root_<hostname>-region
where <hostname> is the name of the Tivoli server. Tivoli Domino administrators are userswho you authorize to manage Domino servers within Tivoli Management Solution forDomino.
The installation routine for this product also gives the Tivoli administrator all privileges forthe management of Domino servers. In effect, the Tivoli administrator is also a TivoliDomino administrator.
In this procedure, the Tivoli administrator assigns the following two types of privileges foreach Tivoli Domino administrator:
¶ Privileges for the Tivoli server. Tivoli Domino administrators who access the Tivolienvironment use the environment to manage Domino server hosts. Tivoli Dominoadministrators require at least the admin or senior role.
¶ Privileges for Tivoli Management Solution for Domino. A basic Tivoli Dominoadministrator needs the following roles:
v Domino_Admin authorizes the administration of Domino servers.
5
59Tivoli® Management Solution for Domino Installation and Setup Guide
5.ManagingDomino
Server
Administrato
rs
v Domino_DPS_Admin authorizes the administration of Domino Performance Stations.
A user who views and runs minor tests in Tivoli Management Solution for Domino hasonly the Domino_User role. See the Tivoli Manager for Domino User’s Guide for moreinformation about these authorization roles.
This procedure describes how to create an administrator who has server managementroles for the entire Tivoli management region for Tivoli Management Solution forDomino. The Tivoli desktop and the wsetadmin command provide more options for theconfiguration of administrators. The Tivoli Management Framework User’s Guidedescribes configuration of administrators in the Tivoli desktop. The Tivoli ManagementFramework Reference Manual describes the commands for configuration ofadministrators.
Required Authorization RolesThe installation routine for Tivoli Management Solution for Domino creates a Tivoliadministrator who is authorized to perform this procedure. Other administrators must havesuper authority to perform these procedures.
Before You BeginCollect the following information:
¶ A list of administrators that you want to create
¶ Valid login names for the endpoints that the Tivoli Domino administrator must manage
When You FinishNot applicable
ProcedureYou can perform this procedure from the Tivoli desktop or from the command line.
Tivoli Desktop
1. Log on to the Tivoli server.
2. Log on to the Tivoli desktop as follows:
a. Use one of the following methods to access the login screen for the Tivoli desktop:
¶ Enter the tivoli command. See the Tivoli Management Framework ReferenceManual for more information on this command.
—OR—
¶ Click Start in the Windows taskbar and select Programs → Tivoli → Tivoli.
b. Type the following values in the login screen:
¶ Host Machine specifies the Tivoli managed node, including the Tivoli serverwhere the Tivoli desktop should connect.
¶ Log In As specifies the login name to the managed node.
¶ Password specifies the password for the specified login name.
c. Click OK to display the Tivoli desktop.
3. Right click on the Administrator icon to display the pop-up menu.
4. Select Create Administrator.
Managing Domino Server Administrators
60 Version 3.2.0
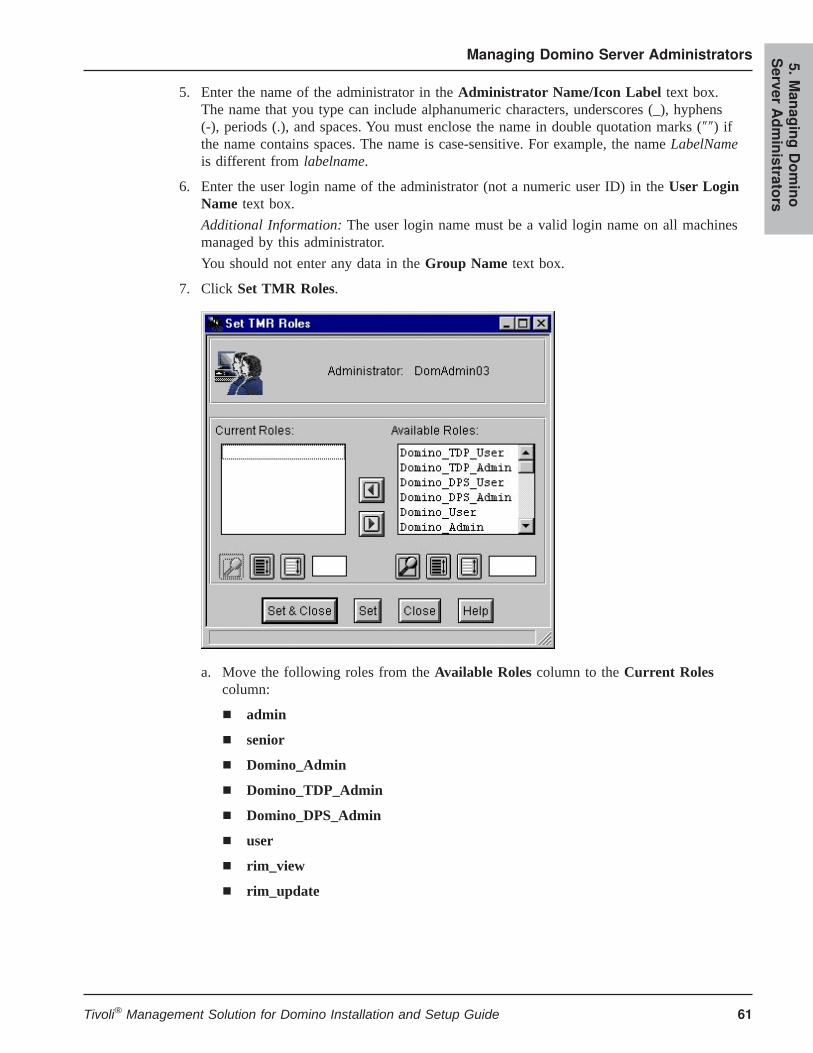
5. Enter the name of the administrator in the Administrator Name/Icon Label text box.The name that you type can include alphanumeric characters, underscores (_), hyphens(-), periods (.), and spaces. You must enclose the name in double quotation marks (″″) ifthe name contains spaces. The name is case-sensitive. For example, the name LabelNameis different from labelname.
6. Enter the user login name of the administrator (not a numeric user ID) in the User LoginName text box.
Additional Information: The user login name must be a valid login name on all machinesmanaged by this administrator.
You should not enter any data in the Group Name text box.
7. Click Set TMR Roles.
a. Move the following roles from the Available Roles column to the Current Rolescolumn:
¶ admin
¶ senior
¶ Domino_Admin
¶ Domino_TDP_Admin
¶ Domino_DPS_Admin
¶ user
¶ rim_view
¶ rim_update
Managing Domino Server Administrators
61Tivoli® Management Solution for Domino Installation and Setup Guide
5.ManagingDomino
Server
Administrato
rs
Note: The Create Administrator dialog box provides more options for configuringan administrator’s roles. These options become more useful and important as asystem grows. See the Tivoli Management Framework User’s Guide for moreinformation.
b. Click Set & Close.
8. Click Create & Close. The icon of the new administrator is displayed in theAdministrators window.
Command LineUse the wcrtadmin command to create a new administrator from the command line. See thefollowing partial CLI syntax for the wcrtadmin command:
wcrtadmin –l <login>... [–r <group>,<role1>:<role2>...] [–u <user_id>] <name>
where:
–l <login>...Sets the login in one of the following formats:
¶ user_name
¶ NTdomain\user_name
–r <group>,<role1>:<role2>...Assigns roles in the specified Tivoli group. In Tivoli Management Solution forDomino, Administrators is a valid name for group. The installation routine forTivoli Management Solution for Domino creates the Administrators group tocontain the Tivoli Domino administrators that you want to create.
–u <user_id>Sets the user ID in one of the following formats:
¶ user_name
¶ NTdomain\user_name
<name>The label of the new administrator. The name that you type can includealphanumeric characters, underscores (_), hyphens (-), periods (.), and spaces. Youmust enclose the name in double quotation marks (″″) if the name contains spaces.The name is case-sensitive. For example, the name LabelName is different fromlabelname.
The following example creates an administrator with the Tivoli login kimiko on system ohiowho has admin and senior authorization roles in the Administrators group:wcrtadmin -l kimiko@ohio -r @Administrators,admin:senior
See the Tivoli Management Framework Reference Manual for more information on thiscommand.
Viewing Administrators
ObjectiveTo view Tivoli Domino administrators so you can see who is authorized to manage resourcesin Tivoli Management Solution for Domino.
Managing Domino Server Administrators
62 Version 3.2.0
Background InformationUse this procedure to do the following:
¶ View a display of all administrators.
¶ Review all administrator privileges.
¶ Plan creation of additional administrators. See “Creating a Tivoli Domino Administrator”on page 59 for more information.
¶ Plan deletion of administrators. See “Deleting an Administrator” on page 64 for moreinformation.
Each icon in the Administrators window of the Tivoli desktop represents an administrator.The icon label is the name of the administrator. Each icon has a pop-up menu that enablesyou to view the administrator properties, such as the administrator’s Tivoli managementregion roles, resource roles, logins, and notice groups.
Note: The Tivoli desktop and the wsetadmin command provide more options for theconfiguration of administrators. To change an administrator’s configuration, you musthave the senior role. The Tivoli Management Framework User’s Guide describesconfiguration of administrators in the Tivoli desktop. The Tivoli ManagementFramework Reference Manual describes the wsetadmin command for configurationof administrators.
Required Authorization RolesThe installation routine for Tivoli Management Solution for Domino creates the Tivoliadministrator who is authorized to perform this procedure. Other administrators must havethe user role to perform this procedure.
Before You BeginLog in as the Tivoli administrator or a Tivoli Domino administrator.
When You FinishNot applicable.
ProcedureYou can perform this procedure from the Tivoli desktop or from the command line.
Tivoli DesktopTo view all administrators from the Tivoli desktop, perform the following steps:
1. Log on to the Tivoli server.
2. Log on to the Tivoli desktop as follows:
a. Use one of the following methods to access the login screen for the Tivoli desktop:
¶ Enter the tivoli command. See the Tivoli Management Framework ReferenceManual for more information on this command.
—OR—
¶ Click Start in the Windows taskbar and select Programs → Tivoli → Tivoli.
b. Type the following values in the login screen:
¶ Host Machine specifies the Tivoli managed node, including the Tivoli serverwhere the Tivoli desktop should connect.
Managing Domino Server Administrators
63Tivoli® Management Solution for Domino Installation and Setup Guide
5.ManagingDomino
Server
Administrato
rs

¶ Log In As specifies the login name to the managed node.
¶ Password specifies the password for the specified login name.
c. Click OK to display the Tivoli desktop.
3. Double-click the Administrators icon to display the Administrators window.
4. Right click the icon of an individual administrator to display the pop-up menu. Themenu provides the following items:
¶ Open: Displays the desktop for the administrator you selected.
¶ Edit Properties: Enables you to change the name, user login name, and group nameassociated with an administrator.
¶ Edit TMR Roles: Enables you to change the roles an administrator has in the localTivoli management region and connected regions.
¶ Edit Resource Roles: Enables you to change the roles an administrator has overspecific resources in the local Tivoli management region or any connected region(for example, policy regions or the Administrator collection).
¶ Edit Logins: Enables you to change the login names mapped to an administrator.
¶ Edit Notice Group Subscriptions: Enables you to change the notice groups towhich an administrator is subscribed.
5. Select an item to see specific settings for the administrator.
Command LineUse one of the following commands to view administrators.
¶ Use the wls command to view a list of administrator names, as follows:wls /Administrators
—OR—
¶ Use the wlookup command to view a list of administrator names and object labels, asfollows:wlookup –ar Administrator
—OR—
¶ Use the wgetadmin command to view complete information on administrators, asfollows:wgetadmin
When you add the name of a specific administrator to the wgetadmin command, yousee information for only that administrator. For example, the wgetadmin DomAdmin01command displays complete information for an administrator named DomAdmin01.
See the Tivoli Management Framework Reference Manual for more information on thesecommands.
Deleting an Administrator
ObjectiveTo delete an administrator from Tivoli Management Solution for Domino.
Managing Domino Server Administrators
64 Version 3.2.0
Background InformationDeleting an administrator removes the icon from the Tivoli desktop and permanently deletesthe object from the Tivoli database. You might want to delete an administrator who nolonger has administrator responsibilities in Tivoli Management Solution for Domino.
Required Authorization RoleThe installation routine for Tivoli Management Solution for Domino creates the Tivoliadministrator who is authorized to perform this procedure. Other administrators must havethe policy, senior, or super role to perform this procedure.
Before You BeginNot applicable
When You FinishNot applicable
ProcedureYou can perform this procedure from the Tivoli desktop only.
Tivoli Desktop
1. Log on to the Tivoli server.
2. Log on to the Tivoli desktop as follows:
a. Use one of the following methods to access the login screen for the Tivoli desktop:
¶ Enter the tivoli command. See the Tivoli Management Framework ReferenceManual for more information on this command.
—OR—
¶ Click Start in the Windows taskbar and select Programs → Tivoli → Tivoli.
b. Type the following values in the login screen:
¶ Host Machine specifies the Tivoli managed node, including the Tivoli serverwhere the Tivoli desktop should connect.
¶ Log In As specifies the login name to the managed node.
¶ Password specifies the password for the specified login name.
c. Click OK to display the Tivoli desktop.
3. Double-click the Administrator icon to display the Administrator window.
4. Click the icon of the administrator you want to delete.
5. Select Edit → Delete.
6. Click Yes in the confirmation dialog box.
Command LineUse the wdel command to delete an administrator.
wdel <label...>
Managing Domino Server Administrators
65Tivoli® Management Solution for Domino Installation and Setup Guide
5.ManagingDomino
Server
Administrato
rs
where <label...> specifies the name of one or more administrators that you want to delete.See the Tivoli Management Framework Reference Manual for more information on thiscommand.
Managing Domino Server Administrators
66 Version 3.2.0
Backing Up and Uninstalling
This chapter describes how to back up, restore, and uninstall various components of theTivoli environment.
The following table provides an overview of the topics covered in this chapter.
Table 9. Guidelines for Backing Up and UninstallingGoal Refer to
Back up databases and related files for the Tivoli environment. Usethis procedure to create a backup copy that you can restore if theactive files in your Tivoli environment become corrupt.
“Backing Up Tivoli Databases” on page 67
Restore a copy of the databases and related files of the Tivolienvironment that you previously backed up.
“Restoring a Tivoli System Backup” on page68
Uninstall the product. Use this procedure to uninstall the product atthe end of the product’s life cycle.
“Uninstalling Tivoli Management Solution forDomino” on page 69
Uninstall the management console for Tivoli Management Solutionfor Domino. Use this procedure to remove the management consolefrom an administrator’s workstation.
“Uninstalling the Management Console” onpage 71
Backing Up Tivoli Databases
ObjectiveTo back up databases and related files for the Tivoli server so you can restore them at a laterdate, if necessary.
Background InformationYou should back up the databases and related files for the Tivoli environment on a regularschedule to prevent loss of data. You should also perform backups before performing majorsystem upgrades or other procedures that alter the Tivoli files, such as installation ofoptional Tivoli software. Backups enable you to replace files with the backup copies of theTivoli files if the active files become unstable at some point.
Backing up consists of copying the \Tivoli\db directory to a backup directory that youcreate. Consider keeping separate copies of each set of backup files that you periodicallycreate. The installation routine for this product creates the db_backup directory and storesthe installation copy of the db directory in the db_backup directory at installation.
6
67Tivoli® Management Solution for Domino Installation and Setup Guide
6.Backin
gUpand
Uninstallin
g
Note: Do not modify the contents of db_backup because these files represent theconfiguration of the Tivoli environment at installation. You can restore these originalfiles if you discover that you cannot restore the backup files that you create using thisprocedure.
Required Authorization RoleValid logon to the operating system of the Tivoli server.
Before You BeginLog on to the operating system of the Tivoli server.
When You FinishThe database is not available for restoration at all times. See “Restoring a Tivoli SystemBackup” on page 68 for information on when and how to restore a backup copy of Tivolifiles.
ProcedureYou can perform this procedure in the DOS command prompt window or in the WindowsExplorer.
DOS Command Prompt
1. Run the Change Directory (chdir or cd) command to display the Tivoli\db directory.
2. Run the Extended Copy (xcopy) command in the MS DOS Prompt to copy the contentsof the db directory to the Tivoli\<dir> directory, where <dir> is the unique name of thebackup directory that you create.
Windows Explorer
1. Click the Start button in the Windows taskbar.
2. Launch Windows Explorer.
3. Display the files in the Tivoli\db directory.
4. Use Edit → Select All to select all the files in the directory.
5. Select Edit → Copy.
6. Create the Tivoli\<dir> directory, where <dir> is the unique name of the backupdirectory that you create.
7. Select Edit → Paste.
Restoring a Tivoli System Backup
ObjectiveTo restore a copy of the databases and related files of the Tivoli environment.
Note: You previously backed up these files as described in “Backing Up Tivoli Databases”on page 67.
Background InformationThis procedure restores the Tivoli database and related files for the Tivoli server. You canrestore the databases and related files if the Tivoli system becomes unstable.
Backing Up and Uninstalling
68 Version 3.2.0
You can use conventional Windows NT or DOS methods to restore the database and relatedfiles. However, you must first shut down the Tivoli process, as described in this procedure.
Required Authorization RoleThe installation routine for Tivoli Management Solution for Domino creates the Tivoliadministrator who is authorized to perform this procedure.
Before You BeginNot applicable
When You FinishNot applicable
ProcedureYou can perform this procedure in the DOS command prompt.
Command Line
1. Run the following command to stop oserv, the Tivoli object dispatcher service:net stop oserv
2. Run the Extended Copy (xcopy) command in the MS DOS Prompt to replace thecontents of the db directory with contents of a backup directory.
3. Run the following command to start oserv:net start oserv
Uninstalling Tivoli Management Solution for Domino
ObjectiveTo uninstall the product at the end of the product’s life cycle.
Background InformationYou perform this procedure from the command line.
Required Authorization RoleThe installation routine for Tivoli Management Solution for Domino creates the Tivoliadministrator who is authorized to perform this procedure.
Before You BeginAs a precautionary measure, back up the Tivoli management region as described in “BackingUp Tivoli Databases” on page 67.
When You FinishNot applicable
ProcedureYou can perform this procedure from the command line only.
Command Line
1. Launch the management console as described in “Starting the Management Console” onpage 36.
Backing Up and Uninstalling
69Tivoli® Management Solution for Domino Installation and Setup Guide
6.Backin
gUpand
Uninstallin
g
2. Unconfigure all Domino server objects using the Configuration tab in the managementconsole.
Additional Information: See ″Deleting a Domino Server Object″ on page 36 of the TivoliManager for Domino User’s Guide for more information.
3. Use the Tivoli management agent wizard to remove Tivoli management agent softwarefrom Domino server hosts, as described in “Removing a Tivoli Management Agent” onpage 52.
4. Move the uninstall.cmd uninstallation executable from the uninstall sub-directory ofyour Tivoli installation to a temporary directory outside the Tivoli installation directory.
5. Run the uninstall.cmd uninstallation executable.
6. (Optional) Manually delete the remaining Tivoli files from Domino server hosts.
Note: uninstall.cmd does not delete these files. You can leave them on the endpointsbecause no software now exists on the network that can invoke the files. If youwant to delete the files, determine which of the following scenarios matches yourconfiguration and take the action indicated:
No Domino Server Object Exists on the ServerAction: You can delete these files because no other server object existsthat needs to access the files.
One or More Domino Server Object Exists on the ServerAction: Do not delete the files because you cannot be certain which filesare used by the Tivoli server objects that remain on the server.
The following list provides the directory path and file names for the three Tivoli files onthe different operating systems:
¶ On UNIX operating systems, the /opt/lotus/bin directory contains Tivoli binariescalled tivoliv46 and tivoliv50.
¶ On Windows NT, the \Lotus\Domino directory contains Tivoli binaries calledntivoliv46 and ntivoliv50.
¶ On OS/400, the QNOTES library contains Tivoli programs called TIVOLIV46 andTIVOLIV50. Symbolic links to the programs are in /qibm/userdata/lotus/notesdirectory. The QNOTES library also contains Tivoli service program LIBMAILT50.A symbolic link to the service program is in the /qibm/proddata/lotus/notesdirectory.
7. Delete the DB2 shortcut from the Startup folder:
a. Right-click the Windows taskbar to display the menu.
b. Select Properties.
c. Click the Start Menu Programs tab.
d. Click Advanced to launch the Windows Explorer window.
e. Delete the shortcut for DB2 in the right pane of the window.
Backing Up and Uninstalling
70 Version 3.2.0
Uninstalling the Management Console
ObjectiveTo uninstall the management console for the Tivoli Management Solution for Domino.
Background InformationAfter you install the management console, the installation wizard presents new options whenyou run it, including the uninstallation option. “Installing the Management Console” on page34 describes installation of the console.
Required Authorization RoleNot applicable
Before You BeginThe management console must be installed so that the InstallShield options update andprovide the option to uninstall the console.
When You FinishNot applicable
ProcedureYou perform this procedure first in the command line and then in an installation wizard.
1. Exit from Lotus Notes if you are uninstalling the management console for Notes.
2. Open the TMD_31_Patch_x\portal directory of the installation CD labeled TivoliManagement Solution for Domino v3.2 (CD #4), where x is an integer that correspondsto the patch number.
3. Run setup.exe.
4. Select the Remove option.
5. Click Next.
6. Click OK in the confirmation dialog box.
7. Click Finish.
8. Select a restart option:
¶ Click Yes to restart immediately.
—OR—
¶ Click No to restart the machine later.
Note: This procedure is complete after the machine restarts.
Backing Up and Uninstalling
71Tivoli® Management Solution for Domino Installation and Setup Guide
6.Backin
gUpand
Uninstallin
g

72 Version 3.2.0
Problem Determination
This appendix provides information about determining the source of problems and abouthow to correct those problems. The following table provides an overview of the topicscovered in this appendix.
Table 10. Guidelines for Problem DeterminationGoal Refer to
Determine the source of a common problem andresolve it.
“Common Problems” on page 73
Determine the source of connectivity errors in aDomino server endpoint and resolve the errors.
“Testing Endpoint Connectivity” on page74
Work with the error message that the Tivolimanagement agent wizard generates when install theagent.
“Resolving Error Messages from the TivoliManagement Agent Wizard” on page 76
To clean up the Tivoli management agent process andto remove Tivoli management agent files from theTivoli environment.Note: You use this procedure to resolve connectivityproblems. You can remove the Tivoli managementagent using this procedure and then reinstall it. Acompletely new installation of the agent might resolvethe connectivity problem.
“Cleaning Up and Removing the TivoliManagement Agent” on page 77
Common ProblemsThis section describes common problems and solutions to the problems.
Restoring a Backup of the Tivoli EnvironmentYou can restore a backup copy of the Tivoli files. The installation routine for thisproduct creates the db_backup directory and stores the installation copy of the dbdirectory in the db_backup directory at installation.
Note: Do not modify the contents of the db_backup directory. These files representthe configuration of the Tivoli environment at installation.
You can make backup copies that you restore as needed, as described in “BackingUp Tivoli Databases” on page 67.
Language Settings
In non-English operating systems, if characters become illegible, you might be ableto change the locale settings of the operating system of the Tivoli server. Manyoperating systems that use double-byte character sets, such as Chinese, have variablelocale settings. If you adjust the locale settings in the Tivoli server you might
A
73Tivoli® Management Solution for Domino Installation and Setup Guide
A.Problem
Determ
inatio
n

resolve this error. For example, a Chinese operating system might have multiplelocale variants that you can try until you find one that works for the target language.However, not all operating systems have variable locale settings. See thedocumentation for your operating system to learn about its capabilities.
Dynamic Link Library that Tivoli RequiresFor a non-English Tivoli environment, you must install the kbdus.dll file beforeinstalling Tivoli Management Solution for Domino. This requirement applies to boththe Tivoli server and the Domino server hosts in the Tivoli environment. You canobtain this file from Microsoft or on the product CDs for Windows NT or Windows2000 in all language versions of these operating systems. The kbdus.dll file mustreside in the %SystemRoot%\system32 directory.
Communication in the Management Console
If the management console cannot communicate with the Tivoli server, the consolestops functioning. When this occurs, the console displays one of the followingexceptions: ExObjAdapter failure or connection to oserv lost. To resolve thisproblem, stop and restart the management console to re-establish communicationwith the Tivoli server.
About the Log File for Installation ErrorsThe installation routine creates a TMD_install.log log file containing any error messagesthat the components of the product generate during installation. The file is located on theTivoli server in the %TMP% directory, where %TMP% is the environment variable forthe temporary directory in the operating system. This file specifies problems and in somecases gives solutions. You and the Tivoli Customer Support staff can review this log file toresolve installation problems.
If the installation routine generates installation errors, call the support staff and send theinstallation error log file. See “Contacting Customer Support” on page vii.
Testing Endpoint ConnectivityThe Tivoli server must be able to communicate with the Domino server hosts it manages.The Tivoli management agent is software that you install on a Domino server to enablecommunication. You can use the Tivoli management agent wizard to verify the Tivolimanagement agent, as described in “Verifying a Tivoli Management Agent Endpoint” onpage 54. The wizard might generate an Error message during verification. You should testendpoint connectivity when you encounter this Error message.
Test an endpoint’s connection to the Tivoli server for Tivoli Management Solution forDomino as follows:
1. Run the ping command from the Tivoli server to confirm that the endpoint is accessibleover the network. If you receive connection or timeout errors, stop at this point andcontact your network administrator for help.
2. If you do not know the name of the endpoint, run the following command on the Tivoliserver to see a list of all endpoints, that are connected to the server:wlookup -a -r Endpoint
3. Run the following command on the Tivoli server:wadminep <ep_name> view_version
Problem Determination
74 Version 3.2.0

where <ep_name> is the name of a specific Tivoli management agent on a Dominoserver. See the list generated in Step 2 to obtain the names of endpoints.
4. If you receive a message other than one containing a single version number, the Tivolimanagement agent software must be restarted. You can manually restart the Tivolimanagement agent on that server as follows:
¶ On Windows perform the following steps:
a. Run the following command to stop lcfd, the process of the Tivoli managementagent:net stop lcfd
b. Run the following command to start the lcfd process:net start lcfd
¶ On Solaris and AIX perform the following steps:
a. Use the following command to identify the lcfd process:ps -ef | grep lcfd
b. Kill this process.
c. Use the following command set the required environment variables:. /etc/Tivoli/lcf/<RUN_ID>/lcf_env.sh
where [RUN_ID] is the ID number of the lcfd process.
d. Use the following command to restart the lcfd process:$LCF_BINDIR/lcfd.sh
¶ On OS/400 perform the following steps:
a. Run the ENDTMEEPT command and press F4 and choose the appropriatecommands for stopping the endpoint process.
b. Run the STRTMEEPT command and press F4 and choose the appropriatecommands restarting the endpoint process.
5. Monitor the state of the Tivoli management agent you have just restarted from a Webbrowser using the following URL:http://<ep_host>:<ep_port>
where <ep_host> is the name of the Domino server host and <ep_port> is the name ofthe port that you assigned for Tivoli management agent transactions in the Tivoli server.After the state of the Tivoli management agent becomes running, go to Step 6.
6. Use the TMA Wizard to run the TMA Verify command.
Additional Information: Verification can generate one of the following results:
¶ Success means that the endpoint is running and communicating with the Tivoliserver. You have finished checking endpoint connectivity.
—OR—
¶ Error means that verification failed. You can respond as follows:
a. Clean up and remove the Tivoli management agent as described in “Cleaning Upand Removing the Tivoli Management Agent” on page 77.
b. Install the Tivoli management agent on the Domino server host again, asdescribed in “Installing the Tivoli Management Agent” on page 39.
Problem Determination
75Tivoli® Management Solution for Domino Installation and Setup Guide
A.Problem
Determ
inatio
n
c. Verify whether reinstallation of the Tivoli management agent resolved the originalproblem.
d. If verification generates an Error message again, contact Tivoli CustomerSupport for further assistance with problem determination.
Resolving Error Messages from the Tivoli Management AgentWizard
When you install Tivoli management agent software on a Domino server host, theinstallation routine generates a text file. This file is named tma_reprocess.txt and it residesin your Profiles directory in the Windows system directory. For example, if you are usingthe Administrator account on a Windows NT operating system located on the C drive, thefile might be located in the following path:c:\winnt\profiles\administrator\tma_reprocess.txt
The Tivoli Management Agent Wizard creates the tma_reprocess.txt file every time you runthe Install and Configure option. The wizard overwrites the previous versions of the fileevery time it performs this operation.
The Install and Configure operation generates an Error message when endpoint installationfails. The Tivoli Management Agent Wizard populates the tma_reprocess.txt file with theconfiguration settings that you made for each failed endpoint.
You can use the tma_reprocess.txt file to resolve error messages as follows:
1. Open the text file.
2. Verify each setting in the text file.
3. Correct invalid settings. For example, if the user logon name is Administrator and youmisspelled this name in the Tivoli Management Agent Wizard, correct the spelling ofthis misspelled entry in the tma_reprocess.txt file.
4. Save your changes.
5. Close the text file.
6. Click Start on the Windows taskbar.
7. Select Programs → Tivoli → TMA Wizard.
8. Select the Install and Configure option.
9. Click Next to display the panel for inserting endpoint information.
10. Click Load to display the Windows dialog box for file selection.
11. Navigate to the Profiles directory for your logon name.
Additional Information: For example, if you are using the Administrator account on aWindows NT operating system located on the C drive, the file might be located in thefollowing path:c:\winnt\profiles\administrator\tma_reprocess.txt
12. Select the tma_reprocess.txt file. The file populates the Tivoli Management AgentWizard window with the information you entered in Step 3.
Problem Determination
76 Version 3.2.0
13. Click Next to install the Tivoli management agent software on the endpoints listed inthe panel of the wizard.
If your installation attempt results in an Error, you can click Details to view theinformation about the error. You can copy this information and send it to the TivoliCustomer Service center to help them determine the source of the problem.
Cleaning Up and Removing the Tivoli Management Agent
ObjectiveTo clean up the Tivoli management agent process and remove Tivoli management agent filesfrom the Tivoli environment.
Background InformationYou use this procedure after you complete the diagnostic tests listed in “Testing EndpointConnectivity” on page 74. Those tests can confirm that the Tivoli management agentendpoint is not working.
The Tivoli management agent is a process that runs at all times on a Domino server host.Removal of the agent requires three steps that this procedure describes:
¶ Access the environment of the Tivoli management agent process.
¶ Clean up the threads and other elements of this process.
Note: A cleanup executable is stored in the tmp temporary directory of each Dominoserver that hosts the Tivoli management agent. The cleanup executables for alloperating systems are also stored in the \Tivoli\tma_cleanup directory on theTivoli server.
¶ Delete the Tivoli management agent software.
On a partitioned Domino server that runs in a Windows, UNIX, or AIX environment, eachpartition runs a separate copy of the Tivoli management agent. When you uninstall a Tivolimanagement agent, you must identify the specific agent that you want to uninstall, asdescribed in this procedure. In OS/400, one instance of the Tivoli management agent servesall Domino server hosts that the Tivoli server manages.
Required Authorization RoleThe installation routine for Tivoli Management Solution for Domino creates the Tivoliadministrator who is authorized to perform this procedure. Other administrators must havethe senior role to perform this operation.
Before You BeginComplete the tests described in “Testing Endpoint Connectivity” on page 74.
When You FinishIf you used this procedure to resolve a communications error with a Domino serverendpoint, perform the following steps:
1. Install a new Tivoli management agent, as described in “Installing the TivoliManagement Agent” on page 39.
Problem Determination
77Tivoli® Management Solution for Domino Installation and Setup Guide
A.Problem
Determ
inatio
n
Note: If you re-use the original name of the Tivoli management agent, wait 15 minutesbefore you perform this step to ensure that no process is referencing the name.
2. Verify the new Tivoli management agent you installed, as described in “Verifying aTivoli Management Agent Endpoint” on page 54.
ProcedureYou can perform this procedure from the command line only.
Command Line for Windows, UNIX, and AIX
Note: A separate command-line procedure for OS/400 exists in “Command Line forOS/400” on page 79.
1. Log on to the operating system of the Tivoli server.
2. Run the wadminep command to obtain the ID number of the Tivoli management agentthat you want to uninstall.
Additional Information: For example, the following wadminep command uses theview_run_dir flag to determine the path of the directory for an endpoint namedWebServer01:wadminep WebServer01_ep view_run_dir
If the command returns the directory path \opt\lcf\dat\2, the ID number for this Tivolimanagement agent is 2.
Note: In partitioned Domino servers, the dat directory contains a numbered subdirectoryfor each partition that you configure as a Tivoli management agent endpoint.
3. Log on to the operating system of the Domino server endpoint.
4. Run the lcf_env.cmd command to access the environment of the Tivoli managementagent process.
Additional Information: For the Windows operating system, this file is located in thesystem directory for the Windows operating system. For example, the followingcommand string causes the lcf_env.cmd command to run:%SystemRoot%\winnt\tivoli\lcf\<number>\lcf_env.cmd
where <number> is the ID number of the Tivoli management agent.
5. Access the temporary directory where the cleanup executable is located.
Additional Information: The executable is located in the tmp directory of Domino serverhosts. The following list shows the names of the cleanup executables for Tivolimanagement agents on Windows, UNIX, and AIX:
¶ On Windows, tma_cleanup_w32-ix86.exe
¶ On Solaris, tma_cleanup_solaris
¶ On AIX, tma_cleanup_aix4-r1
6. Run the Tivoli management agent cleanup executable.
Additional Information: A version of the executable exists for each operating system thatcan host the Tivoli management agent. You must pass the ID number of the Tivolimanagement agent to the executable. (Step 2 describes how to obtain the ID number.)
Problem Determination
78 Version 3.2.0
For example, on Windows, if the ID number of the Tivoli management agentsub-directory in the data (dat) directory is 2, enter the following command:tmp\tma_cleanup_w32-ix86.exe 2
7. Run the following command on the Tivoli server to delete the Tivoli management agentobject:wdelep <endpoint_name>
where <endpoint_name> the name of the Tivoli management agent, which you assignduring the procedure “Installing the Tivoli Management Agent” on page 39.
Command Line for OS/400
1. Log on to the Domino server endpoint.
2. Run the DLTLICPGM LICPGM(1TMELCF) command.
3. Run the following command on the Tivoli server to delete the Tivoli management agentobject:wdelep <endpoint_name>
where <endpoint_name> the name of the Tivoli management agent, which you assignduring the procedure “Installing the Tivoli Management Agent” on page 39.
Problem Determination
79Tivoli® Management Solution for Domino Installation and Setup Guide
A.Problem
Determ
inatio
n

Problem Determination
80 Version 3.2.0
Error Messages for Installation
Tivoli Management Solution for Domino appends the following error messages to standarderror messages that can occur during installation. Each of the following error messages canbe associated with more than one of the basic installation error messages from Tivolicomponents. Use these supplemental messages to identify possible sources of errors:
AMG030001WLogin failure
The Tivoli management system is not yet connected to the server. You canperiodically check to see if it has connected at the URL <variable>. If the status isnot set to Running within an hour, see the Tivoli Management Solution for DominoInstallation and Setup Guide for information on problem determination.
AMG030002Cleanup failure
The TMA software could not be unconfigured. Consult the Tivoli ManagementSolution for Domino Installation and Setup Guide for procedures to manuallyunconfigure the TMA software.
AMG030002Variable not set
Variable <variable> is not set in the system environment
AMG030002Not an administrator
Current user is not an administrator. The user must be an administrator to performthis procedure.
B
81Tivoli® Management Solution for Domino Installation and Setup Guide
B.ErrorMessag
esfor
Installatio
n

82 Version 3.2.0
Index
Special Characters\Tivoli\db directory
backing up 67
Aadministrators, Tivoli 3administrators, Tivoli Domino
assigning privileges for 59creating 59deleting 64guidelines for managing 59viewing 62
assigning user privilegesfor Windows operating system 10
assignment of communication ports panelof the installation wizard 24
authorization rolesdefined 3for Tivoli Domino administrators 59for Tivoli Management Solution for Domino 59
Bbacking up
\Tivoli\db directory 67guidelines 67, 73Tivoli environment components 67, 73Tivoli environment databases 67Tivoli server databases 67
binaries, Tivolitivoliv46 70
binary files, Tivolitivoliv50 70
booksfeedback vionline viordering vi
CCleanup failure error message 81command line
user interface 4commands
ENDTMEEPT 75lcf_env.sh 75lcfd.sh 75
commands (continued)net start 75net start oserv 69net stop 75net stop oserv 69ps 75QALWOBJRST 50RSTLICPGM 50RSTOBJ 50setup.exe 16, 18, 31, 32, 71STRTMEEPT 75uninstall 70w4inslcf 47, 49, 50wadminep 74, 78wcrtadmin 60, 62wdel 65wdelep 79wgetadmin 64winstlcf 47wlookup 64, 74wls 64wping 74
communication connection lost, oserv 74communication ports panel
assignment in the installation wizard 24configurations, system
and uninstalling options 70configuring
Tivoli management agent 39configuring Tivoli endpoints
guidelines 39connectivity
testing Domino server endpoint 74console display exceptions
ExObjAdapter failure 74Customer Support vii
Ddatabase hardware requirements
about 16database software requirements
about 16databases
backing up 67db_backup directory
creating as backup of \Tivoli\db directory 67DB2 database hardware requirements
about 16DB2 database software
installing 16
83Tivoli® Management Solution for Domino Installation and Setup Guide
Index
DB2 database software requirementsabout 16
DB2 destination panelof the installation wizard 22
DB2/400 database softwareabout 16
disk space required to install Tivoli Management Solution forDomino 7
disk space requirementsendpoints, Tivoli management agent 8management console 8Tivoli management agent endpoints 8Tivoli Management Solution for Domino 7
dispatcher service, Tivoli objectoserv 69
display charactersand locale settings 73double-byte 9, 73single-byte 9
Domino administrators, Tivoliassigning privileges for 59creating 59deleting 64guidelines for managing 59viewing 62
Domino server administratorsguidelines for managing 59
Domino server endpoint problemstroubleshooting 74
Domino server endpointstesting connectivity of 74
DominoPerformanceStation endpoint 2double-byte characters
in language settings 14in locale settings 14
Ee-mail contact viiEndpoint
proxy 51endpoints
disk space requirementsTivoli management agent 8
hardware and software requirements 8installing Tivoli 39planning sheet for 40removing Tivoli management agent from 52testing connectivity of 74Tivoli Management Solution for Domino 2troubleshooting 74verifying Tivoli management agents on 54
ENDTMEEPT command 75error files
tma_reprocess.txt from Tivoli Management AgentWizard 76, 77
error log fileslocation of 14
error messageschecking the TMD_install.log file for 74Cleanup failure 81login failure 81Not an administrator 81Tivoli management agent wizard 74Tivoli Management Solution for Domino installation 81Variable not set 81
exceptions, console displayExObjAdapter failure 74
ExObjAdapter failureconsole display exceptions 74
Ffeedback about publications viifiles
j2_1301.exe 35lcf_env.cmd 78LicenseAgreement.html 31location of error logs 14ntivoliv46 binary 70ntivoliv50 binary 70os4LcfH.err 50setup.exe 16, 18, 31, 32, 35, 71suite.rsp 30tivoliv46 70TIVOLIV46 binary 70tivoliv50 70TIVOLIV50 binary 70tma_cleanup_aix4–r1 79tma_cleanup_w32–ix86.exe 79TMD_install.log 74TMfD.nsf 36, 37
files, errortma_reprocess.txt from Tivoli Management Agent
Wizard 76, 77
Ggateways
defined 2
Hhardware and software requirements
Tivoli management agent endpoints 8hardware and software requirements, Tivoli servers 7hardware requirements
Tivoli Management Solution for Domino 7hardware requirements, DB2 database
about 16help, online viii
84 Version 3.2.0

Iillegible character display
and locale settings 73install wizard
user interface 4installation
error messageschecking the TMD_install.log file for 74
management consolesoftware and hardware requirements 34
Tivoli Management Solution for Domino errormessages 81
tma_reprocess.txt error file from Tivoli Management AgentWizard 76, 77
installation wizarddisplaying the assignment of communication ports panel 24displaying the DB2 destination panel 22displaying the language verification panel 18displaying the licensing panel 21displaying the product destination panel 21displaying the welcome panel 20
installingDB2 database software 16management console
software requirements for Web browsers 34national language settings (locales) 9, 14Tivoli management agent 39Tivoli Management Solution for Domino 7
installing and setting upguidelines for Tivoli Management Solution for Domino 5
installing Tivoli endpointsguidelines 39
installing Tivoli management agentusing Tivoli Management Agent Wizard for 42
installing Tivoli Management Solution for Domino 13about 13cancelling 16default port settings for 30hardware and software requirements 7preparing for 7preparing Windows operating system for 10privileges required for Windows 10procedures for 14starting the management console 36using silent method 29
Integrated xSeries Server (IxSS) Tivoli serverssoftware requirements for 8
Internet Explorersoftware requirements for management console 8
IxSS (Integrated xSeries Server) Tivoli serverssoftware requirements for 8
Jj2_1301.exe file 35Java 2 Run-Time Environment
management console installationsoftware requirement for Web browsers 34
Llanguage settings
single-byte and double-byte characters 14language settings (locales)
installing 9, 14language settings (locales), national
installing 9, 14language settings for installation
single-byte and double-byte characters 22language verification panel
for the installation wizard 18lcf_env.cmd file 78lcf_env.sh command
using to access lcfd Tivoli management agent process 75lcf.sh command
using to restart lcfd Tivoli management agent process 75lcfd, Tivoli management agent process
stopping with net stop command 75LicenseAgreement.html file 31licensing panel
of the installation wizard 21locale settings
causing illegible character display 73single-byte and double-byte characters 14
locales (national language settings)installing 9, 14
login failure error message 81Lotus Notes Clients
software requirements for management console 8LotusDominoServer endpoint 2
Mmanaged resources
defined 2management console
defined 2disk space requirements 8installation
software and hardware requirements 34software requirement for Web browsers 34
installing 34Java 2 Run-Time Environment
software requirement for Web browsers 34software requirements 8software requirements for Internet Explorer 8software requirements for Lotus Notes Clients 8software requirements for Netscape 8starting 36uninstalling 71user interface 3
manualsfeedback vionline viordering vi
85Tivoli® Management Solution for Domino Installation and Setup Guide
Index

Nnational language settings (locales)
installing 9, 14net start command
using to start lcfd Tivoli management agent process 75net start oserv command 69net stop command
using to stop lcfd Tivoli management agent process 75net stop oserv command 69Netscape
software requirements for management console 8Not an administrator error message 81ntivoliv46 binary files 70ntivoliv50 binary files 70
Oobject dispatcher service, Tivoli 69online help viiionline publications viordering publications viOS/400 environment software requirements
for Tivoli servers 8OS/400, DB2/400 database software
about 16os4LcfH.err file 50oserv
lost communication connection to 74Tivoli object dispatcher service 69using net start command with 69using net stop command with 69
Ppolicy region
defined 2port settings for Tivoli gateway
installing Tivoli Management Solution for Domino 30privileges
required for installing Tivoli Management Solution forDomino on Windows 10
problem determination 73process, Tivoli management agent
removing 77Proxy endpoint
creating 51ps command
using to identify lcfd Tivoli management agent process 75publications
online viordering virelated visubmitting feedback about viviewing online vii
QQALWOBJRST command 50
Rremoving and cleaning up
Tivoli management agent process and files 77removing Tivoli management agent process and files 77restoring databases
in the Tivoli environment 68RSTLICPGM command 50RSTOBJ command 50
Sserver endpoint problems, Domino
troubleshooting 74server endpoints, Domino
testing connectivity of 74server hosts
defined 2server objects
defined 2server, Tivoli
assigning privileges for 59servers
configuring as a Windows NT Server Service 9service, Tivoli object dispatcher 69setup.exe file 16, 18, 31, 32, 35, 71single-byte and double-byte characters
language settings for installation 22single-byte characters
in language settings 14in locale settings 14
software and hardware requirementsmanagement console installation 34
software requirementsDB2 database 16for Integrated xSeries Server (IxSS) Tivoli servers 8for iSeries Tivoli servers 8for Tivoli servers 8for Tivoli servers in OS/400 environment 8installing Web browsers for management console 34management console 8
for Internet Explorer 8for Lotus Notes Clients 8for Netscape 8
Tivoli Management Solution for Domino 7stopping Tivoli management agent process 77STRTMEEPT command 75suite.rsp file 30
86 Version 3.2.0
TTCP/IP communication protocol
using with Tivoli management agent 39technical support, contacting viiTivoli
gatewaysdefined 2
serversdefined 2
Tivoli administratorsassigning privileges to Tivoli Domino administrators 59authorization roles for 3defined 3
Tivoli binary filestivoliv46 70tivoliv50 70uninstalling 70
Tivoli Customer Support viiTivoli desktop
user interface 4Tivoli Domino administrators
assigning privileges for 59authorization roles for 3creating 59defined 3deleting 64guidelines for managing 59viewing 62
Tivoli endpointsinstalling 39
Tivoli environmentbacking up databases 67basic components of 1defined 1restoring databases in 68using with Tivoli Management Solution for Domino 17
Tivoli gatewaydefault port numbers for 30
Tivoli management agentabout installing 39configuring 39defined 2endpoints
disk space requirements 8hardware and software requirements 8
installing 39using Tivoli Management Agent Wizard for 42
processdefined 2removing 77stopping 77
removing from endpoints 52using TCP/IP communication protocol for 39verifying on endpoints 54wizard
error messages 74Tivoli Management Agent Wizard
tma_reprocess.txt error file 76, 77troubleshooting analysis 77using to install Tivoli management agent 42
Tivoli Management Agent Wizard (continued)using to remove Tivoli management agent from
endpoints 52using to verify Tivoli management agent on endpoints 54
Tivoli management regiondefined 2server
defined 2Tivoli Management Solution for Domino
assigning privileges for 59authorization roles for 59disk space requirements 7installation and setup guidelines 5installation error messages 81installing 7, 13
about 13hardware and software requirements 7port numbers for Tivoli gateway 30preparing for 7using silent method 29
overview 1product components of 1starting the management console 36uninstalling 69user interfaces for 3
Tivoli object dispatcher serviceoserv 69
Tivoli serverassigning privileges for 59defined 2
Tivoli server databasesbacking up 67
Tivoli servershardware and software requirements 7OS/400 environment software requirements 8software requirements 8
TIVOLIV46 binary files 70tivoliv46 Tivoli binary files 70TIVOLIV50 binary files 70tivoliv50 Tivoli binary files 70tma_cleanup_aix4–r1 command 79tma_cleanup_aix4–r1 file 79tma_cleanup_solaris command 79tma_cleanup_solaris file 79tma_cleanup_w32–ix86.exe file 79tma_reprocess.txt file
installation error file from Tivoli Management AgentWizard 76
installation error from Tivoli Management AgentWizard 77
tmd RIM databaseuninstalling 69
TMD_install.log filechecking for error messages in 74
TMfD.nsf file 36, 37troubleshooting
endpoint problems 74Tivoli Management Agent Wizard 77
87Tivoli® Management Solution for Domino Installation and Setup Guide
Index
Uuninstall.cmd command 70uninstalling
and system configurations 70guidelines 67, 73the management console 71Tivoli binaries 70Tivoli binary files 70Tivoli environment components 67, 73Tivoli Management Solution for Domino 69
user interfacescommand line 4install wizards 4management console 3Tivoli desktop 4Tivoli Management Solution for Domino 3
VVariable not set error message 81versions of software supported by Tivoli Management Solution
for Domino 7
Ww4inslcf command 47, 49, 50wadminep command 78
using to test connectivity 74wcrtadmin command 60, 62wdel command 65wdelep command 79Web browsers software requirement
management console installationJava 2 Run-Time Environment 34
wgetadmin command 64Windows NT Server Service
configuring servers as 9Windows operating system
assigning user privileges for 10installation preparation for Tivoli Management Solution for
Domino 10winstlcf command 47wizard, Tivoli management agent
error messages 74wlookup command 64
using to test connectivity 74wls command 64wping command
using to test connectivity 74
88 Version 3.2.0


Printed in the United States of Americaon recycled paper containing 10%recovered post-consumer fiber.
GC32-0755-00


![Tivoli Manager for Oracle ¨Ï¥Î¤â¥U - IBM Supportpublib.boulder.ibm.com/tividd/td/oracle2/GC32-0455-00/zh_TW/PDF/... · ⌠≤IBM z]úvAúiH NIBM ú B{í A ˘ CΣPΣLú bB@W](https://img.pdfslide.net/doc/110x75/5abae4407f8b9a441d8c2c24/tivoli-manager-for-oracle-u-ibm-ibm-zvaih-nibm-b-a-cpl-bbw-p-.jpg)


![Tivoli Workload Scheduler for z/OS - IBM Supportpublib.boulder.ibm.com/tividd/td/TWS/SH19-4544-00/ja_JA/...^(,-xiii \qNP]IT xiii \qN=. xiii 2MqA xv Tivoli Workload Scheduler for z/OS](https://img.pdfslide.net/doc/110x75/5ab7add17f8b9ad5338bdef7/tivoli-workload-scheduler-for-zos-ibm-xiii-qnpit-xiii-qn-xiii-2mqa-xv.jpg)