Embed Size (px)
Citation preview
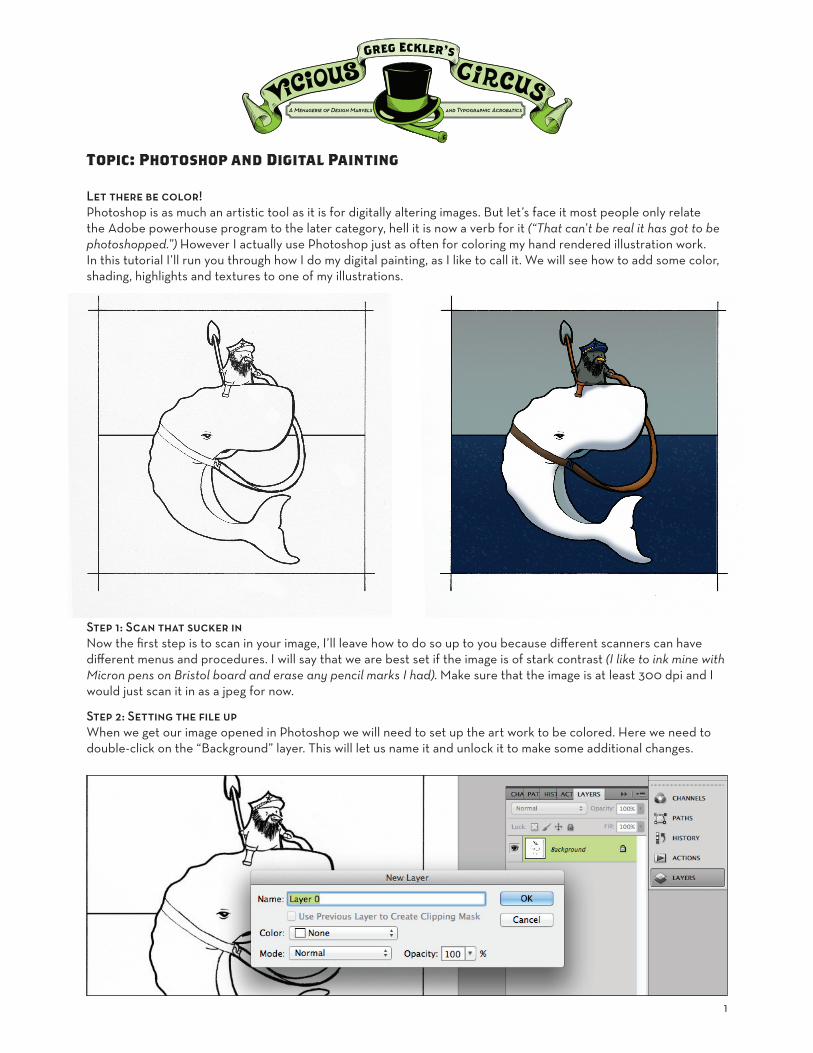
Topic: Photoshop and Digital Painting
1
Let there be color! Photoshop is as much an artistic tool as it is for digitally altering images. But let’s face it most people only relate the Adobe powerhouse program to the later category, hell it is now a verb for it (“That can’t be real it has got to be photoshopped.”) However I actually use Photoshop just as often for coloring my hand rendered illustration work. In this tutorial I’ll run you through how I do my digital painting, as I like to call it. We will see how to add some color, shading, highlights and textures to one of my illustrations.
Step 1: Scan that sucker in Now the first step is to scan in your image, I’ll leave how to do so up to you because different scanners can have different menus and procedures. I will say that we are best set if the image is of stark contrast (I like to ink mine with Micron pens on Bristol board and erase any pencil marks I had). Make sure that the image is at least 300 dpi and I would just scan it in as a jpeg for now.
Step 2: Setting the file up When we get our image opened in Photoshop we will need to set up the art work to be colored. Here we need to double-click on the “Background” layer. This will let us name it and unlock it to make some additional changes.

Topic: Photoshop and Digital Painting
2
I like to name the initial layer with my line drawing simply “art” (but you’re free to name it what you wish). After naming it we want to change the layers opacity setting to “Multiply” from the drop down menu at the top of the Layers Palette. When that is done I also will click on the little lock icon to Lock the layer so that I don’t alter it further by accident.
You see when we set the opacity to Multiply it makes all the black opaque and the white transparent. We don’t need to use this layer anymore because we are actually going to color BEHIND the image.
Step 3: Organization is Everything As I said we are actually going to color behind the initial art, and for each color we add we are going to give it a layer of its own and name them accordingly. So let’s start with our Whale here. I’ll create a new layer behind the art layer and name it Whale so I can keep things straight and organized.

Topic: Photoshop and Digital Painting
3
Step 4: Let’s Talk Color The default Swatches palette in Photoshop can leave something to be desired, but there are many other options open to us. We could complete coloring this piece just using the color picker but having a palette of color to choose from gives us a bit more of a launching point than trying to figure out colors straight from our heads. For this I like to choose from the Swatches more options menu . Now there are a lot of options here but I tend to go for the TOYO COLOR FINDER, I find the palette has a more natural range of colors to work with.
Step 5: Can’t Paint Without a Brush With some colors to choose from its time to get our brush on. Choose the brush tool from the Tool Palette and set the size to something that can cover some ground, I also recommend setting the Hardness to 100% (we will be using softer brushes down the road).

Topic: Photoshop and Digital Painting
4
Step 6: Get Coloring From here out as we set our initial colors it can be quite relaxing and actually pretty on par with coloring books from our childhood. Just fill in the designated area for the layer we are working on.
And we have color

Topic: Photoshop and Digital Painting
5
Play it again Sam From here on out we want to pick an area to color, create a layer for said area and make sure to name it so we can keep track of our layers.
Step 7: Adding Shadow Now we haven’t quite finished the inital coloring but before the number of layers gets any heavier lets take a look at adding a bit of depth to each of our parts. Here we need to create a new layer for our whale’s shadow (justifiably named “Whale-Shadow.”) Now we need to move our “Whale-Shadow” layer ABOVE our “Whale” layer. Once there hold down the Alt (Option) key and click with the mouse BETWEEN the two layers. The upper layer should connect to the lower layer as in the third image here. (Note that this attaching is a form of layer masking so as you paint anything outside of what is painted on the original layer is hidden from view.)

Topic: Photoshop and Digital Painting
6
Setting opacity and color We are going to use the same blue as our whale on this layer but we are going to change the opacity setting to “Multiply” which will make what we paint a darker shade of the blue.
Soften Up Those Brushes We can also reduce the hardness of our shading brush to get a better sense of depth. A couple initial passes over areas where shadow makes the most sense and we start getting a bit more depth to our illustration.

Topic: Photoshop and Digital Painting
7
Step 8: Adding Highlights This is much of the same with two slight differences. We will make a “Whale-Highlight” layer and position it above the “Whale-Shadow” layer, remember to Alt (Option)+Mouse Click BETWEEN the layers to attach it. The two differences here are that I increase the brush hardness to 100% again and you DON’T need to change the layers opacity setting from Normal. For color I just try to choose a lighter shade of the original blue.
Step 9: Folders Okay so I’ve jumped ahead a bit to save us from the repetitive stuff. Here we have finished the Whale and our Captain. As you can see the Layers Palette is getting a bit cramped. Once upon a time there would have been nothing to do but live with it but now we can put layers into folders to help unclutter our Layers. YAY! Just go to the bottom of the Layer Palette and click the Folder icon, name your folder as you would a layer then select, drag and drop the layers you want into the folder.

Topic: Photoshop and Digital Painting
8
Step 10: Backgrounds In this case instead of drawing with a brush I like to use the Marquee Tool to select the area (remember to give each part it’s own layer). So a bit of grey sky and the gradient tool for depth. The same for the sea, but here we can add another layer then play with some of Photoshop’s brushes to give the sea a bit of wave-like texture.
Step 11: There is No Permanent Self So you may have noticed the Captain Ahab/Moby Dick theme this piece has, but did you catch the mistake? Moby wasn’t a Blue Whale, he was a giant White one. So let’s go back into our Whale Folder and select the layer (we can just hold down Command and click on the little thumbnail on the layer and it will select just the painted part). Then fill the selection with white. We may or may not want to also adjust the “Whale-Shadow” and “Whale-Highlight” layers too.

Topic: Photoshop and Digital Painting
9
Finale And there we have it. It can take a few tries to get this method straight but I’ve found after years of hand rendering this is by far my favorite way to color my work. Enjoy!
![Genius Guide - Illustrate with Photoshop 2012 - Volume 1[ChrisArmand] draw drawing digital painting 2d.pdf](https://img.pdfslide.net/doc/110x75/55cf9b42550346d033a5551d/genius-guide-illustrate-with-photoshop-2012-volume-1chrisarmand-draw.jpg)