Embed Size (px)
Citation preview

UK Location Programme Location Information Interoperability Board
Data Publisher – How To Guide
Setting up GeoServer on a Windows Machine
UK Location Programme
DOCUMENT CONTROL
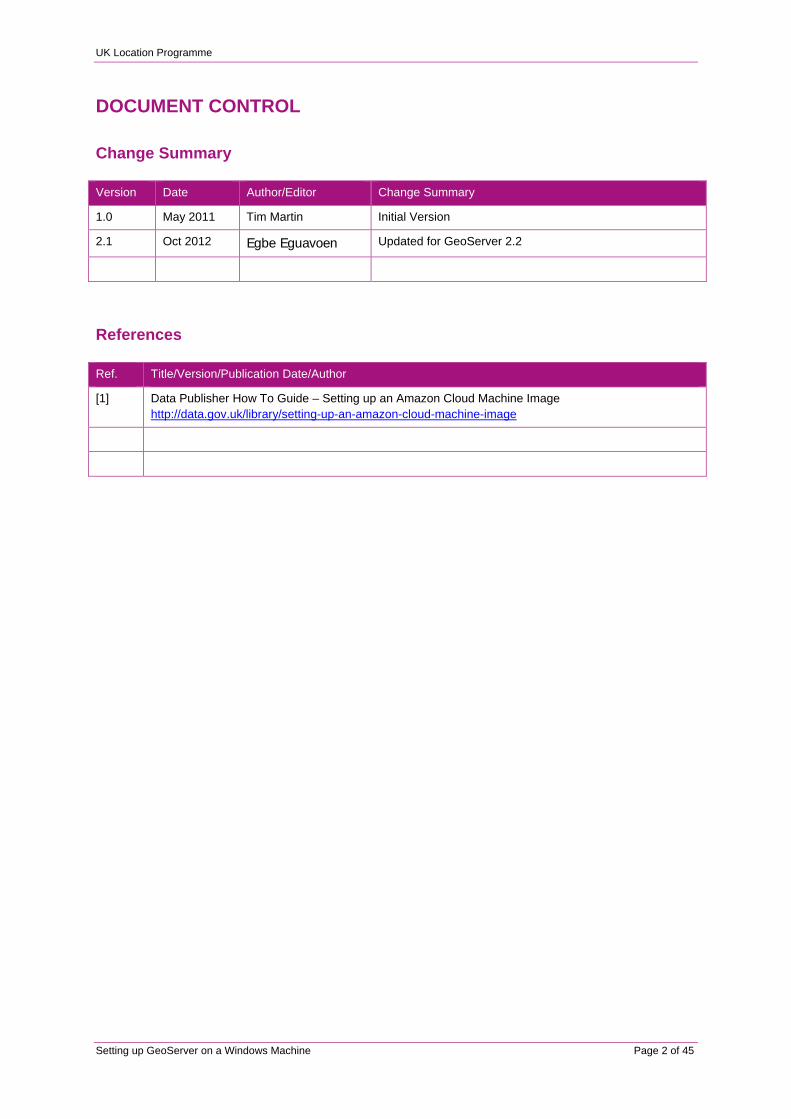
Change Summary
Version Date Author/Editor Change Summary
1.0 May 2011 Tim Martin Initial Version
2.1 Oct 2012 Egbe Eguavoen Updated for GeoServer 2.2
References
Ref. Title/Version/Publication Date/Author
[1] Data Publisher How To Guide – Setting up an Amazon Cloud Machine Image http://data.gov.uk/library/setting-up-an-amazon-cloud-machine-image
Setting up GeoServer on a Windows Machine Page 2 of 45
UK Location Programme
Setting up GeoServer on a Windows Machine Page 3 of 45
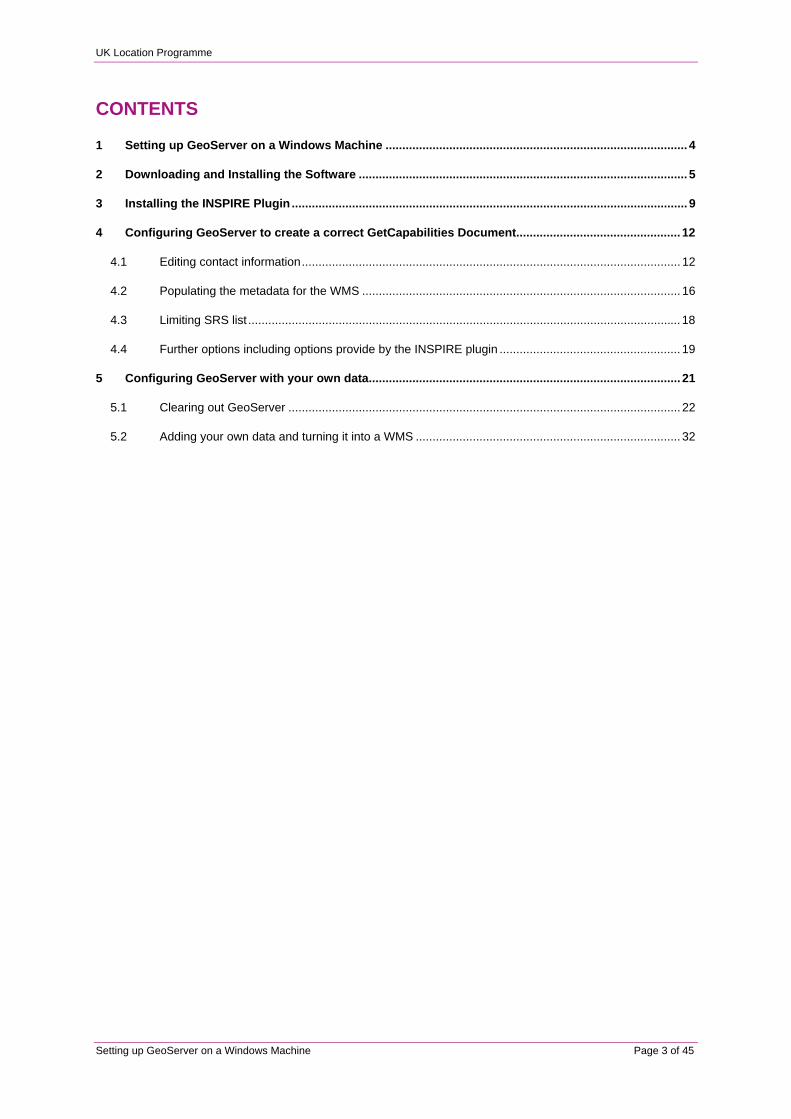
CONTENTS
1 Setting up GeoServer on a Windows Machine .......................................................................................... 4
2 Downloading and Installing the Software .................................................................................................. 5
3 Installing the INSPIRE Plugin ...................................................................................................................... 9
4 Configuring GeoServer to create a correct GetCapabilities Document................................................. 12
4.1 Editing contact information ................................................................................................................. 12
4.2 Populating the metadata for the WMS ............................................................................................... 16
4.3 Limiting SRS list ................................................................................................................................. 18
4.4 Further options including options provide by the INSPIRE plugin ...................................................... 19
5 Configuring GeoServer with your own data ............................................................................................. 21
5.1 Clearing out GeoServer ..................................................................................................................... 22
5.2 Adding your own data and turning it into a WMS ............................................................................... 32

UK Location Programme
1 SETTING UP GEOSERVER ON A WINDOWS MACHINE
This guide outlines the configuration procedure for getting GeoServer installed and setup to serve geospatial datasets as a Web Map Service (WMS).
For this I will be using GeoServer 2.2 and also an Amazon EC2 Windows Server 2008 32-bit Instance. Please refer to the Data Publisher How To Guide ‘Setting up an Amazon Cloud Machine Image’ [1] available at http://data.gov.uk/location/guidance_and_tools#geoserverreferenceimplementation for details of how to setup and launch an Amazon EC2 Windows Instance.
Setting up GeoServer on a Windows Machine Page 4 of 45
UK Location Programme
2 DOWNLOADING AND INSTALLING THE SOFTWARE
The following software is required to setup GeoServer and run a WMS
1) JAVA JDK - latest version possible and pick appropriate version depending on 32-bit or 64-bit
http://www.oracle.com/technetwork/java/javase/downloads/index.html
On a Windows 64-Bit machine it is best to install the JDK 32-Bit version as this will allow you to install the native JAI libraries that significantly speed up the server of raster data.
Once you have downloaded install using the default locations and settings. Now that it is installed it is best to tweak JAVA to run as a server version rather than client. To do this, find the file
jvm.cfg
by doing a search within the jdk1.7.0_XX folder. Open the file using notepad or your own text editor.
You should see the following
-client KNOWN
-server KNOWN
These need to be switched around. This should make the default choice be server. You can check you have the right one by opening up a command prompt and typing
java -version
This should list the version you have.
2) Native JAI - as explained in the GeoServer documentation it is best to download and install the native versions of JAI and JAI ImageI/O
http://download.java.net/media/jai/builds/release/1_1_3/jai-1_1_3-lib-windows-i586-jdk.exe
http://download.java.net/media/jai-imageio/builds/release/1.1/jai_imageio-1_1-lib-windows-i586-jdk.exe
These can only be installed when JAVA JDK has been installed and you must point them to the JDK folder in Program Files. It should do this automatically. If they fail to install then it is likely that they are not finding JAVA JDK installed. You may need to add JAVA_HOME to your environment variables.
3) Apache Tomcat - I downloaded the 32-bit/64-bit Windows Service Installer
http://tomcat.apache.org/download-70.cgi
During the installation you will be asked to add a username and password. Make sure it is something you will remember but is also secure.
Setting up GeoServer on a Windows Machine Page 5 of 45
UK Location Programme
During the install make sure you point to the JDK and not the JRE version. You can check this has worked by opening 'Configure Tomcat'. In the dialogue box click the JAVA tab and look at where Tomcat is pointing to.
4) GeoServer WAR file - this WAR file will be deployed via Tomcat
http://geoserver.org/display/GEOS/Stable
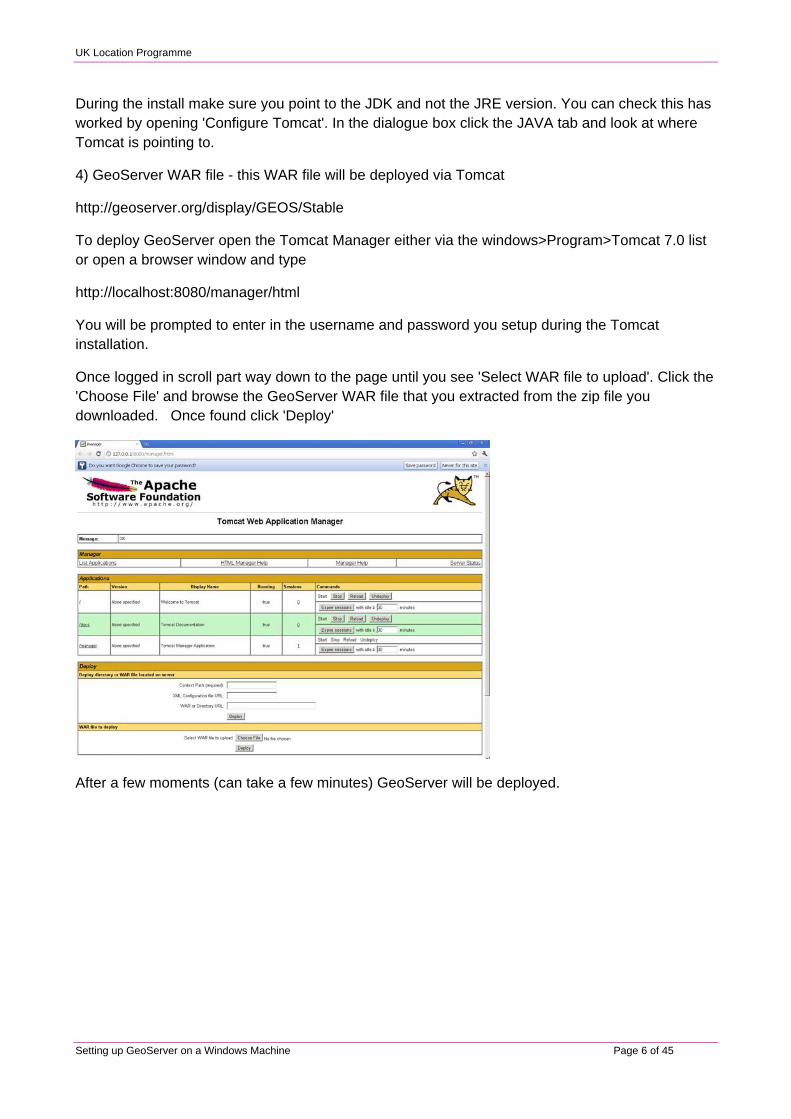
To deploy GeoServer open the Tomcat Manager either via the windows>Program>Tomcat 7.0 list or open a browser window and type
http://localhost:8080/manager/html
You will be prompted to enter in the username and password you setup during the Tomcat installation.
Once logged in scroll part way down to the page until you see 'Select WAR file to upload'. Click the 'Choose File' and browse the GeoServer WAR file that you extracted from the zip file you downloaded. Once found click 'Deploy'
After a few moments (can take a few minutes) GeoServer will be deployed.
Setting up GeoServer on a Windows Machine Page 6 of 45
UK Location Programme
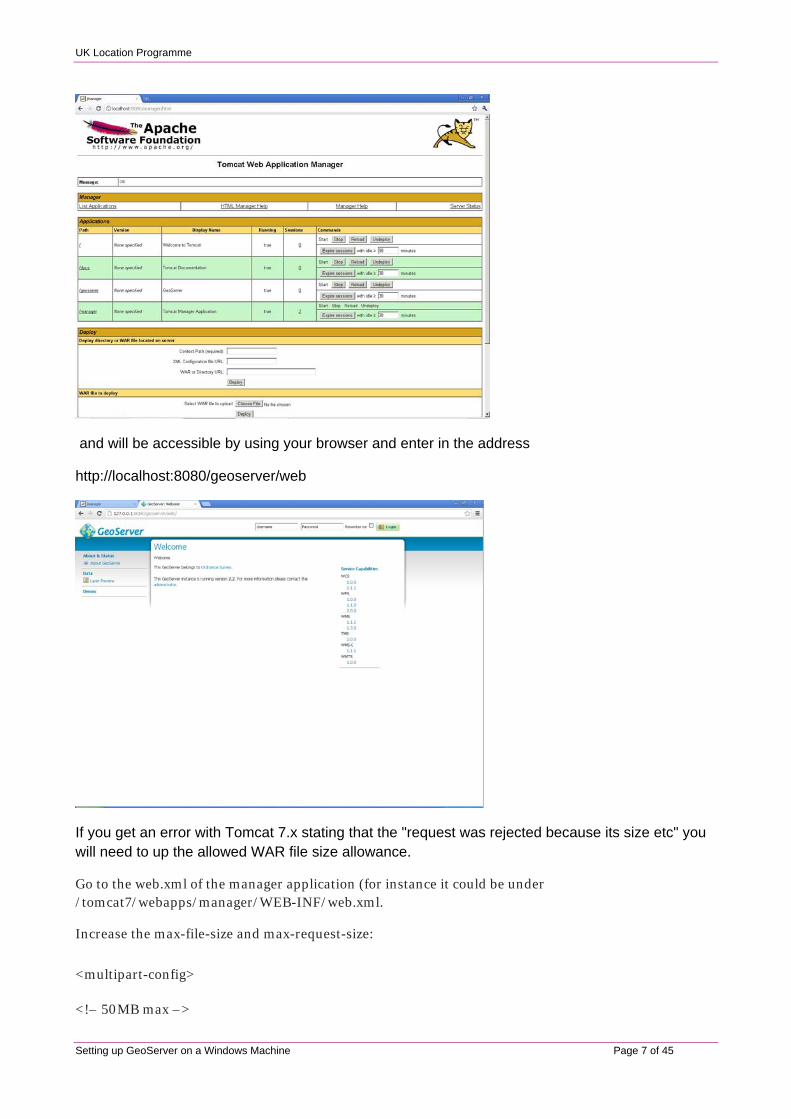
and will be accessible by using your browser and enter in the address
http://localhost:8080/geoserver/web
If you get an error with Tomcat 7.x stating that the "request was rejected because its size etc" you will need to up the allowed WAR file size allowance.
Go to the web.xml of the manager application (for instance it could be under /tomcat7/webapps/manager/WEB-INF/web.xml.
Increase the max-file-size and max-request-size:
<multipart-config>
<!– 50MB max –>
Setting up GeoServer on a Windows Machine Page 7 of 45

UK Location Programme
<max-file-size>52428800</max-file-size>
<max-request-size>52428800</max-request-size>
<file-size-threshold>0</file-size-threshold>
</multipart-config>
I just put a "1" in front of the 5 which is probably excessive but it did the job.
Setting up GeoServer on a Windows Machine Page 8 of 45
UK Location Programme
3 INSTALLING THE INSPIRE PLUGIN
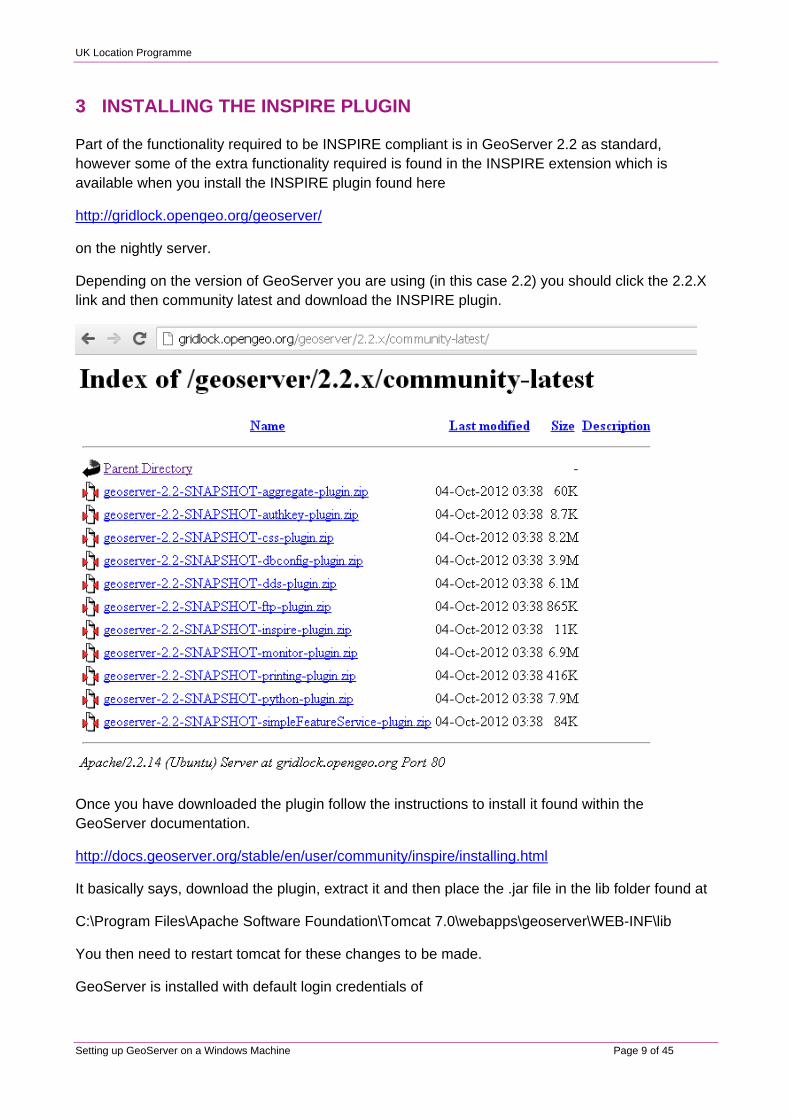
Part of the functionality required to be INSPIRE compliant is in GeoServer 2.2 as standard, however some of the extra functionality required is found in the INSPIRE extension which is available when you install the INSPIRE plugin found here
http://gridlock.opengeo.org/geoserver/
on the nightly server.
Depending on the version of GeoServer you are using (in this case 2.2) you should click the 2.2.X link and then community latest and download the INSPIRE plugin.
Once you have downloaded the plugin follow the instructions to install it found within the GeoServer documentation.
http://docs.geoserver.org/stable/en/user/community/inspire/installing.html
It basically says, download the plugin, extract it and then place the .jar file in the lib folder found at
C:\Program Files\Apache Software Foundation\Tomcat 7.0\webapps\geoserver\WEB-INF\lib
You then need to restart tomcat for these changes to be made.
GeoServer is installed with default login credentials of
Setting up GeoServer on a Windows Machine Page 9 of 45

UK Location Programme
username: admin
password: geoserver
Enter these in the top dialogue boxes, click Remember Me and then click 'Login'
Once logged in you should see this page
Setting up GeoServer on a Windows Machine Page 10 of 45
UK Location Programme
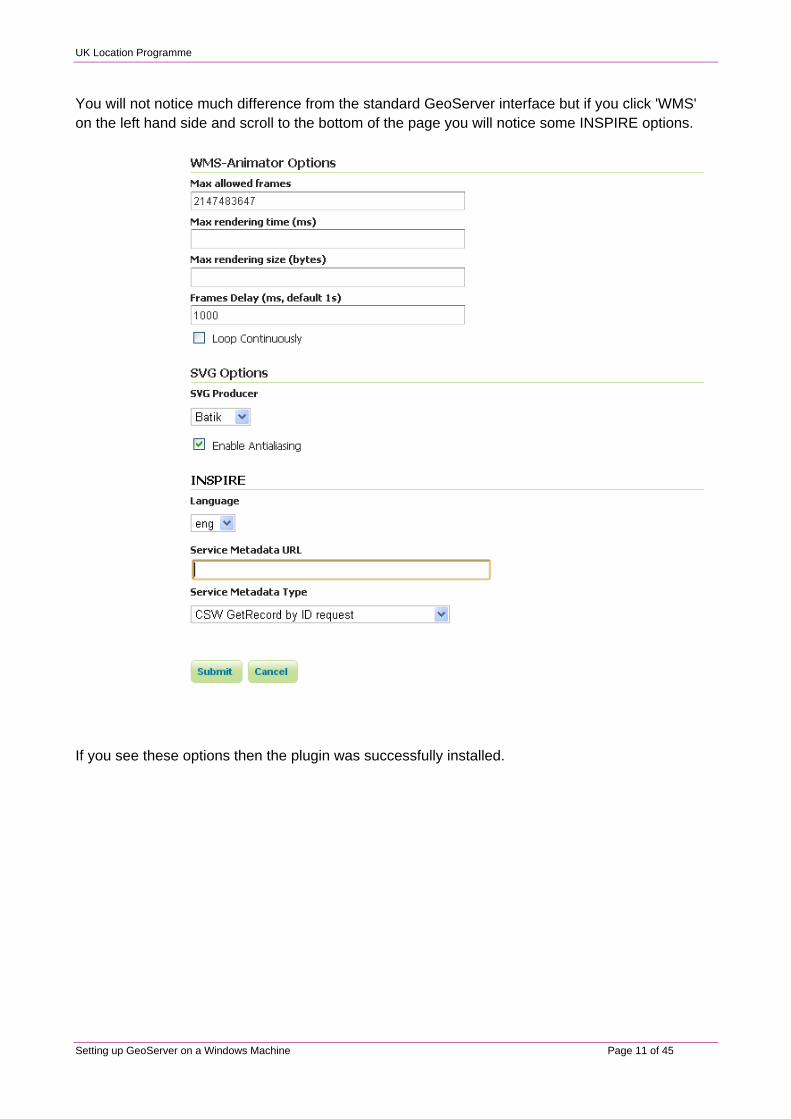
You will not notice much difference from the standard GeoServer interface but if you click 'WMS' on the left hand side and scroll to the bottom of the page you will notice some INSPIRE options.
If you see these options then the plugin was successfully installed.
Setting up GeoServer on a Windows Machine Page 11 of 45
UK Location Programme
4 CONFIGURING GEOSERVER TO CREATE A CORRECT GETCAPABILITIES DOCUMENT
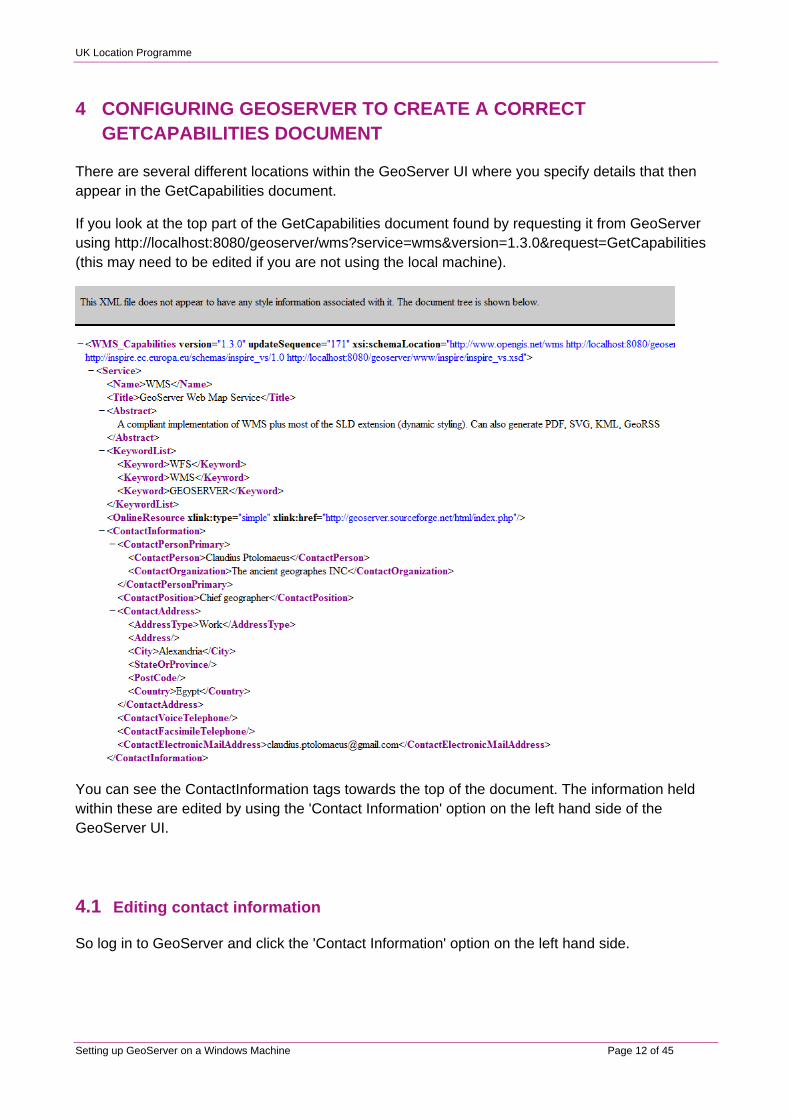
There are several different locations within the GeoServer UI where you specify details that then appear in the GetCapabilities document.
If you look at the top part of the GetCapabilities document found by requesting it from GeoServer using http://localhost:8080/geoserver/wms?service=wms&version=1.3.0&request=GetCapabilities (this may need to be edited if you are not using the local machine).
You can see the ContactInformation tags towards the top of the document. The information held within these are edited by using the 'Contact Information' option on the left hand side of the GeoServer UI.
4.1 Editing contact information
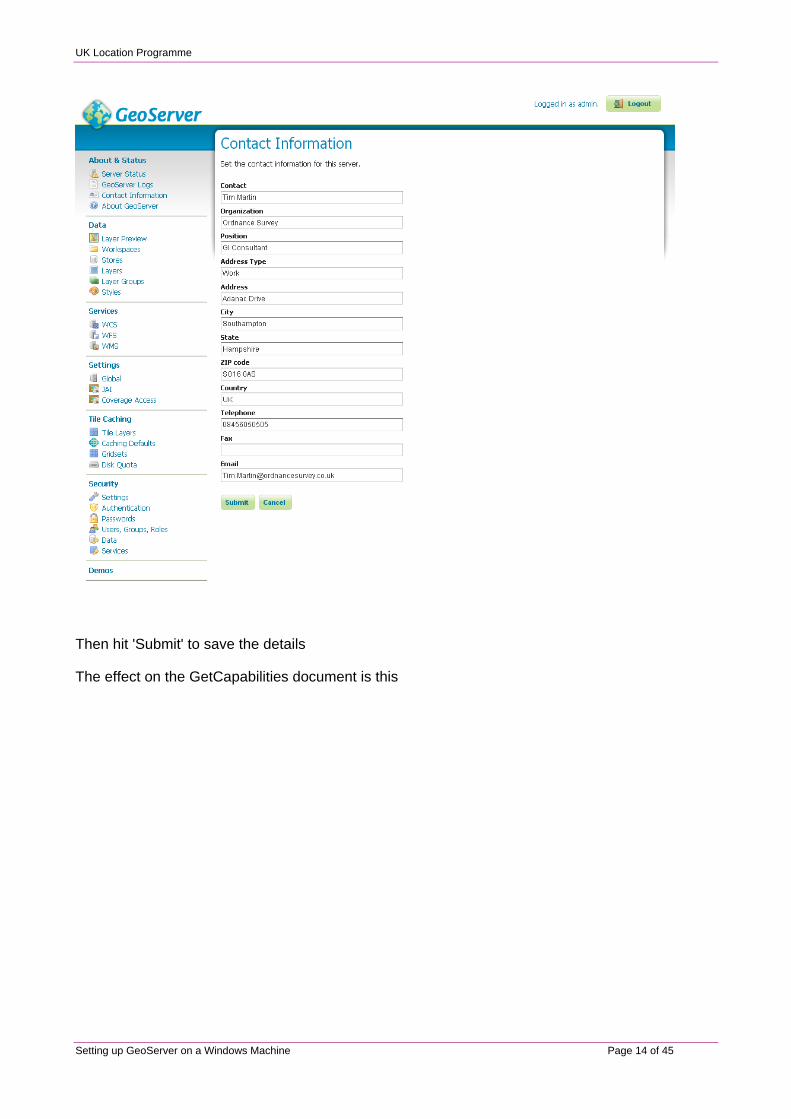
So log in to GeoServer and click the 'Contact Information' option on the left hand side.
Setting up GeoServer on a Windows Machine Page 12 of 45

UK Location Programme
Now fill in the appropriate details, if you are unsure what goes in where use the GeoServer documentation found here
http://docs.geoserver.org/stable/en/user/webadmin/server/contact.html
After filling in the details mine looked like this
Setting up GeoServer on a Windows Machine Page 13 of 45
UK Location Programme
Then hit 'Submit' to save the details
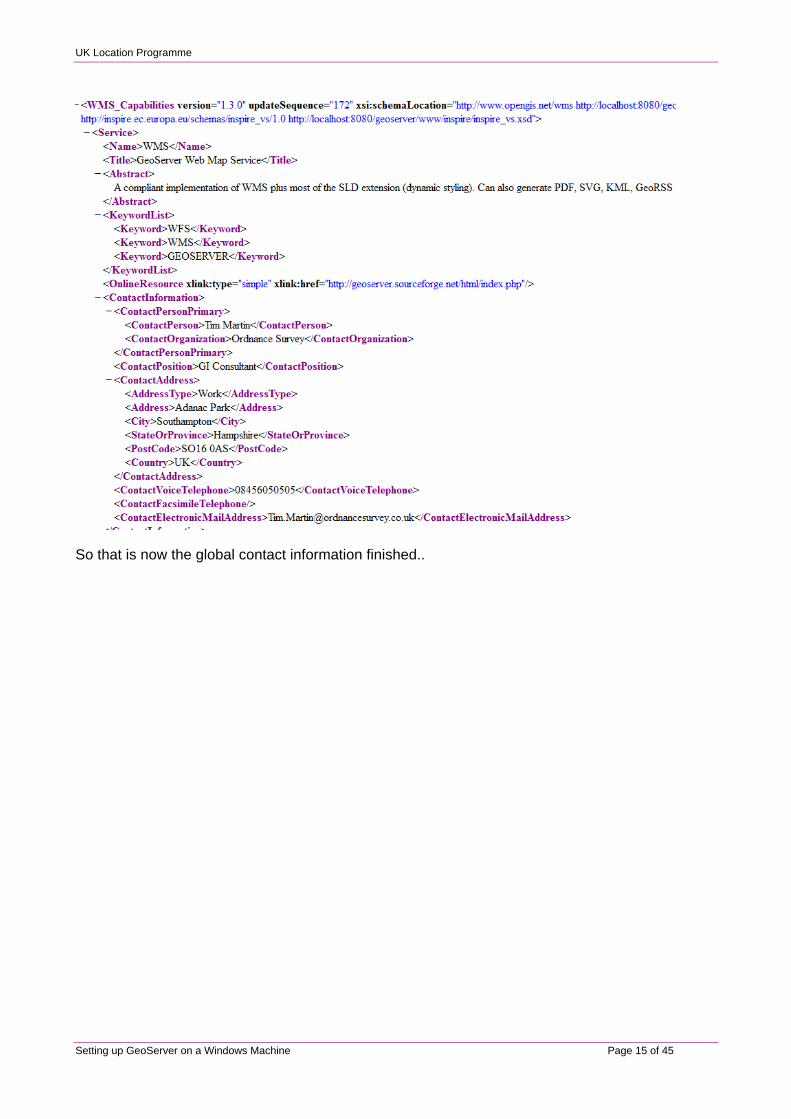
The effect on the GetCapabilities document is this
Setting up GeoServer on a Windows Machine Page 14 of 45
UK Location Programme
So that is now the global contact information finished..
Setting up GeoServer on a Windows Machine Page 15 of 45
UK Location Programme
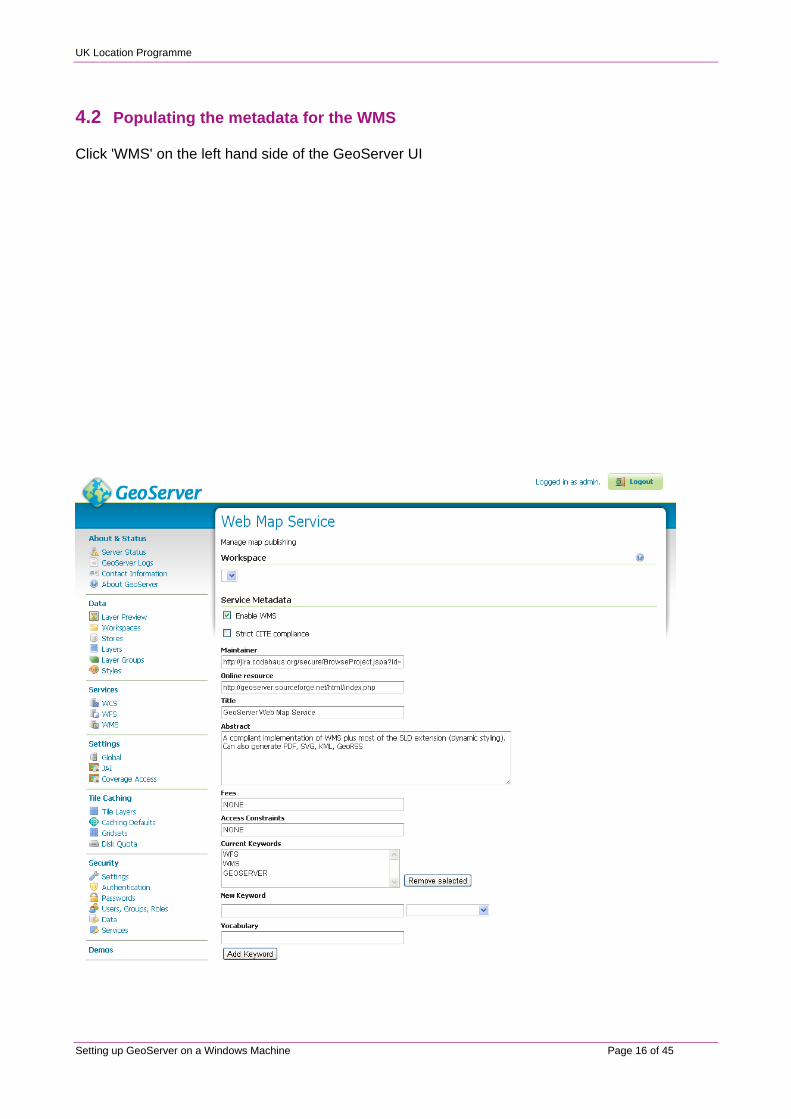
4.2 Populating the metadata for the WMS
Click 'WMS' on the left hand side of the GeoServer UI
Setting up GeoServer on a Windows Machine Page 16 of 45
UK Location Programme
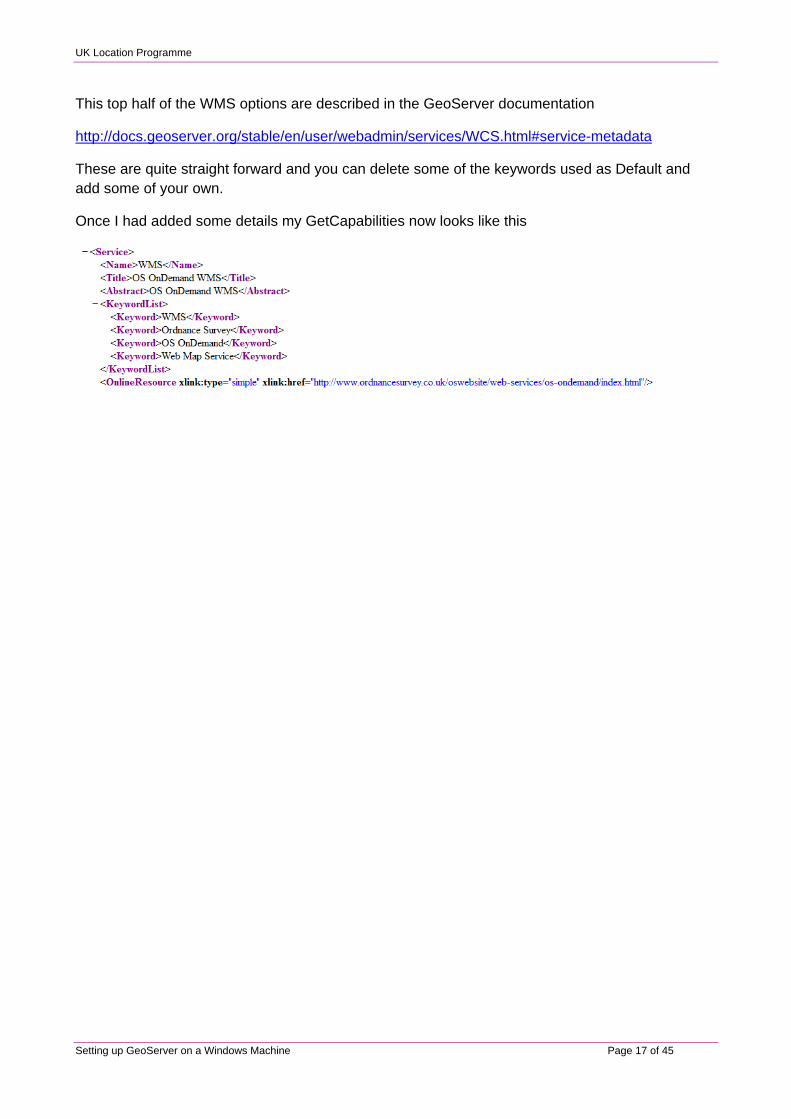
This top half of the WMS options are described in the GeoServer documentation
http://docs.geoserver.org/stable/en/user/webadmin/services/WCS.html#service-metadata
These are quite straight forward and you can delete some of the keywords used as Default and add some of your own.
Once I had added some details my GetCapabilities now looks like this
Setting up GeoServer on a Windows Machine Page 17 of 45
UK Location Programme
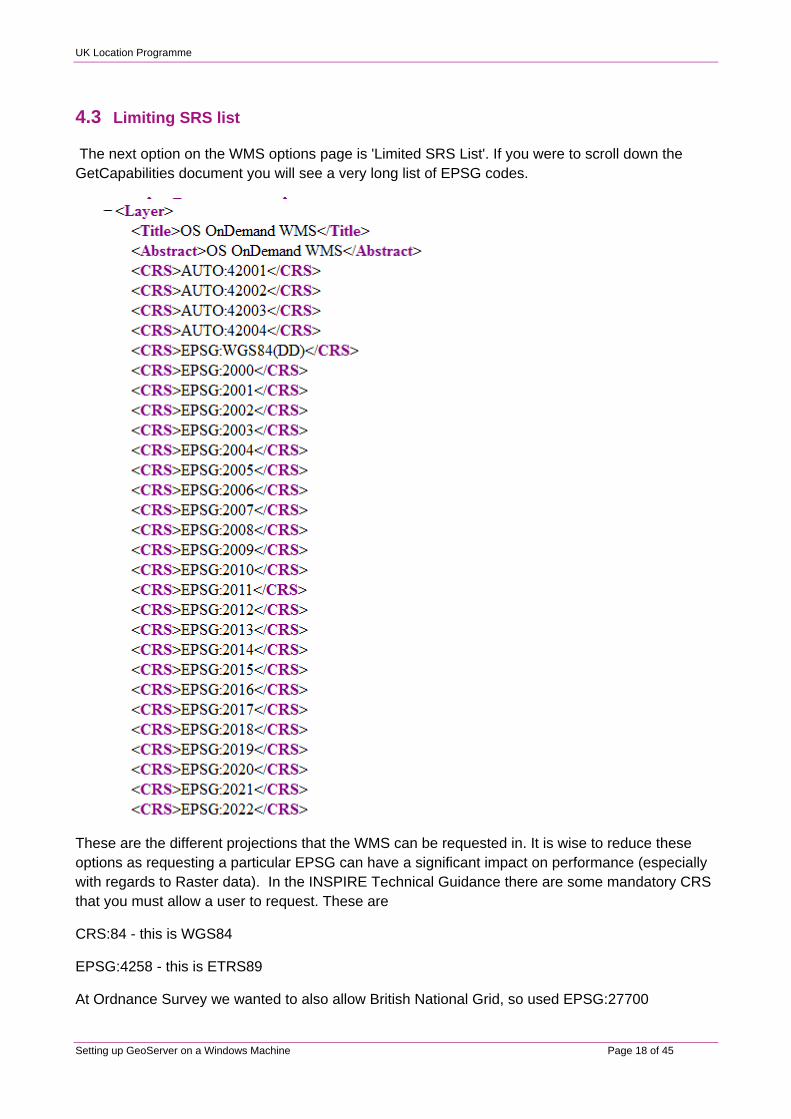
4.3 Limiting SRS list
The next option on the WMS options page is 'Limited SRS List'. If you were to scroll down the GetCapabilities document you will see a very long list of EPSG codes.
These are the different projections that the WMS can be requested in. It is wise to reduce these options as requesting a particular EPSG can have a significant impact on performance (especially with regards to Raster data). In the INSPIRE Technical Guidance there are some mandatory CRS that you must allow a user to request. These are
CRS:84 - this is WGS84
EPSG:4258 - this is ETRS89
At Ordnance Survey we wanted to also allow British National Grid, so used EPSG:27700
Setting up GeoServer on a Windows Machine Page 18 of 45
UK Location Programme
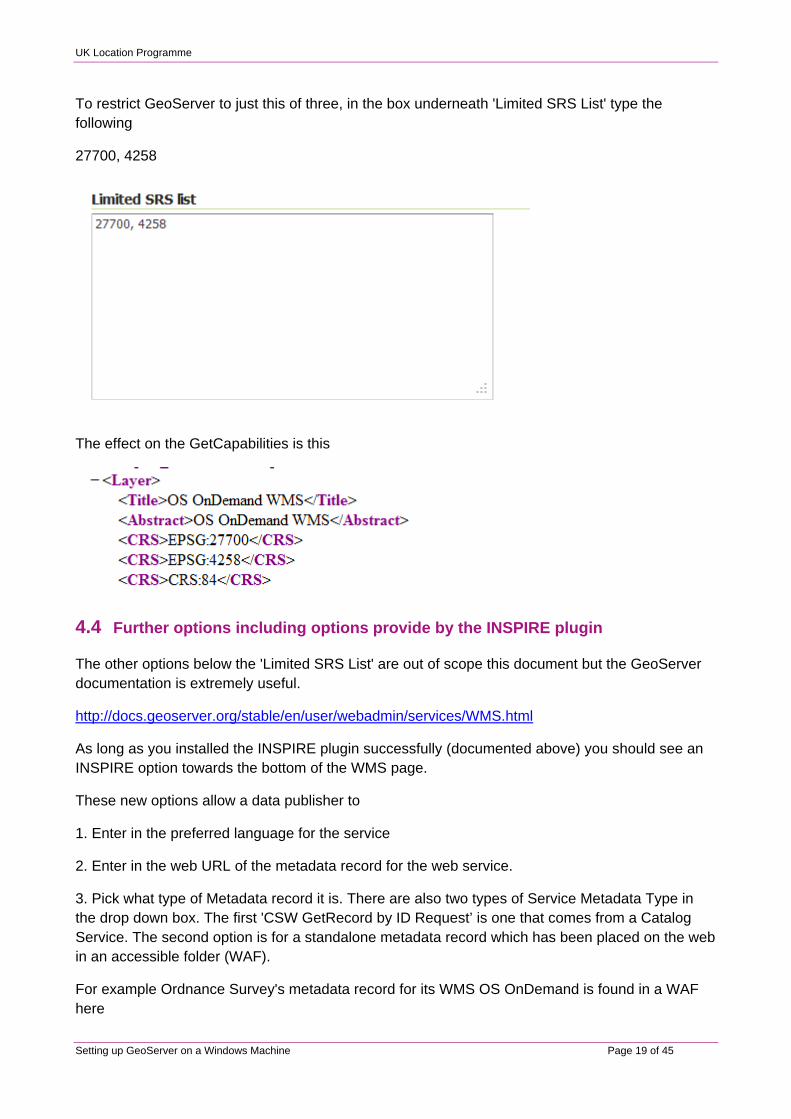
To restrict GeoServer to just this of three, in the box underneath 'Limited SRS List' type the following
27700, 4258
The effect on the GetCapabilities is this
4.4 Further options including options provide by the INSPIRE plugin
The other options below the 'Limited SRS List' are out of scope this document but the GeoServer documentation is extremely useful.
http://docs.geoserver.org/stable/en/user/webadmin/services/WMS.html
As long as you installed the INSPIRE plugin successfully (documented above) you should see an INSPIRE option towards the bottom of the WMS page.
These new options allow a data publisher to
1. Enter in the preferred language for the service
2. Enter in the web URL of the metadata record for the web service.
3. Pick what type of Metadata record it is. There are also two types of Service Metadata Type in the drop down box. The first 'CSW GetRecord by ID Request’ is one that comes from a Catalog Service. The second option is for a standalone metadata record which has been placed on the web in an accessible folder (WAF).
For example Ordnance Survey's metadata record for its WMS OS OnDemand is found in a WAF here
Setting up GeoServer on a Windows Machine Page 19 of 45
UK Location Programme
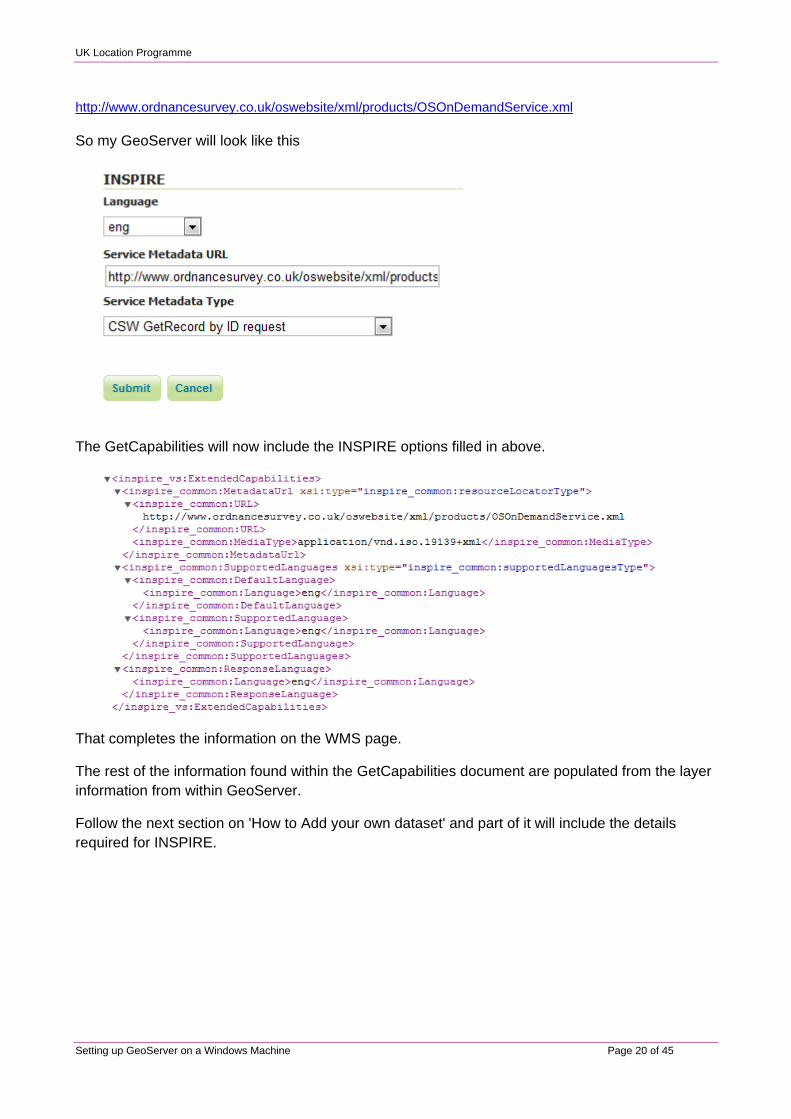
http://www.ordnancesurvey.co.uk/oswebsite/xml/products/OSOnDemandService.xml
So my GeoServer will look like this
The GetCapabilities will now include the INSPIRE options filled in above.
That completes the information on the WMS page.
The rest of the information found within the GetCapabilities document are populated from the layer information from within GeoServer.
Follow the next section on 'How to Add your own dataset' and part of it will include the details required for INSPIRE.
Setting up GeoServer on a Windows Machine Page 20 of 45
UK Location Programme
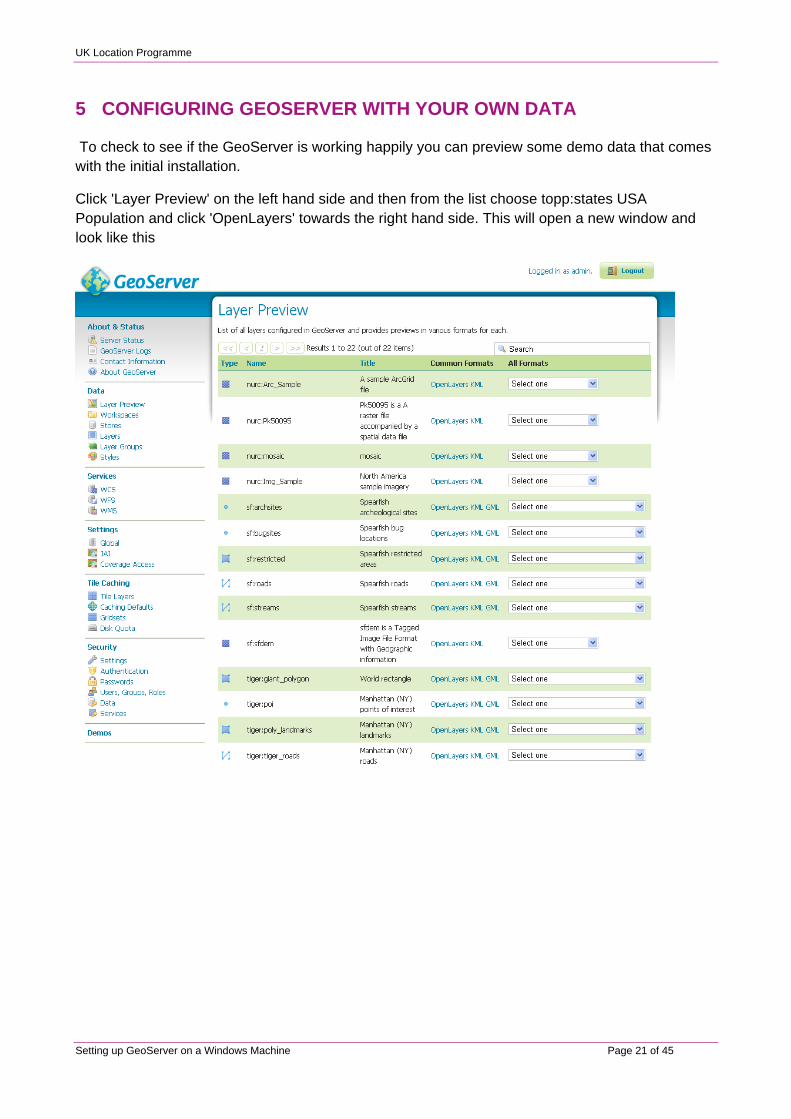
5 CONFIGURING GEOSERVER WITH YOUR OWN DATA
To check to see if the GeoServer is working happily you can preview some demo data that comes with the initial installation.
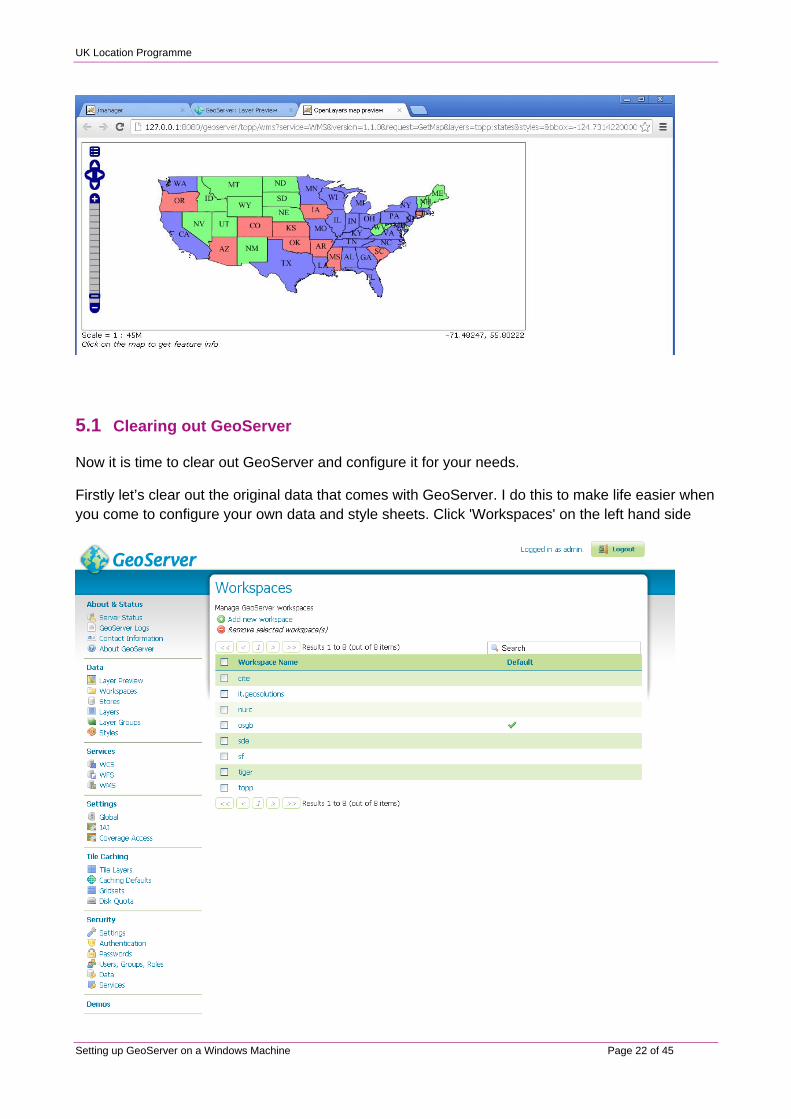
Click 'Layer Preview' on the left hand side and then from the list choose topp:states USA Population and click 'OpenLayers' towards the right hand side. This will open a new window and look like this
Setting up GeoServer on a Windows Machine Page 21 of 45
UK Location Programme
5.1 Clearing out GeoServer
Now it is time to clear out GeoServer and configure it for your needs.
Firstly let’s clear out the original data that comes with GeoServer. I do this to make life easier when you come to configure your own data and style sheets. Click 'Workspaces' on the left hand side
Setting up GeoServer on a Windows Machine Page 22 of 45
UK Location Programme
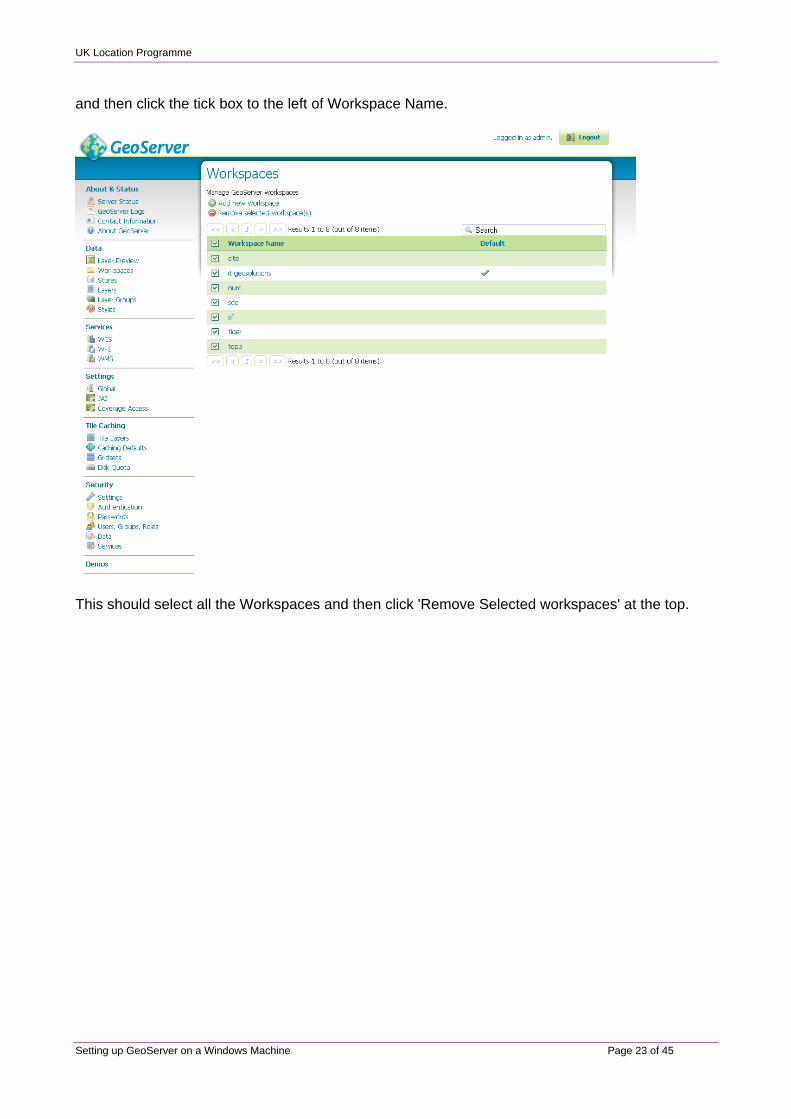
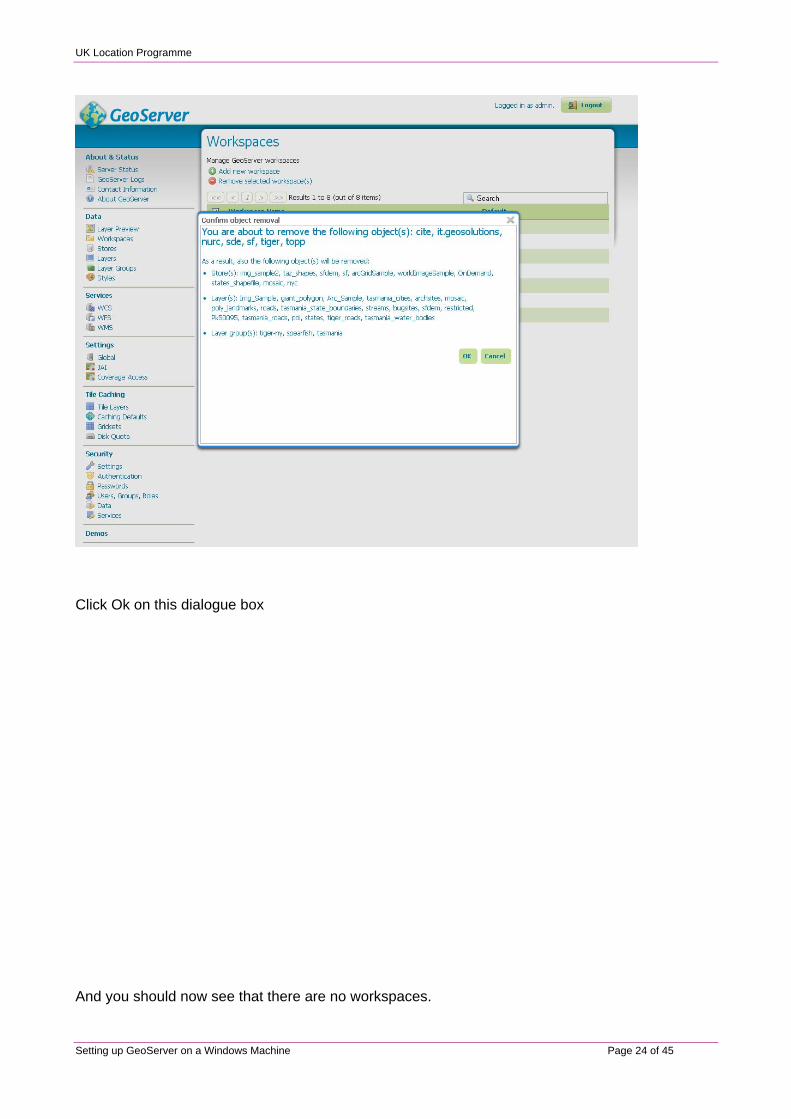
and then click the tick box to the left of Workspace Name.
This should select all the Workspaces and then click 'Remove Selected workspaces' at the top.
Setting up GeoServer on a Windows Machine Page 23 of 45
UK Location Programme
Click Ok on this dialogue box
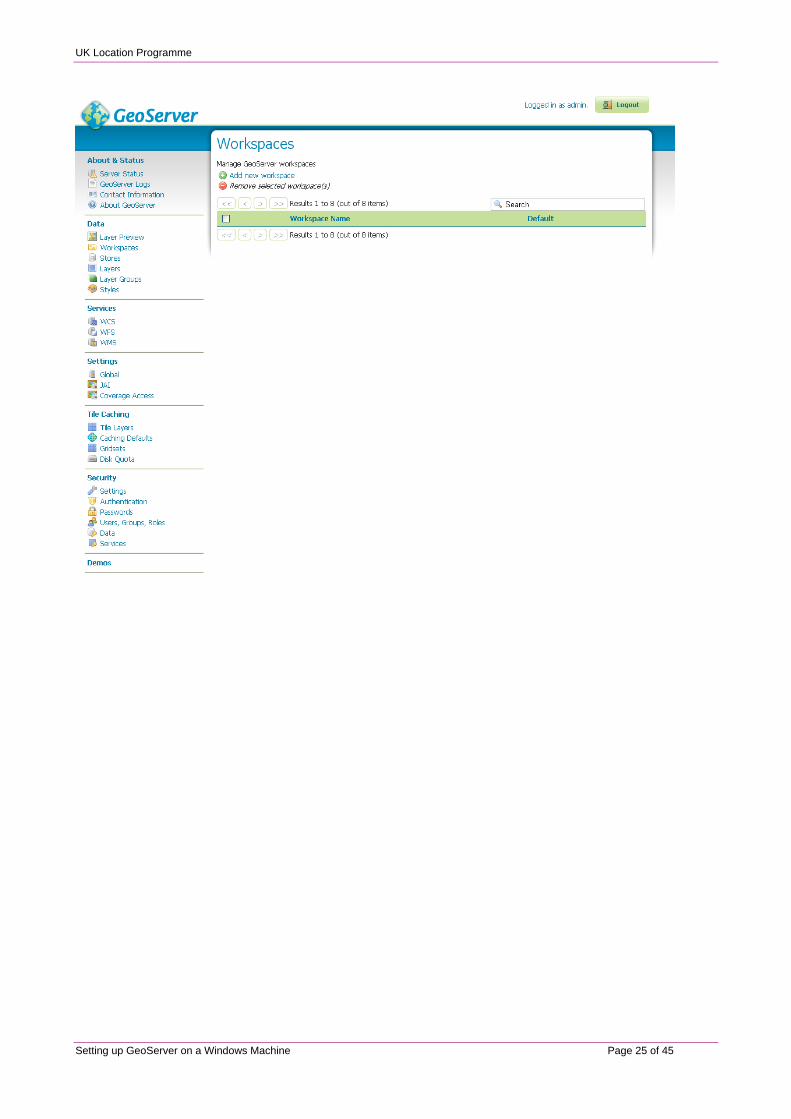
And you should now see that there are no workspaces.
Setting up GeoServer on a Windows Machine Page 24 of 45
UK Location Programme
Setting up GeoServer on a Windows Machine Page 25 of 45
UK Location Programme
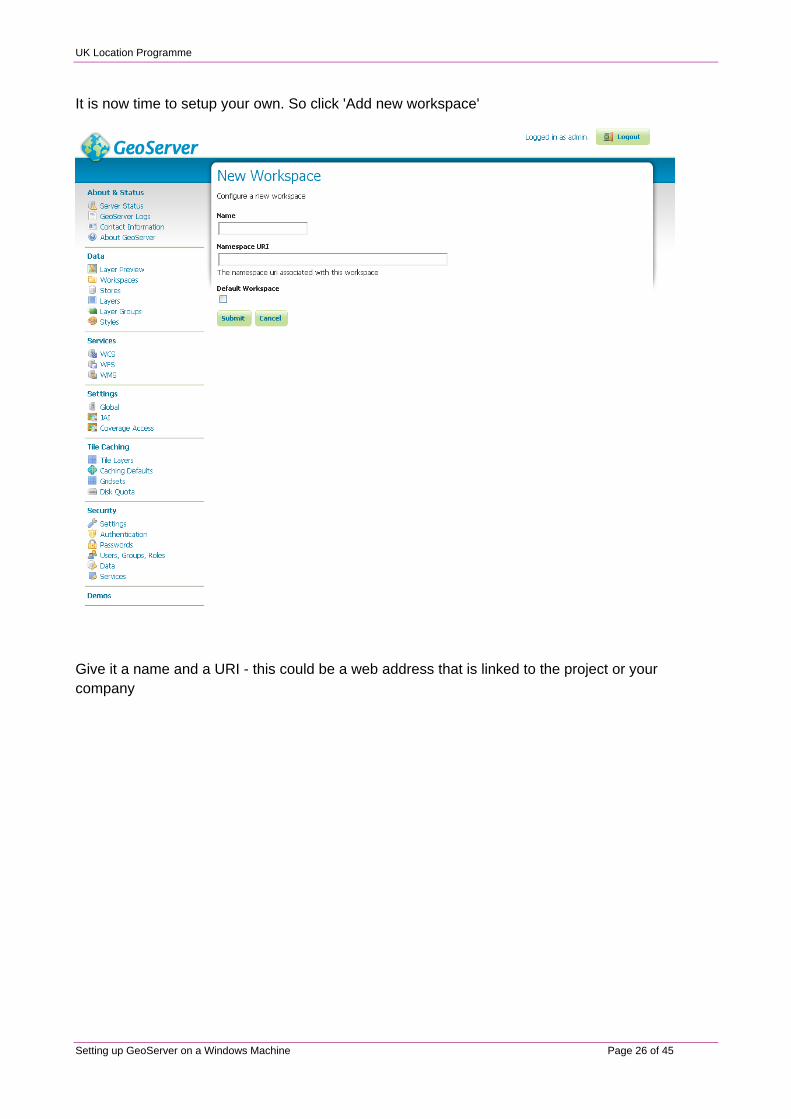
It is now time to setup your own. So click 'Add new workspace'
Give it a name and a URI - this could be a web address that is linked to the project or your company
Setting up GeoServer on a Windows Machine Page 26 of 45

UK Location Programme
And click ' Default Workspace'
Once you are happy click 'Submit'. This will now save your workspace.
Setting up GeoServer on a Windows Machine Page 27 of 45
UK Location Programme
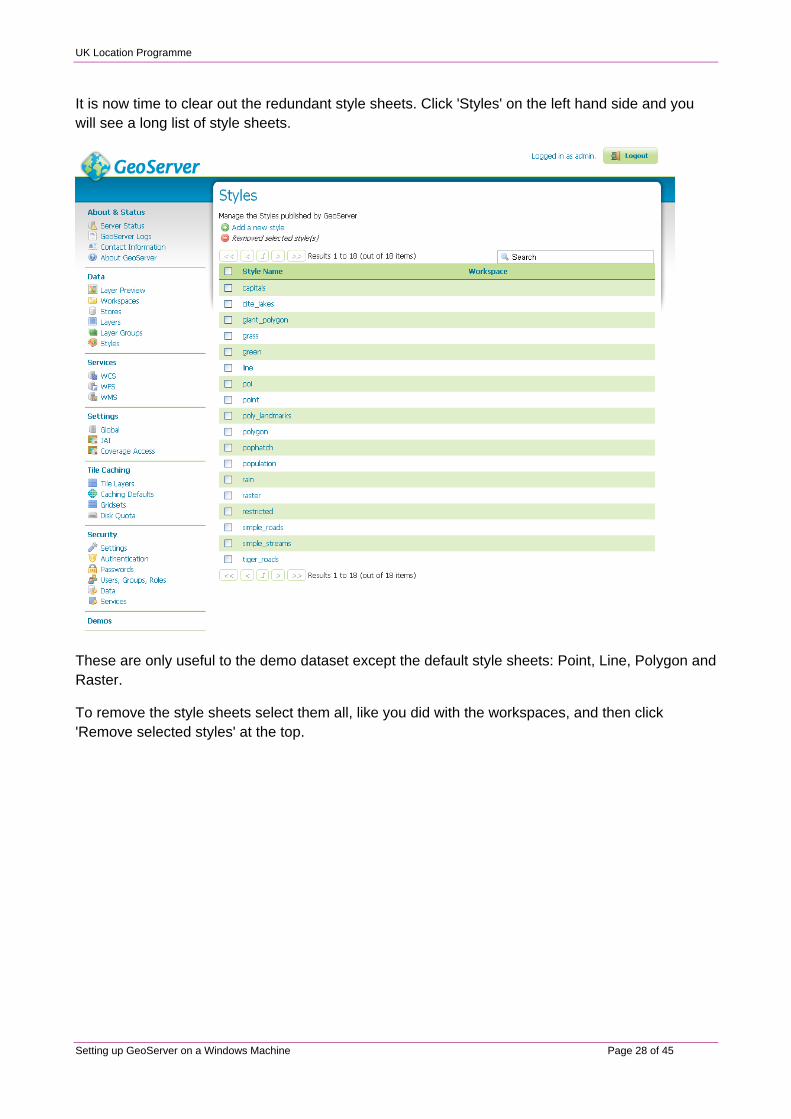
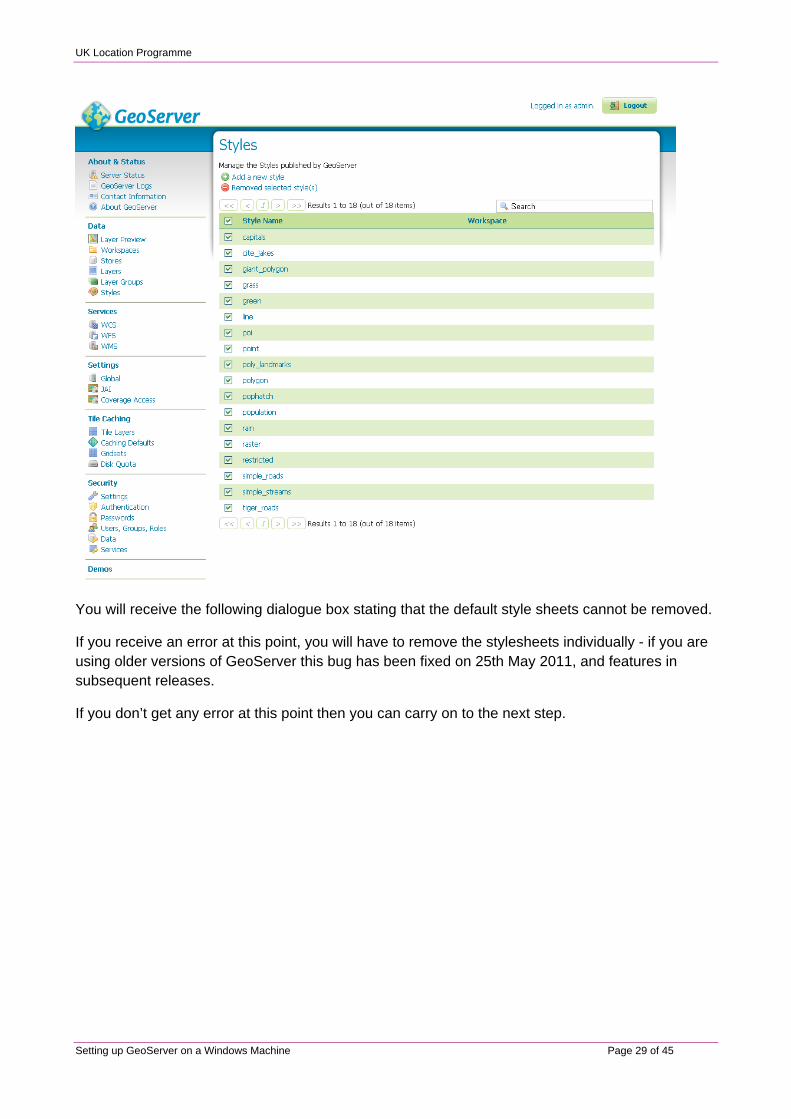
It is now time to clear out the redundant style sheets. Click 'Styles' on the left hand side and you will see a long list of style sheets.
These are only useful to the demo dataset except the default style sheets: Point, Line, Polygon and Raster.
To remove the style sheets select them all, like you did with the workspaces, and then click 'Remove selected styles' at the top.
Setting up GeoServer on a Windows Machine Page 28 of 45
UK Location Programme
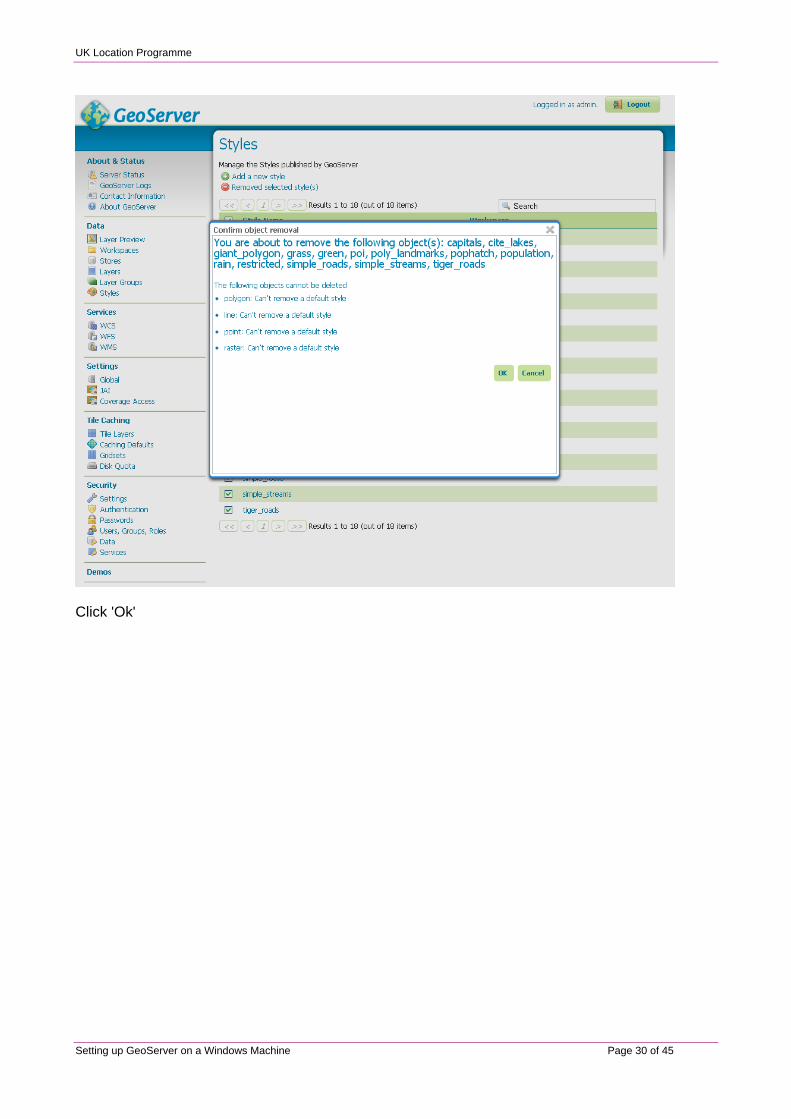
You will receive the following dialogue box stating that the default style sheets cannot be removed.
If you receive an error at this point, you will have to remove the stylesheets individually - if you are using older versions of GeoServer this bug has been fixed on 25th May 2011, and features in subsequent releases.
If you don’t get any error at this point then you can carry on to the next step.
Setting up GeoServer on a Windows Machine Page 29 of 45
UK Location Programme
Click 'Ok'
Setting up GeoServer on a Windows Machine Page 30 of 45
UK Location Programme
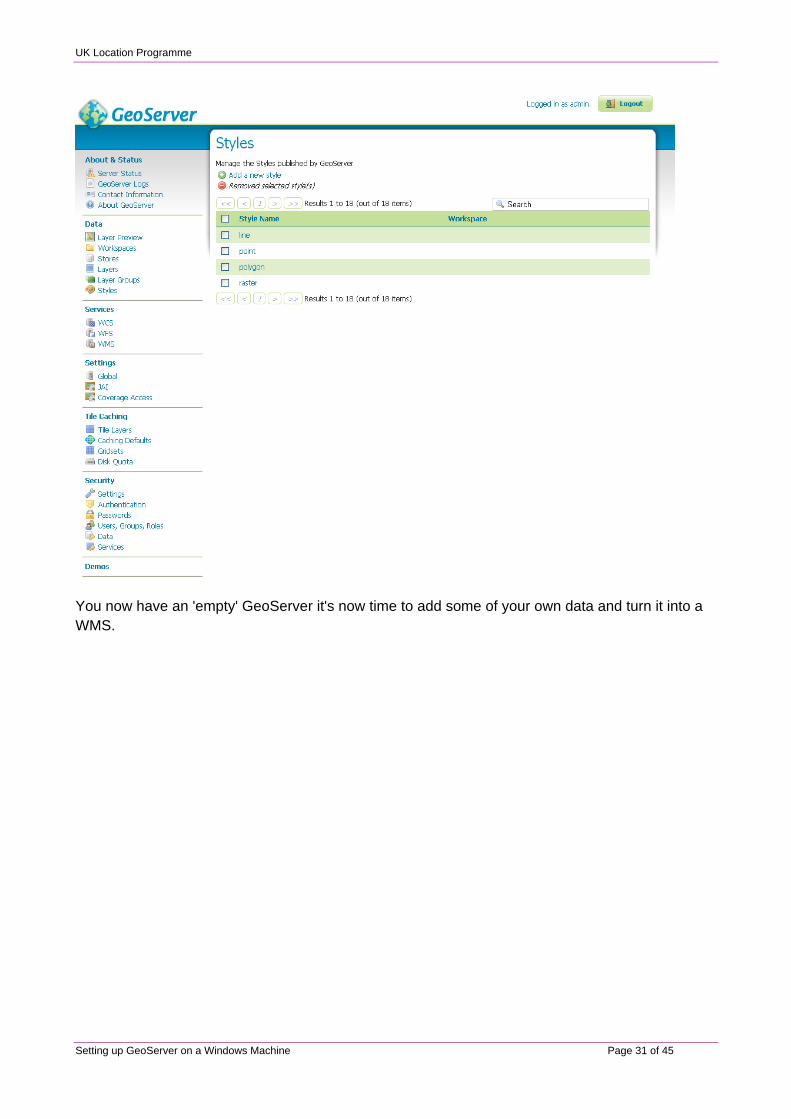
You now have an 'empty' GeoServer it's now time to add some of your own data and turn it into a WMS.
Setting up GeoServer on a Windows Machine Page 31 of 45
UK Location Programme
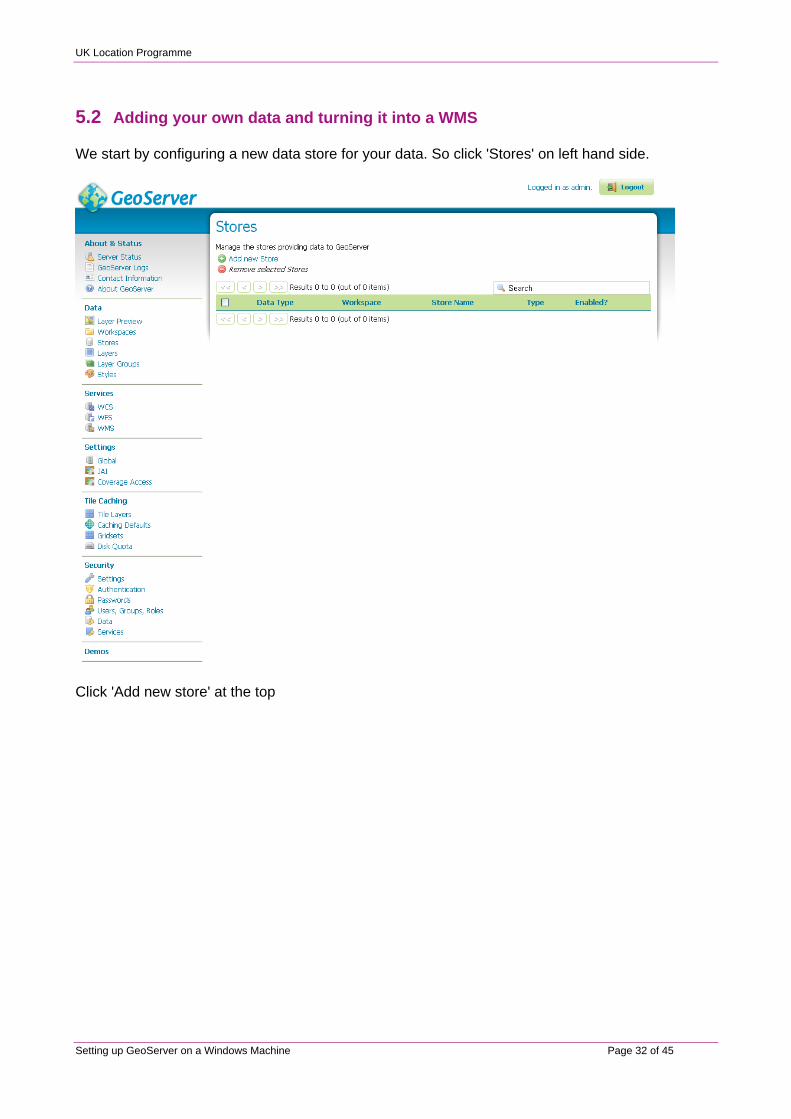
5.2 Adding your own data and turning it into a WMS
We start by configuring a new data store for your data. So click 'Stores' on left hand side.
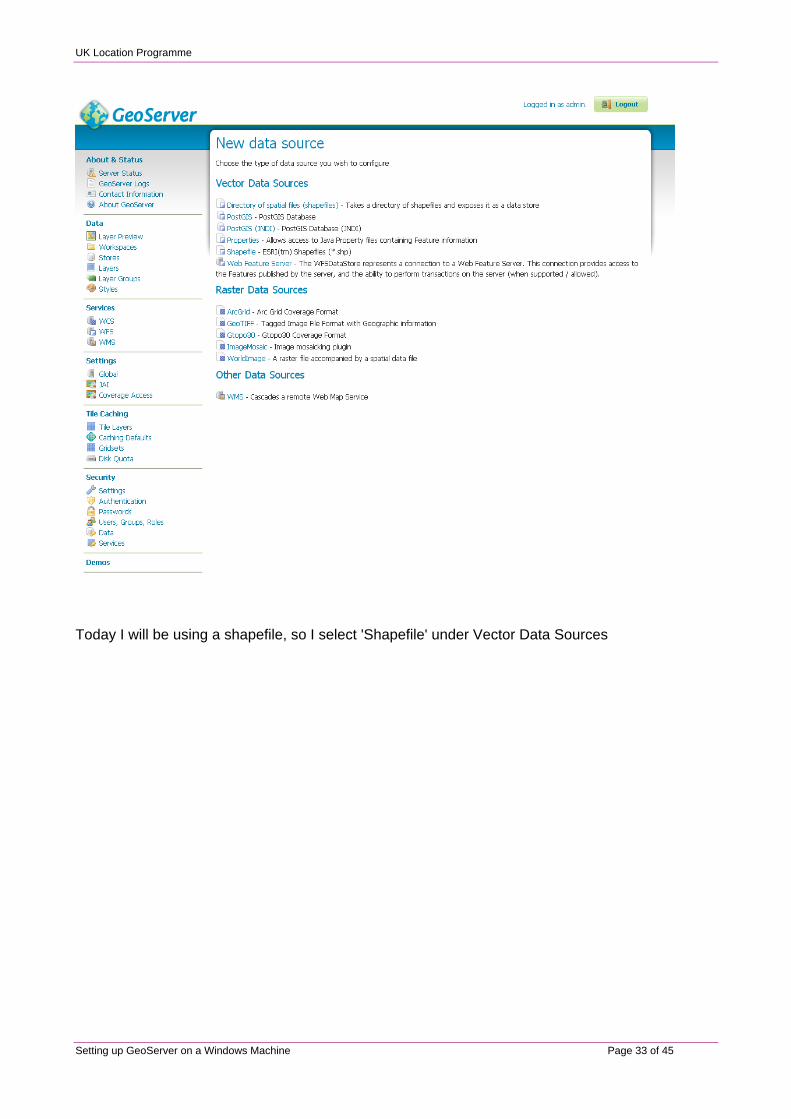
Click 'Add new store' at the top
Setting up GeoServer on a Windows Machine Page 32 of 45
UK Location Programme
Today I will be using a shapefile, so I select 'Shapefile' under Vector Data Sources
Setting up GeoServer on a Windows Machine Page 33 of 45
UK Location Programme
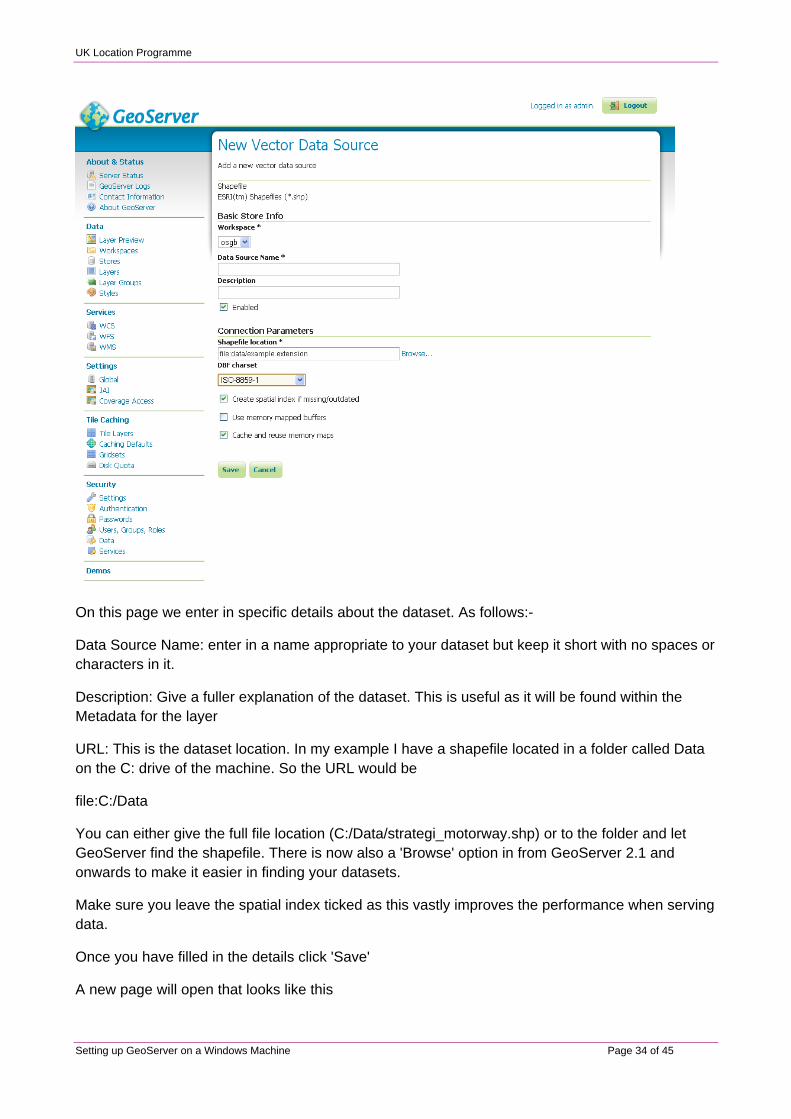
On this page we enter in specific details about the dataset. As follows:-
Data Source Name: enter in a name appropriate to your dataset but keep it short with no spaces or characters in it.
Description: Give a fuller explanation of the dataset. This is useful as it will be found within the Metadata for the layer
URL: This is the dataset location. In my example I have a shapefile located in a folder called Data on the C: drive of the machine. So the URL would be
file:C:/Data
You can either give the full file location (C:/Data/strategi_motorway.shp) or to the folder and let GeoServer find the shapefile. There is now also a 'Browse' option in from GeoServer 2.1 and onwards to make it easier in finding your datasets.
Make sure you leave the spatial index ticked as this vastly improves the performance when serving data.
Once you have filled in the details click 'Save'
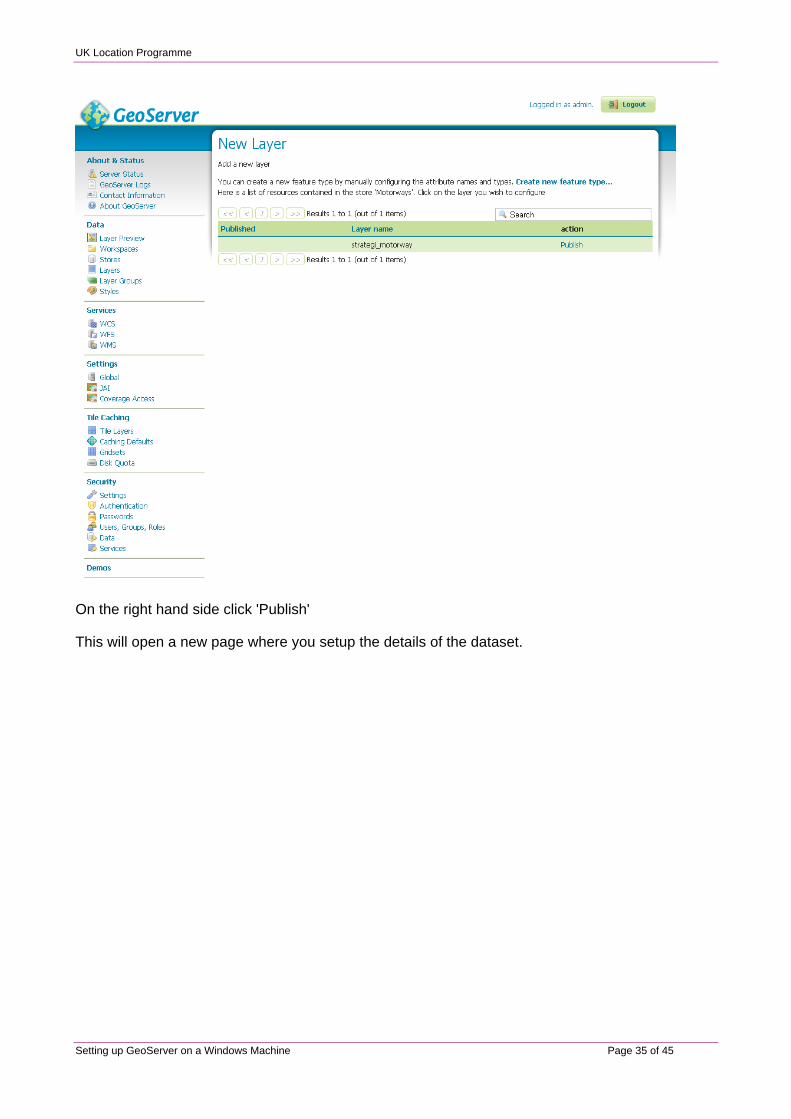
A new page will open that looks like this
Setting up GeoServer on a Windows Machine Page 34 of 45
UK Location Programme
On the right hand side click 'Publish'
This will open a new page where you setup the details of the dataset.
Setting up GeoServer on a Windows Machine Page 35 of 45
UK Location Programme
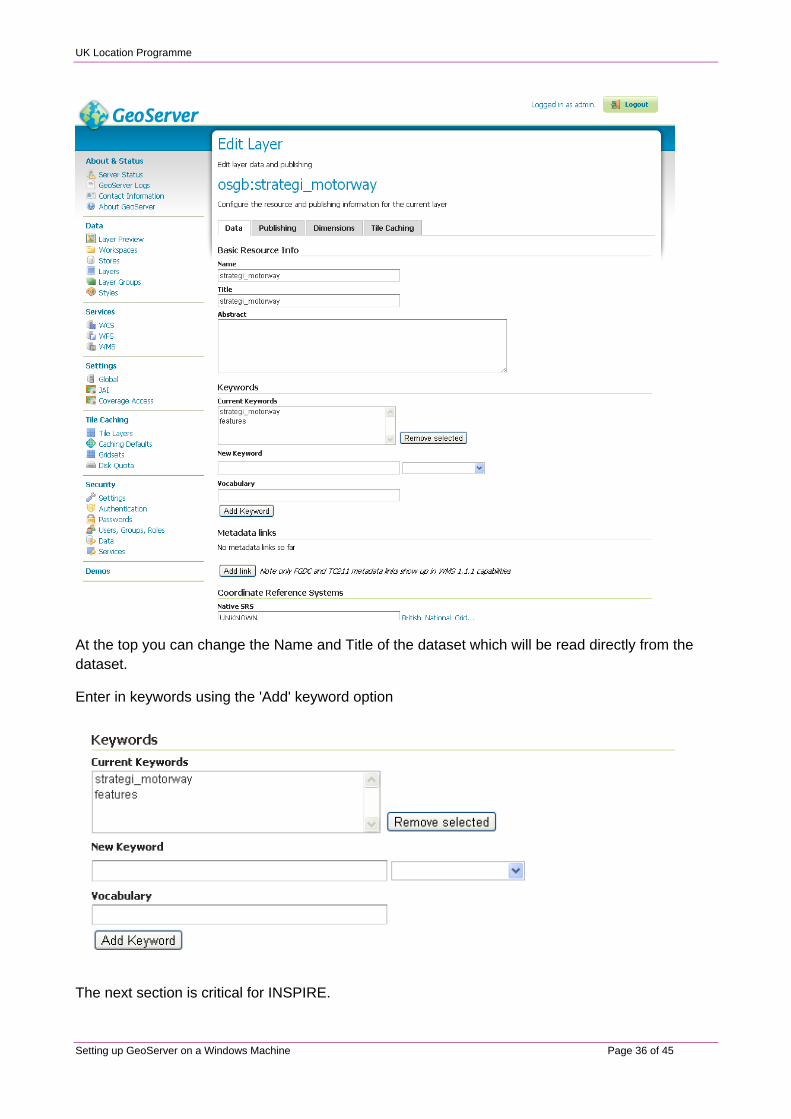
At the top you can change the Name and Title of the dataset which will be read directly from the dataset.
Enter in keywords using the 'Add' keyword option
The next section is critical for INSPIRE.
Setting up GeoServer on a Windows Machine Page 36 of 45
UK Location Programme
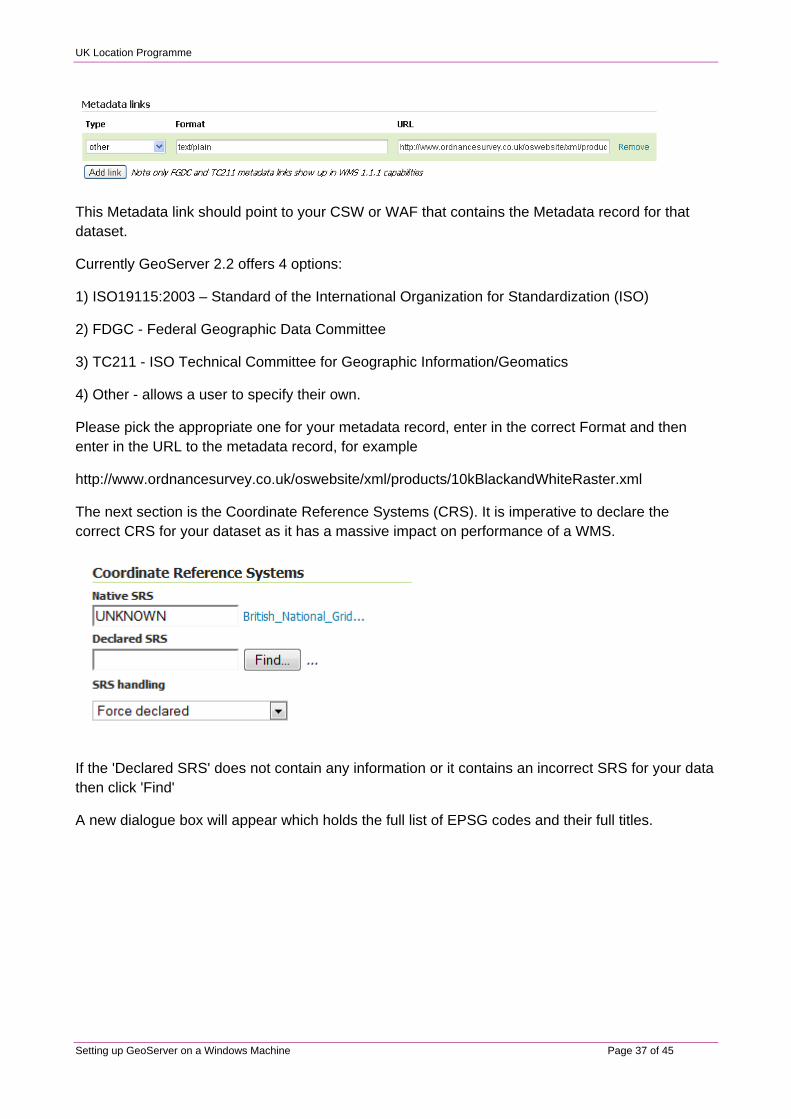
This Metadata link should point to your CSW or WAF that contains the Metadata record for that dataset.
Currently GeoServer 2.2 offers 4 options:
1) ISO19115:2003 – Standard of the International Organization for Standardization (ISO)
2) FDGC - Federal Geographic Data Committee
3) TC211 - ISO Technical Committee for Geographic Information/Geomatics
4) Other - allows a user to specify their own.
Please pick the appropriate one for your metadata record, enter in the correct Format and then enter in the URL to the metadata record, for example
http://www.ordnancesurvey.co.uk/oswebsite/xml/products/10kBlackandWhiteRaster.xml
The next section is the Coordinate Reference Systems (CRS). It is imperative to declare the correct CRS for your dataset as it has a massive impact on performance of a WMS.
If the 'Declared SRS' does not contain any information or it contains an incorrect SRS for your data then click 'Find'
A new dialogue box will appear which holds the full list of EPSG codes and their full titles.
Setting up GeoServer on a Windows Machine Page 37 of 45

UK Location Programme
In the search field in the top right hand corner, type in the EPSG code or the name of the coordinate system you want eg EPSG 27700 is British National Grid
Select your EPSG code by clicking on the number code on the left hand side.
You should now see the Declared SRS have your EPSG code.
Underneath the CRS section is Bounding Boxes. We need to tell GeoServer the specific bounding box for the data in its native coordinate system. You can do this is one of two ways:-
1) Get GeoServer to do it for you by clicking 'Compute from Data' or
Setting up GeoServer on a Windows Machine Page 38 of 45
UK Location Programme
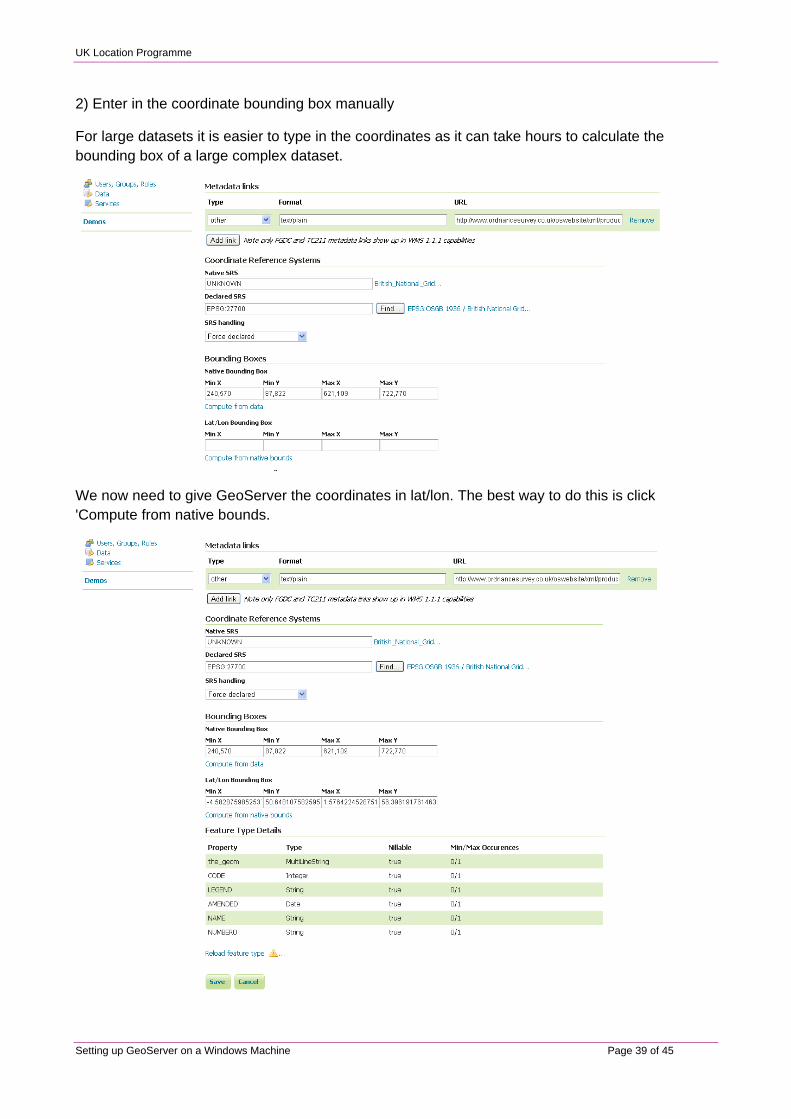
2) Enter in the coordinate bounding box manually
For large datasets it is easier to type in the coordinates as it can take hours to calculate the bounding box of a large complex dataset.
We now need to give GeoServer the coordinates in lat/lon. The best way to do this is click 'Compute from native bounds.
Setting up GeoServer on a Windows Machine Page 39 of 45
UK Location Programme
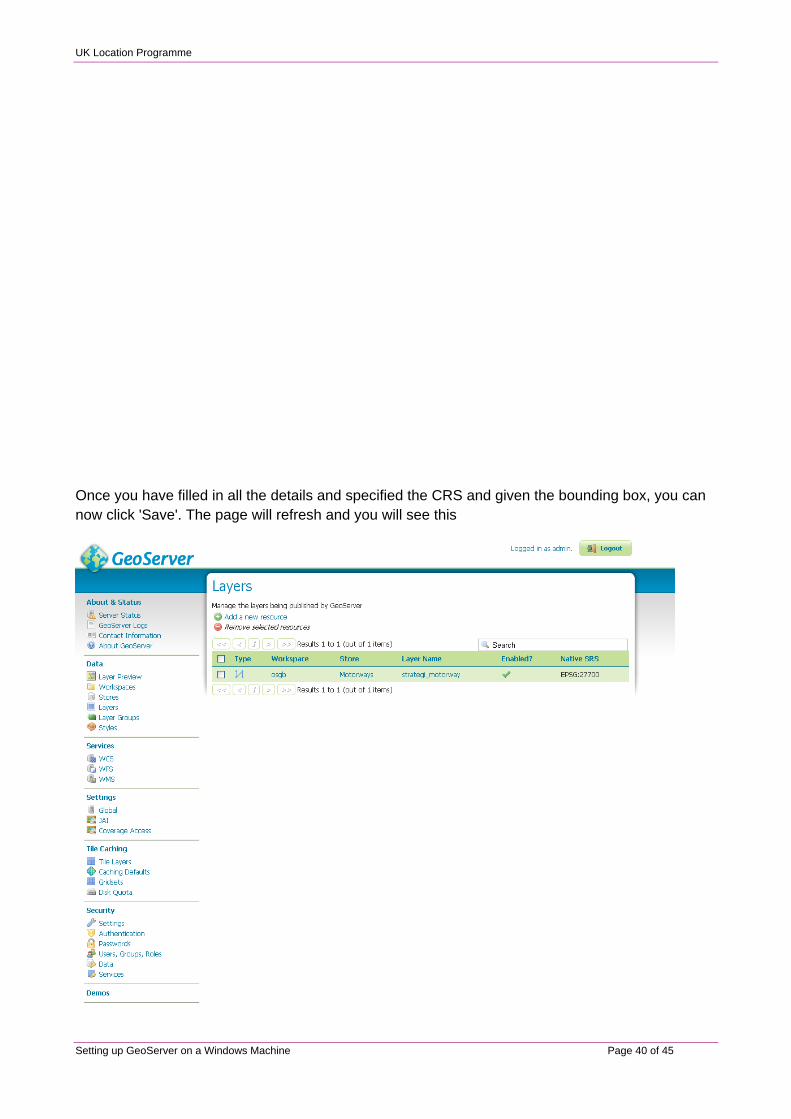
Once you have filled in all the details and specified the CRS and given the bounding box, you can now click 'Save'. The page will refresh and you will see this
Setting up GeoServer on a Windows Machine Page 40 of 45
UK Location Programme
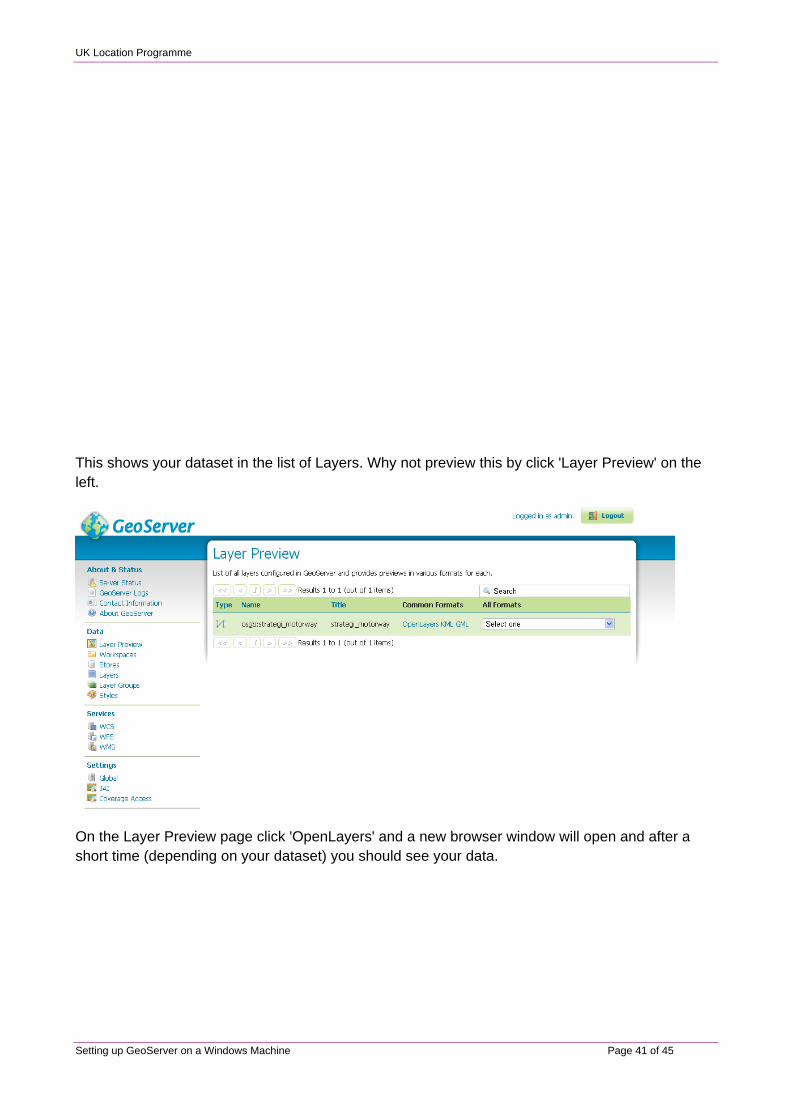
This shows your dataset in the list of Layers. Why not preview this by click 'Layer Preview' on the left.
On the Layer Preview page click 'OpenLayers' and a new browser window will open and after a short time (depending on your dataset) you should see your data.
Setting up GeoServer on a Windows Machine Page 41 of 45

UK Location Programme
Congratulations if you see your dataset, you have successfully configured and setup GeoServer to serve your dataset as a WMS.
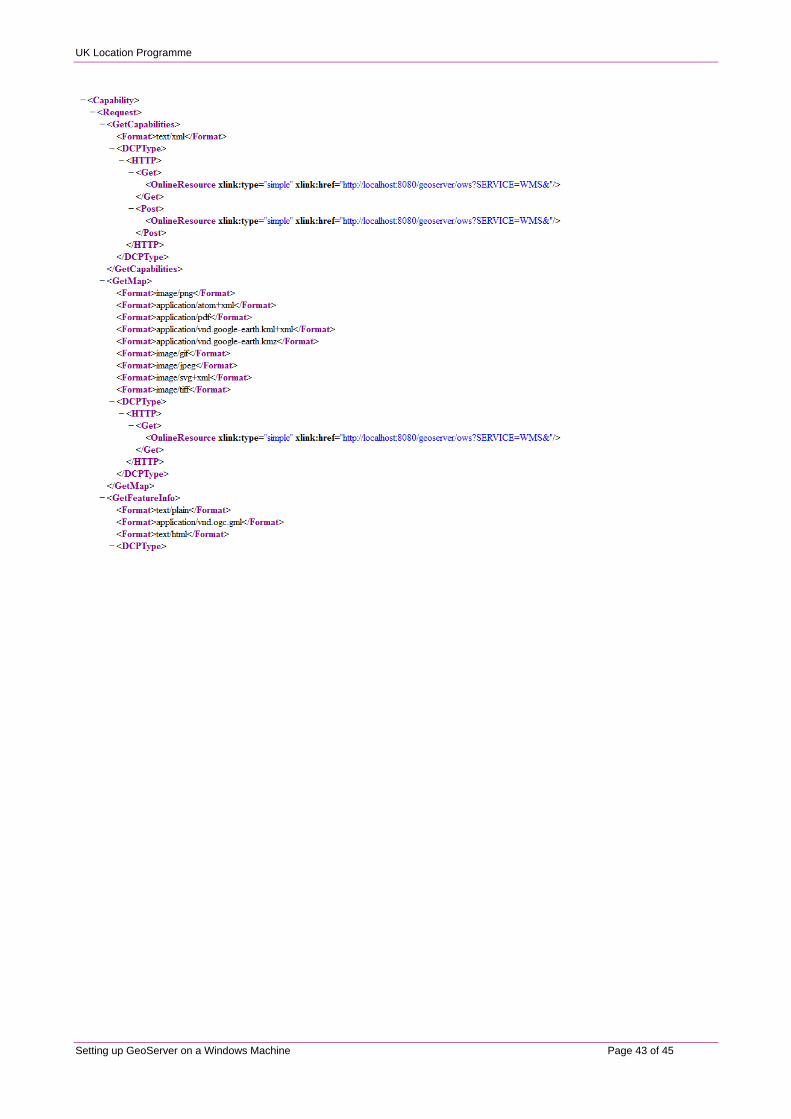
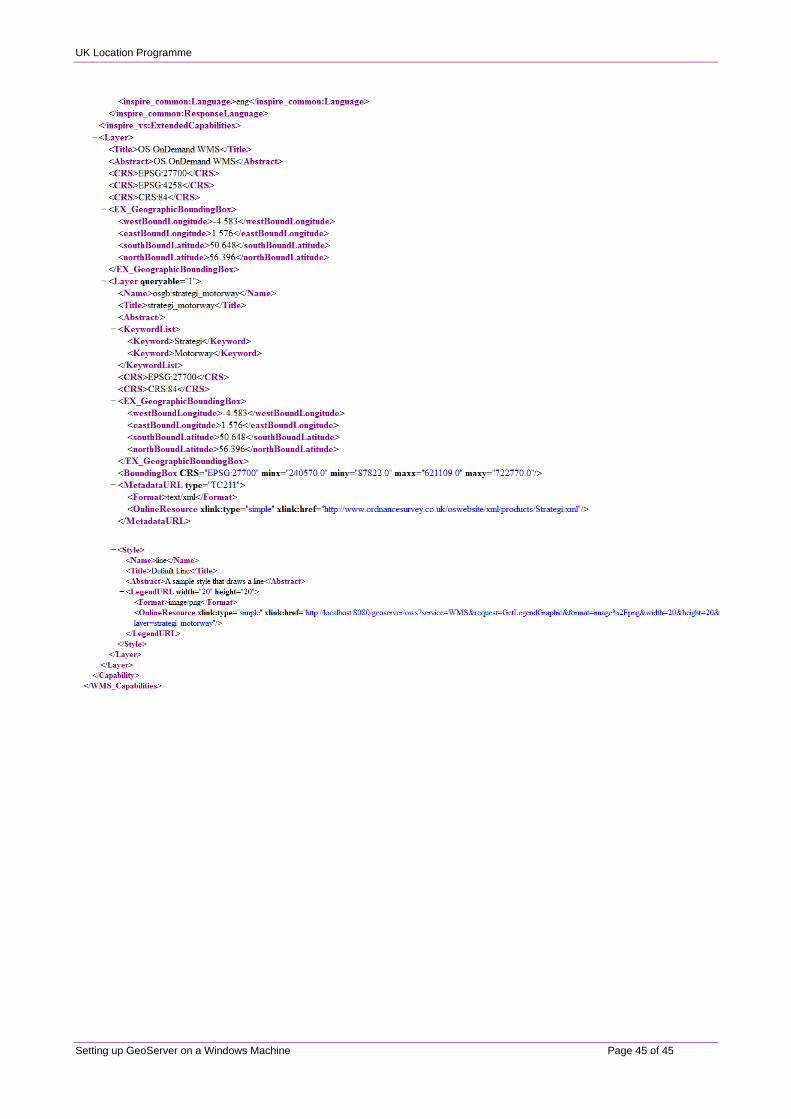
Once you have filled in all of those details the GetCapabilities document should now look like this
Setting up GeoServer on a Windows Machine Page 42 of 45
UK Location Programme
Setting up GeoServer on a Windows Machine Page 43 of 45

UK Location Programme
Setting up GeoServer on a Windows Machine Page 44 of 45
UK Location Programme
Setting up GeoServer on a Windows Machine Page 45 of 45