Embed Size (px)
Citation preview
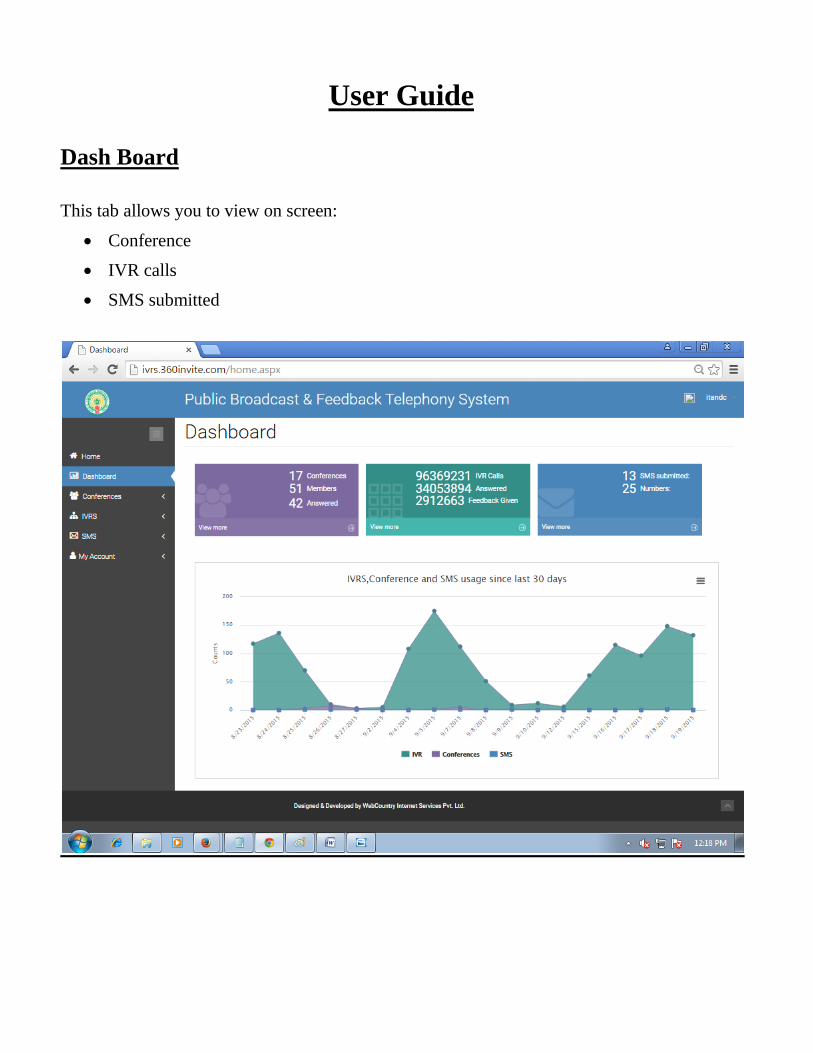
User Guide
Dash Board
This tab allows you to view on screen:
Conference
IVR calls
SMS submitted
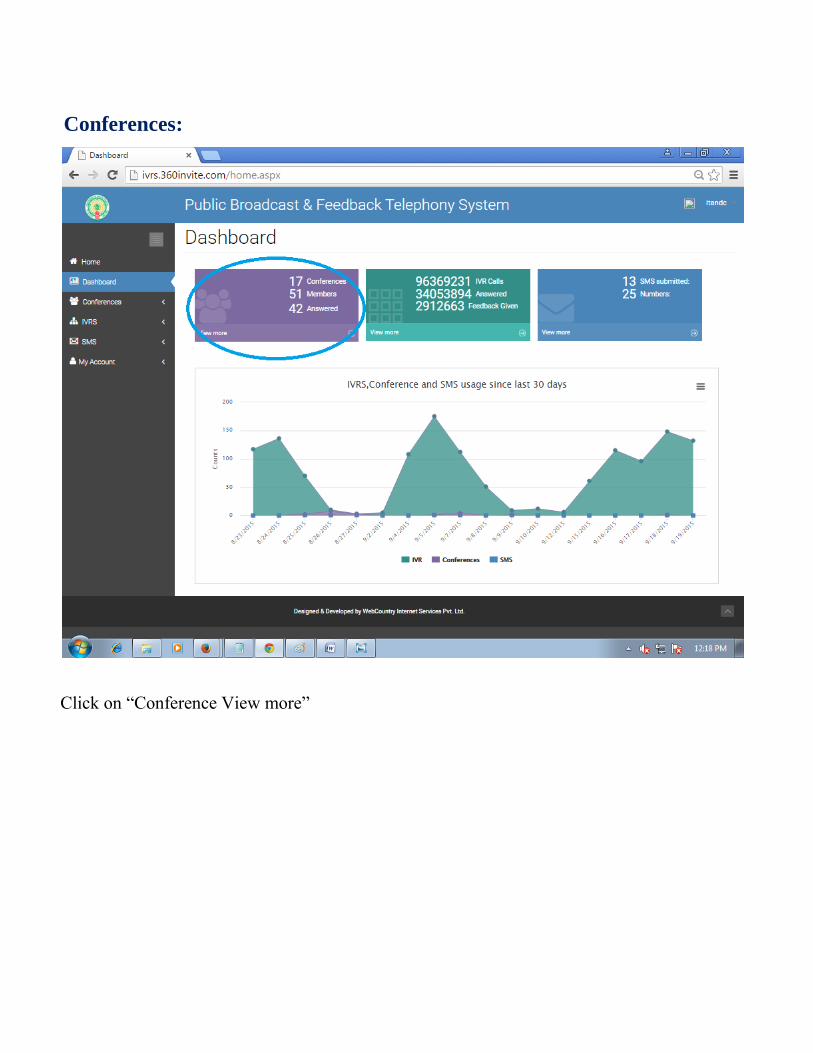
Conferences:
Click on “Conference View more”

Here we can see Total conferences count report

1. Select Date Range: When you click on Select Date Range, you can see all the listed
conferences count as per date
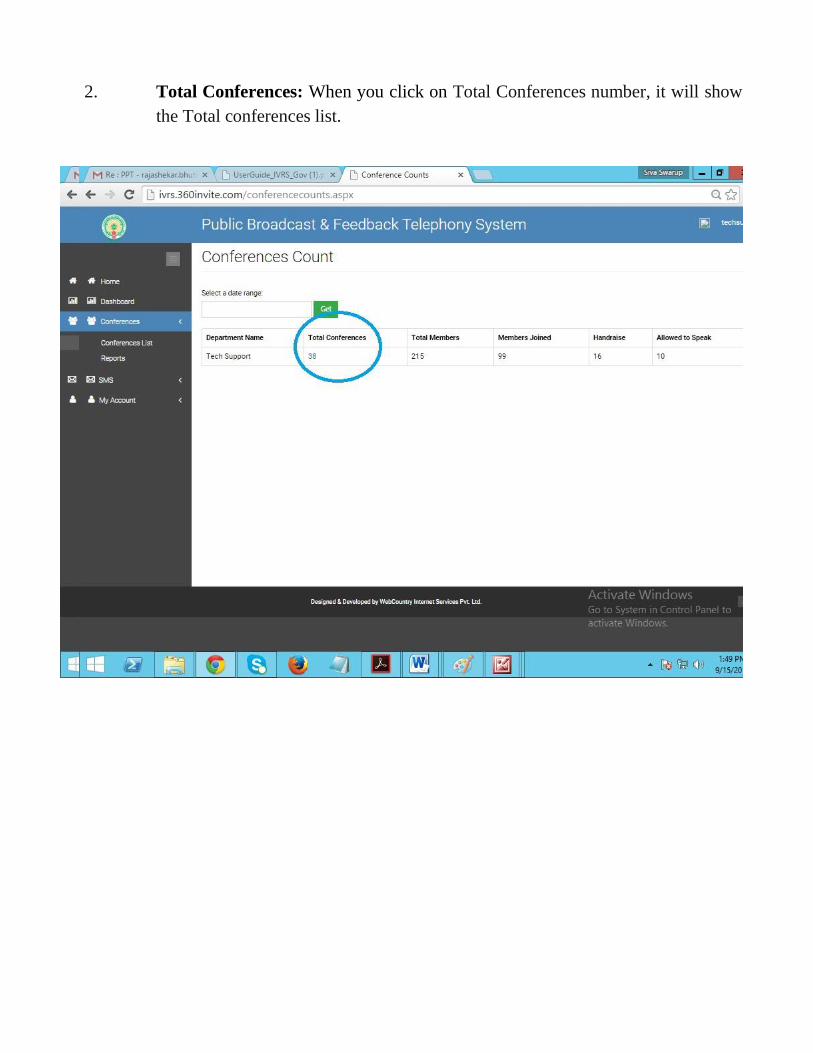
2. Total Conferences: When you click on Total Conferences number, it will show
the Total conferences list.
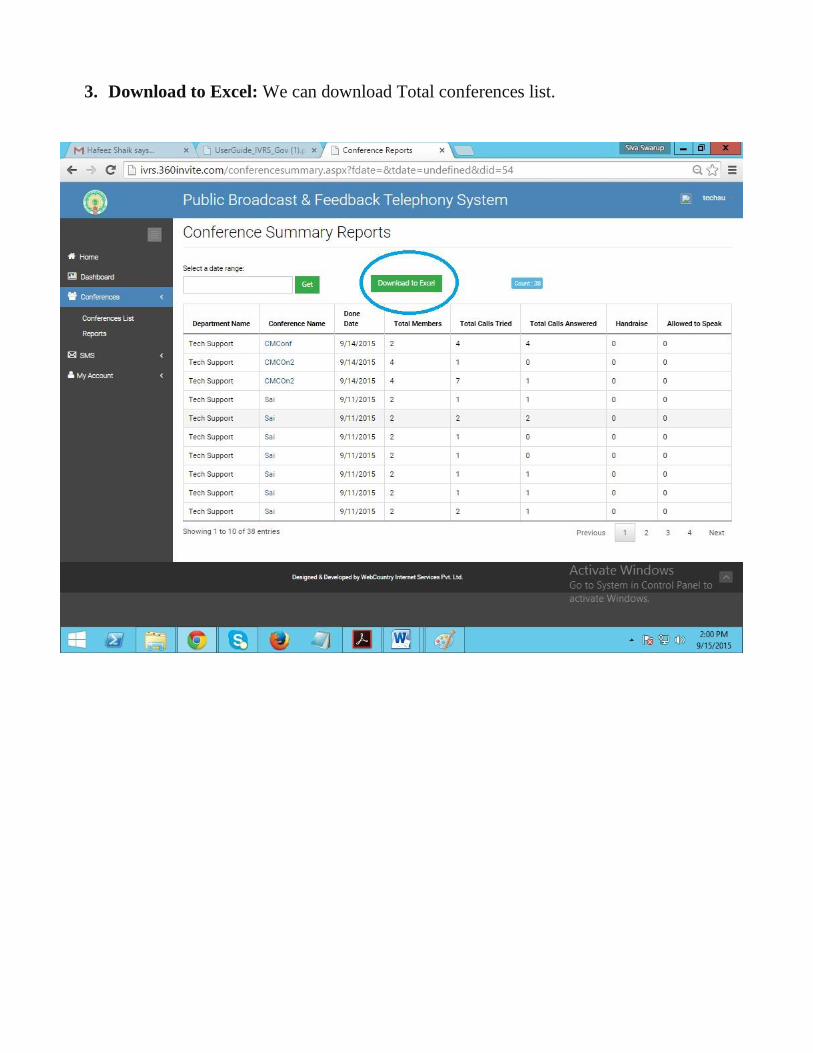
3. Download to Excel: We can download Total conferences list.
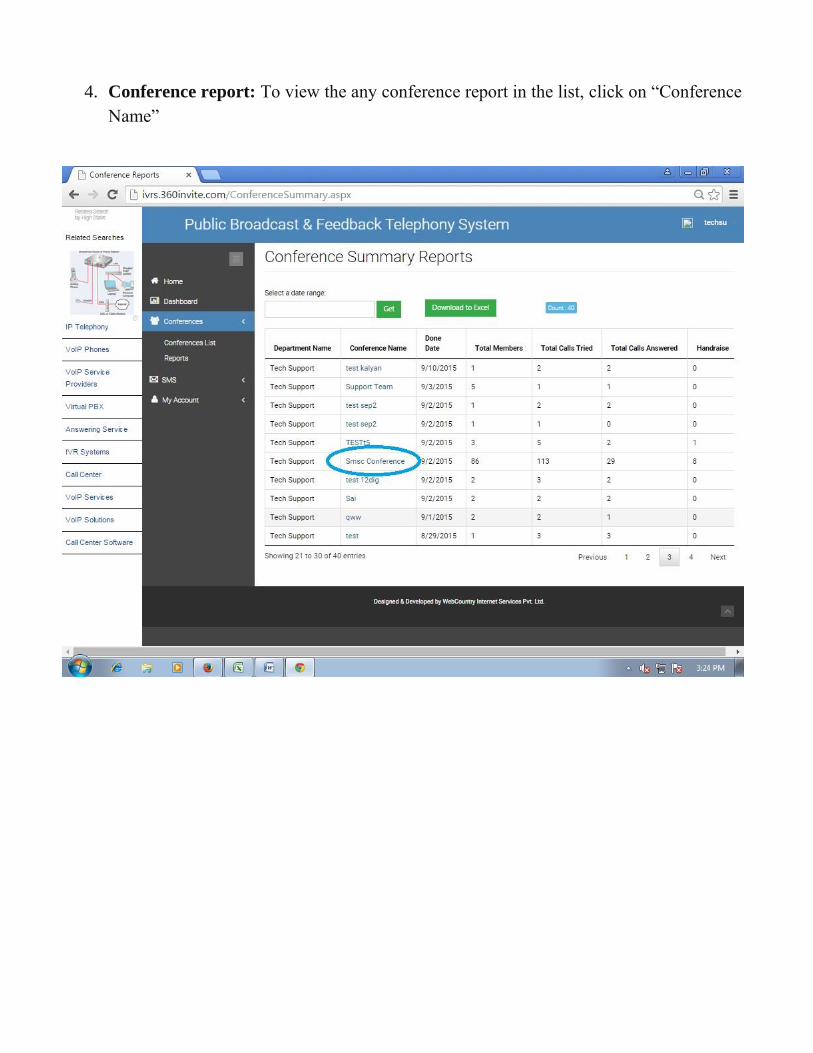
4. Conference report: To view the any conference report in the list, click on “Conference
Name”
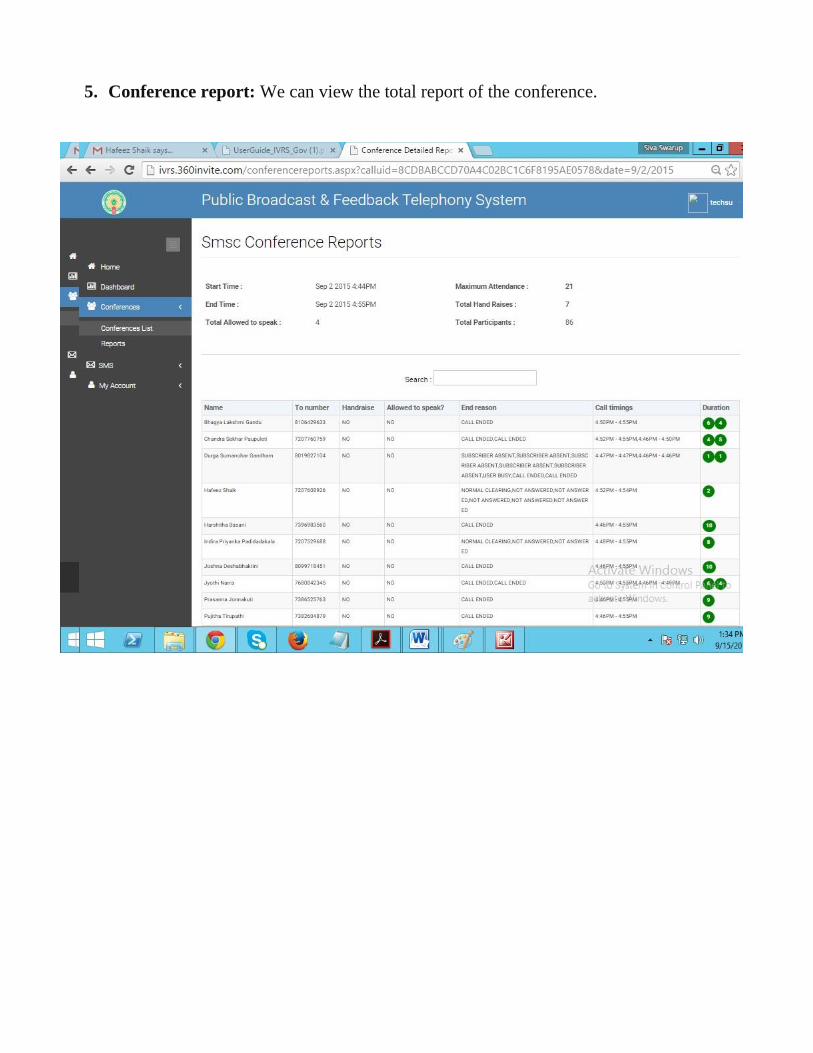
5. Conference report: We can view the total report of the conference.

IVR calls:
Click on “IVR Calls View more”
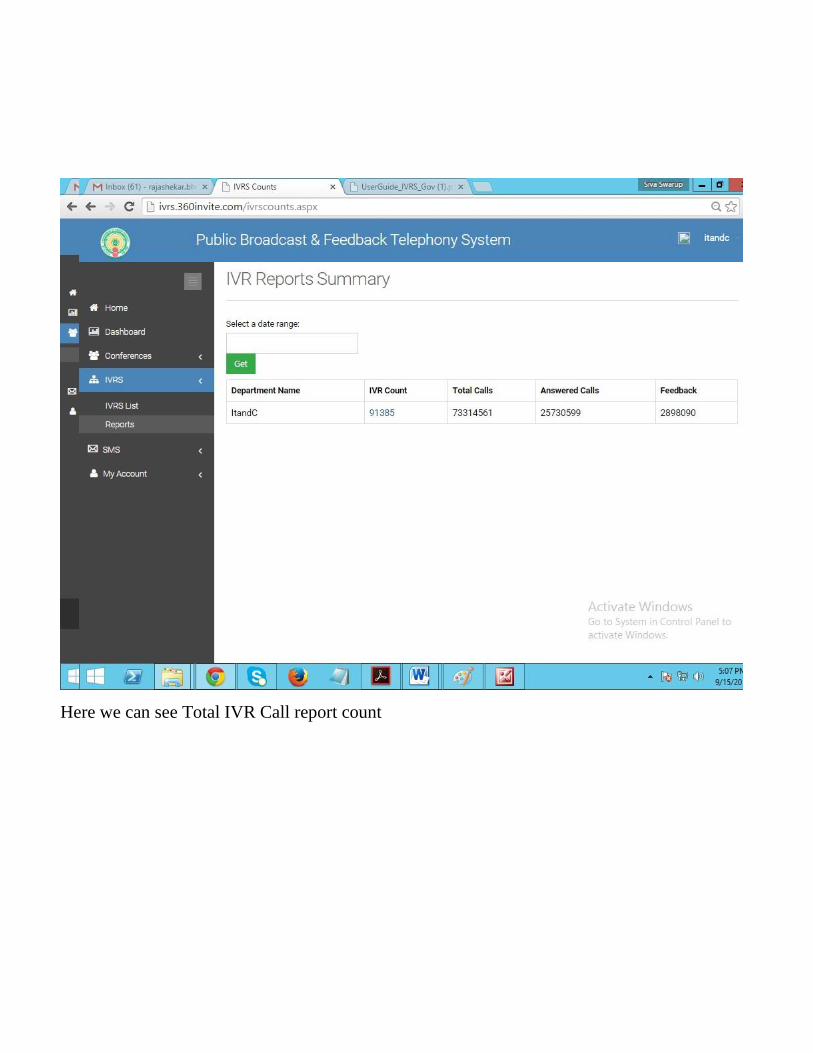
Here we can see Total IVR Call report count
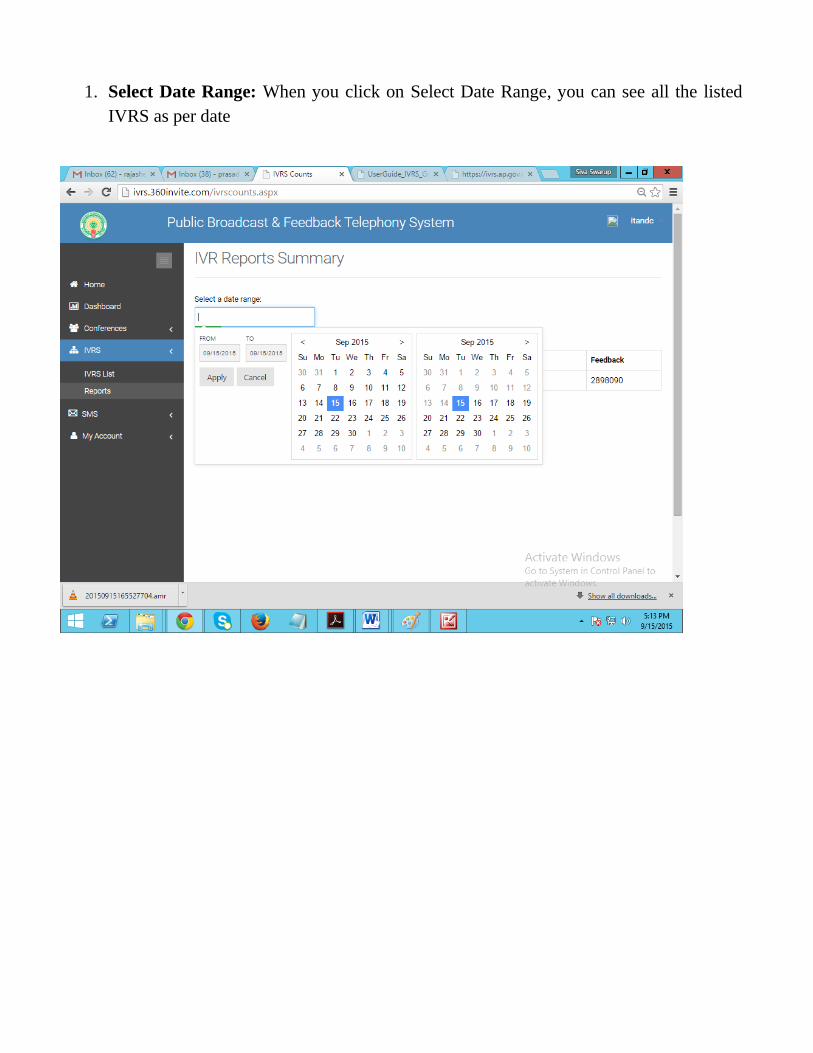
1. Select Date Range: When you click on Select Date Range, you can see all the listed
IVRS as per date
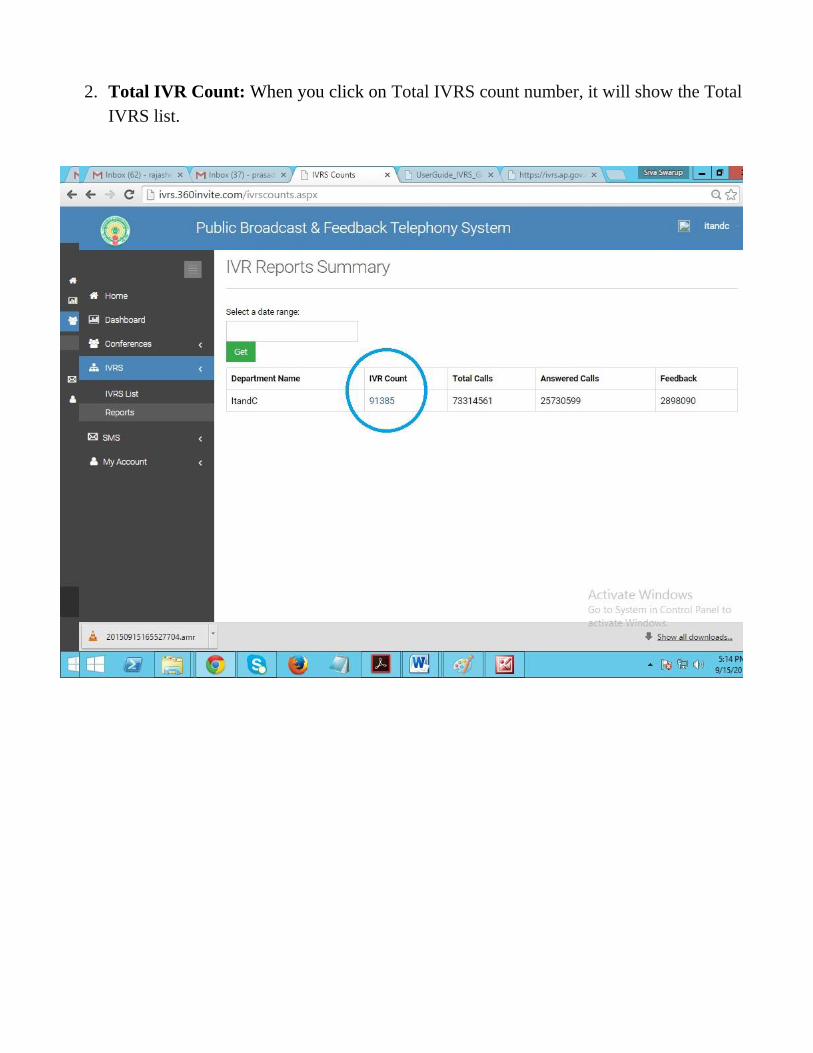
2. Total IVR Count: When you click on Total IVRS count number, it will show the Total
IVRS list.
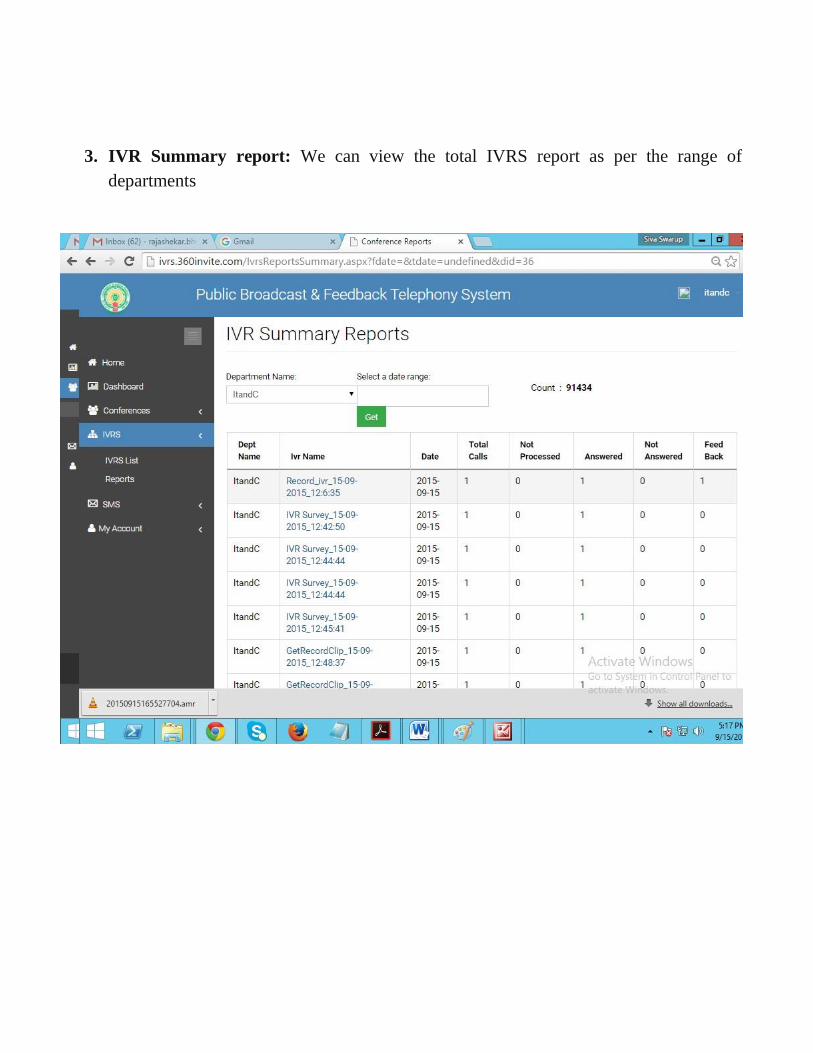
3. IVR Summary report: We can view the total IVRS report as per the range of
departments
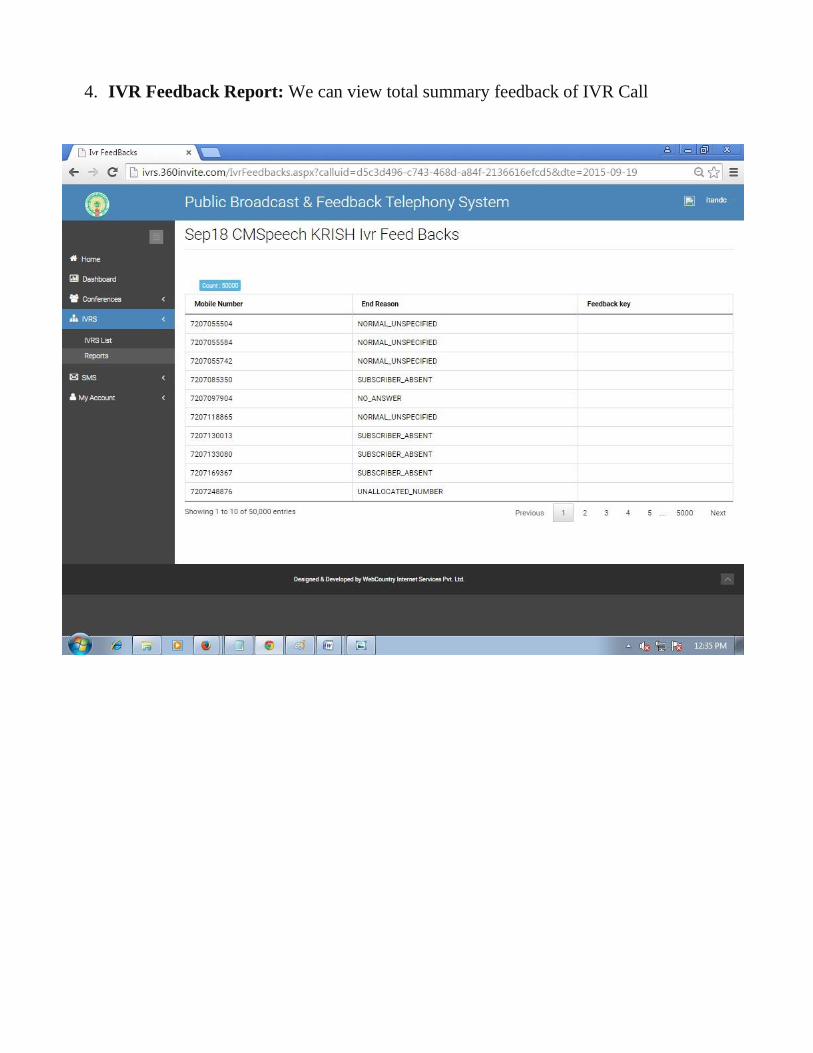
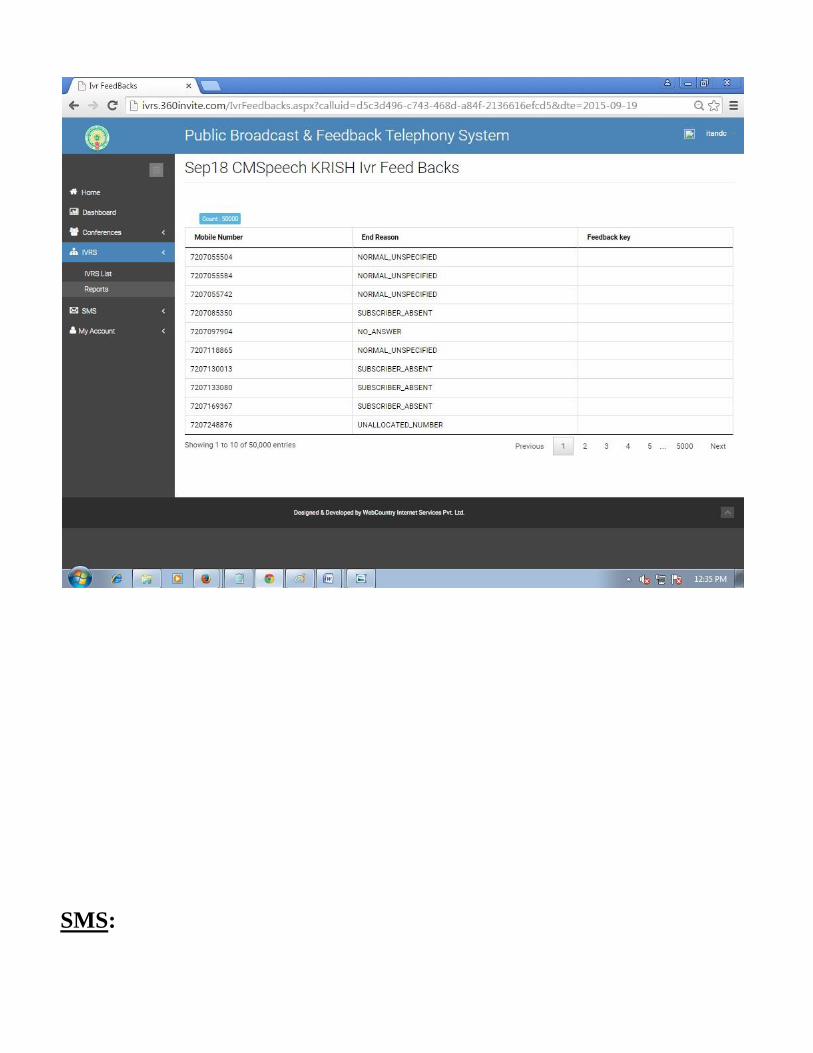
4. IVR Feedback Report: We can view total summary feedback of IVR Call

SMS Submitted:
Click on “SMS Submitted View more”
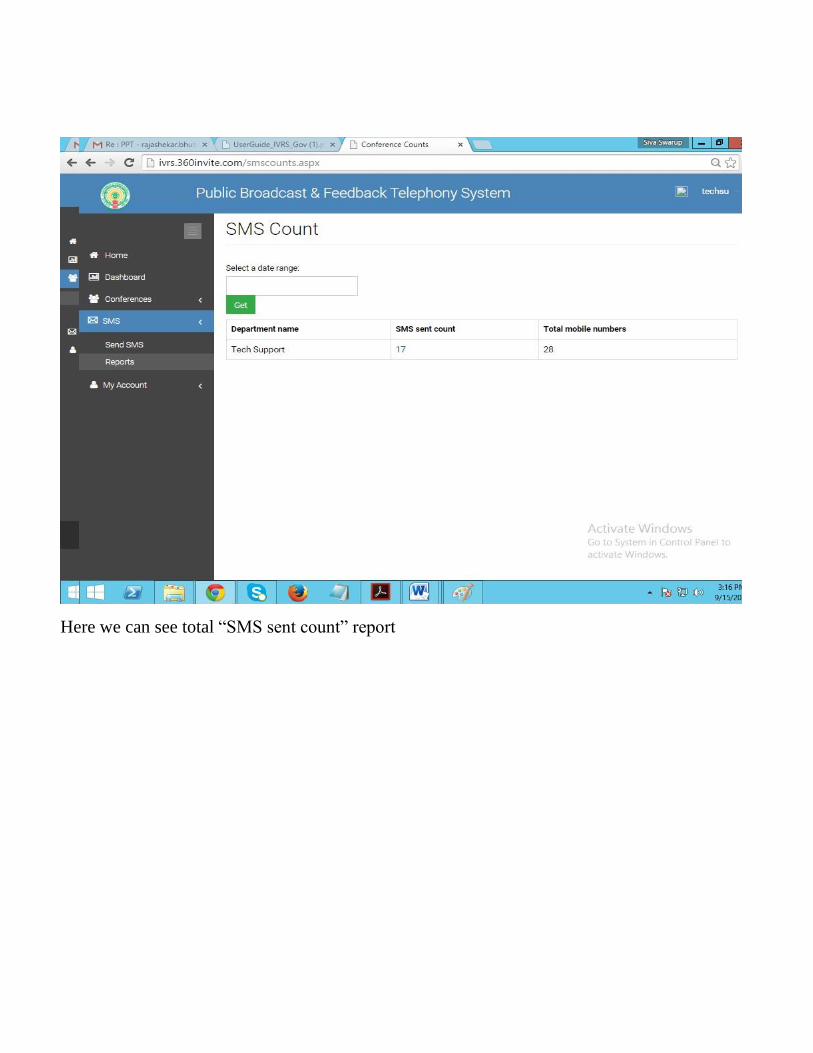
Here we can see total “SMS sent count” report

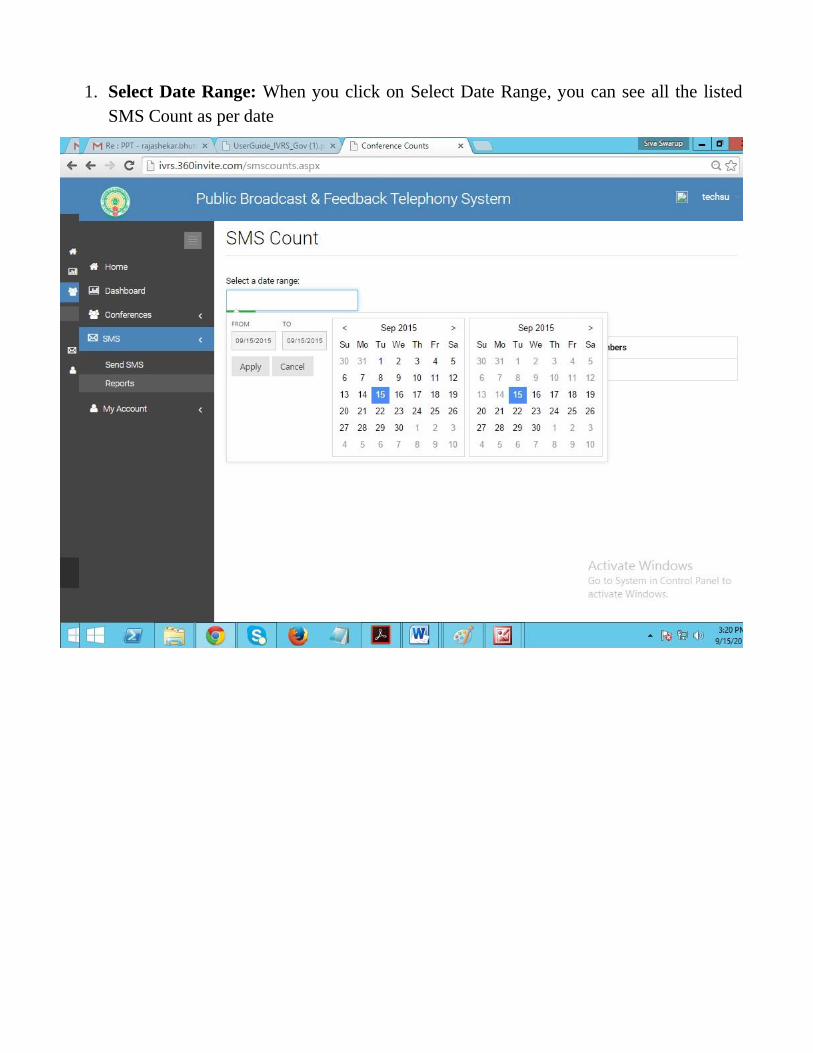
1. Select Date Range: When you click on Select Date Range, you can see all the listed
SMS Count as per date

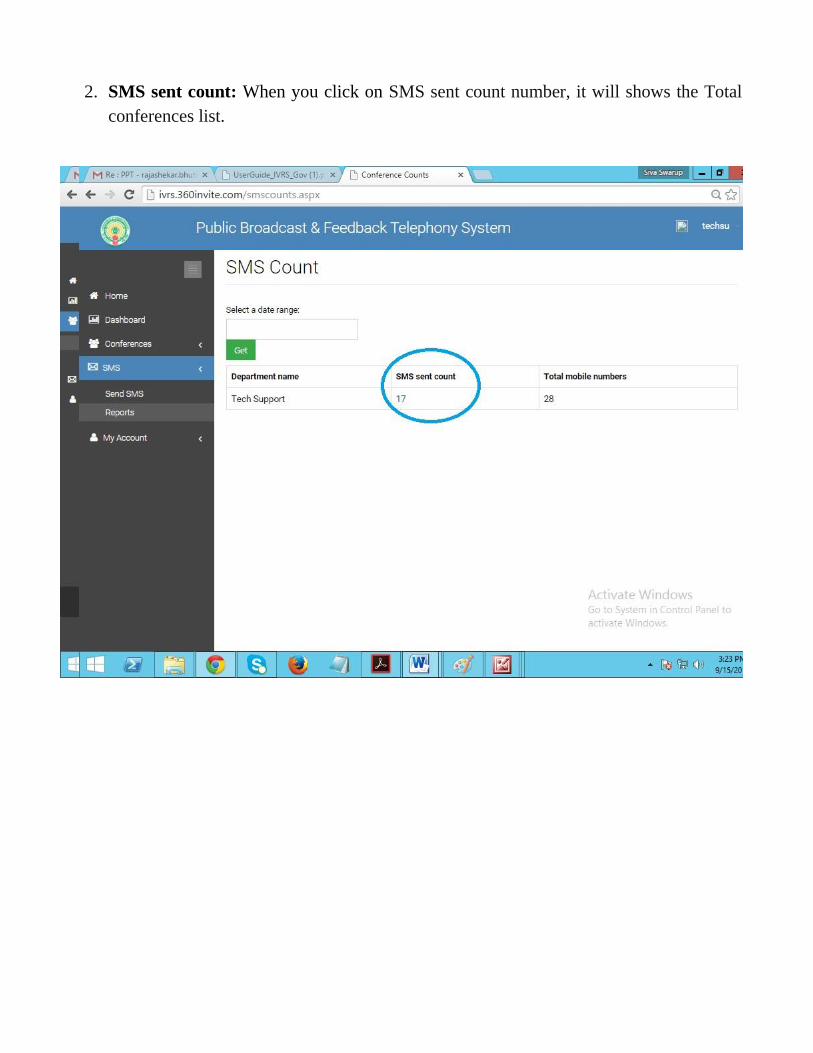
2. SMS sent count: When you click on SMS sent count number, it will shows the Total
conferences list.

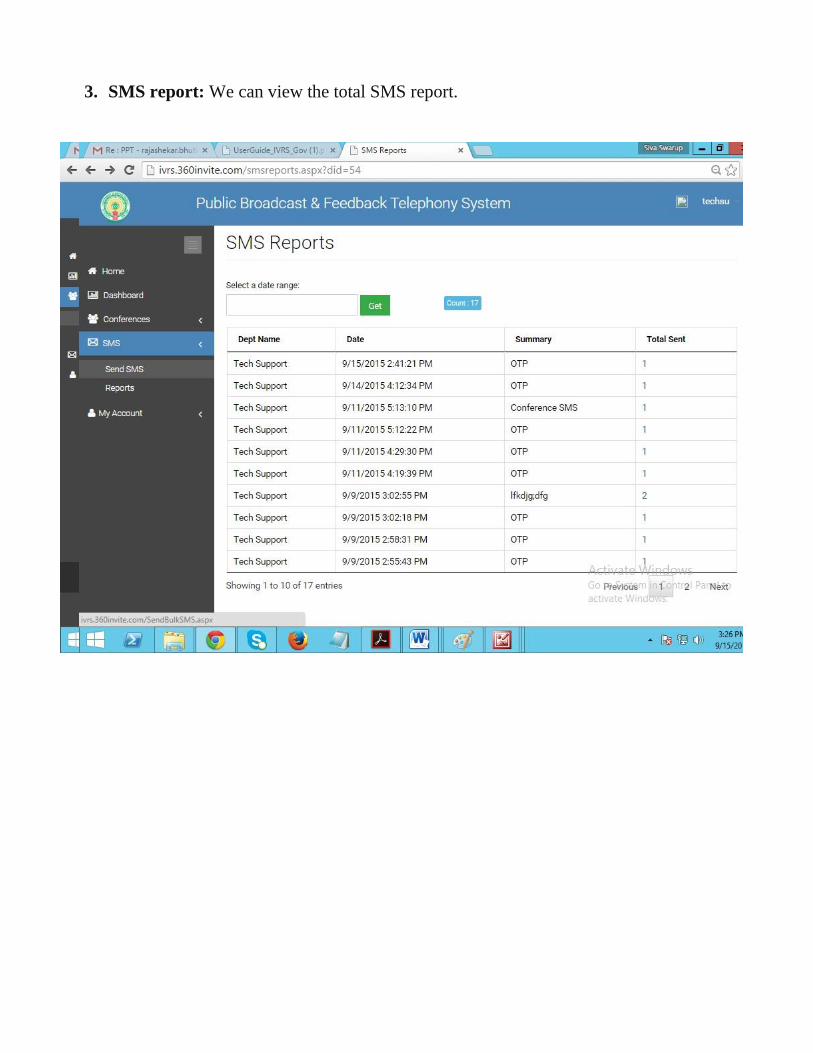
3. SMS report: We can view the total SMS report.
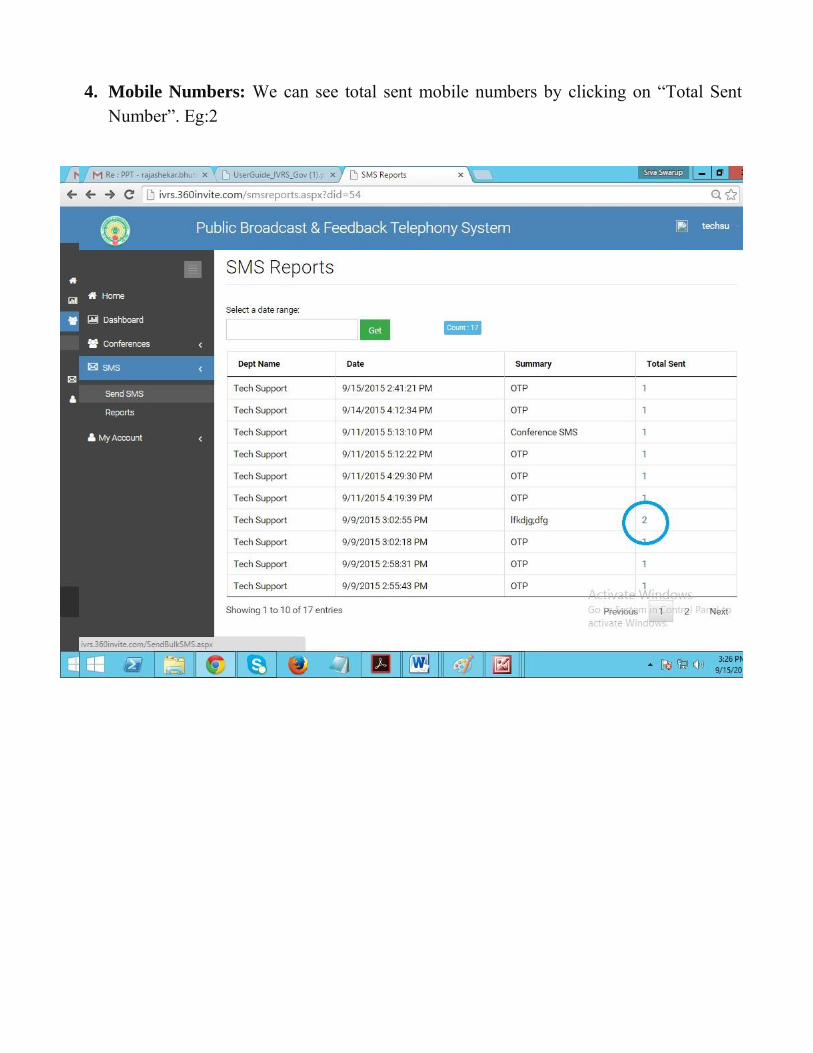
4. Mobile Numbers: We can see total sent mobile numbers by clicking on “Total Sent
Number”. Eg:2
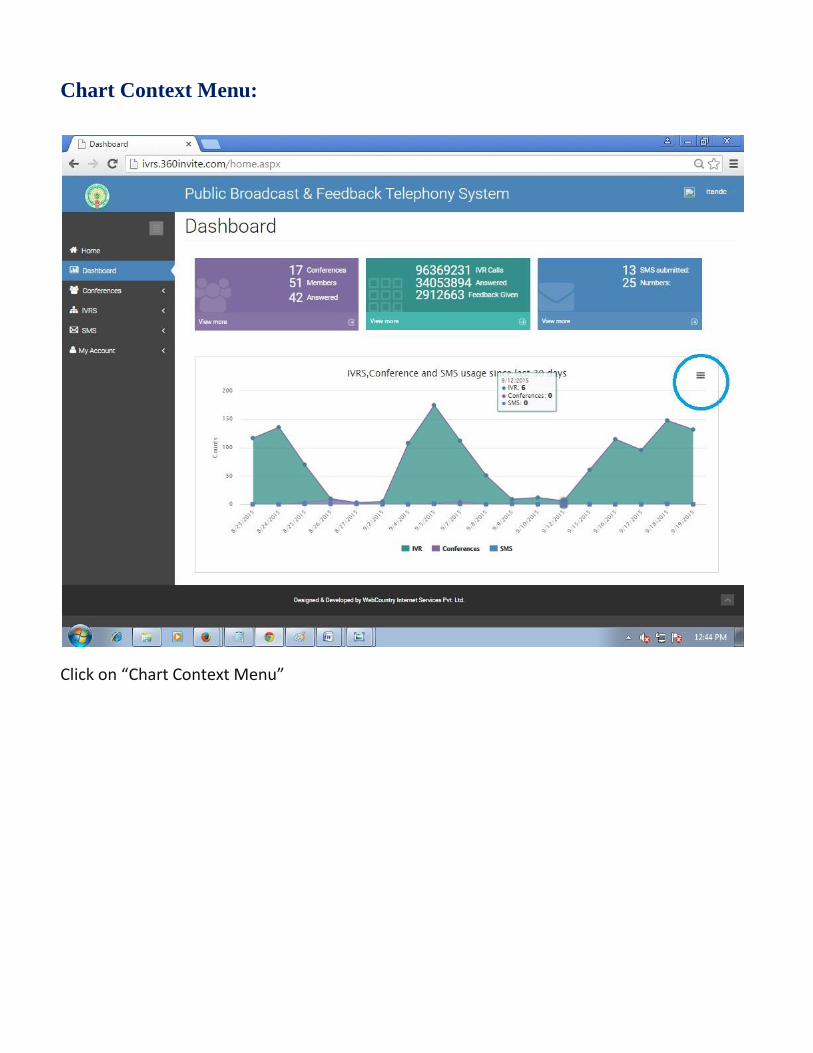
Chart Context Menu:
Click on “Chart Context Menu”
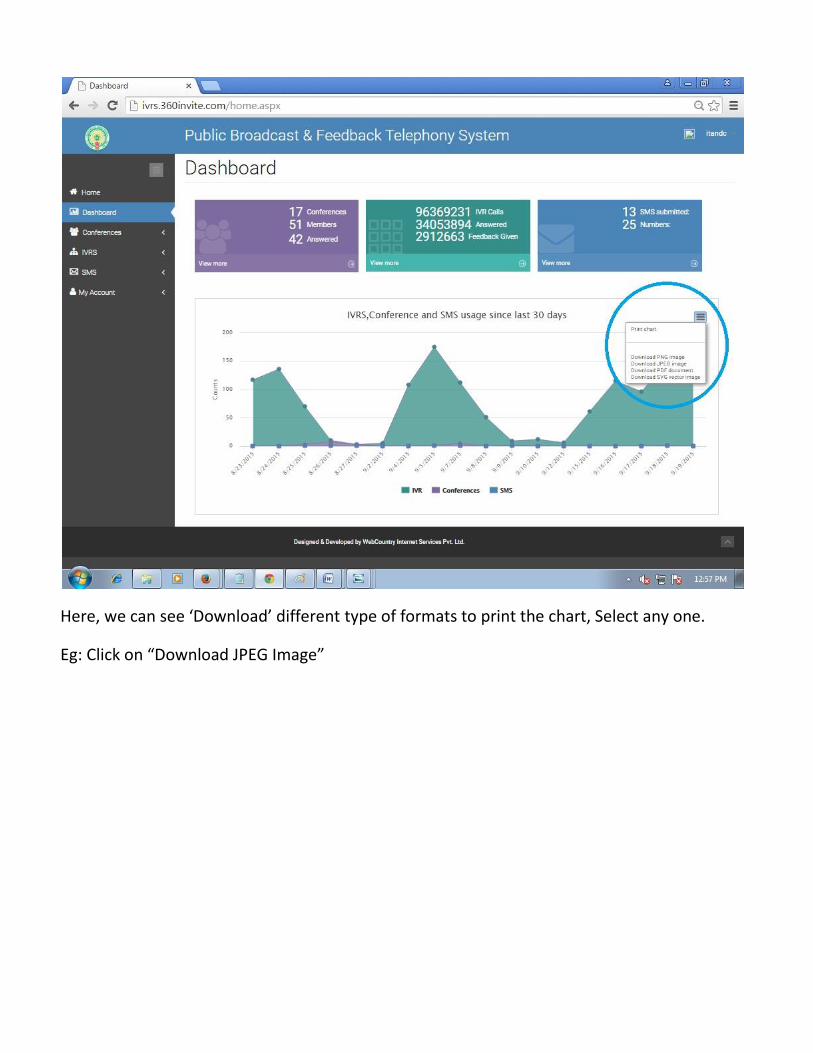
Here, we can see ‘Download’ different type of formats to print the chart, Select any one.
Eg: Click on “Download JPEG Image”
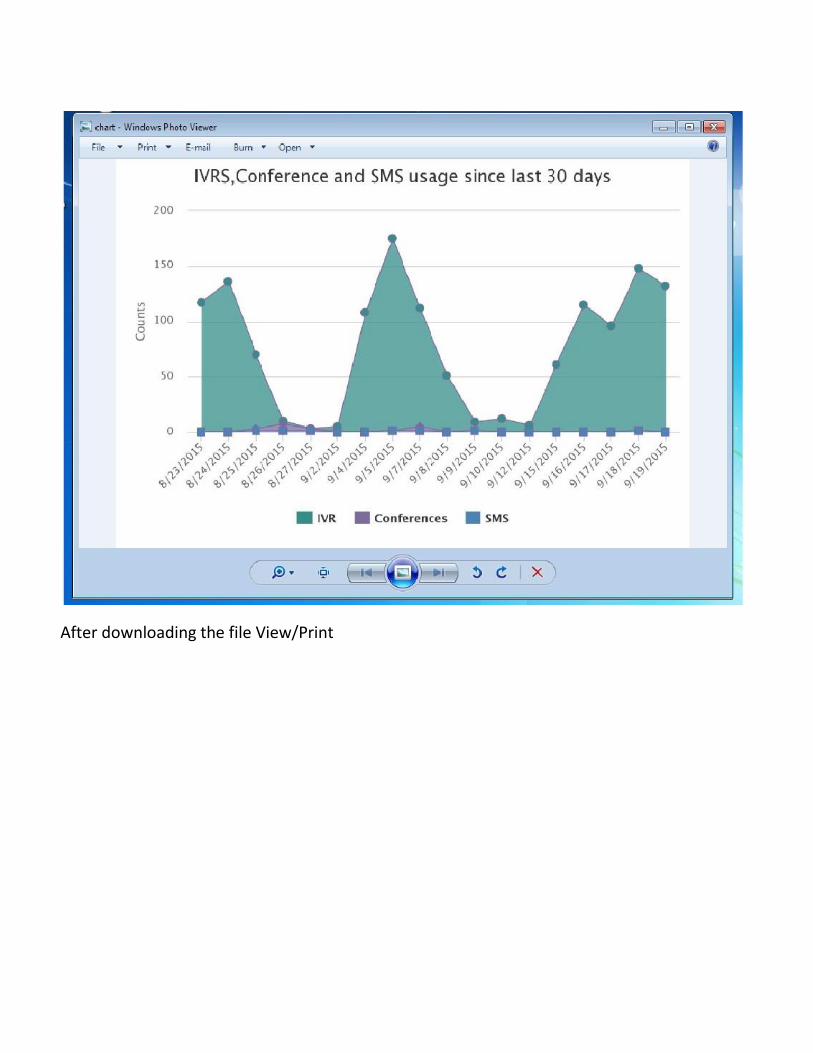
After downloading the file View/Print
Conferences
This tab allows you to view:
Conferences List
Reports
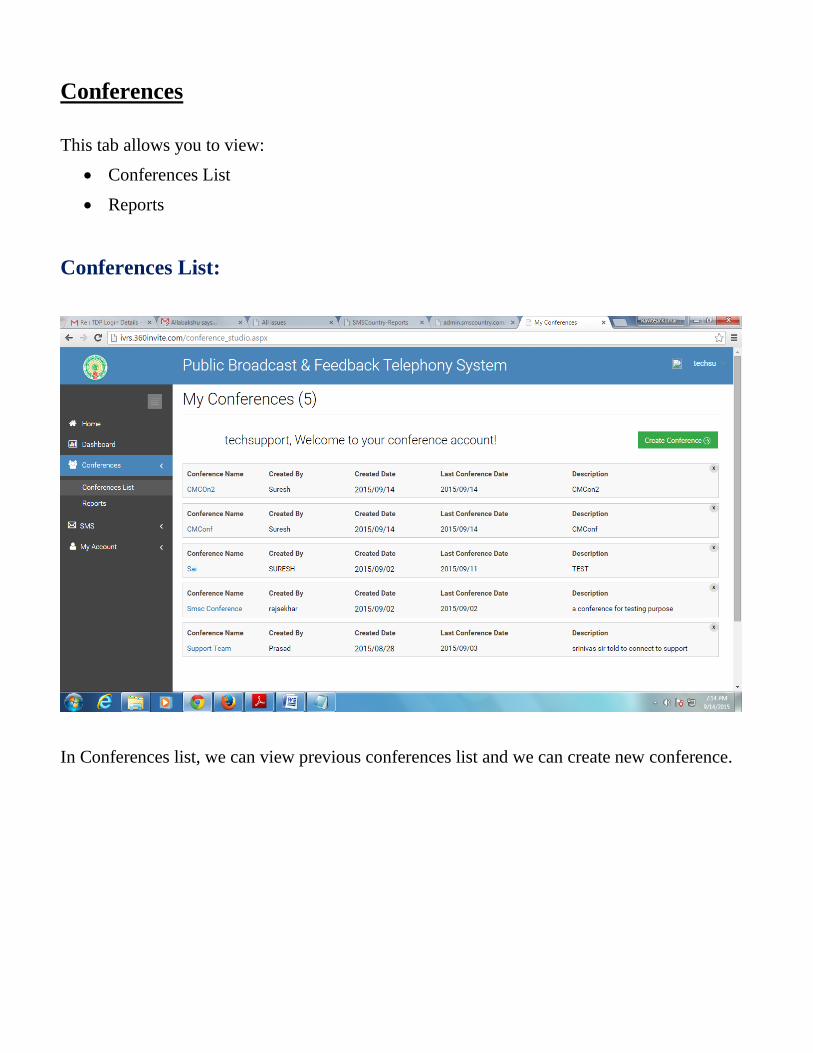
Conferences List:
In Conferences list, we can view previous conferences list and we can create new conference.
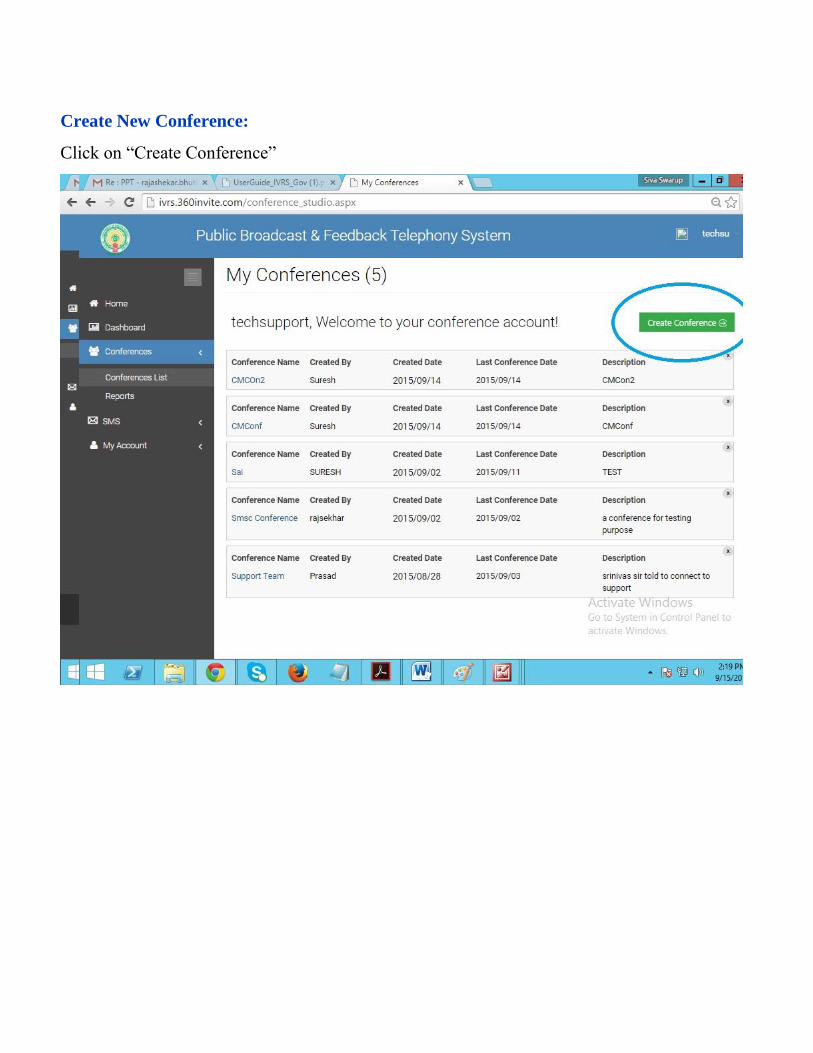
Create New Conference:
Click on “Create Conference”
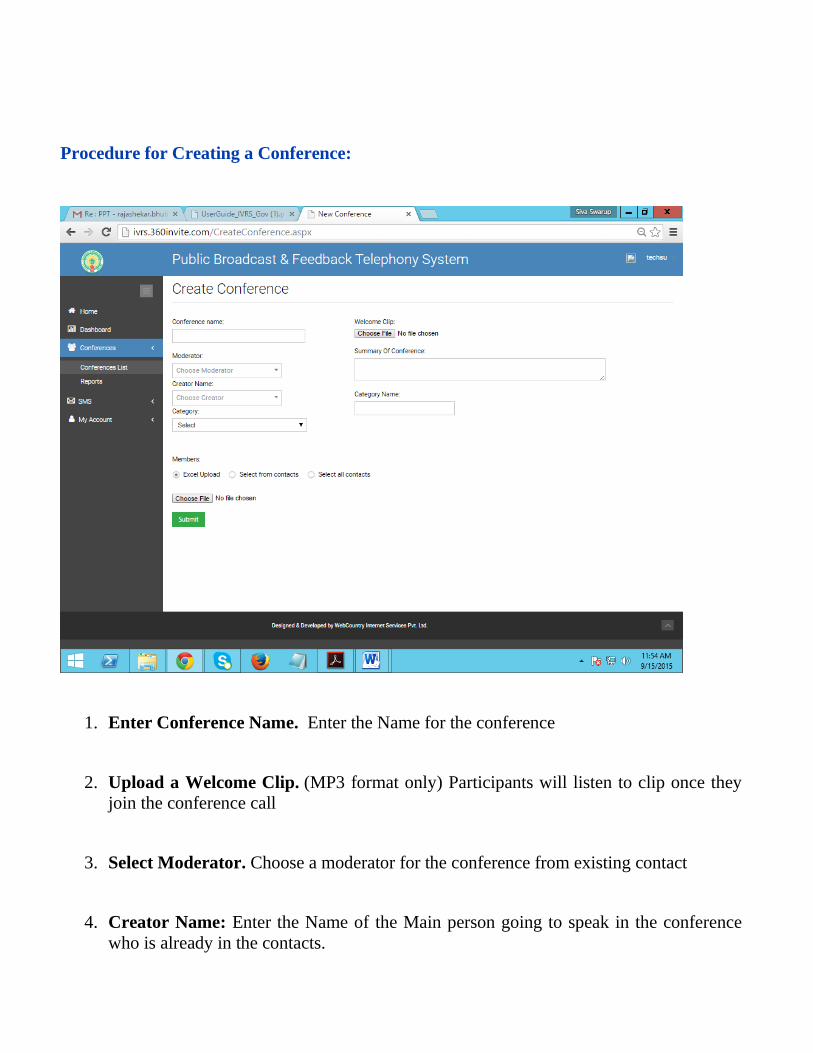
Procedure for Creating a Conference:
1. Enter Conference Name. Enter the Name for the conference
2. Upload a Welcome Clip. (MP3 format only) Participants will listen to clip once they
join the conference call
3. Select Moderator. Choose a moderator for the conference from existing contact
4. Creator Name: Enter the Name of the Main person going to speak in the conference
who is already in the contacts.
5. Summary of conference: Enter the summary of the conference
6. Category: Choose the category from the list
7. Category Name: Enter the name belongs to the Category
8. Add Contact(s). Choose from existing contacts or upload multiple new contacts using
an Excel sheet or Select from contacts or Select all contacts
9. Submit: Click on Submit after finish all fields.
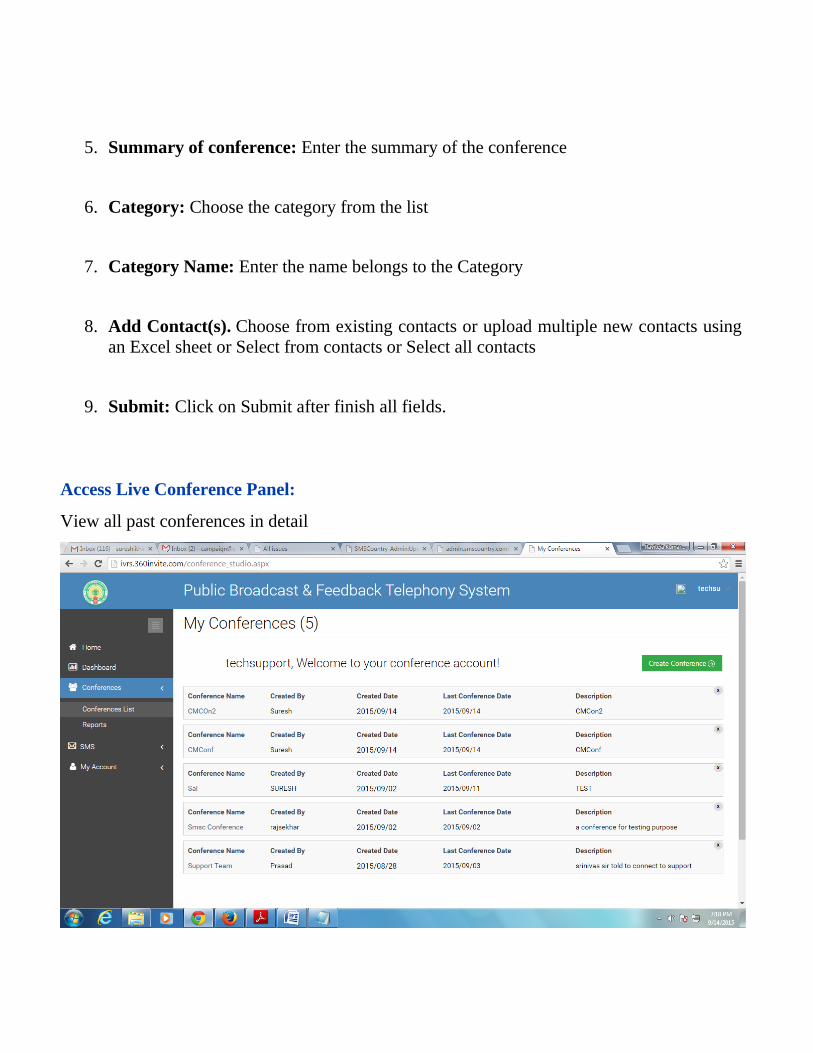
Access Live Conference Panel:
View all past conferences in detail
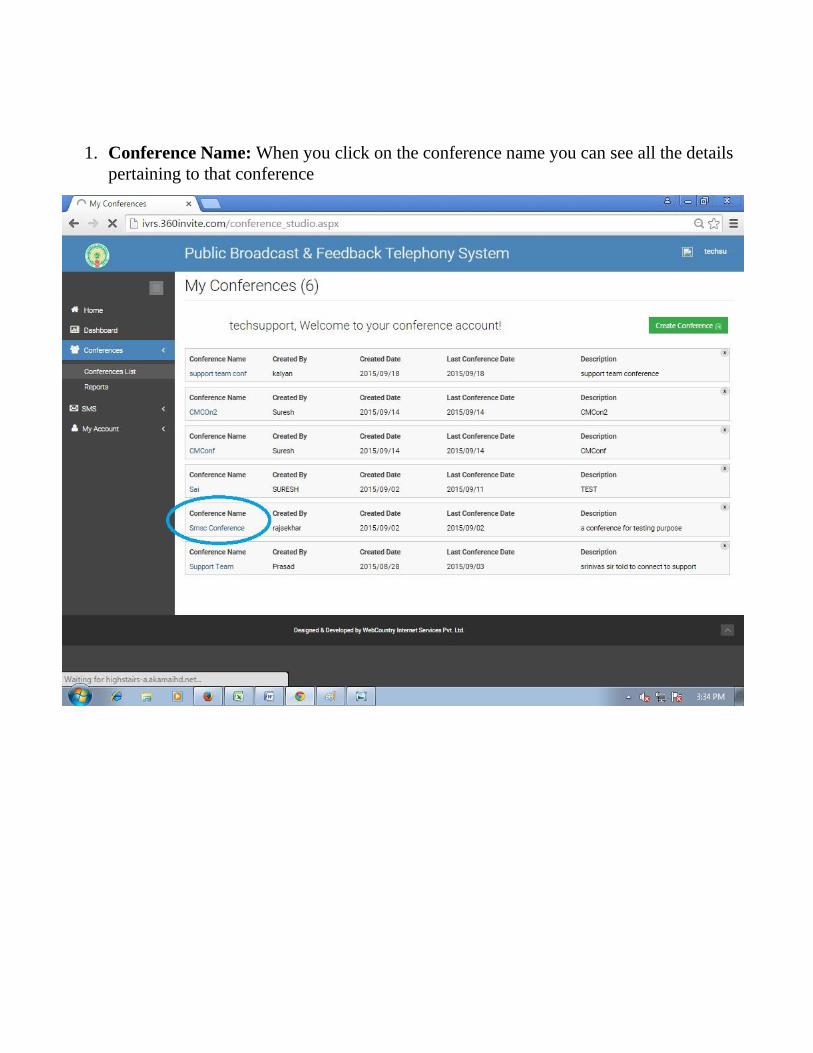
1. Conference Name: When you click on the conference name you can see all the details
pertaining to that conference
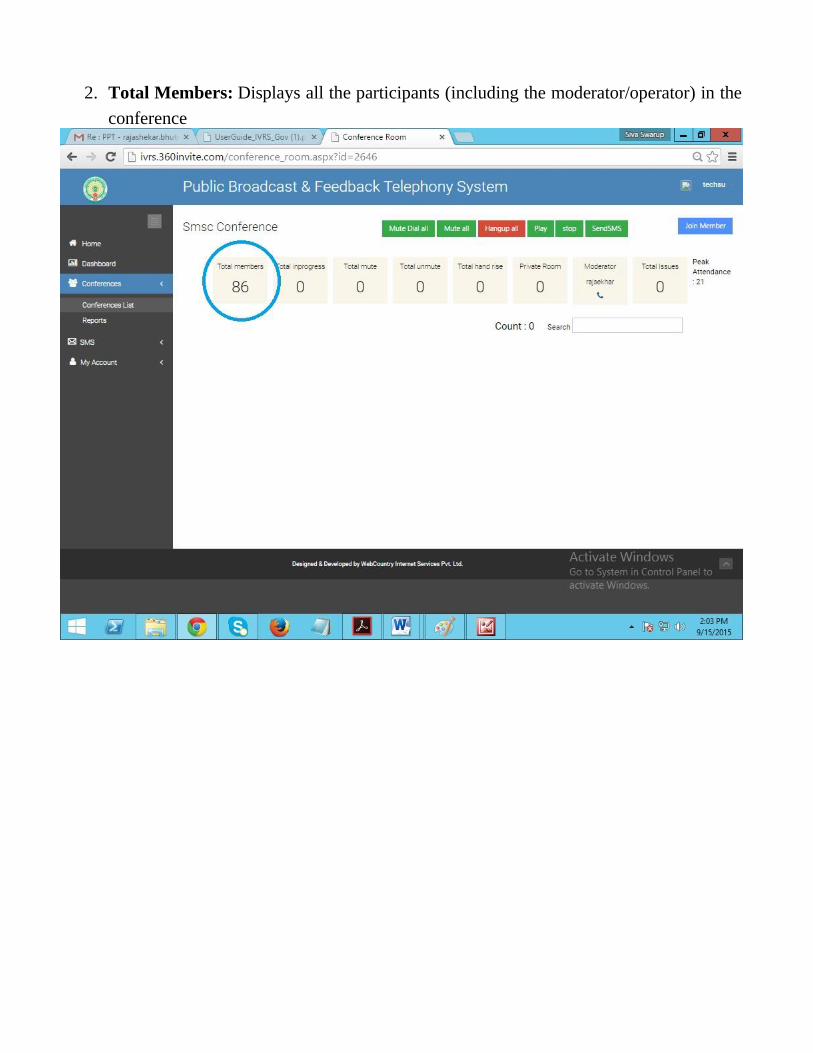
2. Total Members: Displays all the participants (including the moderator/operator) in the
conference
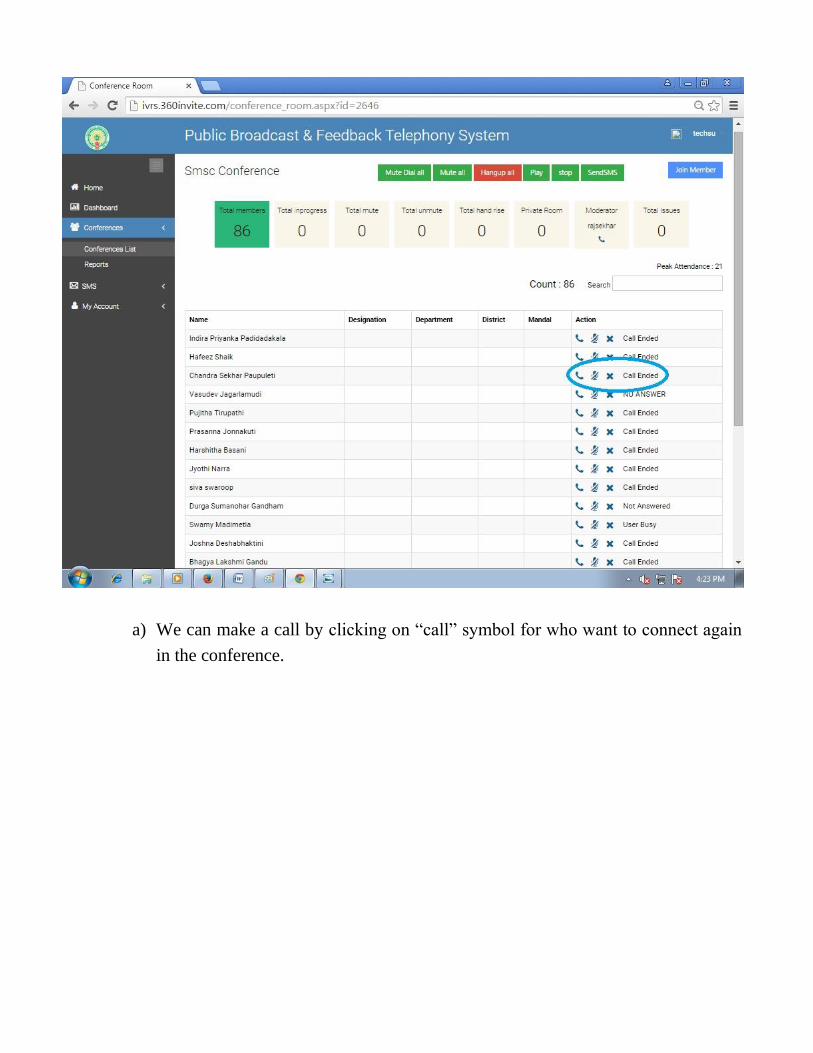
a) We can make a call by clicking on “call” symbol for who want to connect again
in the conference.
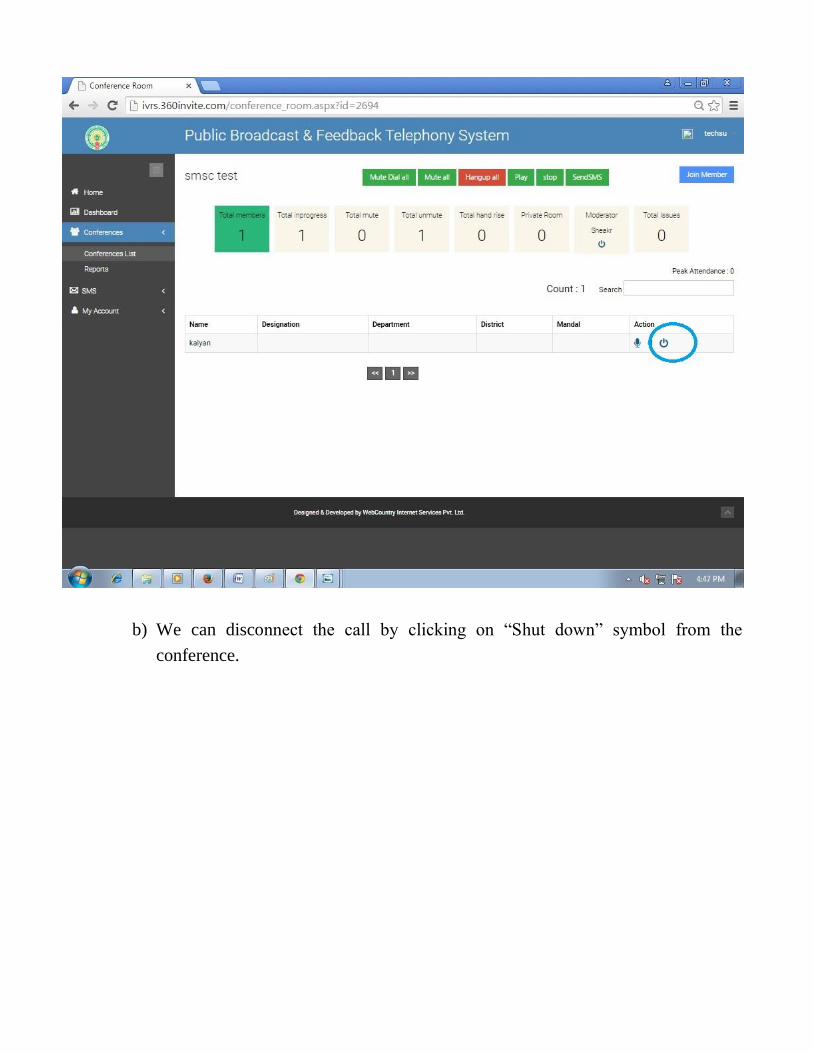
b) We can disconnect the call by clicking on “Shut down” symbol from the
conference.
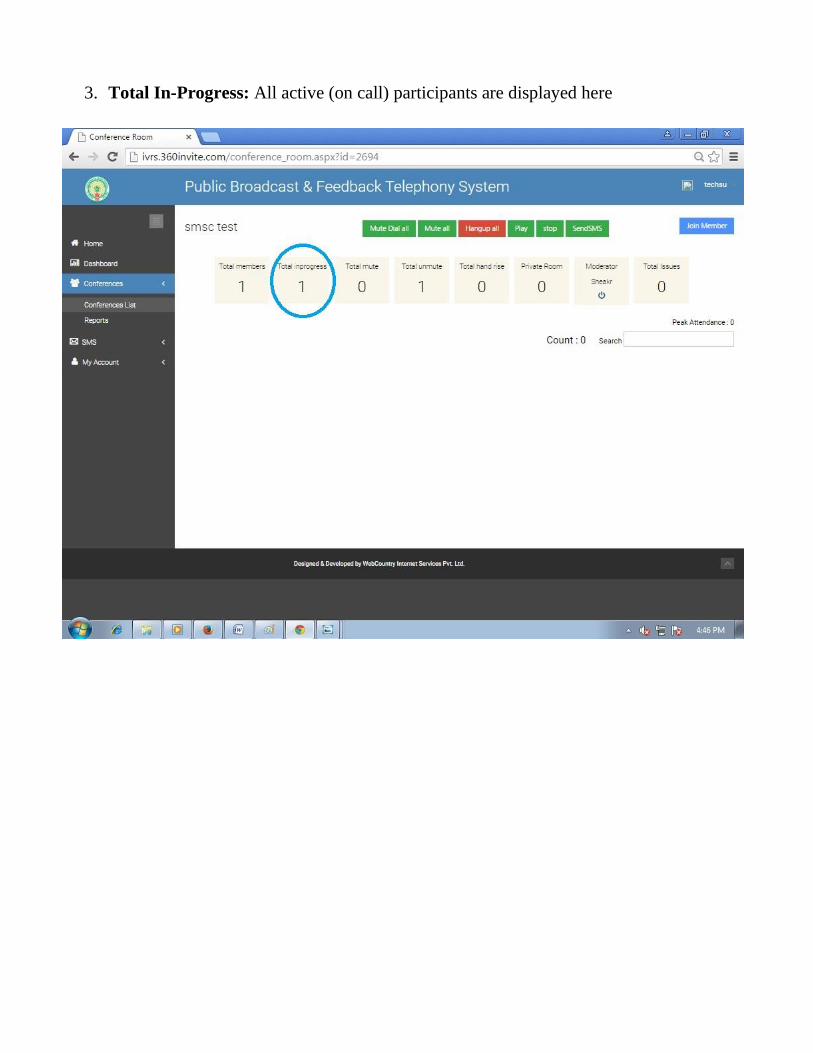
3. Total In-Progress: All active (on call) participants are displayed here

a) When click on “Total inprogress”, it shows the list of the persons who are in
conference.
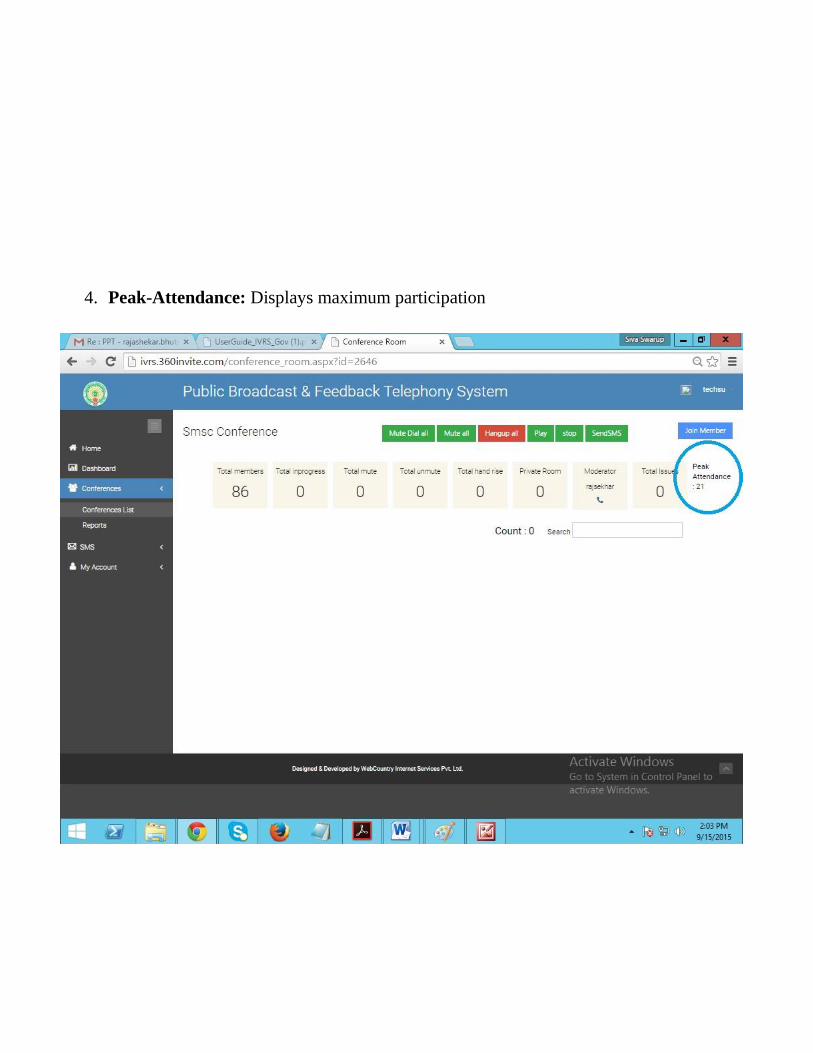
4. Peak-Attendance: Displays maximum participation
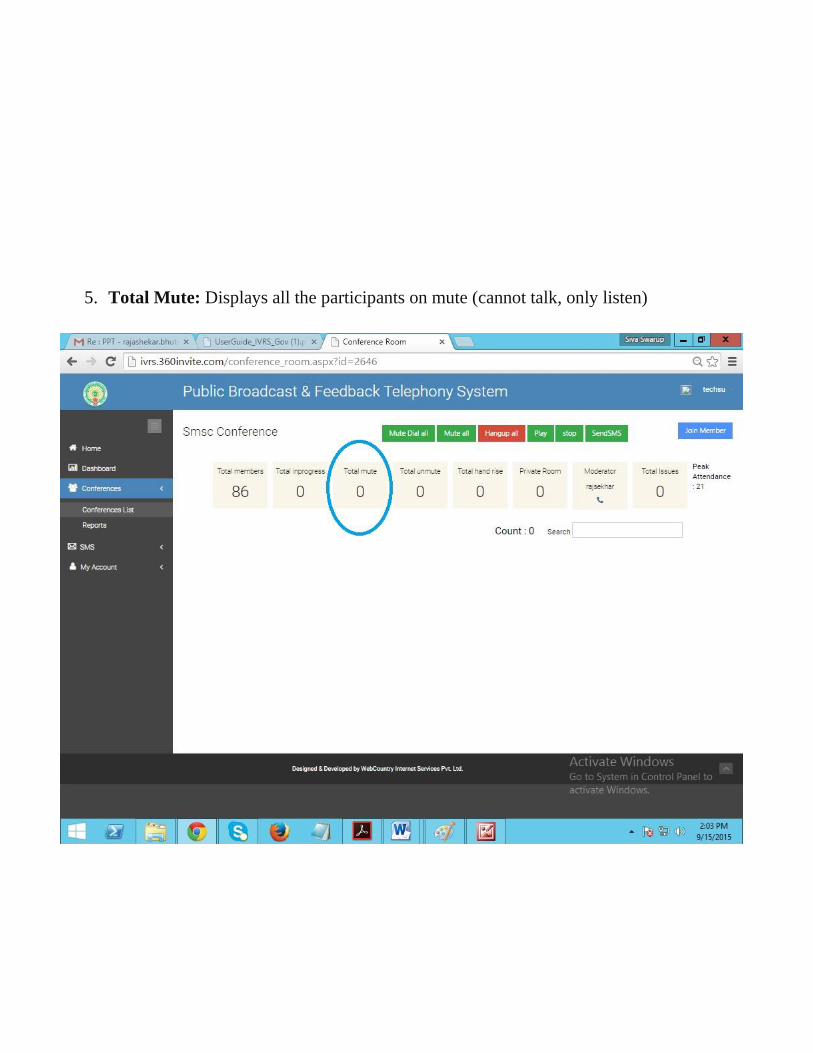
5. Total Mute: Displays all the participants on mute (cannot talk, only listen)
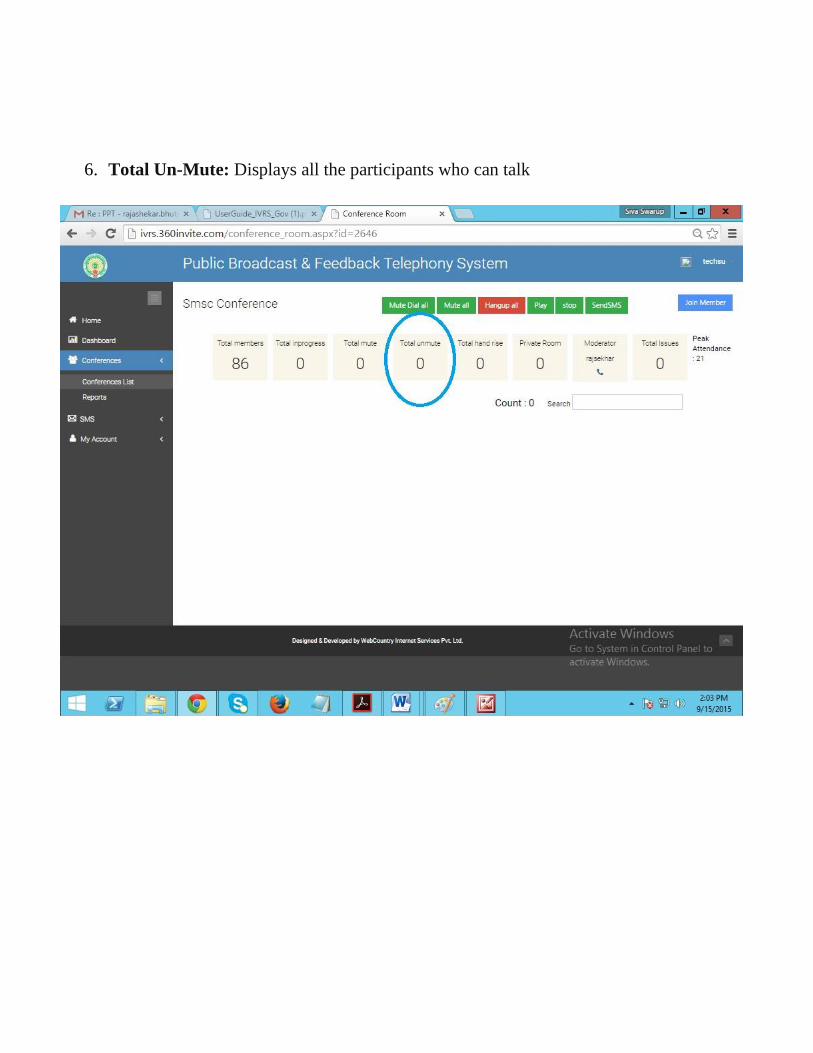
6. Total Un-Mute: Displays all the participants who can talk
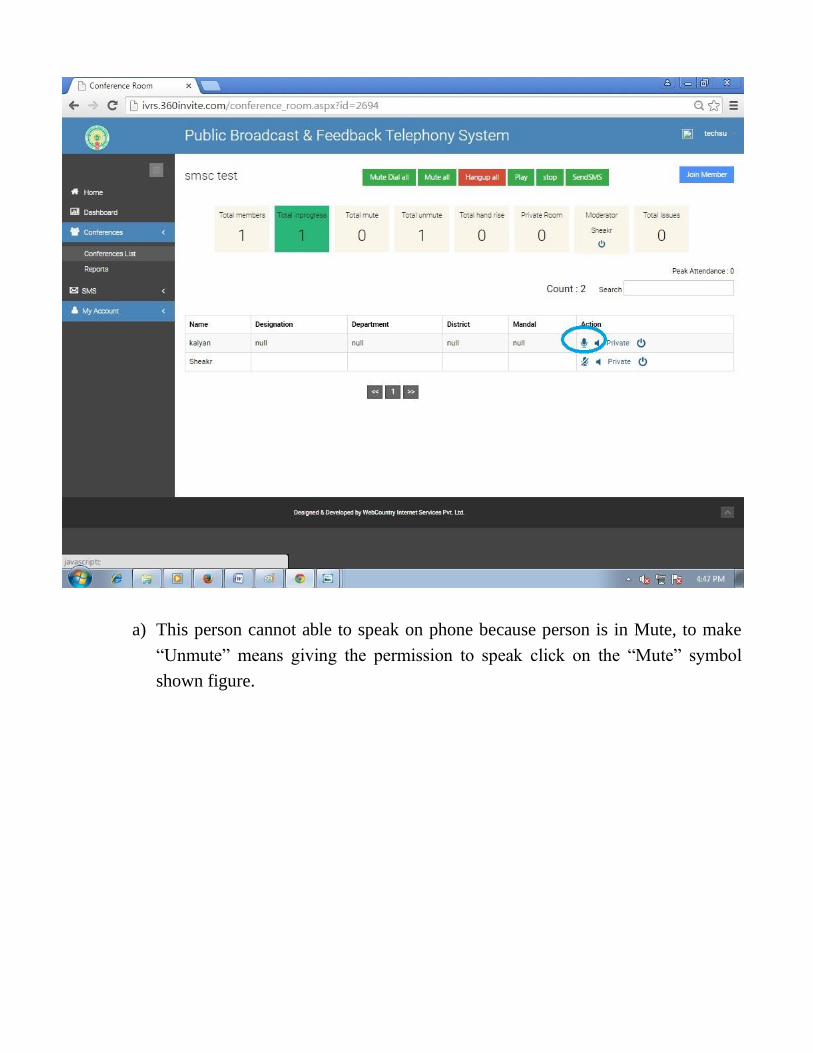
a) This person cannot able to speak on phone because person is in Mute, to make
“Unmute” means giving the permission to speak click on the “Mute” symbol
shown figure.
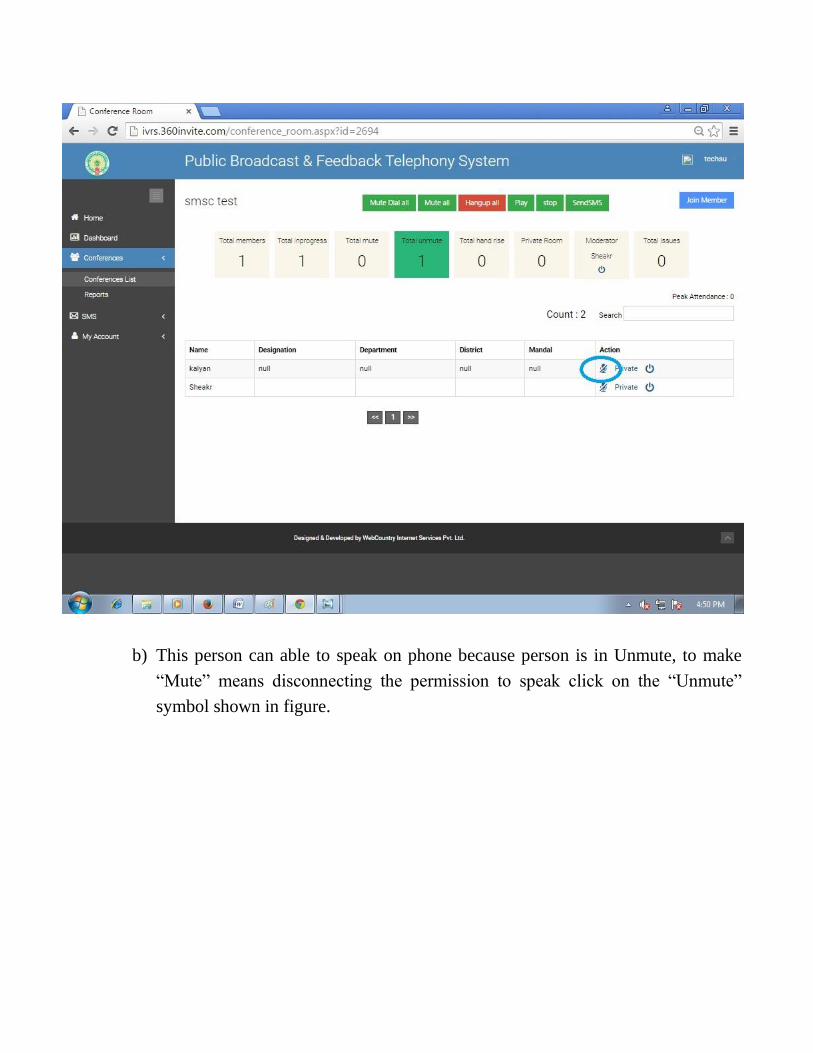
b) This person can able to speak on phone because person is in Unmute, to make
“Mute” means disconnecting the permission to speak click on the “Unmute”
symbol shown in figure.
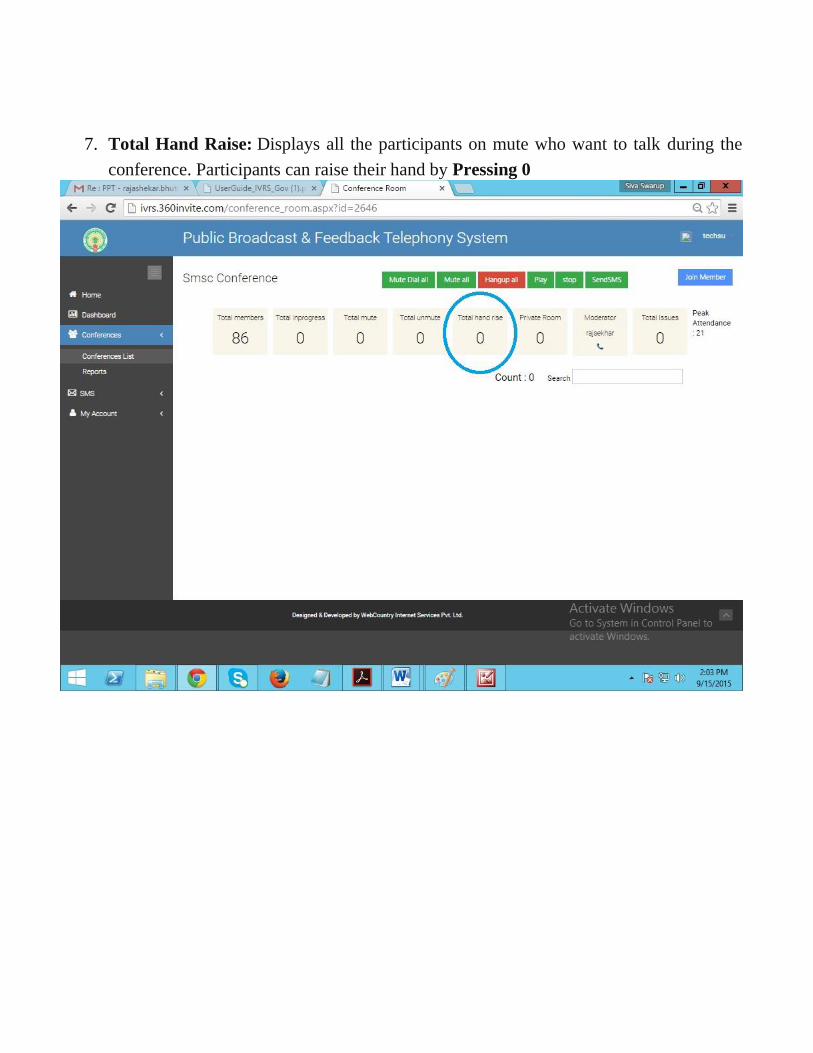
7. Total Hand Raise: Displays all the participants on mute who want to talk during the
conference. Participants can raise their hand by Pressing 0
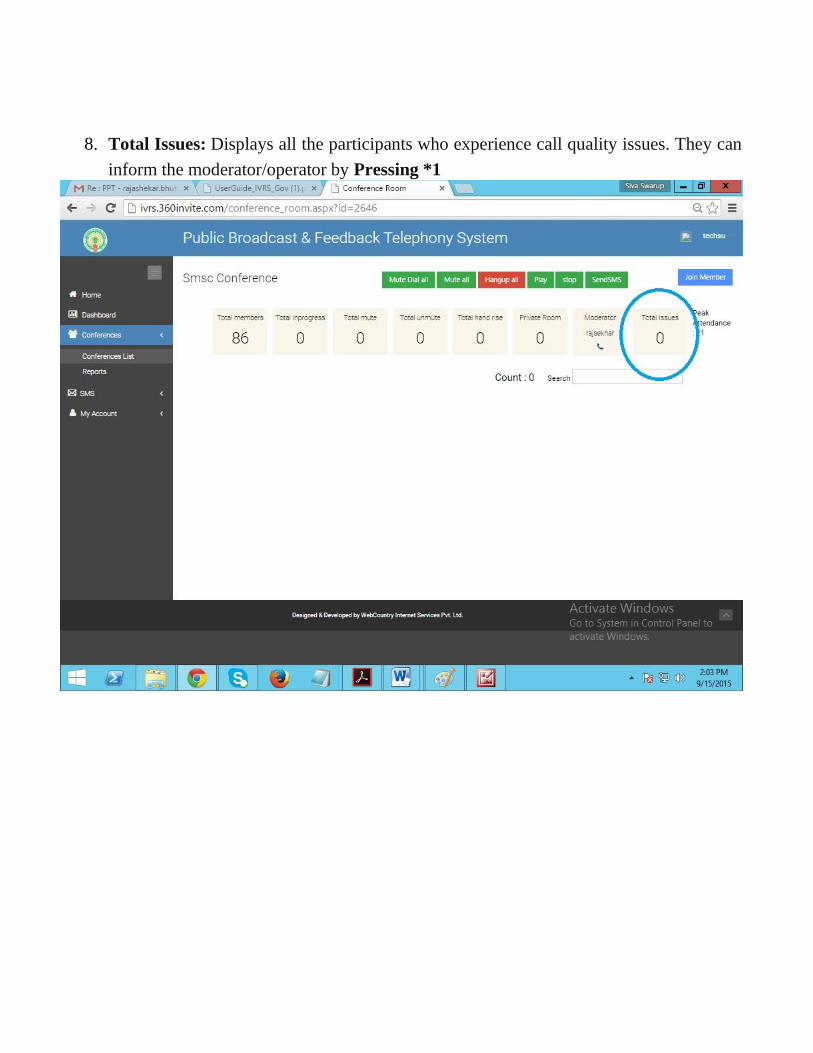
8. Total Issues: Displays all the participants who experience call quality issues. They can
inform the moderator/operator by Pressing *1
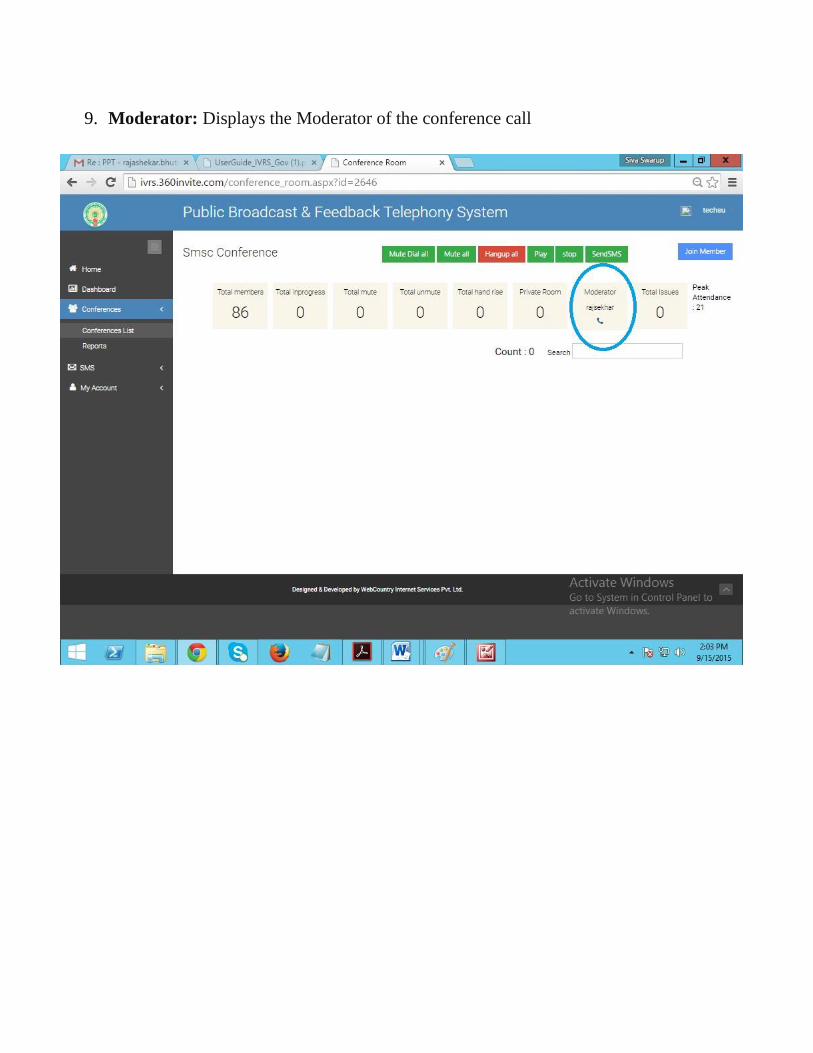
9. Moderator: Displays the Moderator of the conference call
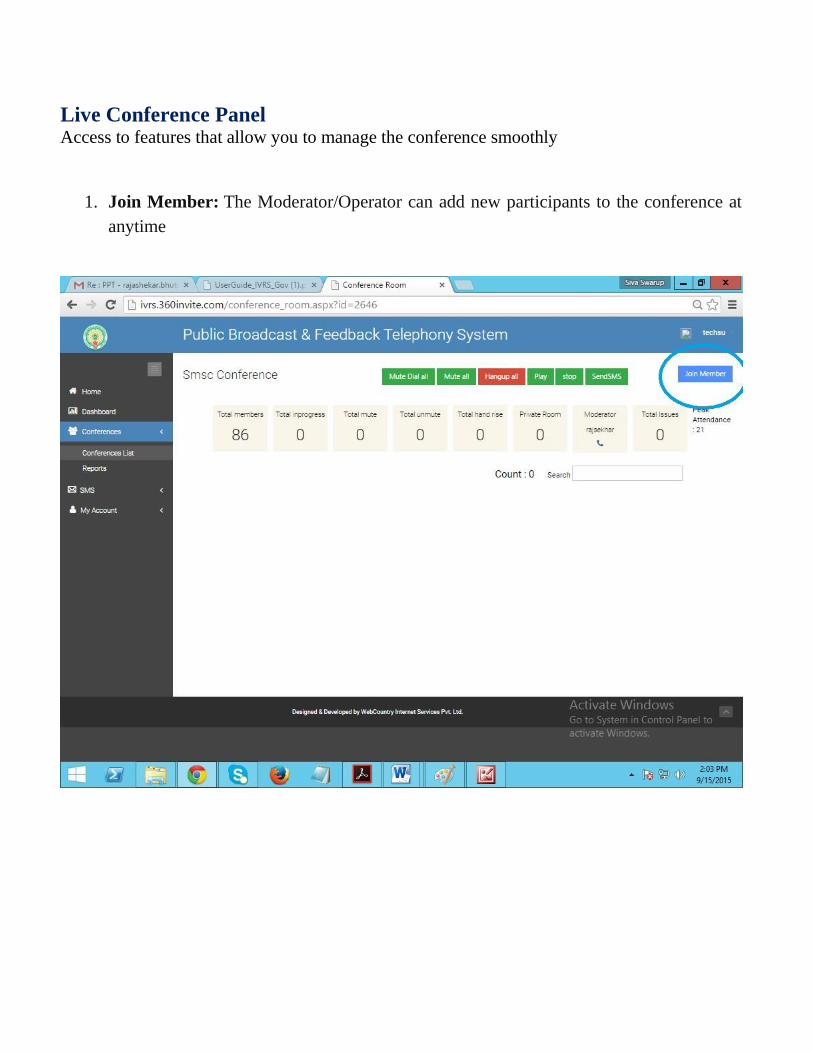
Live Conference Panel Access to features that allow you to manage the conference smoothly
1. Join Member: The Moderator/Operator can add new participants to the conference at
anytime
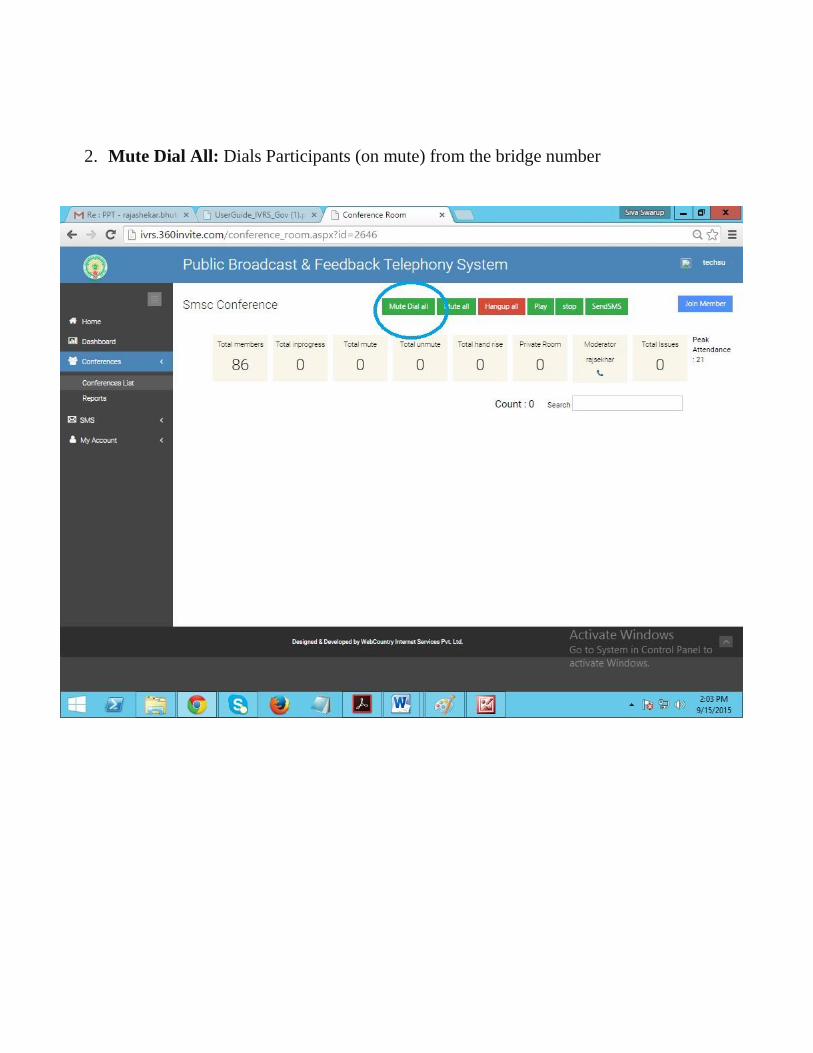
2. Mute Dial All: Dials Participants (on mute) from the bridge number
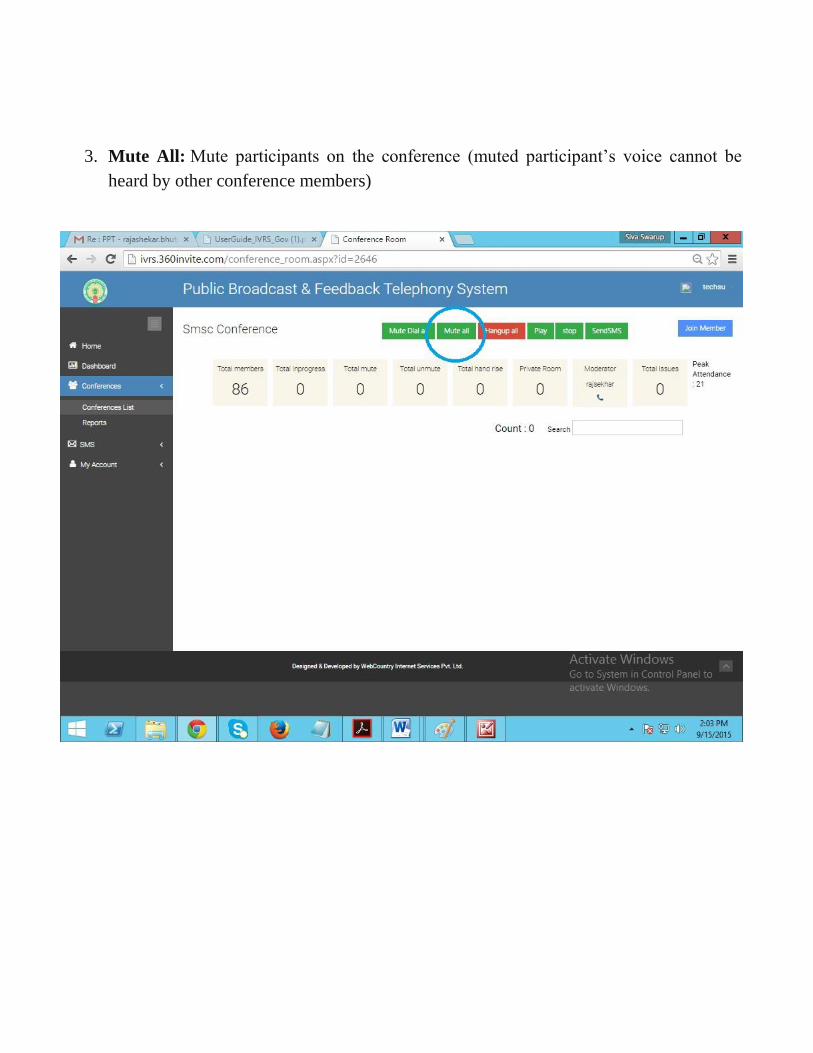
3. Mute All: Mute participants on the conference (muted participant’s voice cannot be
heard by other conference members)
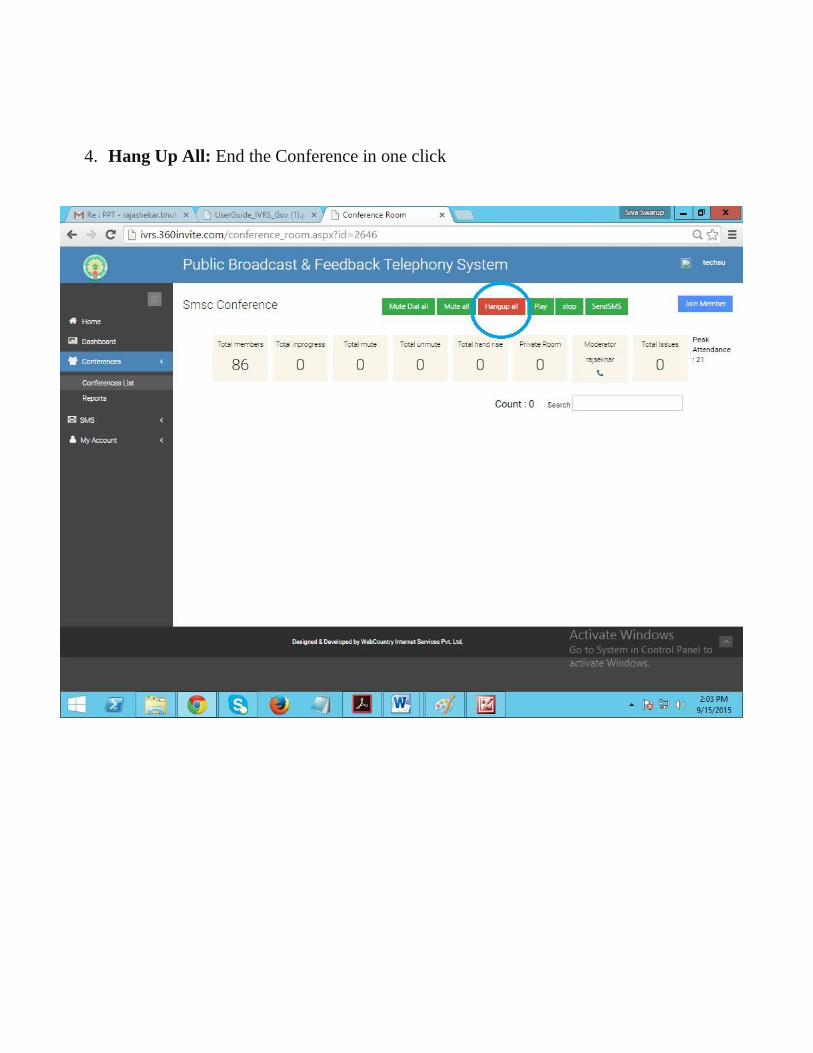
4. Hang Up All: End the Conference in one click
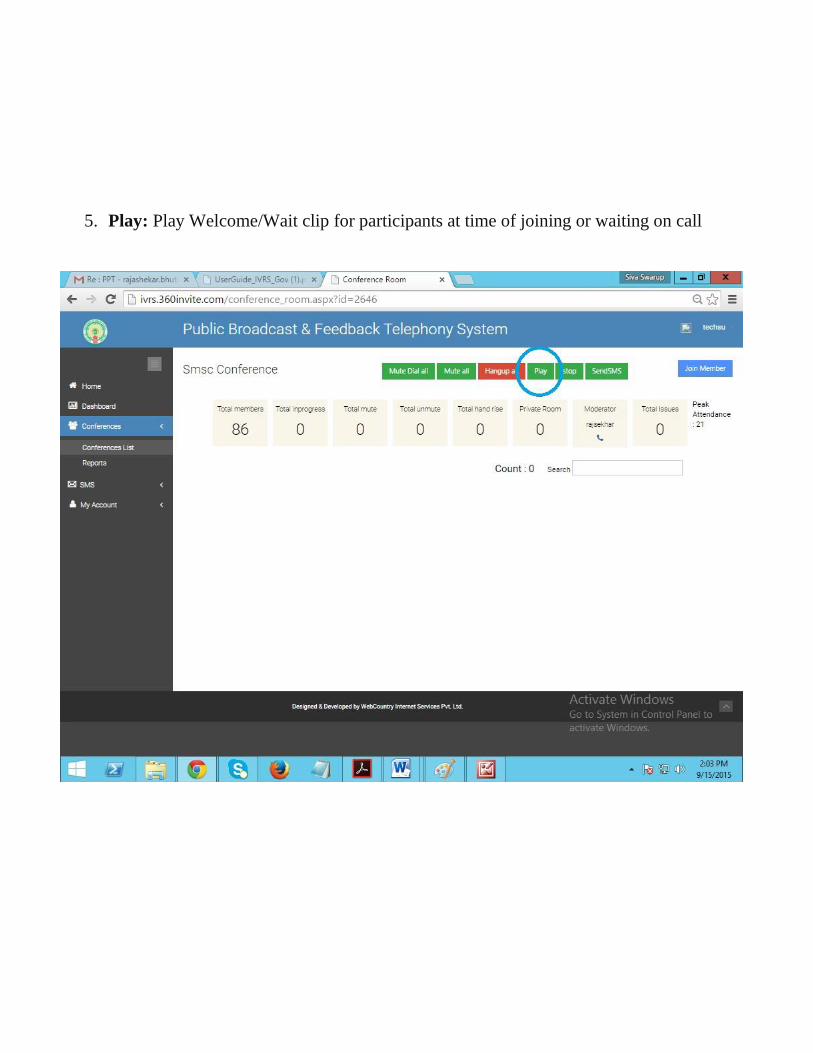
5. Play: Play Welcome/Wait clip for participants at time of joining or waiting on call
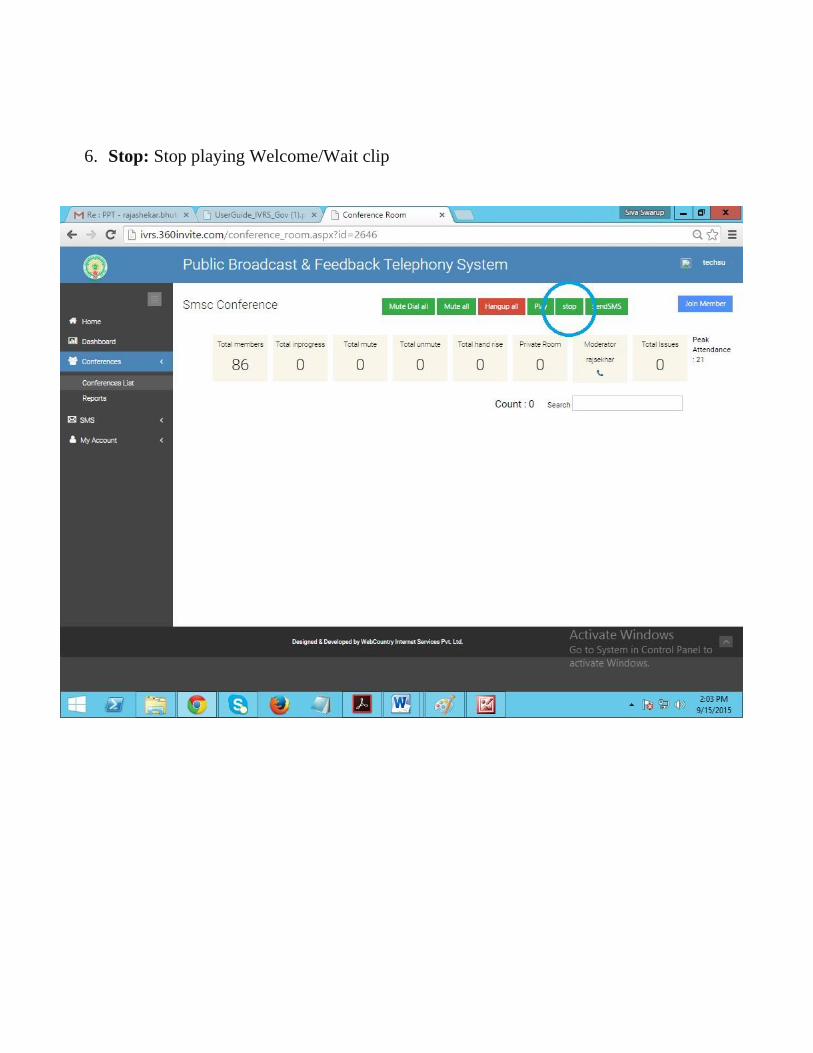
6. Stop: Stop playing Welcome/Wait clip
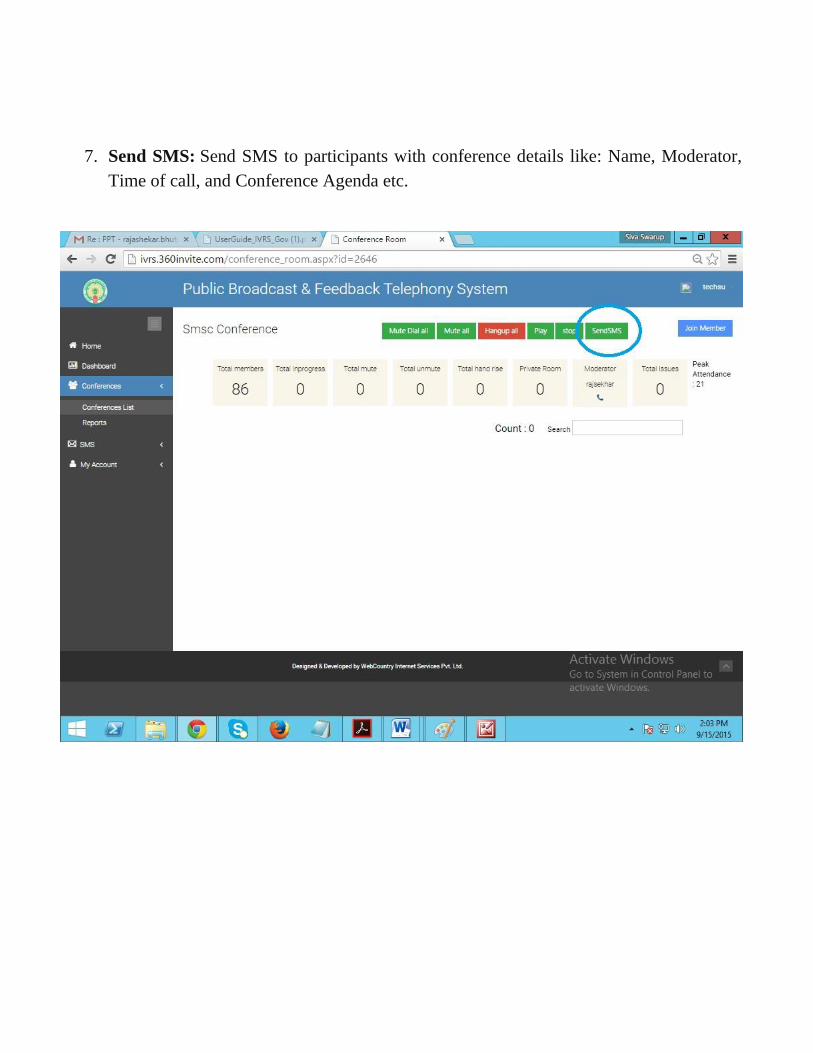
7. Send SMS: Send SMS to participants with conference details like: Name, Moderator,
Time of call, and Conference Agenda etc.
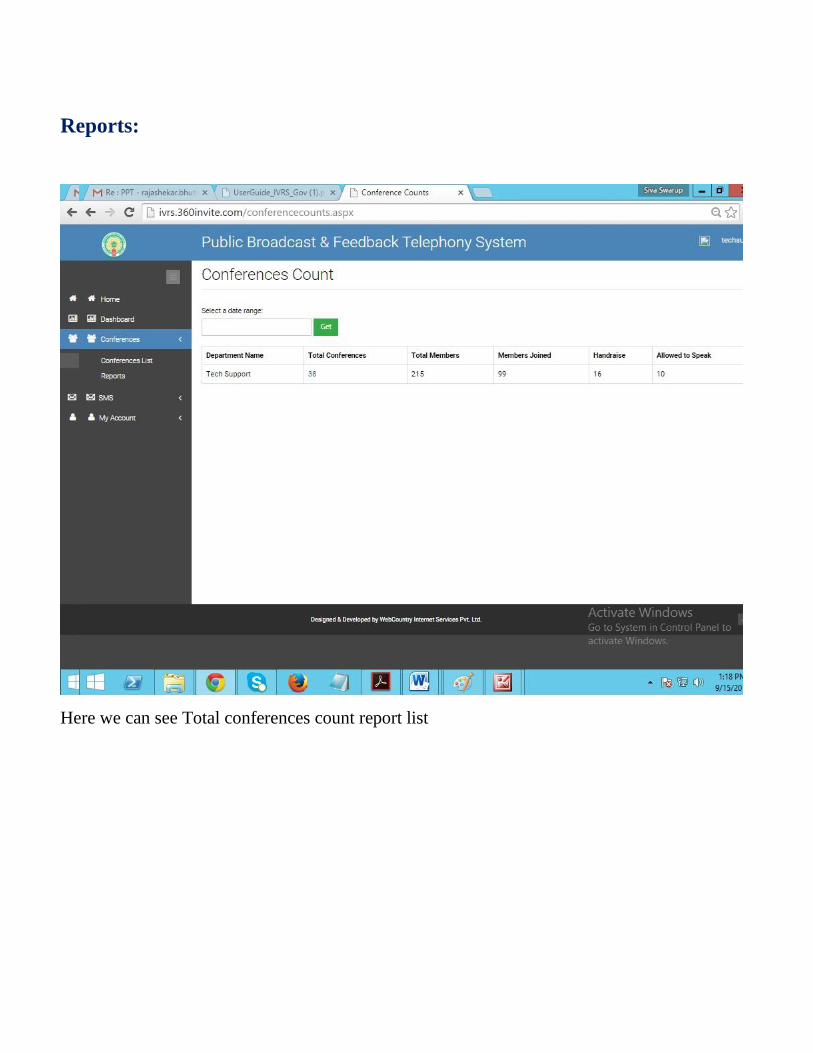
Reports:
Here we can see Total conferences count report list
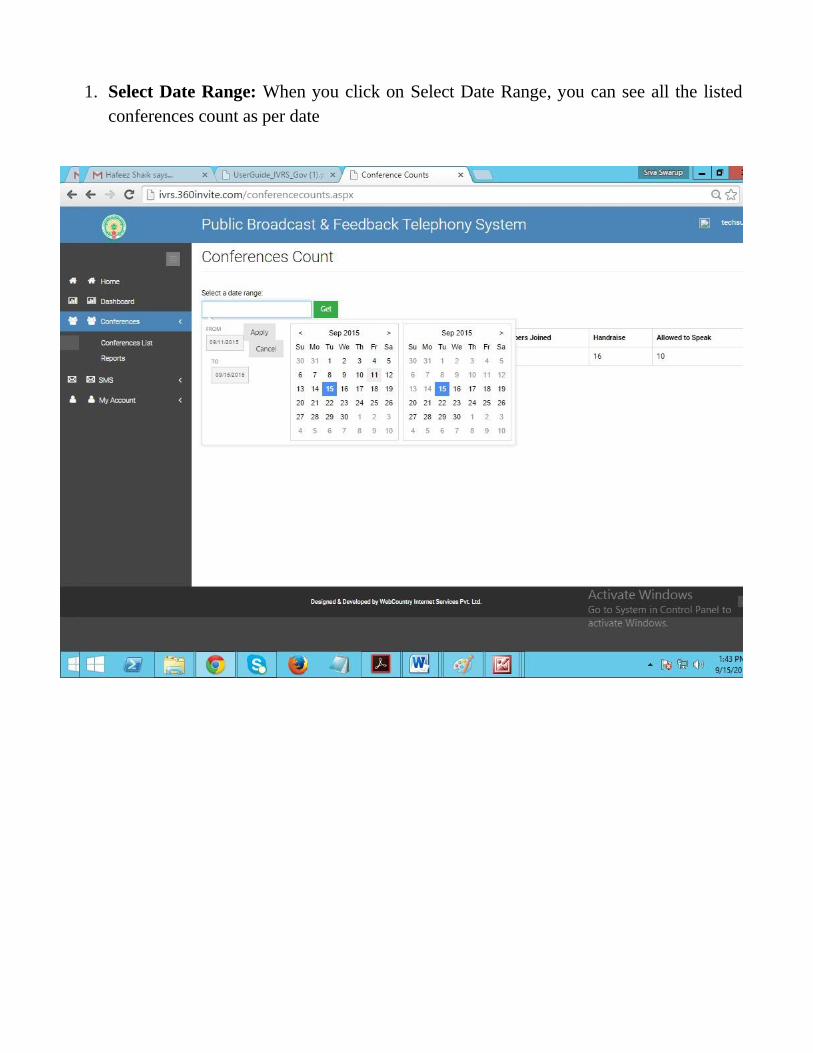
1. Select Date Range: When you click on Select Date Range, you can see all the listed
conferences count as per date

2. Total Conferences: When you click on Total Conferences number, it willshow
the Total conferences list.

3. Download to Excel: We can download Total conferences list.

4. Conference report: We can view the total report for the conference.
IVRS
This tab allows you to:
IVRS list
Reports
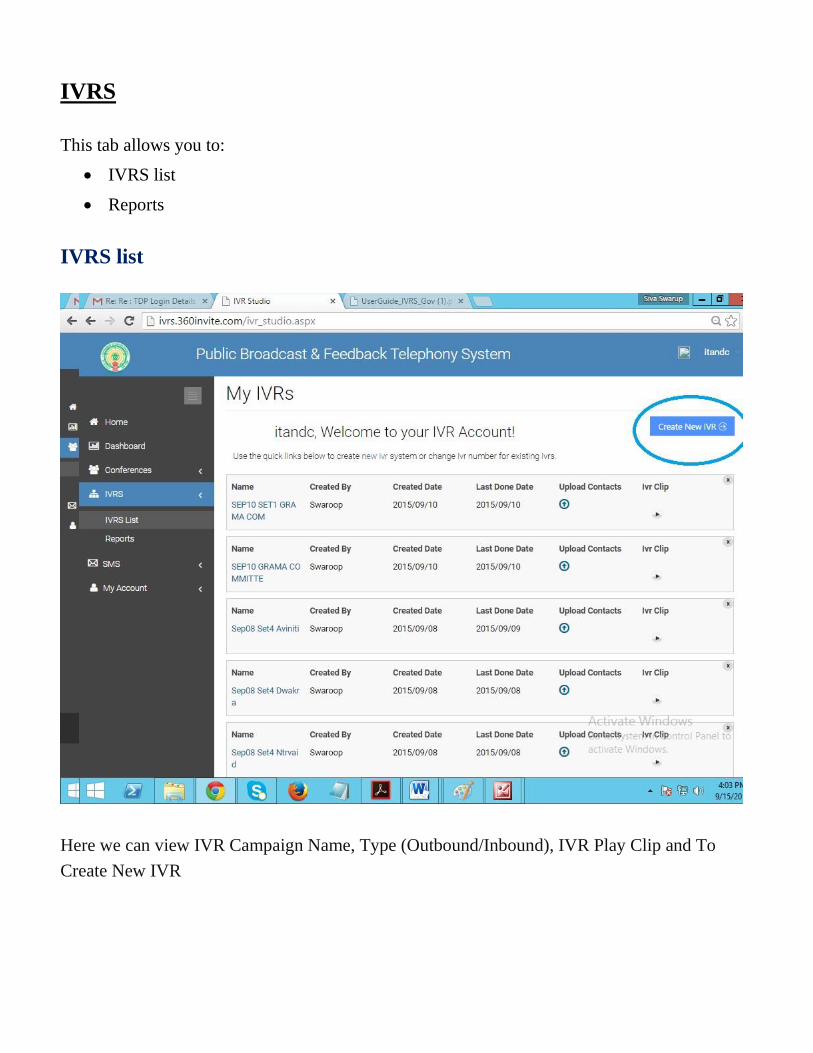
IVRS list
Here we can view IVR Campaign Name, Type (Outbound/Inbound), IVR Play Clip and To
Create New IVR
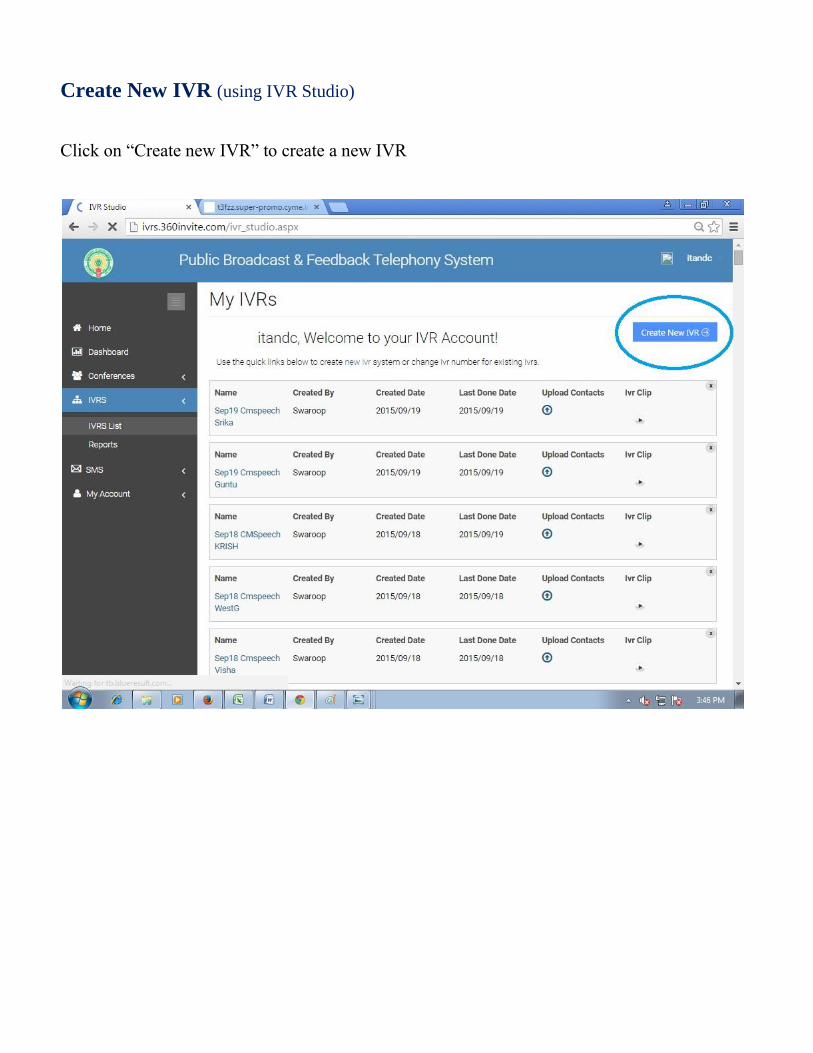
Create New IVR (using IVR Studio)
Click on “Create new IVR” to create a new IVR

Select from Outbound IVR or Inbound IVR
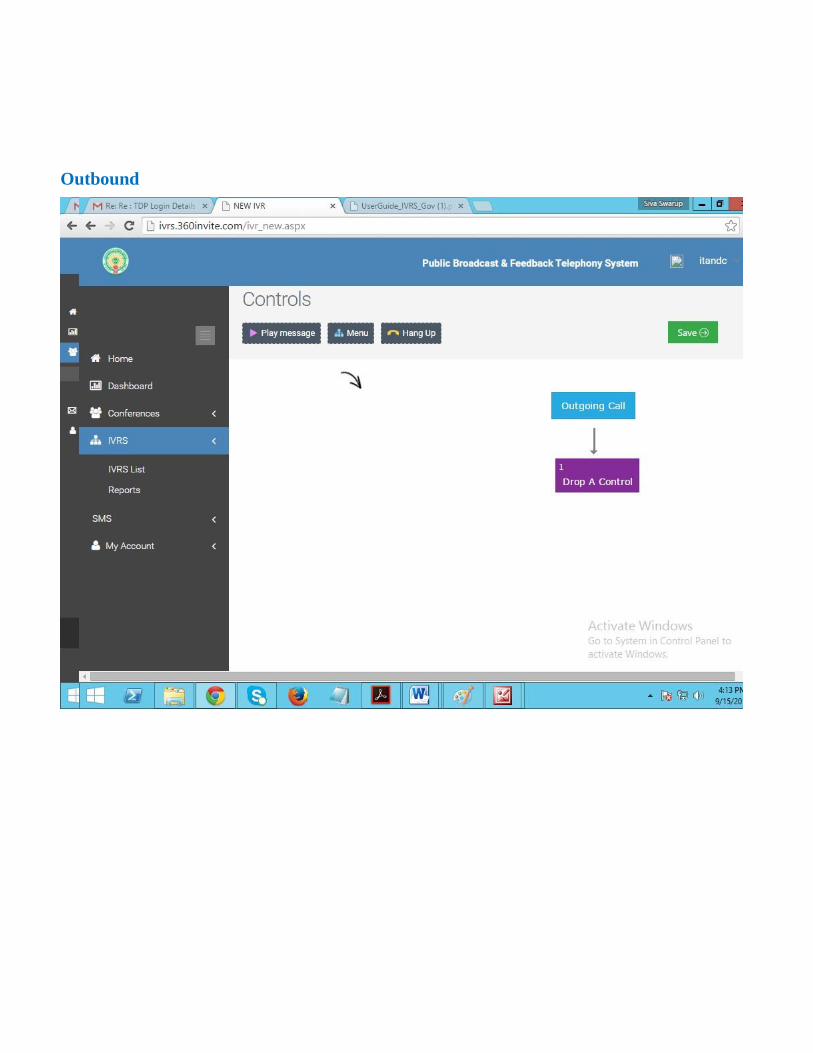
Outbound
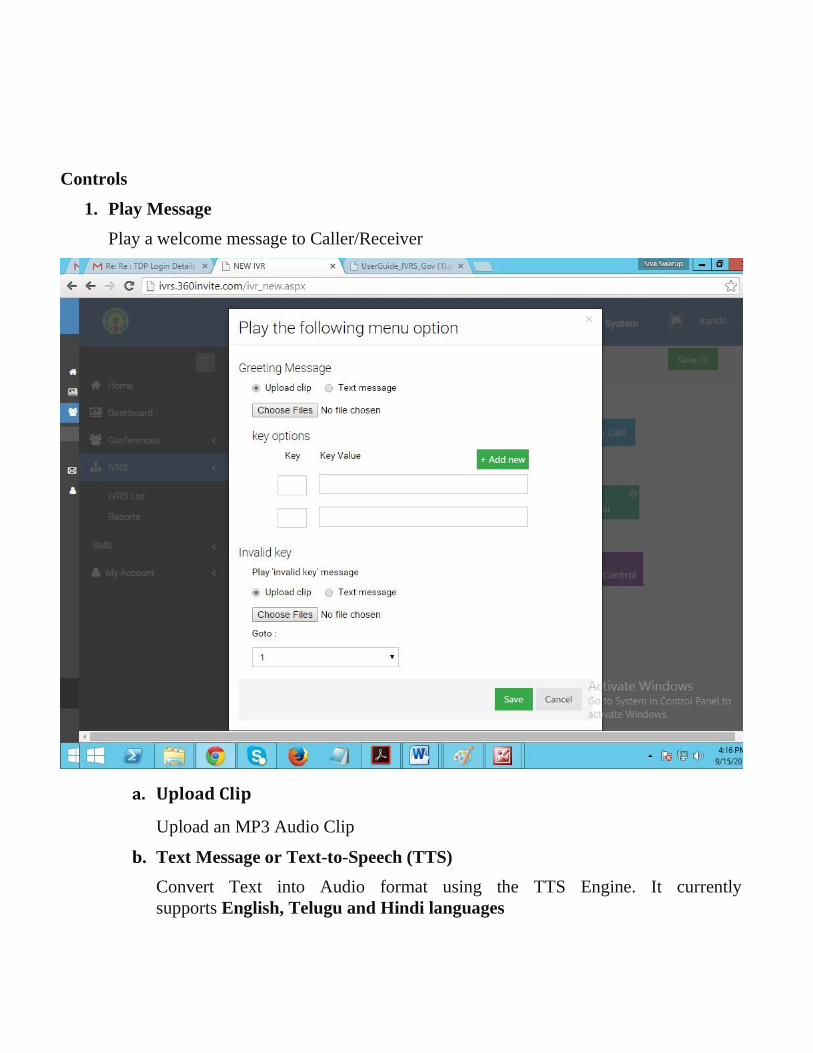
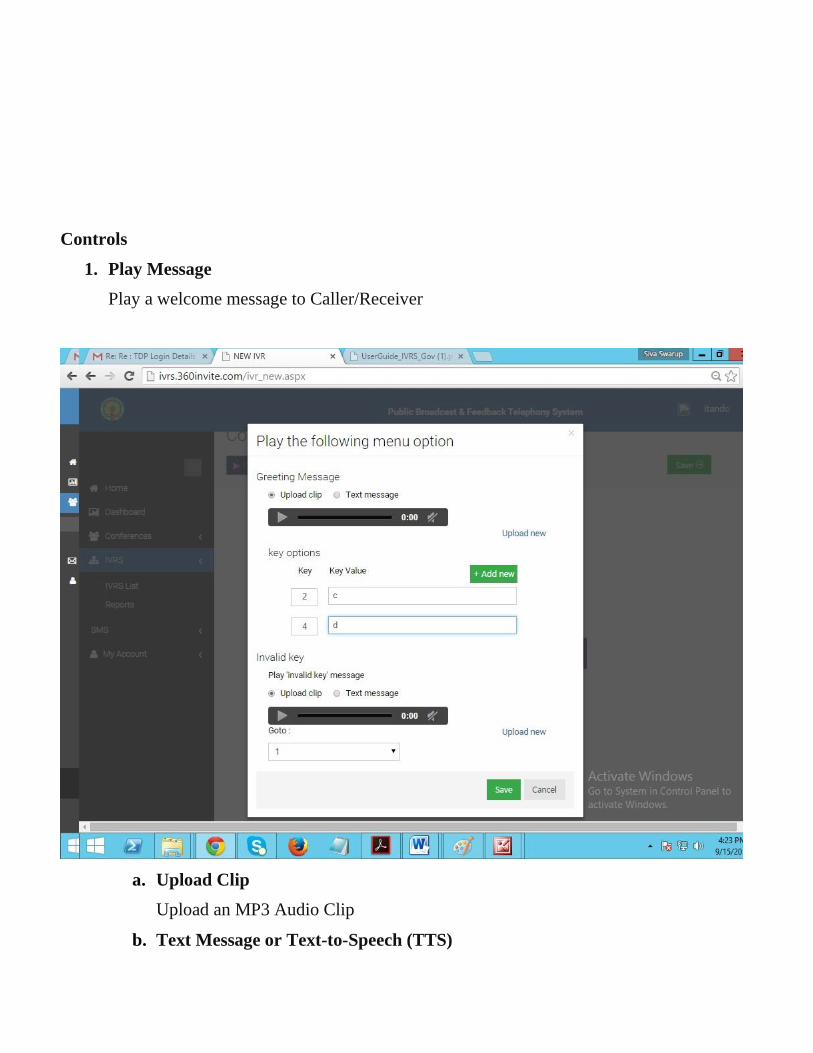
Controls
1. Play Message
Play a welcome message to Caller/Receiver
a. Upload Clip
Upload an MP3 Audio Clip
b. Text Message or Text-to-Speech (TTS)
Convert Text into Audio format using the TTS Engine. It currently
supports English, Telugu and Hindi languages
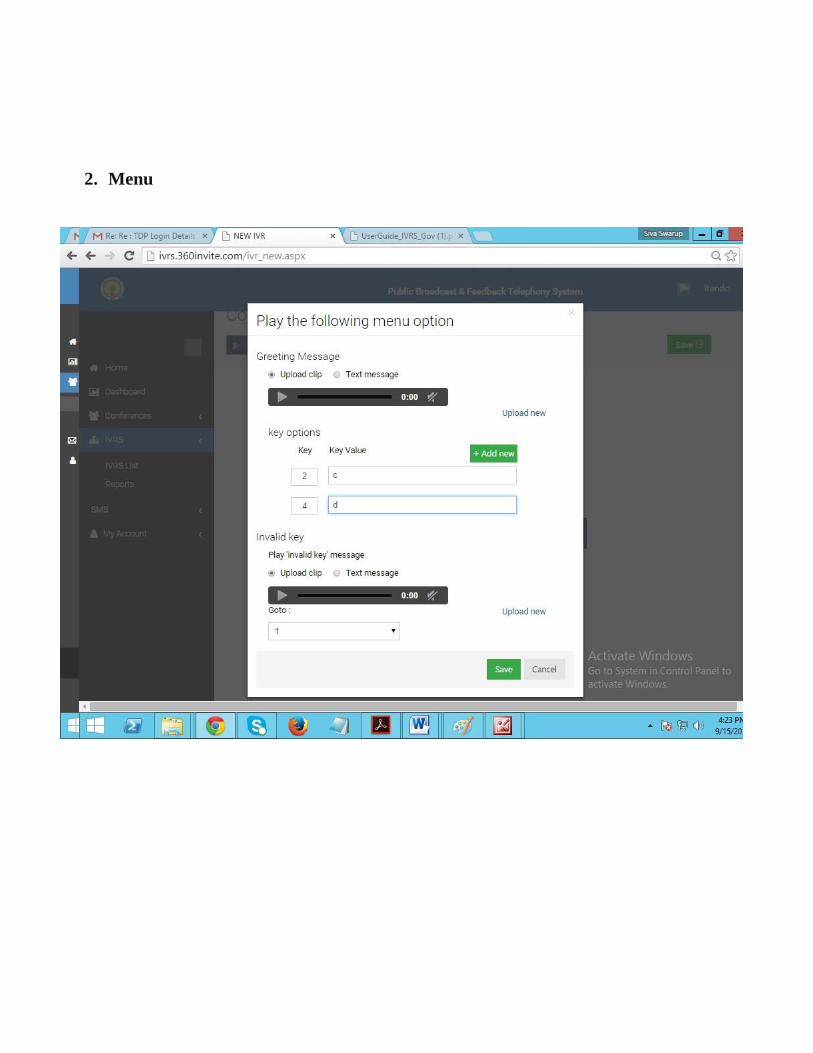
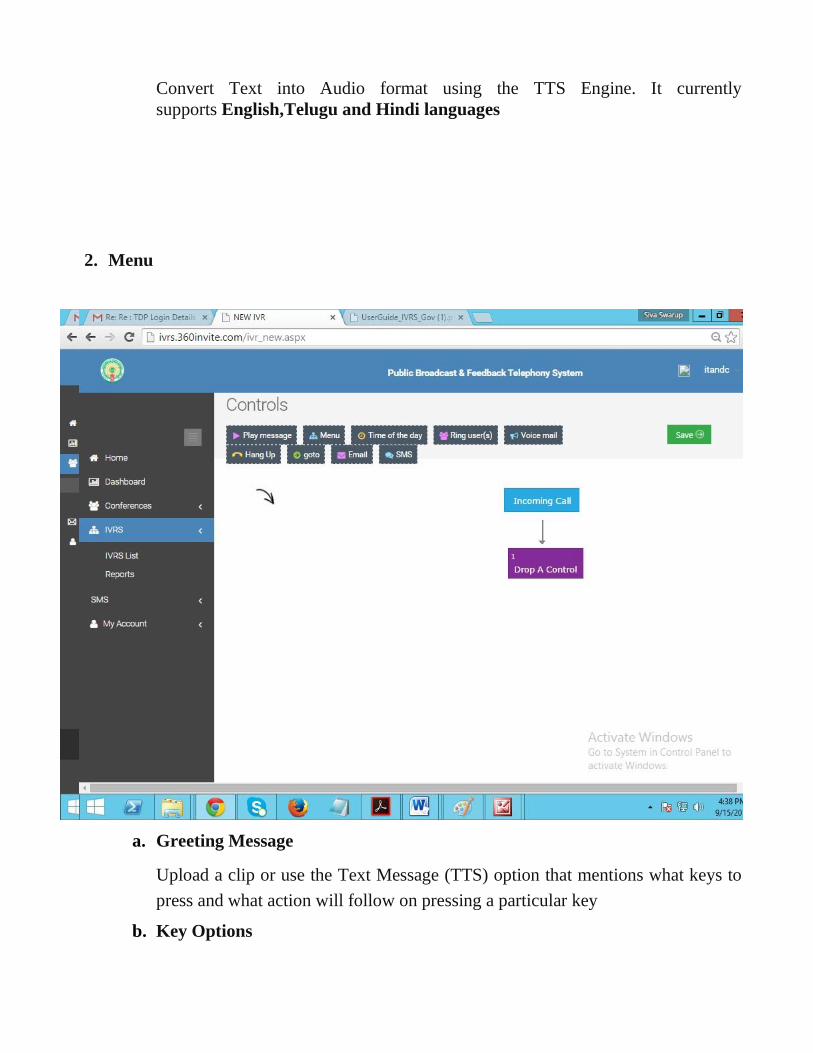
2. Menu
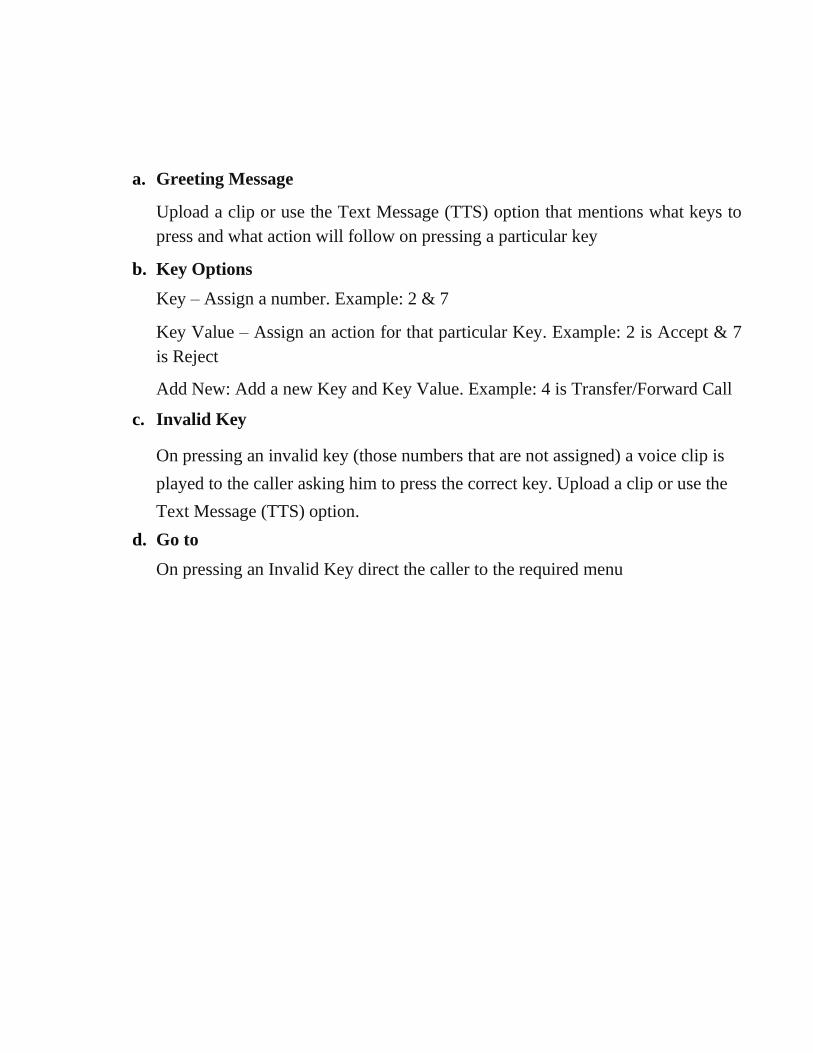
a. Greeting Message
Upload a clip or use the Text Message (TTS) option that mentions what keys to
press and what action will follow on pressing a particular key
b. Key Options
Key – Assign a number. Example: 2 & 7
Key Value – Assign an action for that particular Key. Example: 2 is Accept & 7
is Reject
Add New: Add a new Key and Key Value. Example: 4 is Transfer/Forward Call
c. Invalid Key
On pressing an invalid key (those numbers that are not assigned) a voice clip is
played to the caller asking him to press the correct key. Upload a clip or use the
Text Message (TTS) option.
d. Go to
On pressing an Invalid Key direct the caller to the required menu
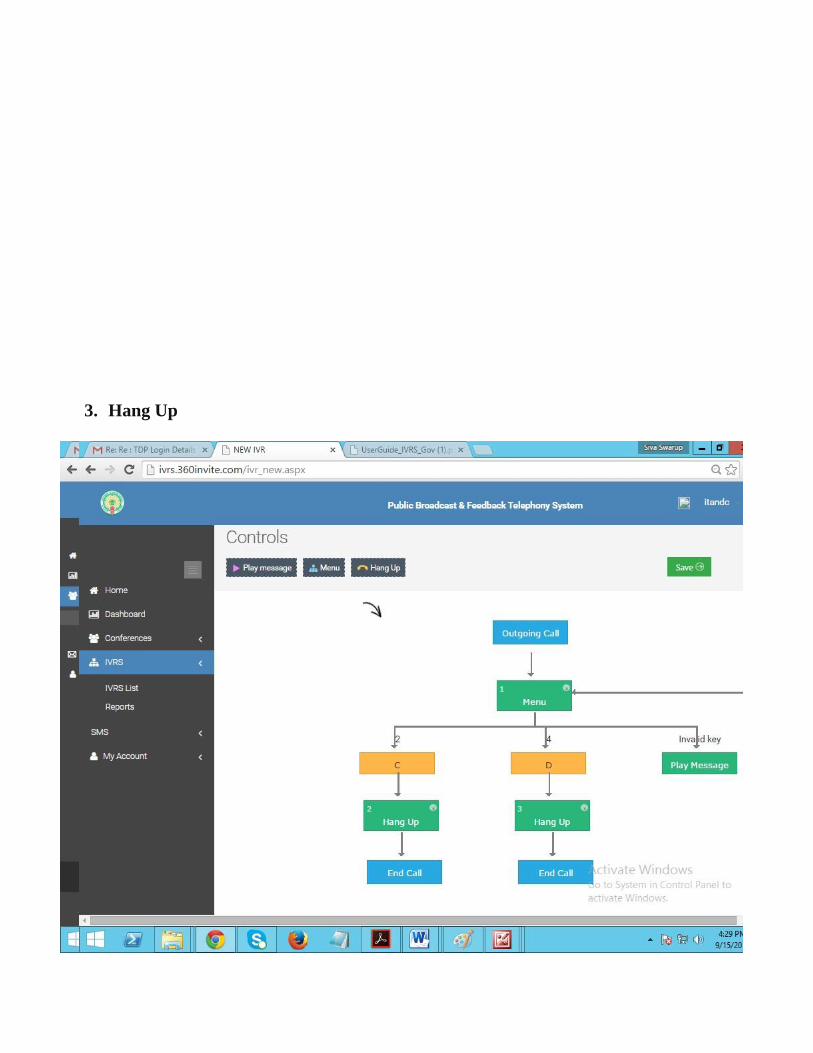
3. Hang Up
a. Send SMS to Caller
Send SMS to Caller on ending the call
b. Send SMS to User
Send SMS to Client or authorized person on ending the call
c. Send Email to
Send Email to multiple parties on ending the call
d. Simply Hang up
‘Clicking on Save’ without selecting any of the above options, simply ends the
cal
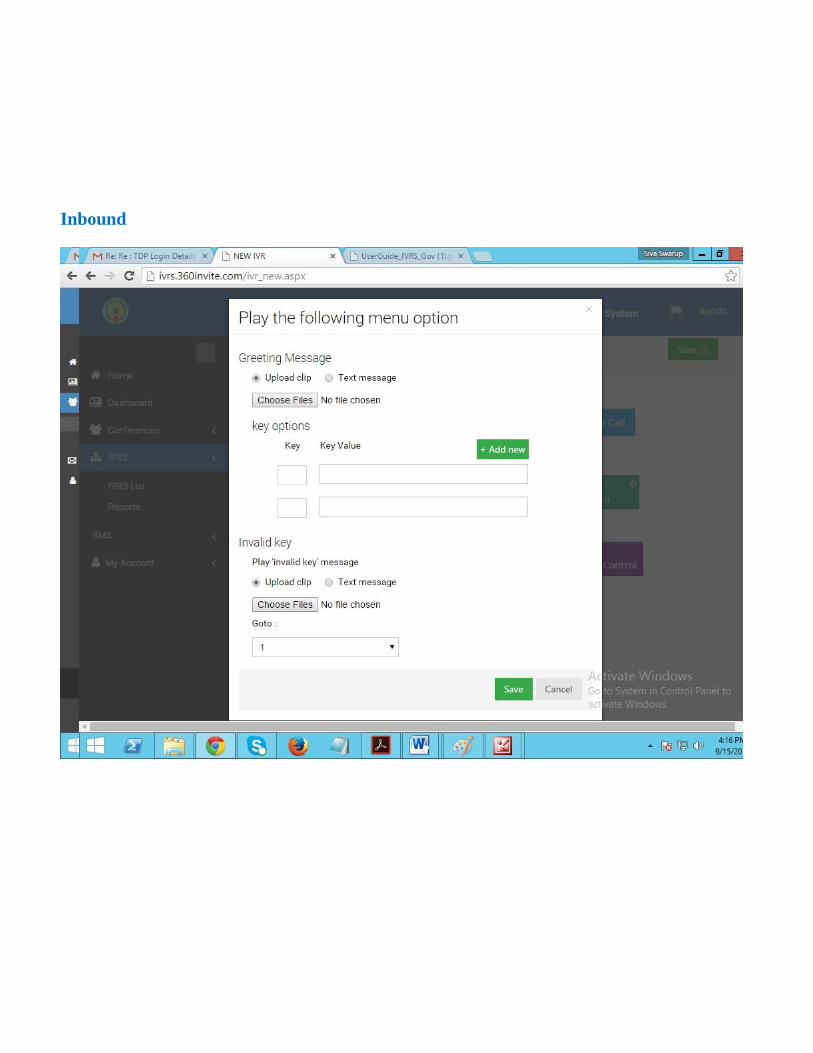
Inbound
Controls
1. Play Message
Play a welcome message to Caller/Receiver
a. Upload Clip
Upload an MP3 Audio Clip
b. Text Message or Text-to-Speech (TTS)
Convert Text into Audio format using the TTS Engine. It currently
supports English,Telugu and Hindi languages
2. Menu
a. Greeting Message
Upload a clip or use the Text Message (TTS) option that mentions what keys to
press and what action will follow on pressing a particular key
b. Key Options
Key – Assign a number. Example: 2 & 7
Key Value – Assign an action for that particular Key. Example: 2 is Accept & 7
is Reject
Add New: Add a new Key and Key Value. Example: 4 is Transfer/Forward Call
c. Invalid Key
On pressing an invalid key (those numbers that are not assigned) a voice clip is
played to the caller asking him to press the correct key. Upload a clip or use the
Text Message (TTS) option.
d. Go to
On pressing an Invalid Key direct the caller to the required menu
3. Time of the Day
Forward/Transfer calls based on time of the day. Create more complicated work flows
based on day of the week.
4. Ring User(s)
a. Add New
Add Agent Contact information (name, number and email)
b. Ring Strategy
Ring all Agents at once or one at a time (round-robin strategy)
c. Login Authentication
Option to add additional login security layer for agent
d. Wait Clip
Upload an MP3 clip
e. User Busy
If agent is busy option to send an SMS to caller and/or forward to Voice Mail.
Recorded voice mail clip can also be emailed to concerned person(s).
5. Voice Mail
a. Greeting Message
Upload MP3 or use TTS
b. Thank You Message
Upload MP3 or use TTS
c. Select User
Select which agent’s voice mail the clip should be forwarded to
d. Notify User
SMS and/or Email concerned agent about receiving a voice mail
6. Go To
Direct Callers to required IVR menu as per their key press
7. Email
Trigger Emails (Subject & Body can be edited) to concerned person(s)
8. SMS
Trigger SMS to concerned person(s)
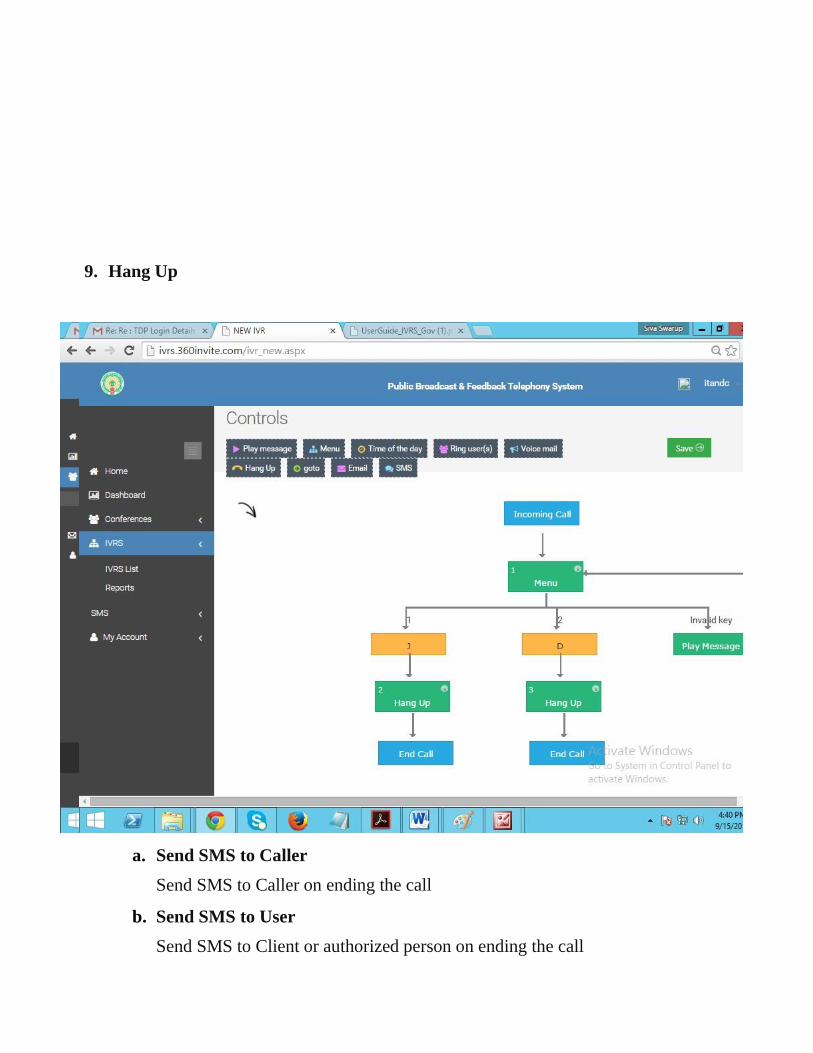
9. Hang Up
a. Send SMS to Caller
Send SMS to Caller on ending the call
b. Send SMS to User
Send SMS to Client or authorized person on ending the call
c. Send Email to
Send Email to multiple parties on ending the call
d. Simply Hang up
‘Clicking on Save’ without selecting any of the above options, simply ends the
call
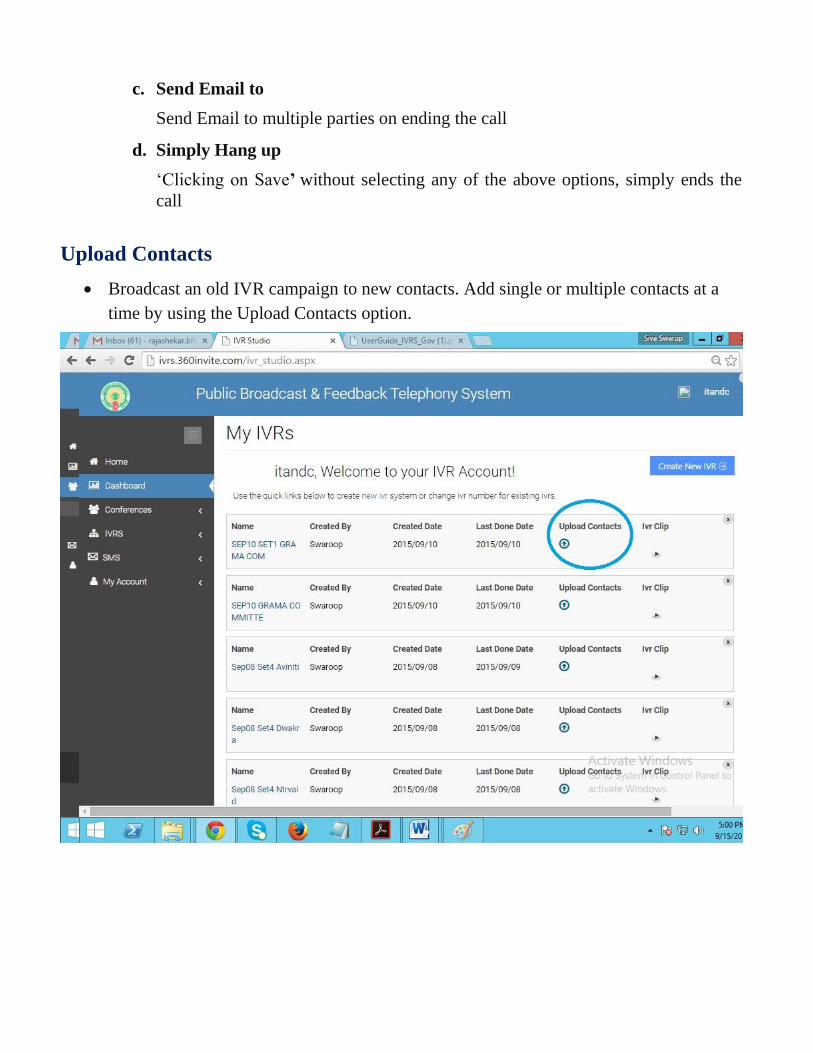
Upload Contacts
Broadcast an old IVR campaign to new contacts. Add single or multiple contacts at a
time by using the Upload Contacts option.
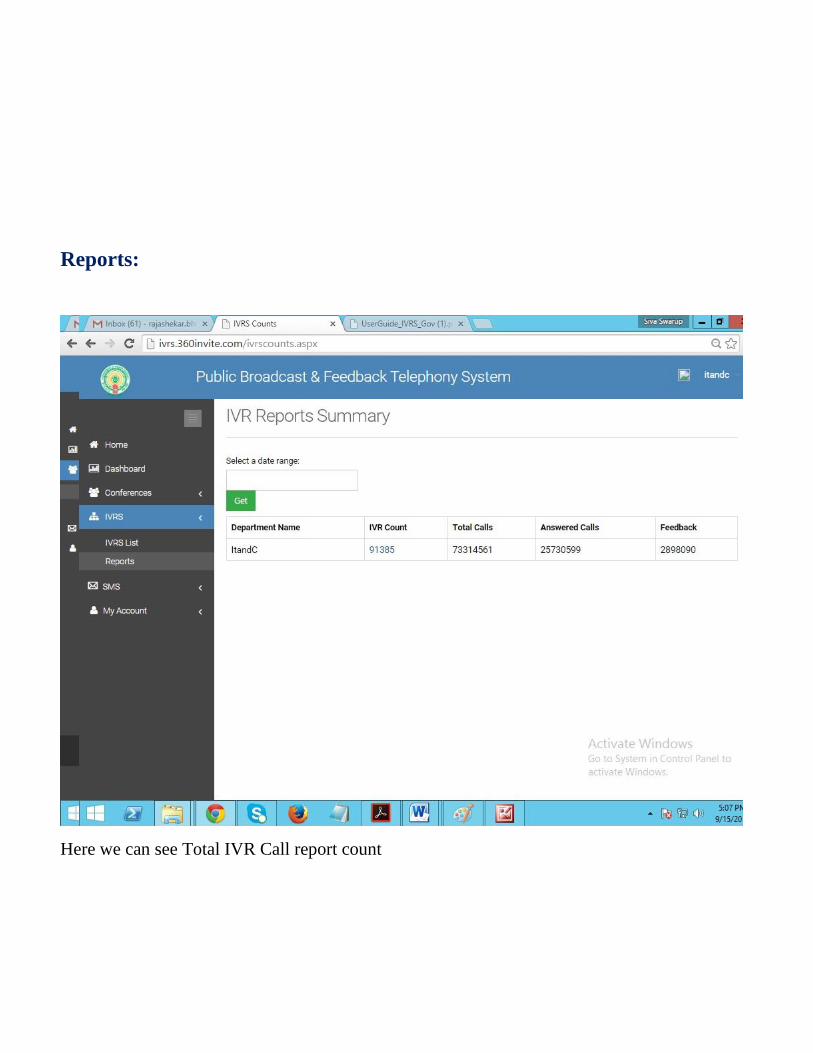
Reports:
Here we can see Total IVR Call report count
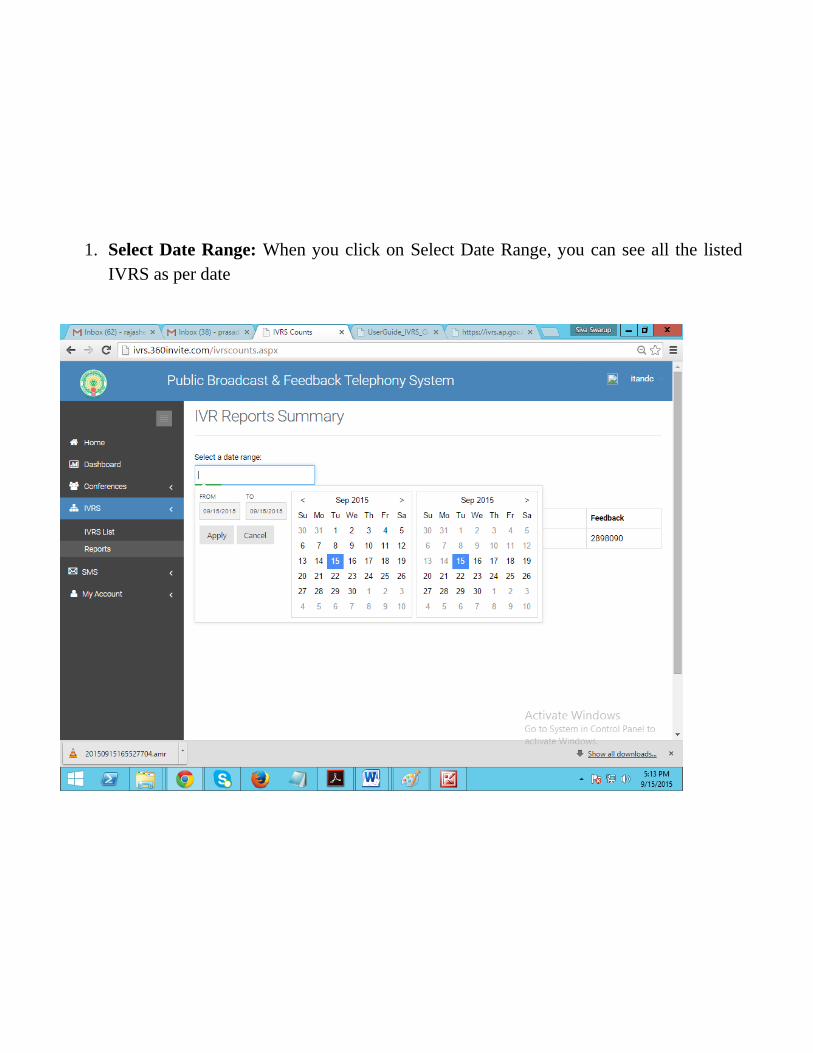
1. Select Date Range: When you click on Select Date Range, you can see all the listed
IVRS as per date
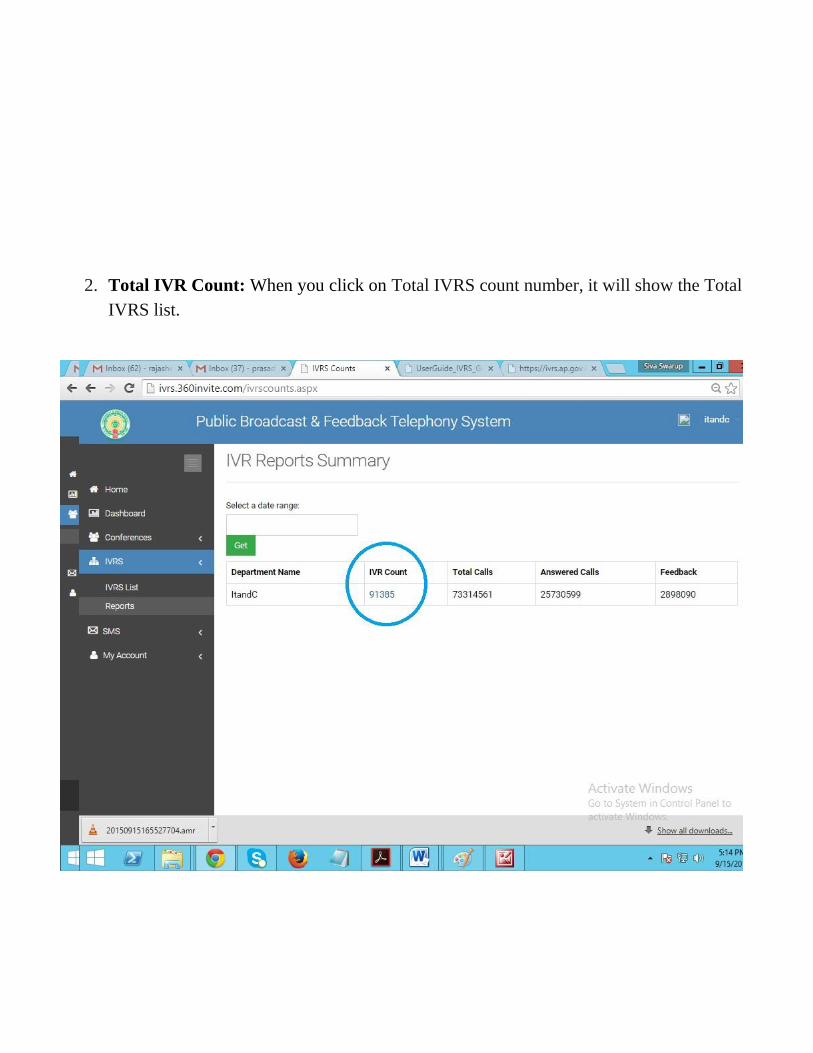
2. Total IVR Count: When you click on Total IVRS count number, it will show the Total
IVRS list.

3. IVR summary report: We can view the total IVRS report as per the range of
departments
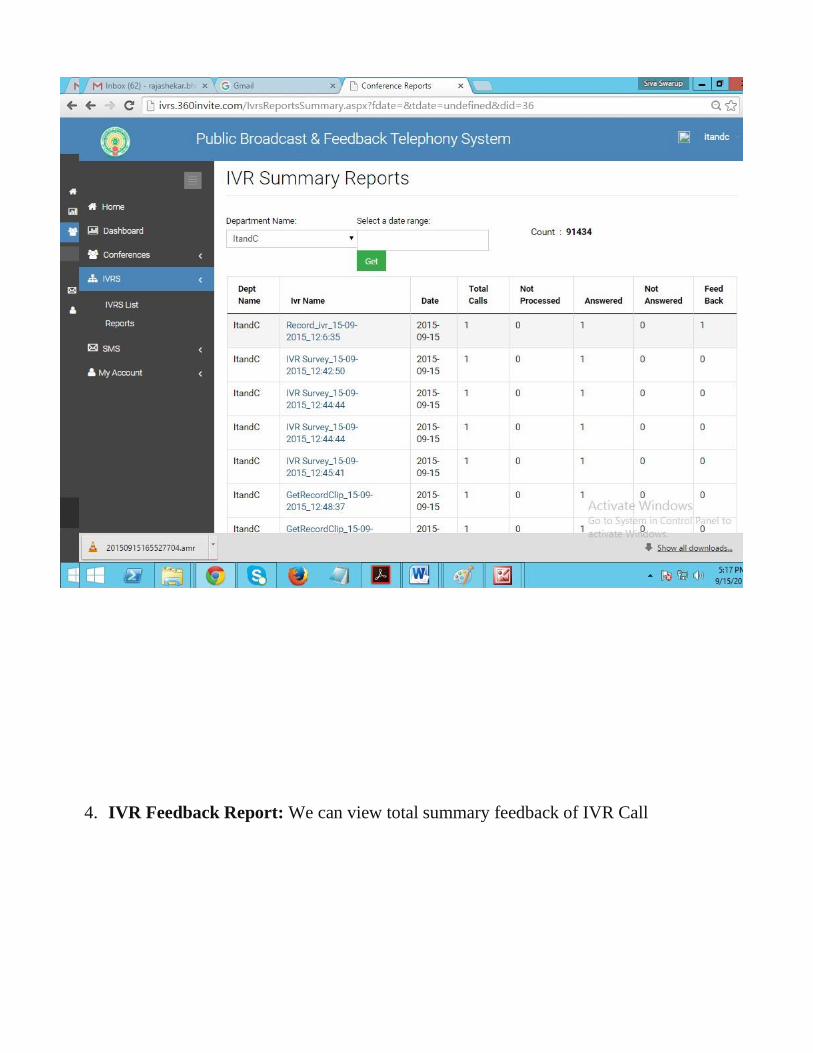
4. IVR Feedback Report: We can view total summary feedback of IVR Call
SMS:
This tab allows you to view Send SMS
Reports
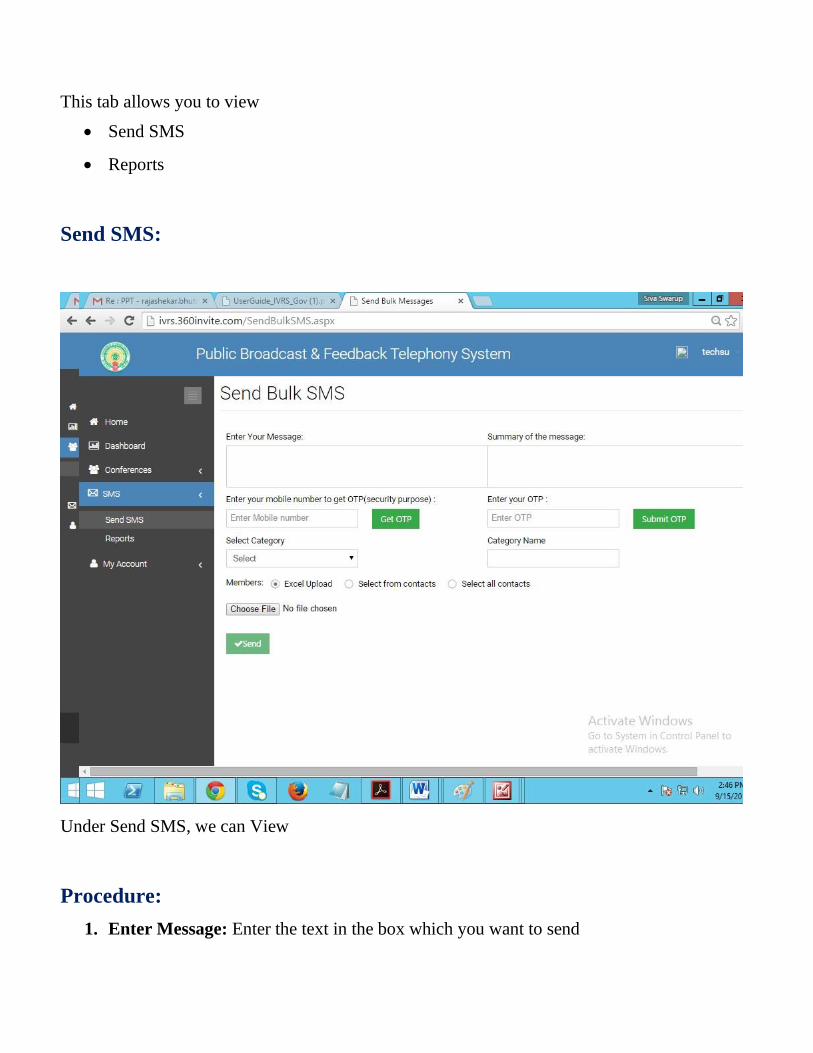
Send SMS:
Under Send SMS, we can View
Procedure:
1. Enter Message: Enter the text in the box which you want to send
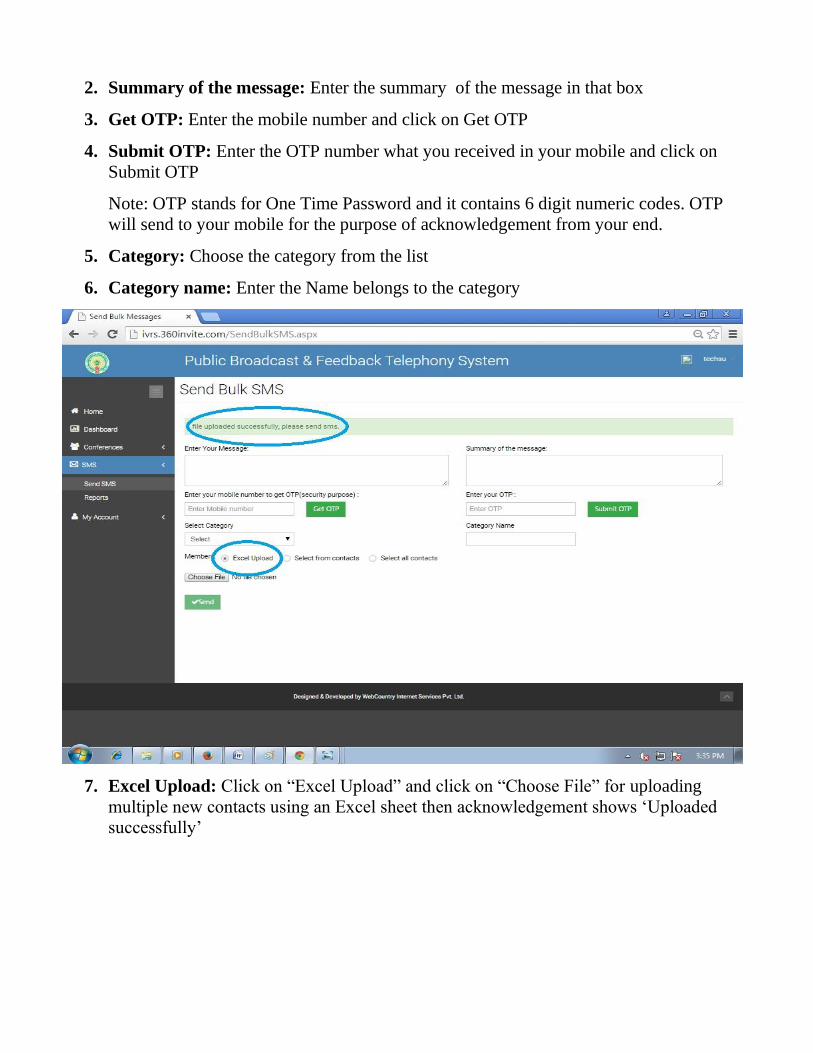
2. Summary of the message: Enter the summary of the message in that box
3. Get OTP: Enter the mobile number and click on Get OTP
4. Submit OTP: Enter the OTP number what you received in your mobile and click on
Submit OTP
Note: OTP stands for One Time Password and it contains 6 digit numeric codes. OTP
will send to your mobile for the purpose of acknowledgement from your end.
5. Category: Choose the category from the list
6. Category name: Enter the Name belongs to the category
7. Excel Upload: Click on “Excel Upload” and click on “Choose File” for uploading
multiple new contacts using an Excel sheet then acknowledgement shows ‘Uploaded
successfully’
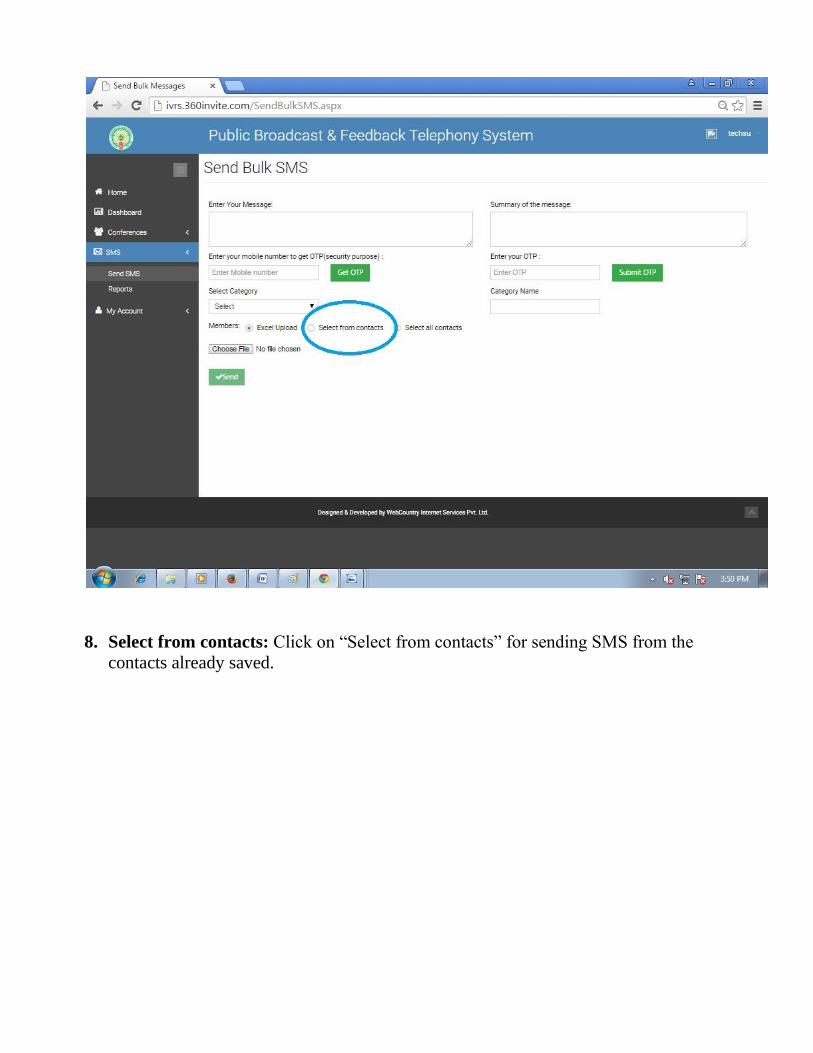
8. Select from contacts: Click on “Select from contacts” for sending SMS from the
contacts already saved.
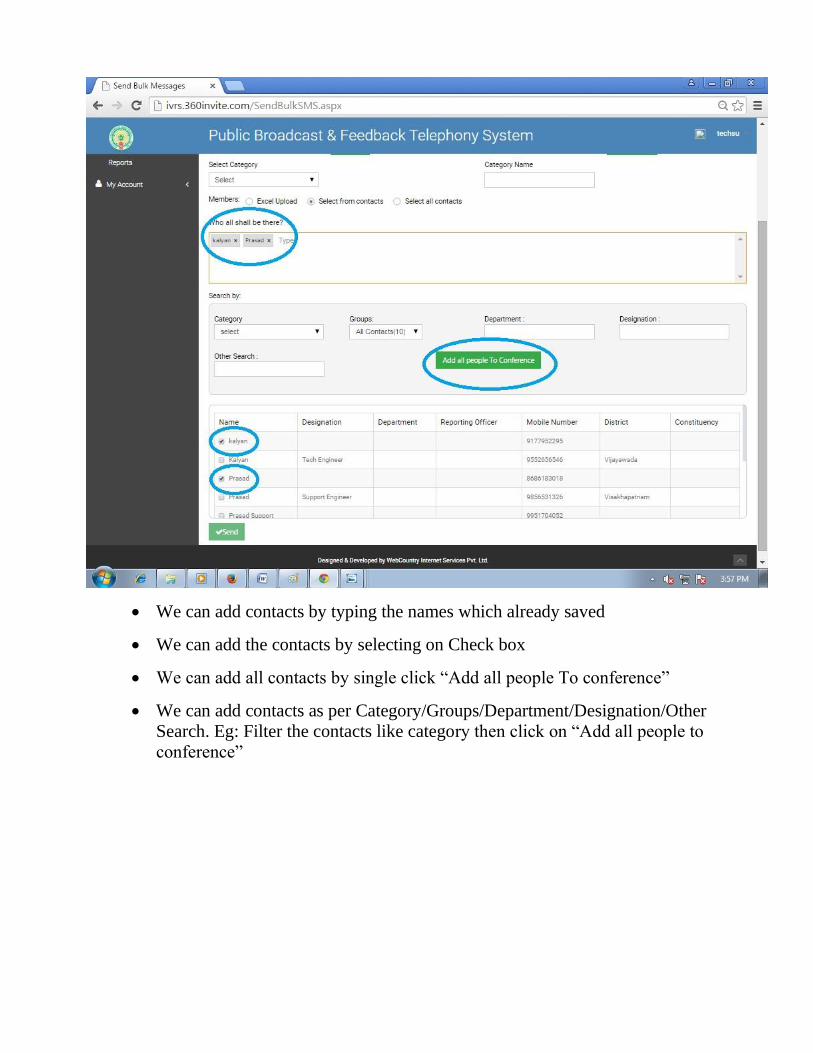
We can add contacts by typing the names which already saved
We can add the contacts by selecting on Check box
We can add all contacts by single click “Add all people To conference”
We can add contacts as per Category/Groups/Department/Designation/Other
Search. Eg: Filter the contacts like category then click on “Add all people to
conference”
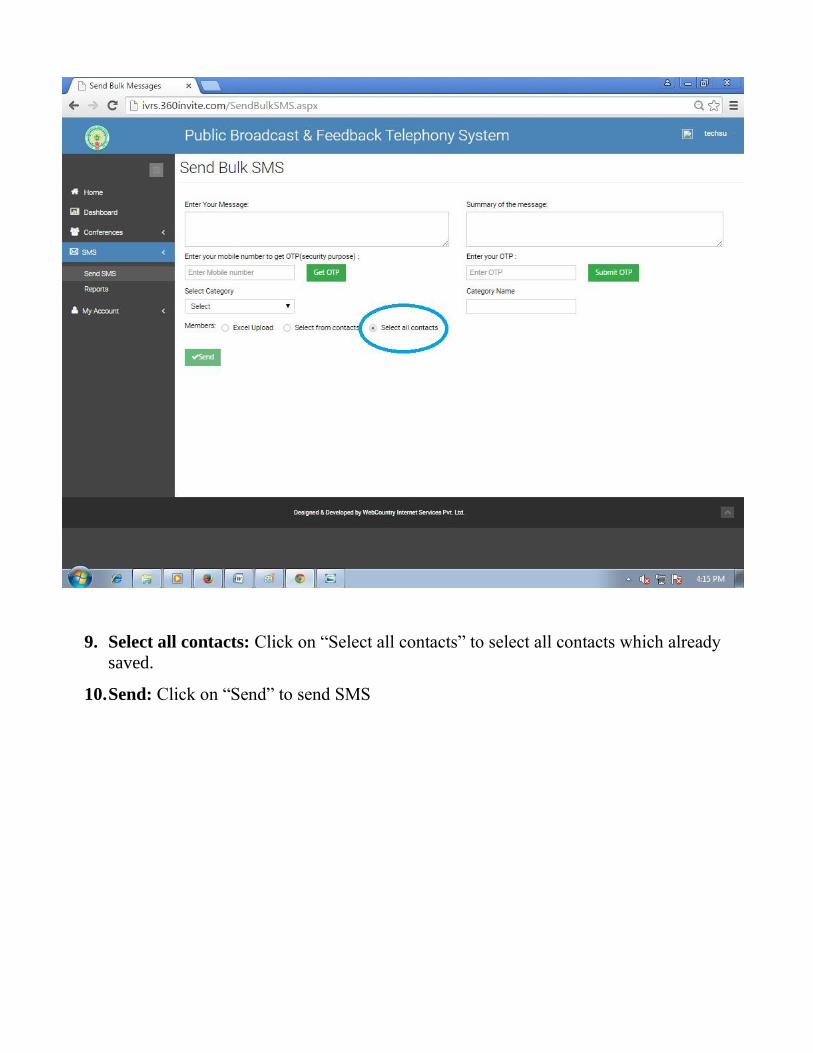
9. Select all contacts: Click on “Select all contacts” to select all contacts which already
saved.
10. Send: Click on “Send” to send SMS
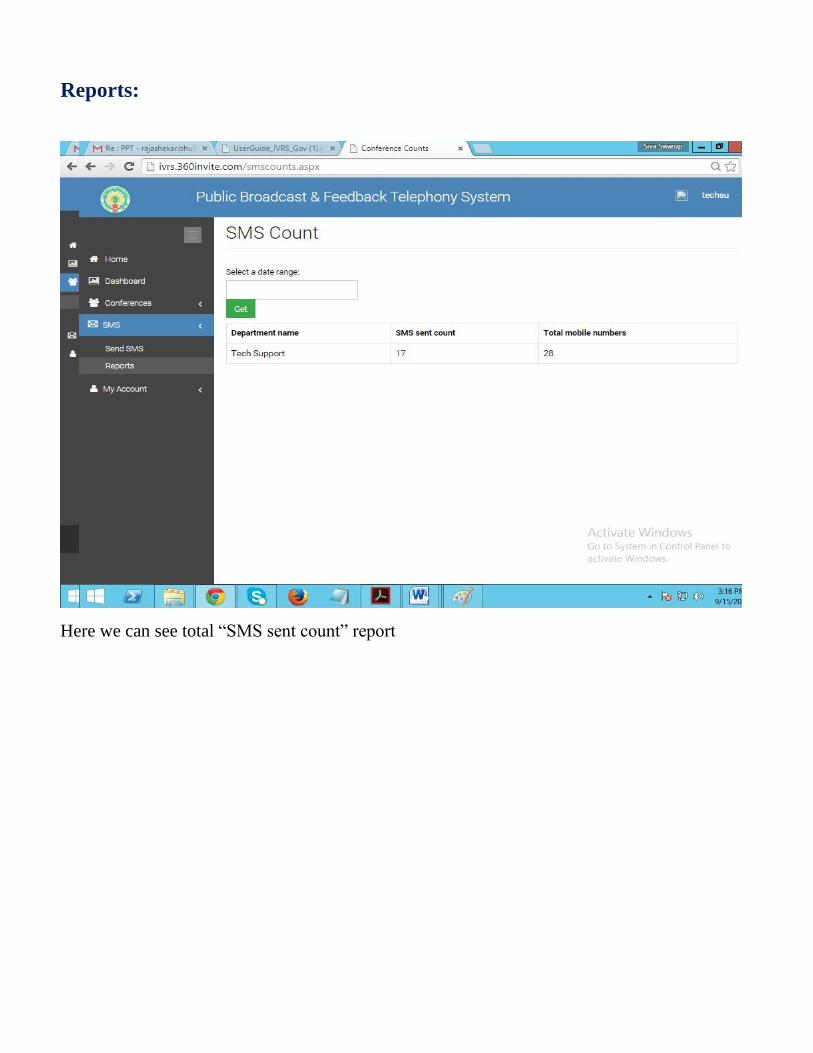
Reports:
Here we can see total “SMS sent count” report
1. Select Date Range: When you click on Select Date Range, you can see all the listed
SMS Count as per date
2. SMS sent count: When you click on SMS sent count number, it will shows the Total
conferences list.
3. SMS report: We can view the total SMS report.

4. Mobile Numbers: We can see total sent mobile numbers by clicking on “Total Sent
Number”. Eg:2
My Account:
This tab allows you to view Profile
Contacts
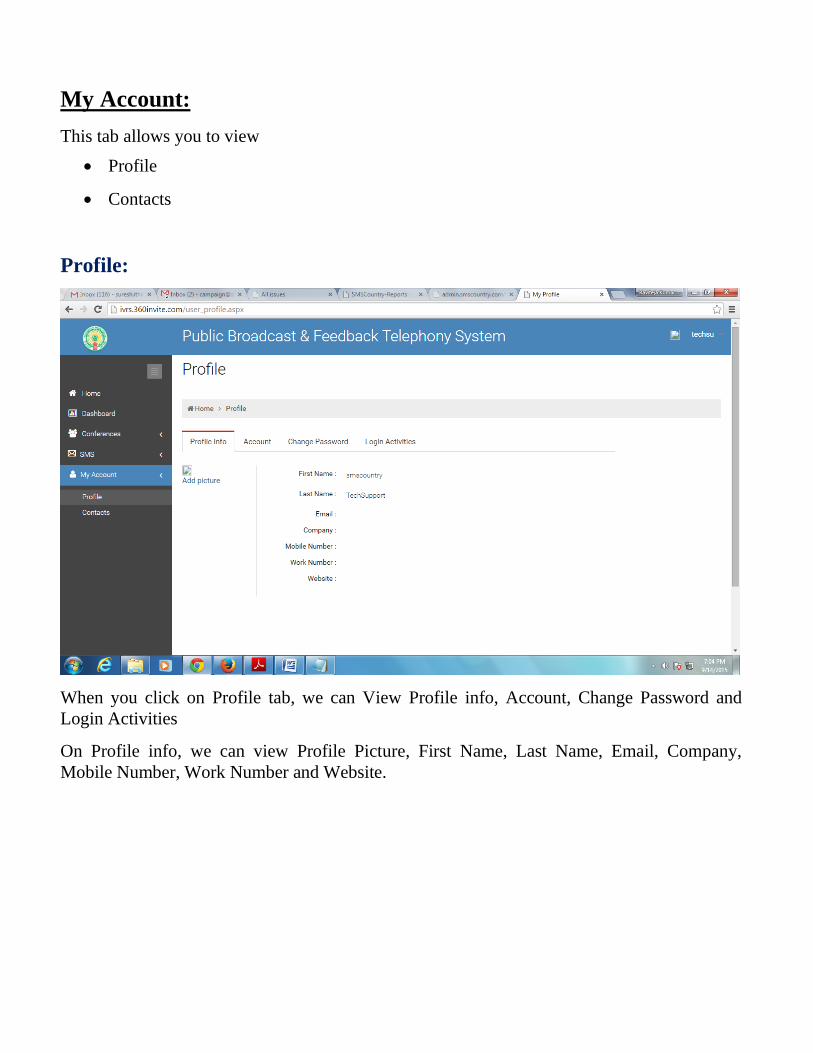
Profile:
When you click on Profile tab, we can View Profile info, Account, Change Password and
Login Activities
On Profile info, we can view Profile Picture, First Name, Last Name, Email, Company,
Mobile Number, Work Number and Website.

Account:
This tab allows you to view Personal Info
Change Avatar
Personal Info
On Personal information and we can modify information like First Name, Last Name, Email,
Company, Mobile Number, Work Number and Website.

Change Avatar
On Change Avatar, we can upload “Avatar” from your computer by click on “Choose file”
for uploading Avatar then click on “Save”
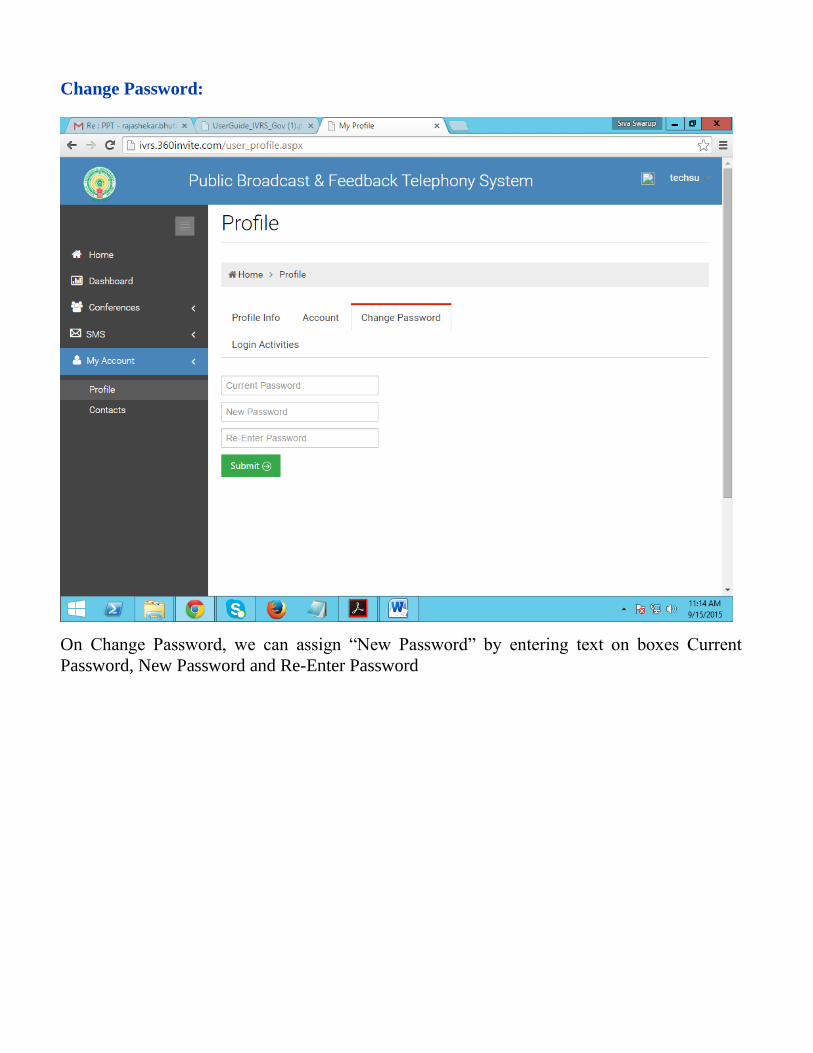
Change Password:
On Change Password, we can assign “New Password” by entering text on boxes Current
Password, New Password and Re-Enter Password
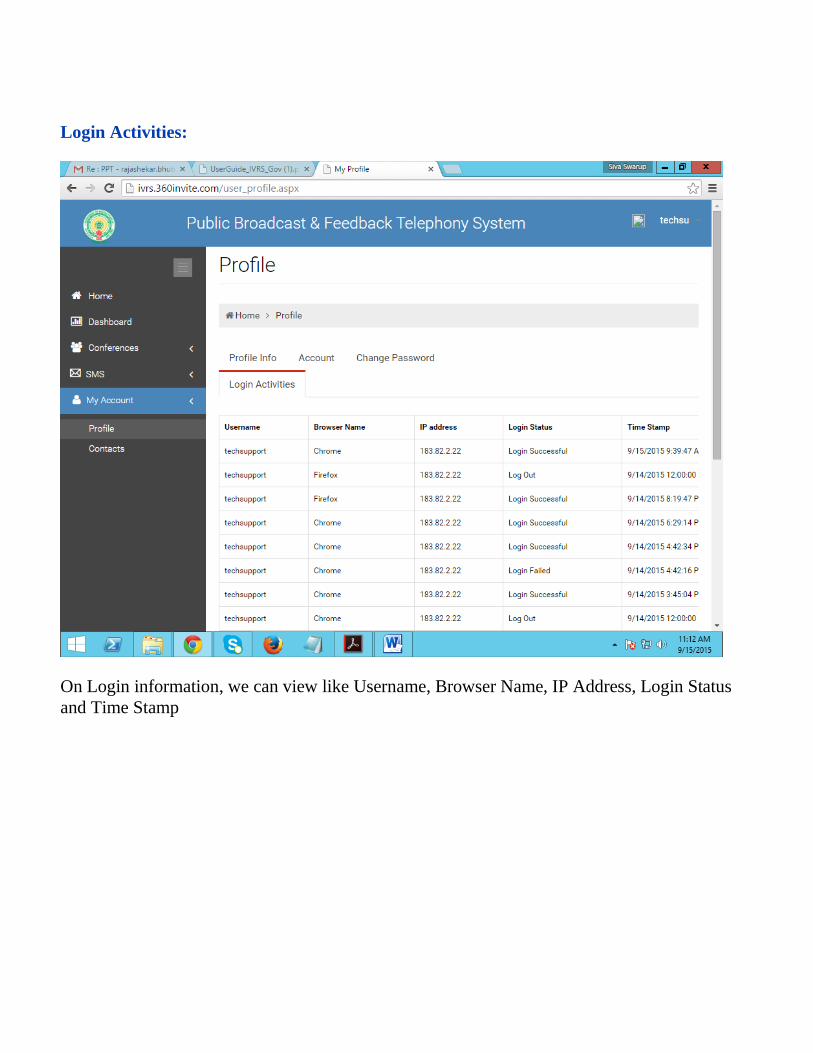
Login Activities:
On Login information, we can view like Username, Browser Name, IP Address, Login Status
and Time Stamp
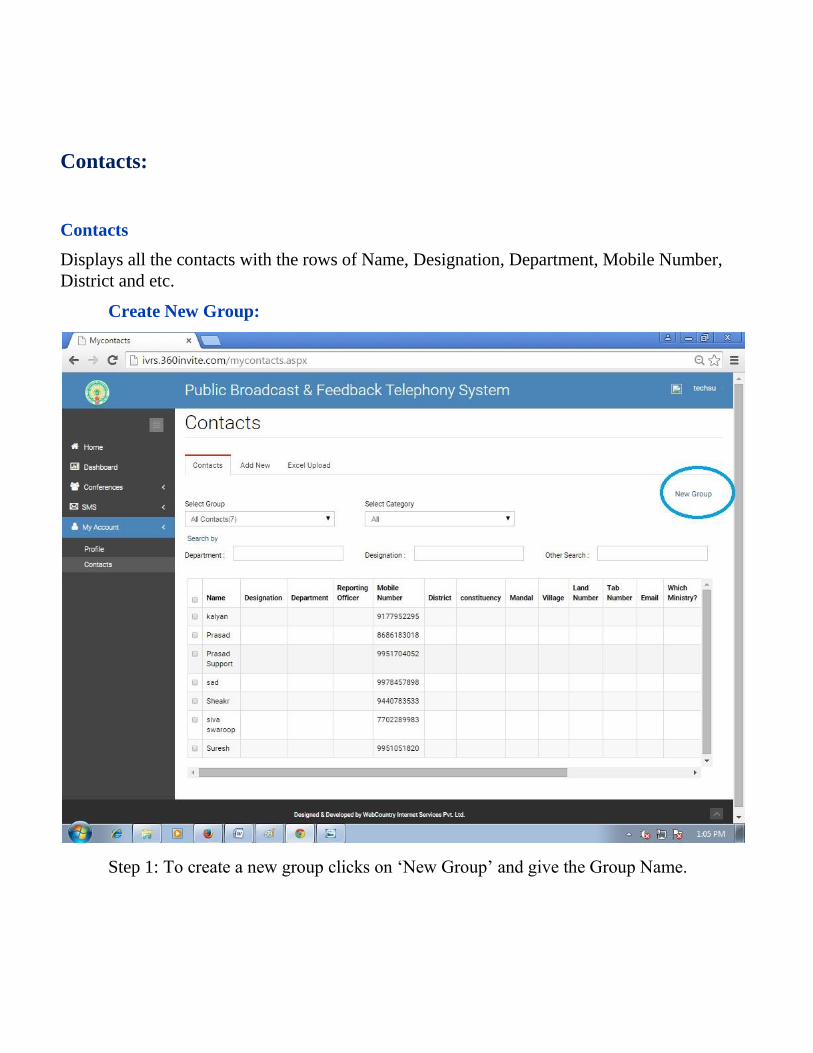
Contacts:
Contacts
Displays all the contacts with the rows of Name, Designation, Department, Mobile Number,
District and etc.
Create New Group:
Step 1: To create a new group clicks on ‘New Group’ and give the Group Name.
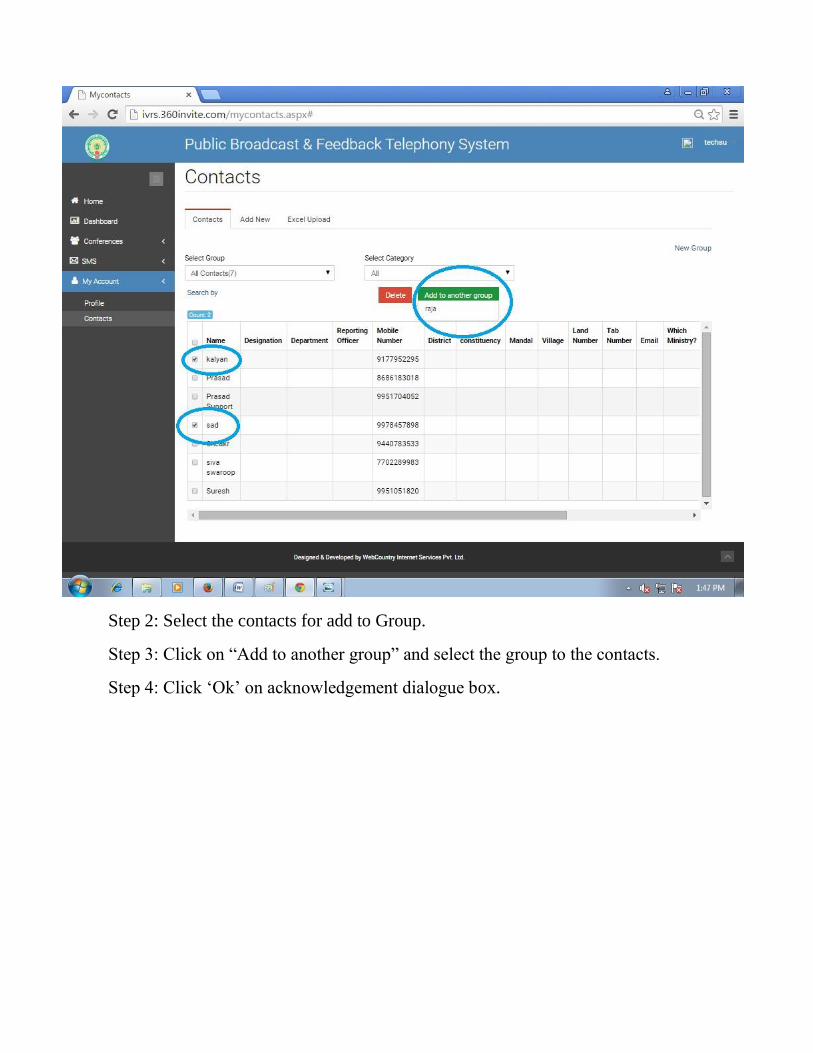
Step 2: Select the contacts for add to Group.
Step 3: Click on “Add to another group” and select the group to the contacts.
Step 4: Click ‘Ok’ on acknowledgement dialogue box.
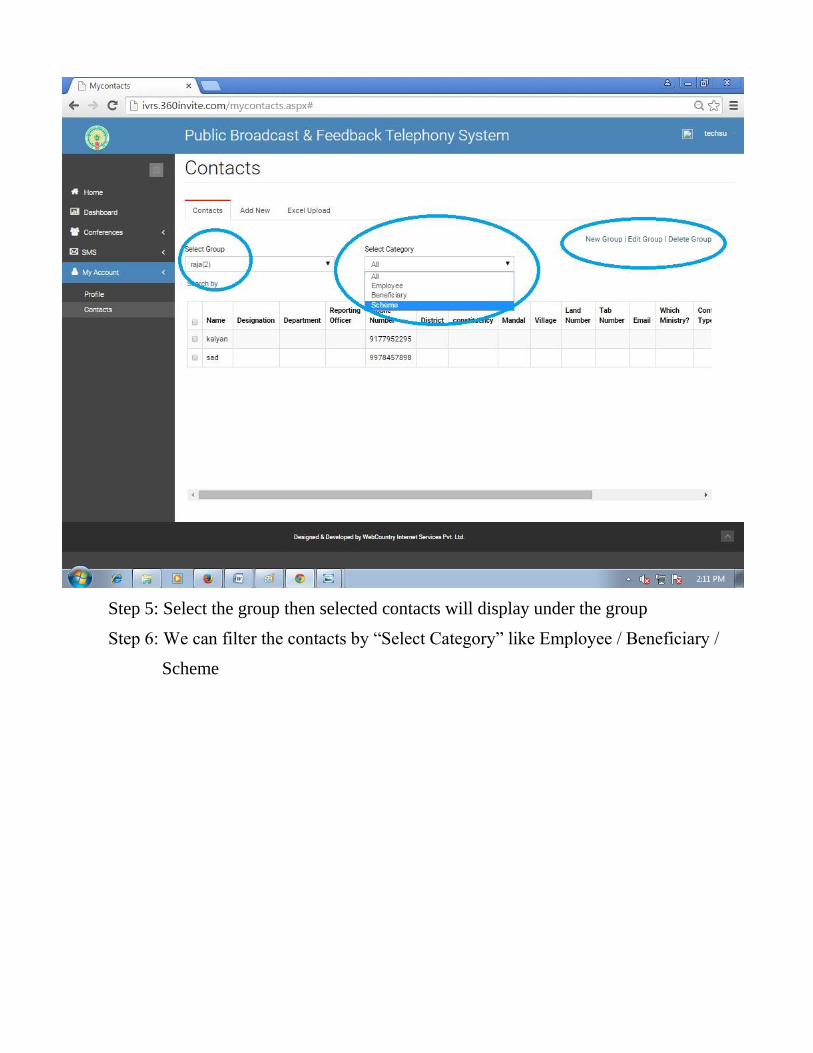
Step 5: Select the group then selected contacts will display under the group
Step 6: We can filter the contacts by “Select Category” like Employee / Beneficiary /
Scheme
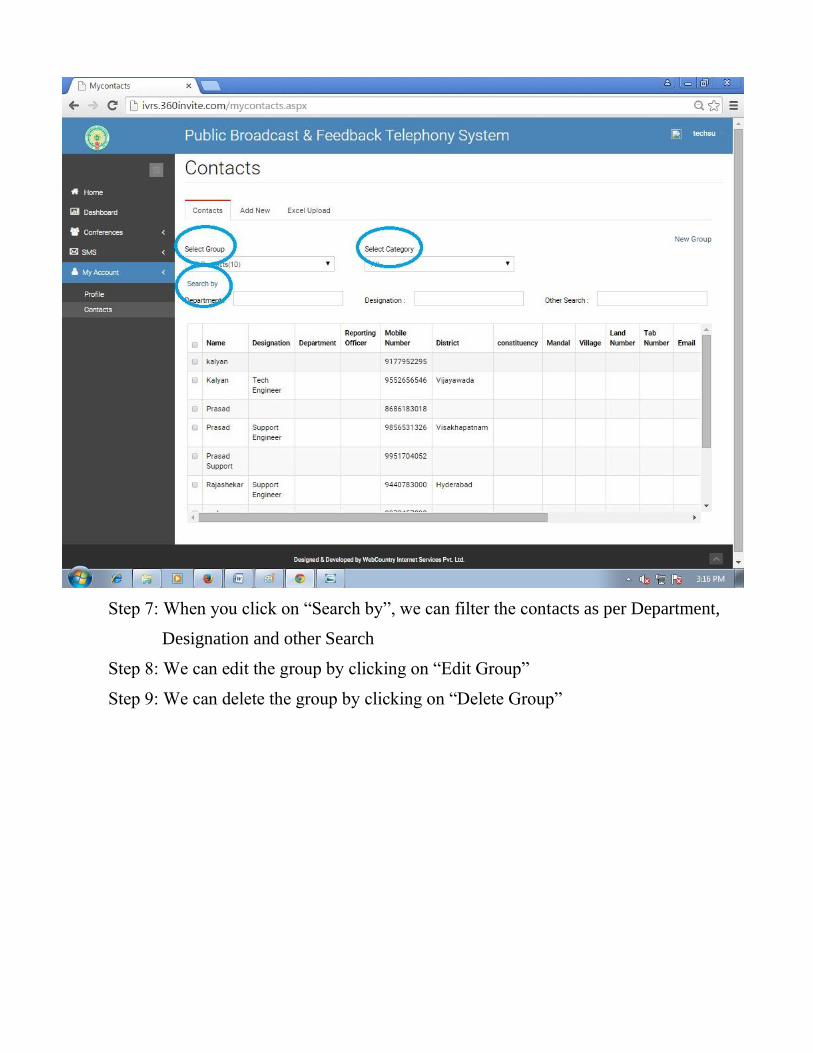
Step 7: When you click on “Search by”, we can filter the contacts as per Department,
Designation and other Search
Step 8: We can edit the group by clicking on “Edit Group”
Step 9: We can delete the group by clicking on “Delete Group”
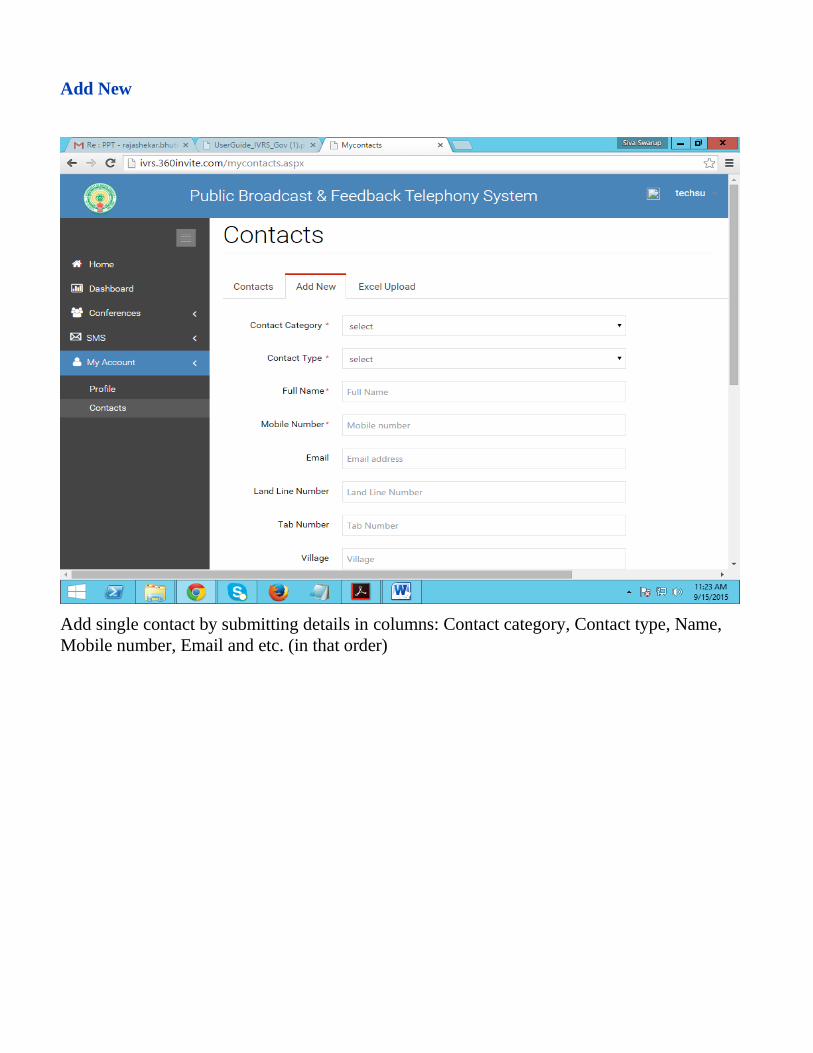
Add New
Add single contact by submitting details in columns: Contact category, Contact type, Name,
Mobile number, Email and etc. (in that order)
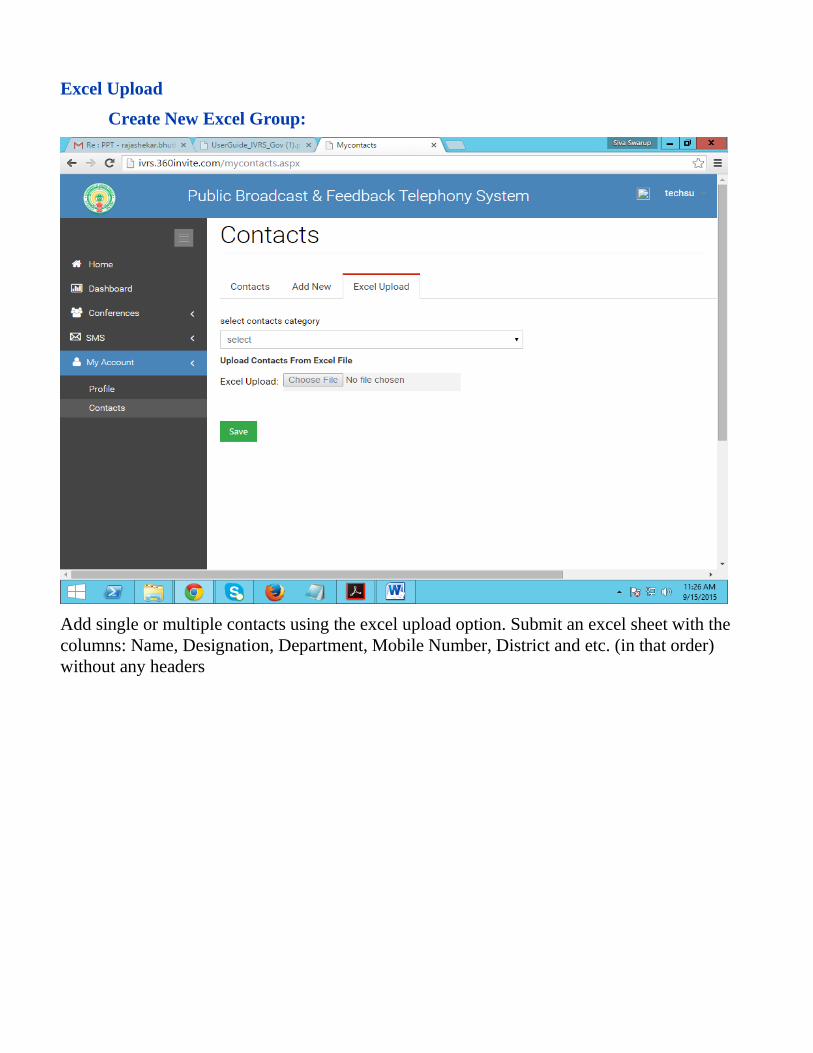
Excel Upload
Create New Excel Group:
Add single or multiple contacts using the excel upload option. Submit an excel sheet with the
columns: Name, Designation, Department, Mobile Number, District and etc. (in that order)
without any headers
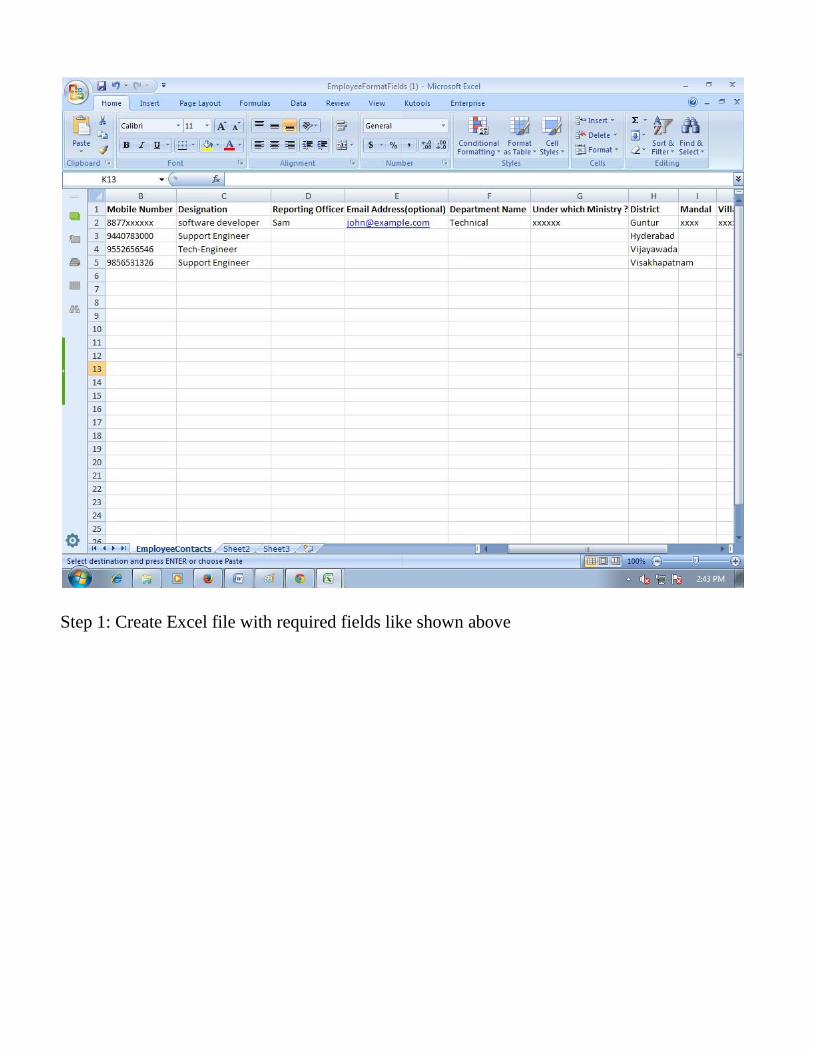
Step 1: Create Excel file with required fields like shown above

Step 2: Choose from “Select Contacts Category” like Employee / Beneficiary / Scheme
Step 3: Click “Download” for sample excel file (Optional)
Step 4: Click on “Choose File” for uploading excel file then click on “Save”
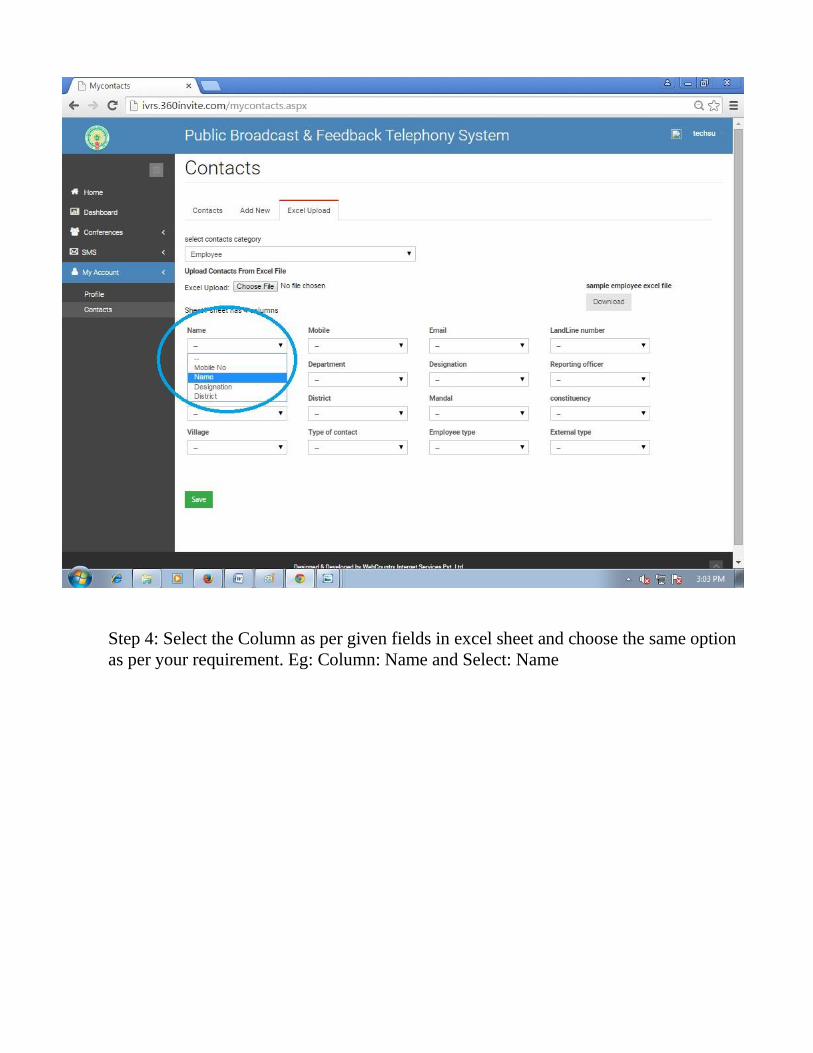
Step 4: Select the Column as per given fields in excel sheet and choose the same option
as per your requirement. Eg: Column: Name and Select: Name
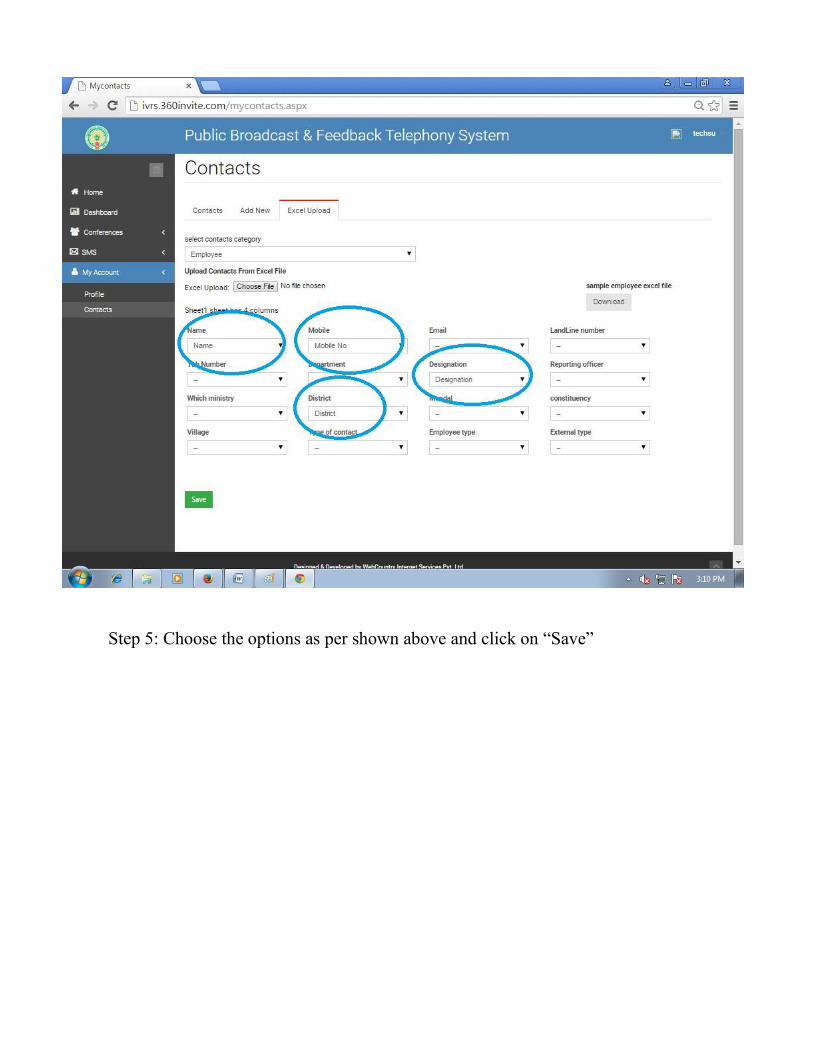
Step 5: Choose the options as per shown above and click on “Save”