Embed Size (px)
Citation preview

Using Microsoft Word to Create Theses and Long Documents
Contents What is a long document? .......................................................................................................... 2 The structure of a long document............................................................................................... 2 Overview of creating a long document ...................................................................................... 3 Detailed guidelines for creating a long document...................................................................... 4
Step 1 – The regulations......................................................................................................... 4 Step 2 – Use Numbered Styles............................................................................................... 5
Preparation ......................................................................................................................... 5 Adding the numbering scheme (Word 2000)..................................................................... 6 Cleaning Up........................................................................................................................ 7
Step 3 – Create a template...................................................................................................... 7 Step 4 – Create each chapter of your thesis using the template ............................................. 8 Step 5 – Create a master document and add the chapters ...................................................... 8 Step 6 – Create a table of contents and any other front matter ............................................ 10 Step 7 – Create the back matter............................................................................................ 12
Cleaning up long documents .................................................................................................... 12 Reference.................................................................................................................................. 13
1

Using Microsoft Word to Create Theses and Long Documents The purpose of this paper is to provide you with guidelines on working with long documents in Microsoft Word. Variations between Word versions make it hard to provide detailed instructions on actions, so we have attempted to write in terms of “what you need to do”, rather than “how to do it”. You will need to fill in the details using Word’s help system. Note: Where the need to demonstrate relatively difficult or non-obvious procedures occurs, we have used directions and screen shots from Word 2000. A great deal of pre-requisite knowledge is assumed. Ideally, you should be completely confident with the use of styles and templates as well as basic Word operations before putting together a long document. We recommend that you work through the companion article “Styles and Templates in Microsoft Word”. This article focuses on document structure and numbering schemes. It doesn’t include information on including drawings, pictures, charts or tables. Neither does it include information on bibliographic referencing. This information is available elsewhere. Finally, we recognise that many students will read this after they have done a great deal of work on their thesis, and we offer some tips on how to clean up a document prior to using the techniques we describe here.
What is a long document? There is no simple definition of a long document but a few examples should help. Textbooks are long documents as are technical reports, annual reports, legal transcripts, documentation of all kinds and, of course, theses. A long document will have some or all of the following features:
• A series of separate chapters, each with their own header • A title page • A table of contents, table of figures, bibliography and index • Embedded graphics and tables with captions • Footnotes or endnotes • Cross references to figures, headings and chapters
The structure of a long document A long document usually consists of three main sections; the front matter, the body or subject matter, and the back or end matter.(Xerox Corporation, 1988) The front matter is everything that physically comes before the first chapter. This typically includes the title page, copyright page, preface, table of contents, table of figures, table of authorities etc. Its purpose is to introduce the publication and give an overview of the contents. In many publications the front matter is distinguished from the subject matter by a different page numbering scheme. Roman numerals are often used for numbering the front matter pages, as distinct from Arabic numerals which are often used throughout the rest of a document.
2
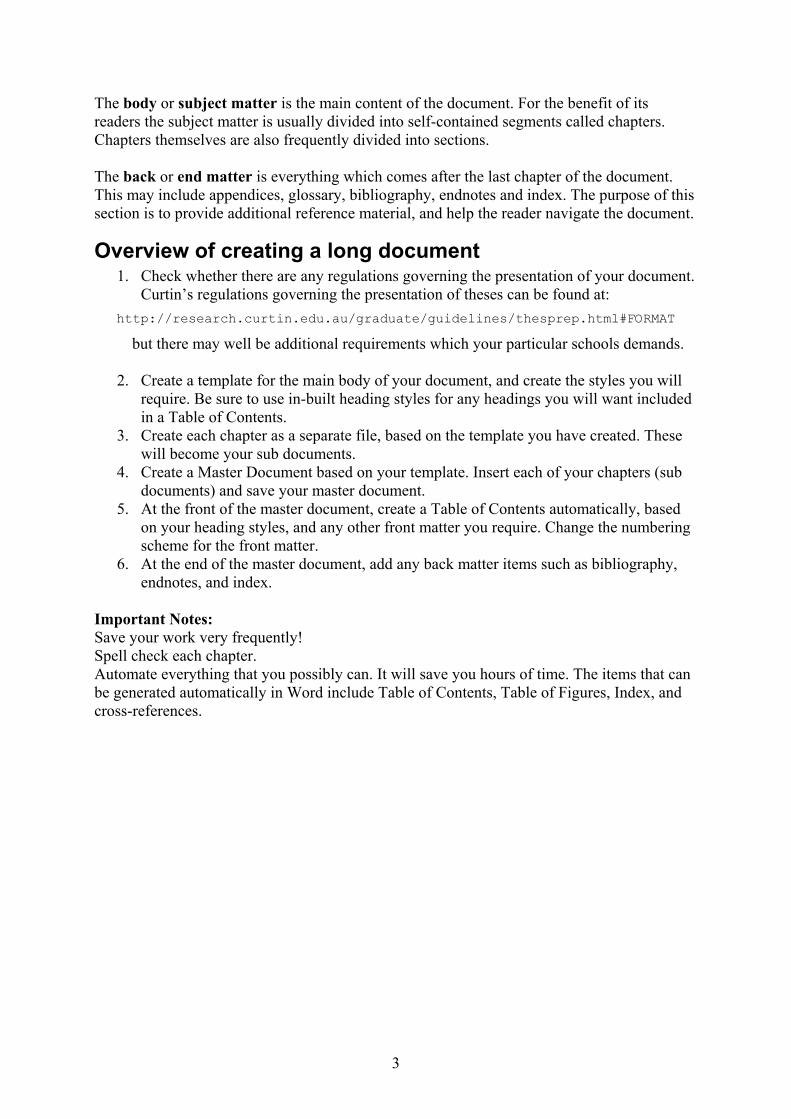
The body or subject matter is the main content of the document. For the benefit of its readers the subject matter is usually divided into self-contained segments called chapters. Chapters themselves are also frequently divided into sections. The back or end matter is everything which comes after the last chapter of the document. This may include appendices, glossary, bibliography, endnotes and index. The purpose of this section is to provide additional reference material, and help the reader navigate the document.
Overview of creating a long document 1. Check whether there are any regulations governing the presentation of your document.
Curtin’s regulations governing the presentation of theses can be found at: http://research.curtin.edu.au/graduate/guidelines/thesprep.html#FORMAT
but there may well be additional requirements which your particular schools demands.
2. Create a template for the main body of your document, and create the styles you will require. Be sure to use in-built heading styles for any headings you will want included in a Table of Contents.
3. Create each chapter as a separate file, based on the template you have created. These will become your sub documents.
4. Create a Master Document based on your template. Insert each of your chapters (sub documents) and save your master document.
5. At the front of the master document, create a Table of Contents automatically, based on your heading styles, and any other front matter you require. Change the numbering scheme for the front matter.
6. At the end of the master document, add any back matter items such as bibliography, endnotes, and index.
Important Notes: Save your work very frequently! Spell check each chapter. Automate everything that you possibly can. It will save you hours of time. The items that can be generated automatically in Word include Table of Contents, Table of Figures, Index, and cross-references.
3

Detailed guidelines for creating a long document
Step 1 – The regulations Let’s imagine that you have consulted Curtin’s general regulations and found out that your thesis must have pages with a left margin of 4cm and 2.5cm for all others. You must have a line spacing of 1.5 lines. You have consulted your department and have found out that in addition to the general regulations, your thesis must have numbered paragraphs throughout for the headings, sub-headings and body text. Below is an example printout of part of a chapter conforming to the regulations, but alas no template!
Take a moment to study the pages. Notice that there is a chapter number, a chapter title, and that the following paragraphs are mostly numbered. The numbering scheme shows examples of headings, sub headings, and numbered body-text paragraphs. There is also a quotation in italics which is not numbered and has single line spacing. The footer consists of only the page number and there are no headers. How would you go about creating a template for this document? Your starting point is to imagine the table of contents (TOC) that will be required. You will want the TOC to be generated automatically; because that’s the only way you can guarantee it will be correct. Automatically generating entities like TOCs is essential because it means you can add and remove pages from your thesis, and even re-arrange chapters without having to worry about getting the page and cross references wrong.
4

Look at the TOC which has been automatically generated from these pages. It includes the “Chapter 1” entry together with the headings and subheadings, but not the numbered body text paragraphs. The page numbers are aligned at the right margin, and there are . . . characters across the page to help maintain eye alignment between the text and the page numbers. These dots are called leader characters. The only thing that wasn’t generated automatically was the heading “Table of Contents”. Notice also that the page number at the bottom of the page is a Roman numeral. This is because the TOC is part of the front matter and by convention the front matter is numbered separately and the numbers are shown as Roman numerals to avoid confusion with the subject matter. If you look back at the subject matter pages, you will see that their numbering has been restarted at 1 and the numbers are printed in Arabic numerals. The reason for thinking about the TOC is that it helps you identify which styles need to be used. Word requires that you use the in-built “Heading” styles in order to create TOCs automatically. You will have to modify the in-built styles to conform to your requirements. This is probably the most difficult operation in Word you will have to do. There is one other sting in the tail. The numbered body text paragraphs also belong to the in-built family of “Heading” styles. Why don’t they too appear in the TOC? The answer is that they could if you wanted them to, but Word has the flexibility to let you choose which heading levels appear in the TOC.
Step 2 – Use Numbered Styles If you would like to practise making a template like the one above, we have provided a working Word document, free from the necessary styles, for you to work with. Open the supplied file Chapter1.doc and examine it in View/Normal. You will see that it consists entirely of paragraphs of style normal. What formatting there is has been applied manually. Even the page layout (margins) is incorrect.
Preparation Return to View/Print Layout. Start by choosing File/Page Setup and making the page margins conform to
standard.
5

Change the default tab settings to 1cm and then change the header and footer styles so that the tabs correspond to the right margin and centre.
Assign the Chapter Number the Heading 1 style. Assign the Chapter Title the Title style (use the Format/Style dialog box). Assign paragraph headings and subheadings to the Heading 2 and Heading 3
styles respectively. Select the quotation paragraph (in italics) and create a new style called
“Quotation”. Give it paragraph attributes of left indent 3cm, right indent 1cm, alignment justified, line spacing single, space after 12pt. Retain the rest of the existing formatting.
Remove all empty paragraphs – you will set spacing between paragraphs using paragraph attributes. To remove all empty paragraphs use Edit/Replace to find all instances of two consecutive paragraph markers (^p^p) with a single instance (^p). Repeat this until Word shows 1 replacement.
Save the document (do this frequently throughout the procedures that follow).
Adding the numbering scheme (Word 2000)
Select the first paragraph “Chapter 1”.
Choose Format/Style/Modify and from the Modify Style dialog box choose Format/Numbering/Outline Numbered. Choose the style indicated in the figure and click on OK.
Click on OK and then on Apply. Notice that your first paragraph
now reads Chapter 1 Chapter 1. This is because the numbering style you chose automatically adds the words Chapter 1 to the Heading 1 level.
If necessary turn on the display of hidden characters and notice that the first paragraph reads: Chapter1 Chapter . 1¶. You need to remove the second instance of Chapter 1, but not the Tab character . Just use the Backspace key to do so.
If you accidentally remove all of the words, reapply the Heading 1 style from the drop down style list, and choose Reapply the formatting of the style to the selection.
If you now examine the text, you will see that all of the subheadings have also been allocated a numbered style (Heading 2 and Heading 3 respectively).
To extend the numbering scheme to the body paragraph level, you will need to change the body paragraphs to the Heading 4 style. This may seem a bit strange, but it will work.
You can change all of the paragraphs in your document in one go by using the Edit/Replace dialog box. You will need to find all instances of style Normal and replace them with style Heading 4. (For more information see the article “Styles and Templates in Microsoft Word”.
6

Cleaning Up Now that you have put the main numbering scheme in place, you will have to tidy
up the document. Use the techniques you have learned in “Styles and Templates” to make each of
the Heading 1 through Heading 4 styles what you really want them to be. In addition to personal choices of font style and size, there are some must dos. o We recommend that paragraph spacing be achieved using only space after
settings. This ensures that those paragraphs which fall at the top of a page will start at the top of the page. A good choice is 0pt before and 12pt after.
o Change the tab settings for all of the Heading 2, 3, and 4 paragraphs so that the first tab is at 2cm.
o Heading 4 style (the body paragraphs) must have the “Keep with next “ attribute deselected. Use Paragraph/Line and Page Breaks/Keep with next. Don’t forget that this paragraph also needs line spacing of 1.5 lines. Change the paragraph alignment to Justified and add a Hanging Indent of 2cm. Change the font to Regular/12 points.
o Heading 1 style must have a page break before it so that each chapter will always start on a new page. Use Paragraph/Line and Page Breaks/Page break before.
Save your document. You should take a considerable amount of time and care in setting up your first chapter, because you are going to use it as a template for the remaining chapters. Try and include an example of each kind of paragraph that you will need.
Step 3 – Create a template With your document safely saved, save it again using File/Save As to resave it,
but this time save it as a Document Template and give it a new file name such as “ThesisChapter.dot”.
Be quite certain that you have saved it as a document template (the Word Title bar should say ThesisChapter.dot).
Select all of the text in the document and delete it. Resave the document (it’s still a template).
Close the template. Your original Chapter 1 should still be open. If it isn’t, open it again. Use
File/Properties/Summary to examine the template for Chapter 1. Notice that the Normal template is still in use. Even though you have used Chapter 1 to create a template, it’s not actually being used by Chapter 1 at this stage.
In order to create a master document / sub-document system for your thesis it’s vital that each chapter uses the same template and that the master document also uses the same template. For this reason you must attach the newly created template to Chapter 1. Proceed as follows.
Choose Tools/Templates and add ins. Select the Automatically update document styles check box. Click on the Attach button. Select the ThesisChapter template from the list and then click on Open and then
on OK. Use File/Properties/Summary to check that you have been successful. Save and close Chapter 1.
7

Step 4 – Create each chapter of your thesis using the template Ideally you would now use the newly created template for all of your subsequent chapters. In reality you may have several chapters created before you chose to use the methods described here. Or perhaps you have a thesis which is one huge Word document. Whatever you have, separate out your thesis into individual chapters and attach your newly created template to each chapter. If you find the need to define new styles, make sure that you select the Add to template check box in the Modify Style dialog box, so that new additions are available to subsequent chapters. During this phase of construction of your thesis, all Chapter numbers, sub-headings etc. will be numbered as though they were Chapter 1. Do not worry about this. The numbering scheme will automatically update once you include the individual chapters within the master document.
Step 5 – Create a master document and add the chapters When your individual chapters are complete, you create a master document and then add the individual chapters to it. At this stage they are automatically renumbered. You might like to simulate this activity as part of the exercise.
Open Chapter1.doc and immediately use Save As to save it as Chapter2.doc. Change the Title of the chapter (not the Chapter number), and change a few subheadings so that you can easily see that it’s different from Chapter1.
Save Chapter2. Repeat the exercise and make Chapter3. Remember these are just to practise with. Close all open documents and then re-open Chapters 1 through 3. You should see
that each one is numbered as though it was Chapter 1. This is not a problem. Close all open documents.
Now it’s time to create a master document.
Use File/New and choose your ThesisChapter template. Save the new document using a sensible title: for example MyThesis.doc.
Remember that you are going to add the Chapters to this document: this really is your thesis!
Choose View/Outline. A new toolbar appears. This is where you will work on the structure of your thesis.
If you aren’t used to using outline view, move your mouse pointer over each of the buttons to learn what it does. Make sure you can find the Insert Sub-document button.
Click on the Insert Sub-document button and locate and open Chapter 1. Repeat for Chapter 2 and Chapter 3.
8

Click on the Show Heading 2 button in the Outlining toolbar. Your Word document collapses to show only Heading 1 and Heading 2 levels (and the Title style). It should look similar to the screen shot shown.
Save this document (it’s your thesis remember) and then close it. Reopen the document. It should look similar to the following.
9

This shows you what a master document really is. It’s a container for all of the individual chapters of your thesis. Each chapter in the master document is a reference to its location – it’s similar to a hyperlink. At any time you can open and work on an individual chapter from within the master document, or you can open them all. Conversely, you can work on the individual chapters outside of the master document. The master document is important because it divides your thesis into Word sections. Each section can have different headers and footers, and each section can be separately numbered if you wish; for example Roman numbering for the front matter starting at (i), and Arabic numbering for the body matter starting at (1). The master document also lets you compile a Table of Contents (TOC), a Table of Figures and an index if you want one.
Step 6 – Create a table of contents and any other front matter Change to View/Print Layout. Make sure you are at the very start of the document by pressing <Ctrl><Home>. Choose Insert/Index and Tables/Table of Contents. If you haven’t already
opened the subdocuments, you will be asked if you wish to open them. You must have the sub-documents open to compile a TOC.
Choose the Table of Contents tab in the Index and Tables dialog box. Make sure that the Show levels dialog box shows 3. It’s this box that controls
which Heading levels appear in the TOC. Since you are using Heading level 4 as the main body text, you must make sure that nothing lower than Heading level 3 appears in the TOC.
10

Choose a TOC format to your liking (you can modify the formatting later if you wish). Click on OK.
Return to the very start of the document by typing <Ctrl><Home>. Type in “Table of Contents” and press <Enter>. Make sure that the “Table of Contents” paragraph is set to Style/Normal, and
then use manual formatting to make it look like you want; for example 16pt Bold Arial Centred with 24pts after.
When the TOC is generated you will see that Chapter 1 starts at page 2. This is incorrect. To fix this problem, you will have to alter the page number formatting in sections 1 and 2 of your thesis.
If you haven’t already done so, turn on the display of hidden characters. You can see that Word adds a section break after the TOC (and between sub-documents). This is what makes it possible to control the page numbering.
The following assumes that you have added page numbering by choosing View/Header and Footer and inserting a page number from the Header and Footer toolbar.
With the insertion point in the first section (the TOC), choose View/Header and Footer and select the page number.
Click on the Format Page Number button in the Header and Footer toolbar. You see this dialog box. Choose Roman numbering from the Number format drop down box. In the Page numbering section, choose Start at and then choose i.
Click on OK. Now move your insertion point into
Chapter 1 and again select the page number in the Chapter 1 footer.
Click on Format Page Number in tHeader and Footer dialog box and this time choose Arabic numbering and maksure that Page numbering once more starts at 1.
he e
Close the Header and Footer dialog box.
The remaining chapters should be numbered in sequence, but if they restart at 1, you will have to go into each section and reset the Page numbering at Continue from previous section. (This is the default so it shouldn’t be necessary.)
Now that the page numbering scheme is correct, you will need to recompile the TOC.
Return to the TOC and click right within it. From the short-cut menu, choose Update Field. You can decide whether to update just the numbers or the whole TOC (for example if you have added new chapters).
11

Step 7 – Create the back matter The back matter will include appendices, glossary, bibliography and possibly an index. Theses don’t normally contain an index because the preparation of an index used to be very time consuming. A word processor eases the task, but you will have to decide whether you want one. Back matter continues page numbering from the main body, but it doesn’t normally use numbered paragraphs. Typically each back matter chapter such as Appendix, Glossary, Bibliography wants to appear in the TOC as just that (see the example on Page 5). For each back matter chapter, create a new document based on the ThesisChapter template, but don’t include any Heading styles. Use the title style for the chapter heading, and use predefined (or create your own) styles for the body of the chapters.
To insert new chapters into a master document, open the master document and then open all sub-documents from within the master document (click on the Expand subdocuments button in the Outline toolbar).
Press <Ctrl><End> to go to the end of the document and insert your chapters in order.
Update the TOC by clicking right on it and then choosing Update Field from the short-cut menu. Choose Update entire table from the dialog box.
Cleaning up long documents Remember that one of the reasons for using templates and styles is to achieve consistency in layout. You can only do this if your starting material has obeyed some simple rules. If you are starting from a more or less finished thesis, you may not have done this. You will have to decide whether you wish to use the methods outlined in this article, but if you do we recommend that you start by cleaning up your thesis and we offer some suggestions for doing so. WARNING: Before you begin, make ABSOLUTELY CERTAIN that you have at least two safe backup copies of your work. We strongly recommend that the copies are on a CDROM and that you make sure to store the copies in different places. DO NOT start cleaning up until you have done this and you are certain that your copies are safe and can be read by your computer! The purpose of cleaning up is to ensure consistency of layout and therefore a neat and tidy presentation. You should do the following things:
Consider removing all instances of double spaces. You should never use space characters for alignment purposes, because what looks right on screen may not print correctly. You will have to think about the amount of work that might be necessary if you do this.
Remove all empty paragraphs. The way to achieve consistent appearance is to use space before and space after attributes in your styles (preferably space after).
12

13
There may be occasions where you have to use empty paragraphs for controlling page layout, but they should be rare.
If necessary, split your thesis up into separate chapters. The performance of Word diminishes with very long documents. Use of the master document/sub-document system will speed up editing.
Reference Xerox Corporation. (1988). Xerox Publishing Standards. A Manual of Style and Design. New York: Watson-Guptill Publications.