Embed Size (px)
Citation preview
Using Your Minimoog Voyager With Your Modular Synthesizer
Overview
Contrary to what some people think, the Moog Minimoog Voyager interfaces extremely well with a modular. In cases where there is a control voltage level variance between the two, one can easily correct any gaps with a Q125 signal processor. This module will allow you to easily amplify/attenuate and invert any control voltage to what is needed. I find that most times, I never need to use one as I am not always needing a full CV signal.
There are several ways in which one can use their Moog Minimoog Voyager with a modular. Here are a few of the basic ways:
• Via a Q104 MIDI Interface using MIDI output from the Minimoog Voyager• Via a Moog VX-351 Expander using CV(Control Voltage)• Via a Q118 Instrument Interface using audio output from the Minimoog Voyager• How to add more oscillators to your Minimoog Voyager
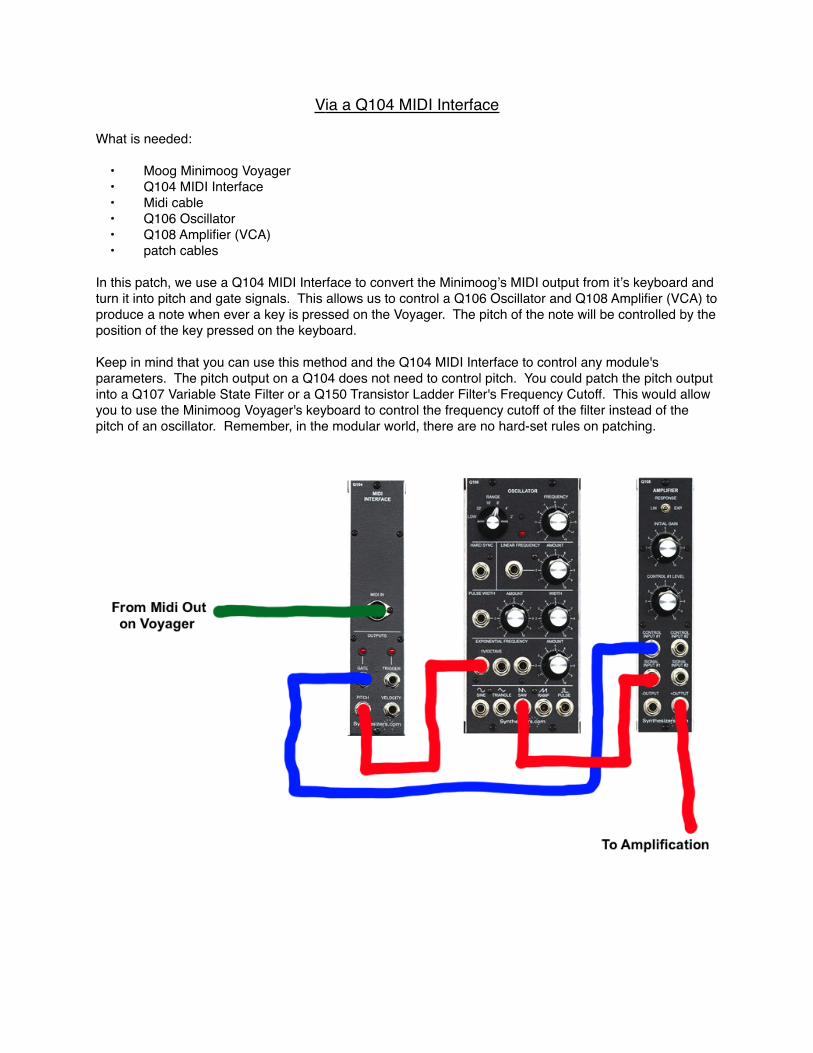
Via a Q104 MIDI Interface
What is needed:
• Moog Minimoog Voyager• Q104 MIDI Interface• Midi cable• Q106 Oscillator• Q108 Amplifier (VCA)• patch cables
In this patch, we use a Q104 MIDI Interface to convert the Minimoogʼs MIDI output from itʼs keyboard and turn it into pitch and gate signals. This allows us to control a Q106 Oscillator and Q108 Amplifier (VCA) to produce a note when ever a key is pressed on the Voyager. The pitch of the note will be controlled by the position of the key pressed on the keyboard.
Keep in mind that you can use this method and the Q104 MIDI Interface to control any module's parameters. The pitch output on a Q104 does not need to control pitch. You could patch the pitch output into a Q107 Variable State Filter or a Q150 Transistor Ladder Filter's Frequency Cutoff. This would allow you to use the Minimoog Voyager's keyboard to control the frequency cutoff of the filter instead of the pitch of an oscillator. Remember, in the modular world, there are no hard-set rules on patching.
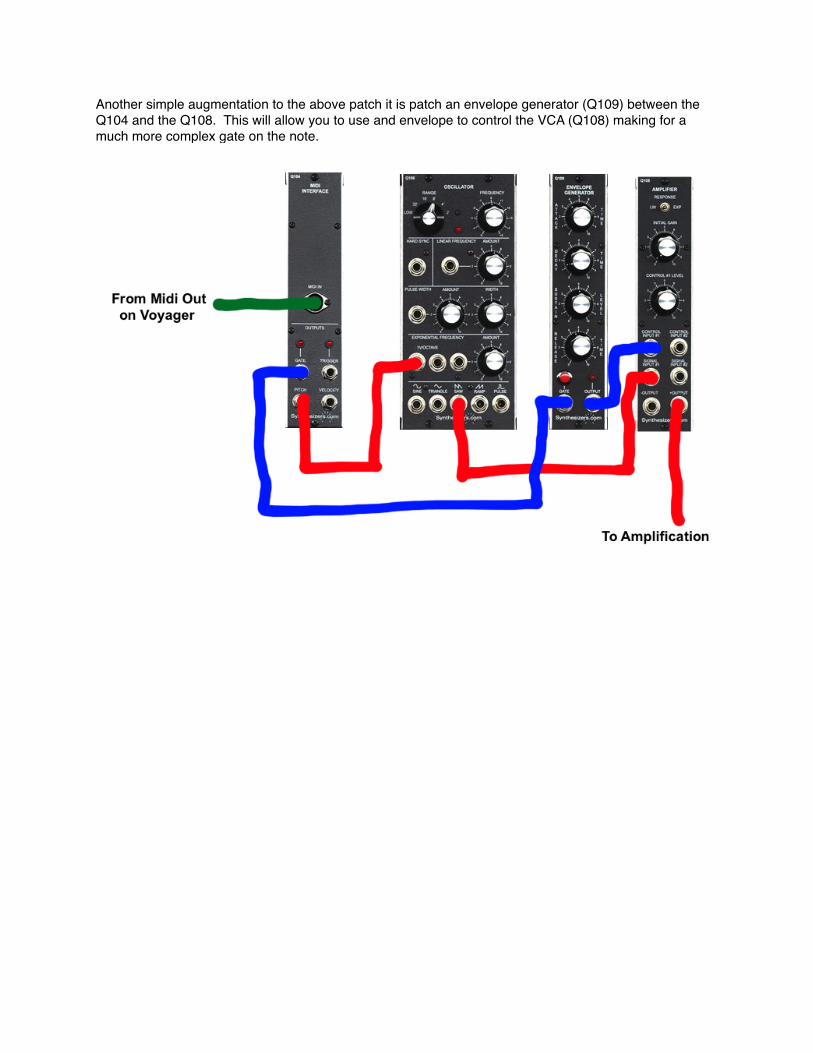
Another simple augmentation to the above patch it is patch an envelope generator (Q109) between the Q104 and the Q108. This will allow you to use and envelope to control the VCA (Q108) making for a much more complex gate on the note.
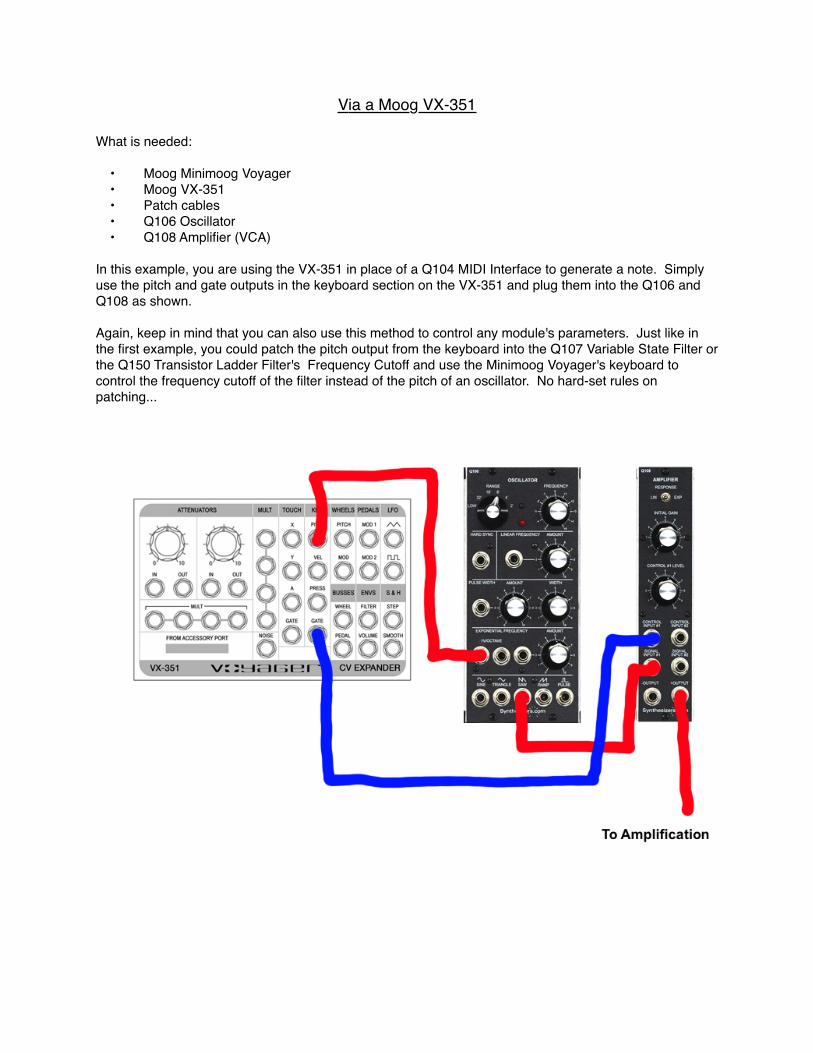
Via a Moog VX-351
What is needed:
• Moog Minimoog Voyager• Moog VX-351• Patch cables• Q106 Oscillator• Q108 Amplifier (VCA)
In this example, you are using the VX-351 in place of a Q104 MIDI Interface to generate a note. Simply use the pitch and gate outputs in the keyboard section on the VX-351 and plug them into the Q106 and Q108 as shown.
Again, keep in mind that you can also use this method to control any module's parameters. Just like in the first example, you could patch the pitch output from the keyboard into the Q107 Variable State Filter or the Q150 Transistor Ladder Filter's Frequency Cutoff and use the Minimoog Voyager's keyboard to control the frequency cutoff of the filter instead of the pitch of an oscillator. No hard-set rules on patching...
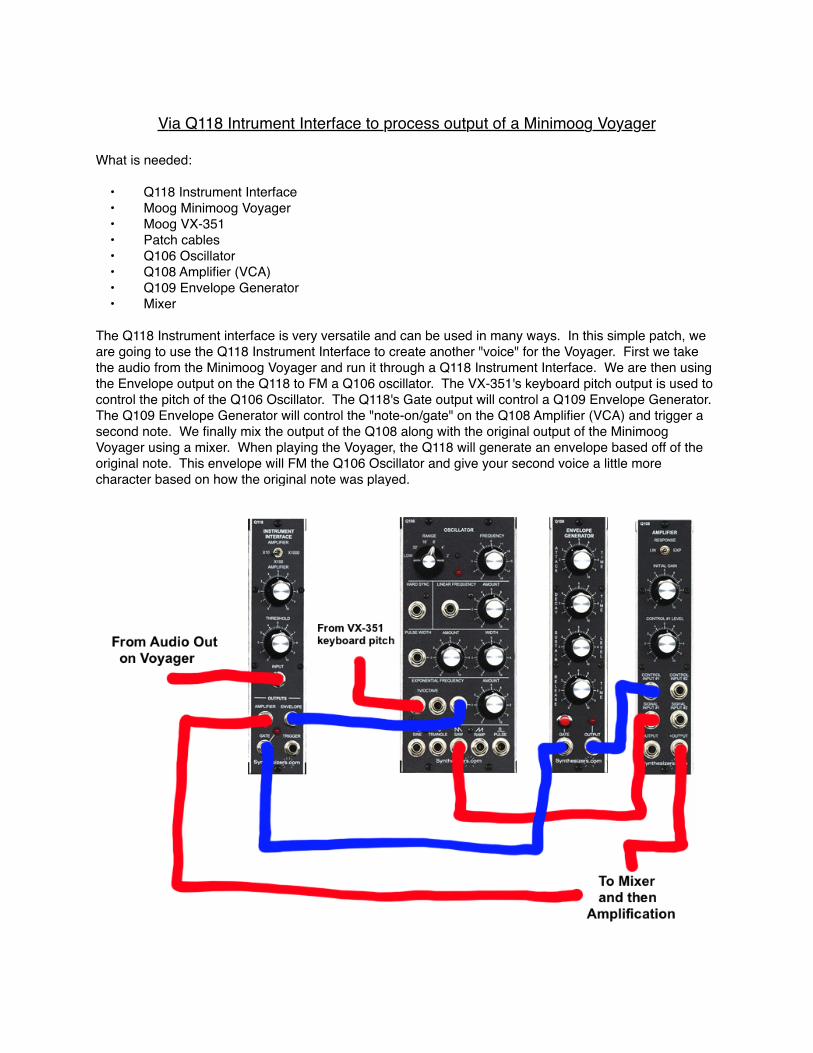
Via Q118 Intrument Interface to process output of a Minimoog Voyager
What is needed:
• Q118 Instrument Interface• Moog Minimoog Voyager• Moog VX-351• Patch cables• Q106 Oscillator• Q108 Amplifier (VCA)• Q109 Envelope Generator• Mixer
The Q118 Instrument interface is very versatile and can be used in many ways. In this simple patch, we are going to use the Q118 Instrument Interface to create another "voice" for the Voyager. First we take the audio from the Minimoog Voyager and run it through a Q118 Instrument Interface. We are then using the Envelope output on the Q118 to FM a Q106 oscillator. The VX-351's keyboard pitch output is used to control the pitch of the Q106 Oscillator. The Q118's Gate output will control a Q109 Envelope Generator. The Q109 Envelope Generator will control the "note-on/gate" on the Q108 Amplifier (VCA) and trigger a second note. We finally mix the output of the Q108 along with the original output of the Minimoog Voyager using a mixer. When playing the Voyager, the Q118 will generate an envelope based off of the original note. This envelope will FM the Q106 Oscillator and give your second voice a little more character based on how the original note was played.
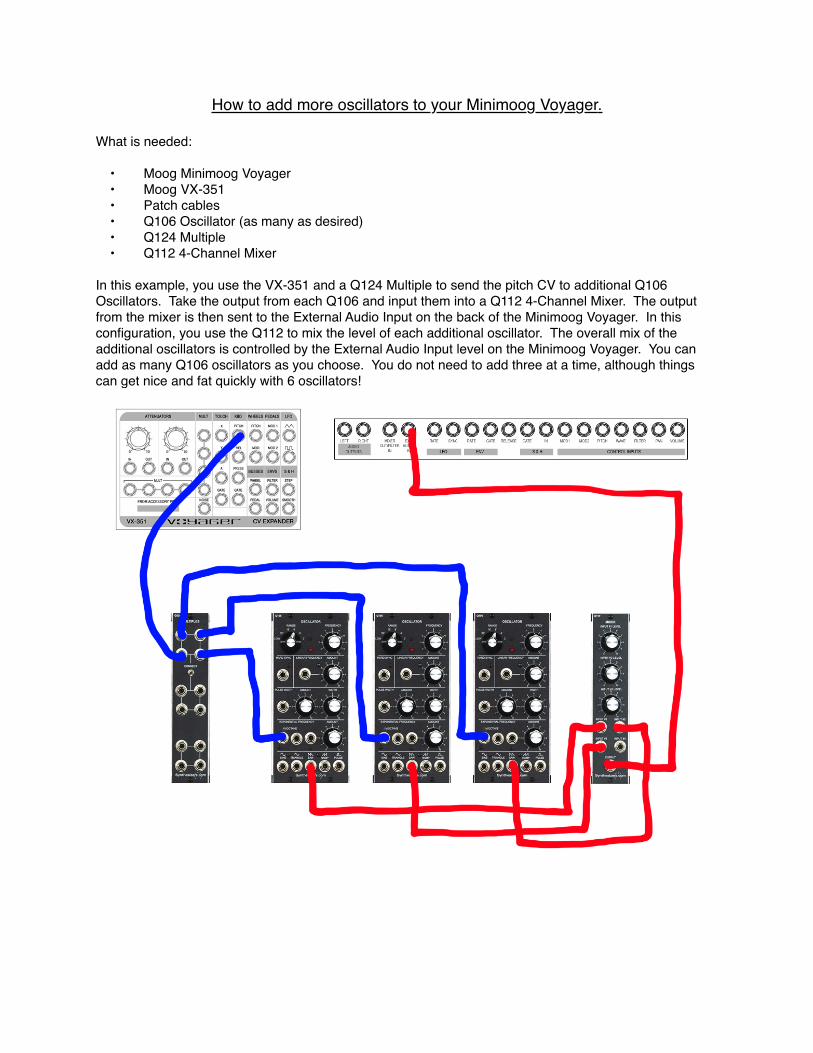
How to add more oscillators to your Minimoog Voyager.
What is needed:
• Moog Minimoog Voyager• Moog VX-351• Patch cables• Q106 Oscillator (as many as desired)• Q124 Multiple• Q112 4-Channel Mixer
In this example, you use the VX-351 and a Q124 Multiple to send the pitch CV to additional Q106 Oscillators. Take the output from each Q106 and input them into a Q112 4-Channel Mixer. The output from the mixer is then sent to the External Audio Input on the back of the Minimoog Voyager. In this configuration, you use the Q112 to mix the level of each additional oscillator. The overall mix of the additional oscillators is controlled by the External Audio Input level on the Minimoog Voyager. You can add as many Q106 oscillators as you choose. You do not need to add three at a time, although things can get nice and fat quickly with 6 oscillators!
Conclusion
Final thing to remember - Experiment! Don't be afraid to try patching different things together. Contrary to what many people think, it is not going to break your Voyager or your modular by simply plugging in a cable from the "wrong source". There are a few simple rules to follow like "do not use a Q124 Multiple as a mixer". It is not intended to do that job duty. Just because the 'normal' or popular method is to use LFO signals for modulation doesn't mean that you cannot try audio signals. The worst thing that usually happens is no noise will be produced. However, sometimes high or loud pitches signals can be produced in patching in this manner. Therefore, it is always wise to start out with amplification volumes turned low when experimenting with a patch for the first time. Both your ears and your wallet will thank you! When in doubt about something, simply ask someone. They will usually be more than happy to help out a fellow "patcher"...