Embed Size (px)
Citation preview

Intelligent Products For A Smarter World
Utilities Reference
Revision J

2 Utilities Reference
Copyright and Publication InformationCopyright ©2000 Microware Systems Corporation. All Rights Reserved. Reproduction of this document, in part or whole, by any means, electrical, mechanical, magnetic, optical, chemical, manual, or otherwise is prohibited, without written permission from Microware Systems Corporation.
Revision: JPublication date: September 2000
DisclaimerThe information contained herein is believed to be accurate as of the date of publication. However, Microware will not be liable for any damages including indirect or consequential, from use of the OS-9 operating system, Microware-provided software, or reliance on the accuracy of this documentation. The information contained herein is subject to change without notice.
Reproduction NoticeThe software described in this document is intended to be used on a single computer system. Microware expressly prohibits any reproduction of the software on tape, disk, or any other medium except for backup purposes. Distribution of this software, in part or whole, to any other party or on any other system may constitute copyright infringements and misappropriation of trade secrets and confidential processes which are the property of Microware and/or other parties. Unauthorized distribution of software may cause damages far in excess of the value of the copies involved.
For additional copies of this software/documentation, or if you have questions concerning the above notice, please contact your OS-9 supplier.
TrademarksOS-9, OS-9000, DAVID, and MAUI are registered trademarks of Microware Systems Corporation. SoftStax, FasTrak, UpLink, and Hawk are trademarks of Microware Systems Corporation. All other product names referenced herein are either trademarks or registered trademarks of their respective owners.
AddressMicroware Systems Corporation1500 N.W. 118th StreetDes Moines, Iowa 50325515-223-8000

Table of Contents
Chapter 1: Utilities 11
13 Formal Syntax Notation
Chapter 2: Using the debug Utility 363
364 Symbolic Debugging365 Starting debug365 Exiting the Debugger366 Relocation Registers367 Breakpoints369 debug Commands369 Execution Commands373 Stack Traceback Command374 Memory Change Commands375 Memory Commands377 Hex/ASCII Dump Memory Display378 Instruction Disassembly Memory Display379 Floating Point Memory Displays381 Display/Change Machine Registers387 Memory Fill389 Memory Search392 Linking to a Module394 Symbolic Debugging401 Creating a Process to Debug403 Starting the Debugger from the Shell Command Line404 Setting and Displaying debug Options407 Expressions and the V Command412 Command Summary
Utilities Reference 3

Chapter 3: Using the editmod Utility 419
421 Use Instructions421 Creating Modules421 Listing Modules421 Editing Modules424 Editing an Array425 Editing a String425 Editing a Variable Length List426 Expressions429 Programming Guide429 Features430 Pre-Processor432 Macro Definitions433 Expressions434 Search Directories436 Configuration File437 Help Text439 Module Creation440 Description Files441 Definition blocks448 Initialization Block449 Module Block450 Header Generation453 General Rules454 Example455 Design the Data Module456 Create the Description File460 Create the Module with editmod462 Display the Contents of the Module with editmod463 Edit the Module
4 Utilities Reference

Chapter 4: Using the os9make Utility 467
468 os9make Commands468 Dependency Entry469 Command Entry469 Comment Entry470 Include Entry470 Macro Entry471 Conditional Entry476 os9make Operation477 Implicit Rules, Definitions, and Assumptions480 Modes481 Macro Recognition484 os9make Generated Command Lines
Chapter 5: Using the mshell Utility 487
488 Automatic mshell Login489 Command Line Editing491 Change Default Command Line Editing Keys492 History Buffer493 History Substitution493 View History494 History Compression496 Command Completion499 Pathlist Completion501 Command Name Aliases (Assigns)503 Enhanced Piping Facilities504 Command Line Batchfiles505 Procedure File Programming Language505 Parameter Passing to Procedure Files506 Environment Variable Substitution507 Programming Variable Substitution508 Command Output Substitution
Utilities Reference 5

509 Variable Substitution Modifiers511 Procedure File Line Concatenation512 Procedure File Debugging Facilities514 Built-in Commands514 profile Command515 UNIX-like Data Directory Commands517 prenv Built-in Command517 set Command518 which Command519 mshell Command Line Options524 Parameter Passing among mshells525 Invoking the Initialization File527 Prompt Format String531 Non-blocking Readln532 mshell Directives534 Operators534 Variables535 Functions536 Constants539 Directive Descriptions560 mshell Functions568 Example Programs
Chapter 6: Using the shell Utility 569
570 Overview of shell Utility573 Setting shell Options574 The shell Environment577 The Environment Utilities577 Using Environment Variables as Command Line Parameters578 Using Parameters with Procedure Files581 The profile Command582 The login shell, .login, and .logout584 shell Command Line Syntax
6 Utilities Reference

587 Command Line Execution589 Example Command Lines
Chapter 7: Using the uMACS Utility 591
592 uMACS Overview592 Terminal Capabilities593 Cursor Positioning593 Search and Replace593 Cut and Paste593 Format Commands594 Buffers595 Command Basics595 Execute Commands596 Key Bindings597 Change Key Bindings598 Find Current Key Bindings598 The Help Command599 Repeat Commands599 Abort Command599 Macro Commands601 The Execute-File Command601 The .umacsrc File602 Command Summary: key and help604 Introduction to Windows and Buffers604 The Status Line605 Switching Windows606 Start uMACS608 Input/Output Command609 Insert File609 Read File610 Find File610 View File610 Change File Name
Utilities Reference 7

611 Saving Files611 Execute Operating System Commands612 uMACS Editing Modes614 Add or Delete a Mode616 Exit uMACS617 The uMACS Command Set619 Cursor Positioning Commands620 Next or Previous Word, Line, or Paragraph621 Next or Previous Page621 Go To Beginning or End of Line/File621 Go to a Specified Line622 Insert Text623 Insert a Non-Printable Character624 New Lines624 Insert a Tab624 Insert a File625 Delete Text626 The Kill Buffer626 Delete Word/Blank Lines627 Place a Region of Text Into the Kill Buffer627 Insert Kill Buffer Contents628 Search and Replace629 Search Forward and Backward630 Replace632 Region Commands633 Mark Region Boundaries633 Copy or Move a Region633 Paste634 Change a Region’s Character Case635 Format Commands635 Change Character Case636 Reformat Paragraph Margins637 Transpose Characters638 Buffer Commands
8 Utilities Reference

639 Display Current Buffers639 Change Buffer or File Name640 Edit a Buffer641 Open a New Buffer641 Switch Buffers642 Buffer Position642 Delete Buffer643 Execute Buffer644 Window Commands645 Open Additional Windows645 Move to the Next or Previous Window646 Scroll Text646 Change Window Size646 Delete All But Current Window647 Termcap File Format648 The Termcap File649 Terminal Capabilities650 Special Characters651 Termcap Capabilities651 Cursor Addressing652 Example Notations653 Example Termcap Entries654 uMACS Command Summary
Glossary 663
Index 665
Product Discrepancy Report 693
Utilities Reference 9

10 Utilities Reference

Chapter 1: Uti l i t ies
For quick reference purposes, the format of the utility information has been standardized. Each utility contains the following headings and corresponding information, if applicable:
• Command syntax
• Operating System (OS)
• Command options
• Description of the utility
• Examples
• References to related utilities
• Special uses
Syntax identifies the rules governing the structure of the utility command line.
• Syntax specified in the command section does not include the shell built-in options (e.g., alternate memory size, I/O redirection, piping, etc.). The shell filters these options out from the command line before processing the program being called.
OS identifies Microware operating systems with which the utility is packaged and other operating systems on which the utility is functional. Some utilities function under other operating systems in addition to OS-9 and OS-9 for 68K.
11

1 Utilities
NoteNoteSome path names and code examples may refer to OS-9000. These references pertain to the OS-9 (non-68K) operating system.
Options lists the available options for each utility.
• Unless otherwise specified, command line option order is insignificant. For example, the following command lines provide the same results:
attr -a junk -pwattr junk -pw -a attr junk -a -pw
• The equal sign (=) used in many utility options and the k used in the alternate memory size option are generally optional. For example, you may write -b=256k as -b256, -b256k, or -b=256. However, the equal sign is mandatory when using -z=<file> option.
• Utilities that use the -z option expect input of one file name per line. Some utilities do not interpret comments (lines beginning with a "*") in a -z file.
• The -? option is available although not listed for most utilities. Typing -? displays the options, function, and command syntax of the utility. Exceptions are built-in shell commands, such as chd and set.
• A few utilities offer only the -? option. You cannot list other options on the command line. Built-in shell commands, such as chd and set, do not have options including the -? option.
Description presents a narrative detailing the uses, features, and specific instructions for each utility.
Examples provides one or more illustrations of using the utility.
See Also provides a reference to related utilities that offer additional information.
12 Utilities Reference
1Utilities
Formal Syntax Notation
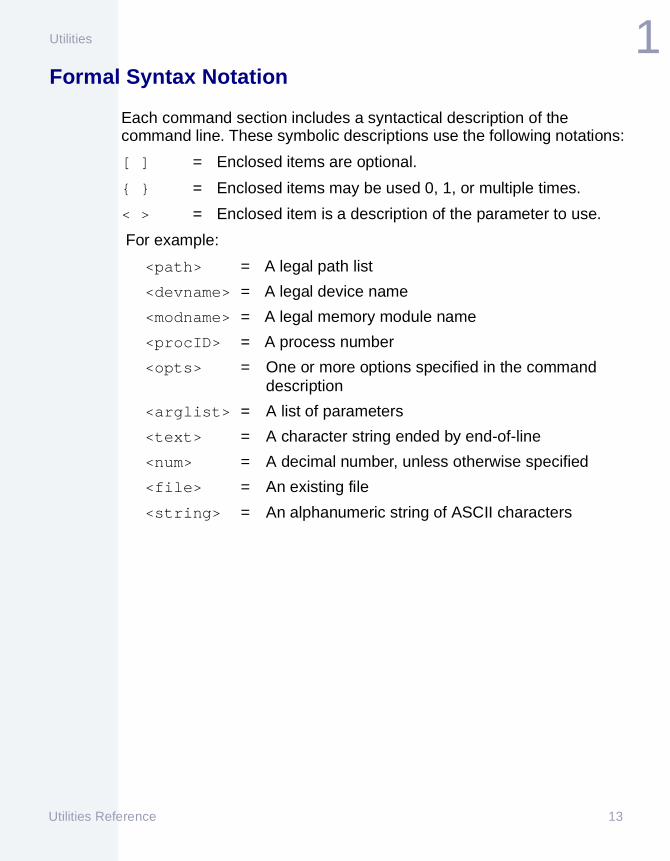
Each command section includes a syntactical description of the command line. These symbolic descriptions use the following notations:
[ ] = Enclosed items are optional.
{ } = Enclosed items may be used 0, 1, or multiple times.
< > = Enclosed item is a description of the parameter to use.
For example:
<path> = A legal path list
<devname> = A legal device name
<modname> = A legal memory module name
<procID> = A process number
<opts> = One or more options specified in the command description
<arglist> = A list of parameters
<text> = A character string ended by end-of-line
<num> = A decimal number, unless otherwise specified
<file> = An existing file
<string> = An alphanumeric string of ASCII characters
Utilities Reference 13

1 Utilities
activ Activates a Process
Syntax
activ {<procID>}
OS
OS-9
Description
The activ utility activates processes that were stopped by the suspend utility.
Type activ and the process ID of the process to activate a process. The process ID can be obtained by using the procs utility. Suspended processes are identified with a z in the state status.
NoteNoteOnly super users may use this utility.
Example$ procs -eId PId Grp.Usr Prior MemSiz Sig S CPU Time Age Module & I/O2 0 0.0 128 30.75k 0 w 0.04 0:10 tsmon <>>>term3 5 0.0 128 11.00k 0 z 7.00 0:01 eatmpu <>>>term4 0 0.0 128 30.75k 0 s 0.04 0:10 tsmon <>>>t35 2 0.0 128 9.00k 0 w 3.09 0:10 shell <>>>term6 5 0.0 128 35.25k 0 * 0.07 0:00 procs <>>term >dd$ activ 3$ procs -eId PId Grp.Usr Prior MemSiz Sig S CPU Time Age Module & I/O2 0 0.0 128 30.75k 0 w 0.04 0:10 tsmon <>>>term3 5 0.0 128 11.00k 0 a 13.73 0:01 eatmpu <>>>term4 0 0.0 128 30.75k 0 s 0.04 0:10 tsmon <>>>t35 2 0.0 128 9.00k 0 w 3.46 0:10 shell <>>>term
6 5 0.0 128 35.25k 0 * 0.05 0:00 procs <>>term >dd
14 Utilities Reference

1Utilities
See Also
suspend
Utilities Reference 15

1 Utilities
alias Sets Device Pathlist Alias
Syntax
alias <alias name> <actual name>
OS
OS-9
Options
-d Deletes the specified alias name.
-l Prints the current list of aliases. -l must be used alone.
-z Gets list of aliases from standard input. Cannot be used with -d.Lists one pair per line in the form:<devname> <pathlist>
-z[=]<file> Gets list of aliases from <file>. Cannot be used with -d.
Description
The alias utility assigns an alternate name to a device pathlist. Pathlist aliases allow you to refer to specific device pathlists with shorter or more convenient names.
Type alias, the alternate (alias) name, and the actual pathlist to assign an alternate name to a pathlist. IOMAN expands all alias references into their associated pathlist name.
NoteNoteThe <actual name> must exist. OS-9 does not verify the existence of <actual name>.
16 Utilities Reference

1Utilities
NoteNoteA real device name as <alias name> is discouraged.
Example
$ dir /h1Error #000:221$ alias /h1 /n0/tony/h0$ dir /h1 Directory of /h1 16:00:55CMDS DEFS LIB SYS USRSysBoot startup$
Utilities Reference 17

1 Utilities
assign Single Word Command Line Substitutions
Syntax
assign [<name> <definition>]
OS
OS-9
Options
The assign utility only has zero or two arguments.
Description
The assign utility equates a single word to a string for command line substitution.
The substitution occurs when <name> appears as the command to execute.
Not all occurrences of <name> in the command line are replaced. Only in those occurrences where <name> is a command to be executed is the <name> replaced.
NoteNoteThis command does not appear in the CMDS directory as it is a built-in shell command.
Example
$ assign ls dir Changes ls to dir$ assign cd chd Changes cd to chd$ assign Changes ls to dir and cd to chdcd chdls dir
18 Utilities Reference

1Utilities
attr Changes/Examines File Security Attributes
Syntax
attr [<opts>] {<path>} {<permissions>}
OS
OS-9; OS-9 for 68K
Options
-a Suppresses the printing of attributes. In OS-9, suppresses the warning that appears if group attributes are specified.
-q Quiet mode suppresses “can’t open” file error messages.
-x Searches for the specified files in the execution directory. The files must have execute permission to be found using -x.
-z Reads the file names from standard input.
-z=<file> Reads the file names from <file>.
Description
The attr utility examines or changes the security attributes (<permissions>) of the specified files.
Type attr, followed by the pathlist for the files whose security permissions you want to change or examine. Then, enter a list of permissions to turn on or off.
Permission is granted by specifying the permission code preceded by a hyphen (-).
Permission is withdrawn by specifying the permission code preceded by a hyphen and an n (-n).
Utilities Reference 19

1 Utilities
Permissions not explicitly named by permission code are unaffected.
If permissions are not specified on the command line, the attr utility displays the current file attributes.
Attempts to change permission attributes of a file by a user other than the owner, except super user, is disallowed. A super user can examine or change the attributes of any file in the system.
See Also
deldir
makdir
Examples
$ attr myfile Displays the current attributes of myfile.
$ attr myfile -npr -npwWithdraws public read and public write permissions.
$ attr myfile -rweprpwpeGrants both the public and the owner read, write, and execute permissions.
$ attr -z Displays the attributes of the file names read from standard input.
$ attr -z=file1 Displays the attributes of the file names read from file1.
$ attr -npwpr * Withdraws public write and grant public read for all files in the directory.
$ attr *.lp Lists the attributes of all files with names ending in .lp.
20 Utilities Reference

1Utilities
Table 1-1 Permission Codes
OS-9 for 68K Files
OS-9Files
OS-9 Directory Specification
d d d Directory file
s o o Single user file or directory Non-sharable file or directory
r r r Read permission to owner
w w w Write permission to owner
e e Execute permission to owner
s Search permission to owner
gr gr Read permission to group
gw gw Write permission to group
ge Execute permission to group
gs Search permission to group
pr pr pr Read permission to public
pw pw pw Write permission to public
pe pe Execute permission to public
ps Search permission to public
Utilities Reference 21
1 Utilities
NoteNoteOn OS-9 for 68K, the owner is the creator of the file. Owner access is given to any user with the same group ID number as the owner. The public is any user with a different group ID number than the owner. You can determine file ownership with the dir -e command.
Specifying group attributes on OS-9 for 68K gives a non-fatal warning that they are ignored. This warning is suppressed when the -a option is used.
22 Utilities Reference

1Utilities
backup Makes a Backup Copy of Disk
Syntax
backup [<opts>] [<srcpath> [<destpath>]]
OS
OS-9; OS-9 for 68K
Options
-b[=]<num> Allocates <num> k bytes of memory for use by the backup buffer. backup uses a 4K buffer by default. The greater the allocation of memory, the faster backup runs.
-r Causes backup to continue upon occurrence of a read error.
-v Prevents backup from making a verification pass.
Description
The backup utility physically copies all data from one device to another.
A physical copy is performed sector by sector without regard to file structures. In most cases, the specified devices must have the same format and must be devoid of defective sectors.
NoteNoteWhen an OS-9 bootable floppy is copied using backup, you also need to use the bootgen utility to make the target floppy bootable.
Utilities Reference 23

1 Utilities
NoteNoteThis backup utility does not work with PCF.
In the following description, source disk is the disk to back up (from disk) and destination disk is the disk to copy onto (to disk).
WARNING!Before backing up a disk, you should write protect the source disk with the appropriate write protect mechanism to prevent accidentally confusing the source disk and the destination disk during exchanges.
Single Drive Backup
A single drive backup requires exchanging disks in and out of the disk drive.
To begin the backup procedure, put the source disk in the drive and type backup/d0. The system asks if you are ready to backup. Type y if you are ready.
Initially, the backup utility reads a portion of the source disk into memory. The backup utility then prompts you to exchange disks. Remove the source disk from the drive, and insert the destination disk. The backup utility writes the previously stored data onto the destination disk. This exchange process continues until all of the data on the source disk is copied to the destination disk. When the backup is finished, an exchange is again requested. This places the source disk back in the drive.
The -b option increases the amount of memory the backup procedure uses. This decreases the number of disk exchanges required.
24 Utilities Reference

1Utilities
Two Drive Backup
On a two drive system, device names /d0 and /d1 are assumed if both device names are omitted on the command line. If the second device name is omitted, a single unit backup is performed on the drive specified.
To begin the backup procedure, put the source disk in the source drive and the destination disk in the destination drive. By default, the source drive is /d0 and the destination drive is /d1. Enter backup, the name of the source drive, and the name of the destination drive. The system asks if you are ready to backup. Enter y if you are ready. If errors do not occur, the backup procedure is complete.
Errors
The backup procedure includes two passes by default. The first pass reads a portion of the source disk into a buffer in memory and then writes it to the destination disk. The second pass verifies that the data was copied correctly.
If errors occur on the first pass, the source disk or source drive is at fault.
If errors occur in the second pass, the destination disk is at fault. If backup fails repeatedly on the second pass, reformat the destination disk and retry the backup.
Examples
$ backup /D2 /D3 Backs up the disk in /d2 to the disk in /d3.
$ backup -v Backs up the disk in /d0 to the disk in /d1 without making a verification pass.
$ backup -b40 /d0 /d2 Allocates 40K of memory to use in backing up /d0 to /d2.
Utilities Reference 25
1 Utilities
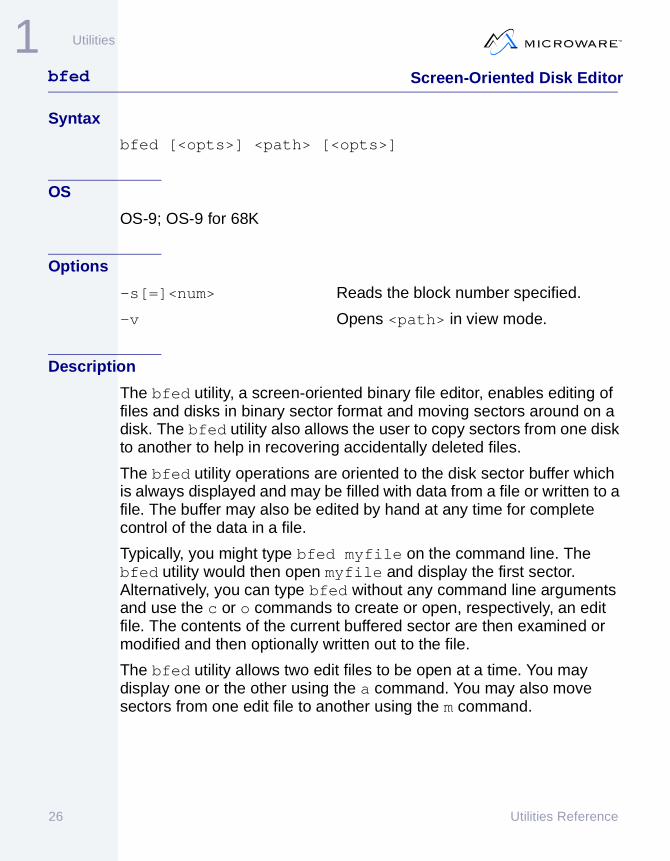
bfed Screen-Oriented Disk Editor
Syntax
bfed [<opts>] <path> [<opts>]
OS
OS-9; OS-9 for 68K
Options
-s[=]<num> Reads the block number specified.
-v Opens <path> in view mode.
Description
The bfed utility, a screen-oriented binary file editor, enables editing of files and disks in binary sector format and moving sectors around on a disk. The bfed utility also allows the user to copy sectors from one disk to another to help in recovering accidentally deleted files.
The bfed utility operations are oriented to the disk sector buffer which is always displayed and may be filled with data from a file or written to a file. The buffer may also be edited by hand at any time for complete control of the data in a file.
Typically, you might type bfed myfile on the command line. The bfed utility would then open myfile and display the first sector. Alternatively, you can type bfed without any command line arguments and use the c or o commands to create or open, respectively, an edit file. The contents of the current buffered sector are then examined or modified and then optionally written out to the file.
The bfed utility allows two edit files to be open at a time. You may display one or the other using the a command. You may also move sectors from one edit file to another using the m command.
26 Utilities Reference

1Utilities
One of the bfed utility’s more useful capabilities is its ability to recover a deleted file by writing the "deleted" sectors to a recovery file. It is important that the recovery file be on a different mass storage device than the deleted file to ensure that the sectors of the deleted file are not overwritten.
To recover a deleted file, open the recovery file using the c (create edit file) command. Use the m command to copy sectors to the new file.
Another feature of the bfed utility is the distinction between the buffer sector and the current sector. If the buffer's current contents were read from the edit file, the buffer sector is the location in the file from which the data came. The current sector, which is independent, is the current position in the edit file for reading or writing. Thus, it is possible to read a sector from one location in a file and to copy it to another location.
All numbers that the bfed utility asks for are assumed to be hexadecimal; however, by using a leading # in the number, the bfed utility interprets the number as decimal. To enter 100 in decimal, type #100.
The following commands are available for the bfed utility. Please note that all values are given in hexadecimal.
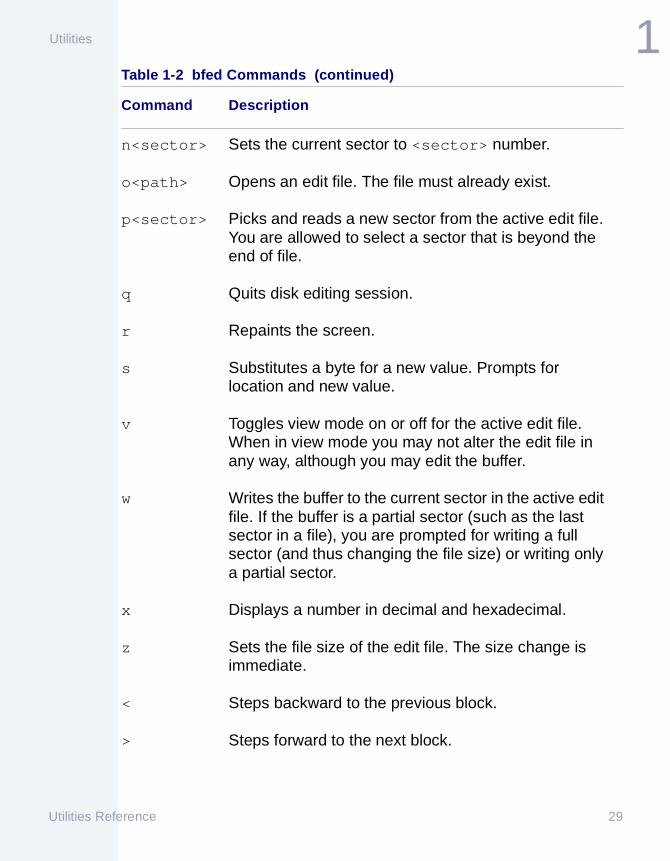
Table 1-2 bfed Commands
Command Description
a Switches the current active file. Most of the bfed utility’s commands operate on the active edit file, which is denoted by an * at the start of the status line for that file. The buffer displayed on the screen is the buffer associated with the current active file.
c Creates a new edit file. This is especially useful when recovering a deleted file, and it is the only way to open a file that does not exist.
Utilities Reference 27

1 Utilities
e Ends the edit session for the current active file; that is, it closes the active file. If the buffer has been modified, the bfed utility displays a prompt asking if you want to continue. When answering in the affirmative, the buffer is not discarded but may not be written unless another edit file is opened.
f<value> Fills the buffer with an arbitrary, user-supplied value. The value may be a byte, word, or long, with byte size being the default. Size is specified by entering the number in the format nnnn.s where s is b, w, or l. The size is optional with the default being byte.
g Reads the current sector into the sector buffer.
i Displays the information from the File Descriptor sector for the active edit file.
l Accepts a pattern and start and end points in the active file in which to look for the pattern. The pattern may be a number in byte, word or long sizes, or it may be a string of characters by preceding the string with a " (double-quote mark). Thus to search for the string help, you would enter "help when prompted. When entering the start and end points, <CR> defaults to the start and end of the file, respectively.
m<1st sector><count>
Moves sectors from the active edit file to the other edit file. You may specify the start point and number of sectors from the source (active) file, but the copy uses the current sector in the target as the starting location. When an error is encountered, you are prompted about continuing. If you continue, garbage is written in the target where the error occurred.
Table 1-2 bfed Commands (continued)
Command Description
28 Utilities Reference
1Utilities
n<sector> Sets the current sector to <sector> number.
o<path> Opens an edit file. The file must already exist.
p<sector> Picks and reads a new sector from the active edit file. You are allowed to select a sector that is beyond the end of file.
q Quits disk editing session.
r Repaints the screen.
s Substitutes a byte for a new value. Prompts for location and new value.
v Toggles view mode on or off for the active edit file. When in view mode you may not alter the edit file in any way, although you may edit the buffer.
w Writes the buffer to the current sector in the active edit file. If the buffer is a partial sector (such as the last sector in a file), you are prompted for writing a full sector (and thus changing the file size) or writing only a partial sector.
x Displays a number in decimal and hexadecimal.
z Sets the file size of the edit file. The size change is immediate.
< Steps backward to the previous block.
> Steps forward to the next block.
Table 1-2 bfed Commands (continued)
Command Description
Utilities Reference 29

1 Utilities
The bfed utility has a feature enabling editing of a sector on the screen in either hexadecimal or ASCII. From the command line, the <tab> command positions the cursor into the hexadecimal display on the screen. Entering hex values replaces the existing ones in the buffer. Changes must be saved by writing to the disk with the w command.
In edit mode, the <tab> key toggles between hexadecimal and ASCII edit modes. In ASCII edit mode, typed characters are placed in the buffer. Note that changes in either edit mode, hexadecimal or ASCII, causes an update of both hexadecimal and ASCII displays to new values. Cursor control in screen edit mode uses the following keystrokes for up, left, right, and down movements respectively:
^P = Up
^B = Left
^F = Right
^N = Down
When in either hexadecimal or ASCII edit mode, return to the command mode is accomplished by pressing the <tab> key. Use the \ key as an escape character in ASCII mode, thus allowing the entry of control keys into the buffer. For example, to enter the value <tab> into the buffer in ASCII mode, type \ then <tab>. The ^P, ^B, ^F, ^N, and <tab> characters are entered in this manner.
+ Steps forward 256 bytes in the file.
- Steps backward 256 bytes in the file.
<tab> Steps through command, hexadecimal editing, and ASCII editing modes.
<CR> Steps forward 256 bytes.
Table 1-2 bfed Commands (continued)
Command Description
30 Utilities Reference
1Utilities
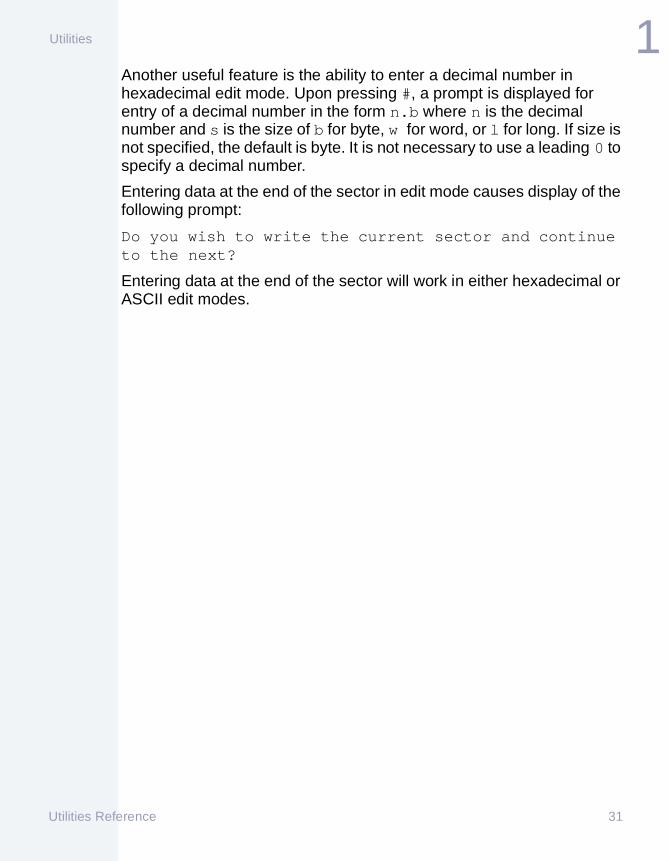
Another useful feature is the ability to enter a decimal number in hexadecimal edit mode. Upon pressing #, a prompt is displayed for entry of a decimal number in the form n.b where n is the decimal number and s is the size of b for byte, w for word, or l for long. If size is not specified, the default is byte. It is not necessary to use a leading 0 to specify a decimal number.
Entering data at the end of the sector in edit mode causes display of the following prompt:
Do you wish to write the current sector and continue to the next?
Entering data at the end of the sector will work in either hexadecimal or ASCII edit modes.
Utilities Reference 31

1 Utilities
binex Converts Binary Files to S-Record Format
Syntax
binex {<option(s)>) [<inpath>] [<outpath>] [<opts>]
OS
OS-9; OS-9 for 68K; WIN; UNIX
Options
-a[=]<hex> Specifies the load address in hex.
-b[=]<value>[k] Specifies the conversion buffer size to use. The ‘k’ sub-option converts <value> to k bytes.
-s[=]<num> Specifies which type of S-record format binex is to generate. Default is 1.
-x Gets file from the execution directory. (OS-9 and OS-9 for 68K only)
-z[[=]<file>] Reads the command line arguments and options from <file>. Default is stdin.
Description
The binex utility converts binary files to S-record files.
S-record files are a type of text file containing records that represent binary data in ASCII hexadecimal form. This Motorola-standard format is used by many commercial PROM programmers, emulators, logic analyzers, and similar devices that use the RS-232 interface. It can be useful for transmitting files over data links that can only handle character type data. It can also be used for converting assembler or compiler generated programs to load on non-OS-9 systems.
The binex utility converts the binary file specified by <path1> to a new file with S-record format. The new file is specified by <path2>. S-records have a header record to store the program name for
32 Utilities Reference

1Utilities
informational purposes and each data record has an absolute memory address. This absolute memory address is meaningless to the operating systems because they use position-independent code.
To specify the type of S-record file to generate, use the -s=<num> option. <num> = 1, 2, etc., corresponding to S1, S2, etc.
Standard input and output are assumed if both paths are omitted. If the second path is omitted, standard output is assumed.
Examples
The following example downloads a program to T1. This type of command downloads programs to devices such as PROM programmers.
$ binex scanner.S1 >/T1
The next example generates prog.S1 in S1 format from the binary file, prog.
$ binex -s1 prog prog.S1
Table 1-3 S-Record Types Generated
Record Description
S1 Uses a two-byte address field. (Default)
S2 Uses a three-byte address field.
S3 Uses a four-byte address field.
S7 Terminates blocks of S3 records.
S8 Terminates blocks of S2 records.
S9 Terminates blocks of S1 records.
Utilities Reference 33

1 Utilities
See Also
exbin
34 Utilities Reference
1Utilities
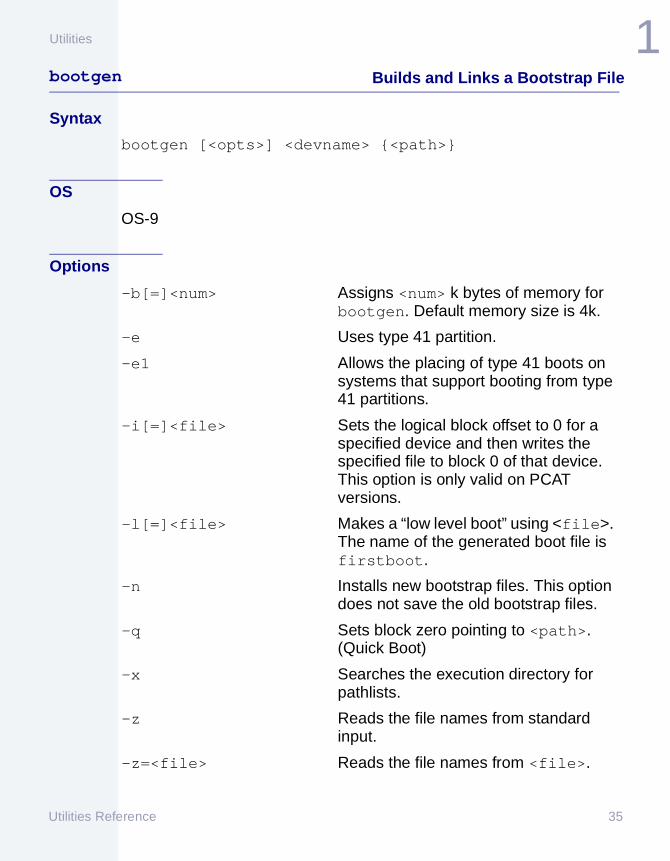
bootgen Builds and Links a Bootstrap File
Syntax
bootgen [<opts>] <devname> {<path>}
OS
OS-9
Options
-b[=]<num> Assigns <num> k bytes of memory for bootgen. Default memory size is 4k.
-e Uses type 41 partition.
-e1 Allows the placing of type 41 boots on systems that support booting from type 41 partitions.
-i[=]<file> Sets the logical block offset to 0 for a specified device and then writes the specified file to block 0 of that device. This option is only valid on PCAT versions.
-l[=]<file> Makes a “low level boot” using <file>. The name of the generated boot file is firstboot.
-n Installs new bootstrap files. This option does not save the old bootstrap files.
-q Sets block zero pointing to <path>. (Quick Boot)
-x Searches the execution directory for pathlists.
-z Reads the file names from standard input.
-z=<file> Reads the file names from <file>.
Utilities Reference 35

1 Utilities
Description
The bootgen utility creates and links the sysboot file required on any disk from which OS-9 is to be bootstrapped. The bootgen utility makes a copy of an existing boot file, adds modules to an existing boot file or creates an entirely new boot file for a different system. These are just a few examples.
Type bootgen and the name of the device on which the sysboot file is to be installed. If a sysboot file already exists on the target device, it is renamed. The sysboot file is copied onto the target device. The File Descriptor’s starting address is linked in the disk’s Identification Block (LSN 0) for use by the OS-9 bootstrap firmware.
If the -z option is used, the bootgen utility first uses the files specified on the command line and then the file names from its standard input, or from the specified pathlist, one pathlist per line. If the names are entered manually, no prompts are given and the end-of-file key (usually <escape>) or a blank line is entered after the line containing the last pathlist. Files included with the -z option can contain comment lines. Comment lines are lines starting with an asterisk (*).
To determine what modules are necessary for your boot file, use ident with the sysboot file that came with your system.
The -el option allows placing type 41 boots on systems that support booting on type 41 partitions. PowerPC PrepSpec includes the ability of systems conforming to the standard to boot devices with type 41 partitions. The fdisk utility must be used to set up the partition as type 41. Once the disk is formatted, a type 41 boot may be placed on the disk.
$ chd /h0/MWOS/OS9000/603/PORTS/MVME1603/CMDS/BOOTOBJS/ROM$ bootgen -el=/hs01fmt coreboot -b400
• PCAT:
Place PCAT specific IPL on system.
chd /h0/MWOS/OS9000/80386/PORTS/PCAT/CMDS/BOOTOBJS/IPLbootgen -i=iplhd /hs01fmt
Place first boot on system.
chd /h0/MWOS/OS9000/80386/PORTS/PCAT/CMDS/BOOTOBJS/ROM
36 Utilities Reference

1Utilities
Place OS-9 boot on system.
chd /h0/MWOS/OS9000/80386/PORTS/PCAT/CMDS/BOOTOBJS/BOOTFILEbootgen /hs01fmt h0_s8xx
• PowerPC:
Place type 41 boot on system.
chd /h0/MWOS/OS9000/603/PORTS/MVME1603/CMDS/BOOTOBJS/ROMbootgen -el=coreboot /hs01fmt
Place OS-9 boot on system.
chd /h0/MWOS/OS9000/603/PORTS/MVME1603/CMDS/BOOTOBJS/BOOTFILEbootgen /hs01fmt h0_scsi
The -q option updates information in the disk’s Identification Block by directing it to point to a file already contained in the root directory of the specified device.
The -q option is useful when restoring the sysboot.old file as the valid boot on the disk. bootgen renames the specified file to be sysboot and saves the current boot as described previously.
Examples
This command manually installs a boot file on device /d1 which is an exact copy of the sysboot file on device /d0.
$ bootgen /d1 /d0/sysboot
The following three methods manually install a boot file on device /d1. The bootfile on /d1 is a copy of the sysboot file on device /d0 with the addition of modules stored in the files /d0/tape.driver and /d2/video.driver:
Method 1:$ bootgen /d1 /d0/sysboot /d0/tape.driver /d2/video.driver
Utilities Reference 37

1 Utilities
Method 2:
$ bootgen /d1 /d0/sysboot -z/d0/tape.driver/d2/video.driver[ESCAPE]
Method 3:
$ bootgen /d1 -z/d0/sysboot/d0/tape.driver/d2/video.driver[ESCAPE]
You can automatically install a boot file by building a bootlist file and using the -z option to either redirect bootgen standard input or use the specified file as input:
$ build /d0/bootlist Create file bootlist
? /d0/sysboot Enter first file name
? /d0/tape.driver Enter second file name
? /d2/video.driver Enter third file name
? * V1.2 of video driver Comment line
? [RETURN] Terminate build
$ bootgen /d1 -z </d0/bootlistRedirects standard input
$ bootgen /d1 -z=/d0/bootlistReads input from pathlist
38 Utilities Reference

1Utilities
NoteNotebootgen treats any input line preceded by an asterisk (*) as a comment.
The following command makes the TestBoot file the current boot, but saves the current SysBoot file as SysBoot:
$ bootgen /d1 -q testboot
Utilities Reference 39

1 Utilities
break Invokes System Level Debugger or ResetSystem
Syntax
break
OS
OS-9; OS-9 for 68K
Description
The break utility executes an F$SysDbg (OS-9), F_SYSDBG (OS-9000) system call. This call stops the operating system and all user processes and returns control to the ROM debugger. The debugger’s g[o] command resumes execution of the operating system.
You should only call the break utility from the system’s console device, because the debugger only communicates with that device. If the break utility is called from another terminal, you must still use the system’s console device to communicate with the debugger.
NoteNoteOnly super users may use this utility.
The break utility is used only for system debugging. It should not be included with or run on a production system.
If there is not a debugger in ROM or if the debugger is disabled, the break utility resets the system.
The system clock is not updated when the system is running ROMbug. It is recommended that a setime be performed when returning from ROMbug to standard system operation.
40 Utilities Reference

1Utilities
You must be aware of any open network paths when you use the break utility as all timesharing is stopped. Network paths are not serviced while the system is in ROMbug and protocol time-outs may occur.
Utilities Reference 41

1 Utilities
build Builds Text File from Standard Input
Syntax
build <path>
OS
OS-9; OS-9 for 68K
Description
The build utility creates a file specified by a given pathlist.
Type build and a pathlist. A question mark prompt (?) displays. This requests an input line. Each line entered is written to the output file.
To terminate the build utility:
• Enter a line consisting of only a carriage return.
• Enter an end-of-file character at the beginning of an input line. The end-of-file character is typically <escape>.
Example
$ build newfile? Build should only be used? in creating short text files.? [RETURN]$ list newfileBuild should only be usedin creating short text files.
42 Utilities Reference

1Utilities
cfp Command File Processor
Syntax
cfp [<opts>] [<path1>] {<path2>}
OS
OS-9; OS-9 for 68K
Options
-b[=]<size> Specifies the buffer size in k bytes used by cfp for processing the command file.
-d Deletes the temporary file. This is the default.
-nd Does not delete the temporary file.
-e Executes the procedure file. This is the default.
-ne Does not execute the procedure file. Instead, the cfp utility lists the procedure file to standard output. If the -s option is specified, any path on the command line is treated as a <path2> substitution string.
-s=<str> Reads <str> instead of a procedure file. If the string contains characters interpreted by the shell, the entire option needs to be enclosed in quotes. It does not make sense to specify both a procedure file and this option.
-t=<path> Creates the temporary file at <path> rather than in the current working directory.
-z Reads the file names from standard input substitution strings.
Utilities Reference 43

1 Utilities
-z=<file> Reads the file names from <file> after processing any existing <path2>.
Description
The cfp utility creates a temporary procedure file in the current data directory and then invokes the shell to execute it.
Type cfp, the name of the procedure file to execute (<path1>), and the file(s) (<path2>) for the names to substitute when executing the <path1> procedure file and creating a temporary procedure file.
All occurrences of an asterisk (*) in the procedure file (<path1>) are replaced by the given pathlists, <path2>, unless preceded by the tilde character (~). For example, ~* translates to *. The command procedure is not executed until all input files have been read.
For example, if you have a procedure file in your current data directory called copyit that consists of a single command line, copy *, all of your C programs from two directories, PROGMS and MISC.JUNK, are placed in your current data directory by typing:
$ cfp copyit ../PROGMS/*.c ../MISC.JUNK/*.c
If you use the "-s=<string>" option, you may omit the name of the procedure file, but you must enclose the option and its string in quotes. The -s option causes cfp to use the string instead of a procedure file. For example:
$ cfp "-s=copy *" ../PROGMS/*.c ../MISC.JUNK/*.c
NoteNoteYou must use double quotes to force the shell to send the string -s=copy * as a single parameter to cfp. The quotes also prevent the shell from expanding the asterisk (*) to include all pathlists in the current data directory.
44 Utilities Reference

1Utilities
In the above examples, the cfp utility creates a temporary procedure file to copy every file ending in .c in both PROGMS and MISC.JUNK to the current data directory. The procedure file created by the cfp utility is deleted when all the files have been copied.
Using the -s option is convenient because you do not have to edit the procedure file to change the copy procedure. For example, if you are copying large C programs, you may want to increase the memory allocation to speed up the process.
You can allocate the additional memory on the cfp command line:
$ cfp "-s=copy -b100 *" ../PROGMS/*.c ../MISC.JUNK/*.c
You can use the -z and -z=<file> options to read the file names from either standard input or a file. Use the -z option to read the file names from standard input. For example, if you have a procedure file called count.em that contains the command count -l * and you want to count the lines in each program to see how large the programs are before you copy them, enter the following command line:
$ cfp -z count.em
The command line prompt does not appear because the cfp utility is waiting for input. Enter the file names on separate command lines. For example
$ cfp -z count.em../PROGMS/*.c ../MISC.JUNK/*.c
When you have finished entering the file names, press the carriage return a second time to get the shell prompt.
If you have a file containing a list of the files to copy, enter:
$ cfp -z=files "-s=copy *"
Example
In this example, test.p is a procedure file that contains the command line list * >/p2. The command cfp test.p file1 file2 file3 produces a procedure file containing the following commands:
list file1 >/p2
Utilities Reference 45

1 Utilities
list file2 >/p2list file3 >/p2
The following command accomplishes the same thing:
$ cfp "-s=list * >/p2" file1 file2 file3
46 Utilities Reference

1Utilities
chd Changes the Current Data Directory
Refer to chx for details.
Utilities Reference 47

1 Utilities
chm Change the Current Module Directory
Refer to chx for details.
48 Utilities Reference

1Utilities
chx Change the Current Execution Directory
Syntax
chd [<path>]chm [<path>]chx <path>
chd/chx OS
OS-9; OS-9 for 68K
chm OS
OS-9
Description
These commands are built-in shell commands used to change the working data directory, working module directory or working execution directory.
Type chd and the pathlist of the new data directory to change your data directory.
Type chx and the pathlist of the new execution directory to change your execution directory.
On OS-9 (non-68K), type chm and the pathlist of the new module directory to change your primary module directory.
In all cases a full or relative pathlist may be used. Relative pathlists used by the chd, chm and chx utilities are relative to the current data, module and execution directory, respectively.
If the HOME environment variable is set, the chd command with no specified directory changes your data directory to the directory specified by HOME.
Utilities Reference 49

1 Utilities
NoteNoteOS-9: If the MDHOME environment variable is set, the chm command with no specified directory changes your current module directory to the directory specified by MDHOME.
chm does not search the alternate pathlist for a module directory if the directory is not found in the current module directory.
These commands do not appear in the CMDS directory as they are built in to the shell.
Examples
$ chd /d1/PROGRAMS$ chx ..$ chx /D0/CMDS; chd /D1$ chm /usr/tony$ chm //tony/newproj
50 Utilities Reference

1Utilities
chown Changes the Ownership of a File/Directory
Syntax
chown [<opts>] <group>.<user> {<file>}
OS
OS-9; OS-9 for 68K
Options
-s Does not print details of changes (Silent).
-z Reads file names from standard input.
-z=<file> Reads file names from <file>.
Description
The chown utility changes the owner ID of a file or directory to the owner ID specified.
NoteNoteYou must be a super user to change the ownership of a file.
Examples
$ chown 1.1 prog.c Changes the file owner ID to 1.1
Utilities Reference 51

1 Utilities
cmp, os9cmp Compares Two Binary Files
Syntax
cmp {<option(s)>} <path1> <path2> OS-9/68K or OS-9os9cmp {<option(s)>} <path1> <path2> DOS or UNIX
cmp OS
OS-9; OS-9 for 68K
os9cmp OS
WIN; UNIX
Options
-b[=]<size> Assigns <size> k bytes of memory for the cmp utility to use. The cmp utility uses a 4K memory by default.
-s Stops the comparison when the first mismatch occurs and prints an error message (Silent mode).
-t Prints only the byte totals compared and different.
-x Searches the current execution directory for both of the specified files. (cmp only)
Description
The cmp utility opens two files and performs a comparison of the binary values of the corresponding data bytes of the files. If any differences are encountered, the file offset (address), the hexadecimal value, and the ASCII character for each byte display.
The comparison ends when an end-of-file is encountered on either file. A summary of the number of bytes compared and the number of differences found is displayed.
52 Utilities Reference

1Utilities
Type cmp and the pathlists of the files to compare.
Examples
The following example uses an 8K buffer to compare file1 with file2.
$ cmp file1 file2 -b=8Differences (hex) (ascii)byte #1 #2 #1 #2======== == == == ==00000019 72 6e r n0000001a 73 61 s a0000001b 74 6c t lBytes compared: 0000002dBytes different: 00000003file1 is longer
The following example compares file1 with itself.
$ cmp file1 file1Bytes compared: 0000002fBytes different: 00000000
Utilities Reference 53

1 Utilities
code Prints the Hex Value of the Input Character
Syntax
code
OS
OS-9; OS-9 for 68K
Description
The code utility prints the input character followed by the hex value of the input character.
Unprintable characters print as a period (.). The keys specified by tmode quit and tmode abort terminate code.
tmode quit is normally <control>E, and tmode abort is normally <control>C.
The most common use of code is to discover the value of an unknown key on the keyboard or the hex value of an ASCII character.
Examples
$ codeABORT or QUIT characters will terminate CODEa -> 61e -> 65A -> 41. -> 10. -> 04$
54 Utilities Reference

1Utilities
com Communicates With a Remote System
Syntax
com <devicename> [<functionkeyfile>]
OS
OS-9
Description
The com utility allows you to communicate with a remote system using an RS-232 serial port.
<devicename> is the name of the communications I/O port to be used during the session. You must give this name or an error message displays and com aborts.
<functionkeyfile> is the name of a file that specifies up to ten user defined functions keys that transmits text sequences through com.
You must make sure that the I/O port to be used is properly wired to the modem or remote computer and is set to the correct baud rate. If you are connecting two computers using a hard-wired connection, you may need a null modem device. You can use the com utility to help test your connections.
The default configuration of your terminal and the I/O port (as given in device descriptors and displayed by the tmode command) are not important to com because the configuration is automatically set by the com utility to the appropriate values.
Upon entering the com utility you should see the following message:
% Com V2.0 Copyright 1986 Microware Systems Corp.% You are talking to the remote system. (on line); metachar: ^Z
Utilities Reference 55

1 Utilities
NoteNoteThe % character always begins each com utility generated message. This differentiates com utility messages from the data received from the remote computer.
At this point, your terminal is directly connected to the communications port. This is called communications mode. At this time, you should dial the remote system if you are using a modem. If you are using a hard-wired connection, or after the modem connection is made, you may immediately perform any log-in procedure that may be required by the remote system.
In communications mode, all data sent by the remote computer is immediately displayed on your terminal. Anything typed on your keyboard is immediately transmitted to the remote system. Communications in either direction is done on a character-by-character basis.
The usual OS-9 keyboard control keys (such as backspace, line delete, etc.) and your tmode settings (such as echo, auto line feed, screen pause, etc.) do not work within the com utility. Instead, your terminal responds only to the control characters supported by the remote system.
All control keys (except the meta-character (<control>-z) and function keys (see the programmable function keys section below) are passed directly to the remote computer for processing without interference by the com utility or OS-9.
Similarly, all data received from the remote system passes directly to your terminal, except for ASCII null (hex 00) and rubout (hex 7F) characters, which are disposed of.
This transparency of data transmission eliminates possible conflicts between terminal control functions of OS-9 and the remote computer system.
56 Utilities Reference

1Utilities
You can enter control mode at any time from communication mode by typing the meta-character (<control>-z). While you are in control mode, the data link is kept open. However, it is always wise to halt any output from the remote system before entering control mode to prevent possible data loss. Most computers stop output when they receive an X-OFF character (<control>-s) and resume output when an X-ON character (<control>-q) is received.
A summary of the control mode commands are shown in Table 1-4. They are followed by a more detailed explanation. These commands are not case sensitive.
Table 1-4 Control Mode Commands
Command Specification
c Change directory on host system.
d Download file from remote system.
e Echo on/off. The default is off.
l Lock upper case on/off. The default is off.
m Change meta-char (^z).
p Copy communications to print file.
q Exit to operating system.
r Return to remote system.
t Strip parity from data remote on/off. The default is on.
u Upload to remote system.
x Send XON to remote system, return on-line.
Utilities Reference 57

1 Utilities
When you enter control mode, the com utility displays the following:
% COM:
At the prompt, you can enter any of the above commands. You can use the r command at any time to return to communications mode.
If an error occurs in a control mode command, an error message displays along with the corresponding OS-9 error number.
NoteNoteImportant Notes About System Hardware Configuration
• The communications port and your terminal must be interrupt-driven for the com utility to work properly. Almost all OS-9 serial I/O ports are interrupt-driven.
• Your terminal must be able to operate at a baud rate equal to or faster than the communications port baud rate.
You may discover a maximum speed at which your OS-9 system can receive data without dropped characters or read errors. The maximum data rate depends on CPU clock speed, the type of I/O interface and the number of active tasks on the system.
* Automatic download on/off. The default is off.
$ OS9 shell command.
<cr> Display help menu.
. Automatic download quick mode. Default is disabled.
Table 1-4 Control Mode Commands (continued)
Command Specification
58 Utilities Reference

1Utilities
Change Directory Command
The c command allows you to change your current working directory on the host system. This is useful when uploading and downloading files.
Echo On/Off Command
Most computers automatically echo characters from the terminal keyboard to the display screen. This is referred to as full duplex operation. Some systems do not echo characters, so the terminal must echo locally. This is known as half duplex operation. The e command allows you to turn local echo on or off. The default setting is full duplex (local echo off). If the remote system responds to your input, but does not echo keyboard input to the screen, you should switch the com utility to half duplex (local echo on).
Case Lock Command
The l command alternately turns the upper case lock on and off. When the case lock is on, all lower case characters received from the remote system are automatically converted to upper case. Characters sent from your keyboard are not converted. The default setting is off.
Set Meta-Character Command
The m command allows the meta-character to be changed. The meta-character returns to command mode when you are in communications mode. The default meta-character is <control>-z. If it is necessary to send a <control>-z to the remote system, changing the meta-character to an unused character allows <control>-z to be transmitted. Similarly, if you are talking to a third device or system through a second com link, you will want to change the meta-character on the first com.
Utilities Reference 59

1 Utilities
Quit Command
The q command closes any open files and terminates com. You must log-off the remote system (and hang up the phone line) before using this command.
Strip Parity Command
The t command strips the parity bit on data received from the remote system. By default, this option is ON.
Send XON and Return to Communications Mode
The x command is identical to the r command, except that an XON character is sent to the remote system before returning to communications mode.
OS-9 Shell Command
The $ command can be used to create a shell and return control to the host system. You may execute a single command by typing $ <command line>. After typing $, the prompt changes to the following:
% Com: $OS9:
By typing $<cr>, you enter the new shell until a subsequent escape (EOF) key is entered. The escape (EOF) key returns you to the com utility.
For example:
% Com: $ mfreeCurrent total free RAM: 4240.00 K-bytes% Com:
Programmable Function Keys
The com utility has a programmable function key feature that allows up to ten user-defined text sequences to be stored for transmission upon a simple keyboard command. You can use this feature to eliminate
60 Utilities Reference

1Utilities
repetitive typing of common keyboard entries such as user ID logins, program names, or auto-dial modem phone numbers. This is a software feature that does not require use of a terminal with special function keys.
Ten function keys are available. Select them by typing <control>-f followed by a number key (0-9). For example, the function key number four is selected by typing:
<control>-F4
The text associated with each function key is read from a disk file. You must specify the file name on the command line when you start the com utility. For example, if your function key file is called mykeys, start com like this:
com /t1 mykeys
You can create a personalized text file using a text editor or OS-9’s build utility. The file contains up to ten text lines. Each line of the file is used as the string for the associated function key. The first line is function key 0, the second is function key 1, etc. The maximum size of this file is 512 characters.
Each line is transmitted exactly as stored in the file with one exception: a less than character (<) sends a <return> character to the remote system. This permits you to specify whether or not the transmitted function key string should be followed by a <return> character or not. It also allows the transmitted string to be several “lines.”
Here is an example function key file:
dial 202 555 2626<user12<mypassword<basic myprogram<run<bye<dir<dirchdlistbasic
Utilities Reference 61

1 Utilities
Because you specify the name of the function key file when you run the com utility, you can create many different function key files for use with different systems.
Uploading And Downloading Files
An important feature of the com utility is its ability to transfer data between the remote computer and files on your OS-9 system. The control mode u and d commands are used for these functions.
Downloading refers to copying data from the remote system to a file on your system. The downloaded data can be a text file, the output of a program, S-records or any ASCII character data.
Uploading refers to copying data from a file on your system to the remote computer. The data transmitted can be any type of text. Normally, the data file to be transmitted is created with a text editor or generated by a program.
The only restriction on uploading and downloading is that the data must be text. Binary files must be converted to S-record files before being transmitted, otherwise certain bytes would be mistaken for control characters.
Downloading Files
The d command downloads files. When this command is input, the com utility asks you for the name of the file to be created for holding received data. You can then enter the name of any legal OS-9 file name (pathlist). If the file already exists, the com utility returns the following prompt:
% File already exists. Rewrite (y/n)?
If the com utility can open the file without error, it automatically switches to communications mode and stores all data received from the remote system on the file. If the communications line is operating in full duplex mode, the data stored will include any data typed on your keyboard that was echoed back from the remote system.
62 Utilities Reference
1Utilities
To terminate the download, type <control>-z to enter command mode and enter the d command again. You can now enter another filename or press ENTER to return to command mode.
Here is a sample download session:
% Com: Download filename: stock.pricesonline:run summaryThe Dow-Jones average closed up 7-1/2 points today at1225 in heavy trading, fueled by Wall Street rumors ofa lower third quarter inflation forecast.<control>-Z% Com:
Auto-Download
Another way to download files is to use the auto-download option. Auto-download is toggled on and off with the asterisk (*) command. The advantage to using auto-download is that the entire transfer can be done in communications mode instead of switching back to command mode. This is especially helpful when downloading more than one file.
After switching to communications mode, an auto-download is started by the character sequence ~>: (tilde, greater than, colon) followed by the destination file name. If this file already exists on the host system, the com utility allows you to overwrite it. Downloading of this file is terminated by the character sequence ~> (tilde, greater than).
Utilities Reference 63

1 Utilities
Here is a sample auto-download session (this example assumes the remote computer is an OS-9 system):
% Com: *% Com: *** automatic download mode ***% Com: Ronline: echo \7e\3e\3a; echo stock.pricesDownloading file: stock.prices
run summaryThe Dow-Jones average closed up 7-1/2 points today at1225 in heavy trading, fueled by Wall Street rumors ofa lower third quarter inflation forecast.echo \7e\3efile closed
If the remote system is an OS-9 system, auto-download procedure may be automated by using a cfp file. For example:
"echo \7E\3E\3A; echo *; list *; echo \7E\3E\0D"
Auto-Download Quick Mode
When downloading files, the text being transferred is echoed to your screen. If the dot (.) command is used, the com utility prints dots to show the progress of the transfer instead of echoing the text.
Download Data Buffering
When data is being downloaded, the com utility saves the received text in a 1K memory buffer. When this buffer is full (or when the download is terminated, if earlier) its contents are written to the disk file.
This buffering and XON-XOFF protocol is critical for OS-9 systems that have disk controllers that halt the system while accessing the disk. Otherwise, incoming data could be lost. In order for the com utility to work properly, the remote computer must recognize the XON-XOFF protocol.
64 Utilities Reference

1Utilities
NoteNoteIn the case (worst case) of an OS-9 system that does not recognize XON-XOFF, with a disk controller that halts the system while talking to a remote system, the maximum file size that can be reliably downloaded corresponds to the size of the com buffer.
Systems with disk controllers that halt the CPU should also not run any other simultaneous task that accesses the disk while the com utility is running.
Uploading Files
The u command uploads files. After this command is input, the com utility asks you for the name of the file to be transmitted. You can then enter any legal OS-9 file name (path list). If the com utility can locate and open the file without error, it automatically switches to communications mode and begins sending the contents of the file to the remote system.
If the communications link is in full duplex mode, you will see the transmitted data echoed back to your terminal. If you want to abort the upload, type <control>-z to enter command mode, type the u command again and type <return> instead of a file name.
Here is a example upload session:
% Com: Upload filename: message.to.lincDear Lincoln,I got your message today. I will be visiting youon June 12th so we can finalize our plans. I’m lookingforward to seeing you then.Regards,Steve<control>-Z% Com:
Utilities Reference 65

1 Utilities
If you want the remote computer to save the uploaded file, you must give the correct command for that system to store a file before starting the upload. You may also have to give the correct command after the upload to tell the remote system to close the file. If the remote system does not have a special upload command, you can often use the system’s text editor program or merge-type utilities to receive uploaded files.
You can also use the upload command to send short commonly used commands to the remote system such as log-on sequences, etc.
66 Utilities Reference

1Utilities
compress Compresses ASCII Files
Syntax
compress [<opts>] {<path>}
OS
OS-9; OS-9 for 68K
Options
-d Deletes the original file. This is inappropriate when no pathlist is specified on the command line and standard input is used.
-n Creates an output file.
-z Reads file names from standard input.
-z=<file> Reads file names from <file>.
Description
The compress utility reads the specified text file(s), converts it to compressed form, and writes the compressed text file to standard output or to an optional output file.
Type compress and the path of the text file to compress. If files are not given, standard input is used.
The compress utility replaces multiple occurrences of a character with a three character coded sequence:
aaaaabbbbbcccccccccc would be replaced with ~Ea~Eb~Jc.
Each compressed input file name is appended with _comp. If a file with this name already exists, the old file is overwritten with the new file. Typical files compress about 30% smaller than the original file.
The compress utility reduces the size of a file to save disk space. See the expand utility for details on how to expand a compressed file.
Utilities Reference 67

1 Utilities
WARNING!Only use the compress and expand utilities on text files.
Examples
In the first example, file1 is compressed, file1_comp is created, and file1 is deleted.
$ compress file1 -dn
In this example, file2 is compressed, file3 is created from the redirected standard output, and file2 is deleted.
$ compress file2 -d >file3
68 Utilities Reference

1Utilities
copy Copies Data from One File to Another
Syntax
copy [<opts>] <path1> [<path2><dir>]
OS
OS-9; OS-9 for 68K
Options
-a Aborts the copy routine if a source file error occurs. This option cancels the continue (y/n) ? prompt of the -w option.
-b[=]<num> Allocates <num> k bytes of memory for buffering by copy. The default is 8k.
-c[=][[<host>]<target] Convert ASCII files from <host> to <target> where: d = MS-DOS (CRLF) o = OS-9 or OS-9/68K (CR) u = UNIX (LF)Default <host> is ANY and <target> is o.
-f Rewrites destination files with no write permission.
-n Does not copy original file descriptor information (attributes, etc.) to the destination.
-p Does not print a list of the files copied. This option is only for copying multiple files.
-r Overwrites the existing file.
-v Verifies the integrity of the new file.
Utilities Reference 69

1 Utilities
-w[=]<dir> Copies one or more files to <dir>. This option prints the file name after each successful copy. If an error such as no permission to copy occurs, the prompt Continue (y/n)? is displayed.
-x Uses the current execution directory for <path1>.
-z Reads file names from standard input.
-z=<file> Reads file names from <file>.
Description
The copy utility copies data from <path1> to <path2>. If <path2> already exists, the contents of <path1> overwrites the existing file when the -r option is specified. If <path2> does not exist, it is created.
If files are not given on the command line and the -z option is not specified, an error is returned.
You can copy any type of file. Copied files are not modified in any way unless the -c option is specified. The -c option should not be used on binary files.
The attributes of <path1> are copied exactly.
NoteNoteYou must have permission to copy the file.
You must be the owner of the file specified by <path1> or have public read permission in order to copy the file.
You must also be able to write to the specified directory.
In any case, if the copy procedure is successful, <path2> has your group.user number unless you are the super user. If you are the super user, <path2> has the same group.user number as <path1>.
70 Utilities Reference

1Utilities
If <path2> is omitted, the destination file has the same name as the source file. It is copied into the current data directory. Therefore, the following two copy commands have the same effect:
$ copy /h0/cmds/file1 file1$ copy /h0/cmds/file1
The copy utility can also copy one or more files to the same directory by using the -w=<dir> option. The following command copies file1 and file2 into the BACKUP directory:
$ copy file1 file2 -w=BACKUP
If used with wildcards, the -w=<dir> option becomes a selective dsave. The following command copies all files in the current data directory that have names ending with .lp into the LP directory:
$ copy *.lp -w=lp
Specification of the -w option for a destination directory name is optional. If the last path given to the copy command is an already existing directory name, then the destination directory name will be this path. For instance, to copy all files in the current directory to /r0, type:
$ copy * /r0
Data is transferred using large block reads and writes until an end-of-file occurs on the input path. Because block transfers are used, normal output processing of data does not occur on character-oriented devices such as terminals, printers, etc. Therefore, the list utility is preferred over the copy utility when a file consisting of text is sent to a terminal or printer.
NoteNoteAny error that occurs while creating or writing a destination file aborts the copy utility.
The copy utility always runs faster if you specify additional memory with the -b option. This allows the copy utility to transfer data with a minimum number of I/O requests
Utilities Reference 71

1 Utilities
Examples
The following example copies file1 to file2. If file2 already exists, error #218 is returned.
$ copy file1 file2
This example copies file1 to file2 using a 15K buffer.
$ copy file1 file2 -b=15
This example copies all files in the current data directory to MYFILE.
$ copy * -w=MYFILE
This example copies all files in the current data directory that have names ending in .lp.
$ copy *.lp -w=MYFILE
This example copies /d1/joe and /d0/jim to FILE.
$ copy /d1/joe /d0/jim -w=FILE
This example writes file3 over file4.
$ copy file3 file4 -r
This example copies a set of ASCII files, converting them to several different line termination styles. In the end, the directories OS9 and OS9000 will contain identical files.
$ copy OS9/*.c -c=d -w=DOS$ copy DOS/*.c -c=u -w=UNIX$ copy UNIX/*.c -c=o -w=OS9000
72 Utilities Reference
1Utilities
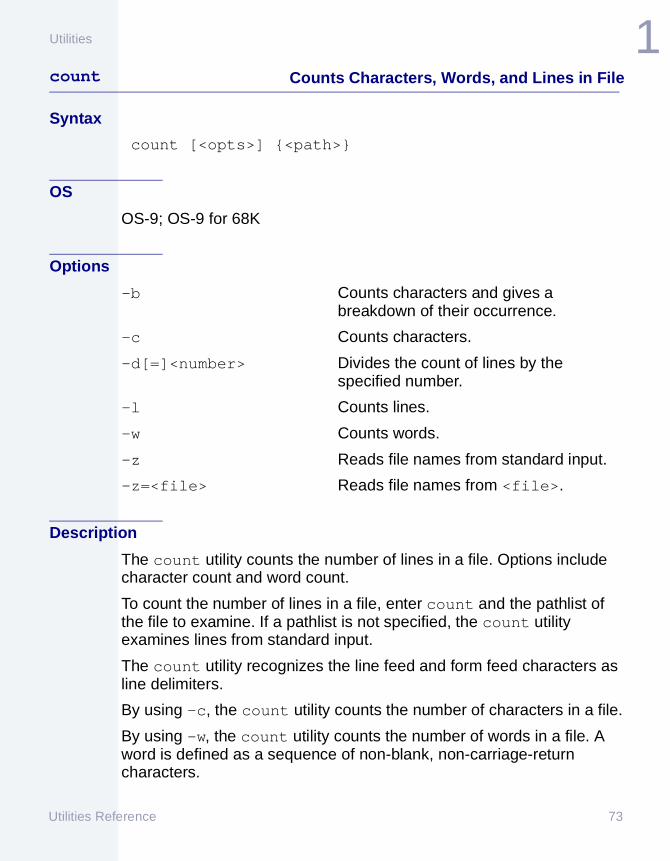
count Counts Characters, Words, and Lines in File
Syntax
count [<opts>] {<path>}
OS
OS-9; OS-9 for 68K
Options
-b Counts characters and gives a breakdown of their occurrence.
-c Counts characters.
-d[=]<number> Divides the count of lines by the specified number.
-l Counts lines.
-w Counts words.
-z Reads file names from standard input.
-z=<file> Reads file names from <file>.
Description
The count utility counts the number of lines in a file. Options include character count and word count.
To count the number of lines in a file, enter count and the pathlist of the file to examine. If a pathlist is not specified, the count utility examines lines from standard input.
The count utility recognizes the line feed and form feed characters as line delimiters.
By using -c, the count utility counts the number of characters in a file.
By using -w, the count utility counts the number of words in a file. A word is defined as a sequence of non-blank, non-carriage-return characters.
Utilities Reference 73

1 Utilities
By using -l, the number of lines in a file is displayed. A line is defined by zero or more characters ending in a carriage-return.
Example
$ list file1first linesecond linethird line
$ count -clw file1"file1" contains 34 characters"file1" contains 6 words"file1" contains 3 lines
74 Utilities Reference

1Utilities
date Displays System Date and Time
Syntax
date [<opts>]
OS
OS-9; OS-9 for 68K
Options
-j Displays the Julian date and time.
-m Displays the military time (24 hour clock) after the date.
Description
The date utility displays the current system date and system time. The system date and time are set by the setime utility.
Examples
$ dateDecember 18, 1994 Tuesday 2:20:20 pm
$ date -mDecember 18, 1994 Tuesday 14:20:24
See Also
setime
Utilities Reference 75

1 Utilities
dcheck Checks Disk File Structure
Syntax
dcheck [<opts>] <devname>
OS
OS-9; OS-9 for 68K
Options
-b[=]<low>[:<high>] Print file names containing blocks in the given range. (OS-9 only)
-d[[=]<num>] Prints the path to the directory <num> deep.
-r Prompts to turn on or off bits in the bit map (Repair mode.)
-y Does not prompt for repair, but answers yes to all prompts (Repair mode). This option may only be used with the -r option.
Description
The dcheck utility is a diagnostic tool which detects the condition and general integrity of the directory/file linkages of a disk device.
Type dcheck, the option(s) desired, and the name of the disk device to check.
The dcheck utility first verifies and prints some of the vital file structure parameters. It moves down the tree file system to all directories and files on the disk. As it moves down the tree file system, the dcheck utility verifies the integrity of the file descriptor sectors (FDs) and reports any discrepancies in the directory/file linkages.
From the segment list associated with each file, the dcheck utility builds a sector allocation map. This map is created in memory.
76 Utilities Reference

1Utilities
NoteNoteOS-9:
• Sectors are called blocks.
• Cluster size is one block.
If any FDs describe a segment with a cluster not within the file structure of the disk, the dcheck utility reports the following message:
OS-9 for 68K: *** Bad FD segment (xxxxxx-yyyyyy)OS-9: *** bad fd segment ($xxxxxxxx-$yyyyyyyy)
This indicates that a segment starting at sector xxxxxx (hexadecimal) and ending at sector yyyyyy cannot be used on this disk. The entire FD is probably bad if any of its segment descriptors are bad. Therefore, the allocation map is not updated for bad FDs.
While building the allocation map, the dcheck utility ensures that each disk cluster appears only once in the file structure. If a cluster appears more than once, the dcheck utility displays a message:
OS-9 for 68K: Sector xxxxxx (byte=nn bit=n) previously allocated
OS-9: Block $xxxxxxxx previously allocated
On OS-9 for 68K, this message indicates the cluster at sector xxxxxx has been found at least once before in the file structure. byte=nn bit=n specifies in which byte of the bitmap this error occurred and in which bit in that byte. The first byte in the bitmap is numbered zero. For the dcheck utility’s purposes, bits are numbered zero through seven; the most significant bit is numbered zero. The message may be printed more than once if a cluster appears in a segment in more than one file.
Occasionally, sectors on a disk are marked as allocated even though they are not associated with a file or the disk’s free space. This is most commonly caused by media defects discovered by format. These defective sectors are not included in the free space for the disk. This can also happen if a disk is removed from a drive while files are still open, or if a directory containing files is deleted by a means other than deldir.
Utilities Reference 77

1 Utilities
If all the sectors of a cluster are not used in the file system, the dcheck utility prints a message:
OS-9 for 68K: xxxxxx cluster only partially usedOS-9: Block $xxxxxxxx not in file structure
The allocation map created by the dcheck utility is then compared to the allocation map stored on the disk. Any differences are reported in messages:
OS-9 for 68K: Sector xxxxxx (byte=nn bit=n) not in file structureSector xxxxxx (byte=nn bit=n) not in bit map
OS-9: Block $xxxxxxxx not in bitmap
On OS-9 for 68K, the first message indicates sector number xxxxxx was not found as part of the file system but is marked as allocated in the disk’s allocation map. In addition to the causes previously mentioned, some sectors may have been excluded from the allocation map by the format program because they were defective. They could be the last sectors of the disk, whose sum is too small to comprise a cluster.
The second message indicates that the cluster starting at sector xxxxxx is part of the file structure but is not marked as allocated in the disk’s allocation map. This type of disk error could cause problems later. It is possible that this cluster may later be allocated to another file. This would overwrite the current contents of the cluster with data from the newly allocated file. All current data located in this cluster would be lost. Any clusters reported as previously allocated by the dcheck utility have this problem.
Repairing the Bitmap
The dcheck utility can repair two types of disk problems using the -r option. If a cluster was found in the file structure but not in the bitmap, the bit may be turned on in the bitmap to include the cluster. If the cluster was marked in the bitmap but not in the file structure, the bit in the bitmap may be turned off.
78 Utilities Reference

1Utilities
WARNING!Do not use the -r option unless you thoroughly understand what you are doing. The disk errors could be caused by previously mentioned problems and perhaps should not be repaired.
Restrictions
1. Only the super user (user 0.n) may use this utility.
2. The dcheck utility should have exclusive access to the disk being checked. The dcheck utility can be fooled if the disk allocation map changes while it is building its bitmap file from the changing file structure.
Example$ dcheck /r0Volume - ’Ram Disk (Caution: Volatile)’ on device /r0$001000 total sectors on media, 256 bytes per sectorSector $000001 is start of bitmap$0200 bytes in allocation map, 1 sector(s) per clusterSector $000003 is start of root dirBuilding allocation map...$0003 sectors used for id sector and allocation mapChecking allocation map...
’Ram Disk (Caution: Volatile)’ file structure is intact5 directories, 60 files580096 of 1048576 bytes (0.55 of 1.00 meg) used on media
Utilities Reference 79

1 Utilities
debug Debugs and Tests 68000 Machine LanguagePrograms
Syntax
debug [<opts> <prog> <prog opts>]
OS
OS-9
Options
-m=<n> Increases memory size for program.
Description
The debug utility debugs and tests user-state 68000 machine language programs written for the OS-9 for 68000 operating system.
The debug utility uses:
• Software techniques to control a process to debug.
• The F$DFork and F$DExec system calls to create and execute the process to debug. These system calls provide an environment that allows the debugger to control how a process executes without affecting other processes on the system.
Full access to the 68000 user-mode registers is provided. On 68020/68881-based systems, full access to user-mode 68020 registers and all 68881 floating point registers are provided.
For More InformationMore Info More Information More Information More Information More
-6-
For more information about the debug utility, see Chapter 2: Using the debug Utility.
80 Utilities Reference

1Utilities
deiniz Detaches Device
Syntax
deiniz [<opts>] {<modname>}
OS
OS-9; OS-9 for 68K
Options
-z Reads the module names from standard input.
-z=<file> Reads the module names from <file>.
Description
The deiniz utility removes the device from the system device table.
The deiniz utility uses the I$Detach (OS-9 for 68K) or I_Detach (OS-9) system call to accomplish this.
Type deiniz, followed by the name of the module(s) to detach.
<modname> may begin with a slash (/). The module names may be read from standard input or from a specified pathlist if the -z option is used.
WARNING!Do not use the deiniz utility to detach a module unless you have explicitly iniz-ed it. If you use the deiniz utility to detach a device that you have not iniz-ed, you could cause problems for other users who may be using the module.
Utilities Reference 81

1 Utilities
See Also
I$Detach OS-9 Technical Manual
I_Detach OS-9000 Technical Manual
iniz
Example
$ deiniz t1 t2 t3
82 Utilities Reference

1Utilities
del, os9del Deletes a File
Syntax
del [<opts>] {<path>} OS-9 or OS-9/68Kos9del [<opts>] {<path>} DOS or UNIX
del OS
OS-9; OS-9 for 68K
os9del OS
WIN; UNIX
Options
-d Deletes hard link to directories. (OS-9 only)
-e Erases the disk space that the file occupied.
-f Deletes files with no write permission.
-p Prompts for each file to be deleted with the following prompt:
delete <filename> ? (y,n,a,q)
y = yes. n = no. a = deletes all specified files without further prompts. q = quits the deleting process.
-q Quiet mode. Suppress File Not Found error messages.
-x Looks for the file in the current execution directory. (del only)
-z Reads the file names from standard input.
Utilities Reference 83

1 Utilities
-z=<file> Reads the file names from <file>.
-@<path> Reads the file names from <file>. (os9del only)
Description
The del utility deletes the files specified by the pathlists.
You must have write permission for the files to be deleted. You cannot delete directory files with the del utility unless their attribute is changed to non-directory.
Examples
These examples use the following directory structure:
$ dir Directory of /D1 14:29:46junk myfile newfile number_five old_test_program test_program
$ del newfile Delete newfile.$ del *_* Delete all files in the current data
directory with an underscore character in their name
After executing the preceding two examples, the directory has the following files:
$ dirDirectory of /D1 14:30:37junk myfile
To delete all files in the current directory, type:
$ dir -u ! del -z
See Also
attr
deldir
84 Utilities Reference

1Utilities
deldir Deletes All Files in Directory
Syntax
deldir [<opts>] {<path>}
OS
OS-9; OS-9 for 68K
Options
-e Erases the disk space that files in the directory occupied.
-f Deletes files regardless of whether write permission is set.
-q Quiet mode. No questions are asked. The directory and its sub-directories are all deleted, if possible.
-x Deletes directories relative to the execution directory.
-z Reads the directory names from standard input.
-z=<file> Reads the directory names from <file>.
Description
The deldir utility deletes a directory and the files (and subdirectories) it contains.
When the deldir utility is run, it prints a prompt message:
$ deldir OLDFILESDeleting directory: OLDFILESDelete, List, or Quit (d, l, or q) ?
Utilities Reference 85

1 Utilities
After listing the files, the deldir utility prompts with:
delete ? (y,n)
The directory to be deleted may include directory files, which may themselves include directory files. In this case, the deldir utility operates recursively (that is, lower-level directories are also deleted). The lower-level directories are processed first.
You must have the correct access permission to delete all files and directories encountered. If not, the deldir utility aborts when it encounters the first file for which you do not have write permission.
The deldir utility automatically calls dir and attr, so they must reside in the current execution directory. When the deldir utility calls dir, it executes a dir -ea command to show all files contained in the directory.
NoteNoteYou should never delete the current data directory (.).
Table 1-5 Prompt Response
Response Action
d Initiate the process to delete the files.
l Cause dir -e to run so you can have an opportunity to see the files in the directory before they are deleted.
q Abort the command before action is taken.
86 Utilities Reference

1Utilities
delmdir Deletes Existing Module Directories
Syntax
delmdir [<opts>] {<module directory>}
OS
OS-9
Options
-z Reads the module directory names from standard input.
-z=<file> Reads the module directory names from <file>.
Description
The delmdir utility deletes existing module directories.
The module directory to delete may contain both modules and module sub-directories. These sub-directories may contain sub-directories, or modules, etc. The delmdir utility recursively deletes all sub-directories when the parent directory is deleted.
The delmdir utility does not delete the module directory if there are modules located in the directory which are in use or if any of the sub-directories are in use.
Utilities Reference 87

1 Utilities
NoteNoteThe delmdir utility does not search the alternate module directories if the directory to be deleted is not located in the current module directory.
You must have the appropriate access permissions to a module directory in order to delete it.
See Also
makdir
chm
mdir
Example
$ mdir USR Module Directory of USRproram1 program2 program3$ delmdir USR$ mdir USR$
88 Utilities Reference

1Utilities
devs Displays System’s Device Table
Syntax
devs
OS
OS-9; OS-9 for 68K
Options
-a Lists extended information about each device. (OS-9 only)
Description
The devs utility displays a list of the system’s device table.
The device table contains an entry for each active device known. The devs utility does not display information for non-initialized devices.
Under OS-9 for 68K, the devs display header lists the system name, the operating system version, and the maximum number of devices allowed in the device table.
Under OS-9, the devs display header lists the system hardware architecture, operating system version, and the CPU class.
Each line in the devs utility’s display contains five fields:
Table 1-6 devs Display Fields
OS-9 for 68K OS-9 Description
Device Device Name of the device descriptor.
Driver Driver Name of the device driver.
File Mgr File Mgr Name of the file manager.
Utilities Reference 89

1 Utilities
Data Ptr Address of the device driver’s static storage.
Links Device use count. Each time a user executes a chd to an RBF device, the use count of that device increments one. Therefore, the Links field may be artificially high.
DrvStat Location of device driver’s static storage.
FMStat File manager static storage.
LUStat Logical unit static storage.
Users User count
Table 1-6 devs Display Fields (continued)
OS-9 for 68K OS-9 Description
90 Utilities Reference

1Utilities
Example
The following example displays the OS-9 device table for a system named Tazz:
$ devsTazz_VME147 OS-9/68K V3.0.3 (128 devices max) Device Driver File Mgr Data Ptr Links---------- ---------- ---------- --------- ------term sc8x30 scf $007fda40 7h0 rbsccs rbf $007fcbe0 31175d0 rb320 rbf $007e94a0 1dd rbsccs rbf $007fcbe0 23t10 sc335 scf $006d3a70 5t11 sc335 scf $006d3850 5t12 sc335 scf $006d3630 5t13 sc335 scf $006d3410 5t20 sc335 scf $006d31f0 5t21 sc335 scf $006d2fd0 5t22 sc335 scf $006d2db0 5t23 sc335 scf $006d2b90 55803 rb320 rbf $007e94a0 203803 rb320 rbf $007e94a0 1mt2 sbgiga sbf $006d9640 1n0 n9026 nfm $006d63a0 372nil null scf $006d6340 10socket sockdvr sockman $006c0500 4lo0 ifloop ifman $006c0380 4le0 am7990 ifman $006bed60 1pipe null pipeman $0068ecc0 3pk pkdvr pkman $0048dc90 1pkm00 pkdvr pkman $00427b50 13807 rb320 rbf $007e94a0 12pcd0 rb320 pcf $007e94a0 3pks00 pkdvr scf $004279b0 2
Utilities Reference 91

1 Utilities
See Also
iniz
deiniz
92 Utilities Reference

1Utilities
dir Displays Names of Files in Directory
Syntax
dir [<opts>] {<path>}
OS
OS-9; OS-9 for 68K
Options
-a Displays all file names in the directory. This includes file names beginning with a period.
-b Does not display block address in extended listing (OS-9 only)
-d Appends a slash (/) to all directory names listed. This does not affect the actual name of the directory.
-e Displays an extended directory listing.
-e=<opt> Displays an extended directory listing. (OS-9 only)† opt = c, a, m, u, and b
a = last access time b = last backup time c = creation time m = last modified time (default)u = last update time
-f Displays the file link count in extended listing (OS-9000 only).
-h Displays the file host number in extended listing (OS-9 only).
-i Inverts the order of sorted listings (OS-9 only).
Utilities Reference 93

1 Utilities
-n Displays directory names without displaying the file names they contain. This option is especially useful with wildcards.
-o Does not display file owner in extended listing (OS-9000 only).
-r Recursively displays the directories. †
-r=<num> Displays the directories recursively up to the <num> level below the current directory. †
-s Displays an unsorted listing. †
-t Sorts on file date and time instead of name. (OS-9000 only).
-u Displays an unformatted listing. †
-x Displays the current execution directory. †
-z Reads the directory names from standard input.
-z=<file> Reads the directory names from <file>.
† This does not include file names beginning with a period.
Description
The dir utility displays a formatted list of file names of the specified directory file on standard output.
Type dir and the directory pathlist, if desired.
If parameters are not specified, the current data directory is shown. If you use the -x option, the current execution directory is shown. If a pathlist of a directory file is specified, the files of the indicated directory are shown.
94 Utilities Reference

1Utilities
Using the -e options, you can create your own listing, showing specific items as needed. Valid <opt> values are: c, a, m, u, or b.
$dir -e=a Displays time last append occurred.
$dir -e=b Displays time of last backup.
$dir -e=c Displays creation time.
$dir -e=m Displays time last modified.
$dir -e=u Displays time of last update.
Because the shell does not interpret the -x option, wildcards do not work as expected when you use this option.
Unless you use the -a option, the dir utility does not display file names that begin with a period (.).
Unformatted Directory Listing
You can print an unformatted directory listing using the -u option. This displays only the names of the entries of a directory. No directory header is displayed. Entries are printed as follows:
$ dir -uDIR1file1file2file3
You can send the output of a dir -u command through a pipe to another utility or program that can use a pipe. For example:
$ dir -u ! attr -z
This displays the attributes of every entry in the current directory.
You can use the -e option to display an extended directory listing without the header by adding the -u option.
Examples
The first example displays the current data directory:
$ dir
Utilities Reference 95

1 Utilities
Directory of . 12:12:54BK BKII RELS ed10.c ed11.ced2.c
In the second example, the parent of the working data directory is displayed:
$ dir ..
This example displays the NEWSTUFF directory:
$ dir NEWSTUFF
The next example displays the entire description of the current data directory:
dir -e Directory of . 13:54:44 Owner Last modified Attributes Sector Bytecount Name------- ------------- ---------- ------ --------- ---- 1.78 90/11/28 0357 d-ewrewr 383C8 160 NOTES 1.78 90/11/28 0357 d-ewrewr 383E8 608 PROGRAMS 1.78 90/11/28 0357 d-ewrewr 383D8 160 TEXT 1.78 90/11/14 0841 ------wr F4058 438 arrayex.c 1.78 90/11/12 0859 ------wr F4068 538 arrayex.r 1.78 90/11/09 0852 ------wr F2AB0 312 asciiinfo 0.0 90/04/27 1719 ----r-wr 71EC8 4626 atari.doc 1.78 90/11/14 0911 ------wr B4548 636 bobble.c 1.78 90/11/14 0910 ------wr B4AA8 815 bobble.r 1.78 90/10/18 1259 ------wr BD418 619 cd.order 1.78 90/06/06 1009 ---wr-wr 82B8 5420 cdichanges 1.78 90/11/28 1102 ------wr E0C68 1478 checks.c 1.78 90/11/28 1102 ------wr E1D08 1075 checks.r 1.78 90/09/07 0848 ------wr 708B8 274 datafile 0.78 90/04/12 1206 ---wr-wr 70EE8 1065 drvr.a
1.78 90/11/13 1544 ------wr B1650 112 exloop
To display the execution directory, type:
$ dir -x
To display the entire description of the execution directory, type:
$ dir -xe
To display the contents of the current directory and all directories one level below this directory, type:
96 Utilities Reference
1Utilities
$ dir -r=1
The next example displays the entire description of all files within the current directory. This includes files within all subdirectories of the current directory.
$ dir -er
This example displays all directory and file names that begin with B.
$ dir -n B*
To display all named pipes for device /pipe, type:
$ dir /pipe
Utilities Reference 97

1 Utilities
diskcache Enables, Disables, or Displays Status ofCache
OS-9 for 68K Syntax
diskcache [<opts>] [<dev>]
OS-9 Syntax
diskcache [<opts>] {<devname>[=<num>k]}
OS
OS-9; OS-9 for 68K
Options
-c Disables CRC checking of cached sectors. (OS-9 for 68K)
-d Disables cache for <dev>.
-e Enables cache for <dev>.
-i Disables statistical information. (OS-9 for 68K)
-l Display the cache status for <dev>. (OS-9 for 68K)
-t=<size> Specifies the size limit of the total cache. (OS-9 for 68K)
-s Prints cache status information for the specified device. (OS-9)
Description
The diskcache utility enables, disables, or displays the status of cache.
Caching may be enabled for any type of RBF device, and more than one device may be cached at a time.
98 Utilities Reference

1Utilities
OS-9 for 68K Systems: Use the -t option to set the total amount of system memory used for caching all enabled drives. If not explicitly defined, diskcache automatically selects a reasonable value based on the amount of free system memory.
OS-9 Systems: The following command enables caching on the hard disk (/h0) with an 800k cache:
diskcache -e /h0=800k
Use the -e and -d options to dynamically enable or disable caching on a per drive basis while the system is running.
Statistical information regarding the hit/miss ratios and amount of memory allocated can be inspected on a drive by drive basis using the -l /(device) OS-9 for 68K option, or -s /(device) OS-9 option.
An example output of this information follows.
Current size = 1047552 Size limit = 1048576crc enabled, stats enabled
Device: /h0:1:1 Requests Sectors Hits Zaps >2 Xfr Hit Rate Reads: 47592 55436 21874 143 662 39.5% Writes: 7723 8065 7342 68 Dir Reads: 54048 54048 34526 18387<-Sctr Zero 63.9%Hit compares = 63399 ( 1/hit)Miss compates = 92685 ( 3/miss)
The Device: /h0:1:1 line of information uses the following syntax: [[<dev>[<bias>:<rebias>]]. Where <bias> is the bias when last used, and <rebias> is the bias when last reused. The hit (miss) compares show total number of hits or misses, and average number of compares in cache before each hit or miss).
Utilities Reference 99
1 Utilities
NoteNoteIf caching is to be enabled on drives with different sector sizes, include the device with the largest sector size in the initial cache enabling.
Attempting to add a drive (with a sector size larger than any currently cached drive) to the cache system after initial cache startup results in continuous “misses” for that drive, as the sector size is too large.
100 Utilities Reference

1Utilities
dosfile Converts DOS Text to OS-9 and Vise Versa
Syntax
dosfile [<opts>] [<file_name>] [<opts>]
OS
OS-9
Options
-d Converts OS-9 text file to DOS format.
-r Rewrites the target file if it exists.
-b[=]<size> Use buffer of <size> kilobytes.
Description
The dosfile utility converts DOS text tiles to OS-9 format or OS-9 text files to DOS format.
Similar functionality is also implemented in the copy command for both OS-9 for 68K and OS-9. This utility may be removed in a future release.
Utilities Reference 101

1 Utilities
dpsplit Splits/Rejoins the DPIO descriptor
Syntax
dpsplit [<opts>] <desc> [<opts>]
OS
OS-9; OS-9 for 68K; WIN; UNIX
Options
-j Joins <desc>.1 and <desc>.2 into <desc>.
-s Splits <desc> into <desc>.1 and <desc>.2.
Description
The dpsplit utility was designed to make development of the DPIO descriptors for the OS-9/68000 operating system easier. Because the editmod utility cannot handle a fully constructed DPIO descriptor, the descriptor must be split to be edited or listed.
Use the dpsplit utility to split the DPIO descriptor, and the editmod utility to edit or list the split components, then the dpsplit utility again, to rejoin the descriptor.
When creating a DPIO descriptor, the editmod utility can be used to create both components and the dpsplit utility can be used to join the components.
102 Utilities Reference

1Utilities
Example
dpsplit -s nv0 Creates nv0.1 and nv0.2
editmod -l nv0.1 List contents of the wrapper module
<<< listing not shown >>>
dpsplit -j nv0 Join nv0.1 and nv0.2 back to nv0
Utilities Reference 103

1 Utilities
dsave Generates Procedure File to Copy Files
Syntax
dsave [<opts>] [<path>]
OS
OS-9; OS-9 for 68K
Options
-a Does not copy any file that has a name beginning with a period.
-b[=]<n> Allocates <n> k bytes of memory for copy and chm if needed.
-c[=][[<host>]<target] Convert ASCII files from <host> to <target> where: d = MS-DOS (CRLF) o = OS-9 or OS-9/68K (CR) u = UNIX (LF)Default <host> is ANY and <target> is o.
-d Compares dates with files of the same name and copies files with more recent dates.
-d=<date> Compares the specified date with the date of files with the same name and copies any file with a more recent date than that specified. See format for <date> above.
-e Executes the output immediately.
-f Uses copy’s -f option to force the writing of files.
-i Indents for directory levels.
104 Utilities Reference

1Utilities
-l Does not save directories below the current level.
-m Does not include makdir commands in the procedure file.
-n Does not load copy (cmp, os9cmp if -v is specified).
-o Uses os9gen (OS-9 for 68K), bootgen (OS-9), to create a bootfile on the specified destination device if a bootfile exists on the source device. The default name used for the bootfile is OS9Boot (OS-9 for 68K), SysBoot (OS-9). This option creates a bootable disk. Merely copying OS9Boot or SysBoot to a new disk does not make it bootable.
-o=<name> Uses os9gen (OS-9 for 68K), bootgen (OS-9), to create a bootfile on a new device, using the specified name. This option creates a bootable disk. Merely copying OS9Boot or SysBoot to a new disk does not make it bootable.
-r Write any source file over a file with the same name in the destination directory. This is the same as using the copy utility with the -r option.
-s Skip files on error. This turns off the prompt to continue the dsave routine when an error occurs.
-t Do not issue tmode commands.
-v Verify files with the cmp, os9cmp utility.
Description
The dsave utility backs up or copies all files in one or more directories. It generates a procedure file, which is either executed later to actually do the work or is executed immediately using the -e option.
Utilities Reference 105

1 Utilities
Type dsave and the path of the new directory. The dsave utility writes commands on standard output to copy files from the current data directory to the directory specified by <path>. If <path> is not specified, the copies are directed to the current data directory when the procedure file is executed.
You should direct the dsave utility’s standard output to a procedure file that you can later execute or use the -e option to execute the dsave utility’s output immediately.
If the dsave utility encounters a directory file, it automatically includes the makdir and chd commands in the output before generating copy commands for files in the subdirectory. The procedure file duplicates all levels of the file system connected downward from the current data directory.
If the current working directory is the disk’s root directory, the dsave utility creates a procedure file to backup the entire disk, file by file. This is useful when you need to copy many files from different format disks, or from a floppy disk to a hard disk.
If an error occurs, the dsave utility displays the following prompt:
continue (y,n,a,q)?
Enter one of the following responses:
Table 1-7 Responses
Response Description
y Continue. Ignore the error.
n Do not continue. Save work to this point.
a Copy all possible files. Skip all files where an error occurs. Do not display the error or prompt.
q Quit the dsave procedure.
106 Utilities Reference

1Utilities
If for any reason you do not wish to be bothered by this prompt, use the -s option. This skips any file which cannot be copied and continues the dsave utility with no prompt.
The dsave utility helps keep up-to-date directory backups. When you use the -d or -d=<date> options, the dsave utility compares the date of the file to copy with a file of the same name in the directory it is to be copied to.
• -d copies any file with a more recent date.
• -d=<date> copies a file with a date more recent than that specified. The format for the date is as follows:
<year> <delimiter> <month> <delimiter> <day> where:
<year> is any two digit whole number from 00 to 99
<delimiter> colon (:), semicolon (;), slash (/), comma (,), or space ( )
<month> 1 to 12
<day> 1 to 31
A common error occurs when using the dsave utility if the destination directory has files with the same name as the source directory. Because a file name must be unique within a directory, this produces an error. Use the -r option to prevent this error.
Examples
The first three examples accomplish the same goal: copying all files in /d0/MYFILES/STUFF to /d1/BACKUP/STUFF. Each example highlights a different method of using the dsave utility.
In the first example, no path is specified in the dsave command and a procedure file is generated. Therefore, you must change data directories before executing the procedure file. If the directory is not changed, an error message occurs:
#218--file already exists in this directory under the same name.
Utilities Reference 107
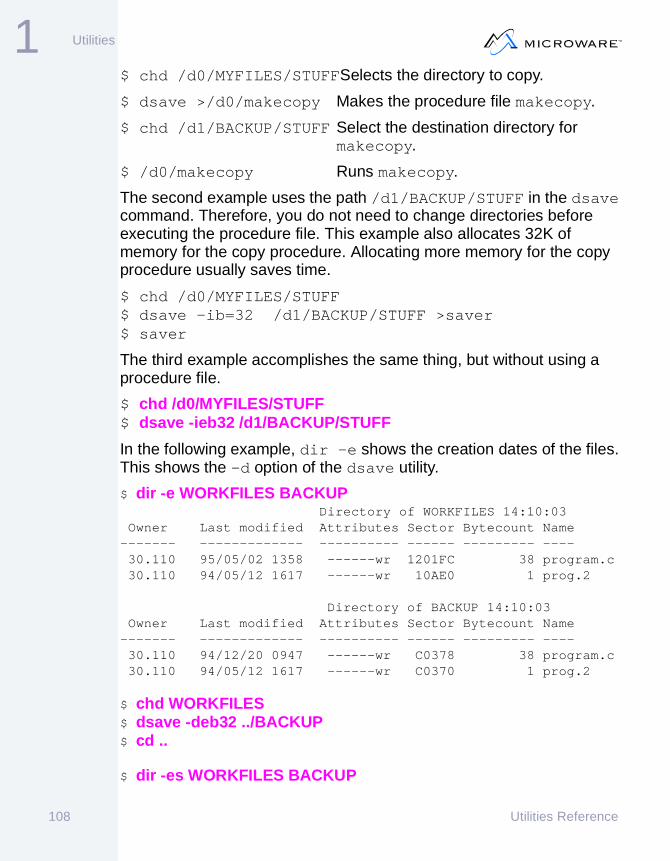
1 Utilities
$ chd /d0/MYFILES/STUFFSelects the directory to copy.
$ dsave >/d0/makecopy Makes the procedure file makecopy.
$ chd /d1/BACKUP/STUFF Select the destination directory for makecopy.
$ /d0/makecopy Runs makecopy.
The second example uses the path /d1/BACKUP/STUFF in the dsave command. Therefore, you do not need to change directories before executing the procedure file. This example also allocates 32K of memory for the copy procedure. Allocating more memory for the copy procedure usually saves time.
$ chd /d0/MYFILES/STUFF$ dsave -ib=32 /d1/BACKUP/STUFF >saver$ saver
The third example accomplishes the same thing, but without using a procedure file.
$ chd /d0/MYFILES/STUFF$ dsave -ieb32 /d1/BACKUP/STUFF
In the following example, dir -e shows the creation dates of the files. This shows the -d option of the dsave utility.
$ dir -e WORKFILES BACKUP Directory of WORKFILES 14:10:03 Owner Last modified Attributes Sector Bytecount Name------- ------------- ---------- ------ --------- ---- 30.110 95/05/02 1358 ------wr 1201FC 38 program.c 30.110 94/05/12 1617 ------wr 10AE0 1 prog.2
Directory of BACKUP 14:10:03 Owner Last modified Attributes Sector Bytecount Name------- ------------- ---------- ------ --------- ---- 30.110 94/12/20 0947 ------wr C0378 38 program.c 30.110 94/05/12 1617 ------wr C0370 1 prog.2
$ chd WORKFILES$ dsave -deb32 ../BACKUP$ cd ..
$ dir -es WORKFILES BACKUP
108 Utilities Reference

1Utilities
Directory of WORKFILES 14:12:23 Owner Last modified Attributes Sector Bytecount Name------- ------------- ---------- ------ --------- ---- 30.110 95/05/02 1358 ------wr 1201FC 38 program.c 30.110 94/05/12 1617 ------wr 10AE0 1 prog.2
Directory of BACKUP 14:12:22 Owner Last modified Attributes Sector Bytecount Name------- ------------- ---------- ------ --------- ---- 30.110 95/05/02 1358 ------wr 14025C 38 program.c 30.110 94/05/12 1617 ------wr C0370 1 prog.2
In this example only prog2 was copied because the date was more recent in the WORKFILE directory.
Utilities Reference 109

1 Utilities
dump, os9dump Displays Formatted Dump
Syntax
dump {<option(s)>} [<path> [<starting offset>]]os9dump {<option(s)>} [<path> [<starting offset>]]
dump OS
OS-9; OS-9 for 68K
os9dump OS
WIN; UNIX
Options
-a Interpret path as memory range of either: <start>[-end] or <start>[:size].
-c Does not compress duplicate lines.
-k Displays shift-JIS Kanji code in the ASCII format area.
-m Dumps from a memory resident module.
-s Interprets the starting offset as a sector number. This is useful for RBF devices with a sector size not equal to 256.
-x Indicates that <path> is an execution directory. You must have execute permission for the pathlist.
Description
The dump utility produces a formatted display of the physical data contents of <path>. <path> may be a mass storage file or any other I/O device. The dump utility is commonly used to examine the contents of non-text files.
110 Utilities Reference

1Utilities
Type dump and the pathlist of the file to display. A starting address within a file may also be specified.
If <path> is omitted, the dump utility uses standard input. The output is written to standard output.
When <starting offset> is specified, the contents of the file are displayed starting with the appropriate address. <addr> is must be a hexadecimal number.
The data is displayed 16 bytes per line in both hexadecimal and ASCII character format. Data bytes that have non-displayable values are represented by periods.
The addresses shown in the dump are relative to the load addresses of the memory modules.
Examples
$ dump Display keyboard input in hex.
$ dump myfile >/P Dump myfile to printer.
$ dump shortfile Dump shortfile.
Sample OutputStarting Data bytes in hexadecimal format Data bytes in ASCII formatAddressAddr 0 1 2 3 4 5 6 7 8 9 A B C D E F 0 2 4 6 8 A C E-------- ---- ---- ---- ---- ---- ---- ---- ---- ----------------00000000 6d61 696e 2829 0d7b 0d09 696e 7420 783b main().{..int x;00000010 0d09 0d09 6765 745f 7465 726d 5f64 6566 ....get_term_def00000020 7328 293b 0d09 783d 6d65 6e75 2829 3b0d s();..x=menu();.
Utilities Reference 111

1 Utilities
echo Echoes Text to Output Path
Syntax
echo [<opts>] {<text>}
OS
OS-9; OS-9 for 68K
Options
-n Separates the text with carriage returns.
-r Does not send a carriage return after <text>.
-z Reads the text from standard input.
-z=<file> Reads the text from <file>.
Description
The echo utility echoes its parameter to the standard output path.
The echo utility is used to generate messages in shell procedure files or to send an initialization character sequence to a terminal.
Type echo and the text to output. The echo utility reads the text until a carriage return is encountered. The input then echoes on the output path.
You can embed a hexadecimal number representing a character in a character string, but you must precede it with a backslash (\). The shell removes all but one embedded space from character strings passed to the echo utility. Therefore, to allow for more than one blank between characters, you must enclose the string with double quotes. A single backslash (\) is echoed by entering two backslashes (\\).
112 Utilities Reference

1Utilities
NoteNoteDo not include any of the punctuation characters used by the shell in the text unless you enclose the string with double quotes.
Examples
$ echo "Here is an important message!"
Here is an important message!
$ echo \1b >/p1 Send an <escape> character to a printer (/p1).
$ echo column1 column2 column3
column1 column2 column3
$ echo "column1 column2 column3"
column1 column2 column3
Utilities Reference 113

1 Utilities
editmod Creates, Displays, and Edits Modules
Syntax
editmod [<opts>] [<module>] [<opts>]
OS
OS-9; OS-9 for 68K; WIN; UNIX
Options
-a[=]<dir> Specifies an alternative MWOS directory structure.
-b Enables verbose debugging messages. Multiple -b options increase the amount of output. For example: editmod -bbb -c test shows very verbose debugging messages while the module test is being created.
-c Creates a module.
-d[=]<name>[[=]<value>]Defines name for the pre-processor. If the optional value is not supplied, the empty string is name’s value.
-e Edits the contents of a module.
-f[=]file Specifies the file which contains the named module. If the module being edited or listed is contained in a larger file, use this option. The OS-9 for 68K boot file is an example of this situation. To edit the init module within the boot file, the following command line is used:
editmod -f=OS9Boot init -e
114 Utilities Reference

1Utilities
The edited module’s size is not constrained by the size of the module prior to editing module.
-h[=]<struct> Emits the symbol <struct> as a C structure (or macro, see -m) to standard output or to the pathlist specified with -o. Multiple -h options may be used on a single command line. This option is most commonly used to generate a header file that is included by the device driver.
-i[=]<file> Specifies a non-interactive edit file name (used in conjunction with -e). The file specified is read after all other description files. Generally, the file contains init blocks as well as symbol redefinitions. These items are processed and the modified module is written to the file.
-l Lists the contents of a module.
-m[=]<name>=<struct> Emits the symbol struct as a C pre-processor macro called name to standard output or to the pathlist specified with -o. Only a single -m may be used on a command line. This option generates a header file that is included by the device driver.
-nc[=]<file> Overrides the initial file read in creation mode. Normally, systype.des is read when -c is used. This option allows you to specify a different file name. For example, to read testfile.des instead of systype.des:
editmod -nc=testfile.des -c -dTEST testmod
Utilities Reference 115

1 Utilities
-nd[=]<name> Renames the driver for a descriptor module. If the descriptor being edited has the same format as a sc8042 module, but uses a driver with a different name, use this option. For example:
editmod -nd=<name> newterm
-nf[=]<name> Renames the file manager for a descriptor module. When editing a descriptor module such as the term module, the names of the file manager and driver are used to determine what description files to read. If the descriptor being edited has the same format as a sc8042 module, but uses a file manager with a different name, use this option. For example:
editmod -nf=<name> newterm
-nm[=]<name> Renames the module. When editing a data or system module such as the init module, the module name determines what description file to read. If the module being edited has the same format as the init module but is named differently, use this option. For example:
editmod -nm=init newinit
-o[=]<file> Overrides the output file name when a module is being edited. This option allows you to edit one descriptor but write the edited version to a different file. This option cannot be used when -f is used.
-p Prints the pre-processed version of the description files that editmod reads. This can be useful when developing the
116 Utilities Reference

1Utilities
description files to examine what is actually being seen by editmod in the presence of conditional code.
-q[=]<name>[[=]<qvalue>]Define name (with optional qvalue) for pre-processor qvalue will replace with double-quotes on either end.
-t? Displays target OS and CPU options.
-to[=]<name> Specifies the target operating system for the generated module.
-tp[=]<name> Specifies the target processor for the generated module. Refer to the output of -t? for information about valid target processors.
-v[=]<dir> Adds a directory to the list of directories searched for include files.
-z Reads command line arguments from standard input.
-z[=]<file> Reads command line arguments from <file>.
Description
The editmod utility creates, displays, and edits modules. It has the following attributes:
Table 1-8 OS Naming Conventions
name Target Operating System
osk OS-9 for 68K
os9000, os9k OS-9
Utilities Reference 117

1 Utilities
For More InformationMore Info More Information More Information More Information More
-6-
For more information about the editmod utility, see Chapter 3: Using the editmod Utility.
• Comprehensive — Use the editmod utility for all aspects of module maintenance: creation, examination, and modification. The editmod utility supports these actions on device descriptors, system modules, and data modules. You can use it in conjunction with the os9make utility to create modules non-interactively. It is not necessary to use the moded utility, compilers, assemblers, and linkers.
• Host/Target independent — The editmod utility may be used on any host platform to manipulate modules for any target platform.
• Stand-alone — With the exception of supporting description files, the editmod utility does not require any other resources to manipulate modules.
• Extensible — End-Users can write the supporting files necessary for the editmod utility to understand modules of their own creation.
• Unconstrained — The editmod utility does not limit module modifications based on previous module contents. This includes support for variable length lists such as the colored memory list in the init module. In addition, a module within a boot file may be modified to any length.
• User interface — The editmod utility allows entry of C expressions with additional operand types for hexadecimal constants, binary constants, internet addresses, and ethernet addresses.
Examples
To edit the cnfgdata module, first set your MWOS environment variable, then type:
editmod -e cnfgdata -dc_all
118 Utilities Reference

1Utilities
edt Line-Oriented Text Editor
Syntax
edt [<opts>] <path>
OS
OS-9; OS-9 for 68K
Options
-b[=]<num> Allocates a buffer area equal to the size of the file plus <num> k bytes. If the file does not exist, a buffer of the indicated size is assigned for the new file.
Description
The edt utility is a line-oriented text editor that allows you to create and edit source files.
Type edt and the pathlist desired. If the file is new or cannot be found, the edt utility creates and opens it. The edt utility then displays a question mark prompt (?) and waits for a command. If the file is found, the edt utility opens it, displays the last line, and then displays the ? prompt.
The first character of a line must be a space if text is to be inserted. If any other character is typed in the first character position, the edt utility tries to process the character as an edt command. The edt utility command format is very similar to BASIC’s editor.
The edt utility determines the size of the file to edit and uses the returned size plus 2K as the edit buffer. If the file does not already exist, the edit buffer is initialized to 2K. When the end of the edit buffer is reached, a message is displayed.
Utilities Reference 119

1 Utilities
edt Commands
All edt commands begin in the first character position of a line.
Table 1-9 edt Commands
Command Description
<num> Moves the cursor to line number <num>.
<esc> Closes the file and exits. q also does this.
<cr> Moves the cursor down one line (carriage return).
+[<num>] Moves the cursor down <num> lines. Default is one.
-[<num>] Moves the cursor up <num> lines. Default is one.
<space> Inserts lines.
c Change string in current line.
d[<num>] Deletes <num> lines. If <num> is not specified, the default value of <num> is one.
l[<num>] Lists <num> lines. <num> may be positive or negative. The default value of <num> is one.
l* Lists all lines in the entire file.
q Quits the editing session. Command returns to the program that called the editor or the shell.
s Searches for occurrences of a pattern.
120 Utilities Reference

1Utilities
NoteNoteFor the following search and replace commands, <delim> may be any character. The asterisk (*) option indicates that all occurrences of the pattern are searched for and replaced if specified.
Search command: searches for the occurrences of a pattern. For example:
s[*]<delim><search string><delim>
s/and/ Finds the first occurrence of and.
s*,Bob, Finds all occurrences of Bob.
Replace command: finds and replaces a given string. For example:
c[*]<delim><search string><delim><replace string><delim>
c/Tuesday/Wednesday/ Replaces the first occurrence of Tuesday with Wednesday.
c*"employee"employees" Replaces all occurrences of employee with employees.
Utilities Reference 121
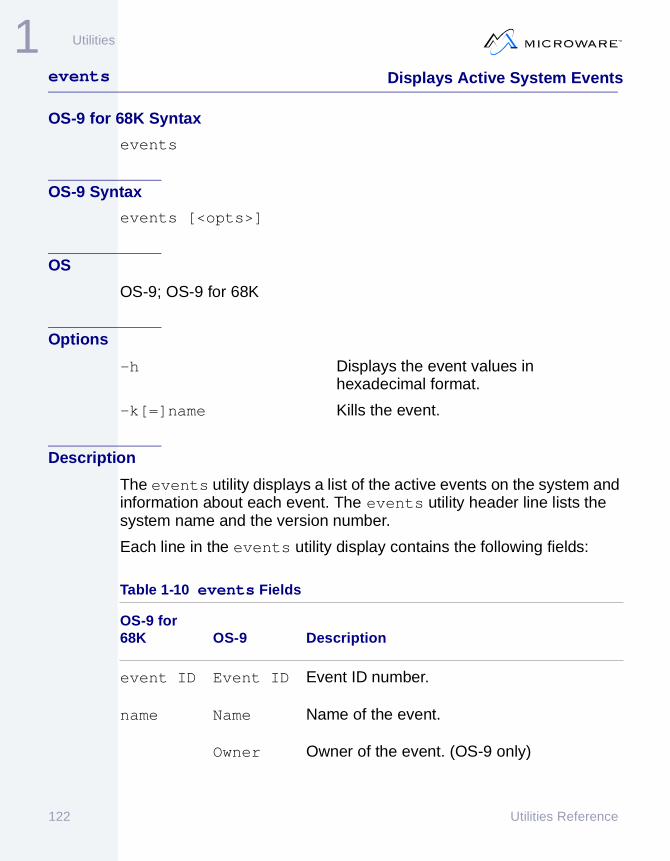
1 Utilities
events Displays Active System Events
OS-9 for 68K Syntax
events
OS-9 Syntax
events [<opts>]
OS
OS-9; OS-9 for 68K
Options
-h Displays the event values in hexadecimal format.
-k[=]name Kills the event.
Description
The events utility displays a list of the active events on the system and information about each event. The events utility header line lists the system name and the version number.
Each line in the events utility display contains the following fields:
Table 1-10 events Fields
OS-9 for 68K OS-9 Description
event ID Event ID Event ID number.
name Name Name of the event.
Owner Owner of the event. (OS-9 only)
122 Utilities Reference

1Utilities
You cannot delete an event unless the link count is zero.
If there are no active events currently on the system, the events utility displays the message “No active events.”
Perm Event’s permission field. For example,0333 represents an event with all permissions set. Permissions are from left to right: reserved, public, group, owner. (OS-9 only)
value Value Current contents of the event variable
W-inc W-inc Wait increment. Assigned when the event is created and does not change.
S-inc S-inc Signal increment. Assigned when the event is created and does not change.
links Links Event use count. When the event is created, links is assigned the value one. links increments each time a process links to the event.
Table 1-10 events Fields (continued)
OS-9 for 68K OS-9 Description
Utilities Reference 123

1 Utilities
Example
The following example displays the active system events for an OS-9 for 68K system named Calvin:
Calvin OS-9/68K V3.0event ID name value W-inc S-inc links--------- ------------ ---------- ------ ------ ------ 10000 evtfffe4000 1 -1 1 1 20001 irqfffe4000 0 -1 1 1 30002 SysMbuf 121952 0 0 1 40003 net_input 0 -1 -1 1 50004 Sur00227750 0 0 0 1 60005 Str002261f0 0 0 0 1 70006 Stw002261f0 0 0 0 1 80007 Str00227380 0 0 0 1 90008 Stw00227380 0 0 0 1 a0009 Str00232a50 0 0 0 1 b000a Stw00232a50 0 0 0 1 c000b Str0020ac30 0 0 0 1 d000c Stw0020ac30 0 0 0 1 e000d pkm00i 0 0 0 1 f000e pkm00o 0 0 0 1 10000f teln.1 0 -1 -1 1 130012 Str0020adf0 0 0 0 1 140013 Stw0020adf0 0 0 0 1
See Also
F$Event service request OS-9 for 68K Technical Manual.
F_Event system call OS-9 Technical Manual.
124 Utilities Reference

1Utilities
ex Chains to a program.
Syntax
ex <path> [<arglist>]
OS
OS-9; OS-9 for 68K
Description
The ex utility is a built-in shell command that causes the shell to chain to another program. It permits a transition from the shell to another program without creating another process, thus conserving system memory.
The ex utility is used when the shell is called from another program to execute a specific program, after which the shell is not needed. For example, applications which use only BASIC need not waste memory space on shell.
The ex utility should always be the last command on a shell input line because any command lines following it are never processed.
NoteNoteBecause this is a built in shell command, it does not appear in the CMDS directory.
Utilities Reference 125

1 Utilities
Example
$ ex BASIC$ echo "Starting tsmon" ; ex tsmon /t1 /t2 /term
126 Utilities Reference

1Utilities
exbin Converts S-Record to Binary
Syntax
exbin {<option(s)>} [<inpath>[<outpath>]]
OS
OS-9; OS-9 for 68K
Options
-b[=]<num>[k] Specifies the conversion buffer size in bytes to use. The k sub-option converts <num> to k bytes.
Description
The exbin utility converts S-record files to binary.
S-record files are a type of text file containing records that represent binary data in hexadecimal form. This Motorola-standard format is often used by commercial PROM programmers, emulators, logic analyzers, and similar devices that use the RS-232 interface. It can be useful for transmitting files over data links that can only handle character type data. It can also be used for converting assembler or compiler generated programs to load on non-OS-9/OS-9for 68K systems.
<inpath> is assumed to be an S-Record format text file which the exbin utility converts to pure binary form in a new file, <outpath>. The load addresses of each data record must describe contiguous data in ascending order.
The exbin utility does not generate or check for the proper module headers or CRC check value required to actually load the binary file. You can use ident to check the validity of the modules if they are to be loaded or run. The exbin utility converts any of the S-record types mentioned above.
Standard input and output are assumed if both paths are omitted.
If the second path is omitted, standard output is assumed.
Utilities Reference 127

1 Utilities
Examples
The following example generates CMDS/prog in binary format from the S1 type file, prog.S1.
$ exbin prog.S1 cmds/prog
See Also
binex
128 Utilities Reference

1Utilities
expand Expands Compressed File
Syntax
expand [<opts>] {<path>}
OS
OS-9; OS-9 for 68K
Options
-d Deletes the old version of the file. This option should not be used when a pathlist is not specified on the command line and standard input is used.
-n Sends output to a file instead of the standard output. The file has _exp appended to it, unless the file name already has a _comp suffix. In this case, the _comp is removed.
-z Reads the file names from standard input.
-z=<file> Reads the file names from <file>.
Description
The expand utility restores compressed files to their original form. It is the complement command of the compress utility.
Type expand and the name of the file to expand.
If file names are not given on the command line, standard input is assumed.
Examples
$ expand data.a -nd Expands and then delete data.a, creating data.a_exp.
Utilities Reference 129

1 Utilities
$ expand file1_comp Expands file1_comp and displays output on standard output.
$ expand -nd file2_compfile2_comp is expanded and then deleted, creating file2 with the expanded output.
130 Utilities Reference

1Utilities
fdisk Displays/Alters the Partition Table
Syntax
fdisk [<opts>]
OS
OS-9
Options
-a[=]<num> Makes partition <num> the active partition.
-d[=]<dev> Examines/changes device. Default = /hc.
-c Forces terminal mode (curses off).
-e Includes partition information in display mode.
-i Initialize the partition table to zero.
-s Shows partition table.
Description
Although OS-9 may be used without disk partitions of any kind, the use of partitions is strongly recommended, even if only one partition is used.
There are several reasons for using partitions with OS-9.
• Hard Disk Booting Without partitions, you must boot from floppy disk.
• Multiple Operating Systems When disk partitioning is employed, other operating systems may share the same physical disk.
Utilities Reference 131

1 Utilities
OS-9 is compatible with most Boot Managers, including OS-2 Boot Manager and Linux LILO. If a boot manager is not used, OS-9 includes an IPL (Initial Program Loader) which prompts you for information on where to boot from.
Partition Information
The OS-9 partition for x86 is defined as a primary partition type 0x9.
OS-9 for the Power PC includes extended type41 and 0x41. The RBF file system only understands these two type partitions.
The fdisk utility allows a maximum of four primary partitions to be created.
The fdisk utility also allows extended partitions to be converted to OS-9 primary partitions.
WARNING! When converting extended partitions to OS-9, all data on the extended partition is deleted. This includes any logical partitions associated with the extended partition.
WARNING! Do NOT place OS-9 on a logical drive partition.
You may have to use extended partitions for other operating systems such as DOS, OS/2 and WINDOWS.
Further, with OS-9 “PCF” DOS extended partitions and logical drives may be accessed.
To create or delete a partition, you must enter fdisk in the interactive mode:
132 Utilities Reference
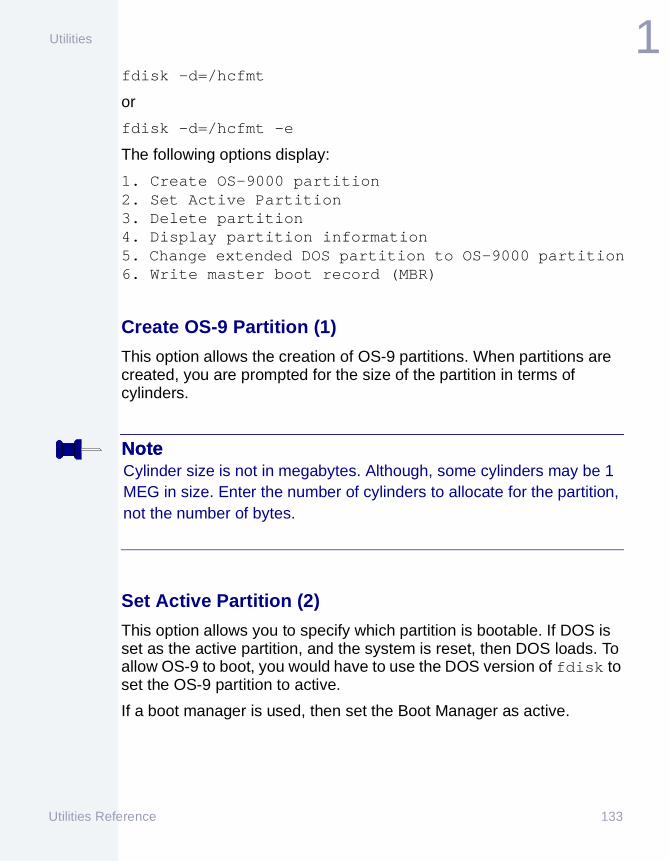
1Utilities
fdisk -d=/hcfmt
or
fdisk -d=/hcfmt -e
The following options display:
1. Create OS-9000 partition2. Set Active Partition3. Delete partition4. Display partition information5. Change extended DOS partition to OS-9000 partition6. Write master boot record (MBR)
Create OS-9 Partition (1)
This option allows the creation of OS-9 partitions. When partitions are created, you are prompted for the size of the partition in terms of cylinders.
NoteNoteCylinder size is not in megabytes. Although, some cylinders may be 1 MEG in size. Enter the number of cylinders to allocate for the partition, not the number of bytes.
Set Active Partition (2)
This option allows you to specify which partition is bootable. If DOS is set as the active partition, and the system is reset, then DOS loads. To allow OS-9 to boot, you would have to use the DOS version of fdisk to set the OS-9 partition to active.
If a boot manager is used, then set the Boot Manager as active.
Utilities Reference 133

1 Utilities
Delete Partition (3)
Use the delete option with care. Extended partitions may include any logical drives associated with them.
Display Partition Information (4)
This option displays the partition tables. If the -e option is used from the command line, additional information about the partition tables displays.
The extended/additional information includes:
st Start-flag (if 80 drive is startable)
s_head Start head (byte)
s_cyl_blk Start Cylinder block (word)
type Partition type (word)
e_head End head (byte)
e_cyl_blk End cylinder block (word)
s_blk Start block (LBA) (long-word)
size Size of block (LBA) (long-word)
{end} s_blk + size
Change Extended DOS Partition to OS-9 Partition (5)
This option converts an extended partition to an OS-9 partition. Use this option with care. Extended partitions may include logical drives.
Write Master Boot Record (MBR) (6)
This option writes the master boot record to disk. The master boot record is required to boot IDE and SCSI devices on x86 platforms.
If the disk is newly formatted or does not appear to boot, this option may correct the problem.
134 Utilities Reference

1Utilities
Examples
To modify the partition table for SCSI disk ID 1, type:
fdisk -d=/hs1fmt
To find out the partition information of a drive, type:
fdisk -d=/hs1fmt -s
See Also
pinfo
Utilities Reference 135

1 Utilities
fixmod Fixes Module CRC and Parity
Syntax
fixmod {<option(s)>} {<modname>}
OS
OS-9; OS-9 for 68K; WIN; UNIX
Options
-d[=<path>] Locates and dumps all modules in file to separate files (in either the current directory or the specified path).
-f Forces dump of module even if destination filename already exists.
-j[=<pathname>] Skips junk (invalid module data) and continue locating modules in the specified file.
-l[=]<name> Specify module on which to operate.
-q Quiet mode. Does not display status as files are updated.
-r Changes the revision number only.
-u Updates an invalid module CRC or parity.
-ua[=]<att.rev> Changes module’s attribute/revision level.
-ub Fixes the sys/rev field in BASIC packed subroutine modules.
-ue[=]<sysedit> Changes module’s edition to <sysedit>.
-ug Updates the corresponding STB module with the new CRC of the module being modified.
136 Utilities Reference

1Utilities
-un[=]<name> Changes the name stored in the module header. This option can only be used on files that contain a single module.
-uo=<grp>.<usr> Sets the module owner’s group.user number to <g>.<u>. Only the super user is allowed to use this option.
-up=<perm> Sets the module access permissions to <perm>. <perm> must be specified in hexadecimal.
-us[=]<size>[k] Sets the module required stack size to the specified value. The ‘k’ sub-option converts <size> to k bytes.
-x Looks for the module in the execution directory. (OS-9, OS-9 for 68K only)
-z Reads the module names from standard input.
-z=<file> Reads the module names from <file>.
Description
The fixmod utility verifies and updates module parity and module CRC (cyclic redundancy check). You can also use the fixmod utility to set the access permissions and the group.user number of the owner of the module. The fixmod utility can process OS-9 for 68K, OS-9/80386, and OS-9/PowerPC modules, regardless of the host operating system.
Use the fixmod utility to update the CRC and parity of a module every time a module is patched or modified in any way. OS-9 and OS-9 for 68K cannot recognize a module with an incorrect CRC.
You must have write access to the file in order to use the fixmod utility on it.
Use the -u option to recalculate and update the CRC and parity. Without -u, the fixmod utility only verifies the CRC and parity of the module.
Utilities Reference 137

1 Utilities
The -up=<perm> option sets the module access permissions to <perm>. <perm> must be specified in hexadecimal. You must be the owner of the module or a super user to set the access permissions.
The permission field of the module header is divided into four sections from right to left:
owner permissionsgroup permissionspublic permissionsreserved for future use
Each of these sections are divided into four fields from right to left:
read attributewrite attribute execute attributereserved for future use
The entire module access permissions field is given as a three-digit hexadecimal value. For example, the command fixmod -up=555 specifies the following module access permissions field:
-----e-r-e-r-e-r
The -uo<grp>.<usr> option allows the super user to change the ownership of a module by setting the module owner’s group.user number.
138 Utilities Reference

1Utilities
Examples
$ fixmod dt Checks parity and CRC for module dt.
$ fixmod dt -u Checks parity and CRC for module dt and updates them if necessary.
The following example changes the name stored in the module header:
$ chd /h0/CMDS
$ copy dir ls
$ fixmod -u -n=ls ls
Module: dir - Fixing header parity - Fixing module CRC
See Also
CRC and parity OS-9 for 68K Technical Manual OS-9 Technical Manual
ident
Utilities Reference 139

1 Utilities
format Initializes Disk Media
Syntax
format [<opts>] <devname>
OS
OS-9; OS-9 for 68K
Options
-bo=<num> Sets the block offset to <num>. (OS-9)
-c Uses the interactive mode. (OS-9)
-c=<num> Specify the number of sectors per cluster. <num> must be decimal and must be a power of 2. The default is 1. (OS-9)
-dd Initializes a double-density (floppy) disk.
-ds Initializes a double-sided (floppy) disk.
-e Displays elapsed verify time. This is useful for checking the sector interleave values. (OS-9 for 68K)
-h=<num> Sets the number of heads to <num>. (OS-9)
-i=<num> Specifies the number for sector interleave offset value. <num> is decimal.
-m=<num> Sets the bitmap address to <num>. (OS-9)
-nf Specifies no fast verify mode. (OS-9 for 68K)
-np Specifies no physical format.
-nv Specifies no physical verification.
140 Utilities Reference

1Utilities
-o Performs interleave optimization. (OS-9)
-r Inhibits the ready prompt. This option is ignored if the device is a non-partitioned hard disk under OS-9 for 68K or any hard disk under OS-9.
-sd Initializes a single-density (floppy) disk.
-ss Initializes a single-sided (floppy) disk.
-s=<num> Uses a spiral skew of <num>. (OS-9)
-t=<num> Specifies the number of cylinders given in decimal.
-to=<num> Sets the track offset to <num>. (OS-9)
-v=<name> Specifies the volume name. This name can be 32 characters maximum. If the name contains blanks, enclose the option and name with quotation marks. For example, "-v=Name of disk".
Description
The format utility physically initializes, verifies, and establishes an initial file structure on a disk. You must format all disks before using them on an OS-9 or OS-9 for 68K system.
Type format, the name of the device to format, and any options. The format utility determines whether the device is:
• Autosize (for example, devices such as SCSI CCS drives).
• Non-autosize (such as standard floppy disks and many hard disks).
An autosize device is one which can be queried to determine the capacity of the device.
The format utility checks a bit in PD_Ctrl to determine whether or not a device is autosize. If this bit is zero, the device is non-autosize. If one, the media is autosize.
Utilities Reference 141

1 Utilities
Format on Non-Autosize Devices
If the format utility determines that your device is non-autosize, the format utility reads a description of the disk from the device descriptor module. The values in the descriptor determine the default values for the number of sides (single or double), number of tracks, sector size, and density. At this time, the default cluster size is set at one.
The format utility determines the media capacity by multiplying together the number of:
• Cylinders (PD_CYL).
• Tracks (PD_TKS).
• Sectors per track (PD_SCT, PD_T0S).
Because the format utility calculates the device capacity using this formula, you can use the -t=<num> and -ss/-ds options to affect the capacity of the device.
On OS-9 for 68K, the following information is displayed before formatting begins:
Disk FormatterOS-9/68K V2.4 Delta MVME147 - 68030------------ Format Data ------------Fixed values: Physical floppy size: 5 1/4" (Universal Format) Sector size: 256 Sectors/track: 16 Track zero sect/trk: 16 Sector offset: 1 Track offset: 1 LSN offset: $000000Total physical cylinders: 80 Minimum sect allocation: 8Variables: Recording format: MFM all tracks Track density in TPI: 96Number of log. cylinders: 79 Number of surfaces: 2Sector interleave offset: 1Formatting device: /d0proceed?
142 Utilities Reference

1Utilities
You can change the values in the variables section when formatting floppy disks by using command line options or by answering n to the prompt. The format utility asks for any required options not given on the command line.
When formatting hard disks, answering n to the prompt returns control to the shell. You can change hard disk parameters only by command line options or by changing the device descriptor.
You can only change the values in the Fixed values section by altering the device descriptor module of the specific unit.
Format on Autosize Devices
If the format utility determines that the device has the autosize feature, the format utility performs an SS_DSize SetStat call to the drive to request the capacity of the device. The driver then queries the actual drive. The value returned to the format utility is the capacity of the device. Because the format utility performs no calculations when determining the capacity, the -t and -ss/-ds options do not affect the capacity of the device.
The following information is displayed before formatting commences:
Disk FormatterOS-9/68K V2.4 Delta MVME147 - 68030------------ Format Data ------------Fixed values: Disk type: hard Sector size: 512 Disk capacity: 208936 sectors (106975232 bytes) Sector offset: 0 Track offset: 0 LSN offset: $000000 Minimum sect allocation: 8Variables:Sector interleave offset: 1Formatting device: /h1proceed?
Utilities Reference 143

1 Utilities
When formatting hard disks, answering n to the prompt returns control to the shell. You can only change the sector interleave offset. The format utility cannot change the other values.
You can only change the values in the Fixed values section by altering the device descriptor module of the specific unit.
Continuing the Format Procedure
The formatting process works as follows:
1. The disk surface is physically initialized and sectored.
2. Each sector is read back and verified. If the sector fails to verify after several attempts, the offending sector is excluded from the initial free space on the disk. As the verification is performed, track numbers are displayed on the standard output device for non-autosize devices; logical sector numbers are displayed for autosize devices.
3. The disk allocation map, root directory, and identification sector are written to the first few sectors of track zero. These sectors cannot be defective.
NoteNoteThe format utility uses a fast verify mode. This means that the format utility reads a minimum of 32 sectors. If the cluster size is greater than 32 sectors, one cluster’s worth of sectors is read.
• If the cluster size is less than 32 sectors, 32 sectors are read.
• If you want the format utility to use the cluster size regardless of the number of sectors per cluster, you must use the -nf option. For example, if your cluster size has one sector, 32 sectors are read by default, while only one sector would be read if you specify -nf.
144 Utilities Reference

1Utilities
You must run os9gen or bootgen to create the bootstrap after the disk has been formatted if you use the disk as a system disk
Examples
$ format /D1 -dsdd -v="database" -t=77$ format /D1 -sssd -r
Utilities Reference 145

1 Utilities
free Displays Free Space Remaining onMass-Storage Device
Syntax
free [<opts>] {<devname>}
OS
OS-9; OS-9 for 68K
Options
-b[=]<num> Uses the specified buffer size in k bytes.
Description
The free utility displays the number of unused sectors on a device available for new files or for expanding existing files.
The free utility also displays the disk’s name, creation date, cluster size, and largest free block in bytes.
NoteNoteOS-9:
• Sectors are called blocks.
• Cluster size is one block. (Cluster information is not used in OS-9).
Type free followed by the name of the device to examine. The device name must be the name of a mass-storage, multi-file device.
Data sectors are allocated in groups called clusters. The number of sectors per cluster depends on the storage capacity and physical characteristics of the specific device.
146 Utilities Reference
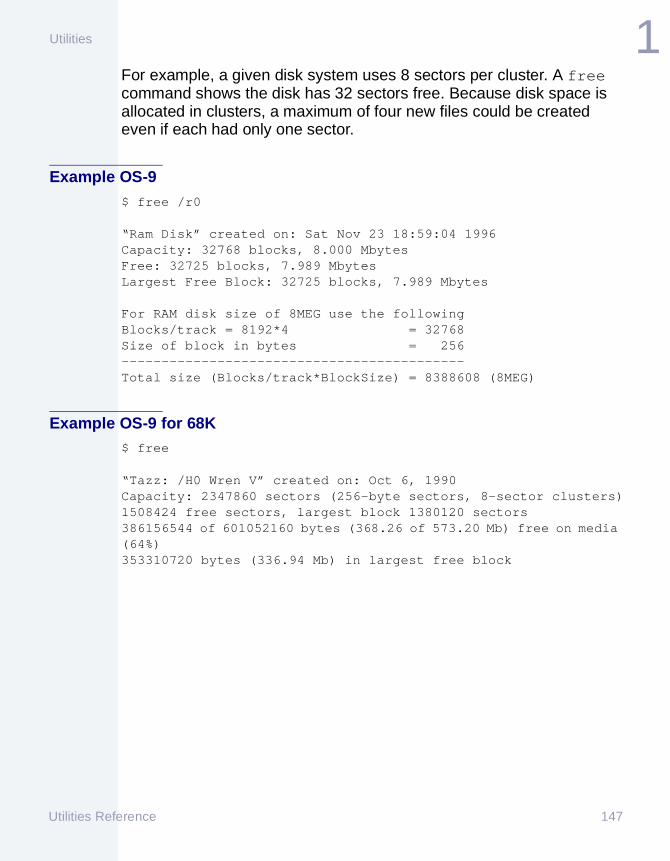
1Utilities
For example, a given disk system uses 8 sectors per cluster. A free command shows the disk has 32 sectors free. Because disk space is allocated in clusters, a maximum of four new files could be created even if each had only one sector.
Example OS-9$ free /r0
“Ram Disk” created on: Sat Nov 23 18:59:04 1996Capacity: 32768 blocks, 8.000 MbytesFree: 32725 blocks, 7.989 MbytesLargest Free Block: 32725 blocks, 7.989 Mbytes
For RAM disk size of 8MEG use the followingBlocks/track = 8192*4 = 32768Size of block in bytes = 256-------------------------------------------Total size (Blocks/track*BlockSize) = 8388608 (8MEG)
Example OS-9 for 68K$ free
“Tazz: /H0 Wren V” created on: Oct 6, 1990Capacity: 2347860 sectors (256-byte sectors, 8-sector clusters)1508424 free sectors, largest block 1380120 sectors386156544 of 601052160 bytes (368.26 of 573.20 Mb) free on media (64%)353310720 bytes (336.94 Mb) in largest free block
Utilities Reference 147

1 Utilities
frestore Restores Directory from Backup
Syntax
frestore [<opts>] [<path>]
OS
OS-9; OS-9 for 68K
Options
-a Forces access permission for overwriting an existing file. You must be the owner of the file or a super user (0.n) to use this option. (OS-9 for 68K)
-a[=]<number> Consider media to begin after <number> tape marks. (OS-9)
-b[=]<int> Specifies the buffer size in k bytes used to restore the files.
-c Checks the validity of files without the interactive shell.
-d[=]<path> Specifies the source device. The default source device is /mt0.
-e Displays the pathlists of all files in the index as the index is read from the source device.
-f[=]<path> Restores from a file.
-i Displays the backup name, creation date, group.user number of the owner of the backup, volume number of the disk or tape, and whether the index is on the volume. This option does not restore any files. The information is displayed, and frestore is terminated.
148 Utilities Reference

1Utilities
-j[=]<int> Sets the minimum system memory request in k bytes. (OS-9 for 68K)
-p Suppresses the prompt for the first volume.
-q Overwrites already existing files when used with the -s option.
-s Forces frestore to restore all files from the source device without an interactive shell.
-t[=]<dirpath> Specifies an alternate location for the temporary index file.
-v Displays the backup name, creation date, group.user number of the owner of the backup, and volume number of the disk or tape. This option does not restore any files. The information is displayed, and frestore is terminated.
-x[=]<int> Pre-extends a temporary file. <int> is specified in kilobytes.
-z[=]<path> Adds pathlists <path> to restoration list. Pathlists start from root of tape directory. (OS-9 for 68K)
NoteNoteOS-9 for 68K: -j allows you to specify the size of the dynamic memory requests made by the frestore utility. As the frestore utility builds its index structure in memory, it requests additional memory from the system as needed. Since the number of requests allowed is limited, increasing the minimum request size may be needed on systems with very large backups or with fragmented free memory.
Utilities Reference 149

1 Utilities
Description
The frestore utility restores a directory structure from multiple volumes of tape or disk media.
Typing frestore by itself on the command line attempts to restore a directory structure from the device /mt0 to the current directory.
Specifying the pathlist of a directory on the command line causes the files to be restored in the specified directory. The fsave utility creates the directory structure and an index of the directory structure.
If more than one tape/disk is involved in the fdisk utility backup, each tape/disk is considered a different volume. The volume count begins at one (1). When you begin an frestore operation, you must use the last volume of the backup first. The last volume of the backup contains the index of the entire backup.
The frestore utility first attempts to locate and read in the index of the directory structure from the source device. The device you are restoring from is the source device. It then begins an interactive session with you to determine which files and directories in the backup should be restored to the current directory.
The -s option forces the frestore utility to restore all files/directories of the backup from the source device without the interactive shell.
The -d option allows you to specify a source device other than /mt0.
The -v option causes the frestore utility to identify the name and volume number of the backup mounted on the source device. It also displays the date the backup was made and the group.user number of the person who made the backup. This option does not restore any files. After displaying the appropriate information, the frestore utility terminates. This is helpful for locating the last volume of the backup if a mix-up has occurred.
The -i option duplicates the -v option and also checks to see if the index is on the volume being checked.
The -e option echoes each file pathlist as the index is read off the source device.
150 Utilities Reference
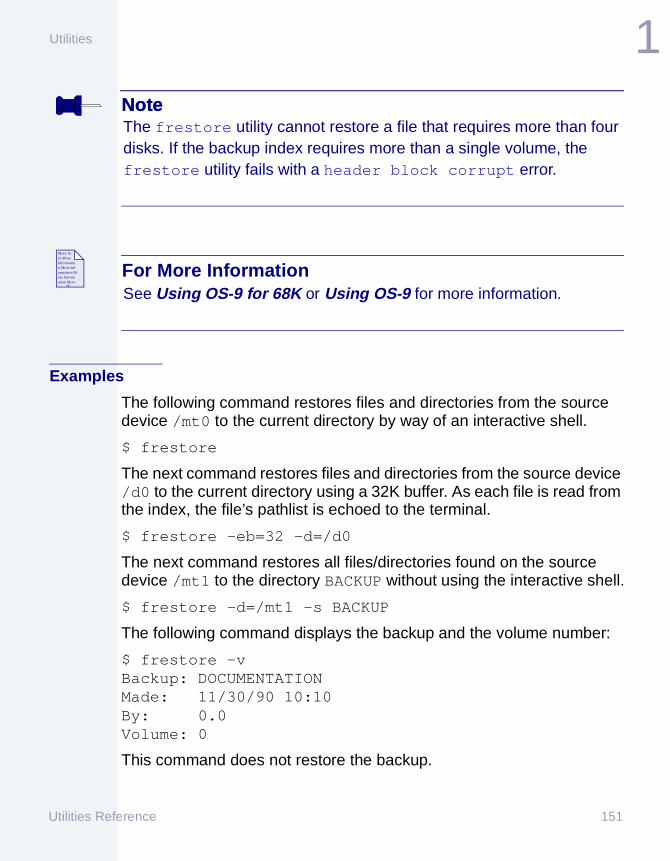
1Utilities
NoteNoteThe frestore utility cannot restore a file that requires more than four disks. If the backup index requires more than a single volume, the frestore utility fails with a header block corrupt error.
For More InformationMore Info More Information More Information More Information More
-6-
See Using OS-9 for 68K or Using OS-9 for more information.
Examples
The following command restores files and directories from the source device /mt0 to the current directory by way of an interactive shell.
$ frestore
The next command restores files and directories from the source device /d0 to the current directory using a 32K buffer. As each file is read from the index, the file’s pathlist is echoed to the terminal.
$ frestore -eb=32 -d=/d0
The next command restores all files/directories found on the source device /mt1 to the directory BACKUP without using the interactive shell.
$ frestore -d=/mt1 -s BACKUP
The following command displays the backup and the volume number:
$ frestore -vBackup: DOCUMENTATIONMade: 11/30/90 10:10By: 0.0Volume: 0
This command does not restore the backup.
Utilities Reference 151

1 Utilities
fsave Incremental Directory Backup
Syntax
fsave [<opts>] [<dir>]
OS
OS-9; OS-9 for 68K
Options
-a Appends backup data to data already existing on tape. (OS-9)
-b[=]<int> Allocate a <int> k byte buffer to read files from source disk.
-d[=]<dev> Specifies the target device to store the backup. The default target device is /mt0.
-e Does not echo the file pathlist as it is saved to the target device.
-f[=]<path> Saves to a file.
-g[=]<int> Specifies a backup of files owned by group number <int> only.
-i Provides information about backup: the amount of time it took to perform the backup and the number of kilobytes per second. (OS-9)
-j[=]<num> Sets the minimum system memory request in k bytes. (OS-9 for 68K)
-l[=]<int> Specifies the level of backup to be performed.
-m[=]<path> Specifies the pathlist of the date backup log file to be used. The default is /h0/sys/backup_dates.
152 Utilities Reference

1Utilities
-p Turns off the mount volume prompt for the first volume.
-s Displays the pathlists of all files needing to be saved and the size of the entire backup without actually executing the backup procedure.
-t[=]<dirpath> Specifies an alternate location for the temporary index file.
-u[=]<int> Specifies a backup of files owned by user number <int> only.
-v Does not verify the disk volume when mounted.
-x[=]<int> Pre-extends the temporary file. <int> is specified in kilobytes.
NoteNoteOS-9 for 68K: -j allows you to specify the size of the dynamic memory requests made by the fsave utility. As the fsave utility builds its index structure in memory, it requests additional memory from the system as needed. Since the number of requests allowed is limited, increasing the minimum request size may be needed on systems with very large backups or with fragmented free memory.
Description
The fsave utility performs an incremental backup of a directory structure to tape(s) or disk(s).
Typing fsave by itself on the command line makes a level 0 backup of the current directory onto the target device /mt0.
Utilities Reference 153

1 Utilities
Use the -l option to specify different backup levels. A higher level backup only saves files changed since the most recent backup with the next lower number. For example, a level 1 backup saves all files changed since the last level 0 backup.
The backup log file, /h0/sys/backup_dates, is updated each time an fsave command is executed. The backup log keeps track of the name of the backup and the date it was created. More importantly, it keeps track of the level of the backup.
When the fsave utility is executed, this backup log is examined for the specified level of the current backup and the previous backups with the same name. Once the backup is finished, a new entry is entered in the file indicating the date, name, and level of the current backup. The fsave utility does not accept a device name as a directory. For example, if fsave /h0 is entered, error #216 is returned.
NoteNotePrior to performing the first backup, a log file named backup_dates must be created and must be completely blank (no end of file marks, etc.). To create this blank file, type the following:
touch /h0/sys/backup_dates
The fsave Procedure
When you start an fsave procedure, the fsave utility first builds the directory structure. You are then prompted to mount the first volume to use:
fsave: please mount volume.(press return when mounted).
If you use a disk as the backup medium, the fsave utility verifies the disk and displays the following information:
verifying disk
154 Utilities Reference

1Utilities
NoteNoteThe numbers above are used as an example. If you use a tape as the backup medium, the backup begins at this point.
As each file is saved to the backup device, its pathlist is echoed to the terminal. If this is a long backup, use the -e option to turn off the echoing of pathlists.
If the fsave utility receives an error when trying to backup a file, it displays a message and continues the fsave operation.
If the backup requires more than one volume, the fsave utility prompts you to mount the next volume before continuing.
At the end of the backup, the fsave utility prints the following information:
fsave: Saving the index structure
Logical backup name:Date of backup:Backup made by:Data bytes written:Number of files:Number of volumes:Index is on volume:
By specifying one or more directories on the command line, the fsave utility performs recursive backups for each specified pathlist. You can specify a maximum of 32 directories on the command line.
Use the -d option to specify an alternative target device. The default device is /mt0.
Use the -m option to specify an alternative backup log file. The default pathlist is /h0/sys/backup_dates.
Utilities Reference 155

1 Utilities
WARNING!When using disks for backup purposes, be aware that the fsave utility does not use an RBF file structure to save the files on the target disk. It creates its own file structure. This makes the backup disk unusable for purposes other than the fsave and frestore utilities without reformatting.
Any data on the disk before using the fsave utility is destroyed by the backup.
NoteNoteFor a full description of the fsave, frestore, and tape utilities, refer to Making Backups in Using OS-9 or Using OS-9 for 68K. The information includes work through examples and backup strategies for disk and tape.
Examples
The following command specifies a level 0 backup of the current directory. It assumes the device /mt0 is to be used. /h0/SYS/backup_dates is used as the backup log file.
$ fsave
This command specifies a level 2 backup of the current directory. The device /mt1 is used. /h0/misc/my_dates is used as the backup log file.
$ fsave -l=2 -d=/mt1 -m=/h0/misc/my_dates
The next command specifies a level 0 backup of all files owned by the super user in the CMDS directory, assuming CMDS is in your current directory. /d2 is the target device used for this backup. The backup log
156 Utilities Reference

1Utilities
file used is /h0/sys/backup_dates. The mount volume prompt is not generated for the first volume, and a 32K buffer reads the files from the CMDS directory.
$ fsave -pb=32 -g=0 -u=0 -d=/d2 CMDS
Utilities Reference 157

1 Utilities
grep Searches File for Pattern
Syntax
grep [<opts>] [<expression>] {[<path>]}
OS
OS-9; OS-9 for 68K
Options
-c Counts the number of matching lines.
-e=<expr> Searches for <expr>. This is the same as <expression> in the command line.
-f=<path> Reads the list of expressions from <path>.
-g Formats output similar to UNIX grep.
-i Searches for text, insensitive to upper/lower case.
-l Prints only the names of the files with matching lines.
-m=<num> Prints specified number of lines from each matched occurrence.
-n Prints the relative line number within the file followed by the matched expression.
-s Does not display matching lines. Silent Mode.
-v Prints all lines except for those that match.
-z Reads the file names from standard input.
-z=<path> Reads the file names from <path>.
158 Utilities Reference

1Utilities
NoteNoteYou cannot use -l and -n at the same time, nor can you use -n and -s at the same time. You cannot use -f when information to grep is read from STDIN.
Description
The grep utility searches the input pathlists for lines matching <expression>.
Type grep, the expression to search for, and the pathlist of the file to search. If the <path> is not specified, the grep utility searches standard input.
If the grep utility finds a line that matches <expression>, the line is written to the standard output with an optional line number of where it is located within the file. When multiple files are searched, the output has the name of the file preceding the occurrence of the matched expression.
Utilities Reference 159

1 Utilities
Expressions
An <expression> specifies a set of characters. A string which is a member of this set is said to match the expression. To facilitate the creation of expressions, some metacharacters are defined to create complex sets of characters.
Table 1-11 Expression Special Characters
Character Specification
. ANY. The period (.) is defined to match any ASCII character except new line.
~ BOL or NEGATE. The tilde (~) is defined to modify a character class as described above when located between square brackets ([ ]). At the beginning of an entire expression, it requires the expression to compare and match the string at only the beginning of the line.
The NEGATE character modifies the character class so it matches any ASCII character not in the given class or newline.
[ ] CHARACTER CLASS. The square brackets ([ ]) define a group of characters which match any single character in the compare string. The grep utility recognizes certain abbreviations to aid the entry of ranges of strings:
[a-z] Equivalent to the string abcdefghijklmnopqrstuvwxyz
[m-pa-f] Equivalent to the string mnopabcdef
[0-7] Equivalent to the string 01234567
160 Utilities Reference

1Utilities
* CLOSURE. The asterisk (*) modifies the preceding single character expression, so it matches zero or more occurrences of the single character. If a choice is available, the longest such group is chosen.
$ EOL. The dollar sign ($) requires the expression to compare and match the string only when located at the end of line.
\ ESCAPE. The backslash (\) removes special significance from special characters. It is followed by a base and a numeric value or a special character. If the base is not specified, the base for the numeric value defaults to hexadecimal. An explicit base of decimal or hexadecimal can be specified by preceding the numeric value with a qualifier of d or x, respectively. It also allows entry of some non-printing characters such as:
\t = Tab character\n = New-line character\l = Line feed character\b = Backspace character \f = Form feed character
Table 1-11 Expression Special Characters (continued)
Character Specification
Utilities Reference 161
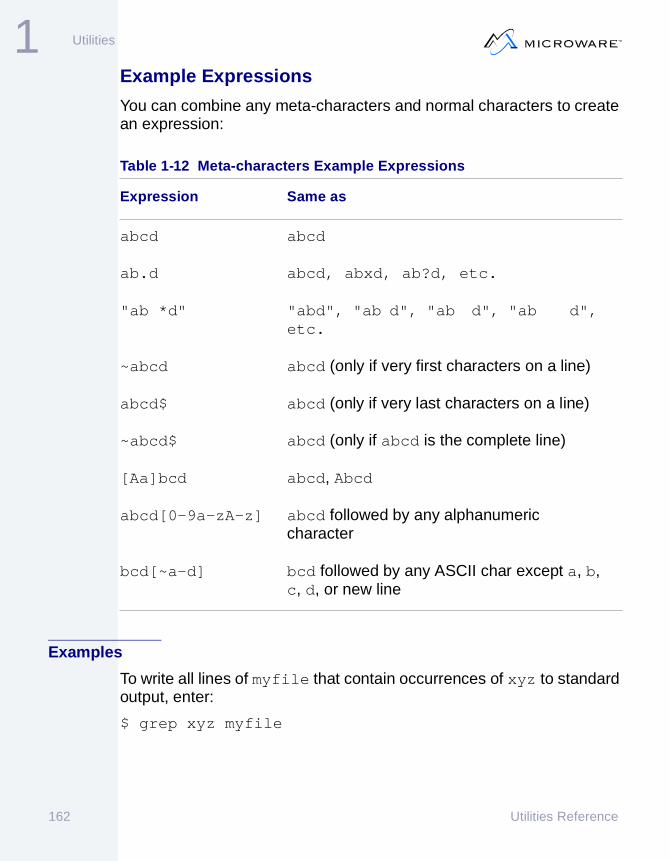
1 Utilities
Example Expressions
You can combine any meta-characters and normal characters to create an expression:
Examples
To write all lines of myfile that contain occurrences of xyz to standard output, enter:
$ grep xyz myfile
Table 1-12 Meta-characters Example Expressions
Expression Same as
abcd abcd
ab.d abcd, abxd, ab?d, etc.
"ab *d" "abd", "ab d", "ab d", "ab d", etc.
~abcd abcd (only if very first characters on a line)
abcd$ abcd (only if very last characters on a line)
~abcd$ abcd (only if abcd is the complete line)
[Aa]bcd abcd, Abcd
abcd[0-9a-zA-z] abcd followed by any alphanumeric character
bcd[~a-d] bcd followed by any ASCII char except a, b, c, d, or new line
162 Utilities Reference

1Utilities
This example searches myfile for expressions input from words, counts the number of matches, and gives the line number found with each occurrence:
$ grep -f=words myfile -nc
Utilities Reference 163

1 Utilities
help On-Line Utility Reference
Syntax
help [<utility names>]
OS
OS-9; OS-9 for 68K
Description
The help utility displays information about a specific utility.
Type help and the name of the desired utility for information about any utility. The help utility displays the function, syntax, and options of the utility. After the information displays, control returns to the shell.
For information about the help utility, type help by itself. The help utility lists the syntax and function of the help utility.
NoteNoteBuilt-in shell commands do not have help information.
Examples
$ help build$ help attr
164 Utilities Reference

1Utilities
hist Command History
Syntax
hist
OS
OS-9
Description
The hist utility is a built-in shell command that displays the commands that you have already entered.
As commands are entered, they are stored in a buffer. This is a history of your commands. To see the commands that you have entered, type hist on the command line.
Commands residing in a buffer may be executed or retrieved using tildes (~). One tilde followed by a number (~<num>) executes the command that <num> points to. For example, entering ~4 on the command line causes the shell to execute the fourth command in your history list.
Entering a number after two tildes (~~<num>) places the command in the command line buffer, just as if were the last command entered. For example, if you type ~~3, the command is placed in a buffer as if it had just been executed. By typing <control>A, you can retrieve the command line. It is placed after the shell prompt. This allows you to edit the command line before executing it.
A single tilde “~” followed by alphabetic characters specifies the most recent command executed that began with those letters. For example: ~pro executes the most recent command line that began with the letters “p”, “r”, and “o”.
Examples
[5]$ histShell History-------------
Utilities Reference 165

1 Utilities
1) makdir /h0/usr/TMS 2) chd /h0/usr/tms 3) build stat 4) procs 5) hist
[6]$ ~4
Id PId Grp.Usr Prior MemSiz Sig S CPU Time Age Module & I/O3 2 6.10 128 5.25k 0 w 5.02 02:34 shell <>>>term4 3 6.10 128 8.50k 0 * 0.08 00:00 procs <>>term
[7]$ histShell History------------- 3) build stat 4) procs 5) hist 6) procs 7) hist[8]$ ~~3[8]$ <control>A[8]$ build stat
166 Utilities Reference

1Utilities
ident Prints OS-9 Module Identification
Syntax
ident {<option(s)>} {<modname>}
OS
OS-9; OS-9 for 68K; WIN; UNIX
Options
-e Displays executable file edition (DOS and UNIX only).
-h Prints hex numbers instead of decimals.
-m Searches for modules in memory.
-o Displays offset in memory of within file of located module.
-q Quick mode. Only one line per module.
-qa Displays processor, OS revision, edition, and CRC information.
-s Silent mode. Quick, but only indicates modules with bad CRCs.
-x Searches for modules in the execution directory (OS-9 and OS-9 for 68K only).
-z Reads the module names from standard input.
-z=<file> Reads the module names from <file>.
Description
The ident utility displays module header information and the additional information that follows the header from OS-9/OS-9 for 68K memory modules.
The ident utility also checks for incomplete module headers.
Utilities Reference 167

1 Utilities
The ident utility is capable of identifying modules for OS-9 for 68K, OS-9/80386, and OS-9/PowerPC regardless of host OS.
The ident utility displays the following information in this order:
actual module namemodule sizeownerCRC bytes (with verification)header parity (with verification)editiontype/language, and attributes/revisionaccess permission
For program modules it also includes:
execution offsetdata sizestack sizeinitialized data offsetoffset to the data reference lists
The ident utility prints the interpretation of the type/language and attribute/revision bytes at the bottom of the display.
With the exception of the access permission data, all of the above fields are self-explanatory. The access permissions are divided into four sections from right to left:
owner permissionsgroup permissionspublic permissionsreserved for future use
Each of these sections are divided into four fields from right to left:
read attributewrite attributeexecute attributereserved for future use
If the attribute is turned on, the first letter of the attribute (r, w, e) is displayed.
168 Utilities Reference

1Utilities
All reserved fields are displayed as dashes unless the fields are turned on. In that case, the fields are represented with question marks. In any case, the kernel ignores these fields as they are reserved for future use.
Owner permissions allow the owner to access the module. Group permissions allow anyone with the same group number as the owner to access the module. Public permissions allow access to the module regardless of the group.user number. The following example allows the owner and the group to read and execute the module, but bars access to the public:
Permission: $55 ---------e-r-e-r
Example
$ ident -m identHeader for: identModule size: $1562 #5474Owner: 0.0Module CRC: $FA8ECA Good CRCHeader parity: $2471 Good parityEdition: $C #12Ty/La At/Rev: $101 $8001Permission: $555 -----e-r-e-r-e-rExec. off: $4E #78Data size: $15EC #5612Stack size: $C00 #3072Init. data off: $1482 #4250Data ref. off: $151A #5402Prog mod, 68000 obj, Sharable
Utilities Reference 169

1 Utilities
iniz Attaches Devices
Syntax
iniz [<opts>] {<devname>}
OS
OS-9; OS-9 for 68K
Options
-z Reads the device names from standard input.
-z=<file> Reads the device names from <file>.
Description
The iniz utility performs an I$Attach (OS-9 for 68K), I_Attach (OS-9) system call on each device name passed to it. This initializes and links the device to the system.
Type iniz and the name(s) of the device(s) to attach a device to the system. The operating system searches the system module directory using the name of the device to see if the device is already attached.
If the device is not attached, an initialization routine is called to link the device to the system.
If the device is attached, it is not re-initialized but the link count is incremented.
The device names may be listed on the command line, read from standard input, or read from a specified pathlist.
NoteNoteDo not use the iniz utility to attach non-sharable device modules as they become “busy” forever.
170 Utilities Reference
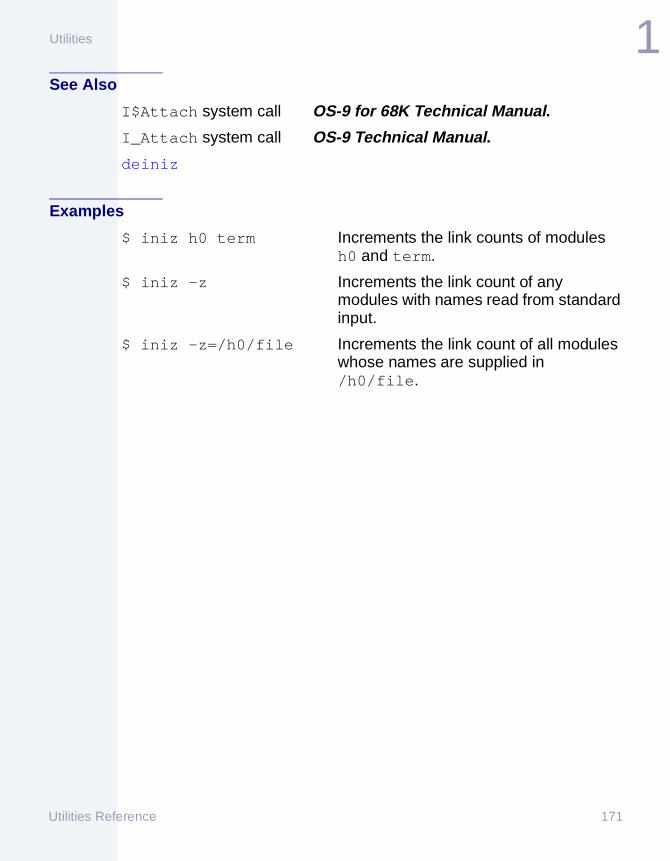
1Utilities
See Also
I$Attach system call OS-9 for 68K Technical Manual.
I_Attach system call OS-9 Technical Manual.
deiniz
Examples
$ iniz h0 term Increments the link counts of modules h0 and term.
$ iniz -z Increments the link count of any modules with names read from standard input.
$ iniz -z=/h0/file Increments the link count of all modules whose names are supplied in /h0/file.
Utilities Reference 171
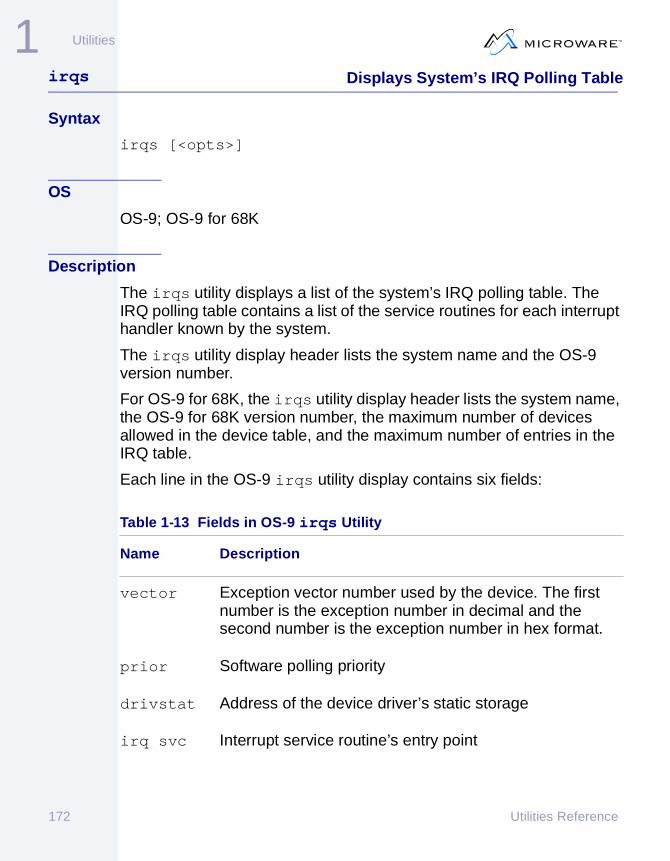
1 Utilities
irqs Displays System’s IRQ Polling Table
Syntax
irqs [<opts>]
OS
OS-9; OS-9 for 68K
Description
The irqs utility displays a list of the system’s IRQ polling table. The IRQ polling table contains a list of the service routines for each interrupt handler known by the system.
The irqs utility display header lists the system name and the OS-9 version number.
For OS-9 for 68K, the irqs utility display header lists the system name, the OS-9 for 68K version number, the maximum number of devices allowed in the device table, and the maximum number of entries in the IRQ table.
Each line in the OS-9 irqs utility display contains six fields:
Table 1-13 Fields in OS-9 irqs Utility
Name Description
vector Exception vector number used by the device. The first number is the exception number in decimal and the second number is the exception number in hex format.
prior Software polling priority
drivstat Address of the device driver’s static storage
irq svc Interrupt service routine’s entry point
172 Utilities Reference

1Utilities
Each line in the OS-9 for 68K irqs utility display contains seven fields:
driver Name of the module which contains the interrupt service routine, usually a device driver
dev list If the drivstat is also the driver device entry ‘dev list’, then the ‘dev list’ entry displays, otherwise, ‘<na>’ displays.
If the ‘dev list’ entry displays, then option ‘-d’ displays additional information about the device.
Table 1-14 Fields in OS-9 for 68K irqs Utility
Name Description
vector Exception vector number used by the device. A second number, the hardware interrupt level, is displayed for auto-vectored interrupts.
prior Software polling priority.
port addr Base address of the interrupt generating hardware. The operating system does not use this value, but passes to the interrupt service routine.
data addr Address of the device driver’s static storage.
irq svc Interrupt service routine’s entry point.
Table 1-13 Fields in OS-9 irqs Utility (continued)
Name Description
Utilities Reference 173

1 Utilities
Options
-? Displays the options.
-d Displays extended information about available device list entries. (OS-9)
Example OS-9
The following example displays the IRQ polling table for a system named Calvin:
$ irqs
PC-AT Compatible 80386 OS-9000 V2.0 for Intel x86
vector $ prior drivstat irq svc driver dev list------- ----- --------- --------- --------- --------- ------- 64 ($40) 10 $00fd3f40 $0005dlb5 tk8253 <na> 65 ($41) 10 $00ffd080 $00069alc sc8042 $00ffd080 66 ($75) 10 $00ff7474 $0007cla8 aha1540 <na>
$ irqs -d
PC-AT Compatible 80386 OS-9000 V2.0 for Intel x86
Vector: 65 ($41) Priority 10 IRQ_SVC $00ffd080Device: term Driver: sc8042 File MGR: scf
driver Name of the module which contains the interrupt service routine, usually a device driver.
device Name of the device descriptor. If a device name is not displayed, then the entries relate to IRQ handlers that support anonymous devices (for example, the clock ticker, DMA devices associated with other peripherals.)
Table 1-14 Fields in OS-9 for 68K irqs Utility (continued)
Name Description
174 Utilities Reference

1Utilities
DrvStat: $00ffd080 FMStat: $00ffe3d0 LUStat: $00ffc8d0 Port: $000b8000Users: 2 Mode: $2003 Type: 0 Class: 1 Logical Unit: 0 Current Process: 3
Example OS-9 for 68K
$ irqs
Calvin OS-9/68K V2.4 (max devs: 32, max irqs: 32)
vector prior port addr data addr irq svc driver device------- ----- --------- --------- --------- --------- ------- 68 0 $fffe1800 $00230b90 $00215084 am7990 69 5 $fffe4000 $003bd560 $00012ad2 scsi147 70 5 $fffe4000 $003bd560 $00012ad2 scsi147 72 0 $fffe1000 $00000000 $0000ccda tk147 88 5 $fffe3002 $003be3f0 $0000dacc sc8x30 term 88 5 $fffe3000 $003bd300 $0000dacc sc8x30 t1 89 5 $fffe3800 $002044a0 $0000dacc sc8x30 t3 89 5 $fffe3802 $003bbbe0 $0000dacc sc8x30 t2 90 5 $ffff1001 $003bc560 $0000e6b6 sc68560 t4 91 5 $ffff1041 $003bc120 $0000e6b6 sc68560 t5255 5 $ffff8800 $00245a50 $002458e0 n9026 n0
See Also
_os_irq() Ultra C Library Reference Manual
_os_irq() OS-9 Technical Manual
F$IRQ system state service request OS-9 for 68K Technical Manual
Utilities Reference 175

1 Utilities
kermit Transfers Sequential Files OverAsynchronous Lines
Syntax
kermit <mode>[<options>] <option arg>...
kermit c[8le line esc.char] (connect mode)
kermit s[dx8ifl line] file ...(send mode)
kermit r[dx8iflk line] (receive mode)
kermit h[dx8ifl line] (host server mode)
kermit g[dx8iflk line] file...(get file from server)
kermit q[dx8ifl line] (quit remote host server)
OS
OS-9; OS-9 for 68K
Options
d Verbose. The states the kermit utility goes through are printed along with other traces of its operation. A second, third, and even fourth d flag causes the kermit utility to give an even more detailed trace.
e Escape. Allows you to set the first character of the two character escape sequence for connect mode. When you type the escape character, the kermit utility holds it and waits for the next character.
If the next character is:
• c or C, the kermit utility closes the connection with the remote host.
176 Utilities Reference

1Utilities
• The same as the escape character, the escape character itself is passed.
• P or p, or an exclamation point (!) to accommodate Unix users, the kermit utility forks a shell. (Use your EOF character to return to the kermit connect mode.)
• 8 toggles the setting of the eighth-bit flag (which, for connect mode, controls whether the most significant bit of characters received from the remote host is masked out before being displayed).
• 0 sends an ASCII NUL to the remote host.
• A question mark (?) displays information about these escape sequences. If, in connect mode, you type any character other than those named above after typing the escape character, an ASCII BEL is echoed to the terminal and characters are not passed to the remote host.
• All other typed characters are passed through unchanged. The default escape character is tilde (~).
f No filename case conversion. the kermit utility does not perform filename case conversions.
i Image. Allows slightly more efficient file transfer between OS-9 for 68K machines. The kermit utility typically converts between its host’s end-of-line conventions and its internal
Utilities Reference 177

1 Utilities
representation (CRLF); image mode bypasses this transformation. It is useful when sending binary data (for which modification of the data could be ruinous).
k Kermit. If you specify k on a Receive or Get kermit, data received is written to standard output rather than to the specified files. This, along with the “-” pseudo file name, makes the kermit utility useful with redirection and pipes.
l Line. Use this when you want to specify the TTY line that the kermit utility should use to communicate with the other machine. This is specified as a regular file name (for example, /t2).
If you do not specify the l option, the kermit utility uses standard input and assumes it is running on the remote host (that is, NOT the machine to which your terminal is attached).
If you specify the l option, the port name (TTY line) must be the first argument following the options.
x XON/XOFF flow control. Turn off XON/XOFF flow control. The kermit utility protocol does not use any control characters except SOH, CR, and LF, so that the usual XON/XOFF characters (<control>q and <control>s respectively) can be used for flow control. You may want to turn flow control off to avoid spurious XOFF characters on a noisy line.
8 Eighth-bit quoting. Request eighth-bit quoting. the kermit utility honors requests to do eighth-bit quoting whether
178 Utilities Reference

1Utilities
this flag appears or not, so you only need to specify it when you send files over a known seven-bit communications line to avoid the overhead of eighth-bit quoting. In connect mode, the 8 flag indicates that the most significant bit of incoming characters should be masked out.
The file arguments are only meaningful to a Send or Get kermit. The receiving the kermit utility attempts to store the file with the same name that was used to send it. The OS-9 for 68K kermit utility, unless the you use the f flag, converts outgoing file names to uppercase and incoming ones to lower case. If a file name contains a slash (/), all outgoing kermit utilities strip off the leading part of the name through the last slash. In the Get command, file names are sent to the remote host as is and the file names sent back are converted as usual for a receiving kermit utility. (Wildcard characters may be expanded on the remote end.) A Send kermit takes a dash (-) file name to mean that you want standard input to be read and sent. In this case, the name STDIN is sent in the send-init packet so that a receiving kermit has a reasonable file name to write to.
Description
The kermit utility is a protocol for transferring sequential files between computers over asynchronous telephone lines. It provides for reliable file transfer and primitive virtual terminal communication between machines.
Utilities Reference 179

1 Utilities
The kermit utility’s protocols and the original implementation were developed at Columbia University.
The kermit utility has been implemented on many different computers. You can transfer files of arbitrary ASCII data (7-bit characters) of any length. The file transfer protocol uses small (96 character) checksum packets, with ACK/NACK responses and time-outs. The OS-9 kermit utility uses a ten-second time-out and ten retries.
The arguments for the kermit utility are a set of flags (no spaces between the flags), three optional arguments (which, if included, must be in the same order as the examples previous), and if this is a Send or Get operation, a list of one or more files.
A sample working implementation of the kermit “kernel” was written in the C language. This kernel was intended to illustrate the protocol and did not include a user interface or features such as server support, 8-bit quoting, file warning, timeouts, etc. Several sites have added the necessary trappings to make this a production version of kermit, usually under the UNIX operating system. Limited server functions have also been added to the OS-9 for 68K version.
NoteNoteCommand line options must all be in the same context, “-cl” not“-c -l”.
The following does not work for debugging: kermit -d -d -d -cl /t4
The following does work for level 3 debugging: kermit -dddcl /t4
NoteNoteThe escape option must precede the connect option.
180 Utilities Reference

1Utilities
The following does not work for escape: kermit -cle ^g/t4
The following does work for escape: kermit -ecl ^g /t4
Modes
The kermit utility has six modes. The mode is specified by the first flag. You can only specify one mode.
Table 1-15 Modes
Mode Specification
c Connect; virtual terminal connection.
s Send; transfer files in a non-server mode. Used with a remote kermit server.
r Receive; transfer files in a non-server mode.
g Get; used with a remote kermit server.
q Quit; used with a remote kermit server. q sends a generic finish packet to the remote kermit server.
h Host; make the OS-9 for 68K system a server. The Host command has not been fully implemented and tested as of this writing.
Utilities Reference 181

1 Utilities
Examples
Example 1
On the OS-9 for 68K target, the kermit, lmm, and shell utilities, and pipe capability must be present.
The following example is for loading a module into memory when it is passed serially to the system. The lmm utility opens the pipe and waits for a module to be placed serially into the pipe. The kermit utility waits to receive a binary file from the current port and places the file into the pipe to be read by the lmm utility.
To initiate the process type the following on the OS-9 for 68K shell:
$ lmm /pipe/hello&$ kermit rik >-/pipe/hello
Once this is done, break out of whatever communications software you are running, then use the kermit utility to send the binary file down from the host machine.
Example 2
For the next example, assume two OS-9 for 68K machines. You are logged on OS-9a (the local machine), and want to communicate with OS-9b (the remote machine). There is a modem on /t2. You want to connect to OS-9b, then transfer file1 to that machine.
• Type:
kermit cl /t2
The kermit utility answers:
kermit: connected...
• Dial the remote machine and connect the modem.
Anything typed on the terminal is sent to the remote machine. Output from that machine is displayed on your terminal.
• Press <return>.
182 Utilities Reference

1Utilities
A login: prompt displays.
• Type your login and press <return>.
• Start the kermit utility on the remote machine so that you can send the file.
• Start the remote (in this case receiving) kermit utility, then the local, (sending) one.
Remember that you are talking to OS-9b right now.
• Type:
kermit r
There is now a Receive kermit on OS-9b.
• Type ~ (the escape character) and the letter c to kill the local (Connecting) kermit:
~c
The kermit utility responds:
kermit: disconnected.
• Type:
kermit sl /t2 file1
The kermit utility responds:
Sending file1 as FILE1
When the transmission is finished, the kermit utility responds with either a Send complete or a Send failed message, depending on the success of the transfer.
To transfer a file from OS-9b (remote) to OS-9a (local), use these commands:
kermit cl /t2(connected to OS-9b)kermit s file9~c (talking to OS-9a again)kermit rl /t2
Utilities Reference 183

1 Utilities
After all the transfers are done, you should connect again, log out of OS-9b, kill the Connect kermit utility and hang up the phone.
NoteNoteYou do not need to exit the connect mode kermit as shown above; you can escape to a shell from within it, and from that shell invoke kermit in send or receive mode.
Miscellaneous Notes
To maximize throughput and avoid inefficient constructs such as busy wait loops for timing out, the OS-9 for 68K kermit utility uses the SS_RDY and SS_SSIG status requests and reads all pending characters from the communications port. Therefore, it does not work on devices for which SS_RDY and SS_SSIG are not supported, and does not work efficiently on devices for which the SS_RDY does not return a correct count of pending characters. The latter condition is peculiar to extremely old SCF device drivers which would return one rather than the true count of pending input characters.
The kermit utility can interrupt a file transfer. The OS-9 for 68K kermit utility now notices X and Z in ACK packets, and recognizes <control >x and <control>z in local non-server mode.
The kermit utility protocol uses only printing ASCII characters, <control>a, and CRLF. Therefore, he OS-9 for 68K kermit utility leaves the XON/XOFF fields of the path descriptors it uses intact to avoid buffer overruns unless you specify the x option.
Since BREAK is not an ASCII character, the OS-9 for 68K kermit utility cannot send a BREAK to the remote machine. On some systems, a BREAK is read as a NUL.
The OS-9 for 68K kermit utility supports timeouts, so that it is stable when communicating with “dumb” versions of the kermit utility that do not have timeouts.
184 Utilities Reference

1Utilities
The OS-9 for 68K kermit utility supports repeat-count encoding and eighth-bit encoding.
Errors
cannot open device Wrong permissions.
could not create file A Receive kermit could not create the file being sent to it.
nothing to connect to A Connect kermit was started without a line argument.
can’t stat You are attempting to kermit across a device whose driver does not support the SS_RDY getstat call.
See Also
lmm
Utilities Reference 185

1 Utilities
kill Aborts Processes
Syntax
kill [<opts>] {<procID list>}
OS
OS-9; OS-9 for 68K
Options
-<num> Signal value to send
Description
The kill utility is a built-in shell command. It sends a signal to the processes having the specified process ID numbers.
If no signal value is specified, the SIGKILL signal is sent which unconditionally terminates the processes.
Type kill, and the ID number(s) of the process(es) to send the signal. The processes must have the same user ID as the user executing the command. Use procs to obtain the process ID numbers.
If a process is waiting for I/O, it cannot die until it completes the current I/O operation. Therefore, if you kill a process and procs shows it still exists, the process is probably waiting for the output buffer to be flushed before it can die.
The command kill 0 kills all processes owned by the user.
NoteNoteBecause kill is a built-in shell command, it does not appear in the CMDS directory.
186 Utilities Reference

1Utilities
Examples$ kill 6 7$ procs Id PId Grp.Usr Prior MemSiz Sig S CPU Time Age Module & I/O 2 1 0.0 128 0.25k 0 w 0.01 ??? sysgo <>>>term 3 2 0.0 128 4.75k 0 w 4.11 01:13 shell <>>>term 4 3 0.0 5 4.00k 0 a 12:42.06 00:14 xhog <>>>term 5 3 0.0 128 8.50k 0 * 0.08 00:00 procs <>>term 6 0 0.0 128 4.00k 0 s 0.02 01:12 tsmon <>>>t1 7 0 0.0 128 4.00k 0 s 0.01 01:12 tsmon <>>>t2$ kill 4$ procs Id PId Grp.Usr Prior MemSiz Sig S CPU Time Age Module & I/O 2 1 0.0 128 0.25k 0 w 0.01 ??? sysgo <>>>term 3 2 0.0 128 4.75k 0 w 4.11 01:13 shell <>>>term 4 3 0.0 128 8.50k 0 * 0.08 00:00 procs <>>term
To send a signal 3 to processes 28 and 32 type:
$ kill -3 28 32
Utilities Reference 187

1 Utilities
link Links Previously Loaded Module intoMemory
Syntax
link [<opts>] {<modname>}
OS
OS-9; OS-9 for 68K
Options
-z Reads the file names from standard input.
-z=<file> Reads the file names from <file>.
Description
The link utility locks a previously loaded module into memory.
Type link and the name(s) of the module(s) to lock into memory.
The link count of the module specified increments by one each time it is linked.
Use unlink to unlock the module when it is no longer needed.
Examples
$ link prog1 prog2 prog3
$ link -z=linkfile Links modules from linkfile.
$ link -z Links modules from standard input.
188 Utilities Reference

1Utilities
list Lists Contents of Text File
Syntax
list [<opts>] {<path>}
OS
OS-9; OS-9 for 68K
Options
-z Reads the file names from standard input.
-z=<file> Reads the file names from <file>.
Description
The list utility displays text lines from the specified path(s) to standard output.
Type list and the pathlist.
The list utility terminates when it reaches the end-of-file of the last input path. If more than one path is specified, the first path is copied to standard output, the second path is copied next, and so on. Each path is copied to standard output in the order specified on the command line.
The list utility is most commonly used to examine or print text files.
Examples
To redirect the listing, startup, to the printer and place the entire command in the background, enter:
$ list /d0/startup >/P&
The following example lists text from files to standard output in the same order as the command line:
$ list /D1/user5/document /d0/myfile /d0/Bob/text
To list all files in the current data directory, enter:
Utilities Reference 189

1 Utilities
$ list *
The following example reads the name(s) of the file(s) to list from namefile and lists their contents.
$ list -z=namefile
The following line lists the contents of the named pipe staff while consuming all the data from the pipe.
$ list /pipe/staff
190 Utilities Reference

1Utilities
lmm Loads Modules At Pathlist
Syntax
lmm [<options>] <pathlist>
OS
OS-9; OS-9 for 68K
Options
-q Runs in quiet mode; do not exit with error.
-u Do not attempt to unload old module.
Description
The lmm utility loads the module at the specified pathlist.
Use lmm to initiate a process to load a memory module from a pathlist. The filename of the pathlist must be the same as the module that you wish to load.
The lmm utility may be run as a background process (&).
The lmm utility performs the following steps:
1. Checks the pathlist for existence each second for two minutes until it exists. If after two minutes the pathlist does not appear, then the lmm utility exits.
2. Reads a module header from the path.
3. Infers the module name from the pathlist by stripping any preceding pathlist components from the pathlist.
For example, each of the following pathlists has an inferred module name of testmod:
/h0/TEST/testmod/pipe/testmodtestmod
Utilities Reference 191
1 Utilities
4. Unloads any module with the inferred name from memory.
If unloading the module fails, the lmm utility reads the remaining data from the pathlist and exits with error EOS_KNWMOD.
5. Reads the remaining module from the pathlist and loads it into memory.
Example
The following example starts the lmm utility in the background and then uses kermit to download a module in the foreground. It demonstrates the method that you might use to load a module on a ROM-based system.
$ lmm /pipe/testmod &+118$ kermit rik >-/pipe/testmod$ mdir testmod Module Directory at 14:05:09testmod
See Also
kermit
192 Utilities Reference

1Utilities
ln Creates a Hard Link to an Existing File
Syntax
ln <link to create> <file to link to>
OS
OS-9
Description
The ln utility creates a directory entry as specified as the first argument that refers to the same file descriptor as the second argument.
Type ln, the pathlist of the hard link you want to create and the pathlist of the file you want to link to.
Examples
ln /h0/DEFS/errno.h /h0/MWOS/OS9000/SRC/DEFS/errno.hln /h0/CMDS/ls /h0/CMDS/dir
Utilities Reference 193

1 Utilities
load Loads Module(s) from File into Memory
Syntax
load [<opts>] {<path>}
OS
OS-9; OS-9 for 68K
Options
-c=<color> Specifies a specific memory color in which to load the module.
-d Loads the file from your current data directory, instead of your current execution directory.
-d=<path> Specifies path relative to current data directory from which to load the module.
-i Ignore errors loading modules and keep going.
-l Prints the pathlist of the file loaded.
-s Loads “sticky” modules only.
-w=<moddir> Loads modules into module directory <moddir>. (OS-9 only)
-z Reads the file names from standard input.
-z=<file> Reads the file names from <file>.
Description
The load utility loads one or more modules specified by <path> into memory.
194 Utilities Reference

1Utilities
Unless a full pathlist is specified, <path> is relative to your current execution directory. Therefore, if the module to load is in your execution directory, you need only enter its name:
load <file>
If <file> is not in your execution directory and if the shell environment variable PATH is defined, the load utility searches each directory specified by PATH until <file> is successfully loaded from a directory.
This corresponds to the shell execution search method using the PATH environment variable. By using the -l option, the load utility prints the pathlist of the successfully loaded file.
The module names are added to the module directory. If a module is loaded with the same name as a module already in memory, the module having the highest revision level is kept.
File Security
The file security mechanism enforces certain requirements regarding owner and access permissions when loading modules into the module directory.
You must have file access permission to the file to be loaded. If the file is loaded from an execution directory, the execute permission (e) must be set. If the file is loaded from a directory other than the execution directory and the -d option is specified, only the read permission (r) is required.
NoteNoteUnless the file has public execute and/or public read (OS-9: group execute/group read) permissions, only the owner of the file or a super user can load the file. Use the dir -e command to examine a file’s owner and access permissions.
Utilities Reference 195

1 Utilities
You must have module-access permission to the file being loaded. Do not confuse this with the file-access permission. The module owner and access permissions are stored in the module header; use ident to examine them.
To prevent ordinary users from loading super user programs, the operating system enforces the following restriction: if the module group ID is zero (super group), you can load the module only if the process’ group ID and the file’s group ID is also zero.
If you are not the owner of a module and not a super user, the public execute and/or read access permissions must be set. The module access permissions are divided into three groups:
• owner
• group
• public
Only the owner of the module or a super user can set the module access permissions.
Example$ mdir Module Directory at 14:44:35kernel init p32clk rbf p32hdh0 p32fd d0 d1 ramr0 dd mdir
$ load edit
$ mdir Module Directory at 14:44:35kernel init p32clk rbf p32hdh0 p32fd d0 d1 ramr0 dd edit mdir
196 Utilities Reference

1Utilities
login Timesharing System Login
Syntax
login [<name>] [,] [<password>]
OS
OS-9; OS-9 for 68K
Options
-n Verifies a password entry’s contents.
If an entry exists for the name and password supplied on the command line, the information (except the password itself) is printed to standard output.
This option operates in a non-interactive mode.
Description
The login utility provides login security in timesharing systems.
It is automatically called by the timesharing monitor tsmon, or you can explicitly call it after the initial login to change a terminal’s user.
The login utility requests a user name and password, which is checked against a validation, or password file. If the information is correct, the user’s system priority, user ID, and working directories are set up according to information stored in the file. The login utility then forks the pd utility to acquire the current working and execution directories. The initial program specified in the password file is also executed. This initial program is usually the shell utility. The date, time, and process number also display.
If you cannot supply a correct user name and password after three attempts, the login attempt is aborted.
Utilities Reference 197

1 Utilities
NoteNoteIf you do not need the shell from which you called the login utility, you may discard it using the ex utility to start the login command: ex login.
To log off the system, you must terminate the initial program specified in the password file. For most programs, including shell, you can do this by typing an end-of-file character (escape) as the first character on a line.
If the file motd exists in the SYS directory with the password file, a successful login displays the contents of motd on your terminal screen.
The Password File
The password file must be present in the SYS directory being used: /h0/SYS, /d0/SYS, etc. The file contains one or more variable-length text entries; one for each user name. These entries are not shell command lines. Each entry has seven fields. Each field is delimited by a comma. The fields are
1. User name
This field may be up to 32 characters long. It cannot include spaces. The user name may not begin with a number, a period, or an underscore, but these characters may be used elsewhere in the name. If this field is empty, any name matches.
2. Password
This field may contain up to 32 characters including spaces. If this field is omitted, no password is required for the specified user.
198 Utilities Reference

1Utilities
3. Group User ID number
This field allows 0 to 65535 groups and 0 to 65535 users. 0.n is the super user. The file security system uses this number as the system-wide user ID to identify all processes initiated by the user. The system manager should assign a unique ID to each potential user.
4. Initial Process Priority
The initial process priority can be from 1 to 65535.
5. Initial Execution Directory Pathlist
The initial execution directory is usually /h0/CMDS. Specifying a period (.) for this field defaults the initial execution directory to the CMDS file located in the current directory, usually /h0 or /d0.
6. Initial Data Directory Pathlist
This is the specific user directory. Specifying a period (.) for this field defaults to the current directory.
7. Initial Program
The name and parameters of the program to initially execute. This is usually shell.
Sample Password Filesuperuser,secret,0.0,255,.,.,shell -p="@howdy"brian,open sesame,3.7,128,.,/d1/STEVE,shellsara,jane,3.10,100,/d0/BUSINESS,/d1/LETTERS,wordprocessorrobert,,4.0,128,.,/d1/ROBERT,Basicmean_joe,midori,12.97,100,Joe,Joe,shell
Utilities Reference 199

1 Utilities
Using password file entries, the login utility sets the following shell environment variables. Programs can examine these environment variables to determine various characteristics of the user’s environment:
NoteNoteEnvironment variables are case sensitive.
To show how the login utility uses the password file to set up environment variables, examine the previous sample password file. Assume login’s data and execution directories are /h0 and /h0/CMDS, respectively, logging in as mean_joe executes a shell with the data directory of /h0/Joe and the execution directory of /h0/CMDS/Joe.
The environment variables passed to the shell are set as follows:
HOME=/h0/JoeSHELL=shellUSER=mean_joePATH=/H0/Cmds
Table 1-16 Environment Variables
Name Description
HOME Initial data directory pathlist.
SHELL Name of the initial program executed.
USER User name.
PATH Login process’ initial execution directory. If a period (.) is specified, PATH is not set.
200 Utilities Reference

1Utilities
logout Timesharing System Logout
Syntax
logout
OS
OS-9; OS-9 for 68K
Description
The logout utility terminates the current shell. If the shell to terminate is the login shell, the logout utility executes the .logout procedure file before terminating the shell.
Type logout and a carriage return to terminate the current shell.
This terminates the current shell in the same manner as an end-of-file character, with one exception. If the shell to be terminated is the login shell, the logout utility executes the procedure file .logout.
The login shell is the initial shell created by the login utility when you log on the system. In order for the logout utility to execute the .logout file, .logout must be located in the directory specified by the HOME environment variable.
NoteNoteThese commands do not appear in the CMDS directory as they are built in to the shell.
Example3.lac: list .logoutprocswaitdateecho "see you later. . ."
Utilities Reference 201

1 Utilities
3.lac: logout2.lac: logout1.lac: logout Id PId Grp.Usr Prior MemSiz Sig S CPU Time Age Module & I/O 2 1 0.0 128 0.25k 0 w 0.01 ??? sysgo <>>>term 3 2 0.0 128 4.75k 0 w 4.11 01:13 shell <>>>term 4 3 0.0 128 8.50k 0 * 0.08 00:00 procs <>>term 5 0 0.0 128 4.00k 0 s 0.02 01:12 tsmon <>>>t1July 7, 1989 11:59 pmsee you later . . .
202 Utilities Reference

1Utilities
makdir Creates Directory File
Syntax
makdir [<opts>] {<path>}
OS
OS-9; OS-9 for 68K
Options
-p Creates all missing components of the specified path.
-q Quiet mode.
-x Creates the directory in the execution directory.
-z Reads the directory names from standard input.
-z=<file> Reads the directory names from <file>.
Description
The makdir utility creates a new directory file specified by the given pathlist.
Type makdir and the pathlist specifying the new directory.
You must have write permission for the new directory’s parent directory. The new directory is initialized and does not initially contain files except for the pointers to itself (.) and its parent directory (..). All access permissions are enabled except single use, or non-sharable.
Examples
$ makdir /d1/STEVE/PROJECTCreates directory project in /d1/STEVE
Utilities Reference 203

1 Utilities
$ makdir DATAFILES Creates directory DATAFILES in current working execution directory.
$ makdir ../SAVEFILES Creates directory SAVEFILES in parent of current working data directory.
$ makdir RED GREEN BLUE ../PURPLECreates directories RED, GREEN and BLUE in current working data directory and PURPLE in parent of current working data directory.
$ makdir -p MWOS/SRC/TOOLS/UTILSCreates directory: MWOS (if it does not already exist) in current working directory, and SRC (if it does not already exist) as a child of MWOS, and TOOLS (if it does not already exist) as a child of SRC. And finally, the UTILS directory (if it does not already exist) is created as a child of the tools directory.
204 Utilities Reference

1Utilities
os9make Maintains, Updates, and RegeneratesGroups of Programs
Syntax
os9make {<option(s)>} [<target>] {[<target>]} [<macros>]
OS
OS-9; OS-9 for 68K; WIN; UNIX
Options
-b Does not use built-in rules.
-bo Does not use built-in rules for object files.
-d Prints the dates of the files in the makefile (debug mode).
-dd Double debug mode. Very verbose.
-e Imports environment variables as macros in the makefile.
-ee Forces imported environment variables (implies -e flag) to override all other macro definitions. This includes command line definitions unless -ll is in effect.
-f- Reads the makefile from standard input.
-f[=]<path> Specifies <path> as the makefile. If you do not specify -f- or -f=<path>, os9make looks for a file named makefile. If <path> is specified as a hyphen (-), os9make commands are read from standard input.
-i Ignores errors.
Utilities Reference 205

1 Utilities
-l Switches the order of precedence to os9make later macros override previous definitions. This flag forces os9make to behave similar to the order of precedence used by UNIX make.
-ll Forces command line macros to have the highest precedence (cannot be overridden). This flag also turns on the -l flag.
-m Ignores undefined macros rather than causing a fatal os9make error.
-mode[=]<mode> Sets the mode (compat, ucc, or c68). If used on the command line, this option overrides the environment variable (MWMAKEOPTS). If the option is set in the makefile, it overrides both the environment variable and the command line option.
-n Displays commands but do not execute them.
-o Dependencies without ROFs (.r) will succeed and not give an error. For example:
RDIR = relsmake.date: clean touch make.dateclean: zfile del $(RDIR)/state.r
Assumptions abou .r/.o are made, however, when no dependencies are provided (for example, clean:).
-p Don’t change slash to backslash in makefile lines (os9make only).
206 Utilities Reference

1Utilities
-r Views the built-in rules for the current mode. For example, os9make -rn lists the current rules without running the makefile.
-s Silent Mode. Executes commands without echo.
-t Updates the file dates without executing commands.
-u Does the make regardless of the file dates.
-x Uses the cross-compiler/assembler.
-z[=<path>] Gets a list of files to make from standard input or <path>.
Description
The os9make utility determines whether a file needs to be updated. It examines the dates of the target file and the files used to create the target file. If the os9make utility determines that the file must be updated, it executes specified commands to recreate the file.
The os9make utility has several built-in assumptions specifically designed for compiling high-level language programs; however, you may use os9make to maintain any files dependent on updated files.
For More InformationMore Info More Information More Information More Information More
-6-
For more information about the os9make Utility, see Chapter 4: Using the os9make Utility.
The os9make utility executes commands from a special type of procedure file called a makefile. The makefile describes the dependent relationships between files used to create the <target> file(s). A makefile may describe the commands to create many files.
Utilities Reference 207

1 Utilities
If the os9make utility is called without a target file on the command line, the os9make utility attempts to make the first target file described in the makefile. If one or more target file is entered on the command line, the os9make utility reads and processes the entire makefile and only attempts to make the appropriate file(s).
208 Utilities Reference

1Utilities
makmdir Creates a New Module Directory
Syntax
makmdir [<opts>] {<module directory>}
OS
OS-9; OS-9 for 68K
Options
-z Reads the module directory names from standard input.
-z=<file> Reads the module directory names from <file>.
Description
The makmdir utility creates a new module directory.
Type makmdir, the module directory pathlist and any desired options to create a new directory.
You must have write permission for the new directory’s parent module directory. The new module directory is created with all of the access permissions enabled. A module directory’s access permissions can be changed using the mdattr utility.
It is an OS-9 convention to capitalize module directory names.
Utilities Reference 209

1 Utilities
NoteNoteThe makmdir utility only searches the current module directory for a specified module when creating a new module directory.
The alternate pathlists specified by the MDPATH environment variable are not searched if a specified module is not found in the current module directory.
For example, if USER is your current module directory and you want to make a new directory in a directory called TEST, OS-9 does not search the alternate module directories for a module directory named TEST.
Examples
$ makmdir USERS$ makmdir ../UTILS$ makmdir -z=/h0/sys/users
210 Utilities Reference
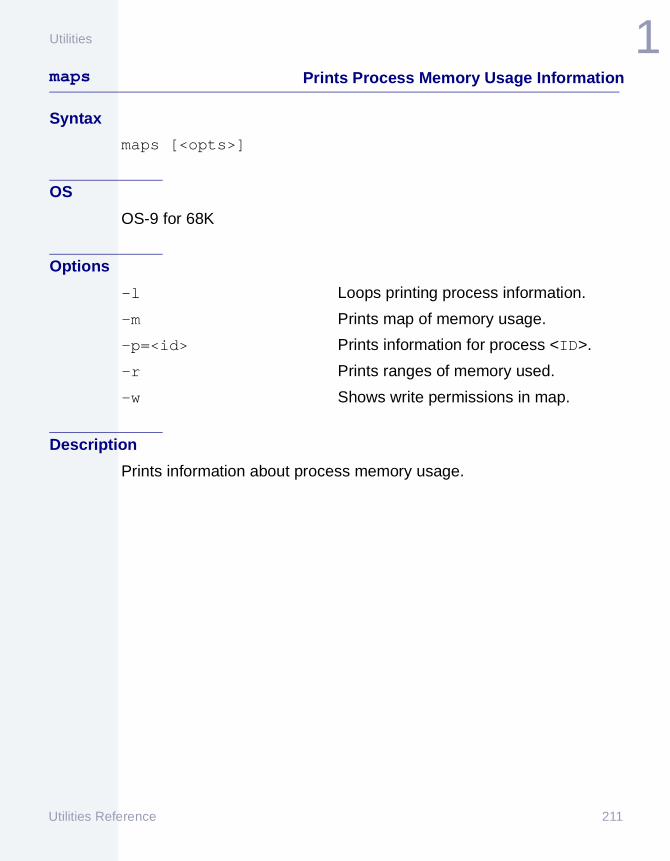
1Utilities
maps Prints Process Memory Usage Information
Syntax
maps [<opts>]
OS
OS-9 for 68K
Options
-l Loops printing process information.
-m Prints map of memory usage.
-p=<id> Prints information for process <ID>.
-r Prints ranges of memory used.
-w Shows write permissions in map.
Description
Prints information about process memory usage.
Utilities Reference 211
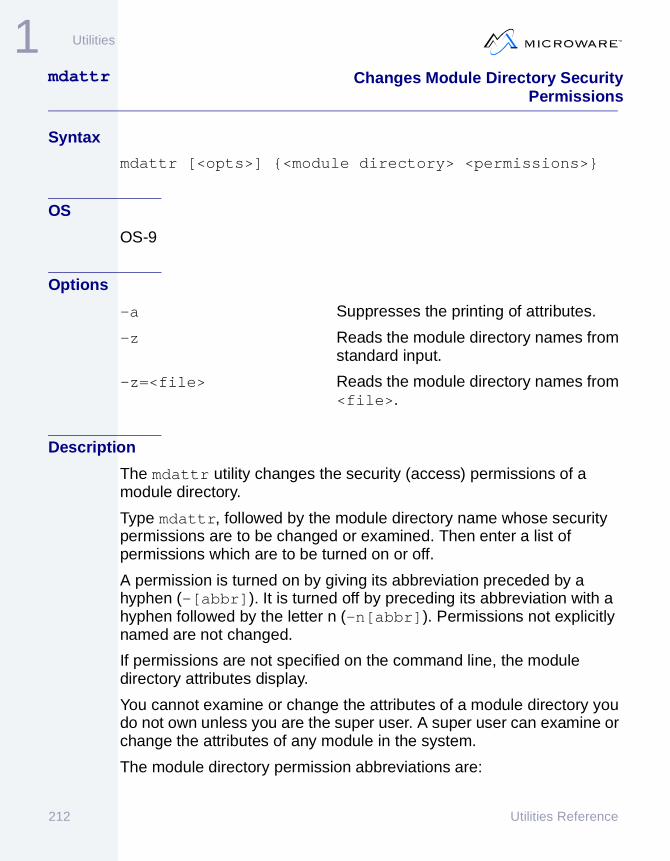
1 Utilities
mdattr Changes Module Directory SecurityPermissions
Syntax
mdattr [<opts>] {<module directory> <permissions>}
OS
OS-9
Options
-a Suppresses the printing of attributes.
-z Reads the module directory names from standard input.
-z=<file> Reads the module directory names from <file>.
Description
The mdattr utility changes the security (access) permissions of a module directory.
Type mdattr, followed by the module directory name whose security permissions are to be changed or examined. Then enter a list of permissions which are to be turned on or off.
A permission is turned on by giving its abbreviation preceded by a hyphen (-[abbr]). It is turned off by preceding its abbreviation with a hyphen followed by the letter n (-n[abbr]). Permissions not explicitly named are not changed.
If permissions are not specified on the command line, the module directory attributes display.
You cannot examine or change the attributes of a module directory you do not own unless you are the super user. A super user can examine or change the attributes of any module in the system.
The module directory permission abbreviations are:
212 Utilities Reference

1Utilities
r Read permission to ownerw Write permission to ownergr Read permission to groupgw Write permission to grouppr Read permission to publicpw Write permission to public
NoteNoteThe owner is the creator of the module directory. Owner access is allowed to any user with the same user ID number as the owner.
The group is any user with the same group ID number. The user ID number and the group ID number are combined to form a group.user ID number.
The public is any user with a different group.user ID number than the owner.
Module directory ownership can be readily determined with the mdir -e command.
Examples
$ mdattr sc83 Displays the current attributes of sc83.
$ mdattr sc83 -npr -npw Turns off the public read and public write permissions.
$ mdattr sc83 -rwprpw Turns on both the public and owner read and write permissions.
$ mdattr -z Displays the attributes of the module directory names read from standard input.
Utilities Reference 213

1 Utilities
See Also
makmdir
mdir
214 Utilities Reference

1Utilities
mdir Displays Module Directory
Syntax
mdir [<opts>] [<modname>]
OS
OS-9; OS-9 for 68K
Options
-a Displays the language field instead of the type field in an extended listing.
-e Displays the extended module directory.
-r Displays directories recursively. (OS-9)
-t=<type> Displays only the modules of the specified type.
-u Displays an unformatted listing used for piping output.
Description
OS-9 for 68K: The mdir utility displays the present module names in the system module directory. The system module directory contains all modules currently resident in memory. By specifying individual module names, only specified modules are displayed (if resident in memory.)
OS-9: The mdir utility displays the present module names in the specified module directory. You may use either a full or relative pathlist when specifying a module directory. By specifying individual module names, only specified modules are displayed if resident in memory.
If you use -e, the mdir utility displays an extended listing of the physical address, size, owner, revision level, user count, and the type of each module.
Utilities Reference 215

1 Utilities
The module type is listed using the following mnemonics:
NoteNoteUser-defined modules not corresponding with this list are displayed by their number.
Table 1-17 mdir -e option type Mnemonics
Mnemonic Description
Prog Program Module
Subr Subroutine Module
Mult Multi Module
Data Data Module
Trap Trap Handler Module
Sys System Module
FMan File Manager
Driv Device Driver Module
Desc Device Descriptor Module
MDir(OS-9)
Module Directory (not truly a module that consumes memory)
216 Utilities Reference

1Utilities
By using -a, mdir displays each module’s language instead of the type in an extended listing. The language field uses the following mnemonics:
NoteNoteIf the language field is inappropriate for the module, a blank field is displayed. For example, d0, t1, or init.
WARNING!Not all modules listed by the mdir utility are executable as processes; always check the module type code to make sure it is executable before executing an unfamiliar module.
Table 1-18 mdir Lang Mnemonic
Mnemonic Description
Obj 68000/80386/PowerPC Machine Code
Bas Basic09 I Code
Pasc Pascal I Code
C C I Code
Cobl Cobol I Code
Fort Fortran I Code
Utilities Reference 217

1 Utilities
Examples
To save space, the following examples are incomplete. Module directories are generally much larger.
$ mdir Module Directory at 15:32:38
kernel syscache ssm init tk147 rtclock rbf $ mdir -eAddr Size Owner Perm Type Revs Ed # Lnk Module name-------- ------- -------- ----- ---- ---- ----- ---- -------00006f00 27562 0.0 0555 Sys a000 83 2 kernel0000daaa 368 0.0 0555 Sys a000 10 1 syscache0000dc1a 1682 0.0 0555 Sys a000 29 1 ssm0000e2ac 622 0.0 0555 Sys 8000 20 0 init0000e51a 322 0.0 0555 Sys a000 7 1 tk1470000e65c 494 0.0 0555 Subr a000 8 0 rtclock0000e84a 8952 0.0 0555 Fman e000 79 26 rbf
$ mdir -eaAddr Size Owner Perm Lang Revs Ed # Lnk Module name-------- -------- ------- ---- ---- ---- ---- ----- ---- -------00006f00 27562 0.0 0555 Obj a000 83 2 kernel0000daaa 368 0.0 0555 Obj a000 10 1 syscache0000dc1a 1682 0.0 0555 Obj a000 29 1 ssm0000e2ac 622 0.0 0555 8000 20 0 init0000e51a 322 0.0 0555 Obj a000 7 1 tk1470000e65c 494 0.0 0555 Obj a000 8 0 rtclock0000e84a 8952 0.0 0555 Obj e000 79 26 rbf
218 Utilities Reference

1Utilities
merge, os9merge Copies and Combines Files to StandardOutput
Syntax
merge {<option(s)>} {<path>}
merge OS
OS-9; OS-9 for 68K
os9merge OS
DOS; UNIX
Options
-a[=]<num> File alignment. Default is 1.
-b[=]<size> Allocates <size> k bytes for use by merge. The default memory size is 4K.
-o[=]<file> Output file. Default is stdout.
-x Searches the current execution directory for files to be merged (merge only).
-z Reads the file names from standard input.
-z=<file> Reads the file names from <file>.
Description
The merge utility copies multiple input files specified by <path> to standard output.
The merge utility is commonly used to combine several files into a single output file.
Data is copied in the order the pathlists are specified on the command line.
Utilities Reference 219

1 Utilities
The merge utility does no output line editing such as automatic line feed.
The standard output is generally redirected to a file or device.
Examples
$ merge compile.list asm.list >/p$ merge file1 file2 file3 file4 >combined.file -b=32k$ merge -x load link copy >Utils1$ merge -z=/h0/PROGS/file1 >merged_files
220 Utilities Reference

1Utilities
mfree Displays Free System RAM
Syntax
mfree [<opts>]
OS
OS-9; OS-9 for 68K
Options
-e Displays an extended free memory list.
-s Displays system information summary.
Description
The mfree utility displays a list of areas in memory not presently in use and available for assignment.
The address and size of each free memory block are also displayed.
Examples$ mfreeCurrent total free RAM: 1392.00 K-bytes $ mfree -eMinimum allocation size: 4.00 K-bytes Number of memory segments: 25 Total RAM at startup: 4095.00 K-bytes Current total free RAM: 1392.00 K-bytes Free memory map: Segment Address Size of Segment ----------------- -------------------------- $55000 $7000 28.00 K-bytes $6A000 $B000 44.00 K-bytes $80000 $8A000 552.00 K-bytes $10E000 $1A000 104.00 K-bytes $12F000 $1E000 120.00 K-bytes $151000 $60000 384.00 K-bytes $1B5000 $2000 8.00 K-bytes
Utilities Reference 221

1 Utilities
$1B8000 $E000 56.00 K-bytes $1DE000 $1000 4.00 K-bytes $208000 $4000 16.00 K-bytes $21C000 $5000 20.00 K-bytes $245000 $1000 4.00 K-bytes $249000 $1000 4.00 K-bytes
222 Utilities Reference

1Utilities
mkdatmod Packages File into Data Module
Syntax
mkdatmod -tp=<name> {<option(s)>} <in-file> <out-file>
OS
OS-9; OS-9 for 68K; WIN; UNIX
Options
-b[=]<size>[k|K] Specifies the size of the copy buffer. <size> is always in K bytes, k or K is optional/ignored. The default memory size is 32K.
-n[=]<name> Name of data module (default=<in-file>
-r Reverse operation (take off module header/footer)
-to[=]<name> Specify target operating system, where <name> is the target operating system:os9 or osk OS-9 for 68Kos9000 or os9k OS-9
-tp[=]<name> Specify target processor and options, where <name> is the target processor:386 or x86 Intel x86 (386+) family68k Motorola 68k familyarm ARM familymips MIPS familyppc PowerPC(™) familysh or sh3 Hitachi SH3 familysh4 Hitachi SH4 familysparc SPARC family
Utilities Reference 223

1 Utilities
-z[[=]<file>] Read additional command line arguments from <file> (stdin used if no file).
Description
The mkdatmod utility packages a file into a data module. mkdatmod can also strip the header adn footer off an existing data module.
To creat a data module, type mkdatmod, the processor type of the destination module (using the -tp option), followed by the source file <in-file> and the destination data module <out-file>. The created data module <out-file> retains <in-file> as the module name unless specified otherwise with -n[=]<name>.
To reverse the operation and strip the header and footer off and existing data module, type mkdatmod -r, followed the by the data module <in-file> and the destination file <out-file>.
NoteNotemkdatmod automatically calls the fixmod utility during data module creation to set the module parity and CRC (fixmod -u), so fixmod must be accessible on your system.
Examples$ mkdatmod -tp=ppc junk junkmodModule: junk - Fixing header parity -Fixing module CRC$ mkdatmod -r junkmod junk
See Also
fixmod
224 Utilities Reference

1Utilities
moded Edits OS-9 Modules
Syntax
moded [<opts>] [<path>]
OS
OS-9 for 68K
Options
-d[=]<path> Uses <path> for the field descriptions (moded.fields).
-e[=]<path> Uses <path> for the error message file.
-f[=]<path> Specifies a file consisting of one or more modules to load into the moded buffer.
Description
The moded utility edits individual fields of certain types of OS-9 for 68K modules. Currently, you can use the moded utility to change the init module and any OS-9 for 68K device descriptor module.
The moded utility can edit modules which exist in their own files or modules which exist among other modules in a single file such as a bootstrap file. The moded utility updates the module’s CRC and header parity if changes are made.
Regardless of how you call the moded utility, you always enter the editor’s command mode. This is designated by the moded: prompt.
If parameters are not specified on the moded command line, the current module is not loaded into memory.
If a file is specified on the command line, it is assumed to contain a module of the same name. This module is loaded into the editor’s buffer and becomes the current module.
Utilities Reference 225

1 Utilities
If the -f option is used, the specified file is loaded into the editor’s memory. If a module of the same name exists in the file, it becomes the current module. If the module does not exist, there is not a current module.
If the -f option is used and a module name is specified on the command line, the specified module becomes the current module.
You can execute the following commands from command mode:
Once the moded utility is invoked, it attempts to read the moded.fields file. This file contains module field information for each type of module to edit. Without this file, the moded utility cannot function.
moded searches for moded.fields in the following directories in this order:
1. Device /dd .
Table 1-19 Commands
Command Description
e(dit) Edits the current module.
f(ile) Opens a file of modules.
l(ist) Lists the contents of the current module.
m(odule) Finds a module in a file.
w(rite) Updates the module CRC and writes to the file.
q(uit) Returns to the shell.
$ Calls the OS-9 shell.
? Prints this help message.
226 Utilities Reference

1Utilities
2. The default system device, as specified in the init module (M$SysDev). If the init module cannot be linked to, the SYS directory is searched for on the current device.
If the moded utility cannot find moded.fields, it returns an error.
Selecting the Current Module
If you do not specify a module or file on the command line, you may open a module or file from command mode using the e or f commands, respectively.
• e prompts for a file name and a module name if different from the file name. This module then becomes the current module.
• f prompts for the name of a file containing one or more modules. If a module in the file has the same name as the file, it becomes the current module by default.
• Use the m command to change the current module.
Edit Mode
To edit the current module, use the e command. If there is not a current module, the editor prompts for the module name to edit. The editor prints the name of a field, its current value, and prompts for a new value. At this point, you can enter any of the following edit commands:
Table 1-20 Edit Commands
Command Specification
<expr> A new value for the field.
- Re-displays the last field.
. Leaves the edit mode.
? Prints the edit mode commands.
Utilities Reference 227
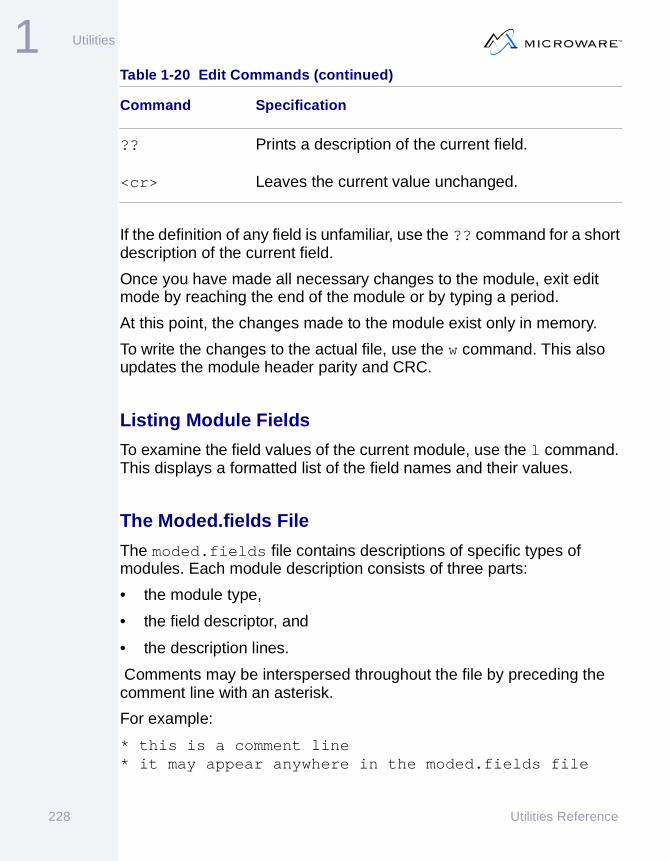
1 Utilities
If the definition of any field is unfamiliar, use the ?? command for a short description of the current field.
Once you have made all necessary changes to the module, exit edit mode by reaching the end of the module or by typing a period.
At this point, the changes made to the module exist only in memory.
To write the changes to the actual file, use the w command. This also updates the module header parity and CRC.
Listing Module Fields
To examine the field values of the current module, use the l command. This displays a formatted list of the field names and their values.
The Moded.fields File
The moded.fields file contains descriptions of specific types of modules. Each module description consists of three parts:
• the module type,
• the field descriptor, and
• the description lines.
Comments may be interspersed throughout the file by preceding the comment line with an asterisk.
For example:
* this is a comment line* it may appear anywhere in the moded.fields file
?? Prints a description of the current field.
<cr> Leaves the current value unchanged.
Table 1-20 Edit Commands (continued)
Command Specification
228 Utilities Reference

1Utilities
1. The module type
This is a single line consisting of the module type as specified in M$Type in the module header and the device type as specified in PD_DTP in the device descriptor. Both values are specified as decimals and are separated from each other by a comma.
The module type line is the only line which begins with a pound sign (#).
The following example line describes an RBF device descriptor module:
#15,1
Two module type values are accepted.
The device type value is only used when a device descriptor module is being described. The following device type values are accepted.:
Table 1-21 Module Type Values
Value Specification
12 System module (init module only)
15 Device descriptor module
Table 1-22 Device Type Values
Value Specification
0 SCF
1 RBF
2 PIPE
3 SBF
Utilities Reference 229

1 Utilities
2. The field descriptor
This consists of two lines. The first is a textual description of the module field; the baud rate, parity. and descriptor name. The moded utility uses this description as a prompt to change this field’s value.
The second line has the following format:
<type>,<offset>,<base>,<value>[,<name>]
<type> specifies the field size in bytes. This is a decimal value.
The following values are accepted.:
4 NET
6 UCM
7 SOCKET
11 GFM
Table 1-23 Type Values
Value Specification
1 Byte
2 Word
3 3 byte value
4 Long word
Table 1-22 Device Type Values (continued)
Value Specification
230 Utilities Reference

1Utilities
<offset> specifies the offset of the field from the beginning of the module. This is a hexadecimal value.
NoteNoteFor device-specific fields (see <name>), this offset is the offset of the field within the DevCon section of the descriptor (and not the module start).
<base> specifies the numeric base in which the field value is displayed by the moded utility. The following bases are supported.
<value> specifies the default value of the field. This is currently unused; set it to zero.
5 Long word offset to a string
6 Word offset to a string
Table 1-23 Type Values
Value Specification
Table 1-24 Bases Supported
Value Specification
0 ASCII
8 Octal
10 Decimal
16 Hexadecimal
Utilities Reference 231
1 Utilities
<name> specifies the driver name for this and each field description that follows until a new <name> is specified or a module type line is encountered. This field is optional.
For example, <name> allows descriptors with DevCon sections specific to certain drivers to be edited.
The following lines describe a “descriptor name” field:
descriptor name5,c,0,0
The field consists of a long-word offset to a string. It is offset 12 bytes from the beginning of the module. The display base is in ASCII.
3. Description lines
After the Field Descriptor lines, you can use any number of lines to describe the field.
This description displays when the edit mode command, ??, is used.
Each description line must begin with an exclamation point (!) to differentiate it from a Field Descriptor. These lines are optional, but they are useful when editing uncertain module fields.
The following lines might be used to describe the example used for the Field Descriptor:
! This field contains the name that the descriptor! will be known by when in memory.
4. Repeated Sequences.
Braces ({ })can be used to surround a sequence of field descriptor and description lines to imply that the sequence is repeated one or more times.
The fields are assumed to be repeated within the descriptor until the value of the first field is zero. The offset values used within the repeated sequence determine the format of each structure.
232 Utilities Reference

1Utilities
The first offset specified denotes the offset where the repeated sequences begin. Subsequent offsets specify the format of the repeated sequences. Refer to the supplied moded.fields file for an example of repeated sequences.
Utilities Reference 233

1 Utilities
Example Module Description in Moded.fields:
The following example shows one way to set up a module description:
*************************************************************the following section describes an RBF device descriptor *************************************************************#15,1 descriptor name 5,c,0,0! This field contains the name that the descriptor will ! be known by when in memory. port address 4,30,16,0 ! This is the absolute physical address of the hardware ! controller. irq vector1,34,10,0 ! This is the irq vector that the device will assert. ! Auto-vectored interrupt devices will use vectors 25-31. ! Vectored interrupt devices will use vectors 64-255.
The Provided Moded.fields File:
The provided moded.fields file comes with module descriptions for standard RBF, SBF, SCF, PIPE, NETWORK, UCM, and GFM module descriptors. It also includes a description for the init module.
234 Utilities Reference

1Utilities
mshell Command Interpreter
Syntax
mshell
OS
OS-9; OS-9 for 68K
Description
MShell is a command interpreter designed to help you become as productive as possible when working with the OS-9/OS-9 for 68K operating systems. It accomplishes this by providing keyboard shortcuts and a means to automate menial tasks. It is compatible with the current OS-9/OS-9 for 68K shell.
MShell started as a port of the OS-9 standard shell to OS-9 for 68K. From that point, enhancements replaced some built-in features of OS-9 and features unique to MShell were added. Now, MShell contains many of the same features as UNIX shells, as well as some OS-9/OS-9 for 68K specific options.
MShell Features
For More InformationMore Info More Information More Information More Information More
-6-
See Chapter 5: Using the mshell Utility for more information.
MShell has many features that do not exist in the standard OS-9/OS-9for 68K shell. These features fall into three basic categories:
• Command line interface.
• Procedure files.
• Built-In Commands and Command Line Options.
Utilities Reference 235

1 Utilities
mv Move a File/DirectoryFrom One Directory to Another
Syntax
mv [<opts>] <srcpath> [<srcpaths>] [<dstpath>]
OS
OS-9; OS-9 for 68K
Options
-f Forces move even if the <srcpath> is write-protected. (OS-9)
-r Rewrites existing files. (OS-9)
-w[=]<dir name> Moves specified file(s) to <dir name>. (OS-9)
-x Gets files from execution directory.
-z Gets file names from standard input.
-z[=]<file> Gets file names from <file>.
Description
The mv utility moves a file or directory from one directory into another.
You can also use the mv utility to do a rename operation although the rename utility is better suited for this purpose.
Type mv, the pathlist of the file or directory to move, then the pathlist of where it is to be moved. If more than one file is to be moved, type mv, the names of the files to be moved separated by spaces. Use the -w option to specify the directory where the files are to be moved.
Examples
Move joe from CMDS to CMDS/DAVEL.
$ mv CMDS/joe CMDS/DAVEL/joe
236 Utilities Reference

1Utilities
Move steve to current directory.
$ mv CMDS/steve
Move all the files directories in the current directory.
$ mv * -w=/h0/USR/YOU/YOURFILES
Move the files listed in whatfiles.
$ mv -z=whatfiles -w=/h0/USR/YOU/THESEFILES
Utilities Reference 237

1 Utilities
os9cmp Compares Two Binary Files
Description
Refer to cmp, os9cmp.
238 Utilities Reference

1Utilities
os9del Deletes a File
Description
Refer to del, os9del.
Utilities Reference 239

1 Utilities
os9dump Displays Formatted Dump
Description
Refer to dump, os9dump.
240 Utilities Reference

1Utilities
os9gen Builds and Links Bootstrap File
Syntax
os9gen [<opts>] <devname> {<path>}
OS
OS-9 for 68K
Options
-b[=]<num> Allocates <num> k bytes for use by os9gen. The default memory size is 64K.
-e Allows you to use large (greater than 64K) and/or non-contiguous files. Extended Boot. Bootstrap ROMs must support this feature.
-q[=]<file> Set sector zero pointing to <file>. Quick Boot.
-r Removes the pointer to the boot file. This file is not deleted.
-x Searches the execution directory for pathlists.
-z Reads the file names from standard input.
-z=<file> Reads the file names from <file>.
Description
The os9gen utility creates and links the OS9Boot file required on any disk from which OS-9 for 68K is to be bootstrapped.
You can use the os9gen utility to:
• Make a copy of an existing boot file.
Utilities Reference 241

1 Utilities
• Add modules to an existing boot file.
• Create an entirely new boot file for a different system.
Type os9gen and the name of the device on which to install the OS9Boot file.
The os9gen utility creates a working file called TempBoot on the device specified. Each file specified on the command line is opened and copied to the TempBoot file.
NoteNoteOnly super users (0.n) may use this utility. Also, you can only use the os9gen utility on format-enabled devices.
After all input files are copied to TempBoot, any existing OS9Boot file on the target device is renamed OldBoot. If an OldBoot file is already present, the os9gen utility deletes it before renaming OS9Boot.
TempBoot is then renamed OS9Boot. Its starting address and size are linked in the disk’s Identification Sector (LSN 0) for use by the OS-9 for 68K bootstrap firmware.
If your boot file is non-contiguous or larger than 64K, use the -e option.
NoteNoteYour bootstrap ROMs must support this feature. If they do not, you should not use this option.
If you use the -z option, the os9gen utility first uses the files specified on the command line and then the file names from its standard input, or from the specified pathlist, one pathlist per line. If the names are entered manually, no prompts are given and the end-of-file key (usually <escape>).
242 Utilities Reference

1Utilities
To determine what modules are necessary for your boot file, use the ident utility with the OS9Boot file that came with your system.
The -q option updates information in the disk’s Identification Sector by directing it to point to a file already contained in the root directory of the specified device.
The -q option is useful when restoring the OldBoot file as the valid boot on the disk. The os9gen utility renames the specified file to be OS9Boot and saves the current boot as described previously.
The -r option removes the pointer to the boot file but does not delete the file. This is useful if you delete the bootfile from your disk (using the del command).
Deleting the bootfile from the file structure does not remove the bootfile pointers from the disk’s Identification Sector. You can also use it to make a disk non-bootable without deleting the bootfile.
Examples
This command manually installs a boot file on device /d1 which is an exact copy of the OS9Boot file on device /d0.
$ os9gen /d1 /d0/os9boot
The following three methods manually install a boot file on device /d1. The boot file on /d1 is a copy of the OS9Boot file on device /d0 with the addition of modules stored in the files /d0/tape.driver and /d2/video.driver:
Method 1$ os9gen /d1 /d0/os9boot /d0/tape.driver /d2/video.driver
Method 2
$ os9gen /d1 /d0/os9boot -z/d0/tape.driver/d2/video.driver[ESCAPE]
Utilities Reference 243

1 Utilities
Method 3
$ os9gen /d1 -z/d0/os9boot/d0/tape.driver/d2/video.driver[ESCAPE]
You can automatically install a boot file by building a bootlist file and using the -z option to either redirect the os9gen utility’s standard input or use the specified file as input:
$ build /d0/bootlist Create file bootlist
? /d0/os9boot Enter first file name
? /d0/tape.driver Enter second file name
? /d2/video.driver Enter third file name
? * V1.2 of video driver Comment line
? [RETURN] Terminate build
$ os9gen /d1 -z </d0/bootlist Redirects standard input
$ os9gen /d1 -z=/d0/bootlist Reads input from pathlist
NoteNoteThe os9gen utility treats any input line preceded by an asterisk (*) as a comment.
The following command makes the OldBoot file the current boot and saves the current OS9BOOT file as OldBoot:
$ os9gen /d1 -q=oldboot
244 Utilities Reference

1Utilities
os9make Maintains, Updates, and RegeneratesGroups of Programs
Description
Refer to os9make.
Utilities Reference 245

1 Utilities
os9merge Copies and Combines Files to StandardOutput
Description
Refer to merge, os9merge.
246 Utilities Reference

1Utilities
p2init Links and Initializes An OS9P2 Module
Syntax
p2init <module>
OS
OS-9; OS-9 for 68K
Description
Use the p2init utility to install OS9P2 modules.
NoteNoteOnly the super user may use this utility.
The p2init utility initializes an OS9P2 system extension module after the operating system is already up and running. This provides additional functionality which would not be available when the OS9P2 module is initialized as part of the system startup.
You can also use the p2init utility to add OS9P2 modules to a running ROM-based system.
NoteNoteFor Version 3.0 of OS-9/Atomic OS-9 for 68K, FPU and FPSP math emulation modules may not be installed with the p2init utility.
Utilities Reference 247

1 Utilities
padrom Extends File Size
Syntax
padrom {<option(s)>} <size> <file> [<file>]
OS
OS-9; OS-9 for 68K
Options
-b[=]<num>[k] Specifies the buffer size in bytes to use. The ‘k’ sub-option converts <num> to k bytes. The default is 16k.
Description
Use the padrom utility when making the ROMs for OS-9 Board Support Packages (BSP).
The padrom utility appends bytes with a hex value of FF to the named file, extending the file to the specified <size>.
Examples
The following shows how to use the padrom utility to extend the size of the booter and modules files.
$ dir -e booter modules Owner Last modified Attributes Sector Bytecount Name ------- ------------- ---------- ------ --------- ---- 0.29 93/11/12 1142 ------wr 1CEB38 12153 booter 0.29 93/11/12 1143 ------wr 1CEB48 256 modules
If you try to pad a file to a size smaller than its current size, the padrom utility displays the following message.
$ padrom 0x2000 booterpadrom: file booter already bigger than 8192
This example specifies a hex value for <size>.
248 Utilities Reference

1Utilities
$ padrom 0x8000 booter
This example specifies a decimal value for <size>.
$ padrom 1024 modules$ dir -e booter modules Owner Last modified Attributes Sector Bytecount Name------- ------------- ---------- ------ --------- ---- 0.29 93/11/12 1144 ------wr 1CEB38 32768 booter 0.29 93/11/12 1144 ------wr 1CEB48 1024 modules
Utilities Reference 249

1 Utilities
park Park Hard Drive Heads
Syntax
park [<opts>] [<device>] [<opts>]
OS
OS-9
Description
The park utility parks hard drive heads.
250 Utilities Reference

1Utilities
paths Display Process Paths
Syntax
paths [<opts>] [<process id list>]
OS
OS-9; OS-9 for 68K
Options
-e Displays all processes of all users.
Description
The paths utility displays path information about processes running on the system owned by the user invoking the routine.
Processes can switch states rapidly, usually many times per second. Therefore, the display is a snapshot taken at the instant the command is executed and shows only those processes running at that exact moment.
Display information about specific processes by listing their process IDs in <process id list>.
The paths utility with no options displays ten pieces of information for each process:
Table 1-25 Process Information
Name Specification
Id Process ID
PId Parent process ID
Grp.usr Owner of the process (group and user)
Utilities Reference 251

1 Utilities
Examples$ paths -e Id PId Grp.Usr MemSiz Module & I/O 2 0 0.0 4.00k sysgo <h0:startup >>>term 3)term 3 2 0.0 52.00k mshell <>>>term 22 0 0.0 32.00k telnetdc <pks00 4)pkm00 5)nil 6)socket 30 0 0.0 20.00k routed <>>>nil 3)socket 31 0 0.0 2.00k ifman 32 0 0.0 2.00k sockman 35 0 0.0 24.00k telnetd <>>>nil 3)socket 36 0 0.0 24.00k ftpd <>>>nil 3)socket 37 22 0.190 52.00k mshell <>>>pks00 52 37 0.190 44.00k umacs <>>>pks00 55 3 0.0 40.00k paths <>>>term 56 0 0.0 64.00k ftpdc <>socket >>nil
MemSiz Amount of memory the process is using
Module & I/O
Process name and I/O paths:
If several of the paths point to the same pathlist, the identifiers for the paths are merged.
Table 1-25 Process Information (continued)
Name Specification
252 Utilities Reference

1Utilities
partition Partition OS-9/68k hard disks
Syntax
partition [<opts>] <device name> [<descs>] [<opts>]
OS
OS-9 for 68K
Options
-r Replace any existing files.
-w=<dir> Write partition descriptors to specified directory <dir>. Default is current directory.
-z=<file> Reads names of partition descriptors from <file>.
Description
OS-9 for 68K logical disk drives are limited to approximately 4GB in size. The partition utility facilitates breaking a large (greater than 4GB) drive up into a number of smaller logical drives. Using the partition utility, the size of each partition is specified after which a device descriptor is created for each partition. The created device descriptors can then be read in by the partition utility to allow subsequent modification of the partitions.
The partition utility takes the name of the device to be partitioned as follows:
partition /h0
The first action of partition is to create partitions for any space on the device that is not allocated. If descriptors for existing partitions were included on the command line or via the -z option, only the space not covered by those descriptors will be allocated. After completing the initial allocation, the following options display:
1. create new partition
Utilities Reference 253

1 Utilities
2. edit existing partition3. delete existing partition4. display partition information5. write device descriptors for partitions6. format a partition7. format all partitions8. exit
You enter the number of the action to be performed. For any numerical choice such as a partition number of command number, the letter ‘x’ can also be entered to abort the command (or exit the utility in the case of a command number.)
Create New Partition (1)
This option allows the creation of a new partition. You will are prompted for a name for the partition. The default name is the name of the device being partitioned followed by a number representing its partition number. For example, if the device being partitioned is named h1, the partition names will be h11, h12, etc. If the default name is acceptable, simply type the enter key. This is name of the device descriptor generated for the partition.
You are then prompted to enter the partition’s size as number of megabytes, number of gigabytes or percent of the total disk capacity. The default is the smaller of the maximum partition size or the amount of space remaining on the device. If the default size is acceptable, simply type the enter key. To specify megabytes enter the number (the number can optionally be followed by m and can be a decimal fraction) for example 214 or 214.3m. To specify gigabytes enter the number as a decimal fraction followed by g, for example 3.4g. To specify the percentage of the total drive capacity, enter the number followed by the % sign, for example 45%. If there is insufficient space left to allocate the partition, the partition size is set to the amount of space available. If the size specified is larger than the maximum of 4GB, the partition size is set to the maximum.
254 Utilities Reference

1Utilities
Edit Partition (2)
This option allows the size and name of a partition to be changed. You will be prompted to enter the partition number after which you will be prompted to enter the name and size of the partition as described above for Create New Partition (1).
Delete Partition (3)
This option deletes a partition. You are prompted to enter the partition number to delete. Use the delete option with care.
Display Partition Information (4)
This option allows you to view the name and size of each existing partition. If there is any disk space un-allocated, that information will also be displayed.
Write Device Descriptors (5)
This option causes the device descriptors for each partition to be generated. For each descriptor, a format enabled version is also created. The format enabled version has the suffix fmt appended to the partition name. The device descriptors by default are written to the BOOTOBJS directory in the current execution directory by default. This can be overridden using the -w option described above. If any of the files to be written already exist, you will be prompted as to whether you want to overwrite them or not. Using the -r option causes files to be overwritten without any prompting.
Format a Partition (6)
This option allows a single partition to be formatted. The partition is neither physically or logically formatted since this is not normally needed for SCSI drives.
Utilities Reference 255

1 Utilities
Format All Partitions (7)
This option allows all the defined partitions to be logically formatted. The user is prompted before each partition is formatted to ensure that none are accidentally overwritten. The partitions are neither physically or logically formatted since this is not normally needed for SCSI drives.
Exit (8)
This option exits the partition utility. If partition sizes have changed since the partitions were formatted, the user is prompted as to whether a format should be done. If the answer is yes, the Format All Partitions (7) option is invoked. If partition information has changed since the last time the device descriptors were written, you are prompted as to whether or not the descriptors should be written before exiting.
256 Utilities Reference

1Utilities
pcformat Creates a FAT File System for use with PCF
Syntax
pcformat [<opts>] {<devname>}
OS
OS-9
Options
-N Don’t create file system; just print out parameters
-B <path> Get bootstrap from file
-F <type> FAT type (12, 16, or 32)
-I <value> Volume ID
-L <str> Volume label (up to 11 chars)
-O <str> OEM string
-S <count> Bytes/sector
-a <count> Sectors/FAT
-b <count> Block size
-c <count> Sectors/cluster
-e <count> Root directory entries
-f <count> Standard format (sectors per track)
-h <count> Drive heads
-i <sec> File system info sector
-k <sec> Backup boot sector
-m <type> Media descriptor (0xf0, etc.)
-n <count> Number of FATs
-o <count> Hidden sectors
Utilities Reference 257

1 Utilities
-q Quiet (no prompt, just format)
-r <count> Reserved sectors
-s <count> File system size (sectors)
-u <count> Sectors/track
-? Displays the options
Description
The pcformat utility creates a PC file system on a low-level formatted random access device under PCF. It does not do low-level formatting or sector integrity checking. Instead, pcformat uses information in the device descriptor to create an empty PC file system that can then be used with PCF.
For many removable media devices, it is important to verify that the media being formatted has been low-level formatted and is free from errors. The low-level formatting and error checking should be done using the format utility.
The pcformat utility can format FAT12, FAT16 and FAT32 file systems with a variety of options.
NoteNotePCF and pcformat support FAT12, FAT16, and FAT32 file formats. Although PCF and pcformat have been tested to interoperate well, some FAT32 file system configurations are not supported by Windows®. It is recommended that FAT32 be used only on partitions 2GB and larger.
When formatting, pcformat will attempt to determine the size of the drive directly from the driver as well as the information in the device descriptor.
258 Utilities Reference

1Utilities
The pcformat utility supports the following standard floppy formats: 160, 180, 320, 360, 720, 1200, 1440, 2880. You can force a particular floppy format on any floppy device by using the –f option followed by the desired format.
pcformat /md0_3 –f 360
Utilities Reference 259
1 Utilities
pd Prints Working Directory
Syntax
pd [<opts>]
OS
OS-9; OS-9 for 68K
Options
-a Displays all directory paths.
-d Displays the current data directory.
-m Displays the current and alternate module directory paths. (OS-9)
-x Displays the path to the current execution directory.
Description
The pd utility displays a pathlist showing the path from the root directory to your current data directory.
Programs can use the pd utility to discover the actual physical location of files or by users to find their whereabouts in the file system.
The command pd -x displays the pathlist from the root directory to the current execution directory.
260 Utilities Reference
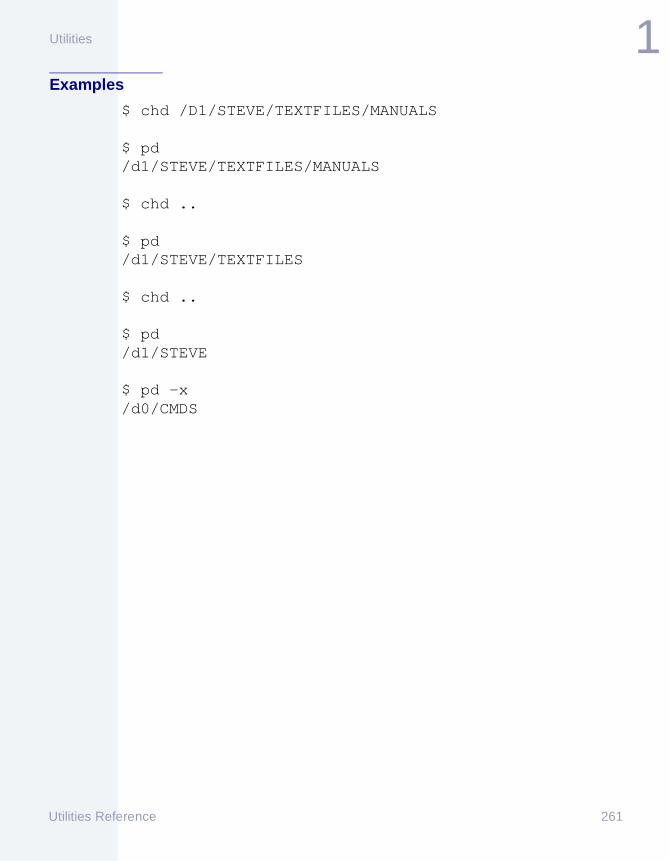
1Utilities
Examples
$ chd /D1/STEVE/TEXTFILES/MANUALS
$ pd/d1/STEVE/TEXTFILES/MANUALS
$ chd ..
$ pd/d1/STEVE/TEXTFILES
$ chd ..
$ pd/d1/STEVE
$ pd -x/d0/CMDS
Utilities Reference 261

1 Utilities
pinfo Partition Table Utility
Syntax
pinfo <device name>
OS
OS-9
Description
Although OS-9 only supports the use of four primary partitions it is possible to use DOS extended partitions with the PCF file manager.
To use DOS extended partitions device descriptors must be created which include the ’logical sector offset’ to the partition desired. Further, the ’logical unit number’ must match the extended partition primary entry.
To aid in creation of PCF DOS extended descriptors for OS-9, the pinfo utility may be used.
The pinfo utility displays the value of the ’logical unit number’ and ’logical sector offset’ required to create the new descriptor. Also, the "FMGR" section shows if the given partition is supported by PCF.
The pinfo utility displays information related to the way your hard disk is currently partitioned. If the partitions are changed new descriptors for the extended partitions are required.
The pinfo utility expects one argument, the device name. The device name should be the name of the RAW device descriptor and not a descriptor based on a partition.
IDE:/hcfmt or /hdfmt
SCSI:/hs0fmt, /hs1fmt through /hs7fmt
262 Utilities Reference

1Utilities
Examples
The following example of a DOS formatted hard disk contains one DOS primary partition, one DOS extended partition and ten DOS logical partitions.
$ pinfo /hcfmt
Primary PartitionsPartition LUN LSNOFFS Par_Type FMGR----------------------------------------------------------01 01 0x00000000 DOS 16-bit FAT >=32M PCF02 02 0x00000000 DOS Extended NA03 03 0x00000000 EMPTY NA04 04 0x00000000 EMPTY NA
================ Extended Partitions ====================
Partition LUN LSNOFFS Par_Type FMGR----------------------------------------------------------01 01 0x00064680 DOS 16-bit FAT >=32M PCF02 01 0x000c8d00 DOS 16-bit FAT >=32M PCF03 01 0x00191a00 DOS 16-bit FAT >=32M PCF04 01 0x001c3d40 DOS 16-bit FAT >=32M PCF05 01 0x001f6080 DOS 16-bit FAT >=32M PCF06 01 0x002283c0 DOS 16-bit FAT >=32M PCF07 01 0x0025a700 DOS 16-bit FAT >=32M PCF08 01 0x0028ca40 DOS 16-bit FAT >=32M PCF09 01 0x002bed80 DOS 16-bit FAT >=32M PCF10 01 0x002f10c0 DOS 16-bit FAT >=32M PCF
Utilities Reference 263

1 Utilities
Creating New Descriptors
Use editmod to create new descriptors for the DOS logical drives. There are three ways to do this.
Method 1. Create descriptor information in systype.h and create new makefiles. This is done the same way as stock descriptors are created.
Method 2. Cloning. This is the quickest method. If you are cloning an IDE PCF based descriptor, enter the following:
$ chd /h0/mwos/os9000/80386/ports/pcat/cmds/bootobjs/desc/rb1003$ copy mhc1 mhc5$ editmod -dPORT -e mhc5
1. module header2. Device descriptor data definitions3. PCF path options4. PCF Logical Unit Static Storage
Which? [?/1-4/p/t/a/w/q] 11. module owner’s group number : 02. module owner’s user number : 03. module name : "mhc1"4. access permissions : 0x5555. type/lang : 0xf016. rev/attr : 0x80007. edition : 1
Which? [?/1-7/p/t/a/w/q] 3module name : "mhc1"New string: mhc5
1. module owner’s group number : 02. module owner’s user number : 03. module name : "mhc5"4. access permissions : 0x5555. type/lang : 0xf016. rev/attr : 0x80007. edition : 1
Which? [?/1-7/p/t/a/w/q] p
264 Utilities Reference

1Utilities
1. module header2. Device descriptor data definitions3. PCF path options4. PCF Logical Unit Static Storage
Which? [?/1-4/p/t/a/w/q] p1. module header2. Device descriptor data definitions3. PCF path options4. PCF Logical Unit Static StorageWhich? [?/1-4/p/t/a/w/q] 3 1. number of surfaces : 5 2. verify disk writes (0=verify) : 1 3. device format : 0x8003 4. number of cylinders : 930 5. default blocks/track : 17 6. default blocks/track for trk0 : 17 7. segment allocation size : 1 8. block interleave offset : 1 9. track base offset : 010. block base offset : 011. # tries : 712. size of block in bytes : 51213. control word : 0x714. first write precomp cylinder : 12815. first reduced write current cylinder : 93016. park cylinder for hard disks : 017. lsn offset for partition : 018. max transfer size in terms of bytes : 0x10000
Which? [?/1-18/p/t/a/w/q] 17 lsn offset for partition : 0 New value: 0x00064680 1. number of surfaces : 5 2. verify disk writes (0=verify) : 1 3. device format : 0x8003 4. number of cylinders : 930 5. default blocks/track : 17 6. default blocks/track for trk0 : 17 7. segment allocation size : 1 8. block interleave offset : 1 9. track base offset : 010. block base offset : 011. # tries : 712. size of block in bytes : 512
Utilities Reference 265

1 Utilities
13. control word : 0x714. first write precomp cylinder : 12815. first reduced write current cylinder : 93016. park cylinder for hard disks : 017. lsn offset for partition : 41126418. max transfer size in terms of bytes : 0x10000Which? [?/1-18/p/t/a/w/q] p 1. module header 2. Device descriptor data definitions 3. PCF path options 4. PCF Logical Unit Static Storage
Which? [?/1-4/p/t/a/w/q] p 1. module header 2. Device descriptor data definitions 3. PCF path options 4. PCF Logical Unit Static Storage
Which? [?/1-4/p/t/a/w/q] 2 1. device port address : 0x1f0 2. logical unit number : 1 3. path descriptor size : 0x168 4. device type : 10 5. device mode capabilities : 0xffff 6. file manager name : "pcf" 7. driver name : "rb1003" 8. sequential or random : 2
Which? [?/1-8/p/t/a/w/q] 2logical unit number : 1New value: 1 1. device port address : 0x1f0 2. logical unit number : 1 3. path descriptor size : 0x168 4. device type : 10 5. device mode capabilities : 0xffff 6. file manager name : "pcf" 7. driver name : "rb1003" 8. sequential or random : 2
Which? [?/1-8/p/t/a/w/q] wWhich? [?/1-8/p/t/a/w/q] q
$ editmod -dPORT -l mhc5
module owner’s group number : 0
266 Utilities Reference

1Utilities
module owner’s user number : 0module name : "mhc5"access permissions : 0x555type/lang : 0xf01rev/attr : 0x8000edition : 1device port address : 0x1f0logical unit number : 1path descriptor size : 0x168device type : 10device mode capabilities : 0xfffffile manager name : "pcf"driver name : "rb1003"sequential or random : 2number of surfaces : 5verify disk writes (0=verify) : 1device format : 0x8003number of cylinders : 930default blocks/track : 17default blocks/track for trk0 : 17segment allocation size : 1block interleave offset : 1track base offset : 0block base offset : 0# tries : 7size of block in bytes : 512control word : 0x7first write precomp cylinder : 128first reduced write current cylinder : 930park cylinder for hard disks : 0lsn offset for partition : 411264max transfer size in terms of bytes : 0x10000drive initialized flag : 0x0interrupt vector : 0x4einterrupt level : 6interrupt priority : 10step rate : 2DMA transfer mode : 0drive logical unit number : 0controller id : 0total number of cylinders : 930
Method 3. If you want to automate the procedure show for Method 2, you can create script files to do the same job.
Utilities Reference 267

1 Utilities
-nx -tcopy mhc1 mhc5 -rfeditmod -e -dPORTS mhc5 >>>/nil13mhc5pp3170x00064680pp221wq
268 Utilities Reference

1Utilities
pr Prints Files
Syntax
pr [<opts>] {<path>}
OS
OS-9; OS-9 for 68K
Options
An equal sign (=) specifies the additional parameters are optional.
-c[=]<char> Uses <char> as the specified column separator. A <space> is the default column separator.
-d[=]<num> Specifies the actual page depth in lines (default is 66).
-f Pads the page using a series of \n (new line), instead of a \f (form feed).
-h[=]<num> Sets the number of blank lines after title line. The default is 5.
-k[=]<num> Sets the <num> columns that the output file prints for multi-column output.
-l[=]<num> Sets the left margin to <num>. The default is 0.
-m Prints files simultaneously, one file per column. If three files are given on the command line, each file is printed in its own column on the page.
-n[=]<num> Specifies the line numbering increment: <num>. The default is 1.
-o Truncates lines longer than the right margin. By default, long lines are wrapped around to the next line.
Utilities Reference 269

1 Utilities
-p[=]<num> Specifies the number of lines per page: <num>. The default is 61.
-r[=]<num> Sets the right margin to <num>. The default is 79.
-t Does not print the title.
-u[=]<title> Use specified title instead of file name. <title> may not be longer than 48 characters.
-x[=]<num> Sets the starting page number to <num>. The default is 1.
-z Reads the file names from standard input.
-z=<file> Reads the file names from <file>.
Description
The pr utility produces a formatted listing of one or more files to the standard output.
Type pr and the pathlist(s) of the files to list. The listing is separated into pages. Each page has the page number, the name of the listing, and the date and time printed at the top.
The pr utility can produce multi-column output. When printing multiple output columns with the -m option, if an output line exceeds the column width, the output line is truncated.
The pr utility can also print files simultaneously, one per column.
If files are not specified on the command line and the -z option is used, standard input is assumed to be a list of file names, one file name per input line, to print out.
If files are not specified on the command line and the -z option is not used, standard input is displayed on standard output.
Files and options may be intermixed.
270 Utilities Reference

1Utilities
A typical page of output consists of 66 lines of output. Therefore, the pr utility uses the following default parameters: 61 lines of output with 5 blank lines as a trailer. The 61 lines of output contain one line for the title, 5 blank lines for a header, and 55 lines of text. The trailer can be reduced or eliminated by expanding the number of lines per page.
Examples
The following example prints file1 using the default values of 55 lines of text per page, one line for the title, and 5 lines each for the header and trailer:
$ pr file1 >/p1
The following example prints file1 with no title. This uses 56 lines of text per page:
$ pr file1 -t >/p1
The following example prints file1 using 90 lines per page. Pagination begins with page 10:
$ pr file1 -x=10 p=90 >/p1
To display a numbered, unformatted listing of the data directory, type:
$ dir -u ! pr -n
Utilities Reference 271

1 Utilities
printenv Prints Environment Variables
Syntax
printenv
OS
OS-9; OS-9 for 68K
Description
The printenv utility prints any defined environment variables to standard output.
Example
$ printenvNAME=andyTERM=abm85LIST=/p1As_long_as_you_want=long_value
See Also
setenvunsetenv
For More InformationMore Info More Information More Information More Information More
-6-
See the Using OS-9 or Using OS-9 for 68K manuals for more information.
272 Utilities Reference

1Utilities
procs Displays Processes
Syntax
procs [<opts>][<process id list>]
OS
OS-9; OS-9 for 68K
Options
-a Displays alternate information.
-b Displays regular and alternate procs information.
-e Displays all processes of all users.
-t Displays thread information (OS-9 only; not valid for OS-9 for 68K systems).
-x Displays an extended process descriptor listing (OS-9 only; not valid for OS-9 for 68K systems).
Description
The procs utility displays a list of processes running on the system owned by the user invoking the routine.
Processes can switch states rapidly, usually many times per second. Therefore, the display is a snapshot taken at the instant the command is executed and shows only those processes running at that exact moment.
Display information about specific processes by listing their process IDs in <process id list>.
Utilities Reference 273

1 Utilities
The procs utility with no options displays ten pieces of information for each process:
Table 1-26 Process Information
Name Specification
Id Process ID
PId Parent process ID
Grp.usr Owner of the process (group and user)
Prior Initial priority of the process
MemSiz Amount of memory the process is using
Sig Last pending signal value for the process/exit status for dead process
CPU Time Amount of CPU time the process has used
Age Elapsed time since the process started
274 Utilities Reference

1Utilities
The command procs -a displays ten pieces of information:
• the process ID
• the parent process ID
• the process name, and
• standard I/O paths and
• six new pieces of information
S Process status:
* Currently executingw Waitings Sleepinga Activee Waiting on eventm Waiting for an mbufz Suspended process
Module & I/O
Process name and standard I/O paths:
< Standard input> Standard output>> Standard error output
If several of the paths point to the same pathlist, the identifiers for the paths are merged.
Table 1-26 Process Information (continued)
Name Specification
Utilities Reference 275
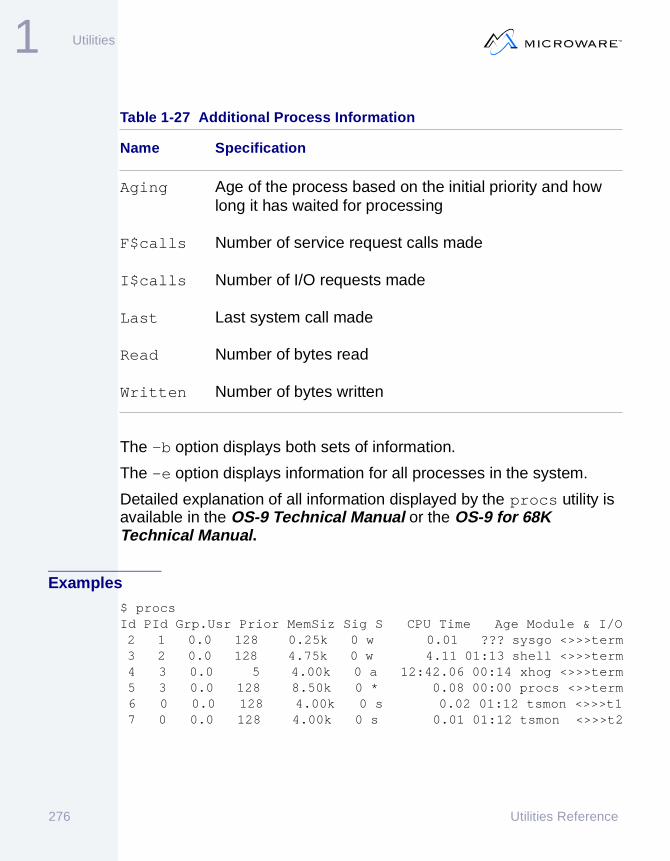
1 Utilities
The -b option displays both sets of information.
The -e option displays information for all processes in the system.
Detailed explanation of all information displayed by the procs utility is available in the OS-9 Technical Manual or the OS-9 for 68K Technical Manual.
Examples$ procsId PId Grp.Usr Prior MemSiz Sig S CPU Time Age Module & I/O 2 1 0.0 128 0.25k 0 w 0.01 ??? sysgo <>>>term 3 2 0.0 128 4.75k 0 w 4.11 01:13 shell <>>>term 4 3 0.0 5 4.00k 0 a 12:42.06 00:14 xhog <>>>term 5 3 0.0 128 8.50k 0 * 0.08 00:00 procs <>>term 6 0 0.0 128 4.00k 0 s 0.02 01:12 tsmon <>>>t1 7 0 0.0 128 4.00k 0 s 0.01 01:12 tsmon <>>>t2
Table 1-27 Additional Process Information
Name Specification
Aging Age of the process based on the initial priority and how long it has waited for processing
F$calls Number of service request calls made
I$calls Number of I/O requests made
Last Last system call made
Read Number of bytes read
Written Number of bytes written
276 Utilities Reference

1Utilities
$ procs -aId PId Aging F$calls I$calls Last Read Written Module & I/O 2 1 129 5 1 Wait 0 0 sysgo <>>>term 3 2 132 116 127 Wait 282 129 shell <>>>term 4 3 11 1 0 TLink 0 0 xhog <>>>term 5 3 128 7 4 GPrDsc 0 0 procs <>>>term 6 0 130 2 7 ReadLn 0 0 tsmon <>>>t1 7 0 129 2 7 ReadLn 0 0 tsmon <>>>t2
$ procs 1Id Pld Grp. Usr Prior MemSiz Sig S CPU Time Age Module & I/O1 0 0.0 65535 0.00k 0 86:42:07.19 90.58 Kernel <>>>term
Utilities Reference 277

1 Utilities
profile Reads Commands from File and Return
Syntax
profile <path>
OS
OS-9; OS-9 for 68K
Description
The profile utility causes the current shell to read its input from the named file and then return to its original input source which is usually the keyboard.
The file specified in <path> may contain any utility or shell commands, including those to set or un-set environment variables or to change directories. These changes remain in effect after the command executes. This is in contrast to calling a normal procedure file by name only, which a child shell would then execute. This would not affect the environment of the calling shell.
You can nest profile commands. That is, the file itself may contain a profile command for another file. When the latter profile command completes, the first one resumes.
A particularly useful application for profile files is within the .login and .logout files of a system’s users. For example, if each user includes the following line in their .login file, system-wide commands (such as common environments and news bulletins) can be included in the file /dd/SYS/login_sys:
profile /dd/SYS/login_sys
You can use a similar technique for .logout files.
278 Utilities Reference

1Utilities
NoteNoteBecause this is a built-in shell command, it does not appear in the CMDS directory.
Utilities Reference 279

1 Utilities
qsort In-Memory Quick Sort
Syntax
qsort [<opts>] {<path>}
OS
OS-9; OS-9 for 68K
Options
-c[=]<char> Specifies the field separation character. If an asterisk (*), question mark (?), or comma (,) are used as field separation characters, You must enclose the option and the character by quotation marks.
-f[=]<num> Specifies the sort field. Only one -f field is allowed on a command line.
-z Reads the file names from standard input.
-z=<file> Reads the file names from <file>.
Description
The qsort utility is a quick sort algorithm that sorts any number of lines up to the maximum capacity of memory.
Type qsort and the pathlist(s) of the file(s) to sort.
The qsort utility sorts the file(s) by a user-specified field or field one by default.
The field separation character defaults to a space if the separation character is not specified.
If the file names are not given on the command line, standard input is assumed.
280 Utilities Reference

1Utilities
NoteNoteMultiple separation characters in a row are counted as a single field separator. For example, if a comma is specified as the field separation character, three commas in a row (,,,) signify only one field separator. To create two null fields, you must insert a space between each comma (, , ,).
Examples
$ qsort file1 file2 file3 Individually sorts the files and displays.
$ list file1 file2 file3 ! qsortSorts the files together and displays.
$ dir -ue ! qsort -f=2 Sorts extended directory listing by entry date, field 2.
$ qsort file -f=2 "-c=*" Sorts file by field 2 using an asterisk (*) as the field separation character.
$ qsort file -f=2 "-c=," Sorts file by field 2 using a comma (,) as the field separation character.
$ qsort -z Reads file names from standard input.
Utilities Reference 281

1 Utilities
rename Changes File Name
Syntax
rename [<opts>] <path> <new name>
OS
OS-9; OS-9 for 68K
Options
-f Forces rename even if the file is write-protected (OS-9 only).
-x Indicates that <path> starts at the current execution directory. You must have execute permission for the specified file.
Description
The rename utility assigns a new name to the mass storage file specified in the pathlist.
Type rename, followed by the name of the file to rename, followed by the new name.
You must have write permission for the file to change its name.
You cannot use the names “.” or “..” for <path>.
Examples
$ dir Directory of . 16:22:53blue myfile$ rename blue purple$ dir Directory of . 16:23:22myfile purple
282 Utilities Reference

1Utilities
$ rename /h0/HARRY/test1 test2$ rename -x screenclear clearscreen
Utilities Reference 283

1 Utilities
romsplit Splits File
Syntax
romsplit {<optopn(s)>} {<path>}
OS
OS-9; OS-9 for 68K; WIN; UNIX
Options
-b[=]<size> Specifies the buffer size in k bytes. Defaults to 16k.
-q Splits the input file into four files.
-x Reads the input file from execution directory (OS-9, OS-9 for 68K only).
Description
The romsplit utility splits the input file specified by <path> into two or four files.
The romsplit utility converts a ROM object image into an 8-bit wide file. This is useful when a PROM programmer cannot burn more than one PROM at a time and the system has the ROMs addressed as 16-bit or 32-bit wide memory.
If the -q option is not specified, the romsplit utility copies the even bytes of data to a new file with the same name with a .0 extension. The odd bytes are copied to a new file with the same name with a .1 extension.
284 Utilities Reference

1Utilities
If the -q option is specified, the following copying scheme is used:
Table 1-28 Copying Data
Byte Number Destination File
0, 4, 8, 12 etc. <path>.0
1, 5, 9, 13 etc. <path>.1
2, 6, 10, 14 etc. <path>.2
3, 7, 11, 15 etc. <path>.3
Utilities Reference 285

1 Utilities
save Saves Memory Module(s) to File
Syntax
save [<opts>] {<modname>}
OS
OS-9; OS-9 for 68K
Options
-f[=]<path> Saves all specified modules to <path>.
-r Rewrites existing files.
-x Saves modules into the current execution directory.
-z Reads the module names from standard input.
-z=<file> Reads the module names from <file>.
Description
The save utility copies the specified module(s) from memory into your current data directory. The file(s) created in your directory have the same name(s) as the specified module(s).
Type save, followed by the name(s) of the module(s) to save. <modname> must exist in the module directory when saved.
The new file is given access permissions for all modes except public write.
If you specify more than one module, each module is stored in a separate file, unless you use the -f option. In that case, all modules listed are saved in the specified file.
286 Utilities Reference

1Utilities
NoteNoteTo save a module, the module must have read access permission for either your group or user ID.
The save utility uses the current data directory as the default directory. You should generally save executable modules in the default execution directory.
Examples
$ save -x dir copy$ save -f=/d1/math_pack add sub mul div
Saving separate module directories in OS-9 requires that you either use chm to change the module directory or create a directory of the same name as the module directory to save.
$ makmdir MYMODS create module directory
$ makdir MYMODS create directory of same name
$ load -dw=MYMODS modules load modules into module directory
$ mdir -u ! save -z save modules back to disk
$ mdir -u ! save -z -f=memmodssave modules to a single file
Utilities Reference 287

1 Utilities
set Sets Shell Options
Syntax
set [<opts>]
OS
OS-9; OS-9 for 68K
Options
Refer to your shell documentation for available options.
Description
The set utility changes shell options for the individual shell in which they are declared.
To change the options for your current shell, enter set and the desired shell options. This command is the equivalent of typing the options directly after the shell prompt on the command line. This is the preferred method of changing shell parameters within procedure files because of its clarity.
The hyphen that usually proceeds declared options is unnecessary when using the set command.
The options specified by the set utility change the shell parameters only in the shell in which they are declared. All descendant shells have the default parameters unless changed within the new shell.
NoteNoteset is a built-in shell command. Therefore, it is not in the CMDS directory.
288 Utilities Reference

1Utilities
NoteNoteMShell allows the set command to be used to examine the current value of all options. Entering the command line set<cr> displays all shell options. See mshell for more information.
Examples
All commands on the same line have the same effect:
$ set x $ set -x $ -x$ set xp="JOE" $ set -xp="JOE" $ -xp="JOE"
Utilities Reference 289

1 Utilities
setenv Sets Environment Variables
Syntax
setenv <name> <evalue>
OS
OS-9; OS-9 for 68K
Description
The setenv utility sets environment variables within a shell for use by the individual shell’s child processes.
<name> and <evalue> are strings stored in the environment list by shell. These variables are known to the shell in which they are defined and are passed on to descendent processes from that shell.
NoteNoteDo not confuse setenv with the shell set command. It has a completely different function. The setenv command is a built-in shell command. Therefore, it is not in the CMDS directory.
Examples
$ setenv PATH ../h0/CMDS:/d0/CMDS:/dd/CMDS$ setenv TERM abm85$ setenv _sh 0$ setenv As_long_as_you_want long_value
290 Utilities Reference

1Utilities
setime Activates and Sets System Clock
Syntax
setime [<opts>] [y m d h m s [am|pm]]
OS
OS-9; OS-9 for 68K
Options
-d Does not echo date/time when set.
-s Reads time from battery backed up clock.
Description
The setime utility sets the system date and time. Once set, it activates the system interrupt clock.
Type setime, and enter the year, month, day, hour, minute, second, and am or pm as parameters on the command line.
The setime utility does not require field delimiters, but allows you to use the following delimiters between the year, month, day, etc.:
colon (:), semicolon (;), slash (/), comma (,), or space ( )
If semicolons are used as field delimiters, the date and time string must be enclosed by quotes so that the semicolons are not interpreted by the shell. For Example
$ setime "91;1;15;1;25;30;pm"
If parameters are not given, the setime utility issues the prompt:
$ setime yy/mm/dd hh:mm:ss [am/pm]Time:
Utilities Reference 291

1 Utilities
The yy field in the setime utility works as follows: for each yy value from 70 to 99, the corresponding year value is 1970 through 1999. For each yy value from 00 to 69, the corresponding year value is 2000 through 2069.
When no am|pm field is specified, the system time uses the 24 hour clock. For example, 15:20 is 3:20 pm. Midnight is specified as 00:00. Noon is specified as 12:00. Using the am|pm field allows you to use the 12 hour clock. If a conflict exists between the time and the am|pm field (such as 15:20 pm) the system ignores the am/pm designation.
NoteNoteThe setime utility uses the date utility to echo the date and time after it is set.
NoteNoteThe system ticker is required to be running so setime time sharing operation can commence. The OS-9 kernel automatically starts the system ticker during system cold start unless the init module’s M$Compat flag (B_NoClock) is set. If the system has a battery-backed clock, this command also sets the system’s date and time.
If this system does not have a battery-backed clock, (or the init module flag is set), you should run this utility to set the system date and time for the file system.
Systems with Battery Backed Up Clocks
The setime utility should still be run to start timeslicing, but you only need to give the -s. The date and time are read from the clock.
292 Utilities Reference

1Utilities
See Also
The date utility.
Examples
$ setime 91 01 13 15 45Set to: January 13, 1991, 3:45 PM
$ setime 910113 154500 Set to: January 13, 1991, 3:45 PM
$ setime 91/01/13/3/45/pmSet to: January 13, 1991, 3:45 PM
$ setime -s For systems with a battery-backup clock sets time to the value of the battery-backed clock.
If no parameters are specified, the user is prompted:
$ setime yy/mm/dd hh:mm:ss [am/pm]Time: 91 01 13 15 45January 13, 1991 Sunday 3:45:00 pm
Utilities Reference 293

1 Utilities
setpr Sets Process CPU Priority
Syntax
setpr <procID> <priority>
OS
OS-9; OS-9 for 68K
Description
The setpr utility changes the CPU priority of a process.
Type setpr, the process ID, and the new priority value of the process to change.
The setpr utility may only be used with a process having your ID. Use procs to obtain the ID number and present priority of any current process.
The priority number is a decimal number in the range of 1 (lowest) to 65535 (hex FFFF).
NoteNoteThis command does not appear in the CMDS directory as it is a built-in shell command.
Example
$ setpr 8 250 Change the priority of process number 8 to 250
294 Utilities Reference

1Utilities
shell Command Interpreter
Syntax
shell [[set] <arglist>]
OS
OS-9; OS-9 for 68K
Options
-a Echoes command line if altered after entry. (OS-9)
-na Does not echo altered command line. (OS-9)
-c=<num> Specifies the number of previously executed commands the shell should “remember.” This provides a history of your commands. If <num> is not specified, the default is 40. (OS-9)
-nc Does not keep a command line history. (OS-9)
-e Prints error messages from /dd/SYS/errmsg.
-e=<file> Prints error messages from <file>.
-ne Does not print error messages, only error numbers. This is the default.
-h Displays the command’s history number in front of the command line prompt. This is the default option. (OS-9)
-nh Does not display the command’s history number. (OS-9)
Utilities Reference 295

1 Utilities
-l Requires the logout command to terminate the login shell. End-of-File <eof> does not terminate the shell.
-nl Terminates the login shell when using end-of-file <eof>. The <Esc> key normally sends an <eof> to the shell.
-p Displays prompt. The default prompt is $ (dollar sign).
-p=<string> Sets current shell prompt equal to <string>.
-np Does not display prompt.
-q Passes “assign”s from shell to shell. (OS-9)
-nq Does not pass “assign”s from shell to shell. (OS-9)
-s Saves your command history from one login session to the next. The command history is saved in a .history file in your home directory. (OS-9)
-ns Does not save your command history from one login session to the next. This is the default. (OS-9)
-t Echoes input lines.
-nt Does not echo input lines. This is the default.
-v Displays a message using verbose mode for each directory searched when executing a command.
-nv Turns off verbose mode.
-x Aborts process upon error. This is the default.
-nx Does not abort on error.
296 Utilities Reference
1Utilities
Description
The shell utility is the operating system’s command interpreter program. It reads data from its standard input which is usually the keyboard or a file and interprets the data as a sequence of commands.
The basic function of the shell utility is to initiate and control execution of other programs.
See Also
For more information about using the shell utility, see Chapter 6: Using the shell Utility.
Utilities Reference 297

1 Utilities
sleep Suspends Process for Period of Time
Syntax
sleep [<opts>] <num>
OS
OS-9; OS-9 for 68K
Options
-s Changes count representation to seconds.
Description
The sleep utility puts your process to sleep for a number of ticks or seconds.
This utility is generally used to generate time delays in procedure files.
Type sleep, followed by the number of ticks you want the process to sleep.
A tick count of one causes the process to give up its current time slice and return immediately.
A tick count of zero causes the process to sleep indefinitely, usually until awakened by a signal.
The duration of a tick is system-dependent.
NoteNoteOnly one number may be used on the command line. If none is specified, <num> defaults to zero.
298 Utilities Reference

1Utilities
Examples
$ sleep 25 Sleep for 25 ticks.
$ sleep -s 1000 Sleep for 1000 seconds.
Utilities Reference 299

1 Utilities
su Fork a New Shell with a New User ID
Syntax
su <name> [<,>] <password>
OS
OS-9; OS-9 for 68K
Options
-p Don’t change prompt.
Description
The su utility allows you to start a new shell with a different user ID. This allows you to change user ID’s without logging off and logging back on to the system. The system’s password file is searched for the name and password given. If a matching entry is found in the password file, a new shell is forked with the associated user ID specified in the password file entry.
300 Utilities Reference

1Utilities
suspend De-activate an Active Process
Syntax
suspend <process id>
OS
OS-9
Description
The suspend utility de-activates or suspends an active process.
Type suspend and the process ID of the process you wish to suspend. Obtain the process ID from the procs utility.
The suspend utility uses the _os_suspend system call to remove the process from the system’s active queue. It places the process in a limbo state. While it is in this limbo state, it is not a member of any system queue.
The queue identifier for suspended processes is a z. This indicates an inactive state.
WARNING!You must be extremely careful not to suspend a process that currently owns a device. If a process is suspended while using a device, the device is inaccessible until the process is activated.
NoteNoteOnly super users may suspend an active process of another user.
Utilities Reference 301

1 Utilities
Example$ procs -eId PId Grp.Usr Prior MemSiz Sig S CPU Time Age Module & I/O2 0 0.0 128 30.75k 0 w 0.04 0:10 tsmon <>>>term3 5 0.0 128 11.00k 0 a 7.00 0:01 eatmpu <>>>term4 0 0.0 128 30.75k 0 s 0.04 0:10 tsmon <>>>t35 2 0.0 128 9.00k 0 w 3.09 0:10 shell <>>>term6 5 0.0 128 35.25k 0 * 0.07 0:00 procs <>>term >dd$ suspend 3
$ procs -eId PId Grp.Usr Prior MemSiz Sig S CPU Time Age Module & I/O2 0 0.0 128 30.75k 0 w 0.04 0:10 tsmon <>>>term3 5 0.0 128 11.00k 0 z 8.73 0:01 eatmpu <>>>term4 0 0.0 128 30.75k 0 s 0.04 0:10 tsmon <>>>t35 2 0.0 128 9.00k 0 w 3.46 0:10 shell <>>>term6 5 0.0 128 35.25k 0 * 0.05 0:00 procs <>>term >dd
$ procs -eId PId Grp.Usr Prior MemSiz Sig S CPU Time Age Module & I/O2 0 0.0 128 30.75k 0 w 0.04 0:10 tsmon <>>>term3 5 0.0 128 11.00k 0 z 8.73 0:01 eatmpu <>>>term4 0 0.0 128 30.75k 0 s 0.04 0:10 tsmon <>>>t35 2 0.0 128 9.00k 0 w 3.47 0:10 shell <>>>term6 5 0.0 128 35.25k 0 * 0.05 0:00 procs <>>term >dd
See Also
The activ utility.
302 Utilities Reference

1Utilities
sysid Print System Identification
Syntax
sysid [<opts>]
OS
OS-9
Options
-a Prints reserved string.
Description
The sysid utility prints out the identification information of the system. This information includes the OEM number, serial number, specific processor number, processor type, floating point processor, time zone, and the system copyright message.
Utilities Reference 303

1 Utilities
tape Tape Controller Manipulation
Syntax
tape {<opts>} [<dev>]
OS
OS-9; OS-9 for 68K
Options
-b[=<num>] Skips the specified number of blocks. The default is one block. If <num> is negative, the tape skips backward.
-e=<num> Erases a specified number of blocks of tape. (* is to end of tape.)
-f[=<num>] Skips the specified number of tapemarks. The default is one tapemark. If <num> is negative, the tape skips backward.
-o Puts tape off-line.
-r Rewinds the tape.
-s Determines the block size of the device.
-t Retains the tape.
-w[=<num>] Writes a specified number of tapemarks. The default is one tapemark.
-z Reads a list of device names from standard input. The default device is /mt0.
-z=<file> Reads a list of device names from <file>.
304 Utilities Reference

1Utilities
NoteNoteIf you specify more than one option, the tape utility executes each option function in a specific order. Therefore, you can skip ahead a specified number of blocks, erase, and then rewind the tape all with the same command.
Description
The tape utility provides a means to access a tape controller from a terminal. The tape utility can rewind, erase, skip forwards and backwards, and write tapemarks to a tape.
If the tape device <dev> is not specified on the command line and the -z option is not used, tape uses the default device /mt0.
The order of option execution is as follows:
1. Get device name(s) from the -z option.
2. Skip the number of tapemarks specified by the -f option.
3. Skip the number of blocks specified by the -b option.
4. Write a specified number of tapemarks.
5. Erase a specified number of blocks of tape.
6. Rewind the tape.
7. Put the tape off-line.
Examples
$ tape /mt0 -r Rewind tape on device /mt0.
$ tape -f=5 -e=2 -r Skip forward five files on device /mt0, erase the next two blocks, and then rewind the tape.
Utilities Reference 305

1 Utilities
tapegen Creates a bootable tape
Syntax OS-9 for 68K
tapegen [<opts>] <filename> <filename>
Syntax OS-9
tapegen [<opts>] <devnam> [<filename>] [<opts>]
OS
OS-9; OS-9 for 68K
Options
-b=<bootfile> Installs an OS-9 for 68K boot file. (OS-9 for 68K)
-b[=]<num> Use buffer of <num> kilobytes. (OS-9)
-bz Reads boot module names from standard input. (OS-9 for 68K)
-bz=<bootlist> Reads boot module names from the specified bootlist file. (OS-9 for 68K)
-c Checks and displays header information. (OS-9 for 68K)
-d[=]<dev> Specifies the tape device name. The default is /mt0. (OS-9 for 68K)
-i[=]<file> Installs an initialized data file on the tape. This is usually a RAM disk image. (OS-9 for 68K)
-o Takes the tape drive off-line when finished. (OS-9 for 68K)
-s Swaps bytes in tape header. (OS-9)
-t[=]<target> Specifies the name of the target system. (OS-9 for 68K)
306 Utilities Reference

1Utilities
-v[=]<volume> Specifies the name of the tape volume. (OS-9 for 68K)
-x Searches execution directory for files. (OS-9)
-z Reads list of files from standard input.
-z=<file> Reads file names from the specified file.
Description
The tapegen utility creates the “bootable” tape.
The tapegen utility performs a function similar to the os9gen utility. Both utilities place the bootstrap file on the media and mark the media identification block with information regarding the bootstrap file. In addition, the tapegen utility can add an initialized data on the tape, for application-specific purposes.
Type tapegen followed by any desired options.
OS-9 for 68K Examples
The following example makes a bootable tape. The disk image is derived from the /dd device.
$ tapegen -b=OS9Boot.tape -i=/dd@ “-v=OS-9/68K Boot Tape” -t=MySystem
This example makes a bootable tape with no initialized data file. The “header” information is displayed after writing the tape.
$ tapegen -b=OS9Boot.h0 -c
OS-9 Example$ chd /h0/MWOS/OS9000/603/PORTS/MVME1603/CMDS/BOOTOBJS/BOOTFILE
$ tapegen /mt0 h0_scsi -b400
$ chd /h0/MWOS/OS9000/603/PORTS/MVME1603
$ tapegen /mt0 -b400 -z=BOOTLIST/h0_scsi.bl
Utilities Reference 307

1 Utilities
tapestart Initialize RBF Device from Tape
Syntax
tapestart [<opts>] [<device name>] [<opts>]
OS
OS-9 for 68K
Options
<device name> RBF device to initialize (defaults to whatever is specified in the init module).
-d=<tdevname> Specifies the tape device (default is ‘/mt0’).
-o Forces the tape drive “offline” when finished.
NoteNoteOn some drives the -o option ejects the tape.
Description
This utility is used to initialize the ram disk when booting off tape.
308 Utilities Reference

1Utilities
tar Tape Archive
Syntax
tar <options> <file or directory names>
OS
OS-9; OS-9 for 68K
Options
-b N Specifies blocking factor N (block size = Nx512 bytes).
-B Re-blocks as we read.
-c Creates an archive.
-D Dumps record number within archive with each message.
-e Swaps bytes within 16-bit hunks.
-f F Reads/writes archive from file or device F.
-i Ignores blocks of zeros in the archive, which normally mean EOF.
-k Keeps existing files, does not overwrite them from the archive.
-m Does not extract file modified time.
-o Writes an old V7 format archive, rather than P1003 format.
-p Extracts protection information.
-s Sorts list of names to extract to match the archive.
-t Lists a table of contents of an archive.
-T F Gets names to extract or create from file F.
Utilities Reference 309

1 Utilities
-v Lists (verbosely) what files we process.
-x Extracts files from an archive.
Description
The tar utility archives multiple files or directories onto a magnetic tape or file, lists a table of contents of an archive, or restores (extracts) multiple files or directories from a tape to another media maintaining integrity of attributes as archived.
The tar utility’s action is controlled by the first option indicating exactly one function from the set -c, -t, or -x.
Other arguments to the tar utility are file or directory names that specify which files to archive, list, or extract.
In all cases, the appearance of a directory name refers recursively to the files and subdirectories of that directory.
Example
$ tar cvf tarfile *.outputdos.outputdosexxp.outputexpr.output$ tar tvf tarfile-rw------- 110/30 21056 Jun 27 14:29 1994 dos.output-rw------- 110/30 9 Jul 11 11:48 1994 dosexp.output-rw------- 110/30 9 Jul 11 12:46 1994 expr.output$ tar xvf tarfile-rw------- 110/30 21056 Jun 27 14:49 1994 dos.output-rw------- 110/30 9 Jul 11 11:48 1994 dosexp.output-rw------- 110/30 9 Jul 11 12:46 1994 expr.output
310 Utilities Reference

1Utilities
tee Copies Standard Input to Multiple OutputPaths
Syntax
tee {<path>}
OS
OS-9; OS-9 for 68K
Description
The tee utility is a filter that copies all text lines from its standard input to its standard output and any other additional pathlists given as parameters.
Type tee and the pathlist(s) to which standard input is to be redirected. This utility is generally used with input redirected through a pipe.
Examples
The example below uses a pipeline and the tee utility to simultaneously send the output listing of dir to the terminal, printer, and a disk file:
$ dir -e ! tee /printer /d0/dir.listing
This example sends the output of an assembler listing to a disk file and the printer:
$ asm pgm.src l ! tee pgm.list >/printer
This example broadcasts a message to three terminals:
$ echo WARNING System down in 10 minutes ! tee /t1 /t2 /t3
Utilities Reference 311

1 Utilities
tmode Changes Terminal Operating Mode
Syntax
tmode [<opts>] [<arglist>]
OS
OS-9; OS-9 for 68K
Options
-a Prints input mapping table values in ASCII format. (OS-9)
-c Prints input mapping table values as control characters. (OS-9)
-h Prints input mapping table values in hexadecimal format. (OS-9)
-v Displays all mapped control characters including those passed through. (OS-9)
-w=<path#> Changes the path number <path#> affected.
Description
The tmode utility displays or changes the operating parameters for a path. It accomplishes this by getting and optionally setting a path’s options.
The changes made by the tmode utility only last as long as the path that it modifies lasts. That is, if the modified path is closed the modifications are lost. This differs from the xmode utility in that it modifies the default options used to create paths so any changes made with it are permanent, but largely do not effect any open paths. See your technical reference manual for more information on paths and the xmode utility documentation for more information on permanently changing path and device options.
312 Utilities Reference

1Utilities
NoteNoteYou can only use tmode on paths to SCF, GFM, or UCM devices.
To change the operating parameters of the path to your terminal, type tmode and any parameters you want changed. If parameters are not given, the tmode utility displays the present value for the each path option. Otherwise, the tmode utility processes the parameter(s) given on the command line.
Parameters are given in a variety of ways. If the parameter to be changed is either enabled or disabled (such as pause or echo) then the option is enabled by just specifying the name of the option.
tmode pause Enables the pause option.
tmode echo Enables the echo option.
To disable these types of options, the option name is specified prefixed with the word "no".
tmode nopause noecho Disables the pause and echo options.
If the parameter has a name and a value then these are specified together, separated by an equal sign. Generally, the value 0 disables an option. For example, to disable xon and xoff processing for a path use the command line.
tmode xon=0 xoff=0 Disables XON and XOFF processing options
For OS-9 for 68K, the value is the hex number for the option (0x is implied). For OS-9, the value is either the hex value (preceded by 0x), the "control character" (caret [^] followed by the character), or the ASCII mnemonic for the character.
To return one of these type values to its default, use the name of the option without the equal sign and value.
tmode xon xoff Re-enables XON and XOFF options with default values
Utilities Reference 313

1 Utilities
For OS-9, setting the character mapping table is accomplished by either specifying the character to be mapped and the behavior or the behavior followed by the character to be mapped. The character can be expressed by either the hex value (preceded by 0x), the "control character" (caret [^] followed by the character), or the ASCII mnemonic for the character. For example, to add ^Y with IGNORE mapping you could use any of these command line arguments:
^Y=IGNORE IGNORE=^Y 0x19=IGNORE IGNORE=0x19 EM=IGNORE IGNORE=EM
Use the -w=<path#> option to specify which path number to affect. If none is given, standard input is affected.
NoteNoteIf you use the tmode utility in a shell procedure file, you must use -w=<path#> to specify one of the standard paths other than standard input (1 or 2) to change the terminal’s operating characteristics.
The change remains in affect until the path is closed. For a permanent change to a device characteristic, you must change the device’s initial operating parameters using xmode. See the xmode utility for more information.
OS-9 for 68K:Two of the options that are displayed by tmode effect all paths open to the device: type and baud. baud is the baud rate for the device and type contains bit-fields for the word size, stop bits, and
314 Utilities Reference

1Utilities
parity. Baud is set by setting the baud option. The bit-fields for the word size, stop bits, and parity portions of the type option are set by using the cs, stop, and par options.
Table 1-29 tmode Parameter Names
OS-9 for 68K Name
OS-9Name Specification
abort=h (See xmode.)
Aborts character (normally <control>C, default = 03).
For OS-9 for 68K, numeric value of character in hexadecimal.
For OS-9, numeric value of character in hexadecimal if prefixed with 0x, "control character" when prefixed with caret (^), or ASCII mnemonic.
baud=n (See xmode.)
Baud rate: The baud rate may currently be set to the following values:
n = 50 300 2400 19200 57600 75 600 3600 38400 115200 110 1200 4800 56000 midi 124.5 1800 7200 64000 extern 150 2000 9600 31250
Utilities Reference 315

1 Utilities
bell=h bell=h Sets bell (alert) output character (default = 07).
For OS-9 for 68K, numeric value of character in hexadecimal.
For OS-9, numeric value of character in hexadecimal if prefixed with 0x, "control character" when prefixed with caret (^), or ASCII mnemonic.
bsb bsb Erases on backspace. Backspace characters are echoed as a backspace-space-backspace sequence. Default.
bse=h Sets output backspace character (default = 08).
For OS-9 for 68K, numeric value of character in hexadecimal.
bsl del Backspaces over line. Lines are deleted by sending backspace-space-backspace sequences to erase the line. Default.
Table 1-29 tmode Parameter Names (continued)
OS-9 for 68K Name
OS-9Name Specification
316 Utilities Reference

1Utilities
bsp=h bsp=h OS-9 for 68K: Sets the backspace input and output character (normally, control-H, default = 08).
OS-9: Sets the backspace output character.
For OS-9 for 68K, numeric value of character in hexadecimal.
For OS-9, numeric value of character in hexadecimal if prefixed with 0x, "control character" when prefixed with caret (^), or ASCII mnemonic.
cs=n (See xmode.
Sets character length using one of the following values:
n = 8, 7, 6 or 5 (bits)
Changing character length changes the type value.
del=h (See Table 1-29.)
Sets input delete line character (normally <control>X, default = 18).
For OS-9 for 68K, numeric value of character in hexadecimal.
dup=h (See Table 1-29.)
Sets the duplicate last input line character (normally <control>A, default = 01).
For OS-9 for 68K, numeric value of character in hexadecimal.
Table 1-29 tmode Parameter Names (continued)
OS-9 for 68K Name
OS-9Name Specification
Utilities Reference 317

1 Utilities
echo echo Inputs characters echoed back to terminal. Default.
eof=h eof=h For OS-9 for 68K, sets end-of-file input character (normally <esc>, default = 1B) that causes an EOS_EOF to be returned when entered as the first character of a read or readln system call. Numeric value of character in hexadecimal.
For OS-9, it sets the character that will appear in the input buffer when a character mapped to endofile is entered as the non-first character of a read or readln system call. Numeric value of character in hexadecimal if prefixed with 0x, "control character" when prefixed with caret (^), or ASCII mnemonic.
eor=h eor=h Sets end-of-record input character (normally <cr>, default = 0D).
For OS-9 for 68K, numeric value of character in hexadecimal.
For OS-9, numeric value of character in hexadecimal if prefixed with 0x, "control character" when prefixed with caret (^), or ASCII mnemonic.
lf lf Auto line feed on. Line feeds are automatically echoed to terminal on input and output carriage returns. Default.
Table 1-29 tmode Parameter Names (continued)
OS-9 for 68K Name
OS-9Name Specification
318 Utilities Reference
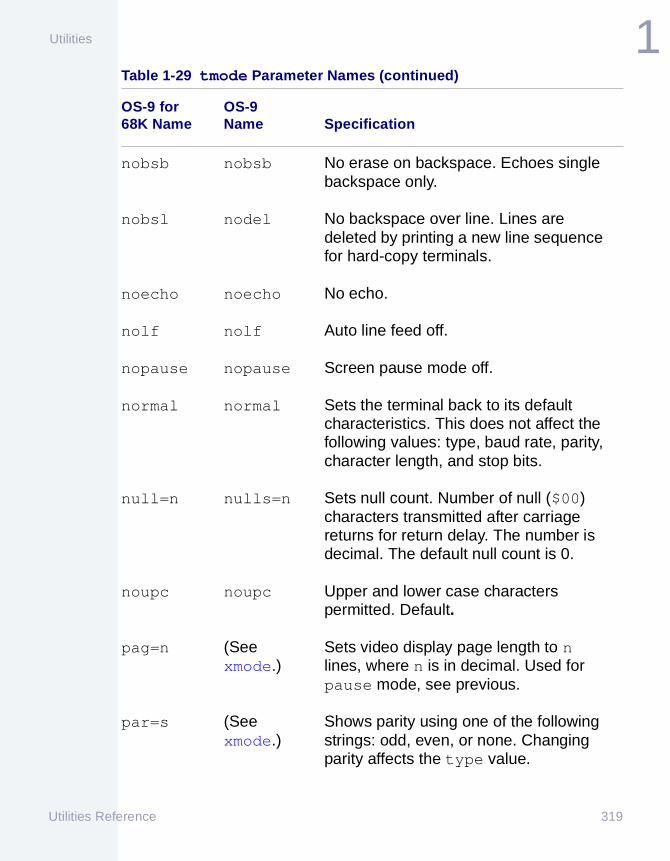
1Utilities
nobsb nobsb No erase on backspace. Echoes single backspace only.
nobsl nodel No backspace over line. Lines are deleted by printing a new line sequence for hard-copy terminals.
noecho noecho No echo.
nolf nolf Auto line feed off.
nopause nopause Screen pause mode off.
normal normal Sets the terminal back to its default characteristics. This does not affect the following values: type, baud rate, parity, character length, and stop bits.
null=n nulls=n Sets null count. Number of null ($00) characters transmitted after carriage returns for return delay. The number is decimal. The default null count is 0.
noupc noupc Upper and lower case characters permitted. Default.
pag=n (See xmode.)
Sets video display page length to n lines, where n is in decimal. Used for pause mode, see previous.
par=s (See xmode.)
Shows parity using one of the following strings: odd, even, or none. Changing parity affects the type value.
Table 1-29 tmode Parameter Names (continued)
OS-9 for 68K Name
OS-9Name Specification
Utilities Reference 319

1 Utilities
pause pause Screen pause on. Output suspended upon full screen. See pag parameter for definition of screen size. Output can be resumed by typing any key.
psc=h (See xmode.)
Sets pause character (normally <control>W, default = 17).
For OS-9 for 68K, numeric value of character in hexadecimal.
quit=h (See xmode.)
Quits character (normally <control>E, default = 05).
For OS-9 for 68K, numeric value of character in hexadecimal.
reprint=h (See Table 1-29.)
Sets reprint line character (normally <control>D, default = 04).
For OS-9 for 68K, numeric value of character in hexadecimal.
stop=n (See xmode.)
Sets the number of stop bits used:
n = 1, 1.5 or 2
Changing the stop bit value affects the type value.
Table 1-29 tmode Parameter Names (continued)
OS-9 for 68K Name
OS-9Name Specification
320 Utilities Reference

1Utilities
tabc=h tab=h Tabs character (normally <control>I, default = 09).
For OS-9 for 68K, numeric value of character in hexadecimal.
For OS-9, numeric value of character in hexadecimal if prefixed with 0x, "control character" when prefixed with caret (^), or ASCII mnemonic.
tabs=n tabsiz=n Number of characters between tab stops. The number is in decimal. The default is 4 characters between tab stops.
time=h Sets the timeout value in 256th’s of a second for unblocked I_READ and I_READLN operations.
If the number of characters requested is not satisfied within the duration of ticks specified, the I/O operation returns with the number of characters available.
If time=1 the I/O operation does not wait. Instead, the number of characters available are returned.
type=h (See xmode.)
ACIA initialization value: shows parity, character size, and number of stop bits. Value in hexadecimal.
This value is affected by changing the individual par(ity), cs (character length), and stop (stop bits) values.
Table 1-29 tmode Parameter Names (continued)
OS-9 for 68K Name
OS-9Name Specification
Utilities Reference 321

1 Utilities
upc upc Upper case only. Lower case characters are converted automatically to upper case.
xon=h (See xmode.)
Resumes output input character (normally <control>Q, default = 11).
For OS-9 for 68K, numeric value of character in hexadecimal.
For OS-9, numeric value of character in hexadecimal if prefixed with 0x, "control character" when prefixed with caret (^), or ASCII mnemonic.
xoff=h (See xmode.)
Suspends output input character (normally <control>S, default = 13).
For OS-9 for 68K, numeric value of character in hexadecimal.
For OS-9, numeric value of character in hexadecimal if prefixed with 0x, "control character" when prefixed with caret (^), or ASCII mnemonic.
Table 1-29 tmode Parameter Names (continued)
OS-9 for 68K Name
OS-9Name Specification
322 Utilities Reference

1Utilities
For OS-9, numeric value of character in hexadecimal if prefixed with 0x, "control character" when prefixed with caret (^), or ASCII mnemonic.
Table 1-30 tmode Parameter Names (OS-9)
Name Description
delchrl=h Sets input backspace character (delete character-left). (Normal ^H).
delchru=h Sets the "delete character under the cursor" character. (Normal ^D).
deline=h Sets input delete line character (normally <control>X).
delwrdl=h Sets the delete word left character. (Normal ^L).
Numeric value of character is hexadecimal by default.
delwrdr=h Sets the delete word right character. (Normal ^R).
Numeric value of character is hexadecimal by default.
endofile=h Sets the end-of-file character. (Normal <esc>).
Numeric value of character is hexadecimal by default.
endorec=h Sets the end-of-record character. (Normal <cr>).
Numeric value of character is hexadecimal by default.
insrtmode=h Sets the enter insert mode character. (Normal ^I).
Numeric value of character is hexadecimal by default.
Utilities Reference 323

1 Utilities
Examples
For OS-9 for 68K
tmode noupc nopause Disable upper-case lock and page pause
tmode reprint=10 Change reprint character to <control>P
movebeg=h Sets the move cursor to the beginning of the line character. (Normal ^Z).
Numeric value of character is hexadecimal by default.
moveend=h Sets move to the end-of-line character (normally ^A).
moveleft=h Sets the move cursor left character. (Normal ^B).
Numeric value of character is hexadecimal by default.
moveright=h Sets the move cursor right character. (Normal ^F).
Numeric value of character is hexadecimal by default.
reprint=h Sets reprint line character (Normal ^P).
truncate=h Sets the truncate to end-of-line character. (Normal ^K).
Numeric value of character is hexadecimal by default.
Table 1-30 tmode Parameter Names (OS-9) (continued)
Name Description
324 Utilities Reference

1Utilities
tmode xon=0 xoff=0 Disable XON and XOFF processing
For OS-9
tmode noupc nopause Disable upper-case lock and page pause
tmode REPRINT=0x04 Change reprint character to <control>D
tmode pause page=65 Enable page pause and set page size to 65
Utilities Reference 325

1 Utilities
touch, os9touch Update Last Modification Date of File
Syntax
touch {<option(s)>) {<path>} OS-9 for 68K or OS-9os9touch {<option(s)>) {<path>} DOS or UNIX
touch OS
OS-9; OS-9 for 68K
os9touch OS
WIN
Options
-c Does not create a file if not found.
-q Does not quit if an error occurs.
-x Searches the execution directory for the file.
-z Reads the file names from standard input.
-z=<path> Reads the file names from <path>.
Description
The touch utility updates the last modification date of a file. Usually, this command is used with a os9make command’s makefile.
Associated with every file is the date the file was last modified. The touch utility opens a file and updates the modification date to the current date and closes it.
Type touch and the pathlist of the file to update. The touch utility searches the current data directory for the file to update if another directory or the -x option is not specified.
326 Utilities Reference

1Utilities
NoteNoteIf the specified file is not found, touch creates a file with a current modification date.
Examples
$ touch -c /h0/sys/motdDon’t create file if it does not exist.
$ dir -u ! touch -z Update all files in current directory.
Utilities Reference 327

1 Utilities
tr Transliterate Characters
Syntax
tr [<opts>] <str1> [<str2>] [<path1>] [<path2>]
OS
OS-9; OS-9 for 68K
Options
-c Transliterates all ASCII characters (1 through $7F) to <str2>, except for the set of characters in <str1>.
-d Deletes all matching input characters and expressions.
-s Squeezes all repeated output characters or expressions in <str2> to single characters or expressions.
-v Same as -c.
-z Reads standard input for list of file names.
-z=<path> Reads the file names from <path>.
Description
The tr utility transliterates characters from <str1> into a corresponding character from <str2>.
If <str1> contains more characters than <str2>, the final character in <str2> is used for each excess character in <str1>.
Type tr and the characters to search for (<str1>), and optionally, the replacement characters (<str2>), the input file’s pathlist (<path2>) and the output file’s pathlist (<path2>).
<str1> is required.
328 Utilities Reference
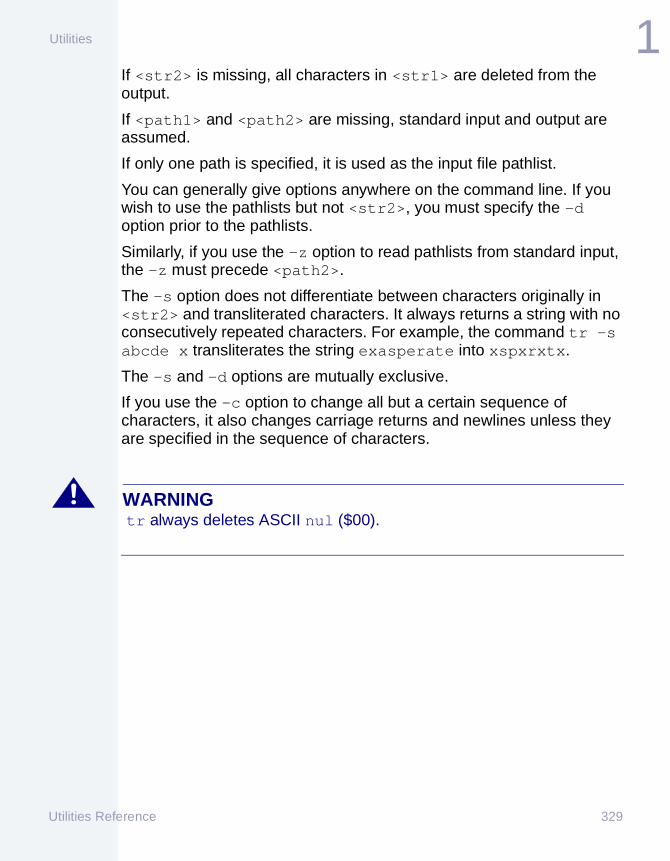
1Utilities
If <str2> is missing, all characters in <str1> are deleted from the output.
If <path1> and <path2> are missing, standard input and output are assumed.
If only one path is specified, it is used as the input file pathlist.
You can generally give options anywhere on the command line. If you wish to use the pathlists but not <str2>, you must specify the -d option prior to the pathlists.
Similarly, if you use the -z option to read pathlists from standard input, the -z must precede <path2>.
The -s option does not differentiate between characters originally in <str2> and transliterated characters. It always returns a string with no consecutively repeated characters. For example, the command tr -s abcde x transliterates the string exasperate into xspxrxtx.
The -s and -d options are mutually exclusive.
If you use the -c option to change all but a certain sequence of characters, it also changes carriage returns and newlines unless they are specified in the sequence of characters.
WARNING! tr always deletes ASCII nul ($00).
Utilities Reference 329

1 Utilities
<str1> and <str2> are interpreted as character classes. To facilitate creating character classes, use the following meta-characters:
Table 1-31 Meta-characters
Char Specification
- RANGEThe hyphen (-) is defined as representing all characters lexicographically greater than the preceding character and less than the following character. For Example
[a-z] is equivalent to the string abcdefghijklmnopqrstuvwxyz.
[m-pa-f] is equivalent to the string mnopabcdef.
[0-7] is equivalent to the string 01234567.
See Appendix A: ASCII Conversion Chart for character values.
\ ESCAPEThe backslash (\) removes special significance from special characters. It is followed by a base and a numeric value or a special character. If the base is not specified, the base for the numeric value defaults to hexadecimal. An explicit base of decimal or hexadecimal can be specified by preceding the numeric value with a qualifier of d or x, respectively. It also allows entry of some non-printing characters such as:
\t = Tab character\n = Newline character\l = Line feed character\b = Backspace character\f = Form feed character
330 Utilities Reference

1Utilities
Examples
The following examples use standard input for the input to the tr utility. The output is sent to standard output. Thus, the first line following each command line is the standard input, and the second line is the standard output.
$ tr abcd jklmaabdc_efgjjkml_efg
Transliterates standard input, converting each a, b, c, and d to j.
$ tr abcd jabcd_efghjjjj_efgh
Transliterates standard input, converting each a, b, c, and d to j.
$ tr a-d kabc_abcd-efghkkk_kkkk-efgh
Transliterates standard input, converting each character contained in the expression abcd to k.
$ tr abcdabcd_efgh_efgh
Transliterates standard input, deleting each a, b, c, and d.
$ tr -d abcdabcdefgefg
Transliterates standard input, deleting each a, b, c, and d.
$ tr -s dcba eocdedenbcadaencoded
Transliterates standard input converting d to e, c to o, b to c, and a to d. Consecutively repeated output characters, the matching eocd, are squeezed into a single character.
$ tr -c a-zA-Z \none word per lineonewordperline
Transliterates standard input, converting all non-alphabetic characters to newline characters.
Utilities Reference 331

1 Utilities
tsmon Supervises Idle Terminals and Initiate LoginCommand
Syntax
tsmon [<opts>] {/<dev>}
OS
OS-9; OS-9 for 68K
Options
-d Displays statistics when a ^\ character (control-backslash or hex $1C) is typed on a monitored terminal.
-l=<prog> Forks <prog>, an alternate login program.
-p Displays an “online” prompt to each timesharing terminal being monitored by the tsmon utility.
-r=<prog> Forks an alternate shell program for remote commands.
-z Reads the device names from standard input.
-z=<path> Reads the device names from <path>.
Description
The tsmon utility supervises idle terminals and starts the login utility in a timesharing application.
Typically, the tsmon utility is executed as part of the start-up procedure when the system is first brought up and remains active until the system shuts down.
/<dev> specifies a terminal to monitor. This is generally an SCF device.
332 Utilities Reference

1Utilities
You can specify up to 28 device name pathlists for the tsmon utility to monitor.
When you type a carriage return on any of the specified paths, the tsmon utility automatically forks login, with standard I/O paths opened to the device. If login fails because you could not supply a valid user name or password, control returns to the tsmon utility.
Most programs terminate when an end-of-file character (normally <escape>) is entered as the first character on a command line. This logs you off the system and returns control to the tsmon utility.
The tsmon utility prints a message when you log off:
Logout after 11 minutes, 30 seconds. Total time 3:57:46.
The Total time figure is the total amount of time that the terminal has accumulated on-line since the tsmon utility was started.
The tsmon utility is normally used to monitor I/O devices capable of bi-directional communication, such as CRT terminals. However, you may use the tsmon utility to monitor a named pipe. If this is done, the tsmon utility creates the named pipe, and then waits for data to be written to it by some other process.
When data arrives, the tsmon utility starts a shell with its input redirected to the pipe file. This is useful for starting remote processes in a networked environment.
You can run several tsmon utility processes concurrently, each one watching a different group of devices. This must be done when more than 28 terminals are to be monitored, but is sometimes useful for other reasons. For example, you may want to keep modems or terminals suspected of hardware trouble isolated from other devices in the system.
The tsmon utility forks login with the PORT environment variable set to the SCF device name and all other environment variables cleared.
Examples
This command starts timesharing on term and t1, printing a welcome message to each. A similar command might be used as the last line of a system startup file.
Utilities Reference 333

1 Utilities
tsmon -dp /term /t1&
2 devices online (confirmation by tsmon)
The -d option causes the tsmon utility to print various statistics about the devices being monitored whenever control-backslash (^\) is typed on either terminal. The statistics might look something like this:
tsmon started 12-11-90 20:38:15 with 2 devices 0:36:06 /term quiet at 0:08:07 cumulative time 3:29:30 logins: 1/9*/t1 quiet at 0:36:03 cumulative time 3:57:46 logins: 2/4
NoteNoteThe standard input device shown for the tsmon utility by the procs utility always indicates the last device to gain the tsmon utility’s attention.
You must implement the SS_SSig I$SetStat (OS-9 for 68K), I_SETSTAT (OS-9) function (send signal on data ready) on any device to be monitored by the tsmon utility. Because this function is used (for example, instead of I$ReadLn or I_READLN), it is possible to output data to a terminal that is not logged in without having to wait for someone to press a key.
334 Utilities Reference

1Utilities
µmacs Advanced Screen Editor
Syntax
umacs [<opts>] {<files>}
OS
OS-9; OS-9 for 68K
Description
µMACS is a screen-oriented text editor you can use to create and modify text files. µMACS can maintain multiple buffers so you can work with several files and/or portions of the same file at once.
See Also
For more information about the µMACS Utility, see Chapter 7.
Utilities Reference 335

1 Utilities
unassign Discards Single Word Command LineSubstitutions
Syntax
unassign <name> {<name>}
OS
OS-9
Description
Discards relationships assigned with the assign command.
NoteNoteThis command does not appear in the CMDS directory as it is a built-in shell command.
Example
$ assigncd chdh histl listls dirprintenv prenv
$ unassign cd$ assignh histl listls dirprintenv prenv
336 Utilities Reference

1Utilities
undel Retrieves Deleted OS-9 for 68K RBF Files
Syntax
undel [<opts>] <path> [<dstpath>]
OS
OS-9 for 68K
Options
-o[=]<dev> Specify alternate device.
Description
The OS-9 for 68K undel utility provides a way to possibly recover an undeleted file. The undel utility allows you to copy the data of the deleted file to a new file on another device.
The OS-9 for 68K undel utility is only capable of restoring one file at a time.
If the -o option is not selected, the OS-9 for 68K undel selects the destination device as follows:
The file can be recovered if none of the disk storage formerly being used by the deleted file is allocated to some other file on the disk.
Source Attempted Destinations
/h0 /r0, /d0
/d0 /r0, /h0
/r0 /h0, /d0
<other> /r0, /d0
Utilities Reference 337

1 Utilities
NoteNoteOS-9 for 68K RBF marks files as deleted by placing a null in the first byte of the filename in the directory entry. For that reason, the OS-9 for 68K undel cannot tell the difference between the names of files that were deleted that only differ by the first character. For instance, the file boo, foo, and zoo would all look the same. undel select the first name that matches all but the first character of the indicated filename.The OS-9 undel does not have this problem.
Examples
The following command line attempts to recover the file procs, from the current directory, by copying it to /r0/procs.
$ undel procs
The following command line attempts to recover the file procs, from the current directory, by copying it to /h1/procs.
$ undel procs -o=/h1
The following example demonstrates that you don’t always get what you want (see Note).
$ build foo? foo?$ build boo? boo?$ del foo boo$ undel boo$ list /r0/boofoo
338 Utilities Reference

1Utilities
undel Retrieves Deleted OS-9 RBF Files
Syntax
undel [<opts>] <srcpath> [<dstpath>]
OS
OS-9
Options
-b[=]<num> Allocates <num> k bytes of memory to be used as a buffer for undel. undel uses 4K by default.
-r Overwrites the existing file(s).
-w[=]<dir> Restores one or more files to <dir>. This option prints a message as to which file is being restored.
-x Uses the current execution directory for <srcpath>.
-z Reads file names from standard input.
-z=<file> Reads file names from <file>.
Description
When OS-9 RBF deletes a file, the file can be recovered if none of the disk storage formerly being used by the deleted file is allocated to some other file on the disk.
The OS-9 undel utility provides a way to possibly recover an undeleted file. The undel utility allows you to copy the data of the deleted file to a new file on another device.
The under utility copies the data of the deleted file <srcport> to <dstpath>. <dstpath> must not be on the same device as <srcpath>.
Utilities Reference 339
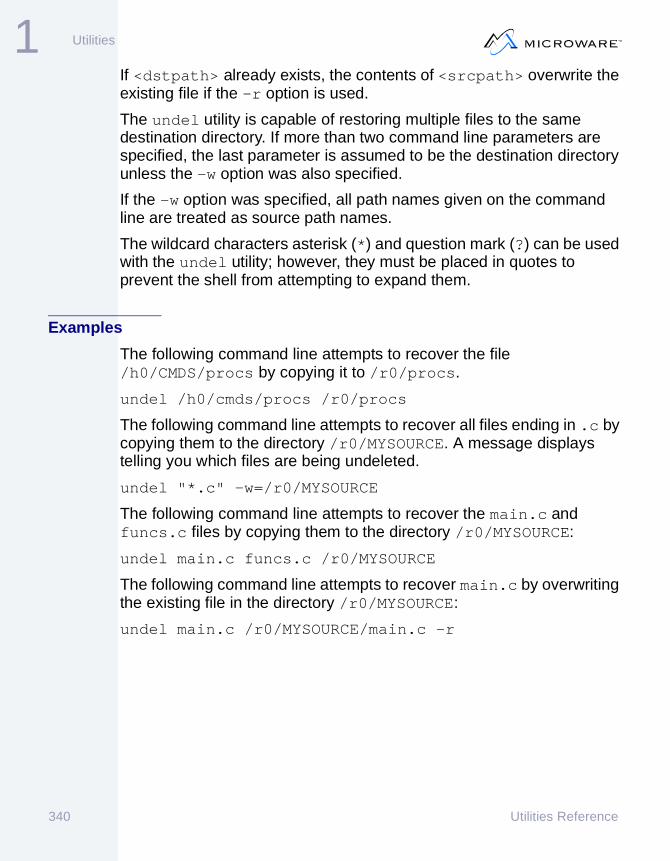
1 Utilities
If <dstpath> already exists, the contents of <srcpath> overwrite the existing file if the -r option is used.
The undel utility is capable of restoring multiple files to the same destination directory. If more than two command line parameters are specified, the last parameter is assumed to be the destination directory unless the -w option was also specified.
If the -w option was specified, all path names given on the command line are treated as source path names.
The wildcard characters asterisk (*) and question mark (?) can be used with the undel utility; however, they must be placed in quotes to prevent the shell from attempting to expand them.
Examples
The following command line attempts to recover the file /h0/CMDS/procs by copying it to /r0/procs.
undel /h0/cmds/procs /r0/procs
The following command line attempts to recover all files ending in .c by copying them to the directory /r0/MYSOURCE. A message displays telling you which files are being undeleted.
undel "*.c" -w=/r0/MYSOURCE
The following command line attempts to recover the main.c and funcs.c files by copying them to the directory /r0/MYSOURCE:
undel main.c funcs.c /r0/MYSOURCE
The following command line attempts to recover main.c by overwriting the existing file in the directory /r0/MYSOURCE:
undel main.c /r0/MYSOURCE/main.c -r
340 Utilities Reference

1Utilities
unlink Unlinks Memory Module
Syntax
unlink [<opts>] {<modnames>}
OS
OS-9; OS-9 for 68K
Options
-f Forces a module (if not in use) to be purged from the module directory.
-z Reads the module names from standard input.
-z=<file> Reads the module names from <file>.
Description
The unlink utility tells the operating system that you no longer need the memory module(s) named.
Type unlink and the name(s) of the module(s) to unlink. The link count decrements by one. If the link count becomes zero, the module directory entry is deleted and the memory is de-allocated.
NoteNoteThe -f option can be slow on OS-9 for 68K because of retries. Unlike OS-9, the OS-9 for 68K _os_unload() does not return an error code in some cases when it fails to unlink the module.
It is a good practice to unlink modules whenever possible to make most efficient use of available memory resources.
Utilities Reference 341

1 Utilities
See Also
The link and load utilities.
Examples
$ unlink pgm pm5 pgm9 Unlinks pgm, pgm5, and pgm9 and lowers the link count of each module by one.
$ dir -u ! unlink -z Pipes an unsorted listing of the current data directory to unlink. This unlinks all modules contained in the directory, lowering the link count of each module by one.
$ mdir -u ! unlink -f -zPipes the current module directory listing to the unlink which then flushes all modules (which are currently not in use) from the system. Under OS-9 for 68K this may take awhile because of the number of retries.
$ unlink -z=namefile Unlinks each module listed in namefile and lowers the link count of each module by one.
$ mdir Module Directory at 14:44:35kernel init p32clk rbf p32hdh0 d0 r0 edit mdir$ unlink edit$ mdir Module Directory at 14:44:35kernel init p32clk rbf p32hdh0 d0 r0 mdir
342 Utilities Reference

1Utilities
unsetenv Clears Environment Parameter
Syntax
unsetenv <name>
OS
OS-9; OS-9 for 68K
Description
The unsetenv utility deletes the specified environment variable from the environment list.
Type unsetenv, followed by the environment parameter to delete. This removes the variable from the environment list.
NoteNoteIf the specified variable has not been previously defined, the unsetenv utility has no effect and it gives you no message.
NoteNoteThese commands do not appear in the CMDS directory as they are built-in to the shell.
Examples
$ unsetenv _sh$ unsetenv TERM
Utilities Reference 343

1 Utilities
See Also
setenv and printenv utility descriptions.
344 Utilities Reference
1Utilities
what Display Version Strings
Syntax
what [<opts>] <file names> [<opts>]
OS
OS-9; OS-9 for 68K; DOS
Options
-s Stop searching after the first occurrence of the pattern.
Description
The what utility searches each filename for occurrences of the pattern @(#) and prints what follows up to a ", >, or null character.
This utility is useful for finding embedded version stings that exist in some modules.
Examples
$ what OS9/68000/CMDS/maui
Utilities Reference 345

1 Utilities
w, wait Waits for One/All Child Process(es) toTerminate
Syntax
wwait
OS
OS-9; OS-9 for 68K
Description
The w utility causes the shell to wait for the termination of one child process before returning with a prompt.
The wait causes the shell to wait for all child processes to terminate before returning with a prompt.
Type w or wait and a carriage return. When the shell prompt is displayed, the child process(es) have terminated.
NoteNoteThis command does not appear in the CMDS directory as it is a built-in shell command.
Examples
$ list file1 >/p1&$ list file2.temp ! filter >file2&$ wait$ list file2 >/p1
In this example, the prompt returns when the first of these three processes (one, two, or three) terminates:
$ one&
346 Utilities Reference

1Utilities
$ two&$ three&$ w$
Utilities Reference 347

1 Utilities
xmode Examines or Changes Device InitializationMode
Syntax
xmode [<opts>] <devname> [<arglist>] {<devname>}
OS
OS-9; OS-9 for 68K
Options
-a Prints input mapping table values in ASCII format. (OS-9)
-c Prints input mapping table values as control characters. (OS-9)
-h Prints input mapping table values in hexadecimal format. (OS-9)
-v Displays all mapped control characters including those passed through. (OS-9)
-z Reads device names from standard input.
-z=<file> Reads device names from <file>.
Description
The xmode utility displays or changes the default operating parameters for a device. It accomplishes this by getting and optionally setting a device’s default options.
For OS-9, the changes made by the xmode utility last as long as the device that it modifies is initialized (see iniz, devs). That is, if the modified device is de-initialized the modifications are lost.
348 Utilities Reference

1Utilities
For OS-9 for 68K, the changes made by the xmode utility last as long as the device descriptor for the device remains in memory (generally until the machine is rebooted). This differs from the tmode utility in that it modifies only an open path’s options.
See your technical reference manual for more information on paths and the tmode utility documentation for more information on temporarily changing path and device options.
NoteNoteYou can only use xmode for SCF, GFM and UCM devices.
NoteNoteOS-9 for 68K: On SSM systems, the module header permissions of the module must allow the appropriate write permission; otherwise an access error occurs. The typical default for modules is write-protected, this means you need to use fixmod on the module before it is loaded into memory.
Generally, changes made with using the xmode utility should be made prior to iniz-ing the device as changes made after the device is initialized will only affect paths opened after the changes have been made. For Example Assuming that device t1 is not initialized, the following command sequence opens all paths to t1 without the pause option.
xmode /t1 nopause sets the nopause optioniniz /t1 initializes t1
Utilities Reference 349

1 Utilities
The exceptions are the five parameters type, par, cs, stop, and baud. Any change to these options affects all currently open paths as well as any paths opened to the device in the future.
To change the operating parameters of a terminal device, type xmode, the name of the device, and any parameters you want changed. If parameters are not given, the xmode utility displays the present value for the each device option. Otherwise, the xmode utility processes the parameter(s) given on the command line.
For OS-9, the device name is optional, the xmode utility assumes the device that is open on standard input is to be displayed/modified.
Parameters are given in a variety of ways. If the parameters to be changed is either enabled or disabled (such as pause or echo) then the option is enabled by just specifying the name of the option.
xmode /term pause Enables the pause option.
xmode /term echo Enables the echo option.
To disable these types of options the option name is specified prefixed with the word "no".
xmode /term nopause noechoDisables the pause and echo options.
If the parameter has a name and a value then these are specified together, separated by an equal sign. Generally, the value 0 disables an option. For example, to disable xon and xoff processing for a path use the command line.
xmode /term xon=0 xoff=0 Disables XON and XOFF processing options.
For OS-9 for 68K, the value is the hex number for the option (0x is implied).
For OS-9, the value is either the hex value (preceded by 0x), the "control character" (caret [^] followed by the character), or the ASCII mnemonic for the character.
350 Utilities Reference

1Utilities
On OS-9 for 68K, to return one of these type values to its default, use the name of the option without the equal sign and value.
xmode /term xon xoff Enables XON and XOFF options with default values.
For OS-9, setting the character mapping table is accomplished by either specifying the character to be mapped and the behavior or the behavior followed by the character to be mapped. The character can be expressed by either the hex value (preceded by 0x), the "control character" (caret [^] followed by the character), or the ASCII mnemonic for the character. For example, to add ^Y with IGNORE mapping you could use any of these command line arguments:
^Y=IGNOREIGNORE=^Y0x19=IGNOREIGNORE=0x19EM=IGNOREIGNORE=EM
For OS-9, xmode sets two different I/O system items: the default path options and the logical unit options. Changes to the path options will only take effect when new paths are opened. Changes to the logical unit options take effect immediately to all paths already open to the device as well as paths that are opened in the future.
Utilities Reference 351
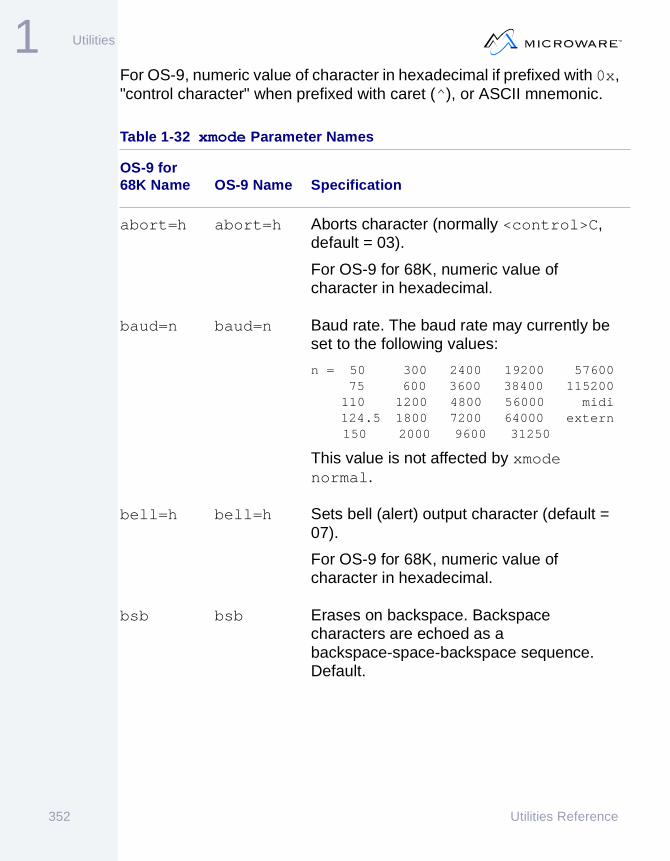
1 Utilities
For OS-9, numeric value of character in hexadecimal if prefixed with 0x, "control character" when prefixed with caret (^), or ASCII mnemonic.
Table 1-32 xmode Parameter Names
OS-9 for 68K Name OS-9 Name Specification
abort=h abort=h Aborts character (normally <control>C, default = 03).
For OS-9 for 68K, numeric value of character in hexadecimal.
baud=n baud=n Baud rate. The baud rate may currently be set to the following values:
n = 50 300 2400 19200 57600 75 600 3600 38400 115200 110 1200 4800 56000 midi 124.5 1800 7200 64000 extern 150 2000 9600 31250
This value is not affected by xmode normal.
bell=h bell=h Sets bell (alert) output character (default = 07).
For OS-9 for 68K, numeric value of character in hexadecimal.
bsb bsb Erases on backspace. Backspace characters are echoed as a backspace-space-backspace sequence. Default.
352 Utilities Reference
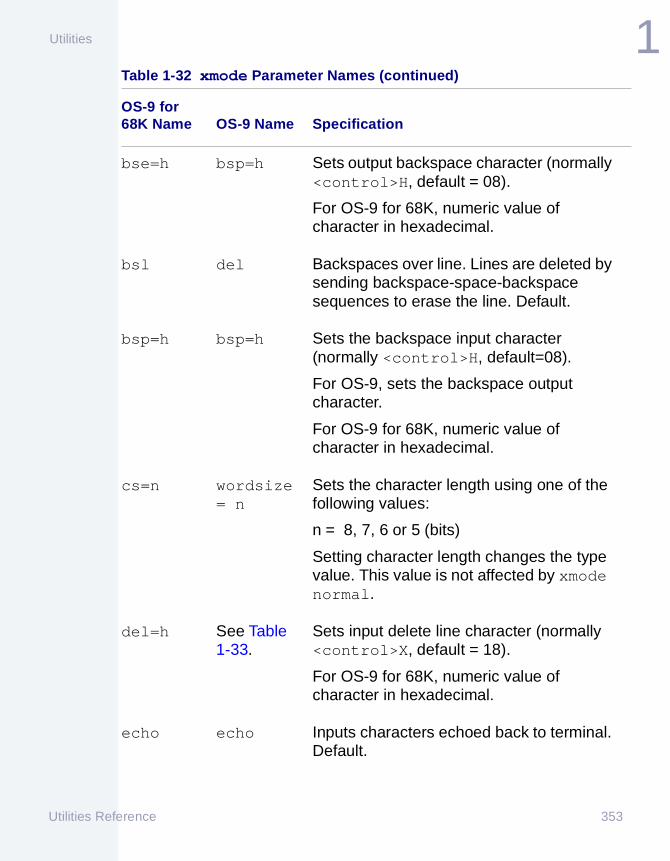
1Utilities
bse=h bsp=h Sets output backspace character (normally <control>H, default = 08).
For OS-9 for 68K, numeric value of character in hexadecimal.
bsl del Backspaces over line. Lines are deleted by sending backspace-space-backspace sequences to erase the line. Default.
bsp=h bsp=h Sets the backspace input character (normally <control>H, default=08).
For OS-9, sets the backspace output character.
For OS-9 for 68K, numeric value of character in hexadecimal.
cs=n wordsize = n
Sets the character length using one of the following values:
n = 8, 7, 6 or 5 (bits)
Setting character length changes the type value. This value is not affected by xmode normal.
del=h See Table 1-33.
Sets input delete line character (normally <control>X, default = 18).
For OS-9 for 68K, numeric value of character in hexadecimal.
echo echo Inputs characters echoed back to terminal. Default.
Table 1-32 xmode Parameter Names (continued)
OS-9 for 68K Name OS-9 Name Specification
Utilities Reference 353

1 Utilities
eof=h eof=h For OS-9 for 68K, sets end-of-file input character (normally <esc>, default = 1B) that causes an EOS_EOF to be returned when entered as the first character of a read or readln system call. Numeric value of character in hexadecimal.
For OS-9, it sets the character that will appear in the input buffer when a character mapped to endofile is entered as the non-first character of a read or readln system call.
eor=h eor=h Sets end-of-record input character (normally <cr>, default = 0D).
For OS-9 for 68K, numeric value of character in hexadecimal.
dup=h See Table 1-33.
Sets duplicate last input line character (normally <control>A, default = 01).
For OS-9 for 68K, numeric value of character in hexadecimal.
lf lf Auto line feed on. Line feeds are automatically echoed to terminal on input and output carriage returns. Default.
nobsb nobsb No erase on backspace. Echoes single backspace only.
nobsl nodel No backspace over line. Lines are deleted by printing a new line sequence.
Table 1-32 xmode Parameter Names (continued)
OS-9 for 68K Name OS-9 Name Specification
354 Utilities Reference

1Utilities
noecho noecho No echo.
nolf nolf Auto line feed off.
nopause nopause Screen pause mode off.
normal Sets the terminal back to its default characteristics. This does not affect the following values: type, baud rate, parity, character length, and stop bits.
noupc noupc Upper and lower case characters are permitted. Default.
null=n null=n Sets null count. Number of null ($00) characters transmitted after carriage returns for return delay. The number is decimal. By default, the null count is set to zero.
pag=n page=n Sets video display page length to n lines. n is a decimal number. Used for pause mode.
par=s Sets parity using one of the following strings: odd, even, or none. Setting parity affects the type value. This value is not affected by xmode normal.
parity=s Sets parity using one of the following strings: odd, even, or none.
Table 1-32 xmode Parameter Names (continued)
OS-9 for 68K Name OS-9 Name Specification
Utilities Reference 355

1 Utilities
pause pause Screen pause on. Output suspended upon full screen. See pag parameter for definition of screen size. Output can be resumed by typing any key.
psc=h psc=h Sets pause character (normally <control>W, default = 17).
For OS-9 for 68K, numeric value of character in hexadecimal.
quit=h quit=h Quits character (normally <control>E, default = 05).
For OS-9 for 68K, numeric value of character in hexadecimal.
reprint=h
(See Table 1-33.)
Sets reprint line character (normally <control>D, default = 04).
For OS-9 for 68K, numeric value of character in hexadecimal.
stopbits=n
Sets the number of stop bits used:
n = 1, 1.5, or 2 (stop bits)
stop=n Sets the number of stop bits used:
n = 1, 1.5 or 2 (stop bits)
Setting the stop bit value affects the type value. This value is not affected by xmode normal.
Table 1-32 xmode Parameter Names (continued)
OS-9 for 68K Name OS-9 Name Specification
356 Utilities Reference

1Utilities
tabc=h tab=h Tab character (normally <control>I, default = 09).
For OS-9 for 68K, numeric value of character in hexadecimal.
tabs=n tabsiz=n Number of characters between tab stops. The number is in decimal. By default, there are four characters between tab stops.
time=n Sets the timeout value in 256ths of a second for unblocked I_READ and I_READLN operations. If the number of characters requested is not satisfied within the duration of ticks specified, the I/O operation returns with the number of characters available. If time=1 the I/O operation does not wait. Instead, the number of characters available are returned.
type=h ACIA initialization value. Sets parity, character size, and number of stop bits. Value in hexadecimal. This value is affected by changing the individual par(ity), cs (character length), and stop (stop bits) values. This value is not affected by the xmode normal command.
upc upc Upper case only. Lower case characters are converted automatically to upper case.
Table 1-32 xmode Parameter Names (continued)
OS-9 for 68K Name OS-9 Name Specification
Utilities Reference 357

1 Utilities
For OS-9, numeric value of character in hexadecimal if prefixed with 0x, "control character" when prefixed with caret (^), or ASCII mnemonic.
xon=h xon=h Resumes output input character (normally <control>Q, default = 11).
For OS-9 for 68K, numeric value of character in hexadecimal.
xoff=h xoff=h Suspends output input character (normally <control>S, default = 13).
For OS-9 for 68K, numeric value of character in hexadecimal.
Table 1-33 OS-9 Control Keys that Affect the Input Line
Name Description
delchrl=h Sets input backspace character (delete character-left). (Normal ^H.)
delchru=h Sets the "delete character under the cursor" character. (Normal ^D.)
deline=h Sets input delete line character (normally <control>X).
delwrdl=h Sets the delete word left character. (Normal ^L).
Numeric value of character is hexadecimal by default.
Table 1-32 xmode Parameter Names (continued)
OS-9 for 68K Name OS-9 Name Specification
358 Utilities Reference

1Utilities
delwrdr=h Sets the delete word right character. (Normal ^R).
Numeric value of character is hexadecimal by default.
endofile=h Sets the end-of-file character. (Normal <esc>).
Numeric value of character is hexadecimal by default.
endorec=h Sets the end-of-record character. (Normal <cr>).
Numeric value of character is hexadecimal by default.
insrtmode=h Sets the enter insert mode character. (Normal ^I).
Numeric value of character is hexadecimal by default.
movebeg=h Sets the move cursor to the beginning of the line character. (Normal ^Z).
Numeric value of character is hexadecimal by default.
moveend=h Sets move to the end-of-line character (normally <control>A).
moveleft=h Sets the move cursor left character. (Normal ^B).
Numeric value of character is hexadecimal by default.
Table 1-33 OS-9 Control Keys that Affect the Input Line (continued)
Name Description
Utilities Reference 359

1 Utilities
Examples
For OS-9 for 68K
xmode /term noupc nopauseDisables upper-case lock and page pause.
tmode /term reprint=1 Changes reprint character to <control>P.
tmode /term xon=0 xoff=0Disables XON and XOFF processing.
For OS-9
tmode /term noupc nopauseDisables upper-case lock and page pause.
moveright=h Sets the move cursor right character. (Normal ^F).
Numeric value of character is hexadecimal by default.
reprint=h Sets reprint line character (Normal ^P).
truncate=h Sets the truncate to end-of-line character. (Normal ^K).
Numeric value of character is hexadecimal by default.
Table 1-33 OS-9 Control Keys that Affect the Input Line (continued)
Name Description
360 Utilities Reference

1Utilities
tmode /term REPRINT=0x04Changes reprint character to <control>D.
tmode /term pause page=65Enables page pause and set page size to 65.
Utilities Reference 361

1 Utilities
362 Utilities Reference

Chapter 2: Using the debug Uti l i ty
The debug utility is a software tool for debugging and testing user-state 68000 machine language programs written for the OS-9 for 68000 operating system.
debug uses:
• Software techniques to control a process to debug.
• The F$DFork and F$DExec system calls to create and execute the process to debug. These system calls provide an environment that allows the debugger to control how a process executes without affecting other processes on the system.
Full access to the 68000 user-mode registers is provided. On 68020/68881-based systems, full access to user-mode 68020 registers and all 68881 floating point registers are provided.
363

2 Using the debug Utility
Symbolic Debugging
The OS-9 linker (l68) produces a symbol module for a program if you specify the l68 -g option when the program is linked. This option places global data and code symbols in a data module. debug automatically loads the symbol table data (STB) module when the debugging session begins.
This method of separating symbolic debugging information from the executable program module provides a number of advantages. The symbol information is not loaded into memory until the program is actually debugged. No production linkage or symbol stripping is required to remove the symbols from the code. You can keep the STB module for possible future debugging of the production code. The CRC of the program module is stored in the STB module and validated by the debugger to ensure that the symbol module matches the version of the program being debugged.
364 Utilities Reference

2Using the debug Utility
Starting debug
Type debug at the shell prompt. The debug utility then waits for a command with the prompt: dbg:
The f command is the first command entered in a debug session. This creates a process to execute the program to debug.
If any parameters are specified on the shell command line, they are assumed to be arguments for the f command.
If any parameters are specified, the f command is implicitly executed upon startup.
If redirection, priority specification, and stack size (<, >, ^, #) are given, be sure to enclose the arguments in quotes to protect them from interpretation by the shell.
The f command can pass up to 64 arguments to the process.
A full explanation of entering debug via the shell command line and the f command appear in later sections of this chapter.
Exiting the Debugger
Use the q command to exit the debugger. The process being debugged is terminated and all its resources returned to the system. Any module linked by the l command is unlinked as well as any symbol modules in use.
Utilities Reference 365

2 Using the debug Utility
Relocation Registers
The debugger maintains eight relocation registers. These registers are used for storing memory base addresses for later use in commands and expressions.
The registers are referenced by the names r0 through r7. The r0 register is hard-wired to zero.
When an address is specified, the default relocation register is added to the address automatically. Setting the default relocation register to zero disables this action.
The default relocation register is not added if a symbolic address or an expression is specified.
The following commands deal with the relocation registers.
Examplesdbg: @the default relocation register is .r0 00000000dbg: .r4 1fe00dbg: @the default relocation register is .r4 0001fe00dgb: .rrn: 00000000 00000000 00000000 0001fe00 00000000 00000000 00000000 00000000
Table 2-1 Relocation Register Commands
Command Specification
@ Prints the default relocation register.
@<num> Sets the default relocation register to <num>. <num> = 0 to 7.
.r Displays the relocation registers.
.r<num> <val> Sets specified relocation register to <val>.
366 Utilities Reference

2Using the debug Utility
Breakpoints
The debugger sets up to 16 simultaneous breakpoint addresses. Breakpoints can only be set at even-byte addresses.
The debugger supports two distinct types of breakpoints: soft breakpoints and hard breakpoints. Each is used in a different manner.
A soft breakpoint is not actually placed in the code, but is emulated by the F$DExec system call. This allows you to set breakpoints in ROM code or code that another process is currently executing. Because the soft breakpoint facility is implemented in software, the program runs much slower than normal in this mode.
A hard breakpoint is an illegal instruction placed in the code that causes an illegal instruction exception. Because of this, you cannot use a hard breakpoint in ROM code. If another process is executing the code being debugged, it will most likely exit with an illegal instruction error when the breakpoint instruction is reached. The program runs at full speed when using hard breakpoints.
By default, the debugger uses soft breakpoints. To continue the program at full speed using hard breakpoints, use the x -1 command. For more information, see the execution commands section in this chapter.
The following commands deal with breakpoints:
Table 2-2 Breakpoint Commands
Command Specification
b Displays the breakpoint list.
b<addr> Sets the breakpoint at <addr>.
k <addr> Kills breakpoints at <addr>.
k * Kills all breakpoints.
Utilities Reference 367

2 Using the debug Utility
Examples
dbg: bbreakpoint count = 0dbg: b maindbg: bbreakpoint count = 1main (00162f40)dbg: b main+1f0dbg: bbreakpoint count = 2main (00162f40)main+1f0 (00163130)dbg: k main+1f0dbg: k clear all breakpoints? ydbg: k *
368 Utilities Reference

2Using the debug Utility
debug Commands
To get a brief synopsis of debugger commands, type ? at the prompt.
Execution Commands
The debug utility provides a number of commands to initiate and control program execution:
Table 2-3 Execution Commands
Command Specification
i Instruction countDisplays the number of instructions the program executed. This count does not include instructions executed in system state or during the x -1 command.
g GoRuns the program until a breakpoint, exception, or the F$Exit system call is encountered.
g <addr> Go from addressRuns the program starting execution at <addr>, until a breakpoint, exception, or the F$Exit system call is encountered.
gs Go and stopExecutes the program until the next instruction is encountered. This is the same as the Go command, but it sets a breakpoint at the next instruction. The breakpoint is automatically removed when the debugger regains control.
Utilities Reference 369

2 Using the debug Utility
All code executed in system state (including system calls) is considered a single instruction. If a system call or exception transfers control to a user handler, tracing continues at the first instruction of the user handler.
The F$TLink system call executes the initialization routine of a user trap handler in user state. When tracing a program that has issued an F$STrap system call to handle an exception, control is transferred immediately to the exception handler code when the exception occurs.
gs <addr> Go and stop at addressExecutes the program starting at the address in the PC register up to the specified <addr>. This is the same as the Go command, but it sets a breakpoint at <addr>. The breakpoint is automatically removed when the debugger regains control.
t TraceExecutes one instruction and re-displays the machine registers.
t <count> Trace instructionsExecutes <count> instructions and re-displays the machine registers. Each instruction is displayed as it is executed. Breakpoints are ignored while tracing.
x <count> Execute instructionsExecutes <count> instructions and re-displays the machine registers. Breakpoints are in effect and no instruction trace is displayed. If <count> is -1, hard breakpoints are set in the program allowing full-speed debugging. If <count> is positive, soft breakpoints are used and control returns after <count> instructions have been executed.
Table 2-3 Execution Commands (continued)
Command Specification
370 Utilities Reference

2Using the debug Utility
The gs command is useful when stopped at a bsr or db instruction. The program runs until control is returned from the subroutine or the decrement loop terminates.
NoteNoteThe program may stop before the next instruction breakpoint is reached if another breakpoint, exception or F$Exit is reached first.
The x and t commands cause the debugger to enter a repeat command mode. If <cr> is entered at the exe: or tra: prompt, the last t or x command respectively, is performed again. Even though <cr> has a special meaning at this point, any other command may be given.
For example:
dbg: iinstructions executed = 16 (0x10)dbg: x10dn: 00000001 00000000 00000082 00000003 00000000 00000076 00001020 00000020an: 0001B2FE 00000020 00000000 001809C0 0001B306 0001B298 000222F0 0001B298pc: 00180A5C cc: 00 (-----)_cstart+0x4E >670C beq.b _cstart+0x5Cexe: <cr> entered; repeat x10 commanddn: 00000001 00000000 00000084 00000003 00000000 00000076 00001020 0000000Ban: 0001B2F6 0000000B 00000000 001809C0 0001B306 0001B298 000222F0 0001B298pc: 00180A5C cc: 00 (-----)<68881 in Null state>_cstart+0x4E >670C beq.b _cstart+0x5Cexe: <cr> entered; repeat x10 command againdn: 00000001 00000000 00000086 00000003 00000000 00000076 00001020 00000000an: 0001B2EE 00000000 00000000 001809C0 0001B306 0001B298 000222F0 0001B298pc: 00180A5C cc: 04 (--Z--)<68881 in Null state>_cstart+0x4E >670C beq.b _cstart+0x5C->exe: iinstructions executed = 64 (0x40)dbg:
A program can cause the kernel to transfer control to specific code within the program by issuing an F$STrap system call. Given in the call are a list of exception vector offsets and handler addresses for each
Utilities Reference 371

2 Using the debug Utility
exception that the program wishes to handle. Any exceptions not explicitly handled by the program cause the process to abort when the exception occurs. If a given exception occurs while tracing the program, control is immediately transferred to the handler. The debugger cannot tell that the exception occurred other than through the transfer of control.
If the program causes an exception and does not have an exception handler installed, control transfers to the debugger, the appropriate error number/message is printed, and for bus and address exceptions the following information is displayed:
execution error - class=0161 violation address=00555553 inst = 5988Error #000:102 bus trapdn: 0000000C 000C0064 00000080 00000003 00000000 000000A2 00001050 00000000an: 00555555 0001EB50 00000000 0015B610 00000000 0001EAAC 00025B00 0001EAACpc: 0015B678 cc: 04 (--Z--)_cstart+0x1A >4A68FFFE tst.w -2(a0)tra:
NoteNoteclass is the stack frame special status word on the 68010/68020; for the 68000 this is the first word of the exception frame. violation address is the access address that caused the exception. inst is the instruction input buffer for the 68000/68010; for the 68020 this is the instruction pipe stage B word. On the 68010, the PC shown by the debugger may be advanced up to five words due to instruction pipeline buffering.
372 Utilities Reference

2Using the debug Utility
Stack Traceback Command
You can examine the flow of execution with the stack traceback command. When you use this command, the debugger displays the functions on the call stack and their absolute addresses. The following syntax is used for this command:
Exampledbg: gs printfdn: 001972BE 00000000 00000001 00000003 00000001 0008434A 00004380 000000an: 001972BE 00000000 00084342 00084338 00084334 00084218 00088000 000841pc: 00197506 cc: 00 (-----)<FPCP in Null state>printf >4E550000 link.w a5,#0dbg: tdn: 001972BE 00000000 00000001 00000003 00000001 0008434A 00004380 000000an: 001972BE 00000000 00084342 00084338 00084334 000841D4 00088000 000841pc: 0019750A cc: 00 (-----)<FPCP in Null state>printf+0x4 >48E7C080 movem.l d0-d1/a0,-(a7)tra: wStack traceback via (a5):printf+0x4 (0019750A)main+0xA4 (00196F04)_cstart+0xE4 (00196D24)
Table 2-4 Stack Traceback Command
Command Description
w[<n>] Linkstack traceback via (a5). <n> = depth of traceback. If <n> is not specified, a complete traceback is displayed.
Utilities Reference 373

2 Using the debug Utility
Memory Change Commands
You can examine and change memory with the debugger memory change command. When you use this command, the debugger automatically enters the memory change mode. There are three forms of this command:
Addresses specified by the word and longword change commands must be even for non-68020 processors. The debugger displays the address and the values at the address and prompt for the new value:
dbg: d1 .d0 Display memory
0x1EF7E - 6A626364 65660000 00000000 00000000 jbcdef..........
dis: c .d0 Enter change mode
0x1EF7E :6A ’a Store the character a
0x1EF7F :62 20 Store a blank
0x1EF80 :63 - Back up
0x1EF7F :20 #20 Different base (use 10)
0x1EF80 :63 - Back up
0x1EF7F :14 + Advance
0x1EF80 :63 . Exit change mode
dbg: d1 .d0 Display memory
0x1EF7E - 61146364 65660000 00000000 00000000 a.cdef..........
Table 2-5 Memory Change Command
Command Specification
c<addr> Change byte values.
cw<addr> Change word values.
cl<addr> Change longword values.
374 Utilities Reference
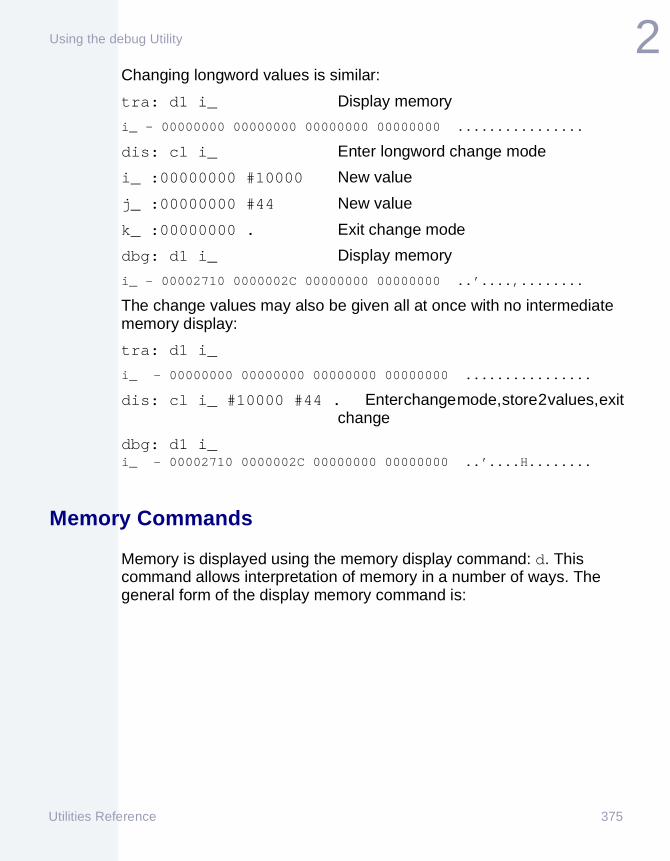
2Using the debug Utility
Changing longword values is similar:
tra: d1 i_ Display memory
i_ - 00000000 00000000 00000000 00000000 ................
dis: cl i_ Enter longword change mode
i_ :00000000 #10000 New value
j_ :00000000 #44 New value
k_ :00000000 . Exit change mode
dbg: d1 i_ Display memory
i_ - 00002710 0000002C 00000000 00000000 ..’....,........
The change values may also be given all at once with no intermediate memory display:
tra: d1 i_
i_ - 00000000 00000000 00000000 00000000 ................
dis: cl i_ #10000 #44 . Enter change mode, store 2 values, exit change
dbg: d1 i_i_ - 00002710 0000002C 00000000 00000000 ..’....H........
Memory Commands
Memory is displayed using the memory display command: d. This command allows interpretation of memory in a number of ways. The general form of the display memory command is:
Utilities Reference 375

2 Using the debug Utility
d[M][N] <addr> [<len>]
If not present, the memory dump is displayed in the normal hexadecimal/ASCII dump format. You can specify one of the following codes to cause the dump to interpret a memory as follows:
Table 2-6 Memory Display Parameters
Parameter Specification
[M] Optional format indicator.
[N] Number of lines (0-9) of dump to display. This value is used only if <len> is not given.
<addr> Starting address for the memory display. This value must be even for instruction disassembly and floating point display.
<len> Number of bytes to display. If not given, the default is 256 for hex/ASCII display, 16 for instruction disassembly, and 12, 8, and 4 for X, D, and F floating point formats, respectively. <len> is rounded so that a full line is always displayed. For example, if 1 is specified, 16 bytes are actually displayed.
Table 2-7 Dump Memory Interpretation Codes
Code Specification
I Instruction disassembly.
F Single precision floating point.
376 Utilities Reference

2Using the debug Utility
Hex/ASCII Dump Memory Display
NoteNoteIn the ASCII field of the hex/ASCII dump, bytes in the range of $20 - $7E are displayed as the ASCII character equivalent. All other values are displayed as a period (.)
dbg: d _cstart Use hex/ASCII dump format (256 bytes)
_cstart - 2D468010 2D468014 3D438018 4A85671E -F..-F..=C..J.g._cstart+0x10 - 08050000 661441F5 58004A68 FFFE660A ....f.AuX.Jh.~f._cstart+0x20 - 598849E8 FFFC7001 60204235 58FF204D Y.Ih.|p.B5X. M_cstart+0x30 - D7EB000C 42A72F0B 74016100 10186076 Wk..B’/.t.a...‘v_cstart+0x40 - 43E80004 2D4984E8 74002260 2E09670C Ch..-I.ht.".g._cstart+0x50 - D3CD4229 FFFF2089 528260EE 538067E0 SMB).. .R.S.g~pc_cstart+0x60 - 4A826610 4A68FFFE 670A4228 FFFF2448 J.f.Jh.~g.B(..$H_cstart+0x70 - 58886006 208D2448 52825282 4A946718 X. .$HR.R.J.g._cstart+0x80 - 28544A1C 66FCB5CC 631E0C1C 00FC6618 (TJ.f|5Lc....|f._cstart+0x90 - 528C2654 D7CD6014 0C2D00FC 00026608 R.&TWM.-.|..f._cstart+0xA0 - 266D0004 D7CD6004 D7EB000C 210B2F08 &m..WMWk..!./._cstart+0xB0 - 4228FFFF 2F026100 0E7E6500 01086114 B(../.a..~e...a._cstart+0xC0 - 4CDF0003 9BCD2F2E 84E86100 01367000 L_...M/..ha..6p._cstart+0xD0 - 61001340 207CFFFF 8572D1CE 2D488004 a..@ |...rQN-H.._cstart+0xE0 - 2D4F8000 2D4F8008 203CFFFF FF042F08 -O..-O.. <..../._stkchec+0x2 - 41F70800 B1EE8008 640AB1EE 80046508 Aw..1n..d.1n..e.dis: d _cstart 44 Same as before but at 44 bytes_cstart - 2D468010 2D468014 3D438018 4A85671E -F..-F..=C..J.g._cstart+0x10 - 08050000 661441F5 58004A68 FFFE660A ....f.AuX.Jh.~f._cstart+0x20 - 598849E8 FFFC7001 60204235 58FF204D Y.Ih.|p.B5X. M
D Double precision floating point.
X Extended precision floating point (only if 68881 is available).
Table 2-7 Dump Memory Interpretation Codes
Code Specification
Utilities Reference 377

2 Using the debug Utility
_cstart+0x30 - D7EB000C 42A72F0B 74016100 10186076 Wk..B’/.t.a..._cstart+0x40 - 43E80004 2D4984E8 74002260 2E09670C Ch..-I.ht.".g.dis: d5 _cstart Five line display_cstart - 2D468010 2D468014 3D438018 4A85671E -F..-F..=C..J.g._cstart+0x10 - 08050000 661441F5 58004A68 FFFE660A ....f.AuX.Jh.~f._cstart+0x20 - 598849E8 FFFC7001 60204235 58FF204D Y.Ih.|p.B5X. M_cstart+0x30 - D7EB000C 42A72F0B 74016100 10186076 Wk..B’/.t.a..._cstart+0x40 - 43E80004 2D4984E8 74002260 2E09670C Ch..-I.ht.".g.dis: d1 _cstart One line display_cstart - 2D468010 2D468014 3D438018 4A85671E -F..-F..=C..J.g.dis: d _cstart 1 Same as above_cstart - 2D468010 2D468014 3D438018 4A85671E -F..-F..=C..J.g.
Instruction Disassembly Memory Display
In the instruction disassembly display format, conditional instructions may be followed with a hyphen, followed by a right angle bracket (->) indicator. If -> is present, the instruction performs its TRUE operation; otherwise, the instruction performs the FALSE operation. The appropriate condition code register is examined to determine which case the processor performs. The following conditional instruction categories use this feature:
Table 2-8 Conditional Instructions
Instruction Description
Bcc Branch on condition.
DBcc Decrement and branch on condition.
Scc Set according to condition.
TRAPcc Trap on condition.
FBcc Branch on floating condition.
FScc Set according to floating condition.
378 Utilities Reference

2Using the debug Utility
Example
dis: di _cstart Instruction disassembly_cstart >2D468010 move.l d6,_totmem(a6)_cstart+0x4 >2D468014 move.l d6,_sbsize(a6)_cstart+0x8 >3D438018 move.w d3,_pathcnt(a6)_cstart+0xC >4A85 tst.l d5_cstart+0xE >671E beq.b _cstart+0x2E_cstart+0x10 >08050000 btst.b #0,d5_cstart+0x14 >6614 bne.b _cstart+0x2A->_cstart+0x16 >41F55800 lea.l 0(a5,d5.l),a0_cstart+0x1A >4A68FFFE tst.w -2(a0)_cstart+0x1E >660A bne.b _cstart+0x2A->_cstart+0x20 >5988 subq.l #4,a0_cstart+0x22 >49E8FFFC lea.l -4(a0),a4_cstart+0x26 >7001 moveq.l #1,d0_cstart+0x28 >6020 bra.b _cstart+0x4A_cstart+0x2A >423558FF clr.b -1(a5,d5.l)_cstart+0x2E >204D movea.l a5,a0
dis: di _cstart 5 Disassemble 5 instructions_cstart >2D468010 move.l d6,_totmem(a6)_cstart+0x4 >2D468014 move.l d6,_sbsize(a6)_cstart+0x8 >3D438018 move.w d3,_pathcnt(a6)_cstart+0xC >4A85 tst.l d5_cstart+0xE >671E beq.b _cstart+0x2E
Floating Point Memory Displays
Floating point conditional instructions use the condition portion of the 68881 FPSR register, the others use the processor CC register. During memory disassembly display, the -> indicator appears based on the
FDBcc Decrement and branch on floating condition.
FTRAPcc Trap on floating condition.
Table 2-8 Conditional Instructions
Instruction Description
Utilities Reference 379

2 Using the debug Utility
static value of the condition register value when the disassembly occurred. The following are examples of floating point memory displays:
dis: d1 f_ Display in hex/ASCII format
f_ - 3F2AAAAB 00000000 00000000 00000000 ?**+............
dis: df f_ Display in single-precision decimal
f_ - 3F2AAAAB 0.6666666865348816
dis: d1 a_ Display in hex/ASCII format
a_ - 3FE55555 55555555 3F2AAAAB 00000000 ?eUUUUUU?**+....
dis: dd a_ Display in double-precision decimal
a_ - 3FE5555555555555 0.6666666666666666
To display a floating point number in machine registers, give the name of the register preceded by an ampersand (&). Normal expression evaluation uses the value in the register as a pointer to the desired value. Using ampersand (&) syntax, the value in the register is used.
dn: 3FE55555 55555555 00000001 00000003 00000000 000000A6 00001210 00000000an: 0001DB78 00000000 0001E7EE 0001E7E2 0001E7DE 00000000 00025610 0001E758pc: 0010CD40 cc: 00 (-----)<68881 in Null state>main+0x2C 2F2E801E move.l a_+0x4(a6),-(a7)dbg: dd &.d0 Display double precision value in register[reg] - 3FE5555555555555 0.6666666666666666dn: 3F2AAAAB 55555555 00000001 00000003 00000000 000000A6 00001210 00000000an: 0001DB78 00000000 0001E7EE 0001E7E2 0001E7DE 00000000 00025610 0001E750pc: 0010CD4C cc: 00 (-----)<68881 in Null state>main+0x38 61001750 bsr.w _T$FtoDdbg: gsdn: 3FE55555 60000000 00000001 00000003 00000000 000000A6 00001210 00000000an: 0001DB78 00000000 0001E7EE 0001E7E2 0001E7DE 00000000 00025610 0001E750pc: 0010CD50 cc: 00 (-----)<68881 in Null state>main+0x3C 2F01 move.l d1,-(a7)tra: df f_ Display single precision floatf_ - 3F2AAAAB 0.6666666865348816dis: dd f_ Display using wrong formatf_ - 3F2AAAAB00000000 0.0002034505596384406 Garbage valuedis: dd .d0 Uses .d0 as a pointer (wrong)0x3F2AAAAB bus error.dis: dd &.d0 Uses value in .d0 (correct)
380 Utilities Reference

2Using the debug Utility
[reg] - 3F2AAAAB55555555 0.0002034505984435479dis: df &.d0[reg] - 3F2AAAAB 0.6666666865348816
Displaying values in the 68881 floating point registers is similar.
Utilities Manual 2-19dn: 3FE55555 60000000 00000001 00000003 00000000 000000A6 00001210 00000000an: 0001DB78 00000000 0001E7EE 0001E7E2 0001E7DE 00000000 00025610 0001E750pc: 0010DDB0 cc: 00 (-----)fp0:3FFE0000 AAAAAB00 00000000 fp4:7FFF0000 FFFFFFFF FFFFFFFF fpcr: 0000 XNfp1:7FFF0000 FFFFFFFF FFFFFFFF fp5:7FFF0000 FFFFFFFF FFFFFFFF fpiar: 00000000fp2:7FFF0000 FFFFFFFF FFFFFFFF fp6:7FFF0000 FFFFFFFF FFFFFFFF fpsr: 00000000fp3:7FFF0000 FFFFFFFF FFFFFFFF fp7:7FFF0000 FFFFFFFF FFFFFFFF (---- 0)main+0x3C 2F01 move.l d1,-(a7)dbg: dd .fp0 Uses .fp0 as a pointer (wrong)0x3FFE0000 bus error.dbg: dd &.fp0 Uses value in .fp0 (correct, wrong format)[reg] - 3FFE0000AAAAAB00 1.875000635782897dis: dx .fp00x3FFE0000 bus error.dbg: dx &.fp0 Uses value in .fp0 (correct format - ’X’)[reg] - 3FFE0000AAAAAB0000000000 0.6666666865348816
Display/Change Machine Registers
Use the period (.) command to display and change the machine registers:
The register display appears as follows:
dn: 0000000C 000C0064 00000080 00000003 00000000 000000A6 00001210 00000000an: 00000000 0001E820 00000000 0010CAC0 00000000 0001E778 00025610 0001E778
Table 2-9 Display/Change Machine Register Commands
Command Specification
. Display machine registers.
.<reg> <val> Change machine register.
Utilities Reference 381

2 Using the debug Utility
pc: 0010CB12 cc: 00 (-----)<68881 in Null state>_cstart> 2D468010 move.l d6,_totmem(a6)
The first two lines of the display show the data and address registers from D0 - D7 and A0 - A7 respectively. The third line shows the program counter and status register. Only the user byte (containing the processor condition code values) is available. The condition code bits are interpreted and displayed after the condition code register hex value in parentheses.
The bit interpretation is:
(XNZVC)
C = Carry
V = Overflow
Z = Zero
N = Negative
X = Extend
The following discussion of the 68881 coprocessor registers applies only to OS-9 systems running on a 68020 processor with the 68881 installed as a coprocessor.
If the display 68881 registers option is set, the next line(s) indicate the state of the 68881 coprocessor. If the coprocessor is not present on the system, the following message appears:
<No 68881 available>
If the process has yet to access the 68881, the following message appears:
<68881 in Null state>
When the process accesses the 68881, a floating point register dump appears. If the setting of the debugger decimal register display option indicates hex display, the 68881 coprocessor registers appear as follows:
fp0:40010000 D5555555 55555200 fp4:7FFF0000 FFFFFFFF FFFFFFFF fpcr: 0000 XNfp1:7FFF0000 FFFFFFFF FFFFFFFF fp5:7FFF0000 FFFFFFFF FFFFFFFF fpiar: 00000000fp2:7FFF0000 FFFFFFFF FFFFFFFF fp6:7FFF0000 FFFFFFFF FFFFFFFF fpsr: 00000208fp3:7FFF0000 FFFFFFFF FFFFFFFF fp7:7FFF0000 FFFFFFFF FFFFFFFF (---- 0)
382 Utilities Reference

2Using the debug Utility
If a decimal display is indicated, the registers appear in the following format:
fp0:6.666666666666666 fp4:<NaN> fpcr: 0000 XNfp1:<NaN> fp5:<NaN> fpiar: 00000000fp2:<NaN> fp6:<NaN> fpsr: 00000208fp3:<NaN> fp7:<NaN> (---- 0)
The value of the registers are printed in decimal using scientific notation when the value becomes very large or very small. IEEE not-a-number values are printed as <NaN>, plus and minus infinity values are printed as <+Inf> and <-Inf>, respectively. The extended precision values are converted to double precision before printing, so conversion overflow may result. The hexadecimal format display can be used to determine the exact values in the registers.
The eight 68881 floating point registers are displayed in either hexadecimal or decimal form depending on the floating point register display option setting.
The 68881 status registers appear to the far right of the display:
fpcr: 0000 -- 68881 control register
fpiar: 00000000 68881instruction address register
fpsr: 00000000 68881 status register
(---- 0) FPSR interpretation bits
The -- field next to the FPCR register displays an interpretation of the 68881 rounding mode and precision. These fields are interpreted as follows:
fpcr: 0000 - -
Rounding mode:Z = Toward zero- = Toward minus infinity+ = Toward plus infinity
Rounding Precision:S = SingleD = Double
N = Nearest
X = Extended
Utilities Reference 383

2 Using the debug Utility
The FPSR condition code byte and the quotient byte are displayed as follows:
Immediately following the main floating register display, the debugger interprets the exception enable byte of the control register and the exception status and accrued exception bytes of the status register. If all bits in the byte are zero, nothing is printed. Otherwise, the bits are displayed as follows:
XE:(BSUN,SNAN,OPERR,OVFL,UNFL,DZ,INEX2,INEX1)FPCR exception enable
AX:(IOP,OVFL,UNFL,DZ,INEX,???,???,???) FPSR accrued exception
XS:(BSUN,SNAN,OPERR,OVFL,UNFL,DZ,INEX2,INEX1)FPSR exception status
A full register display example follows:
dn: 00000000 00000000 00000001 00000003 00000000 000000A2 00001050 00000000an: 000152D2 00000000 00015F4E 00015F46 00015F42 00000000 0001CF30 00015ED4pc: 00139364 cc: 04 (--Z--)fp0:40010000 C0000000 00000000 fp4:7FFF0000 FFFFFFFF FFFFFFFF fpcr: 0000 XNfp1:7FFF0000 FFFFFFFF FFFFFFFF fp5:7FFF0000 FFFFFFFF FFFFFFFF fpiar: 00000000fp2:7FFF0000 FFFFFFFF FFFFFFFF fp6:7FFF0000 FFFFFFFF FFFFFFFF fpsr: 00000008fp3:7FFF0000 FFFFFFFF FFFFFFFF fp7:7FFF0000 FFFFFFFF FFFFFFFF (---- 0)AX:(INEX)_exit+0x6 >DEADDEAD add.l -8531(a5),d7
You can change processor registers with the period (.) command. Any processor register or coprocessor control register can be changed with this command:
.<regname> <expr>
Valid register names are:
.d0 - .d7
( - - - - 0)
Quotient byte value (displays in signed decimal)
Floating point condition codes
? = NaN or UnorderedI = Infinity
Z = ZeroN = Negative
¸″
384 Utilities Reference

2Using the debug Utility
.a0 - .a7
.sp, .pc, .cc
.fpsr, .fpcr, .fpiar (for 68881 only)
Exampledn: 00000000 00000000 00000001 00000003 00000000 000000A6 00001210 00000000an: 0001DB78 00000000 0001E7EE 0001E7E2 0001E7DE 00000000 00025610 0001E770pc: 000F8FA8 cc: 04 (--Z--)_exit+0x6 DEADDEAD add.l -8531(a5),d7dbg: .d4 100 Set D4 to 100dbg: . Display registersdn: 00000000 00000000 00000001 00000003 00000100 000000A6 00001210 00000000an: 0001DB78 00000000 0001E7EE 0001E7E2 0001E7DE 00000000 00025610 0001E770pc: 000F8FA8 cc: 04 (--Z--)dbg: .d4 .d2+.a6 Set D4 using an expressiondbg: . Display registersdn: 00000000 00000000 00000001 00000003 00025611 000000A6 00001210 00000000an: 0001DB78 00000000 0001E7EE 0001E7E2 0001E7DE 00000000 00025610 0001E770pc: 000F8FA8 cc: 04 (--Z--)dbg: .d4 No <value> means zerodbg: .dn: 00000000 00000000 00000001 00000003 00000000 000000A6 00001210 00000000an: 0001DB78 00000000 0001E7EE 0001E7E2 0001E7DE 00000000 00025610 0001E770pc: 000F8FA8 cc: 04 (--Z--)
The floating point register change command allows the change value to be either a double precision decimal constant or a left-justified hexadecimal value:
.fp<n> <float-decimal constant> or
.fp<n> <96-bit left-justified hex constant> or
.fp<n> .fp<n>
<n> is one of 0 - 7 representing the desired 68881 general floating point register.
The syntax for <float-decimal constant> is:
[+/-]digits[.digits][Ee[+/-]integer]
The syntax for <96-bit left-justified hex constant> is:
0xh
Utilities Reference 385

2 Using the debug Utility
h represents up to 12 hexadecimal digits. If less than 12 digits are given, the value is padded on the right with zeroes. Remember that bits 68 through 80 of an extended precision value in IEEE are always zero.
dbg: .fp0 4 Set FP0 to 4.0dbg: .dn: 00000000 00000000 00000001 00000003 00000000 000000A6 00001210 00000000an: 0001DB78 00000000 0001E7EE 0001E7E2 0001E7DE 00000000 00025610 0001E770pc: 000F8FA8 cc: 04 (--Z--)fp0:40010000 80000000 00000000 fp4:7FFF0000 FFFFFFFF FFFFFFFF fpcr: 0000 XNfp1:7FFF0000 FFFFFFFF FFFFFFFF fp5:7FFF0000 FFFFFFFF FFFFFFFF fpiar: 00000000fp2:7FFF0000 FFFFFFFF FFFFFFFF fp6:7FFF0000 FFFFFFFF FFFFFFFF fpsr: 00000208fp3:7FFF0000 FFFFFFFF FFFFFFFF fp7:7FFF0000 FFFFFFFF FFFFFFFF (---- 0)AX:(INEX) XS:(INEX2)_exit+0x6 >DEADDEAD add.l -8531(a5),d7dbg: .fp0 0x4 Set FP0 with hex value (left justified)dbg: .dn: 00000000 00000000 00000001 00000003 00000000 000000A6 00001210 00000000an: 0001DB78 00000000 0001E7EE 0001E7E2 0001E7DE 00000000 00025610 0001E770pc: 000F8FA8 cc: 04 (--Z--)fp0:40000000 00000000 00000000 fp4:7FFF0000 FFFFFFFF FFFFFFFF fpcr: 0000 XNfp1:7FFF0000 FFFFFFFF FFFFFFFF fp5:7FFF0000 FFFFFFFF FFFFFFFF fpiar: 00000000fp2:7FFF0000 FFFFFFFF FFFFFFFF fp6:7FFF0000 FFFFFFFF FFFFFFFF fpsr: 00000208fp3:7FFF0000 FFFFFFFF FFFFFFFF fp7:7FFF0000 FFFFFFFF FFFFFFFF (---- 0)AX:(INEX) XS:(INEX2) _exit+0x6 >DEADDEAD add.l -8531(a5),d7dis: .fp0 0x40200000aef5 Another hex value
386 Utilities Reference
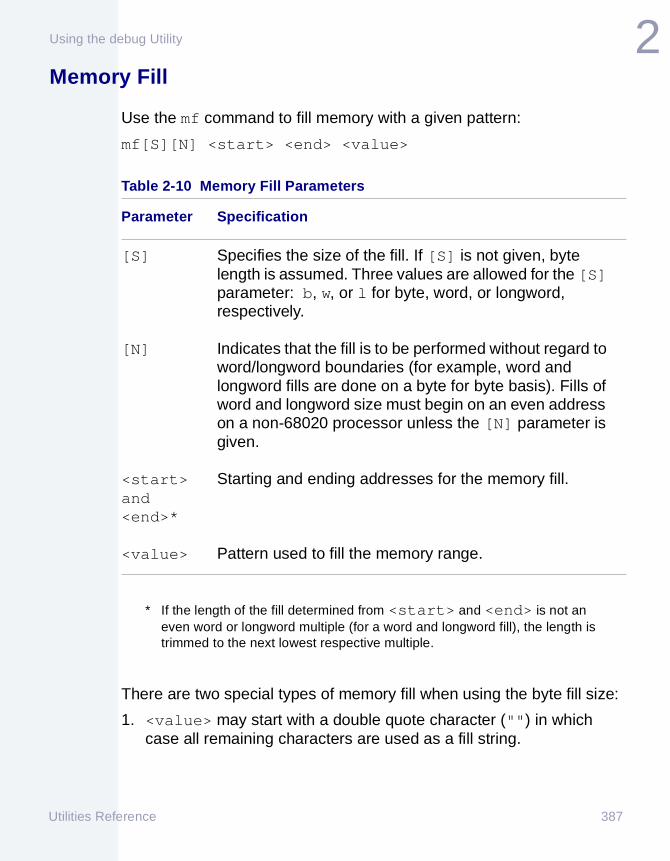
2Using the debug Utility
Memory Fill
Use the mf command to fill memory with a given pattern:
mf[S][N] <start> <end> <value>
* If the length of the fill determined from <start> and <end> is not an even word or longword multiple (for a word and longword fill), the length is trimmed to the next lowest respective multiple.
There are two special types of memory fill when using the byte fill size:
1. <value> may start with a double quote character ("") in which case all remaining characters are used as a fill string.
Table 2-10 Memory Fill Parameters
Parameter Specification
[S] Specifies the size of the fill. If [S] is not given, byte length is assumed. Three values are allowed for the [S] parameter: b, w, or l for byte, word, or longword, respectively.
[N] Indicates that the fill is to be performed without regard to word/longword boundaries (for example, word and longword fills are done on a byte for byte basis). Fills of word and longword size must begin on an even address on a non-68020 processor unless the [N] parameter is given.
<start> and <end>*
Starting and ending addresses for the memory fill.
<value> Pattern used to fill the memory range.
Utilities Reference 387

2 Using the debug Utility
2. <value> can be multiple byte values in which case each successive value is used as fill characters.
In both cases, the pattern is reused from the beginning if the fill count has not been exhausted.
Exampled3 70000 Display memory0x00070000 - FEEDC0DE FEEDC0DE FEEDC0DE FEEDC0DE ~m@^~m@^~m@^~m@^0x00070010 - FEEDC0DE FEEDC0DE FEEDC0DE FEEDC0DE ~m@^~m@^~m@^~m@^0x00070020 - FEEDC0DE FEEDC0DE FEEDC0DE FEEDC0DE ~m@^~m@^~m@^~m@^dis: mfb 70000 70003 a1 Fill with bytedbg: d2 700000x00070000 - A1A1A1A1 FEEDC0DE FEEDC0DE FEEDC0DE !!!!~m@^~m@^~m@^0x00070010 - FEEDC0DE FEEDC0DE FEEDC0DE FEEDC0DE ~m@^~m@^~m@^~m@^dis: mfw 70000 7000f 5252 Fill with worddbg: d2 700000x00070000 - 52525252 52525252 52525252 52525252 RRRRRRRRRRRRRRRR0x00070010 - FEEDC0DE FEEDC0DE FEEDC0DE FEEDC0DE ~m@^~m@^~m@^~m@^dis: mfl 70000 70002 81186226 Fill with longworddbg: d3 700000x00070000 - 81186226 81186226 81186226 81186226 ..b&..b&..b&..b&0x00070010 - FEEDC0DE FEEDC0DE FEEDC0DE FEEDC0DE ~m@^~m@^~m@^~m@^0x00070020 - FEEDC0DE FEEDC0DE FEEDC0DE FEEDC0DE ~m@^~m@^~m@^~m@^dis: mfwn 70001 70007 0102 Non-aligned fill worddbg: d3 700000x00070000 - 81010201 02010201 81186226 81186226 ..........b&..b&0x00070010 - FEEDC0DE FEEDC0DE FEEDC0DE FEEDC0DE ~m@^~m@^~m@^~m@^0x00070020 - FEEDC0DE FEEDC0DE FEEDC0DE FEEDC0DE ~m@^~m@^~m@^~m@^dbg: mfb 70000 7000f "shazam! Fill with a stringdbg: d4 700000x00070000 - 7368617A 616D2173 68617A61 6D217368 shazam!shazam!sh0x00070010 - FEEDC0DE FEEDC0DE FEEDC0DE FEEDC0DE ~m@^~m@^~m@^~m@^0x00070020 - FEEDC0DE FEEDC0DE FEEDC0DE FEEDC0DE ~m@^~m@^~m@^~m@^0x00070030 - FEEDC0DE FEEDC0DE FEEDC0DE FEEDC0DE ~m@^~m@^~m@^~m@^0x00070040 - FEEDC0DE FEEDC0DE FEEDC0DE FEEDC0DE ~m@^~m@^~m@^~m@^0x00070050 - FEEDC0DE FEEDC0DE FEEDC0DE FEEDC0DE ~m@^~m@^~m@^~m@^0x00070060 - FEEDC0DE FEEDC0DE FEEDC0DE FEEDC0DE ~m@^~m@^~m@^~m@^0x00070070 - FEEDC0DE FEEDC0DE FEEDC0DE FEEDC0DE ~m@^~m@^~m@^~m@^dis: mf 70000 70010 1 2 3 4 3+2 Fill with multiple byte valuesdbg: d4 700000x00070000 - 01020304 05010203 04050102 03040501 ................0x00070010 - 02EDC0DE FEEDC0DE FEEDC0DE FEEDC0DE .m@^~m@^~m@^~m@^0x00070020 - FEEDC0DE FEEDC0DE FEEDC0DE FEEDC0DE ~m@^~m@^~m@^~m@^0x00070030 - FEEDC0DE FEEDC0DE FEEDC0DE FEEDC0DE ~m@^~m@^~m@^~m@^
388 Utilities Reference

2Using the debug Utility
Memory Search
Use the ms command to search memory for a given pattern:
ms[S][N] <start> <end> [:<mask>] <value>
* If the length of the search determined from <start> and <end> is not an even word or longword multiple (for a word and longword search), the length is trimmed to the next lowest respective multiple.
There are two special types of memory search when using the byte search size:
• <value> may start with a double quote character (") in which case all remaining characters are used as a search string.
Table 2-11 Memory Search Parameters and Specifications
Parameter Specification
[S] Specifies the size of the search. If [S] is not given, byte length is assumed. Three values are allowed for the [S] parameter: b, w, or l for byte, word, or longword, respectively.
[N] Indicates that the search is to be performed without regard to word/longword boundaries (for example, word and longword searches are done on a byte for byte basis). Fills of word and longword size must begin on an even address on a non-68020 processor unless the [N] parameter is given.
<start> and <end>*
Starting and ending addresses for the memory search.
<value> Pattern used to search the memory range.
Utilities Reference 389

2 Using the debug Utility
• <value> can be multiple byte values in which case each successive value is used as a search pattern.
A <mask> may be specified to limit the comparison to only those bits set in the mask. If <mask> is not specified, the mask used is -1 (all bits set). <mask> is ignored for multiple character patterns.
Exampledbg: d1 btext
btext - 4AFC0001 0000259E 000C0064 00000048 J|....%....d...H
dis: msw btext btext+259e 1 Search for word-aligned 0001btext+0x2 - 00010000 259E000C 00640000 00480555 ....%....d...H.Usprintf+0x1C0 - 0001206F 000C58AF 000C2008 56802200 .. o..X/.. .V.".putc+0x42 - 000141EF 00072208 306A000E 2008206A ..Ao..".0j.. . jfclose+0x20 - 0001670E 200A6126 28006006 4A6A000C ..g. .a&(.‘.Jj..fseek+0xB8 - 000167BC 0CAF0000 00010020 6608202A ..g<./..... f. *fseek+0xC0 - 00010020 6608202A 00089092 988024AA ... f. *......$*ftell+0x2E - 00017200 306A000E 20086100 057C588F ..r.0j.. .a..|X._setbase+0x2A - 00016606 303C0080 60027040 48C0816A ..f.0<..‘.p@[email protected]_setbase+0xC8 - 00010012 603E306A 00122008 22000CAE ....‘>0j.. ."..._iobinit+0x16 - 00018182 3D7C0002 819C3D7C 0002819E ....=|....=|...._T$LDiv+0x14 - 00016122 E20A6402 4480E20A 64024481 ..a"b.d.D.b.d.D.getstat+0x - 0001672E 0C010006 673A0C01 00026710 ..g.....g:....g.getstat+0x2 - 00016000 03044E40 008D6500 02FC206F ..‘[email protected]..| olseek+0xC - 00016716 0C010002 670672CB 6000013C ..g.....g.rK‘..<_utinit+0x2 - 00014E75 4E752F05 7A004A80 6A047A08 ..NuNu/.z.J.j.z.Tens16+0xA6 - 00013C67 0EF54646 D4973C9C D2B297D8 ..<g.uFFT.<.R2.X_T$DInt+0x3A - 00015247 E288E291 51CEFFF2 64125281 ..RGb.b.QN.rd.R._T$DMul+0x18E - 000108C0 001F6030 0C828000 00006604 ...@..‘0......f.PackD+0x58 - 00010101 01010101 01011111 01111101 ................PackD+0xE0 - 000104E8 00000000 00000001 04E40000 ...h.........d..PackD+0xEA - 000104E4 00000000 0085230F 0D74000F ...d......#..t..
dbg: msw btext btext+259e 4e40 Search for system calls_stkchec+0x30 - 4E40008C 321F4E75 202E8000 90AE8008 [email protected] .......trapinit+0x1A - 4E400021 64066100 12CE6564 2F490014 N@.!d.a..Ned/I..trapinit+0xBA - 4E400006 4E400006 12D866FC 4E7548E7 [email protected]@...Xf|NuHgtrapinit+0xBE - 4E400006 12D866FC 4E7548E7 C080203C [email protected]|NuHg@. <getstat+0x2C - 4E40008D 650002FC 206F0010 20826000 [email protected]..| o.. .‘.getstat+0x3E - 4E40008D 650002EA 20016000 02E2206F [email protected] .‘..b ogetstat+0x50 - 4E40008D 600002D6 48E76080 C1414A81 N@..‘..VHg‘.AAJ.setstat+0x1E - 4E40008E 600002B0 48E76080 20403001 N@..‘..0Hg‘. @0.access+0x8 - 4E400084 650002A2 4E40008F 60000294 [email protected].."N@..‘...access+0x10 - 4E40008F 60000294 48E76080 20403001 N@..‘...Hg‘. @0.
390 Utilities Reference

2Using the debug Utility
open+0xA - 4E400084 60000286 48E76080 4E40008F N@..‘...Hg‘[email protected]+0x4 - 4E40008F 6000027A 48E76080 20403001 N@..‘..zHg‘. @0.mknod+0xA - 4E400085 6500026A 60000260 48E76080 [email protected]‘..‘Hg‘.create+0x10 - 4E400083 6000023A 48E76080 2F092040 N@..‘..:Hg‘./. @creat+0x16 - 4E400083 2049225F 64000218 0C0100DA N@.. I"_d......Zcreat+0x36 - 4E400084 650001FE 74007202 4E40008E [email protected][email protected]+0x42 - 4E40008E 640001F0 34014E40 008F3202 [email protected]@..2.creat+0x4C - 4E40008F 32026000 01E648E7 60802040 [email protected].‘..fHg‘. @unlinkx+0x8 - 4E400087 650001D6 600001CC 48E76080 [email protected]‘..LHg‘.unlink+0x8 - 4E400087 650001C2 600001B8 48E76080 [email protected]‘..8Hg‘.
dup+0x4 - 4E400082 600001B0 48E76080 2041222F N@..‘..0Hg‘. A"/read+0xA - 4E400089 65062001 6000019A 0C4100D3 [email protected]. .‘....A.Sreadln+0xA - 4E40008B 60DC48E7 60802041 222F0010 N@..‘\Hg‘. A"/..write+0xA - 4E40008A 6500016E 20016000 016648E7 [email protected] .‘..fHgwriteln+0xA - 4E40008C 60E648E7 6080122F 00136726 N@..‘fHg‘../..g&lseek+0x1E - 4E40008D 640E60F2 72054E40 008D6404 [email protected].‘[email protected]+0x28 - 4E40008D 640460E8 7400D497 22024E40 [email protected].‘ht.T.".N@lseek+0x36 - 4E400088 65DC2001 60000114 48E76080 [email protected]\ .‘...Hg‘.ebrk+0x42 - 4E400028 204A245F 650000C8 2D4884D8 N@.( J$_e..H-H.Xsbrk+0x14 - 4E400007 64000008 225F6000 00642D40 [email protected]..."_‘..d-@_srqmem+0x2 - 4E400028 650A2D40 84E0200A 245F4E75 N@.(e.-@.‘ .$_Nu_srtmem+0x8 - 4E400029 245F6000 000691C8 C1886406 N@.)$_‘....HA.d._exit+0x2 - 4E400006 DEADDEAD 003C0001 4E754E75 N@.. -̂ -̂.<..NuNu
dbg: msl btext btext+259e :ffffff80 4e400000Only non-I/O callssbrk+0x14 - 4E400007 64000008 225F6000 00642D40 [email protected]..."_‘..d-@_srqmem+0x2 - 4E400028 650A2D40 84E0200A 245F4E75 N@.(e.-@.‘ .$_Nu_srtmem+0x8 - 4E400029 245F6000 000691C8 C1886406 N@.)$_‘....HA.d._exit+0x2 - 4E400006 DEADDEAD 003C0001 4E754E75 N@.. -̂ -̂.<..NuNu
dbg: msln btext btext+259e :ffffff80 4e400000 Non-longword boundary searchtrapinit+0x1A - 4E400021 64066100 12CE6564 2F490014 N@.!d.a..Ned/I..trapinit+0xBA - 4E400006 4E400006 12D866FC 4E7548E7 [email protected]@...Xf|NuHgtrapinit+0xBE - 4E400006 12D866FC 4E7548E7 C080203C [email protected]|NuHg@. <ebrk+0x42 - 4E400028 204A245F 650000C8 2D4884D8 N@.( J$_e..H-H.Xsbrk+0x14 - 4E400007 64000008 225F6000 00642D40 [email protected]..."_‘..d-@_srqmem+0x2 - 4E400028 650A2D40 84E0200A 245F4E75 N@.(e.-@.‘ .$_Nu_srtmem+0x8 - 4E400029 245F6000 000691C8 C1886406 N@.)$_‘....HA.d._exit+0x2 - 4E400006 DEADDEAD 003C0001 4E754E75 N@.. -̂ -̂.<..NuNu
dbg: ms btext btext+259e "math String searchtrapinit+0x7B - 6D617468 00000000 00223C00 0000402F math....."<...@/
dis: ms btext btext+259e "* String searchtrapinit+0x34 - 2A2A2A2A 20537461 636B204F 76657266 **** Stack Overftrapinit+0x35 - 2A2A2A20 53746163 6B204F76 6572666C *** Stack Overfltrapinit+0x36 - 2A2A2053 7461636B 204F7665 72666C6F ** Stack Overflotrapinit+0x37 - 2A205374 61636B20 4F766572 666C6F77 * Stack Overflow
Utilities Reference 391

2 Using the debug Utility
trapinit+0x48 - 2A2A2A2A 0D002A2A 2A2A2043 616E2774 ****..**** Can’ttrapinit+0x49 - 2A2A2A0D 002A2A2A 2A204361 6E277420 ***..**** Can’t trapinit+0x4A - 2A2A0D00 2A2A2A2A 2043616E 27742069 **..**** Can’t i_T$DMul+0x150 - 2A04CA81 84852A04 4685C285 C8808284 *.J...*.F.B.H..._T$DMul+0x156 - 2A044685 C285C880 8284C085 4A826A3C *[email protected]<_T$DDiv+0x64 - 2A3C0000 07FF2801 C885B981 80842803 *<....(.H.9...(.NormD+0x66 - 2A044685 C285C882 82846022 E8B9E8B8 *.F.B.H...‘"h9h8
dbg: ms btext btext+259e 2a 00 Same as above but null terminatedsprintf+0x3B8 - 2A0047EE 803E2004 720FC081 2C002200 *.Gn.> .r.@.,.".putc+0x7 - 2A000C48 C0028000 0080220C 80000080 *..H@.....".....putc+0x1B - 2A000C48 C07222C0 810C8000 00000266 *..H@r"@.......fputc+0x35 - 2A000C48 C0080000 02672A48 78000141 *[email protected]*Hx..Aputc+0x6B - 2A000C48 C0080000 08660620 0A610001 *[email protected]. .a..putc+0x8D - 2A000C48 C0080000 0766160C 97000000 *[email protected]+0xD - 2A000C48 C0080000 0F671430 2A000C48 *[email protected]*..Hfclose+0x19 - 2A000C48 C0080000 01670E20 0A612628 *[email protected]. .a&(_setbase+0x4B - 2A000C48 C0080000 07670E41 FA049E25 *[email protected]..%_setbase+0x75 - 2A000C48 C0720CC0 81660000 9E4A6A00 *..H@[email protected]._setbase+0x89 - 2A000C48 C0080000 07670835 7C020000 *[email protected]|..._setbase+0xFB - 2A001248 C0D1AE81 54700848 C0816A00 *[email protected]@.j._setbase+0x10D - 2A000432 2A001248 C1D08125 40000824 *..2*..HAP.%@..$_setbase+0x111 - 2A001248 C1D08125 40000824 80588F4C *..HAP.%@..$.X.Ldbg:
Linking to a Module
Use the l command to link to a memory module. If the named module is not in memory, debug tries to load a file (in the execution directory) of the given name. The module’s address is placed in the .r7 relocation register. Subsequent l commands unlink the previously linked module and link to the new module. The module is automatically unlinked when the debugger terminates.
Table 2-12 Link Memory Module Command
Command Specification
l <name> Link debugger to the module specified by <name>.
392 Utilities Reference

2Using the debug Utility
Exampledbg: l term Link to the module named TERMdbg: @7 Set default relocation register todbg: .r Display relocation registersRn: 00000000 00000000 00000000 0001FE00 00000000 00000000 00000000 000230Cdbg: d8 0 Display memory0x00000000+r7 - 4AFC0001 0000007A 00000000 00000070 J|.....z.......p0x00000010+r7 - FFFF0F00 80000004 00000000 00000000 ................0x00000020+r7 - 00000000 00000000 00000000 0000C5F3 ..............Es0x00000030+r7 - 00FF8080 1B030123 00640068 00000000 .......#.d.h....0x00000040+r7 - 00000000 0000001C 00000100 01010001 ................0x00000050+r7 - 1808180D 1B040117 03050807 000F0070 ...............p0x00000060+r7 - 11130904 53636600 73633638 36383100 ....Scf.sc68681.0x00000070+r7 - 7465726D 00000022 24014AFC 00010000 term..."$.J|....dis:
Utilities Reference 393

2 Using the debug Utility
Symbolic Debugging
The debugger’s symbolic debugging facility allows easy debugging without linkage maps or address tables for reference. The -g option of the linker (l68) writes symbol information into an OS-9 data module. The linker places the symbols associated with global code and data offsets into the symbol table. If a symbol module is available for the code module being debugged, symbolic addresses can be used in most debugger commands.
The linker’s -g option creates a symbol module in the execution directory. The name of the module is that of the code module with .stb appended. If a directory named STB exists in the execution directory, the linker places the symbol module in that directory. This is helpful to reduce the number of entries in the execution directory.
Upon successful creation of a process to execute a program module (see the f command), the debugger searches the execution directory for the symbol module. If not found in the execution directory, the STB directory in the execution directory is searched. If the STB directory does not exist or the symbol module was not found, the debugger begins the same search sequence using directories given in the PATH environment variable. This search sequence is the same as the shell uses.
For More InformationMore Info More Information More Information More Information More
-6-
See the shell documentation in Using OS-9 for details on the PATH environment variable.
If the symbol module cannot be located, the following message is reported:
- can’t find ’prog.stb’. Error #000:216 file not found
394 Utilities Reference

2Using the debug Utility
When the symbol module is successfully loaded, it is examined to verify that it matches the code module being debugged. The module CRC of the program module is stored in the symbol module. If this CRC value does not match that of the code module, the following message is reported:
- symbol module ’c68.stb’ is obsolete.
This message indicates one of three problems:
• The symbol module does not match the code module.
• The code module does not match the symbol module.
• The debugger does not recognize the format of the symbol module.
The cause of this error is usually that an old version of the symbol module and/or code module is already in memory. Be sure that the program has been properly linked by the linker and that old versions of the program are removed from memory.
If the debugger cannot locate a symbol module, the program can still be debugged but the symbolic facilities are not available. Because the program’s symbols are kept in a separate module, a program need not have a final production compilation to remove the symbol information. You can keep the symbol modules of production programs in case additional debugging is required.
The debugger maintains a table of symbol modules containing an entry for each program module being debugged. Normally, this consists of a primary program module and any trap handler module symbol tables. The debugger automatically locates and uses the proper symbol module when that point in the program is reached.
Utilities Reference 395

2 Using the debug Utility
The following commands deal with the symbol table features:
Examplesdbg: f progx Create process running progxdefault symbols belong to ’progx’ Current symbol module set to progxdn: 0000000A 000C0064 00000080 00000003 00000000 000000A2 00001050 00000000an: 00000000 0001B660 00000000 0016F030 00000000 0001B5BC 00022610 0001B5BCpc: 0016F07E cc: 00 (-----)<68881 in Null state>_cstart >2D468010 move.l d6,_totmem(a6)dbg: sm Display known symbol modules
Table 2-13 Symbol Table Commands and Specifications
Command Specification
s Display all symbols in all symbol modules.
s [mod:]<symb>
Display a single symbol from the current symbol module or symbol module [mod:]. The asterisk (*) and question mark (?) wildcard symbols may be used in the symbol name.
sm Display symbol module table.
ss Set current symbol module to the module containing the current PC.
ss <addr> Set current symbol module to the module containing <addr>.
ss <name>: Set current symbol module to the symbol module specified by <name>.
sd <name> Display data symbols only for the specified symbol module.
sc <name> Display code symbols only for the specified symbol module.
396 Utilities Reference

2Using the debug Utility
Mod Addr Code Lo Code Hi Data Lo Data Hi Count Name0016e850 0016f030 0016f51e 0001a610 0001a9bc 83 *progx
Code Lo and Code Hi are the base and end addresses of the program module. Data Lo and Data Hi are the lower and upper addresses of the initial process data area when the process was forked. Note that the data addresses have the (a6)+32768 bias removed.dbg: gs mainInstalled symbol module for trap handler ’cio’dn: 00000001 0001B62E 0001A62A 0001B636 00000000 000000A2 00001050 00000000an: 0001A9BE 001F214A 0001B62E 0001B626 0001B622 00000000 00022610 0001B5B4pc: 0016F280 cc: 00 (-----)<68881 in Null state>main >48E7F080 movem.l d0-d3/a0,-(a7)
When control is returned to debug, the debugger checks to see if the process has called a trap handler module (via the F$TLink system call) to install a trap handler. If so, debug attempts to locate a symbol table module for the trap handler. If found, the symbol module is entered into the symbol module table. You can then reference code and data addresses in the trap handler by symbol name.
The asterisk (*) before the symbol module name indicates the current symbol module. Symbols without a symbol module qualifier are assumed to be in this symbol module. Symbols in other symbol modules are accessed by preceding the symbol name with a colon-terminated symbol module name.dbg: smMod Addr Code Lo Code Hi Data Lo Data Hi Count Name0016c5d0 001f20c0 001f4b48 0016cd70 0016d7dc 109 cio0016e850 0016f030 0016f51e 0001a610 0001a9bc 83 *progxdis: gs main+1cdn: 4042C28F 5C28F5C3 40040000 00000000 00000000 000000A2 00001050 00000000an: 0001A9BE 001F214A 0001B62E 0001B626 0001B622 00000000 00022610 0001B5A0pc: 0016F29C cc: 00 (-----)<68881 in Null state>main+0x1C >4E4F0012 tcall T$Math,T$DMuldbg: gsInstalled symbol module for trap handler ’math’
Program
Current
Number of symbols
Upper data
Lower dataUpper code
Lower codeAddress
address
addressaddress
address
SymbolModule
module name
symbol module
Utilities Reference 397
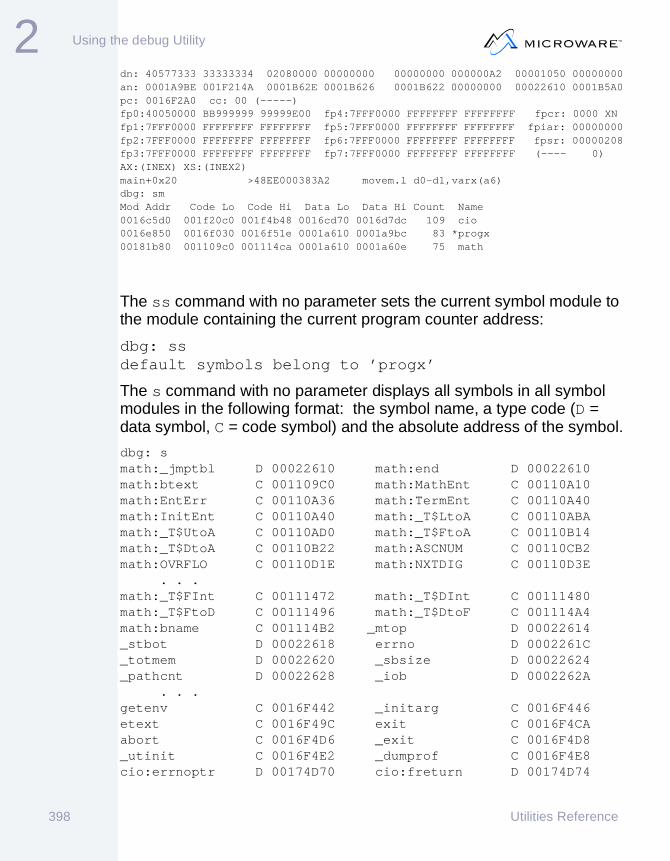
2 Using the debug Utility
dn: 40577333 33333334 02080000 00000000 00000000 000000A2 00001050 00000000an: 0001A9BE 001F214A 0001B62E 0001B626 0001B622 00000000 00022610 0001B5A0pc: 0016F2A0 cc: 00 (-----)fp0:40050000 BB999999 99999E00 fp4:7FFF0000 FFFFFFFF FFFFFFFF fpcr: 0000 XNfp1:7FFF0000 FFFFFFFF FFFFFFFF fp5:7FFF0000 FFFFFFFF FFFFFFFF fpiar: 00000000fp2:7FFF0000 FFFFFFFF FFFFFFFF fp6:7FFF0000 FFFFFFFF FFFFFFFF fpsr: 00000208fp3:7FFF0000 FFFFFFFF FFFFFFFF fp7:7FFF0000 FFFFFFFF FFFFFFFF (---- 0)AX:(INEX) XS:(INEX2) main+0x20 >48EE000383A2 movem.l d0-d1,varx(a6)dbg: smMod Addr Code Lo Code Hi Data Lo Data Hi Count Name0016c5d0 001f20c0 001f4b48 0016cd70 0016d7dc 109 cio0016e850 0016f030 0016f51e 0001a610 0001a9bc 83 *progx00181b80 001109c0 001114ca 0001a610 0001a60e 75 math
The ss command with no parameter sets the current symbol module to the module containing the current program counter address:
dbg: ssdefault symbols belong to ’progx’
The s command with no parameter displays all symbols in all symbol modules in the following format: the symbol name, a type code (D = data symbol, C = code symbol) and the absolute address of the symbol.
dbg: smath:_jmptbl D 00022610 math:end D 00022610math:btext C 001109C0 math:MathEnt C 00110A10math:EntErr C 00110A36 math:TermEnt C 00110A40math:InitEnt C 00110A40 math:_T$LtoA C 00110ABAmath:_T$UtoA C 00110AD0 math:_T$FtoA C 00110B14math:_T$DtoA C 00110B22 math:ASCNUM C 00110CB2math:OVRFLO C 00110D1E math:NXTDIG C 00110D3E
. . .math:_T$FInt C 00111472 math:_T$DInt C 00111480math:_T$FtoD C 00111496 math:_T$DtoF C 001114A4math:bname C 001114B2 _mtop D 00022614_stbot D 00022618 errno D 0002261C_totmem D 00022620 _sbsize D 00022624_pathcnt D 00022628 _iob D 0002262A
. . .getenv C 0016F442 _initarg C 0016F446etext C 0016F49C exit C 0016F4CAabort C 0016F4D6 _exit C 0016F4D8_utinit C 0016F4E2 _dumprof C 0016F4E8cio:errnoptr D 00174D70 cio:freturn D 00174D74
398 Utilities Reference
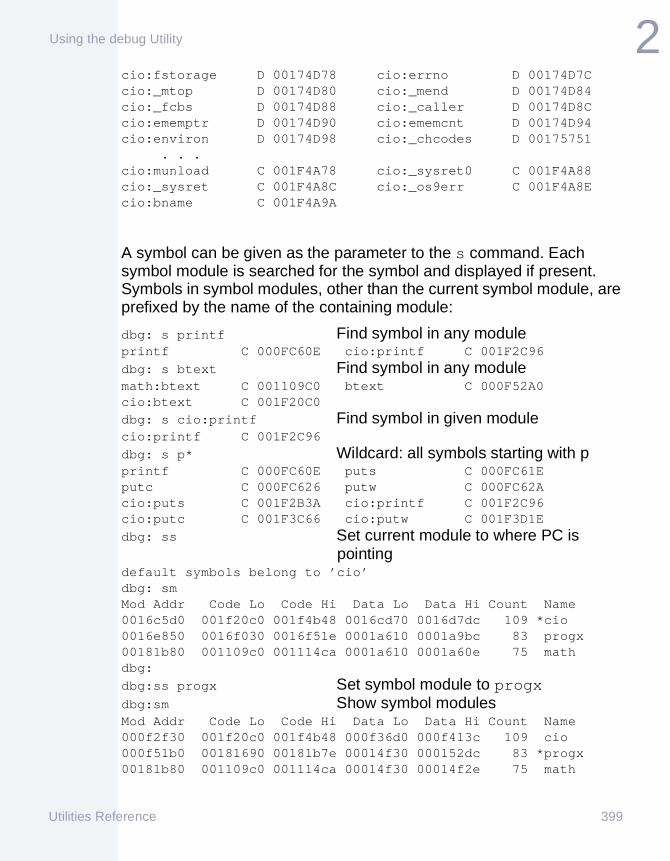
2Using the debug Utility
cio:fstorage D 00174D78 cio:errno D 00174D7Ccio:_mtop D 00174D80 cio:_mend D 00174D84cio:_fcbs D 00174D88 cio:_caller D 00174D8Ccio:ememptr D 00174D90 cio:ememcnt D 00174D94cio:environ D 00174D98 cio:_chcodes D 00175751
. . .cio:munload C 001F4A78 cio:_sysret0 C 001F4A88cio:_sysret C 001F4A8C cio:_os9err C 001F4A8Ecio:bname C 001F4A9A
A symbol can be given as the parameter to the s command. Each symbol module is searched for the symbol and displayed if present. Symbols in symbol modules, other than the current symbol module, are prefixed by the name of the containing module:
dbg: s printf Find symbol in any moduleprintf C 000FC60E cio:printf C 001F2C96
dbg: s btext Find symbol in any modulemath:btext C 001109C0 btext C 000F52A0 cio:btext C 001F20C0
dbg: s cio:printf Find symbol in given modulecio:printf C 001F2C96
dbg: s p* Wildcard: all symbols starting with pprintf C 000FC60E puts C 000FC61E putc C 000FC626 putw C 000FC62A cio:puts C 001F2B3A cio:printf C 001F2C96 cio:putc C 001F3C66 cio:putw C 001F3D1E
dbg: ss Set current module to where PC is pointing
default symbols belong to ’cio’dbg: smMod Addr Code Lo Code Hi Data Lo Data Hi Count Name0016c5d0 001f20c0 001f4b48 0016cd70 0016d7dc 109 *cio0016e850 0016f030 0016f51e 0001a610 0001a9bc 83 progx00181b80 001109c0 001114ca 0001a610 0001a60e 75 mathdbg:
dbg:ss progx Set symbol module to progxdbg:sm Show symbol modulesMod Addr Code Lo Code Hi Data Lo Data Hi Count Name000f2f30 001f20c0 001f4b48 000f36d0 000f413c 109 cio000f51b0 00181690 00181b7e 00014f30 000152dc 83 *progx00181b80 001109c0 001114ca 00014f30 00014f2e 75 math
Utilities Reference 399

2 Using the debug Utility
dbg: sd Show all data symbolsmath:_jmptbl D 0001CF30 math:end D 0001CF30 _mtop D 0001CF34 _stbot D 0001CF38 errno D 0001CF3C _totmem D 0001CF40_sbsize D 0001CF44 _pathcnt D 0001CF48_iob D 0001CF4A _fcbs D 0001D2CAenviron D 0001D2CE varx D 0001D2D2_jmptbl D 0001D2DE end D 0001D2DEcio:errnoptr D 000FB6D0 cio:freturn D 000FB6D4cio:fstorage D 000FB6D8 cio:errno D 000FB6DCcio:_mtop D 000FB6E0 cio:_mend D 000FB6E4cio:_fcbs D 000FB6E8 cio:_caller D 000FB6ECcio:ememptr D 000FB6F0 cio:ememcnt D 000FB6F4cio:environ D 000FB6F8 cio:_chcodes D 000FC0B1cio:_jmptbl D 000FC13E cio:end D 000FC13E
dbg: sd progx: Show data symbols in progx_mtop D 0001CF34 _stbot D 0001CF38errno D 0001CF3C _totmem D 0001CF40_sbsize D 0001CF44 _pathcnt D 0001CF48 _iob D 0001CF4A _fcbs D 0001D2CA environ D 0001D2CE varx D 0001D2D2 _jmptbl D 0001D2DE end D 0001D2DE
dbg: sc progx: Show code symbols in progxbtext C 00181690 bname C 001816D8_cstart C 001816DE _stkcheck C 001817CC_stkchec C 001817CC stacksiz C 00181804freemem C 0018180E trapinit C 00181818main C 001818E0 _iobinit C 00181934fopen C 001819CE fdopen C 001819D2freopen C 001819D6 setbuf C 001819DA
. . .os9exec C 00181A96 _prgname C 00181A9Amodloadp C 00181A9E getenv C 00181AA2_initarg C 00181AA6 etext C 00181AFCexit C 00181B2A abort C 00181B36_exit C 00181B38 _utinit C 00181B42_dumprof C 00181B48
400 Utilities Reference

2Using the debug Utility
Creating a Process to Debug
The f command creates a process to debug. The parameters accepted are similar to those accepted by the shell:
f <prog> [#mem] [^prior] [<stdin] [>stdout] [args]
The program module <prog> is forked with the special F$DFork system call. This action provides a controlled process environment for the debugger. The program module is located in a similar fashion as the shell; the PATH environment variable is used as a list of alternate search directories to search if the command is not found in the execution directory.
NoteNoteThe shell pipe (!) and concurrent (&) features are not supported. You cannot redirect the standard error path as this is the path that the debugger uses for command input and display output. Shell filename wildcards cannot be used on the f command but can be given when debug is run directly from the shell.
You can use the f command at anytime during the debugging session. If a process was already being debugged, that process is terminated before the new process is created.
After the new process is created, control is returned to the debugger immediately. The debugger displays the first instruction to be executed in the program:
dbg: f progx -e Create process running progx with argument -edefault symbols belong to ’progx’
dn: 0000000C 000C0064 00000080 00000003 00000000 000000AA 00001060 00000000an: 00000000 00015F90 00000000 000F52A0 00000000 00015EE4 0001CF30 00015EE4pc: 000F52EE cc: 00 (-----)<68881 in Null state>
Utilities Reference 401

2 Using the debug Utility
_cstart >2D468010 move.l d6,_totmem(a6)dbg: q
402 Utilities Reference

2Using the debug Utility
Starting the Debugger from the Shell Command Line
You can start the debugger from the shell command line. Any arguments given to debug are processed as if the f command was given. Any metacharacters recognized by the shell must be quoted if intended for debug. Metacharacters seen by the shell affect debug itself rather than the program being debugged.
For example:
shell: debug progx -e h1 h2
This command is the equivalent to the f command issued in the debugger:
dbg: f progx -e h1 h2
To pass a memory override to the progx process, the following two commands are equivalent:
shell: debug progx "#32k" -e h1 h2dbg: fprogx #32k -e h1 h2
The debugger uses the standard error path to determine the console device on which the debugger is running. The debugger opens a separate path to this device so as not to interfere with the debugged process’ standard error path. This action is useful to debug programs that run as filters:
shell: qsort data.file ! debug datafilter ! datamerge
In this case, the pipes are set up by the shell and the datafilter process runs within the pipeline but under control of the debugger.
If shell filename wildcard processing is desired, run the debugger from the shell command line as normal:
shell: debug progx -f *.c
The wildcards are expanded and passed to debug, which in turn passes the filenames to progx.
Utilities Reference 403

2 Using the debug Utility
Setting and Displaying debug Options
The o command displays and changes debugger options. To display available options use o?:
The o command displays the current option settings:
dbg: oHexformat = 0x, Input radix = 16Show 68881 registers ON in hex
The ob option controls the number input radix. You can use this option to change the input radix between 16 and 10. The initial input radix is 16. To avoid confusion, the value given as the parameter of the ob command is assumed to be decimal.
Examples
dbg: v 10Display 100x00000010 (16) 0x00000010
dbg: ob 10Change radix to base 10Hexformat = 0x, Input radix = 10
Show 68881 registers ON in dbg: v 10Display 10
0x0000000A (10) 0x0000000A
Table 2-14 debug Options
Option Description
b<n> Numeric input base radix.
d Toggle 68881 decimal register display.
f Toggle 68881 register display.
x Toggle disassembly hex output format.
? Display options help.
404 Utilities Reference

2Using the debug Utility
dbg: odHexformat = 0x, Input radix = 10Show 68881
registers ON in hex
The od option toggles the 68881 register display between decimal and hexadecimaldbg: .dn: 00000000 00000000 00000001 00000003 00000000 000000A2 00001050 00000000an: 000152D2 00000000 00015F4E 00015F46 00015F42 00000000 0001CF30 00015ED4pc: 00139364 cc: 04 (--Z--)fp0:40010000 C0000000 00000000 fp4:7FFF0000 FFFFFFFF FFFFFFFF fpcr: 0000 XNfp1:7FFF0000 FFFFFFFF FFFFFFFF fp5:7FFF0000 FFFFFFFF FFFFFFFF fpiar: 00000000fp2:7FFF0000 FFFFFFFF FFFFFFFF fp6:7FFF0000 FFFFFFFF FFFFFFFF fpsr: 00000008fp3:7FFF0000 FFFFFFFF FFFFFFFF fp7:7FFF0000 FFFFFFFF FFFFFFFF (---- 0)AX:(INEX)_exit+0x6 DEADDEAD add.l -8531(a5),d7dbg: odHexformat = 0x, Input radix = 10Show 68881 registers ON in decimaldbg: .dn: 00000000 00000000 00000001 00000003 00000000 000000A2 00001050 00000000an: 000152D2 00000000 00015F4E 00015F46 00015F42 00000000 0001CF30 00015ED4pc: 00139364 cc: 04 (--Z--)fp0:6 fp4:<NaN> fpcr: 0000 XNfp1:<NaN> fp5:<NaN> fpiar: 00000000fp2:<NaN> fp6:<NaN> fpsr: 00000008fp3:<NaN> fp7:<NaN> (---- 0)AX:(INEX) _exit+0x6 DEADDEAD add.l -8531(a5),d7
The of option toggles the 68881 register display on and off.dbg: .dn: 00000000 00000000 00000001 00000003 00000000 000000A2 00001050 00000000an: 000152D2 00000000 00015F4E 00015F46 00015F42 00000000 0001CF30 00015ED4pc: 00139364 cc: 04 (--Z--)fp0:6 fp4:<NaN> fpcr: 0000 XNfp1:<NaN> fp5:<NaN> fpiar: 00000000fp2:<NaN> fp6:<NaN> >fpsr: 00000008fp3:<NaN> fp7:<NaN> (---- 0)AX:(INEX) _exit+0x6 DEADDEAD add.l -8531(a5),d7dbg: ofHexformat = 0x, Input radix = 10Show 68881 registers OFFdbg: .dn: 00000000 00000000 00000001 00000003 00000000 000000A2 00001050 00000000an: 000152D2 00000000 00015F4E 00015F46 00015F42 00000000 0001CF30 00015ED4pc: 00139364 cc: 04 (--Z--)_exit+0x6 DEADDEAD add.l -8531(a5),d7dbg:
Utilities Reference 405

2 Using the debug Utility
The ox option toggles the hex number indicator between $ (for assembler programmers) and 0x (for C programmers):
dbg:di .pc_cstart >2D468010 move.l d6,_totmem(a6)_cstart+0x4 >2D468014 move.l d6,_sbsize(a6)_cstart+0x8 >3D438018 move.w d3,_pathcnt(a6)_cstart+0xC >4A85 tst.l d5_cstart+0xE >671E beq.b _cstart+0x2E_cstart+0x10 >08050000 btst.b #0,d5_cstart+0x14 >6614 bne.b _cstart+0x2A->dis: oxHexformat = $, Input radix = 16Show 68881 registers ON in hexdbg: di .pc_cstart >2D468010 move.l d6,_totmem(a6)_cstart+$4 >2D468014 move.l d6,_sbsize(a6)_cstart+$8 >3D438018 move.w d3,_pathcnt(a6)_cstart+$C >4A85 tst.l d5_cstart+$E >671E beq.b _cstart+$2E_cstart+$10 >08050000 btst.b #0,d5_cstart+$14 >6614 bne.b _cstart+$2A->
406 Utilities Reference
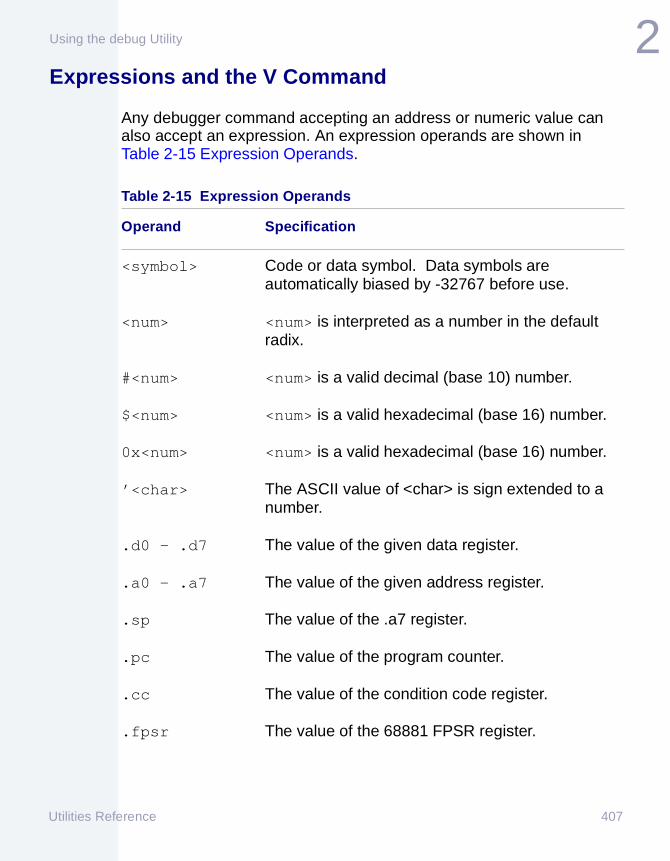
2Using the debug Utility
Expressions and the V Command
Any debugger command accepting an address or numeric value can also accept an expression. An expression operands are shown in Table 2-15 Expression Operands.
Table 2-15 Expression Operands
Operand Specification
<symbol> Code or data symbol. Data symbols are automatically biased by -32767 before use.
<num> <num> is interpreted as a number in the default radix.
#<num> <num> is a valid decimal (base 10) number.
$<num> <num> is a valid hexadecimal (base 16) number.
0x<num> <num> is a valid hexadecimal (base 16) number.
’<char> The ASCII value of <char> is sign extended to a number.
.d0 - .d7 The value of the given data register.
.a0 - .a7 The value of the given address register.
.sp The value of the .a7 register.
.pc The value of the program counter.
.cc The value of the condition code register.
.fpsr The value of the 68881 FPSR register.
Utilities Reference 407

2 Using the debug Utility
An expression may contain any of the following operators.
NoteNoteIn the following tables, e1 and e2 represent any legal expression.
Binary Operations (operate on the left and right operand)
Binary operations are shown in Table 2-16 Binary Operations.
.fpcr The value of the 68881 FPCR register.
.fpiar The value of the 68881 FPIAR register.
Table 2-15 Expression Operands (continued)
Operand Specification
Table 2-16 Binary Operations
Operator Function
e1 + e2 Add e2 to e1.
e1 - e2 Subtract e2 from e1.
e1 * e2 Multiply e1 by e2.
e1 / e2 Divide e1 by e2.
e1 > e2 Bitwise right shift e1 by e2 bits.
e1 < e2 Bitwise left shift e1 by e2 bits.
e1 & e2 Bitwise AND of e1 and e2.
408 Utilities Reference

2Using the debug Utility
Unary Operators (operate on the right operand)
Unary operators are shown in Table 2-17 Unary Operators.
Indirect Operators
Indirect operators are shown in Table 2-18 Indirect Operators.
e1 | e2 Bitwise OR of e1 and e2.
e1 ^ e2 Bitwise Exclusive OR of e1 and e2.
Table 2-17 Unary Operators
Operator Function
- e1 Negate e1.
~ e1 Complements e1.
Table 2-18 Indirect Operators
Operator Function
[e1] The expression e1 is used as the address of a long value for this term.
[e1]l The expression e1 is used as the address of a long value for this term.
Table 2-16 Binary Operations
Operator Function
Utilities Reference 409

2 Using the debug Utility
All expression evaluation is performed using 32-bit two’s complement arithmetic. Traditional operator precedence is not observed; evaluation is simply left to right. Parentheses may be used to force evaluation order. Most commands requiring a count accept an asterisk (*) to mean infinity.
The v command evaluates an expression and prints the value in decimal, hexadecimal, and as a symbolic address.dn: 0000000C 000C0064 00000080 00000003 00000000 000000A2 00001050 00000000an: 00000000 00015F80 00000000 000F32A0 00000000 00015EDC 0001CF30 00015EDCpc: 000F32EE cc: 00 (-----)<68881 in Null state>_cstart >2D468010 move.l d6,_totmem(a6)dbg: v .d10x000C0064 (786532) 0xC0064dbg: v .pc0x000F32EE (996078) _cstartdbg: v .pc+100x000F32FE (996094) _cstart+0x10dbg: v .pc+4000x000F36EE (997102) _initarg+0x38dbg: v .d10x000C0064 (786532) 0xC0064dbg: v .d50x000000A2 (162) 0xA2dbg: v .d5>40x0000000A (10) 0xAdbg: v .sp+80x00015EE4 (89828) 0x15EE4dbg: gs mainInstalled symbol module for trap handler ’cio’dn: 00000001 00015F4E 00014F4A 00015F56 00000000 000000A2 00001050 00000000an: 000152DE 001F214A 00015F4E 00015F46 00015F42 00000000 0001CF30 00015ED4
[e1]w The expression e1 is used as the address of a word value which is sign-extended to 32-bits and used as the value for this term.
[e1]b The expression e1 is used as the address of a byte value which is sign-extended to 32-bits and used as the value for this term.
Table 2-18 Indirect Operators
Operator Function
410 Utilities Reference

2Using the debug Utility
pc: 000F34F0 cc: 00 (-----)<68881 in Null state>main >48E7F080 movem.l d0-d3/a0,-(a7)dbg: v .a10x001F214A (2040138) cio:CIOTrapdbg: v .d10x00015F4E (89934) 0x15F4Edbg: v [.d1]0x00015F46 (89926) 0x15F46dbg: d1 [.d1]0x15F46 - 70726F67 78000000 00015F46 00000000 progx....._F....
More expression examples:dn: 00000000 00012345 00000000 0000004A 00000000 0000FA08 00000000 00000000an: 00008164 00000000 00000045 00000000 00000000 00000000 00002044 00000000pc: 00000000 cc: 00 (-----)<68881 in Null state>dis: v .d10x00012345 (74565) 0x00012345dbg: v .d5>30x00001F41 (8001) 0x00001F41dbg: v 11+690x0000007A (122) 0x0000007Adbg: v #11+#69 Explicit decimal numbers0x00000050 (80) 0x00000050Utilities Manual 2-45dbg: v fe61*2 Some hex values confuse debugSymbol ’fe61*2’ not founddbg: v 0xfe61*2 Use 0x for clarity0x0001FCC2 (130242) 0x0001FCC2dbg: v .a0-240x00008140 (33088) 0x00008140dbg: v .a0&fff0x00000164 (356) 0x00000164dbg: v .d5-5*.a20x004362CF (4416207) 0x004362CFdbg: v .d5-(5*.a2)0x0000F8AF (63663) 0x0000F8AFdbg: v .a2^.d30x0000000F (15) 0x0000000Fdbg: d1 .a60x00002044 - 001FEF70 001FF4F4 00156440 000023E4 ..op..tt..d@..#ddis: v [.a6] Memory indirection0x001FEF70 (2092912) 0x001FEF70dbg: v [.a6]+100x001FEF80 (2092928) 0x001FEF80dbg: v [.a6]w0x0000001F (31) 0x0000001Fdbg: v [.a6]w+10x00000020 (32) 0x00000020dbg: v [.a6]b0x00000000 (0) 0x00000000
Utilities Reference 411

2 Using the debug Utility
Command Summary
Table 2-19 debug Utility Command Summary shows a list of all debug commands and a brief description.
Table 2-19 debug Utility Command Summary
Command Description
b Displays breakpoint list.
b<addr> Sets breakpoint at <addr>.
c<addr> Changes byte values.
cw<addr> Changes word values.
cl<addr> Changes longword values.
d[M][N] <addr> [<len>]
Memory display. [M] is an optional format indicator. If not present, the memory dump is displayed in the normal hexadecimal ASCII dump format. One of the following codes can be given to cause the dump to interpret a memory as follows:
I: Instruction disassembly.
F: Single precision floating point.
D: Double precision floating point.
X: Extended precision floating point (if 68881 is available).
412 Utilities Reference

2Using the debug Utility
f <prog> <params> Creates the process to execute the specified program. <params> may be one of the following:
#<mem>^<prior><<path>><path><args>
Pipes and standard error redirection are not allowed.
g Go: Runs the program until a breakpoint, exception, or the F$Exit system call is encountered.
g <addr> Go from address: Runs the program starting execution at <addr>, until a breakpoint, exception, or the F$Exit system call is encounter
gs Go and stop: Executes the program until the next instruction is encountered. This is the same as the Go command, but it sets a breakpoint at the next instruction. The breakpoint is automatically removed when the debugger regains control.
Table 2-19 debug Utility Command Summary (continued)
Command Description
Utilities Reference 413
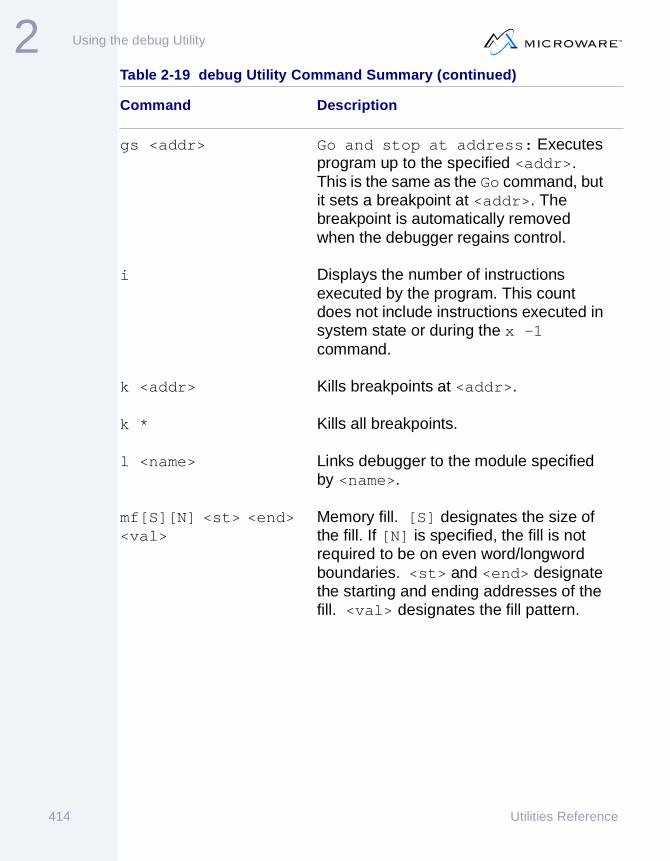
2 Using the debug Utility
gs <addr> Go and stop at address: Executes program up to the specified <addr>. This is the same as the Go command, but it sets a breakpoint at <addr>. The breakpoint is automatically removed when the debugger regains control.
i Displays the number of instructions executed by the program. This count does not include instructions executed in system state or during the x -1 command.
k <addr> Kills breakpoints at <addr>.
k * Kills all breakpoints.
l <name> Links debugger to the module specified by <name>.
mf[S][N] <st> <end> <val>
Memory fill. [S] designates the size of the fill. If [N] is specified, the fill is not required to be on even word/longword boundaries. <st> and <end> designate the starting and ending addresses of the fill. <val> designates the fill pattern.
Table 2-19 debug Utility Command Summary (continued)
Command Description
414 Utilities Reference

2Using the debug Utility
ms[S][N] <st> <end> [:<m>] <val>
Memory search. [S] designates the size of the search. If [N] is specified, the search is not required to be on even word/longword boundaries. <st> and <end> designate the starting and ending addresses of the search. <val> designates the search pattern. <m> is a mask used to limit the search to the bits set in <m>.
o<opt> Displays and changes debugger options. To display available options use o?:
b<n> Numeric input base radix.d Toggle 68881 decimal register display.f Toggle 68881 register display.x Toggle disassembly hex output format.? Display options; help.
q Exits the debugger. The process being debugged is terminated and all its resources returned to the system. Any module linked by the l command is unlinked as well as any symbol modules in use.
s Displays all symbols in all symbol modules
s [mod:]<symb> Displays a single symbol from the current symbol module or symbol module [mod:]. The asterisk (*) and question mark (?) wildcard symbols may be used in the symbol name.
Table 2-19 debug Utility Command Summary (continued)
Command Description
Utilities Reference 415

2 Using the debug Utility
sm Displays symbol module table.
ss Sets current symbol module to the module containing the current PC.
ss <addr> Sets current symbol module to the module containing <addr>.
ss <name>: Sets current symbol module to the symbol module specified by <name>.
sd <name> Displays data symbols only for the specified symbol module.
sc <name> Displays code symbols only for the specified symbol module.
t Trace: The debugger executes one instruction and re-displays the machine registers.
t <count> Trace instructions: The debugger executes <count> instructions and re-displays the machine registers. Each instruction is displayed as it is executed. Breakpoints are ignored while tracing.
v <expr> Prints the value of expression in hexadecimal and decimal
w [<n>] Linkstack traceback via (a5). <n> = depth of traceback. If <n> is not specified, a complete traceback is displayed.
Table 2-19 debug Utility Command Summary (continued)
Command Description
416 Utilities Reference

2Using the debug Utility
x <count> Execute instructions. The debugger executes <count> instructions and re-displays the machine registers. Breakpoints are in effect and no instruction trace is displayed. If <count> is -1, hard breakpoints are set in the program allowing full-speed debugging. If <count> is positive, soft breakpoints are used and control returns after <count> instructions have been executed.
@ Prints the default relocation register.
@<num> Sets default relocation register to <num>. <num> = 0 to 7.
.r Displays the relocation registers.
.r<num> <val> Sets the specified relocation register to <val>.
? Displays debugger commands.
Table 2-19 debug Utility Command Summary (continued)
Command Description
Utilities Reference 417

2 Using the debug Utility
418 Utilities Reference

Chapter 3: Using the editmod Uti l i ty
editmod creates, displays, and edits OS-9 and OS-9 for 68K modules. In addition, it can also generate header files for inclusion in code that deals with these modules. It has the following attributes:
• Comprehensive — Use editmod for all aspects of module maintenance: creation, examination, and modification. editmod supports these actions on device descriptors, system modules, and data modules. You can use it in conjunction with the make utility to create modules non-interactively. It is no longer necessary to use the moded utility, compilers, assemblers, and linkers.
• Host/Target independent — editmod may be used on any host platform to manipulate modules for any target platform.
• Stand-alone — With the exception of supporting description files, editmod does not require any other resources to manipulate modules.
• Extensible — End users can write the supporting files necessary for editmod to understand modules of their own creation.
• Unconstrained — editmod does not limit module modifications based on previous module contents. This includes support for variable length lists such as the colored memory list in the init module. In addition, a module within a boot file may be modified to any length.
• User interface — editmod allows entry of C expressions with additional operand types for hexadecimal constants, binary constants, internet addresses, and ethernet addresses.
419

3 Using the editmod Utility
This section contain a basic guide to using editmod and a technical programmer’s guide for creating modules.
420 Utilities Reference

3Using the editmod Utility
Use Instructions
Creating Modules
The -c option is used to create modules. For example, the following command line creates a device descriptor called term:
editmod -c term -dTERM
• -c specifies the creation mode.
• term is the name of the output file.
• -dTERM defines the identifier TERM.
Refer to the programmer’s guide for more information about creating modules.
Listing Modules
The contents of a module are displayed using the -l option. For example, the following command line lists the contents of the init module.
editmod -l init
• -l selects the view mode.
• init is the file name of the module to list
Editing Modules
The contents of a module can be edited by using the -e option. A series of navigable menus access all the editable fields in the module. The following is a sample annotated editing session.
To start editing a module, use the following command line:
editmod -e init
Utilities Reference 421

3 Using the editmod Utility
• -e selects the edit mode
• init is the file name of the module to edit
After the descriptions and module have been read, the following menu is presented:
1. Module header information 2. Init module information
Which? [?/1-2/p/t/a/w/q]
The valid responses appear in the table below:
Table 3-1 Valid Responses to Which?
Response Description
? Prints help about the valid responses
1 or 2 Selects a portion of the module to edit
p Returns to the previous menu. Since this menu has no previous menu, entering p would cause it to be re-displayed.
t Returns to top menu. Using t at a sub-menu would return you to this menu. Since this is the top menu, entering t would cause it to be re-displayed.
a Aborts module editing without writing the module. If the module has been modified, you are asked if losing the changes is desired.
w Writes the current version of the module into the output file.
q Writes the modified module to the output file and exits.
422 Utilities Reference

3Using the editmod Utility
Entering 1 transfers you to the following menu:
1. Group number : 0x1 2. User number : 0x0 3. Module name : "init" 4. Module access permissions : 0x555 5. Module language : 0x0 6. Module type : 0xc 7. Module revision : 0x0 8. Module attributes : 0x80 9. Module edition : 0x1
Which? [?/1-9/p/t/a/w/q]
There are nine editable items in the menu. Entering 1 displays the prompt:
Group number : 0x1New value:
At this point, any of the following may be entered: ?, <CR>, or a C expression.
? prints help on the semantics of the item. For example:
New value: ?
This is the group number of the owner of the module.
New value:
Pressing <CR> leaves the item at its present value.
A C expression may also be entered. This expression may contain pre-processor identifiers, operators, and constants. Assuming a #define SUPER_GROUP 0 had appeared in the description files, you might enter:
New value: SUPER_GROUP
The menu is re-displayed below. Notice the change in the first line.
1. Group number : 0x02. User number : 0x0 3. Module name : "init" 4. Module access permissions : 0x555
Utilities Reference 423

3 Using the editmod Utility
5. Module language : 0x0 6. Module type : 0xc 7. Module revision : 0x0 8. Module attributes : 0x80 9. Module edition : 0x1
Which? [?/1-9/p/t/a/w/q]
This example is trivial because you are editing an integer field. Module editing may involve the editing of arrays, strings, or variable length lists.
Editing an Array
The array is displayed and you are asked which item in the array you want to edit:
Which array0x01, 0x02, 0x03
Which element? (0 - 2)
At this prompt, a C expression may be entered specifying which item in the array to edit or ? may be used to get help on the semantics of the array elements.
Entering 1 yields:
Old value = 0x2New value =
Again, a C expression for the new value may be entered or ? may be used to get semantics help.
424 Utilities Reference

3Using the editmod Utility
Editing a String
Changing a string is as simple as entering a new one. The old string value is displayed and new one is prompted for.
Module name : "init"New string:
At this point, one of three things may be entered:
• ? provides help on the semantics of the string.
• <CR> results in no change to the string.
• A new string to replace the current one. The new string may contain C-style character escapes (\n, \012, etc.).
To change the string to the “NULL” string, enter NULL in response to the New string: prompt.
Editing a Variable Length List
Some items in modules are not a constant size. For example, some init modules contain a list of colored memory structures terminated with an entry with type zero. This is shown in the following menu:
1. Memory list nodes [0]2. Memory list nodes [1]3. Memory list nodes [2]4. Memory list nodes [3]5. Add additional item to list6. Delete item from list
Which? [?/1-5/p/t/a/w/q]
This indicates that there are currently four nodes in the list (numbered zero through three).
Selecting menu item six allows any of the four memory list nodes to be deleted.
Utilities Reference 425

3 Using the editmod Utility
Selecting menu option five adds one to this list and re-displays the menu as follows. Note the change in item 5.
1. Memory list nodes [0]2. Memory list nodes [1]3. Memory list nodes [2]4. Memory list nodes [3]5. Memory list nodes [4]6. Add additional item to list7. Delete item from listWhich? [?/1-5/p/t/a/w/q]
The items in the list are edited using the procedures described above.
Expressions
editmod contains an user input expression interpreter. When editing fields within the editor, you may enter expressions that contain the following elements:
• Constants character, hexadecimal, octal, decimal (See below for additional constant types)
• Operators all the non-assignment operators are supported
• Preprocessor macros any preprocessor macros entered are replaced with their appropriate values
The expression interpreter has been extended for use within editmod to include additional constant types.
$ prefix
The ’$’ can be used as the prefix for hexadecimal constants. For example, $555 is the same as 0x555.
426 Utilities Reference

3Using the editmod Utility
@ prefix
The ’@’ can be used as the prefix for binary constants. For example, @011101110111 is the same as 0x777.
Internet address
Internet addresses may be used. They appear as a dot(.) separated four item sequence of decimal numbers in the range zero to 255. For example: 190.20.0.45.
Ethernet address
Ethernet addresses may be used. They appear as a colon(:) separated six item sequence of hexadecimal numbers in the range zero to 255(0xff). The 0x or $ prefix is not valid. For example, 6f:ab:0:65:6:4.
DPIO Descriptors
editmod contains some support for OS-9 Dual Ported Input/Output (DPIO) descriptors. editmod assumes an OS-9 system-state program module is a DPIO “secondary” descriptor and that, in creation mode, OS-9 system-state programs may have initialized data.
A utility called DPSplit is also provided to separate and join “primary” and “secondary” descriptors. To edit a DPIO descriptor, use the following process:
Step 1. Use DPSplit to split the file into the individual modules.
Step 2. Edit either module.
Step 3. Use DPSplit to join the individual modules back into a single DPIO descriptor.
To create a DPIO module, use the following process:
Utilities Reference 427

3 Using the editmod Utility
Step 1. Use editmod to create the “primary” module.
Step 2. Use editmod to create the “secondary” module.
Step 3. Use DPSplit to join the individual modules into a single DPIO descriptor.
428 Utilities Reference
3Using the editmod Utility
Programming Guide
If you create a new driver, file manager or system module, you need to know how to create the description files necessary for editmod to understand the format of your descriptors or modules.
Generally, you define the structure of all the sections of the module and the format of the module itself. With this information, editmod has what it needs to create a module from scratch, display the contents of an existing module, edit the contents of an existing module, or generate C structure definitions suitable for inclusion in code that manipulates the modules.
The remainder of this section describes some basic aspects of editmod’s source language, shows the syntax of the language used to describe the module contents, gives some ground rules that must be followed when creating module descriptions, and details how to use the editmod utility.
Features
The description files have the following features:
• C-like pre-processor editmod features a C-like pre-processor that should be familiar to C programmers. The additions and omissions are outlined in a following section.
• C-like syntax editmod’s description files are written much like C structure definitions and assignment statements. The extensions to the expression interpreter were outlined in a preceding section.
The description language has the following features:
• Structures definition of a sequence of possibly non-identically typed data items. A structure may contain other structures or pointers to other data items.
Utilities Reference 429
3 Using the editmod Utility
• Arrays definition of a sequence of identically typed data items.
• Pointer arrays definition of a sequence of pointers to data items.
• Strings definition of a NIL terminated sequence of ASCII characters.
• Repeat structures definition of a series of structures that repeats until a certain condition is met.
• Module layout definition of the exact layout of the module. This technique is superior to relying on a compiler to preserve the programmer’s ordering from the source file.
• Help text ASCII descriptions of the various data items that editmod uses when interfacing with the user.
Pre-Processor
editmod has a built-in pre-processor that is very much like a C pre-processor. The following sections give more specific information.
Exclusions
The following items are not included in editmod’s pre-processor:
• Macros editmod does not support the definition of macros with arguments. The following is not valid:
#define field(x, y) x->y
• Identifier catenation The ##syntax used by ANSI compilers is not supported in editmod.
430 Utilities Reference

3Using the editmod Utility
• Pre-processor directive line extensionThe ’\’ at the end of a pre-processor directive line to include the following line is not supported by editmod.
Additions
The following additional pre-processor directive is supported by editmod.
#cinclude <filename> or #cinclude "filename"
• The #cinclude directive tells editmod to include filename as a C header file. This syntax is used to allowed editmod to extract all the non-macro #define’s from a C header file. Any header files included by a header file included with #cinclude are considered to be a C include file. With this technique, description writers can include system header files and use symbolic names in help text to aid the user while editing. For example, if modes.h was included, S_IREAD could be used when entering device mode capabilities.
• All symbol names are available to the pre-processor during pre-processor expressions. That is, one can test for the definition of data structures with #ifdef, #ifndef, or #if defined(). This can be useful for determining of a given structure has already been defined by a previously processed .des file.
For example,
#if !defined(devcon)struct devcon {
u_int32 empty = 0;};
#endif
Utilities Reference 431

3 Using the editmod Utility
Macro Definitions
_editmod is defined automatically to indicate that the editmod utility is currently being used. For example,
• _editmod indicates that the editmod utility is being used. This might be useful for C header files that are included via #cinclude in description files.
• _editmod_HM indicates that editmod is reading a description file while in header mode. See the emit keyword for an example of where this may be useful.
• _DPIO indicates that the module being edited or listed is a DPIO OS-9 system state program.
• M_EDIT is set to the edition of the module being edited or listed. This may be used to allow editmod to handle multiple formats for the same module.
The remainder of the automatically defined macros are operating system or processor specific.
Table 3-2 Target operating system macros
Operating System Macro
OS-9/68000 _OSK
OS-9 _OS9000
432 Utilities Reference

3Using the editmod Utility
Expressions
The description file contains expressions in various contexts. editmod has an extended expression interpreter that includes additional constant types and operations on non-integer constants. The following are the basic features:
• Constants character, hexadecimal, octal, decimal (See below for additional constant types).
• Operators all non-assignment based operators are included.
• sizeof() operation
• Variables members of other structures can be referenced within expressions.
The following additional features are provided:
• Additional constant typesSee the Use Instructions section on expressions.
• numof() operation provided to determine the number of items in a repeat structure.
Table 3-3 Target processor macros
Processor Family Macros
68000 _MPF68K, _BIG_END
x86/Pentium™ _MPF386, _LIL_END
PowerPC™ _MPFPOWERPC, _BIG_END
Utilities Reference 433

3 Using the editmod Utility
• Operations on Internet and ethernet addressesThe following six operators are allowed on addresses: +, -, |, &, ==, and !=. These integer operations are applied to each addresses respective fields. That is:
3:4:5:10:11:12 + 6:2:2:3:4:4 = 9:6:7:13:15:16 192.60.2.10 & 255.255.255.0 = 192.60.2.0 192.60.2.10 == 0.0.0.0 = 0 (False)
Search Directories
The list of search directories is built of the following components in the order listed:
1. User-specified directories.
Any directories specified on the command line with -v are added to the list.
2. Directories dictated by the module (see options -nd, -nf, and -nm).
The directories that relate to the module being edited/listed are added. If creation mode is being used, no additional directories are added at this point.
For all types of modules the directory:
MWOS/SRC/DESC
is added to the list. This is where description files for non-descriptor modules that are not operating system specific are located.
For non-descriptor modules, the configuration file is examined for an entry indicating that the current module being edited needs a specific directory added (refer to the section on the configuration file for more information). If so, that directory is added to the list.
For all types of modules the directory
MWOS/os/SRC/DESC
434 Utilities Reference

3Using the editmod Utility
where os is the name of the target operating system is added to the list. This is the directory that holds operating system specific description files.
If the module being edited/listed is a descriptor, the file manager specific directory
MWOS/os/SRC/IO/fm/DESC
where os is the name of the operating system and fm is the name of the file manager. If the configuration file has an entry for the file manager, the specified directory is added in place of the file manager specific directory.
If the module being edited/listed is a descriptor, the device driver specific directory
MWOS/os/SRC/IO/fm/DRVR/driver
where os is the name of the operating system and driver is the name of the device driver. If the configuration file has an entry for the device driver, the specified directory is added in place of the device driver specific directory.
A complete list of directories for an OS-9 descriptor module added by step #2 might be:
MWOS/SRC/DESC added for all modulesMWOS/OS9/SRC/DESC added for all OS-9 modulesMWOS/OS9/SRC/IO/SCF/DESC it is an SCF descriptorMWOS/OS9/SRC/IO/SCF/DRVR/SC68681
the device driver is sc68681
A complete list of directories for an OS-9 non-descriptor module added by step #2 might be:
MWOS/SRC/DESC added for all modulesMWOS/OS9000/SRC/DESC added for all OS-9 modules
Utilities Reference 435

3 Using the editmod Utility
NoteNoteThe location of MWOS and the pathlist separators varies on different host OS’s.
3. OS/processor specific #include file directories.
The C include file directories are added to the list.
Configuration File
A configuration file is read to augment the search directories shown in the preceding section. The configuration file can be found at MWOS/SRC/DESC/editmod.cfg. It contains lines with the format:
name,os,directory
where name is the module, file manager, or device driver name whose description files reside in a nonstandard directory, os is the operating system that this particular override applies (OS9 or OS9000), and directory is the directory to used in place of the standard pathlist.
Table 3-4 #include file directories
Target OS #include File Directories
OS-9/68000 MWOS/SRC/DEFSMWOS/OS9/SRC/DEFS
OS-9/80386 MWOS/SRC/DEFSMWOS/OS9000/SRC/DEFSMWOS/OS9000/80386/SRC/DEFS
OS-9/PPC MWOS/SRC/DEFSMWOS/OS9000/SRC/DEFSMWOS/OS9000/PPC/SRC/DEFS
436 Utilities Reference

3Using the editmod Utility
The directory parameter can be either an absolute or relative pathlist. If the pathlist is relative, it is relative to the root of the host system’s MWOS directory structure.
For example, if you were developing a new file manager and driver for OS-9 in sub-directories in your HOME directory, you would add the following lines to the configuration file:
new_fm,os9000,/h0/USR/WARREN/NEWFMnew_driver,os9000,/h0/USR/WARREN/NEWDRVR
If you were working on a new OS-9 for 68K system module called init2, you would add the following line to the configuration file:
init2,os9,OS9/SRC/SYSMODS/INIT2
NoteNoteThe items specified in the configuration file are only considered when modules are being edited or listed. During module creation, the directories for the description files are provided by using the -v option.
Help Text
Various parts of a description file may have help text associated with them. This is the ASCII text that editmod uses to communicate with the user as well as for emitting comments in the generated header files. There is more information detailing where help text is used in the following sections. The basic format of the help text is:
"name:semantics_help"
name is a short (generally less than 30 characters) name for the field. This part of the help text is used when displaying the field for the user or as the comment associated with the item in the generated header file.
semantics_help is the description the user sees when they ask for help on entering a new value for the field.
Utilities Reference 437

3 Using the editmod Utility
As in ANSI C the help text does not have to be, nor is it allowed to be, all in a single double-quoted string. editmod concatenates multiple double-quoted strings in a row. The following example illustrates how a help text appears in the description file, assuming module.h had been included in the description files.
"Module permissions:""The module permissions enable/disable various classes of users from accessing a\n""module. The following values can be used to set the bits:\n"" MP_OWNER_READ (0x0001)\n"" MP_OWNER_WRITE (0x0002)\n"" MP_OWNER_EXEC (0x0004)\n"" MP_GROUP_READ (0x0010)\n"" MP_GROUP_WRITE (0x0020)\n"" MP_GROUP_EXEC (0x0040)\n"" MP_WORLD_READ (0x0100)\n"" MP_WORLD_WRITE (0x0200)\n"" MP_WORLD_EXEC (0x0400)\n"
If an item has help text it implies that the member is editable. Many fields are not editable, yet they should have comments in the emitted header file. Use dot(.) as the first character of the help text to indicate an non-editable field that should have a comment if emitted in a header file. For example:
u_int32 v_lun, ".Logical Unit Number";
This would define a non editable unsigned 32-bit integer item called v_lun that would appear as
u_int32 v_lun; /* Logical Unit Number */
in a generated header file.
Refer to the following data structure specific section for information concerning what style of help text is valid in what context.
438 Utilities Reference

3Using the editmod Utility
Module Creation
When the -c option is used to create a module, the file systype.des in the current directory is implied as the description file to read. This file generally contains mutually exclusive sections that contain the initialization information for various modules. For example:
#if defined(INIT)/* init module specific information */
#endif
#if defined(TERM)/* /term descriptor specific information */
#endif
You must also define a pre-processor identifier (TERM or INIT in the example above) to specify which module is being created.
A sample command line to create a module is as follows:
editmod -c term -dTERM
• -c specifies the creation mode.
• term is the name of the output file.
• -dTERM defines the pre-processor identifier TERM to the empty string.
Utilities Reference 439

3 Using the editmod Utility
Description Files
Description files are text files that describe the format of modules. They reside in directories shown in the following section. The description files read by editmod vary depending on editmod’s operational mode.
editmod’s creation mode reads, by default, a single description file called systype.des. Generally, this description file #include’s the appropriate description files to generate a module. Again, the locations of these included files is described in the following section.
editmod’s display and edit modes read description files based on the module’s contents. If the module is a non-descriptor module, the module name is used to construct a file name in the form module_name.des. This description file and those that are #include’s are read to determine the format of the module. For descriptor modules, two description files with names based on the file manager and driver names are read in sequence: a file named driver_name.des then a file named file_manager_name.des. These description files together define the format of the module.
File names generated by editmod are limited to the MS-DOS file name format of a maximum of eight characters followed by an optional dot and three character maximum extension. Since the extension is always .des, the file’s base name is limited to eight characters. Therefore, if a module’s name, file manager, or driver has a name greater than eight characters, it is truncated to be exactly eight. For example, if the driver was scp68681lc, the description file would be named scp68681.des.
Description files contain three basic elements:
• Definition blocks
• Initialization Block
• Module Block
440 Utilities Reference

3Using the editmod Utility
Definition blocks
Definition blocks are the most basic elements of the definition file. They define the structure and relationships of the various module parts. In C, this is very similar to declaring global variables and defining data structures.
Four types of objects can be defined in a definition block:
• Structures
• Repeat Structures
• Arrays
• Strings
Notes on syntaxes shown:
• This font indicates an item that would appear in the description file exactly as shown.
• This font indicates an item that can have various values that are explained following the syntax diagram.
• Underlined items in the syntax diagrams indicate items that are optional.
Structures
Structures define all the information related to a set of members. The C struct is very similar in syntax to a structure definition.
location struct tag {members
}, helptext;
• location is the section of the module that the structure is to be placed. The keywords that are valid here are code or data. If a location is not specified, the code area is assumed. Refer to the section on module blocks for more information about putting structures into position within the module.
Utilities Reference 441

3 Using the editmod Utility
• tag is the name that is associated with the structure. The importance of the name will be seen later.
• members define the layout of data within the structure. The following section describes the syntax of the members.
• helptext is a double-quoted string that is used when communicating with the user during module display and editing. The current user interface in editmod does not use the semantics portion of the help text on structure definitions.
Each member of the structure may be either a:
• Numerical Member
• Pointer to Another Definition Block
• Sub-Structure
Numerical Member
A numerical member definition is in the form:
type name = expr , helptext;
type specifies the type of the numerical member. The valid types and their general size and alignments are listed in the table below.
Table 3-5 Types and their characteristics
type Size Alignment Display
char 1 1 ’<val>’
u_char 1 1 hexadecimal
int8 1 1 decimal
u_int8 1 1 hexadecimal
int16 2 2 decimal
442 Utilities Reference

3Using the editmod Utility
The alignment shown in the table above is the most likely alignment for the object with the exception of et_addr which has the same size and alignment on all processors. Some target processors may have different alignment characteristics.
See the section on header generation for information about type aliases.
• name is the name of the member. This name is referenced by initialization blocks.
• expr is an optional initialization expression. A numerical member that does not have an initialization expression has a default value of zero.
• helptext is a double-quoted string that is used when communicating with the user during module display and editing.
Pointer to Another Definition Block
The syntax for a structure member that is a pointer to another definition block is:
pointer type name = tag + expr, helptext;
type is one of the types from Table 1-23 on page 230. This determines the width of the pointer. For example,
u_int16 2 2 hexadecimal
int32 4 2 decimal
u_int32 4 2 hexadecimal
in_addr 4 2 internet address
et_addr 6 1 ethernet address
Table 3-5 Types and their characteristics
type Size Alignment Display
Utilities Reference 443

3 Using the editmod Utility
pointer u_int16 fm_name = fm_string;
declares a structure member named fm_name that is a 16-bit wide pointer to fm_string.
• name is the name to be given to the pointer member. This name can be referenced from initialization blocks.
• tag is the name of the data structure that is pointed to by the pointer. The destination data structure may be any type: string, structure, array, pointer array, or repeat structure.
• expr is an offset within the data structure that name is to point to.
Pointer members may have "dot" helptext that will be used when header files are generated. Otherwise, the item pointed at determines if the member is editable.
Sub-Structure
A member of a structure may also be a sub-structure. The syntax for defining such a member is:
struct name tag, helptext;
• name is the tag for the structure that is to be in the structure being defined.
• tag is an optional name for the included structure. When editmod is operating in header generation mode the tag field is not optional so it is best to always include a tag field.
• helptext is the text emitted as a comment in a generated header file. It must being with a dot(.). This text is not used to communicate with the user; instead, the help text for the structure being named is used.
A given structure can only be named as the sub-structure of only one structure. Otherwise, it would be impossible to initialize sub-structures because the name would be ambiguous.
444 Utilities Reference
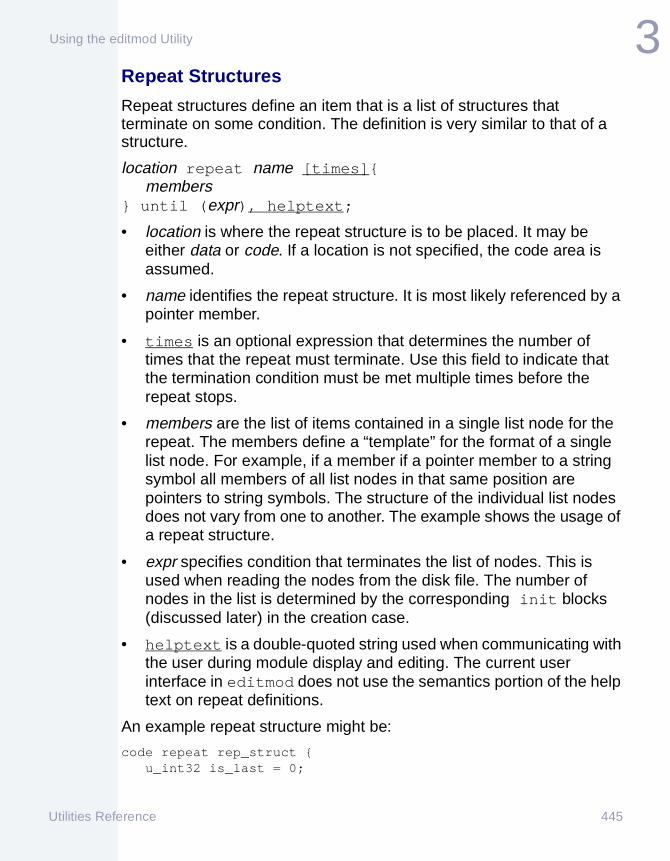
3Using the editmod Utility
Repeat Structures
Repeat structures define an item that is a list of structures that terminate on some condition. The definition is very similar to that of a structure.
location repeat name [times]{members
} until (expr), helptext;
• location is where the repeat structure is to be placed. It may be either data or code. If a location is not specified, the code area is assumed.
• name identifies the repeat structure. It is most likely referenced by a pointer member.
• times is an optional expression that determines the number of times that the repeat must terminate. Use this field to indicate that the termination condition must be met multiple times before the repeat stops.
• members are the list of items contained in a single list node for the repeat. The members define a “template” for the format of a single list node. For example, if a member if a pointer member to a string symbol all members of all list nodes in that same position are pointers to string symbols. The structure of the individual list nodes does not vary from one to another. The example shows the usage of a repeat structure.
• expr specifies condition that terminates the list of nodes. This is used when reading the nodes from the disk file. The number of nodes in the list is determined by the corresponding init blocks (discussed later) in the creation case.
• helptext is a double-quoted string used when communicating with the user during module display and editing. The current user interface in editmod does not use the semantics portion of the help text on repeat definitions.
An example repeat structure might be:
code repeat rep_struct {u_int32 is_last = 0;
Utilities Reference 445

3 Using the editmod Utility
u_int32 mem_start;u_int32 mem_end;
} until (rep_struct.is_last), "Example repeat structure";
Arrays
Array definitions define a block of identically typed objects. The syntax for defining an array is:
location array type name [ expr ] = { data } , helptext;
• location is where the array is to be placed. It may be either data or code. If a location is not specified, the code area is assumed.
• type specifies the type of each element of the array.
• name is the name of the array. It may be referenced by pointer structure members.
• expr is an expression for the size of the array. The array size may be dependent on members of structures.
• data is a comma-separated list of expressions that initialize the array. The array can be uninitialized. This is indicated by not providing any initialization expressions.
• helptext is the text used to communicate with the user regarding the array.
An example array might be:
code array int16 example_array[10] = {1, 3, 5, 7, 9, -2, -4, -6, -8, 0
}, "An example array of numbers";
446 Utilities Reference
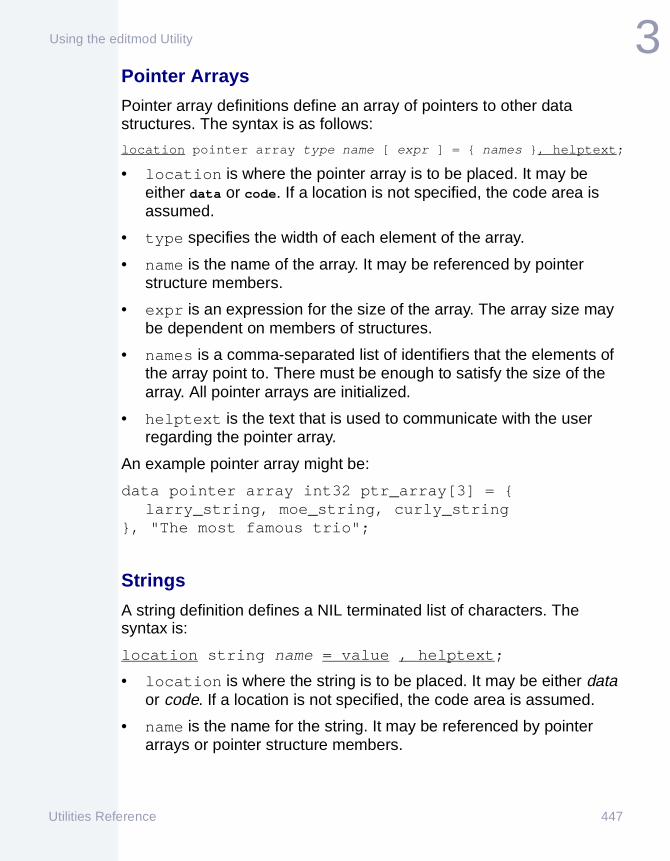
3Using the editmod Utility
Pointer Arrays
Pointer array definitions define an array of pointers to other data structures. The syntax is as follows:
location pointer array type name [ expr ] = { names }, helptext;
• location is where the pointer array is to be placed. It may be either data or code. If a location is not specified, the code area is assumed.
• type specifies the width of each element of the array.
• name is the name of the array. It may be referenced by pointer structure members.
• expr is an expression for the size of the array. The array size may be dependent on members of structures.
• names is a comma-separated list of identifiers that the elements of the array point to. There must be enough to satisfy the size of the array. All pointer arrays are initialized.
• helptext is the text that is used to communicate with the user regarding the pointer array.
An example pointer array might be:
data pointer array int32 ptr_array[3] = {larry_string, moe_string, curly_string
}, "The most famous trio";
Strings
A string definition defines a NIL terminated list of characters. The syntax is:
location string name = value , helptext;
• location is where the string is to be placed. It may be either data or code. If a location is not specified, the code area is assumed.
• name is the name for the string. It may be referenced by pointer arrays or pointer structure members.
Utilities Reference 447

3 Using the editmod Utility
• value is a double quoted string that defines the value for the string data structure.
• helptext is the text used to communicate with the user regarding the string.
An example string might be:
data string larry_string = "Larry", "Example string";
Initialization Block
Initialization blocks set values in data structures. They are used by editmod when a module is being created from scratch. The syntax is:
init name[index] {inits
};
• name specifies the name of the structure/repeat that is to be initialized.
• index is the index into the variable length list of a repeat structure. Although index is an expression, it must resolve to a positive integer. If the item to be initialized is a structure, then index is omitted.
• inits is a series of assignments in the form:
name = expr;
• name is the member of the struct/repeat member that is to be initialized.
• expr is the expression that the member is to be initialized with.
The following example demonstrates an initialization block:
struct example {u_int16 mem1 = 0x10;u_int32 mem2;char mem3 = ’\0’;
};
init example {
448 Utilities Reference

3Using the editmod Utility
mem1 = 0x11;mem2 = -5;mem3 = ’R’;
};
The init block shown overrides the initialization of mem1 and mem3 and initializes mem2. See the example at the end of this section for an example of a repeat initializer.
When editing or displaying a module, init blocks are ignored.
Module Block
The module block defines the format for the entire module. Each valid set of description files has a single module block. The syntax for a module blocks is:
module { names };
names is a comma-separated list of names of data structures that are part of the module.
Assuming two code area data structures (mod_head and code_info) and a data area structure (data_info) had been defined, the following is an example module block:
module {mod_head,code_info,data_info
};
This defines the module to be mod_head followed by code_info in the code area and data info in the data area. More information about module blocks is presented in the full example at the end of this section.
Utilities Reference 449
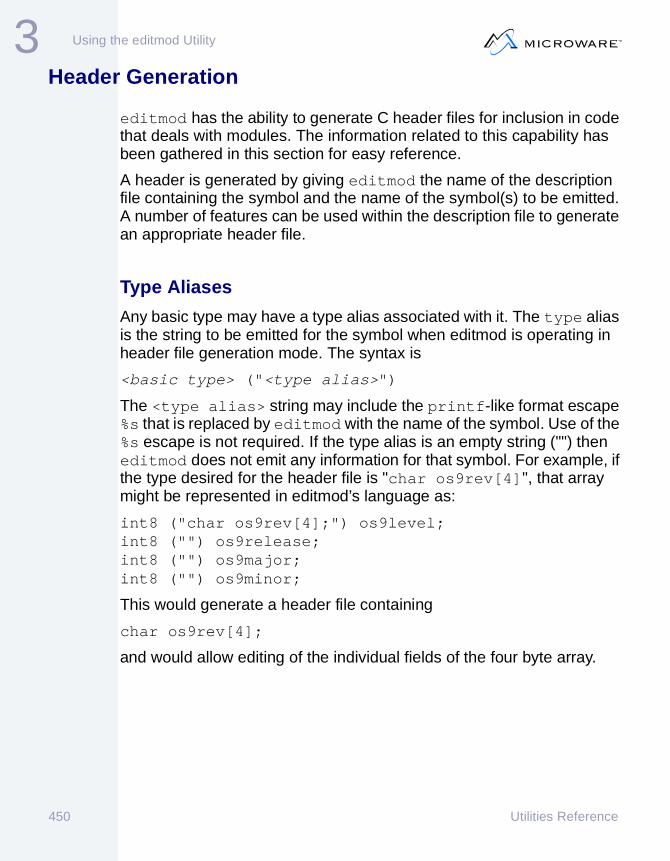
3 Using the editmod Utility
Header Generation
editmod has the ability to generate C header files for inclusion in code that deals with modules. The information related to this capability has been gathered in this section for easy reference.
A header is generated by giving editmod the name of the description file containing the symbol and the name of the symbol(s) to be emitted. A number of features can be used within the description file to generate an appropriate header file.
Type Aliases
Any basic type may have a type alias associated with it. The type alias is the string to be emitted for the symbol when editmod is operating in header file generation mode. The syntax is
<basic type> ("<type alias>")
The <type alias> string may include the printf-like format escape %s that is replaced by editmod with the name of the symbol. Use of the %s escape is not required. If the type alias is an empty string ("") then editmod does not emit any information for that symbol. For example, if the type desired for the header file is "char os9rev[4]", that array might be represented in editmod’s language as:
int8 ("char os9rev[4];") os9level;int8 ("") os9release;int8 ("") os9major;int8 ("") os9minor;
This would generate a header file containing
char os9rev[4];
and would allow editing of the individual fields of the four byte array.
450 Utilities Reference

3Using the editmod Utility
Comments
The "short description" portion of the help text is used as comments in emitted header files. For example,
u_int32 v_lun, "Logical Unit Number:This is the logical unit number.";
would be emitted as:
u_int32 v_lun; /* Logical Unit Number */
emit <string>;
This syntax allows text to added to the emitted header file. It may only be used within a struct or repeat. If editmod is not in header mode, these lines are ignored. The following is an example of its use:
#if defined(DEV_SPECIFIC)emit "#if defined(DEV_SPECIFIC)";
struct dev_specific v_devspec;emit "#endif";#endif
would appear as:
#if defined(DEV_SPECIFIC)struct dev_specific v_devspec;
#endif
emit is useful for inserting pre-processing information into a header file.
_editmod_HM macro
The pre-processor macro EM_HEADER_MODE is defined when editmod is operating in header mode. This is useful for allowing editmod to see an entire structure even when certain defines aren’t present. From the previous example, if one were to generate a header file for the .des file containing the text above with a command line like:
editmod pcf.des -h=pcf_lu_stat
Utilities Reference 451

3 Using the editmod Utility
One would not get any of the text shown above because DEV_SPECIFIC would not be defined so the pre-processor would skip all the text between the #if/#endif.
The example shown above should be written:
#if defined(DEV_SPECIFIC) || defined(EM_HEADER_MODE)emit "#if defined(DEV_SPECIFIC)";
struct dev_specific v_devspec;emit "#endif";#endif
This causes the expected result while generating headers.
452 Utilities Reference

3Using the editmod Utility
General Rules
• Symbol definitions are seen in the order of their declaration with later redefinitions overriding previous declarations.
• A symbol redefinition without help text inherits the original symbol definition’s help text, if it had any.
• The basic principles of modules may not be violated (parity, size, data, m_exec, idata, irefs, CRC, etc.). editmod fills in all appropriate fields to generate a legal module.
• All “pointer” type items must be initialized.
• Only two pointers types may be NULL. A NULL string pointer is defined as a pointer to a string that was never given a value. A NULL repeat pointer is defined as a pointers to a repeat structure that was not given any members by init blocks. All other pointers are not NULL.
• Data area pointers must be 32 bits wide.
• Repeat structures must at least have one item.
• A structure may be named as a sub-structure by only one other structure.
• Each set of description files must contain exactly one module block.
• Symbols named in module block may not be variable sized. Strings and repeat structures, for example, are not permitted.
• Pointers may not point from an item in the code area to an item in the data area.
Utilities Reference 453

3 Using the editmod Utility
Example
The following example shows how to build, display, and edit a data module. There are a number of steps involved:
Step 1. Design the Data Module.
Step 2. Create the Description File.
Step 3. Create the Module with editmod.
Step 4. Display the Contents of the Module with editmod.
Step 5. Edit the Module.
This example uses the OS-9/x86 operating system.
454 Utilities Reference

3Using the editmod Utility
Design the Data Module
The steps in this example create the following:
Module Header
execution offset
Data Module Information
revenues list
names array
wish array
number of wishes
Wish Numbers
"<name string>"
"<name string>"
"<name string>"
"<name string>"
"<name string>"
Names
date string
reveue amount ($)
Revenues List
"<date string>"
date string
reveue amount ($)
"<date string>"
(terminated by entry with $0 revenue)
(size based on ’number of wishes’)
Utilities Reference 455

3 Using the editmod Utility
Create the Description File
Given the information from the design stage, here’s what a description file might look like:
1 struct mh_com {
2 u_int16 m_sync;3 u_int16 m_sysrev = 1;4 u_int32 m_size;5 u_int16 m_group = 0, "Group number";6 u_int16 m_user = 0, "User number";7 pointer u_int32 m_name = mod_name;8 u_int16 m_access = 0x555, "Module access permissions";9 u_int8 m_lang = 0x00, "Module language";10 u_int8 m_type, "Module type";11 u_int8 m_rev = 0x00, "Module revision";12 u_int8 m_attr = 0x80, "Module attributes";13 u_int16 m_edit = 1, "Module edition";14 u_int32 m_needs;15 u_int32 m_usage;16 u_int32 m_symbol;17 pointer u_int32 m_exec = mod_body;18 u_int32 m_excpt;19 u_int32 m_data;20 u_int32 m_stack;21 u_int32 m_idata;22 u_int32 m_idref;23 u_int32 m_init;24 u_int32 m_term;25 u_int16 m_ident;26 u_int32 m_spare1;27 u_int32 m_spare2;28 u_int16 m_parity;29 }, "Module header information";30 31 string mod_name, "Module name";32 33 struct mod_body
{34 u_int32 num_wishes = 3, "Number of wishes";35 pointer u_int16 (“u_int16 %s”) wishes = wish_array,
“.Offset to wish_array”;36 pointer u_int32 (“u_int32 %s”) names = name_array,
456 Utilities Reference

3Using the editmod Utility
“.Offset to name_array”;37 pointer u_int16 (“u_int16 %s”) revs = revenues,
“.Offset to revenues”;38 }, "Module Data";39 40 array u_int8 wish_array[mod_body.num_wishes] =
{41 1, 2, 342 }, "Wish numbers";43 44 pointer array u_int32 name_array[5] =
{ 45 al_string, ge_string, ja_string, ia_string, jas_string46 }, "Character names";47 48 string al_string = "Aladdin", "Main character";49 string ge_string = "Genie", "Magic character";50 string ja_string = "Jafar", "Evil character";51 string ia_string = "Iago", "Animal character";52 string jas_string = "Jasmine", "Female character";53 54 string mod_name = "data";5556 repeat revenues
{57 int32 amount,"Revenue amount:This is the amount ofrevenue"58 " realized on the given date";59 pointer u_int16 date = date_string;60 } until (revenues.amount == 0), "Revenue List";6162 string date_string, "Revenue date:The date the revenue wasrealized";53 64 init mh_com
{65 m_type = 4;66 m_edit = 7;67 }; 6869 init revenues[0]
{70 amount = 10000000;71 date = date1_string;72 };
Utilities Reference 457
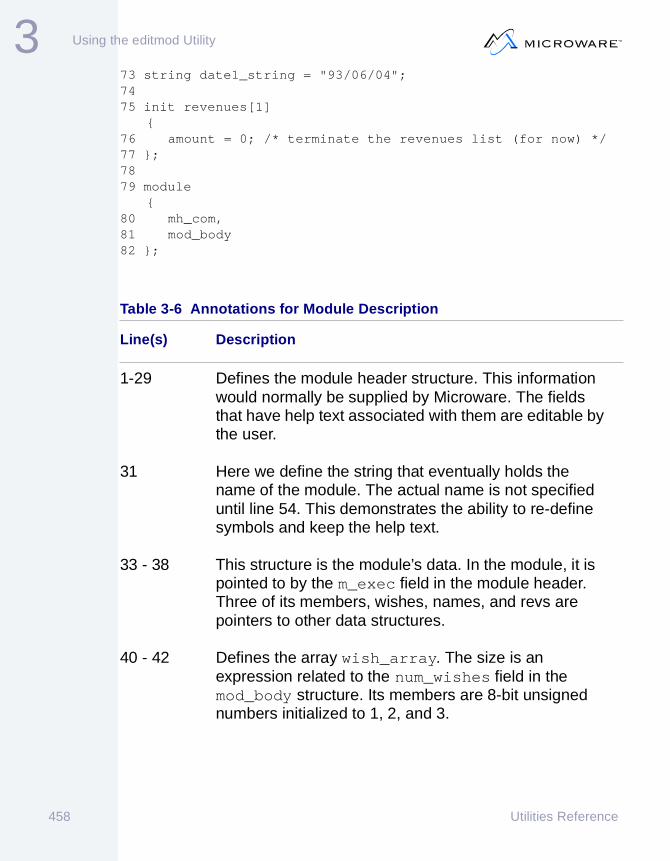
3 Using the editmod Utility
73 string date1_string = "93/06/04";74 75 init revenues[1]
{76 amount = 0; /* terminate the revenues list (for now) */77 };78 79 module
{80 mh_com,81 mod_body82 };
Table 3-6 Annotations for Module Description
Line(s) Description
1-29 Defines the module header structure. This information would normally be supplied by Microware. The fields that have help text associated with them are editable by the user.
31 Here we define the string that eventually holds the name of the module. The actual name is not specified until line 54. This demonstrates the ability to re-define symbols and keep the help text.
33 - 38 This structure is the module’s data. In the module, it is pointed to by the m_exec field in the module header. Three of its members, wishes, names, and revs are pointers to other data structures.
40 - 42 Defines the array wish_array. The size is an expression related to the num_wishes field in the mod_body structure. Its members are 8-bit unsigned numbers initialized to 1, 2, and 3.
458 Utilities Reference

3Using the editmod Utility
44 - 46 Defines the pointer array name_array. Each of the elements is a reference to another data structure (strings in this case).
48 - 52 Definitions of the strings referred to in name_array.
54 Re-definition of the string mod_name. Since this version does not have help text, it adopts the help text from the previous mod_name definition.
56 - 60 Definition of the repeat structure revenues that defines a list of structures containing an integer and a pointer to a string. The list is terminated by a node where amount is zero.
62 The template for the date strings pointed to by the date entry of the repeat structure. The help text supplied here is inherited by each node in the revenues list.
64 - 67 This init block initializes the m_type and m_edit fields of the module. The m_type field is initialized with four to indicate that we are constructing a data module.
69 - 72 This init block creates the first node in the revenues list. The amount is set to 10,000,000 and the string is redirected to point to date1_string.
73 Definition of date1_string. This string is referenced by the init block above it.
Table 3-6 Annotations for Module Description (continued)
Line(s) Description
Utilities Reference 459

3 Using the editmod Utility
Create the Module with editmod
Assuming the description file shown above is in a file called systype.des, the following command line would create the data module from scratch:
editmod -c data
The following annotated hex dump shows the module follows the format we chose:
75 - 77 This init block creates a second node in the revenues list. The amount is set to zero to satisfy the termination condition of the repeat structure.
79 - 82 The module block describes the format of the module. It begins with mh_com in the code area followed by mod_body in the code area.
Table 3-6 Annotations for Module Description (continued)
Line(s) Description
Addr 0 1 2 3 4 5 6 7 8 9 A B C D E F 0 2 4 6 8 A C -------- ---- ---- ---- ---- ---- ---- ---- ---- --------------00000000 fc4a 0100 b400 0000 0000 0000 a600 0000 |J..4.......&.00000010 5505 0004 0080 0700 0000 0000 0000 0000 U.............00000020 0000 0000 5000 0000 0000 0000 0000 0000 ....P.........00000030 0000 0000 0000 0000 0000 0000 0000 0000 ..............00000040 0000 0000 0000 0000 0000 0000 0000 1234 ..............00000050 0300 0000 ab00 5c00 0000 7000 8d00 0000 ....+.\...p...00000060 9b00 0000 9500 0000 a100 0000 8500 0000 ........!.....00000070 8096 9800 7c00 0000 0000 0000 3933 2f30 ....|.......9300000080 362f 3034 004a 6173 6d69 6e65 0041 6c61 6/04.Jasmine.A00000090 6464 696e 004a 6166 6172 0047 656e 6965 ddin.Jafar.Gen000000a0 0049 6167 6f00 6461 7461 0001 0203 0000 .Iago.data....000000b0 00dd c420 .]D
460 Utilities Reference

3Using the editmod Utility
Table 3-7 Annotations for hex dump of module
Addr (hex) Description
0 - 4f mh_com structure — The type (byte 0x13) is four for data module and the edition number (bytes 6 and 7) is seven. These numbers were installed by the init block for mh_com.
50 - 5b mod_body structure — Pointers are stored in the module as offsets from the base of the module.
5c - 6f name_array array — Five two-byte pointers to strings in a row.
70 - 75 revenues' first node
76 - 7b revenues' last node
7c - aa strings — Various strings pointed to by various data structures.
ab - ad wish_array — The three byte array holding the values one, two, and three.
ae - af padding — Two bytes of padding to round the module size up to a four byte boundary.
b0 - b3 CRC — The modules CRC value is recorded in the last four bytes.
Utilities Reference 461
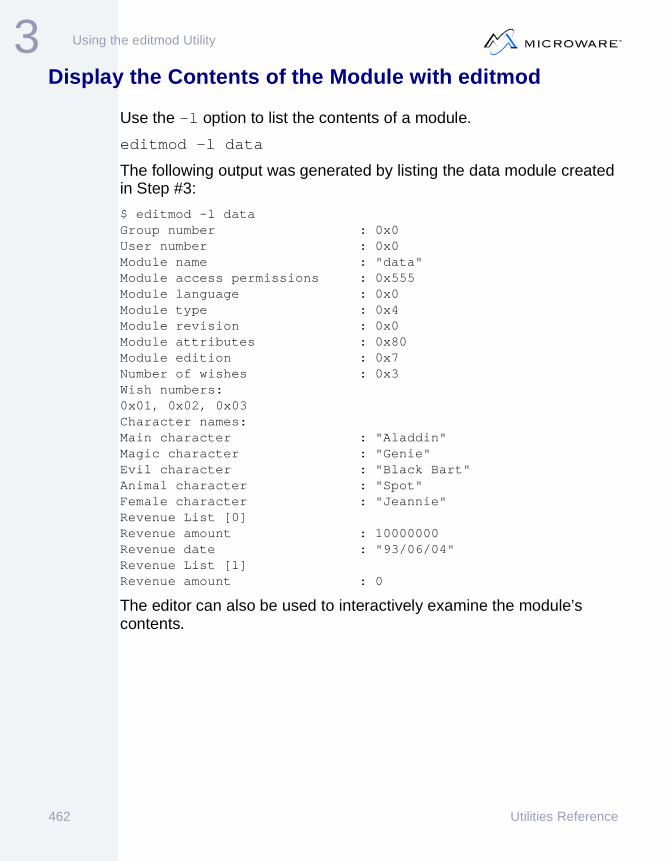
3 Using the editmod Utility
Display the Contents of the Module with editmod
Use the -l option to list the contents of a module.
editmod -l data
The following output was generated by listing the data module created in Step #3:
$ editmod -l dataGroup number : 0x0User number : 0x0Module name : "data"Module access permissions : 0x555Module language : 0x0Module type : 0x4Module revision : 0x0Module attributes : 0x80Module edition : 0x7Number of wishes : 0x3Wish numbers:0x01, 0x02, 0x03Character names:Main character : "Aladdin"Magic character : "Genie"Evil character : "Black Bart"Animal character : "Spot"Female character : "Jeannie"Revenue List [0]Revenue amount : 10000000Revenue date : "93/06/04"Revenue List [1]Revenue amount : 0
The editor can also be used to interactively examine the module’s contents.
462 Utilities Reference

3Using the editmod Utility
Edit the Module
The following is a sample editing session. The user’s input is denoted by the magenta font.
$ editmod -e data
1. Module header information 2. Module Data
Which? [?/1-2/p/t/a/w/q] 2 select the module data to edit
1. Number of wishes : 0x3 2. Wish numbers 3. Character names 4. Revenue List
Which? [?/1-4/p/t/a/w/q] 4 select the revenue list to edit
1. Revenue List [0] 2. Revenue List [1] 3. Add additional item to list
Which? [?/1-3/p/t/a/w/q] 3 add another revenue node to the list
1. Revenue List [0] 2. Revenue List [1] 3. Revenue List [2] 4. Add additional item to list
Which? [?/1-4/p/t/a/w/q] 2 edit the second one (used to be terminating entry) 1. Revenue amount : 0 2. Revenue date : NULL
Which? [?/1-2/p/t/a/w/q] 1 change the amount field
Revenue amount : 0
New value: 50000000 enter the $50,000,000 revenue
1. Revenue amount : 50000000 2. Revenue date : NULL
Which? [?/1-2/p/t/a/w/q] 2 set the date of realization
Utilities Reference 463

3 Using the editmod Utility
Revenue date : NULL
New string: 94/01/01 first day of 1994
1. Revenue amount : 50000000 2. Revenue date : "94/01/01"
Which? [?/1-2/p/t/a/w/q] p move to previous menu
1. Revenue List [0] 2. Revenue List [1] 3. Revenue List [2] 4. Add additional item to list
Which? [?/1-4/p/t/a/w/q] 3 check the last entry in the list to verify that amount is zero
1. Revenue amount : 0 2. Revenue date : NULL
Which? [?/1-2/p/t/a/w/q] q write the module and exit
464 Utilities Reference

3Using the editmod Utility
The following is a listing of the module after the changes were made:
$ editmod -l dataGroup number : 0x0User number : 0x0Module name : "data"Module access permissions : 0x555Module language : 0x0Module type : 0x4Module revision : 0x0Module attributes : 0x80Module edition : 0x7Number of wishes : 0x3Wish numbers:0x01, 0x02, 0x03Character names:Main character : "Aladdin"Magic character : "Genie"Evil character : "Black Bart"Animal character : "Spot"Female character : "Jeannie"Revenue List [0]Revenue amount : 10000000Revenue date : "93/06/04"
Revenue List [1] note the new revenue list entryRevenue amount : 50000000Revenue date : "94/01/01"
Revenue List [2] note the new terminating revenue list entry
Revenue amount : 0Revenue date : NULL
To generate the header file for the mod_body structure we might use a command line like:
editmod data.des -h=mod_body
This generates the following header file:
/*************************************************** This is a generated header file. Do not modify. ***************************************************/
#if !defined(_TYPES_H)#include <types.h>#endif
Utilities Reference 465

3 Using the editmod Utility
/* Module Data */struct mod_body { u_int32 num_wishes /* Number of wishes */ u_int16 wishes; /* Offset to wish_array */ u_int32 names; /* Offset to name_array */ u_int16 revs; /* Offset to revenues */};
466 Utilities Reference

Chapter 4: Using the os9make Util i ty
The os9make utility determines whether a file needs to be updated. It examines the dates of the target file and the files used to create the target file. If the os9make utility determines that the file must be updated, it executes specified commands to recreate the file.
The os9make utility has several built-in assumptions specifically designed for compiling high-level language programs; however, you may use the os9make utility to maintain any files dependent on updated files.
467

4 Using the os9make Utility
os9make Commands
The os9make utility executes commands from a special type of procedure file called a makefile. The makefile describes the dependent relationships between files used to create the <target> file(s).
A makefile may describe the commands to create many files. If the os9make utility is called without a target file on the command line, the os9make utility attempts to make the first target file described in the makefile.
If one or more target file’s are entered on the command line, the os9make utility reads and processes the entire makefile and only attempts to make the appropriate file(s).
A makefile contains the following types of entries:
• Dependency Entry
• Command Entry
• Comment Entry
• Include Entry
• Macro Entry
• Conditional Entry
Dependency Entry
This specifies the relationship of a target file and the file(s) used to build the target file. The entry has the following syntax:
<target>: [<dependent>] {[<dependent>]}
The list of files following the target file is known as the dependency list.
468 Utilities Reference

4Using the os9make Utility
Command Entry
This specifies the command that you must execute to update a particular target file, if the target file needs updating. The os9make utility updates a target file only if it depends on files newer than itself.
If instructions for update are not provided, the os9make utility attempts to create a command entry to perform the operation.
The os9make utility recognizes a command entry by a line beginning with one or more spaces or tabs. Any legal command line is acceptable.
You can list more than one command entry for any dependency. Each command is forked separately unless continued from the previous command with a backslash (\).
For example:
<target>:[[<file>],<file>]<OS command line><OS command line>
Comment Entry
This consists of any line beginning with an asterisk (*) or pound sign (#).
In addition, in a Command Entry, all characters following a pound sign (#) are treated as comments. The one exception to this is a digit following a pound sign is considered part of a command entry. This is because the OS-9 resident shell uses #<num> to increase stack space. Note that an asterisk (*) in a Command Entry is treated as a wildcard character, not a comment.
All blank lines are ignored.
Here is an example:
-b# comment example* comment lineall: # example command
Utilities Reference 469

4 Using the os9make Utility
echo hello # first command
echo world # second command
Outputs:
echo hellohelloecho worldworld
Include Entry
A makefile include entry tells the os9make utility to use a file that has entries common to more than one makefile. The os9make utility processes the lines of the “included” file as if they were in the current makefile. This makes it easier to change information because you can change it in one common file rather than each individual makefile. For example:
include <pathname>
include opens the specified file <pathname> and processes the lines from that file as if they appeared in the current makefile. You can nest included makefiles up to seven times. For example:
include ../../../makesub.com
Macro Entry
A macro definition line has the following syntax:
<name> = [<value>]
This defines a macro called <name> with <value>. <value> can contain references to other previously defined macros.
User defined macro names may contain any combination of “normal” characters (A-Z, a-z) and numbers (0-9). Other “special” characters may work in the current version of os9make, but this could change in future versions.
470 Utilities Reference

4Using the os9make Utility
A macro definition may be appended to with the following syntax:
<name> += [<value>]
This appends <value> to the existing macro value, separated by a single space. If <name> is not yet defined, it is defined with <value>.
Unless the append syntax is used, the redefinition of a macro name already used has no effect. This allows a macro definition from the os9make command line to override macro definitions within the makefile.
A macro does not need to have a value specified in the makefile. In other words,
LOPTS =
is a valid line for a makefile. This type of macro is often used when a command line definition of a macro is expected.
You may continue entries on the next line by placing a space followed by a backslash (\) at the end of each line to continue. If a command line is continued, a space or tab must be the first character in the continued line. With non-command lines, leading spaces and tabs are ignored on continuation lines.
Entries longer than 256 characters must be continued on the next line. For example:
FILES = aaa.r bbb.r ccc.r ddd.r eee.r fff.r ggg.r \ hhh.r iii.r jjj.r
Conditional Entry
Conditional entries allow the conditional parsing of the makefile.
Syntax
Conditional entries take advantage of ’if’ and ’endif’, and have the following syntax:
if <boolean expression>{lines}
Utilities Reference 471

4 Using the os9make Utility
endif
Entries may be extended using ’elif’ and/or ’else’:
if <boolean expression>{line(s)}elif <boolean expression>{line(s)}else{line(s)}endif
Conditionals may be nested to a maximum depth of 30 and may occur anywhere (except in a comment, of course).
Boolean Expressions
The following boolean expressions are valid:
• make
The syntax for a make boolean expression is 'make(<target>)', and is TRUE if <target> has been specified. For example, if make is invoked from the command line, specifying 'ppc' as the target:
$ os9make ppc
then the following make expression is TRUE:
if make(ppc){line(s)}endif
• defined
The syntax for a defined boolean expression is 'defined(<macro>)', and is TRUE if <macro> is defined. For example, if TRGTS is defined, then the defined expression is TRUE:
TRGTS = SunOSif defined(TRGTS){line(s)}endif
472 Utilities Reference

4Using the os9make Utility
• exists
The syntax for an exists boolean expression is 'exists(<filename>)', and is TRUE if <filename> exists. If no path is specified, the current directory is assumed. For example, if the following file exists at the specified path, then the exists expression is TRUE:
MWOS = ../../../../../..if exists($MWOS/target.lst){line(s)}endif
Operators
Boolean expressions may take advantage of the standard C boolean operators &&, ||, and !, and the standard relational operators ==, !=, >, >=, < and <=. The relational operators == and != are overloaded, allowing string comparison capability. These operators are defined as follows:
Table 4-1 os9make Utility Operators
Operator Description
! Logical Not
== Equal
!= Not Equal
< Less Than
<= Less Than or Equal
> Greater Than
>= Greater Than or Equal
Utilities Reference 473

4 Using the os9make Utility
Arithmetic and string operators may only be used to test the value of a variable. The left-hand side must contain the variable expansion, while the right hand-side may contain either a string enclosed in double quotes or a numeric value. Standard C numeric conventions (except for specifying an octal number) apply to both sides. Examples:
if $(REVISION) == 87
if $(TARGET) == "403GAEVB"
if defined(LOAD_ADDR) && $(LOAD_ADDR) >= 0x10
Precedence
Arithmetic and string operators take precedence over &&, || and !. The ! operator takes precedence over &&, which has precedence over ||. Parentheses may be used to further prioritize.
&& Logical AND
|| Logical OR
Table 4-1 os9make Utility Operators
Operator Description
474 Utilities Reference

4Using the os9make Utility
Abbreviations
Abbreviations combining if with defined, exists, or make are available:
Table 4-2
Abbreviations Equivalent
ifdef if defined
ifexists if exists
ifmake if make
ifndef if !defined
ifnexists if !exists
ifnmake if !make
Utilities Reference 475

4 Using the os9make Utility
os9make Operation
The os9make utility starts by reading the entire makefile and setting up a table of dependencies exactly as listed in the makefile. When the os9make utility encounters a name on the left side of a colon, it first checks to see if it has encountered the name before. If it has, the os9make utility connects the lists and continues.
After reading the makefile, os9make determines the target file(s). The target file is the main file to be made on the list. It then makes a second pass through the dependency table.
During the second pass, the os9make utility looks for object files with no relocatable files in their dependency lists and for relocatable files with no source files in their dependency lists. This facilitates program compilation. If the os9make utility needs to find any source files or relocatable files to complete the dependency lists, it looks for them in the specified data directory, unless a macro is specified.
The os9make utility does a third pass through the list to get the file dates and compare them. When the os9make utility finds a file in a dependency list that is newer than its target file, it executes the specified command(s). If a command entry is not specified, a command is generated based on the assumptions given in the next section. Because the operating system only stores the time down to the closest minute, the os9make utility remakes a file if its date matches one of its dependents.
When a command is executed, it is echoed to standard output unless the -s, or silent, option is used or the command line starts with an “at” sign (@). When the -n option is used, the command is echoed to standard output but is not actually executed.
If your system runs out of memory while executing a command, you can redirect the output of the os9make utility into a procedure file and execute the procedure file.
The os9make utility normally stops if an error code is returned when a command line is executed. Errors are ignored if the -i option is used or a command line begins with a hyphen.
476 Utilities Reference

4Using the os9make Utility
Sometimes, it is helpful to see the file dependencies and the dates associated with each of the files in the list. The -d option turns on the os9make utility debugger and gives a complete listing of the macro definitions, a listing of the files as it checks the dependency list, and all the file modification dates. If it cannot find a file to examine its date, it assumes a date of -1/00/00 00:00, indicating the necessity to update the file.
To update the date on a file without remaking it, use the -t option. The os9make utility opens the file for update and then closes it, updating the date to the current.
If you are quite explicit about your makefile dependencies and do not want the os9make utility to assume anything, use the -b option to turn off the built-in rules governing implicit file dependencies.
Implicit Rules, Definitions, and Assumptions
Any time a command line is generated, the os9make utility assumes the target file is a program to compile. Therefore, if the target file is not a program to compile, make sure the command entries are included for each dependency list. The os9make utility uses the following definitions and rules when forced to create a command line.
Table 4-3 os9make Utility Definitions and Rules
Files Definition/Rule
Object Files with no suffix. An object file is made from a relocatable file and linked when it needs to be made.
Utilities Reference 477

4 Using the os9make Utility
NoteNoteOnly use the default linker with programs that use Cstart.
Relocatable Files appended by either the .r suffix (compat and ucc modes) or the .o suffix (c89 mode). Relocatable files are made from source files and assembled or compiled if they need to be made.
Source Files with one of the following suffixes:
ucc mode:.a .o .i .pp .c .f
compat mode:.a .c .f
c89 mode:.s .be .ic .i .c .f
Table 4-4 Default Modes
Description Default
Compiler
Assembler
Linker
Mode
Directory for all files
cc
r68, a386, or a ppc
cc
ucc
The current data directory (.)
Table 4-3 os9make Utility Definitions and Rules
Files Definition/Rule
478 Utilities Reference

4Using the os9make Utility
UCC Rule Modes
To make an executable from a ".cpp":
$(CC) $(CFLAGS) $(SDIR)/$*.cpp -f=$(ODIR)/$*
To make an executable from a ".cxx":
$(CC) $(CFLAGS) $(SDIR)/$*.cxx -f=$(ODIR)/$*
To make a ".r" from a ".cpp":
$(CC) $(CFLAGS) $(SDIR)/$*.cpp -eas=$(RDIR)
To make a ".r" from a ".cxx":
$(CC) $(CFLAGS) $(SDIR)/$*.cxx -eas=$(RDIR)
To make a ".a" from a ".cpp":
$(CC) $(CFLAGS) $(SDIR)/$*.cpp -eao=$(SDIR)
To make a ".a" from a ".cxx":
$(CC) $(CFLAGS) $(SDIR)/$*.cxx -eao=$(SDIR)
To make a ".o" from a ".cpp":
$(CC) $(CFLAGS) $(SDIR)/$*.cpp -ebe=$(SDIR)
To make a ".o" from a ".cxx":
$(CC) $(CFLAGS) $(SDIR)/$*.cxx -ebe=$(SDIR)
To make a ".i" from a ".cpp":
$(CC) $(CFLAGS) $(SDIR)/$*.cpp -efe=$(IDIR)
To make a ".i" from a ".cxx":
$(CC) $(CFLAGS) $(SDIR)/$*.cxx -efe=$(IDIR)
Utilities Reference 479

4 Using the os9make Utility
Modes
Three modes are built into the os9make utility.
For More InformationMore Info More Information More Information More Information More
-6-
Refer to the Using Ultra C/C++ manual, the Using the Executive chapter for more information about Ultra C/C++ modes.
There are three ways to tell os9make to use a particular mode:
1. Set the MWMAKEOPTS environment variable to the desired mode. For example:
setenv MWMAKEOPTS -mode=c89
2. Use the -mode=<mode> option on the command line. This method overrides the environment variable. For example:
os9make -mode=compat
3. Use the -mode=<mode> option within your makefile. This overrides both the environment variable and command line option.
Table 4-5 os9make Utility Modes
Mode Specification
compat The compat files reflect the compat mode of the Ultra C executive. This is also the mode you use if you are still using the V3.2 C Compiler.
c89 The c89 rules reflect the c89 mode of the Ultra C executive.
ucc The ucc rules reflect the ucc mode of the Ultra C executive
480 Utilities Reference

4Using the os9make Utility
Macro Recognition
The os9make utility recognizes a macro by the dollar sign ($) character in front of the name. If a macro name is longer than a single character, the entire name must be surrounded by parentheses. For example:
• R refers to the macro R.
• $(PFLAGS) refers to the macro PFLAGS.
• $(B) and $B refer to the macro B.
• $BR is interpreted as the value for the macro B followed by the character R.
You can place macros in the makefile for convenience or on the command line for flexibility. Everywhere the macro name appears, the expansion is substituted for it. Macros are allowed in the form of <macro name> = <expansion>.
NoteNoteIf a macro is defined in your makefile and then redefined on the command line, the command line definition overrides the definition in the makefile. This feature is useful for compiling with special options.
In order for the os9make utility to be more flexible, you can define special macros in the makefile. The os9make utility uses these macros when assumptions must be made in generating command lines or searching for unspecified files. For example, if a source file is not specified for program.r, os9make searches the specified directory, SDIR, or “.”, for program.a (or .c, .p, .f).
Utilities Reference 481

4 Using the os9make Utility
The os9make utility recognizes the following special macros.
Table 4-6 Special Macros Recognized by os9make
Macro Description
IDIR=<path> The os9make utility searches the directory specified by path for all I-code files not specified by a full path list. If IDIR is not defined in the makefile, the os9make utility searches the current directory by default.
ODIR=<path> The os9make utility searches the directory specified by <path> for all files that have no suffix or relative pathlist. If ODIR is not defined in the makefile, the os9make utility searches the current directory by default.
SDIR=<path> The os9make utility searches the directory specified by <path> for all source files not specified by a full pathlist. If SDIR is not defined in the makefile, the os9make utility searches the current directory by default.
RDIR=<path> The os9make utility searches the directory specified by <path> for all relocatable files not specified by a full pathlist. If RDIR is not defined, the os9make utility searches the current directory by default.
CFLAGS=<opts> These compiler options are used in any necessary compiler command lines.
RFLAGS=<opts> These assembler options are used in any necessary assembler command lines.
LFLAGS=<opts> These linker options are used in any necessary linker command lines.
482 Utilities Reference

4Using the os9make Utility
Some reserved macros are expanded when a command line associated with a particular file dependency is forked. These macros may only be used on a command line. They are useful when you need to be explicit about a command line but have a target program with several dependencies.
In practice, these reserved macros are wildcards with the following meanings:
CC=<comp> The os9make utility uses this compiler when generating command lines. The default compiler is cc.
RC=<asm> The os9make utility uses this assembler when generating command lines. The default assembler is r68.
LC=<link> The os9make utility uses this linker when generating command lines. The default linker is cc.
Table 4-7 Reserved Macros
Macro Description
$@ The current target, including its full path and any suffix.
$* The base name of the target. That is, the target name minus any pathlist or extension.
$? The list of files that were found to be newer than the target on a given dependency line.
Table 4-6 Special Macros Recognized by os9make
Macro Description
Utilities Reference 483

4 Using the os9make Utility
os9make Generated Command Lines
The os9make utility can generate three types of command lines:
1. Compiler Command LinesThese are generated if a source file with a suffix of .c, .f, or .p needs to be recompiled. The os9make utility generates a compiler command line with the following syntax:
compat and ucc mode:
$(CC) $(CFLAGS) $(SDIR)/<file> -f=$(ODIR)/<file>
c89 mode:
$(CC) $(CFLAGS) $(SDIR)/<file> -f $(ODIR)/<file>
2. Assembler Command LinesThese are generated if an assembly language source file needs to be reassembled. The os9make utility generates the assembler command line with the following syntax:
compat and ucc mode:
$(RC) $(RFLAGS) $(SDIR)/<file>.a -o=$(RDIR)/<file>.r
c89 mode:
$(RC) $(RFLAGS) $(SDIR)/<file>.s -o=$(RDIR)/<file>.o
3. Linker Command LinesThese are generated if an object file needs to be relinked in order to remake the program module. The os9make utility generates the linker command line with the following syntax:
ucc and compat mode:
$(LC) $(LFLAGS) $(RDIR)/<file>.r -f=$(ODIR)/<file>
c89 mode:
$(LC) $(LFLAGS) $(RDIR)/<file>.o -f $(ODIR)/<file>
484 Utilities Reference

4Using the os9make Utility
WARNING!When the os9make utility is generating a command line for the linker, it looks at its list and uses the first relocatable file that it finds, but only the first one. For example:
prog: x.r y.r z.r
Generates:cc x.r, not cc x.r y.r z.r or cc prog.r
You can include options on the command line when running the os9make utility or in the makefile for convenience.
NoteNoteThe os9make utility language is highly specific. Therefore, use caution when using dummy files with names like print.
The os9make utility is always case-dependent with respect to directory names and file names.
Unless a file is specifically an object file or the -b option is used to turn off the implicit rules, use a suffix for your dummy files. For example, use print.file and xxx.h for your header files.
Utilities Reference 485

4 Using the os9make Utility
486 Utilities Reference

Chapter 5: Using the mshell Uti l i ty
The mshell utility is a command interpreter that helps you become as productive as possible when working with the OS-9/OS-9 for 68K operating systems. It accomplishes this by providing keyboard shortcuts and a means to automate menial tasks. It is compatible with the current OS-9/OS-9000 shell.
The mshell utility started as a port of OS-9’s standard shell to OS-9 for 68K. From that point, enhancements replaced some built-in features of OS-9 and features unique to the mshell utility were added. Now, the mshell utility contains many of the same features as UNIX shells, as well as some OS-9/OS-9 for 68K specific options.
NoteNoteThe mshell utility is a superset of the shell utility, thus the shell utility’s command line options, syntax, built-in commands, and behavior are not re-documented here.
The mshell utility has many features that do not exist in the standard OS-9/OS-9 for 68K shell. These features fall into three basic categories:
• Command line interface
• Procedure files
• Built-In Commands and Command Line Options
487
5 Using the mshell Utility
Automatic mshell Login
To automatically execute the mshell utility when you log in, you must change your password file to include mshell as the initial program to execute. Also, you should load the mshell utility when the system starts so that it is in memory when the login utility runs. login requires that the initial process be in memory or in the user’s personal execution directory. Place a line like the following in your start-up file to load mshell from the disk into memory:
load mshell
For More InformationMore Info More Information More Information More Information More
-6-
Refer to the Using OS-9 or Using OS-9 for 68K manual for information about the login utility and system start-up file.
488 Utilities Reference
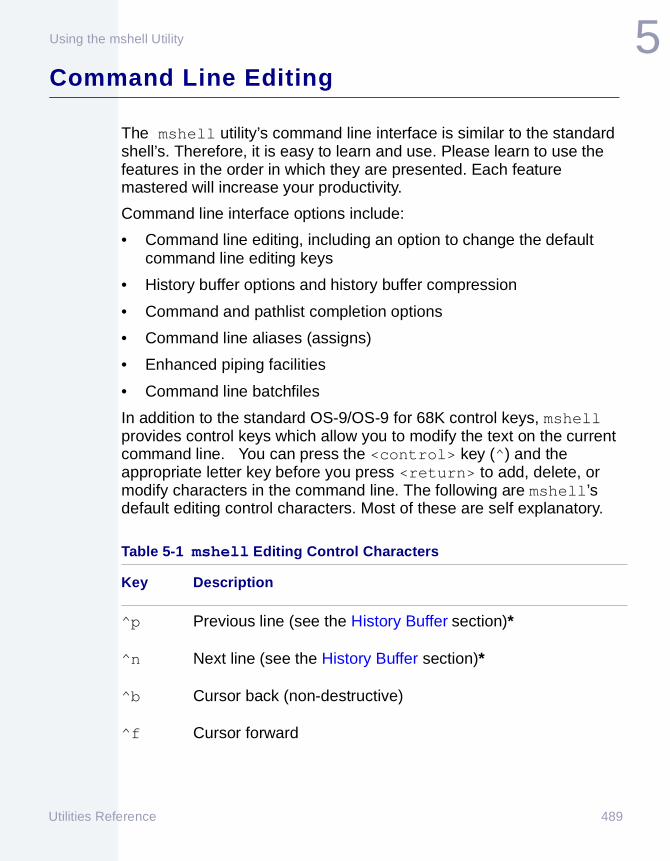
5Using the mshell Utility
Command Line Editing
The mshell utility’s command line interface is similar to the standard shell’s. Therefore, it is easy to learn and use. Please learn to use the features in the order in which they are presented. Each feature mastered will increase your productivity.
Command line interface options include:
• Command line editing, including an option to change the default command line editing keys
• History buffer options and history buffer compression
• Command and pathlist completion options
• Command line aliases (assigns)
• Enhanced piping facilities
• Command line batchfiles
In addition to the standard OS-9/OS-9 for 68K control keys, mshell provides control keys which allow you to modify the text on the current command line. You can press the <control> key (^) and the appropriate letter key before you press <return> to add, delete, or modify characters in the command line. The following are mshell’s default editing control characters. Most of these are self explanatory.
Table 5-1 mshell Editing Control Characters
Key Description
^p Previous line (see the History Buffer section)*
^n Next line (see the History Buffer section)*
^b Cursor back (non-destructive)
^f Cursor forward
Utilities Reference 489

5 Using the mshell Utility
** The first time you press ^z, the cursor goes to the beginning of the line, the next time it goes to the end of the visible line, in effect toggling back and forth between the beginning and end of the line.
* When you use ^p or ^n, insert mode returns to its default value. Refer to the -m command line option for information about the insert mode.
You can press <return> when the cursor is at any point in the command line. mshell processes the entire command.
NoteNote Insert mode remains in its current state until a new command line is displayed. The command line editing keys that work on the current command line (for example, ^b) do not reset the insert mode to its default. Keys that replace the entire command line (^p or ^n) cause the insert mode flag to return to its default.
NoteNoteWhen changing text in the middle of a command line, use ^z instead of ^a. ^a displays and goes to the end of the previous command line. ^z allows you to edit the current command line.
^d Delete character under the cursor
^z Go to visible ends of line**
^k Kill to end of line
^i Toggle insert mode
Table 5-1 mshell Editing Control Characters (continued)
Key Description
490 Utilities Reference

5Using the mshell Utility
Change Default Command Line Editing Keys
If you want to change the default command line editing keys, set the _EDKEYS environment variable. _EDKEYS contains one character for each of the control characters listed above. _EDKEYS has the following form:
<PrevLine><NextLine><PrevChar><NextChar><Insert><Del><Ends> <Kill>
For example, the following command sets the editing control keys to their defaults listed above.
$ setenv _EDKEYS pnBFIDZK
The string which sets _EDKEYS:
• Must be exactly eight characters long (extra characters are ignored).
• Is not case sensitive.
• May not contain any characters that cannot be translated to control characters.
Setting more than one key to the same value causes undefined behavior. Remove the _EDKEYS environment variable to return mshell to the default editing control characters.
NoteNoteThe control characters from the path descriptor take precedence over your command line editing keys. Use the tmode utility to check your path descriptor. If any of the SCF control characters clash with mshell's editing characters, you should either choose a new character for the mshell editing key or change your path descriptor. For example, to override the reprint line (^d) character in your path descriptor, put a tmode reprint=0 command in your .login file. Then, you can use ^d to delete characters.
Utilities Reference 491

5 Using the mshell Utility
History Buffer
mshell maintains a variable sized history buffer for each of its shells. The history buffer contains a record of each command line that you enter. You can use this buffer to duplicate and/or edit previously entered commands. By default, mshell preserves as many as 40 command lines in the history buffer.
The built-in hist command allows you to view your history buffer. Key in hist to display the history of commands and corresponding buffer index numbers.
For More InformationMore Info More Information More Information More Information More
-6-
See the Built-in Commands section, and the mshell Command Line Options section, to learn how to change the size of the history buffer.
To duplicate and immediately execute a command from your history, use ~<num>, where <num> is the index number of the corresponding command in the history buffer. If you want to duplicate and edit a command before executing it, use ~~<num> to bring the history entry into your ^a buffer. Press ^a to display the history entry and use the mshell control keys to make changes to the line as needed. Press <return> to execute the command.
NoteNoteThe ~<num> and ~<word> syntaxes are forms of history substitution that you can do anywhere on the command line. If your eighth history entry was procs, your ninth entry was dir, and you entered ~8 -e; ~di -e mshell would execute procs -e ; dir -e.
For instance, to re-execute a command in a slightly different form, you might enter ~~8, type ^a, then use the editing control keys to edit it.
492 Utilities Reference

5Using the mshell Utility
By default, you can use ^p to scroll backward and ^n to scroll forward through the history buffer from anywhere on the command line. For example:
$ * line 1<cr>$ * line 2<cr>$ ^p At this point, the command line is replaced
with * line 2$ ^p At this point, the command line is replaced
with * line 1
You may also use ~<word> or ~~<word> to access the most recent command in your history that begins with <word>, where <word> is a sequence of characters in the range 0-9, a-z, or A-Z.
History Substitution
To re-execute a command from history:
~<num> or <word>
To place history entry into the ^A buffer for editing:
~~<num> or ~~<word>
View History
To display the history buffer:
hist
Use the -r option to pass your history from mshell to mshell. That is, you could accumulate some history, use µmacs, fork a shell out, and still retain your history. Of course, upon exit any history created in the child shell of µmacs would not be available to the parent of µmacs.
Use the -s option to save your history across login sessions. The -s option saves your history into a temporary file when you log out, and reads from that same file when you log in the next time.
Utilities Reference 493

5 Using the mshell Utility
For More InformationMore Info More Information More Information More Information More
-6-
See the Built-in Commands section, and the mshell Command Line Options section, for details about the -r and -s command line options.
If you enter the same command line twice in succession, mshell does not increment your history counter. This keeps the history buffer from filling up with duplicate commands, and allows as many unique command lines as possible.
History Compression
The -h option enables history compression. -h causes the mshell utility to search the entire current history for a matching command before adding a new history entry. When the -h option is in effect, the history index numbers can be misleading.
For More InformationMore Info More Information More Information More Information More
-6-
See the Built-in Commands section, and the mshell Command Line Options section, for details about the -h command line option.
The following example illustrates the effect of history compression:
[1]$ -h[2]$ sleep 100[3]$ sleep 200[4]$ sleep 100[4]$ hist -h sleep 200 sleep 100 hist[5]$ logout
494 Utilities Reference

5Using the mshell Utility
Notice that the current history index number did not increase when the second sleep 100 was entered, and that it appears only once in the command line history.
Utilities Reference 495

5 Using the mshell Utility
Command Completion
The mshell utility’s command completion feature allows you to complete an entire command line with a single keystroke. Enter the first few characters of a command line from your history and press the escape key (<esc>). mshell replaces the current command line with the most recent command line that begins with the typed characters. Press <esc> again before entering any other characters. mshell replaces the command with the second most recent command which begins with the same few characters, and so on. When there are no more matching command lines a bell sounds. This is a convenient way to access your history without needing to know the number of a particular command.
Press <esc> after entering a few characters and mshell searches your history buffer for a matching replacement command. If the command line contains spaces or tabs before the cursor, press <esc> to use mshell's pathlist completion feature.
Assume that your history buffer contains the following commands:
makemake -f=make.debug iopt.386srcdbg iopt -d test.iumacs dfa.c Most recent command
If you enter ma on the command line and press <esc>, mshell replaces the command line with the most recent occurrence of ma:
make -f=make.debug iopt.386
Now, if you press <esc>, mshell finds the next most recent occurrence of ma and replaces the command line with:
make
As an environment variable, CMDC also controls mshell’s behaviors as mshell performs command completion. There are twelve different possible values for command completion. These values are shown below:
496 Utilities Reference

5Using the mshell Utility
<not set> or histbell when the history commnds that match the pattern are exhausted, the terminal bell rings and the last matching entry remains
histloop when <esc> is hit after the last matching entry, the list of matching entries starts over from the beginning
histbounce when <esc> is hit after the last matching entry, mshell begins moving backward through the list
histpartial when all of the history entries that match the pattern on the command line are examined, the command line is replaced with the longest common substring of all entries. More characters can be typed to disambiguate the entries and <esc> used again to finish command completion.
pathbell the characters on the command line are used as a way in which to find all executable commands and each <esc> advances alphabetically through the list of commands. When the list is exhausted, the terminal bell rings and the last matching entry remains.
pathloop when <esc> is hit after the last matching executable, the list of matching executables starts over from the beginning
pathbounc when <esc> is hit after the last matching executable, mshell begins to move backward through the list of executables
Utilities Reference 497

5 Using the mshell Utility
histpartial when all of the executables that match the pattern on the command line are examined, the command line is replaced with the longest common substring of all the entries. More characters can be typed to disambiguate the executables and <esc> used again to finish command completion.
bothbell the characters on the command line are used as a way in which to find all of the matching history entries and executable commands and each <esc> advances through the list. When the list is exhausted, the terminal bell rings and the last matching entry remains.
bothloop when <esc> is hit after the last matching history entry or executable, the list of matches starts over from the beginning
bothbounce when <esc> is hit after the last matching history entry or executable, mshell begins to move backward through the list
bothpartial when all of the history entries and executables that match the pattern on the command line are examined, the command line is replaced with the longest common substring of all the items. More characters may be typed to disambiguate the item and <esc> may be used again to finish the command completion.
In any of these modes, ^\ (control backslash) can be used examining the complete list of matches. This can be especially useful when disambiguating partial completions.
498 Utilities Reference

5Using the mshell Utility
Pathlist Completion
You enter a partial file name in the command line and mshell completes it. mshell does a wildcard match on the partial pathlist and displays the matching file name on the command line.
For example, in a directory with the files test1.c, file, file2, and file3, if you enter:
del fi<esc>
mshell replaces your command line with the matching file name and places the cursor at the end of the line:
$ del file
You are free to backspace over the file name if it is not the one you are looking for. Press <esc> again before typing any other characters; mshell displays the next file (in alphabetical order) in the directory that begins with fi (file2), and so forth. A bell sounds when there are no more files that match the pattern.
mshell’s file name completion feature is intelligent; it knows the structure of file names. When you enter make -f=make and press <esc>, mshell knows that you are looking for a file that begins with make, not -f=make.
As an environment variable, FILEC is also available to control how mshell behaves when performing command completion. There are four different possible values for command completion. These values are shown below:
<not set> or histbell when the pathlists that match the pattern are exhausted, the terminal bell rings and the last matching entry remains
loop when <esc> is hit after the last matching entry, the list of matching entries starts over again from the beginning
bounce when <esc> is hit after the last matching entry, mshell moves backward through the list
Utilities Reference 499

5 Using the mshell Utility
partial when all of the pathlists that match the pattern on the command line are examined, the pathlist is replaced with the longest common substring of all the entries. More characters may be typed to disambiguate the entries and <esc> used again to finish the pathlist completion.
In any of these modes, ^\ (control backslash) can be used to examine the complete list of matches. This can be especially useful when disambiguating partial completions or examining the contents of a directory.
500 Utilities Reference

5Using the mshell Utility
Command Name Aliases (Assigns)
Command name aliases make it simple to enter commonly used or repetitive commands. Use the assign command to assign an alias to a word which acts as a substitute for a specified string. For example, if you prefer to use the UNIX cd command (change directories) rather than the OS-9/OS-9000 chd command, you could create an assign as follows:
assign cd chd
From that point forward, every cd command you issue automatically changes to chd. Characteristics of assign include:
• mshell only performs the substitution on the command itself, it does not affect the rest of the command line.
• Assigns are case sensitive. Cd is not the same as cd.
• If there are spaces in the string, you must place quotation marks at the beginning and end of the string. For example:
For More InformationMore Info More Information More Information More Information More
-6-
See the Built-in Commands section, and the mshell Command Line Options section, for the mshell command line options (-q), details about changing the default.
$ assign pd "print("%s\n", $(PWD:q))"create a quicker pd
• Assigns are always passed to procedure files, so be cautious when executing other people’s procedure files with your own assigns set.
• You can keep assigns in the environment to follow you from mshell to mshell. For example, if you have a number of assigns, fork µmacs, and shell out, your assigns travel with you.
Utilities Reference 501

5 Using the mshell Utility
mshell has a built-in command, noassign you can use to prevent access to the assign list for a given command. For example:
$ assign pd "print("%s\n", $(PWD:q))" create a quicker pd$ pd execute the "assigned" pd/h0/usr/ric/c/mshell
$ noassign pd execute the "real" pd/h0/USR/RIC/C/MSHELL
Assign
To view all of your current aliases, enter assign with no arguments.
Unassign
Use the unassign command to remove assigns. unassign takes any number of arguments and does not report errors when unassigning words that are not assigned.
502 Utilities Reference

5Using the mshell Utility
Enhanced Piping Facilities
mshell allows you to pipe standard output and/or standard error from one process to another. You may use this to capture all output and error messages of a process. Use the following command separators:
For example, to pipe both the normal and error output of cc to pr:
cc -g -td=/r0 testprog.c !!! pr
Table 5-2 mshell Command Separators
Separator Description
! Standard output
!! Standard error
!!! Both standard output and standard error
Utilities Reference 503
5 Using the mshell Utility
Command Line Batchfiles
With mshell, you can create temporary batchfiles directly from the command line. With this facility, you can use interpreter characteristics without an editor. mshell writes your sequence of command lines into a file and by default executes it as a profiled procedure file.
You may choose to have your batchfiles run as normal (non-profile) procedure files by using the -np option.
For More InformationMore Info More Information More Information More Information More
-6-
See the Built-in Commands section, and the mshell Command Line Options section, for information on -np.
To start the batchfile process, enter the first line of the batchfile on the command line, but put a backslash (\) character at the end. This tells mshell that you want to create a batchfile. mshell then begins prompting with a question mark (?). Carriage return (<cr>) on a blank line terminates the batchfile creation and starts the execution. Press <esc> as the first character on any line to terminate the creation of the batchfile and return to the normal shell prompt.
The question mark (?) prompt is treated like any other prompt. mshell provides file name completion and history access via <esc>.
The following is an example batchfile creation session to copy all *.c files to BACKUP/*.bak:
$ while (next_file(fn,"*.c")) \? copy -rb=32 %fn BACKUP/%(fn:r).bak? endwhile? <cr>
You can set the environment variable _BATCHDEV to the device that you want mshell to use for the temporary batchfile. For example, the following line causes the command line batchfile facility to use the RAM disk for its temporary file:
$ setenv _BATCHDEV /r0
504 Utilities Reference

5Using the mshell Utility
Procedure File Programming Language
mshell procedure files are handled quite differently than OS-9/OS-9 for 68K procedure files. To perform some tasks in OS-9/OS-9 for 68K, the only choice is a quick BASIC or C program. With mshell you can use procedure files. The following describes the mshell procedure file features:
• Parameter Passing to Procedure Files
• Environment Variable Substitution
• Programming Variable Substitution
• Command Output Substitution
• Variable Substitution Modifiers
• Procedure File Line Concatenation
• Procedure File Debugging Facilities
To ensure that you write effective procedure files, master the basics, then progress to their more complex aspects.
mshell includes a full programming language interpreter. The language represents a hybrid of both C and BASIC. The features presented here are related to procedure files. You can use them along with the programming language.
Parameter Passing to Procedure Files
A procedure file may take any number of parameters. To pass parameters to a procedure file, enter them as if you were passing parameters to a program. They are accessed from within the procedure file via environment variables in the form P<num>, where num ranges from 0 to 1 less than the number of parameters passed.
Utilities Reference 505
5 Using the mshell Utility
For More InformationMore Info More Information More Information More Information More
-6-
See the mshell Command Line Options, for more information about the PN argument.
There are two additional variables passed to procedure files; P* and PN. P* is the concatenation of all the parameters separated with a space. P* is useful for procedure files that take a variable number of arguments. PN is set to be the number of arguments passed to the procedure file. PN is useful when processing the arguments one-by-one in an interpreted procedure file.
For example:
$ procfile param0 param1 param2
The line above calls a procedure file with the following environment variables set:
P0=param0P1=param1P2=param2P*=param0 param1 param2PN=3
Environment Variable Substitution
mshell provides a facility to perform environment variable substitution on the command line. mshell replaces the specified environment variable with its actual value. This feature is useful for using the parameters passed to a procedure file or to reduce the amount of typing required.
The following syntax brings environment variables into the command line, where <name> is the name of the environment variable desired.
$(<name>)
506 Utilities Reference

5Using the mshell Utility
For example, the following command line causes mshell to substitute the actual name of the terminal type (kt7) for the specified environment variable (TERM). This command:
$ echo "My terminal type is" $(TERM)
Yields:
My terminal type is kt7
Parameter passing makes procedure files more portable in that you can use environment variables within procedure files.
For More InformationMore Info More Information More Information More Information More
-6-
Refer to the sections in this chapter about Command Output Substitution and Variable Substitution Modifiers.
For instance, use the following line to fork mmacs from within a procedure file:
umacs $(HOME)/tempfile <>>>$(PORT)
This allows a user at any terminal with any HOME directory to use the procedure file.
Programming Variable Substitution
mshell has shell variables that you can place into the command line, similar to environment variable substitution. The syntax is %<name> or %(<name>), where <name> is the name of the variable that is desired.
For More InformationMore Info More Information More Information More Information More
-6-
Refer to the Variable Substitution Modifiers section of this chapter for more information about variables.
Utilities Reference 507

5 Using the mshell Utility
For example:
$ let a = "hello there"$ echo %a or echo %(a)hello there
Programming variable substitution is performed after environment variable substitution.
Command Output Substitution
mshell’s command output substitution feature allows you to place the output of a command within that same command line. In other words, the output which is the result of executing the specified command becomes an argument in the command line.
Use the following syntax (within a command line) to paste the output of a command directly into that same command line:
$("command"{:modifiers})
mshell executes the specified command and substitutes the output for the above syntax. If the output of command contains more than one line, each line is separated by a space and added to the command line.
For example, to make up for the shell’s lack of wildcards for the module directory, you could use mdir -u to execute unlink on all modules containing ric:
unlink $("mdir -u "*ric*"")
This facility can also be very useful in interpreted procedure files. The following command line assigns the output of the date utility to the variable d:
let d = $("date":q)
508 Utilities Reference

5Using the mshell Utility
Variable Substitution Modifiers
Programming variable, environment variable, and command output substitution specifiers may also have modifiers. Most of the modifiers accomplish frequent file name type manipulations on the replacement value. These modifiers do not actually change the variable’s value. They simply alter its appearance. You may use this option to temporarily mask certain characteristics of a variable. The variable, however, retains its actual value.
NoteNoteYou must specify modifiers after the variable name and separate them from the variable name by a colon (for example, $(HOME:q) or %(filename:rq). The modifiers are applied in the order in which they appear and may be separated by any number of colons (:).
The following is a list of variable substitution modifiers and a description of the operation that they perform:
Table 5-3 mshell Variable Substitution Modifiers
Modifier Description
h Strip the file name and slash (/) (if applicable) from the variable, leaving the directory that contains the file name.
r Remove the suffix (all characters from the last period (.) forward) from the variable.
e Remove the entire pathlist and file name, leaving only the suffix portion of the variable.
Utilities Reference 509

5 Using the mshell Utility
The following examples show the modifier applied and the resulting value if the variable had the value at the top of the column:
t Remove any pathlist components, resulting in a file name only.
q Surround the replacement variable with double quotes ("). q is very useful to ensure that the replacement of a variable is interpreted as one argument. For instance, if you want to do a setenv with the value of a variable, you might use the following command to ensure that setenv received only two parameters.
setenv PATH %(pathvar:q)
Table 5-4 mshell Modifier Examples
Modifier test.c /h0/USR/RIC/test.c TESTDIR
h . /h0/USR/RIC .
r test /h0/USR/RIC/test TESTDIR
e c c (empty string)
t test.c test.c TESTDIR
q "test.c" "/h0/USR/RIC/test.c"
"TESTDIR"
Table 5-3 mshell Variable Substitution Modifiers (continued)
Modifier Description
510 Utilities Reference

5Using the mshell Utility
The h modifier returns a period when there is no pathlist because the pathlist ./ is implied. This enables you to write generic code, regardless of the existence of a pathlist.
The following example procedure file makes a backup copy of all .c files:
*** For each file in the directory matching "*.c"while (next_file(fn,"*.c"))
*** make a copy with a different extensioncopy -rb=32 %(fn) %(fn:r).bak
endwhile
Procedure File Line Concatenation
For the convenience of the procedure file programmer, logical lines may span many physical lines. During procedure file execution, if mshell encounters a line that ends with a backslash (\) character, the next line is read and added to the current line. This process continues until mshell finds a line that does not end with a backslash.
The line following a backslash line is inserted starting at the position of the backslash. The current implementation of this feature allows the break to occur anywhere (within quoted strings, between items that would normally be considered a single token).
The following are some examples:
if (strcmp(%answer,"yes") == 0) || \ strcmp(%answer,"YES") == 0) || \ strcmp(%answer,"Yes") == 0))print("This is a \very strange place to break a line into two\n");echo I \just \can’t \get \"enough!"
Utilities Reference 511

5 Using the mshell Utility
Procedure File Debugging Facilities
mshell provides two simple mechanisms for debugging procedure files:
• Command monitoring
• Debugging message logging
The mshell -d option turns on command monitoring. When -d is enabled, before mshell forks a process it prompts you for permission. This allows you to skip or monitor the “dangerous” or time consuming parts of your procedure file (del, deldir, cc, make). This option is most useful while debugging a procedure file, but you could use it when experimenting with variable replacement modifiers or history replacement escapes.
For More InformationMore Info More Information More Information More Information More
-6-
Refer to the Built-in Commands and mshell Command Line Options sections for a complete description of -d.
The following is a sample of command monitoring:
$ -d$ umacs $(HOME)/.loginExecute: "umacs /h0/USR/RIC/.login"? (y, n, a, or q)
At this point, you can enter one of the following:
• y to execute the command
• n or <Return> to skip the command
• a to execute the command and turn off the debugging option
• q to exit the mshell (q is not useful here, but is very useful when debugging a real procedure file)
512 Utilities Reference

5Using the mshell Utility
The -u option turns on the debugging message log. This feature prints useful information about interpreter variables, functions, and directives.
Messages appear for a variety of reasons. Using -t in conjunction with -u is very helpful. Put a -ut before an area where a bug is suspected and a -ntnu after the area. This limits the debugging messages to the area in question.
Utilities Reference 513

5 Using the mshell Utility
Built-in Commands
mshell has a number of built-in commands and command line options. The built-in commands include:
• profile Command
• UNIX-like Data Directory Commands
• prenv Built-in Command
• set Command
• which Command
Command line options include:
• Options that control various mshell features
• Customized prompt string
• Parameter passing among mshells
• An alert message compatible command line
NoteNoteTo change a command line option:
You can change a command line option at any time with the dash (-) or set command.
profile Command
The built-in profile command allows you to execute a procedure file without forking a child shell. This can be useful for changing directories and setting the environment from within a procedure file. A profile procedure file can take arguments just like a normal procedure file. The syntax is:
514 Utilities Reference

5Using the mshell Utility
profile <procfile> [<param> ...]
procfile is the name of the procedure file to execute.
param is any number of parameters that are to be passed to the procedure file. For example, if you had a procedure file (newuser) containing:
setenv USER $(P0)setenv HOME /h0/usr/$(P0)chd $(HOME)
You could execute it with:
$ profile newuser robb
USER would be set to robb, HOME would be /h0/usr/robb, and your current data directory would be /h0/usr/robb.
During the execution of a profile procedure file, stdin is not redirected from that file to mshell, so mmacs on a line by itself works without any additional redirection.
UNIX-like Data Directory Commands
mshell has three built-in commands that you can use to maintain a stack of working directories. They behave exactly like the UNIX built-ins dirs, pushd, and popd. If you are unfamiliar with the UNIX commands, here is a brief explanation of each command and its parameters (each command prints the stack after the operation is complete).
Table 5-5 mshell Data Directory Commands
Command Description
dirs Print the current directory stack.
pushd Reverse the order of the top two items on the stack and chd to the top item. This is very useful when you need to work in two directories at once.
Utilities Reference 515
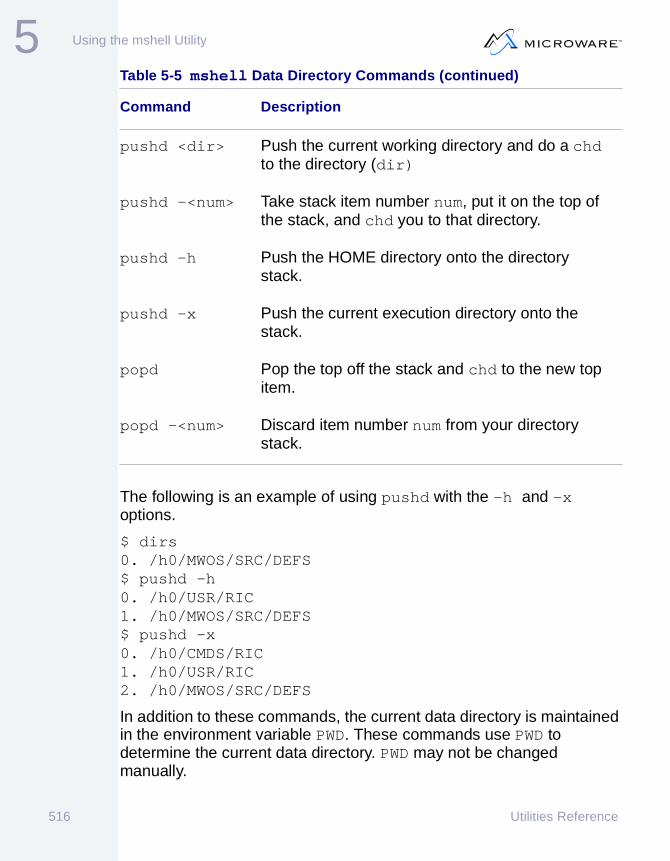
5 Using the mshell Utility
The following is an example of using pushd with the -h and -x options.
$ dirs0. /h0/MWOS/SRC/DEFS$ pushd -h0. /h0/USR/RIC1. /h0/MWOS/SRC/DEFS$ pushd -x0. /h0/CMDS/RIC1. /h0/USR/RIC2. /h0/MWOS/SRC/DEFS
In addition to these commands, the current data directory is maintained in the environment variable PWD. These commands use PWD to determine the current data directory. PWD may not be changed manually.
pushd <dir> Push the current working directory and do a chd to the directory (dir)
pushd -<num> Take stack item number num, put it on the top of the stack, and chd you to that directory.
pushd -h Push the HOME directory onto the directory stack.
pushd -x Push the current execution directory onto the stack.
popd Pop the top off the stack and chd to the new top item.
popd -<num> Discard item number num from your directory stack.
Table 5-5 mshell Data Directory Commands (continued)
Command Description
516 Utilities Reference

5Using the mshell Utility
prenv Built-in Command
prenv is a built-in mshell command. Its function is much like that of printenv in that it displays the environment variables. prenv, however, provides a condensed version of printenv, omitting environment variables which mshell uses to pass history and assign information to other mshells. The list is much shorter and displays only the environment variables that are of the most interest. Specify a dash (-) as an argument to prenv to display all environment variables.
NoteNoteYou can also use prenv to display specific environment variables. For example, to examine the variables HOME and frog you use:
$ prenv HOME frog
Resulting in the following output:HOME=/h0/USR/RIC
frog is undefined
set Command
Use the built-in set command to examine the current mshell options. Enter set on the command line to display all of the current options and any strings associated with them. You can also use set to examine the current command line editing keys. The following is sample output of the set command:
Current Shell OptionsPrompt = ON (@%(nBugg_$ )
Error Messages = OFFInvocation Initialization = OFF
Echo = OFF Verbose = OFF Debug Mode = OFF Debug Message Log = OFF
Utilities Reference 517

5 Using the mshell Utility
Profile Batchfiles = ON Auto Logout = ON Abort on Error = OFF Fancy ReadLn = ON Default Insert Mode = OFF Alter-Echo = ON History = OFF History Save/Load = OFF History Passing = ON History Compression = ON Alias Passing = ONShell Line Editing Chars:PvLine=^P NxLine=^N PvChar=^B NxChar=^F Ins=^I Del=^D Ends=^Z Kill=^K
which Command
The which built-in command displays where to find a module or file of the given name and the nature of the files (module or procedure file). For example:
$ which procsprocs - in-memory module/h0/CMDS/procs - module - on PATH$ which procfileprocfile - procedure file - current data directory relative$ which cdcd - aliased to ’chd’$ which chdchd - built-in mshell command
518 Utilities Reference

5Using the mshell Utility
mshell Command Line Options
mshell features include a number of options that control them. All of these options follow the basic form of a shell option.
The following is a list of options and their effect on mshell.
Table 5-6 Enableing mshell Command Line Options
Enable Option Disable Option
-<char> -n<char>
Table 5-7 mshell Command Line Options
Option Description
-a Alter-echo
When this option is enabled, all lines that are changed between the time they are entered and when the process is ready to be forked are echoed. Changes might include environment variable, interpreter variable, or history substitution. Command name alias substitution does not cause the line to be echoed. The default is -a.
-b Profile batchfiles
This option determines the execution method of batchfiles created from the command line. If you use -b, batchfiles are executed as profiled procedure files. Otherwise, batchfiles are executed as procedure files under a different mshell. The default is -b.
Utilities Reference 519

5 Using the mshell Utility
-c History buffer
This option sets the size of the history buffer, turns on the default history buffer, or turns the history buffer off. It may take a size argument: the number of command lines saved. For example:
-c: Turns on the default 40 command line history buffer.
-c=10: Turns on a ten command line history buffer.
-nc: turns off the command line history buffer.
The default is -c=40.
-d Debug mode
This option enables/disables the debugging mode built into mshell. When -d is enabled, processes are forked under user control. The default is -nd.
-f Fancy readln
Fancy-readln controls the routine mshell uses to read from the user on an SCF device. -f enables command and pathlist completion, editing control characters, and a non-blocking readln command line. This mode has two drawbacks:
• I/O can be done to the device between characters.
• When running mshell over the network, it can cause excessive traffic.
-nf causes mshell to use the standard SCF readln. The default is -f.
Table 5-7 mshell Command Line Options
Option Description
520 Utilities Reference

5Using the mshell Utility
-h History compression
-h, when enabled, causes mshell to search the current command line history after each command is entered. If a matching command line is found, no new history entry is created. This prevents repetition of matching command lines. The default is -nh.
-i Invoke initialization script
This option controls whether or not the file $(HOME)/.shellrc is executed each time an mshell begins execution. (Refer to the “Invoking the Initialization File” section.) The default is -ni.
-m Insert mode
When you enable -m, the default editing mode is insert. If you back into the command line’s text (with ^b) and type, the characters are inserted into the command line rather than overwriting existing characters. The default is -nm, overwrite mode.
NoteNoteThe insert mode remains in its current state until a new command line is displayed. The command line editing keys that work on the current command line (for example, ^b) do not reset the insert mode to its default. Keys that replace the entire command line (for example, ^p) cause the insert mode flag to return to its default.
Table 5-7 mshell Command Line Options
Option Description
Utilities Reference 521

5 Using the mshell Utility
-o Time-out
The -o option allows you to specify the number of minutes to allow an mshell sit at an empty command line prompt before timing out. The default is -nf (no time-out). The syntax to enable -o is:
-o[[=]<n>]
n is the number of minutes to sit before timing out. The default for n is 480 minutes (eight hours).
-q Alias passing
This option controls whether or not your assigns are kept in the environment. Regardless of this option, assigns are passed to all procedure files executed.
For More InformationMore Info More Information More Information More Information More
-6-
Refer to the Command Line Interface chapter for information on assigns.) The default is -q.
-r History passing
This option controls whether or not your history is passed from mshell to mshell. The default is -nr.
Table 5-7 mshell Command Line Options
Option Description
522 Utilities Reference

5Using the mshell Utility
-s History saving
This option determines if your history is saved when you log out and read when you log in. Without -s, you start each login session with an empty command line history. The default is -ns.
-u Procedure file debugging log
This option causes the shell to output debugging messages. It is most effectively used by preceding code where a problem is encountered with a -u, and using -nu to disable the debugging output after the code. The default is -nu.
Table 5-7 mshell Command Line Options
Option Description
Utilities Reference 523
5 Using the mshell Utility
Parameter Passing among mshells
mshell keeps the _SHELLPARAMS environment variable which contains the current settings of some mshell options. This allows mshell to pass its current options to all other mshells that are forked below it. Some options are not passed because they are changed when procedure files are executed, and would therefore affect any mshells forked from procedure files.
_SHELLPARAMS is scanned before the initial command line is parsed, so any option changes on a command line works properly.
You can remove _SHELLPARAMS from the environment, but you cannot set it into the environment manually.
524 Utilities Reference

5Using the mshell Utility
Invoking the Initialization File
Each time mshell starts, it searches for the .shellrc file in your HOME directory. You can use the .shellrc file to set shell options which are not passed in the _SHELLPARAMS environment variable. If the file is found, it is executed in the same manner as the .login file is executed when you log in. This feature is controlled by the -i option (see the mshell Command Line Options section). In the case of the “login shell” it is executed after the .login script file. Therefore, any options set in the.login file can be changed in the .shellrc file. It is not considered fatal if there is no .shellrc file, but if it does not, it is more efficient to use the -ni option (default) to keep it from being checked each time.
For example, the -c option is not passed in the _SHELLPARAMS variable. You can create a one line procedure file named .shellrc in your HOME directory containing the -c=50 command. Then, as long as the -i option is in effect, each forked mshell automatically has a 50-entry history buffer.
To use the -i option effectively, you must understand the order of certain mshell operations. When you run mshell, it:
1. Processes the .login file (login shell only)
2. If the -i option is enabled, processes .shellrc
3. Processes the initial command line specified as arguments to mshell
4. Prompts you for further command lines
Note that the .shellrc file processing is done before the initial command line to mshell. This means that a password file line such as the following does not behave as expected:
joe,user,1.0,128,/h0/CMDS/JOE,/h0/USR/JOE,mshell -ip="Joe: "
mshell enables the -i option after the check to see if -i is enabled. It is better to place the -i option in the .login file. Also, the following command line does not behave as you might expect:
$ mshell -i
Utilities Reference 525
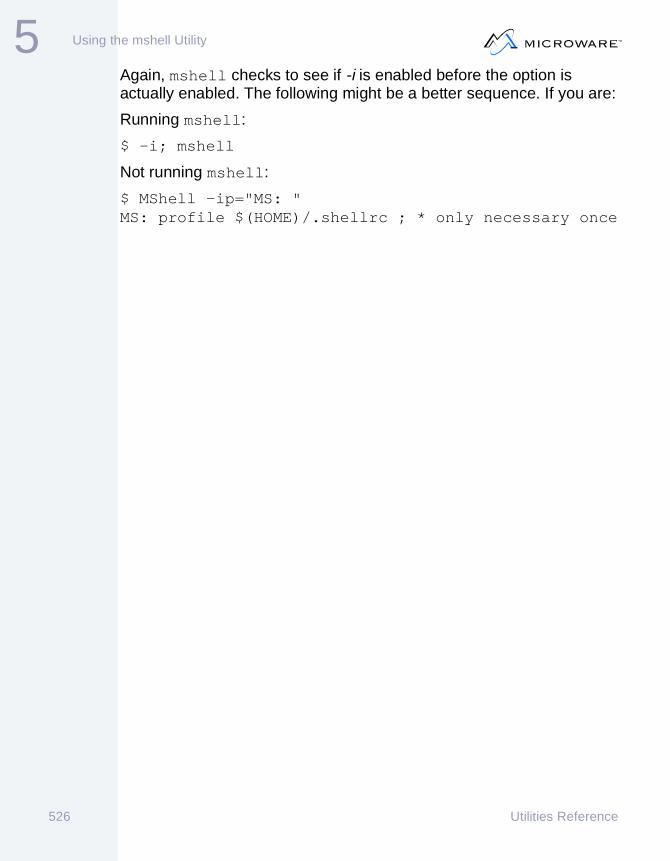
5 Using the mshell Utility
Again, mshell checks to see if -i is enabled before the option is actually enabled. The following might be a better sequence. If you are:
Running mshell:
$ -i; mshell
Not running mshell:
$ MShell -ip="MS: " MS: profile $(HOME)/.shellrc ; * only necessary once
526 Utilities Reference

5Using the mshell Utility
Prompt Format String
mshell allows the prompt text to contain printf-like format escapes. You can customize your prompt format string with this feature. You may want to include the shell level as part of the prompt, as well as other items. The following are the escapes allowed (<d> is the optional delimiter character):
Table 5-8 Allowed Escapes in mshell
Escape Replacement
@ Current shell level and a dot. @ must be the first character in the prompt. (This is included for compatibility with the standard OS-9/OS-9000 shell.)
%<d>s Current shell level (may appear anywhere in the prompt).
%s only displays a value if the environment value _sh is set to a non-zero value.
%<d>h Current command number in the history buffer
%p Current data directory
%<d>n Number of directories currently on the stack
%u Current user ID of the shell
%g Current group number of the shell
%l Login name of the user (USER environment variable)
Utilities Reference 527

5 Using the mshell Utility
%d Current date. The default format of the date is yy/mm/dd. You can change this format by setting the environment variable _DATEFMT with the following replace escapes permitted:
dd = day of month (1-31)
ddd = day of week (Sun-Sat)
mm = month of year (1-12)
mmm = name of month (Jan-Dec)
yy = two digit year number
yyyy = four digit year number
Any other character sequences are copied directly to the prompt. For example:
$ setenv _DATEFMT "mmm dd-mm-yyyy"
Yields a date format such as: Aug 30-08-1993
Table 5-8 Allowed Escapes in mshell (continued)
Escape Replacement
528 Utilities Reference

5Using the mshell Utility
%t Current time. The default format is hh:mm:ss am/pm. You can change this format by setting the environment variable _TIMEFMT with the following replace escapes permitted:
tt Tick
ss Second
mm Minute
hh Hour
24 Military hour
ap a.m. or p.m.
Any other character sequences are copied directly to the prompt. For example:
$ setenv _TIMEFMT "24:mm:ss.tt ap"
Yields a time format such as:
18:27:15.77 pm
For example:
$ -p="@[%h]<%p>Vite_$ "
Causes a prompt which might look like the following:
3.[216]</h0/usr/ric>Vite_$
Table 5-8 Allowed Escapes in mshell (continued)
Escape Replacement
Utilities Reference 529
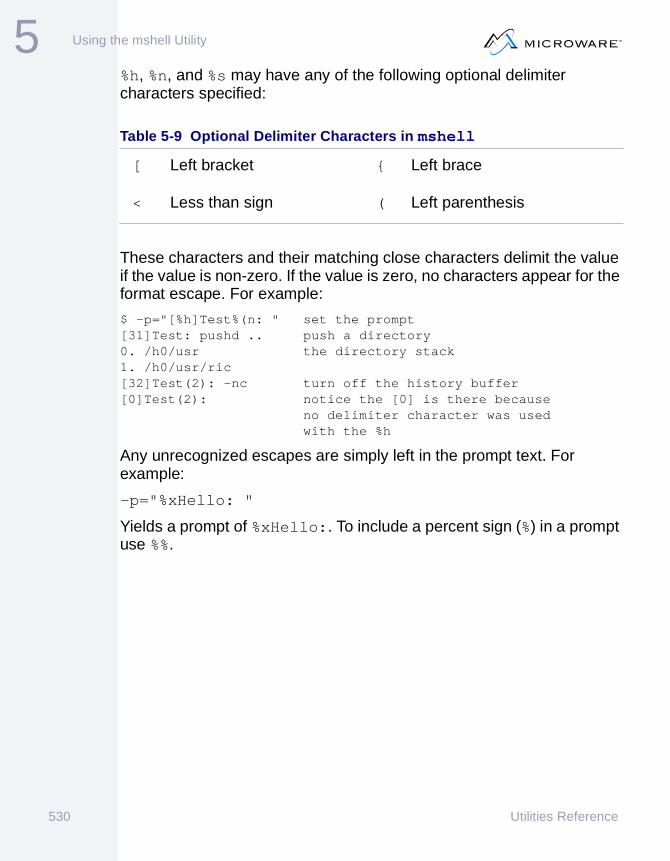
5 Using the mshell Utility
%h, %n, and %s may have any of the following optional delimiter characters specified:
These characters and their matching close characters delimit the value if the value is non-zero. If the value is zero, no characters appear for the format escape. For example:
$ -p="[%h]Test%(n: " set the prompt[31]Test: pushd .. push a directory0. /h0/usr the directory stack1. /h0/usr/ric[32]Test(2): -nc turn off the history buffer[0]Test(2): notice the [0] is there because
no delimiter character was usedwith the %h
Any unrecognized escapes are simply left in the prompt text. For example:
-p="%xHello: "
Yields a prompt of %xHello:. To include a percent sign (%) in a prompt use %%.
Table 5-9 Optional Delimiter Characters in mshell
[ Left bracket { Left brace
< Less than sign ( Left parenthesis
530 Utilities Reference

5Using the mshell Utility
Non-blocking Readln
mshell, when located at the prompt, allows output to the terminal. Output is allowed when the cursor is sitting at the first position and there are no characters on the command line (after ^x). When -f is enabled, mshell uses a non-blocking readln routine to read from SCF devices . When the command line is empty, other processes can do output to the device. This allows you to see the output of background processes if it arrives when you are sitting at an empty prompt.
NoteNoteThis feature causes read errors for background processes that read from the same port as an mshell.
Utilities Reference 531

5 Using the mshell Utility
mshell Directives
mshell has a built-in procedure file interpreter which represents a hybrid of both C and BASIC. It is implemented using built-in commands called directives. The following sections describe the five basic elements of the language:
• mshell Directives
• Operators
• Variables
• Function Calls
• Constants
Directives are built-in commands which control program flow, display text, or assign variables new values. You use directives in the same way that you might use list or dir. Directives, however, are handled as a special case by mshell. Once it is determined that the command is a directive, the remainder of the line is treated as the sole expression argument to the directive. Therefore, apply the following rules when writing shell scripts for mshell:
• Use only one directive per line.
• The directive must be the first item on the line:
if (%a == %b)
• Unconditional branch
• Conditional branch
• Procedure file function
• Variables
• Miscellaneous
The statement above is a conditional branch which starts an if construct.
532 Utilities Reference

5Using the mshell Utility
For More InformationMore Info More Information More Information More Information More
-6-
See the Directive Descriptions section for information about each directive.
You may follow directive lines with an optional semi-colon (;) and any other text. The following lines are valid:
do execute(strcat("del ", %fn))do execute(strcat("del ", %fn));do execute(strcat("del ", %fn)); This is a commentdo execute(strcat("del ", %fn)) ;* This is a comment
Directives take expressions as their argument. Expressions may contain any of the following four elements:
• Operators
• Variables
• Function Calls
• Constants
Utilities Reference 533

5 Using the mshell Utility
Operators
Expressions are formed from operands separated by operators. The operands may be any combination of variables, functions, and constants. See the following table for a list of operators and their precedence.
All operators associate left to right.
Variables
When you reference a variable in an mshell procedure file, you can specify either the variable’s name or its value. To assign a new value to a variable, refer to the name of the variable. To use the value of a variable, precede the variable name with a percent character (%). For example, the following command assigns a value to x (by referring to the name x only), and refers to the value in var (by preceding the name var with a percent character (%).
let x = %var
Table 5-10 Valid Operators
Operators Class Precedence
(<expr>) Grouping High
~, -, + Unary
*, /, %, &, ^ Arithmetic/Bit
+, -, | Arithmetic/Bit
<, <=, >, >=, ==, != Relational
&&, || Logical Low
534 Utilities Reference
5Using the mshell Utility
The name of a variable must follow the rules defined for an identifier constant (see the Identifier Constants section). The case of the letters is significant, that is, AbC is not the same as aBc. The name may be any length.
mshell has both global and local variables.
NoteNoteGlobal variables are given values by the let directive and assign() function. They may be assigned in or out of procedure file functions (PFFs).
Local variables are assigned values inside of PFFs via the llet directive or the lassign() function.
For each variable reference, the locals are searched first (if applicable), then the globals are searched. This causes local variables to take precedence over globals of the same name. See the function and return directives for more information on PFFs.
Functions
mshell has a number of built-in subroutines (functions) which you can call from within expressions. A function may take as many as three expressions as parameters (which may, in turn, have functions in them). The number of parameters for each function varies.
For More InformationMore Info More Information More Information More Information More
-6-
See the mshell functions and their parameters.
Utilities Reference 535

5 Using the mshell Utility
Example:
let a = len(%b)
The statement above places the length of the string held by %b into the variable a.
Constants
There are four types of constants:
• Quoted String Constants
• Integer Constants
• Logical Constants
• Identifier Constants
Quoted String Constants
Quoted string constants begin and end with a double-quote character ("). The string is examined for escape characters. Quoted string constants may contain C-like escape characters in the form \char, where char is one of the following.
Table 5-11 Quoted String Constants in mshell
Escape Character Replacement
b Backspace (0x08)
e Escape character (0x1b)
l Line feed
n Carriage return
r Carriage return
536 Utilities Reference
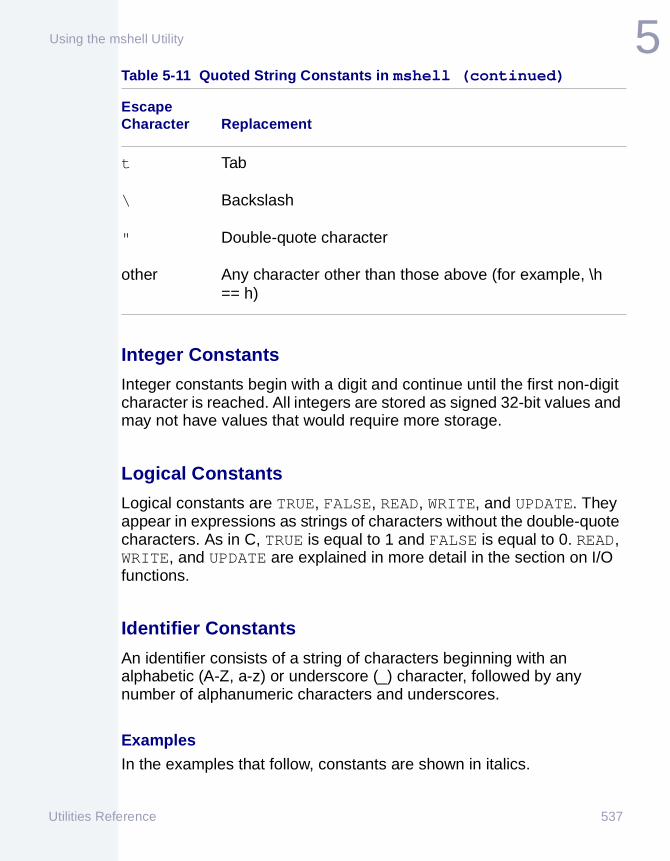
5Using the mshell Utility
Integer Constants
Integer constants begin with a digit and continue until the first non-digit character is reached. All integers are stored as signed 32-bit values and may not have values that would require more storage.
Logical Constants
Logical constants are TRUE, FALSE, READ, WRITE, and UPDATE. They appear in expressions as strings of characters without the double-quote characters. As in C, TRUE is equal to 1 and FALSE is equal to 0. READ, WRITE, and UPDATE are explained in more detail in the section on I/O functions.
Identifier Constants
An identifier consists of a string of characters beginning with an alphabetic (A-Z, a-z) or underscore (_) character, followed by any number of alphanumeric characters and underscores.
Examples
In the examples that follow, constants are shown in italics.
t Tab
\ Backslash
" Double-quote character
other Any character other than those above (for example, \h == h)
Table 5-11 Quoted String Constants in mshell (continued)
Escape Character Replacement
Utilities Reference 537

5 Using the mshell Utility
Quoted string:
let a = "This is a test."if (strcmp(%a, "HELLO") == 0)
print("%s\n", "Something is very wrong here!")endif
Integer:
let a = 127if (%a >= 256)
print("Something is very wrong here! %s >= 256\n", %a)
endif
Logical:
let a = TRUEif (%a == FALSE)
print("%s\n", "Something is very wrong here!")endif
Identifier:
let a = 127label infinite_loop
echo "Stop me!"
goto infinite_loop
NoteNoteThe representation of items within the interpreter is strings of characters. Conversion to integer is done when necessary, but only for computations. The end result of all expressions is a string.
The following statement contains an error. The variable b would be assigned the value backslash (/) and an error would occur; extra tokens starting at h0. White space and punctuation breaks up unquoted strings into separate tokens.
let b = /h0/usr/ric
538 Utilities Reference

5Using the mshell Utility
Both of the following statements are equivalent. Double-quoting strings of digits does not make a difference, since the internal representation of values is a string of characters.
let c = 912 or let c = "912"
Directive Descriptions
Directives tell mshell how to execute a particular procedure file. There are directives which support unconditional and conditional branching, looping, variable assignment, functions, and the printing of expressions. This chapter contains the syntax and descriptions of all mshell directives. Unless otherwise noted, directives may only appear in procedure files; you may not enter them directly from the command line (with the exception of batch file creation as described in the Command Line Batchfiles section.)
Figure 5-1 mshell Directives
Unconditional Branch
labelgotoConditional Branch
if elseelif endifwhile endwhilewbreak continuerepeat untilfor endforswitch casedefault endswitch
Variables
let unletllet lunlet
Procedure File Function
functionendfunctioncall return
Miscellaneous
data enddataprint end do
Utilities Reference 539
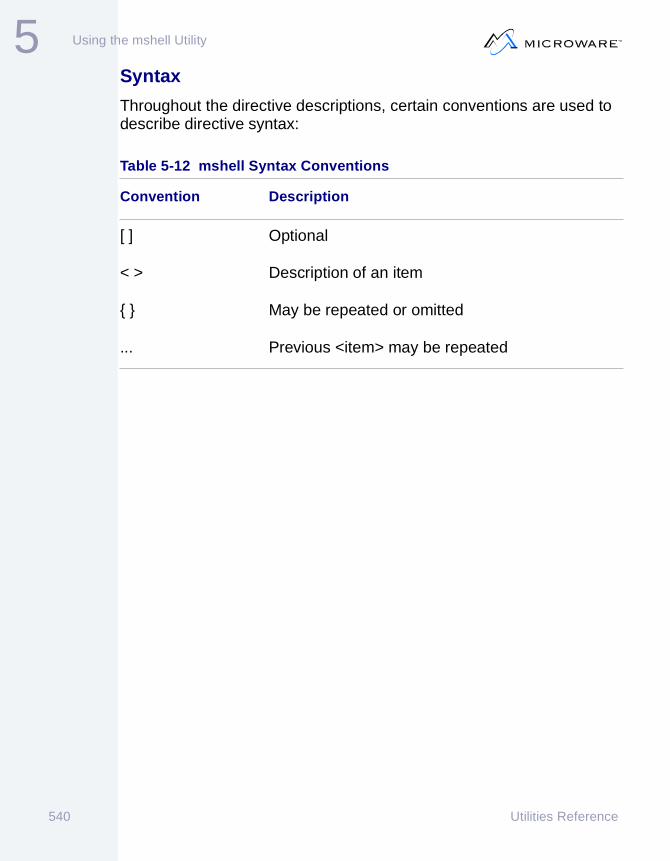
5 Using the mshell Utility
Syntax
Throughout the directive descriptions, certain conventions are used to describe directive syntax:
Table 5-12 mshell Syntax Conventions
Convention Description
[ ] Optional
< > Description of an item
{ } May be repeated or omitted
... Previous <item> may be repeated
540 Utilities Reference

5Using the mshell Utility
Table 5-13 Unconditional Branch Directives
Command Description
goto <expr> Transfer Control to a Label
goto allows the unconditional transfer of control in a procedure file. Execution continues from the line just after the specified label. expr is an expression and may contain function calls. The expression, however, must result in a string of identifier type.
Notes: The goto directive works without regard for constructs. That is, if you use a goto to move into the middle of a while loop, the endwhile causes an error.
label <name>
Declare a Label
label declares a label. name is the name of the label, and refers to the next line in the procedure file. Label names have the same construction as identifiers. Control passes to a label name via the goto directive.
Notes: Label and procedure file function names may not clash.
Utilities Reference 541

5 Using the mshell Utility
Table 5-14 Conditional Branch Directives
Command Description
case (<expr>) [:]
Specify a Test Value in a Switch Construct
case is used within a switch construct to specify the different expressions that should be tested against the switch expression. If the case expression (expr) and the switch expression are the same, execution resumes at the line after the case.
You must put a wbreak at the end of the code to force a break from the switch construct, otherwise code from other cases could be executed. For an example, see the endswitch directive.
continue Restart a Construct
continue transfers control back to the start of a construct (while/endwhile, for/endfor, repeat/until). Generally, the looping expression is re-evaluated to determine if looping should continue.
Note: continue causes an error if it is not encountered inside one of the constructs listed above.
542 Utilities Reference

5Using the mshell Utility
default [:] Specify Code to Execute if a Matching Case is not Found
default is used within a switch construct to specify the code to execute if a case expression is not found to match the switch expression. A switch construct need not have a default directive. The default directive can be placed anywhere within the cases, but is not executed until all the cases have been checked. A wbreak must be used to break out of the switch construct. See endswitch for an example.
elif (<expr>) Conditional False Execution Point for an if or elif Directive
elif, when used in conjunction with an if directive, marks the place where execution should be conditionally transferred if the expression on the if evaluates to FALSE. If this is the case and an elif is encountered, the expression (expr) on the elif is evaluated. If this expression is TRUE, execution begins on the line following the elif directive. Otherwise, execution is transferred to one of three possible locations:
• Conditionally to the next elif directive
• To the next else directive
• To the line following the endif (if no further elif or else directives are found).
Table 5-14 Conditional Branch Directives (continued)
Command Description
Utilities Reference 543

5 Using the mshell Utility
else False Execution Point for an if or elif Directive
else, when used in conjunction with the if directive, marks the place where execution should be transferred if the expression on the if directive evaluates to FALSE. else is optional.
For a full example see the description of the endif directive.
endfor End of FOR Loop Construct
endfor causes execution to branch back to the associated for directive. At that point, loop termination is considered based on the index variable value and loop limits.
Examples:
for i = 1 to 10 by 2print("%s is an odd number\n",
%i);endforfor j = 10 to 2 by -2
print("%s is an even number\n", %j);endfor
Table 5-14 Conditional Branch Directives (continued)
Command Description
544 Utilities Reference
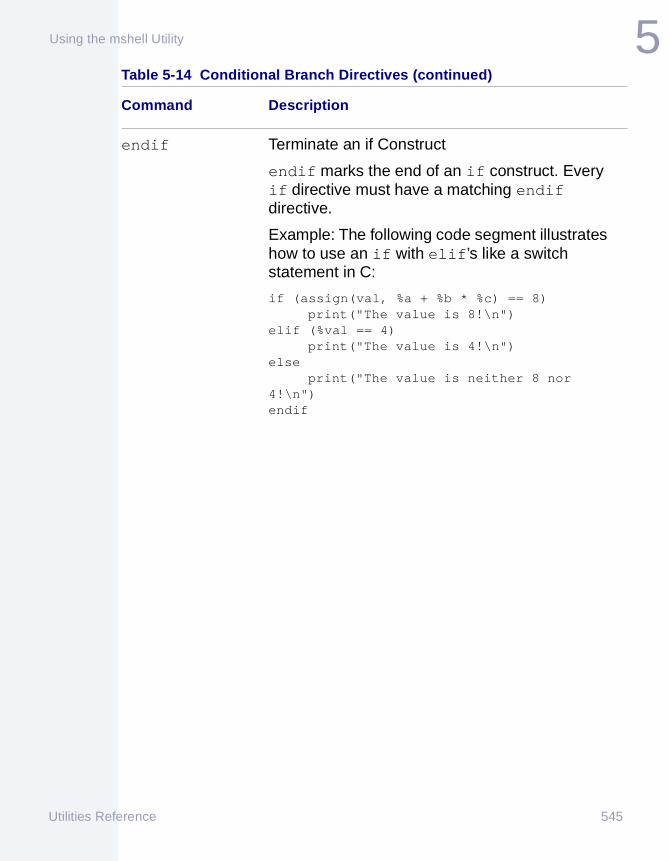
5Using the mshell Utility
endif Terminate an if Construct
endif marks the end of an if construct. Every if directive must have a matching endif directive.
Example: The following code segment illustrates how to use an if with elif’s like a switch statement in C:
if (assign(val, %a + %b * %c) == 8)print("The value is 8!\n")
elif (%val == 4)print("The value is 4!\n")
elseprint("The value is neither 8 nor
4!\n")endif
Table 5-14 Conditional Branch Directives (continued)
Command Description
Utilities Reference 545

5 Using the mshell Utility
endswitch Mark the End of a Switch Construct
endswitch marks the end of a switch construct. When it is encountered and no case’s code has been executed, the default code is executed (if a default case was specified). If a wbreak is encountered within a switch construct, execution resumes at the line following the endswitch.
Example: The following is an example switch construct:
1 print("Please type a character: ");2 let c = input1(); read 1 char from the user3 switch (%c); switch it over these possibilities4 case "\n":5 print("You pressed return!\n");6 wbreak ; leave switch construct7 case " ": ; space?8 case "\t": ; tab?9 print("You entered some white-space\n");10 wbreak;11 default: ; some other character12 print("You entered ’%s’\n", %c);13 wbreak;14 case chr(27):15 print("<esc> entered!\n");16 case "\b":17 print("<esc> or backspace entered!\n");18 wbreak ;wbreak for both "\e" and "\b"19 endswitch
Table 5-14 Conditional Branch Directives (continued)
Command Description
546 Utilities Reference

5Using the mshell Utility
The above example demonstrates several features of switch constructs:
Lines 4-6: Standard case, code, and wbreak sequence
Lines 7-10: Two cases can apply to the same code, if either one matches, the code is executed.
Lines 11-13: Default case to handle other non-special characters, not executed until all other cases are checked Line 14: case expression does not have to be a string constant.
Lines 14-18: case code does not automatically break out of the switch construct when another case is encountered, it continues to execute (skipping other cases) until it encounters a wbreak.
endwhile Mark the End of a While Loop Construct
endwhile causes control to be transferred back to its corresponding while directive. If the expression on the while is still TRUE, the loop executes again. Otherwise, execution continues with the statement following the endwhile directive.
See Also: endwhile
Example: The following example code segment prints all file names in the current data directory matching the pattern *.*:
while (next_file(fn,"*.*"))print("%s\n", %fn)
endwhile
Table 5-14 Conditional Branch Directives (continued)
Command Description
Utilities Reference 547

5 Using the mshell Utility
for <var> = <expr1> to <expr2> [by <expr3>]
Beginning of FOR Loop
for starts a traditional for loop.
var is the index variable name. var is assumed to be local if it is within a procedure file function. Otherwise, it is a global variable.
expr1 is the initial value for var.
expr2 is the boundary expression of the for loop.
The optional expr3 is the increment applied to var each time around the loop. If the by syntax is not used, mshell assumes the increment is +1.
expr1 and expr3 are evaluated only once. expr2 is evaluated each time around the loop. continue and wbreak may be used within a for loop. See endfor for an example.
Table 5-14 Conditional Branch Directives (continued)
Command Description
548 Utilities Reference

5Using the mshell Utility
if (<expr>) Beginning of Conditional Execution Construct
if starts the head of conditionally executed code. expr is the expression to evaluate. If expr evaluates to non-zero (TRUE), the code directly following the if directive line executes. If it is zero (FALSE), execution is transferred to one of three possible locations:
• After the next else directive.
• Conditionally after the next elif directive.
• After the next endif directive (if there is no else or elif present).
For a full example see the description of the endif directive.
repeat Mark Beginning of Repeat/Until Construct
repeat marks the start of a repeat/until loop. Execution continues with the next line.
switch (<expr>)
Beginning of Switch Construct
switch starts a switch construct. This construct allows you to test the expression (expr) for several values and execute code for each possibility. See endswitch for an example.
until (<expr>)
End of Repeat/Until Construct
until marks the end of a repeat/until loop. If the expression (expr) evaluates to FALSE (0), execution is transferred to the line after the associated repeat directive. If the expression is TRUE (non-zero), execution continues with the next line.
Table 5-14 Conditional Branch Directives (continued)
Command Description
Utilities Reference 549

5 Using the mshell Utility
wbreak Exit Construct
wbreak causes control to be transferred to the line following the current construct (while/endwhile, repeat/until, switch/endswitch, for/endfor). For example, you can use it to exit a for loop before the looping conditions have been met.
Note: wbreak causes an error if it is not encountered within one of the previously listed constructs.
while (<expr>)
Beginning of a While Loop Construct
while marks the start of a while loop. The loop continues to execute until the expression (expr) evaluates to FALSE. See endwhile for an example.
Table 5-14 Conditional Branch Directives (continued)
Command Description
550 Utilities Reference

5Using the mshell Utility
Table 5-15 Variable Directives
Command Description
let <id> = <expr>
Assign a Value to a Global Variable
let evaluates the expression (expr) and assigns the result to a global variable (id). id may or may not have been defined earlier. expr, though, may not involve any identifiers that are undefined.
The let directive, without any argument, prints all defined global variables and their values.
Examples: The following line assigns fn with the first file in the current directory that matches the pattern *.c.
$ let fn = filematch("*.c")
This line prints all the defined variables:
$ letfn=dues.c
Note: You may use let directly on the command line.
Utilities Reference 551

5 Using the mshell Utility
llet [<id> = <expr>]
Assign a Value to a Local Variable
llet evaluates an expression (expr) and assigns the result to a local variable (id). id may or may not have been defined earlier. expr, however, may not involve any undefined identifiers.
The llet directive, without any arguments, prints all defined local variables and their values.
Examples: The following line assigns fn with the name of the first file in the current directory which matches the pattern *.c.
llet fn = filematch("*.c")
The following lines print all the defined local variables.
lletfn=dues.c
Note: llet is allowed only in procedure file functions.
Table 5-15 Variable Directives (continued)
Command Description
552 Utilities Reference

5Using the mshell Utility
unlet {<id>} Remove Global Variables from Memory
unlet removes global variable(s) (id) and their values from memory. Since each reference to a variable causes a tree search, it can be beneficial to remove unnecessary variables from the tree. You can specify any number of variable names. If one of the identifiers specified is an asterisk (*), then all variables are removed from the tree.
Note: You may use unlet directly on the command line.
lunlet {<id>} Remove a Local Variable from Memory
lunlet removes local variable(s) (id) and their values from memory. Since each reference to a variable causes a tree search, it can be beneficial to remove unnecessary variables from the tree. If one of the identifiers specified is an asterisk (*), then all local variables are removed from the tree.
Note: lunlet is allowed only in procedure file functions.
Table 5-15 Variable Directives (continued)
Command Description
Utilities Reference 553
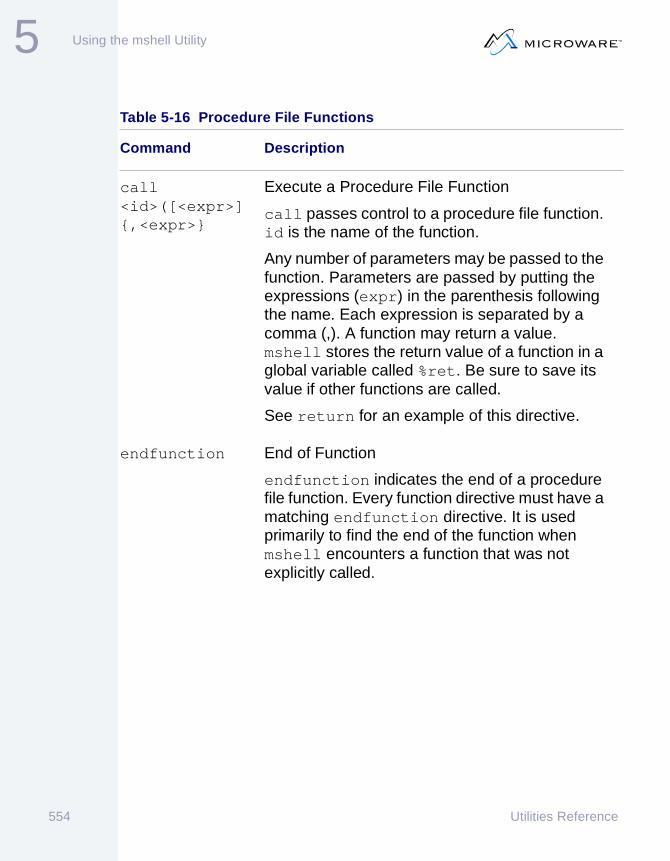
5 Using the mshell Utility
Table 5-16 Procedure File Functions
Command Description
call <id>([<expr>]{,<expr>}
Execute a Procedure File Function
call passes control to a procedure file function. id is the name of the function.
Any number of parameters may be passed to the function. Parameters are passed by putting the expressions (expr) in the parenthesis following the name. Each expression is separated by a comma (,). A function may return a value. mshell stores the return value of a function in a global variable called %ret. Be sure to save its value if other functions are called.
See return for an example of this directive.
endfunction End of Function
endfunction indicates the end of a procedure file function. Every function directive must have a matching endfunction directive. It is used primarily to find the end of the function when mshell encounters a function that was not explicitly called.
554 Utilities Reference

5Using the mshell Utility
function <id>([<pid>]{,<pid>})
Declare the Location of a Function
function declares the location of a procedure file function. id is the function name. The function begins with the line following the function directive. A number of parameters (pid) may be named as well. These are the local names of the expressions passed to the function by the call directive. If a function is encountered that is not explicitly called, mshell remembers its location and skips its code.
See return for an example of this directive.
Note: If the number of parameters passed varies, leave the parameter name area blank and refer to the parameters by their positional names, p0 through p<n>. That is, the first parameter is named p0, the second is p1, and so on.
Table 5-16 Procedure File Functions (continued)
Command Description
Utilities Reference 555

5 Using the mshell Utility
return [<expr>]
Return from a Procedure File Function
return passes control back to the caller from within procedure file functions. The global variable %ret is set to the value of expr (if one was specified, otherwise %ret is set to the empty string) and execution continues with the line directly following the call directive.
Example: The following is a simple use of a procedure file function:
function func(param1)print("Param #1 = %s\n", %param1)return 0
endfunctioncall func(8 + 2)
Executing this procedure file results in the following output:
Param #1 = 10
Table 5-16 Procedure File Functions (continued)
Command Description
556 Utilities Reference

5Using the mshell Utility
Table 5-17 Miscellaneous Directives
Command Description
data [reset]enddata
Include BASIC-like Data Statement in ScriptThe data directive allows you to include BASIC-like data statements in mshell scripts. It is ended with the enddata directive.
The following is an example of its use:
datafile.cfile2.ctest.ctest2.cenddata
The interpreter function get_data(<var_name>) sequentially reads lines of data and puts their contents into the variable named <var_name>. get_data() returns TRUE if a data item was read into the variable and FALSE if the data list is exhausted (with the variable being set to an empty string).
You can also use the data directive to restore the “data pointer” to the beginning of the data by passing the keyword reset to a data directive. The following example uses the above data set:
Utilities Reference 557

5 Using the mshell Utility
while (get_data(fn))print("I’m about to rename %s\n",
%fn);endwhile**** restart at the beginning of the datadata resetwhile (get_data(fn))
rename %fn %(fn:r).bakendwhile
Any number of data/enddata sets may appear in a procedure file. You can use a backslash (\) to continue the data lines on the next physical line.
do <expr> Process an Expression
do evaluates the expression (expr) without regard for the result. This is most useful when you use an expression function that results in no useful return value (for example, close()).
Table 5-17 Miscellaneous Directives (continued)
Command Description
558 Utilities Reference

5Using the mshell Utility
end Terminate Procedure File
end terminates a procedure file. If the procedure file is being run via profile, it terminates and mshell issues a prompt.
print (<format> {, <arg>})
Print a Format String with its Arguments
print allows printf-like statements to appear in procedure files. The first argument is the format string (format), which can contain up to eight format escapes in the form %s. There must be enough arguments (arg) to satisfy the number of escapes in the format string.
Example: The print directive:
let a = 10let b = "hello"print("a is %s and b is ’%s’.\n", %a, %b)
Prints a line:
a is 10 and b is ’hello’.
Note: You may use print directly on the command line.
Table 5-17 Miscellaneous Directives (continued)
Command Description
Utilities Reference 559

5 Using the mshell Utility
mshell Functions
This section contains descriptions of mshell functions. Each function takes from zero to three expressions as arguments. Each expression may involve other functions. The function arguments start with an open parenthesis, are separated by a comma, and end with a close parenthesis. For example:
let dot = left(%filename, index(%filename, "."))
Figure 5-2 mshell Built-In Functions
I/O Functions
close() create()dir() exist()filematch() input()input1() modate()next_file() open()read() readln()seek() size()tell() write()writeln()
String Functions
asc() chr()index() left()len() lower()mid() right()rindex() strcat()strcmp() upper()var_rep()
Miscellaneous Functions
abs() assign()env() execute()getuid() lassign()param()
560 Utilities Reference

5Using the mshell Utility
Table 5-18 String Functions
Command Description
asc(<string>) Return the ASCII Code for the First Character in a String.
asc() returns the integer ASCII value for the first character in string.
chr(<val>) Return a One Character String of an ASCII Code
chr() returns a one character long string containing the character with the given ASCII code (val).
Example: To make sure a character does not have its high bit set:
if (asc(%char) >= 128)let char = chr(asc(%char) & 127);
endif
index(<string>, <char>)
Return the Position of a Character within a String
index() searches from the start of string for the character char. It returns 0 if char is not present in string. Otherwise, it returns the offset from the beginning of the string to char. The index() search is case sensitive.
Note: Since mshell has no “character” constants, the first character of the second argument is assumed to be the character desired. For example the following returns 11 (first t in test):
index ("This is a test","type")
Utilities Reference 561

5 Using the mshell Utility
left(<string>, <num>)
Return the Left Substring
left() returns the left-hand number of characters (num) in the substring of string.
Example: The following function returns the string This.
left("This is a test", 4)
Note: If there are not enough characters to satisfy the request, or the requested number is less than or equal to 0, left() returns a string of size 0.
len(<string>) Return the Length of a String
len() returns the string length, in characters.
lower(<string>)
Change a String to Lower Case
lower() changes each alphabetic character in string to its lower-case counterpart. It does not affect white space or punctuation.
mid(<string>, <start>, <end>)
Return the Midsection Substring of a String
mid() allows you to extract middle parts of a string. It returns the characters from position start to position end of string, where the first character’s position is 1.
Note: If the string does not have enough characters to satisfy the requested start and end positions, mid() returns a string of length 0.
Table 5-18 String Functions (continued)
Command Description
562 Utilities Reference
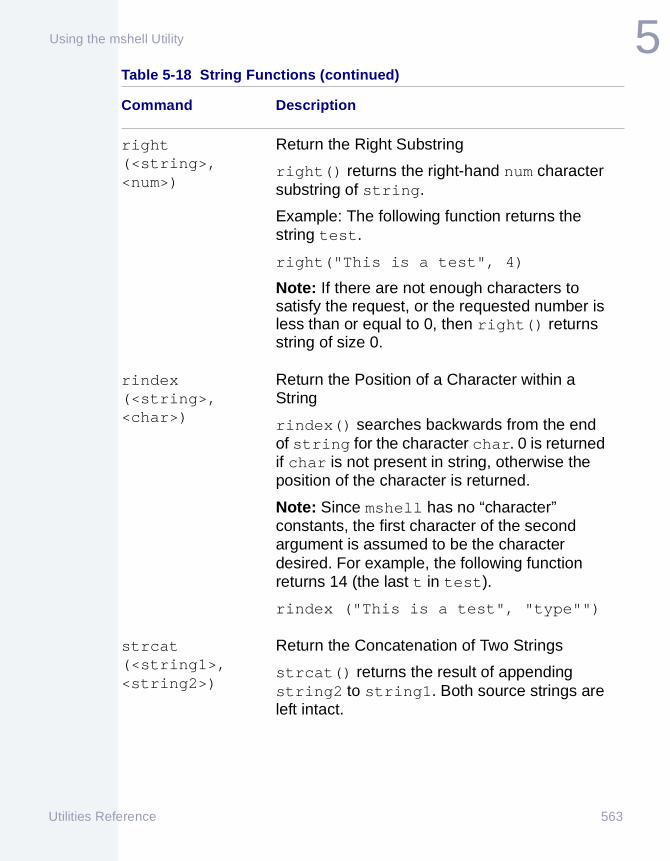
5Using the mshell Utility
right(<string>, <num>)
Return the Right Substring
right() returns the right-hand num character substring of string.
Example: The following function returns the string test.
right("This is a test", 4)
Note: If there are not enough characters to satisfy the request, or the requested number is less than or equal to 0, then right() returns string of size 0.
rindex(<string>, <char>)
Return the Position of a Character within a String
rindex() searches backwards from the end of string for the character char. 0 is returned if char is not present in string, otherwise the position of the character is returned.
Note: Since mshell has no “character” constants, the first character of the second argument is assumed to be the character desired. For example, the following function returns 14 (the last t in test).
rindex ("This is a test", "type"")
strcat(<string1>, <string2>)
Return the Concatenation of Two Strings
strcat() returns the result of appending string2 to string1. Both source strings are left intact.
Table 5-18 String Functions (continued)
Command Description
Utilities Reference 563

5 Using the mshell Utility
strcmp(<string1>, <string2>)
Compare Two Strings for Equality
strcmp() compares string1 to string2 and returns an integer less than zero, zero, or greater than zero if string1 is less than, equal to, or greater than string2, respectively.
upper(<string>)
Change a String to Upper Case
upper() changes each alphabetic character in string to its upper-case counterpart. It does not affect white space or punctuation.
var_rep(<string>)
Perform Variable Replacement on a String
var_rep() passes string through the variable replacements: environment, interpreter, and command output. var_rep() is very useful in conjunction with execute.
Example:
let rels = RELSlet cflags = "-gqt=/r0"setenv NAME test.clet line = var_rep("cc %cflags $(NAME) -r=%(rels)")print("Executing: %s\n", %line)%line
Table 5-18 String Functions (continued)
Command Description
564 Utilities Reference

5Using the mshell Utility
Table 5-19 Miscellaneous Functions
Command Description
abs(<num>) Arithmetic Absolute Value
abs() returns the absolute value of num.
assign(<var>, <expr>)
Perform a Global Assignment
assign() assigns the result of expr to the global variable var. The result of the function is the value that was assigned into the variable. You can use assign() to reduce the number of let directives in your code.
Example:
let fn= filematch("*.c")While (len(%fn))
echo %fnlet fn = filematch("*.c")
endwhile
You could replace the code above with:
while (len(assign(fn, filematch("*.c"))))
echo %fnendwhile
env(<name>) Return the Value of an Environment Variable
env() returns the value of the environment variable name. This method is provided as an alternative to the $(name:q) syntax. env() has the advantage that if name is not defined, no error is generated, instead a string of length 0 is returned from the function.
Utilities Reference 565

5 Using the mshell Utility
execute(<string>)
Execute a String
execute() executes the command line string under a different mshell. The result of execute() is the exit status of the spawned mshell.
getuid Get the Current Group and User ID Number
etuid() returns a string in the form gid.uid, where gid is the current group ID of mshell and uid is the current user ID of mshell. This is useful in a procedure file for determining the caller’s ID.
Example: The following code segment checks the user ID of the user executing the script file, and prints a message and exits if they are not classified as a super user:
if (strcmp(getuid(), "0.0") != 0)print("Must be super user to use
this script file!\n")end
endif
lassign(<var>, <expr>)
Perform a Local Assignment
lassign() assigns the result of expr to the local variable var. The result of the function is the value that was assigned into the variable. You can use lassign() to reduce the number of llet directives used. See assign() for an example.
Table 5-19 Miscellaneous Functions (continued)
Command Description
566 Utilities Reference

5Using the mshell Utility
param(<num>) Return a Procedure Parameter
param() allows quick access to the parameters passed into a procedure file. param() builds a string in the form P<num> and gets the environment variable associated with that name. If num is out of range or the environment variable P<num> does not have a value, param() returns a string of length 0.
getdata(<id>) Read Data Item
get_data() reads the next item from the data section of a script file into the variable <id>. get_data() returns TRUE if it finds data. <id> is set to an empty string and get_data() returns FALSE when there is no more data. Refer to the Directive Descriptions section (data/enddata directive) for more information and an example.
Table 5-19 Miscellaneous Functions (continued)
Command Description
Utilities Reference 567

5 Using the mshell Utility
Example Programs
This example script file plays a “guess a number” game (rand = program that outputs a random number between 1 and 1000):
let num = $("rand"); get the random numberlet done = FALSE; user’s not done yetlet guesses = 0; they haven’t guessed yetwhile (!%done)
print("\nGuess a number: ");
let guess = input(); get the guess from the userlet guesses = %guesses + 1;if (%guess == %num)
print("Correct in %s guesses!\n", %guesses);let done = TRUE;
elif (%guess < %num); too low?print("Higher!\n"); must be too high?
elseprint("Lower!\n");
endifendwhile
This program segment asks the user for a new TERM environment variable, allowing <cr> or <esc> to accept default:
setenv TERM kt7
print("TERM = (%s) ", env("TERM")); print the promptlet ans = input(); get some input* if they typed something and it wasn’t escapeif (len(%ans) && asc(%ans) != 27)
setenv TERM %(ans:q); * set a new TERMendif
568 Utilities Reference

Chapter 6: Using the shell Uti l i ty
The shell utility is the operating system’s command interpreter program. This chapter describes how to use the shell utility.
569

6 Using the shell Utility
Overview of shell Utility
The shell utility reads data from its standard input which is usually the keyboard or a file and interprets the data as a sequence of commands. The basic function of the shell utility is to initiate and control execution of other programs.
Usually you enter the shell utility automatically when you log into the system. The shell utility displays a dollar sign ($) prompt to show that it is ready and waiting for a command line. You can create a new shell by typing shell optionally followed by a command line.
The shell utility reads and interprets one text line at a time from standard input. After interpreting each line, the shell utility reads another line until an end-of-file condition occurs, at which time it terminates itself.
The shell utility may also be given a command in its argument list. In this case, the shell utility processes the specified command as if it was typed on a shell command line. Control returns to the calling program after the single command line is processed. If a command is not specified (shell<cr>) or the command is a shell utility option or built-in command (such as chd and chx), more lines are read from standard input and processed as normal. This continues until an end-of-file condition or the logout command is executed.
NoteNoteThe shell’s ex command does not recognize utility options unless they are separated from the utility name with a space. For example, ex procs -e works properly, but ex procs-e does not.
570 Utilities Reference

6Using the shell Utility
The shell utility uses special characters for various purposes. Special characters consist of the following:
To send one of these characters to a utility program, you must use a method called quoting to prevent the shell utility from interpreting the special character. Quoting consists of enclosing the sequence of characters to be passed to a routine in single or double quotes. For example, ‘<char>’ or "<char>" .
The following command line prints the indicated string:
$ echo "Hello; goodbye"Hello; goodbye
Table 6-1 Special Characters in shell Utility
Type Character Purpose
Modifiers # Memory allocation
^ Process priority modification
> Standard output redirection
< Standard input redirection
>> Standard error output redirection
Separators ; Sequential execution
& Concurrent execution
! Pipe: interprocess communication
+ OS-9: concurrent execution
Wildcards * Stands for any string of characters
? Stands for any single character
Utilities Reference 571

6 Using the shell Utility
However, the following command displays the string Hello on your terminal screen and then attempts to execute a program called goodbye.
$ echo Hello; goodbye
The shell expands the two wildcards to build pathlists. The question mark (?) wildcard matches any single character. The asterisk (*) wildcard matches any string of characters.
dir ???? displays the names of files in the current directory that are four characters long. dir s* displays all names of files in the current directory that begin with s.
Any command that uses a pathlist on the command line accepts a pathlist specified with wildcards. When the shell utility expands the wildcards, if an explicit directory is not given, the files in the current data directory are searched for the matched expansion. If an explicit directory name is given in the pathlist, the specified directory is searched.
NoteNoteIf a command uses an option to search for a file in the current execution directory, wildcards may produce unexpected results.
The shell utility reads the current data directory or the given relative pathlist containing a wildcard and passes these file names to the command. If the command then tries to find the files relative to the execution directory, the search fails.
572 Utilities Reference

6Using the shell Utility
Setting shell Options
There are two methods of setting shell utility options:
1. Type the option on the command line or after the command, shell. For example:
$ -np Turn off the shell prompt.
$ shell -np Create a new shell that does not prompt.
2. Use the special shell command, set. To set shell options, type set, followed by the options desired. When using set, a hyphen (-) is unnecessary before the letter option. For example:
$ set np Turn off the shell prompt.
$ shell set np Create a new shell that does not prompt.
The two methods accomplish the same function. Use the method that is best for you.
Utilities Reference 573

6 Using the shell Utility
The shell Environment
For each user on a system, the shell utility maintains a unique list of environment variables. These variables affect the operation of the shell utility or other programs subsequently executed. They are programmable defaults that you can set to meet your individual needs.
All environment variables can be accessed by any process called by the environment shell or descendent shells. This allows you to use the environment variables as global variables.
NoteNoteIf a subsequent shell redefines an environment variable, the variable is only redefined for that sub-shell and its descendents.
Environment variables are case sensitive.
Several special environment variables are automatically set up when you log on a time-sharing system:
Table 6-2 shell Special Environment Variables
Name Specification
PORT This specifies the name of the terminal. This is automatically set up by tsmon. /t1 is an example of a legal PORT name.
HOME This specifies your home directory. The home directory is the directory specified in your password file entry. This is also the directory used when the command chd with no parameters is executed.
574 Utilities Reference

6Using the shell Utility
Several other important environment variables are available:
SHELL This is the process that is first executed upon logging on to the system.
USER This is the user name you type when prompted by login.
Table 6-3 shell Environment Variables
Name Specification
PATH This specifies any number of directories. Each directory must be separated by a colon (:). The shell utility uses this as a list of commands directories to search when executing a command.
If the default commands directory does not include the file/module to execute, each directory specified by PATH is searched until the file/module is found or until the list is exhausted.
PROMPT This specifies the current prompt. By specifying an “at” sign (@) as the first character of your prompt, you may easily keep track of how many shells you personally have running under each other.
The @ is used as a replaceable macro for the shell level number. The environment variable _sh sets the base level.
Table 6-2 shell Special Environment Variables (continued)
Name Specification
Utilities Reference 575

6 Using the shell Utility
_sh This specifies the base level for counting the number of shell levels. For example, set the shell prompt to "@howdy: " and _sh to 0:
$ setenv _sh 0$ -p="@howdy: "howdy: shell1.howdy: shell2.howdy: eof1.howdy: eofhowdy:
TERM This specifies the specific terminal being used. This allows word processors, screen editors, and other screen dependent programs to know what type of terminal configuration to use.
MDHOME(OS-9000)
This specifies your home module directory. This is the module directory used when the command chm with no parameters is executed.
MDPATH(OS-9000)
This specifies any number of module directories to search. Module directory paths must be separated by a colon (:). The shell uses MDPATH as a list of module directories to search when executing a command.
Table 6-3 shell Environment Variables (continued)
Name Specification
576 Utilities Reference

6Using the shell Utility
The Environment Utilities
Three utilities are available to manipulate environment variables:
• setenv declares the variable and sets its value. The variable is placed in an environment storage area accessed by the shell. For example:
$ setenv PATH ..:/h0/cmds:/d0/cmds:/dd/cmds$ setenv _sh 0
• unsetenv clears the value of the variable and removes it from storage. For example:
$ unsetenv PATH$ unsetenv _sh
• printenv prints the variables and their values to standard output. For example:
$ printenvPATH=..:/h0/cmds:/d0/cmds:/dd/cmdsPROMPT=howdy_sh=0
Using Environment Variables as Command Line Parameters
NoteNoteThe following section applies to OS-9 systems only (does not apply to OS-9 for 68K systems).
When the following syntax is used, the shell utility replaces the environment variable with the value of the environment variable:
$(<env var>)
Utilities Reference 577

6 Using the shell Utility
For example, if HOME is set to /h0/USR/ROB and the command dir $(HOME) is entered, the shell utility executes the command
dir /h0/USR/ROB.
This substitution is useful for entire command lines. By using setenv, a command line can be assigned to an environment variable:
setenv PR "procs -ea"
The shell utility automatically substitutes procs -ea any time $(PR) appears in the command line.
Using Parameters with Procedure Files
NoteNoteThe following section applies to OS-9 systems only (does not apply to OS-9 for 68K systems).
The shell utility allows parameters to be passed to procedure files. These parameters are entered on the command line and take the place of variables located within the procedure file.
For example, if you have the following procedure file, files, you can list the first parameter and delete the second parameter:
$ list fileslist $(P0)del $(P1)
When you enter files and two filenames, the first filename replaces $(P0) and the second replaces $(P1):
files starter update
This command lists the file starter to your terminal screen and deletes update.
578 Utilities Reference

6Using the shell Utility
If you add a third filename to the command line, it is ignored unless the variable $(P2) is added to the procedure file. If there is a variable $(P2), the third parameter is recognized and used.
The $(P*) variable is a concatenation of all the parameters given to the procedure file. The following example shows a procedure file that uses the $(P*) variable and prints out the environment within the shell.
[7]POS: build listfil? list $(P*)? printenv? [8]POS: listfil data1 data2 data3This is the first file Contents of data1This is the second file Contents of data2This is the third file Contents of data3PORT=/pks01HOME=/h0/USR/ROBBSHELL=shellUSER=robbPATH=/h0/cmdsTERM=kt7_sh=1PROMPT=@POS: P0=data1 First parameterP1=data2 Second parameterP2=data3 Third parameterP*=data1 data2 data3 Value of variable P*PN=3 Number of parameters passed to listfil
NoteNoteThe shell utility keeps track of the number of parameters passed to any given procedure file with the PN variable.
When the procedure file has finished executing, the shell utility environment returns to its previous state. The variables P0, P1, etc. are not passed from the procedure file back to the shell utility.
Utilities Reference 579

6 Using the shell Utility
NoteNoteMicroware suggests that you not use setenv to set variables such as P0, P1, etc. as they are not passed between the shell and the procedure file.
580 Utilities Reference

6Using the shell Utility
The profile Command
Usually when a procedure file is executed, a new shell is forked to process the procedure file. Any changes affecting the shell (such as changing any of the current directories or changing the shell environment) made from within a procedure file will not affect the environment of the shell from which the procedure file was called.
The profile built-in shell command executes a procedure file without forking a child shell. This makes it possible to change current directories and environment variables from within a procedure file.
For example, if you frequently work on a project located in directory /h0/usr/proj/myproj and you want the environment variable FRAME to equal pickone whenever you work on your project, you could create a procedure file similar to the following:
$ list myprojectchd /h0/usr/proj/myprojsetenv FRAME pickone
When you want to work on your project, type:
profile myproject
Your current data directory is /h0/usr/proj/myproj and FRAME is set to pickone. Parameters may still be passed to procedure files when profile is used.
The profile utility’s commands may be nested. That is, the file itself may contain a profile command for another file. When the latter profile command completes, the first one resumes.
A particularly useful application for profile files is within a user’s .login and .logout files. For example, if each user includes the following line in the .login file, system-wide commands (such as common environments and news bulletins) can be included in the file /dd/SYS/login_sys.
profile /dd/SYS/login_sys
You can use a similar technique for .logout files.
Utilities Reference 581

6 Using the shell Utility
The login shell, .login, and .logout
The login shell is the initial shell created by the login program to process the user input commands after logging in.
Two special procedure files are extremely useful for personalizing the shell environment:
• .login
• .logout
To use these files, they must be located in your home directory. The .login and .logout files provide a way to execute desired commands when logging on to and leaving the system.
The login shell processes .login as a command file immediately after successful login. This allows you to run a number of initializing commands without remembering each and every command. After processing all commands in the .login file, the shell prompts you for more commands.
The main difference in handling the .login file is that the login shell itself actually executes the commands rather than creating another shell to execute the commands.
You can issue such commands as set and setenv within the.login file and have them affect the login shell. This is especially useful for setting up the environment variables PATH, PROMPT, TERM, _sh, and for OS-9 (non-68K), MDHOME and MDPATH.
The following is an example .login file:
setenv PATH ..:/h0/cmds:/d0/cmds:/dd/cmds:/h0/doc/spex
setenv PROMPT "@what next: "setenv _sh 0setenv TERM abm85hquerymaildatedir
582 Utilities Reference

6Using the shell Utility
.logout is executed when logout is executed to exit the login shell and leave the system. The .logout file is executed before the login shell terminates. Use this to execute any cleaning up procedures that are done on a regular schedule. This might be anything from instigating a backup procedure of some sort to printing a reminder of things to do.
The following is an example .logout file:
procswaitecho "all processes terminated"* basic program to instigate backup if necessary *disk_backupecho "backup complete"
Utilities Reference 583

6 Using the shell Utility
shell Command Line Syntax
The shell command line consists of a keyword and any of the parts listed below. The keyword appears first on a command line. The order of the optional parts depends on the nature of the command and the
584 Utilities Reference
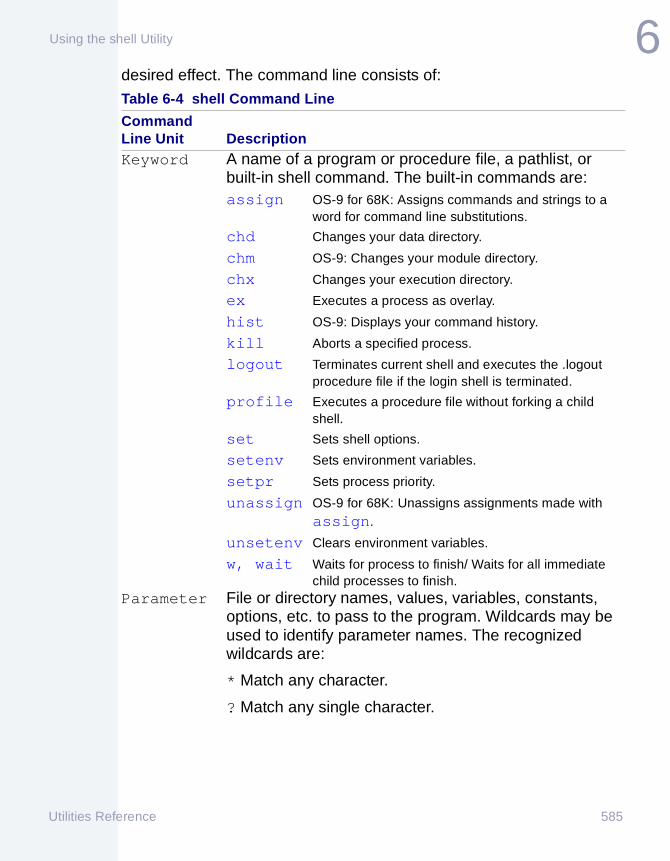
6Using the shell Utility
desired effect. The command line consists of:
Table 6-4 shell Command Line
Command Line Unit DescriptionKeyword A name of a program or procedure file, a pathlist, or
built-in shell command. The built-in commands are:assign OS-9 for 68K: Assigns commands and strings to a
word for command line substitutions.
chd Changes your data directory.
chm OS-9: Changes your module directory.
chx Changes your execution directory.
ex Executes a process as overlay.
hist OS-9: Displays your command history.
kill Aborts a specified process.
logout Terminates current shell and executes the .logout procedure file if the login shell is terminated.
profile Executes a procedure file without forking a child shell.
set Sets shell options.
setenv Sets environment variables.
setpr Sets process priority.
unassign OS-9 for 68K: Unassigns assignments made with assign.
unsetenv Clears environment variables.
w, wait Waits for process to finish/ Waits for all immediate child processes to finish.
Parameter File or directory names, values, variables, constants, options, etc. to pass to the program. Wildcards may be used to identify parameter names. The recognized wildcards are:
* Match any character.
? Match any single character.
Utilities Reference 585

6 Using the shell Utility
ExecutionModifiers
These modify a program’s execution by redirecting I/O or changing the priority or memory allocation of a process:
#<mem size> Allocate specified additional memory to a process.
^<priority> Set the priority of the process.
< Redirect standard input.
>[- or +] Redirect standard output.
>>[- or +] Redirect standard error output.
The hyphen (-) following the modifiers signify to write over a specified file. The plus (+) appends the file with the redirected output.
Separators Separators connect command lines together in the same command line. They specify to the shell how they are to be executed. The separators are:
; Indicate sequential execution.
& Indicate concurrent execution.
! Create a communication pipe between processes. Pipes connect the standard output of one process to the standard input of another.
+ OS-9000: Indicates the concurrent execution of a process to be orphaned.
Table 6-4 shell Command Line (continued)
Command Line Unit Description
586 Utilities Reference

6Using the shell Utility
Command Line Execution
The shell command line syntax indicates that a keyword may be a program name, procedure file name, a pathlist, or built-in shell command. Built-in commands are executed immediately by the shell; no directory searching is required, nor is a process created to execute the command. If the specified command is not a built-in command, the shell must locate the program to execute from a number of possible locations.
The following procedure describes the actions of the shell when processing a command:
Step 1. Get command line.
Step 2. Prepare command:
• OS-9 only (non-68K): Insert into history buffer
• OS-9 only (non-68K): Replace variables
• Validate syntax.
• Isolate keyword, parameters, and execution modifiers.
• Expand wildcard names if given.
Step 3. If the keyword is a built-in command, execute the command. Otherwise, search the following directories until the command is found or the directory search is exhausted:
• The module directory.
• OS-9 only (non-68K): Search alternate module directory and module directories in MDPATH.
• The execution directory.
• Each directory specified by the PATH environment variable.
Step 4. If the command could not be found in the above directories, return error: can’t find command .
Step 5. If the command is found, load the command into the module directory.
Utilities Reference 587

6 Using the shell Utility
Step 6. If the load fails, execute shell command (command is assumed to be a procedure file for the shell)
Step 7. If the load succeeds and the module is executable object code, execute command.
Step 8. If the load succeeds and the module is BASIC I-code, execute Runb command. Command is an argument for RunB.
Step 9. If either of the above command execution fails, return error: can’t execute command .
Commands and procedure files in the current execution directory must have the execute, group execute (OS-9 only—non68K), and/or public execute file attribute set or the file will not be found.
If the PATH environment variable is set, its value is interpreted as a list of directories to search if the initial search of the execution directory fails. If an absolute pathlist, a path beginning with a slash (/) is given as the command, the shell does not perform the PATH directory search. The following are examples of setting up the PATH variable:
setenv PATH /d0setenv PATH /h0/cmds:/n0/jack/h0/cmds:/n0/jill/h0/cmdssetenv PATH kim:../kim:.../cmds
Each directory name is separated by a colon (:). The shell utility isolates the directory name and appends the command name and uses this pathlist to load the command. If the load fails, the next directory given is used until the command is successfully loaded or all directories are tried.
Regardless of the error encountered, the shell utility continues with the next directory. If a directory given is a relative pathlist, the pathlist is relative to the execution directory. To assist in determining the directory from which a command was loaded or not loaded, turn on the -v option to display the shell’s progress while searching the directories.
The login program automatically sets the PATH variable to the execution directory from which login itself was loaded if the password entry gives an execution directory other than “.”. The period (.) tells the shell to use the login’s execution directory.
588 Utilities Reference
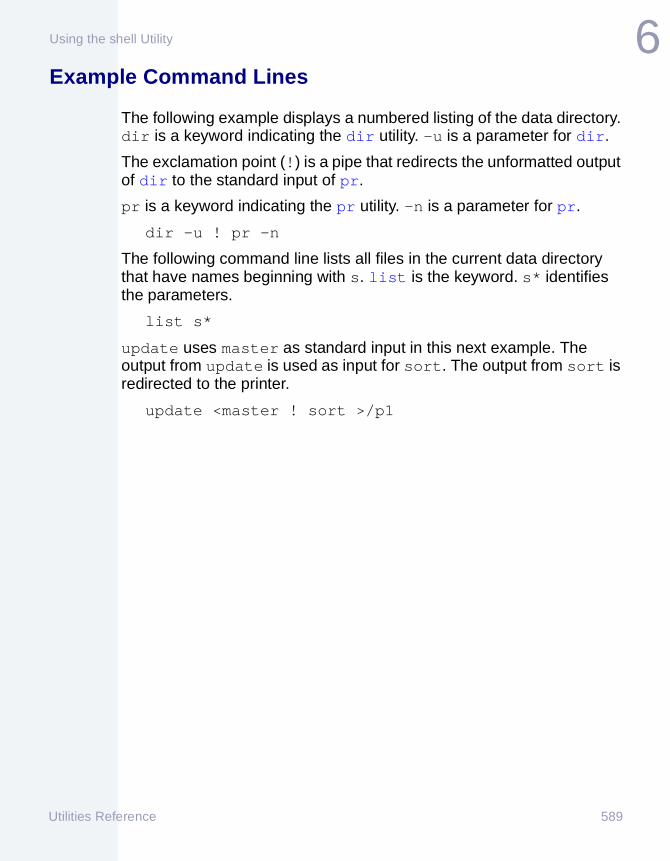
6Using the shell Utility
Example Command Lines
The following example displays a numbered listing of the data directory. dir is a keyword indicating the dir utility. -u is a parameter for dir.
The exclamation point (!) is a pipe that redirects the unformatted output of dir to the standard input of pr.
pr is a keyword indicating the pr utility. -n is a parameter for pr.
dir -u ! pr -n
The following command line lists all files in the current data directory that have names beginning with s. list is the keyword. s* identifies the parameters.
list s*
update uses master as standard input in this next example. The output from update is used as input for sort. The output from sort is redirected to the printer.
update <master ! sort >/p1
Utilities Reference 589

6 Using the shell Utility
590 Utilities Reference

Chapter 7: Using the uMACS Util i ty
The µMACS utility is a screen-oriented text editor you can use to create and modify text files. The µMACS utility maintains multiple buffers so you can work with several files and/or portions of the same file at once.
591
7 Using the uMACS Utility
uMACS Overview
The µMACS utility features an extensive command set. You can bind a command name to a key or key combination. When a command is bound to a key or key combination, instead of typing the command name, you can press the key(s) to execute it. By binding and unbinding keys to commands, you can personalize µMACS to your own configuration.
For More InformationMore Info More Information More Information More Information More
-6-
For an alphabetized list of commands, refer to uMACS Command Summary section.
All key sequences have one or two characters. All two character key sequences begin with a <control>x or an <escape> character.
To simplify personalizing commands, use µMACS to build macros. The macro command can consist of any sequence of commands that are bound to keys.
Terminal Capabilities
The termcap file contains information about terminal capabilities. µMACS looks for the termcap file in the /dd/SYS directory (/dd is the default device for your system). If it is not found, µMACS looks in /h0/SYS and then /d0/SYS.
Refer to the section titled: The Termcap File, for information about the termcap file and basic terminal capabilities required by µMACS.
592 Utilities Reference
7Using the uMACS Utility
Cursor Positioning
You can move the cursor to any place in any buffer and change buffers at will.
Use µMACS cursor positioning commands to move:
• To the right or left by characters or words.
• To the beginning or end of a line.
• Forward or backward through the text by line, paragraph, or screen.
Search and Replace
µMACS can search forward or backward for any pattern of characters, including newline and control sequences. Two replace string commands facilitate the search commands.
Cut and Paste
µMACS provides features to cut any region of text from a file and paste it elsewhere. You can duplicate the cut buffer repeatedly or delete it when you no longer need it. Other commands change all text to upper or lower case within the marked region.
Format Commands
Extensive formatting commands allow you to reformat paragraphs with new user-defined margins, transpose characters, capitalize words, and change words or sections into upper or lower case. Tab handling features allow µMACS to work with most existing text files.
Utilities Reference 593
7 Using the uMACS Utility
Buffers
µMACS holds as many buffers as memory permits. If buffers contain µMACS commands, you can execute them like procedure files. At all times, µMACS keeps a precise account of where you are in each buffer. This allows easy access and easy editing between buffers.
594 Utilities Reference

7Using the uMACS Utility
Command Basics
Before exploring the µMACS features, it is important to understand some details about the command set. You can execute µMACS commands in either of two ways:
• By name.
• By keystroke sequence.
Each command has a name. For example, the command to move the cursor one character to the right is named forward-character. This name is bound to a keystroke sequence. The default key binding is ^f.
All keystroke sequences begin with one of the following:
• <escape> key.
• A control character.
To enter a control character, press the <control> key and the character key simultaneously. The <esc> key must be pressed and released, then press the character key.
NoteNoteIn this manual, references to control characters use the circumflex (^) notation unless specifically referring to the <control> key or a command that uses the circumflex.
Execute Commands
To execute any command by name, type <esc> x. This is the execute-named-command command. It moves the cursor to the bottom of the terminal screen. Type the name of the command and press <return>. µMACS tries to execute a command by that name. If the specified command does not exist or is incorrectly spelled, µMACS returns the error message [No such function].
Utilities Reference 595

7 Using the uMACS Utility
For More InformationMore Info More Information More Information More Information More
-6-
Refer to uMACS Command Summary for an alphabetized list of µMACS commands and key sequences. Refer to The uMACS Command Set for command details.
Some commands prompt for another command (for example, execute-named-command). When you are prompted for a command, you can type a partial command followed by a space; µMACS tries to complete the command for you.
For example, when prompted for a command:
Step 1. type se<space>, µMACS completes the command as far as it can: search-.
Step 2. If you type f<space>, µMACS finishes the command: search-forward.
This is useful as a short cut or when you are uncertain of the spelling or full name of the command.
Key Bindings
Most commands are bound to keys. All key bindings consist of one or two characters. All two character bindings begin with the <escape> character or ^x. Use the following commands to change the default key bindings.
596 Utilities Reference

7Using the uMACS Utility
Do not bind commands to either of the following keystroke combinations:
These commands allow you to personalize the keystroke commands.
• ^q
• ^s
These are used for serial control on most Microware systems.The bind-to-key command prompts with:
: bind-to-key
At the prompt, type:
1. The name of the command.
2. A space.
3. A keystroke combination.
Remember, two stroke commands must begin with <escape> or ^x. You can bind more than one key combination to the same command. For example, the set-mark command is, by default, bound to both <esc>. and <esc> <space>.
Change Key Bindings
To change the binding on a key, use the unbind-key command. The unbind-key command prompts for the keystroke combination to unbind. This unbinds that keystroke combination regardless of the named command.
Table 7-1 Keystroke Bindings
Command Name Binding
bind-to-key <esc> k
unbind-key <esc> ^k
Utilities Reference 597

7 Using the uMACS Utility
Find Current Key Bindings
To view a list of the current key bindings, use the execute-named-command command (<esc> x) with the describe-bindings command. The describe-bindings command is by default unbound. It opens a buffer on the screen and displays an alphabetical list of the command names and their associated key bindings.
To assure that a specific key has no binding, or to find out which command is bound to that key, use the describe-key command (^x ?). This prompts for the key or key sequence. The name of the command bound to that key or key sequence is displayed. If a command is not bound to the key(s), it returns the message Not bound.
The Help Command
The help display is another method of receiving information about commands.
For More InformationMore Info More Information More Information More Information More
-6-
Refer to Start uMACS and Exit uMACS for mode descriptions.
Step 1. Type the help command (<esc> ?).
Step 2. A window is opened on the top half of the screen and a text file is displayed in VIEW mode. The cursor is placed in this buffer and all cursor movement commands, including search commands, are available.
Step 3. To return to the previously edited buffer, use the previous-buffer command (^xp).
598 Utilities Reference

7Using the uMACS Utility
Step 4. To close the help window, use the delete-other-windows (^x1).
Repeat Commands
You can use an argument buffer to execute a command a specified number of times. To specify an argument buffer, press <esc> and type <n>, where <n> is the number of times to execute the command. You can use a positive or negative number. If you use a negative number, the normal direction of the command is reversed.
For example:
• <esc>-10^fMove the cursor back ten characters.
• <esc>10^fMove the cursor forward ten characters.
Abort Command
You can abort commands that have not begun moving the cursor or formatting or editing text. This is useful when aborting commands that require input.
To abort a command, press ^g.
Macro Commands
µMACS allows you to create macro commands. To do this, use the following commands:
Step 1. Start the macro command with the name begin-macro or the begin-macro key sequence:^x(
Utilities Reference 599

7 Using the uMACS Utility
Step 2. Enter commands and text.
Step 3. End the macro with the end-macro command or the end-macro key sequence:^x)
All commands and text entered between the execution of these two commands make up the macro command.
To execute the macro, use the execute-macro command or the key sequence ^x e. This executes all commands and enters all text that makes up the macro. The commands are executed in entry order.
For example, the following series of commands or key sequences would move the cursor to the beginning of the line, insert a tab and move the cursor to the beginning of the next line..
Table 7-2 Macro Commands and Key Sequences
Example MacroCommands Key sequences
begin-macro ^x(
begining-of-line ^a
handle-tab ^i
next-line ^n
begining-of-line ^a
end-macro ^x)
600 Utilities Reference

7Using the uMACS Utility
The Execute-File Command
After you are familiar with the µMACS command set and decide on the key bindings and macros that you want to use, use files and the execute-file command to automatically change key bindings and build macros.
The execute-file command prompts for the name of the file to execute. µMACS tries to execute the file as a series of µMACS commands; one command per line.
Each line in the executed file must consist of the name of the command to execute. If the command name is misspelled or the file is not executable for any other reason, µMACS returns an error message. If only part of the file is non-executable, µMACS executes each line until it encounters a non-executable line and returns an error message.
If a command requires user input, you must anticipate it and supply quotation marks after the command. For example:
search-forward "begin"
The .umacsrc File
Each time you execute µMACS, it looks for the .umacsrc file in your home directory. The home directory is the directory specified by the HOME environment variable. µMACS opens .umacsrc and executes each line as a µMACS command. You can use the .umacsrc file to set up your own key-bindings. These key bindings are used each time you enter µMACS.
To bind a key to a command, use the bind-to-key command. For example, a .umacsrc file might look like this (M- = <esc>):
bind-to-key describe-bindings ^X?bind-to-key execute-named-command M-!
If a binding specified in .umacsrc is bound by default to a different command, the .umacsrc binding takes precedence and the previously bound command is unbound. The .umacsrc file binds the specified
Utilities Reference 601
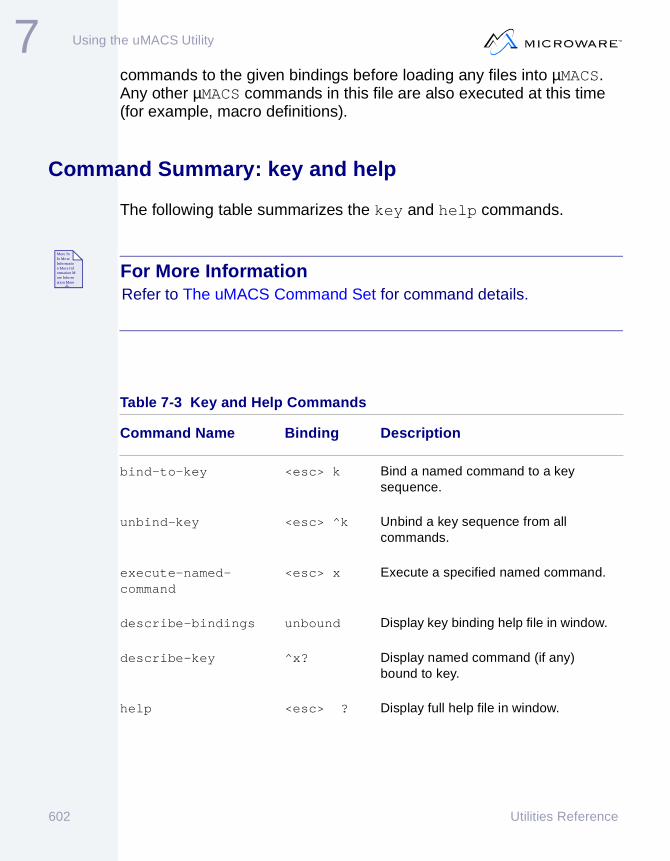
7 Using the uMACS Utility
commands to the given bindings before loading any files into µMACS. Any other µMACS commands in this file are also executed at this time (for example, macro definitions).
Command Summary: key and help
The following table summarizes the key and help commands.
For More InformationMore Info More Information More Information More Information More
-6-
Refer to The uMACS Command Set for command details.
Table 7-3 Key and Help Commands
Command Name Binding Description
bind-to-key <esc> k Bind a named command to a key sequence.
unbind-key <esc> ^k Unbind a key sequence from all commands.
execute-named-command
<esc> x Execute a specified named command.
describe-bindings unbound Display key binding help file in window.
describe-key ^x? Display named command (if any) bound to key.
help <esc> ? Display full help file in window.
602 Utilities Reference

7Using the uMACS Utility
abort ^g Abort any incomplete command.
execute-file unbound Execute a specified file.
Table 7-3 Key and Help Commands
Command Name Binding Description
Utilities Reference 603

7 Using the uMACS Utility
Introduction to Windows and Buffers
This section acquaints you with µMACS window and buffer handling. This will help you understand many of the related commands and how µMACS is organized.
For More InformationMore Info More Information More Information More Information More
-6-
Refer to The uMACS Command Set for command details.
µMACS can display multiple buffers on the screen through split screen windows. A window may be as small as one line of text and a status line or it may fill the entire screen. At the bottom of each window is a status line. At the bottom of the entire screen is a single blank line that µMACS uses to display prompts and error messages for the current window.
The Status Line
Each window is associated with a named buffer. The status line for each window specifies:
For More InformationMore Info More Information More Information More Information More
-6-
Refer to Start uMACS and Exit uMACS, for mode descriptions.
• The µMACS edition.
• The editing mode(s) for that window.
604 Utilities Reference

7Using the uMACS Utility
• The buffer’s name and the name of the file (if any) in the buffer.
Figure 7-1 Window Status Line
Switching Windows
µMACS supports many commands that allow you to move the cursor between windows. To move to another window, do one of the following:
• Specify a buffer by name.
• Specify the next or previous buffer.
• Specify the next or previous window.
µMACS uses a global buffer to copy text, thus allowing you to move text from one buffer to another.
µMACS version
Current modes
Buffer nameFile name
== uMacs 1.1 (CMODE EXACT) == junk == File: temp.c ============
Utilities Reference 605

7 Using the uMACS Utility
Start uMACS
To start µMACS, do one of the following:
• Specify µMACS and one or more files to be edited.
• Type umacs to edit a new file.
The syntax is as follows:
umacs [<opt>] {<filename>}
µMACS has two options:
For More InformationMore Info More Information More Information More Information More
-6-
See the uMACS Editing Modes section of this chapter for information about changing modes.
See the Input/Output Command or Exit uMACS section of this chapter for information about saving files.
Opening a file in VIEW mode allows you to look at the file; you cannot edit it. To edit the file, you must change the mode.
When you execute the umacs command, if the file(s) are found, µMACS:
• Reads and displays the first file specified on the command line.
Table 7-4 µMACS Options
Option Description
-e All files following the -e option are opened in EDIT mode. This is the default.
-v All files on the command line following the -v option are opened in VIEW mode.
606 Utilities Reference

7Using the uMACS Utility
• Tells you how many lines the first file contains.
• Names empty buffers for all other files specified on the command line. The files are read and loaded into the corresponding buffer when that buffer is entered.
If a file does not exist, µMACS assumes that it is new and opens an empty buffer for editing.
If you do not specify a file name, µMACS opens an unnamed buffer. You can name and save this buffer.
Utilities Reference 607

7 Using the uMACS Utility
Input/Output Command
µMACS allows you to load files into existing or new buffers. With two exceptions, all files are read into buffers unchanged.
• All unprintable characters, with the exception of tabs and carriage returns, are displayed as control characters. For example, a form feed is displayed as ^L.
• All lines with more than 255 characters have a carriage return inserted after the 255th character, regardless of word breaks. µMACS alerts you to this with a message at the bottom of the screen. This limitation only affects loading files. Once loaded, a file may have lines of any length.
The following summarizes the commands used to access files and the shell.
Table 7-5 File Access and Shell Commands
Command Name Binding Description
insert-file ^x ^i Inserts a file at the current cursor position.
read-file ^x ^r Reads a file into the current buffer (overwrites current text).
find-file ^x ^f Reads a file into a new buffer.
change-file-name ^x n Names or renames as file in the current buffer.
save-file ^x s Saves a changed file.
write-file ^x ^w Writes a file to the specified name.
608 Utilities Reference

7Using the uMACS Utility
Insert File
The insert-file command (^x ^i) prompts you for a file to insert. If the file is found, it is inserted directly before the cursor.
Read File
The read-file command (^x ^r) prompts you for a file to read into the current buffer. If the file is found and you have edited any portion of the file currently in the buffer, µMACS asks if you wish to save the changes in the file. If you do, the new file is not read.
NoteNoteIf you do not wish to save the existing file, the new file is read into the active buffer. In this case, saving the file removes the currently existing file from the µMACS work space, not from your directory. It also changes the filename associated with the buffer.
i-shell ^x c Forks a shell. Control remains in the shell until you press <escape>.
shell-command ^x ! Forks a shell and execute the specified command. Control returns to µMACS.
view-file ^x^v Opens a file in view mode.
Table 7-5 File Access and Shell Commands (continued)
Command Name Binding Description
Utilities Reference 609

7 Using the uMACS Utility
Find File
The find-file command (^x ̂ f) prompts you for the name of a file to read into a new buffer. The new buffer is given the name of the file, unless a buffer with that name already exists. In this case, µMACS prompts for a new buffer name.
View File
The view-file command (^x ^v) is similar to the find-file command. It also prompts you for the name of a file to display. Unlike find-file, in which the buffer is opened in EDIT mode, view-file opens the file in VIEW mode. If a new buffer is opened, it is given the name of the specified file, unless there is an existing buffer with that name. In this case, µMACS prompts for a new buffer name.
In all cases, if you specify a file that exists in the µMACS buffer list, that file is used instead of reading a file from your directory. If this is done, µMACS displays a message at the bottom of the screen.
Change File Name
The change-file-name command (^x n) either names a new file or renames an existing file. This name exists only in µMACS until you save the file. This does not affect the name of the corresponding file in your directory. There can be multiple files of the same name in different buffers. However, each buffer must have a unique name.
610 Utilities Reference

7Using the uMACS Utility
Saving Files
There are two ways to save files.
• Use the save-file command (^x s) to save the file in the current window. µMACS only saves files that were changed in µMACS. If changes were not made to a file, the save-file command has no effect. If the file is changed, µMACS looks for a file in your directory with the same name. If the file is found, µMACS rewrites it.
• Use the write-file command (^x ^w). This command prompts for a file name. It writes the current buffer to the specified file name. If the file name already exists, the file is rewritten. If the file name does not exist, µMACS creates a new file with the specified name.
For More InformationMore Info More Information More Information More Information More
-6-
When saving or writing files, µMACS rewrites any file with the same name. It does not create a backup file, as do some editors.
Execute Operating System Commands
To execute operating system commands while in µMACS:
• Use the i-shell command (^x c). This command forks a shell from µMACS. Control remains in this shell until you press the <esc> key.
• Use the shell-command command (^x !). This prompts you for a shell command line. µMACS:
• Forks a shell.
• Executes the command line.
• Returns control to µMACS.
You might use shell-command to check the files in your directory.
Utilities Reference 611

7 Using the uMACS Utility
uMACS Editing Modes
All files read into µMACS are by default in EDIT mode, unless you specify the VIEW mode. µMACS has six modes of operation.
You can run any of these modes simultaneously, although some combinations do not make sense. For example, EXACT mode is often used in combination with any other mode. The VIEW mode, however, takes precedence when any other mode is on and does not allow you to overwrite or insert any character. Unless you specify VIEW mode, all modes are by default EDIT modes. This means that all unbound characters are inserted into the text at the cursor position.
Table 7-6 µMACS Modes
Mode Description
EDIT All unbound characters are inserted into the text as entered from the keyboard.
OVER The overwrite mode allows characters entered from the keyboard to replace the text, instead of being inserted.
EXACT All searching is done with exact case matching. The default searching method is not case sensitive.
WRAP When a line exceeds the right-hand margin, the line is wrapped to the following line and a carriage return is inserted.
612 Utilities Reference

7Using the uMACS Utility
The following is a summary of the commands you can use to add and delete modes.
CMODE Lines ending with a left bracket ({) cause the next line to be indented an extra tab.
Lines beginning with a right bracket (}) are indented one less tab than the previous line.
A pound sign (#) with only preceding tabs or blanks causes all tabs and blanks to be deleted on that line. This causes all lines beginning with a # to be formatted at the left margin. This is used to identify preprocessor commands.
Adding tabs, brackets, or pound signs does not change the rest of the file.
CMODE is automatically turned on for any buffer-name ending in .c or .h.
VIEW Viewing mode allows you to look at a file or buffer; you cannot edit it.
Table 7-7 Add and Delete Modes
Command Name Binding Description
add-mode ^x m Add the specified mode to the current buffer.
delete-mode ^x ^m Delete the specified mode from the buffer.
Table 7-6 µMACS Modes (continued)
Mode Description
Utilities Reference 613

7 Using the uMACS Utility
Add or Delete a Mode
To turn on a mode of operation, use the add-mode command (^x m). You are prompted for the name of the mode to add.
To delete a mode, use the delete-mode command (^x ^m). This also prompts you for the name of the mode.
For More InformationMore Info More Information More Information More Information More
-6-
See the Buffer Commands, Display Current Buffers section for information about determining what mode(s) are active for a buffer.
The add-global-mode command (<esc> m) turns on the specified modes for any newly read buffers. Use this when you know that every file you are going to edit will have the same modes of operation.
For example, if you are editing a number of C programs and searching for specific variable names, you may wish all buffers to have both CMODE and EXACT modes specified. To avoid adding these modes every time you enter a new buffer, use the add-global-buffer command. It prompts you for the mode to add. The prompt only adds one mode at a time. If you type more than one mode, no modes are added. add-global-mode does not affect any previously opened buffer.
add-global-mode <esc> m Add the specified mode to all new buffers.
delete-global-mode <esc> ^m Do not add the specified mode to all new buffers.
Table 7-7 Add and Delete Modes (continued)
Command Name Binding Description
614 Utilities Reference

7Using the uMACS Utility
The delete-global-mode command (<esc> ^m) deletes any mode specified as global. This will not affect any previously opened buffer. For example, if you open a buffer in CMODE and EXACT modes, and use the delete-global-mode command to delete the EXACT mode, the buffer is still in EXACT mode.
Utilities Reference 615

7 Using the uMACS Utility
Exit uMACS
There are two ways to exit µMACS.
Save or write your files, one at a time, using the save-file command (^x s) or the write-file command (^x ^w). Then, use the exit-emacs command (^x ^c). This alerts you if there are any unsaved files that have been changed. If there are no changed, unsaved files, you exit µMACS. If there are changed, unsaved files, you must answer a y/n (yes/no) prompt to stay in µMACS or exit without saving the files.
The quick-exit command (<esc> z) automatically saves all files that you changed in µMACS and exits.
Table 7-8 µMACS Exit Commands
Command Binding Description
exit-emacs ^x ^c Before exiting, µMACS asks if you want to exit even though you changed files. Choose y to exit, n to stay in µMACS.
quick-exit <esc> z Save all changed files and exit.
616 Utilities Reference

7Using the uMACS Utility
The uMACS Command Set
This chapter contains details about µMACS commands. The commands are grouped as follows:
• Cursor positioning.
Use cursor positioning commands to move the cursor forward, backward, up, and down.
• Insert.
Use insert commands to insert a space, non-printable characters, new lines, tabs, and files.
For More InformationMore Info More Information More Information More Information More
-6-
Refer to uMACS Command Summary for an alphabetized list of µMACS commands and default key bindings.
• Delete.
Use delete commands to delete a character, a word, lines, regions, and blank lines. You can place text in a kill buffer and insert text from the kill buffer to the position before the cursor.
• Search and replace.
Use search and replace commands to find and replace strings.
• Region commands.
Use region commands to mark region boundaries, copy and delete a region, change all letters within a region to upper or lower case, and paste the kill buffer at the cursor position.
• Format.
Use format commands to format text. For example, you can change a word’s character case, reformat paragraph margins, and transpose characters.
Utilities Reference 617

7 Using the uMACS Utility
• Buffer commands.
Use buffer commands to list information about buffers and change file and buffer names.
• Window commands.
Use window commands to open new windows, duplicate a window, scroll to another window, and delete, move, shrink, or enlarge windows.
618 Utilities Reference

7Using the uMACS Utility
Cursor Positioning Commands
This section discusses µMACS cursor positioning commands.
Table 7-9 µMACS Cursor Positioning Commands
Command Name Binding Moves the cursor:
backward-character ^b One character to the left.
forward-character ^f One character to the right.
next-word <esc> f One word to the right.
previous-word <esc> b One word to the left.
next-line ^n Down the window one line.
previous-line ^p Up the window one line.
next-paragraph <esc> n Ahead to the next paragraph.
previous-paragraph <esc> p Back to the last paragraph.
next-page ^v Ahead one window.
previous-page ^z Back one window.
beginning-of-line ^a To the beginning of the line.
end-of-line ^e To the end of the line.
beginning-of-file <esc> < To the beginning of the file.
end-of-file <esc> > To the end of the file.
goto-line <esc> <line#><esc> g
To the specified line.
Utilities Reference 619

7 Using the uMACS Utility
NoteNoteNote that the commands above use the eight-character substring beginning rather than the nine-character substring beginning.
Next or Previous Word, Line, or Paragraph
The next-word command (<esc> f) moves the cursor to the first character of the next word. The previous-word command (<esc> b) moves the cursor to the last character of the previous word.
NoteNoteA word is defined by any character(s) enclosed by either space, tab, and/or newline characters.
The beginning of a paragraph is defined as text that follows any of the character combinations listed below. The end of a paragraph is defined as text that ends with any of these combinations:
• <newline><newline>
• <newline><tab>
• <newline><space>
The next-line command (^n) positions the cursor on the next line in the text. If possible, µMACS keeps the same cursor position in the next line.
The previous-line command (^p) positions the cursor on the line before the current line. All cursor movement wraps to the previous or next line.
620 Utilities Reference
7Using the uMACS Utility
If you are at the top of the window and use the previous-line command (^p), the window is redrawn and the cursor is placed on the desired line. That line is positioned in the middle of the window.
The next-paragraph command (<esc> n) places the cursor at the end of the paragraph. The previous-paragraph command (<esc> p) places the cursor at the beginning of a paragraph.
Next or Previous Page
The next-page command redraws the window with the bottom two lines on the present page becoming the top two lines on the next page. This allows for some continuity when editing.
The previous-page command redraws the window with the top two lines of the present page becoming the bottom two lines on the previous page.
Go To Beginning or End of Line/File
Use the beginning-of-line (^a) and end-of-line (^e) commands to move the cursor to the beginning or end of the current line.
The end-of-file command (<esc> >) moves the cursor to the last character of the file. The beginning-of-file command (<esc> <) moves the cursor to the first character of the file.
Go to a Specified Line
The go-to-line command (<esc> g) moves the cursor to the first character of the specified line. The <esc> g command needs a line number argument before the command.
To find the current line number, use the buffer-position command (^x =). The correct syntax is thus changed to <esc> <line#><esc> g
Utilities Reference 621

7 Using the uMACS Utility
Insert Text
This section discusses how to insert text into a buffer.
Table 7-10 Insert Text
Command Name Binding Description
insert-space ^c Insert a space character before the cursor.
quote-character <esc> q Allow a control character to be inserted.
newline ^m The same as a carriage return.
open-line ^o Insert a newline character after the cursor.
new-line-and-indent ^j
or
<lf>
Insert a newline character and indent the line equal to the previous line.
handle-tab ^i Redefine and/or insert a tab character.
insert-file ^x ^i Insert a file from the directory before the cursor.
622 Utilities Reference

7Using the uMACS Utility
For More InformationMore Info More Information More Information More Information More
-6-
See the Cursor Positioning section of this chapter for information about moving the cursor.
When you enter µMACS, you are placed in a buffer.
• If you specified a file on the command line, you are in a buffer by that name.
• If you specified more than one file, you are in a buffer with the name of the first file on the command line.
• If you did not specify a file, you are in an unnamed, empty buffer.
To enter text into this buffer:
Step 1. Use any of the cursor positioning commands to move the cursor and type any unbound key.
Step 2. The character is inserted into the text at the cursor position. Any unbound key always inserts text unless you have specified VIEW mode for that buffer.
In OVER mode, the character replaces any character under the cursor. In all other modes, with the exception of VIEW, the character is inserted before the character under the cursor.
Insert a Non-Printable Character
The quote-character command (<esc> q) tells µMACS to insert the next character regardless of whether it is a non-printable character. This allows you to insert control characters into the text. The only exception to this is the carriage return character. It is always entered as a carriage return.
Utilities Reference 623

7 Using the uMACS Utility
New Lines
The newline command has exactly the same effect as entering a carriage return.
The open-line command (^o) inserts a newline character to create a blank line directly after the cursor.
The newline-and-indent command (^j or <linefeed>) inserts a newline character, then inserts the same number of tabs or spaces as the previous line. This indents the character under the cursor on a new line. This could be useful when splitting lines or indenting text.
Insert a Tab
The handle-tab command (^i) inserts a tab before the cursor position. If you specify a numeric argument (<esc> <num> ^i), the tab character is redefined to the specified number of spaces.
Insert a File
The insert-file command (^x ^i) prompts for a file name. If the file is found in your directory, it is loaded into the buffer at the cursor position.
624 Utilities Reference

7Using the uMACS Utility
Delete Text
This section discusses deleting text, placing it in the kill buffer, and inserting text from the kill buffer to another location.
Table 7-11 Delete Text
Command Name Binding Description
delete-next-character ^d Delete the character under the cursor.
delete-previous-character ^hor <bs><del>
Delete the character before the cursor.
delete-next-word <esc> ^d Delete from the cursor to the end of word.
delete-previous-word <esc> ^h<esc> <bs>
Delete the word up to the cursor.
delete-blank-lines ^x^o Delete the blank lines between text.
kill-paragraph <esc> ^w Delete the paragraph under the cursor.
kill-region ^w Delete the marked region.
kill-to-end-of-line ^k Delete the line starting at the cursor position.
yank ^y Insert the kill buffer contents at the cursor position.
Utilities Reference 625

7 Using the uMACS Utility
The Kill Buffer
With two exceptions, all deleted or killed text is put in a buffer called the kill buffer. The delete-next-character (^d) and the delete-previous-character (^h) command do not place the deleted character in the kill buffer.
Use the yank command (^y) to insert the kill buffer into the text. This allows you to reconsider deleting or killing an item in the text.
The kill-to-end-of-line command (^k) puts all characters after the cursor into the kill buffer. The kill-paragraph command (<esc> ^w) puts all characters in the paragraph containing the cursor into the kill buffer.
Both of these commands replace whatever was previously in the buffer unless two conditions are met:
1. A previous command that puts text in the kill buffer occurred directly before the current command.
2. The cursor has not changed positions between the previous command and the current command.
This allows you to append to the kill buffer if you need to move more than a single line or paragraph.
Delete Word/Blank Lines
There are no exceptions to the following three commands. This allows you to pick and choose the text added to the kill buffer.
The delete-next-word command (<esc> d) appends all characters from the cursor position to the end of the word, including the character under the cursor, into the kill buffer. For example, if the cursor was on the first f in buffer and the delete-next-word command was executed, the letters ffer are appended to the kill buffer.
If the cursor is on a space, tab, or newline character, all spaces, tabs, and newlines up to the beginning of the next word are appended to the kill buffer.
626 Utilities Reference

7Using the uMACS Utility
The delete-previous-word command (<esc> ^h) appends all characters from the beginning of the word to the cursor position into the kill buffer. This does not include the character under the cursor.
For example, if the cursor is on the first f in buffer and the delete-previous-word command is executed, the letters bu are appended to the kill buffer. If the cursor is on a space, tab or newline character, all spaces, tabs, newlines, and the previous word are appended to the kill buffer.
A blank line is defined as a line consisting of a single newline character.
The delete-blank-lines command (^x ^o) deletes all blank lines that exist between two non-blank lines. The cursor must be on a newline character between the two non-blank lines to execute this command. All newline characters deleted from the text are appended to the kill buffer.
Place a Region of Text Into the Kill Buffer
The kill-region command (^w) replaces the contents of the kill buffer with a region of text. You mark a region with the set-mark command (<esc> <space> or <esc> .). You then move the cursor to another position. The text between the mark and the cursor is the region. This includes the character under the mark but not the cursor.
Insert Kill Buffer Contents
Use the yank command (^y) to insert the kill buffer directly before the cursor position. For example, if you use the kill-paragraph command (<esc> ^w) and decide that you still need the paragraph, use the yank command to insert the paragraph directly before the cursor position.
Utilities Reference 627

7 Using the uMACS Utility
Search and Replace
There are six commands you can use to search for and replace strings. Each of these commands requires a search string. Once set, this string is used by any search or replace command, until you replace it with another search string.
Table 7-12 Search and Replace Commands
Command Binding Description
search-forward <esc> s Move the cursor forward to the first occurrence of the specified search string.
search-reverse <esc> r Move the cursor backward to the first occurrence of the specified search string before the original cursor position.
hunt-forward <no binding> Move the cursor forward to the first occurrence of the current search string.
hunt-backward <no binding> Move the cursor backward to the first occurrence of the current search string before the original cursor position.
628 Utilities Reference

7Using the uMACS Utility
Search Forward and Backward
The search-forward command (<esc> s) and the search-reverse command (<esc> r) display the current search string and prompt for a new search string. For example, if the current search string is delete, µMACS displays the following prompt:
Search [delete]<ESC>:
If you want a new search string, type the string and press the <esc> key. If you want to use the current search string, press the <esc> key. The <esc> key denotes the end of the search string. You can include newlines and tabs in search strings.
For example, if the current search string is a period (.) followed by a newline, followed by a tab, the prompt is:
Search [. <NL>^I]<ESC>:
For More InformationMore Info More Information More Information More Information More
-6-
See the uMACS Editing Modes section for information about changing modes.
replace-string ^r Substitute all occurrences of the specified search string with the specified replacement string.
query-replace-string <esc> ^r Prompt to substitute each occurrence of the specified search string with the specified replacement string.
Table 7-12 Search and Replace Commands
Command Binding Description
Utilities Reference 629
7 Using the uMACS Utility
Both search-forward and search-reverse look for the next occurrence of the search string. The case of the search string is not significant unless you are in EXACT mode. If a match is found, the cursor is moved to the first character after the matching string. If a match is not found, a Not found message is displayed.
When you want to continue searching for the next occurrence of the search string, use the hunt-forward and hunt-backward commands. By default, these commands are not bound.
To execute the hunt-forward and hunt-backward commands, use the execute-named-command or bind the command(s) to a user-defined binding. They work in the same manner as the search commands, except that they do not prompt for a search string. If a search string is not set at the beginning of an editing session, µMACS displays the No pattern set message.
Replace
The replace-string command (^r) prompts for the search string and a replacement string. The prompt is given in the same format as the search commands: the current search string is displayed. You have the option of accepting the current string (press the <esc> key) or changing the string (type the new string):
Replace [delete]<esc>:
After you press <esc> or type the new string, you are prompted for the replacement string:
With [kill]<esc>:
The replacement string is also saved between execution of replace commands. The example above used kill as the current replacement string.
All matching strings that occur after the cursor are replaced by the replacement string. The cursor is positioned one character after the last occurrence of a matching string. The number of substitutions made is displayed after the final substitution. If substitutions are not made, 0 substitutions is displayed and the cursor is not moved.
630 Utilities Reference

7Using the uMACS Utility
The query-replace-string command (<esc> ^r) allows you to control which occurrences of the search string to replace. After the search and replacement strings are determined, for every matching occurrence, you are prompted:
Replace ’delete’ with ’kill’?
Use one of the following one-character responses:
Table 7-13 Responses
Response Description
y Yes.
n No.
! Continue to substitute all matches without prompting.
^g Abort the command and leave the cursor at its present position.
. The period (. ) response aborts the command and returns the cursor to its original position before the command began executing.
? The help (?) response displays the acceptable responses for the command.
Utilities Reference 631

7 Using the uMACS Utility
Region Commands
A region is the text between the cursor and a previously specified point in the buffer. Regions are used in µMACS to cut, paste, delete, or format sections of text.
Table 7-14 Region Commands
Command Name Binding Description
set-mark <esc> .or<esc> <space>
Set a region’s marked boundary.
exchange-point-and-mark ^x ^x Exchange the region’s marked boundary with the cursor position.
copy-region <esc> w Copy the marked region to the kill buffer.
kill-region ^w Delete the marked region.
case-region-upper ^x ^u Change all letters in the region to upper case.
case-region-lower ^x ^l Change all letters in the region to lower case.
yank ^y Paste the kill buffer at the cursor position.
632 Utilities Reference

7Using the uMACS Utility
Mark Region Boundaries
Regions are bound on one side by a mark in the buffer. To set this mark, use the set-mark command (<esc> <space> or <esc> .). This mark remains in place until you set a new mark. All region commands are relative to this mark.
The mark includes the character on which the mark is set. The other boundary of the region is the cursor. You may interchange the two bounds of the region with the exchange-point-and-mark commands (^x ^x). This places your cursor where the mark was and places the mark where your cursor was.
Copy or Move a Region
After you set a mark, you can use the copy-region command (<esc> w) to place a copy of the region in the kill buffer. This leaves the region in its original place in the text. The copy-region command writes over the kill buffer, deleting anything that was previously there.
To move a region to another section of text, use the kill-region command (^w). This deletes the region from the text and places it in the kill buffer. Use the yank command to paste it elsewhere. The kill-region command writes over the current kill buffer.
Paste
To paste the kill buffer contents elsewhere in the file, use the yank command (^y).
When pasting the kill buffer into a file, place the cursor at the end of the pasted section. Often, when editing a program or text file, you need to move some code or a section of text to another area of the file and then return to the original point to continue editing. Use the exchange-point-and-mark command to do this.
Utilities Reference 633

7 Using the uMACS Utility
NoteNoteWe recommend that you update your mark after executing this command to avoid creating a large region and accidentally editing it.
Change a Region’s Character Case
Two commands change the character case of an entire region:
• case-region-upper (^x ^u)
• case-region-lower (^x ^l)
These change the entire region to upper or lower case, respectively.
634 Utilities Reference

7Using the uMACS Utility
Format Commands
Several text formatting commands are supported by µMACS. These are quite helpful to both programmers and text editors.
Change Character Case
Like the region commands, there are format commands you can use to change the character case. Each of these commands moves the cursor to the space, tab, or newline that ends the word.
Table 7-15 Format Commands
Command Name Binding Description
case-word-upper <esc> u Change all letters from the cursor to the end of the word to upper case.
case-word-lower <esc> l Change all letters from the cursor to the end of the word to lower case.
case-word-capitalize <esc> c Change the letter under the cursor to upper case.
set-fill-column ^x f Set right margin using <esc> <number>^x f.
fill-paragraph <esc> o Reformat paragraph using the fill-column.
transpose-characters ^t Transpose the character under the cursor with the character before the cursor.
Utilities Reference 635

7 Using the uMACS Utility
• case-word-upper (<esc> u) changes all letters from the cursor to the end of a word to upper case. This includes the letter under the cursor.
• case-word-lower (<esc> l) changes all letters from the cursor to the end of a word to lower case. This includes the letter under the cursor.
• case-word-capitalize (<esc> c) capitalizes the letter under the cursor.
If the word begins with a character that cannot be changed to upper case, the cursor is still moved to the end of the word. For example, if the cursor is on the space before the word, #include, and the <esc> c command is executed, the word remains the same and the cursor is moved to the end of the word.
Reformat Paragraph Margins
Two commands reformat the margins of paragraphs. These commands must be used together.
• set-fill-column (^x f) sets the new margin for the paragraph. ^x f requires an argument to specify the fill column. Once set, the fill column number remains in effect until it is set to a new margin.
To set the fill column, the syntax becomes: <esc> <number>^x f.
The new margin has no effect on newly entered text unless in WRAP mode. In WRAP mode, newline characters are automatically inserted at the end of lines exceeding the fill column (right margin).
• fill-paragraph (<esc> o) reformats the paragraph to the new margins specified by the fill column. This replaces all newlines within the paragraph with spaces, and replaces spaces at the end of the new line breaks with newlines.
<esc> o also makes sure that all periods that end words are followed by two spaces. This ensures that previous line endings conform to standard sentence formatting.
636 Utilities Reference

7Using the uMACS Utility
A paragraph is defined as any text that begins and ends with a newline-newline, newline-space, or newline-tab.
fill-paragraph affects only the paragraph that includes the cursor.
WARNING!fill-paragraph (<esc> o) has one or two drawbacks. For example, two spaces are inserted after initials in names. If a real number is indicated in the text by a number followed by a period with no decimal, two spaces are also inserted.
Transpose Characters
You can use µMACS to transpose characters. The transpose-characters command (^t) transposes the character under the cursor with the character before the cursor. This is an easy way to handle some typographical errors.
Utilities Reference 637

7 Using the uMACS Utility
Buffer Commands
µΜACS sets up a separate buffer for each file specified by the command line. Each of these buffers has the name of the file it contains.
Table 7-16 Buffer Commands
Command Name Binding Description
list-buffers ^x ^b List the buffers to be used by µMACS.
select-buffer ^x b Select the buffer to edit.
next-buffer ^x x Select the next buffer in the buffer list to edit.
name-buffer <esc> ^n Change the name of the buffer currently being edited.
buffer-position ^x = Display status line giving the current buffer position in relation to the entire file.
delete buffer ^x k Delete the specified buffer.
execute-buffer <unbound> Execute the buffer as a µMACS procedure file.
638 Utilities Reference

7Using the uMACS Utility
Display Current Buffers
The list-buffer (^x ^b) command displays a formatted list of the buffers currently present in µMACS. Press the space bar to remove the list from your display.
Figure 7-2 Buffer List
Change Buffer or File Name
A buffer always has a name. The file within the buffer may be unnamed, however, you must name the file if you want to save it. The buffer name and the file name do not necessarily have to be the same.
AC MODES Sizes Buffer File-- ----- ----- ------ ---- ...... Global Modes@* ....V. 64 file1 file1@ ...E O 536 file2 file2 ...... 0 file3 file3
Active buffer
@ = Buffer has been entered at least once.
@* = Buffer is currently being edited.
Current mode
Bytes in buffer (decimal) Buffer Name
File Name
Utilities Reference 639

7 Using the uMACS Utility
The following are commands you can use to change buffer and file names.
Edit a Buffer
Once you are aware of the buffers currently available (see the list-buffer Display Current Buffers command), you can use the select-buffer command (^x b) to edit a buffer.
select-buffer prompts for the name of the buffer you wish to edit. If you name an existing buffer that has not yet been edited, µMACS:
• Reads the file.
• Displays the number of lines in the file.
• Places the cursor at the beginning of the file.
Table 7-17 Change Buffer and File Names
Command Name Binding Description
name-buffer <esc> ^n Prompts for a new buffer name.
change-file-name ^x n Prompts for a new file name.
640 Utilities Reference

7Using the uMACS Utility
Open a New Buffer
To open a new buffer, type a name that is not listed in the buffer list. An empty buffer with that name is opened and the cursor is placed at its beginning.
Figure 7-3 Buffer List
Switch Buffers
Use the next-buffer (^x x) command to switch between buffers. This places you in the next buffer in the buffer list (see the list-buffer command). When you are editing the last buffer in the list, the next-buffer command wraps around and places you in the first buffer.
AC MODES Sizes Buffer File-- ----- ----- ------ ---- ...... Global Modes@* ....V. 64 file1 file1@ ...E O 536 file2 file2 ...... 0 file3 file3
Buffer List
Utilities Reference 641

7 Using the uMACS Utility
Buffer Position
The buffer-position command (^x =) displays a status line with information concerning your current position in the buffer. The following is an example status line:
Figure 7-4 Buffer Position Status Line
Delete Buffer
Use the delete-buffer command (^x k) to delete a specified buffer. delete-buffer prompts for the name of the buffer to delete. You cannot delete the currently displayed buffer.
When you delete a buffer, it is removed only from your µMACS workspace. This does not affect any file in your directory.
X and Y are the current screen coordinates.
The current line number.
Hexadecimal value for thecharacter under the cursor.
Percentage of allcharacters in the file.
Total number ofcharacters in file.
Number of characters up toand including the cursor.
X=29 Y=1 Line=23 CH=0xd .=612 (21% of 2795)
642 Utilities Reference

7Using the uMACS Utility
Execute Buffer
Use execute-buffer to execute commands in the buffer. execute-buffer prompts for the name of the buffer to execute. µMACS tries to execute the buffer as a procedure file consisting of a series of µMACS commands. If the buffer is not executable, µMACS returns an error message. If only a part of the buffer is non-executable, µMACS executes the buffer until it reaches the non-executable portion, then returns an error message.
The execute-buffer command is by default unbound to any character sequence. Unless you bind it, you must implement execute-buffer with execute-named-command (<esc> x).
If your buffer contains a command requiring input, you must anticipate the reply and supply quotation marks. Each command in the buffer must be correctly named and on a line by itself. For example, if you use a buffer to search for the string "begin", the buffer looks like this:
search-forward "begin"
Utilities Reference 643

7 Using the uMACS Utility
Window Commands
Buffers are displayed in windows. µMACS can display multiple windows simultaneously. A window may consist of the entire screen or as little as one line. Each window has a status line under it to distinguish it from any other windows on the screen. There are several commands you can use to manipulate windows.
Table 7-18 Window Commands
Command Name Binding Description
split-current-window ^x 2 Duplicate the current window in a new window.
next-window ^x n Move the cursor to the next window.
previous-window ^x p Move the cursor to the previous window.
move-window-up ^x ^p Scroll the current window up one line.
move-window-down ^x ^n Scroll the current window down one line.
scroll-next-up <esc> ^z Scroll the next window up one page.
scroll-next-down <esc> ^v Scroll the next window down one page.
shrink-window ^x ^z Decrease the size of the current window.
grow-window ^x z^x^
Increase the current window’s size.
delete-other-windows ^x 1 Display only the current window.
644 Utilities Reference
7Using the uMACS Utility
Open Additional Windows
There are two ways to open a second window on the screen.
• Use the list-buffer command (^x ^b). This opens a second window and displays the buffer list in the new window. The cursor remains in the original window. Use the next-window command (^x o) to move the cursor to the new window. Now this window is available for use.
To read a new buffer into this window, use the select-buffer command or the read-file command (^x ^r). Now you have two windows on the screen with a different buffer in each.
• Use the split-current-window command (^x 2). This creates a new window on the screen containing a duplicate copy of the buffer that you were editing. This allows you to view the same file in two different areas.
You can manipulate each window with the cursor and scroll commands. Both windows contain the same file. Any text inserted or deleted in either window is inserted or deleted in the other.
You can also use the split-current-window command to read a new buffer or file into the new window. You can use the split-current-window command until each window on the screen has only one line. At this point, it is impossible to split the screen further; an error message is displayed.
Move to the Next or Previous Window
When more than one window is on the screen, a number of commands are available. The next-window command (^x o) moves the cursor to the first line displayed in the window below the current window. If the cursor is currently in the bottom window on the screen, the cursor moves to the top window.
The previous-window command (^x p) works in the same fashion. The cursor is moved to the window directly above the current window.
Utilities Reference 645

7 Using the uMACS Utility
Scroll Text
Use the cursor commands to scroll the text of the current window. There are two additional commands to scroll the window one line at a time:
• move-window-down (^x ^n).
• move-window-up (^x ^p).
These commands affect the current window. To scroll the text of the other displayed window, use:
• scroll-next-up (<esc> ^v).
• scroll-next-down (<esc> ^z).
These commands scroll the next window one page forward or backward, respectively.
Change Window Size
Use the shrink-window command (^x ^z) or the grow-window command (<control>x^ or ^x z) to alter the size of the current window. These commands shrink or enlarge your current window, respectively. This also enlarges or shrinks the other windows displayed.
You can enlarge a window until all other windows display only one line. You can shrink a window until it only displays one line.
Delete All But Current Window
To delete all windows except the current window, use the delete-other-windows command (^x1). This displays the current window on the full screen. All other windows are saved in their respective buffers.
646 Utilities Reference

7Using the uMACS Utility
Termcap File Format
For µMACS to work properly, it must know the properties of the terminal on which it operates. µMACS uses the termcap database to determine the control codes your terminal uses for line delete, cursor positioning, etc.
µMACS looks for the termcap file in the /dd/SYS directory. /dd is the default device for your system. If it is not found, µMACS looks in /h0/SYS and then /d0/SYS.
Utilities Reference 647

7 Using the uMACS Utility
The Termcap File
termcap is a text file containing control code definitions for one or more types of terminals. Each entry is a complete description list for a particular kind of terminal.
NoteNoteEach part of a termcap entry is separated by a vertical bar (|) and is another way of naming the terminal.
The first section of a termcap entry is divided into three parts.
1. The first part is a two character entry. This is a holdover from early UNIX editions.
2. The second part is the most common name for the terminal. This name cannot contain blanks.
3. The final part is a long name that fully describes the terminal. This name can contain blanks for readability. For example:
kh|abm85h|kimtron abm85h:
To check the values stored in TERM, use the printenv utility:
$ printenvTERM=abm85h
The TERM environment variable must be set to the name used in the second part of the name section. In the following example, TERM is set to abm85h:
$ setenv TERM abm85h
The rest of the entry consists of a sequence of control code specifications for each control function. Each item in the list is separated by a colon (:) character. An entry may continue onto the next line by using a backslash (\) character as the last character of the line. It must appear after the ending colon of the previous item. The next line must begin with a colon.
648 Utilities Reference

7Using the uMACS Utility
For example:
ka|amb85|kimtron abm85:\:ct=\E3: ...
Terminal Capabilities
Each item begins with a terminal capability. Each capability is a two character abbreviation. Each capability is either a boolean itself or it is followed by a string or a number. If a boolean capability is present in the termcap entry, then the capability exists on that terminal.
All numeric capabilities are followed by a pound sign (#) and a number. For example, the number of columns capability for an 80 column terminal could be described as follows:
co#80:
All string capabilities are followed by an equal sign (=) and a character string. You can enter a time delay in milliseconds directly after the equal sign (=) if padding is allowed in that capability. The padding characters are supplied by the editor after the remainder of the string is transmitted to provide the time delay. The time delay may be either an integer or an integer followed by an asterisk (*). The asterisk (*) specifies that the padding is proportional to the number of lines affected.
NoteNoteWhen you use an asterisk (*), it may be useful to specify the time delay in tenths of milliseconds. For example, use the following entry to specify the clear screen capability as ^z with a time delay of 3.5 milliseconds:
cl=3.5*^z:
Utilities Reference 649

7 Using the uMACS Utility
Special Characters
Use \E to indicate an escape sequence.
A control character is indicated by a circumflex (^) preceding the character.
The following special character constants are also supported:
You can also specify characters as three Octal digits after a backslash (\). For example:
• If you must use a colon in a capability definition, it must be specified by \072.
• If you need to place a null character in a capability definition, use \200.
C routines using termcap strip the high bits of the output, therefore \200 is interpreted as \000.
Table 7-19 Special Characters
Character Definition Character Definition
\b backspace \f formfeed
\n newline \r return
\t tab \\ backslash
\^ circumflex
650 Utilities Reference

7Using the uMACS Utility
Termcap Capabilities
You must define a number of basic capabilities for µMACS to work properly. The required capabilities are shown below.
Cursor Addressing
Of the above capabilities, the most complex and important capability is cm (cursor addressing). The string specifying the cursor addressing is formatted similar to the C printf() command. It uses % notation to identify addressing encodings of the current line or column position. The line and the column to address could be considered the arguments to the cm string. All other characters are passed through unchanged.
Table 7-20 Termcap Capabilities
Name Type Padding Description
ce string (P) Clear to end of line.
cl string (P*) Clear the screen.
cm string (P) Cursor addressing.
se string End stand out mode
so string Begin stand out mode
sg numeric Number of blank characters left by so or se.
up string Up line (cursor up).
Utilities Reference 651

7 Using the uMACS Utility
The following are the notations used for cm strings:
Example Notations
The following examples illustrate the use of the above notations:
cm=6\E&%r%2c%2Y:
This terminal (HP2645) needs:
• A six millisecond delay.
Table 7-21 cm String Notations
Notation Description
%d A decimal number (origin 0).
%2 Same as %2d.
%3 Same as %3d.
%. ASCII equivalent of value.
%+x Add x to value, then %.
%>xy if value > x adds y, no output.
%r Reverse the order of row and column, no output.
%i Increment line/column (for 1 origin).
%% Give a single %.
%n Exclusive or row and column with 0140.
%B BCD (16*(x/10) + (x%10), no output.
%D Reverse coding (x-2*(x%16)), no output.
652 Utilities Reference

7Using the uMACS Utility
• Rows and columns reversed.
• Rows and columns printed as two digits.
The <escape>& and Y are sent unchanged.
cm=5\E[%i%d;%dH:
This terminal (VT100) needs:
• A 5 millisecond delay.
• Rows and columns separated by a semicolon (;)
• Because of its origin of 1, rows and columns are incremented.
The <escape>[ ; and H are transmitted unchanged. (VT100)
cm=\E=%+ %+ :
This terminal (ABM85H) uses:
• Rows and columns offset by a blank character.
Example Termcap Entries
ka|abm85|kimtron abm85:\:ce=\ET:cm=\E=%+ %+ :cl=^Z:\:se=\Ek:so\Ej:up=^K:sg#1
If two entries in the same termcap file are very similar, with certain exceptions, one can be defined as identical to the other. To do this, the tc capability is used with the name of the similar terminal. This must be the last capability in the entry. All exceptions to the other terminal must appear before the tc listing.
To cancel a capability, use <cap>@. For example, a complete entry might be:
kh|abm85h|kimtron abm85h:\:ce@:cm=\E=%+ %+ :cl=^Z:\:se=\EG0:so\EG4:tc=abm85:
The ce capability is removed from abm85h.
Utilities Reference 653

7 Using the uMACS Utility
uMACS Command Summary
This table contains a summary of the µMACS commands.
Table 7-22 µMACS Command Summary
Command Name Binding Description
abort ^g Abort the current command.
add-mode ^x m Add the specified mode to the current buffer.
add-global-mode <esc> m Add the specified mode to all new buffers.
backward-character ^b Move the cursor one character backwards.
begin-macro ^x ( Begin the macro-command.
beginning-of-file <esc> < Move the cursor to the beginning of the file.
beginning-of-line ^a Move the cursor to the beginning of the line.
bind-to-key <esc> k Bind the specified command to the specified key sequence.
buffer-position ^x = Display the cursor position in the buffer.
case-region-lower ^x ^l Change all letters in the region to lower case.
case-region-upper ^x ^u Change all letters in the region to upper case.
654 Utilities Reference

7Using the uMACS Utility
case-word-capitalize <esc> c Change the letter under the cursor to upper case.
case-word-lower <esc> l Change all letters to the end of the word to lowercase.
case-word-upper <esc> u Change all letters to the end of the word to uppercase.
change-file-name ^x n Change the name of current file to the specified name.
clear-and-redraw ^l Redraw the screen.
copy-region <esc> w Copy a region to the kill buffer.
delete-blank-lines ^x ^o Delete blank lines between text.
delete-buffer ^x k Delete the specified buffer.
delete-mode ^x ^m Delete the specified editing mode.
delete-global-mode <esc> ^m Delete the specified global mode.
delete-next-character ^d Delete the character under the cursor.
delete-next-word <esc> d Delete from the cursor to the end of the word.
delete-other-windows ^x 1 Display only the current window.
delete-previous-character
^h Delete the character before the cursor <bspace>.
Table 7-22 µMACS Command Summary (continued)
Command Name Binding Description
Utilities Reference 655

7 Using the uMACS Utility
delete-previous-word <esc> ^h Delete the word up to the cursor <esc> <bspace>.
describe-bindings <unbound> Display the key binding list.
describe-key ^x ? Display the bound command (if any) for the specified key sequence.
end-macro ^x ) End the macro-command.
end-of-file <esc> > Move the cursor to end of file.
end-of-line ^e Move the cursor to the end of the line.
exchange-point-and-mark ^x ^x Exchange the marked bound of the region with the cursor position.
execute-buffer <unbound> Execute the specified buffer as a procedure file.
execute-command-line <unbound> Execute the command line.
execute-file <unbound> Execute the file as a procedure file.
execute-macro ^x e Execute the macro-command.
execute-named-command <esc> x Execute the command by name.
exit-umacs ^x ^c Exit after saving changed files.
fill-paragraph <esc> o Reformat the paragraph to new margins.
Table 7-22 µMACS Command Summary (continued)
Command Name Binding Description
656 Utilities Reference

7Using the uMACS Utility
find-file ^x ^f Read the file into new buffer.
forward-character ^f Move the cursor forward one character.
goto-line <esc> g Move the cursor to the specified line.
grow-window ^x ^ Enlarge the current window.
handle-tab ^i Insert/Redefine the tab character.
help <esc> ? Display the help file.
hunt-backward <unbound> Move the cursor backward to the last occurrence of a search string.
hunt-forward <unbound> Move the cursor forward to the next occurrence of a search string.
i-shell ^x c Fork a shell; control remains in the shell until <esc>.
insert-file ^x ^i Insert file into the current buffer.
insert-space ^c Insert a space character before the cursor.
kill-paragraph <esc> ^w Delete the current paragraph.
kill-region ^w Delete the marked region.
kill-to-end-of-line ^k Delete text from the cursor to the end of the line.
Table 7-22 µMACS Command Summary (continued)
Command Name Binding Description
Utilities Reference 657

7 Using the uMACS Utility
list-buffer ^x ^b Display the buffer list.
move-window-down ^x ^n Scroll the window down one line.
move-window-up ^x ^p Scroll the window up one line.
name-buffer <esc> ^n Rename the current buffer.
newline ^m Insert a newline before the cursor.
newline-and-indent ^j Insert a newline and indent the new line equal to twice that of the previous line.
next-buffer ^x x Move the cursor to next buffer in the buffer list.
next-line ^n Move the cursor to the next line.
next-page ^v Scroll the file one page forward.
next-paragraph <esc> n Move the cursor to the next paragraph.
next-window ^x o Move the cursor to the next window.
next-word <esc> f Move the cursor to the next word.
open-line ^o Insert two newlines before the cursor.
previous-line ^p Move the cursor up one line.
Table 7-22 µMACS Command Summary (continued)
Command Name Binding Description
658 Utilities Reference

7Using the uMACS Utility
previous-page ^z Move the cursor back one screen. <esc> v
previous-paragraph <esc> p Move the cursor back to the last paragraph.
previous-window ^x p Move the cursor to the last previous window.
previous-word <esc> b Move the cursor backward one word.
query-replace-string <esc> ^r Prompt at each occurrence of the search string with the replacement string.
quick-exit <esc> z Exit after saving all changed files.
quote-character <esc> q Allow control characters to be printed.
read-file ^x ^r Read file into current buffer (overwrite the current text).
redraw-display <esc> ^l Redraw the screen. <esc> !
replace-string ^r Substitute all occurrences of the search string with the replacement string.
save-file ^x s Save changed file.
scroll-next-down <esc> ^v Scroll the next window down one page.
scroll-next-up <esc> ^z Scroll the next window up one page.
Table 7-22 µMACS Command Summary (continued)
Command Name Binding Description
Utilities Reference 659

7 Using the uMACS Utility
search-forward <esc> s Move the cursor forward to the first occurrence of the specified search string.
search-reverse <esc> r Move the cursor back to the first occurrence of the search string previous to the original cursor position.
select-buffer ^x b Select the buffer to be edited.
set-fill-column ^x f Set the right margin using <esc> <int>^XF.
set-mark <esc> <space>
Set the marked bound of the region. <esc> .
shell-command ^x ! Fork a shell; execute command; control is then returned to µMACS.
shrink-window ^x ^z Decrease the size of the current window.
split-current-window ^x 2 Duplicate the current window in new window.
transpose-characters ^t Transpose the character under the cursor with the character before the cursor.
unbind-key <esc> ^k Unbind the specified key sequence from all commands.
view-file ^x ^v Display the specified file in VIEW mode.
Table 7-22 µMACS Command Summary (continued)
Command Name Binding Description
660 Utilities Reference

7Using the uMACS Utility
write-file ^x ^w Write the specifically named file to disk.
yank ^y Paste the kill buffer at the cursor position.
Table 7-22 µMACS Command Summary (continued)
Command Name Binding Description
Utilities Reference 661

7 Using the uMACS Utility
662 Utilities Reference

Glossary
baud rateThe speed (in bits per second) of a data link. Divide baud rate by ten to determine characters per second (i.e., 300 baud = 30 c.p.s).
data linkA communications connection between two computers or between a computer and a terminal.
downloadingTransmission of data from a remote computer to a file on the host computer.
full duplexA transmission mode where data is echoed back over the data link.
half duplexA transmission mode where data is not echoed back over the data link.
hardwiredA direct wired connection between two devices.
663

Glossary
modemA device that converts digital data to audio tones for transmission over telephone lines.
null modemA connector device that reverses the transmit and receive wires for hard-wired connection of two computer ports.
uploadingTransmission of data from a file on the host computer to a remote computer.
XOFFA control character (decimal value = 19) which is used to tell a remote system to stop transmitting.
XONA control character (decimal value = 17) which is used to tell a remote system to resume transmitting.
664 Utilities Reference

A B C D E F G H I J K L M N O P Q R S T U V W X Y Z
Index
Symbols$* macro 483$? macro 483$@ macro 483%ret 556%s 559.c or .h buffer names 613.login 525.login file 278, 582.logout file 201, 278, 582, 583, 585.shellrc 521, 525.umacsrc file 601<esc> 595<esc> escape key 496[No such function] error 595^B cursor back 489^D delete character 490^F cursor forward 489^I toggle insert mode 490^K kill to end of line 490^N next line 489^P previous line 489^Z end of line 490_BATCHDEV 504_EDKEYS 491_sh environment variable 290, 343, 576, 577, 582_SHELLPARAMS 524
A-a option 519abort 599, 654abort process 186
Utilities Reference 665

A B C D E F G H I J K L M N O P Q R S T U V W X Y Z
access files 608activ utility 14activate a process 14add or delete mode 613add-global-buffer 614add-global-mode 614, 654add-mode 614, 654alias 501alias passing 522alias utility 16allocation map
build 76alter-echo option 519append to the kill buffer 626ASCII
compress files 67formatted file dump 110
assign 501assign global variable value
assign() 565assign local variable value
lassign() 566assign utility 18attach devices 170attr utility 19attributes
copied 70
B-b option 519backslash 511
start batchfile 504backup 23
directory restoration 150incremental 152procedure
multiple drive 25single drive 24
backup file 611backup utility 23
666 Utilities Reference

A B C D E F G H I J K L M N O P Q R S T U V W X Y Z
backward-character 654begining-of-file 621, 654begining-of-line 621, 654begin-macro 654beginning of a paragraph
defined 620bfed commands
see table 2 27bfed utility 26binary files
compare 52convert to S-record 32
bind key 592bind-key 601bind-to-key 597, 654binex utility 32bitmap
repair 78bootgen utility 35bootstrap file
build and link 241bracket 613break utility 40breakpoints 367, 369, 370, 371, 412, 413, 416buffer 604, 623
commands 618, 638buffer-position 621, 642, 654build and link a bootstrap file 35build text file from standard input 42build utility 42built-in command 514, 532
assign 501dirs 515hist 492noassign 502popd 516prenv 517pushd 515pushd dir 516pushd -h 516pushd -num 516
Utilities Reference 667

A B C D E F G H I J K L M N O P Q R S T U V W X Y Z
pushd -x 516set 517unassign 502which 518
built-in functionslist of 560
C-c option 520cache
enable, disable 98capability 649capitalize word 593capture output 503case matching 612case-region-lower 654case-region-upper 654case-word-capitalize 636, 655case-word-lower 636, 655case-word-upper 636, 655CC macro 483CFLAGS macro 482cfp utility 43change
buffer and file names 640character case 634, 635current data directory 49current execution directory 49current module directory 49file name 282file security attributes 19module directory permissions 212ownership of file/directory 51
change command line option 514change-file-name 610, 655character
print hex value of 54transliterate 328
characterscount of 73
668 Utilities Reference

A B C D E F G H I J K L M N O P Q R S T U V W X Y Z
chd utility 49chm utility 49chown utility 51chx utility 49clear-and-redraw 655clock
activate/set 291close the help window 599clusters
defined 146cm 651CMODE mode 613cmp utility 52code utility 54com utility 55command
file processor 43history 165interpreter 297, 569
command completion 496Command Line
single word substitution 18command line batchfile 504command line editing keys
display current 517command line interface
options 489command line option
change 514command line options 514command monitoring 512command output substitution 508command separators
! Standard output 503!! Standard error 503!!! Both standard output and standard error 503
communicate with remote system 55compare binary files 52compress ASCII files 67compress utility 67conditional branch
Utilities Reference 669

A B C D E F G H I J K L M N O P Q R S T U V W X Y Z
elsewhile 547endswitch 546list of directives 539
constantstypes 536
controlcharacter 595, 608
control characters from path descriptor 491control code
definitions 648specifications 648
control keys 489conversion to integer 538convert
binary files to S-record 32S-record to binary 127text
dosfile utility 101copy
backup of disk 23data file to RBF device 308data from file 69files to standard output 219generate procedure to 104standard input to multiple output 311
copy text 605copy utility 69copy-region 633, 655count characters, words, lines 73count utility 73CRC
repair 137create
bootable tape 307directory file 203directory link 193new module directory 209
create a batchfile 504current line number 621cursor
addressing 651
670 Utilities Reference

A B C D E F G H I J K L M N O P Q R S T U V W X Y Z
positioning 593, 617cut 593
buffer 593
D-d option 512, 520date
display 75update last modification date on file 326
date utility 75dcheck utility 76de-activate an active process 301debug
breakpoints 367, 369, 370, 371, 412, 413, 416commands
d (display memory) 375debug options 406execution 369fork 401link 392memory change 374memory search 392mf (memory fill) 387ms (memory search) 389o (options) 404summary 412symbol table 396v(evaluate expression) 410
expressionsoperands 407operators 408
invoke debug 403memory fill command 387symbolic debugging 364, 394
debug mode 520debug utility 80debug, test 68000 machine language programs 80debugging
facilities 512log 523
Utilities Reference 671

A B C D E F G H I J K L M N O P Q R S T U V W X Y Z
message logging 512declare a label
label 541default
compiler 478default control characters 489deiniz utility 81del utility 84deldir utility 85delete 617
existing module directories 87file(s) 84file/directory 87mode 613
delete characters 491delete-blank-lines 627, 655delete-buffer 642, 655delete-global-mode 615, 655delete-mode 614, 655delete-next-character 626, 655delete-next-word 626, 655delete-other-windows 599, 646, 655delete-previous- character 655delete-previous-word 627, 656delimiter characters 530delmdir utility 87dependency list 468describe-bindings 598, 656describe-key 598, 656determine current directory 516device
attach 170detach 81display free space 146
device tabledisplay 89
devs utility 89diagnostic tool
dcheck 76dir utility 94Directive
672 Utilities Reference

A B C D E F G H I J K L M N O P Q R S T U V W X Y Z
defined 532directive 532directives
classes of 539conditional branch 539miscellaneous 539procedure file function 539unconditional branch 539variables 539
directorieschange current data 49change current execution 49change current module 49change ownership of a file 51
directorybackup restoration 150delete 85, 87display file names 94Home 574incremental backup 152move to another directory 236print working directory 260unformatted listing 95
directory filecreate 203
directory linkcreate 193
dirs 515disable MShell option 519discard single word commands 336disk
file structure 76initialize media 141make backup 23
disk editorscreen-oriented 26
diskcache utility 98display
files in directory 94free space on device 146processes 273
Utilities Reference 673
A B C D E F G H I J K L M N O P Q R S T U V W X Y Z
status of cache 98system date, time 75system events 122system’s device table 89
display current options 517display environment variables 517display process paths 251display version strings 345DOS
convert text 101dosfile utility 101download of files 62DPIO
split/rejoin descriptors 102dpsplit utility 102dsave utility 104dump utility 110duplicate andexecute a command from history 492
Ee modifier 509-e option 606echo text to output path 112echo utility 112edit file 606EDIT mode 610, 612edit OS-9 modules 225editor
editmod 114editors
screen-oriented disk 26umacs screen 335
edt utility 119enable MShell option 519end of a paragraph
defined 620end-macro 656end-of-file 621, 656end-of-line 621, 656endswitch 546
674 Utilities Reference

A B C D E F G H I J K L M N O P Q R S T U V W X Y Z
endwhile 547enlarge window 646enter text into buffer 623environment variable 505
_BATCHDEV 504_EDKEYS 491_SHELLPARAMS 524, 525PWD 516substitution 506
environment variables_sh 576delete 343HOME 200, 201, 574PATH 195, 200, 575PORT 574print 272PROMPT 575set 290SHELL 200TERM 576USER 200, 575
erase all files in a directory 85erase existing module directories 87erase files 84errors for background processes 531escape
sequence 650escape characters 527, 530escape in quoted string constants 536events utility 122ex utility 125EXACT mode 612, 630examine file security attributes 19examine MShell options 517exbin utility 127exchange-point-and- mark 656exchange-point-and-mark 633execute
command 595macro 600operating system commands 611
Utilities Reference 675

A B C D E F G H I J K L M N O P Q R S T U V W X Y Z
uMACS commands 595execute-buffer 643, 656execute-command-line 656execute-file 601, 656execute-macro 656execute-named- command 656execute-named-command 595, 630, 643exit uMACS 616exit-emacs 616exit-umacs 656expand compressed file 129expand utility 129expression 533
F-f option 520F$DExec system calls 80, 363F$DFork system call 80, 363F$STrap system calls 370, 371F$TLink system calls 370file
.login 581
.logout 581check disk file structure 76copy
data file to RBF device 308copy data from one to another 69copy to standard output 219count characters, words, lines 73move to another directory 236update, maintain, regenerate 207, 467
file name completion 499files
.login 278
.logout 278archive multiple files 309build and link bootstrap file 241change name 282compare binary 52compress 67
676 Utilities Reference

A B C D E F G H I J K L M N O P Q R S T U V W X Y Z
convert to S-record 32copy
via procedure file 104create bootable tape 307create files
build utility 42create, edit files
edt utility 119delete 84delete all in directory 85expand compressed file 129formatted dump in hexadecimal and ASCII 110password 198print 270procedure file
.login 278
.logout 278procedure files
.login 581
.logout 581password 198
put on tape 306read commands from 278relocatable 478retrieve deleted OS-9 files 337retrieve deleted OS-9000 files 339split into two or four files 284S-record
convert to binary 127S-record files
convert binary to S-record 32update last modification date 326
fill-paragraph 636, 637, 656find a module or file 518find current key bindings 598find-file 610, 657fixmod utility 137force a break
wbreak 542fork new shell 300format commands 593, 617
Utilities Reference 677

A B C D E F G H I J K L M N O P Q R S T U V W X Y Z
format escapes%s 559
format utility 141forward-character 657free utility 146frestore utility 150fsave utility 152function 535functions 560
Gglobal buffer 605global variable
%ret 556global variable assignment 565go-to-line 621goto-line 657Group and User ID
getuid() 566grow-window 646, 657
Hh modifier 509-h option 521handle-tab 624, 657help 598, 657help utility 164hex
formatted file dump 110hex values 54hist 492hist utility 165history buffer 492
-c 520option 520set size 520
history compression 521-h option 494
678 Utilities Reference

A B C D E F G H I J K L M N O P Q R S T U V W X Y Z
history counter 494history passing 522history saving 523history substitution 493Home directory 574HOME environment variable 200, 201, 574hunt-backward 630, 657hunt-forward 630, 657
I-i option 521, 522, 525I/O functions
list of 560ident utility 167identifier constants 537IDIR macro 482initialization file
invoke 525initialization script
invoke 521initialize disk media 141iniz utility 170in-memory quick sort 280input character
print hex value of 54insert 617
control character 623kill buffer 626tabs or spaces 624text 622
insert mode 490insert-file 609, 624, 657insert-space 657integer constants 537interpreted procedure files 508IRQ polling table
display 172irqs utility 172i-shell 611, 657
Utilities Reference 679

A B C D E F G H I J K L M N O P Q R S T U V W X Y Z
Kkermit utility 179key
bindings 596sequence 592
kill buffer 626kill process 186kill utility 186kill-paragraph 626, 627, 657kill-region 627, 633, 657kill-to-end-of-line 626, 657
Ll68 364, 394language interpreter 505LC macro 483LFLAGS macro 482line 621
length 608wrap 612
line concatenation 511line-oriented text editor 119lines
count of 73link and build a bootstrap file 35link utility 188link, initialize OS9P2 module 247list command names and key bindings 598list contents of text file 189list utility 189list-buffer 639, 645, 658lmm utility 191ln utility 193load file into buffer 608load modules at pathlist 191load utility 194logical constants 537login
shell 582
680 Utilities Reference
A B C D E F G H I J K L M N O P Q R S T U V W X Y Z
login utility 197logout utility 201loop termination 544
M-m option 521machine language programs
test and debug 80, 363macro 592, 599
$* 483$? 483$@ 483CC 483CFLAGS 482IDIR 482LC 483LFLAGS 482ODIR 482RC 483RDIR 482RFLAGS 482SDIR 482
macro recognition 481makdir utility 203make
command entry 469comment entry 469dependency entry 468ROM for BSP 248
make backup copy of disk 23make utility 207, 467makefile
defined 207, 468makmdir utility 209maps utility 211margins 593mark a region 627mdattr utility 212mdir utility 215memory
Utilities Reference 681

A B C D E F G H I J K L M N O P Q R S T U V W X Y Z
display status of cache 98merge utility 219mfree utility 221miscellaneous functions
list of 560moded utility 225moded.fields 228modes 480modifiers 509module
access permissions 138, 168change permissions 212create new directory 209delete directories
delmdir utility 87display directory 215edit 225identification 167link into memory 188link, initialize OS9P2 247list fields 228load at pathlist 191load from file 194repair CRC 137save to file 286select current 227unlink memory module 341
modulescreate, display, and edit 114
move cursor 620move file/directory to another directory 236move-window-down 646, 658move-window-up 646, 658MShell options
-a alter echo 519-b profile batchfiles 519-c history buffer 520-d debug mode 520-f fancy readln 520-h history compression 521-i invoke initialization script 521, 522
682 Utilities Reference

A B C D E F G H I J K L M N O P Q R S T U V W X Y Z
list of 519-m insert mode 521-o time-out 522-q alias passing 522-r history passing 522-s history saving 523-u debugging log 523
mv utility 236
Nname-buffer 658newline 624, 658newline-and-indent 624, 658next-buffer 641, 658next-line 620, 658next-page 621, 658next-paragraph 621, 658next-window 645, 658next-word 620, 658No pattern set message 630noassign 502non-blocking readln 531Not bound message 598Not found message 630-np option 504numeric capability 649
O-o option 522object file 477ODIR macro 482on-line utility reference 164open
another window 645new buffer 641
open-line 624, 658operands 534operators 534
Utilities Reference 683

A B C D E F G H I J K L M N O P Q R S T U V W X Y Z
OS-9convert text 101
OS-9 for 68000 operating systemtest and debug 80, 363
os9cmp utility 52os9gen utility 241oso9dump utilitiy
formatted file dump in hex or ASCII 110OVER mode 612, 623overwrite mode 521
PP* 506p2init utility 247padrom utility 248page 621parameter passing 505, 507park hard drive heads 250park utility 250partial command 596Partition OS-9/68k hard disks 253pass control to caller 556password file 198paste 593path descriptor control characters 491PATH environment variable 195, 200, 575pathlist alias 16paths
copy standard input to multiple output 311paths utility 251pd utility 260pipe
standard output/standard error 503PN 506popd 516popd -num
built-in commandpopd -num 516
PORT environment variable 574pound sign (#) 613
684 Utilities Reference

A B C D E F G H I J K L M N O P Q R S T U V W X Y Z
pr utility 270prenv 517previous-buffer 598previous-line 620, 658previous-page 621, 659previous-paragraph 621, 659previous-window 645, 659previous-word 620, 659print environment variables 272print files 270print hex value 54print process memory information 211print system identification 303print value of input character 54print working directory 260printenv utility 272procedure file 594
.login 278, 581
.logout 278, 581execute 539generate to copy files 104interpreter 532password 198
procedure file functionlist of directives 539
procedure files 505process
abort 186activate 14de-activate 301display list of running processes 273kill 186set CPU priority 294suspend 298wait for termination 346
process memoryprint usage infomation 211
procs utility 273profile
defined 514profile batchfiles option 519
Utilities Reference 685

A B C D E F G H I J K L M N O P Q R S T U V W X Y Z
profile utility 278programs
execute as overlay 125maintain, update, regenerate 207, 467
PROMPT environment variable 575prompt format string
customize 527push
current directory into stack 516HOME directory into stack 516
pushd 515pushd dir 516pushd -h 516pushd -num 516pushd -x 516
Qq modifier 510-q option 522qsort utility 280query-replace-string 631, 659quick sort 280quick-exit 616, 659quotation marks 643quote-character 623, 659quoted string constants 536
Rr modifier 509-r option 493, 522RAM
display free system RAM 221RC macro 483RDIR macro 482read buffer into window 645read commands from file 278read-file 609, 645, 659readln 520, 531
686 Utilities Reference

A B C D E F G H I J K L M N O P Q R S T U V W X Y Z
redraw-display 659referencing variables 534reformat
margins 636paragraph 593
region 617commands 632defined 627, 632
relocatable files 478remote system
communication with 55remove all files from directory 85remove device from system device table 81remove existing module directories 87remove files 84rename file 610rename utility 282repeat commands 599replace 617
kill buffer contents 626string 593
replace-string 630, 659required capabilities 651reset system 40restart a construct
continue 542retrieve deleted OS-9 files 337retrieve deleted OS-9000 files 339return integer ASCII value
asc() 561RFLAGS macro 482ROM
make for BSP 248romsplit utility 284RS-232 serial port communications 55
S-s option 493, 523save memory module to file 286save utility 286
Utilities Reference 687

A B C D E F G H I J K L M N O P Q R S T U V W X Y Z
save-file 611, 616, 659SCF control characters 491screen editor 335, 591screen-oriented disk editor 26scroll-next-down 646, 659scroll-next-up 646, 659SDIR macro 482search 593, 612, 617
string 628search history buffer 496search-forward 629, 660search-reverse 629, 660sector allocation map 76Security
change/examine file attributes,file securitychange/examine attributes 19
select-buffer 640, 645, 660separators
command line 571set 517
device pathlist alias 16environment variables 290process priority 294shell options 288system clock 291
set editing control keys 491set utility 288setenv utility 290set-fill-column 636, 660setime utility 291set-mark 627, 633, 660setpr utility 294shell 608
environment variables 574login 582set options 288, 573
SHELL environment variable 200, 575shell script
rules for writing 532shell utility
OS-9 295
688 Utilities Reference

A B C D E F G H I J K L M N O P Q R S T U V W X Y Z
shell variables% 507%() 507
shell, continued 297shell-command 611, 660shrink-window 646, 660single word command line substitutions 18sleep utility 298special character constants 650split file 284split-current-window 645, 660S-record files
convert to binary 32, 127start batchfile execution 504start batchfile process 504start uMACS 606status
display cache 98status line
buffer position 642window 604
string capability 649string functions
list of 560su utility 300substitutions
single word command line 18supervise idle terminals 332suspend process 298suspend utility 301switch construct
example 546switching windows 605symbolic debugging 364, 394syntax
directive 540sysid utility 303system
clockactivate/set 291
display date and time 75
Utilities Reference 689

A B C D E F G H I J K L M N O P Q R S T U V W X Y Z
display events 122display free RAM 221
system callsF$DExec 80, 363F$DFork 80, 363F$STrap 370, 371F$TLink 370
system level debuggerinvoke 40
Tt modifier 510-t option 513tab 593, 613, 624tape
archive 309controller 305put files on 306
tape utility 305tapegen utility 307tapestart utility 308tar utility 309tee utility 311temporary batchfiles 504TERM environment variable 576, 648termcap
file 592file location 647
terminalsupervise idle terminals 332
terminates batchfile creation 504test, debug 68000 machine language programs 80text
convert DOS files to OS-9 101echo to output path 112
text filelist contents 189
text formatting 635time
display 75
690 Utilities Reference

A B C D E F G H I J K L M N O P Q R S T U V W X Y Z
timesharing systemlogin 197logout 201
tmodeparameter names 315
tmode utility 491touch utility 326tr utility 328transfer of control
goto 541transfer sequential files 179transliterate characters 328transparent transmissions 56transpose-characters 637, 660tsmon utility 332two stroke commands 597
U-u option 513, 523umacs 606umacs utility 335, 591unassign 502unassign utility 336unbind-key 597, 660unconditional branch
list of directives 539undel utility 337, 339unlink memory module 341unlink utility 341unsetenv utility 343upload of files 62upper case 636USER environment variable 200, 575user input 601
V-v option 606variable
Utilities Reference 691

A B C D E F G H I J K L M N O P Q R S T U V W X Y Z
global 534local 534
variable substitution 507variables
list of directives 539view history buffer
hist 492VIEW mode 606, 610, 612, 623view-file 610, 660
Ww utility 346wait for process(es) to terminate 346wait utility 346what utility 345which 518wildcard 508wildcards
command line 571window 618
and buffer handling 604commands 644status line 604
worddefined 620
wordscount of 73
wrap line 612WRAP mode 612, 636write-file 611, 616, 661
Xxmode
parameter names 352
Yyank 626, 627, 633, 661
692 Utilities Reference

693
Product Discrepancy Report
To: Microware Customer Support
FAX: 515-224-1352
From:___________________________________________
Company:_______________________________________
Phone:__________________________________________
Fax:_____________________Email:__________________
Product Name:
Description of Problem:________________________________________________
________________________________________________
________________________________________________
________________________________________________
________________________________________________
________________________________________________
________________________________________________
________________________________________________
________________________________________________
________________________________________________
Host Platform_____________________________________
Target Platform____________________________________