Embed Size (px)
Citation preview
Vicnet Internet training course
Workbook 4
Introduction to email
Easy English workbook
March 2011
Copyright © State Library of Victoria, 2011
You can
Share – copy it or give it to other people.
Remix – change it.
These are the rules
Attribution – You must write Copyright © State Library of Victoria.
Non-commercial – You cannot sell it or use it to make money.
Share Alike – If you change it, the new work must have the same
license as this work.
For more information, contact Vicnet at the State Library of Victoria
Phone (03) 8664 7001
Email [email protected]
Address 328 Swanston Street, Melbourne VIC 3000
Website www.vicnet.net.au
This publication is licensed under the Creative Commons Attribution-Non-
Commercial-ShareAlike 2.5 Australia License. To view a copy of this license,
visit http://creativecomms.org/licenses/by-nc-sa/2.5/au/
2
About Vicnet Internet training workbooks
This workbook is part of a series of workbooks in
Easy English. They provide basic information on
how to use the Internet.
You can see all the workbooks on the Vicnet
website: www.vicnet.net.au/publications
The workbooks were written by
Vicnet at the State Library of Victoria
The funding came from Department of Planning
and Community Development
When writing this workbook Vicnet used
computers with
Microsoft Windows 7 operating system
Internet Explorer version 8
3
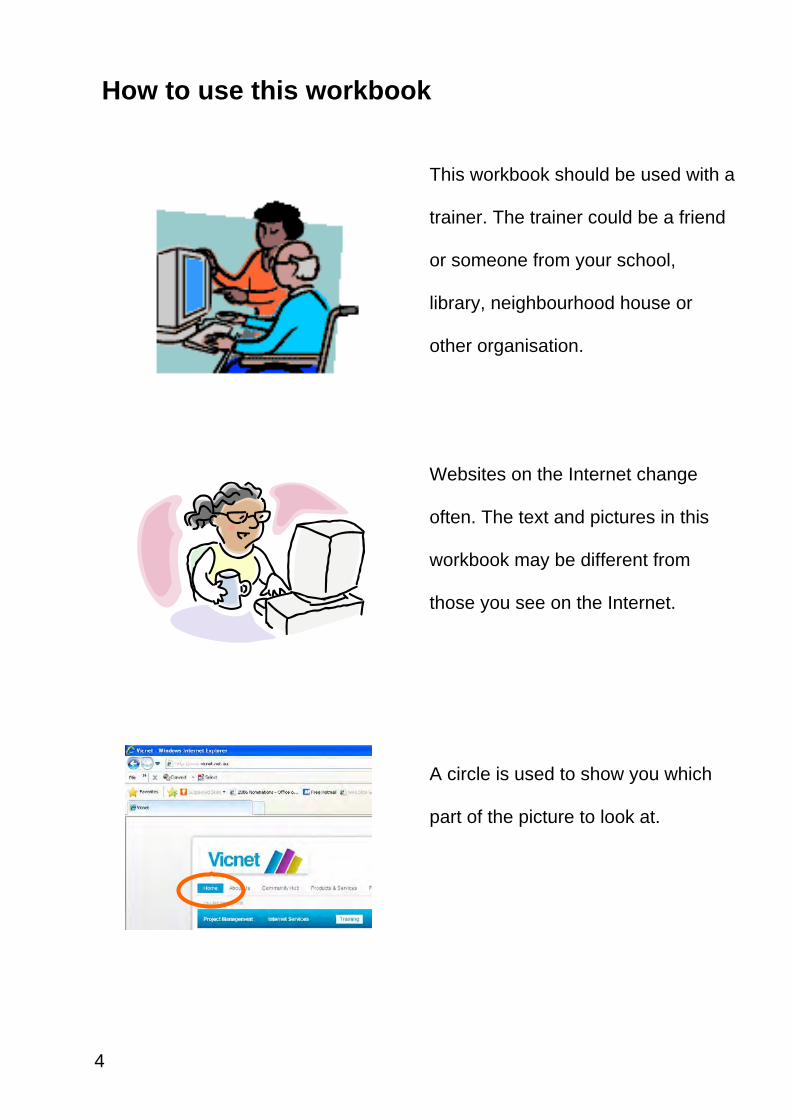
How to use this workbook
This workbook should be used with a
trainer. The trainer could be a friend
or someone from your school,
library, neighbourhood house or
other organisation.
Websites on the Internet change
often. The text and pictures in this
workbook may be different from
those you see on the Internet.
A circle is used to show you which
part of the picture to look at.
4
5
What is in this Workbook
What is email?.................................................................... 7
What is an email address?................................................. 8
How to use email.............................................................. 10
Start your email ................................................................ 13
Write a new email............................................................. 23
Contacts ........................................................................... 26
Add new contacts............................................................. 29
Sign out of your email ...................................................... 33
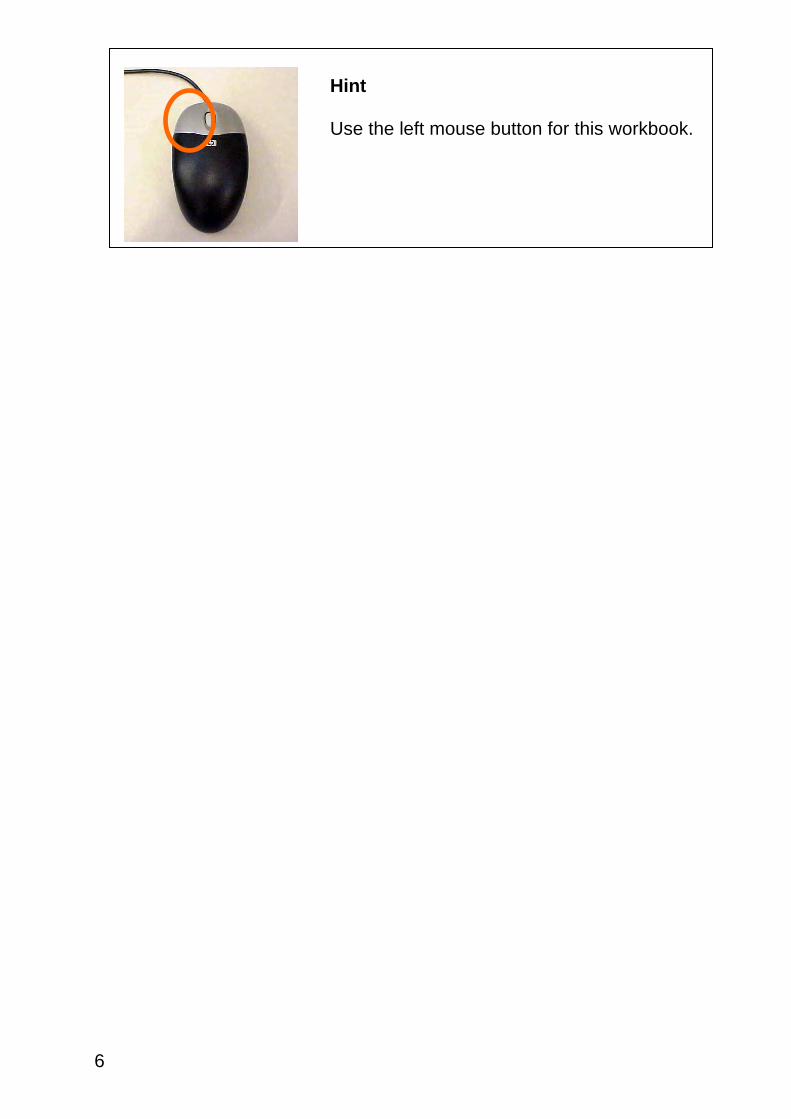
Hint
Use the left mouse button for this workbook.
6
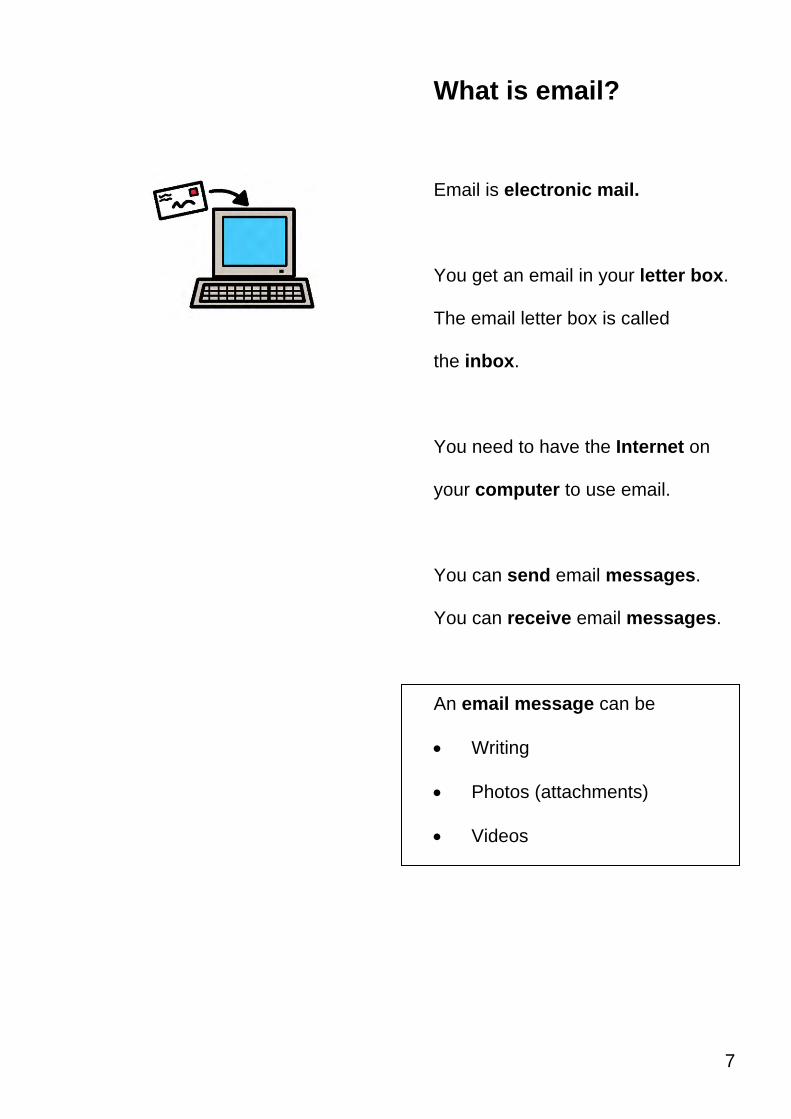
What is email?
Email is electronic mail.
You get an email in your letter box.
The email letter box is called
the inbox.
You need to have the Internet on
your computer to use email.
You can send email messages.
You can receive email messages.
An email message can be
Writing
Photos (attachments)
Videos
7
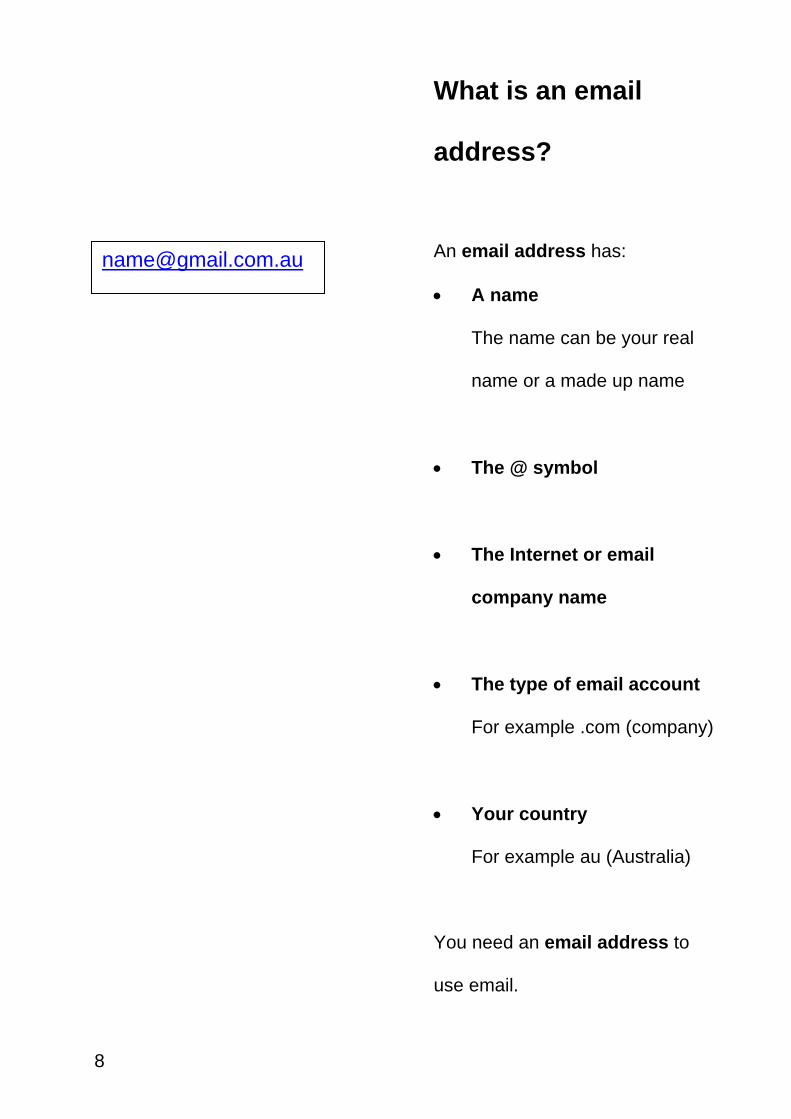
What is an email
address?
An email address has: [email protected]
A name
The name can be your real
name or a made up name
The @ symbol
The Internet or email
company name
The type of email account
For example .com (company)
Your country
For example au (Australia)
You need an email address to
use email.
8
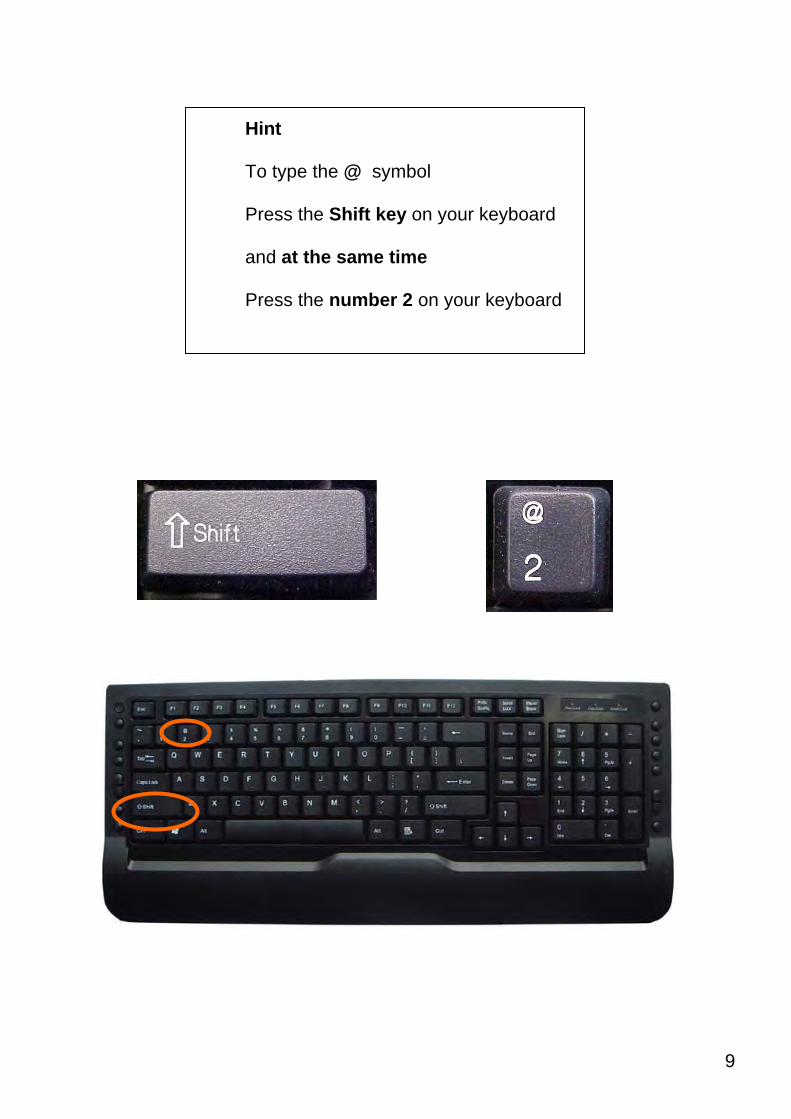
Hint
To type the @ symbol
Press the Shift key on your keyboard
and at the same time
Press the number 2 on your keyboard
9
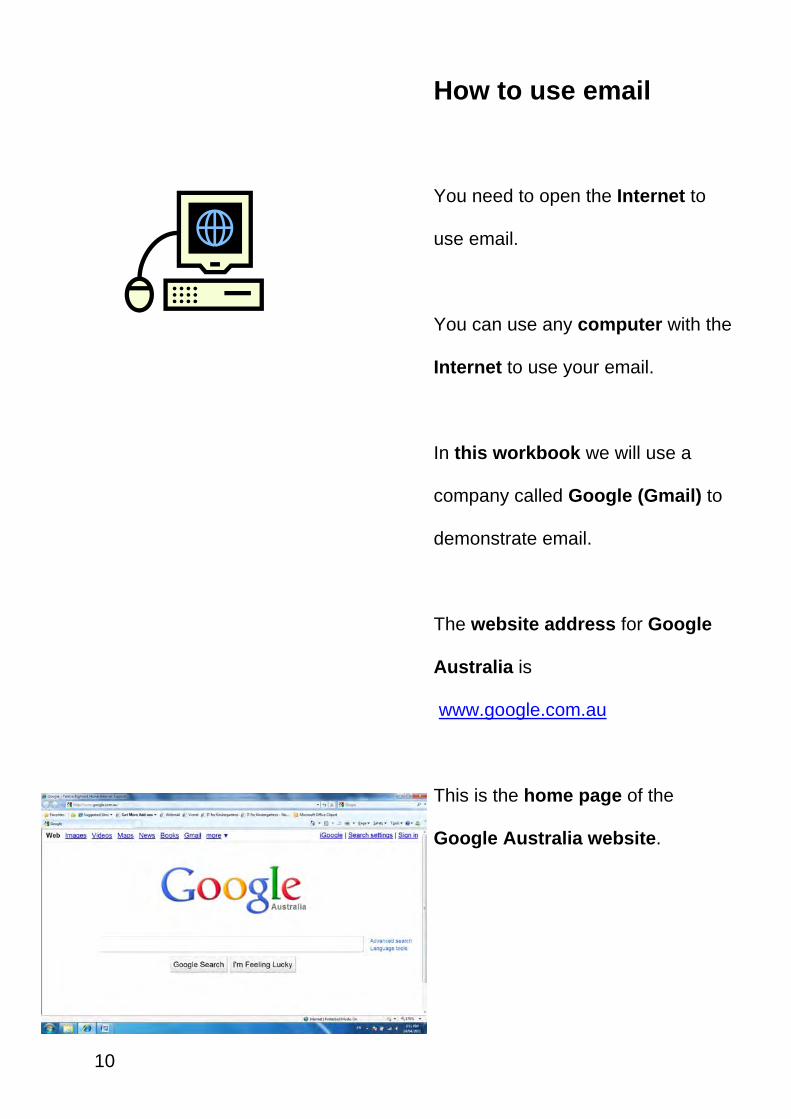
How to use email
You need to open the Internet to
use email.
10
You can use any computer with the
Internet to use your email.
In this workbook we will use a
company called Google (Gmail) to
demonstrate email.
The website address for Google
Australia is
www.google.com.au
This is the home page of the
Google Australia website.
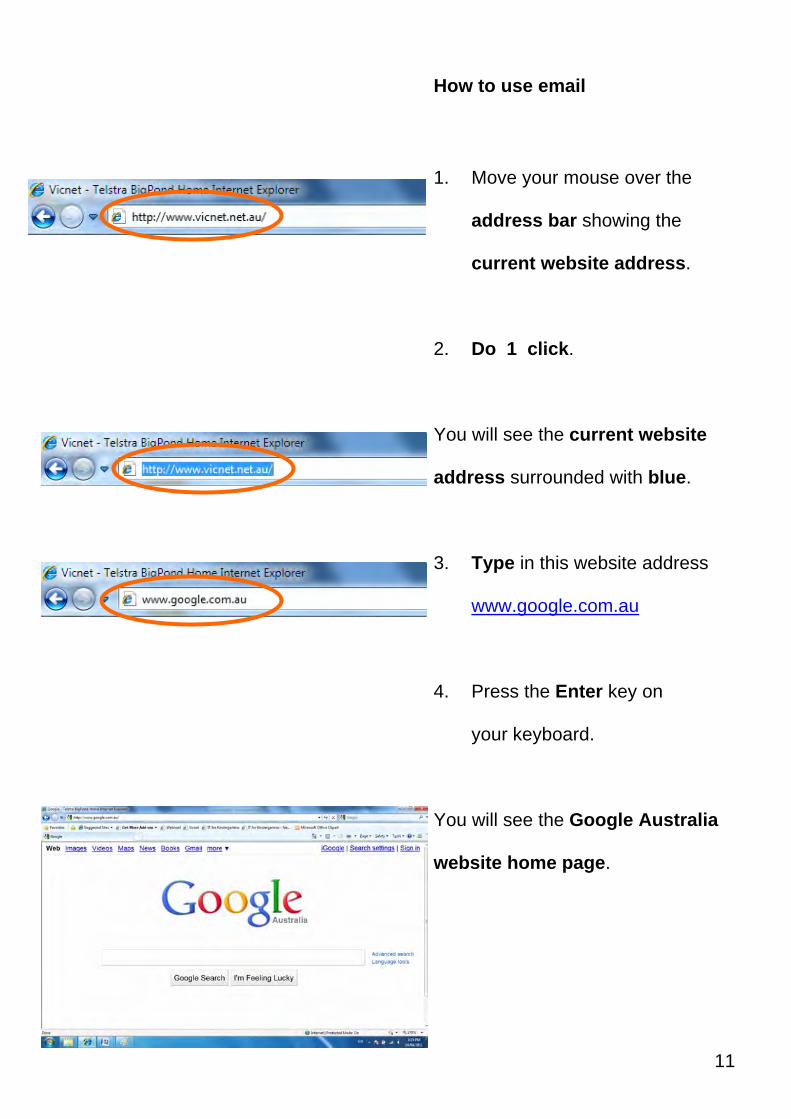
How to use email
1. Move your mouse over the
address bar showing the
current website address.
2. Do 1 click.
You will see the current website
address surrounded with blue.
3. Type in this website address
www.google.com.au
4. Press the Enter key on
your keyboard.
You will see the Google Australia
website home page.
11
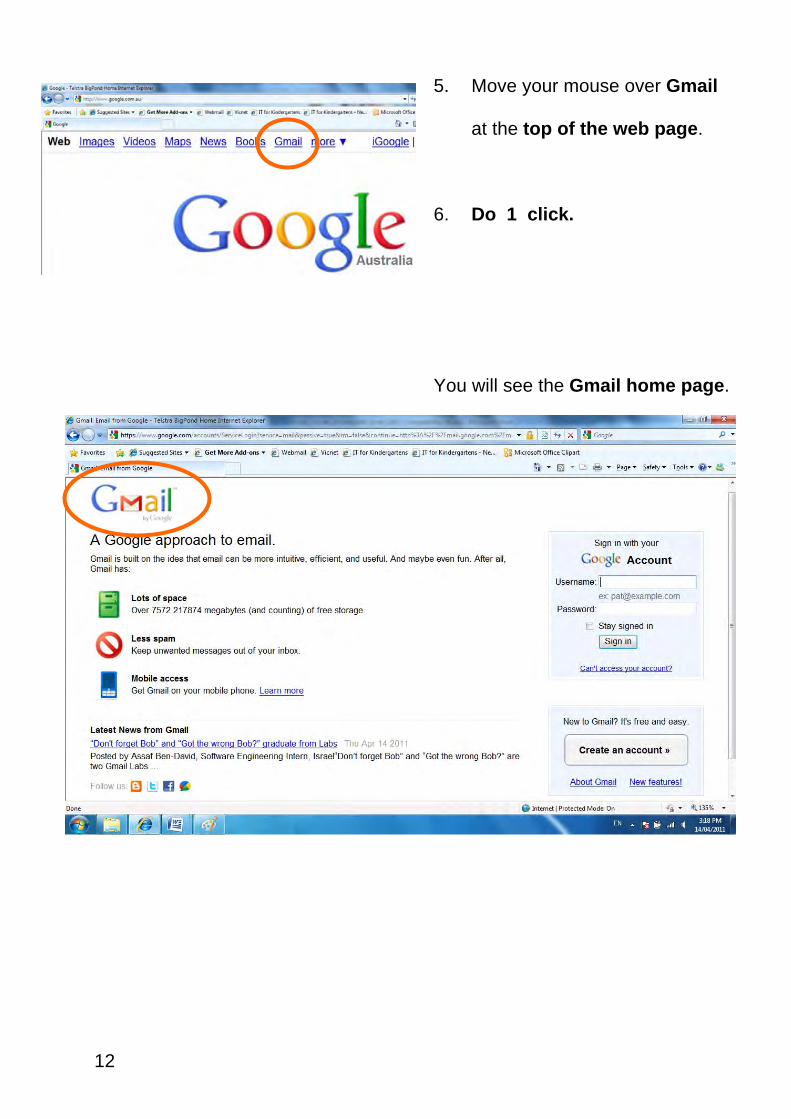
5. Move your mouse over Gmail
at the top of the web page.
6. Do 1 click.
You will see the Gmail home page.
12
13
Start your email
To start using your email account
(Gmail) you will need to sign in.
Sign in
When you sign in it is like using your
key to unlock your front door.
Use the correct key to open the door
and go inside.
Username
The username is the first part of
your email address.
Password
Your password can be a word or
numbers or both, of your choice
Keep your password a secret. This
will stop other people using
your email.
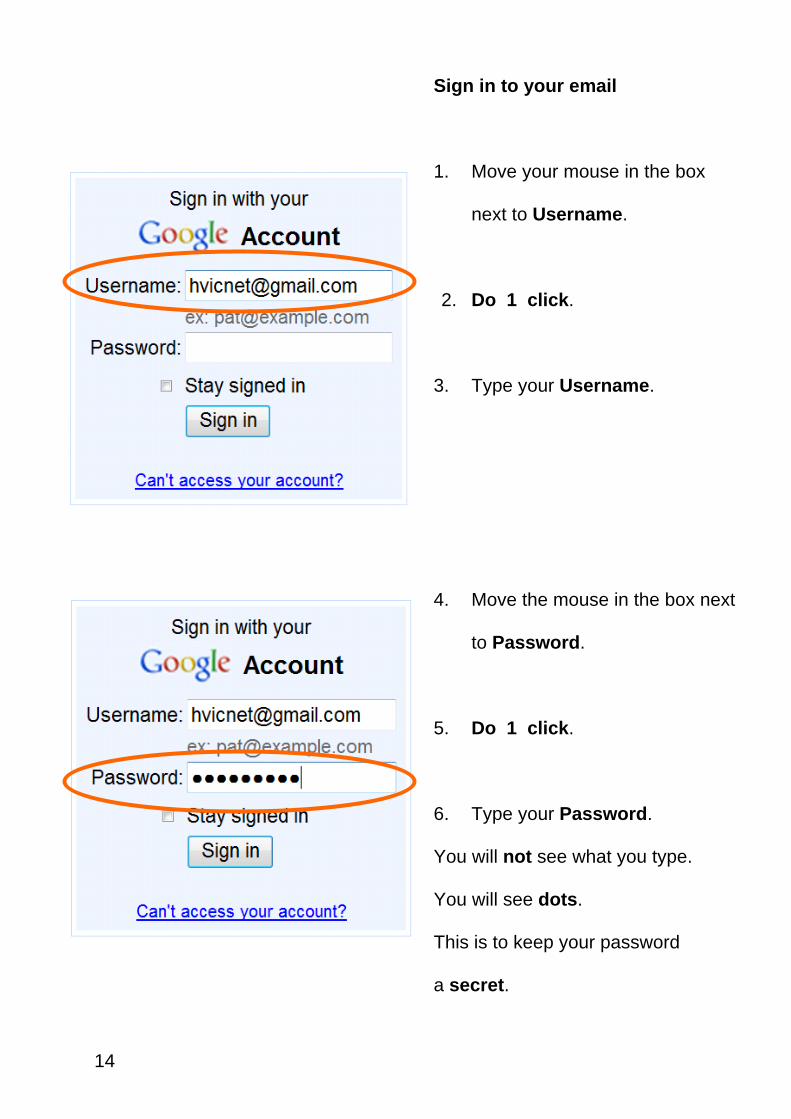
Sign in to your email
1. Move your mouse in the box
next to Username.
14
2. Do 1 click.
3. Type your Username.
4. Move the mouse in the box next
to Password.
5. Do 1 click.
6. Type your Password.
You will not see what you type.
You will see dots.
This is to keep your password
a secret.
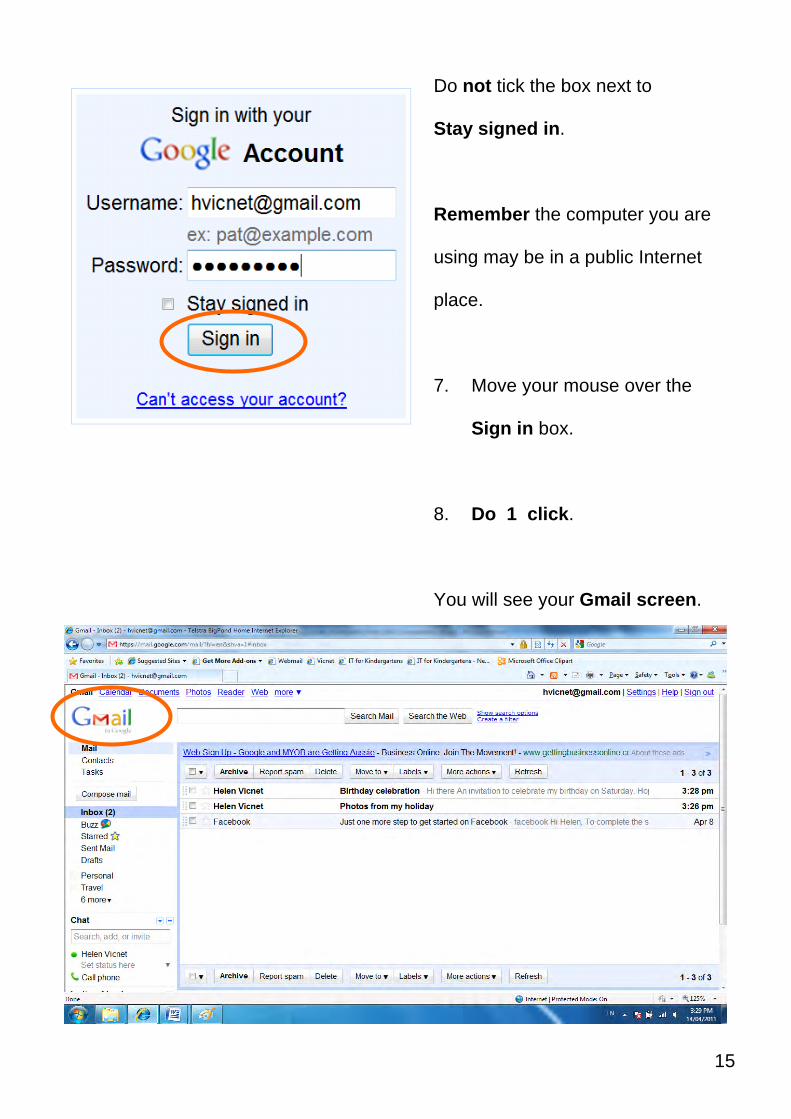
Do not tick the box next to
Stay signed in.
Remember the computer you are
using may be in a public Internet
place.
7. Move your mouse over the
Sign in box.
8. Do 1 click.
You will see your Gmail screen.
15
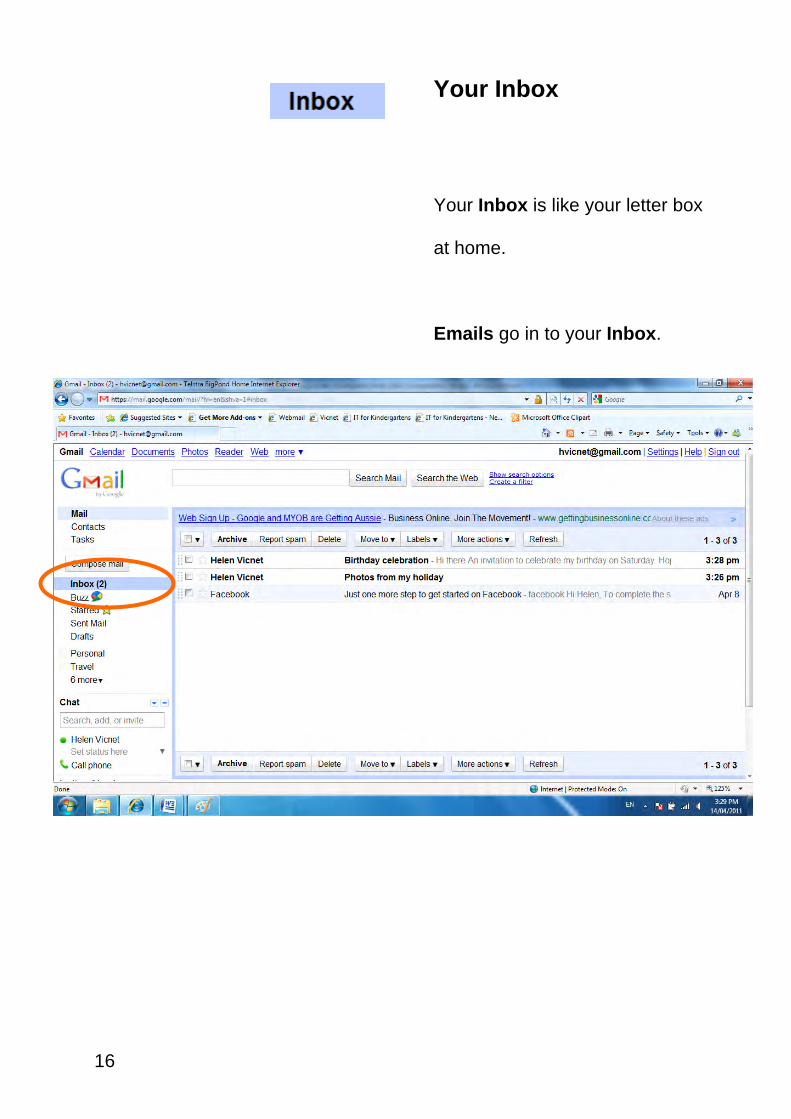
Your Inbox
Your Inbox is like your letter box
at home.
Emails go in to your Inbox.
16
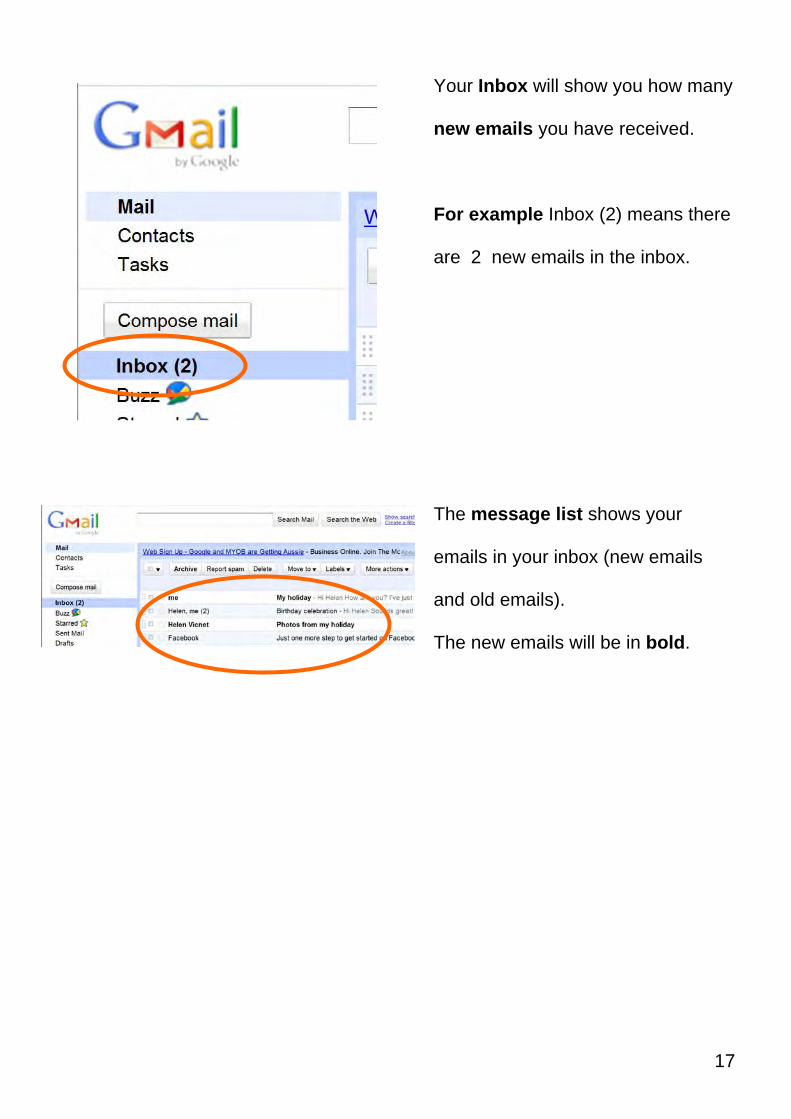
Your Inbox will show you how many
new emails you have received.
17
For example Inbox (2) means there
are 2 new emails in the inbox.
The message list shows your
emails in your inbox (new emails
and old emails).
The new emails will be in bold.
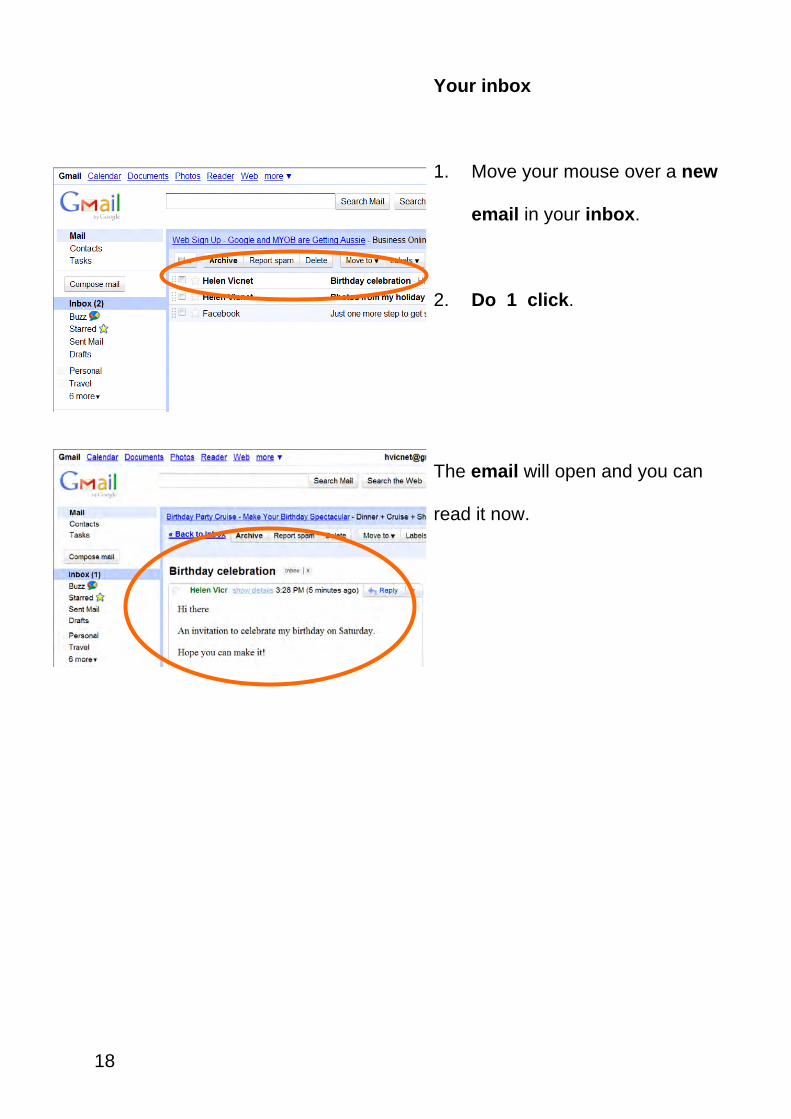
Your inbox
1. Move your mouse over a new
email in your inbox.
2. Do 1 click.
18
The email will open and you can
read it now.
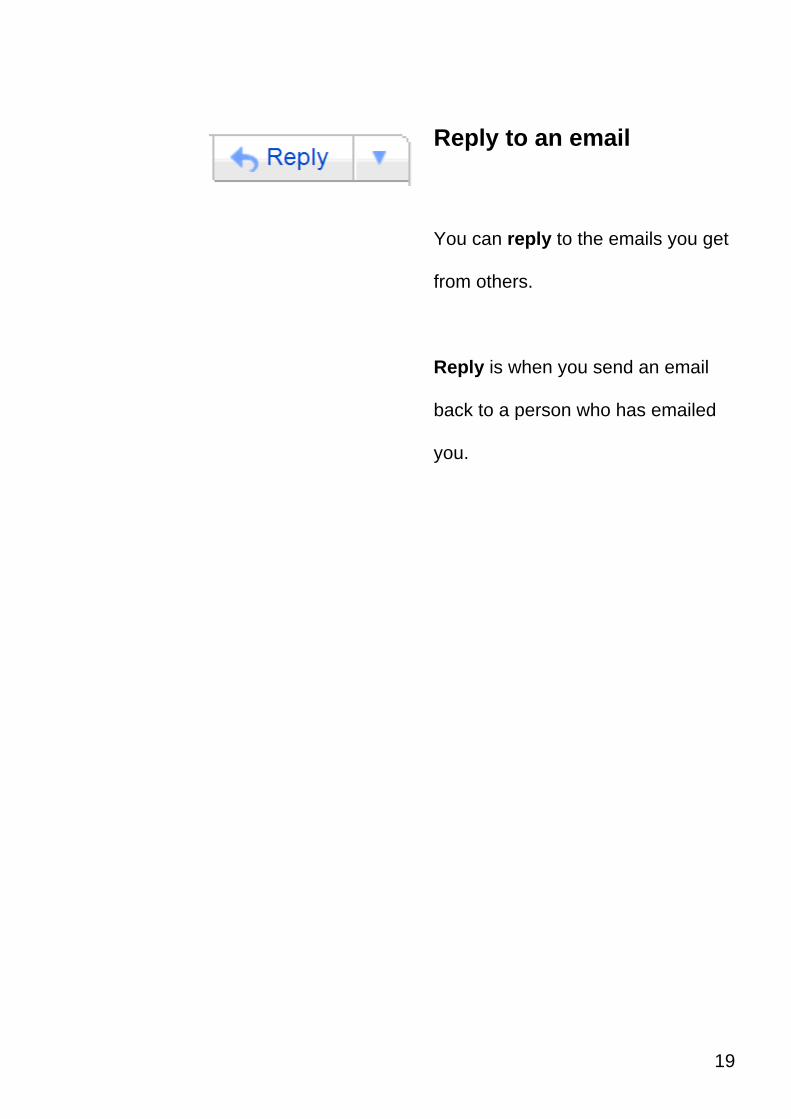
Reply to an email
You can reply to the emails you get
from others.
Reply is when you send an email
back to a person who has emailed
you.
19
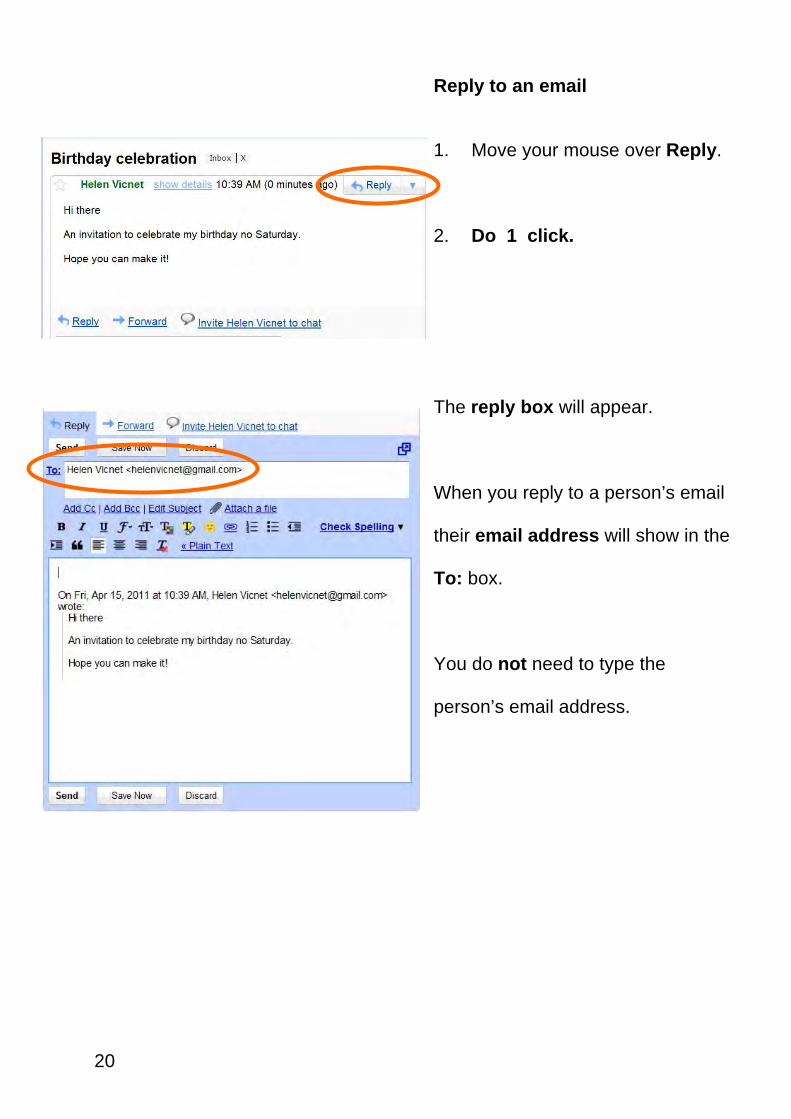
Reply to an email
1. Move your mouse over Reply.
2. Do 1 click.
The reply box will appear.
When you reply to a person’s email
their email address will show in the
To: box.
You do not need to type the
person’s email address.
20
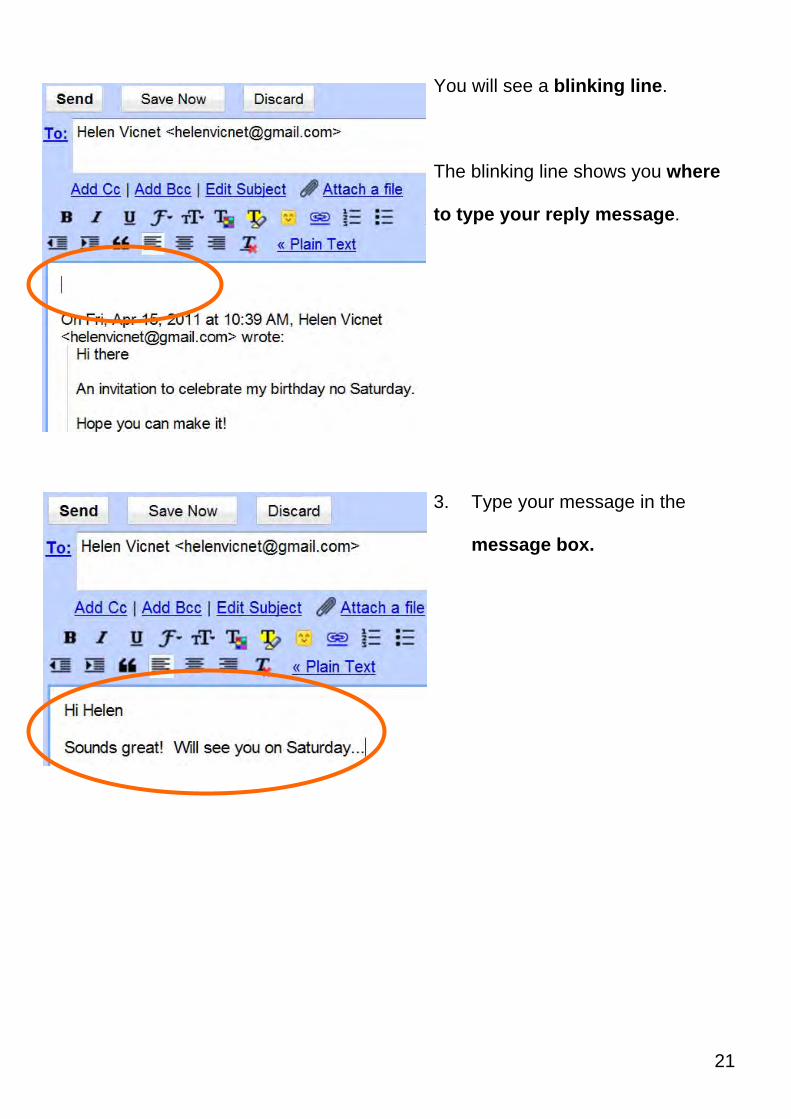
You will see a blinking line.
21
The blinking line shows you where
to type your reply message.
3. Type your message in the
message box.
22
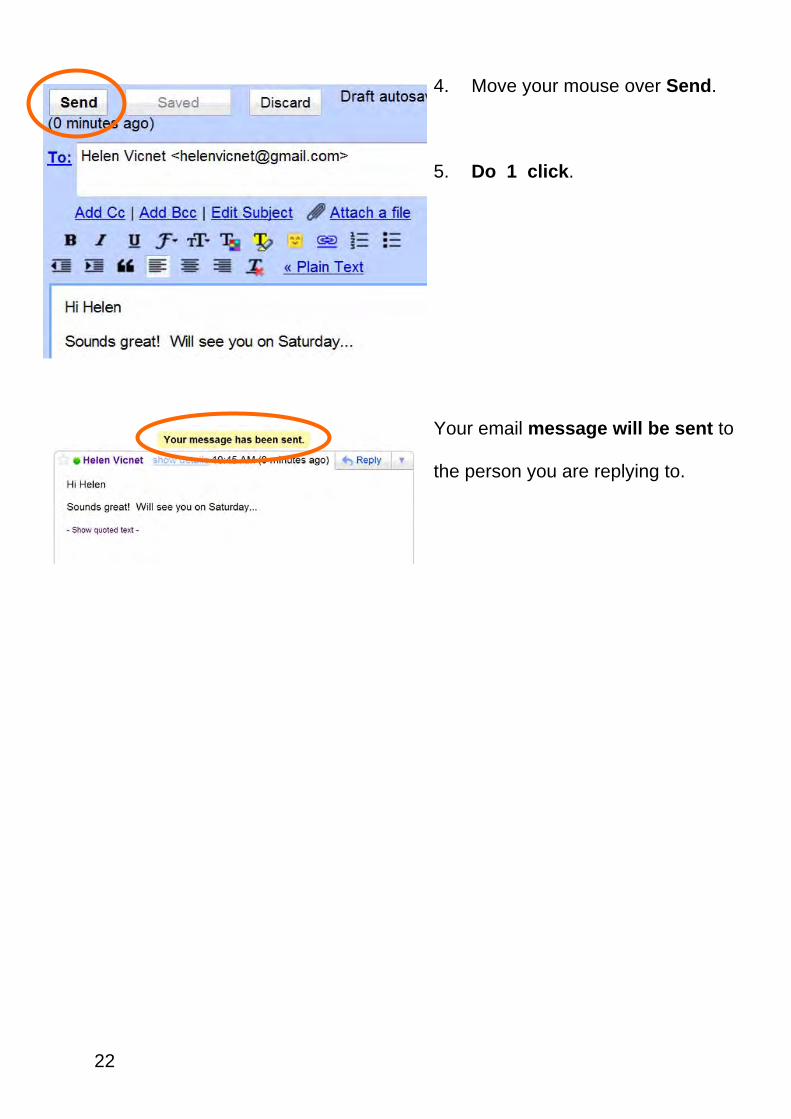
4. Move your mouse over Send.
5. Do 1 click.
Your email message will be sent to
the person you are replying to.
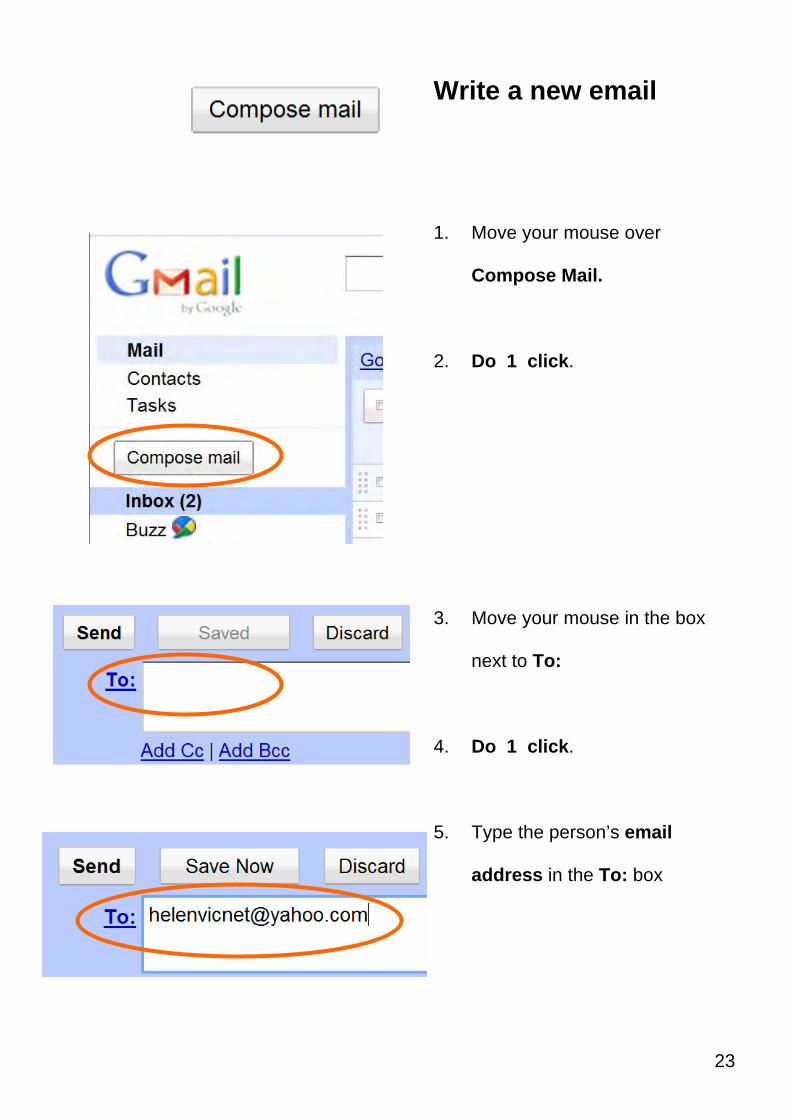
Write a new email
1. Move your mouse over
Compose Mail.
2. Do 1 click.
3. Move your mouse in the box
next to To:
4. Do 1 click.
5. Type the person’s email
address in the To: box
23
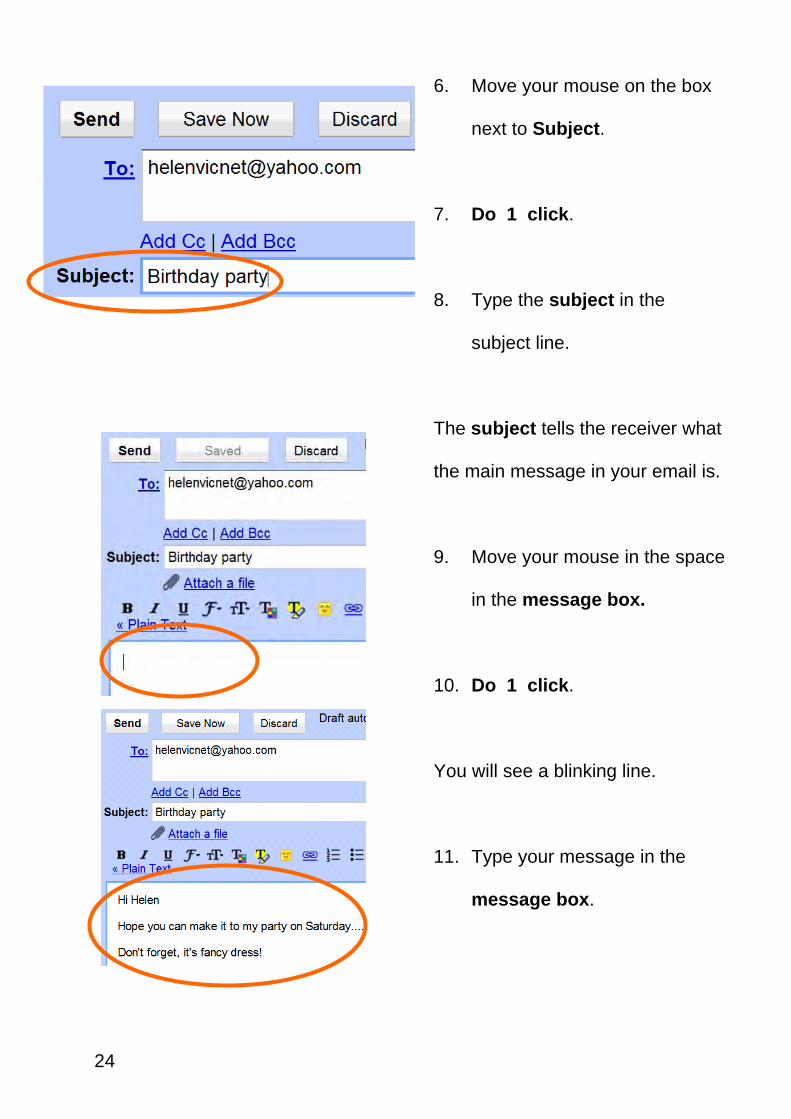
6. Move your mouse on the box
next to Subject.
7. Do 1 click.
8. Type the subject in the
subject line.
The subject tells the receiver what
the main message in your email is.
9. Move your mouse in the space
in the message box.
10. Do 1 click.
You will see a blinking line.
11. Type your message in the
message box.
24
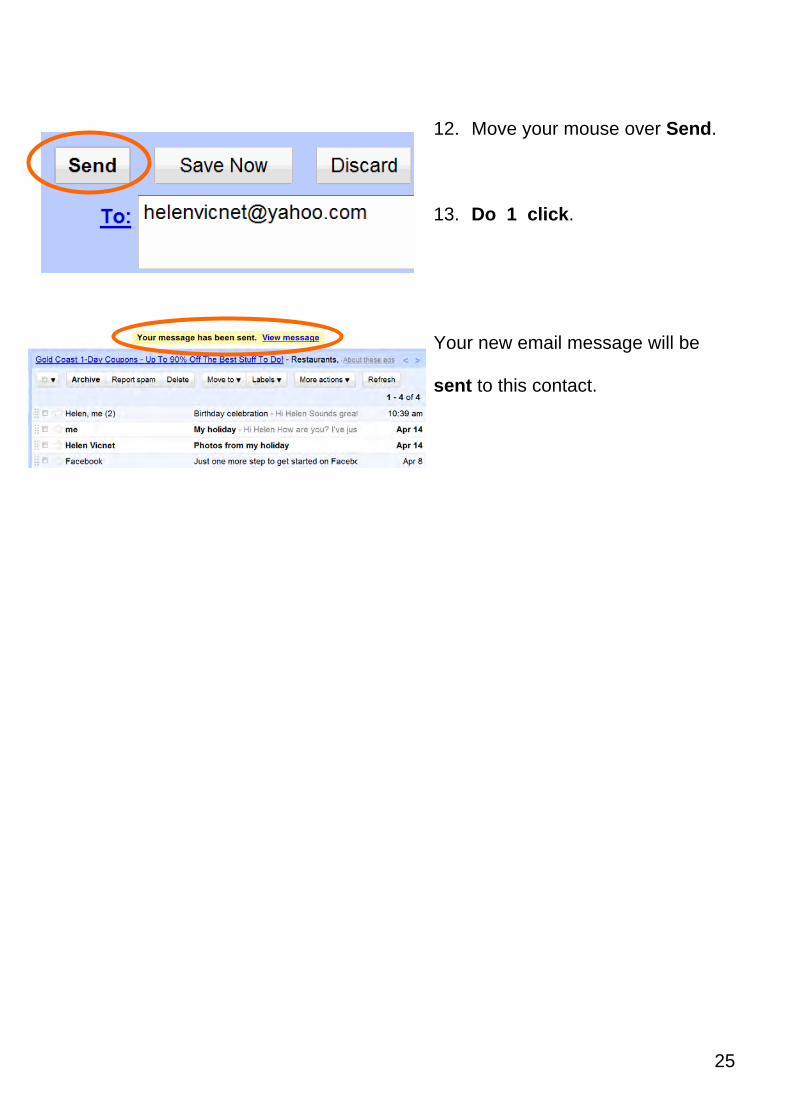
12. Move your mouse over Send.
13. Do 1 click.
Your new email message will be
sent to this contact.
25
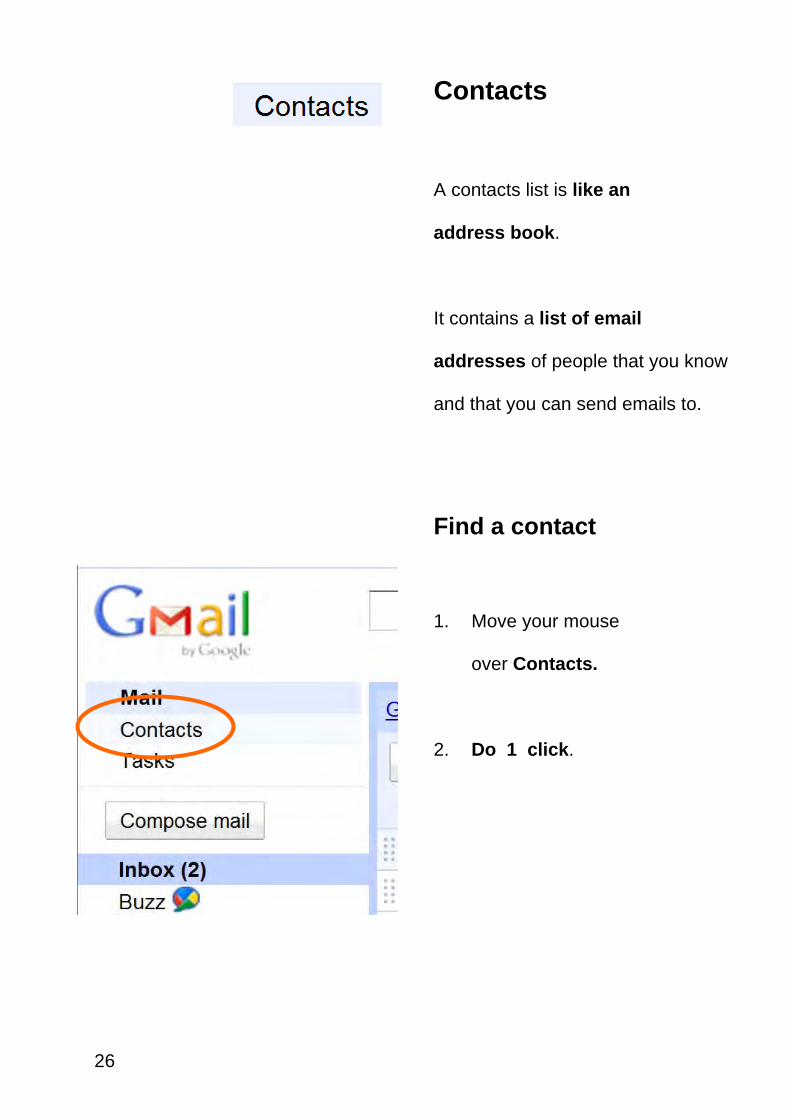
Contacts
A contacts list is like an
address book.
It contains a list of email
addresses of people that you know
and that you can send emails to.
Find a contact
26
1. Move your mouse
over Contacts.
2. Do 1 click.
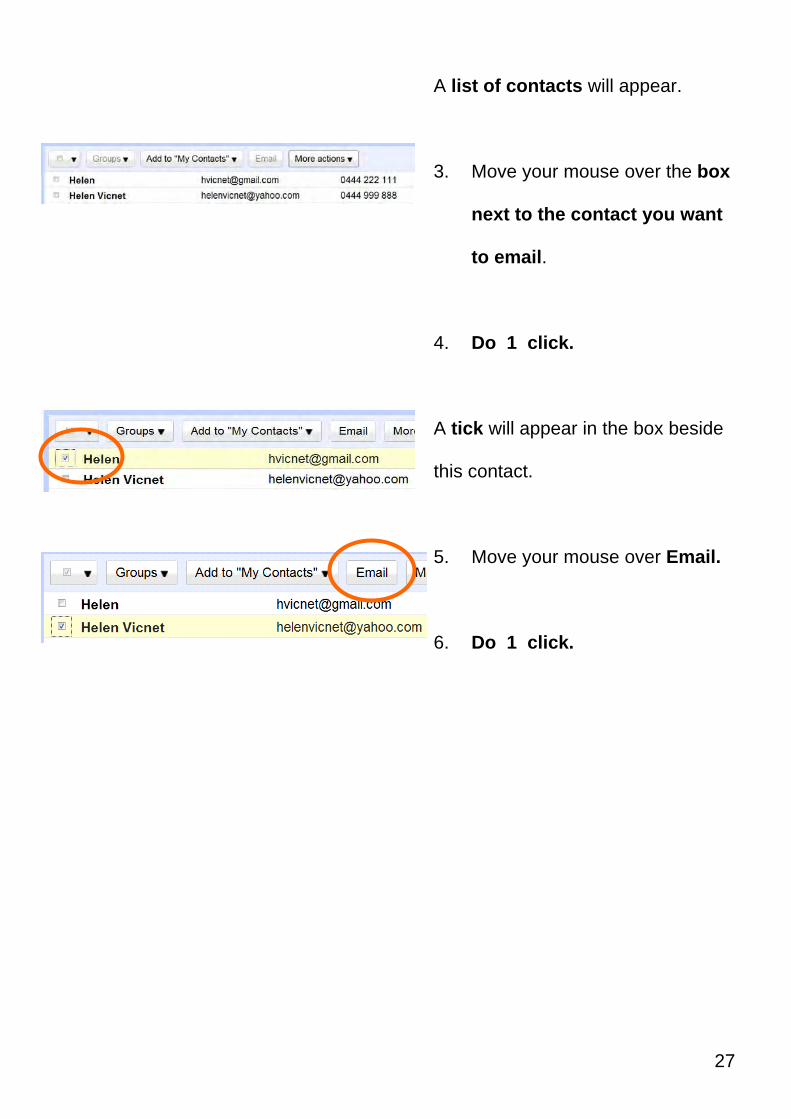
A list of contacts will appear.
3. Move your mouse over the box
next to the contact you want
to email.
4. Do 1 click.
A tick will appear in the box beside
this contact.
27
5. Move your mouse over Email.
6. Do 1 click.
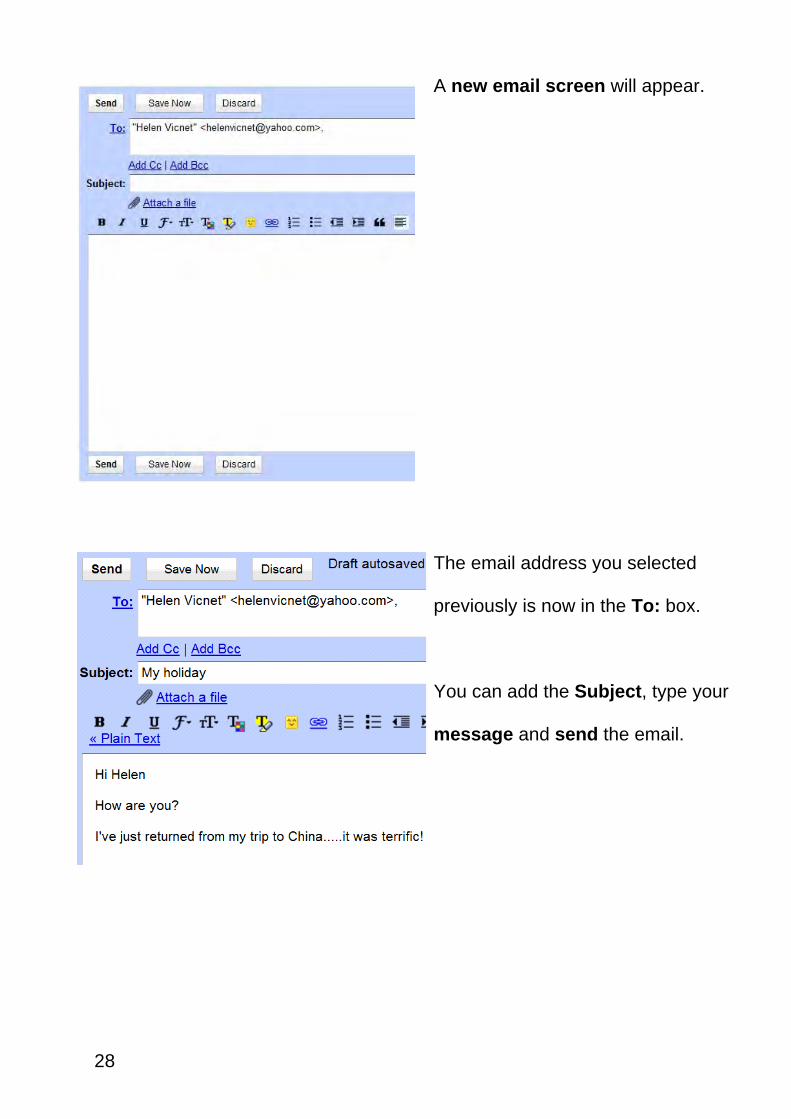
A new email screen will appear.
The email address you selected
previously is now in the To: box.
You can add the Subject, type your
message and send the email.
28
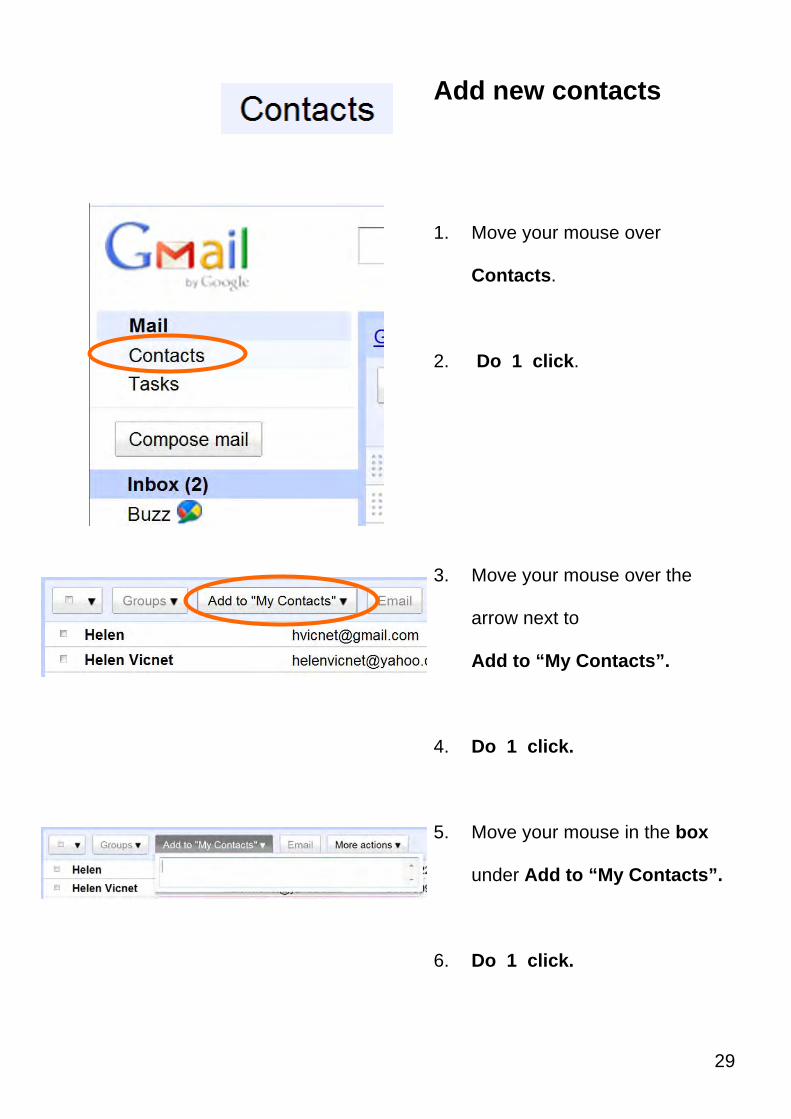
Add new contacts
1. Move your mouse over
Contacts.
2. Do 1 click.
3. Move your mouse over the
arrow next to
Add to “My Contacts”.
29
4. Do 1 click.
5. Move your mouse in the box
under Add to “My Contacts”.
6. Do 1 click.
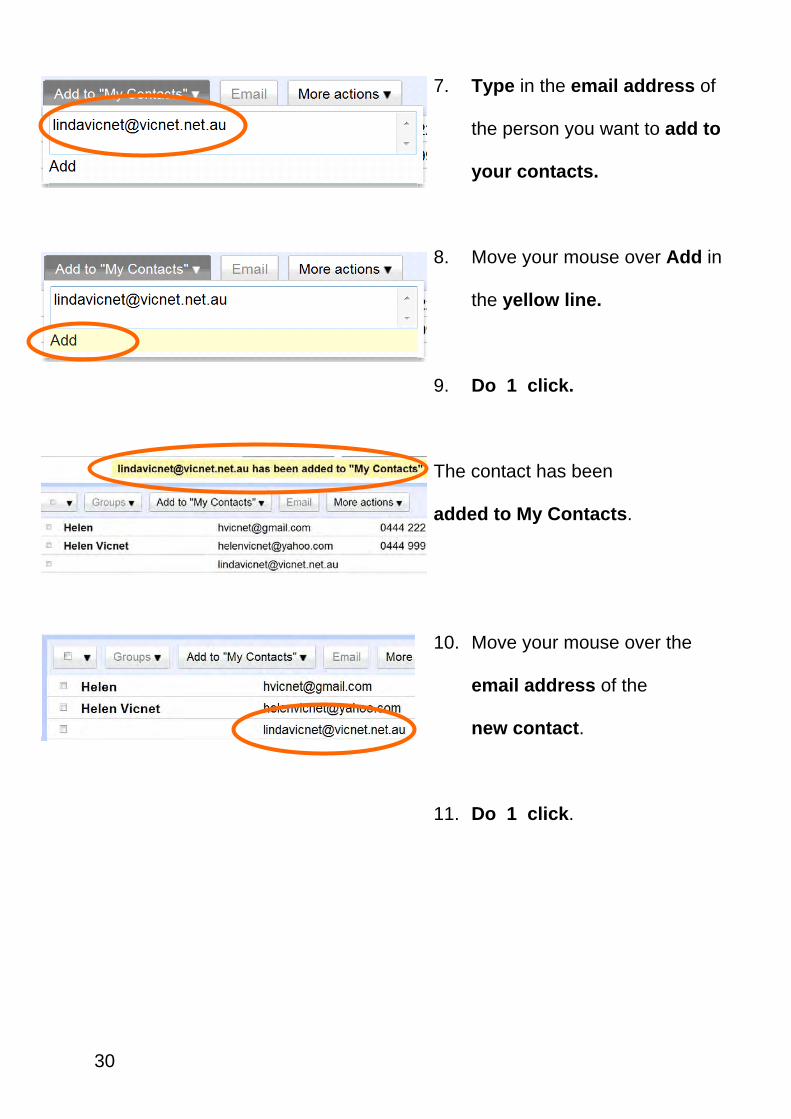
7. Type in the email address of
the person you want to add to
your contacts.
8. Move your mouse over Add in
the yellow line.
9. Do 1 click.
The contact has been
added to My Contacts.
10. Move your mouse over the
email address of the
new contact.
11. Do 1 click.
30
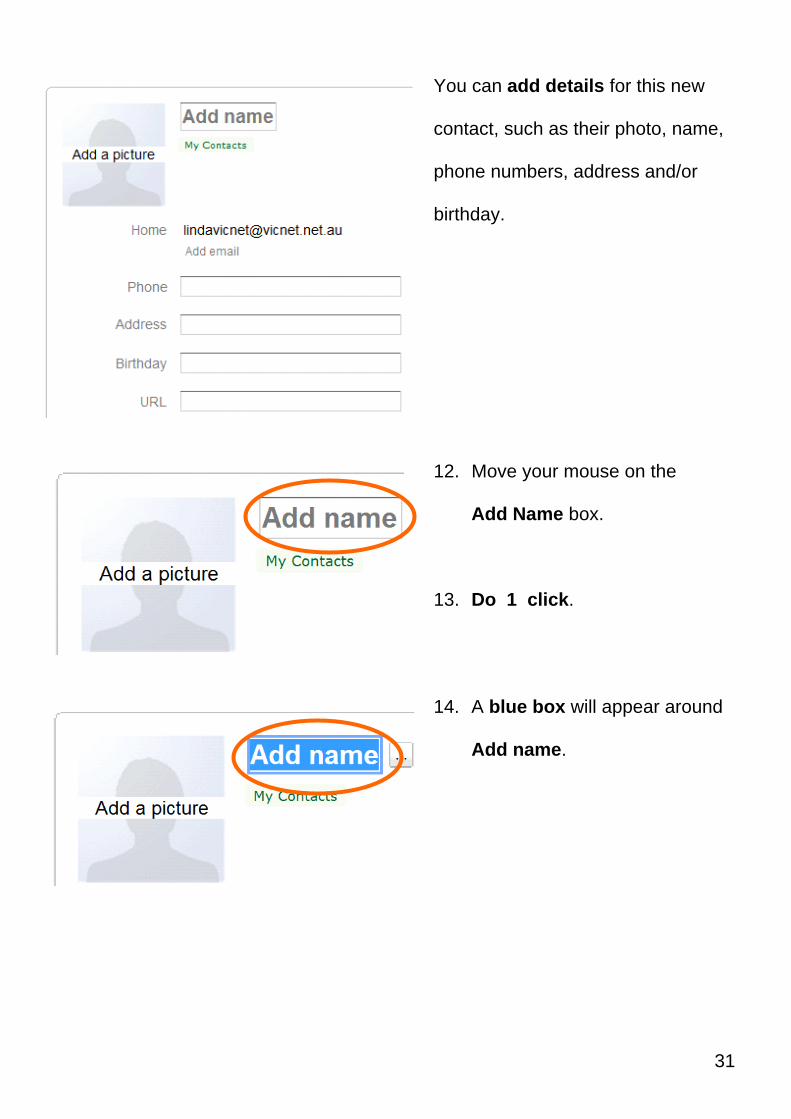
You can add details for this new
contact, such as their photo, name,
phone numbers, address and/or
birthday.
31
12. Move your mouse on the
Add Name box.
13. Do 1 click.
14. A blue box will appear around
Add name.
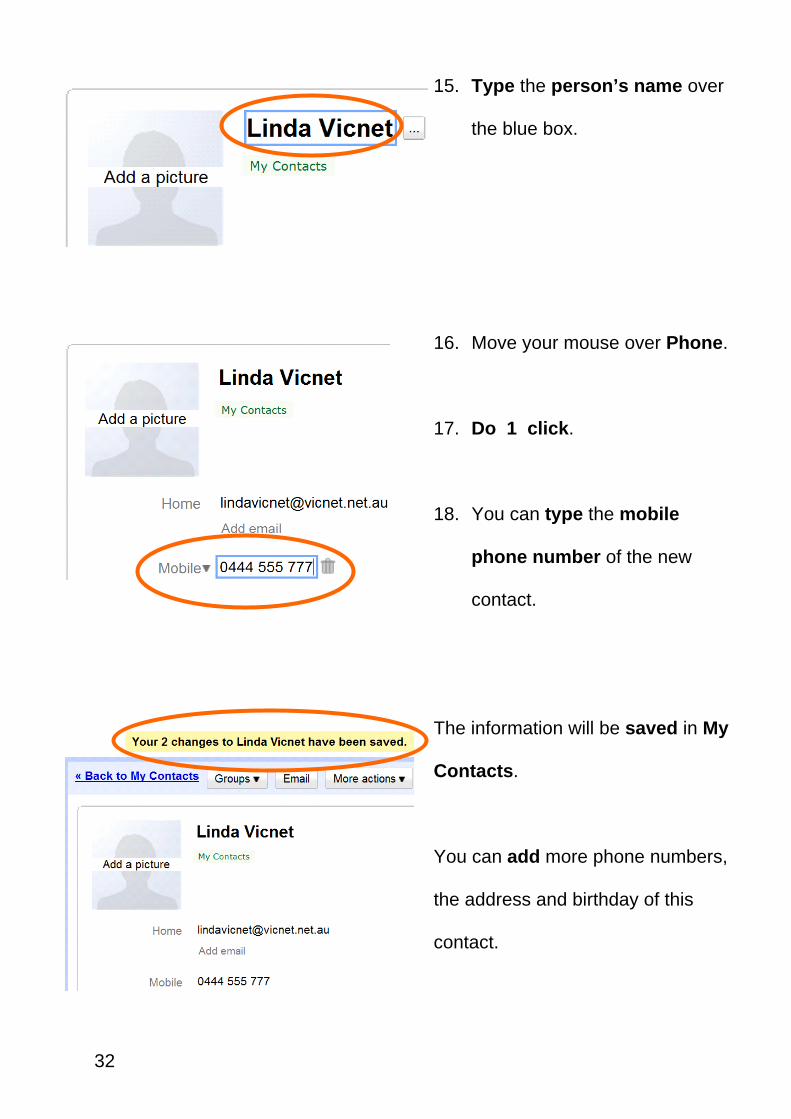
15. Type the person’s name over
the blue box.
16. Move your mouse over Phone.
17. Do 1 click.
18. You can type the mobile
phone number of the new
contact.
The information will be saved in My
Contacts.
You can add more phone numbers,
the address and birthday of this
contact.
32
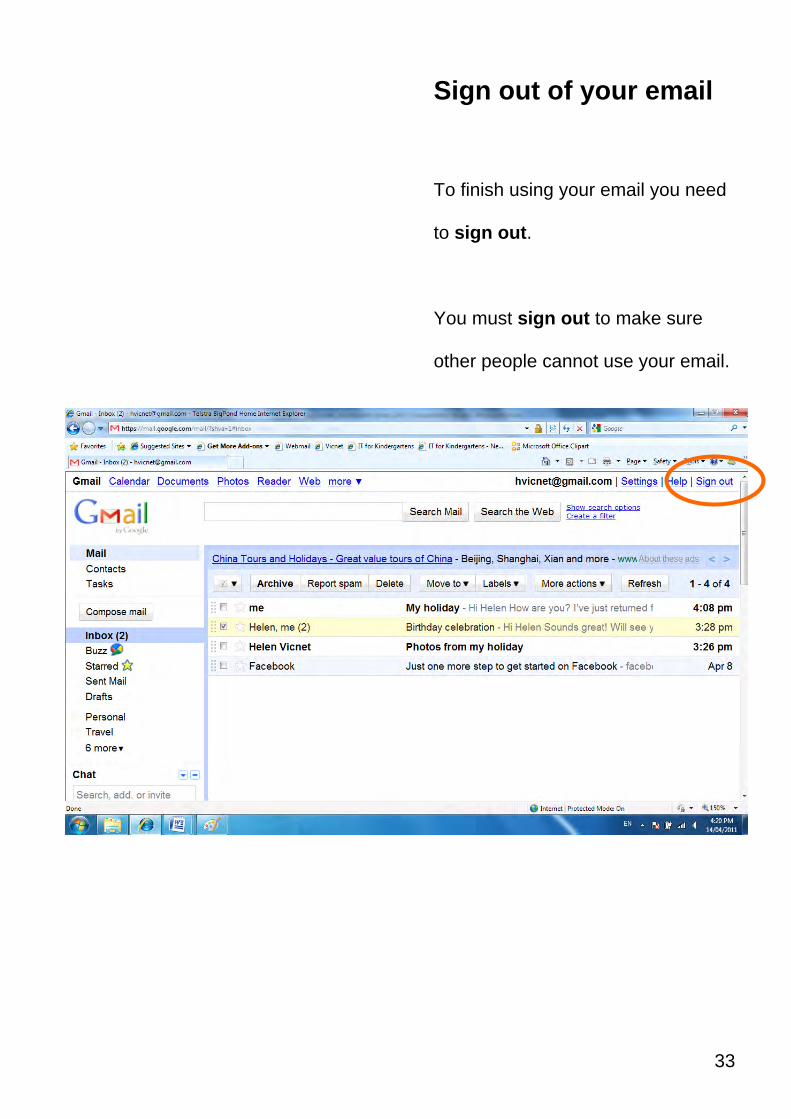
Sign out of your email
To finish using your email you need
to sign out.
You must sign out to make sure
other people cannot use your email.
33
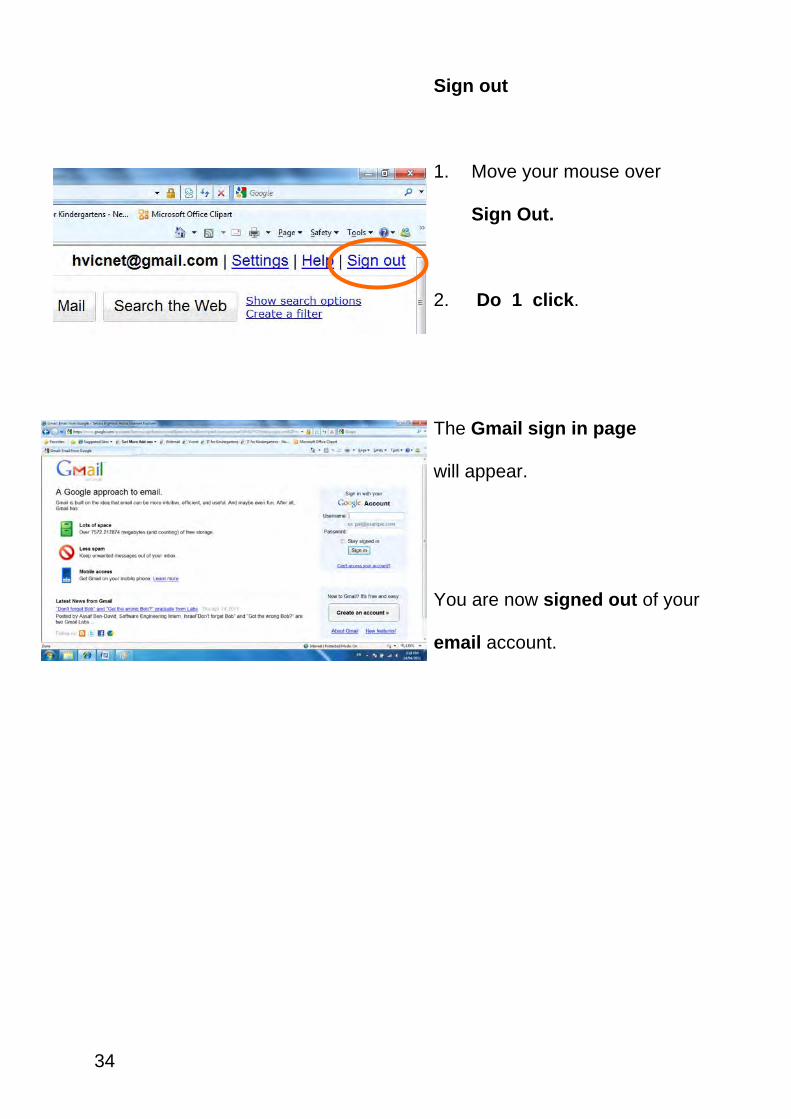
Sign out
1. Move your mouse over
Sign Out.
2. Do 1 click.
The Gmail sign in page
will appear.
You are now signed out of your
email account.
34