Embed Size (px)
Citation preview

Writing Lessons for Personal Narrative - Spanish 2nd Grade, CRM 4, Arcs 5-8
(4 Weeks of Lessons)
Resources Needed for this Unit:
The following books are great mentor texts for organization of a personal
narrative.
“Dogzilla” by Dave Pilkey
“Daisy Comes Home” by Jan Brett
“Alexander y el día terrible, horrible, espantoso, horroroso” by Judith
Viorst (also could pick one small piece of story and elaborate on for
personal narrative)
“Junie B. Jones no es una ladrona” by Barbara Parks
“Brave Margaret” by Robert De San Souci
“Me llamo Celia” by Monica Brown
“It’s All About You: Writing Your Own Journal” by Nancy Loewen
The following are great personal narrative examples:
“When I Was Young in the Mountain” by Cynthia Rylant
“Amelia Bedelia” by Peggy Parish
“Me llamo Gabriela” by Monica Brown
“Fireflies!” By Julie Brinckloe
“Madeline” by Ludwig Bemelmans
“Shortcut” by Donald Crews
“Las aventuras de maxi el perro taxista” by Sal Barracca
“Un sillón para mi mamá” by Vera B. William
“The Snowy Day” by Ezra Jack Keats
“Guillermo Jorge Manuel Jose” by Mem Fox

Additional Resources:
Small Moments: Personal Narrative Writing by Lucy Calkins and Abby
Oxenhorn
The Conferring Handbook by Lucy Calkins
Texas Fuente de Escritura, pp. 58-85
Teaching Notes:
Teacher will guide students through the writing process for a personal narrative.
Remember to pace and revisit lessons based on class needs.
Keep mini-lessons focused and concise. Mini-lessons should be no longer than
10-15 minutes. Students should write independently for twenty to twenty-five
minutes daily.
Writing is a recursive process. The sample lessons below are not meant to be a
lock-step process. Writers must be allowed to move back and forth in the process
as they move toward publication. Writing experiences should encompass
assigned and self-selected writing in a variety of genres and content areas.
Targeted instruction should be provided to whole group, small group and
individuals.
Note: This unit contains 20 lessons. Teachers should choose the lessons that are
most appropriate for your students based on their writing needs at this time of
year. Lessons can be combined or eliminated if appropriate for your students. Or
you may choose to teach all 20 lessons.
Teachers may consider bringing in a photo as a guide for a
personal narrative. Highlight writing about the small moment the
photo captures. Include feelings, thoughts, and actions.

Day 1: Introduction to a Personal Narrative (Prewrite)
The following 5 lessons are prewriting lessons for the personal narrative and can be combined, if
appropriate for your students. Teacher should pace lessons according to the class’ needs.
1. Tell students that writers start the writing process by thinking about their writing ideas and
planning how they will write about these ideas. This thinking step is called Prewriting.
Refer back to your Writing Process anchor chart that you created at the beginning of the
school year.
2. Discuss the ways they have engaged in prewriting in previous writing units, such as they
drew a picture, made a topic list, made a topic web, etc.
3. Tell writers that today they will continue to do the work of real authors by using the writing
process to prewrite. They will be writing a personal narrative, a personal story that has
special meaning to them.
4. Look back through your writer’s notebooks and think about the stories that you listed or
wrote about briefly in previous prewriting lessons. Which stories did you choose not to take
through the writing process in the past, and you can write about them now? Do these stories
spark an idea for a new story you could write? Mark these possible stories with a Post-it
Note.
5. Choose some students to share with the whole group the writing ideas they marked in their
writer’s notebooks.
Mini-Lesson:
Independent Writing:
Share / Reflect:
El Proceso de la Escritura
Prepararse: “¡Puedo Pensar!”
Borrador: “¡Puedo Escribir!”
Revisar: “¡Puedo hacerlo mejor! (Como suena mi escritura)
Corregir: “¡Puedo asegurarme que otros lo puedan leer!” (¿Cómo se
ve mi escritura?)
Conferencia: “¡Puedo reunirme con mis maestros o compañeros para
mejorarlo!”
Publicar: “¡Puedo compartir mi mejor trabajo!”

Day 2: Introduction to Personal Narrative (Prewrite)
1. Remind students about how writers think and plan before they write. This is called
prewriting.
2. Model choosing one small moment to write about as opposed to a broad topic. Model making
a topic web which includes several different topic ideas for your personal narrative.
3. Over the next few days, teacher should read aloud different mentor texts, pointing out how the
author focused on one small moment rather than a broad topic.
4. Refer back to the Personal Narrative criteria chart you made earlier this year, defining, “What
is a personal narrative?” Ask children to add any additional elements of a personal narrative
they have learned this year.
5. Have students talk with a partner about what is a personal narrative.
6. Allow time for students to write independently and make their own personal narrative topic
webs.
7. Choose some students to share their writing with the whole group. Model appropriate
feedback to students after they share.
Mini- Lesson:
Independent Writing:
Share / Reflect:
Una narrativa personal…
o Es una historia acerca de ti.
o Puede ser acerca de algo positivo o negativo
o Está escrita en primera persona (Yo)
o Se trata de un solo evento
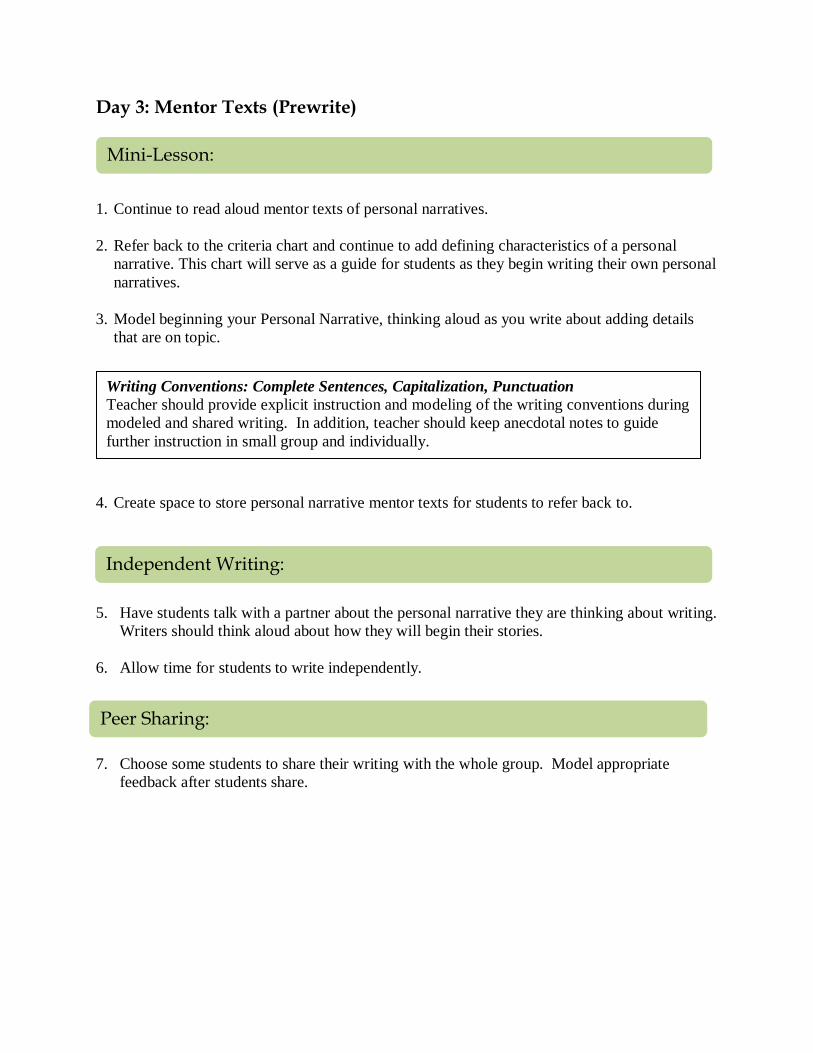
Day 3: Mentor Texts (Prewrite)
1. Continue to read aloud mentor texts of personal narratives.
2. Refer back to the criteria chart and continue to add defining characteristics of a personal
narrative. This chart will serve as a guide for students as they begin writing their own personal
narratives.
3. Model beginning your Personal Narrative, thinking aloud as you write about adding details
that are on topic.
4. Create space to store personal narrative mentor texts for students to refer back to.
5. Have students talk with a partner about the personal narrative they are thinking about writing.
Writers should think aloud about how they will begin their stories.
6. Allow time for students to write independently.
7. Choose some students to share their writing with the whole group. Model appropriate
feedback after students share.
Mini-Lesson:
Independent Writing:
Peer Sharing:
Writing Conventions: Complete Sentences, Capitalization, Punctuation
Teacher should provide explicit instruction and modeling of the writing conventions during
modeled and shared writing. In addition, teacher should keep anecdotal notes to guide
further instruction in small group and individually.

Day 4: Choosing an Idea (Prewrite)
1. Model choosing an idea for a small moment story.
2. Purposefully choose a big event (i.e. trip to grandparent’s house, birthday party).
3. Think aloud that this moment may be too big.
4. List all the small moments within that one big topic.
5. Choose one of those small moments to be your story and model sketching that small moment.
6. Refer back to the criteria chart to see if your chosen moment meets the personal narrative
criteria.
7. Have students talk with a partner about a big moment and the small moments within.
8. Have students choose 3-4 possible small moment ideas and choose with a partner.
9. Allow time for students to write independently.
10. Choose some students to share their writing with the whole group. Model appropriate
feedback after students share.
Mini-Lesson:
Independent Writing:
Peer Sharing:
Teachers may consider bringing in a photo as a guide for a personal
narrative. Highlight writing about the small moment the photo captures.
Include feelings, thoughts, and actions.
Una narrativa personal…
o Es una historia acerca de ti.
o Puede ser acerca de algo positivo o negativo
o Está escrita en primera persona (Yo)
o Se trata de un solo evento

Day 5: Using a Graphic Organizer to Develop your Ideas (Prewrite)
1. Refer back to the idea you chose yesterday.
2. Introduce a story board graphic organizer. See Freeology.com Storyboard
3. Model illustrating the sequence of your story including details about feelings, setting, and
events. Do not write the words to go with each scene at this time. You will do this in the
lesson for Day 6.
4. Provide graphic organizers for students.
5. Allow them time to illustrate their graphic organizers.
6. Use this time to conference with students. Ask them to describe what is happening in their
stories.
7. Choose some students to share their storyboards with the class.
Mini- Lesson:
Independent Writing:
Share /Reflect:
During share time, teacher demonstrates to students how to give feedback. Consider
using a system such as “Stars and Wishes” or “Onions and orchids.” Students should
provide positive feedback (stars, orchids) as well as ways to improve work (wishes,
onions). You may want to create a Peer Conferencing Anchor Chart, and add to it as
needed.
Conferencias de pares
1. Siéntese hombro a hombro con su pareja.
2. Decida quién va a leer primero.
3. El lector lee, mientras que el oyente escucha.
4. El oyente...
a. Le da un cumplido
b. Hace una pregunta
c. Hace una sugerencia
5. El lector hace al menos un cambio.
6. Cambien los papeles y repitan.

Day 6: Ensuring a Story Shape (Drafting)
1. Students will continue to work on their small moment story with the goal of taking a personal
narrative through the writing process.
2. Introduce the concept of drafting to students. Tell students that when writers write the best
they can and keep writing, it is called drafting. Point this out on the Writing Process anchor
chart from the beginning of the year. Discuss the ways they have engaged in drafting
throughout this year.
3. Review the small moment and storyboard you modeled for the class.
4. Model looking at each illustration and thinking of the words to describe each picture.
5. Have students tell a partner their story while looking at each illustration on their storyboard.
(As you proceed through this process it is important to remember that students will be at
varying stages of the process.)
6. Allow time for students to plan a story in a booklet or continue with their prewriting.
7. Allow students to share how they are changing their personal narrative from illustrations to
words.
Mini- Lesson:
Independent Writing:
Share / Reflect:
Writing Conventions: Complete Sentences, Capitalization, Punctuation
Teacher should provide explicit instruction and modeling of the writing
conventions during modeled and shared writing. In addition, teacher should
keep anecdotal notes to guide further instruction in small group and
individually.
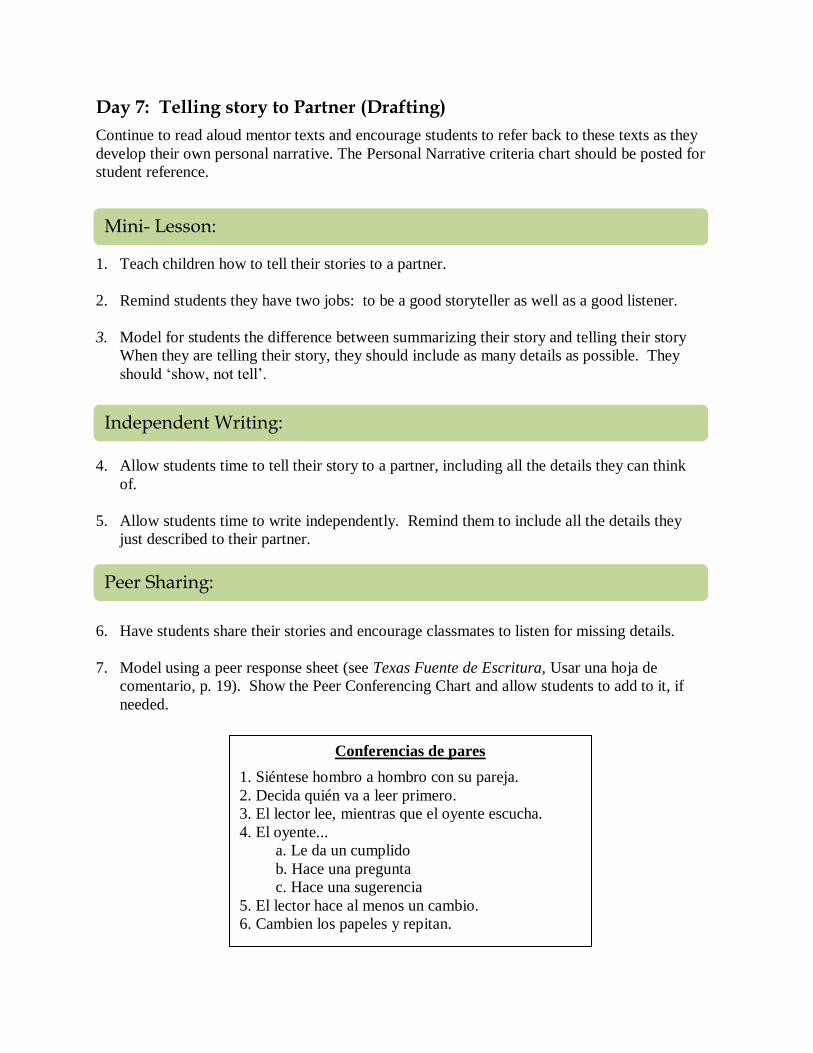
Day 7: Telling story to Partner (Drafting)
Continue to read aloud mentor texts and encourage students to refer back to these texts as they
develop their own personal narrative. The Personal Narrative criteria chart should be posted for
student reference.
1. Teach children how to tell their stories to a partner.
2. Remind students they have two jobs: to be a good storyteller as well as a good listener.
3. Model for students the difference between summarizing their story and telling their story
When they are telling their story, they should include as many details as possible. They
should ‘show, not tell’.
4. Allow students time to tell their story to a partner, including all the details they can think
of.
5. Allow students time to write independently. Remind them to include all the details they
just described to their partner.
6. Have students share their stories and encourage classmates to listen for missing details.
7. Model using a peer response sheet (see Texas Fuente de Escritura, Usar una hoja de
comentario, p. 19). Show the Peer Conferencing Chart and allow students to add to it, if
needed.
Mini- Lesson:
Peer Sharing:
Independent Writing:
Conferencias de pares
1. Siéntese hombro a hombro con su pareja.
2. Decida quién va a leer primero.
3. El lector lee, mientras que el oyente escucha.
4. El oyente...
a. Le da un cumplido
b. Hace una pregunta
c. Hace una sugerencia
5. El lector hace al menos un cambio.
6. Cambien los papeles y repitan.

Day 8: Spelling Difficult Words to Add Words to My Story (Drafting)
1. Remind students that in writing workshop this year we have been planning, drawing, and
writing our ideas.
2. Explain that writers add difficult words to their writing even if they don’t know how to spell
them. Show “When I Don’t Know How to Spell a Word, I Can…” anchor chart.
3. Choose one page of a small moment story from your life.
4. Demonstrate saying a difficult (multisyllable) word and exaggerating the sounds.
5. Demonstrate breaking the word into chunks (word parts or syllables) and writing the sounds
for each chunk.
6. Reread the chunk and repeat the process to spell the entire word.
7. Bilingual partners may practice writing words on white boards.
8. Students use this strategy as they write independently.
9. Have a writer share a word they wrote by breaking the word into chunks (word parts or
syllables) and writing the sounds for each chunk.
Mini- Lesson:
Independent Writing:
Share /Reflect:
Cuando no sé cómo deletrear una palabra, yo puedo...
Escribir los sonidos que escucho
Ver la pared de palabras
Consultar con un amigo
Buscarla en un libro
Leer alrededor del salón
Tratar de escribirla de otra manera
Encerrar la palabra en un círculo y seguir adelante
Separar la palabra en trozos y escribir los sonidos de
cada trozo

Days 9-10: Drafting My Story 1. Continue to read aloud mentor texts and encourage students to refer back to these texts as
they develop their own personal narrative.
2. Point out different techniques the authors use to:
Comenzar y terminar la historia (la entradilla y conclusión)
Describir los detalles de algún evento (demostrar, no contar)
Hacer que los personajes hablen (añadir diálogo)
Describir cómo se siente algún personaje
3. Tell writers that you expect them to include these techniques in their drafts as they continue
writing.
4. For today and tomorrow, students should continue to plan, sketch, and add words to their
personal narrative.
5. When students finish one story, they may begin another, each time adding the techniques you
teach them through the read aloud mini-lessons.
6. Teacher should conference with students to assess needs and assist writers. See possible
conference questions below.
7. Provide time for peers to share their writing with a group. Listeners should give feedback:
a compliment, a question, and a suggestion. Writers choose which parts of their own writing
they want to change.
Mini-Lesson:
Independent Writing:
Peer Sharing:
Preguntas que los maestros pueden plantear durante las conferencias:
¿Cuál es la historia en esta imagen (o en tu mente)?
Toca cada parte de tu guion gráfico y declara lo que vas a escribir.
¿Cuáles técnicas de escritura has estado intentando?
¿Puedes describir esta parte en mayor detalle? Describe la imagen que tienes en mente.
¿Qué estaban diciendo los personajes en esta parte de la historia?
¿Cómo te sentiste en esta parte de la historia?
Day 11: Introduce Revising 1. Tell students that when writers fix up their draft, they are Revising. Point out ‘Revising’ on
the Writing Process anchor chart. When we revise, we listen to and think about how our
writing sounds. Discuss how young writers are reluctant to revise. They think their writing
is finished, but now that they have been writing for all of second grade, they are ready to
make their writing better.
2. Ask children to help you fix up, or revise, a story you’ve written about an event the class
knows well.
3. Show writers that sometimes we add to a story, sometimes we delete parts that don’t make
sense or don’t belong, and sometimes we change or move our ideas to different parts of the
story.
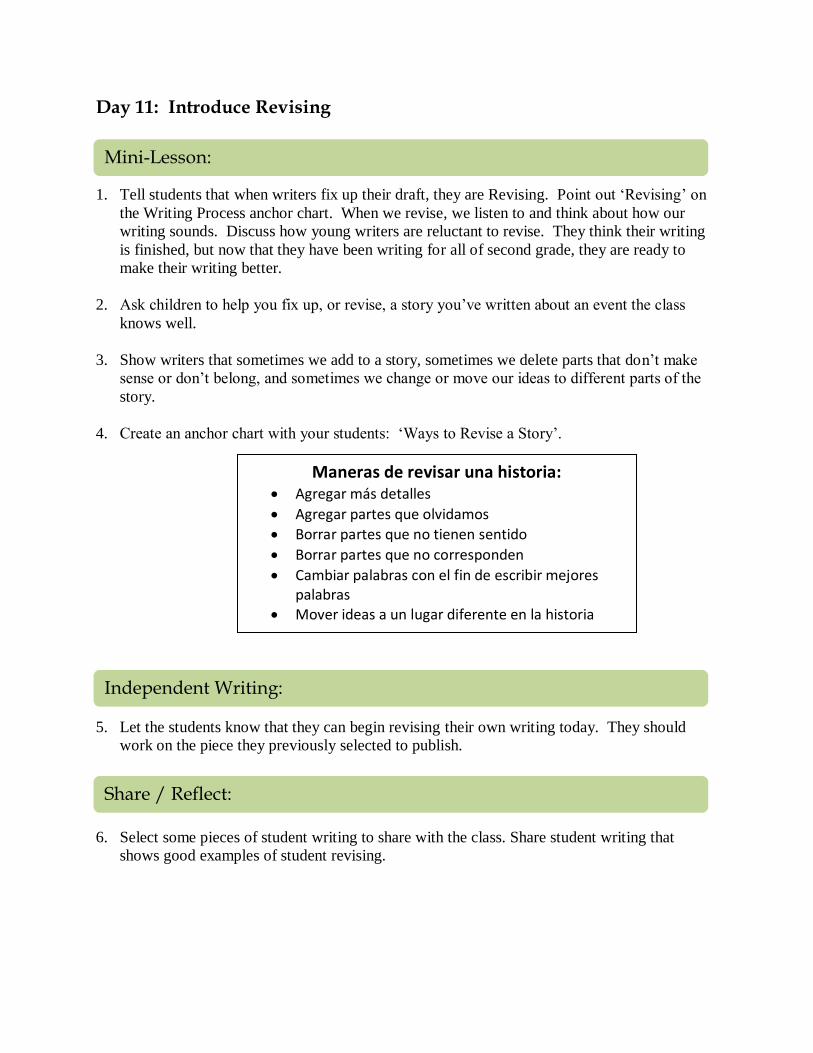
4. Create an anchor chart with your students: ‘Ways to Revise a Story’.
5. Let the students know that they can begin revising their own writing today. They should
work on the piece they previously selected to publish.
6. Select some pieces of student writing to share with the class. Share student writing that
shows good examples of student revising.
Share / Reflect:
Mini-Lesson:
Independent Writing:
Maneras de revisar una historia: Agregar más detalles
Agregar partes que olvidamos
Borrar partes que no tienen sentido
Borrar partes que no corresponden
Cambiar palabras con el fin de escribir mejores palabras
Mover ideas a un lugar diferente en la historia

Day 12: Revising to Add More 1. Explain to students that you have been reading their small moment stories with a focus on
adding more details.
2. Let them know that one way to revise your work is to add more. When we add words, we
use a mark called a carat to show where to put the new words.
3. Show students how to add to a story by writing between the lines (if they skipped lines while
drafting), writing in the margin and drawing an arrow to the place where the sentence should
be added, or adding a Post-it Note to the place where the new information should be added.
4. Model for students how to add more details that enhance their writing. Be sure to clarify
what is appropriate to add and what is not. See Texas Fuente de Escritura, Revising Personal
Narrative, pp. 70-77.
5. Provide another small moment story that is lacking details. Have students discuss details that
could be added or missing information with partners.
6. Share and add the details students suggest as a shared writing.
7. Provide time for students to revise their personal narrative by adding details.
8. Have students share with the whole group places where they added more details to their
writing.
Mini-Lesson:
Mini-Lesson:
Share/Reflect:

Day 13: Revising to Delete or Move Information
1. Remind writers that they are revising their work to make it better.
2. Tell them that today they will continue to revise their work by deleting or moving
information. Discuss why good writers need to do this.
3. Have students help you revise a piece of your writing by deleting unnecessary information or
moving sentences or words.
4. Explain that the hard part about revising is knowing which parts to revise. Show the
following anchor chart to help them with how to revise:
5. Have students revise their small moment story with a partner by adding, deleting or moving
text.
6. Encourage students to use the anchor chart to guide their work.
7. Have students share with the whole group how they revised their personal narrative today.
Mini-Lesson:
Cómo los escritores revisan un escrito
Repasa tu escrito con mucha atención.
Pregunta, “¿Esto tiene sentido? ¿Cómo puedo arreglarlo?”
Pregunta, “¿Qué puedo agregar?” o “¿Qué necesito borrar o mover a otro lugar?”
Haz los cambios y vuelve a leer el escrito con atención.
Independent Writing:
Share /Reflect:

Day 14: Introducing Editing
1. Remind students of the writing process, and let them know they will begin editing their
writing today.
2. Tell students that when we edit our writing, we check to make sure people can read and
understand it. Point out ‘Editing’ on the Writing Process anchor chart.
3. Edit your own writing in front of your students. Slow down your demonstration so the
students can see the kinds of strategies you use.
4. Model rereading your piece using your finger and stopping to fix a misspelled word. Write
the correct word above the misspelled word instead of erasing. (Establish this expectation
for fixing misspelled words.) Model using the word wall, dictionary, trying multiple ways to
spell it, etc.
5. Model rereading your piece again, this time focusing on fixing capital letters. Stop at a few
words to ask yourself, “¿Esta palabra debe llevar mayúscula? ¿Es el nombre de alguna
persona, lugar o cosa? ¿Aparece al principio de una oración?”
6. Reread your piece in front of your students again, focusing on end punctuation and commas.
Use exaggerated pauses to indicate where you have included end punctuation, smaller pauses
for commas, and no pause where you have missed a comma or period. Make all corrections
using editing symbols.
7. Have your students edit their own work in the same way that you modeled.
8. They should read their piece the first time to concentrate on whether words are spelled
correctly. They should reread the piece again, this time focusing on capital letters. And they
reread their piece one more time, focusing on end punctuation and commas.
9. Select some pieces of student writing to share with the class. The pieces should demonstrate
good examples of student editing.
Mini-Lesson:
Independent Writing:
Mini-Lesson:
Marcas Editoriales de Corrección
Escribir con Mayúscula
Borrar
Agregar punto
Day 15: Revising with Partners
1. Explain that during the last few days you have been asking for their help with revising and
editing your writing. Authors usually work on their own pieces first, and then they ask for
help from other writers.
2. Today you will show them how to revise with a partner.
3. Ask a student to help you illustrate this process to the class. Sit side-by-side with the writer.
Have the writer read his/her piece aloud while you follow along, looking at his/her paper. Do
not interrupt the writer during the first reading.
4. After the first reading, give the writer a compliment. Be specific about what you like,
pointing to the place in the story that you like.
5. Ask a clarifying question about the writing, perhaps something that is unclear or doesn’t
make sense.
6. Make a suggestion to the writer about one way he/she could improve the writing. Be specific
with your suggestion. (‘Add more details’ is not specific. ‘Describe how the party looked
when you first arrived’ is specific.)
7. Explain that writers will work together in the same way that you just modeled.
8. When one writer is finished reading and revising, the other writer will read and revise his
piece.
9. Remind writers that only the writer marks on his/her own paper. The listening partner may
point to the area where he is giving feedback, but the writer is the only person who marks on
his own paper.
10. Remind writers to be kind with their words when giving compliments, questions, and
suggestions, just as you have modeled for them all year.
11. Ask students to share with the whole group how the partner revising went today. Did they
get good feedback? Did they have any problems? Remind writers that they have an
important job as a listener and an adviser too. They are becoming writing experts and
writing experts help each other to make their writing the best possible writing.
Mini-Lesson:
Partner Writing:
Share/Reflect:

Day 16: Editing with Partners
1. Tell students that we also edit our work with partners. Editing with partners works almost
the same as revising with partners.
2. Ask a student to help you illustrate this process to the class. Sit side-by-side with the writer.
Have the writer read his/her piece aloud while you follow along, looking at his/her paper. Do
not interrupt the writer during the first reading.
3. Ask the writer to reread his/her piece aloud slowly, so you can concentrate on whether the
words are spelled correctly. If you notice a word that is spelled incorrectly, point to the word
and say, ‘I think we should look at this word again. It doesn’t look right to me. Let’s
try…(spelling the chunks, looking at the Word Wall, etc.)” Continue reading and checking
the way words are spelled for the rest of the writing.
4. Ask the writer to reread his/her piece again, and this time you will focus on capital letters.
Stop the writer at a few places to ask, “¿Esta palabra debe llevar mayúscula? ¿Es el nombre
de alguna persona, lugar o cosa?” Continue reading and checking for capital letters through
the rest of the writing.
5. Ask the writer to reread his/her piece one more time, so you can focus on end punctuation
and commas. Ask the writer to read with exaggerated pauses for end punctuation, a smaller
pause for a comma and no pause if there is no punctuation. Stop the writer when you see a
place to correct end punctuation or commas. Use editing symbols.
6. Writers will work together in the same way that you just modeled. When one writer is
finished reading and editing, the other writer will read and edit his piece.
7. Remind writers that only the writer marks on his/her own paper. The listening partner may
point to the area where he is giving feedback, but the writer is the only person who marks on
his own paper.
8. Remind writers to be kind with their words when pointing out corrections, just as you have
modeled for them all year.
9. Choose students to share how they worked with their partner to edit and improve their
writing.
Partner Writing:
Share/Reflect:
Mini-Lesson:

Day 17: Using Mentor Texts to Publish
1. Let students know that they are getting their pieces ready for an audience.
2. Demonstrate publishing your own writing by going back to rewrite your draft with all
mistakes fixed. Model going very slowly through your draft and think aloud about fixing
your writing on your final draft.
3. Have a few examples of beautiful published books on display for writers to view. Tell the
students that today they are going to look at what published books contain to make sure they
include the same elements in their books.
4. Engage the students in a picture walk of the books noticing various elements and drawing
attention to them.
5. Create a chart “Los libros publicados tienen….” Elicit responses from students to add to the
chart (e.g. cubierta, título, nombre del autor e ilustrador, ilustraciones detalladas, la mejor
escritura).
6. Have students think of how they will add illustrations and color and share their plan with a
buddy before they write.
7. Send students off to publish their work. Encourage students to include and emulate elements
of a mentor text. Consider providing special paper or booklets for their published stories.
8. Engage students in a gallery walk. Say, “Escritores, hoy vamos a exhibir nuestros trabajos en
las mesas y vamos a circular entre las mesas y admirar las maneras en que embellecimos
nuestros trabajos.”
Mini- Lesson:
Independent Writing:
Peer Sharing:
Writing Conventions: Prepositions, Capitalization, Punctuation
Teacher should provide explicit instruction and modeling of the writing conventions
during modeled and shared writing. In addition, teacher should keep anecdotal notes to
guide further instruction in small group and individually.

Days 18-19: Continue Publishing
1. Introduce other examples of published texts with creative, original elements.
2. Share with students how illustrators use various elements such as colors, pictures, real life
objects, and photographs to create illustrations.
3. Share with students various publishing tools now available to them. (i.e. old magazines,
markers, colored pencils, different kinds of paper)
4. Create expectations for use of the materials.
5. Teacher may want to teach students about other elements of published books, such as the
dedication page, cover page , and ‘About the Author’ section.
6. Have students continue to work independently on publishing their completed book.
7. Teacher should continue conferring with students even while they are publishing. Possible
conference topics include:
“Esta parte es confusa para mi”
“Que mas pudieras tu intentar que el autor hace?”
“Los escritores famosos usan puntos para decirles a los lectores donde parar.”
(From The Conferring Handbook, by Lucy Calkins)
8. Allow students to share the work they created.
Mini- Lesson:
Independent Writing:
Peer Sharing:

Day 20: Preparing for Author’s Celebration/Reflection
Author’s Celebration!
During this time, students celebrate their hard work to complete their first
published piece. Guests (parents, other classrooms, school librarian, reading
buddies) are invited to attend and may either read the student work independently
or have it read to them by students.
Provide small cards of paper for guests to write feedback to the students. Allow
time at the end of the celebration for students to read through the feedback cards.
Possible celebration ideas include:
o Tea party
o Book club setting
o Library/Book store
After the celebration, be sure to make one copy of the student writing for students
to take home. Consider placing another copy in the school or classroom library for
check out and further reading.