Embed Size (px)
Citation preview
7/30/2019 Zenit TTL russian SLR camera manual English
http://slidepdf.com/reader/full/zenit-ttl-russian-slr-camera-manual-english 1/10
NOTES:
This text is identical to the one in the User
manual, English version, 1965 year.
Converted to HTML in 2004.
Данный текст идентичен
оригинальному Руководству по
эксплуатации версии 1965 года, был
переведен в текстовый формат и
специально подготовлен для формата
HTML в 2004 году.
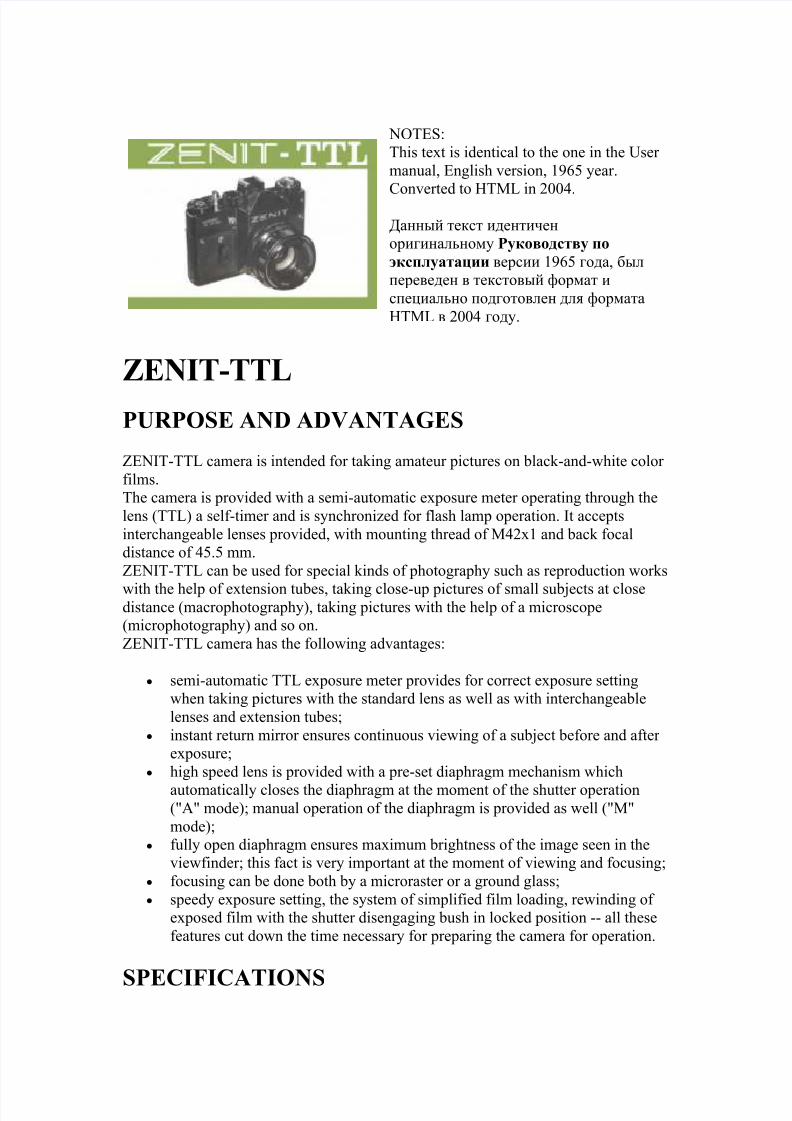
ZENIT-TTL
PURPOSE AND ADVANTAGES
ZENIT-TTL camera is intended for taking amateur pictures on black-and-white color
films.
The camera is provided with a semi-automatic exposure meter operating through the
lens (TTL) a self-timer and is synchronized for flash lamp operation. It accepts
interchangeable lenses provided, with mounting thread of M42x1 and back focal
distance of 45.5 mm.
ZENIT-TTL can be used for special kinds of photography such as reproduction works
with the help of extension tubes, taking close-up pictures of small subjects at closedistance (macrophotography), taking pictures with the help of a microscope
(microphotography) and so on.
ZENIT-TTL camera has the following advantages:
• semi-automatic TTL exposure meter provides for correct exposure setting
when taking pictures with the standard lens as well as with interchangeable
lenses and extension tubes;
• instant return mirror ensures continuous viewing of a subject before and after
exposure;
• high speed lens is provided with a pre-set diaphragm mechanism which
automatically closes the diaphragm at the moment of the shutter operation("A" mode); manual operation of the diaphragm is provided as well ("M"
mode);
• fully open diaphragm ensures maximum brightness of the image seen in the
viewfinder; this fact is very important at the moment of viewing and focusing;
• focusing can be done both by a microraster or a ground glass;
• speedy exposure setting, the system of simplified film loading, rewinding of
exposed film with the shutter disengaging bush in locked position -- all these
features cut down the time necessary for preparing the camera for operation.
SPECIFICATIONS
7/30/2019 Zenit TTL russian SLR camera manual English
http://slidepdf.com/reader/full/zenit-ttl-russian-slr-camera-manual-english 2/10
Frame size -- 24x36 mm
Film used -- 35 mm, perforated
Length of film in cassette -- 1.65 m
Number of frames -- 36
Shutter speeds -- from 1/30 to 1/500 s, "B" (by hand) and long exposure time
Standard lens -- HELIOS-44M:
focal length -- 58 mm
maximum relative aperture -- f/2
diaphragm scale -- from 2 to 16
distance scale -- from 0.55 to "∞"
Exposure meter supply -- from one battery of Mallory "PX-13" type
Film speed range -- from 16 to 500 GOST units
Lens mounting thread -- M42x1
Light filter thread -- M52x0.75
Tripod socket thread -- 1/4"
Viewfinder linear field of view -- 20x28 mm
Overall dimentions without case -- 138x100x93 mm
Mass -- 1.01 kg
Certificates of Authorship:
No 366447 of 14 June 1972; No 150360 of 18 December 1961; No 153652 of 26
February 1952; No 102683 of 7 February 1951.
ATTENTION!
The present Description contains the basic characteristics and essential operating principles of the camera and should not be regarded as a hand-book on photography in
general.
Before using the camera, make thorough study of the operating procedure given in the
present Description.
Due to ever-advancing development in camera construction minor differences may
occur between the text and your camera. Load and unload the camera in faint diffused
light avoiding direct sun rays.
Do not rotate the shutter speed dial within the interval between "500" and "B" and the
film speed setting dial within the figureless interval.
Do not turn the shutter release button if not necessary to avoid disengagement of the
shutter cocking mechanism.Always wind the shutter (by two or three strokes of the lever) as far as it will go to
avoid blank exposures.
Do not keep the camera with the shutter cocked for a long period of time, since it is
likely to affect the shutter operation When taking pictures in frosty weather (below -
10°C), keep the camera under your street-clothes but not in the open air and take it out
only for the moment of photographing.
MAIN ASSEMBLIES AND DETAILS
7/30/2019 Zenit TTL russian SLR camera manual English
http://slidepdf.com/reader/full/zenit-ttl-russian-slr-camera-manual-english 3/10
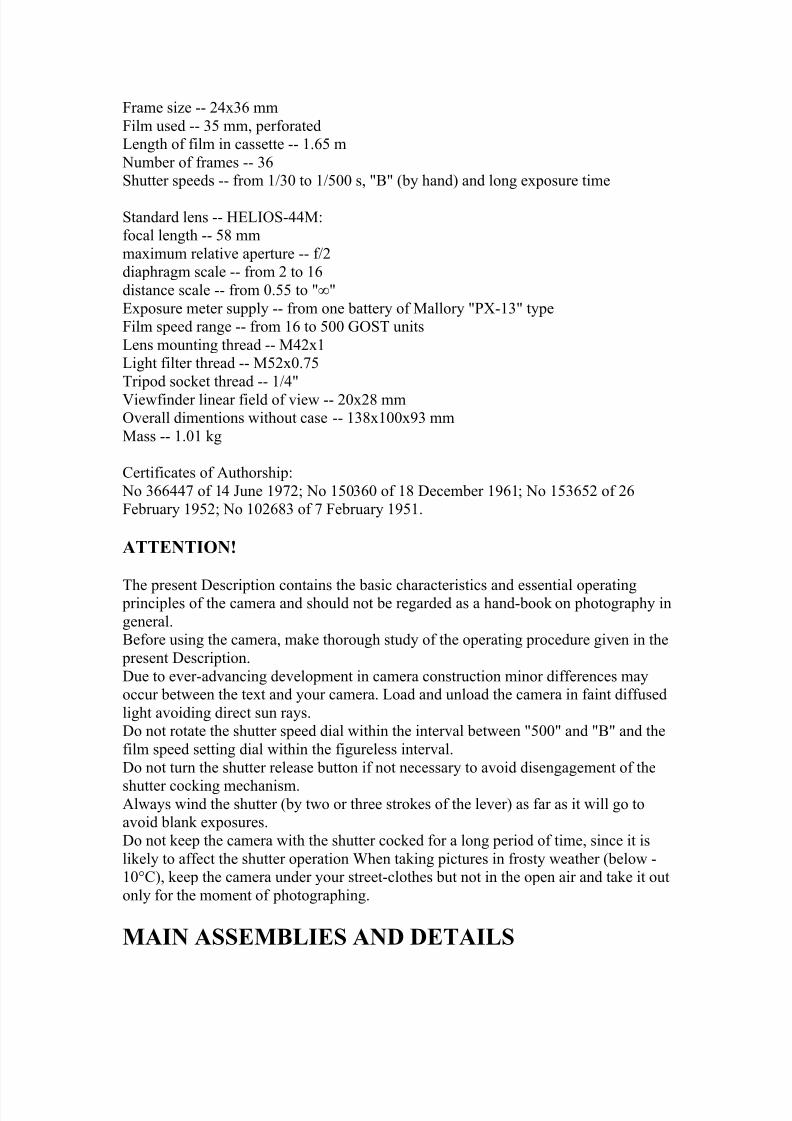
1 -- self-timer lever
2 -- self-timer release button
3 -- release button threaded for
cable release
4 -- flash unit connector socket
5 -- eyelets for strap securing
6 -- film rewind crank
7 -- film speed dial
8 -- shutter speed dial
9 -- shutter disengaging bush
10 -- exposure counter dial
11 -- shutter cocking and film
advance lever
12 -- protective strip
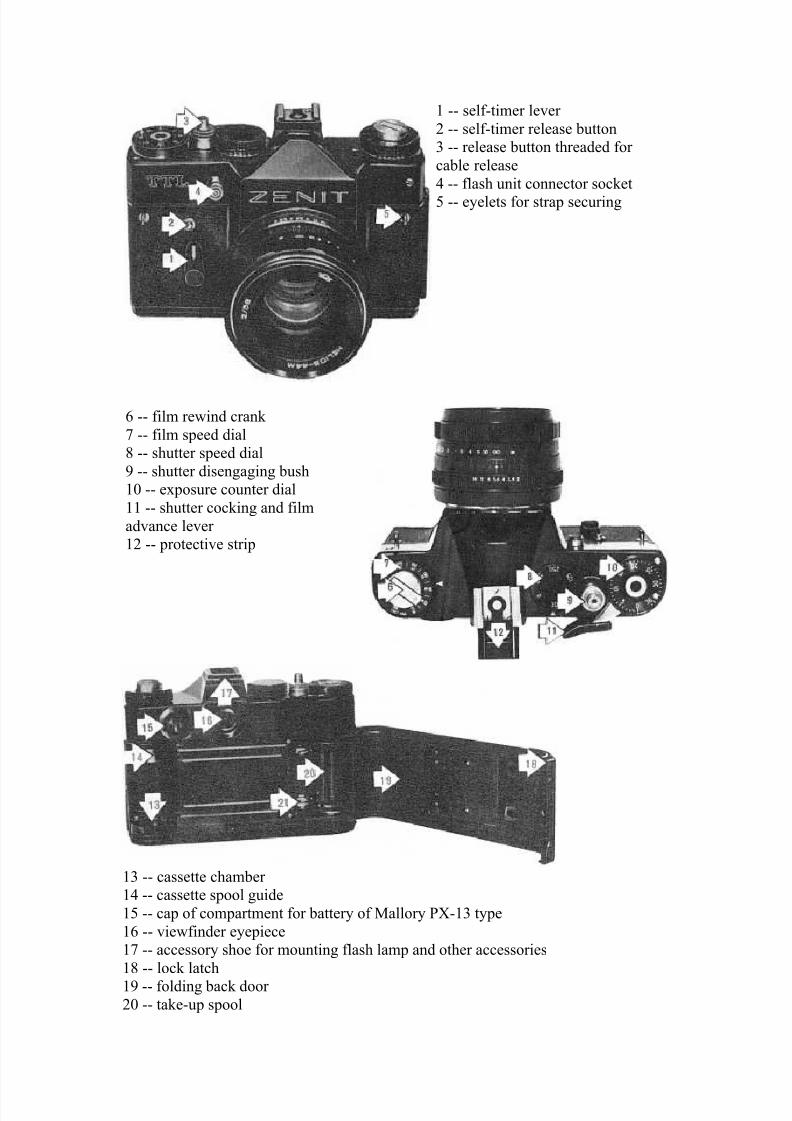
13 -- cassette chamber
14 -- cassette spool guide
15 -- cap of compartment for battery of Mallory PX-13 type
16 -- viewfinder eyepiece
17 -- accessory shoe for mounting flash lamp and other accessories
18 -- lock latch
19 -- folding back door 20 -- take-up spool
7/30/2019 Zenit TTL russian SLR camera manual English
http://slidepdf.com/reader/full/zenit-ttl-russian-slr-camera-manual-english 4/10
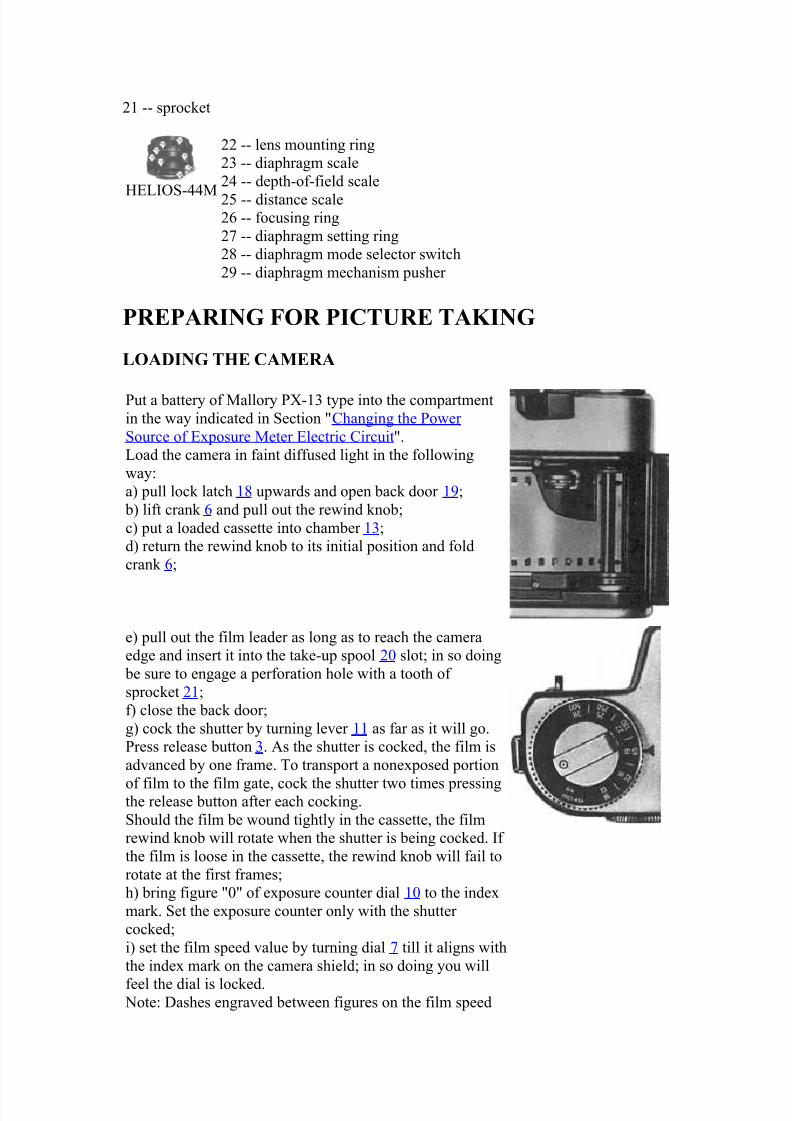
21 -- sprocket
HELIOS-44M
22 -- lens mounting ring
23 -- diaphragm scale
24 -- depth-of-field scale
25 -- distance scale26 -- focusing ring
27 -- diaphragm setting ring
28 -- diaphragm mode selector switch
29 -- diaphragm mechanism pusher
PREPARING FOR PICTURE TAKING
LOADING THE CAMERA
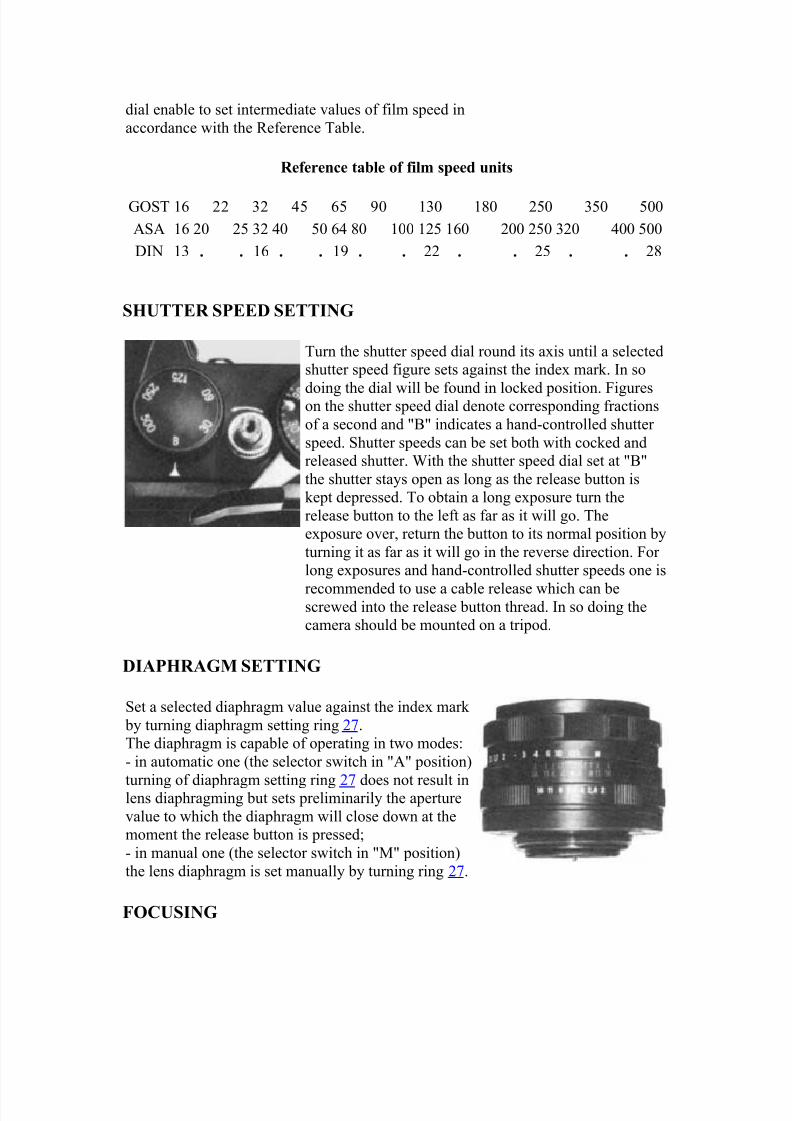
Put a battery of Mallory PX-13 type into the compartment
in the way indicated in Section "Changing the Power
Source of Exposure Meter Electric Circuit".
Load the camera in faint diffused light in the following
way:
a) pull lock latch 18 upwards and open back door 19;
b) lift crank 6 and pull out the rewind knob;
c) put a loaded cassette into chamber 13;
d) return the rewind knob to its initial position and fold
crank 6;
e) pull out the film leader as long as to reach the camera
edge and insert it into the take-up spool 20 slot; in so doing
be sure to engage a perforation hole with a tooth of
sprocket 21;
f) close the back door;
g) cock the shutter by turning lever 11 as far as it will go.
Press release button 3. As the shutter is cocked, the film is
advanced by one frame. To transport a nonexposed portion
of film to the film gate, cock the shutter two times pressingthe release button after each cocking.
Should the film be wound tightly in the cassette, the film
rewind knob will rotate when the shutter is being cocked. If
the film is loose in the cassette, the rewind knob will fail to
rotate at the first frames;
h) bring figure "0" of exposure counter dial 10 to the index
mark. Set the exposure counter only with the shutter
cocked;
i) set the film speed value by turning dial 7 till it aligns with
the index mark on the camera shield; in so doing you will
feel the dial is locked. Note: Dashes engraved between figures on the film speed
7/30/2019 Zenit TTL russian SLR camera manual English
http://slidepdf.com/reader/full/zenit-ttl-russian-slr-camera-manual-english 5/10
dial enable to set intermediate values of film speed in
accordance with the Reference Table.
Reference table of film speed units
GOST 16 22 32 45 65 90 130 180 250 350 500
ASA 16 20 25 32 40 50 64 80 100 125 160 200 250 320 400 500
DIN 13 . . 16 . . 19 . . 22 . . 25 . . 28
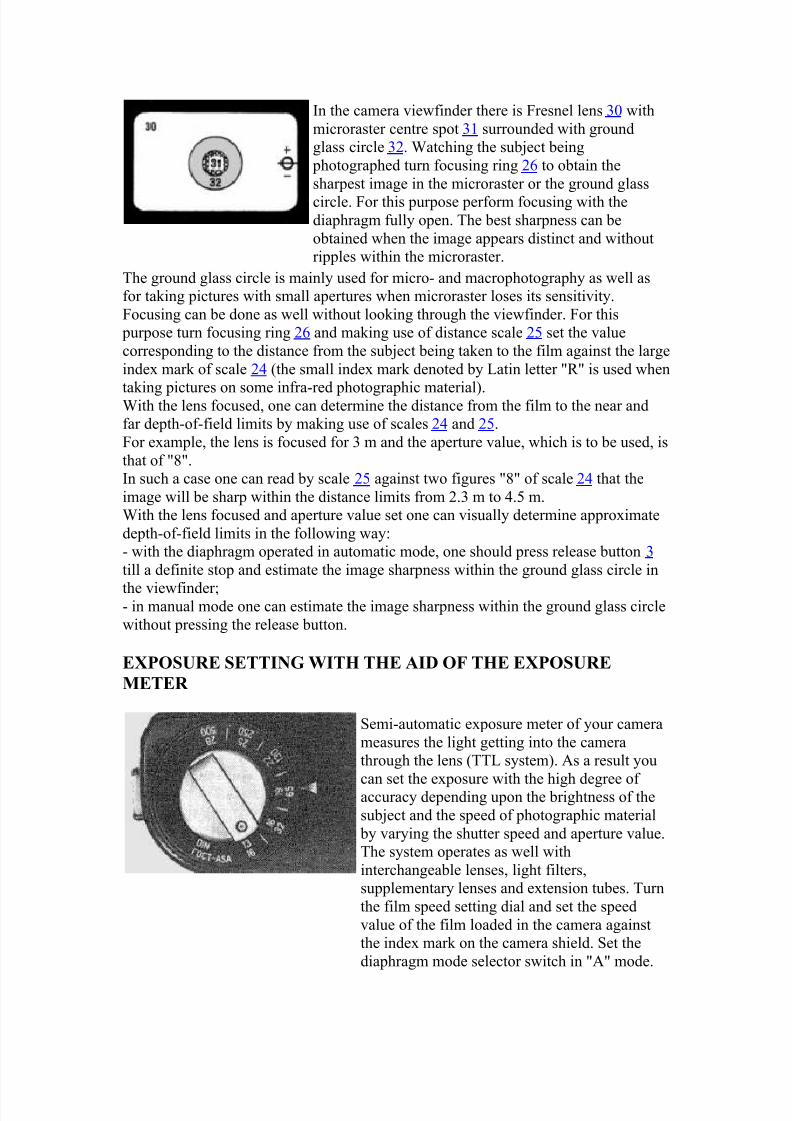
SHUTTER SPEED SETTING
Turn the shutter speed dial round its axis until a selected
shutter speed figure sets against the index mark. In so
doing the dial will be found in locked position. Figureson the shutter speed dial denote corresponding fractions
of a second and "B" indicates a hand-controlled shutter
speed. Shutter speeds can be set both with cocked and
released shutter. With the shutter speed dial set at "B"
the shutter stays open as long as the release button is
kept depressed. To obtain a long exposure turn the
release button to the left as far as it will go. The
exposure over, return the button to its normal position by
turning it as far as it will go in the reverse direction. For
long exposures and hand-controlled shutter speeds one is
recommended to use a cable release which can bescrewed into the release button thread. In so doing the
camera should be mounted on a tripod.
DIAPHRAGM SETTING
Set a selected diaphragm value against the index mark
by turning diaphragm setting ring 27.
The diaphragm is capable of operating in two modes:
- in automatic one (the selector switch in "A" position)
turning of diaphragm setting ring 27 does not result inlens diaphragming but sets preliminarily the aperture
value to which the diaphragm will close down at the
moment the release button is pressed;
- in manual one (the selector switch in "M" position)
the lens diaphragm is set manually by turning ring 27.
FOCUSING
7/30/2019 Zenit TTL russian SLR camera manual English
http://slidepdf.com/reader/full/zenit-ttl-russian-slr-camera-manual-english 6/10
In the camera viewfinder there is Fresnel lens 30 with
microraster centre spot 31 surrounded with ground
glass circle 32. Watching the subject being
photographed turn focusing ring 26 to obtain the
sharpest image in the microraster or the ground glass
circle. For this purpose perform focusing with thediaphragm fully open. The best sharpness can be
obtained when the image appears distinct and without
ripples within the microraster.
The ground glass circle is mainly used for micro- and macrophotography as well as
for taking pictures with small apertures when microraster loses its sensitivity.
Focusing can be done as well without looking through the viewfinder. For this
purpose turn focusing ring 26 and making use of distance scale 25 set the value
corresponding to the distance from the subject being taken to the film against the large
index mark of scale 24 (the small index mark denoted by Latin letter "R" is used when
taking pictures on some infra-red photographic material).With the lens focused, one can determine the distance from the film to the near and
far depth-of-field limits by making use of scales 24 and 25.
For example, the lens is focused for 3 m and the aperture value, which is to be used, is
that of "8".
In such a case one can read by scale 25 against two figures "8" of scale 24 that the
image will be sharp within the distance limits from 2.3 m to 4.5 m.
With the lens focused and aperture value set one can visually determine approximate
depth-of-field limits in the following way:
- with the diaphragm operated in automatic mode, one should press release button 3
till a definite stop and estimate the image sharpness within the ground glass circle in
the viewfinder;- in manual mode one can estimate the image sharpness within the ground glass circle
without pressing the release button.
EXPOSURE SETTING WITH THE AID OF THE EXPOSURE
METER
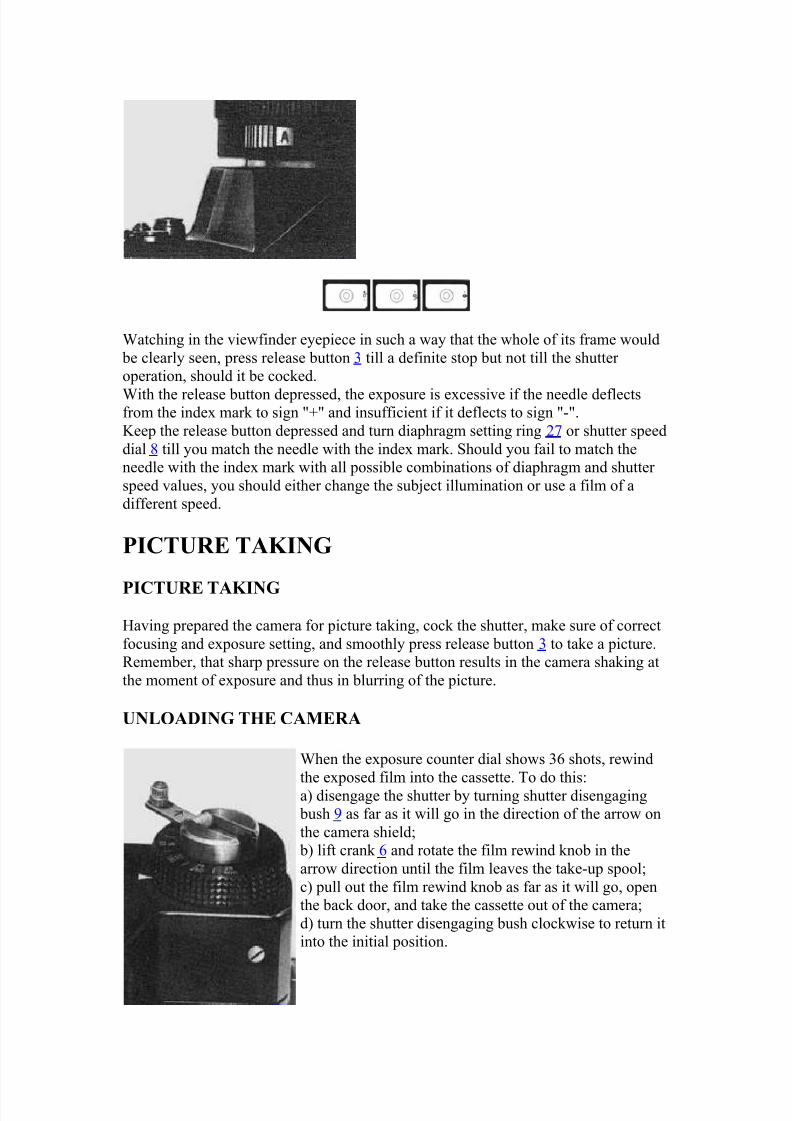
Semi-automatic exposure meter of your camera
measures the light getting into the camera
through the lens (TTL system). As a result you
can set the exposure with the high degree of accuracy depending upon the brightness of the
subject and the speed of photographic material
by varying the shutter speed and aperture value.
The system operates as well with
interchangeable lenses, light filters,
supplementary lenses and extension tubes. Turn
the film speed setting dial and set the speed
value of the film loaded in the camera against
the index mark on the camera shield. Set the
diaphragm mode selector switch in "A" mode.
7/30/2019 Zenit TTL russian SLR camera manual English
http://slidepdf.com/reader/full/zenit-ttl-russian-slr-camera-manual-english 7/10
Watching in the viewfinder eyepiece in such a way that the whole of its frame would
be clearly seen, press release button 3 till a definite stop but not till the shutter
operation, should it be cocked.
With the release button depressed, the exposure is excessive if the needle deflectsfrom the index mark to sign "+" and insufficient if it deflects to sign "-".
Keep the release button depressed and turn diaphragm setting ring 27 or shutter speed
dial 8 till you match the needle with the index mark. Should you fail to match the
needle with the index mark with all possible combinations of diaphragm and shutter
speed values, you should either change the subject illumination or use a film of a
different speed.
PICTURE TAKING
PICTURE TAKING
Having prepared the camera for picture taking, cock the shutter, make sure of correct
focusing and exposure setting, and smoothly press release button 3 to take a picture.
Remember, that sharp pressure on the release button results in the camera shaking at
the moment of exposure and thus in blurring of the picture.
UNLOADING THE CAMERA
When the exposure counter dial shows 36 shots, rewind
the exposed film into the cassette. To do this:
a) disengage the shutter by turning shutter disengaging
bush 9 as far as it will go in the direction of the arrow on
the camera shield;
b) lift crank 6 and rotate the film rewind knob in the
arrow direction until the film leaves the take-up spool;
c) pull out the film rewind knob as far as it will go, open
the back door, and take the cassette out of the camera;
d) turn the shutter disengaging bush clockwise to return it
into the initial position.
7/30/2019 Zenit TTL russian SLR camera manual English
http://slidepdf.com/reader/full/zenit-ttl-russian-slr-camera-manual-english 8/10
SELF-TIMER, SYNCHRO SOCKET, LENS
CHANGING, OPERATING THE SELF-TIMER
OPERATING WITH SELF-TIMER
To use the self-timer mount the camera on a tripod. Then do the following:
a) focus the lens;
b) set the exposure;
c) cock the shutter;
d) wind the self-timer mechanism by turning lever 1 downwards as far as it
will go;
e) change diaphragm selector switch 28 from "A" (Automatic) to "M"
(Manual) position;
f) press self-timer release button 2 and take your place in front of the lens.The shutter will operate in no less than 7 seconds after pressing the button.
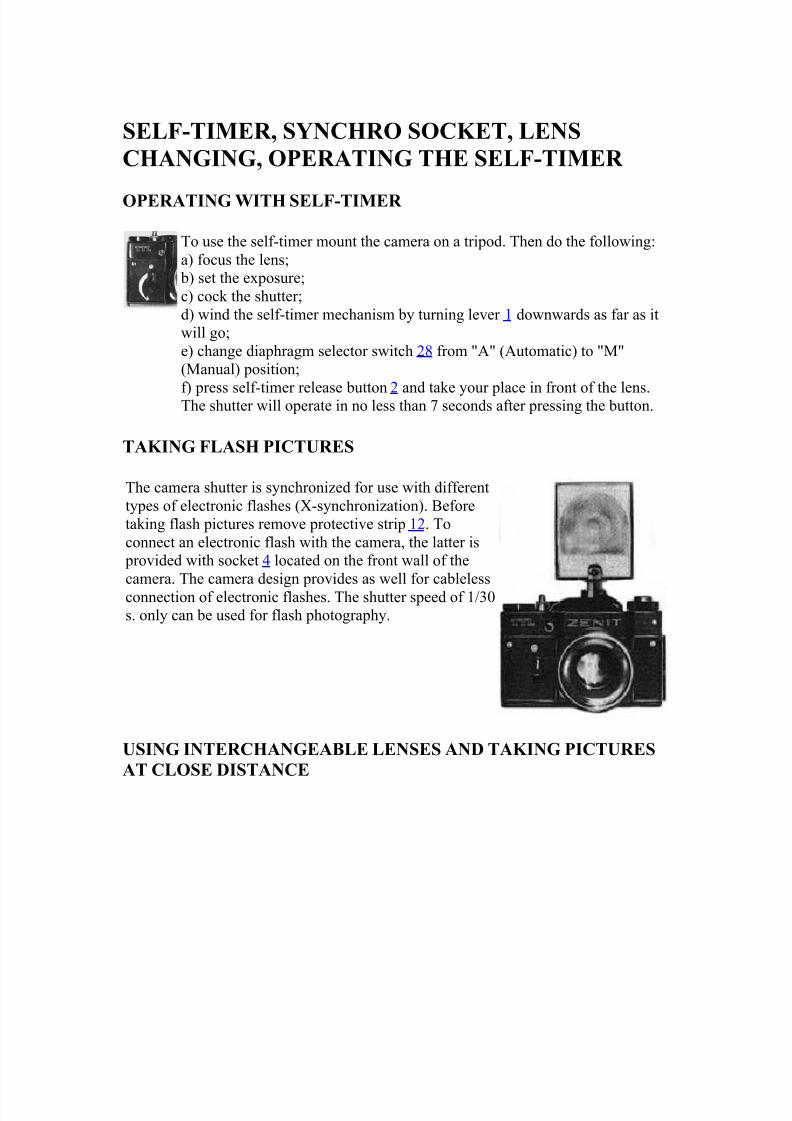
TAKING FLASH PICTURES
The camera shutter is synchronized for use with different
types of electronic flashes (X-synchronization). Before
taking flash pictures remove protective strip 12. To
connect an electronic flash with the camera, the latter is
provided with socket 4 located on the front wall of the
camera. The camera design provides as well for cableless
connection of electronic flashes. The shutter speed of 1/30
s. only can be used for flash photography.
USING INTERCHANGEABLE LENSES AND TAKING PICTURES
AT CLOSE DISTANCE
7/30/2019 Zenit TTL russian SLR camera manual English
http://slidepdf.com/reader/full/zenit-ttl-russian-slr-camera-manual-english 9/10
The camera accepts interchangeable lenses
provided with M42x1 mounting thread and
flange/film distance of 45.5 mm.
If an interchangeable lens has no automatic
diaphragm mechanism, the diaphragm can be
handled manually. When long focus lensesare used, a slight cutting of the left or right
edges of the image on negative is likely to
take place. With the help of a special stand
the ZENIT-TTL camera can be used for
making reproductions of drawings,
manuscripts, photographs. When making
reproduction works, use should be made of
extension tubes by setting them between the
camera body and the lens. To obtain a
necessary scale either one tube or a
combination of some tubes can be used.
The extension tubes without pushers being
used, the lens diaphragm should be operated
manually and the diaphragm mode selector
switch should be set to "M" mode.
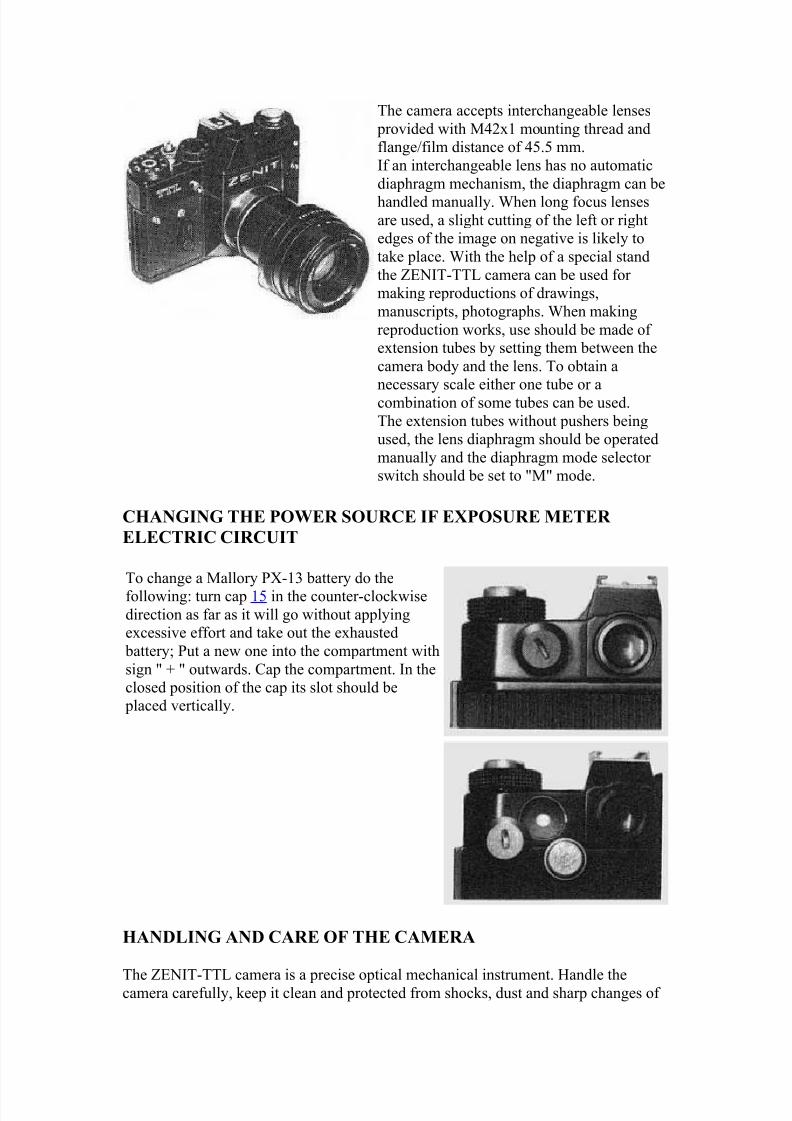
CHANGING THE POWER SOURCE IF EXPOSURE METER
ELECTRIC CIRCUIT
To change a Mallory PX-13 battery do the
following: turn cap 15 in the counter-clockwise
direction as far as it will go without applying
excessive effort and take out the exhausted
battery; Put a new one into the compartment with
sign " + " outwards. Cap the compartment. In the
closed position of the cap its slot should be
placed vertically.
HANDLING AND CARE OF THE CAMERA
The ZENIT-TTL camera is a precise optical mechanical instrument. Handle thecamera carefully, keep it clean and protected from shocks, dust and sharp changes of

7/30/2019 Zenit TTL russian SLR camera manual English
http://slidepdf.com/reader/full/zenit-ttl-russian-slr-camera-manual-english 10/10
temperature.
Keep the camera closed in its case. In so doing the lens should be capped and the
shutter and self-timer should be released. Do not touch the optical details with hands
since this is likely to damage their coating. Clean the coated optical surfaces only
from outside with a clean soft piece of fabric or cotton wool slightly moistened with
rectified alcohol or ether. The mirror and Fresnel lens may be cleaned only if absolutely necessary with a very soft dry brush but in no case with humid cleaning
agents.
Since the camera is a complex instrument, any repair and corresponding adjustments
should be performed only in repair shops.