Embed Size (px)
Citation preview

Fun with
TABLES!Using Tables in
Microsoft Word 2010
By Tiffany Johnson
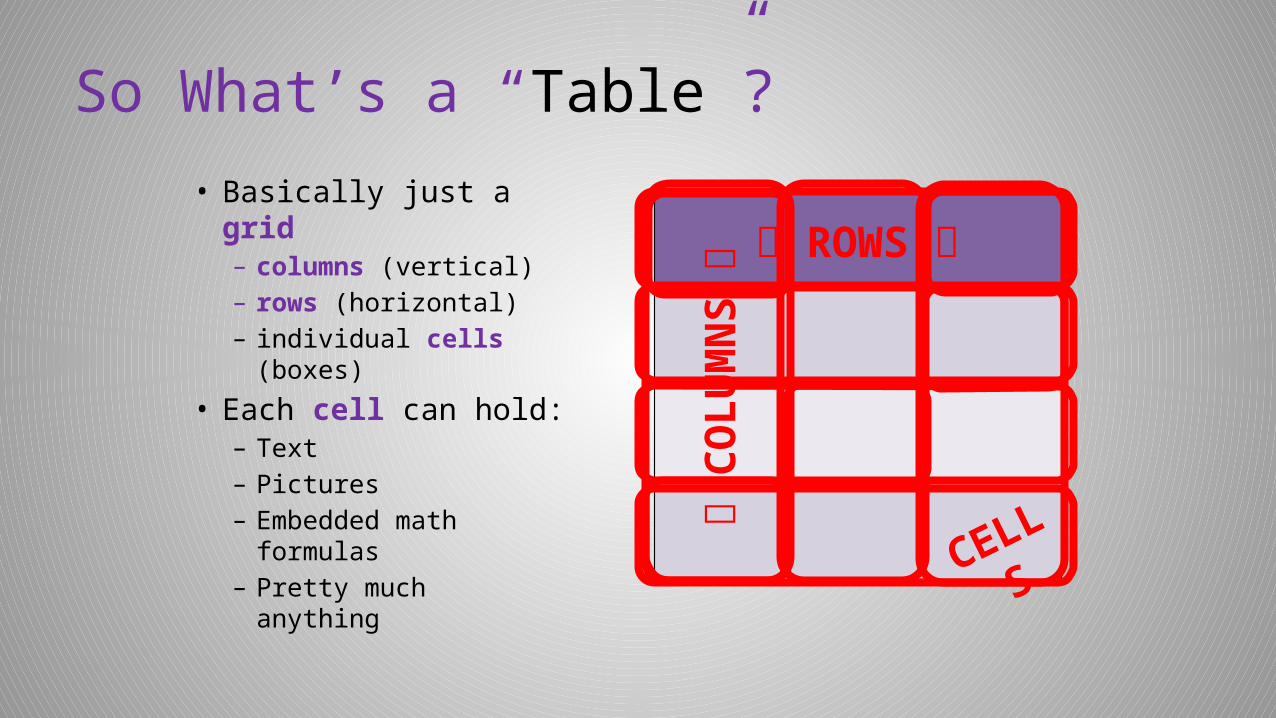
So What’s a “Table”?• Basically just a grid – columns (vertical) – rows (horizontal) – individual cells (boxes)
• Each cell can hold:– Text– Pictures– Embedded math
formulas– Pretty much anything
ROWS
CO
LUM
NS
CELLS
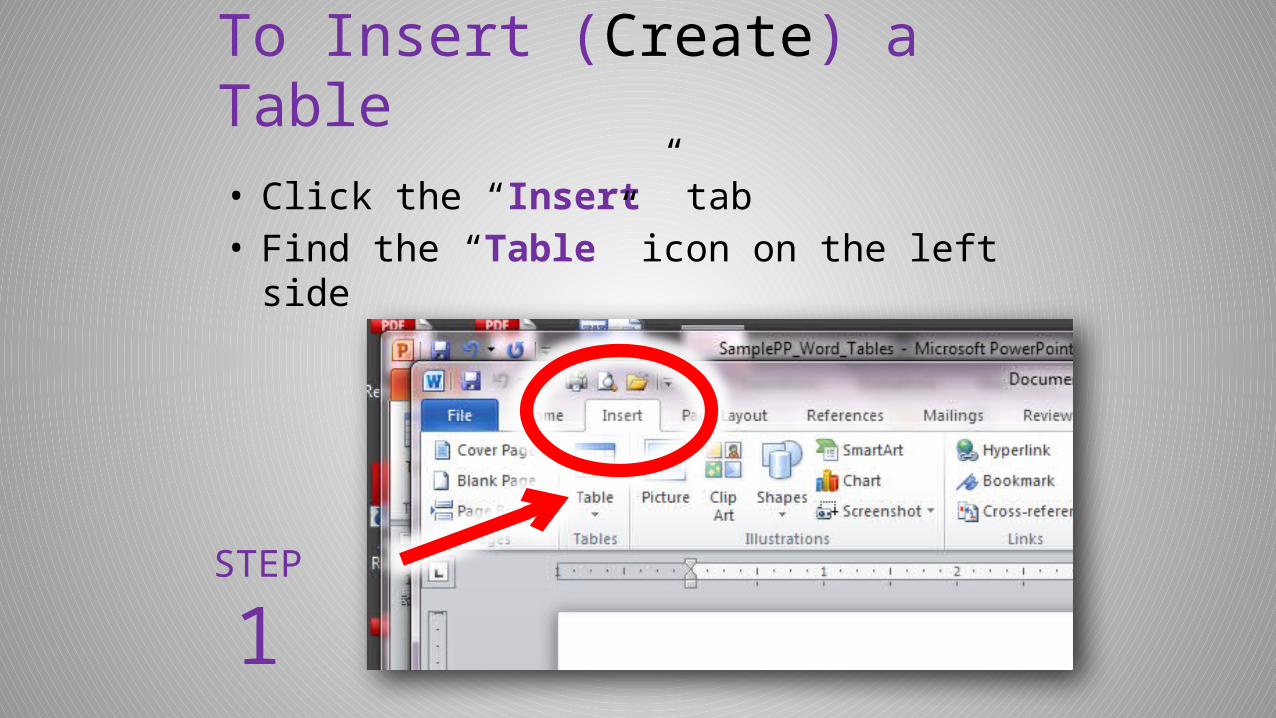
To Insert (Create) a Table• Click the “Insert” tab• Find the “Table” icon on the left side
STEP
1
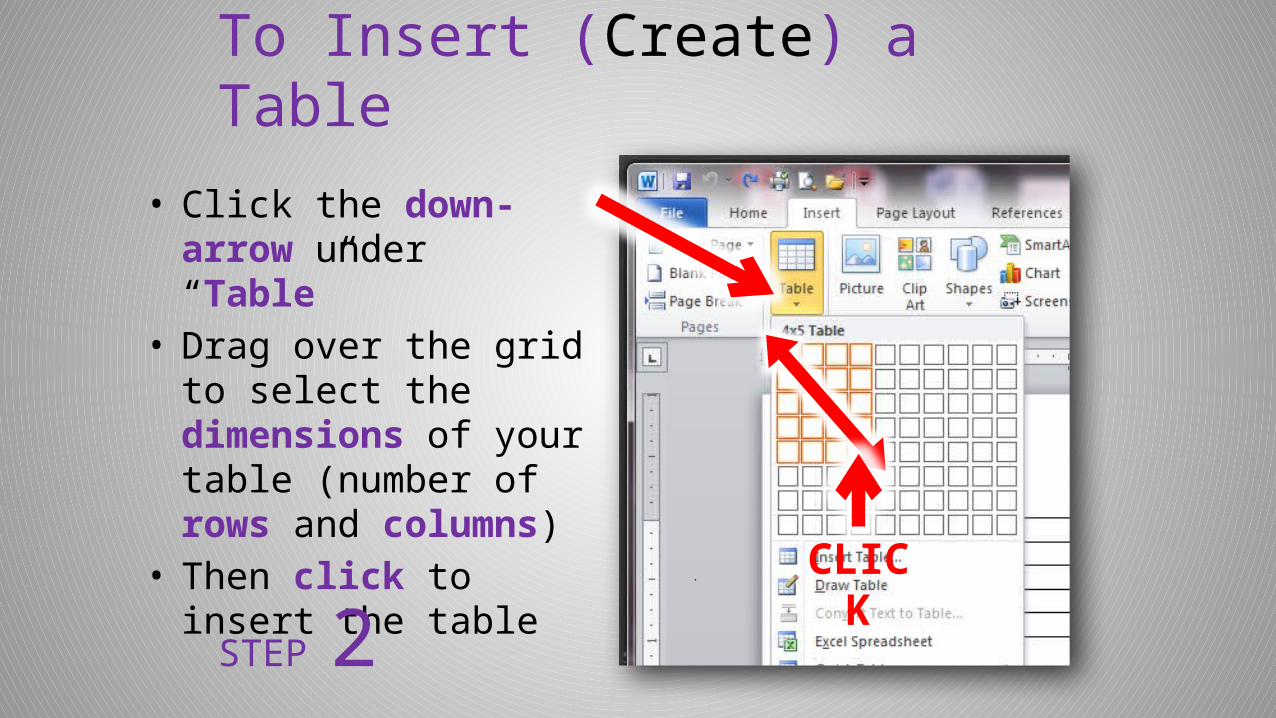
To Insert (Create) a Table
• Click the down-arrow under “Table”
• Drag over the grid to select the dimensions of your table (number of rows and columns)
• Then click to insert the table
STEP 2CLICK
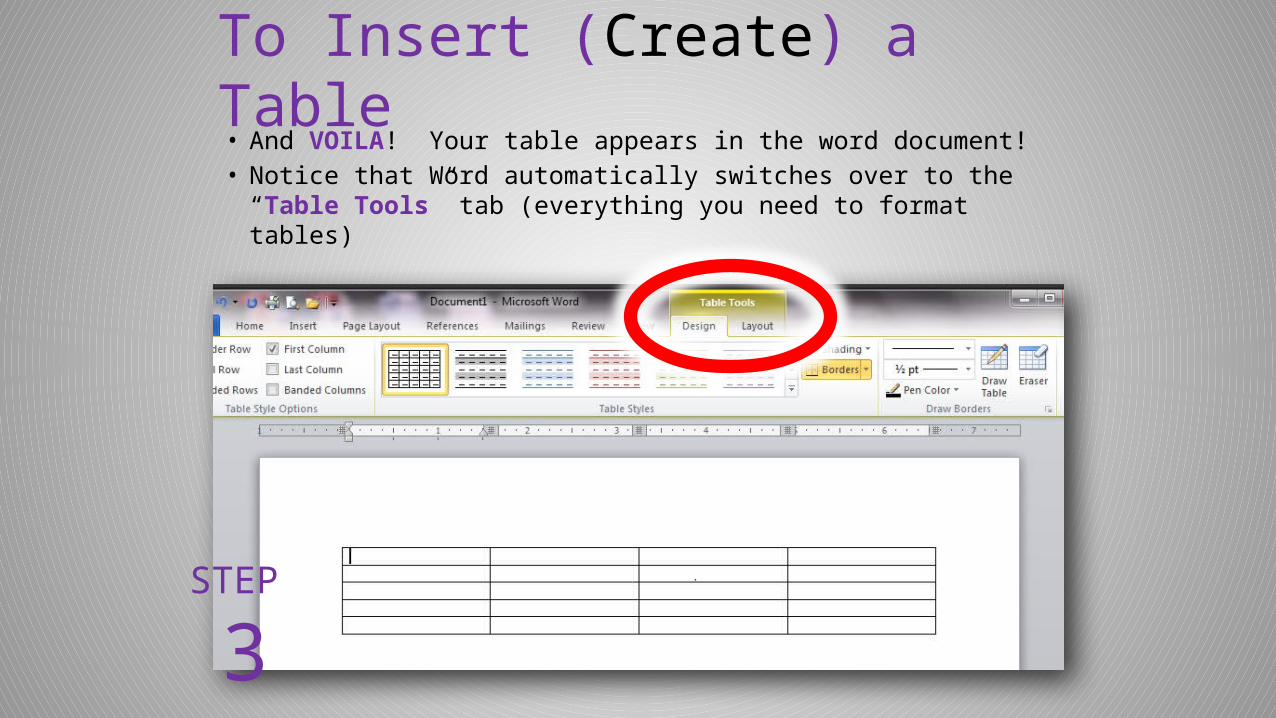
To Insert (Create) a Table• And VOILA! Your table appears in the word document!• Notice that Word automatically switches over to the “Table
Tools” tab (everything you need to format tables)
STEP
3
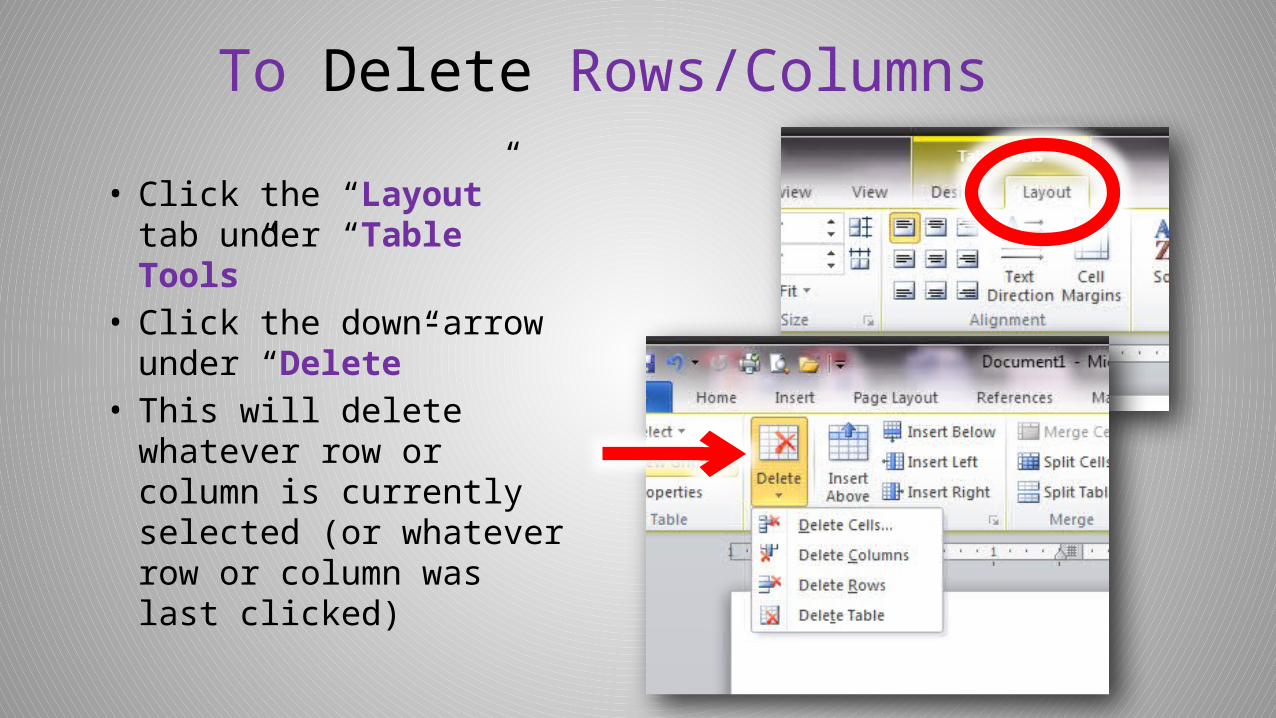
To Delete Rows/Columns• Click the “Layout” tab under
“Table Tools”• Click the down-arrow under
“Delete”• This will delete whatever
row or column is currently selected (or whatever row or column was last clicked)
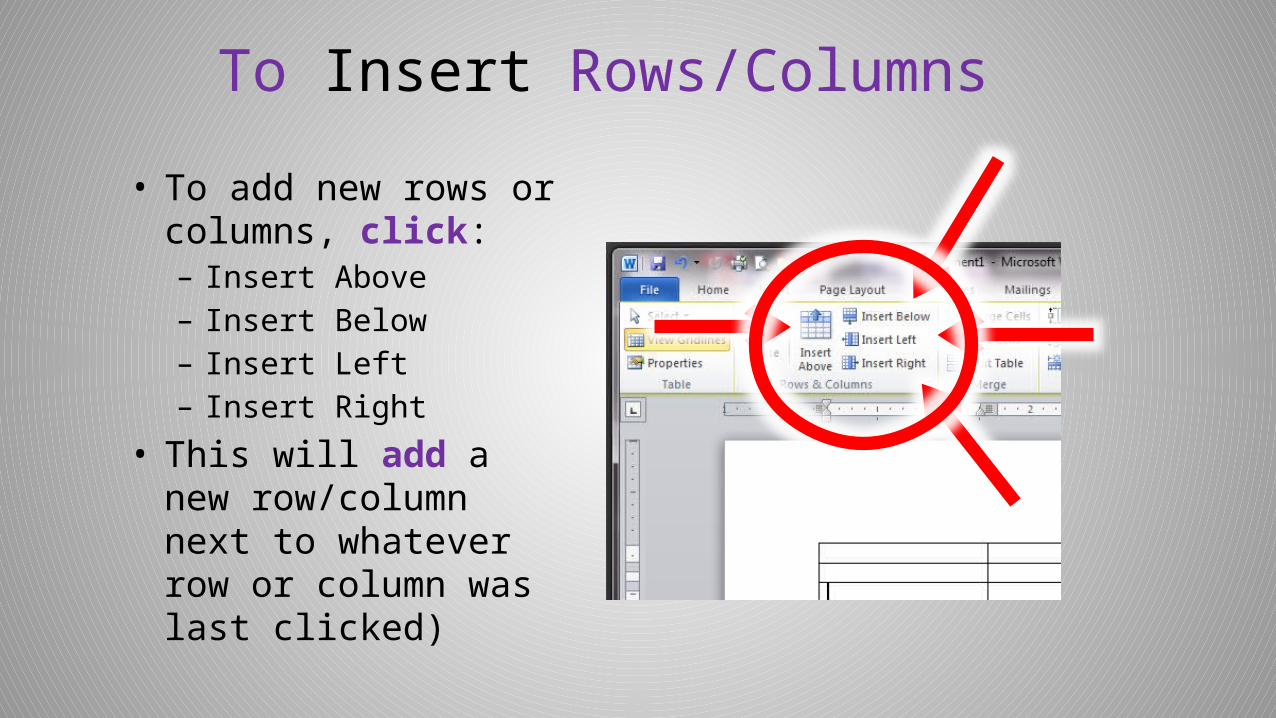
To Insert Rows/Columns• To add new rows or
columns, click:– Insert Above– Insert Below– Insert Left– Insert Right
• This will add a new row/column next to whatever row or column was last clicked)
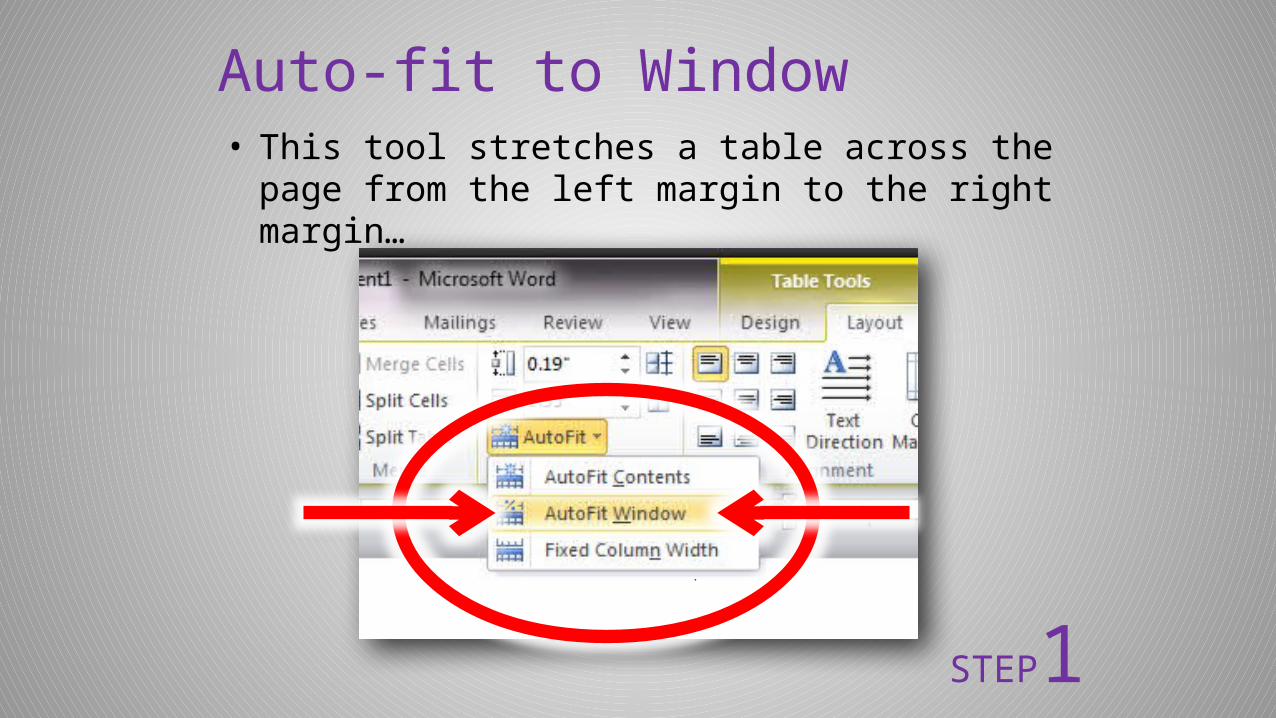
Auto-fit to Window• This tool stretches a table across the page from the
left margin to the right margin…
STEP1

Auto-fit to Window
So we go from this
To this
STEP 2
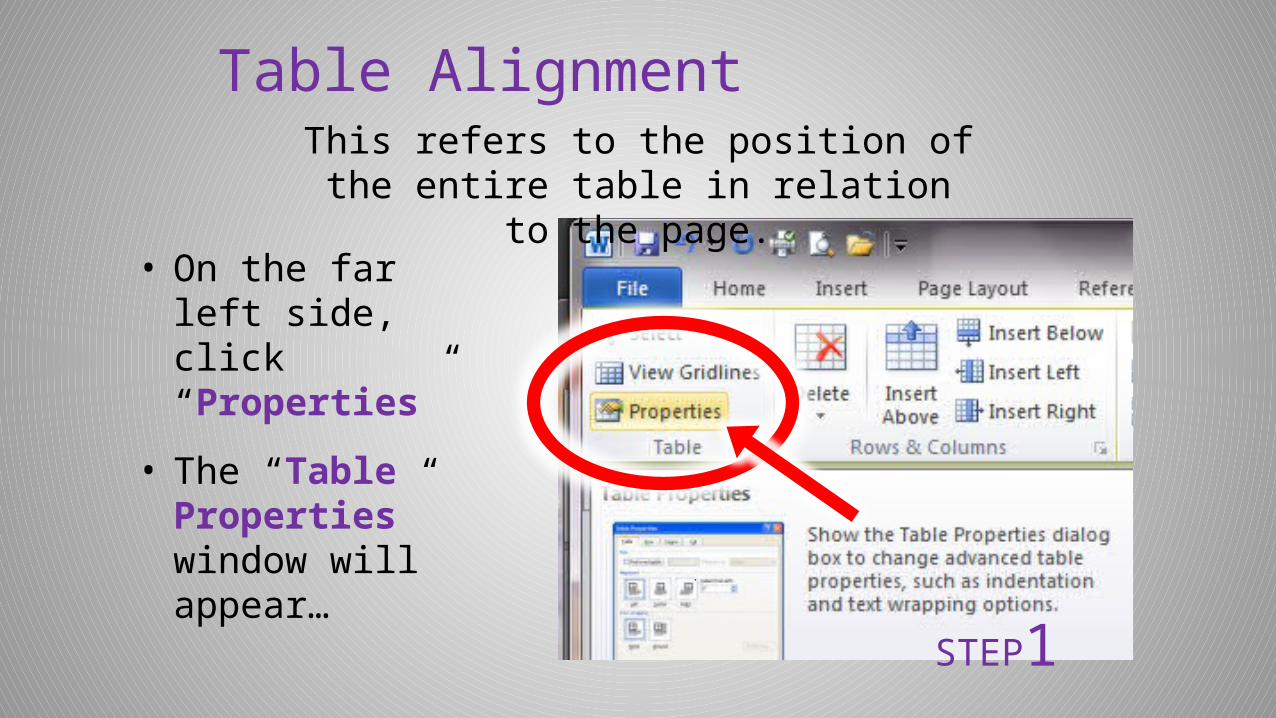
Table Alignment
• On the far left side, click “Properties”
• The “Table Properties” window will appear…
STEP1
This refers to the position of the entire table in relation to the page.
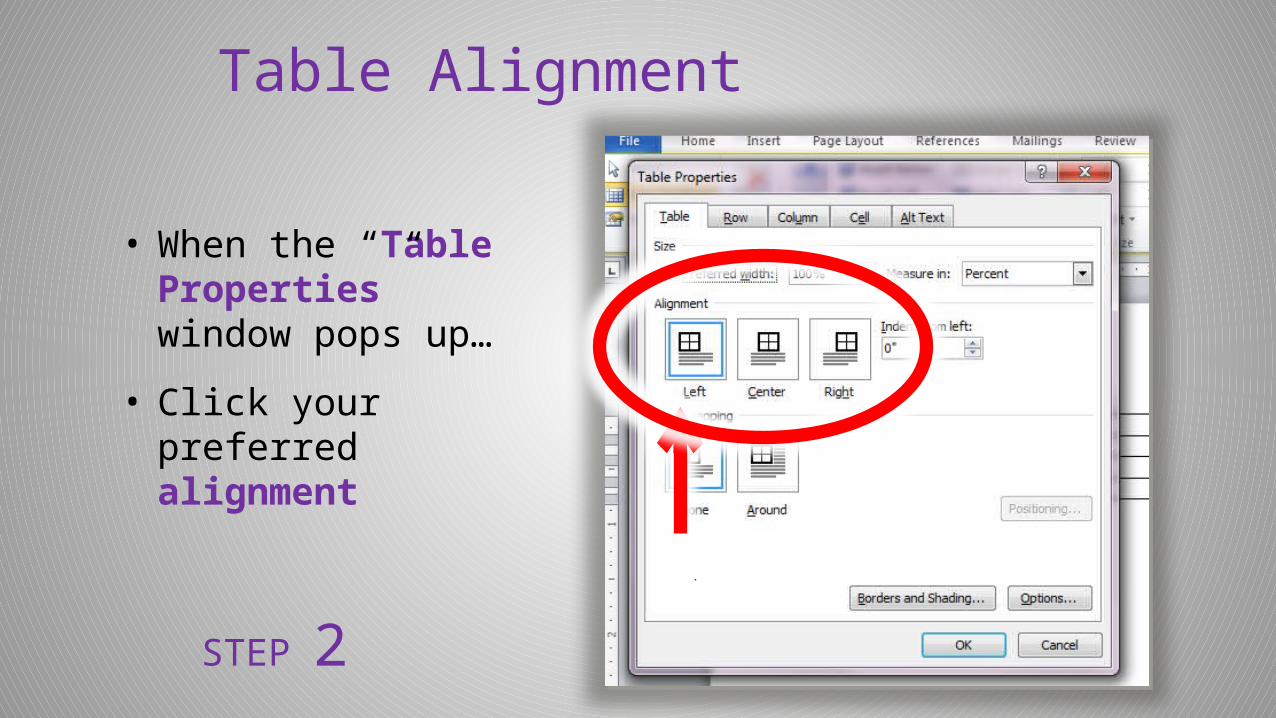
Table Alignment
• When the “Table Properties” window pops up…
• Click your preferred alignment
STEP 2
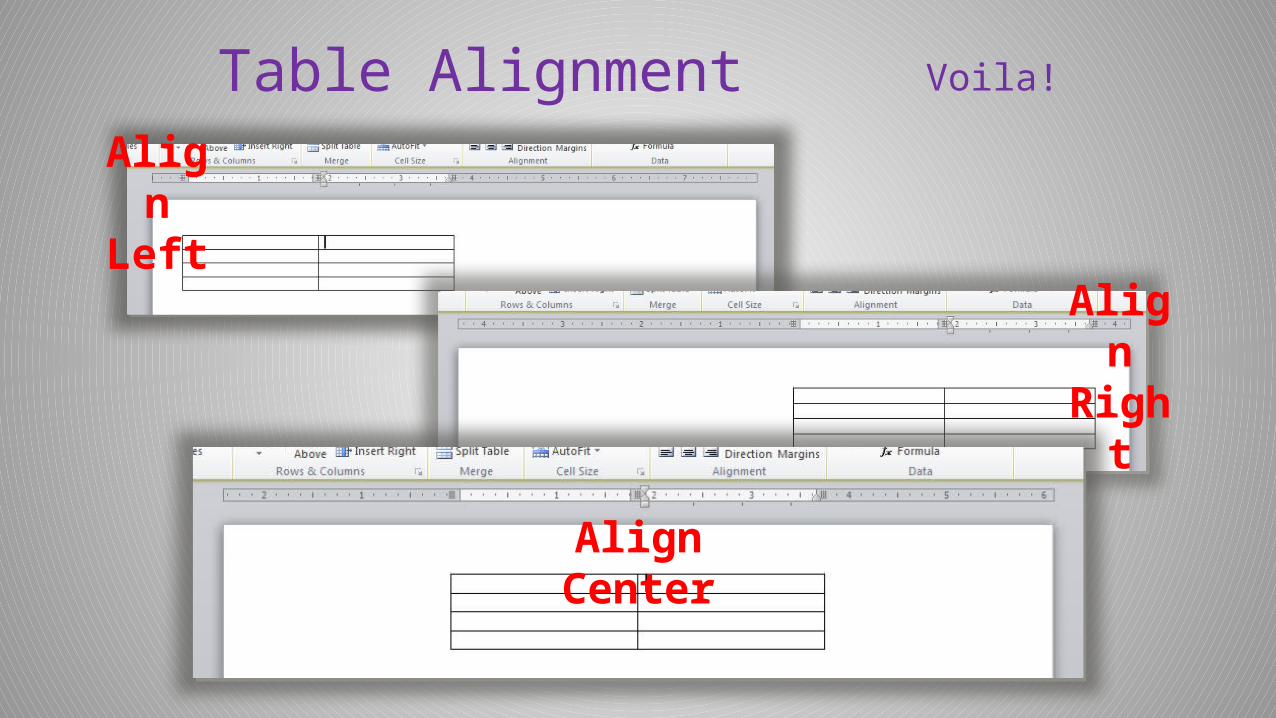
Table Alignment Voila!AlignLeft
AlignRight
Align Center
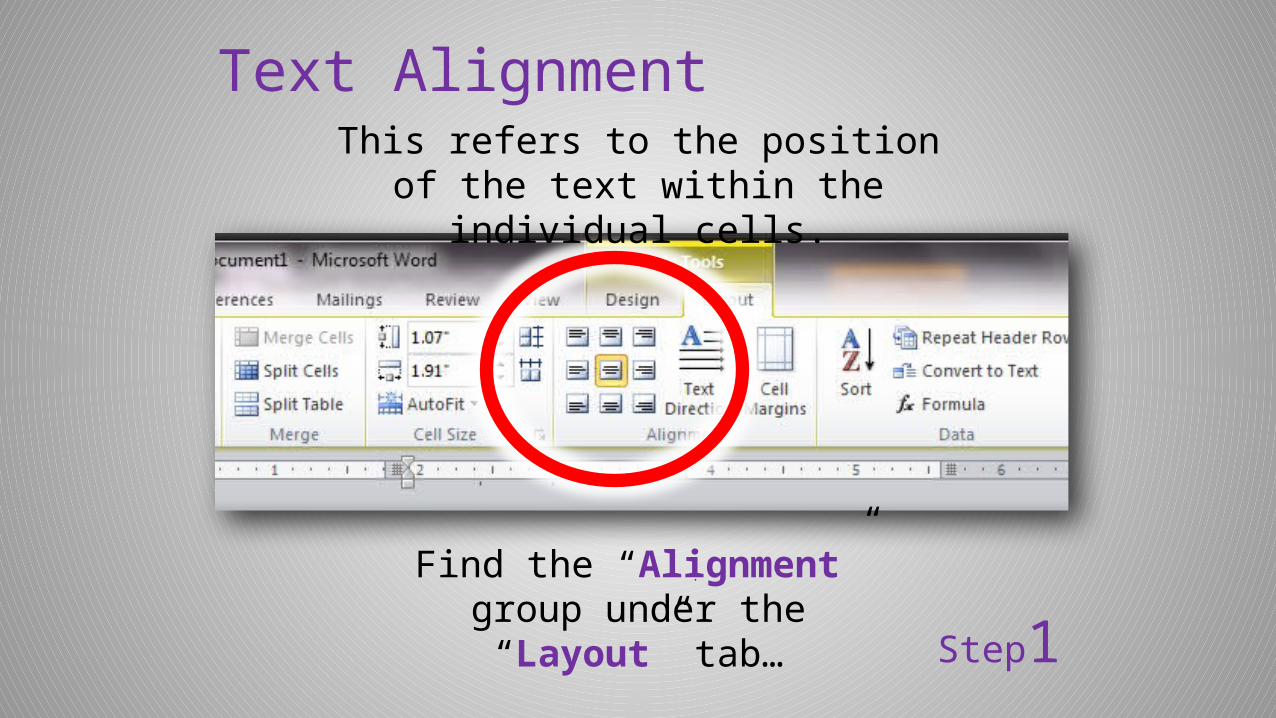
Text Alignment
Step1
This refers to the position of the text within the individual cells.
Find the “Alignment” group under the “Layout” tab…
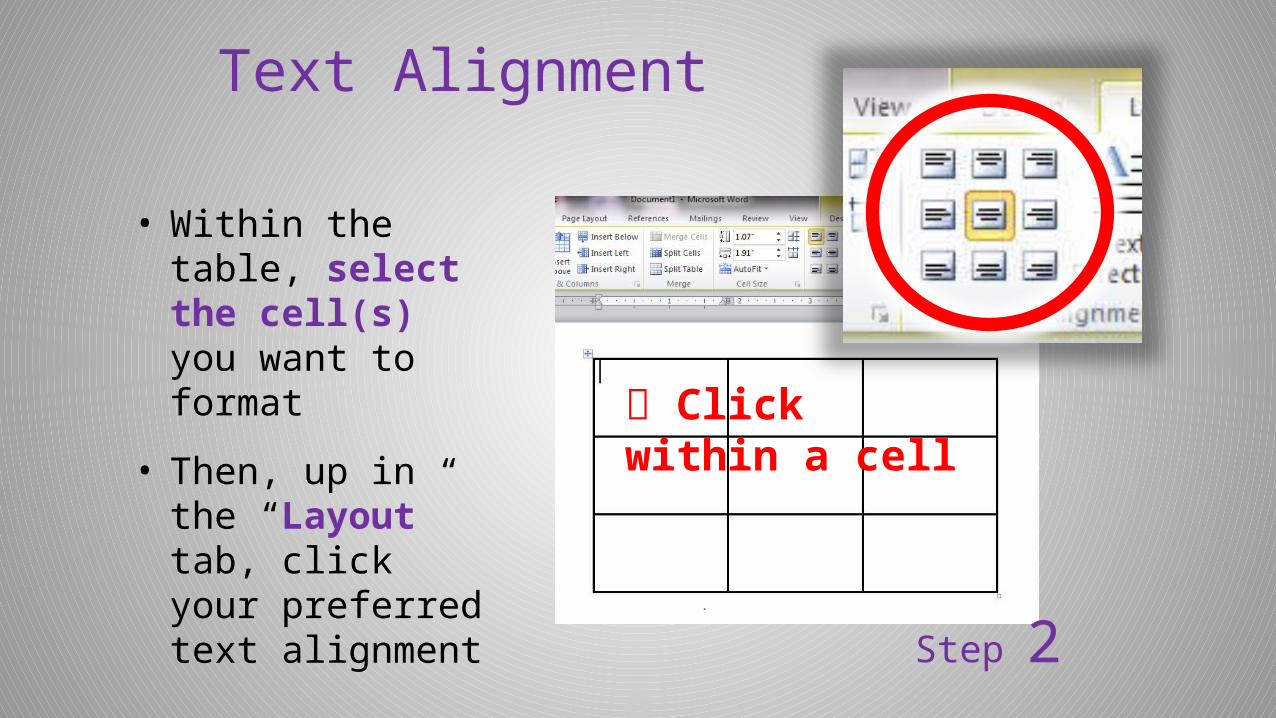
Text Alignment
Step 2
• Within the table, select the cell(s) you want to format
• Then, up in the “Layout” tab, click your preferred text alignment
Click within a cell
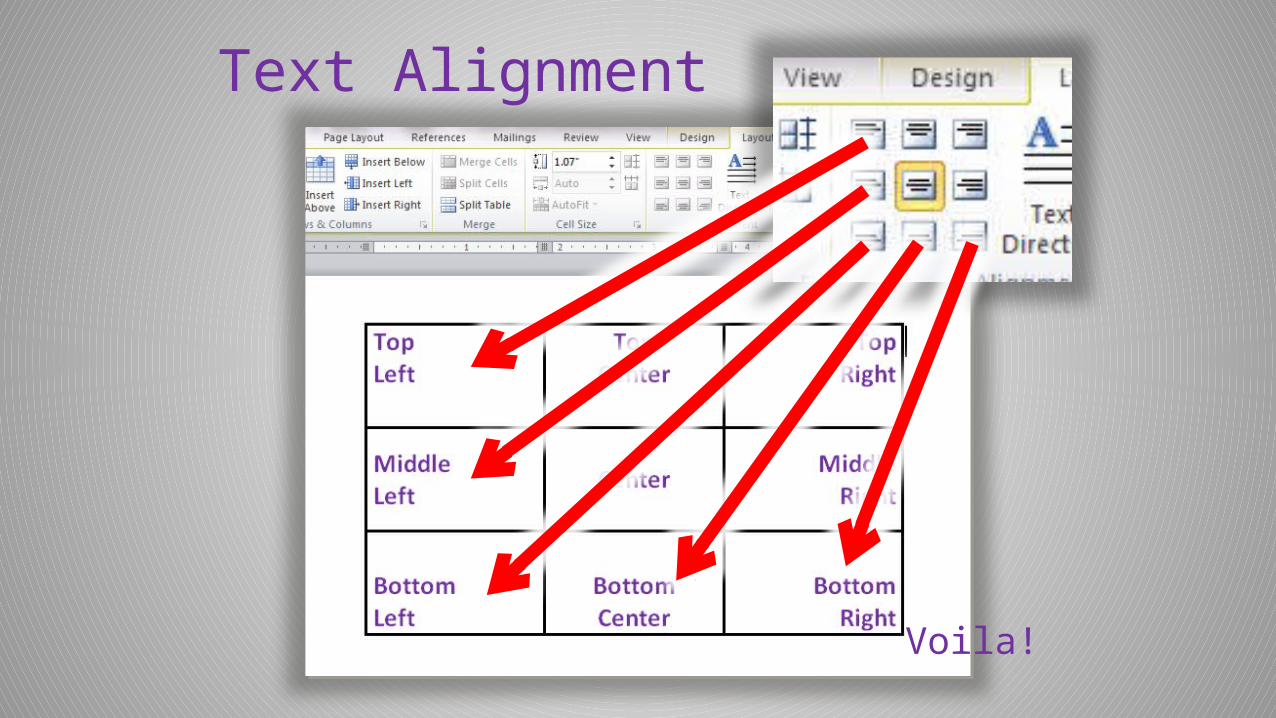
Text Alignment
Voila!
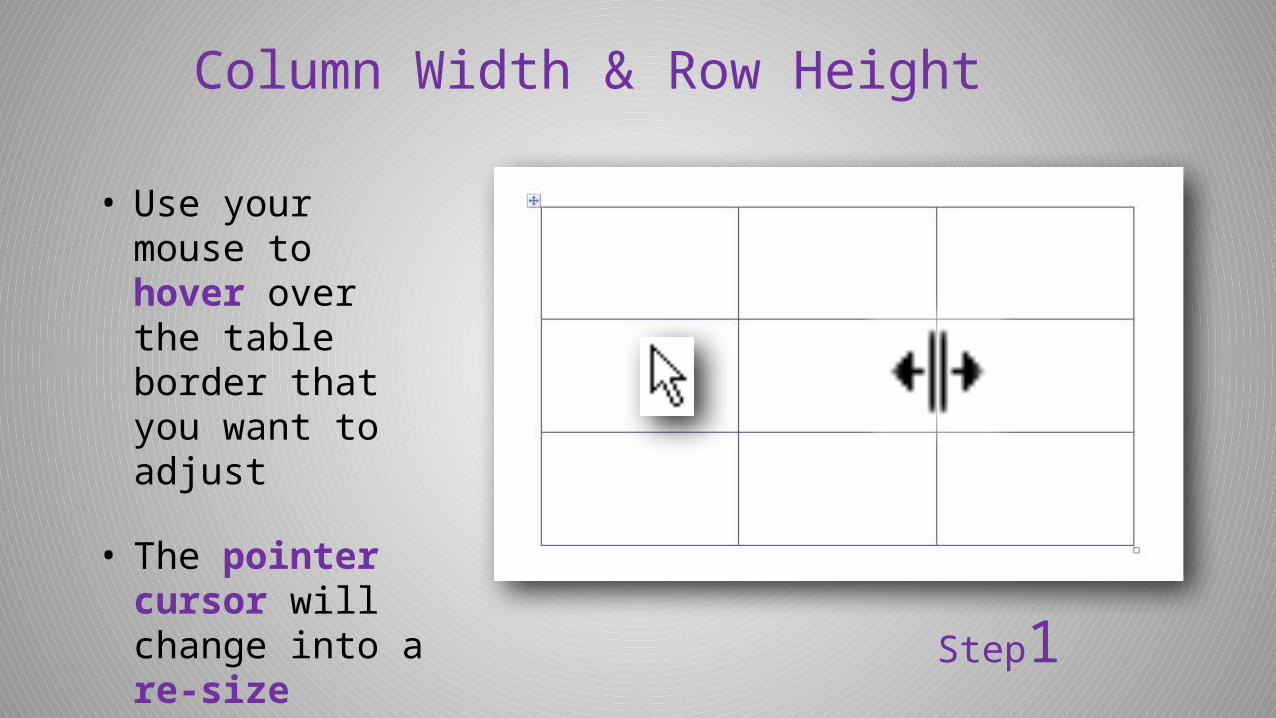
Column Width & Row Height• Use your mouse to
hover over the table border that you want to adjust
• The pointer cursor will change into a re-size cursor
Step1
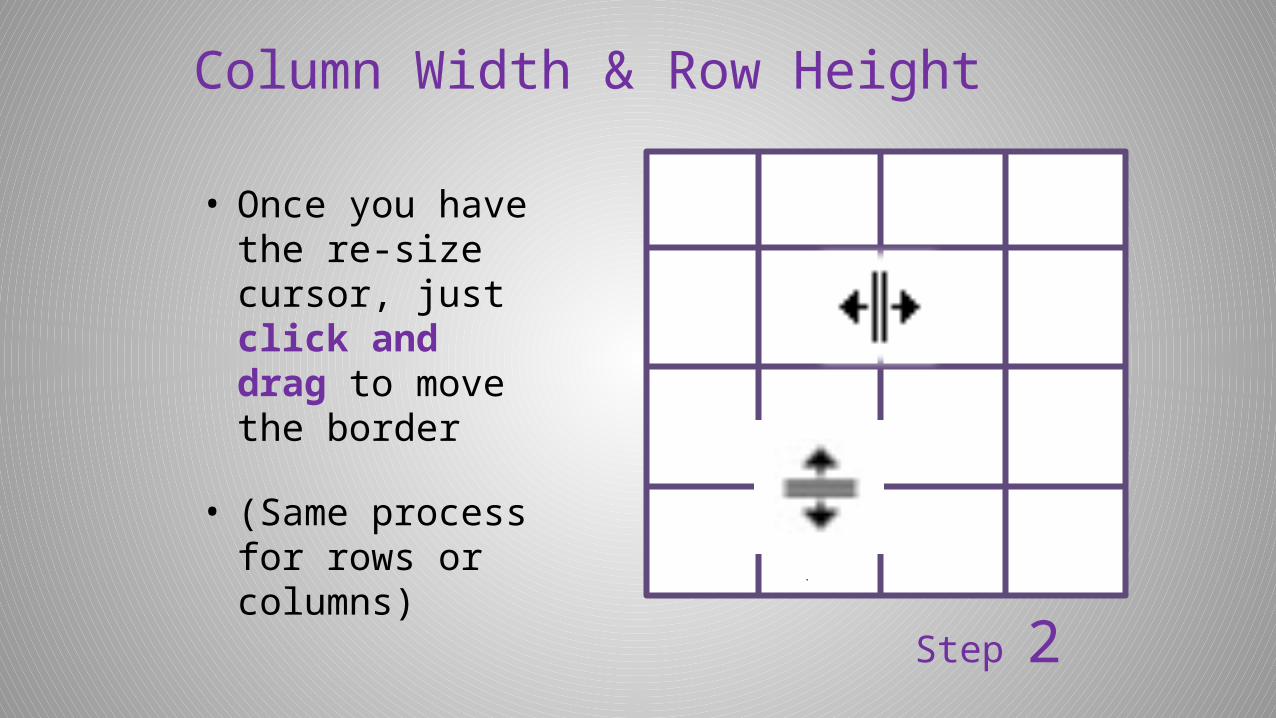
Column Width & Row Height
• Once you have the re-size cursor, just click and drag to move the border
• (Same process for rows or columns)
Step 2
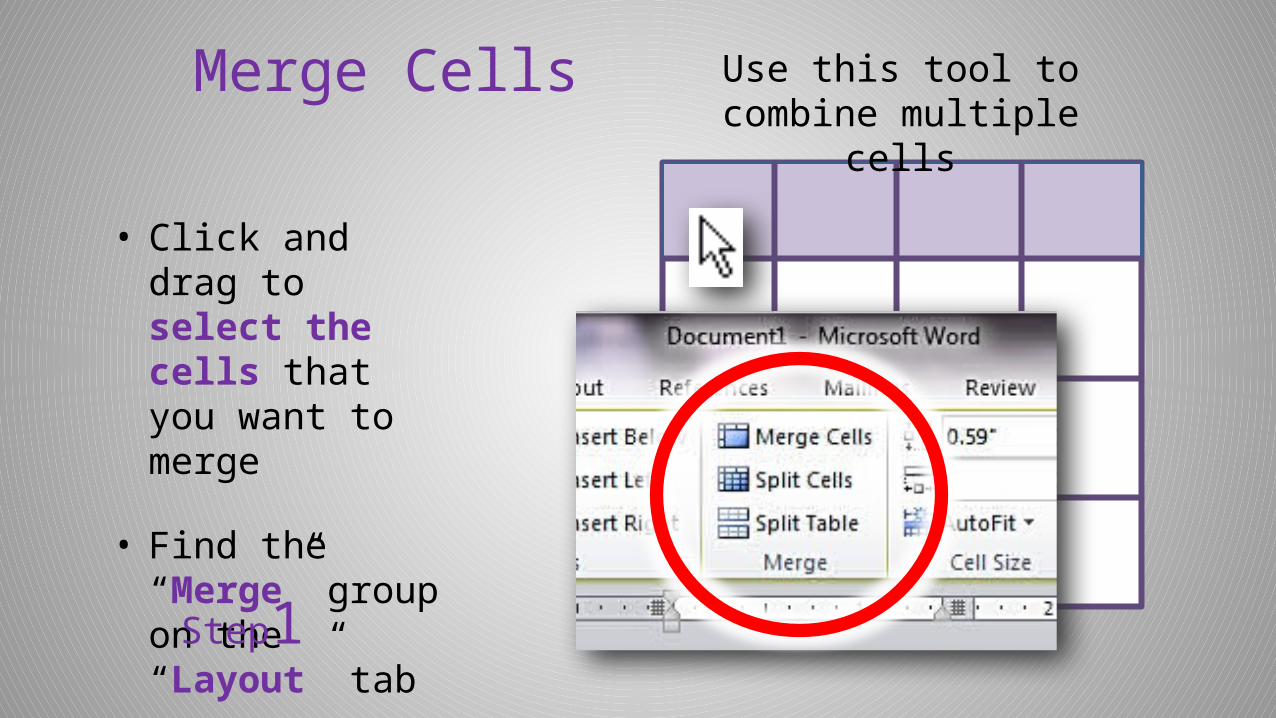
Merge Cells
• Click and drag to select the cells that you want to merge
• Find the “Merge” group on the “Layout” tab
Step1
Use this tool to combine multiple cells
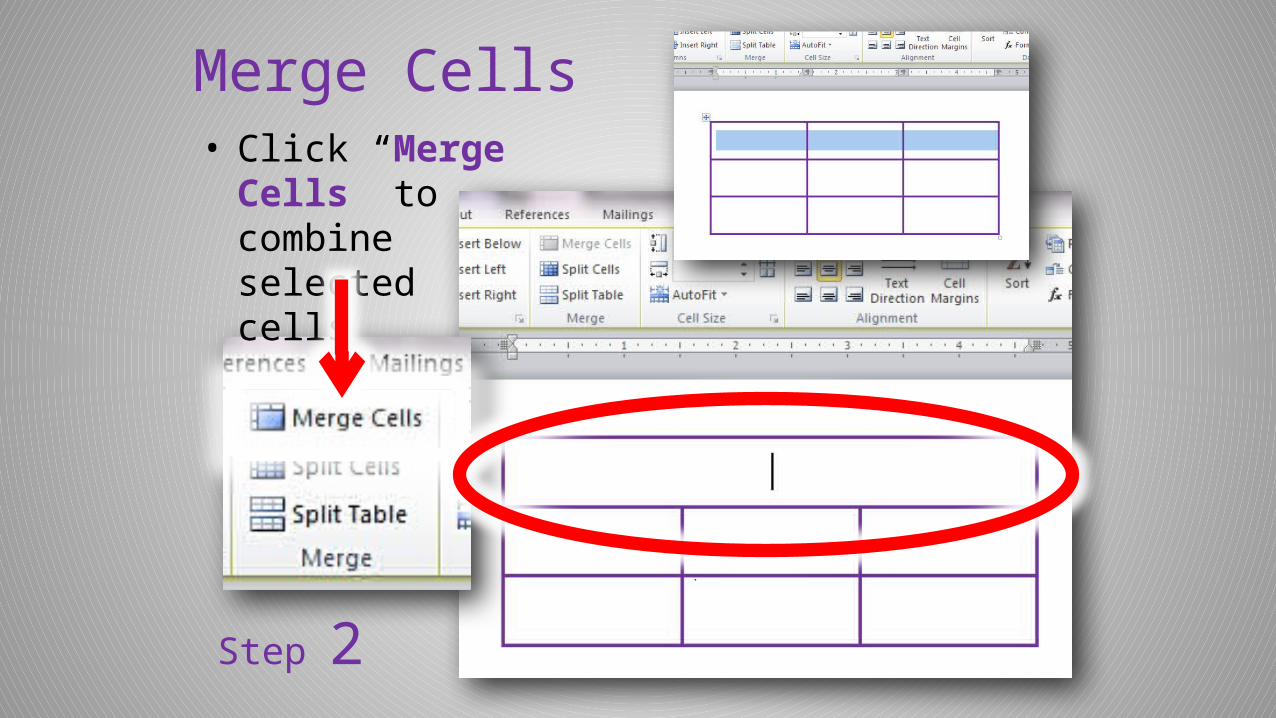
Merge Cells
Step 2
• Click “Merge Cells” to combine selected cells
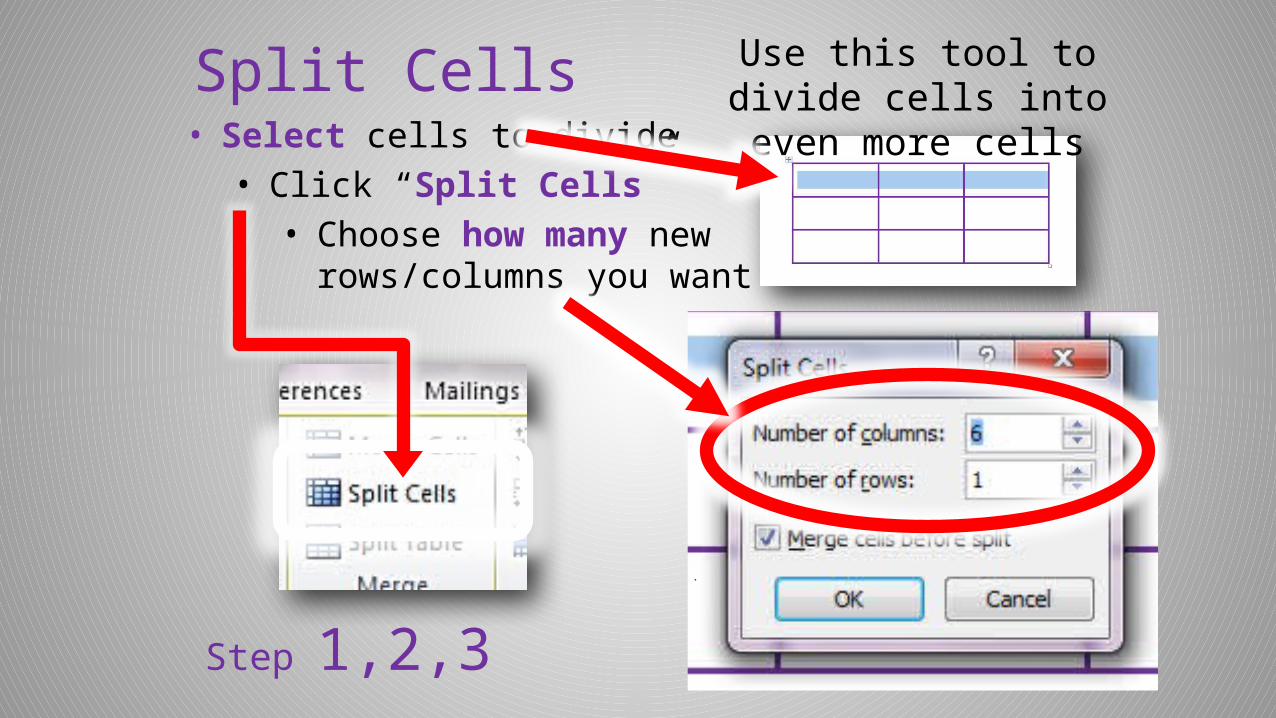
Split Cells
Step 1,2,3
Use this tool to divide cells into even more cells
• Select cells to divide• Click “Split Cells”• Choose how many new
rows/columns you want
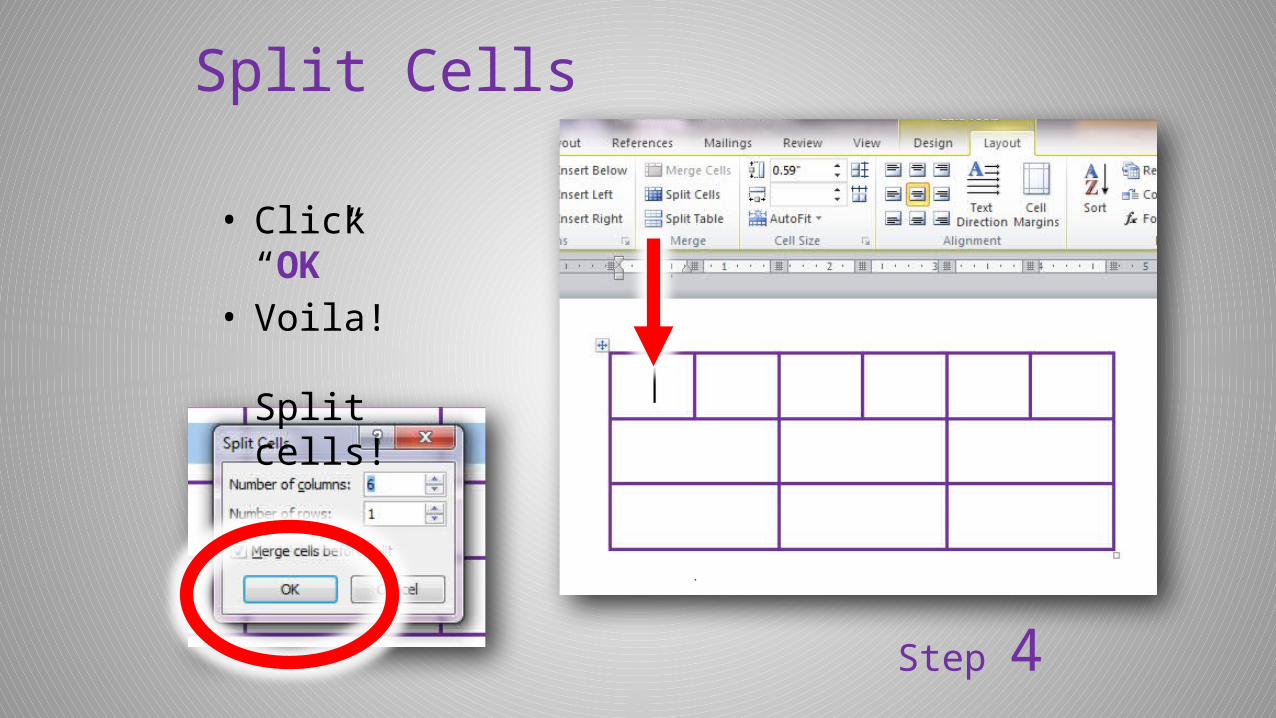
Step 4
• Click “OK”• Voila!
Split cells!
Split Cells
Resources• Office.com Online Course:
“Create and Format Basic Tables” http://office.microsoft.com/en-us/word-help/tables-i-create-and-format-basic-tables-RZ001200716.aspx
• Office.com Article: “Insert of Create a Table” http://office.microsoft.com/en-us/word-help/insert-or-create-a-table-HA010034300.aspx
• YouTube (from Techucomp.com):“Word 2010 Tutorial: Creating Tables”(Lesson 16.2) http://www.youtube.com/watch?v=2YkoY-Xa_T4
More Resources• Office.com Article:
“Word 2010 QuickSteps: Chapter 6 Using Tables” http://office.microsoft.com/en-us/word-help/word-2010-quicksteps-chapter-6-using-tables-HA102264017.aspx
• AddictiveTips.com:“Word 2010: Insert Tables & Formulas” http://www.addictivetips.com/microsoft-office/word-2010-insert-tables-formulas/
• Office.com Article: “Resize a Table Column or Row” http://office.microsoft.com/en-us/word-help/resize-a-table-column-or-row-HA102653846.aspx